Second lesson was an introduction to mark-making! Ironically, even though I am in art school and do love art very much, I had never found making a art therapeutic or relaxing in any way. I would often strive for ‘perfection’ and give myself unnecessary stress in the pursuit of it. Hence, it is not rare for me to dread making art sometimes because I would often disappoint myself when I don’t meet the standards that I had placed for myself. But! I am happy to announce that for once, I think I understand why many find making art therapeutic too! The focus of this mark-making session was to use found objects to create marks. Techniques that could be applied were automatic drawing, using gestural movements, etc. My main goal for this session was to not overthink and simply have fun making marks. I also challenged myself to view the found objects through fresh eyes so that I can use them in unconventional ways.
This post will be a compilation of all the behind-the-scenes look at how I achieved some of the print results. This post also goes hand-in-hand with my sketchbook.
It will be split into 2 parts:
- Fun Experimentation
- Process for Final Works
Part 1: Fun Experimentation
This section will contain all the fun-filled mark-making experimentations using random found objects! It has come to the point where I will look at objects and instinctively wonder if I can use it as a mark-making tool…
Preparation
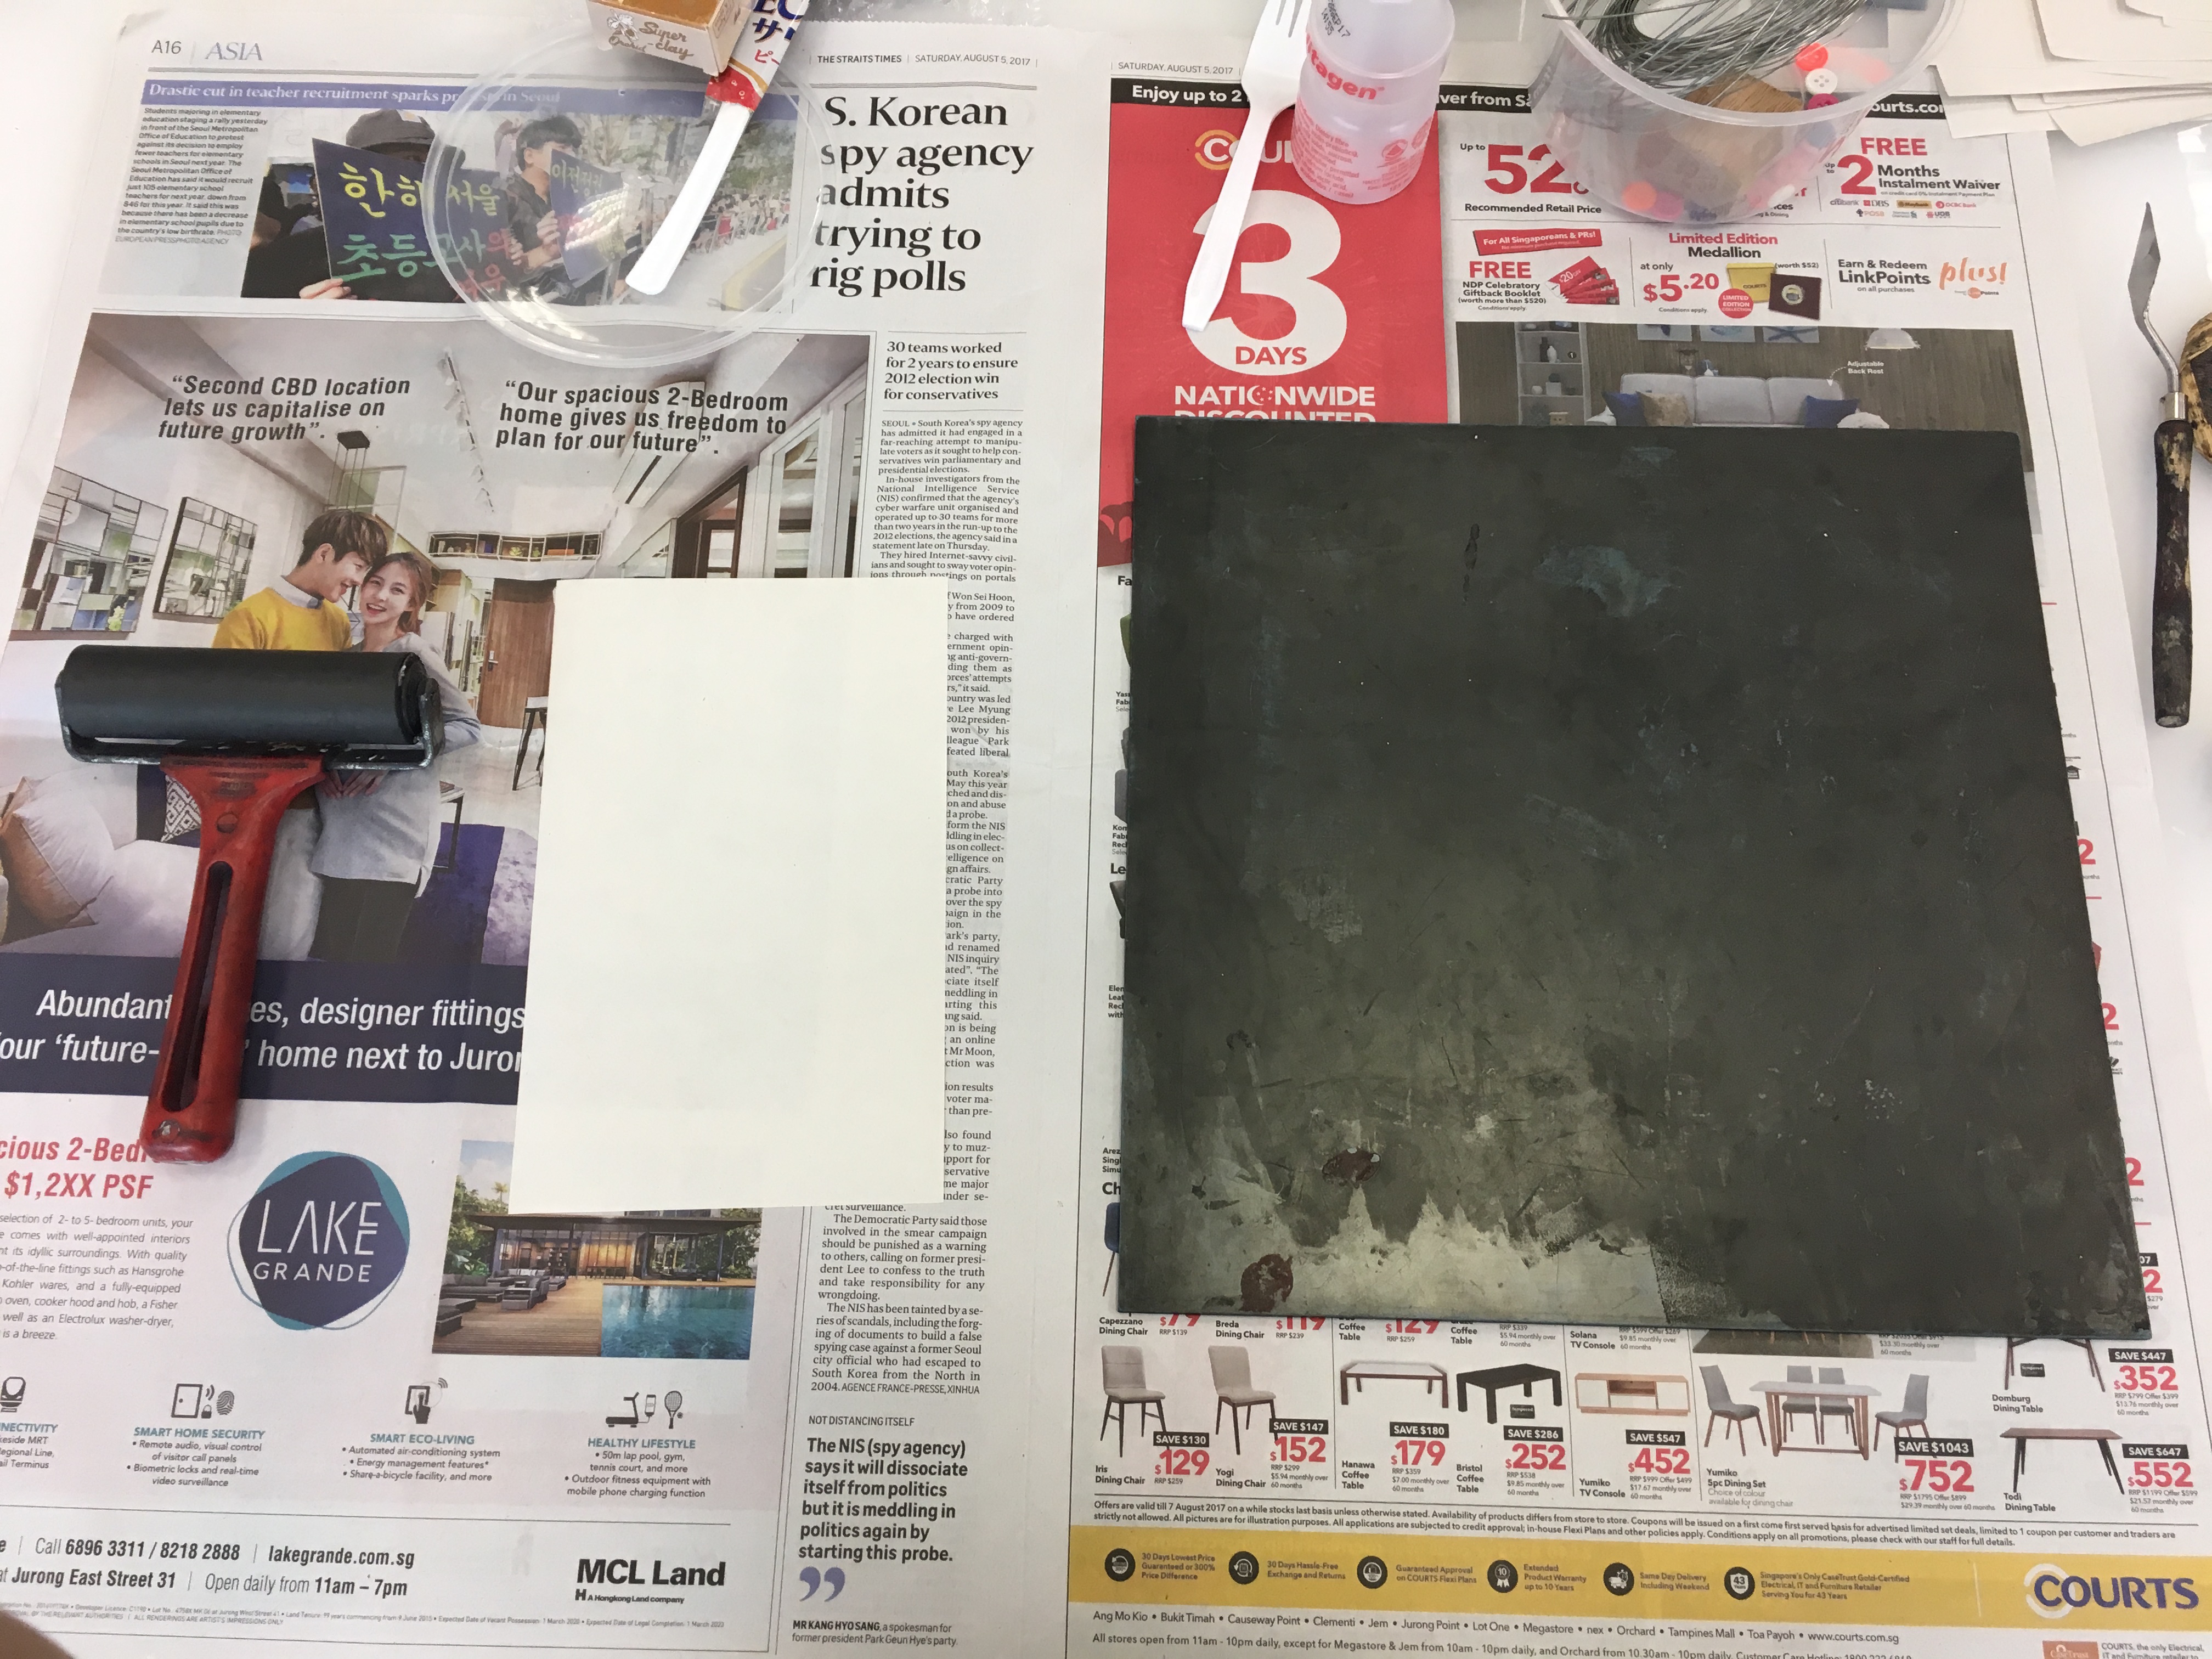
Lined the table surface with newspaper first before laying out all my tools, this would make cleaning up a lot easier later on!
Monoprinting using linoleum
 Disclaimer: This piece of lino is NOT carved by me! I did lino cutting in the first year of my polytechnic before so this was a recap for me. I first coated the lino piece evenly with a layer of block printing paint, then place a piece of newsprint on top and hand-printed it. The results of the print are uneven, but that’s not a bad thing since it gave the print an organic look.
Printing sandpaper
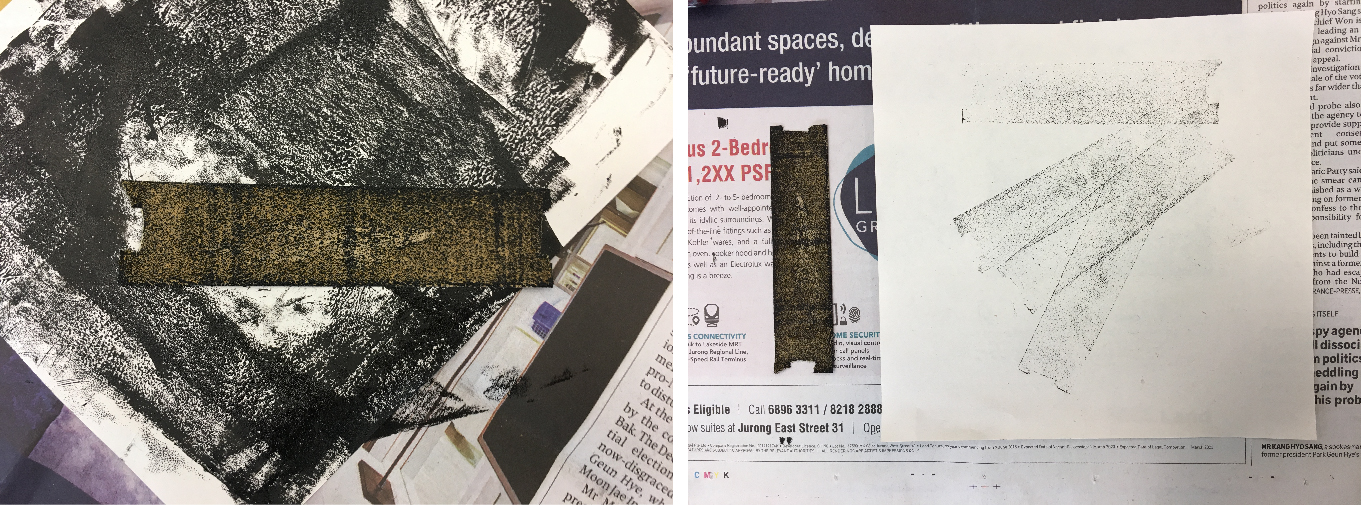 Tried to coat an even layer of paint onto a small piece of sandpaper, but it was pretty difficult to do so due to its texture. As expected, the print revealed the grainy texture of the sandpaper.
Printing bubble wrap
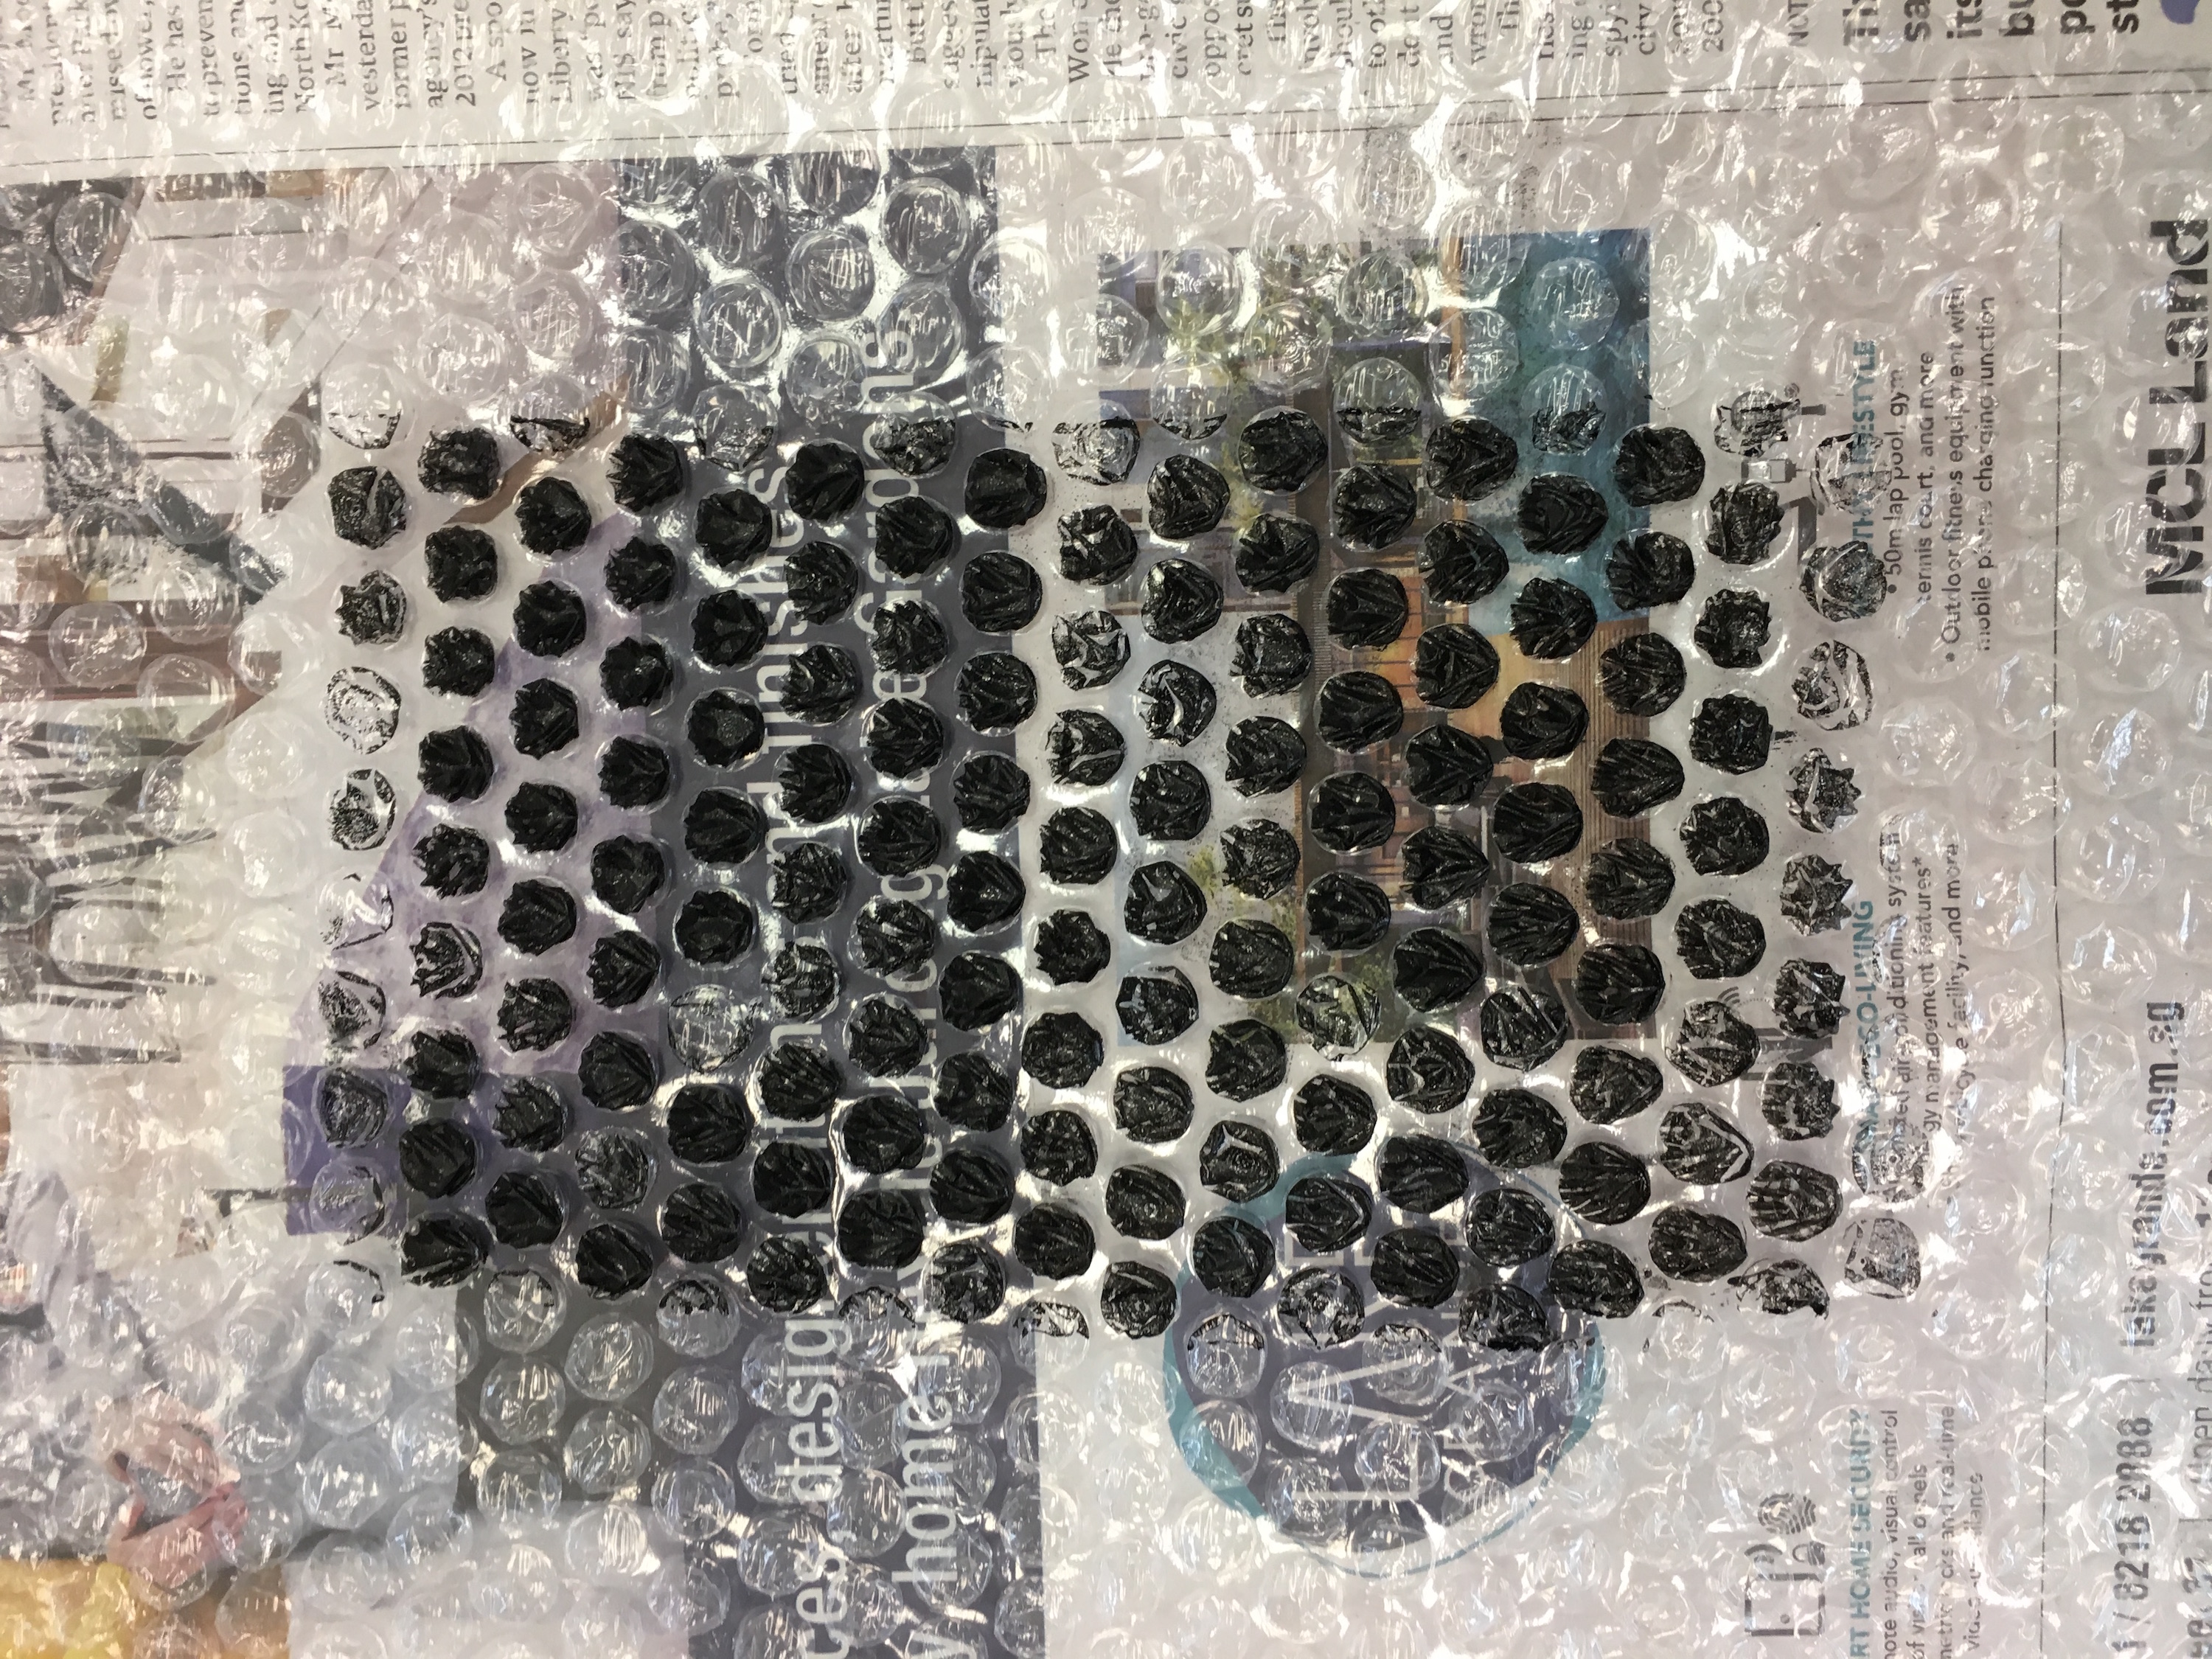 This was a straightforward one. I simply rolled a layer of paint over the bubbles and printed these bubbles directly onto newsprint.
Dabbing with spoon
 Instead of rolling the paint evenly into a layer beforehand like I always do, I simply drop a small dollop of paint and used the back of a spoon to pick the dollop of paint up. Then I used dabbing motions to create the print effect as show in the photo above.
Spreading with fork
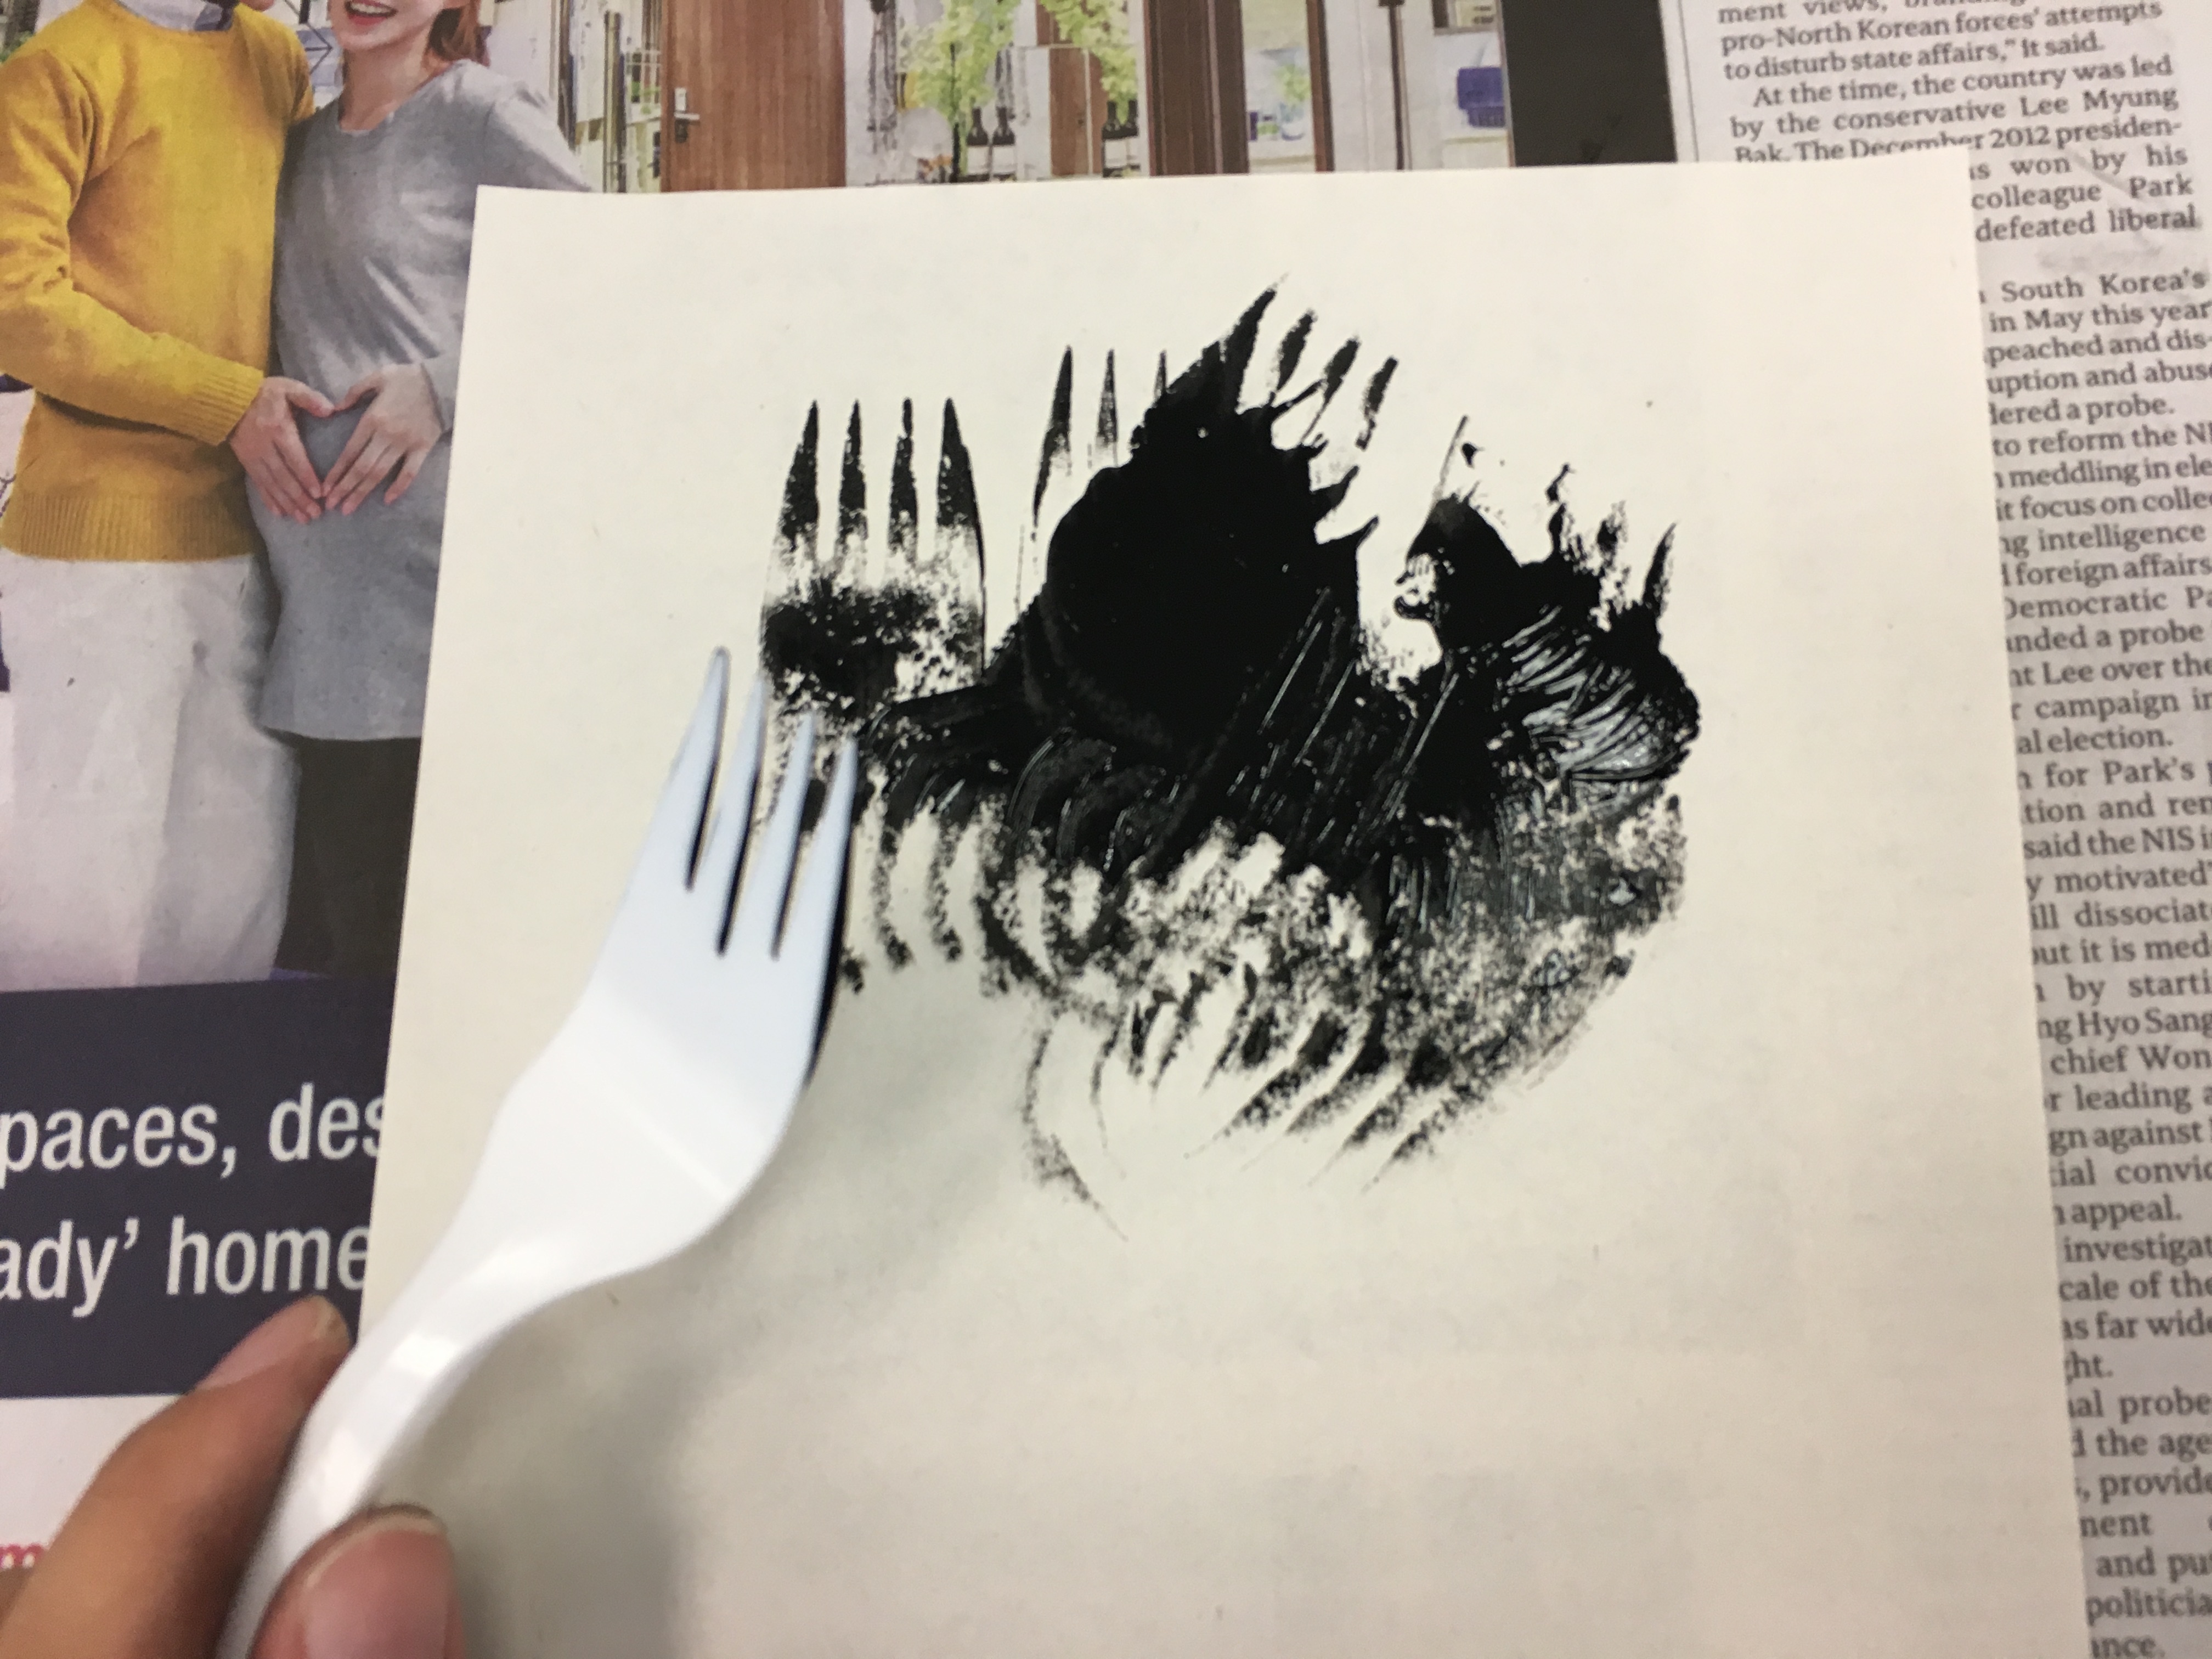 Like the previous experimentation, I picked the dollop of paint up with a fork and spread it across the newsprint like I was spreading butter. To make the pattern more interesting, I varied the types of strokes that I made, for example, straight strokes, wavy strokes, etc.
Printing with Vitagen bottle
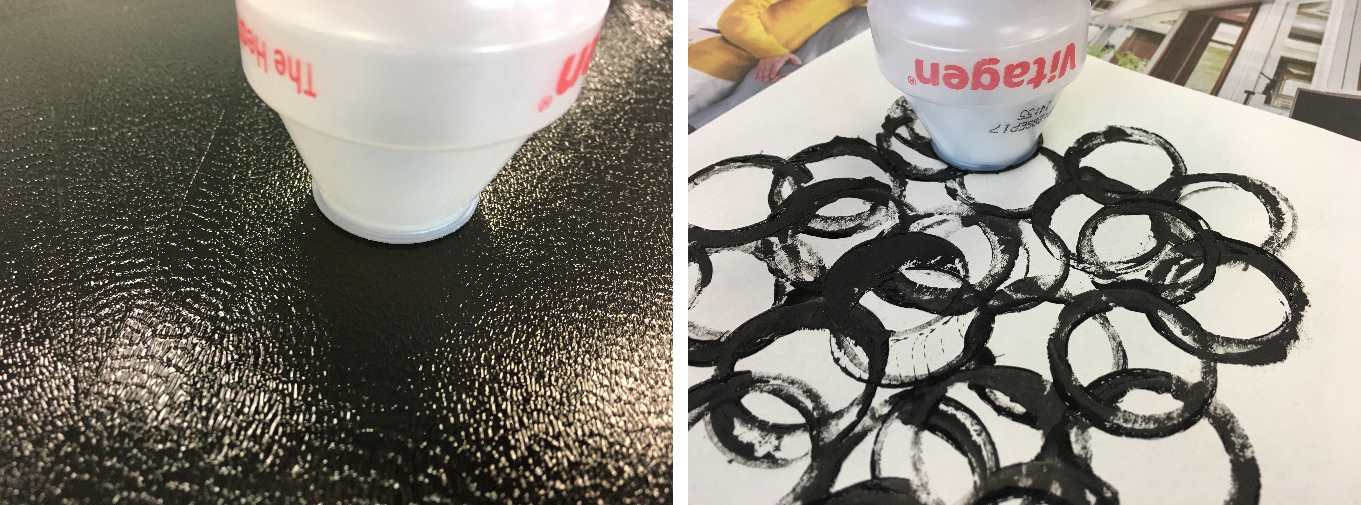
Used a twisting motion to pick up the paint with the mouth of a Vitagen bottle. Then used the same twisting motion to transfer the paint onto newsprint.
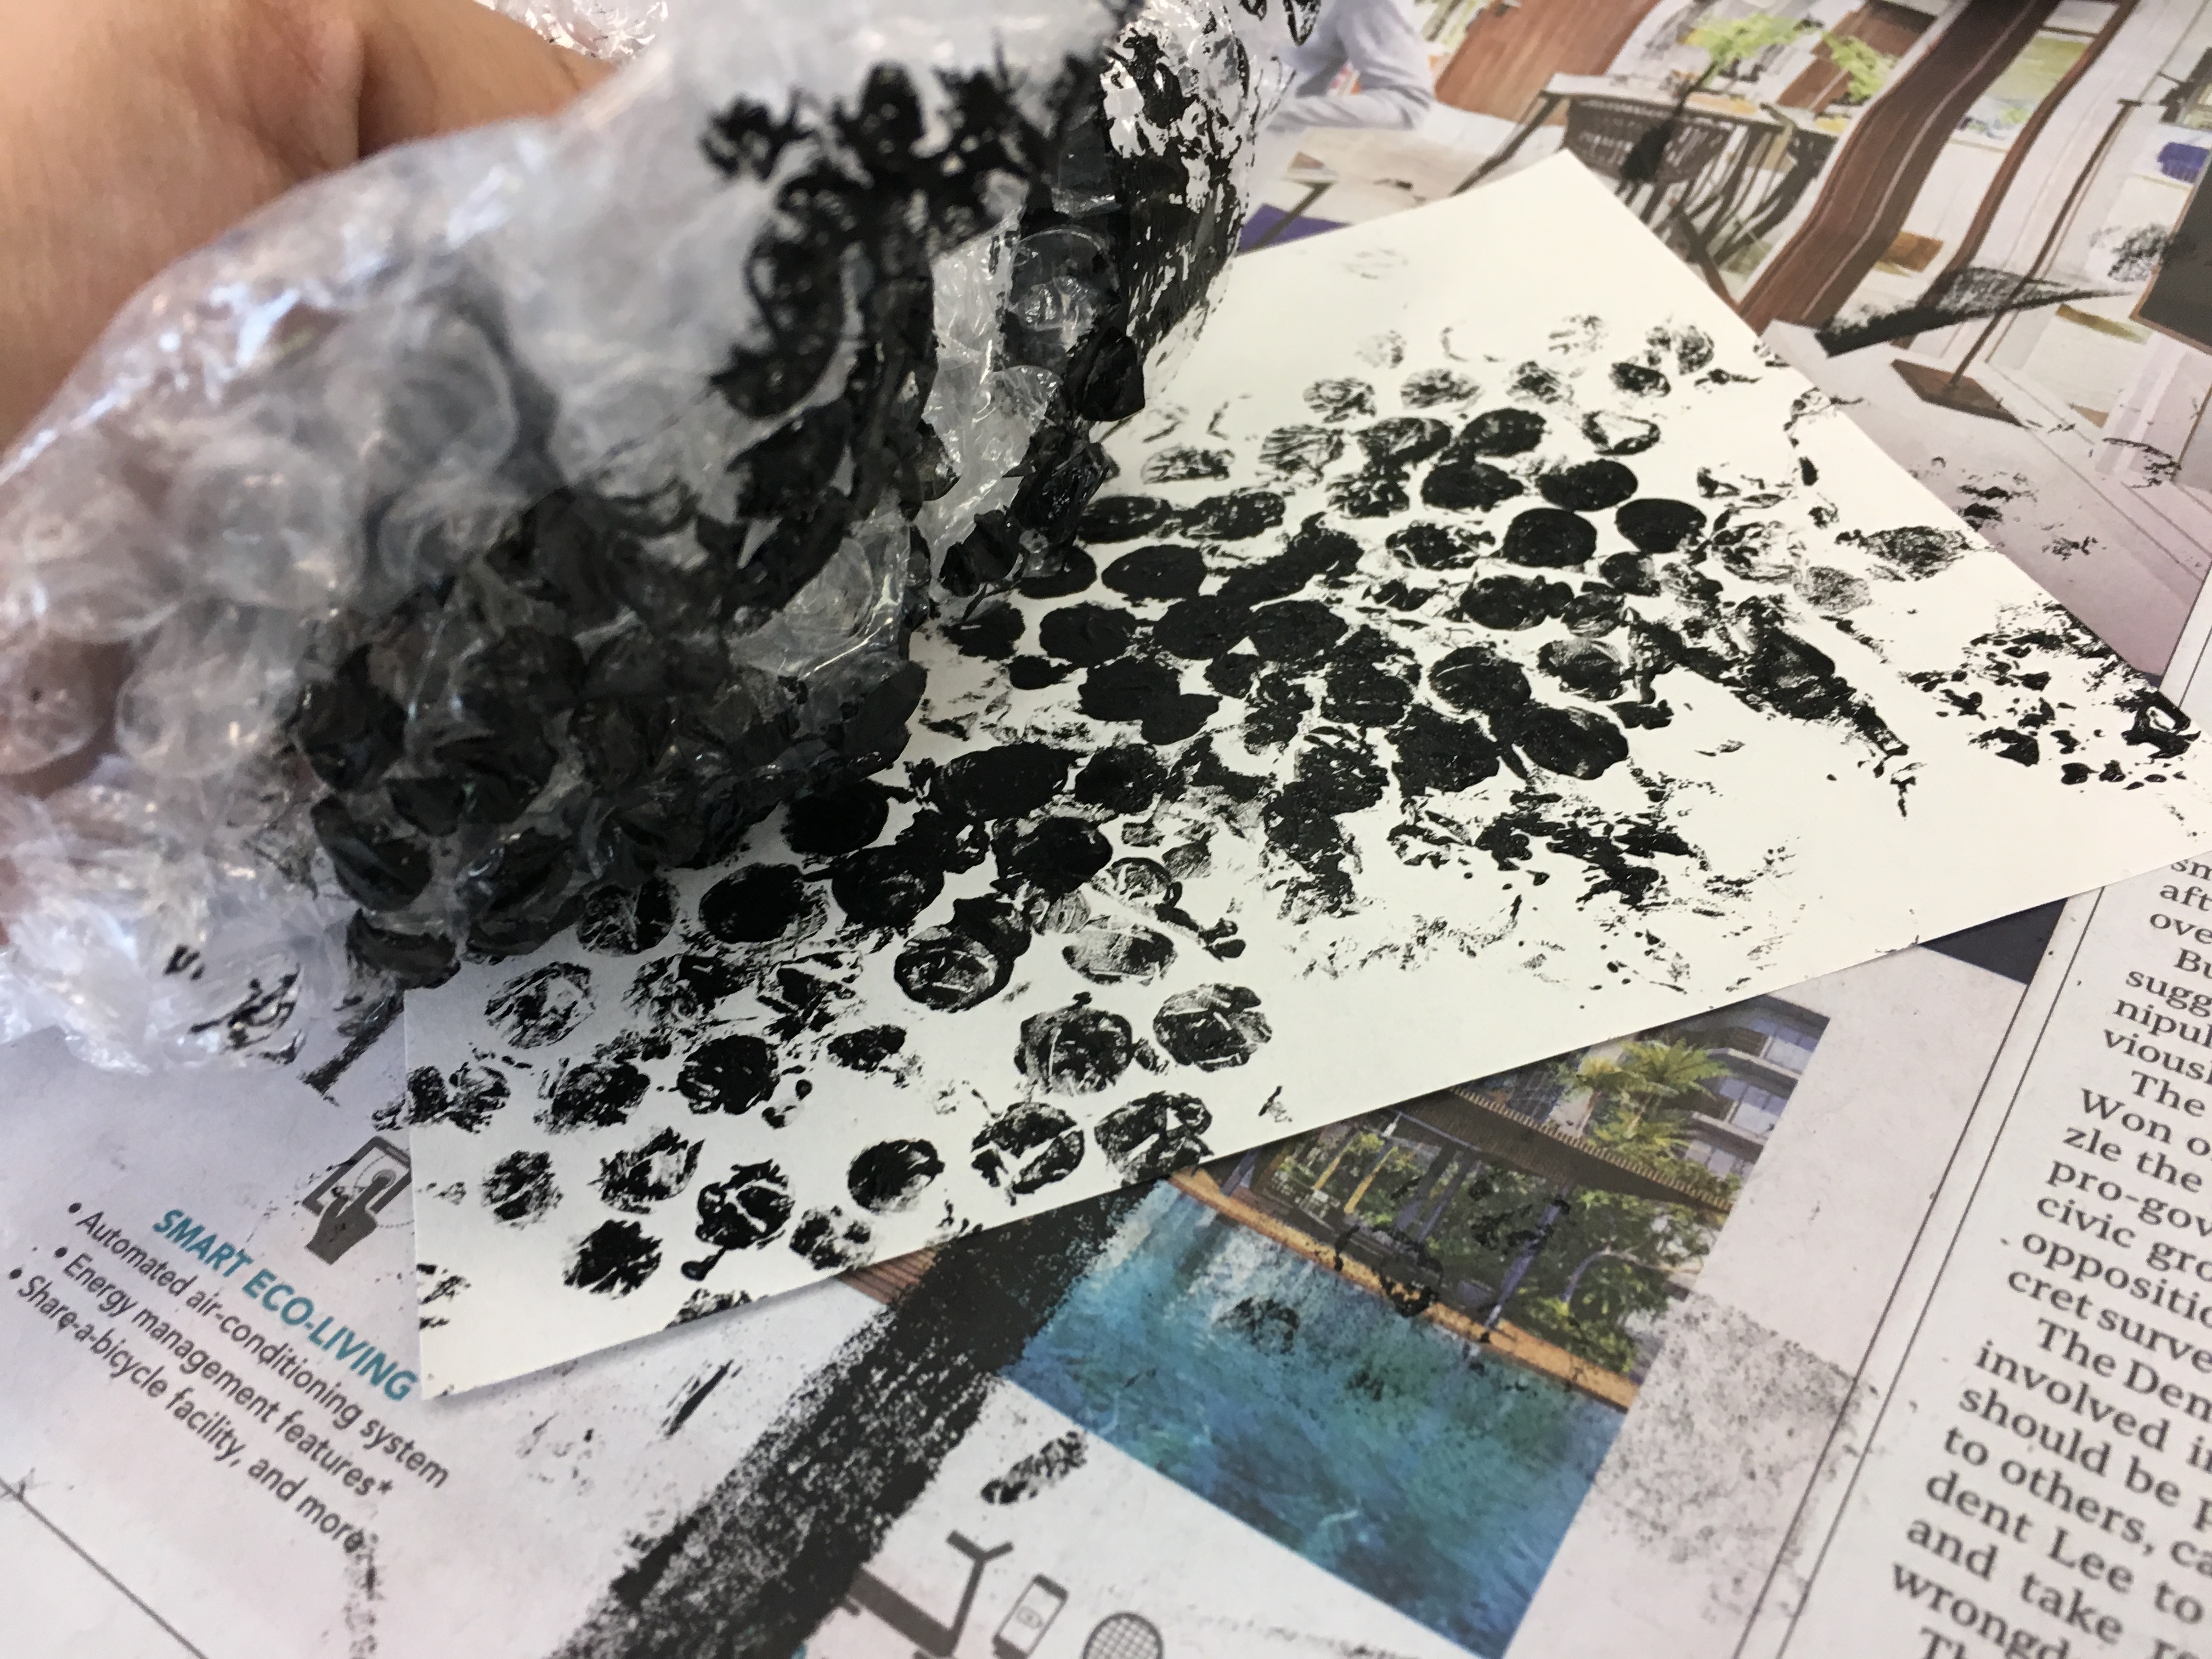
Printing with plastic bag
 Scrunched up the plastic bag so that the creases would create interesting textures. Then created prints using different gestures such as dabbing and swiping the plastic bag across the newsprint.
Printing with cling wrap
 Similar to the experimentation with the plastic bag, but this time with cling wrap. As cling wrap tends to cling to itself easily (hence it’s name), I did not bother scrunching it up but laid it flat instead.
Printing using Llao Llao spoon
 I swear mark-making has made me view ordinary items in a whole new light. Instead of throwing the Llao Llao spoon like a normal person would after eating with it, I kept it and used it for mark-making. I dipped the sharp end of the spoon into paint and made strokes with it. I really like the end result as it reminded me of a snowflake. I was able to achieve contrasting strokes using this spoon too.
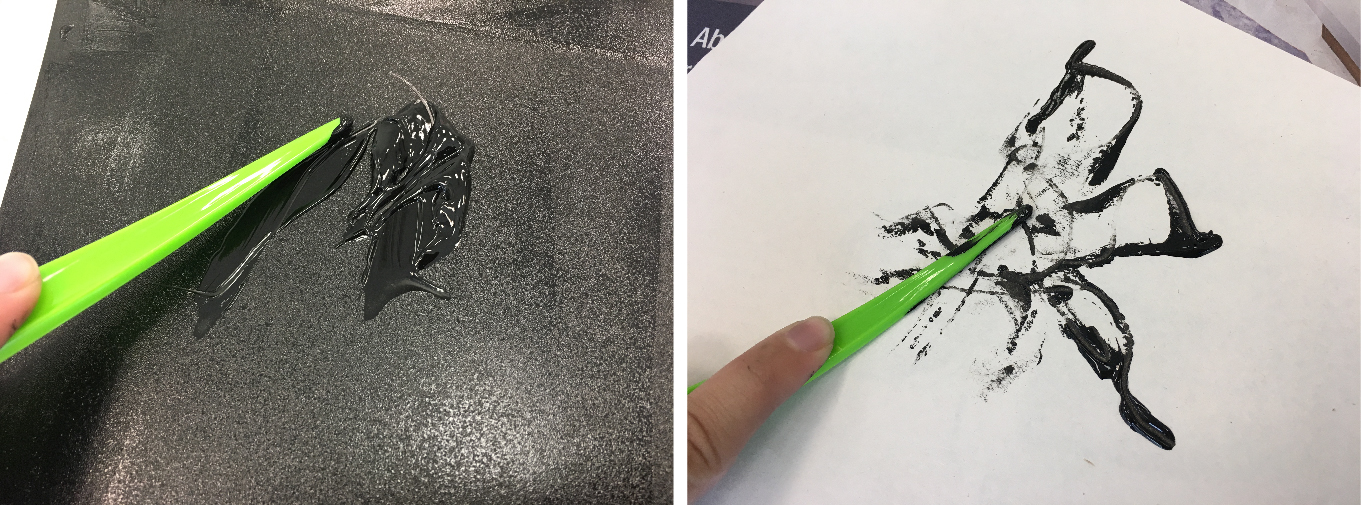
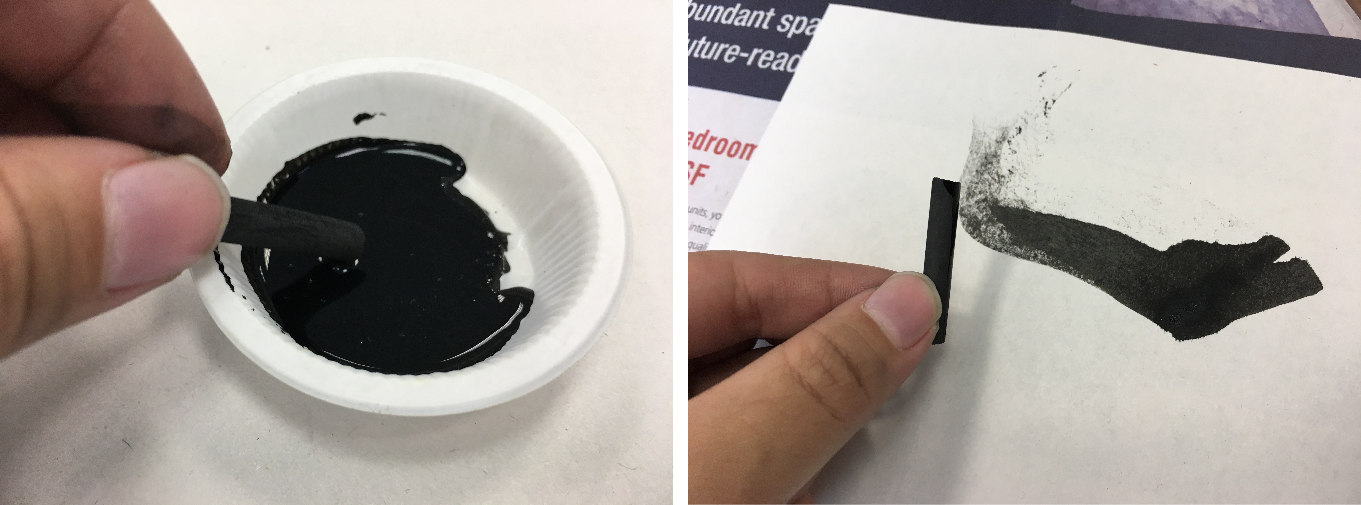
DIY calligraphy pen
 Made a DIY calligraphy pen out of a disposable knife and an aluminium can. Dipped the end of the pen into Chinese ink and made quick strokes with it. The pen was able to pick up quite a bit of paint, thus giving the strokes contrasting thickness. It was also able to capture my quick gestures.
Printing with plasticine
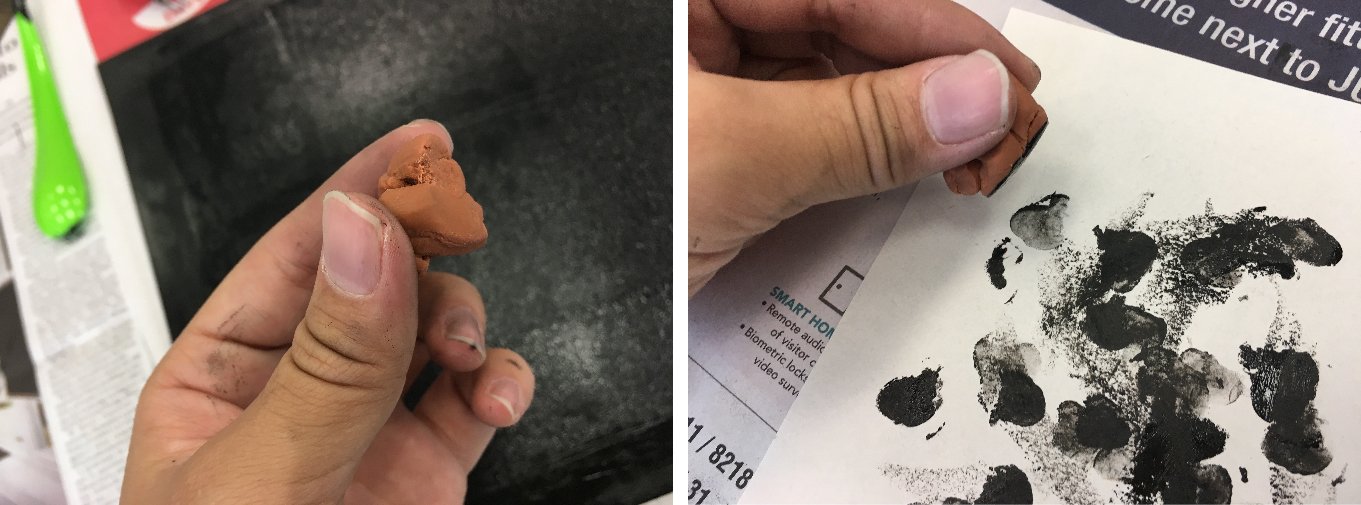 The unique feature about plasticine is that it is mouldable, therefore the results of every print will be different depending on how the plasticine has been shaped. There is a fun element of surprise since we’ll never know what kind of results we will achieve.
Printing with twine
 Grabbed a string of twine and loosely rolled it up as shown in the photo on the left. Dipped it into paint and lightly dabbed it onto newsprint.
Ink + Charcoal
 I wondered if dipping charcoal into ink would make any difference since both mediums are already so intense. The results first leaves gives an inky look, but the trail of the stroke had charcoal streaks.
Printing with bubble wrap 2
 Instead of laying the bubble wrap flat and printing from it directly, which would give a pretty static result, I decided to scrunch the bubble wrap up in my hands and see how the print goes. The bubbles were still visible from the print, but many of them became distorted which gives the print a messier and raw look.
Printing with wire
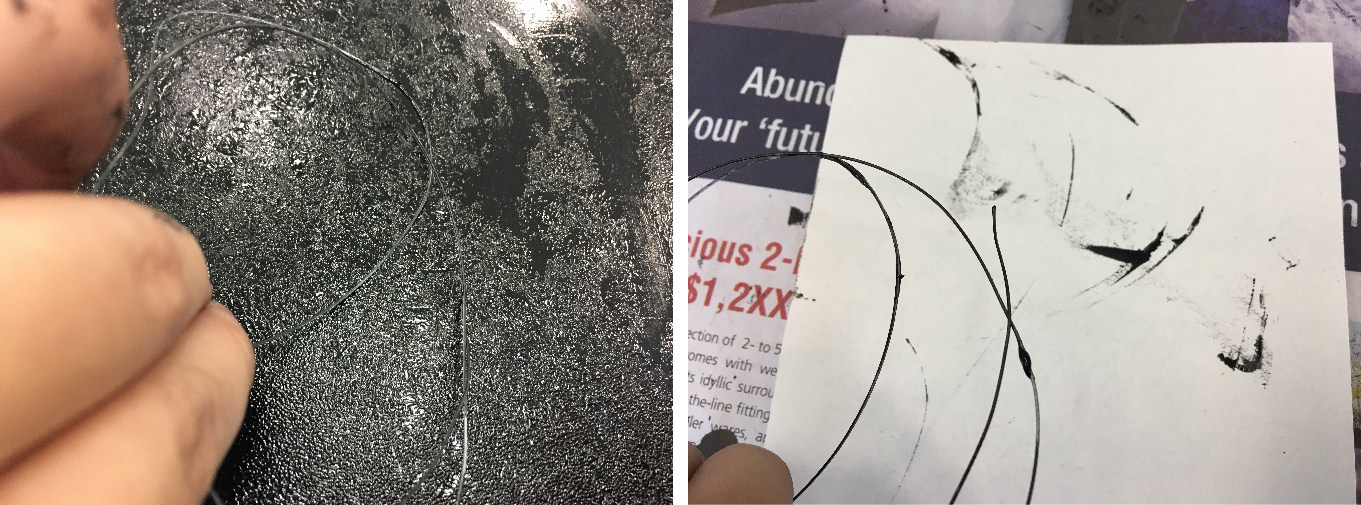
Grabbed a string of wire and scrapped paint with it. Then scrapped against the newsprint with the paint-coated wire.
Printing with crushed aluminium can
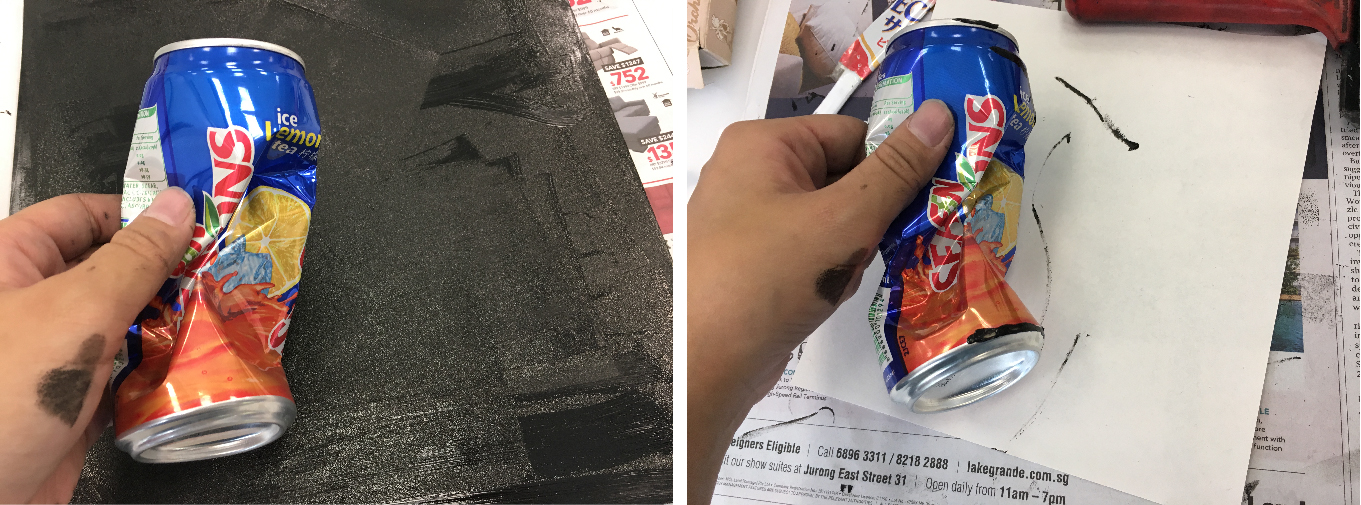
Crushed an aluminium can and scrapped the paint with its body. The strokes made by the can was very sparse and spread out since only some parts of the can got paint on it.
 Used the lino roller to roll some paint onto the body of the crushed aluminium can. Then used a piece of newsprint and wrapped it around the body of the can directly so that as much paint can get onto the paper as possible.
Dropping objects
 Placed my piece of paper onto a layer of paint and dropped objects such as a small piece of wood block and a ball of twine to see what the results are. The wood block is hard and has sharp edges, so its print will be harsher as compared to the print made from the ball of twine, since the ball of twine is soft and light. In a separate print, I also knocked onto the paper to see how the results would be like.
Spraying ink
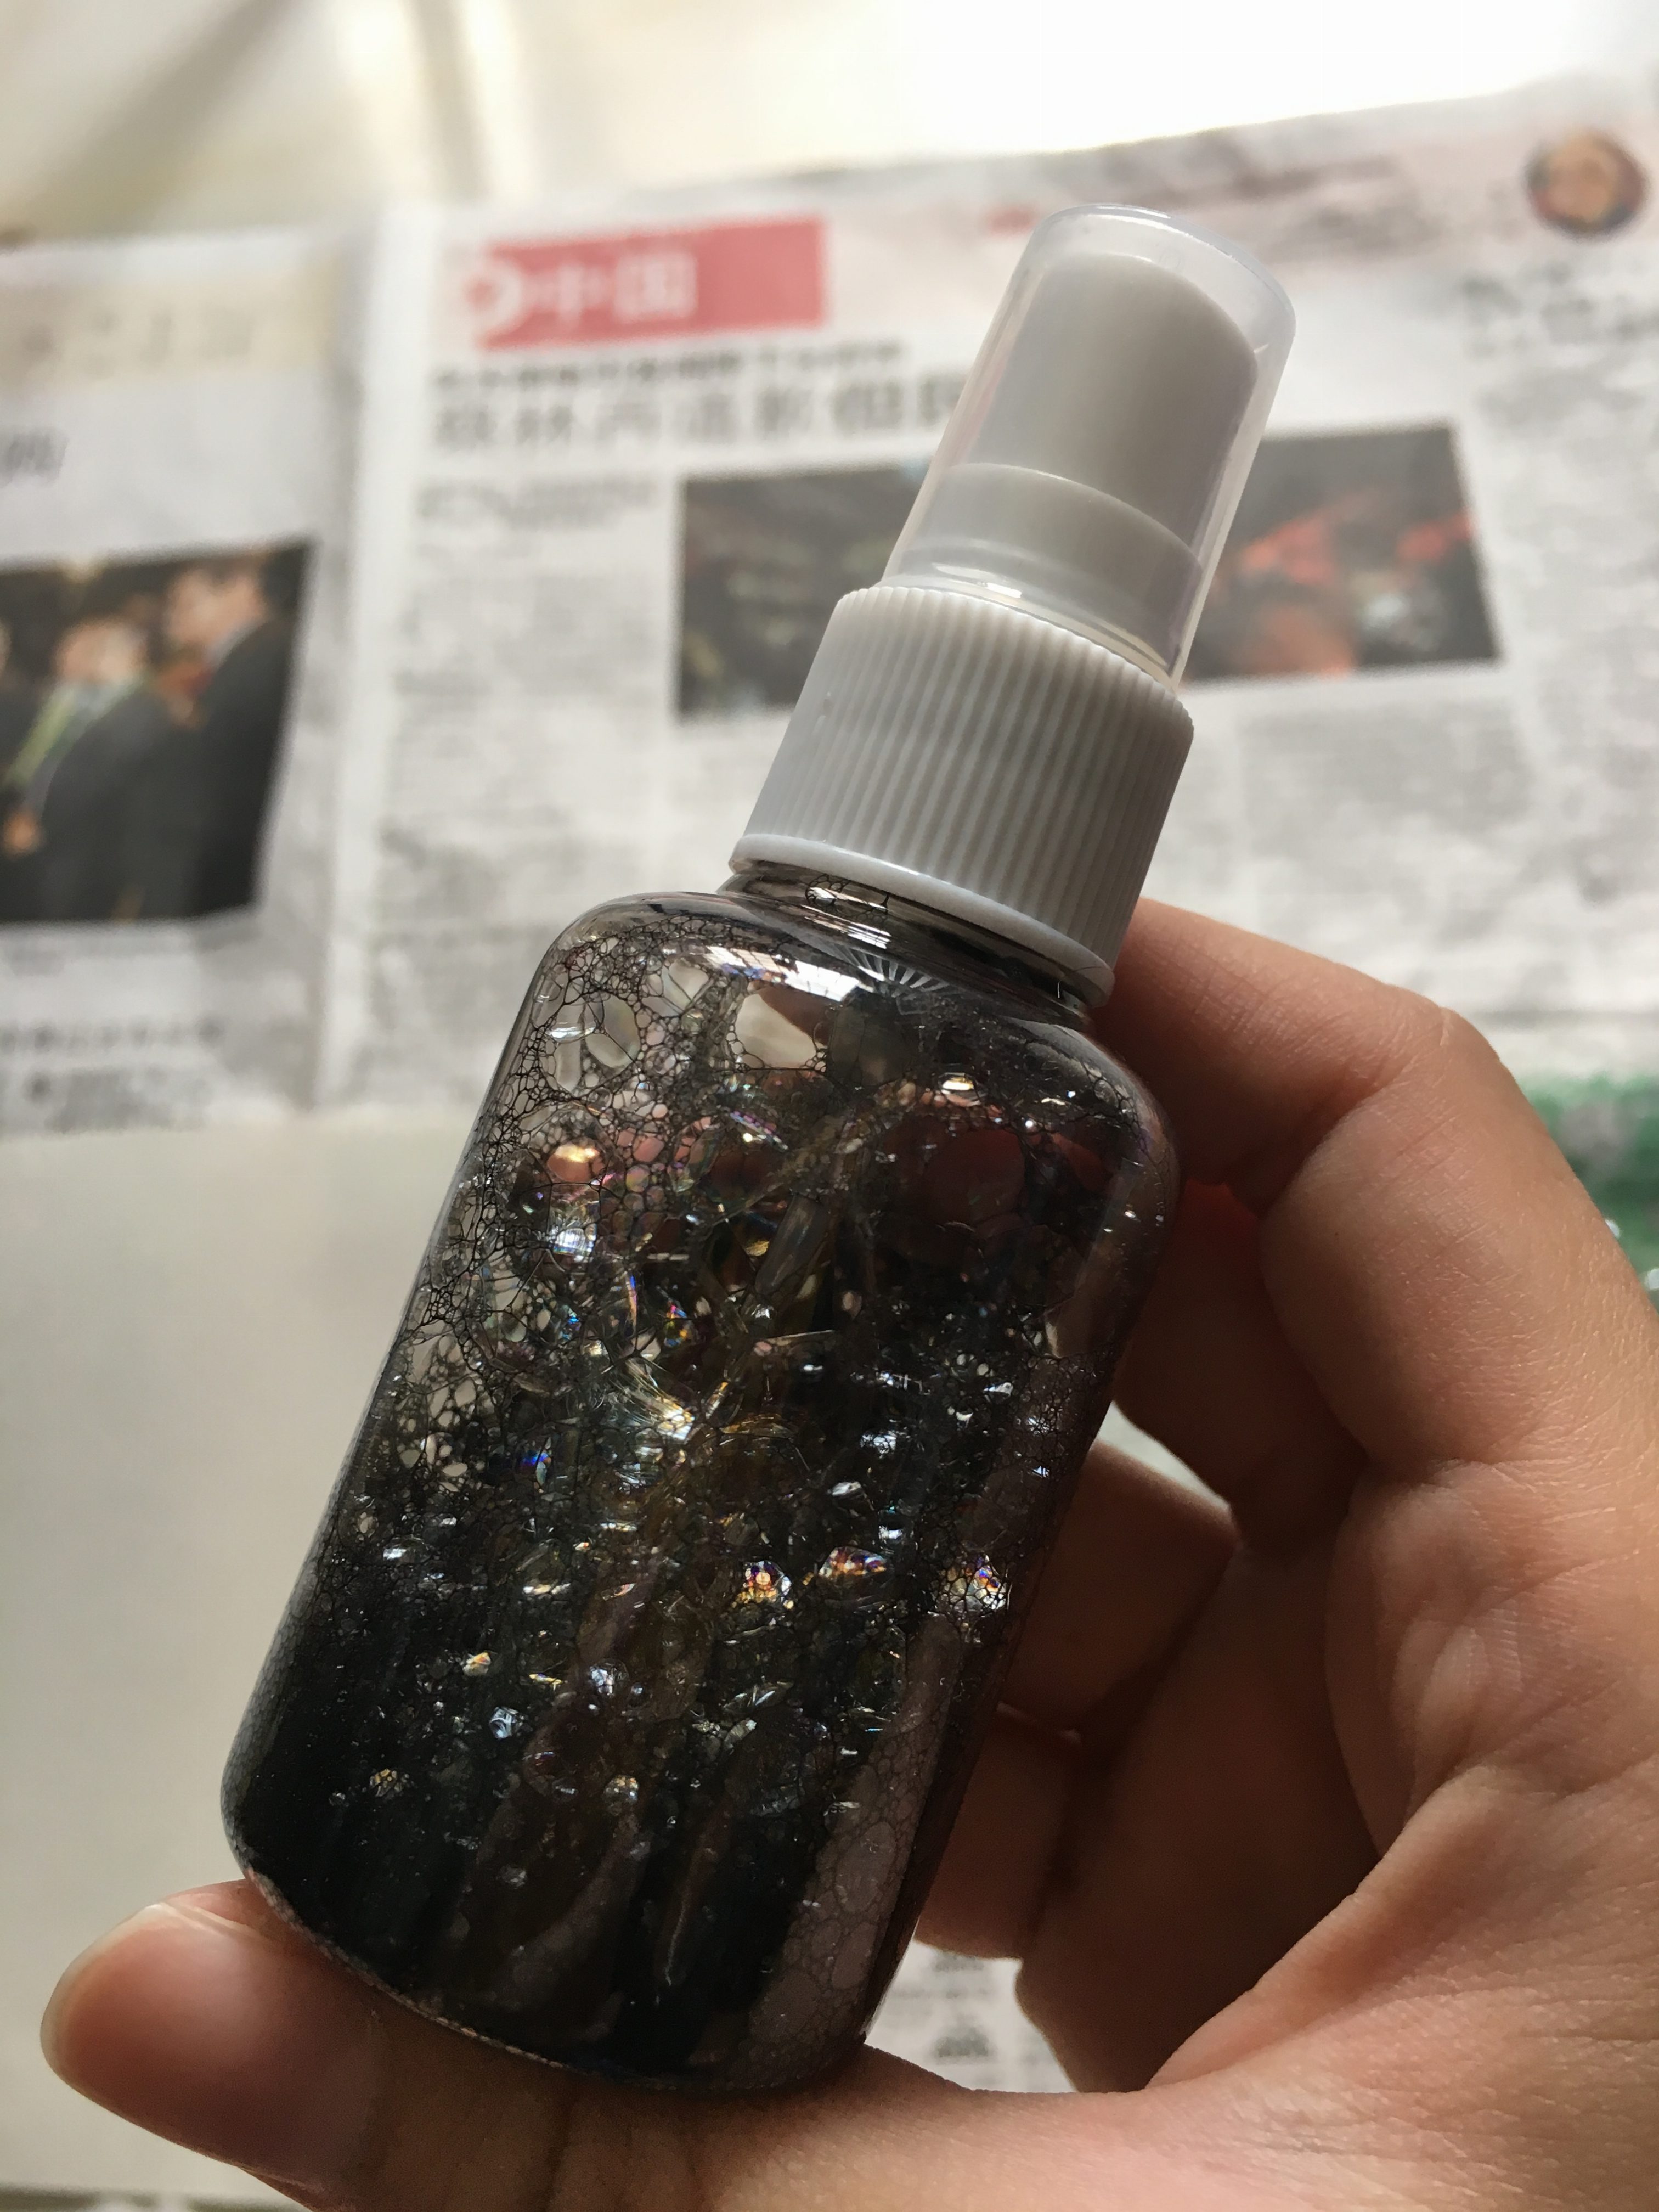
Filled a small spray bottle with a concoction of dishwashing liquid, water and Chinese ink. Then sprayed this concoction onto newsprint.
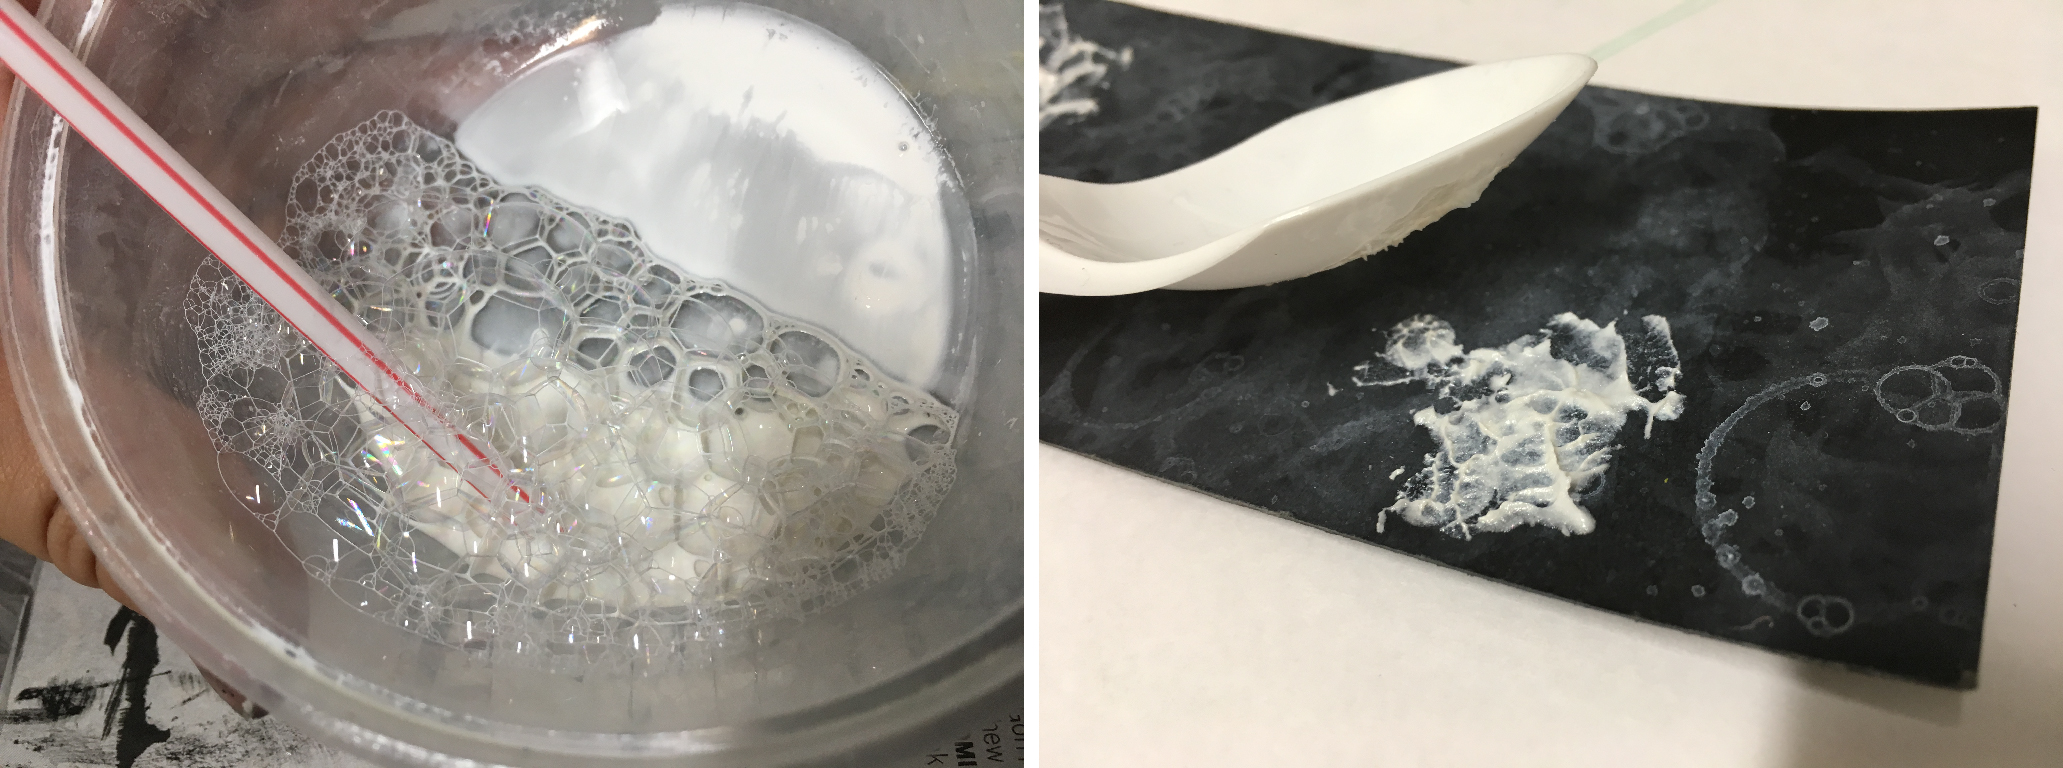
Bubble printing

Using the same mixture at the previous experimentation, I blow bubbles into it and printed the bubbles onto newsprint.
Tree stick as pen
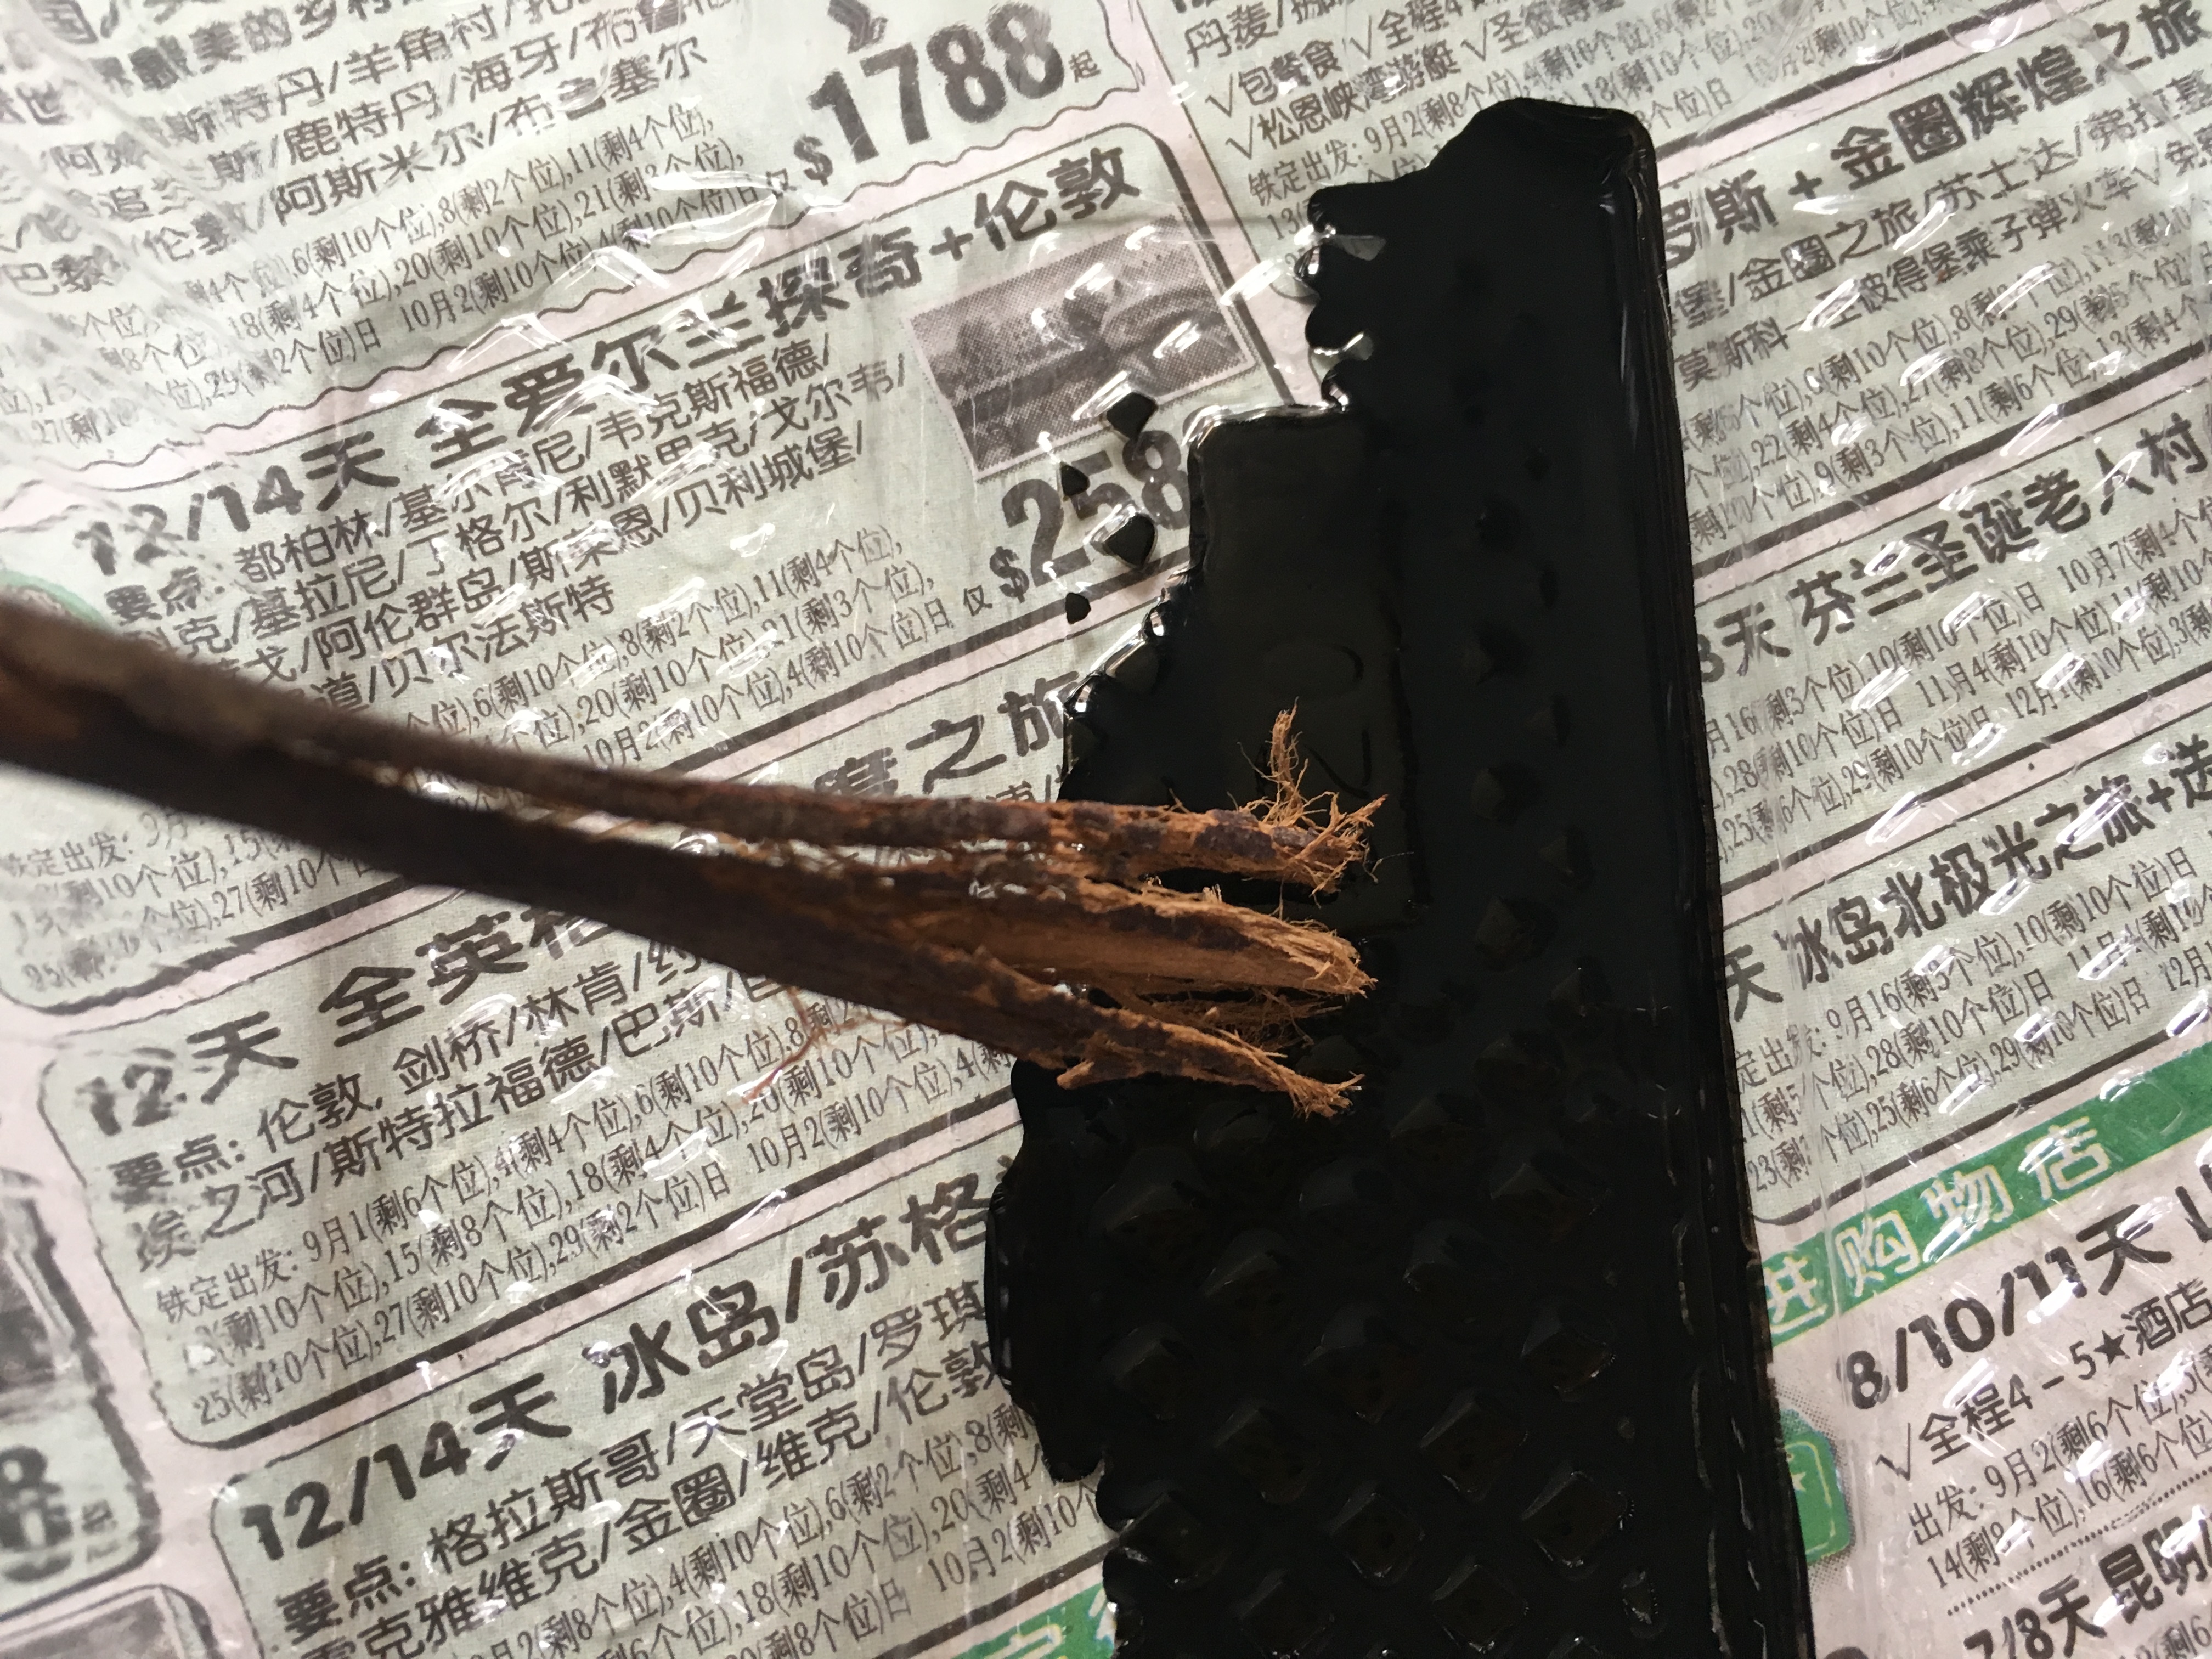
Picked this tree stick off the ground and I like it because its ends are frayed.
Printing with leaf

For the photo on the left, I simply rolled a layer of ink onto the leaf and printed it as it is. It was pretty disappointing since I was unable to capture the veins and designs on the leaf. With the remaining ink left on the left, I used a slapping motion and achieved the results as shown in the photo on the right.
Printing with tree bark

Picked this small piece of tree bark and dipped the entire surface into ink. Then printed this onto newsprint by sliding it in a downward motion.
Printing with lemon
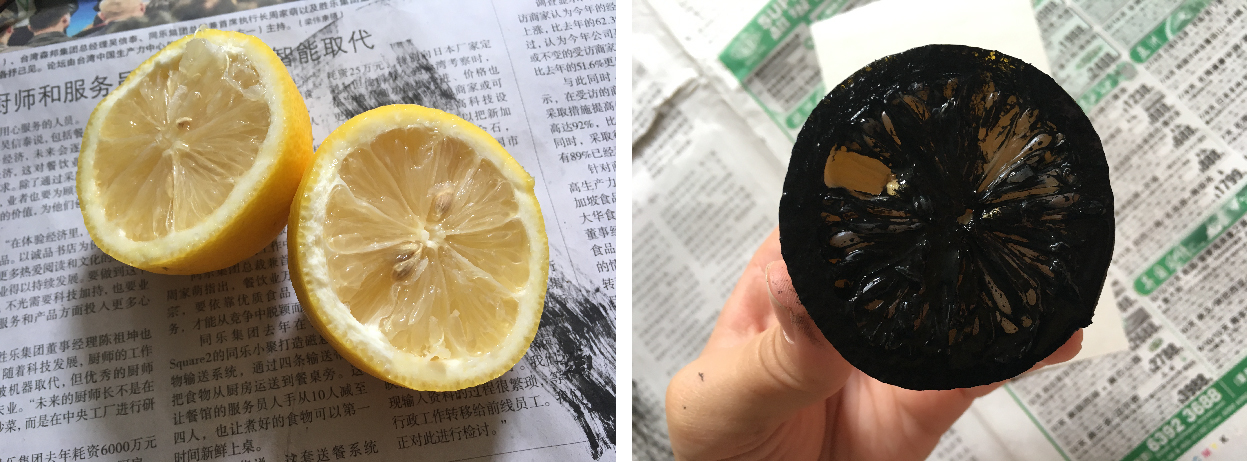
I had 2 lemons that had been sitting in the refrigerator for over a month already, so I wasn’t not sure if it’s going to spoil soon so I might as well just use it for mark making. I sliced the lemon into half and dip each half into ink and printed its cross-section. Again, I was pretty disappointed because I was hoping that the design of the pulp would be captured as well.
Printing with sponge

Poured ink directly onto a sponge and made prints with it.
Chopsticks on tracing paper
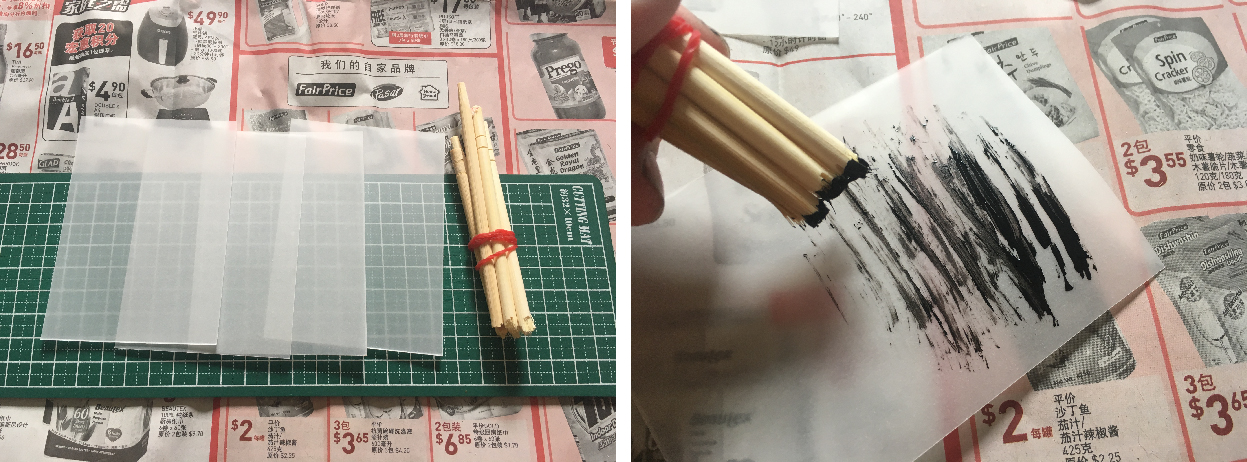
Taking a break from the boring newsprint paper. I decided to give tracing paper a try instead since I can play with the idea of layering emotions. As for my mark-making tool, I broke some chopsticks into half and used the frayed ends to make the marks.
Printing with ice-cream stick

I used one end of the ice-cream stick to make short strokes onto newsprint paper. The strokes vary in intensity, hence giving a sense of depth to it. After filling a small piece of newsprint with these strokes, I tore the newsprint into small pieces and layered them over one another (as shown in the photo on the right)
Printing with small stone
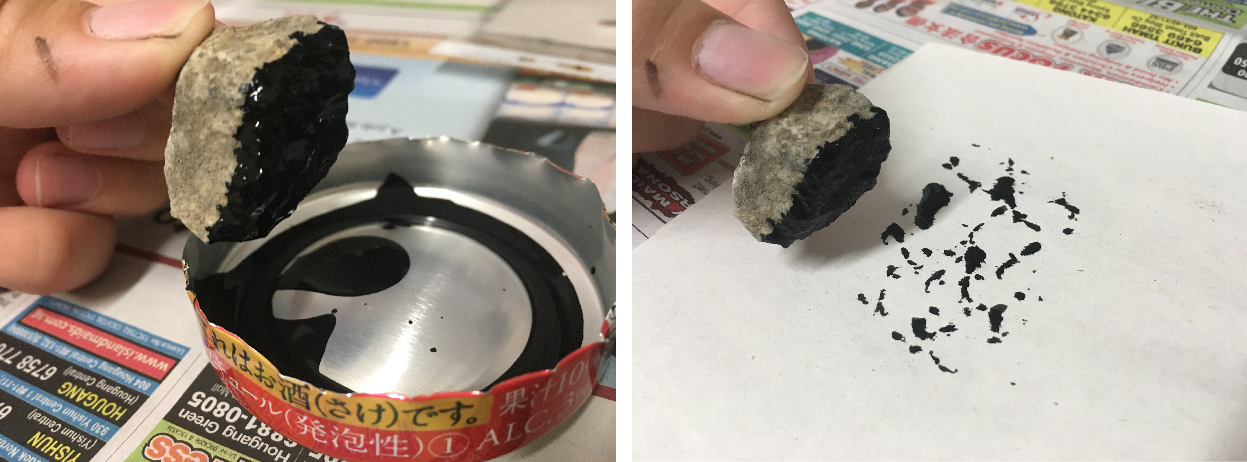
Dipped a small stone into ink and dabbed it onto newsprint paper. Dabbing the stone onto paper was not very effective since only a bit of ink would transfer over due to the rough surface of the stone. To make this print more effective, I printed the paper onto the stone instead.
Printing with paper clips

Straightened some paper clips and held them loosely in my fingers so that they can swing around freely as I move them across the surface. I tried making the marks on floor cleaning wipes and the paper clip managed to pull some of the fibre strands along with it as well!
Printing with foam
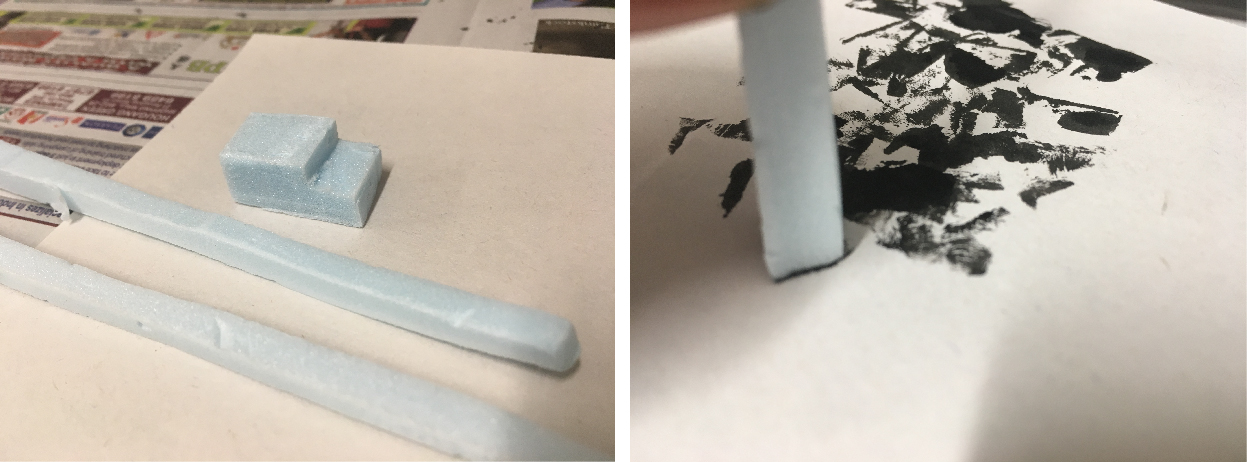
Made use of the foam blocks from Foundation 3D and made marks with the faces of the blocks.
White on black
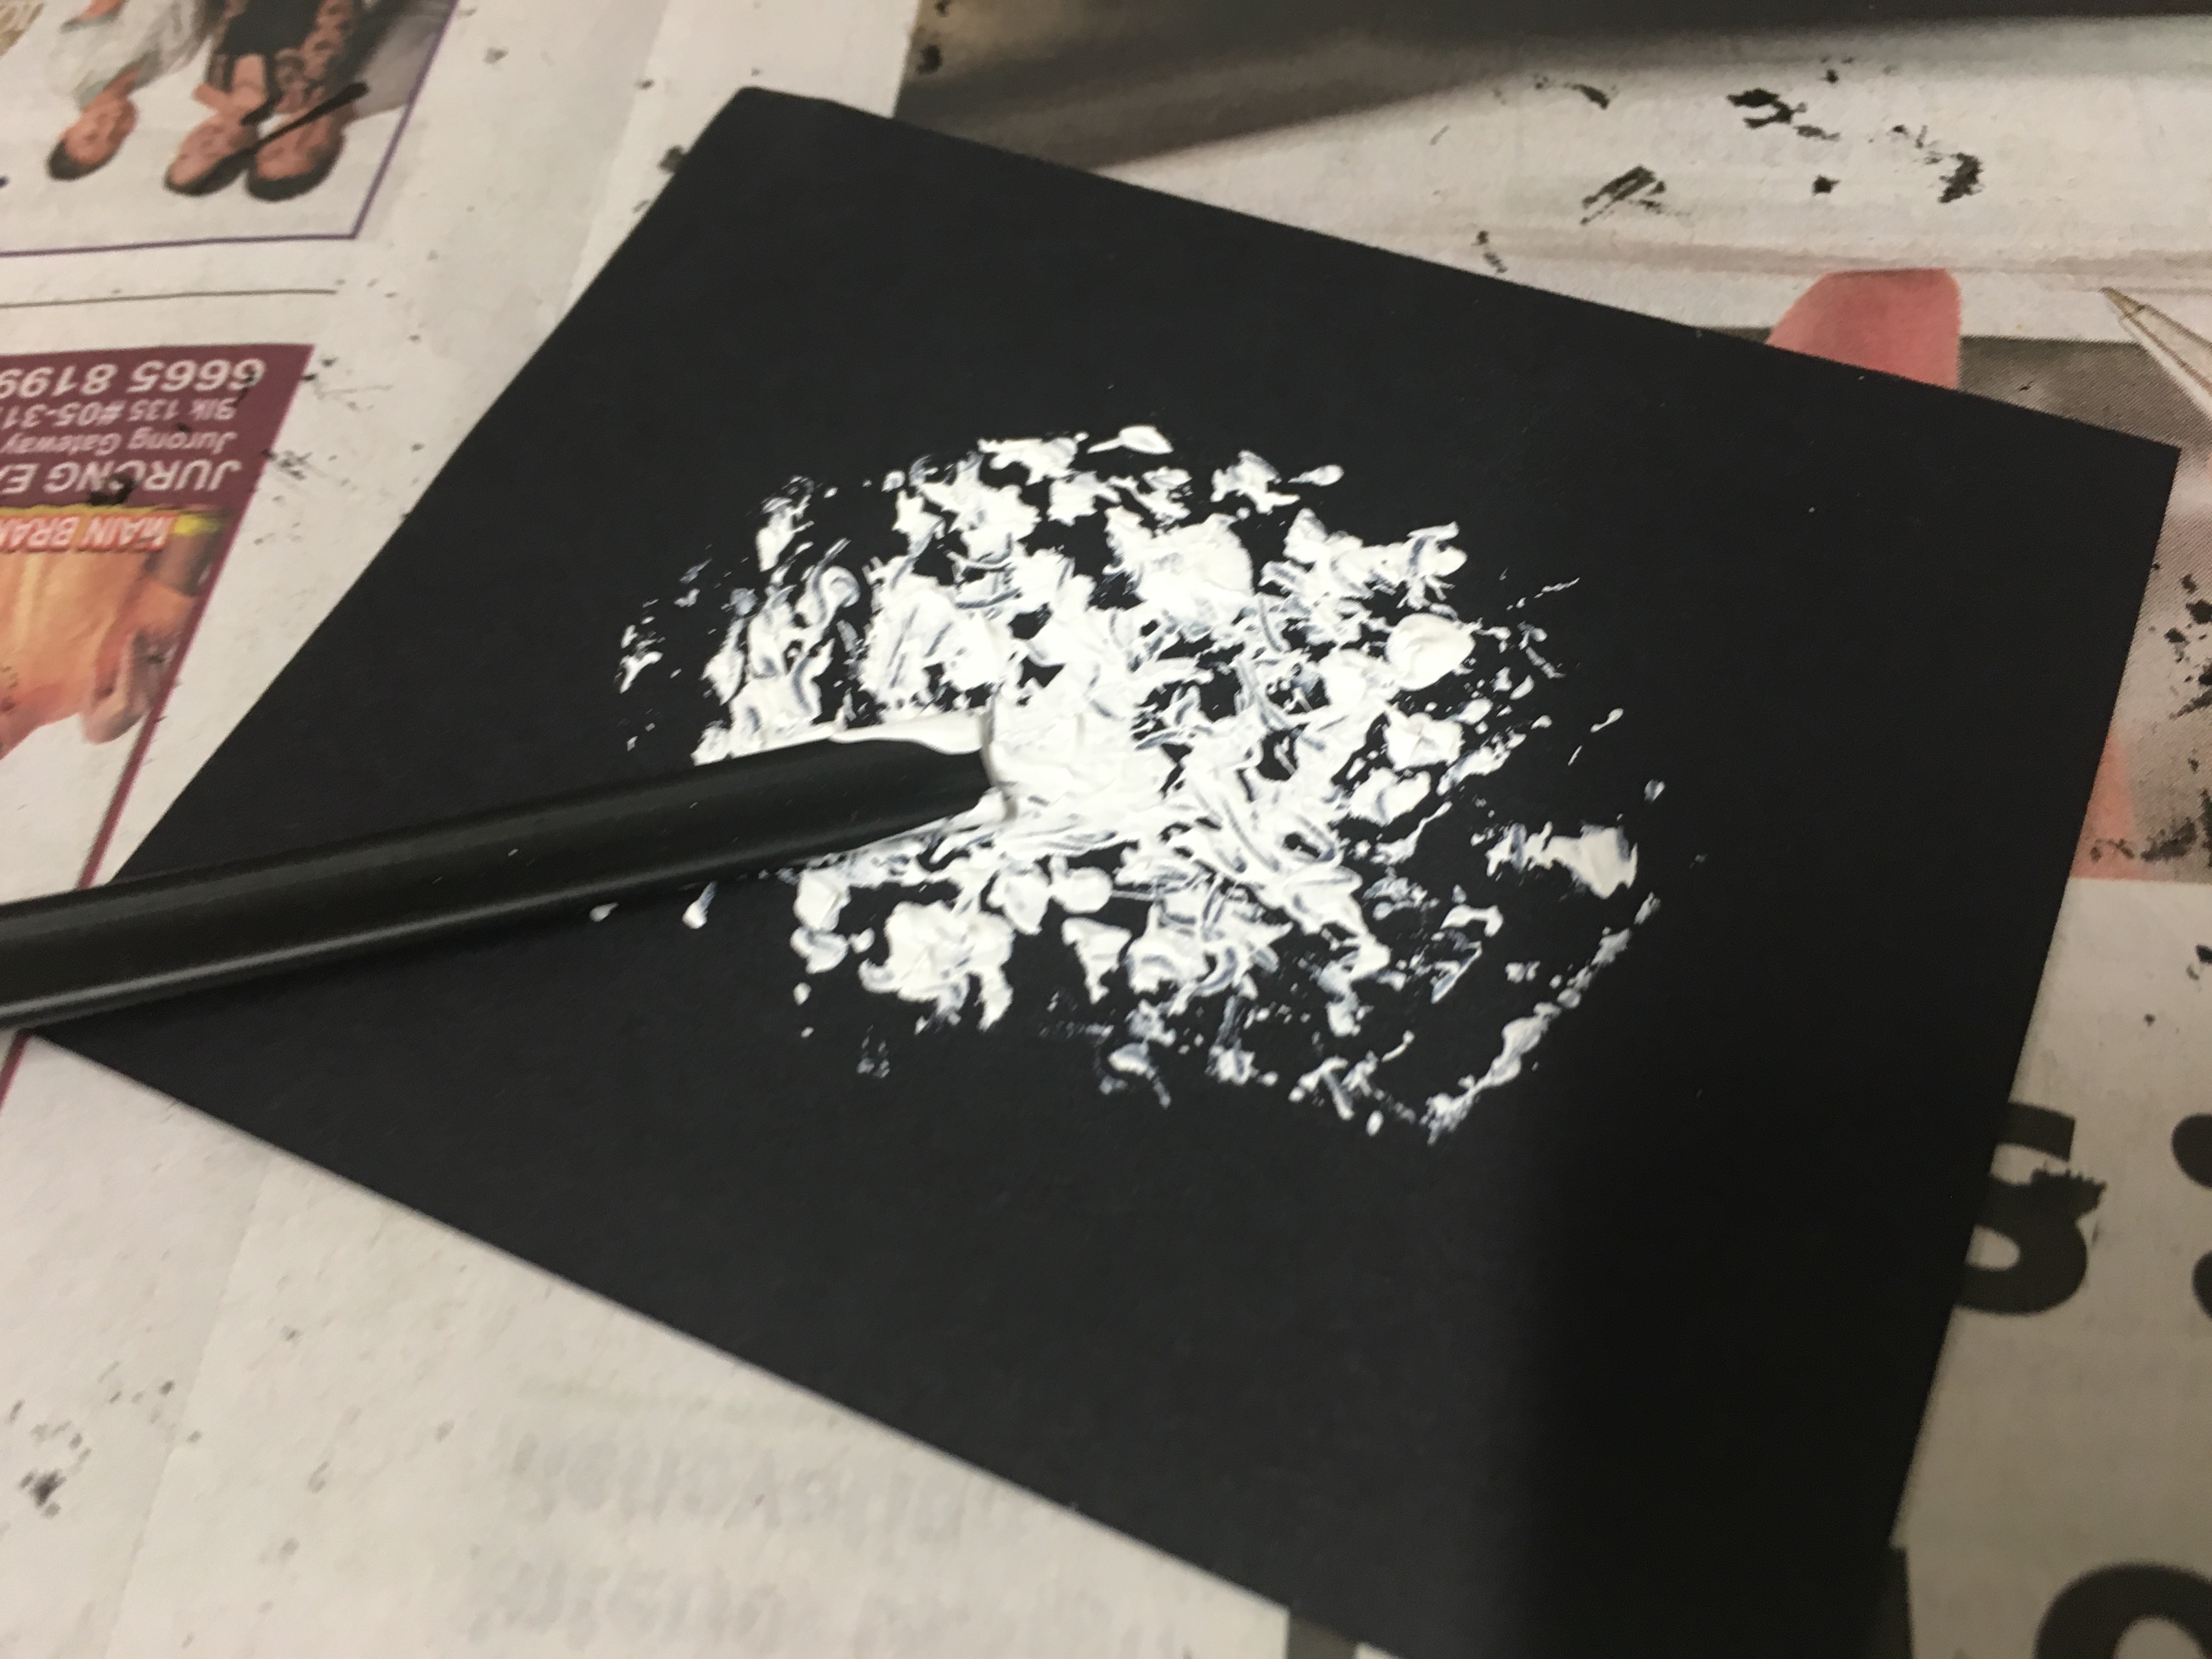
Enough of light-coloured surfaces, time to move on to black ones! For this experimentation, I used a coffee stirrer to pick up some acrylic paint and dabbed it onto a black piece of paper. I personally find the white on black results better since the white stands out a lot.
Scraping with aluminium can
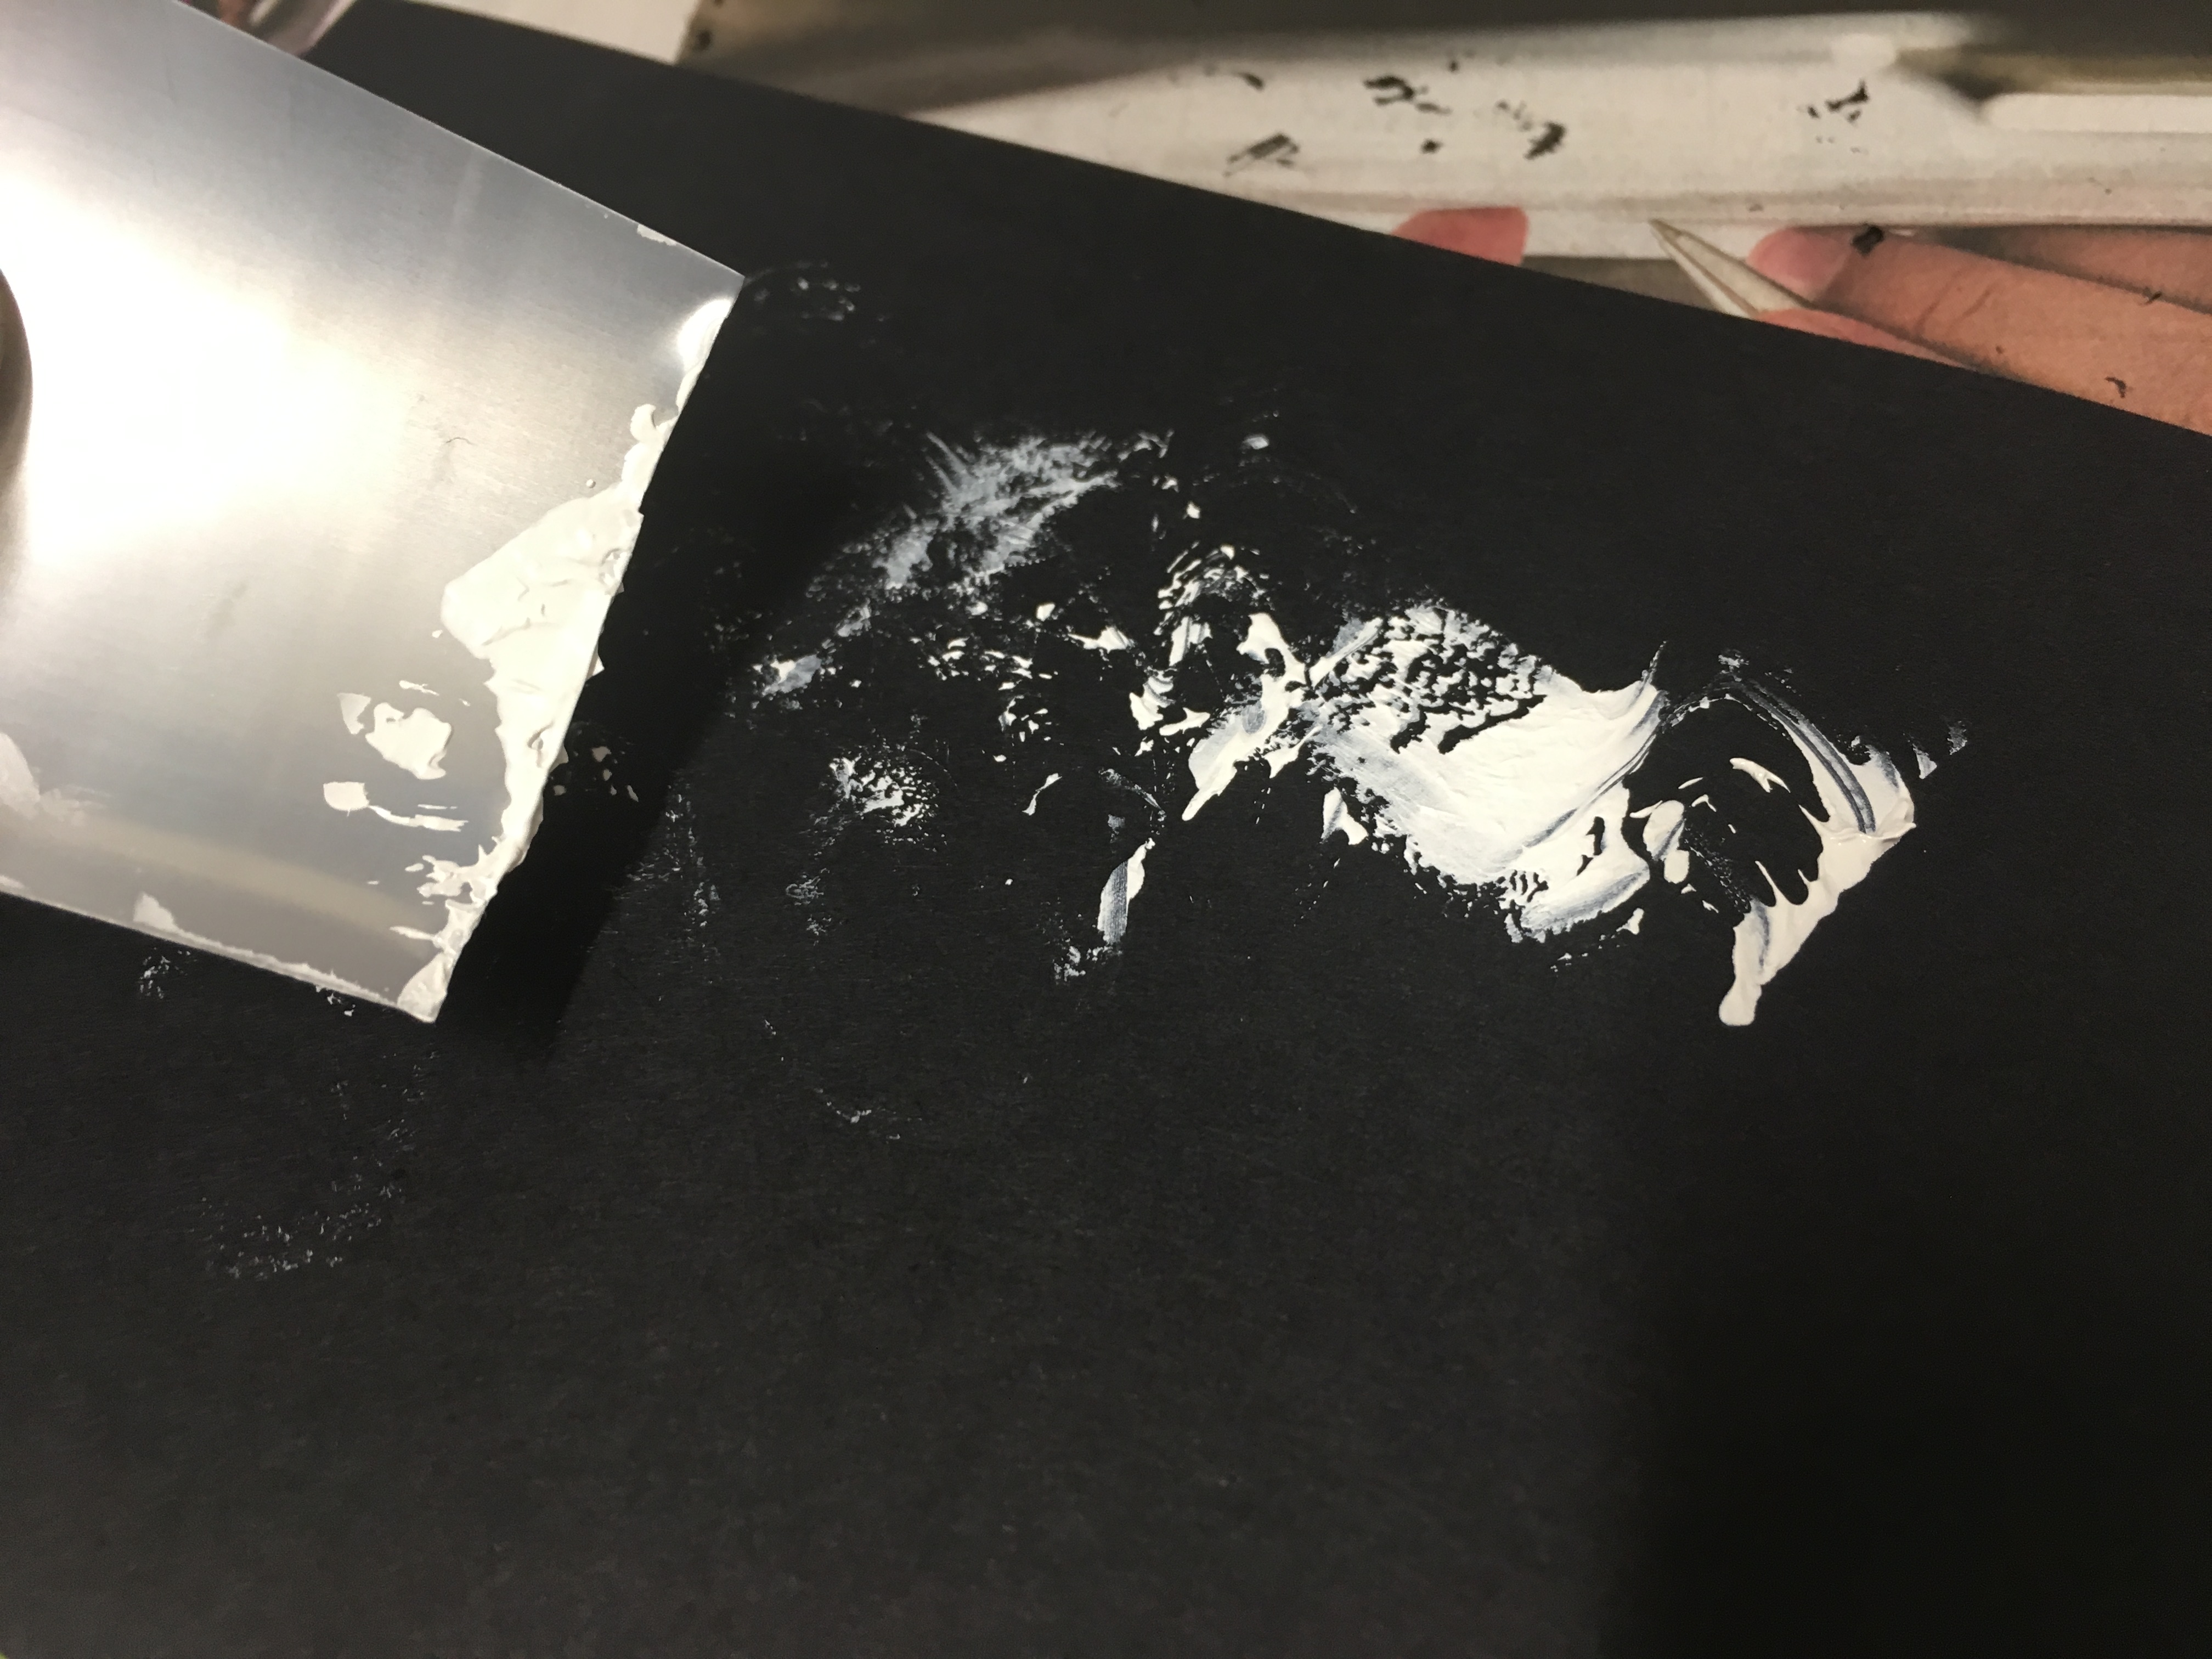
Cut this aluminium piece of out of a can and used the sharp ends to scrape acrylic paint onto black paper.
Printing with thumbtacks
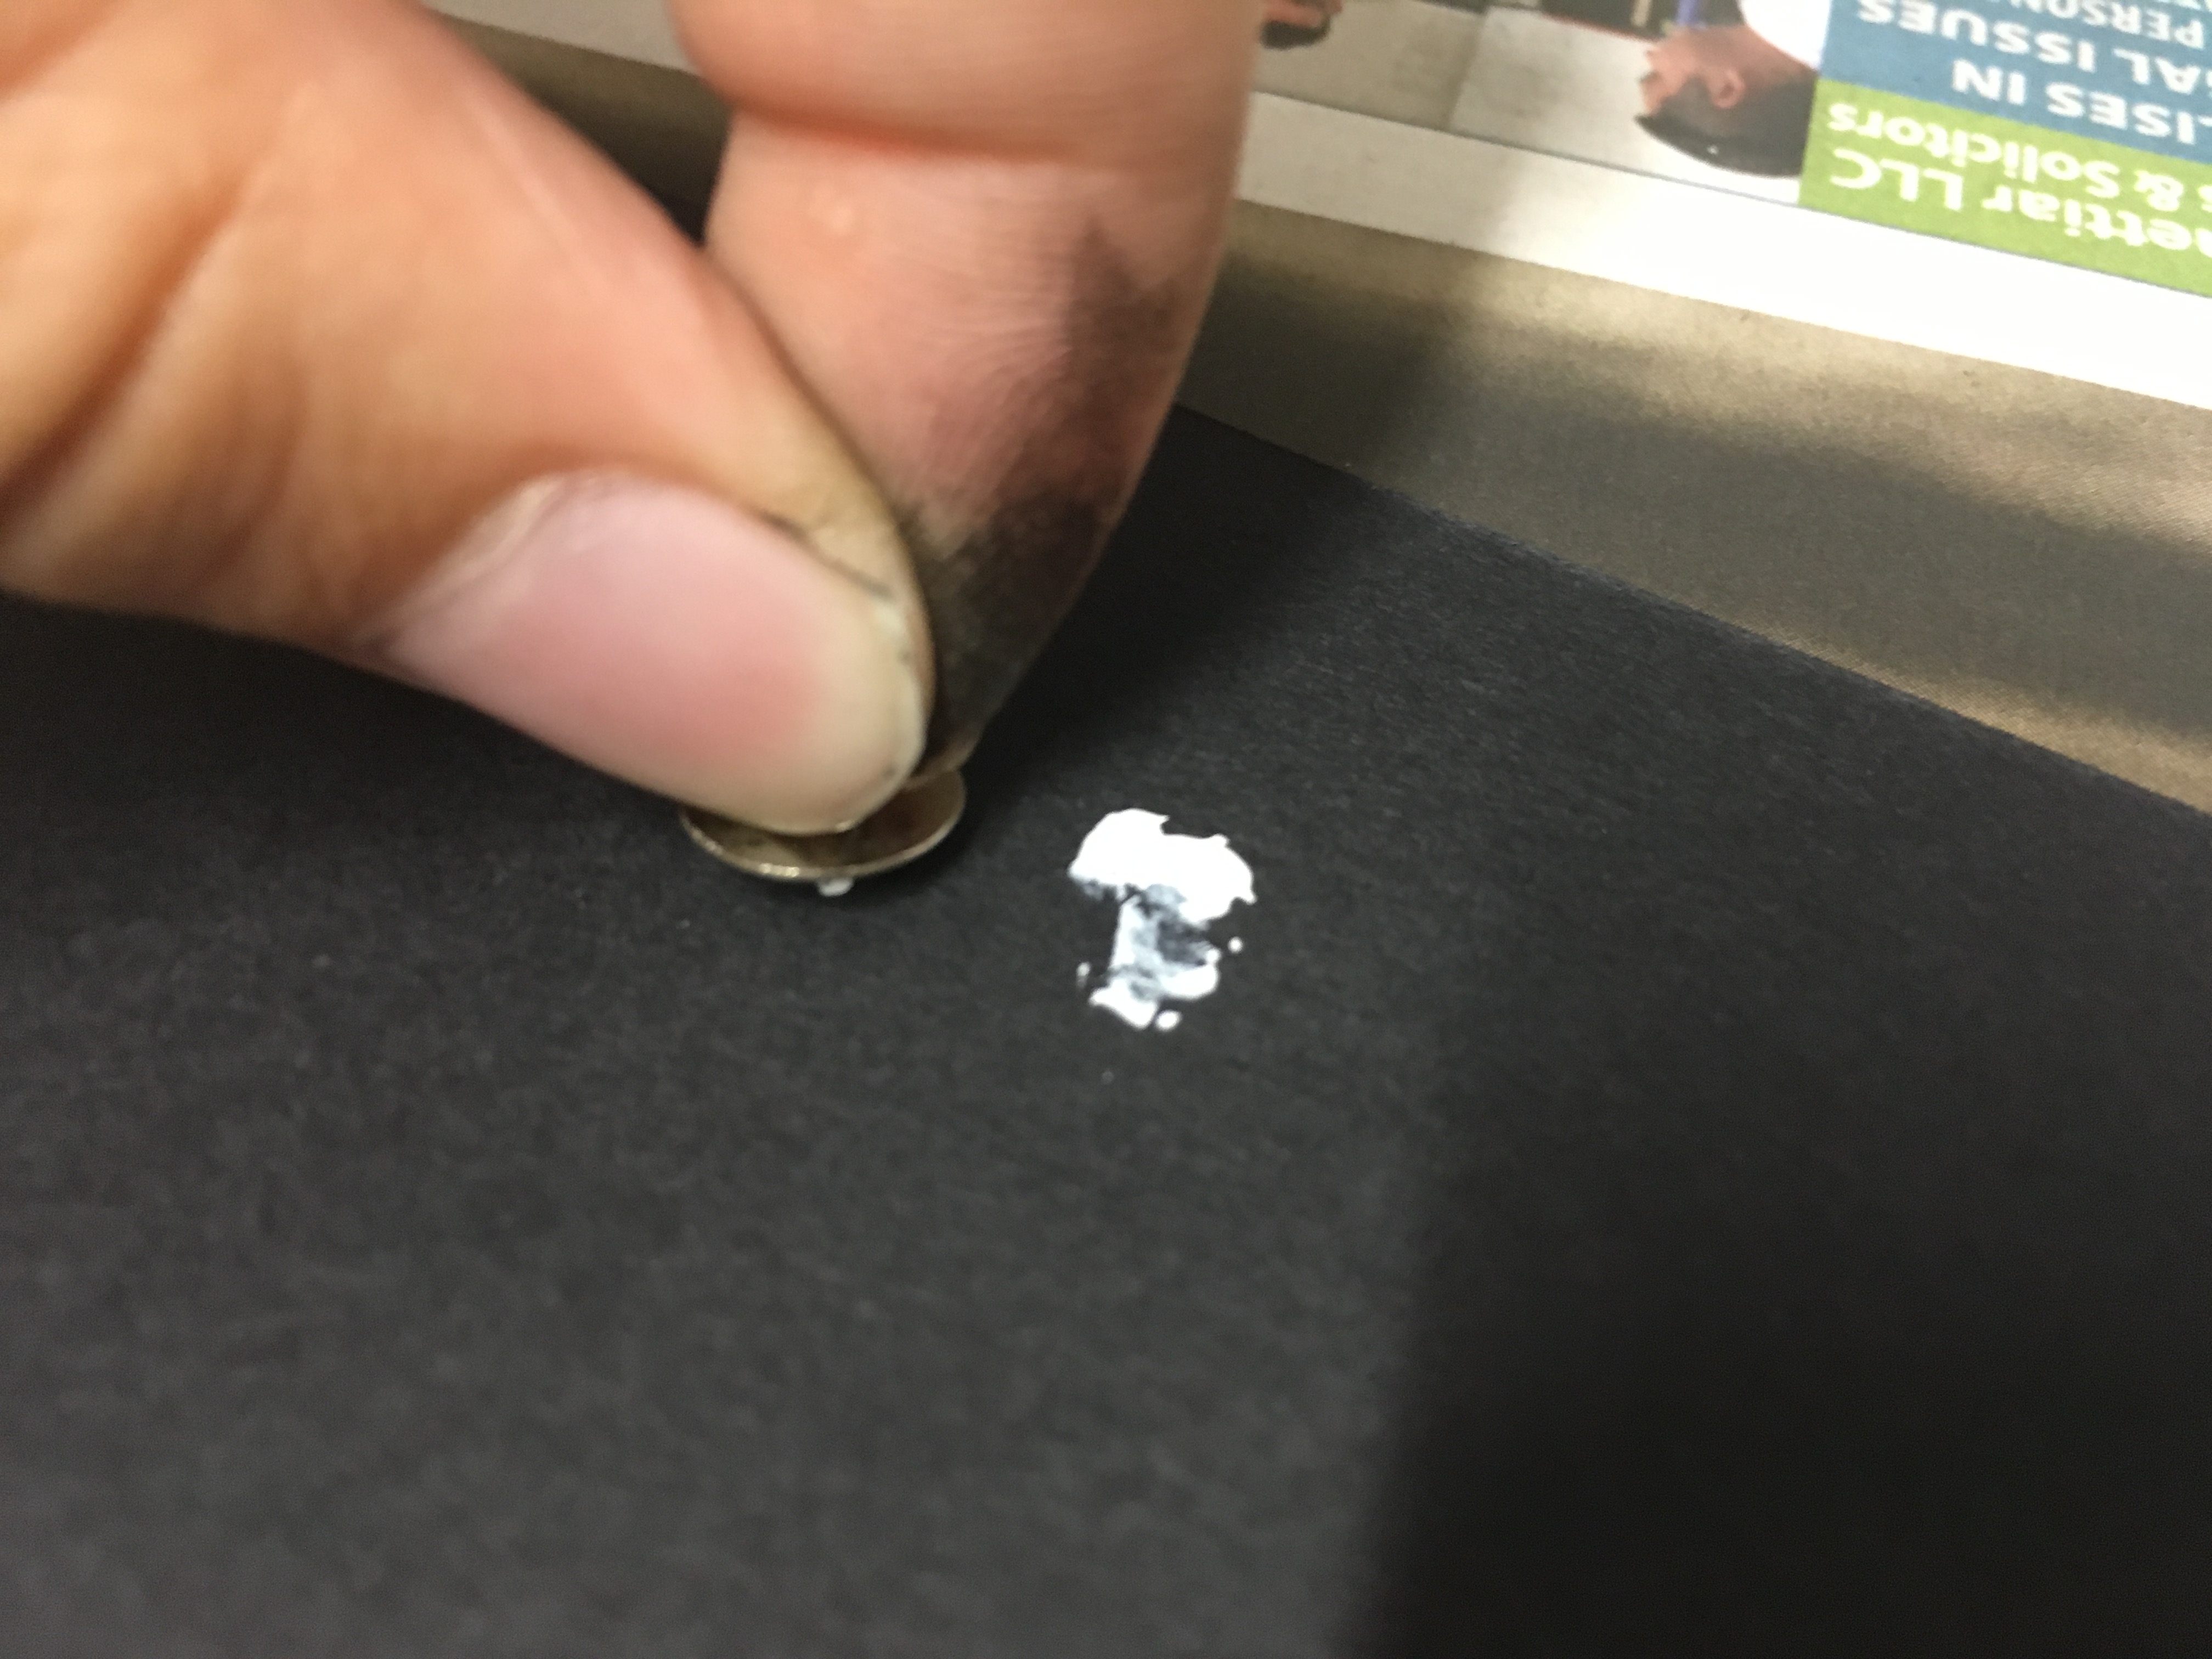
Seeing that I was running out of found objects for mark-making, my gracious room mate offered me a thumbtack. I simply dipped the thumbtack into acrylic paint and printed it directly. The dots made by the thumbtack reminds me of water droplets taken in low-key lighting.
Part 2: Process for Final Works
From the large pool of experimentation that I’ve done, I narrowed down the specific techniques that I wanted to incorporate and here are the photos of the processes. More detailed explanations and thoughts behind the materials and techniques used can be found in my sketchbook.
Fear
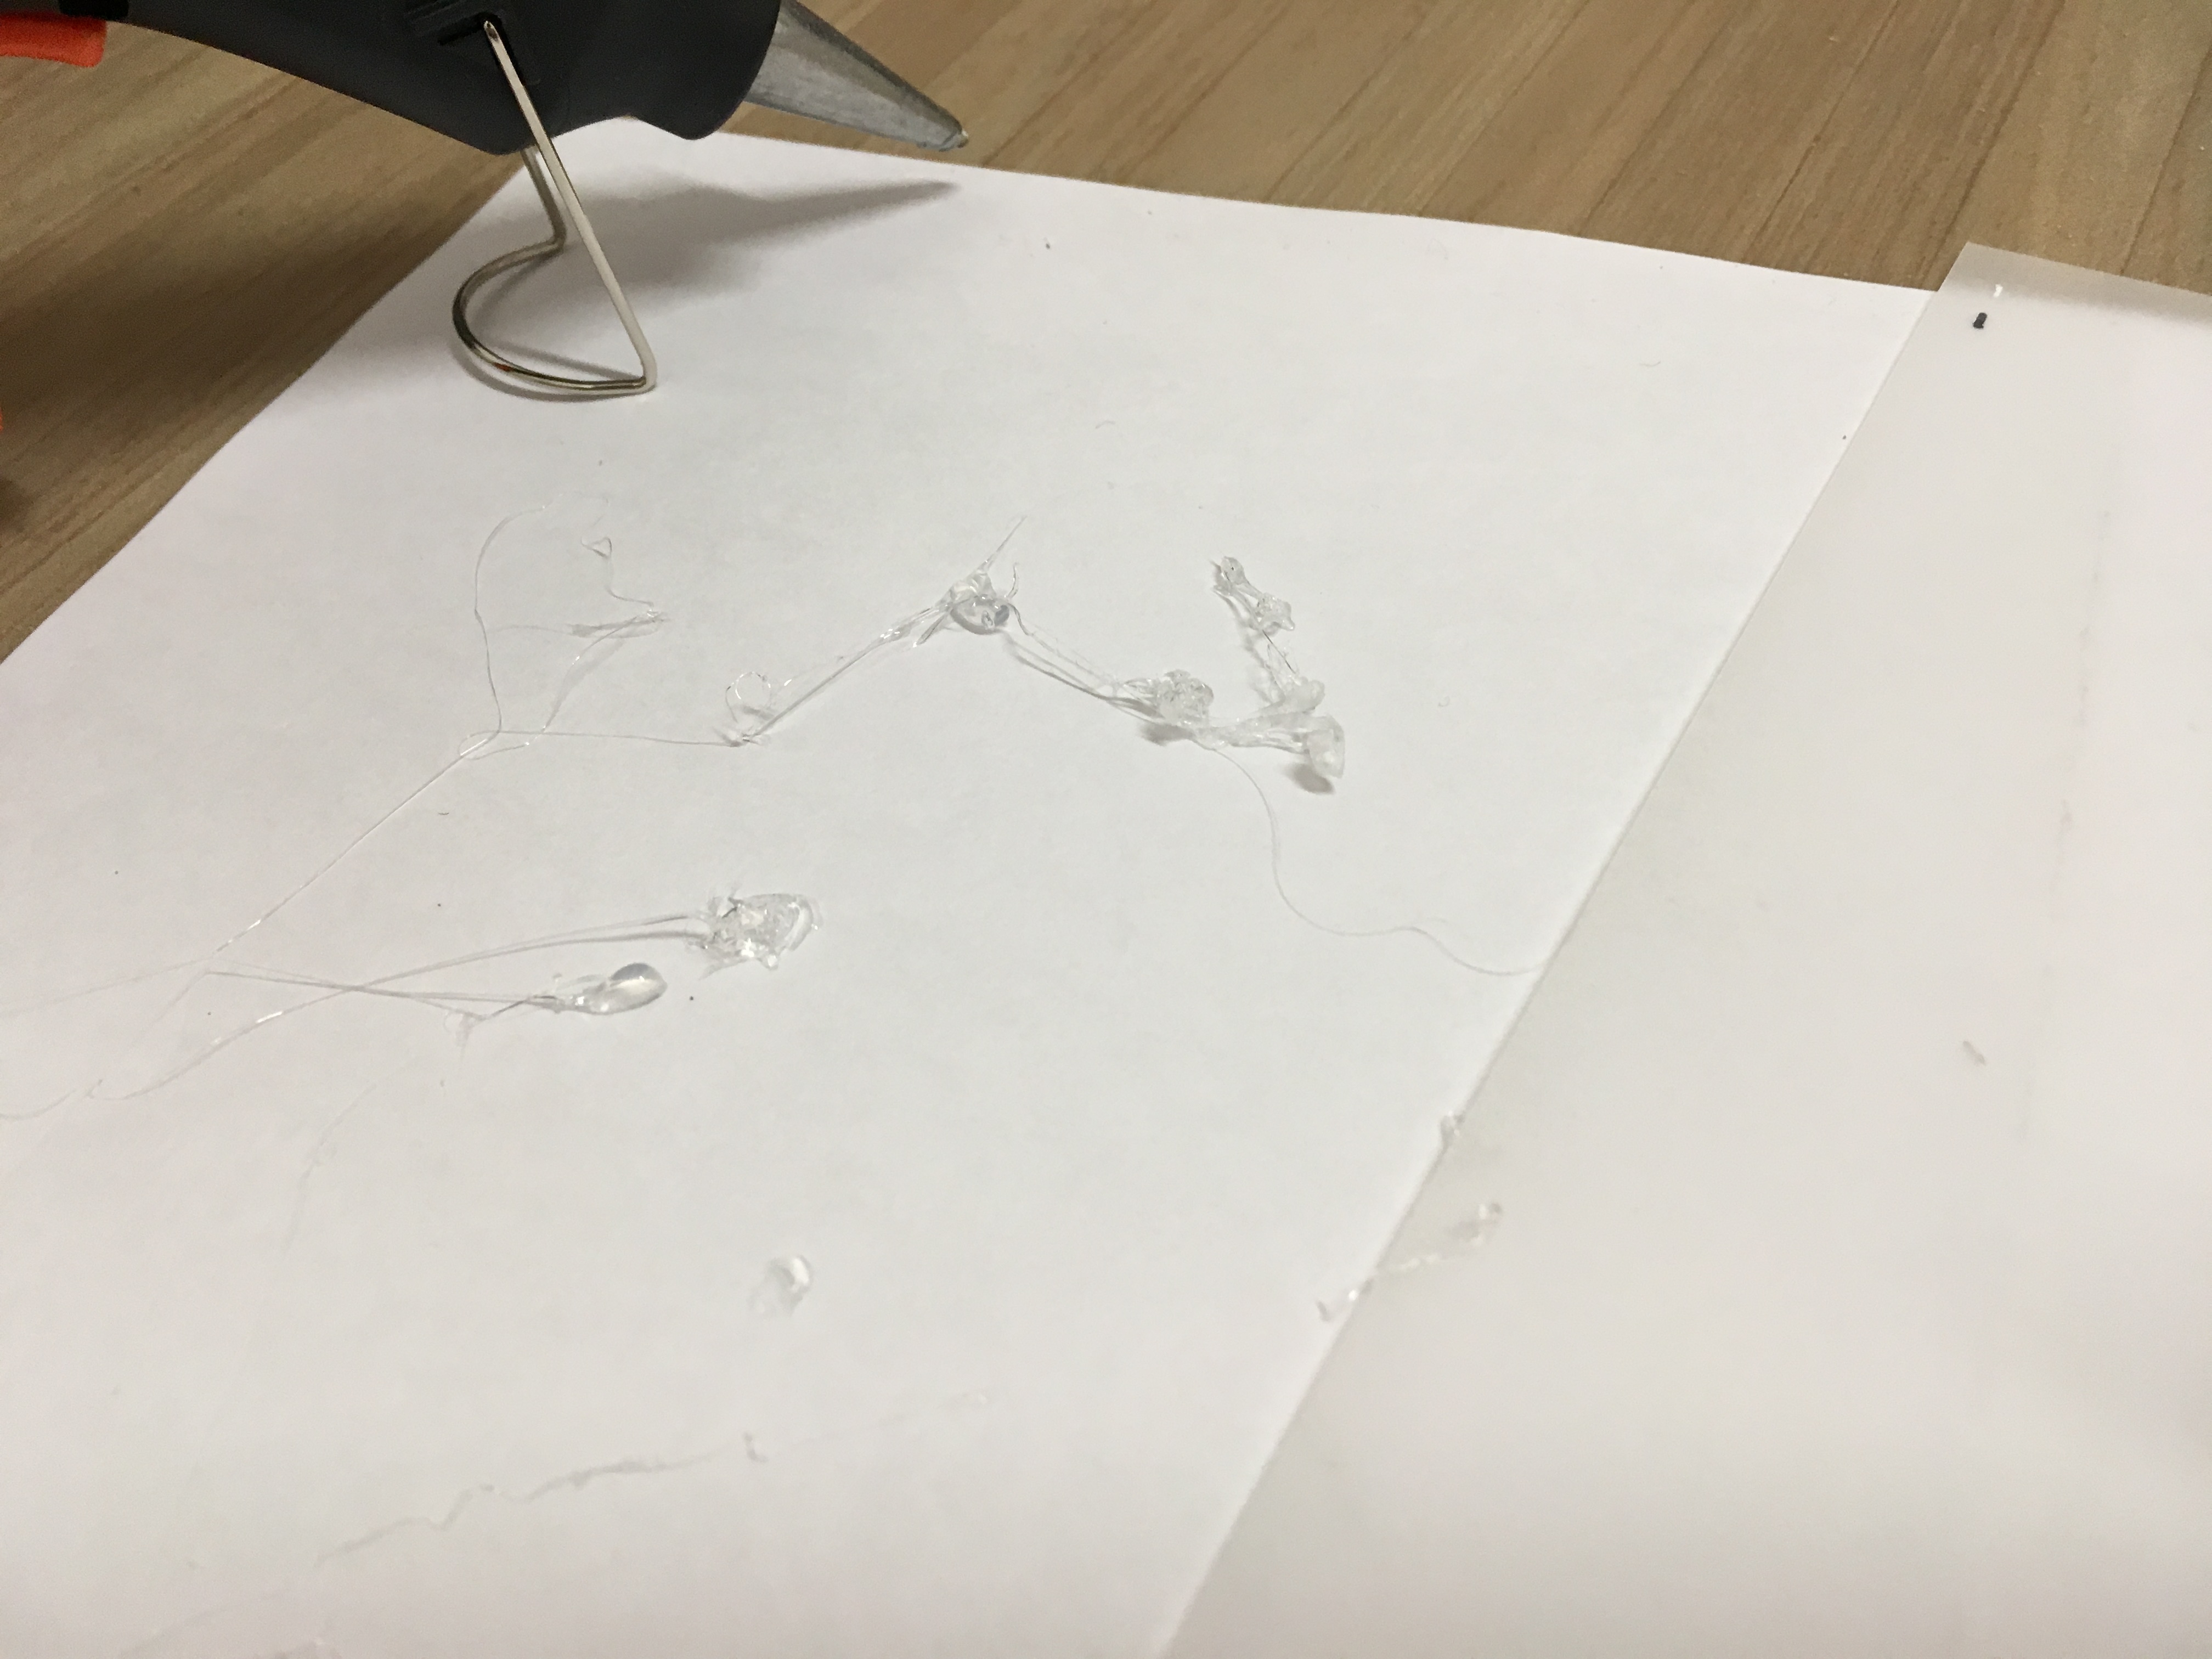
As my ‘fear’ strip plays around with layering of tracing paper, I thought of using the hot glue gun to create texture on the tracing paper. However, I forgot that tracing paper is actually waxy and hence the hot glue gun would simply peel off the tracing paper when some force is applied. I decided to not use the use gun anymore since I didn’t want to risk my hot glue texture peeling off my tracing paper on my final strip.
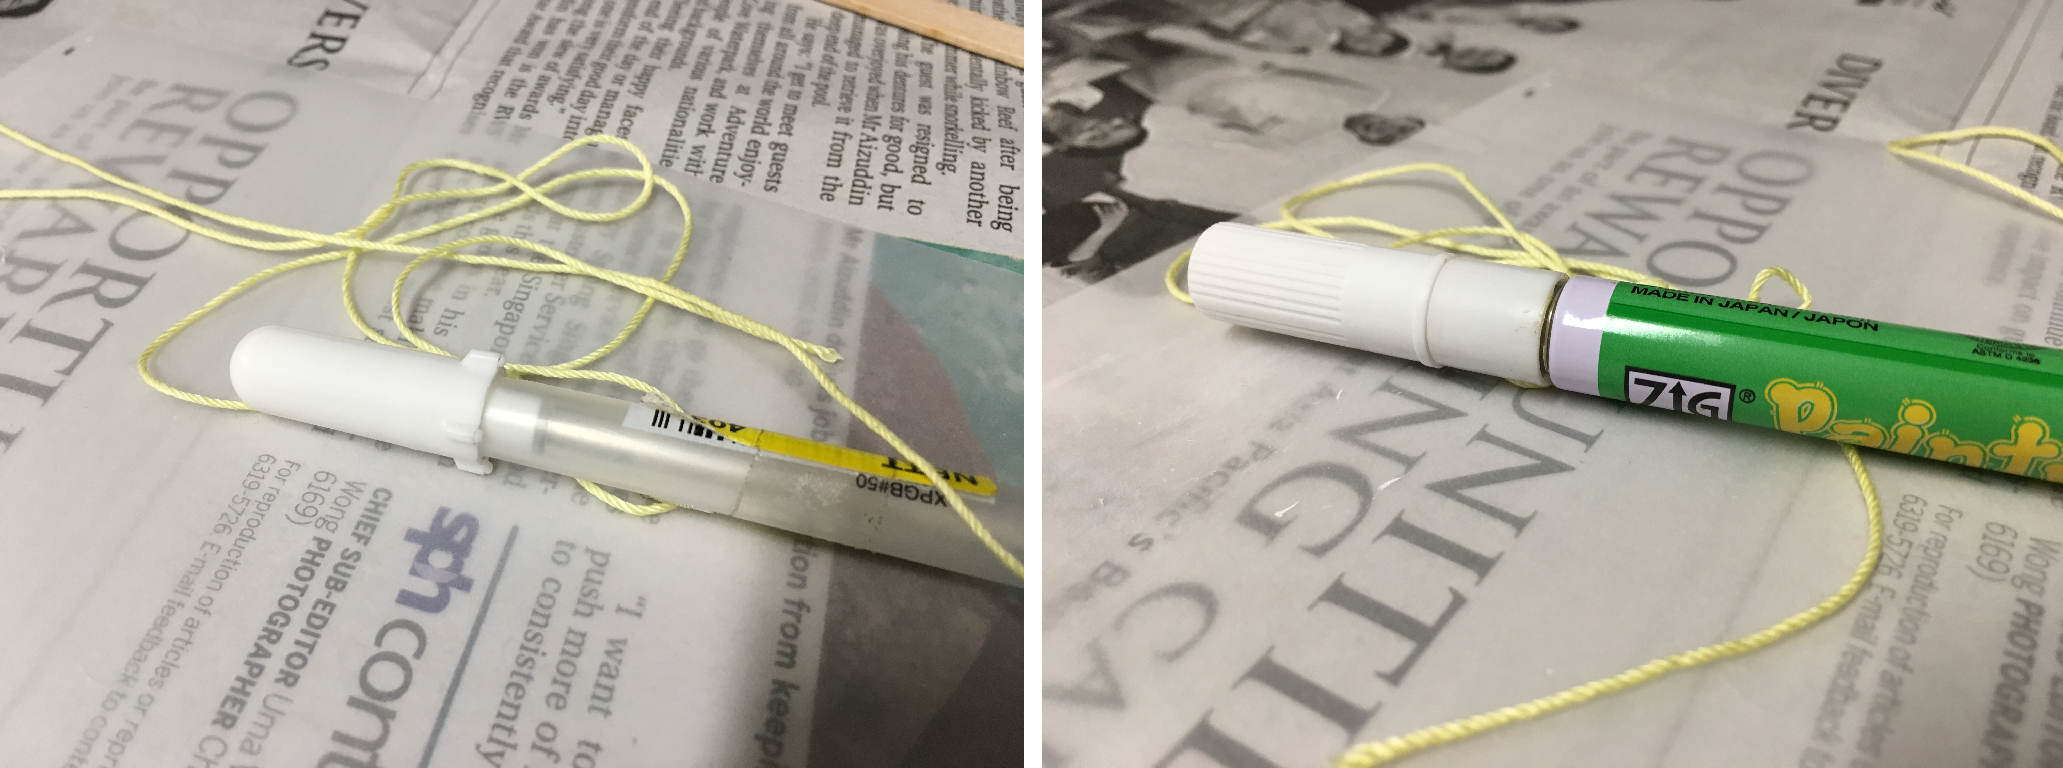
Instead of using glue gun to create texture, I decided to use a white pen to do that. Since it’s boring and predictable to simply hold the pen in my hand and create line steaks, I thought of hanging the pen from a piece of string and create marks by swinging the pen back and forth. For my first try, I used the white gel pen but no ink came out since more force had to be applied to it. Hence for my second try, I used a white paint pen and it worked much better this time!
Anger
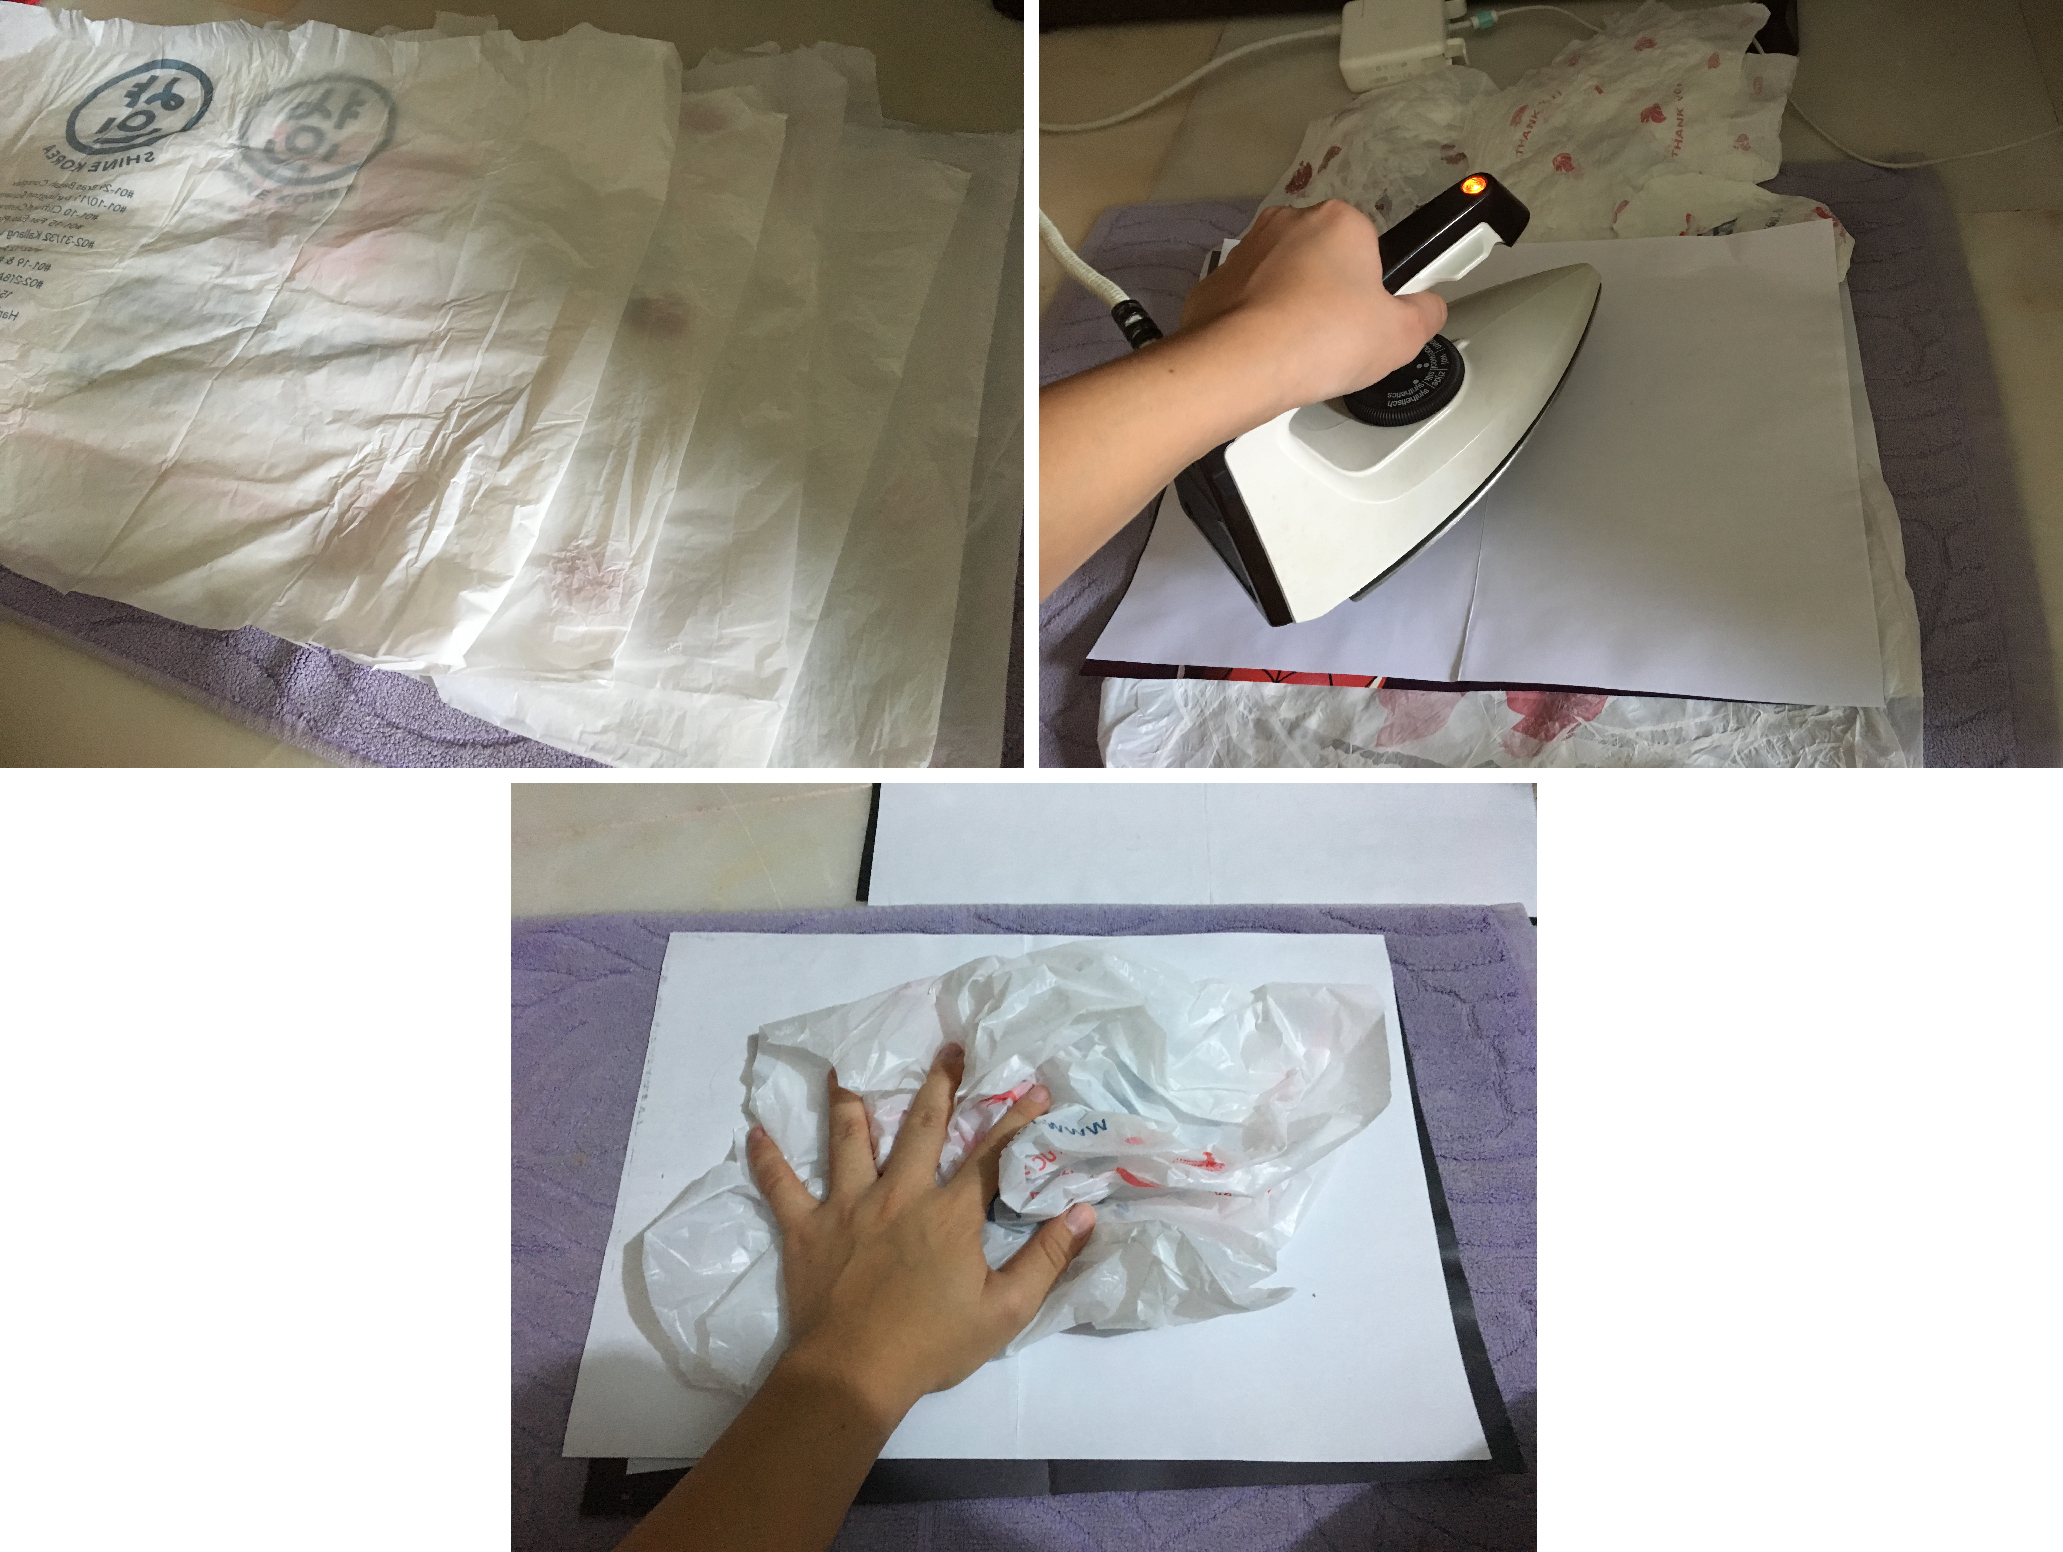
For the emotion ‘fear’, I decided make my own ‘paper’ out of plastic bags. The first step was to cut the handles and bottom hem off the plastic bags and flip them inside out. The reason why the plastic bags had to be flipped inside out was because the printing on them will transfer when heat is applied. I found out that crumpling the plastic bags give a more dynamic and interesting texture than ones that had been smoothened out.
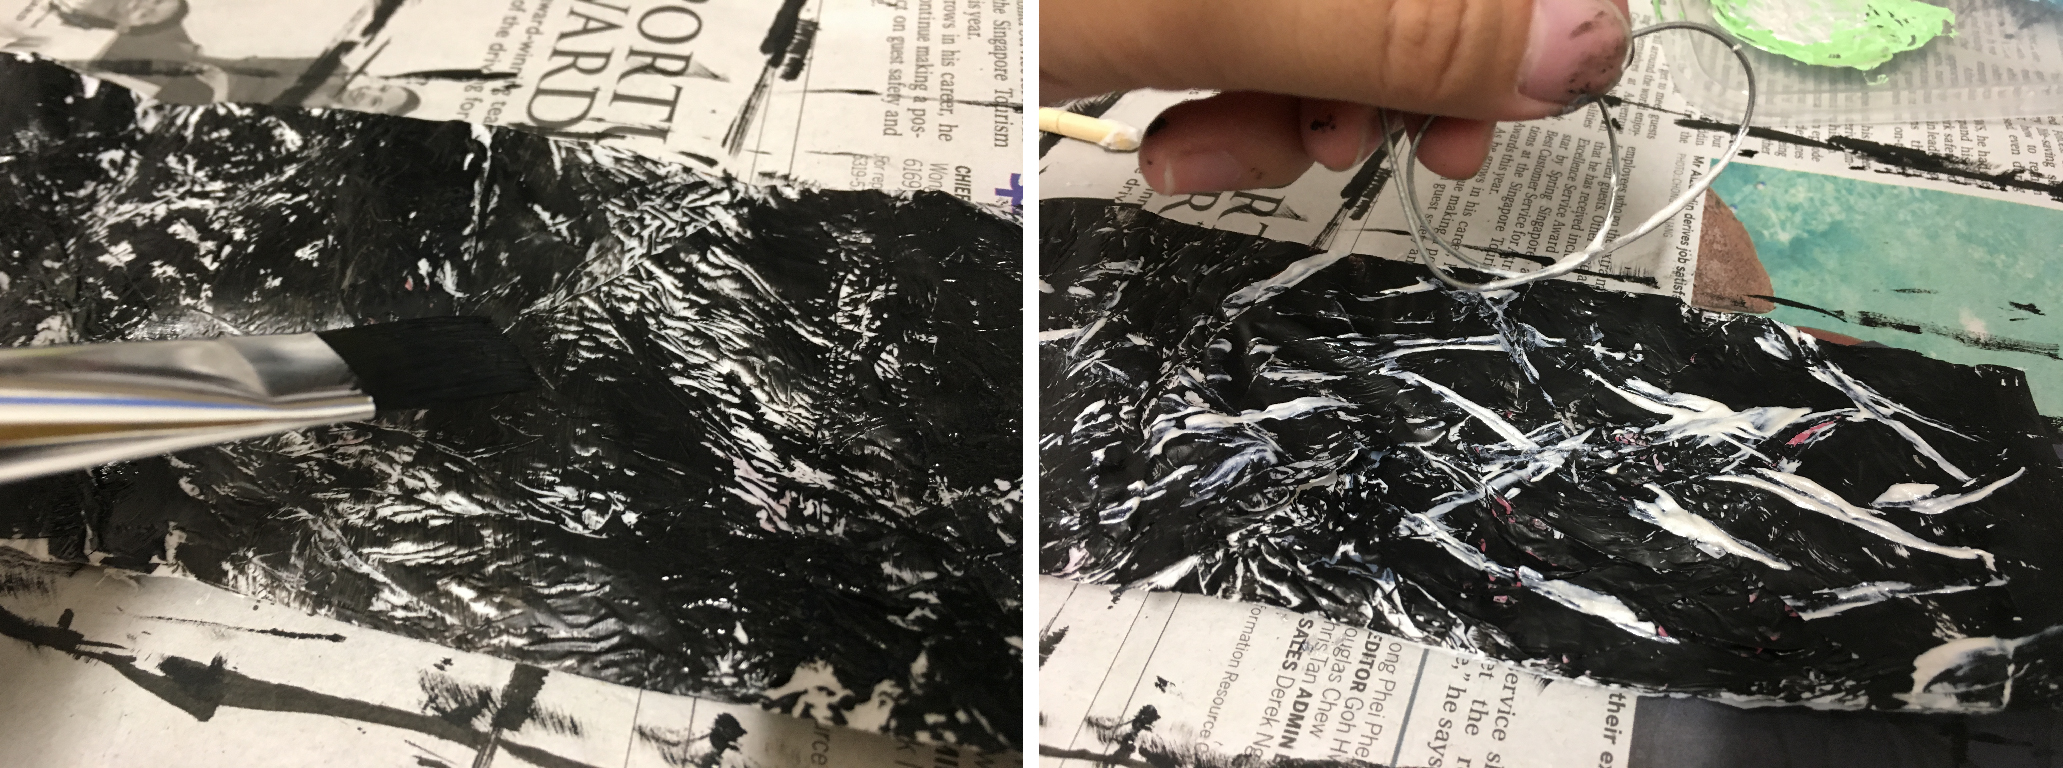
After painting the plastic bag strip with black acrylic paint, I used wire to pick up white acrylic paint and made sharp and fast swiping motions. These motions produced sharp white streaks.
Surprise

Grabbed a string of twine and wrapped it up like what is shown in the photo above, then I dipped the twine into paint and gently dabbed the paint onto the black paper.
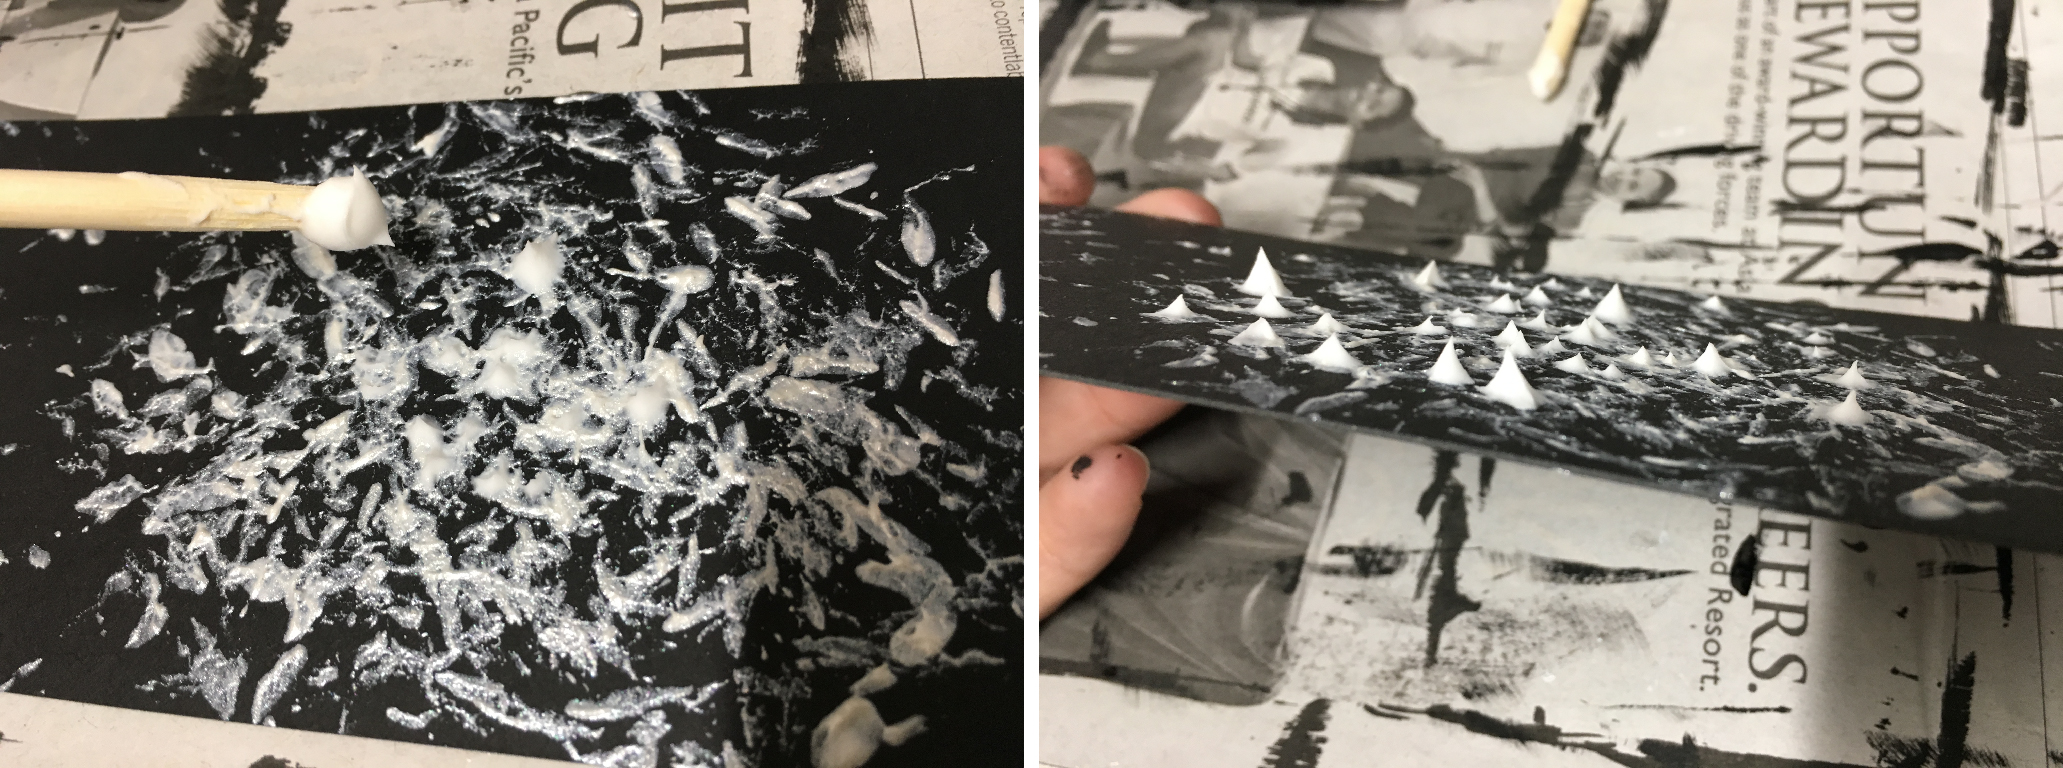
After the paint had dried, I used some modelling paste to add more texture to the surface.
Joy
For my ‘joy’ piece, I started by using the bubble printing technique. As the bubble prints are faint, they can act as background designs, supporting the star of the show which is the circular patterns made by repeatedly dabbing paint onto the surface with the back of a spoon.
Sadness
The idea behind this print is to make a print, then tear this print into small pieces and layer these pieces on top of one another to form a collage.
Above was the initial print that I wanted to use, but I discarded this design after creating a better one. This print was done by simply using a flat brush to spread Chinese ink across.

Above was the better print that I was referring to. I find it more interesting and dynamic. It was done by making circles with ice cream sticks.
Love
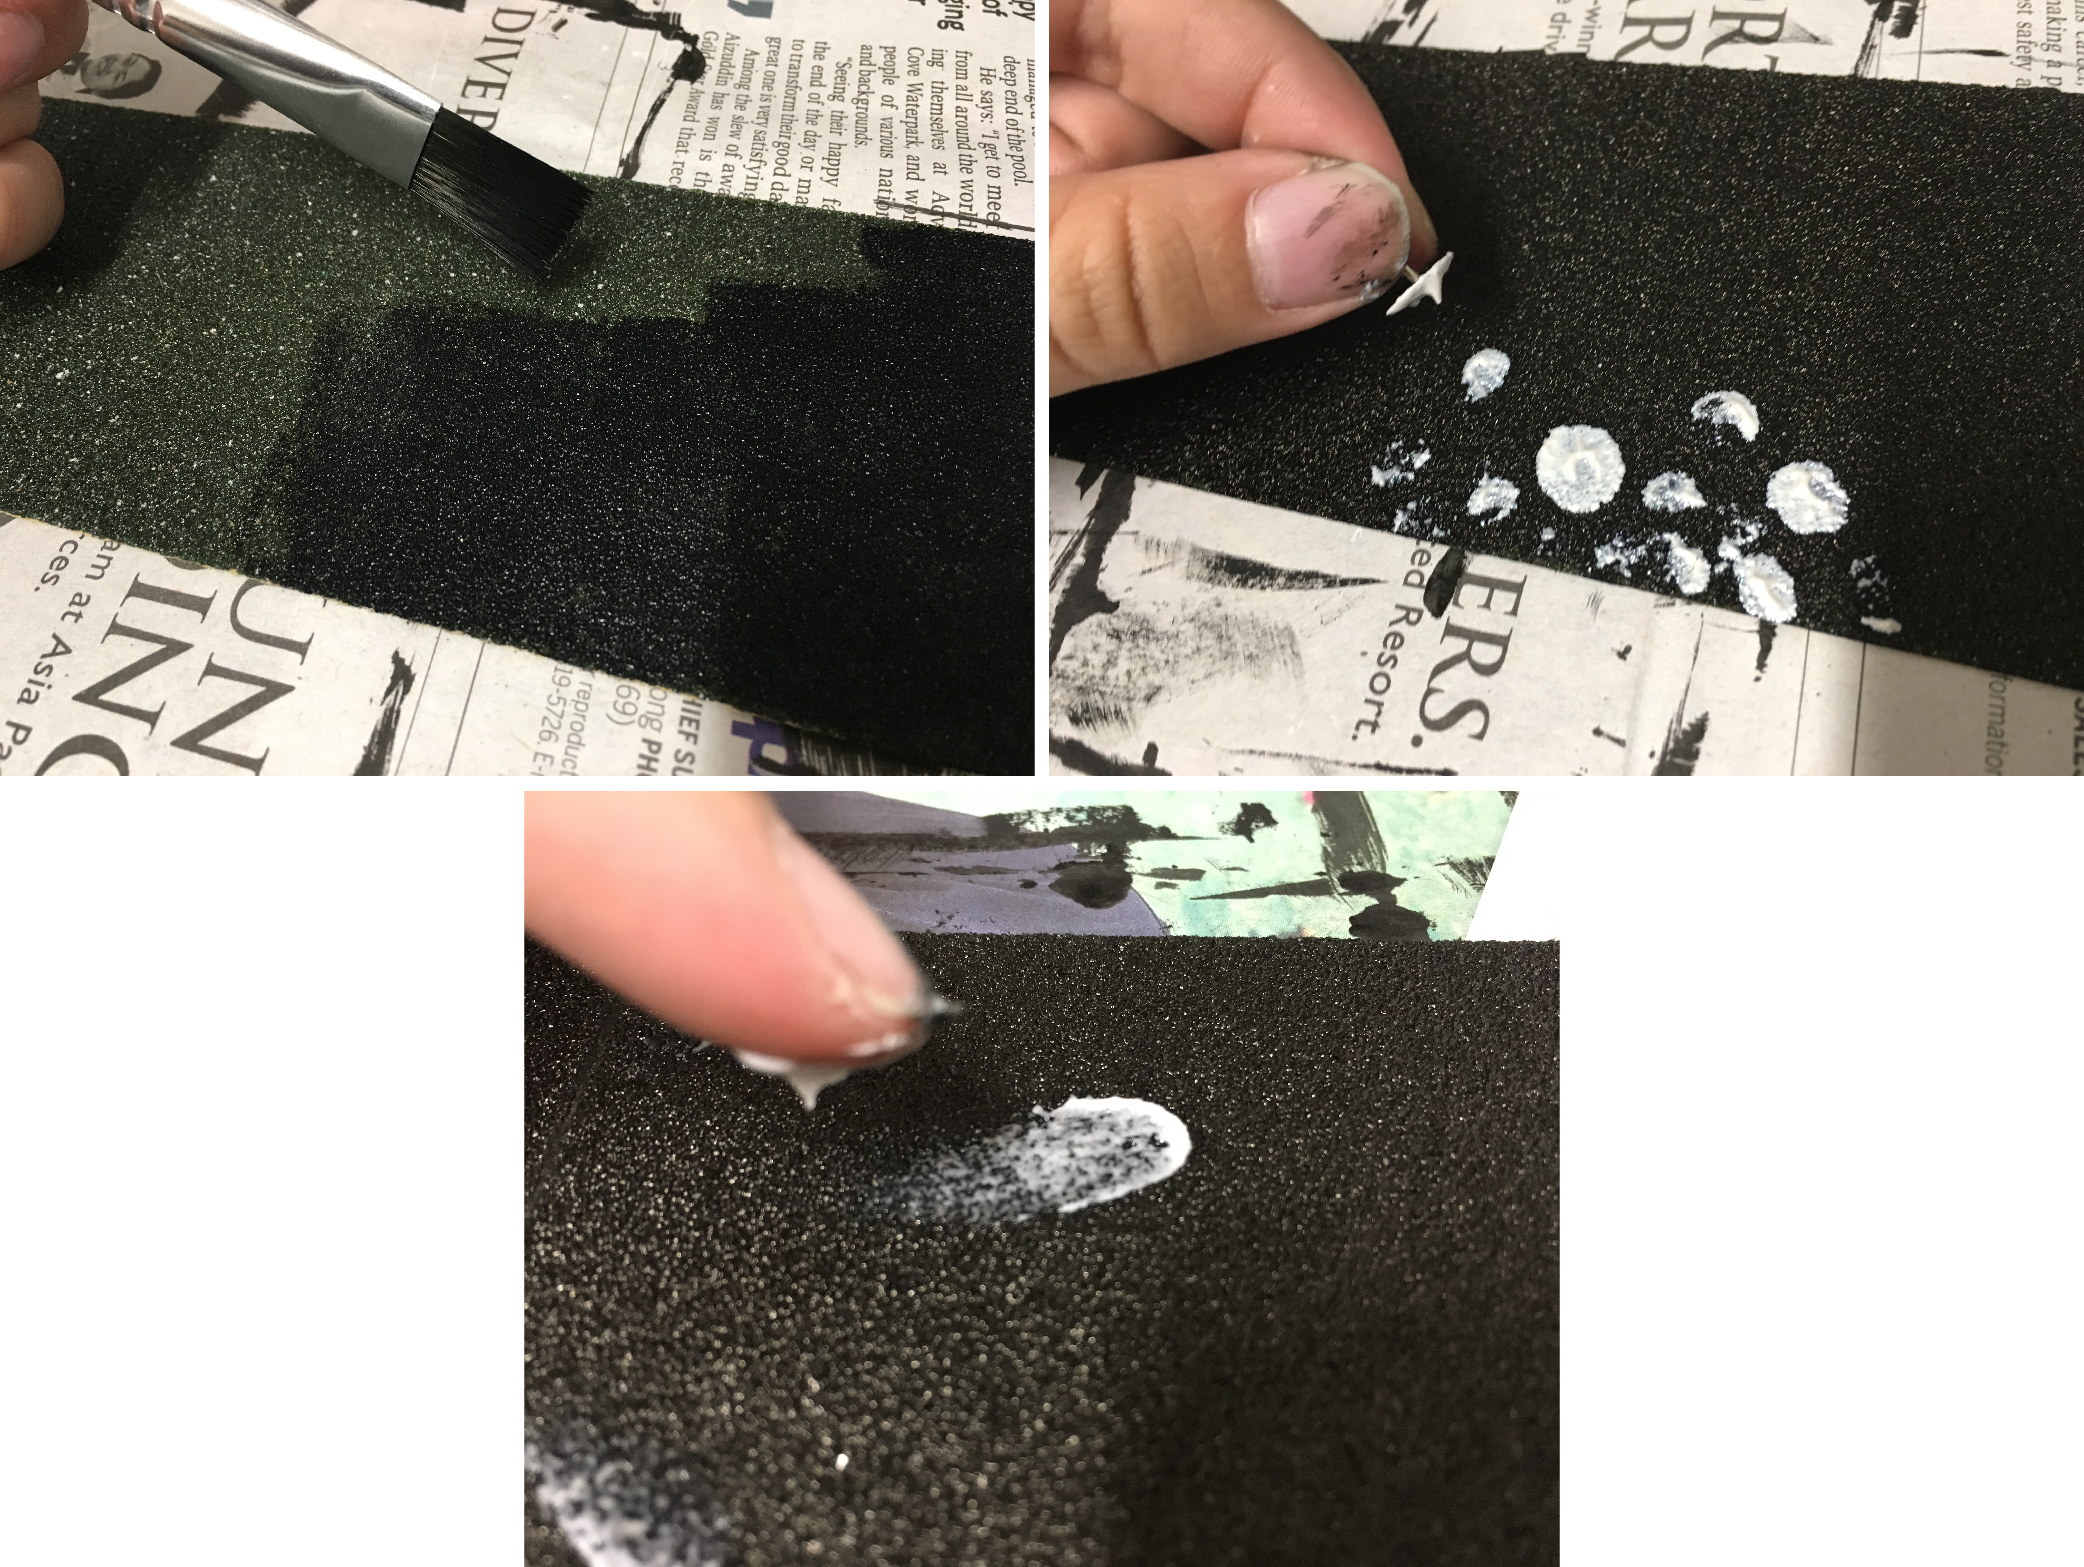
Last but not least, ‘love’. The paper I selected for this emotion is sandpaper. Thumbtacks were the mark-making tool that I used to make these dot patterns. As sandpaper is rough, it was difficult to smear the paint with the thumbtacks, so I resorted to using my fingers to smear the dots, leaving a trail behind the dots and giving the sense of movement. Modelling paste was also used to give additional texture to the print.