
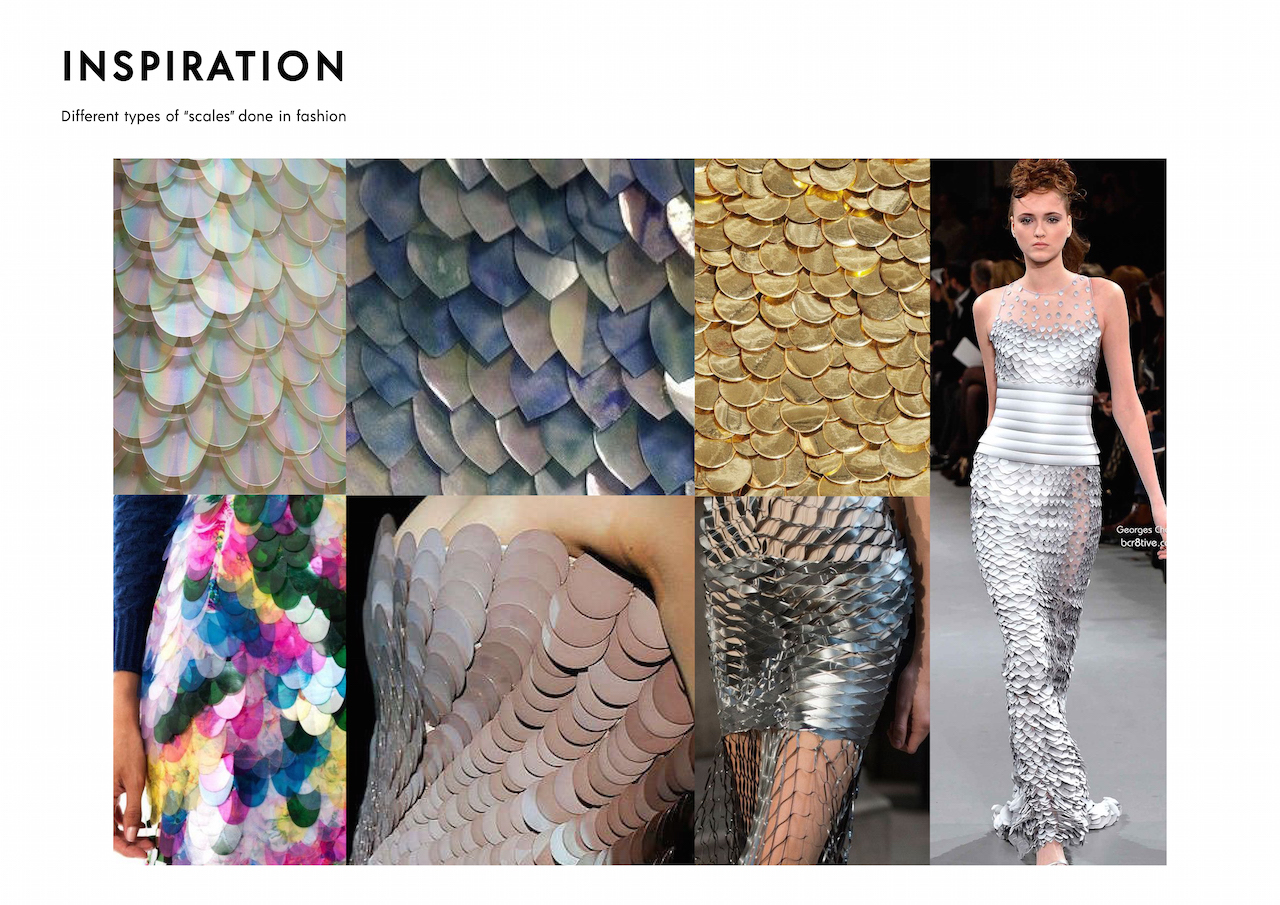
_______________
Final Product: Laser Cut Mermaid inspired Skirt
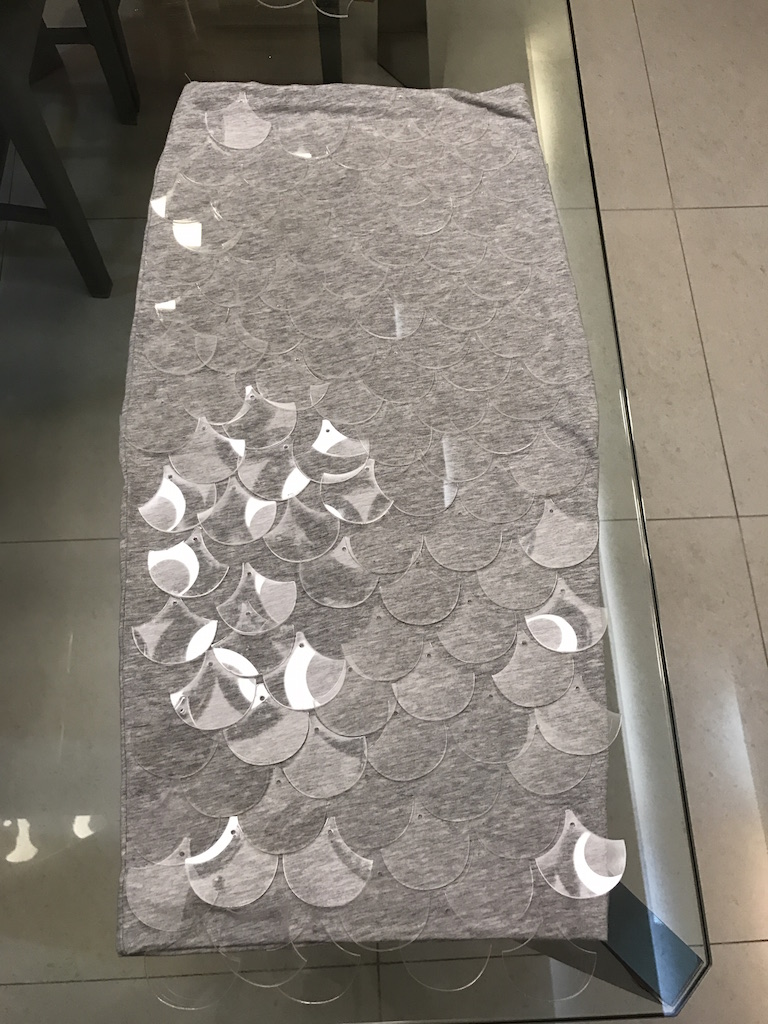
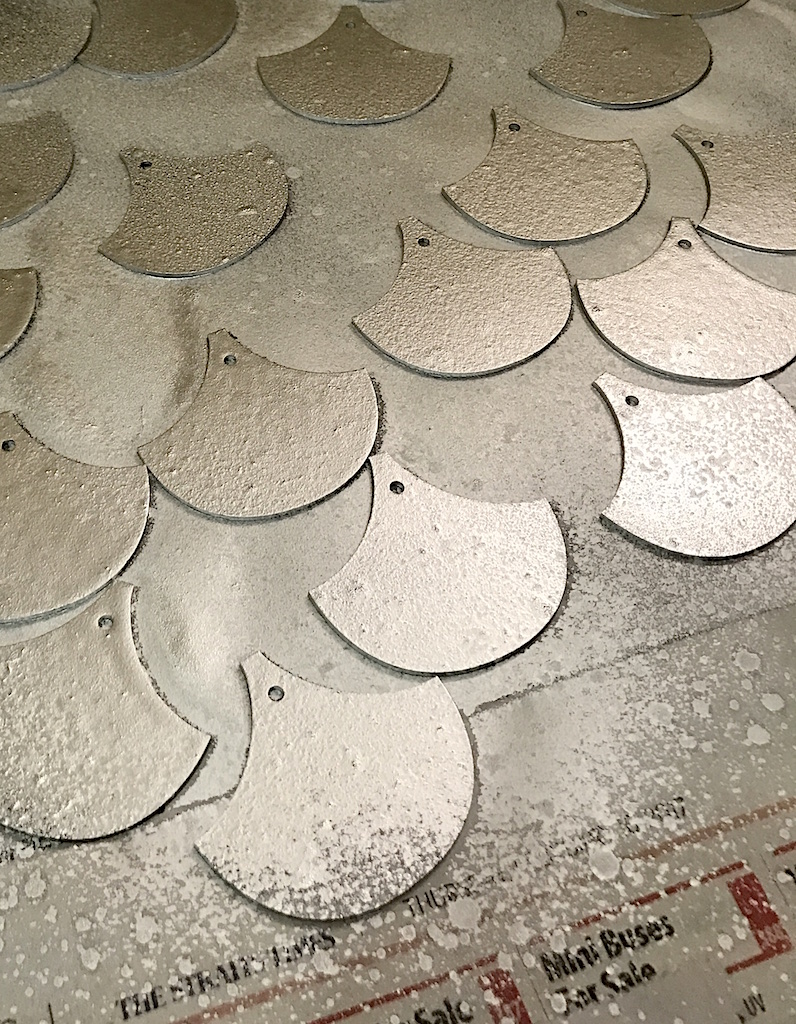
Process: Firstly, I had to laser cut the scale acrylic pieces using the laser cutting machine. Upon laser cutting the first round, I realized that I did not have enough scales to fit both sides of the skirt, hence I had to cut up more. There were a total of 130 pieces+/- of scales.
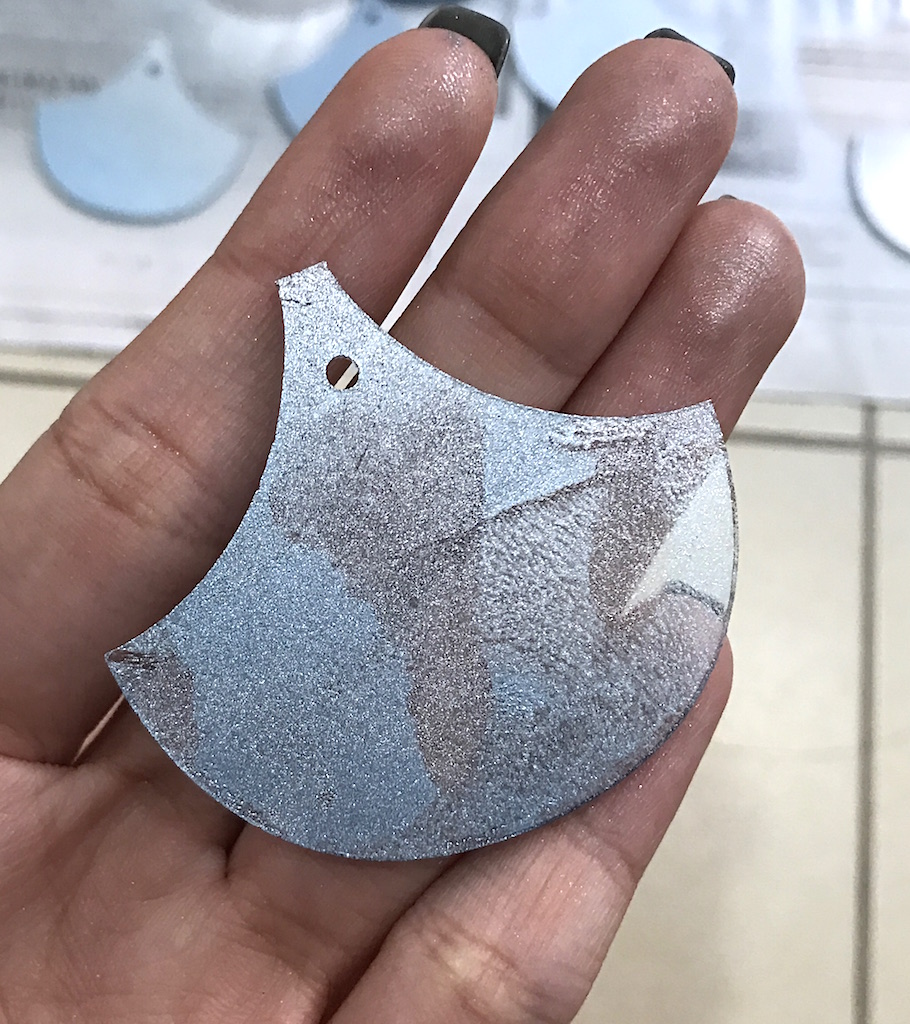
Next, I bought 4 different kinds of spray paint colours, all in metallics. The colours were chrome silver, premium silver, metallic blue and silver glitter. After which, I started spraying each and every piece. Some of the pieces had nice interesting textures and spray dot patterns, as some of the spray nozzles were bigger and tends to splatter when used.
Initially, I wanted to arrange them in a gradient format but upon arranging the scales, I thought that a random pattern will look more similar to the ones in the mood board. I liked how some scales were more reflective than others, which gave a really nice contrast and depth to the entire piece when looked at as a whole.
Here’s the final product:
Counting the number of scales I need
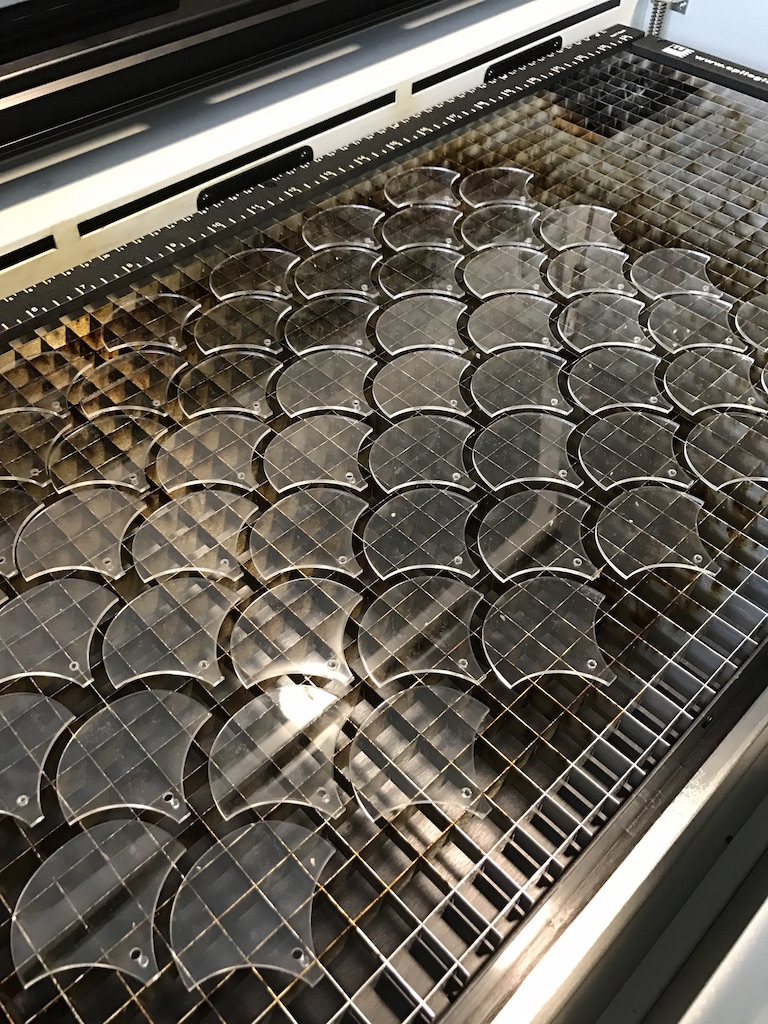
Freshly cut from the laser machine!
Spraying process:
Dot textures!
Mixing blue and silver spray paints/ paper dabbing texture

Mass spraying
Chrome silver
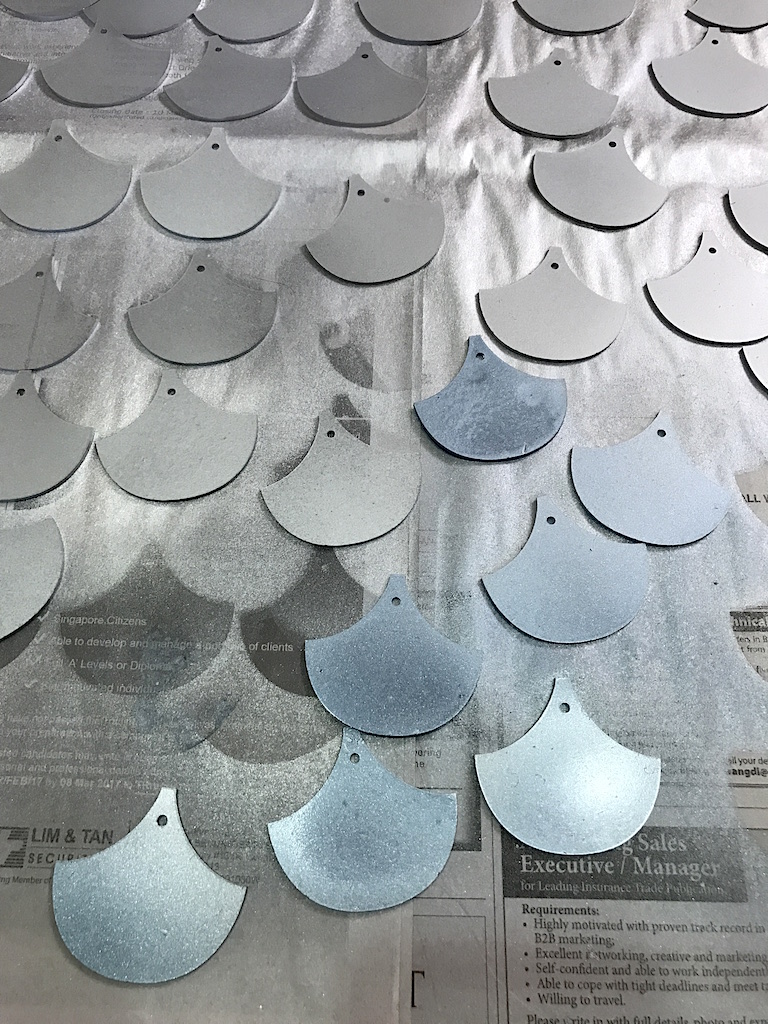
Metallic blue and silver
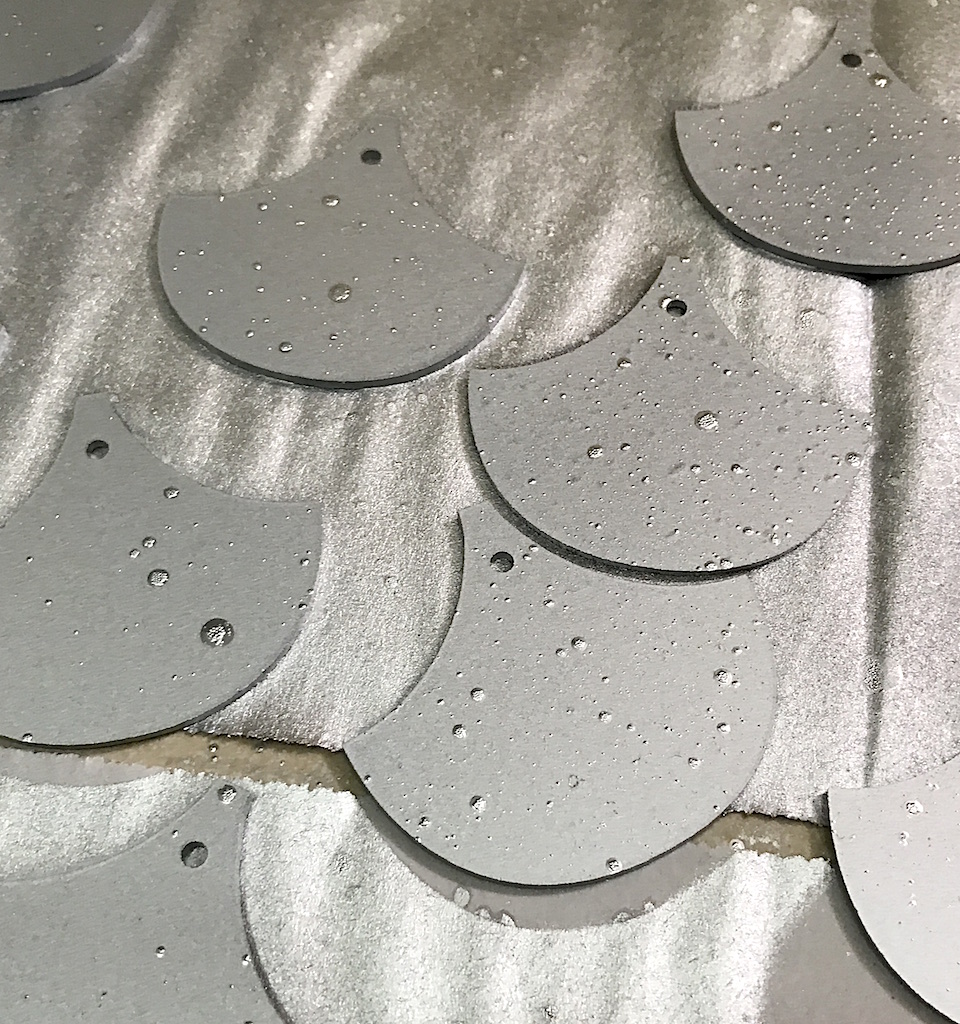
Dot textures on silver spray painted scales

Fixing the scales onto the skirt:
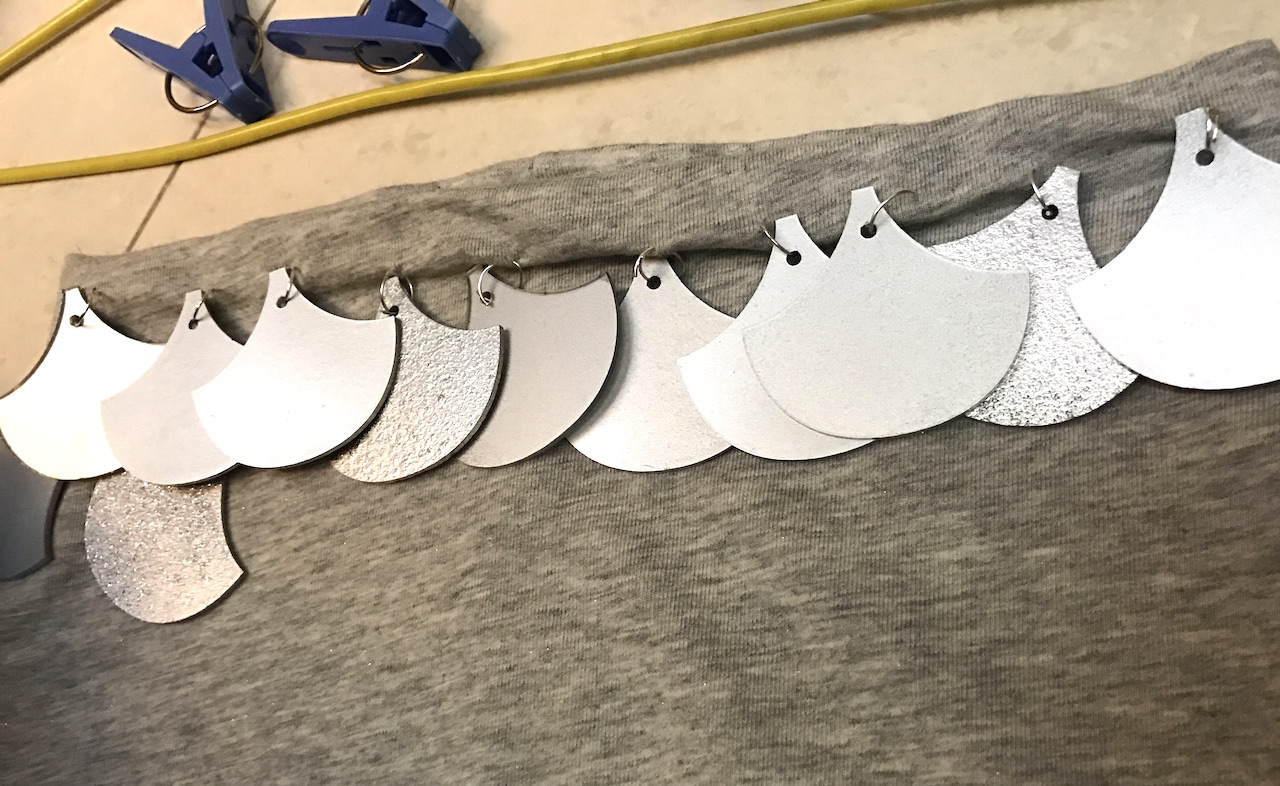
I had trouble arranging the scales into a straight line, as the fabric is very soft and moves all the time. The scales were also irregular in shape, making it harder for me to see too.
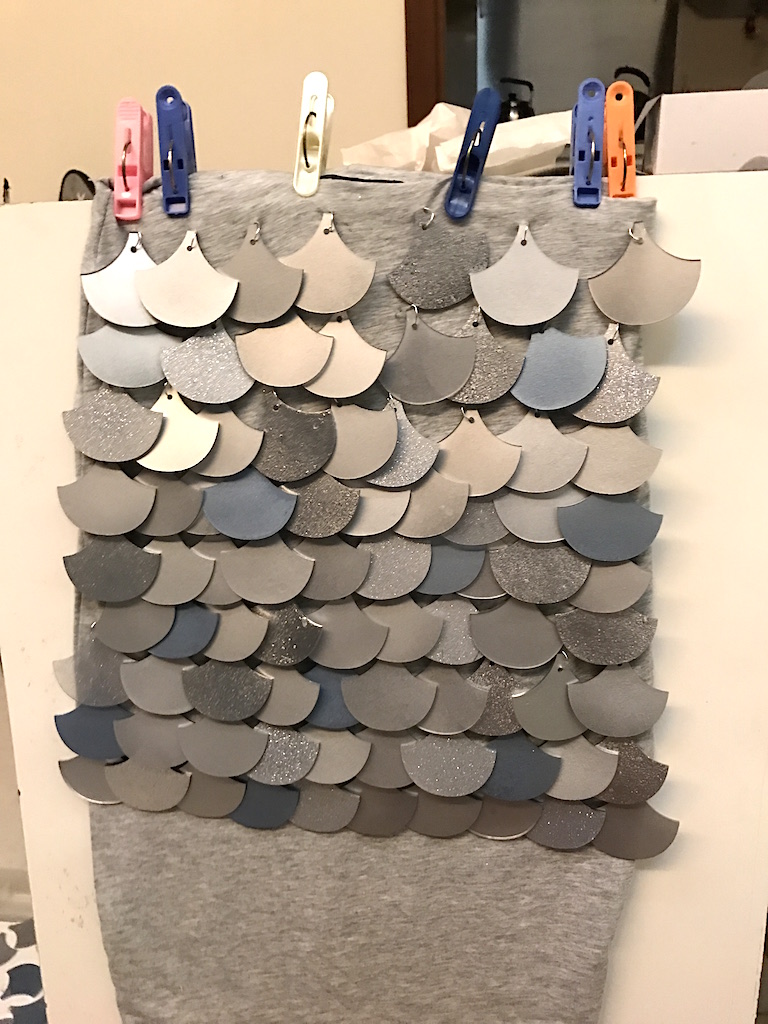
I tried my best to keep it as compact as possible, making sure the scales don’t jut out awkwardly, but it was SO DIFFICULT! The scales also fall off quite often, even while tightening the silver rings, and I’ll have to repeat the process again.
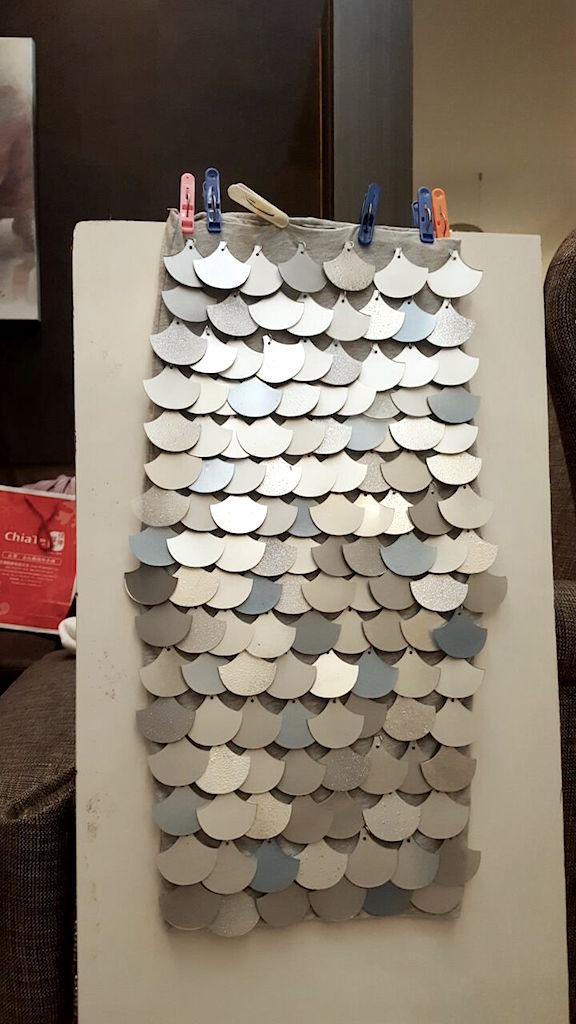
However, I’m quite pleased with the final result even though it was such a tedious process. I still felt that there was something missing on top/ there was too much empty space.
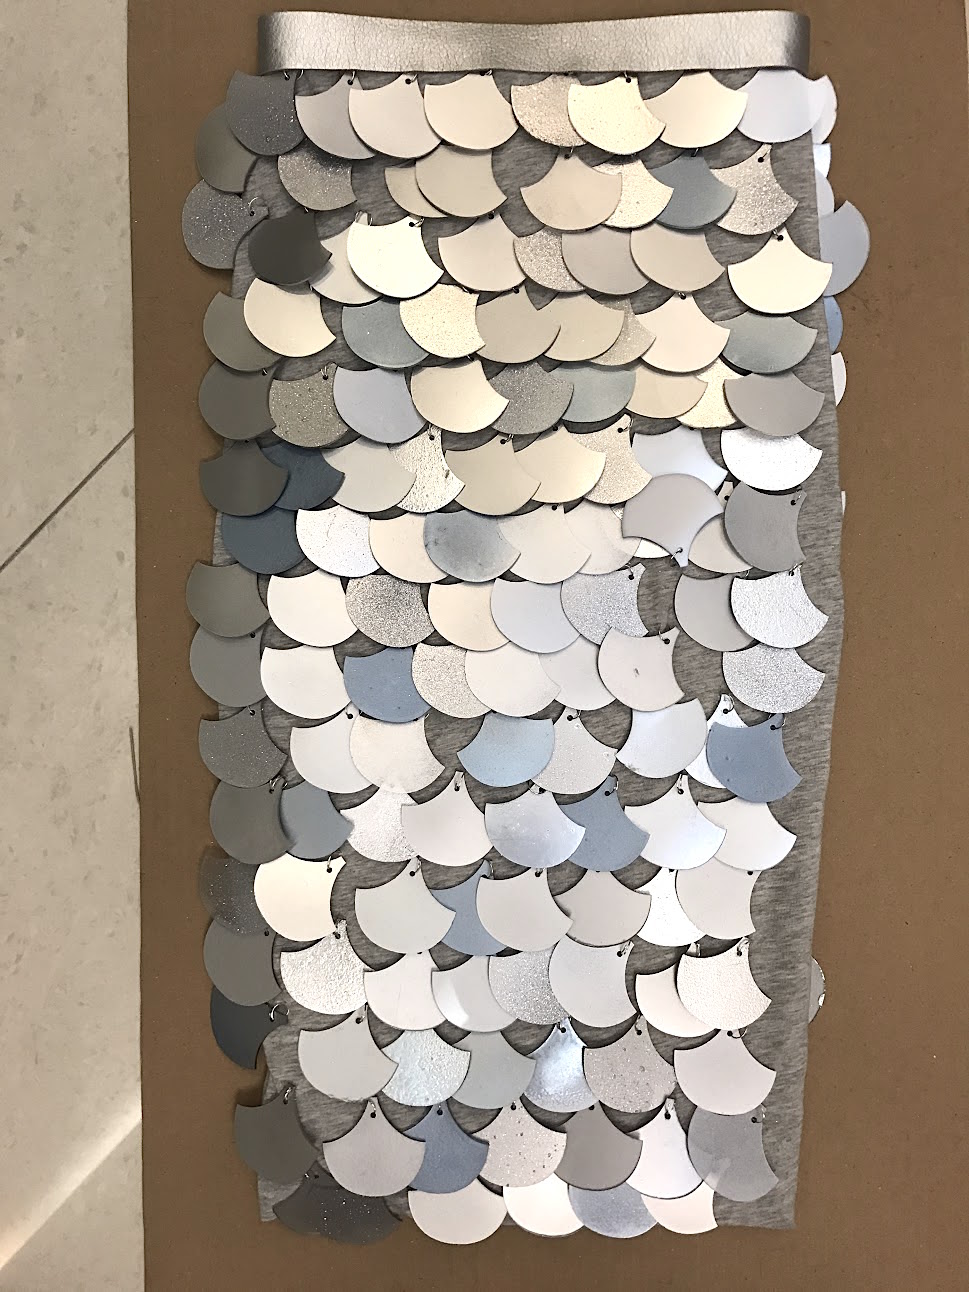
Hence, I added a silver leather band around the waistline. I think that this was the key item that made the whole skirt stand out even more! So happy with the results. It’s a pity the skirt is in size XXS (it was the only piece left in the store) and I can’t fit in it 🙁
(Will update with more professionally taken images)
_____________
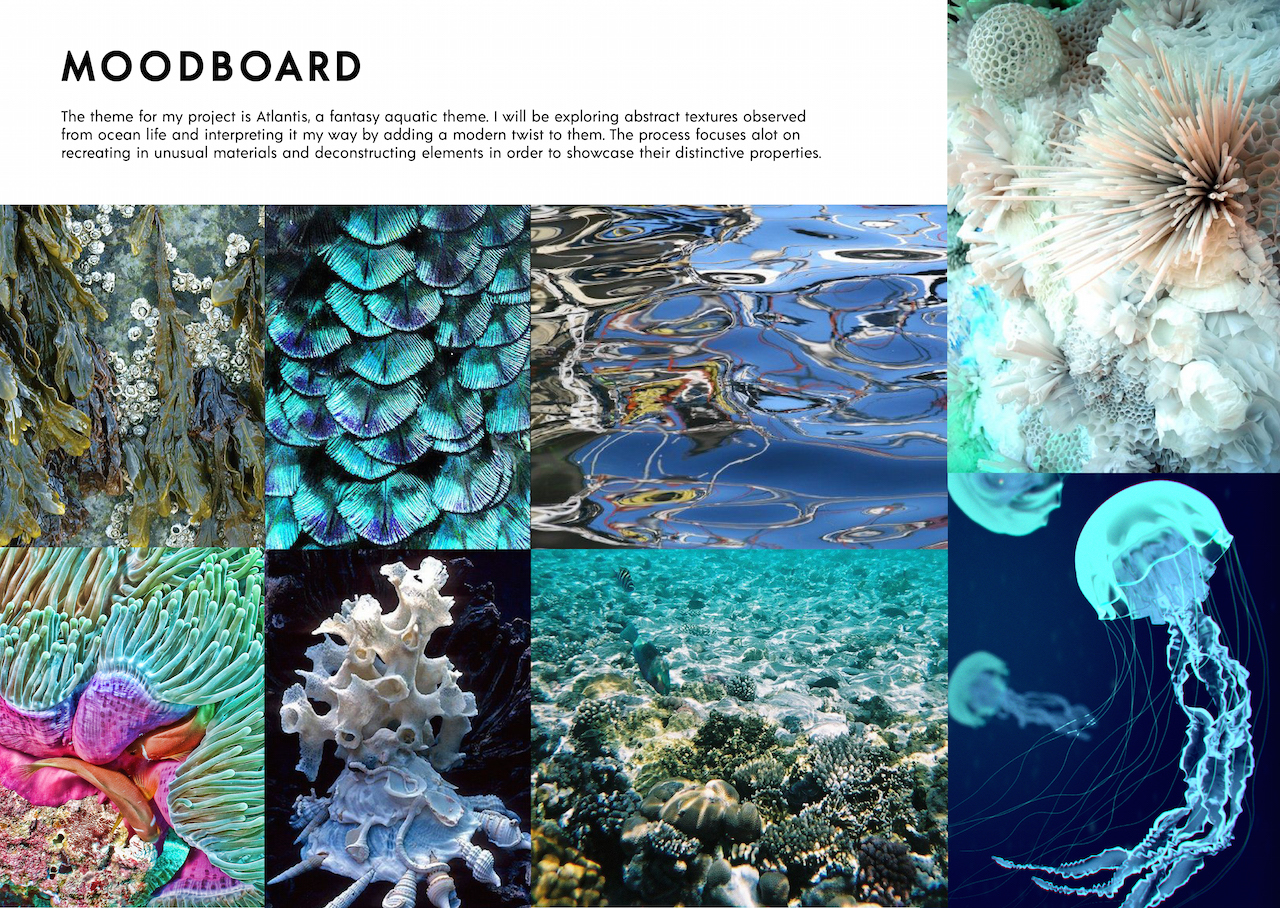
Exploration board
Each piece was created emphasising on the shapes, colours and textures of the moodboard.
Technique 1: Laser cut
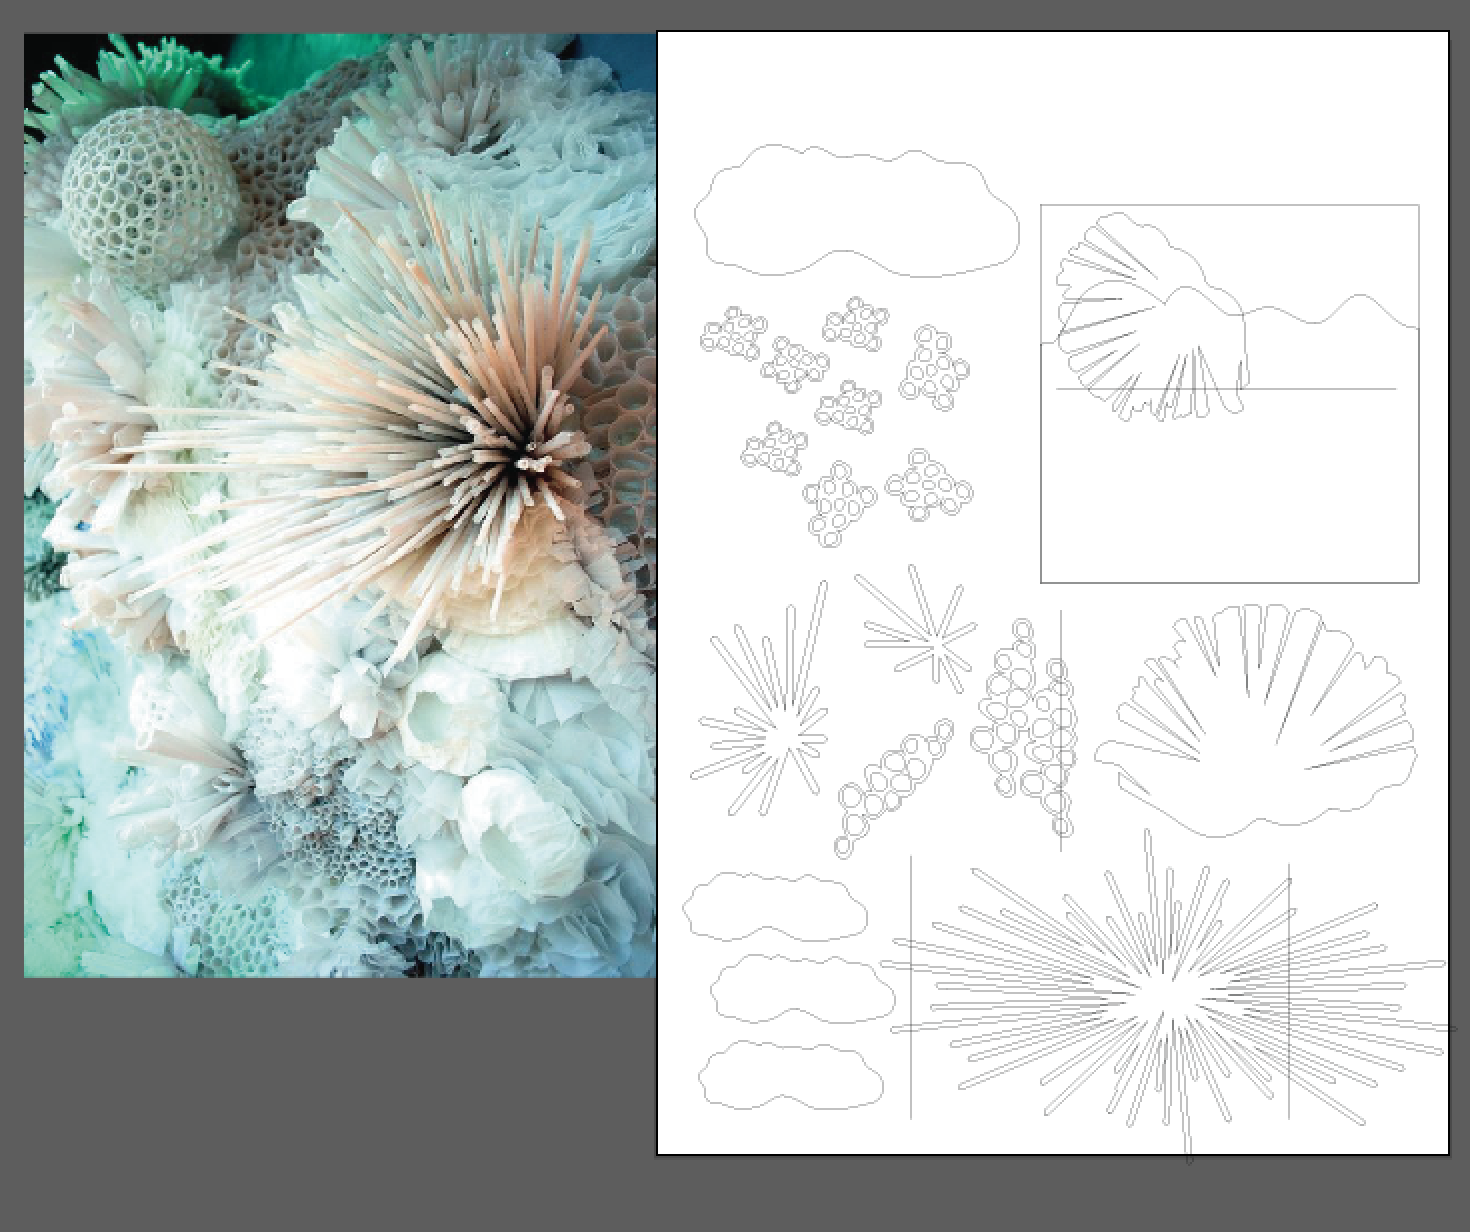
Vectored shapes to follow reference image of coral reef ^
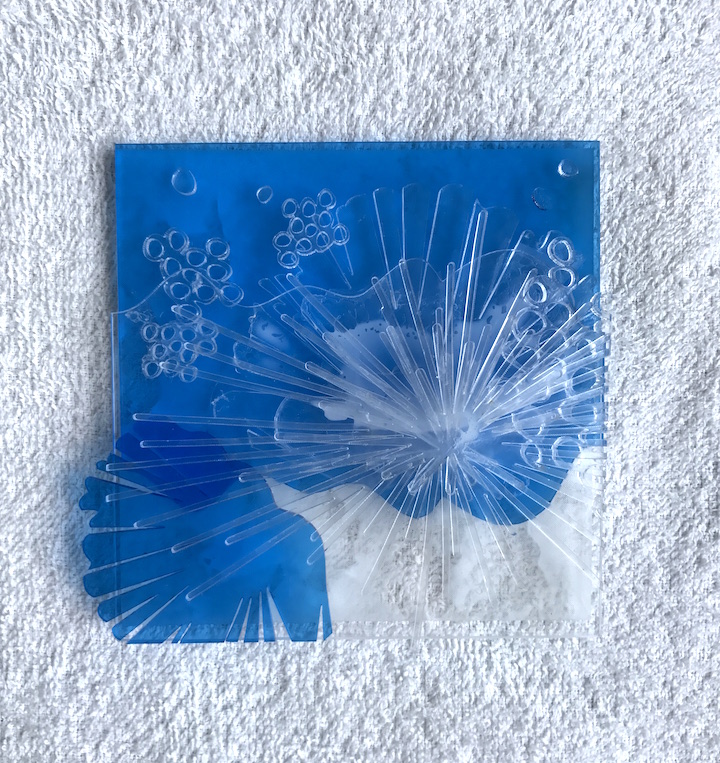
First attempt using white glue, wasn’t pleased with the outcome so I did another one with the remaining shapes.
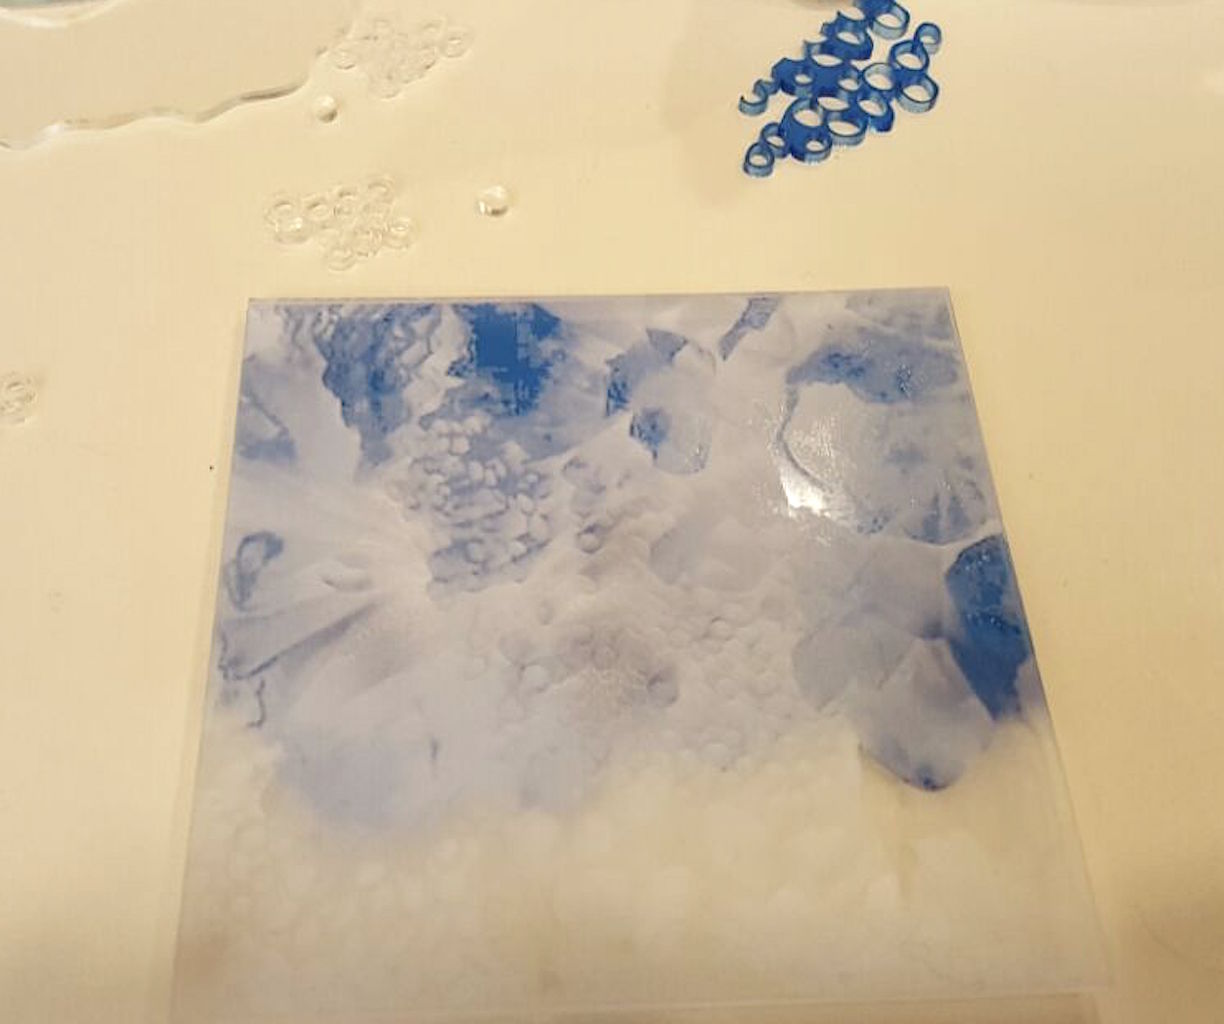
Gluing the pieces together: Layer 1
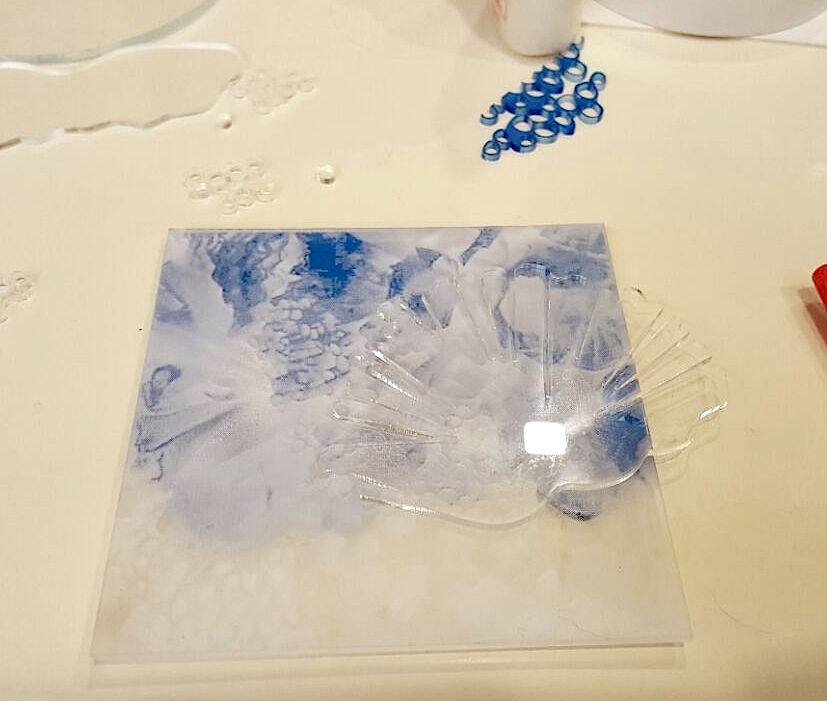
Gluing the pieces together: Layer 2
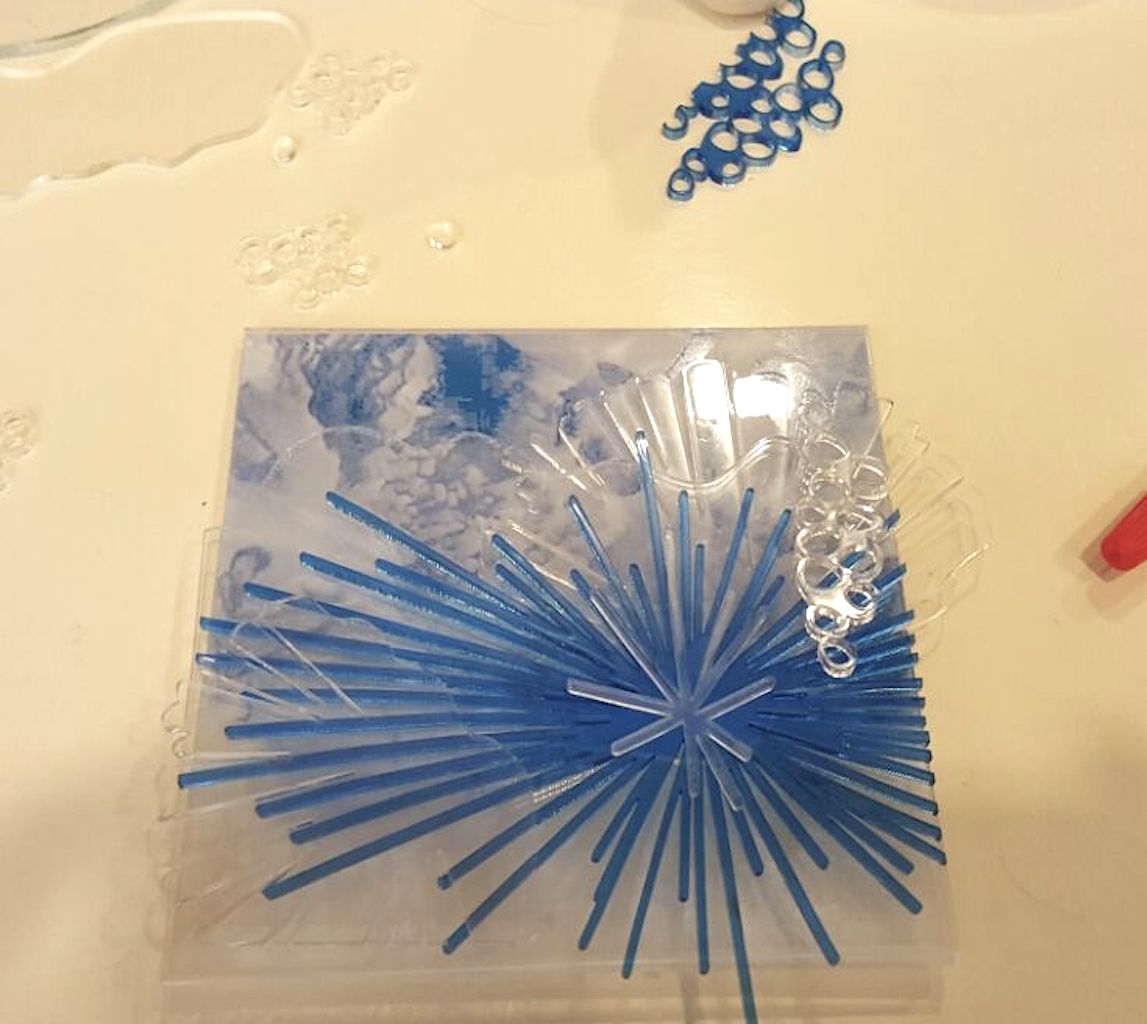
Gluing the pieces together: Layer 3 (Final piece) Added some shiny dots on top after this…
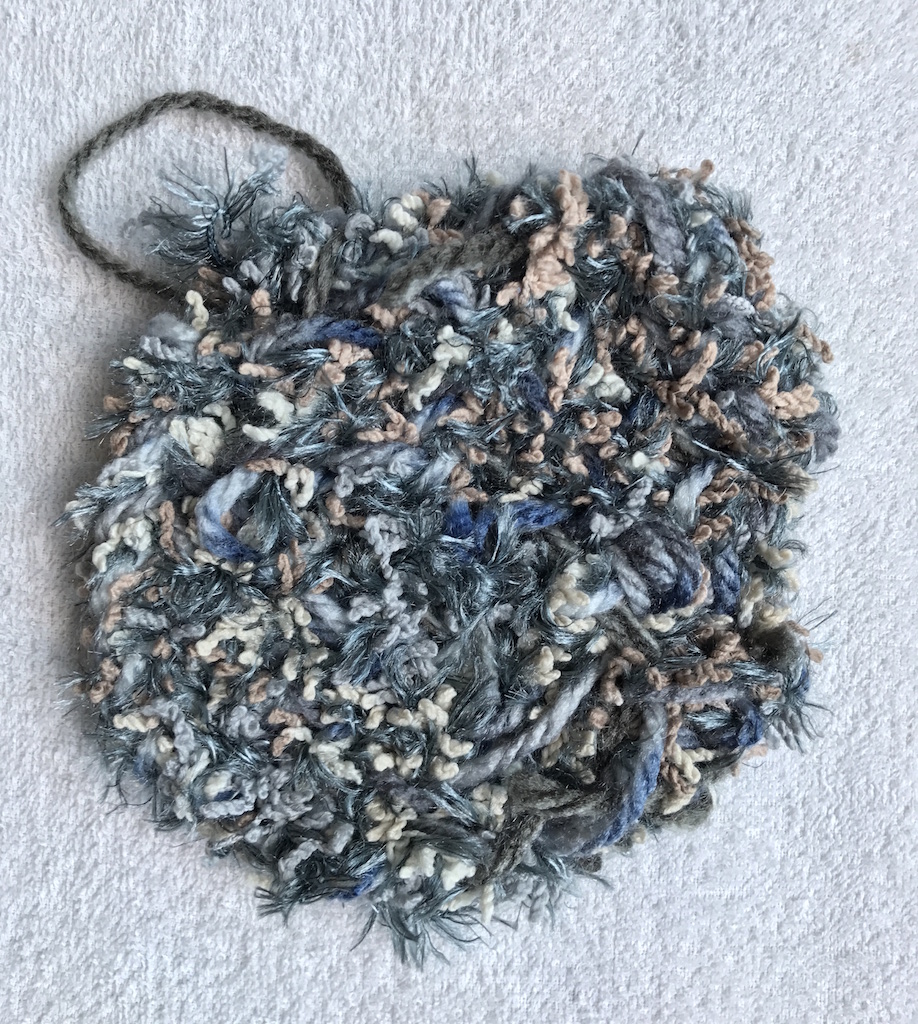
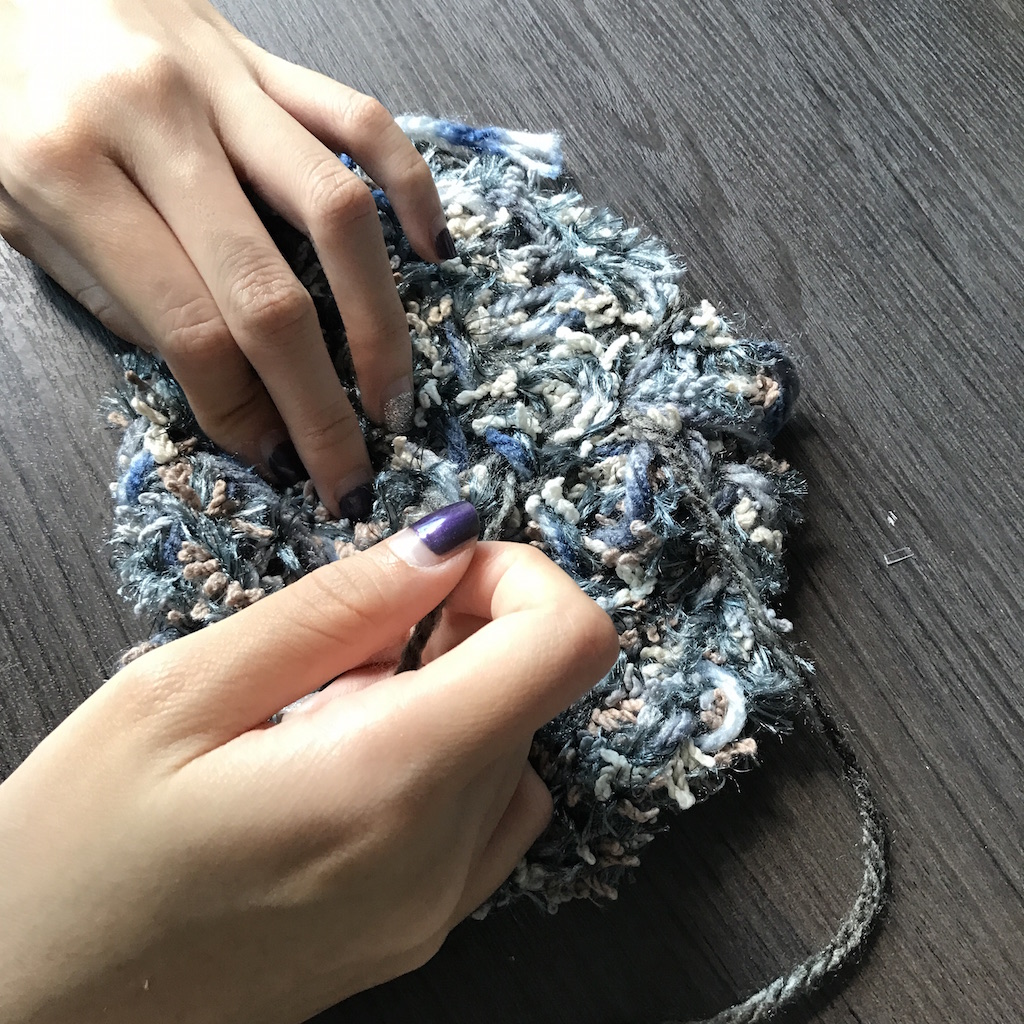
Technique 2: Fabric on thread
Materials used – Knitting wool, Cotton wool, a variety of threads
Finishing touches – Sewn on beads
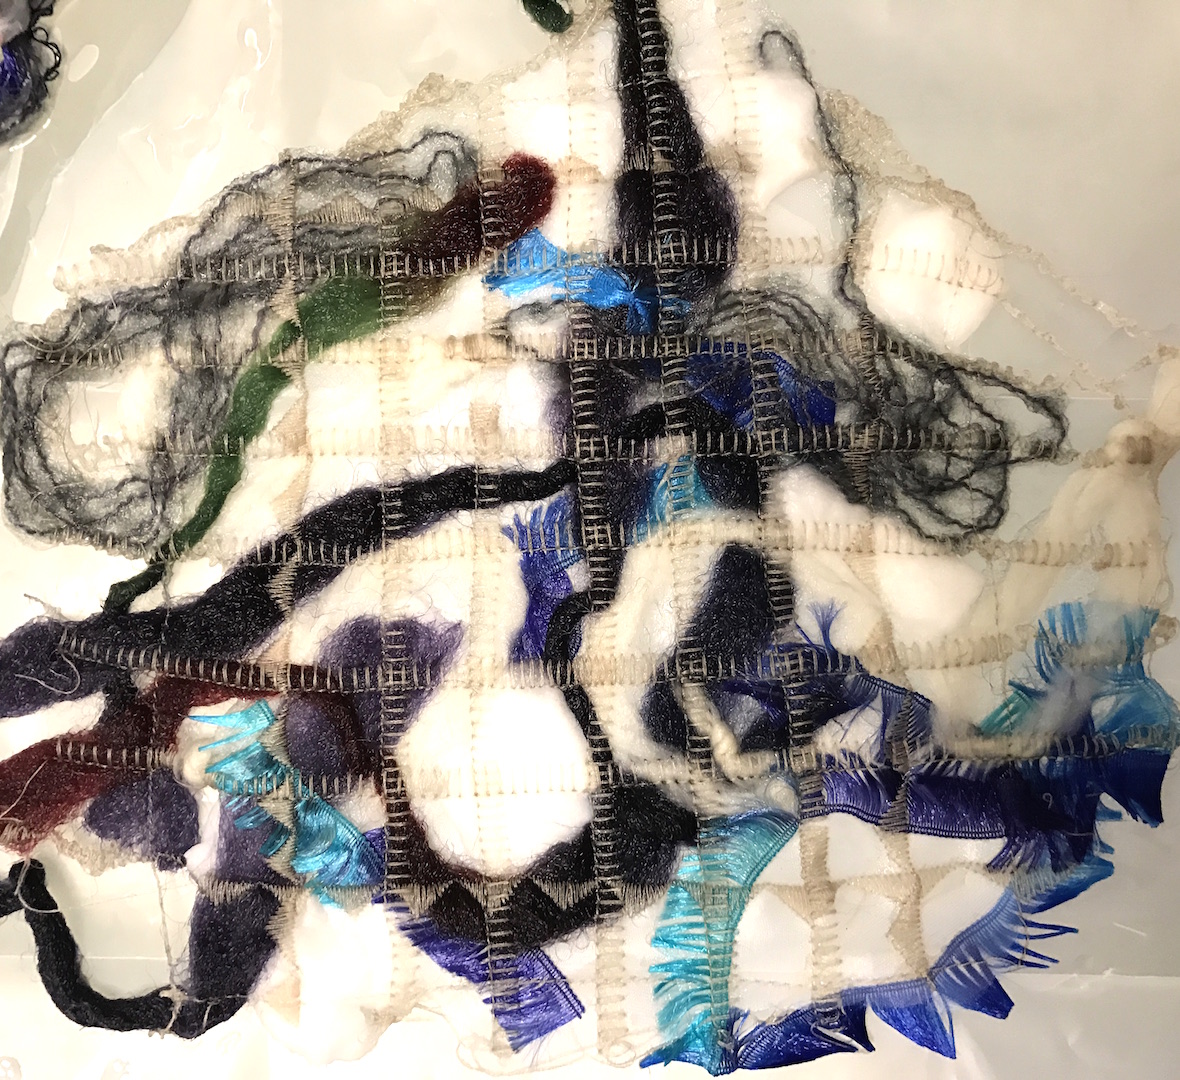
After washing the soluble paper away
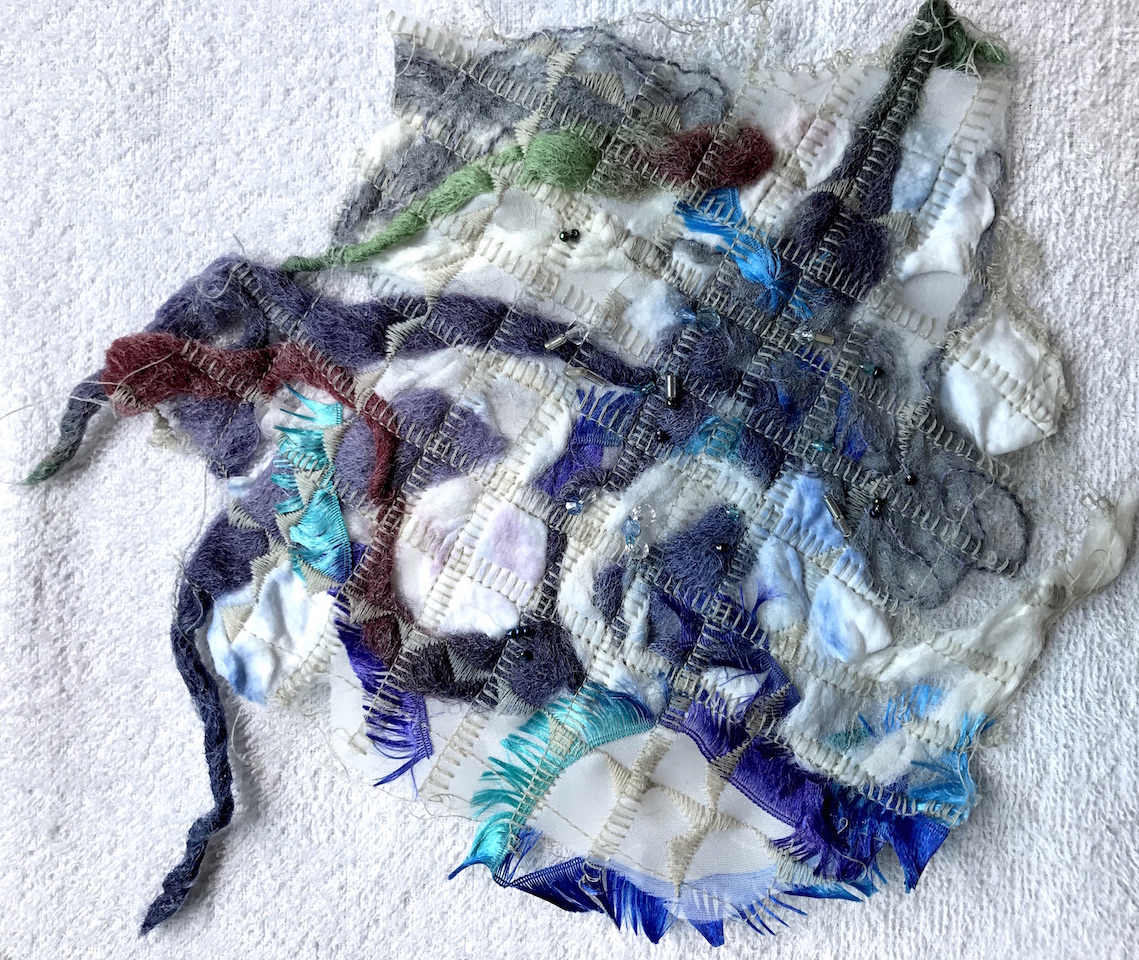
Final product before cutting the edges away
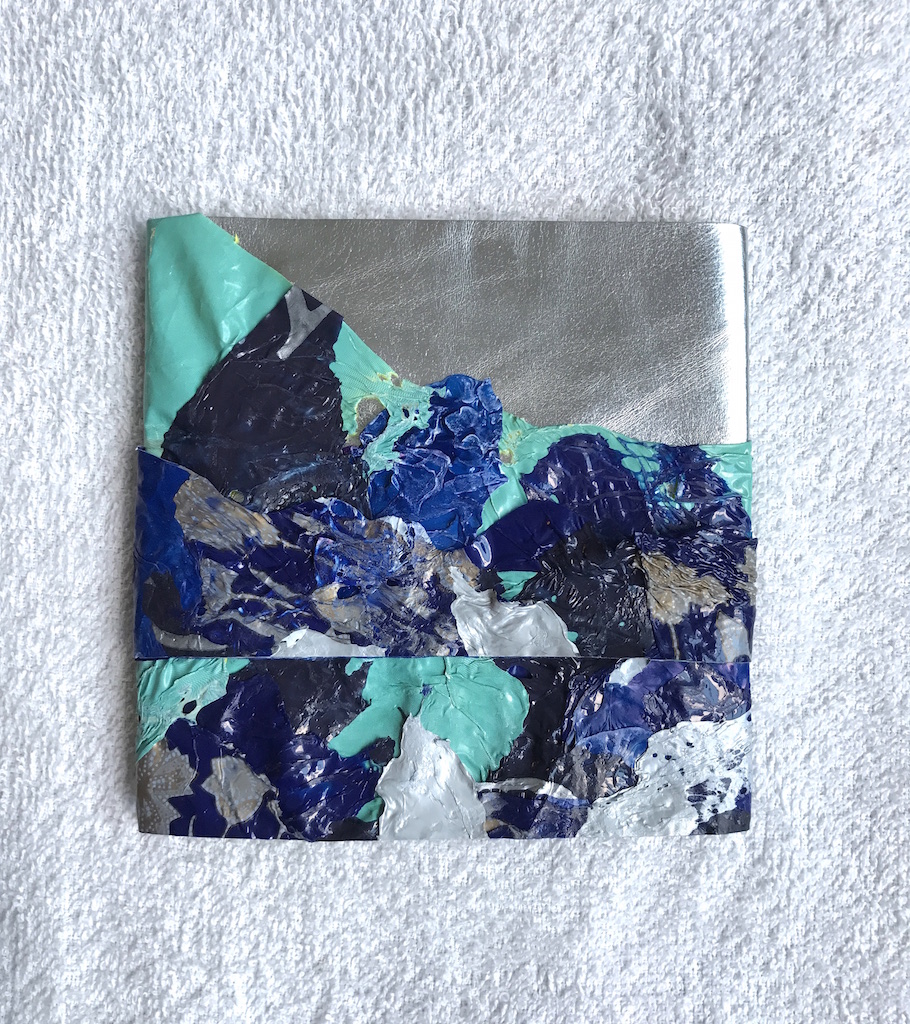
Technique 3: Plastic fusing
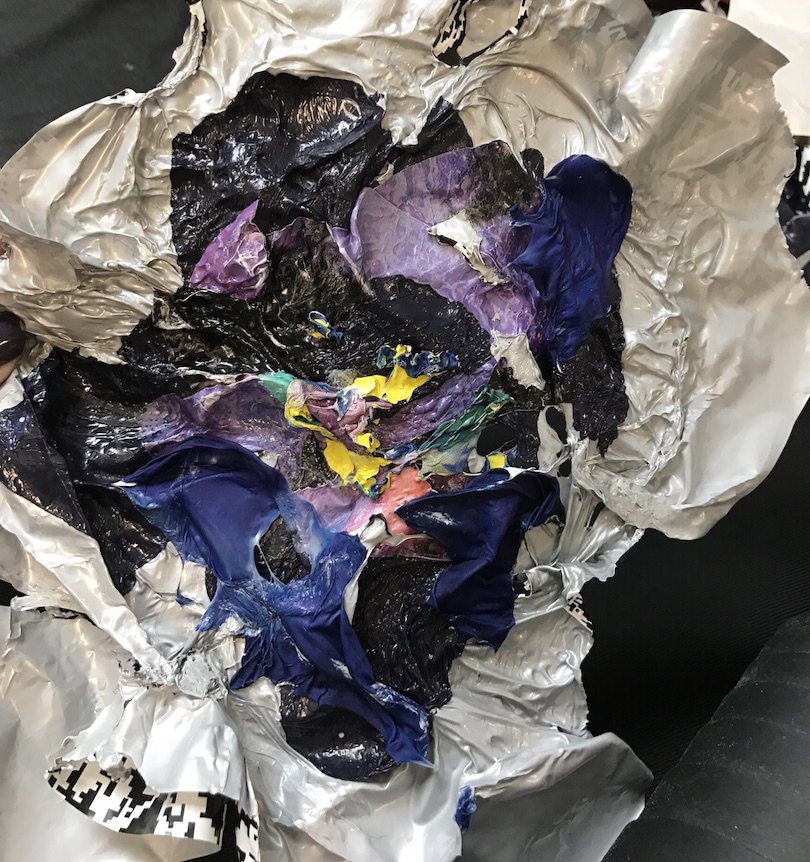
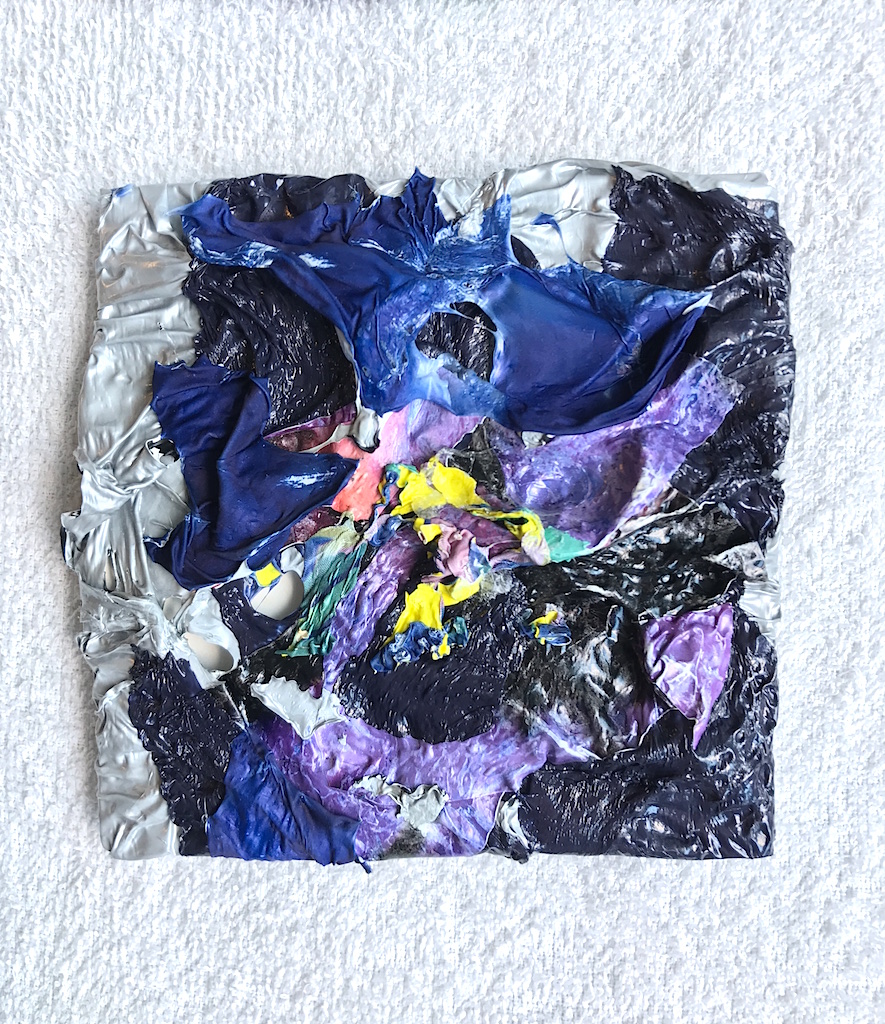
I specifically picked out the colours of plastic bags that matched my moodboard. I had to iron the plastics together first, and use a hot gun to melt it. This was done very carefully as I wanted certain colours at specific spots, therefore I had to control the heat well as I didn’t want the plastics to fuse/ melt too much.

After which, I cut this up and arranged it on the square canvas. I followed the 1/3 rule for a good visual heirachy. Adding on, I thought that a smooth metallic silver fabric background can create contrast in terms of colours and textures (rough v/s smooth). I felt that the colours really complement each other very well.
#2
Technique 4: Thermoplastics
For thermoplastics, I went ahead with this shape because I felt that the irregularity resembled a jellyfish quite well. And again, to add contrast to the pieces, I sprayed on chrome silver to enhance it.

I felt that the organza colours stood out against the teal of the fabric here. I had to hand sew it onto the fabric before adding a hard card behind for mounting.
Technique 5: Weaving
For the last and final technique, I weaved two different yarns together using a loom, to form a coral reef texture. Looking back, perhaps I could use a more contrasting colour for the second yarn so that the piece will stand out more. Nonetheless, I still love how this turned out. Because the furry texture had a bit of metallics in it already, I felt that I didn’t have to add more things to intensify it.

_________
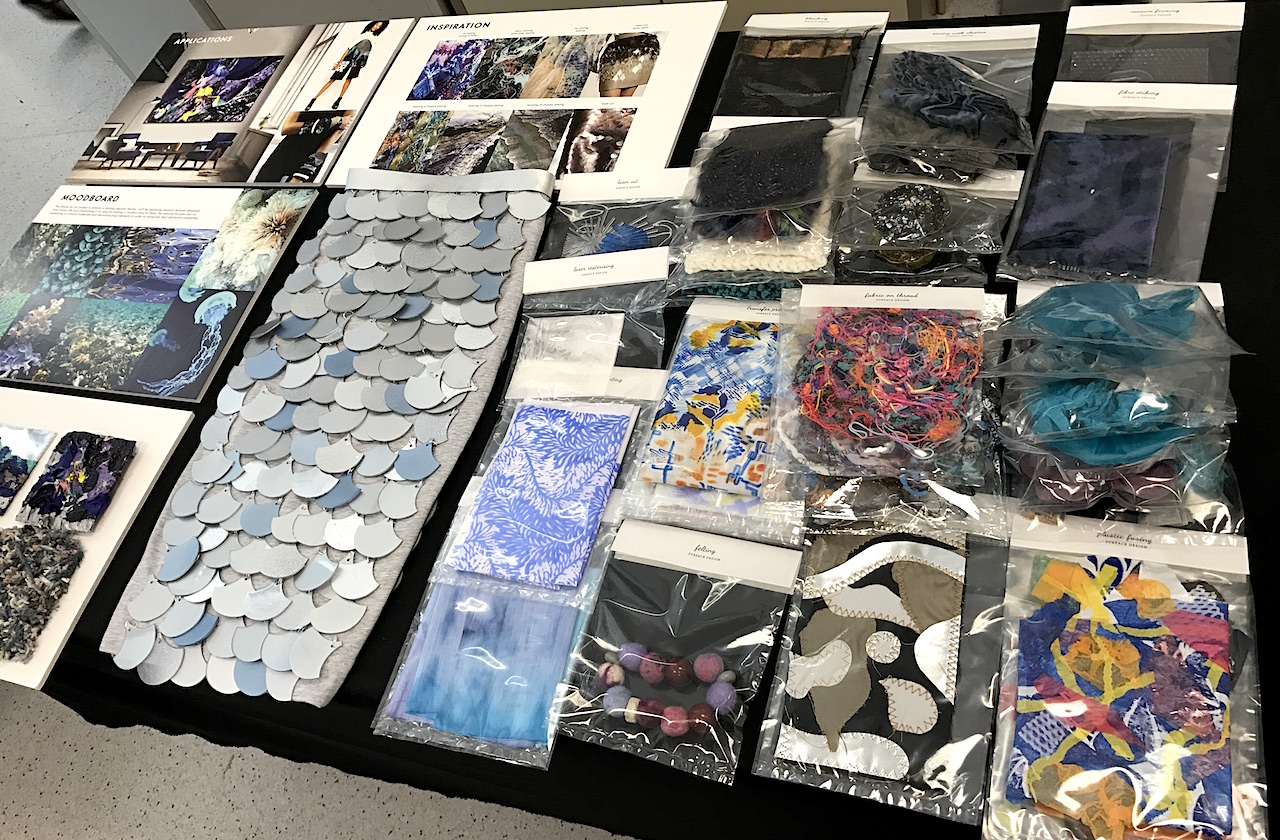
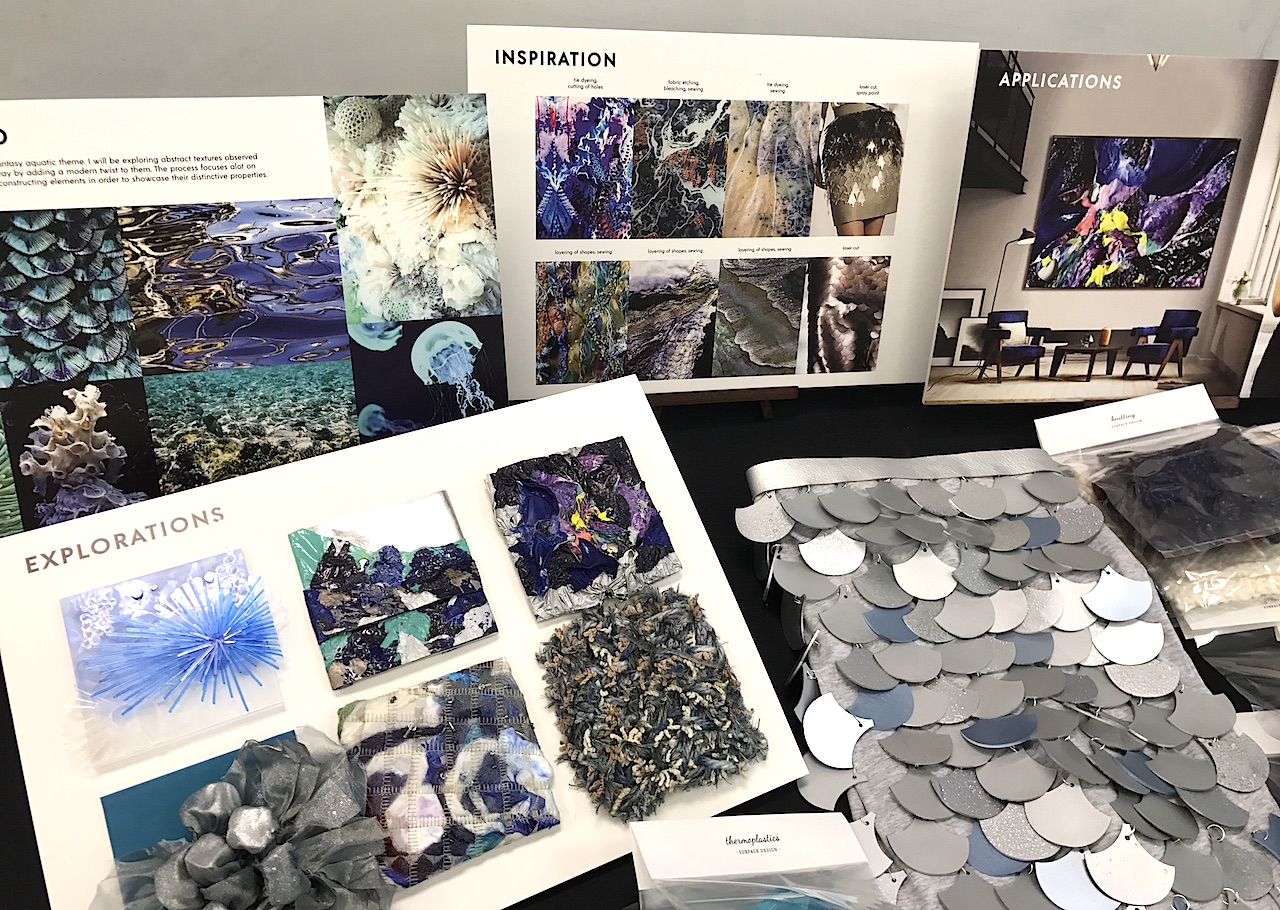
Final Boards, products and techniques done the entire semester!
Reflection: This module was a big eye-opener. From coming into the class not knowing how to use a sewing machine, to learning about interesting fabric manipulation techniques that constantly make me want to create new things again and again, I have no regrets here! I learnt so many new things that I can apply for future use in school and out. I can’t wait to explore other new techniques and continue creating abstract art/ items. I am also thankful to have learnt and grown with such a wonderful mentor, Galina, and class! I hope to see everyone around in school. 🙂 Perhaps we can start a business selling things we made in Surface Design. HEHE! Cheers to continuing the tradition of knitting in classes the next semester! hahaha.