PTSD Vest

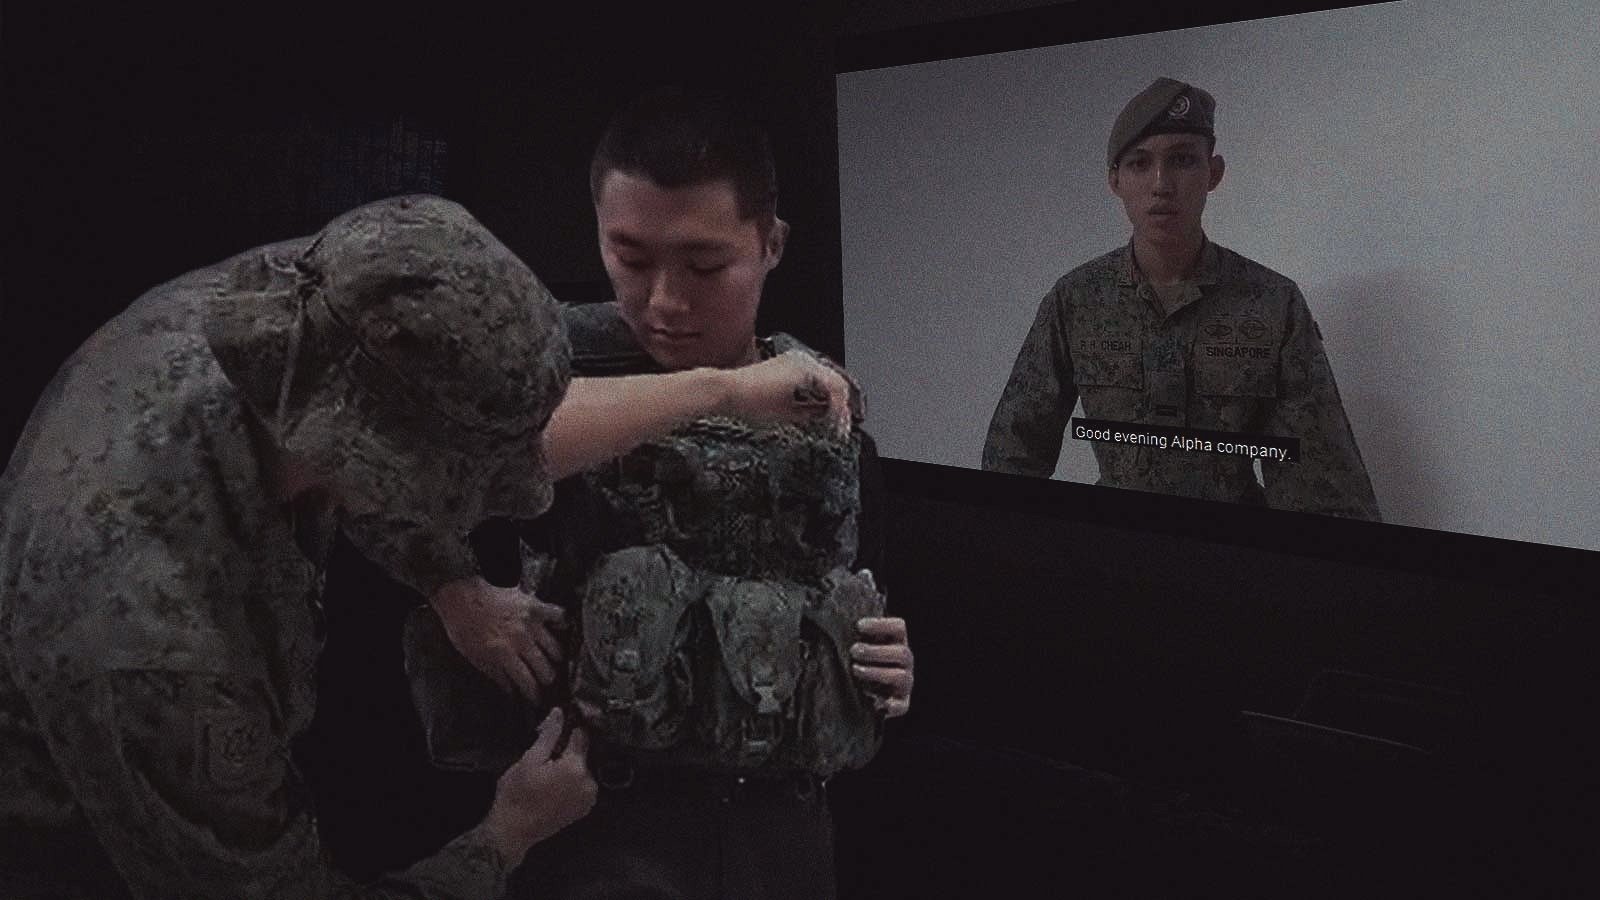
We set out to design a vest that simulates an episode of PTSD experienced by a war veteran. This is a dark object that forces the user to distance himself from others in society due to his seemingly irrational behaviour. We recreated a scenario that encompasses how the veteran: came to develop this disorder, how he acts in a public situation and how people react to him. Scenario: Person A has PTSD, which he had developed from narrowly escaping death from a live grenade explosion. He is being pulled aside by his commander at the point of time, making touch a trigger for his PTSD. He crouches down/ prones to react to the ‘situation’, which triggers different sensors to sound/vibrate. In designing this vest, we are creating an understanding of how one might come about to develop PTSD and hopefully create room for sympathy.


Observational documentation for user tests

3 user tests

Tester A: She was able to get into the vest, albeit the tightness. We gave her verbal instructions to crouch as we didn’t play the video for her.

The circuit ran as intended, the photocell sensor triggered the sound “Grenade!” from processing and she crouched down. In sync with the explosion, the vibration went off as well. We did not tell her about the vibrations beforehand; this will make it a more genuine test to see whether the circuit was able to work properly (and well). She said she could feel vibrations on her chest, but they were subtle. Using this feedback, we decided to put in paddings in the front zipper pouch so that the vibration motor will be closer to the tester’s chest when s/he crouches down.

Tester B: It was a guy, who was rather big sized. He was able to fit into the vest as well as we did not pull the strap too tight. We gave him verbal instructions as per tester A, and this time round he was able to feel the vibration. As he wasn’t taking EI, he didn’t know what the circuit was for and was genuinely intrigued by the PTSD vest. At this point, we knew the circuit was working properly and was satisfied with our testings.

Tester C: Last guy, he is an exchange student and didn’t go through national service. We helped him put on the vest and gave verbal instructions. The test went smoothly; the vibration and sound came out as queued. Tester C said it sounded like “Renade” but we felt that it wasn’t much of an issue because he tested the object in an open environment and wasn’t able to hear clearly. He also mentions that the vest felt light, and didn’t feel like an operational vest. He suggested that we add some weight to it.

Notes:

  1. The grenade sfx and explosion sfx was too far apart, there wouldn’t be a sense of urgency to crouch down.
  2. We also took note of the timing for the entire experiment so that it would not become repetitive.

Improvements

As mentioned, we added the front paddings with stuffings for the rest of the grenade and magazine pouches. This would provide more chest contact. We didn’t use hard material as it would not follow the tester’s bend and would instead make it more difficult for him/her to feel the vibrations.

We added a water canteen(1l water bottle) on the right side, and 1kg dumbbell at the back. These, coupled with the weight of the ipad is similar to the actual weight of an operational vest with hard plates inserted(ours was way more comfortable than the actual).

We cut the videos (introduction brief and day-to-day scenario) to around 2mins. This would consist of about 5-6 triggers, which we felt was just right. On the day itself, Daryl was in charge of guiding the audience around the installation, and I was to help with the participant put on the vest and guide him/her through the scenarios.

Here is the context video for our PTSD Vest.

Here is our final installation.

Feedback from final installation and user test experience:
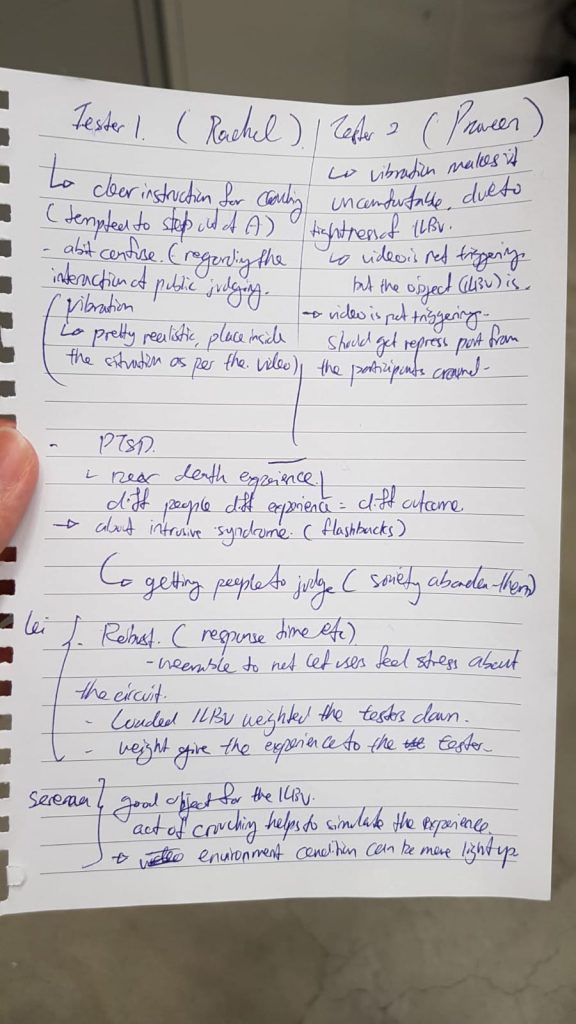
  1. We can look into using surround sound to make it more realistic and immersive.
  2. The lighting could have been adjusted to see the video better and yet create a realistic environment for the tester.


Design Process documentation

It is important to note that we have chosen the ILBV not only for its representation of an object used it war, but also for its robustness and ability to store and conceal multiple objects. During our initial phase, we had planned where we would place our individual sensors and power source (Daryl’s ipad).

We created a google slide file for our initial research and presentation purposes:

Dark object – PTSD Vest Research and Presentation

For more information on design process, you can refer to: Project Development – Ideation Sketches and Context planning

Step-by-step construction of our PTSD vest

Materials:
1. Arduino Uno
2. Photocell
3. Coin Vibration Motor
4. 220k Resistor
5. Cables
6. Vest
7. Grenade Explosion SFX Files
8. Tablet (that can run processing)

Programmes used: Arduino and Processing

Step 1: We started setting up the circuit. We bought the vibration motor and tested it with the arduino. We used a code from online and used different resistors to test the sensitivity of the vibration motor. It was slightly too strong (which shouldn’t be an issue) but that broke our first vibration motor. We were lucky to have bought a spare, and we taped it to whatever surface we were testing on so that it wouldn’t break apart.

Step 2: We uploaded the Arduino code; the photocell sensor would measure the light exposure in our environment. We set a threshold ”int threshold” so that when the amount of light exposure falls below the threshold, it would active the vibration motor and sending ”1” to Processing.

Step 3: Upload the ”Grenade” and explosion sfx into Processing. When ”1” is read, the ”Grenade sound” will go off. After a delay of a few seconds, the explosion sfx will play.

This was our initial voice recording: it wasn’t clear and created unnecessary ‘chaos’.

This was our final voice recording for ”Grenade”

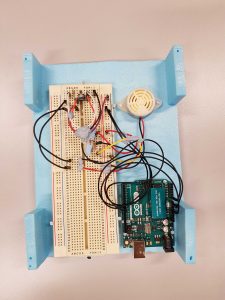
Step 4: Setting up the arduino/ breadboard to the vest. This required us to construct a simple box to hold and protect the breadboard and arduino, and also 2x 1m wires to allow the photocell to be placed on the shoulder pad, and the vibration motor to place in the inner paddings of the vest. This is how we installed it:


Step 5: Setting up the physical space.
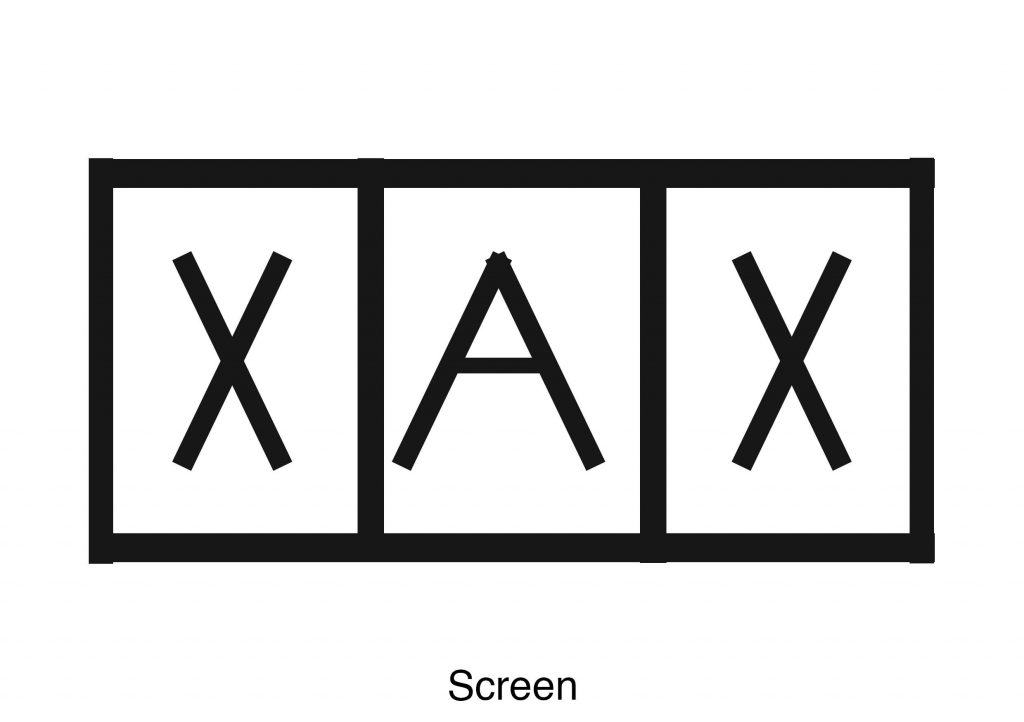
A: represents locality A.

X: Supposedly where the viewers would stand.

This would give us control for our experiment and prevent deviations.

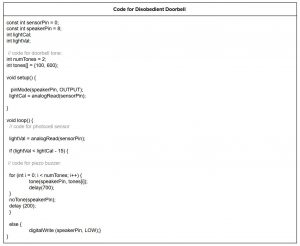
Codes:

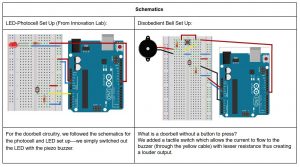
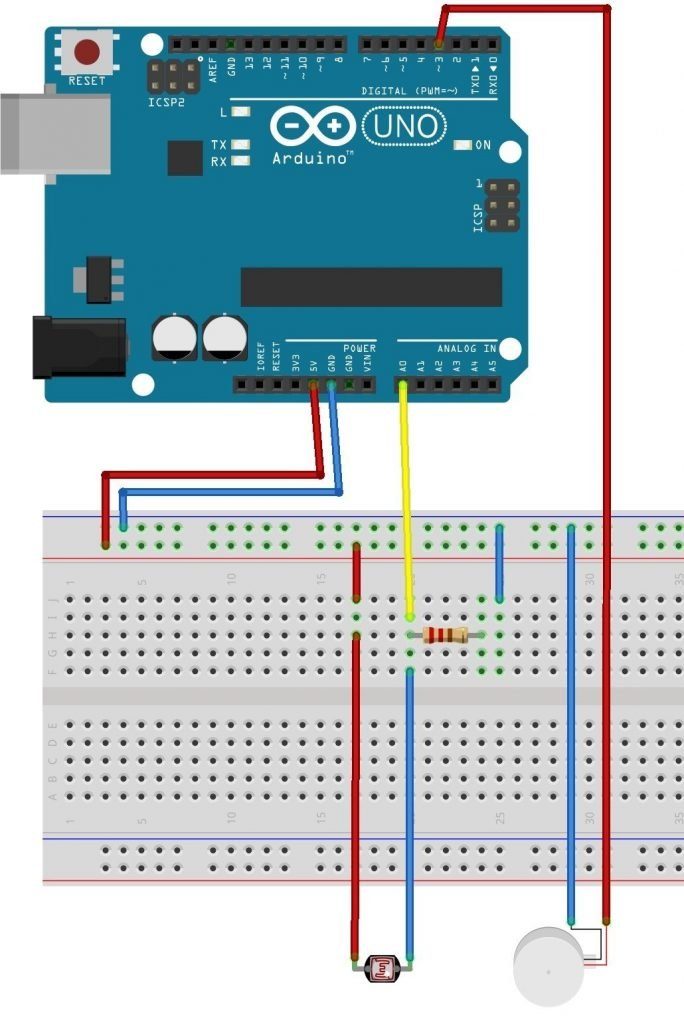
Schematics:
Micro-Project 4: Disobedient Object
ALL by Rui Hong & Daryl

Assignment Brief:
Using Arduino and its sensors and actuators, we were tasked to hack an everyday household object and make it behave in an unexpected/disobedient way.

Ideation:
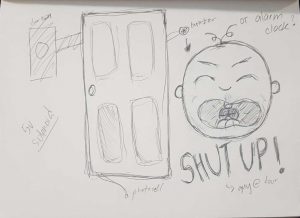
The object of our choice was a doorbell, or rather the concept of a doorbell (We didn’t want to destroy and pluck out our actual doorbell). We chose the doorbell as it is an object with an obvious purpose and a predictable outcome when interacted with. Placed beside a door, the object, being a button, is easily recognized and participants would immediately know how to use it. The call to action for the interaction is straightforward and participants will assume to know what is the outcome–only when you press the button, the bell will ring once-Ding Dong. Here, we have an opportunity to use that assumption to create a new and unexpected experience.

Hence, the disobedient doorbell was meant to play on that preconceived knowledge of the doorbell mechanism. So instead of a doorbell that activates when you press it, it will activate before the participants presses or even attempts to press the button.

There are 2 stages of this interaction:
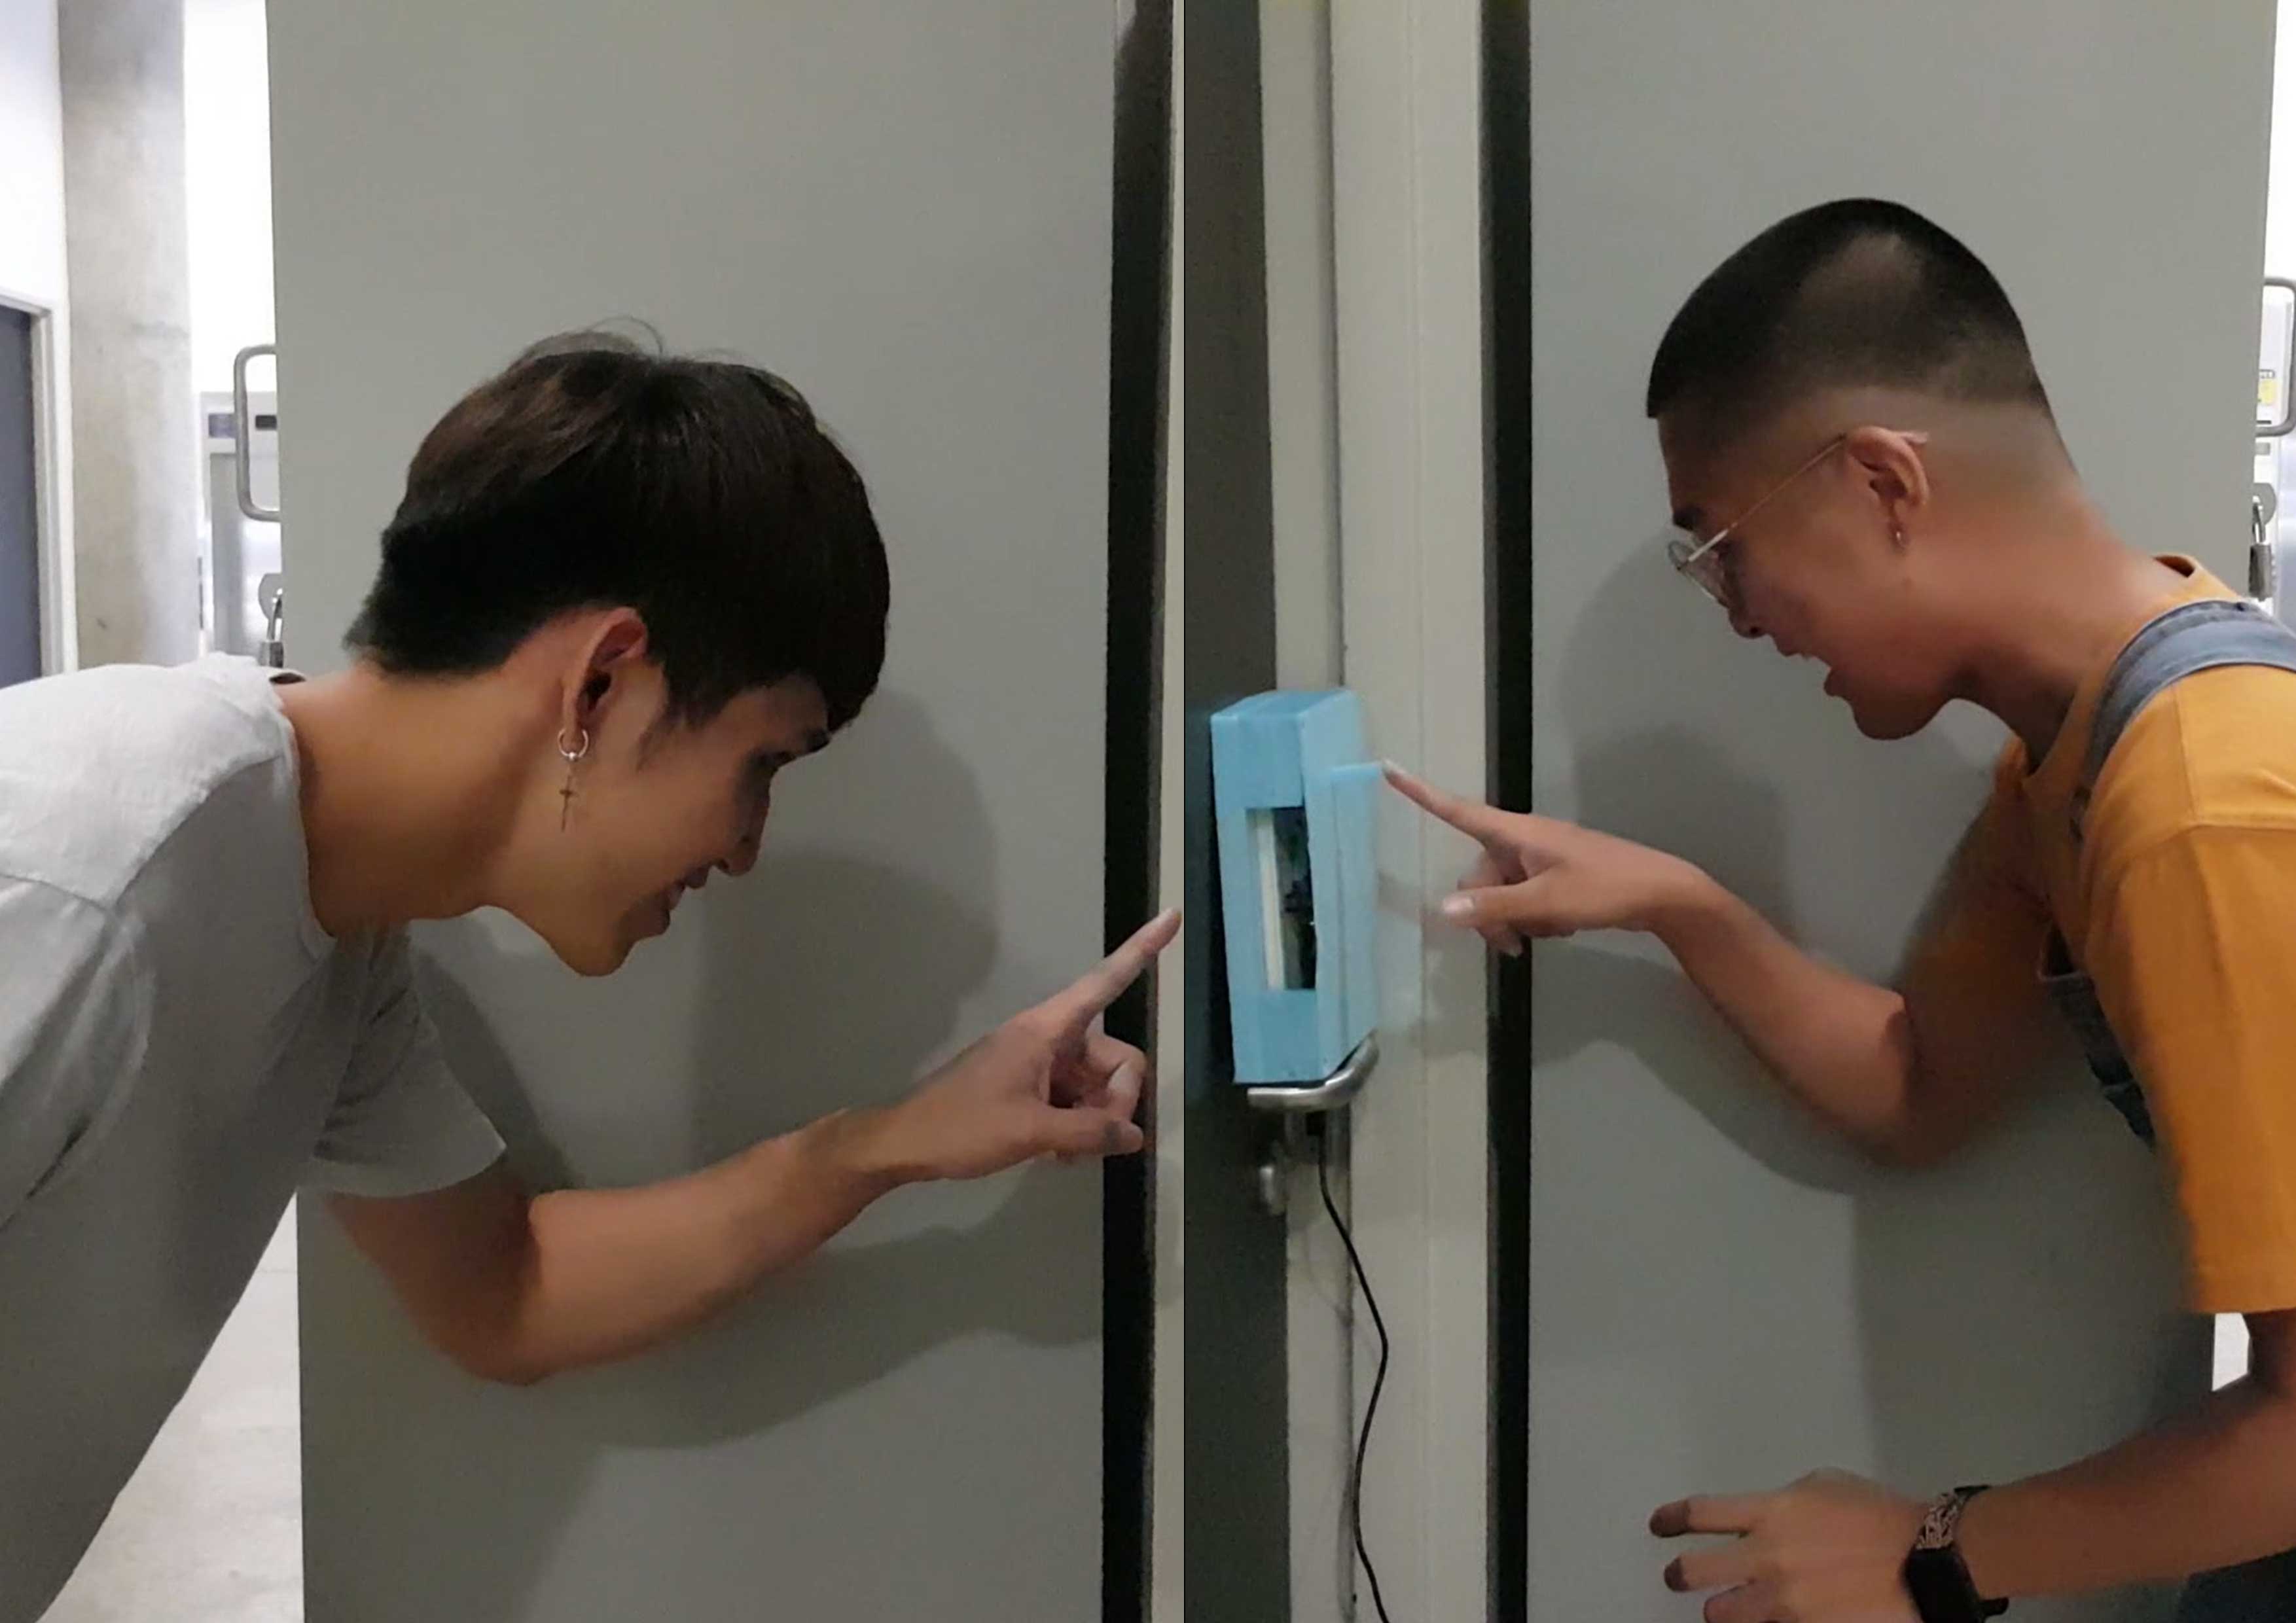
1. The participant approaches or comes into close proximity to the door and the doorbell will unexpectedly ring. The doorbell will continue ringing as long as the participant remains in close distance. (We estimated the distance for the bell to sound to be around 15-30cm.) When participants walk away or retract their hand, the ringing will then stop.
2. With the bell already ringing, when the participant chooses to press the doorbell button (we anticipate that participants will assume pressing the button will stop the ringing), the ringing gets louder to an uncomfortable volume with some distortion. Holding onto the button will keep the ringing at the louder volume while releasing the button will bring the ringing back to its original volume. Again, when the participants choose to walk away or retract their hand, then the ringing will stop.

The disobedient doorbell is meant to make the participant feel alarmed, confused and panicky like the participant is not supposed to be there, encouraging the participants to leave the site of interaction.

Realisation & Delivery:
So we started on our building process.

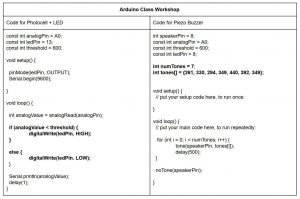
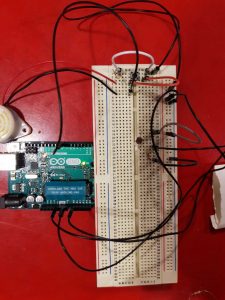
Inspired by the class workshops on the photocell with LED light and piezo buzzer, we combined the codes and modified the circuitry. Instead of the LED lighting up when the threshold of the light reading is low enough, the buzzer will sound. We then coded the buzzer to sound like the average 2-tone doorbell.

Progress & Final:

Video:
In Situ Video here. https://youtu.be/eVCgNR0CAl0


DARYL

What are some reactions you observed from your participants when they interacted with the object?
Participant #1: When #1 approached the bell, she didn’t realise that the bell had already rung when she approached it. She proceeds to press the button, which made the ringing louder, but she remains confused from the interaction. In the feedback session, she mentions that she is intrigued by the bell but wasn’t aware of the bell ringing in advance.

Participant #2: Given that #2 has observed the interaction of #1 with the bell, her interaction with the disobedient bell was closer to what we intended. As she approached the bell, she waves her hand in front of her, trying to test the bells sensitivity. However, the bell only reacted when she tries to press the bell. On multiple tries to press the button, when the bell rang prior to her touching the button, she retracts her hand as if the bell were a buzzer, telling her not to press the bell. She gives up trying to press the button and leaves.

Participant #3: The last participant, having observed the 2 interactions before her, reacted and had the thought process we intended. As she approaches the bell, it sets off even before she lifts her hands to press it. She jumps from the unexpected alarm. She continues to try and press the button. Because the button broke, we simulated the effect of the louder ringing as she pretends to press the bell. In the feedback, she mentions how when the ringing starts, she assumes that the button will stop the continuous ringing, hence she attempts to press the button.

Challenges & Problem Solving:
What are the challenges involved and how did you overcome them? What problems still exist? How might you overcome them eventually?

[Daryl: For the first few classes on Arduino, we were taught to use the arduino board and breadboard, learning how to use specific inputs such as the piezo buzzer, LDR sensor, LED and switch amongst other things. Given our inexperience, we took a while to figure out how the circuits would work, and through errors on writing the sketches we understood coding better.

The first challenge we encountered was starting on the coding. A blank screen can be quite intimidating and we did not know where or how to start. We then decided to work off existing codes we practiced in class. We started with the codes from the photocell workshop then incorporated the codes from the piezo buzzer workshop. We also used the IF & ELSE code from the LED workshop. After a few tries, we manage to get the piezo buzzer to sound.

The second challenges was finding the right sensitivity for the bell. We were not sure how close we wanted the participant to be. On multiple occasions, the bell became unpredictable and started sounding off whenever or did not sound at all to any interaction. We figured it was the angle of the photocell which affected its sensitivity.

Lastly, we had some difficulty fitting everything into a compact object and creating a button to extend from the breadboard to the cover of the case we built. We took a while to get the correct measurements and finish up the case for the doorbell. (After the in-class test run, we realise that the material of the object can also affect the way people interact with it and how they approach the object. We will consider the effects of materials for the next project.)]

RUI HONG

What are some reactions you observed from your participants when they interacted with the object?

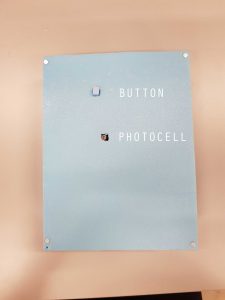
Participant #1: Participant 1, being the real guinea pig in this situation, approached the doorbell with confidence to test out the doorbell. It rang on queue and as there is only 1 button on the foamboard (which was intentional as to lead the participant to try it out on instinct), she pressed it and it gave a secondary beep. She didn’t seem surprised by the louder secondary beep. As we are used to having a ‘click feedback’ when we press a button, the foam button made it hard to feel the ‘click’ and that prompted her to press harder onto the button. What happens afterwards can be seen in the button. Besides the click feedback she was looking for, I felt like she may have expected a different result (such as a louder beep or a different sound) from subsequent presses and that may have prompted her to try again.

Participant #2: Participant 2, having observed participant 1 gained some insight on how the button may work. Approaching the doorbell, she tested out the sensitivity of the photocell by waving her hands in front of it. After that, she attempted to press the doorbell but was prompted by the initial beep of the doorbell to refrain from doing so. She ended up not pressing the doorbell, which I felt may have caused her to be uncomfortable and leave the interaction space (which was one of the intended outcomes).

Participant #3: Our last participant, having observed two interactions, had a similar thought process as us. She startled at the initial beep as she approached the doorbell. Thinking that the doorbell might stop ringing as soon as she presses the button, she is ‘pleasantly’ surprised at how it didn’t stop ringing, but got even louder. The doorbell then obediently invites the participant to leave with the annoying beeping.

What are the challenges involved and how did you overcome them? What problems still exist? How might you overcome them eventually?

For the first few classes on Arduino, we were taught to use the arduino board and breadboard, learning how to use specific inputs such as the piezo buzzer, LDR sensor, LED and switch amongst other things. Given my inexperience, I took awhile to understand how it worked and had to refer back to slides more than just a couple of times. We bumped into a few incompatible sketches which helped us understanding the coding process better.

We started from scratch as we didn’t want to confuse ourselves. The way we revised the arduino coding was to wire the circuit according to the slides and then stare at it until we understood how and why the circuit works. We then read the code and change certain values in the sketches to test out the coding to give ourselves a better understanding. We knew what components we wanted to use, the problem was combining the existing codes to form the correct sketch that would work. We stuck to what we learnt from the workshops, coupled with a few references from existing codes from the google search bar.

The second issue we faced was the ever-changing sensitivity of the photoresistor. Due to the different environments we were in when we worked on the arduino board, we had to tweak the sensitivity according to our classroom to make it workable. This was one we were able to work out easily as we had had a few goes at changing the sensitivity before going to class, so it didn’t seem like much of a hassle.

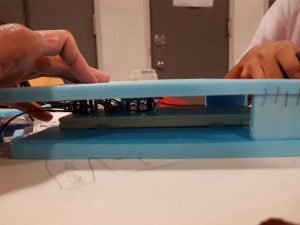
The third issue was the design of the board; the measurements had to be exact so that the photoresistor could stick out just enough for it appear on the foamboard we made. We took a few tries (shaving down the board) before the photoresistor would stay obediently in place. In hindsight, we could have used crocodile clips and other materials to extend the flexibility of our foamboard. We had decided to keep the design of the foam board as not to confuse our participants. In our test-runs, we realised that we have always tested it while the foam board lies flat on the table. We should have tested it in an upright position for more accurate results.

Area of improvements:

  1. Test runs can include more situations, different angles of testing to ensure an accurate experiment.
  2. Prototype board can be more sturdy and should not obstruct our participants from trying out the doorbell as they are afraid of damaging it.

Thank you for reading!

Video done by:

Han Yun, Daryl, Li Xuan and Rui Hong.

This video project tries to incorporate the DIWO concept, which I felt that we had done it in our special way. The project was initially very hard to brainstorm as we thought deeply about the technical aspects of making the video look nice with the visuals. As we discussed further, we realized that that may lead us to miss the point. We shifted our focus to a clearer concept and made the video simple to digest for the audience. That said, we did not take shortcuts and coordinated thoroughly to make a ‘good video’.

Guess what. There were a few screw ups here and there. Instead of being angry at our imperfect video, we laughed instead as we really enjoyed the process and watching others panic on video (obviously) // slightly schadenfreude(ic) . Lets dive into the concept.

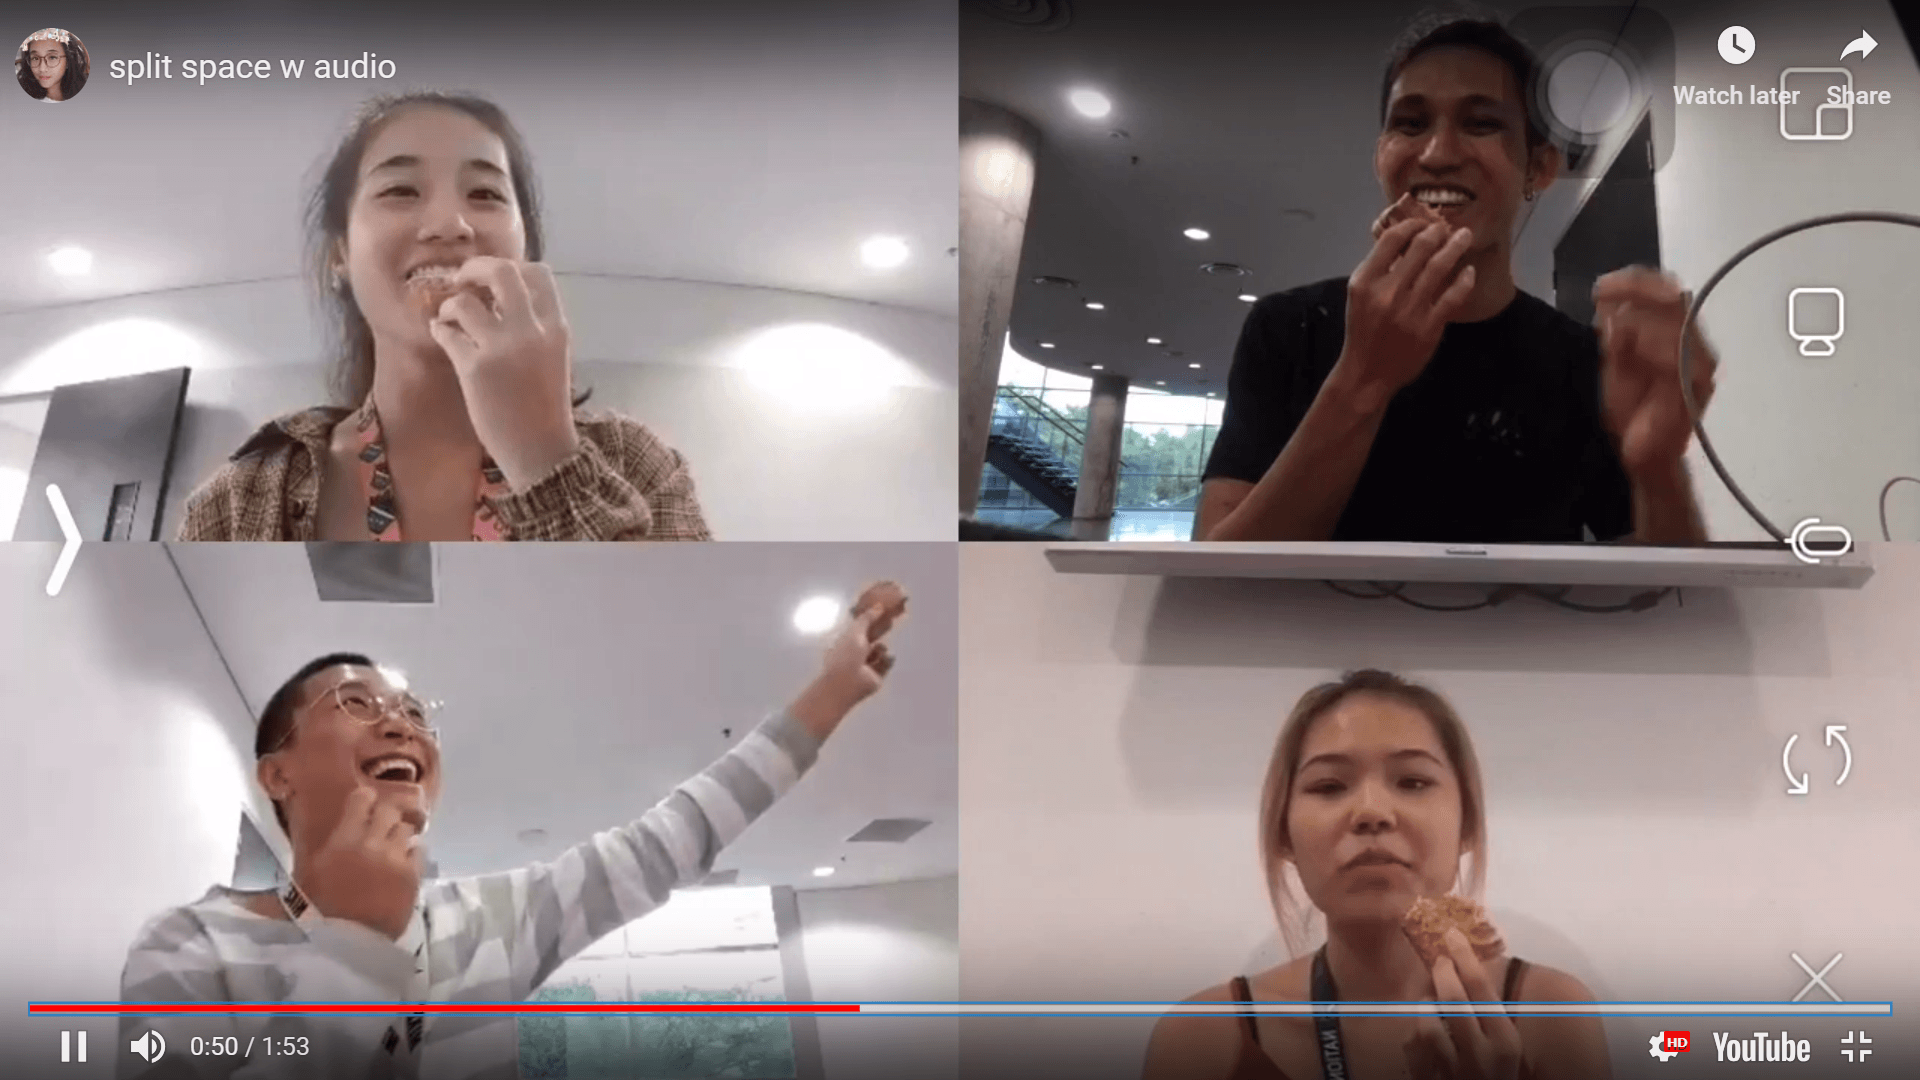
We are a group of university students at immensely different settings, with similar lighting conditions to represent morning/afternoon timings that we share. Although we are fair apart, we feel easily connected through the 4 tiny split screens on our mobile phones. Our physical distance was minimized by technology. The video shows the transitions and varieties of things we do in our individual settings. We started and ended off our ‘day’ by tapping in our matriculation card to show the consistency of our timings.

First activity that happened was Li Xuan brushing teeth. Daryl, Han yun and I were onlookers, being ‘updated’ on what Li Xuan was doing at that point of time. She passed up her tooth brush, which transformed into a mobile phone for me to place calls.

The rest became the onlookers as I placed my calls. Shortly after, I passed my phone to the left which turned into a pair of scissors for Han yun. By this point, you’d realized a bit of cheesy connection we had tried to make.

For some reason (not for us to judge), Han yun chose to cut her hair with a pair of scissors (which actually happened) and as you watch the video you can tell by her genuinely surprised look. Immediately regretting her decision, she passes on the pair of scissors to Daryl, who transforms it into a pen to draw on his sketchbook.

After drawing on his sketchbook, it was lunchtime and we managed to share a virtual – realistic meal together by having Daryl hand out our lunch to us (eating the same food) and stopping whatever we were doing. 

After the meal, we continued our day by connecting our lives together with music, having it played as if we were together and sharing the moment together. We did different things, such as dancing, studying, having a drink and using a laptop. This concluded our journey of our daily lives, which ended off in a ‘unison’. 

WALA. Here is the vid:

Overall, I felt that I really enjoyed the process and outcome. The creative freedom given to us made us explore more and I’m glad that we did not just go ahead with some lame idea that we were not passionate about. The stupid grins on our face was mostly from trying to remember our positions on the master screen and where to pass the objects to. There was much coordination and positioning but we did not feel obliged or burnt out from our failures. After a few tries, we managed to come out with the final piece! The wifi was really bad and kept cutting us out of the chat and resetting our positions, so those were some obstacles we faced.

Overall Reflection

I felt that micro-project 3 provided the most creative control. We were not exactly limited by theme or even space, little to no guidance was given meaning to say we could definitely explore more options than normal. The brief was rather hands-free, and other than the duration of the video as a creative control we pretty much had our own space to brainstorm.

For micro project 2, we had to limit our conditioning options as we didn’t want to inflict unnecessary pain and we had trouble in the initial stages to attain our desired number of audience. We could not control the number of participants, nor automatically garner the response we wanted online (thus improvising on posting a Instagram Picture to increase traffic to the Insta Live). 

For micro project 1, we were limited in terms of space and posting on a social platform exposed to friends and strangers alike kind of limited and pressured us into taking ‘decent’ photos that were acceptable on the social media site.


Micro project 2 had the most unpredictable outcome in my opinion. Firstly, we have to factor in the traffic that we could do little to control. Secondly, for participants, they weren’t exactly sure that we were doing a project and did not understand the intended purpose. Although we did successfully manage to retrieve the schadenfreude experience from the participants, it was a hard project to control and much improvisation was made.

I felt that if we consider BOTH Open Source concept AND DIWO(do-it-with-others) concept, micro project 1 would win hands down. As you can tell, micro project 1 is technically still on-going. Anyone can edit according to the hashtag and add on their own interpretations onto the hashtag page. Micro project 2 and 3 were rather short lived due to either needing a live audience or limited participants to 4 people(in our case). 

Thank you for reading!


1 Join = 1 Flick

The objective of the work is to allow the crowd to participate in my conditioning. An example of conditioning is training the test subject to react to certain triggers, in this case my group has conditioned me to react to a new ‘joined’ notification by anticipating a flick on my forehead.

We uploaded a post on Instagram to preempt the audience of our project but we did not reveal the purpose of it. Then, we started an Instagram live video that can be accessed by my followers. We started off the project by using tickling as an action and using likes as a trigger. As the participants were either my friends or acquaintances, they enjoyed the little exercise quite a bit by leaving comments such as ‘I spammed likes, tickle him harder’ and so on. They did not take it seriously as they were able to feel satisfied with low consequences as ‘flicking’ was not inherently dangerous. After a while, I stopped reacting to the tickles as I was used to them and the participants were able to spam likes on a live story, making the reaction less responsive.

We decided to create a better conditioning by changing it to flicking my forehead as an action and joining/leaving a comment on my live chat as a trigger. Whenever someone comes to watch the live video, a notification will appear and state ”XXX joined”. When that happens, either Li Xuan or Han Yun will give me a flick on my forehead. After awhile, I become accustomed to the feeling of getting flicked whenever a new person joined, and I had some anticipatory reaction even when the two of them did not flick me. At that point of time, I still flinched whenever new somebody joined as I was conditioned.

The creators of the project were both the crowd and the test subject (me). Without the participants, the work will not achieve the intended outcome as I will not get flicked and be conditioned. It was different than the classic conditioning done by Ivan Pavlov – refer to https://www.youtube.com/watch?v=iawj42z4dPM , as my project involved a crowd that was essential to making the conditioning work. Unlike his experiment having a constant, mine did not have one as my participants were a variable. They were able to choose whenever and how many times they want to appear.

How are we so sure that the participants (my friends) would join the live chat and watch me get flicked? We based it off the schadenfreude experience. Schadenfreude is the experience of pleasure, joy, or self-satisfaction that comes from learning of or witnessing the troubles, failures, or humiliation of another. It is one of four related emotions or concepts. Hence, we were sure that my friends would want to see me get flicked. Indeed, there were some who left the room and rejoined just to see me get flicked more than once.

We had to switch up the project as we did not get the intended response whilst using 3 phones as Li Xuan and Han Yun’s friends did not know me and did not care to inflict pain on me. Additionally, I learnt that having a controlled group of participants were important as the context of the audience would affect the intended outcome of the work.

Siva Vaidhyanathan’s writing on open source culture aids us in the understanding of the longevity of open source thinking, combatting the proprietary model that emerged in the 20th century. Open source usually refers to the sharing of blueprints, recipes, and information that includes, but is not limited to software and manufacturing.

Open source does not encourage monopoly, but rather peer to peer interaction that involves multiple parties to work together to build on a common project, so long as they carry the same license (an official permission). It encourages growth, development and accentuates the benefits of working together. Closed source, on the other hand, rejects third-party interaction and maintains a monopoly to not lose revenue from sharing information. To those that adopt a proprietary ideology, innovation is fuelled by commercial gains (Vaidhyanathan, Open Source, 2005). While this may be true to a certain extent, it is not applicable to those who innovate solely for artistic or non-commercial purposes, or even gestures for themselves or others.

This does not mean that open source should be an entirely ‘selfless’ model, as people can remodify, improve and develop based on the information provided freely and commercialise it (Vaidhyanathan, Open Source, 2005). It is however not done at the expense of the provider of the source, which is why open source works. Wikipedia is an open source online encyclopaedia which allows anyone to edit. Wikipedia Art, a collaborative project by Nathaniel Stern and Scott Kildall, was started as a conventional Wikipedia page and intended for art editors to modify the page however they liked, so long as they adhered to the strict guidelines and rule of Wikipedia. However, it was shrouded in controversy and was officially removed only 15 hours into the project.

Wikipedia Art was a perfect example of a non-commercial interaction shut down by Wikipedia in order to protect the integrity of it as an encyclopaedia. Some argued that Wikipedia Art should be removed as it should not be allowed to reference itself, as this created a paradox. Wikipedia further ‘fenced off’ (Vaidhyanathan, Open Source, 2005) the artists by threatening to take legal action against them for using ‘Wikipedia’ as their domain name, according to https://www.eff.org/deeplinks/2009/04/wikipedia-threatens-. It was out of character for an open source owner to pull copyright claims on a third-party that did not exploit their domain for monetary gains. Wikipedia’s reaction to Wikipedia Art sparked debate with the online community, and at the same time unintentionally garnered traction for the project. For Wikipedia Art, this may well be a successful attempt at creating art, as they have achieved an unintended outcome that aligned with their goals.

Even though Wikipedia Art has been removed from the official Wikipedia page, it continues to be ‘resurrected’ through different users and engaging in a discussion of it. While this can be considered a successful project, it also unintentionally highlighted the flaws of Wikipedia as an open source. In retrospect, I felt that the project could have been approached in a different manner which would have avoided the controversy that it did not mean to spark.


Biblography:

Vaidhyanathan, S. (2005). Open Source . In Open Source (p. 25).

Vaidhyanathan, S. (2005). Open Source . In Open Source (p. 27).

Wikipedia Art – http://wikipediaart.org/archive/wikipedia-art-original-page/

The spray paint area in front of the ADM car park; where I had spent many hours(one day in particular) to finish up a 3D project, captured a still memory of my dilemma. In a flashback which I can perfectly re-enact, Jasmine(classmate) and I were staying back late to complete our 3d project over the weekends. Holding two spray cans in my hands, I was tapping my feet and pacing up and down the spray painting area, thinking about my next step of my 3d assignment. Late hours and hard decisions were a constant in my ADM experience, and I have chosen this space as it brought me back to the moment of dilemma, an alternate space of thoughts and ideas.


This alternate virtual space I created was characterized by my creative thoughts, layered into rooms of hypothetical outcomes and boxes of imagination. The ‘messiness’ and past graffiti on the walls made me ponder on the decisions these ‘street artists’ have made, be it for fun or had meaning behind them.


The outdoor space that distinguished itself from the rest of ADM was almost ‘open-source’, where people can edit, add upon or even remove (by covering over with spray paint), and that in a way modifies the alternate space as a new user of that space comes along. It is also possible to change the space alone or with others, as it is not bound by its physical properties and changes with the intent of users.