PTSD Vest
We set out to design a vest that simulates an episode of PTSD experienced by a war veteran. This is a dark object that forces the user to distance himself from others in society due to his seemingly irrational behaviour. We recreated a scenario that encompasses how the veteran: came to develop this disorder, how he acts in a public situation and how people react to him. Scenario: Person A has PTSD, which he had developed from narrowly escaping death from a live grenade explosion. He is being pulled aside by his commander at the point of time, making touch a trigger for his PTSD. He crouches down/ prones to react to the ‘situation’, which triggers different sensors to sound/vibrate. In designing this vest, we are creating an understanding of how one might come about to develop PTSD and hopefully create room for sympathy.
Observational documentation for user tests
3 user tests
Tester A: She was able to get into the vest, albeit the tightness. We gave her verbal instructions to crouch as we didn’t play the video for her.
The circuit ran as intended, the photocell sensor triggered the sound “Grenade!” from processing and she crouched down. In sync with the explosion, the vibration went off as well. We did not tell her about the vibrations beforehand; this will make it a more genuine test to see whether the circuit was able to work properly (and well). She said she could feel vibrations on her chest, but they were subtle. Using this feedback, we decided to put in paddings in the front zipper pouch so that the vibration motor will be closer to the tester’s chest when s/he crouches down.
Tester B: It was a guy, who was rather big sized. He was able to fit into the vest as well as we did not pull the strap too tight. We gave him verbal instructions as per tester A, and this time round he was able to feel the vibration. As he wasn’t taking EI, he didn’t know what the circuit was for and was genuinely intrigued by the PTSD vest. At this point, we knew the circuit was working properly and was satisfied with our testings.
Tester C: Last guy, he is an exchange student and didn’t go through national service. We helped him put on the vest and gave verbal instructions. The test went smoothly; the vibration and sound came out as queued. Tester C said it sounded like “Renade” but we felt that it wasn’t much of an issue because he tested the object in an open environment and wasn’t able to hear clearly. He also mentions that the vest felt light, and didn’t feel like an operational vest. He suggested that we add some weight to it.
Notes:
- The grenade sfx and explosion sfx was too far apart, there wouldn’t be a sense of urgency to crouch down.
- We also took note of the timing for the entire experiment so that it would not become repetitive.
Improvements
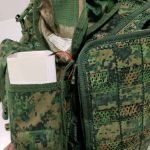
As mentioned, we added the front paddings with stuffings for the rest of the grenade and magazine pouches. This would provide more chest contact. We didn’t use hard material as it would not follow the tester’s bend and would instead make it more difficult for him/her to feel the vibrations.
We added a water canteen(1l water bottle) on the right side, and 1kg dumbbell at the back. These, coupled with the weight of the ipad is similar to the actual weight of an operational vest with hard plates inserted(ours was way more comfortable than the actual).
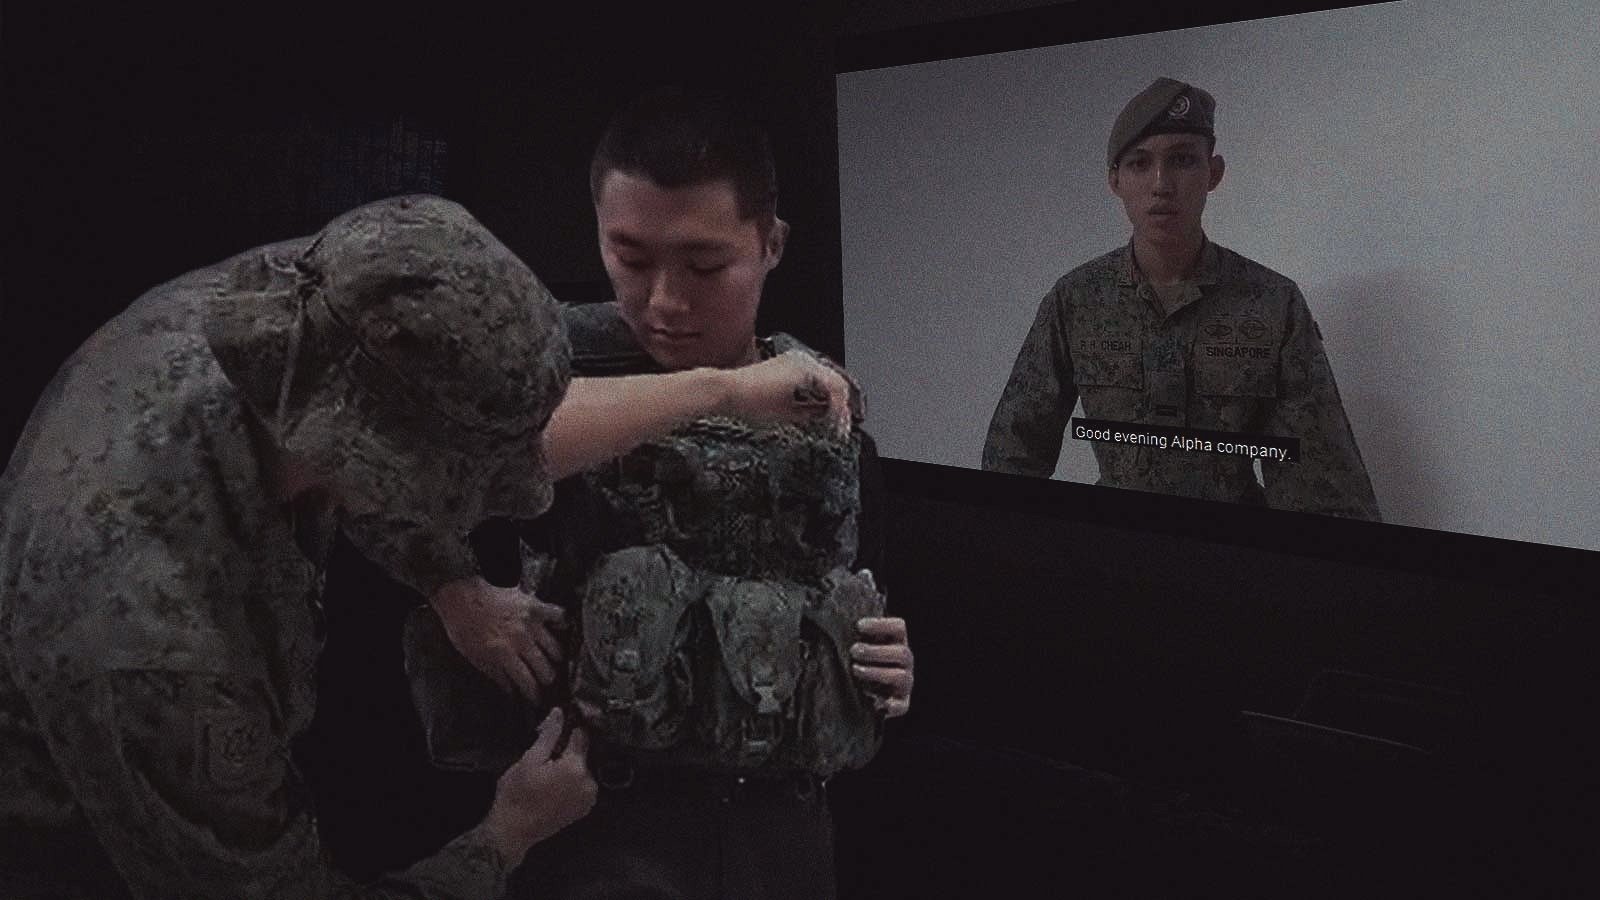
We cut the videos (introduction brief and day-to-day scenario) to around 2mins. This would consist of about 5-6 triggers, which we felt was just right. On the day itself, Daryl was in charge of guiding the audience around the installation, and I was to help with the participant put on the vest and guide him/her through the scenarios.
Here is the context video for our PTSD Vest.
Here is our final installation.
Feedback from final installation and user test experience:
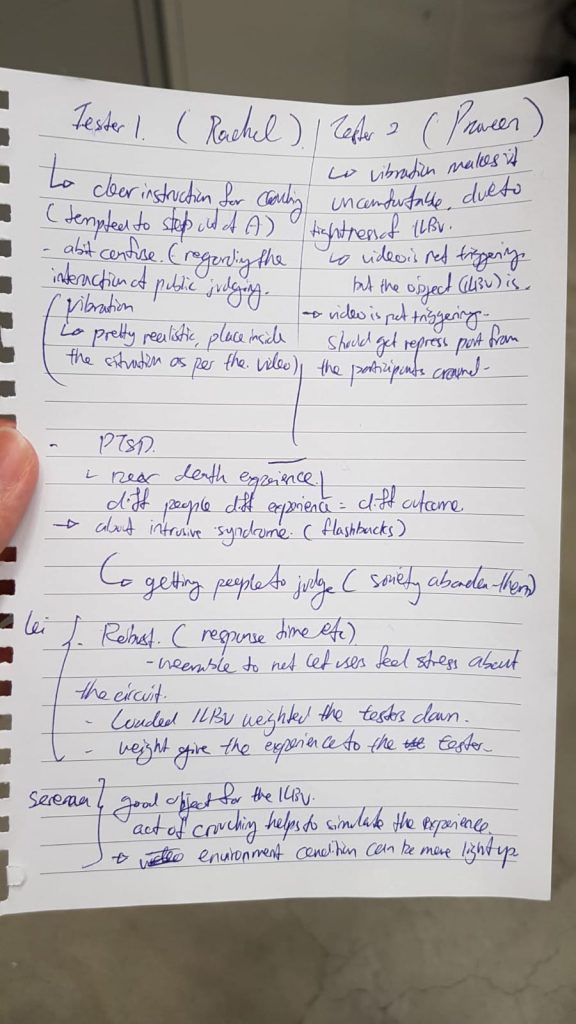
- We can look into using surround sound to make it more realistic and immersive.
- The lighting could have been adjusted to see the video better and yet create a realistic environment for the tester.
Design Process documentation
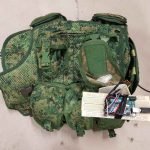
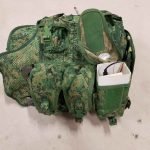
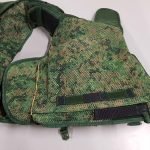
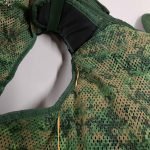
It is important to note that we have chosen the ILBV not only for its representation of an object used it war, but also for its robustness and ability to store and conceal multiple objects. During our initial phase, we had planned where we would place our individual sensors and power source (Daryl’s ipad).
We created a google slide file for our initial research and presentation purposes:
Dark object – PTSD Vest Research and Presentation
For more information on design process, you can refer to: Project Development – Ideation Sketches and Context planning
Step-by-step construction of our PTSD vest
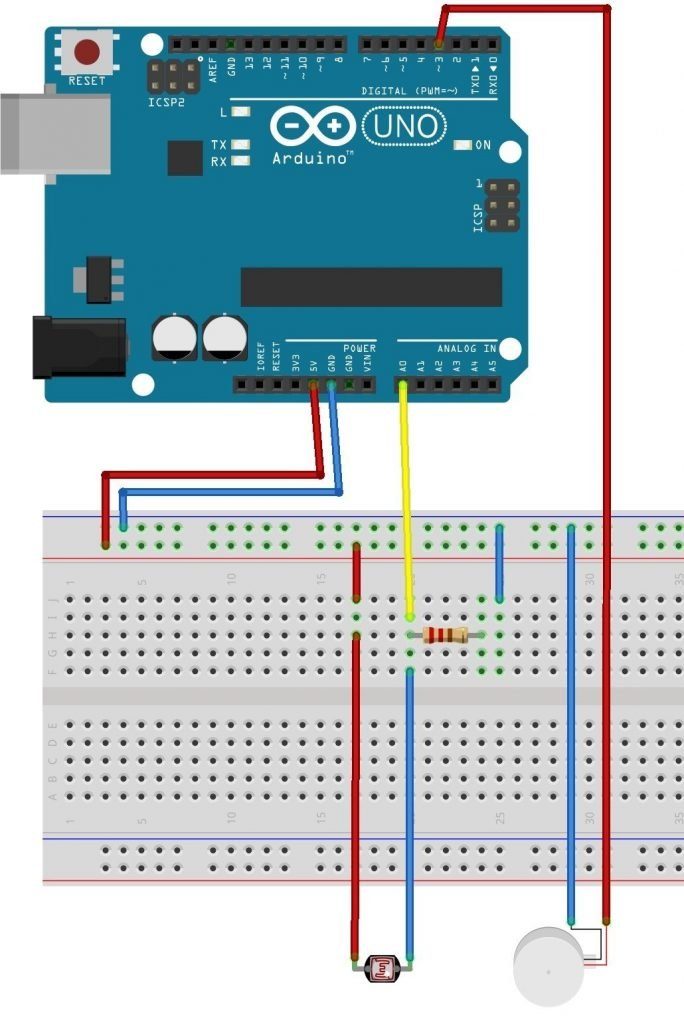
Materials:
1. Arduino Uno
2. Photocell
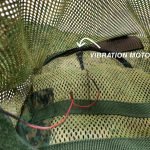
3. Coin Vibration Motor
4. 220k Resistor
5. Cables
6. Vest
7. Grenade Explosion SFX Files
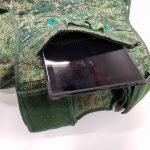
8. Tablet (that can run processing)
Programmes used: Arduino and Processing
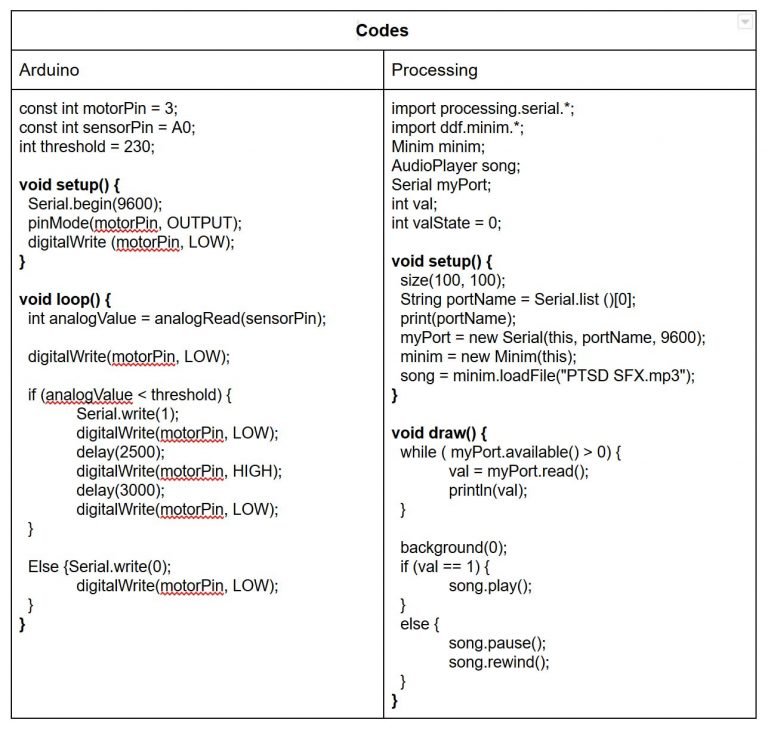
Step 1: We started setting up the circuit. We bought the vibration motor and tested it with the arduino. We used a code from online and used different resistors to test the sensitivity of the vibration motor. It was slightly too strong (which shouldn’t be an issue) but that broke our first vibration motor. We were lucky to have bought a spare, and we taped it to whatever surface we were testing on so that it wouldn’t break apart.
Step 2: We uploaded the Arduino code; the photocell sensor would measure the light exposure in our environment. We set a threshold ”int threshold” so that when the amount of light exposure falls below the threshold, it would active the vibration motor and sending ”1” to Processing.
Step 3: Upload the ”Grenade” and explosion sfx into Processing. When ”1” is read, the ”Grenade sound” will go off. After a delay of a few seconds, the explosion sfx will play.
This was our initial voice recording: it wasn’t clear and created unnecessary ‘chaos’.
This was our final voice recording for ”Grenade”
Step 4: Setting up the arduino/ breadboard to the vest. This required us to construct a simple box to hold and protect the breadboard and arduino, and also 2x 1m wires to allow the photocell to be placed on the shoulder pad, and the vibration motor to place in the inner paddings of the vest. This is how we installed it:


Step 5: Setting up the physical space.
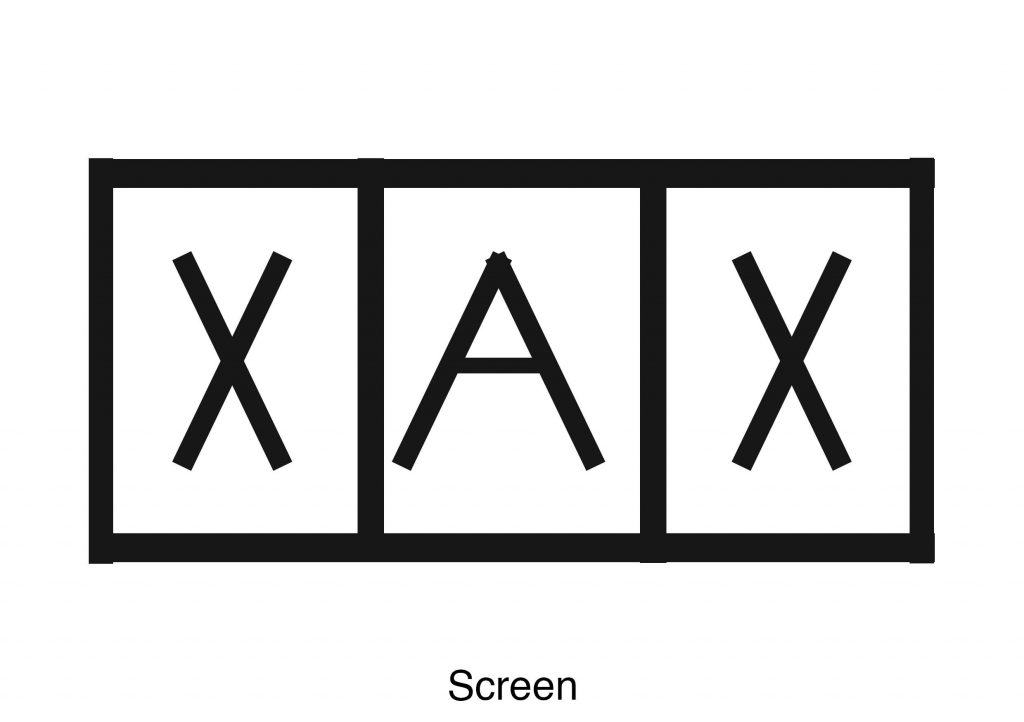
A: represents locality A.
X: Supposedly where the viewers would stand.
This would give us control for our experiment and prevent deviations.
Codes:
Schematics: