Picture Story-Cruating Self

Assignment 1: Picture Story-Curating Self

Task 1: Object and representation of self.

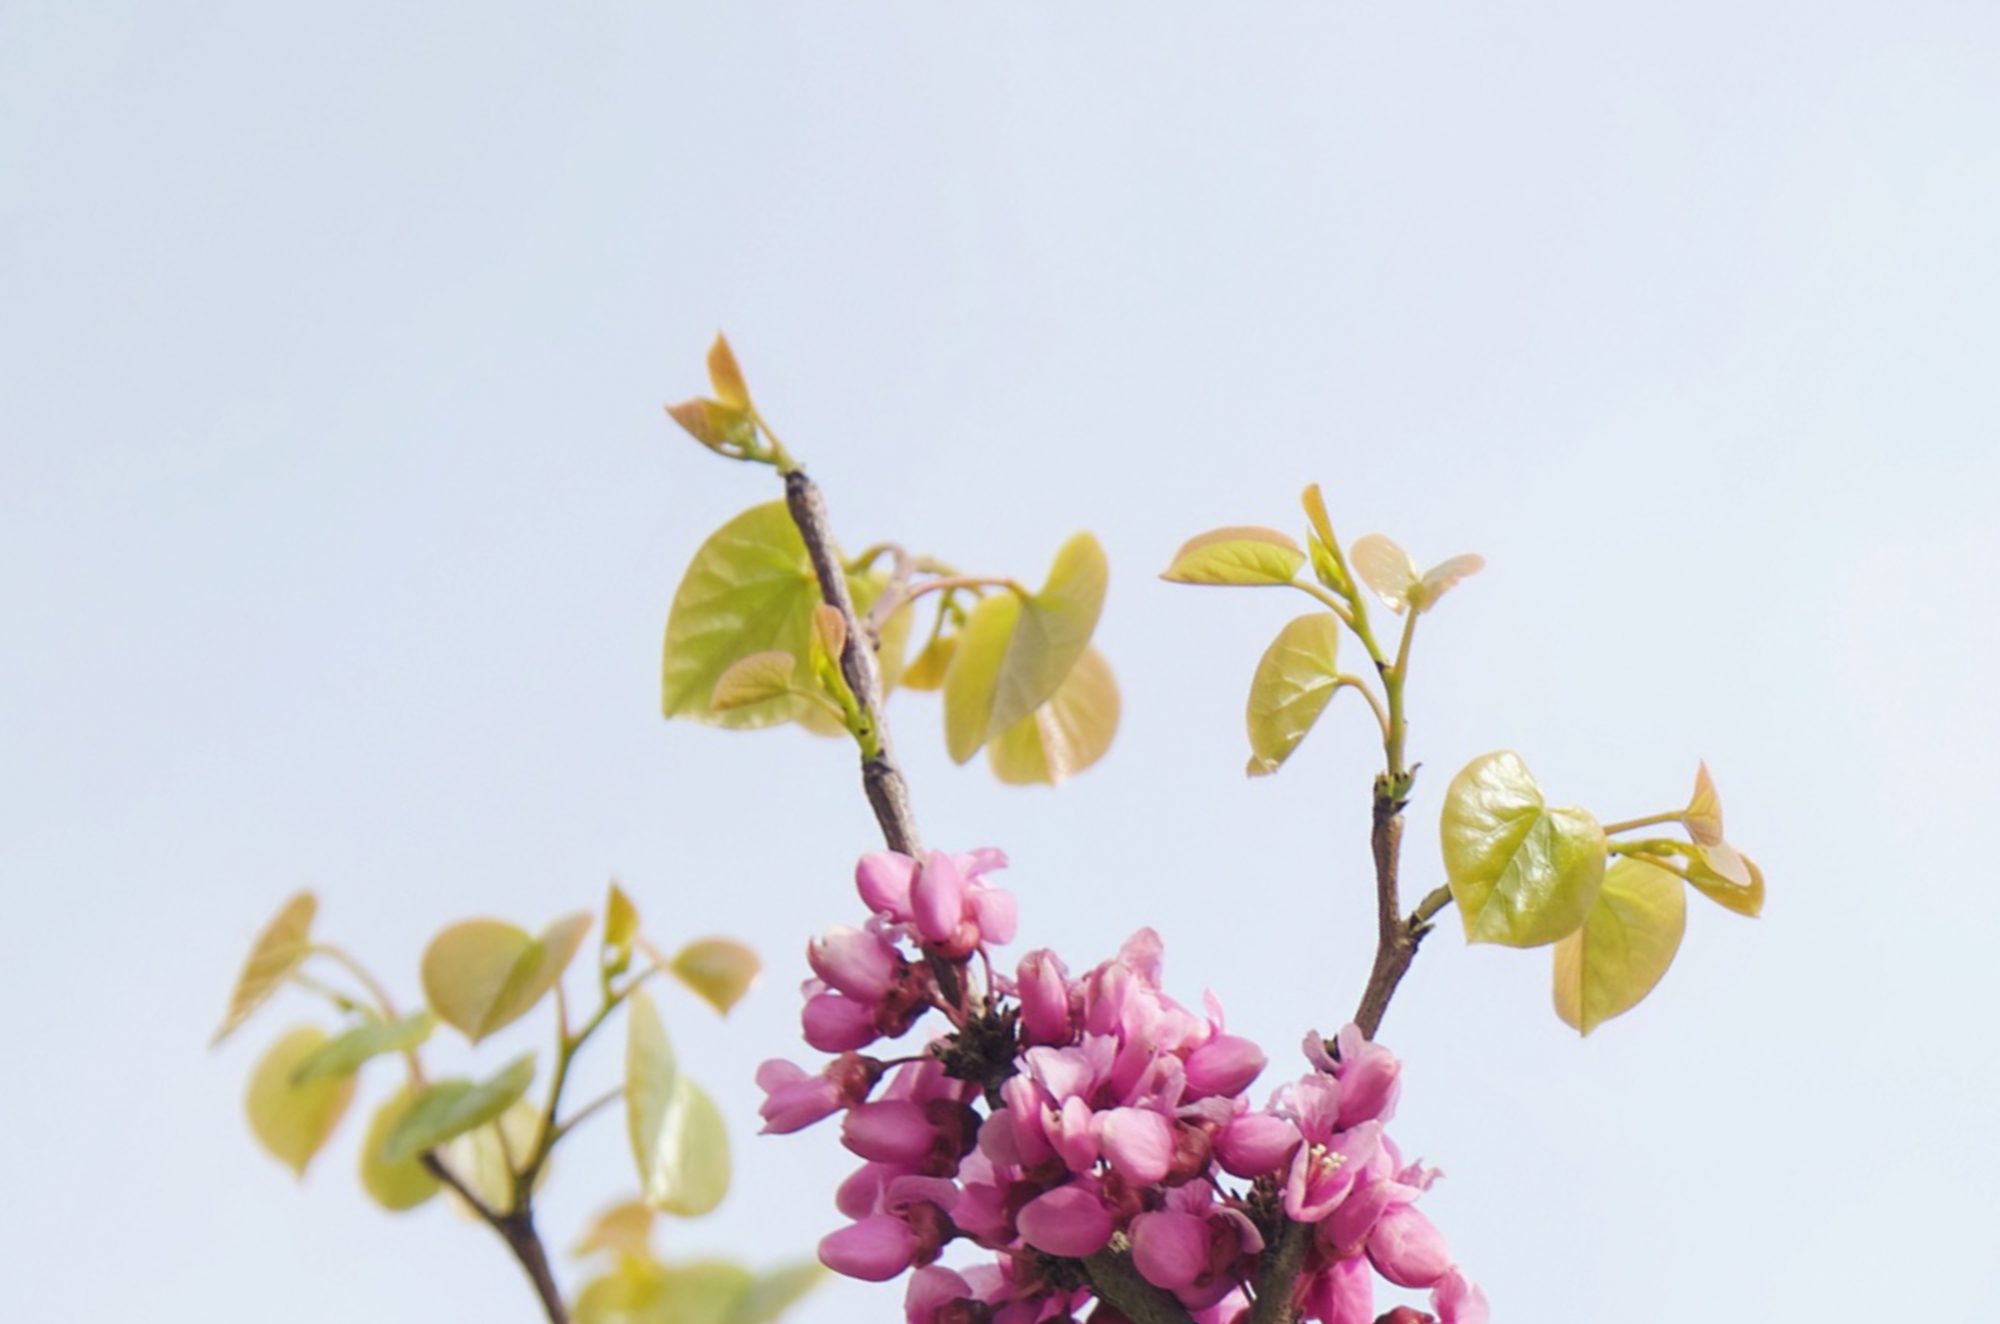
As the saying goes, “An apple a day, keeps the doctor away”. My dad kept telling me about the benefits of apples tirelessly when I was a little girl. Apple is not my favorite fruit, however, now it is more than a fruit, and it has become a necessity of my life.

For the first mid-range shot, I put the apple in the center and took the photo from the top down. I did take photos of the apple from various angles, and I decided to choose the photo above because it looks like the apple is floating in the air or falling down.  

When I was in primary school, my mom put an apple in my bag every morning I left for school. Every day, there was an apple lying on my desk, listening to the lessons and watching me solving questions, just like deskmate. And it also became a recognizable symbol of my seat in my class. Hence, here comes the second image. In this image, it is obvious to see that I  am sitting a little bit far from the apple to show that I didn’t really like eating apples.
This photo was taken following the rule of thirds.

Now, apple is one of my daily necessity. In the third image, I cradled apple in hands and placed it at around the same position of my heart. I was trying to use this close-up shot and focus on the apple to show my love for parents, I want them to know that I cherish everything I have, and I am able to take care of myself even though without them by my side. On the other hand, it shows that I wanna step out my comfort zone and I am learning to accept the sour and face the challenges in my life.

The group of the photos taken above was inspired by Rinko Kawauchi, a photographer from Japan. Kawauchi as a photographer has developed the skill to create poetic moments and purity from everyday objects. I was also trying to achieve what she does in her images to create a beautiful picture out of an ordinary object, with a light tone and shallow depth of field.


Task 2: My World

Library is a place that is significant to me. It is a place where I go with my friends after class, and with my mom on weekends. Although I spent most of my leisure time in the library during my childhood, I am not a bookworm. But my mom is, she likes reading and she dreamt of becoming a writer when she was young. Personally, I really enjoy staying at a place like a library where has extra-high ceiling and huge windows on the walls. And I like such a quiet place and everybody there seems like they are immersed in their own world. It provides a kind of invisible power for me, which makes me concentrate on my own work and be more efficient,  therefore I prefer to go to the library to study.

In the first photo, I tried to make things in symmetry.

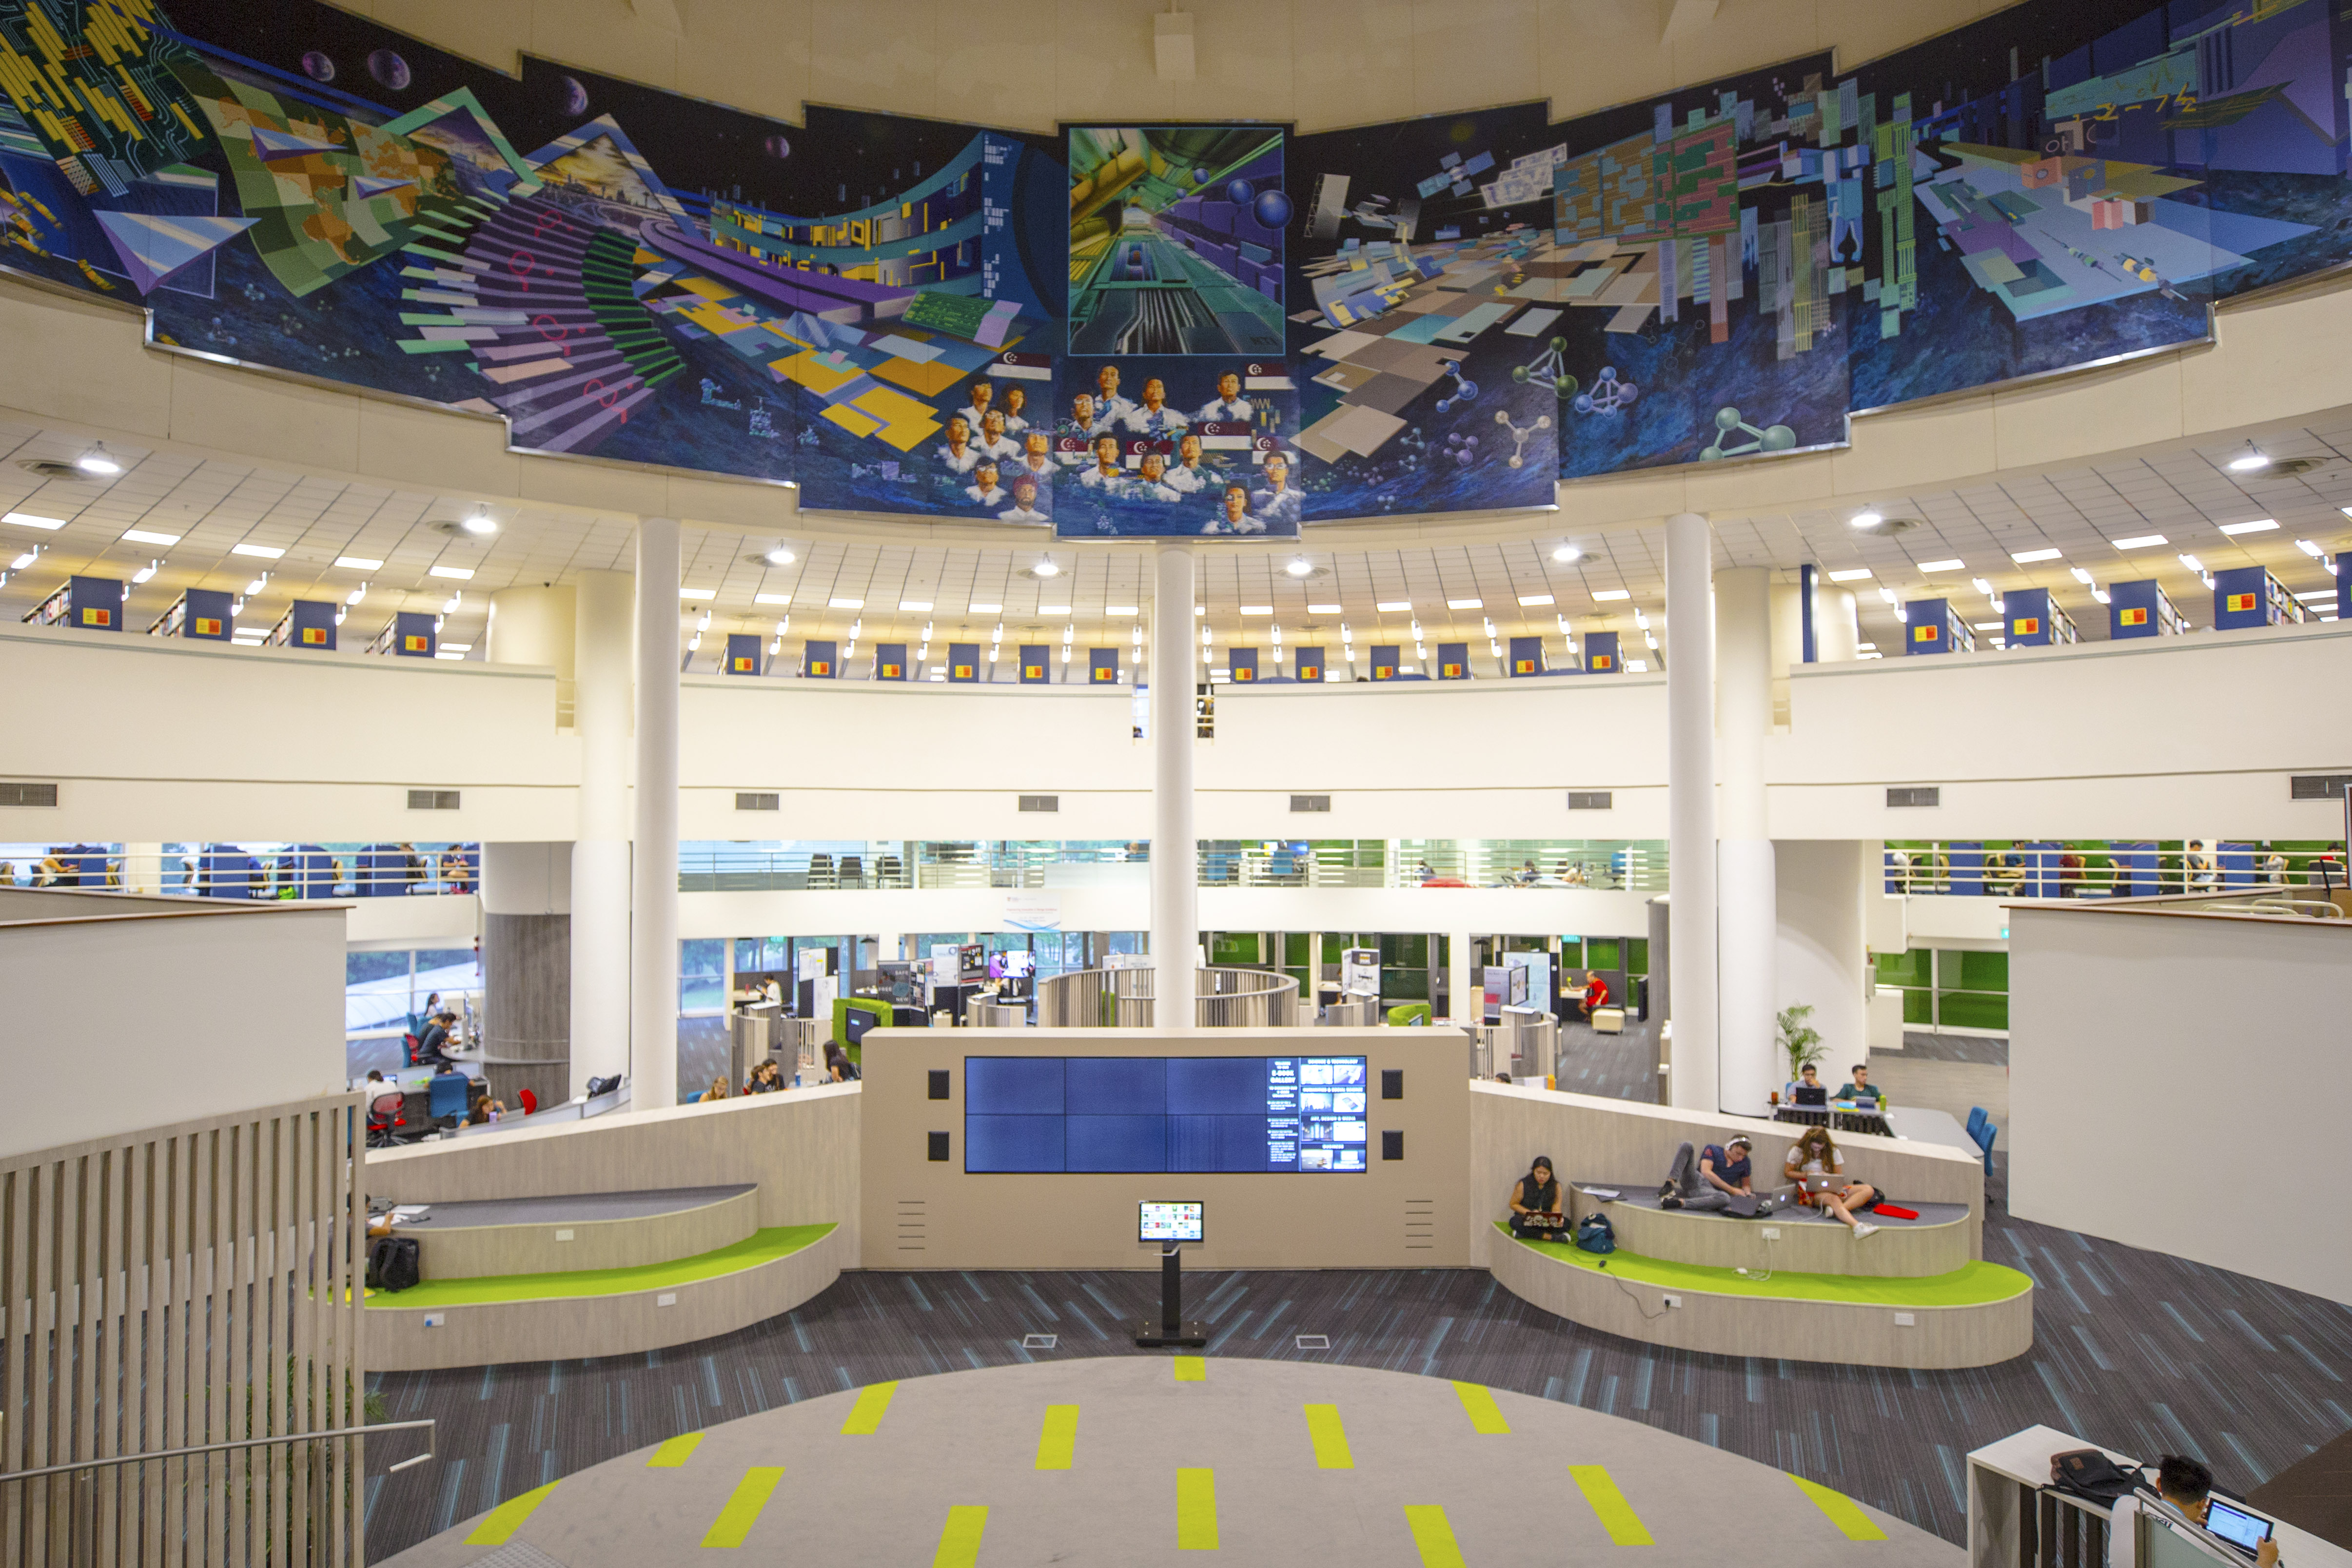
One point perspective shot to show how organized and tidy the library is. All the bookshelves arranged in lines, and all the books are neatly laid out.

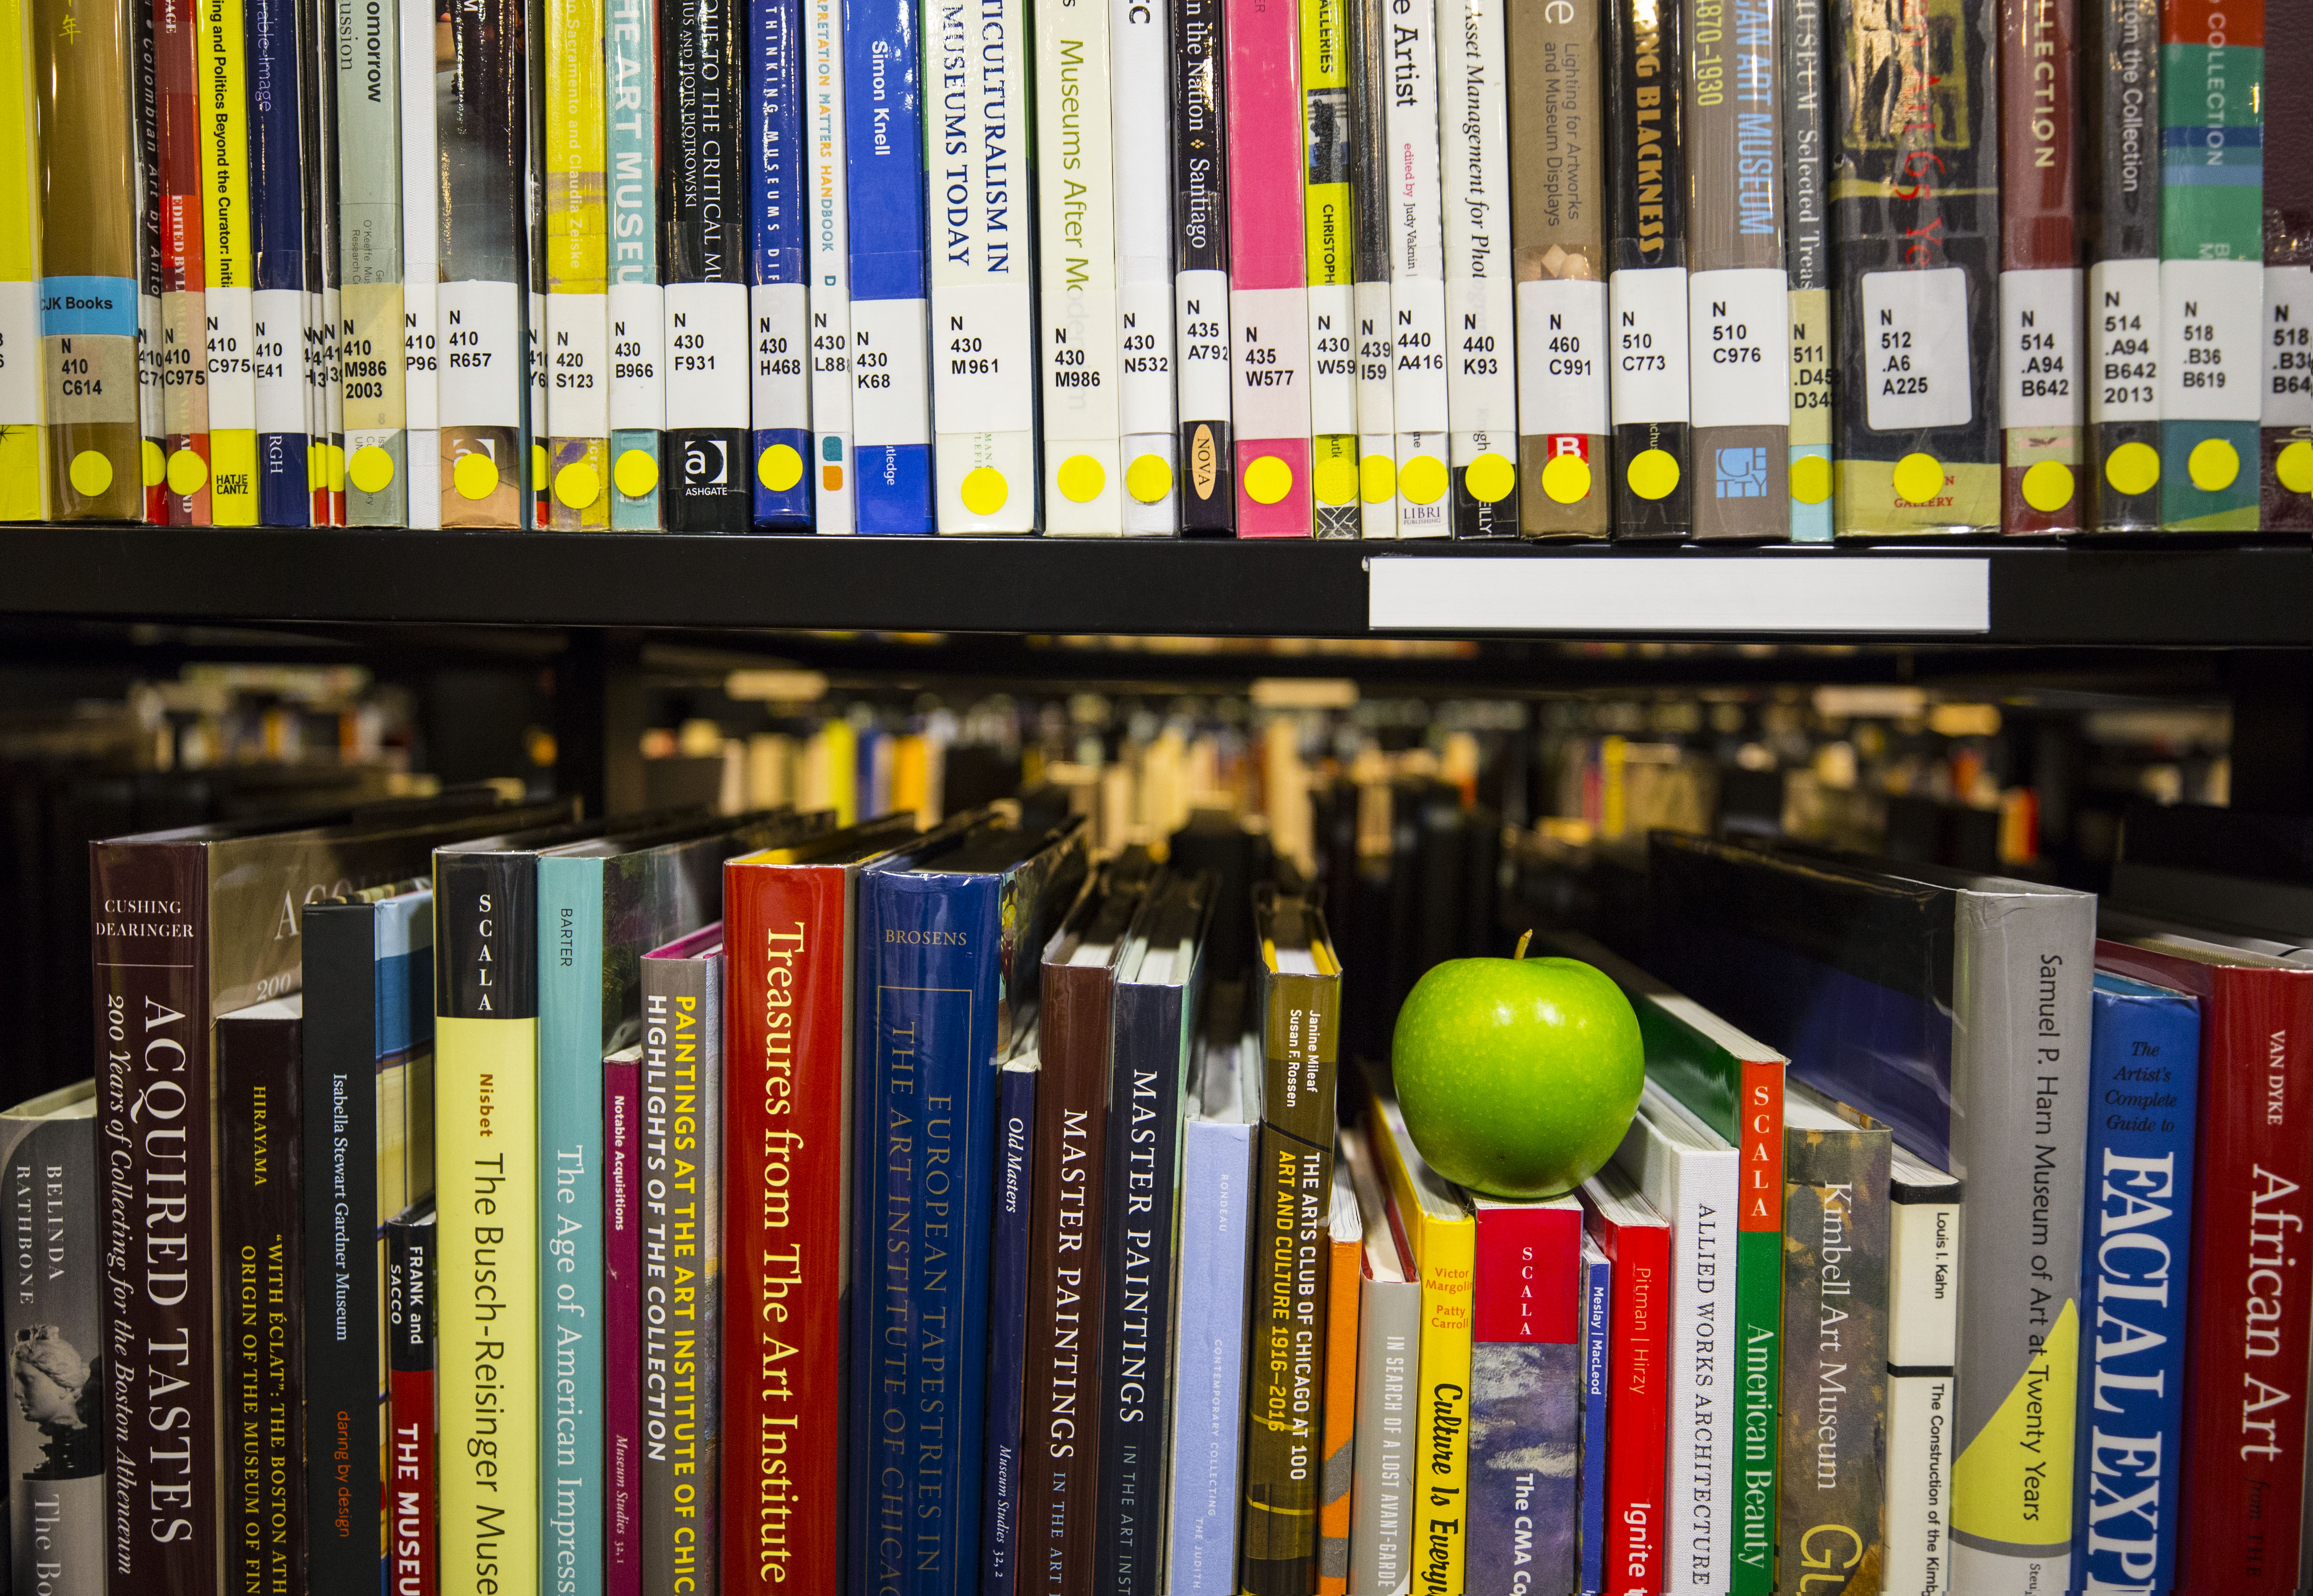
The third photo was taken following the rule of thirds. I use the green apple to represent myself in the library. The photo was taken in ADM library to show that I am currently a student here.

For the three photos above, I tried to make the library look like a ‘wonderland’ by increasing the saturation and contrast of the image to show that how interesting and magical the world is. As reading is a way for traveling as well, we can see everything and go anywhere we want in our mind through a book. Therefore, the library is a place for me to create my own world.

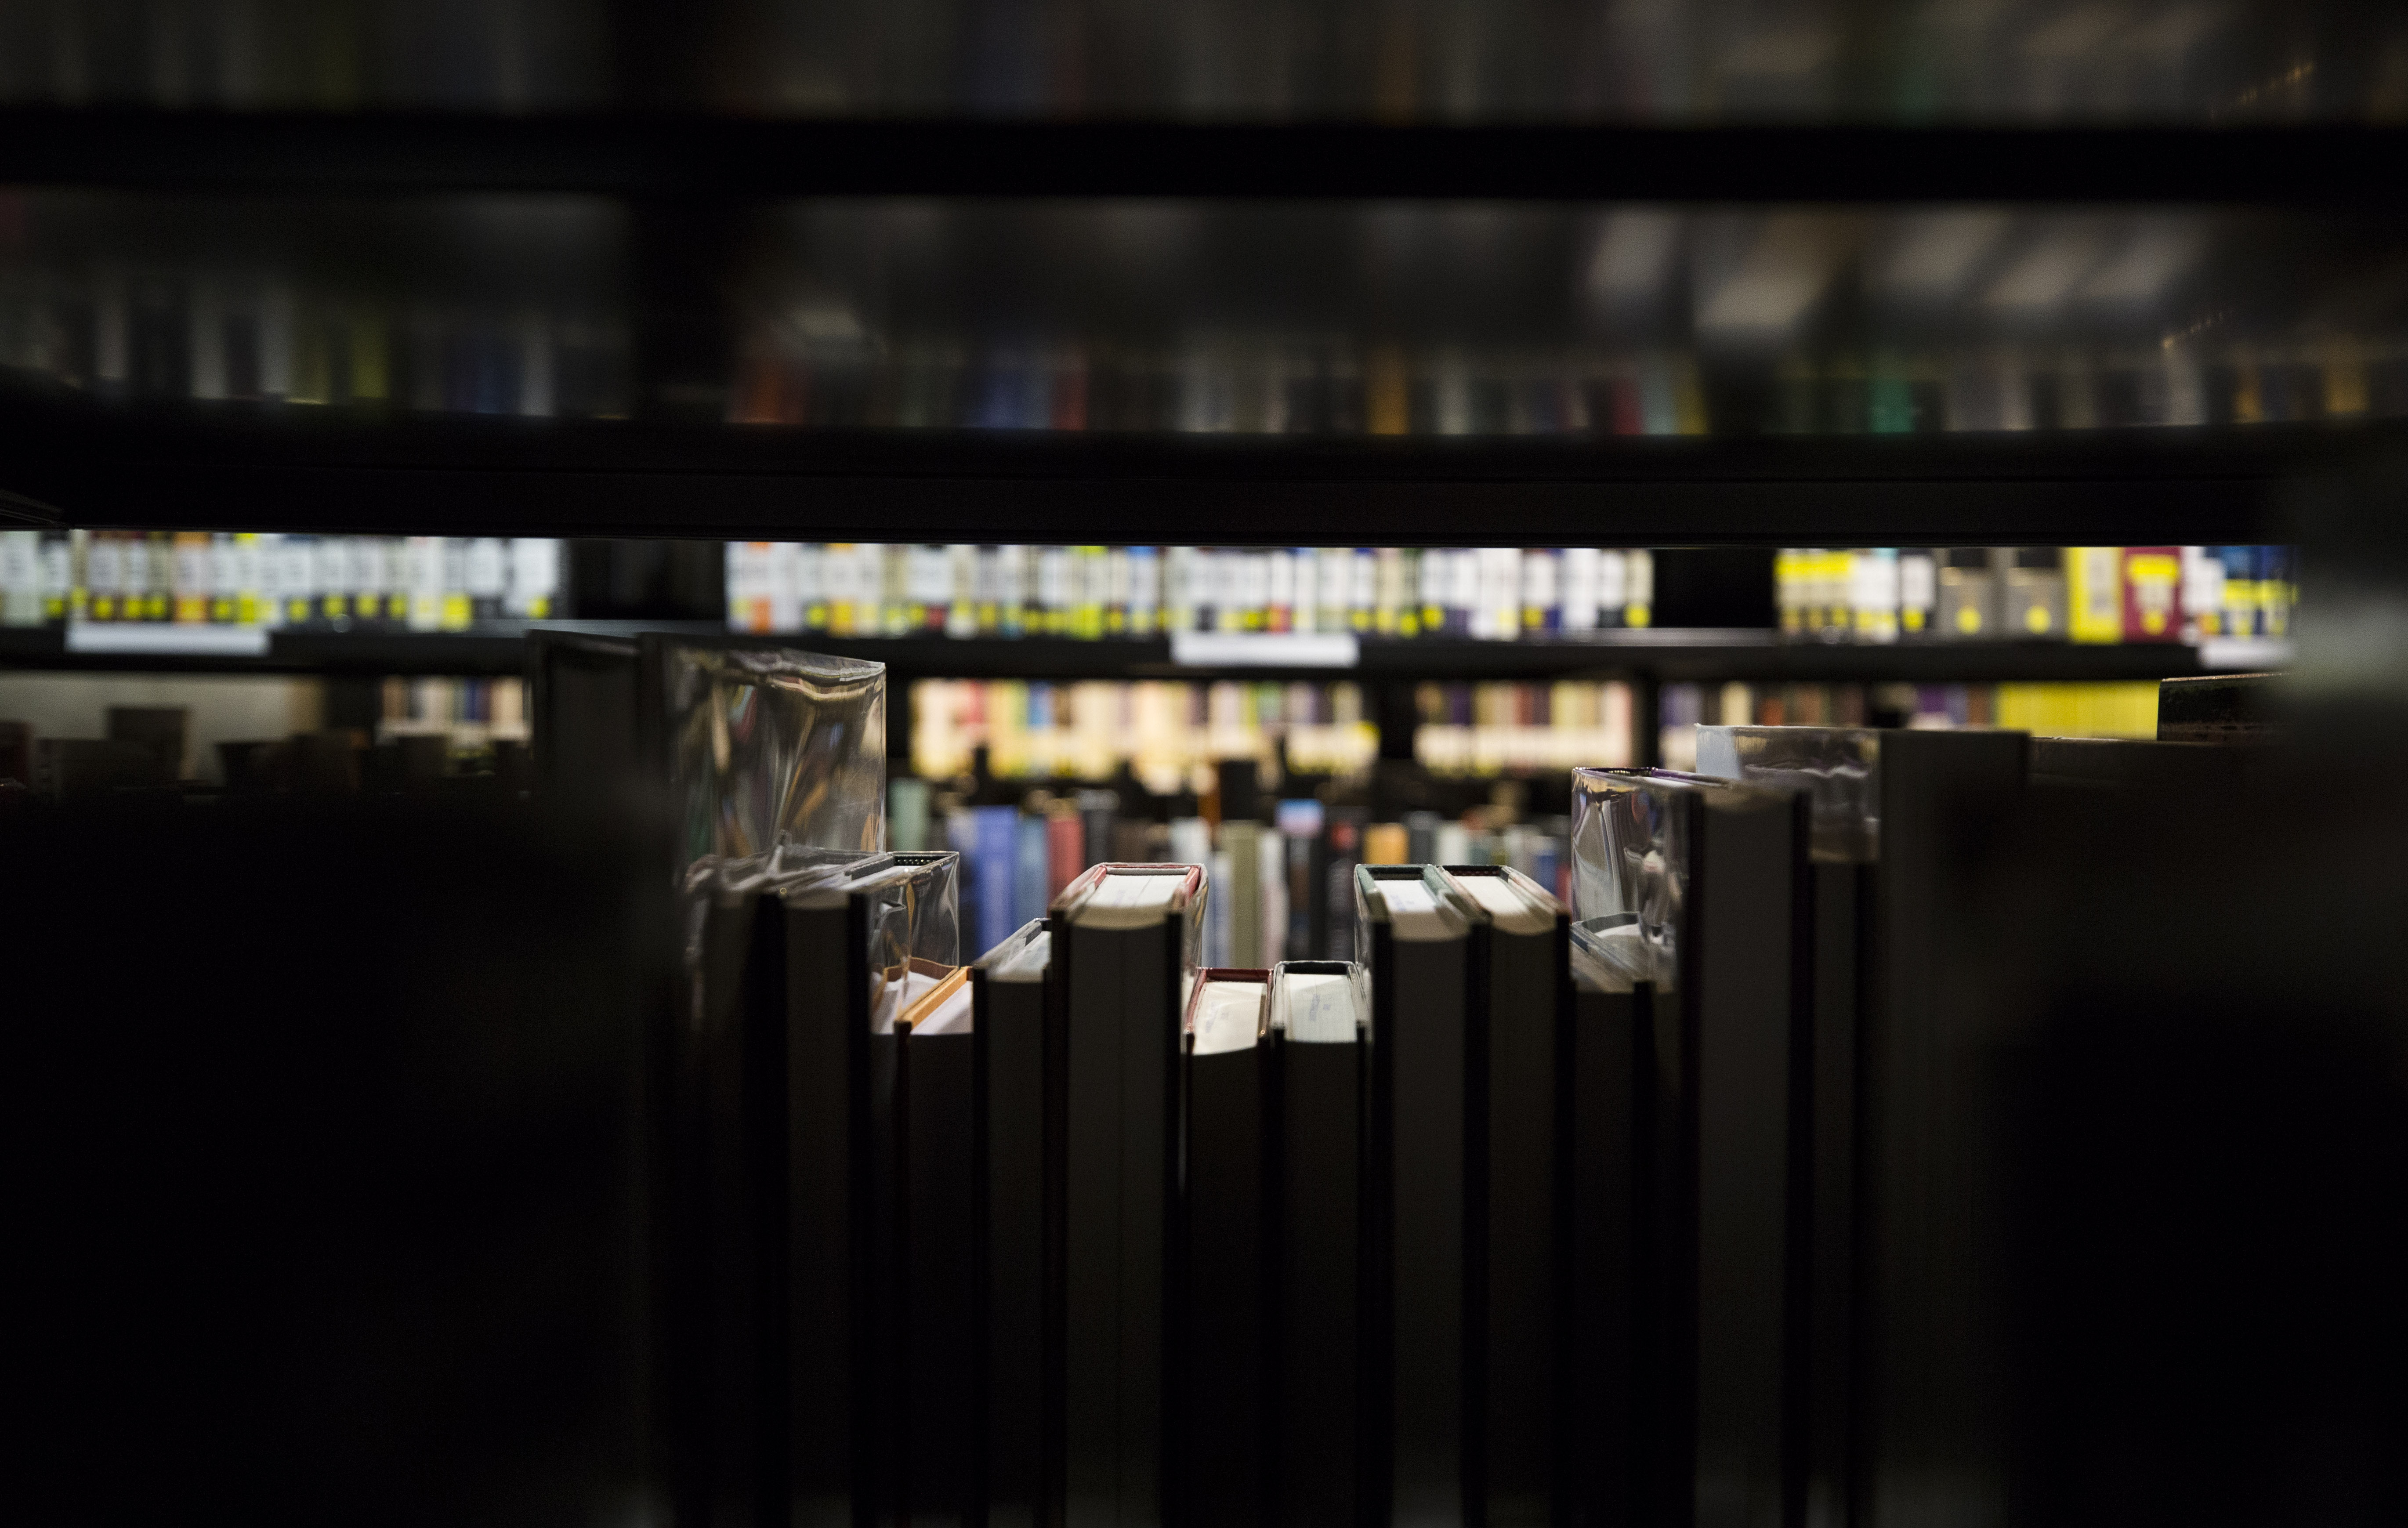
The last photo was taken following the rule of thirds and using the contrast of lighting to show that books can guide us and light up our lives. Sometimes, I feel that reading a book likes we are passing through a tunnel, probably we cannot see and understand anything at first, it is a process of exploration and discovery. In the end, we will see the light and the fascinating world out there.


2D Analysis

2D Analysis of a key chain with a little monkey.

The interesting 3D object I brought for the first 3D lesson was a keychain with a little monkey. From the picture, we can see that the proportion of the length of the chain is about 1:1 to the height of the monkey. The little red monkey is really eye-catching, as it creates a weight down there. For the chain part, it creates a negative balance.

Now, let’s take a close look of the monkey. Here are 3 views of the little monkey.

Front view

Picture shown is the front view of the monkey. We can see that he is in symmetry completely. (except the black spot on its left foot…)

For the colour of the monkey, vibrant red as the main colour which attracts our eyes first is the dominant, and the light yellow of its skin acts as the subdominant. Black is the subordinate, although it is quite less which is only applied for eyes and nose, it can be seen clearly as well from the light colour face. I think it is also a pairing of contrasting colours.

A character with bigger head, shorter and smaller arms and legs is definitely very cute and interesting. Comparing sizes of the head of the monkey with its ears, arms and legs, it shows the pairing of contrasting volumes. And the head of the monkey is almost half the size of its whole body, which makes the proportion of the head to the lower body part is about 1:1.

Side view

Different from other views, the side view of the monkey is asymmetrical. The interesting point of the side view is that its ear, arm and leg are all placed along the principle axis.

Top view

Same as the front view, everything is symmetrical. Ears and nose of the monkey are on the principle axes and, it is obvious to see that the nose and ears create an isosceles triangle over there.


Another interesting point is that all the three different colours of the monkey can be seen at the same time from the views above.

Mark making research

Mark making research

Mark making is a term used to describe the different lines, patterns, and textures we create in a piece of art.  It applies to any art material on any surfaces and with any tools. Mark making is a fundamental element in making any type of art and it is how we begin to express emotion, movement, and other concepts we wish to convey in an artwork. It can be structured or uncontrolled. Most artists work with various kinds of marks in every painting, but there are also some styles just with one type of mark. It is easy to think of a mark as a building block for whatever we choose to create:

  • A single mark creates a dot.
  • An extended mark becomes a line.
  • A cluster of marks become a shape.
  • A series of repetitive marks become a pattern.

Mark making artists and techniques

https://www.thoughtco.com/jackson-pollock-biography-4141240

Jackson Pollock, an influential Action Painter. He is one of the leaders of the avant-garde Abstract Expressionist movement, and is considered as one of America’s greatest artists. He became particularly well-known for drip-painting, a radical new technique that he developed. But his painting materials and methods are not limited to brushes, and instead dripping, splattering, and pouring house paint from the can, also using sticks, knives, and trowels.

http://www.azquotes.com/author/11762-Jackson_Pollock

Many of Pollock’s paintings also display the “all-over” method of painting. In these paintings, there are no clear focal points, and everything is equally weighted. For Pollock, it was more about the rhythm and repetition of movement, gesture, and mark within the vastness of space as he conveyed primal emotion into abstract painting.

Convergence – https://www.jackson-pollock.org/convergence.jsp

There are some mark making ideas that I am going to experiment with my own tools. Such as broken lines, interlocking lines, loops & scribbles, jagged zig zags, etc. And I hope that I can explore some more interesting mark making ideas during the experimental process.

https://www.craftsy.com/blog/2016/07/mark-making-ideas/


Bubble print/Marbling Techniques

There is an another interesting technique of mark making which is by blowing down a straw into a bowl of ink mixed with washing up liquid creates a number of ink bubbles. Placing paper in contact with the bubbles will burst them transferring a perfect, mirror image of the bubble structure. Similar technique and outcome using marbling inks.

https://meganaspery.wordpress.com/2012/03/31/mark-making-techniques/
Paper Marbling – https://i.ytimg.com/vi/T3qcCoJ70XY/maxresdefault.jpg


Painting with candle smoke

Painting with smoke or fumage is a technique by using the smoke from a lit candle to create images on canvas or a piece of paper. The technique is thought to have been invented and popularised by Austrian-Mexican artist Wolfgang Paalen. This technique can be used alone or combine with other traditional painting techniques to add more form and meaning to the artworks. And the effects can be stunning and interesting.

Candle smoke painting – https://feltmagnet.com/painting/How-to-Paint-with-Candle-Smoke
Monoprint techniques

A basic overview of monoprinting is that a monoprint is a one-off print technique in which an image, produced on a plate, transferred to paper. The printing surface can be any type which is flat, smooth, and non-absorbent. For example, plexiglass or thin sheets of metal such as cooper or zinc is a suitable material. The beauty of monoprinting lies in its spontaneity and its allowance for combinations of printmaking, painting and drawing media.

According to the research online, there are 3 main monoprint techniques:

  • The additive or light-field method, in which the image is painted by adding pigment onto the plate. so you can create your image directly on a clean plate.
  • The subtractive or dark-field method where the entire plate is covered with a thin layer of pigment using a roller, which the artist then works out his image by selectively removing or wiping some of the pigment with brushes, sponges, sticks, or other tools. Paper is then directly placed over the plate.
  • The third method is a combination of the two.
http://www.monoprints.com/monoprints.php


L: Basic etching, printed before the additional ink was applied with brushes.

R: Final print
Rapsodia, 2001
© Colleen Corradi


Automatic techniques

Automatic technique is the process of creating art without any rational thinking, which also can be described as “expressing the subconscious.” In automatic drawing or painting, the hand is allowed to move ‘randomly’ across the paper. This unique method of art making has been largely used not only by surrealists, but by other modern and contemporary creators as well.

Automatic Drawing by André Masson https://www.moma.org/learn/moma_learning/andre-masson-automatic-drawing

I hope that I can enjoy and learn through the experimental process. Create some interesting mark.


Project 1-Mark making tools

Project 1 Process

Here are some tools that  I am going to use for mark making.

-Leaf

https://www.pexels.com/photo/green-leaf-plant-212323/

-Rock

https://www.pexels.com/photo/abstract-black-and-white-close-up-construction-237950/