In his lecture, Automated Utopia, Ong Kian Peng talked about Artificial Intelligence (AI), utopia and the combination of the two that results in a technological utopian society. He showed us many examples of artworks and films that investigates the relationship between humans and AI, and also prompted us to think about our (humans and AI’s) role in this future technological utopian society.
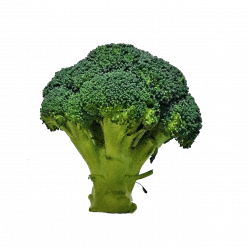
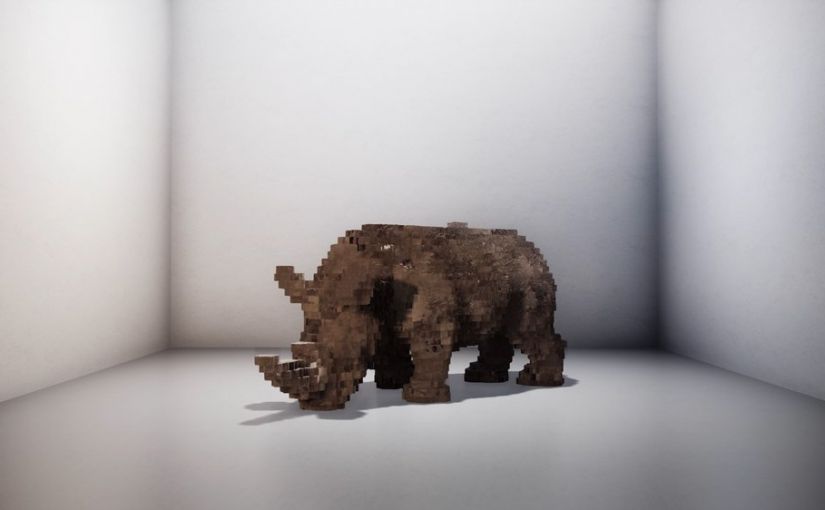
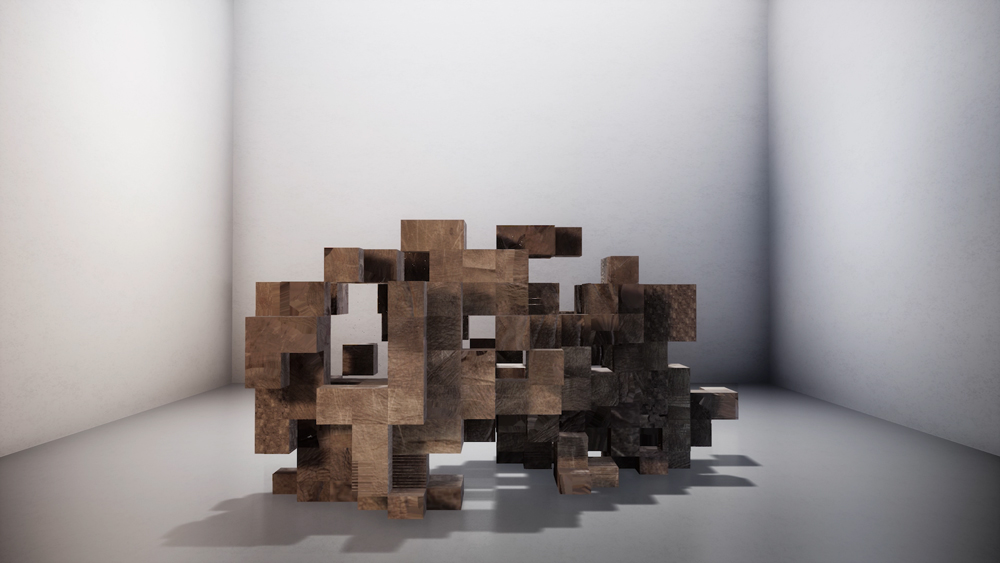
I think one of the most memorable examples was The Substitute by Alexandra Daisy Ginsberg. The installation video is set in a white room and starts off with what seemed like multiple voxels (3D pixels) moving around randomly in the centre of the room. As these voxels move, we see that it resembles a creature of some sort and this is accompanied by sounds that suggest movement and sounds made by this creature. The creature gradually becomes less voxelated, and we get to see that it is actually a rhinoceros. This realistic looking rhinoceros moves around in the white room for almost a minute before vanishing.
The Substitute brings the last male northern white rhinoceros, Sudan, back to life digitally after his species was “lost to human desire for the imagined life-enhancing properties of its horn”. It was made in response to scientists trying to artificially recreate the subspecies of northern white rhinoceros through biotechnology (https://www.nationalgeographic.com/animals/2018/07/white-rhinoceroses-animals-captive-breeding/). With this work, Ginsberg explores the paradox that humans are “[preoccupied] with creating new life forms, while neglecting existing ones”. She questions if we would actually protect this species of rhinoceros if we manage to recreate it, or would it go extinct once again due to humans’ greed. The rhinoceros in the white room reminds us that while it looks real, moves and sounds like an actual rhinoceros, it lacks natural context, just like a rhinoceros created in the lab. And like how the digitally recreated rhinoceros vanishes in the end, the lab-created rhinoceros might just go extinct too.
Even though it discourages the recreation of life forms through biotechnology or digital means, The Substitute prompted me to think about what a world full of digitalised beings would be like, and would this be realised in the future. Imagine waking up to your digital pet dog that will never die, visiting a digital zoo where there is no need for enclosures, or seeing extinct animals like the dodo bird. That sounds like an automated utopia, doesn’t it? In that world, the role of AI would be to capture images, videos and sounds of these animals to learn about them. Through machine learning, the AI will then be able to recreate each of these animals digitally and generate the environment that they live in. What would be our role then, if we live in a digitalised artificial world? To help with the collection of data from the animals or to help preserve these animals so that we can have the data in the first place? It might be cool to think that we can digitally recreate these animals, but like what Ginsberg tries to convey through her work, we should be thinking about preserving the existing life forms rather than focusing on creating new ones.
Last semester, I did the reading assignment on the book Information Arts: Intersections of Art, Science and, Technology by Stephen Wilson. There were a lot of interesting sections in the book but I only managed to cover one previously, so I have decided to do the reading assignment on another section (Robotics and Kinetics) of the book this time.
The section starts off with the history and definition of robots followed by the research done on them and some examples. According to the book, the term ‘robot’ was originally coined by Karel Capek in 1917 and it came from the Czech word ‘robota’, which means obligatory work or servitude. Capek’s vision of a robot was an artificial humanoid machine created in great numbers for a source of cheap labour but robots nowadays have strayed away from its original definition. To me, robots are cool machines programmed to do a variety of things and with artificial intelligence incorporated into them, it seems almost as if they are invincible.
Before robots, there were simple machines that were made to do repetitive actions like automata.
But with technological advancements, we now have robots like Sophia and many other lifelike humanoids.
In this section of the book, the author talks about the areas of research in robots that researchers were focusing on. Even though the information might be a little outdated as this was written back in 2002, I believe these areas of research were what led to the birth of smarter and more lifelike robots like Sophia. These areas of research were: Vision, Sophisticated Motion, Autonomy, Top-Down vs. Bottom-Up Subsumption Architectures, Social Communication between Robots, and Humanoid Robots. I was interested in the social communication between robots so I looked up the examples given in the book.
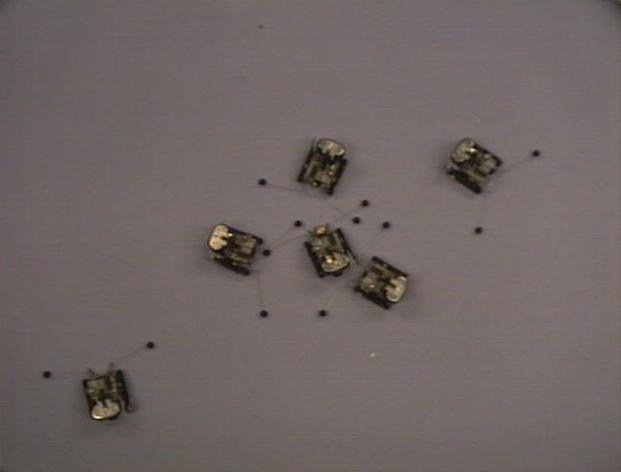
MIT’s The Ants: A Community of Microrobots
James McLurkin started with the goal of creating a robot community and he was inspired by ant colonies. By April 1995, James McLurkin and his colleagues in MIT had created 6 robot ants that pushed the limits of microrobotics as many sensors and actuators were incorporated into their small package. These robot ants contain IR (infra red) emitters and sensors, allowing them to communicate with one another like actual ants.
They can be programmed in such a way that when 1 robot ant finds ‘food’, they will emit IR signals to surrounding ants and these surrounding ants will move towards the first ant while passing down the message by emitting their own IR signals.
The ants can also be programmed to play games like tag where 1 of them starts off as ‘it’ and tries to seek and bump into another ant, turning them into ‘it’ instead. In the video above, you can see the robot ants taking turns being it after bumping into each other.
Other than tag, these robot ants can also play follow the leader and manhunt.
University of Reading’s 7 Dwarf Robots
The video above shows an example of flocking/follow the leader seen in (five out of) seven dwarf robots. The seven dwarf robots were created by Kevin Warwick and his team between 1995 to 1999 and they can communicate through IR signals. These robots can also learn to move around without bumping into objects through reinforcement learning.
In conclusion, I think it’s interesting to see how machines have progressed from a simple hand-cranked automata to microrobots with multiple in-built sensors and now self-learning AI humanoids. With more research and development, we might be able to see robots that fully integrated into our society one day! But for now, I could use these information that I’ve learnt about robots and incorporate it in my projects or even make my own robot ant.
When I first started on this project, I was quite worried as I had no idea what I should do and I am also quite bad at visual communication. I started out with a sketch of the layout of the zine.
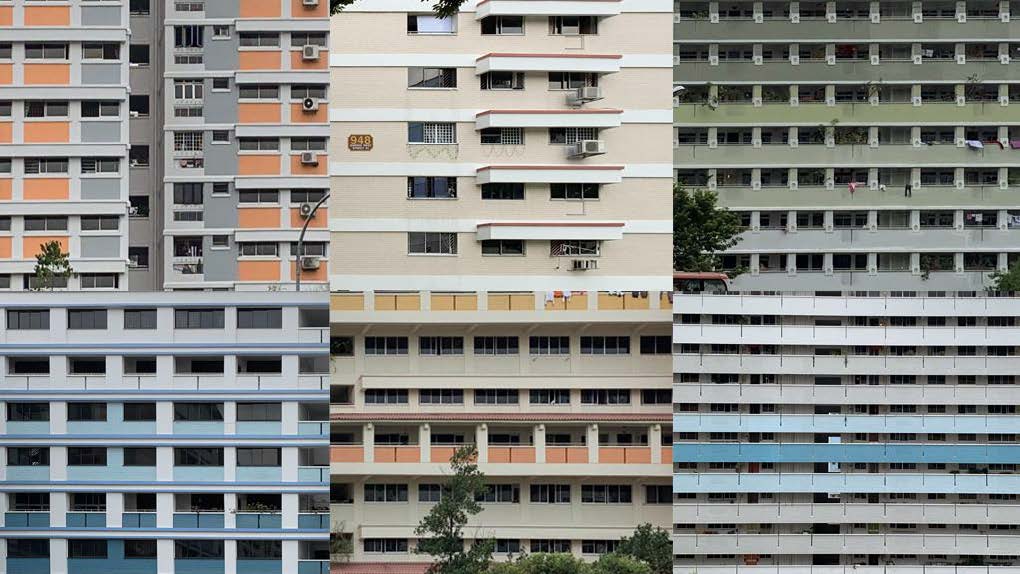
I really like this photo that I took so I wanted it to be on the cover page.
I received feedback that it fitted the brief but didn’t really show my own interpretation of my neighbourhood. I tried looking on pinterest to see what else I could attempt and also to get inspiration for they layout.
I liked those with simple/minimalistic layouts so I decided to try them and also changed my cover to fit the theme. I also liked the engraved words on the nanyang community club rock so I used that as well.
I didn’t really like the layout after I tried so I didn’t continue with the 3rd spread. Instead, I went back to the original cover page and redrew it in illustrator. I liked the vector drawing so I did it for another photo of a HDB that I took.
After the second consultation, I learnt that the layout should contain images of different sizes — dominant, subdominant, subordinate. Shirley also helped me with the layout by showing me how to do it. The text and images should follow the grid lines. As there was a bird on the cover page, I thought I could make it into a story of the bird/the perspective of the bird.
I felt like the cover was still quite plain so I added textures to it and changed the title. I also change my layout of the spreads so that they follow the grid lines. I was still unsure about my 3rd spread at this point.
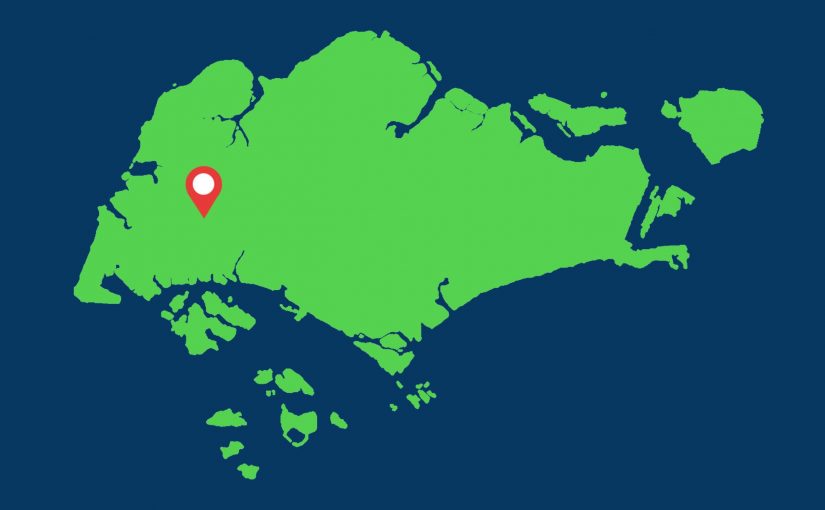
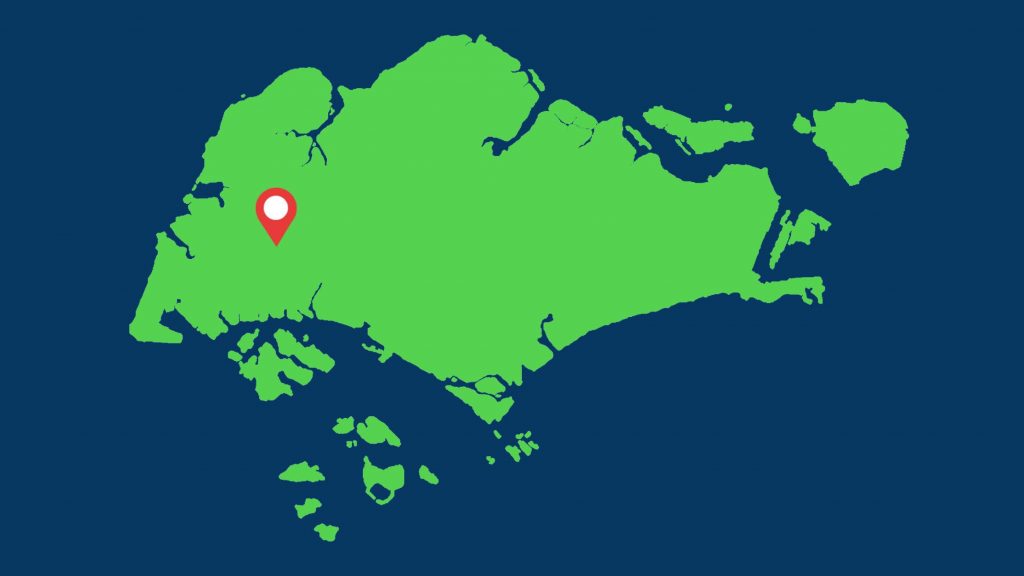
After receiving feedback that I should add the nanyang rock to the back page, I decided to make it such that the map and artist contact are “engraved” in the rock. I also added ‘Jurong West’ in the title on the front page
In the end, I was unsatisfied with the layout of my spread and it didn’t really fit the mood of the cover page so I decided to redo all of them. I wanted the spreads to fit the “chinese” them like the front and back cover so I tried to do some research on chinese paintings. I found some artworks that were really interesting and I felt that I could use that idea for my spreads.
I tried the idea using the HDB vector illustration that I did. I used the font from the front cover but It looked weird so I changed the font to something that looked like calligraphy writing. I tried the change the colours of the drop shadows of the buildings to make it more vibrant but it didn’t fit the mood so I changed it back.
I also added a tree, a bird (the idea of making this the perspective of the bird) and a stamp to make it resemble a chinese painting. The tree was painted in illustrator an the bird was done using image trace. The stamp was also made using illustrator.
For the 2nd and 3rd spread, I tried to replicate the same style but I didn’t want all of them to be HDB buildings since it could be quite boring. For the second spread, I tried mimicking other simpler chinese paintings.
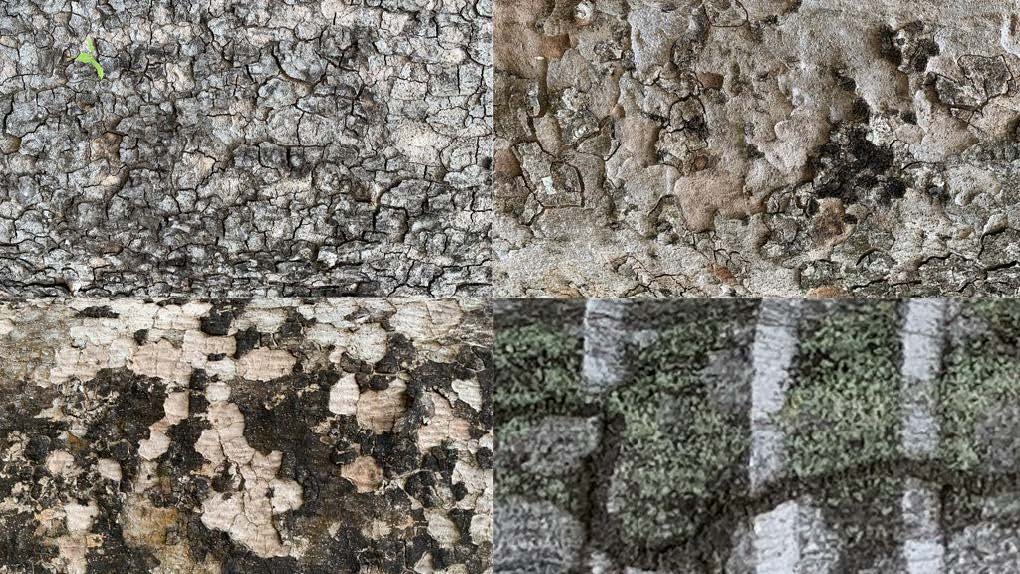
Using the textures in my neighbourhood as the background, I added the the bird, tree and stamp again to follow the theme. I added leaves on the branch to make it less plain and a fruit so it ties in with the title. The layout of the textures follow the grid lines (what I learnt from the previous consultations).
For the last spread, I decided to use patterns to form the mountains and the leaves of the tree. Like the first spread, I varied the sizes and opacity of the pattern to show depth and replicated the look of mountains in a chinese painting. I added a feather instead of a bird to give off a playful feeling, which fits the title.
For the back cover, the background colour was to similar to the rock so I changed it into the pattern used on the third spread. I also changed the colour out the words and made it look more like it was engraved on the rock.
Through this project, I really learnt a lot about design and also how to use photoshop, illustrator and indesign. (It was the first time I used illustrator for all my illustrations.) I also experimented a lot and was really satisfied with my final work. I was very stressed about the project at first but I enjoyed it in the end when I started playing with my layout instead of following everything strictly. I think the cover page is very important as it sets the tone for the zine and I only came up with my final idea because of the cover page.
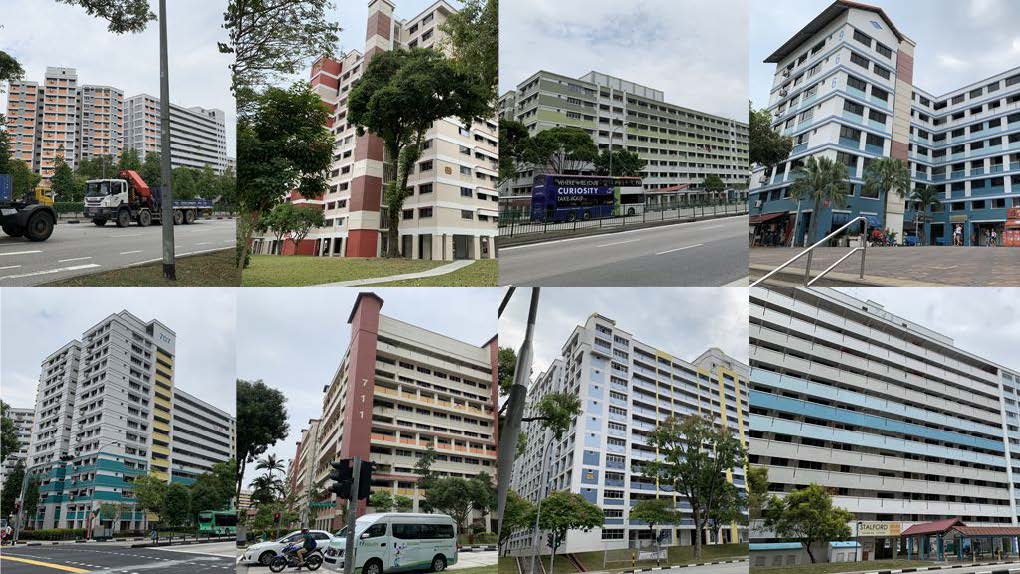
As my neighbourhood is in Jurong West and quite near to NTU, I decided to walk home from NTU to take photos for the project. I took photos of HDBs, flowers and textures as I still wasn’t sure what I wanted to do for the zine.
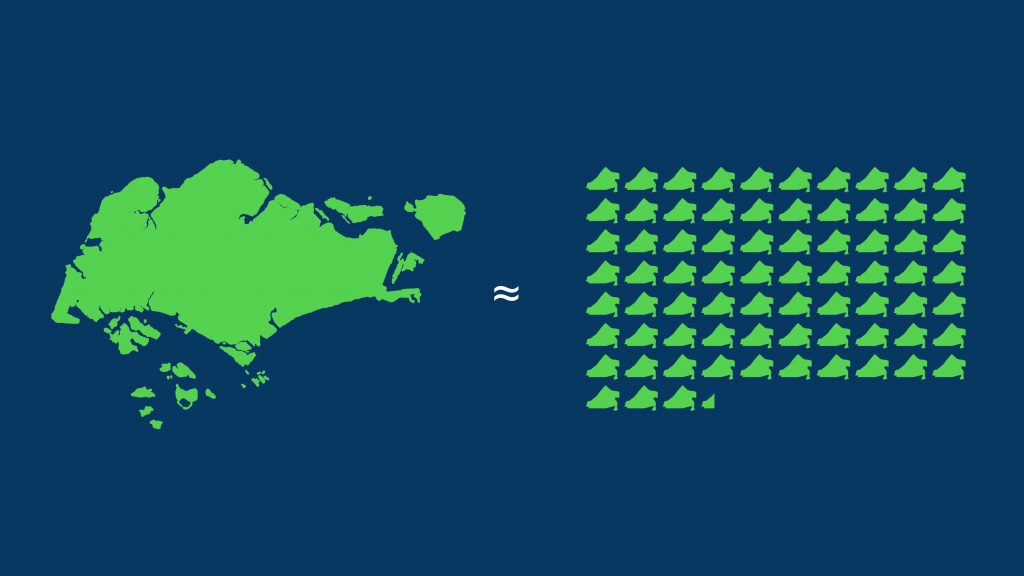
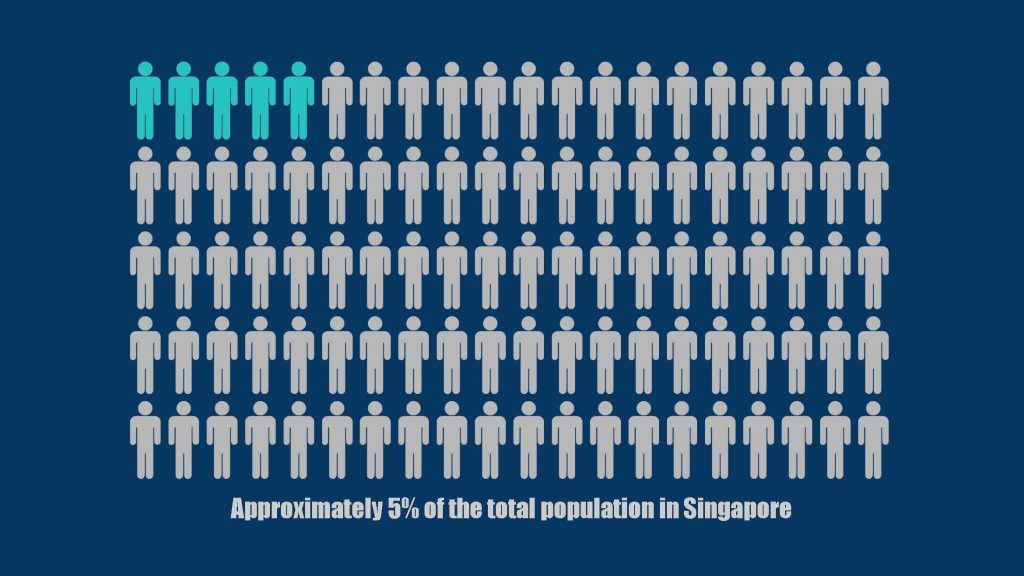
I also went online to search for some information about my neighbourhood and tried to make some icons for the infographic presentation.
I was quite worried when I heard we had to weave again for this assignment as I had trouble weaving for assignment 2A. For part 1, we had to choose a minimum of 2 verbs and try to express them using the weave and another material with a larger surface area in 4 study models. I thought that ‘cradle’ was the easiest so I thought of two ideas using that — a phone cover and bottle holder.
As I was trying to think of ideas for another verb, I thought of including ‘grab’ and ‘slide’ in the phone cover.
After working on the phone cover using rattan, I realised it didn’t work the way I wanted as the rattan was too thick. The ‘slide’ didn’t work and the ends didn’t close up well. In the end, I had the cover to ends with cardboard and the grabbing part was permanent.
As I spent too much time to make the phone cover, I decided not to do the bottle holder but something simpler next. I tried making ‘bind’ using ice cream sticks and string in a way that it can flip continuously. IMG_1539
As I was thinking of what the do for the 3rd study model, Wei Lin suggested that I could replace the sliding lid of a box that I made with a weaved pattern to make ‘slide’. I tried it out and it was quite nice so I replicated it and made a larger box to fit the 10cm requirement. The box was made out of ice cream sticks and satay sticks + weaved cardboard strips.
After consultation, I was told to try out ‘puncture’. My idea of ‘puncture’ would be something sharp emerging from the weave pattern so I made a “sharp” structure using cardboard.
Drawings for study object:
Part 2 – Vessel to be Held, Worn or Carried
For this project, I wanted to make something that I can actually use so I decided on making a bag. My original idea was a squarish 3 in 1 bag that can be used as a bagpack, sling bag and hand-carried bag. The verbs I wanted to include were bind (for the lid) and slide (for the handle).
However, I thought that a 25cm x 22.5cm x 6cm bag couldn’t hold a lot of things so I changed it to 32cm x 24cm x 10cm so that it could hold A4 sized things. I also realised that it would be difficult to make the handle slide and the handle should not be attached to the lid as the lid come off if the bag is too heavy (the lid is only binded on one side so the bind is not very strong) I also wanted to add a buckle-like thing in front to make sure the lid is bounded more tightly when it’s closed.
I first made a tiny prototype of the bag using cardboard strips and foam to see how it would look like. I was satisfied with the dimensions so I decided to go with it.
Due to the way I’m weaving, I had to start with the bind part first. I used leather cord and metal wire since it is stronger and keeps it’s shape better. I used the same pattern as my ‘bind’ study model and replicated it on the other side as well. I spent a lot of time trying to bind it as the space for the cord is quite small.
I continued with the frame using rattan and started weaving.
For the lid, I used a rattan frame with cardboard and covered it with 2 pieces of foam. I tried stitching the foam together but I failed so I ended up using uhu glue to stick them together. I added a nother layer of foam on the underside to make it stronger and it ended up forming a catch for the lid so it doesn’t open easily (so I didn’t need a buckle anymore).
As the dimensions for this bag fits a bagpack more, that was what I had in mind when I made it. But since there were holes (lack of materials + too tight to weave) on the bag, I realised I could hook the handles there and still make it a 3 in 1 bag.
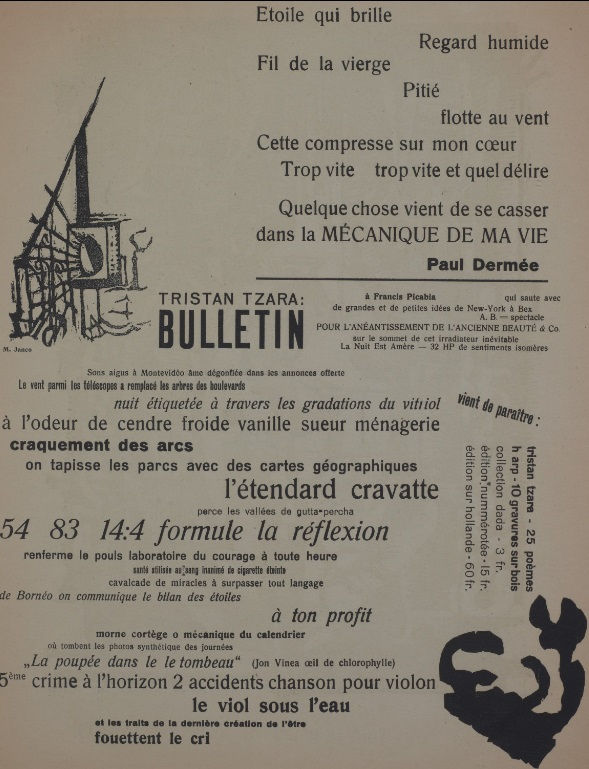
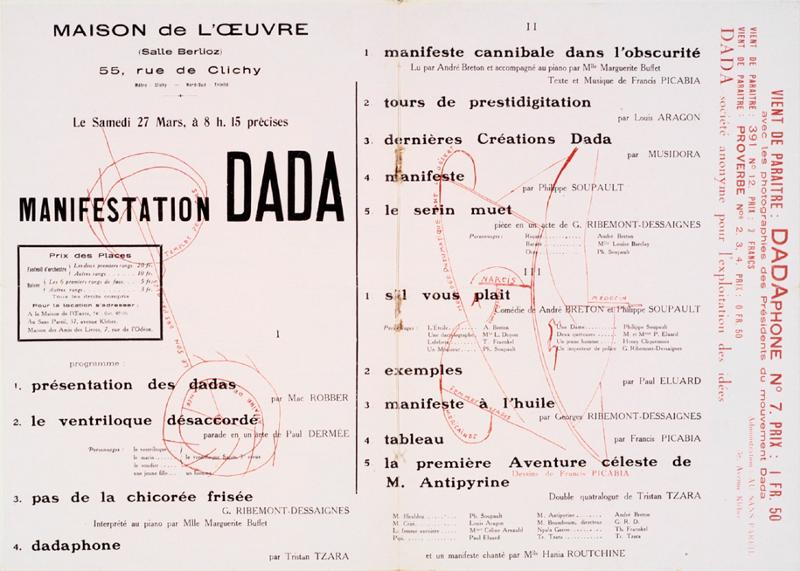
Dada/Dadaism – Questions the society, role of an artist, and the purpose of art
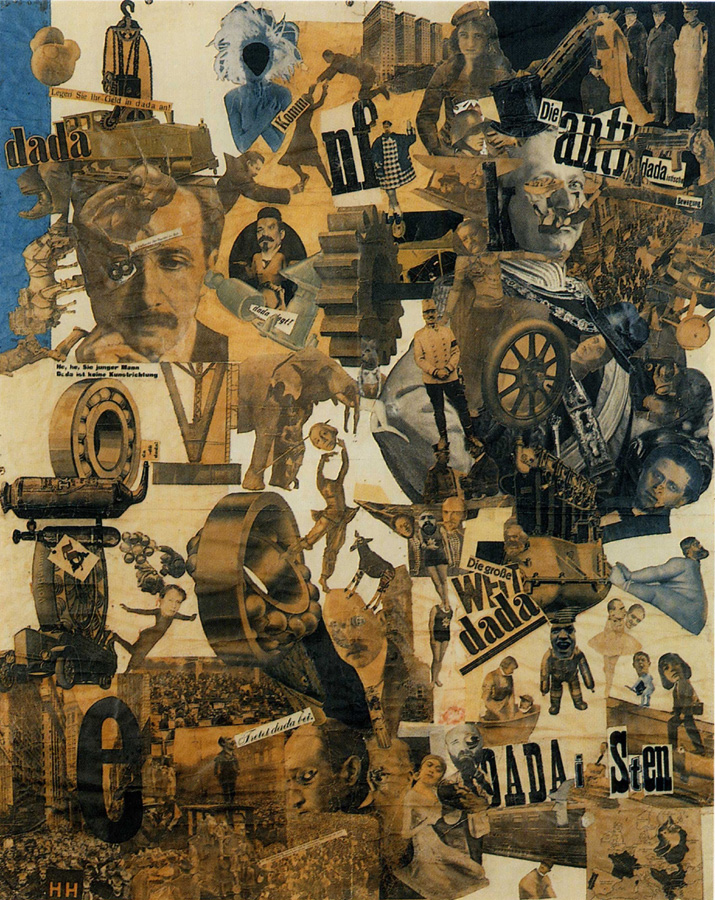
Hannah Höch (1889-1978)
A German photomontage artist active during the Dada movement.
Combined unrelated images to form startling or insightful connections.
Challenged the status of women in the social world of her times.
Famous works:
Heads of State (1918-20)Dada-Rundschau (Dada-Review) (1919)Cut With the Kitchen Knife Through the Last Weimar Beer-Belly Cultural Epoch in Germany (1919-20)
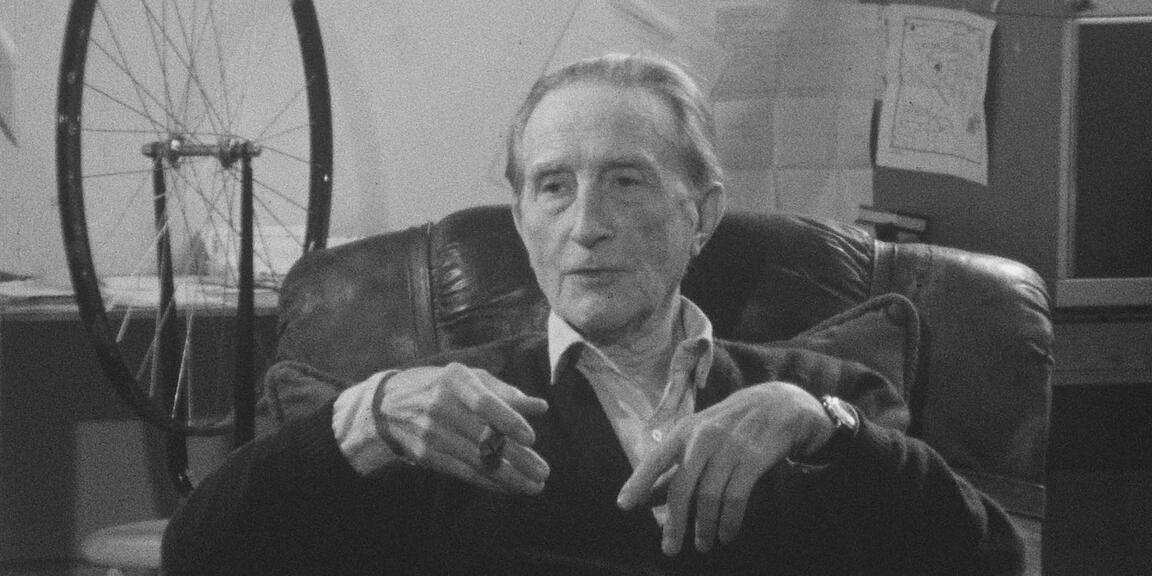
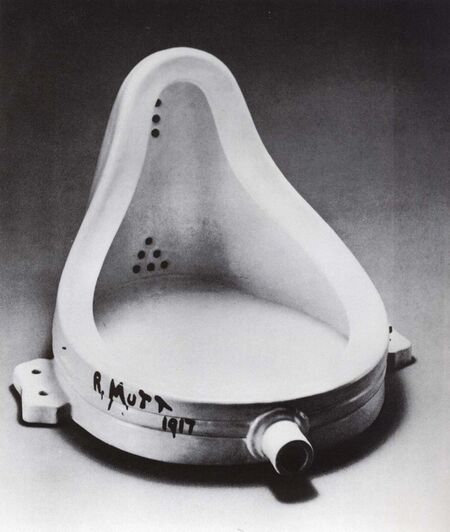
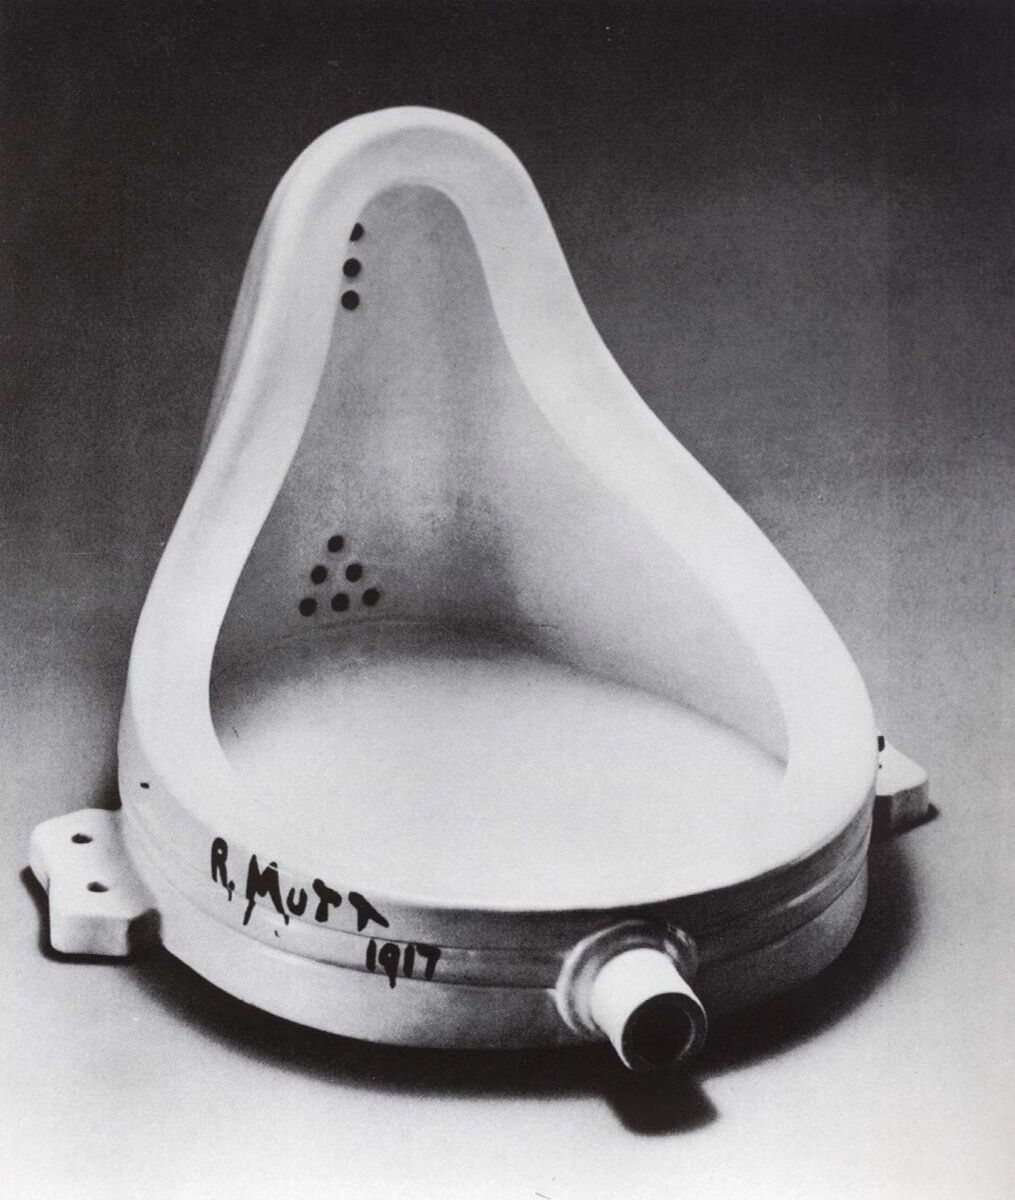
Marcel Duchamp (1887-1968)
A French painter and sculptor who refused to follow a conventional artistic path
“readymades” – turning everyday objects into art
Also associated with Cubism, Surrealism and Conceptual Art
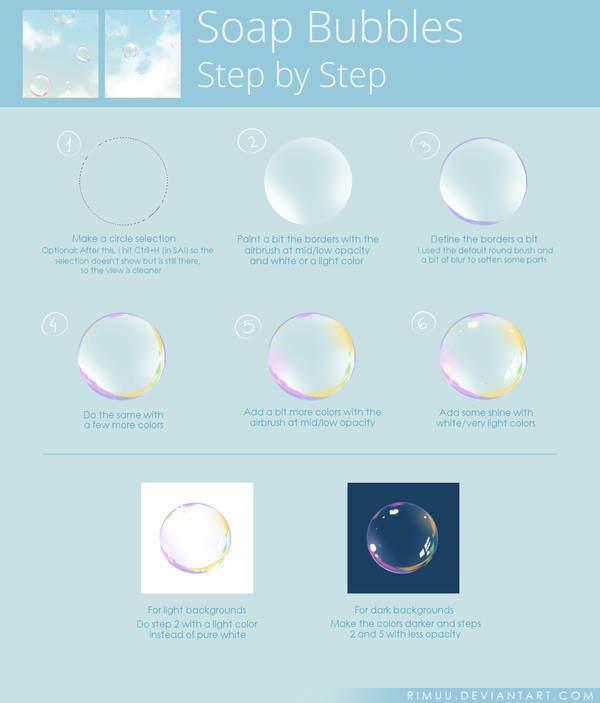
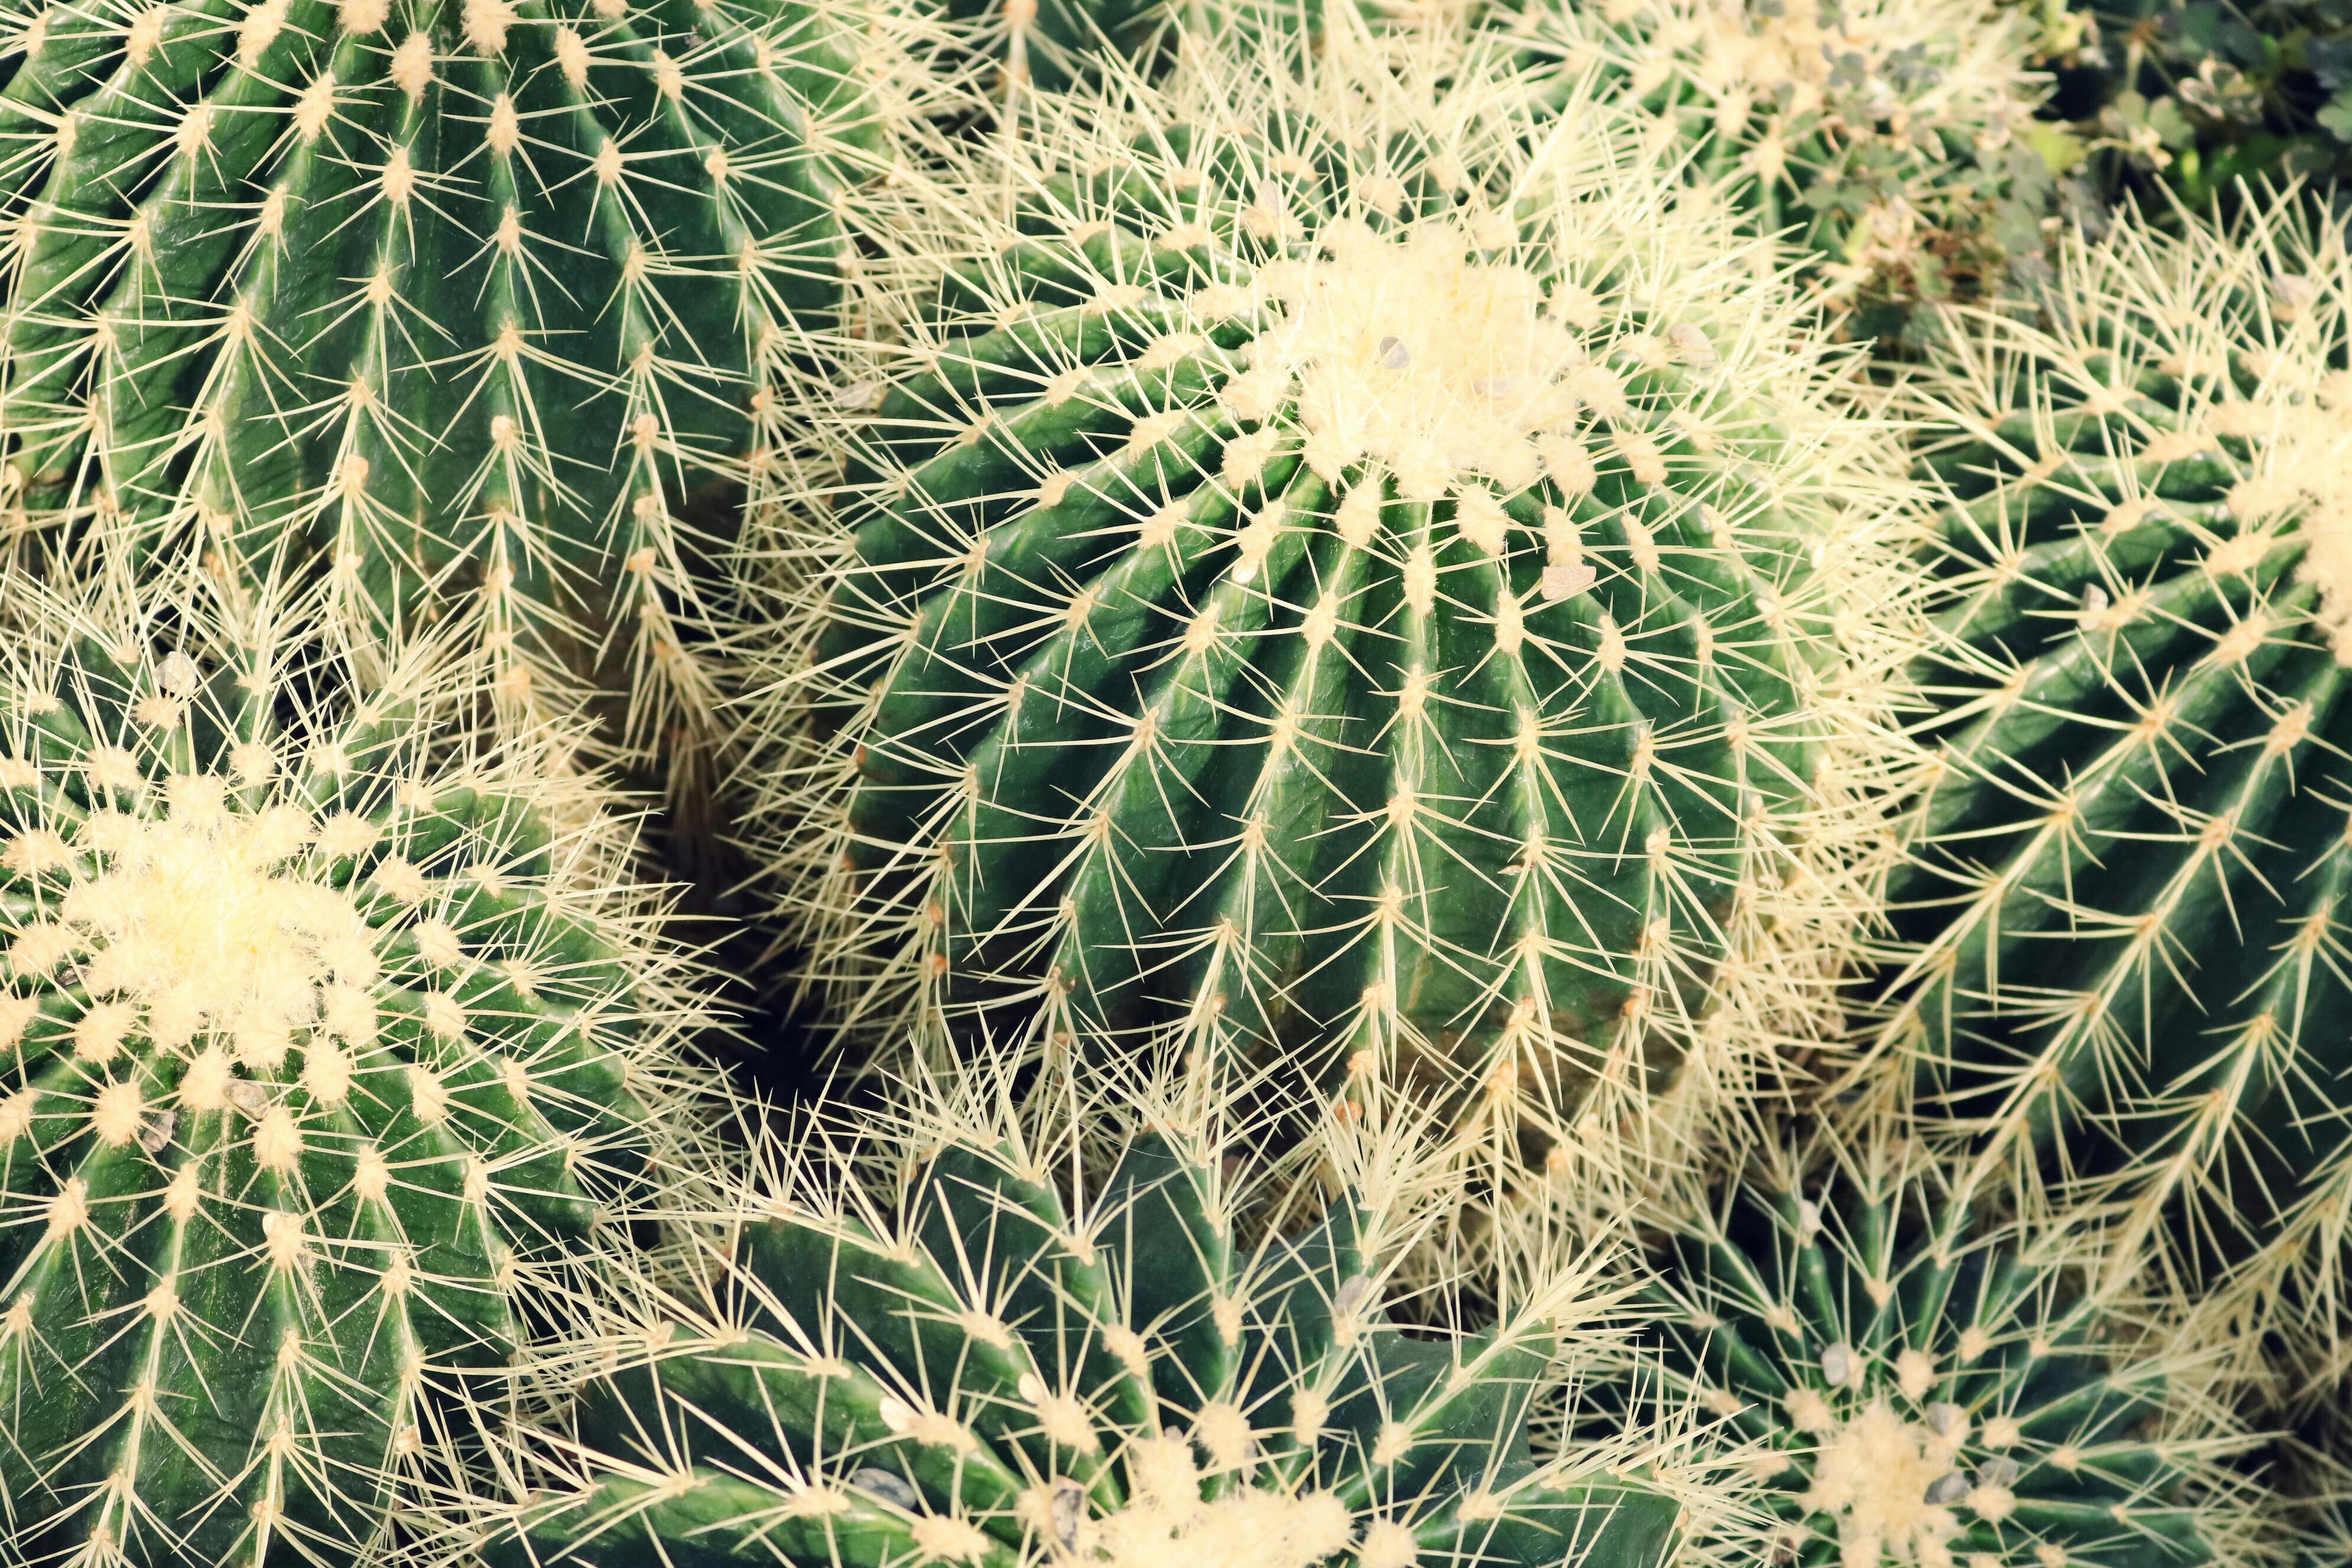
When I first started thinking of ideas/jobs for this project, my four jobs were quite normal and all circus themed (juggler, bubble artist, clown and popcorn seller). I was told to make the jobs more interesting by adding random words/elements to it so it became: egg juggler, bubble artist in a cactus farm and funeral clown (I hadn’t thought of the 4th one yet). I first tried making the elements and objects of each job look like the letters and sketched them out on paper.
Egg juggler: egg, juggling
Bubble artist in a cactus farm: bubble wand, bubble, cactus
Clown: colourful/red afro, red nose, balloons
Popcorn seller: uniform, red and white stripes, popcorn
Juggler: balls, juggling
Bubble artist: bubble, bubble wand
Clown: balloons
Juggler: Juggling
I was told that that wasn’t what I was supposed to do and I should incorporate the elements into the letter itself with bending them. I thought the bubble artist in a cactus farm would be the easiest so I tried it out first.
1 Bubble artist in a cactus farm -> Bubble in a cactus farm Elements: Bubble + green, spikes
Using the elements of a bubble and cactus, I came up with 2 designs using the font called rns baruta as the font is fat and round, which is similar to that of a bubble. I realised that I couldn’t show the bubble artist part so I ended up changing the job to a bubble in a cactus farm.
I didn’t know which design was better so I tried both again digitally to compare (just the letter ‘o’). I followed a tutorial on pinterest to draw the bubble.
I liked the look of the bubble on the left more but it looks more like a cactus in a bubble farm instead. I was also told that the one on the right looks more interesting so I decided to go with that design.
To do the final design, I first brought the image of the font to illustrator to image trace it. Then I opened the vector in krita and drew the green bubbles within the font area by selecting it. I added the spikes after I was done with all the bubbles.
As cacti are usually found in the desert, I decided to use a picture of the desert for the background. I also tried to vary the positions of the letters as bubbles don’t usually stay in a straight line. After looking at pictures of cacti, I realised that the spikes weren’t dark green so I changed them to a lighter colour that is similar to those of the actual cactus spikes.
For the design of the funeral clown, I used the fat face font as it looks more formal and rigid, which is a font suitable for funerals.
I didn’t really like the colours in my sketch so I did it digitally and experimented with the colours. I referenced the colours of an actual coffin for my design. I also made the borders of the letters slightly darker to give the coffin a bit of depth.
I felt like the one with red polka dots looks quite plain and the polka dots don’t seem to pop out like the colourful ones so I ended up picking the colourful ones instead. For the background, I wanted to use a white cloth/curtain to make it look like a wake but I couldn’t find a good picture of it and I also couldn’t draw it so I ended up using a photo of candles which could also represent the solemn occasion.
3 Bankrupt Gambler Elements: Poker cards + torn money(?)
Since this was supposed to be a gambler, I decided to use a poker card character font for it. I started off with adding different gambling elements to my design and using empty pockets to represent bankruptcy but it didn’t seem to express bankrupt gambler well and it was also very messy.
I was told to choose only one element to represent gambler so I decided on the poker cards. I drew the outline of each poker card and pasted images of poker cards on the outlines one by one and trimmed away the parts that were overlapping. I added stitches to the money attached to the poker cards to represent money being torn and also like the patched up clothes of poor/homeless people. I added a reddish/pinkish background as I felt that it represents someone in the red (bankruptcy).
In the end, I felt that the bankruptcy part wasn’t very obvious, so I included a broken piggy bank in the background.
4 Misfortune Cookie Elements: Skull + Slip of paper, cookie
For this design, I used a font called djb hunky chunky. It is fat and has a slightly irregular shape so I felt like it looks like a cookie. I wanted to use another font at first so the font used for the sketch is different. I wanted to write bad fortunes on the slips of paper but I was told it would be better to use symbols.
I referenced a illustration of a fortune cookie for my design. I used the colours of the fortune cookie for my drawing and tried to make it look hollow. Then, I added the textures, cracks and the slip of paper for each of the letter. I also added skulls on the papers to represent the misfortune.
Fortune cookies usually come in packets but I wanted to show them placed on a plate, in a random order. The picture I chose was of a broken plate as I thought the broken plate is also a sign of misfortune.
This project was very challenging for me as I have not attempted digital painting before and I don’t really know how to use photoshop and illustrator. I ended up spending more time on the drawing than I expected. For the colours of the design, I chose them based on the reference images without thinking too much about the colour palette. I could have spent a bit more time on it to make the design better.
Problems with each design:
– bubble in a cactus farm: The bubbles didn’t really look that round after adding the spikes, I could have added the spikes to follow the form more closely instead of putting it in random spots and directions.
– funeral clown: It still ended up looking quite flat even though I tried adding a darker border to show depth, it might have worked better if I tried using a 3D font for my design instead.
– bankrupt gambler: I think I chose the wrong font as the font is too thin so I couldn’t add much to it and it is also quite hard to see the details. I could have also tried to make the tear more obvious. Without the background, it might be quite difficult for people to figure out the job.
– misfortune cookie: I realised that the fortune cookies appear to be floating and not on the plate as I didn’t add shadows. The slips of paper also look flat due to the lack of shadows. Also, I could have taken a photo of actual fortune cookie crumbs on a plate for the background.
Although there were many problems with my designs, I learnt a lot about digital art while doing this project. I think it was quite challenging, having to incorporate the elements of the jobs into the letters instead of just bending the objects/elements into the letters. It forced me to focus on the details of the jobs and think about how to communicate it to the viewers.
For this task, we had to bring a personal item that is held, worn or carried to be studied.
I ended up bringing a wireless mouse.
We had to draw the top, front and side view of the object so I did a sketch before drawing on the graph paper. I also added the measurements on the sketches.
The drawing I did in pencil wasn’t very clear so I went over it with a pen.
Then, we had to draw the 2 point perspective of the object. I also did some sketches of it (shown above) before I did the actual drawing. Once again, I went over the drawing with a pen.
Task 2 – Weave Technique Studies
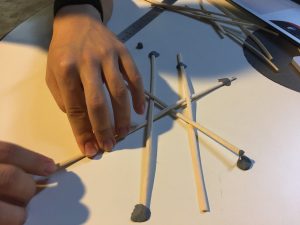
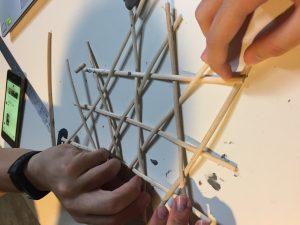
For task 2, we had to weave a 2D and a 3D pattern as a pair work. Chien Ping and I decided to work on the 2D component together. We didn’t have any tape or water so it was really hard to weave the pattern we chose — hexagonal pattern. We tried the method from this video: https://www.youtube.com/watch?v=psHmWNielcw but there was too much tension between the rattan strips so we experimented with different methods and ended up just weaving by looking at the picture of a hexagonal pattern.
I decided to try the pattern again at home using tape and the method from the video. I also did it using 5mm cardboard strips. It works better with cardboard as it is thinner and there’s less tension.
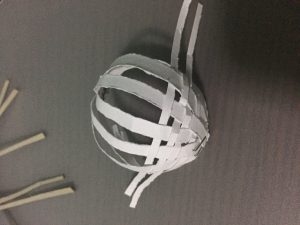
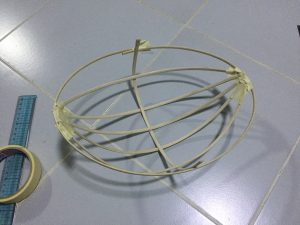
For the 3D component, we decided to split it into half, each of us doing 20x20x10 then combine them together. Chien Ping suggested making it look like a pig since it’s Chinese New Year, so I did the top while he did the bottom of the pig.
Before I started making the actual structure, I experimented with a few patterns.
I think the hexagonal pattern looks better but it would be difficult to replicate it with the rattan strips so I used the mat pattern instead. I liked how the sepak takraw ball turned out but I couldn’t put in in my 3D structure.
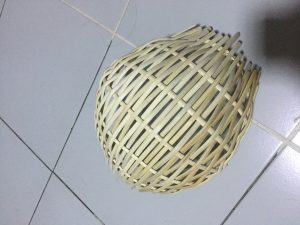
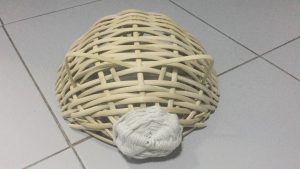
In order to make it look like a pig, I also added the ears and nose. I tried different materials and sizes on the chrysanthemum bottom pattern for the nose. I also made sure the structure could stand.
Afterwards, we just combined our parts together. For the details of the bottom of the structure, please refer to Chien Ping’s post.
Experiment with found objects to create an artwork.
Living on the Edge
Just like the rubber band, people who live on the edge are flexible and take risks.
Class Exercise 3:
Write an interesting memory.
Currents
Current was a recurring word so I decided to focus on that. I tried to take a picture at the bottom of a waterfall feature so as to show the turbulent waves.
Class Exercise 4:
Take 3 photo of the same “subject” in 3 different modes
Sensual
Rigid
Mysterious
Class Exercise 5:
Decide on one theme / rule / restriction, and take a series of photos.
I had a hard time thinking of good ideas when we were given this project but I had a lot of rejected ideas:
Bungee jumping off the roof to represent the act of committing suicide (ridiculous and dangerous)
Making items that allow us the experience the disabilities of the elderly (too similar to an exhibition i’ve been to)
Record people saying an insult that they’ve heard from others before and play all of this in a dark room (doesn’t really convey the meaning well)
Make everyone tie a noose together (doesn’t really convey the meaning well)
Tying a noose blindfolded (doesn’t really convey the meaning well)
In the end, I wanted to address the issue of people being too dependent on phones. Nowadays, people are always stuck to their phones, even when they are with friends or family. Because of phones, we start to have a lack of face to face interaction.
My original idea for this is to make everyone put down their phones for the whole lesson so that everyone would focus on each presentation/project but I know people would want to document the different works. I decided to just make everyone put down their phones for 5 mins and do an activity together. Some of the activities I thought of were:
Broken telephone (Drawing)
Creating an artwork together
Charades
I realised that charades was the only game/activity that requires people to face each other and interact so I decided to do that.
I made everyone put down their phones on the table and made them play charades. They were split into two teams and could decide how many people would act and how many would guess. They had 2 minutes to act and guess 15 words (objects, emotions, art history)
Recording of a part of the activity (Video credits: Harry)
They definitely had face to face interaction and I believe this also showed that we can have fun even without our phones (but I had to use my phone for documentation and timing because my stopwatch wasn’t working)


 Bankrupt Gambler


