Before diving into the creation of our zine for part 2 of project 2, part 1 requires us to complete an in-depth research of our location; a unique site in Singapore. To kick off part 1, I began my research online to jot down a few places of interest that I could possibly visit.
PLACES OF INTEREST?
Bras Basah Complex
someplace familiar to me
second-hand bookstores
AVA Senoko fishery port
brings back memories of childhood
how I hate the smell of wet markets
reminded me of Tsukiji fish market in Japan but a local Singapore version
never knew of this fishery port
respect for the people in this industry and how it operates during the night
The Senoko fishery port is a place that I never knew existed in Singapore. I was really excited to visit the place initially, but after reading through online blogs about the place it seems that it isn’t much different from a regular wet market except that it operates during the night and through the early morning.
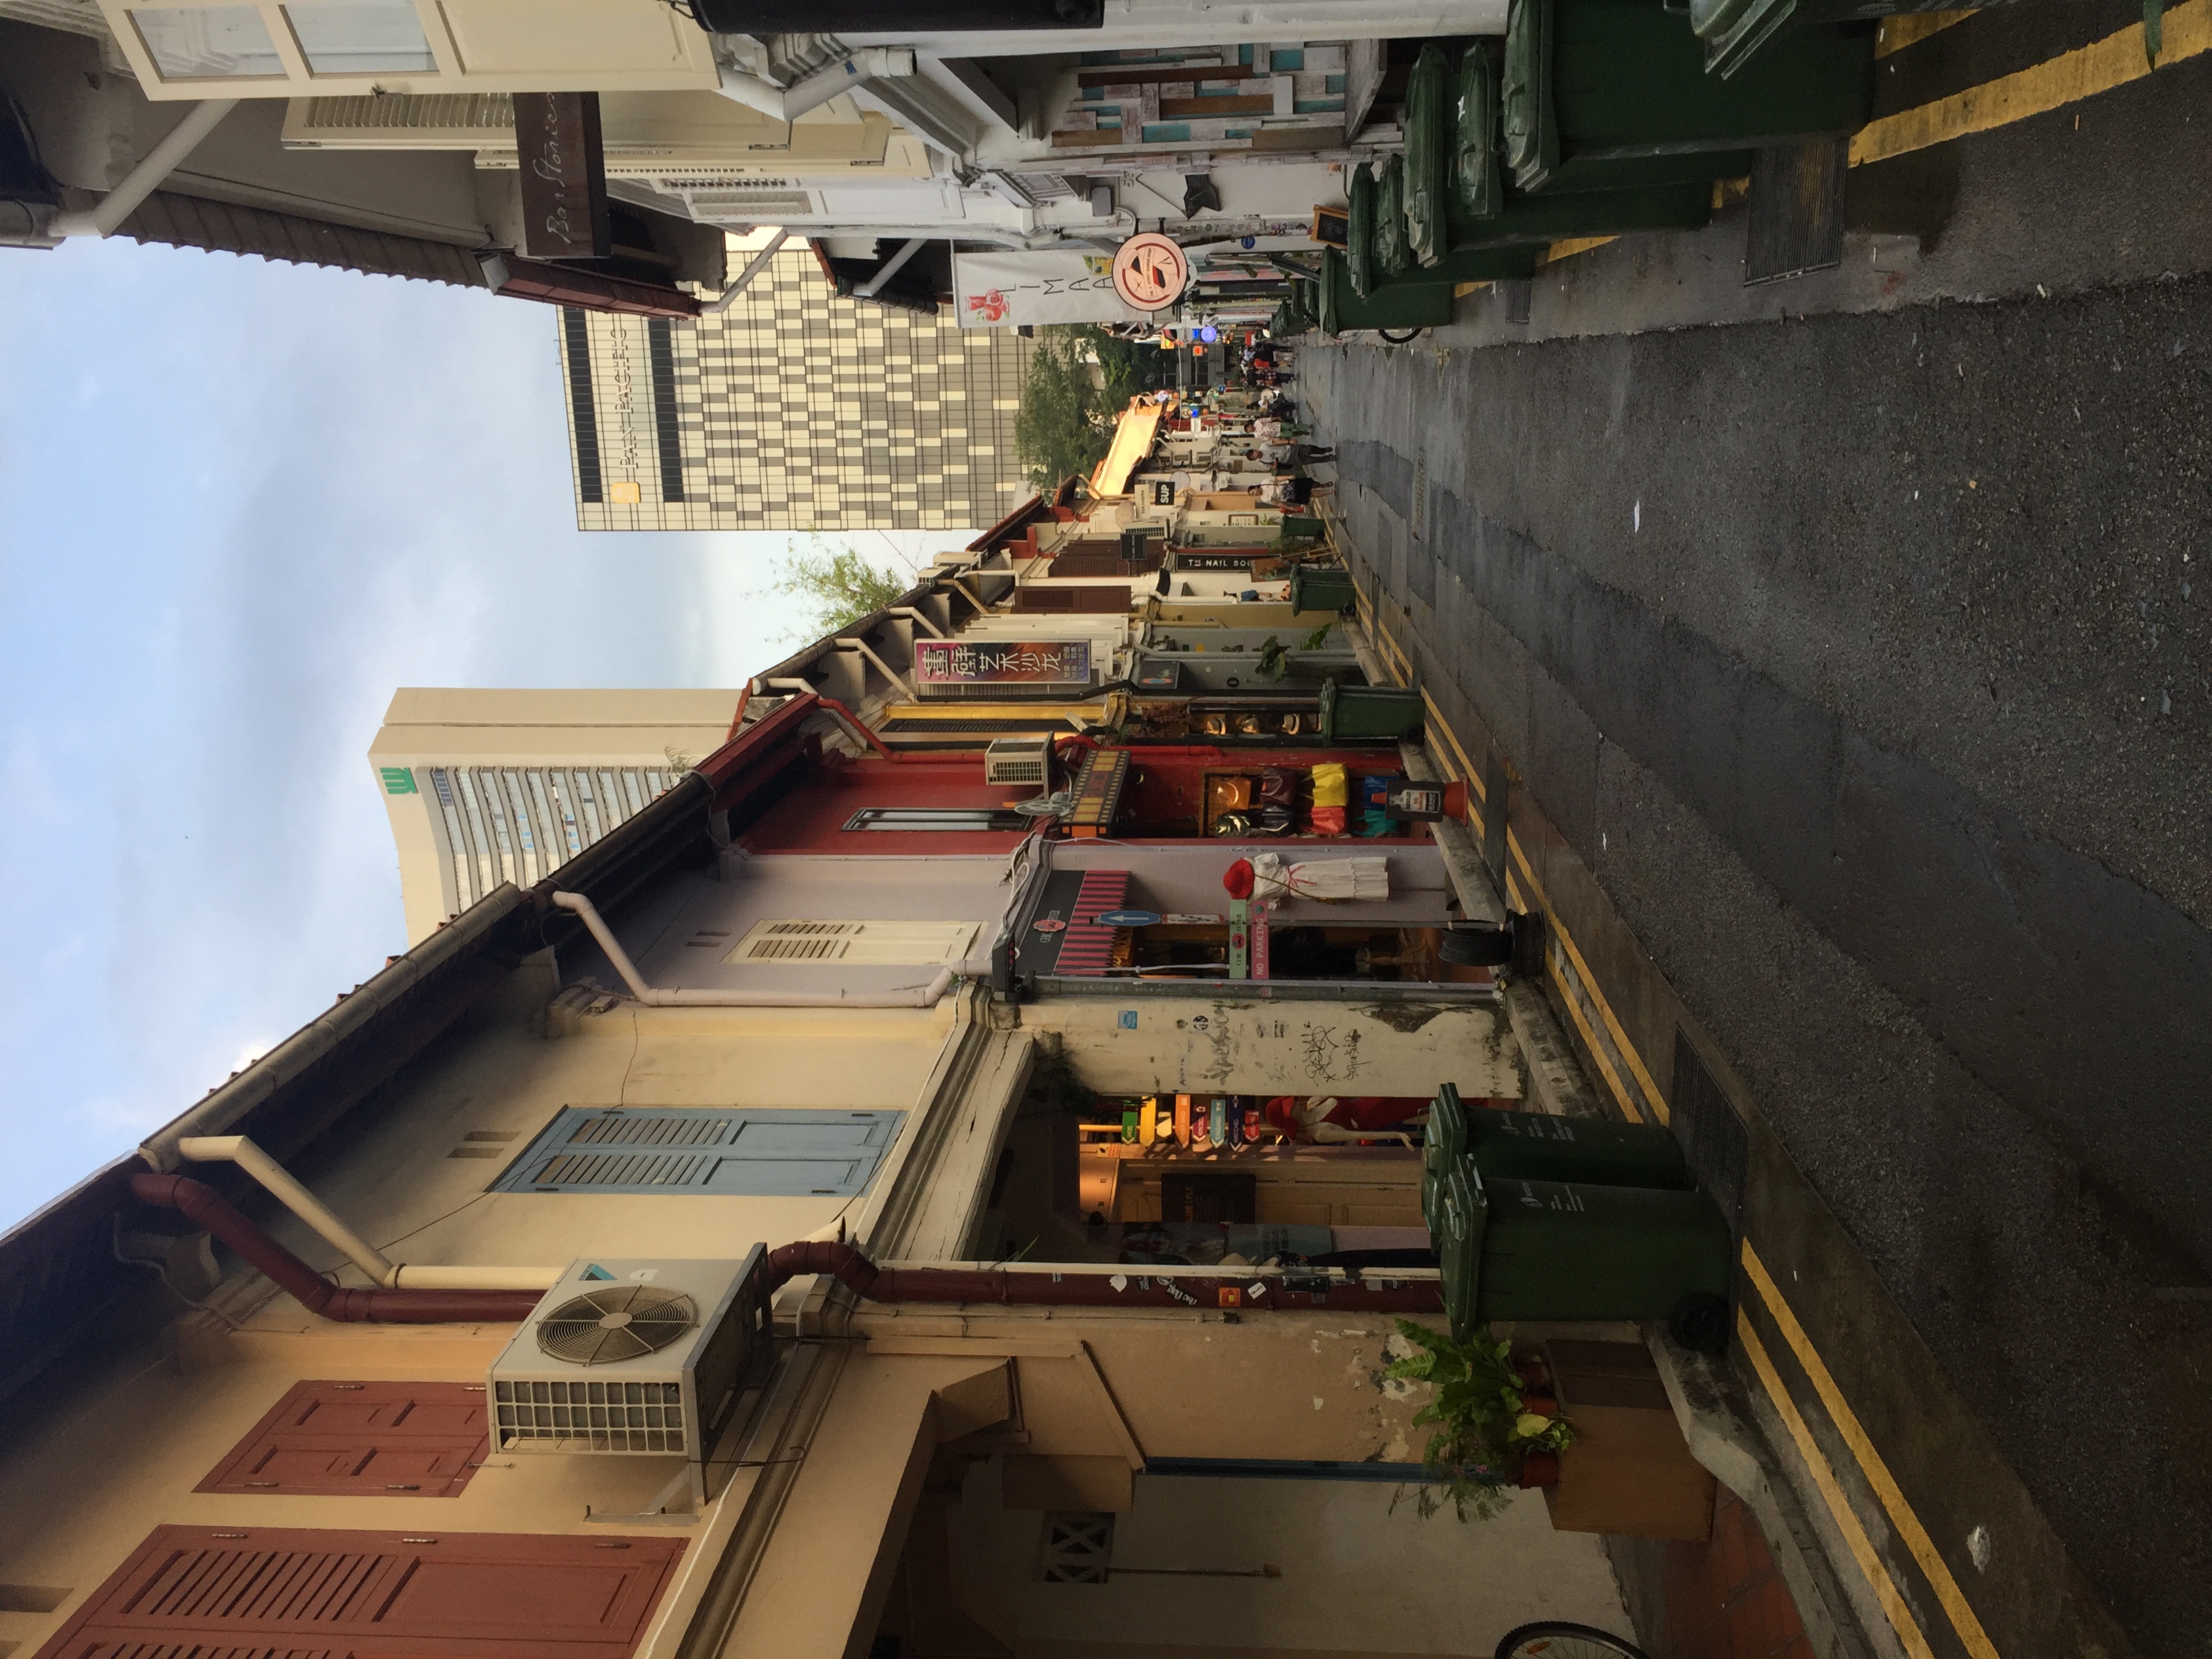
Upon further consideration, I realized that having lived out of Singapore for many years, there’s one place that I’ve always liked visiting when I’m back and that would be Haji Lane. It’s always been nice to just stroll through the shops on a quiet afternoon browsing through the quirky nic nacs that are rare to spot in regular shopping malls. The selection of my location was hence decided; Haji Lane.
RESEARCH METHODS
What is primary research and what is secondary research? Please provide examples of both.
Primary research involves gathering data that has never been collected before. For example, conducting your own survey with questionnaires or interviews with a specific group of people. Secondary research, on the other hand, involves the use of primary research data that is already available. It could be further analysis or interpretations of primary research. Examples are studies or reports by agencies or businesses within the same industry.
What is qualitative and quantitative data? How would you go about collecting the two?
Qualitative data is information about quality and cannot be measured numerically. Examples could be the softness of your hair or the grace at which you walk. It involves descriptions of the quality of things. Quantitative data, on the other hand, involves information that can be measured with numbers. Examples include the age of your car or the length of your fingers.
What are ethnography and participant-observation? What are some ways collecting data?
Ethnography is defined as “the scientific description of peoples and cultures with their customs, habits and mutual differences.” It is designed to explore cultural phenomena where researchers observe society from the subject’s point of view.
Participant-observation occurs when the observer participants in the activity and records his/her observations as a ‘player’ in action. They take on the role of being studied and may involve living in a commune, or becoming a firefighter.
What are infographics and how are they used to effectively communicate data? What other ways can we visually represent data?
Infographics are visual representations of information that use design to express content. The simple yet informative design effectively communicates data clearly and quickly. Examples of infographics are signs, maps and data representations. Other ways to visually represent data.
Interview Qns
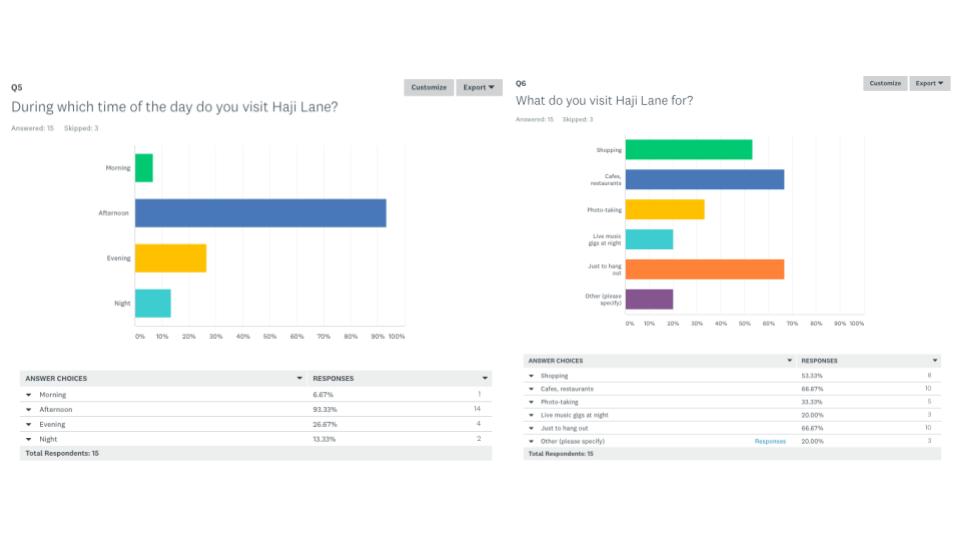
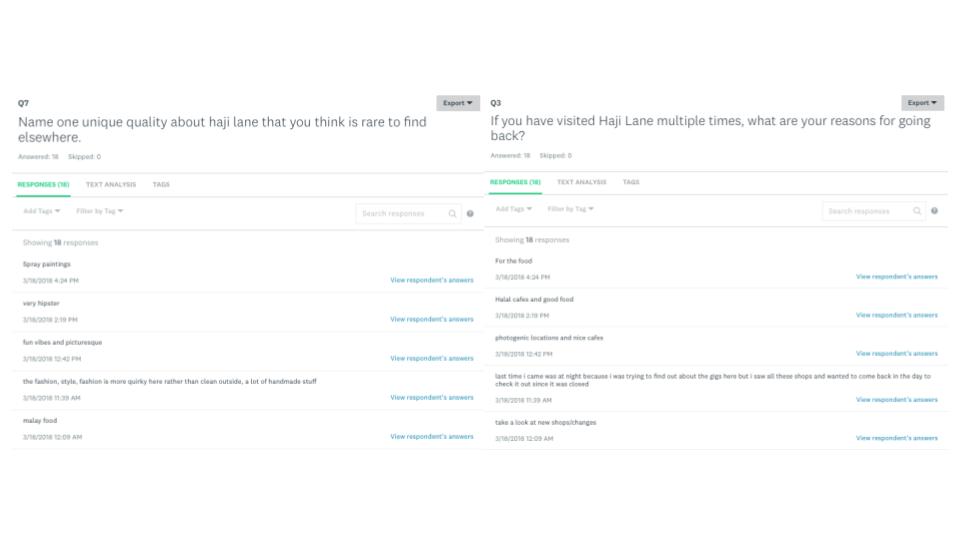
Before visiting Haji Lane, I prepared two sets of interview questions for the respective interviewees. The questions are targeted at obtaining both quantitative and qualitative data.
On-site interview questions (passers-by):
- What is your age and race?
- Are you a local or tourist?
- How often do you visit Haji lane and why are you here today/why do you come back here?
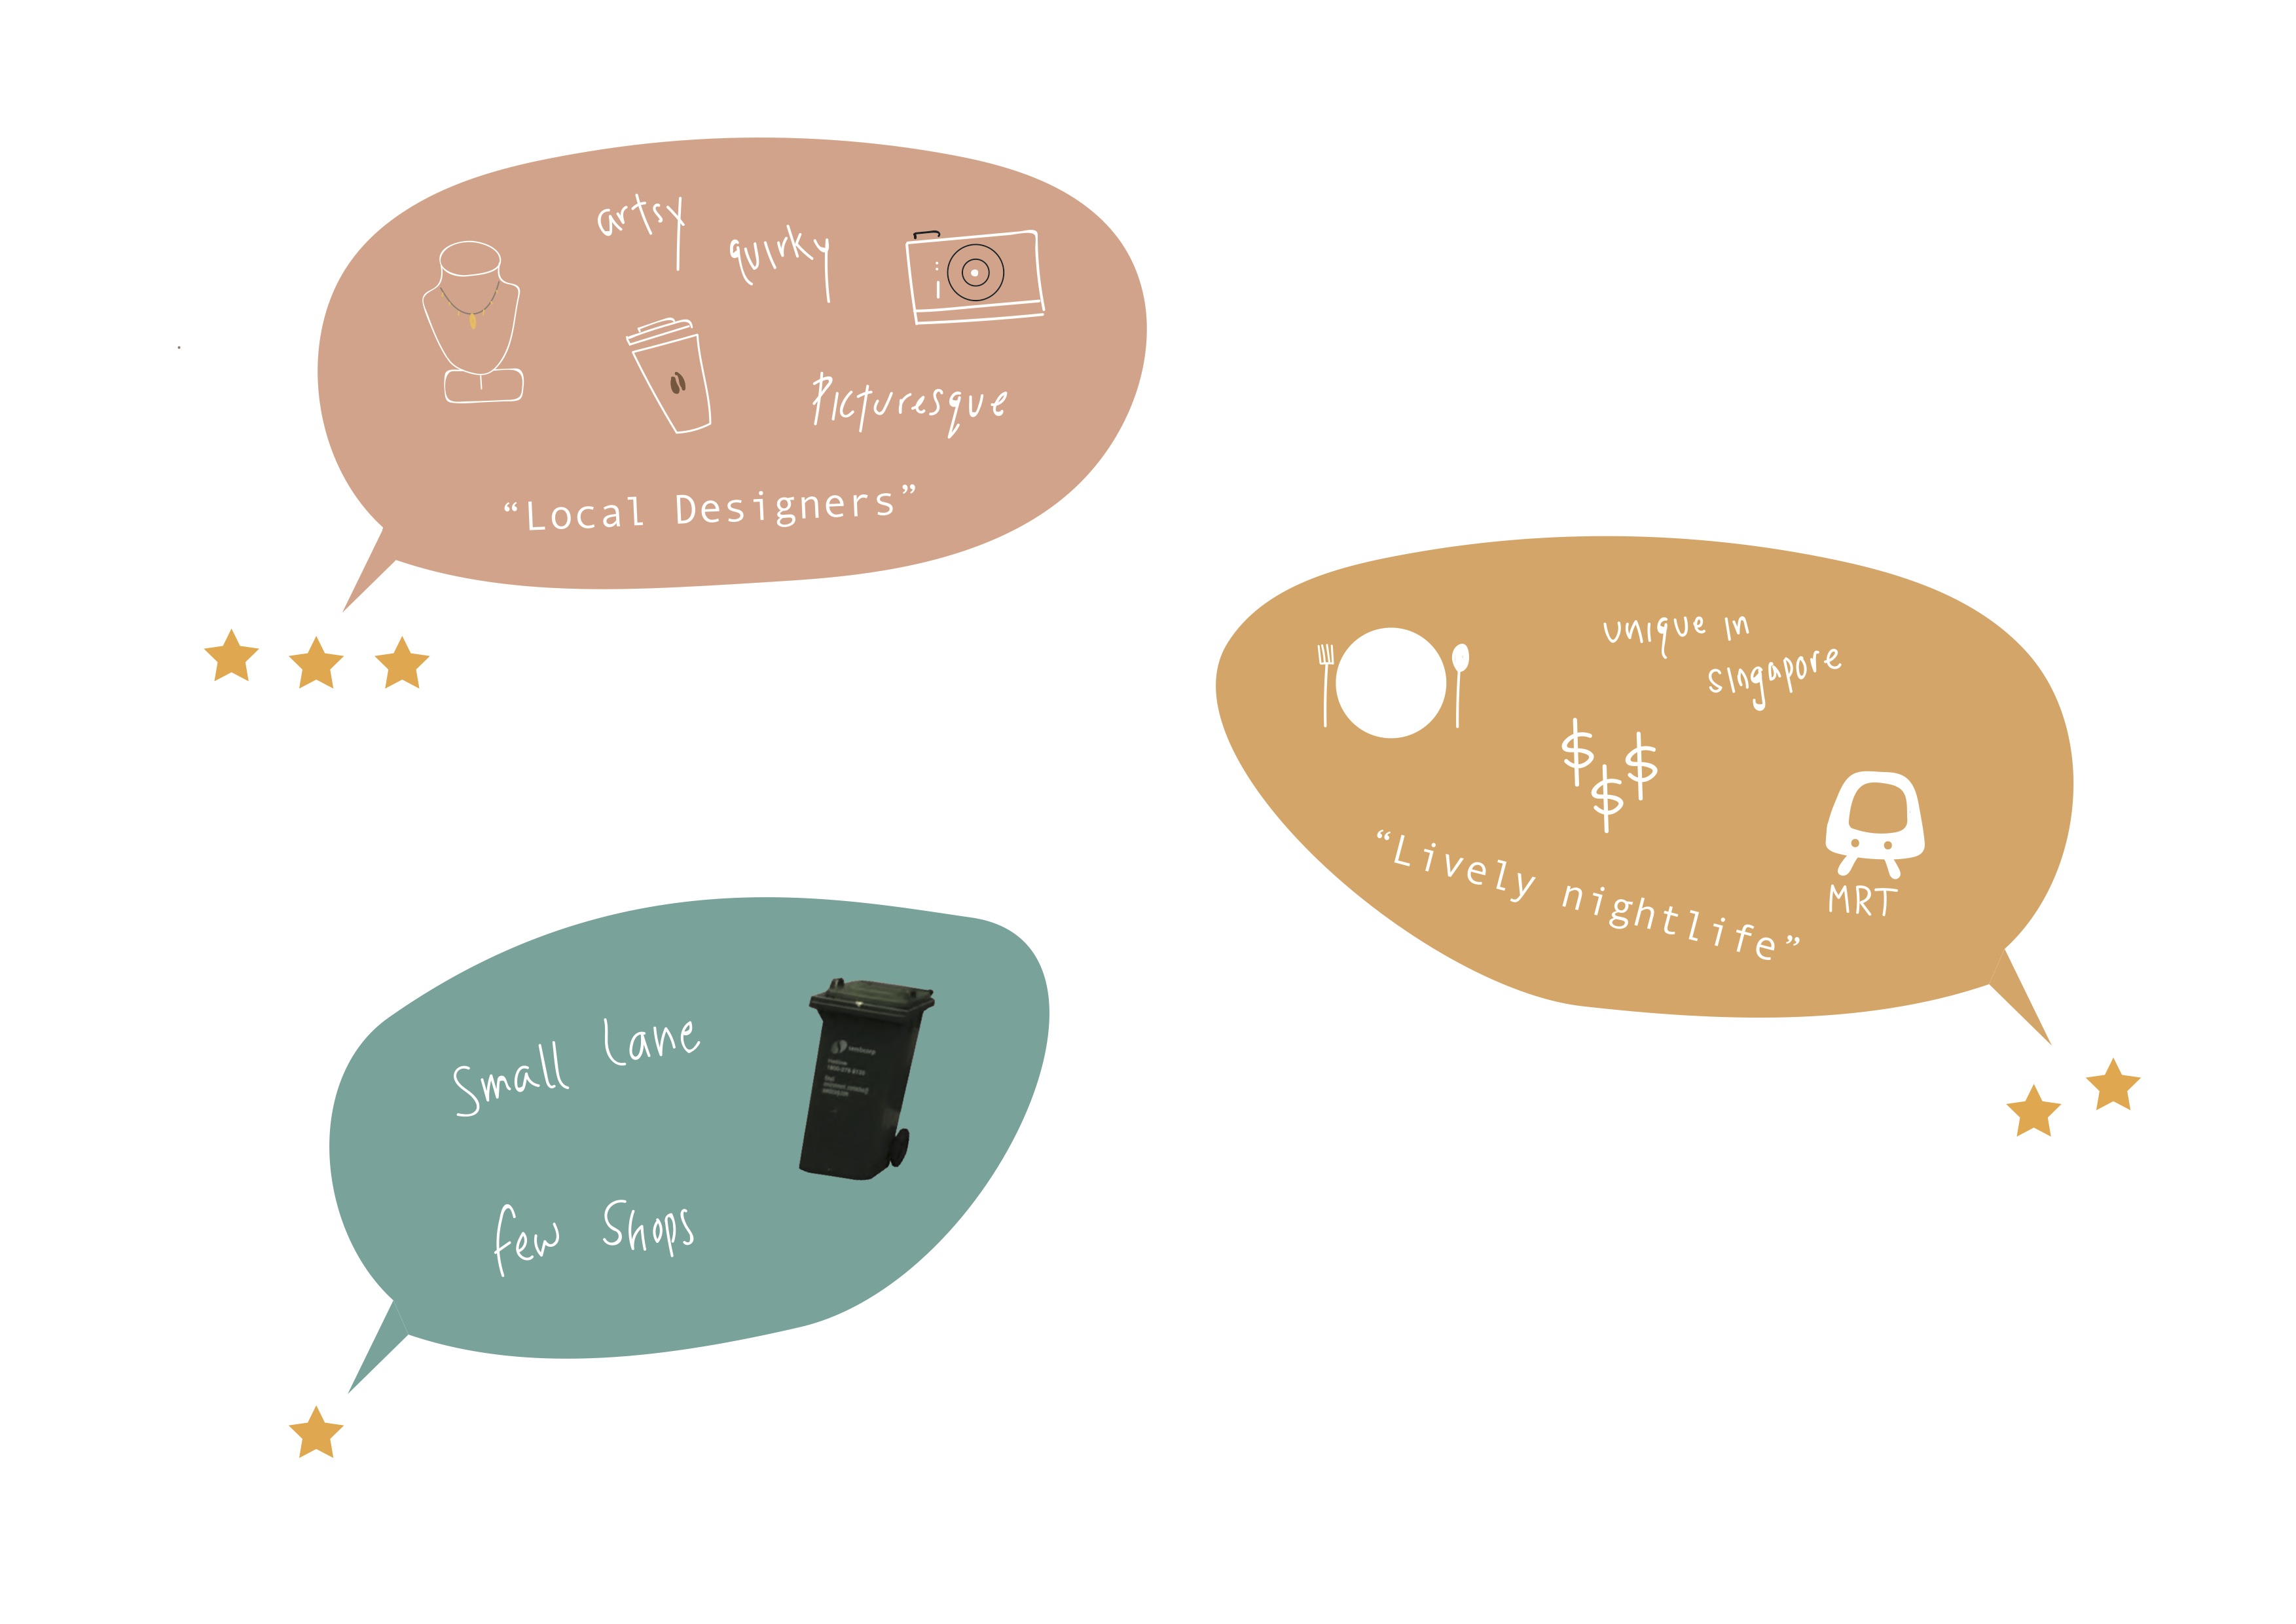
- Could you name me your favourite quality about haji lane/a unique quality about the place
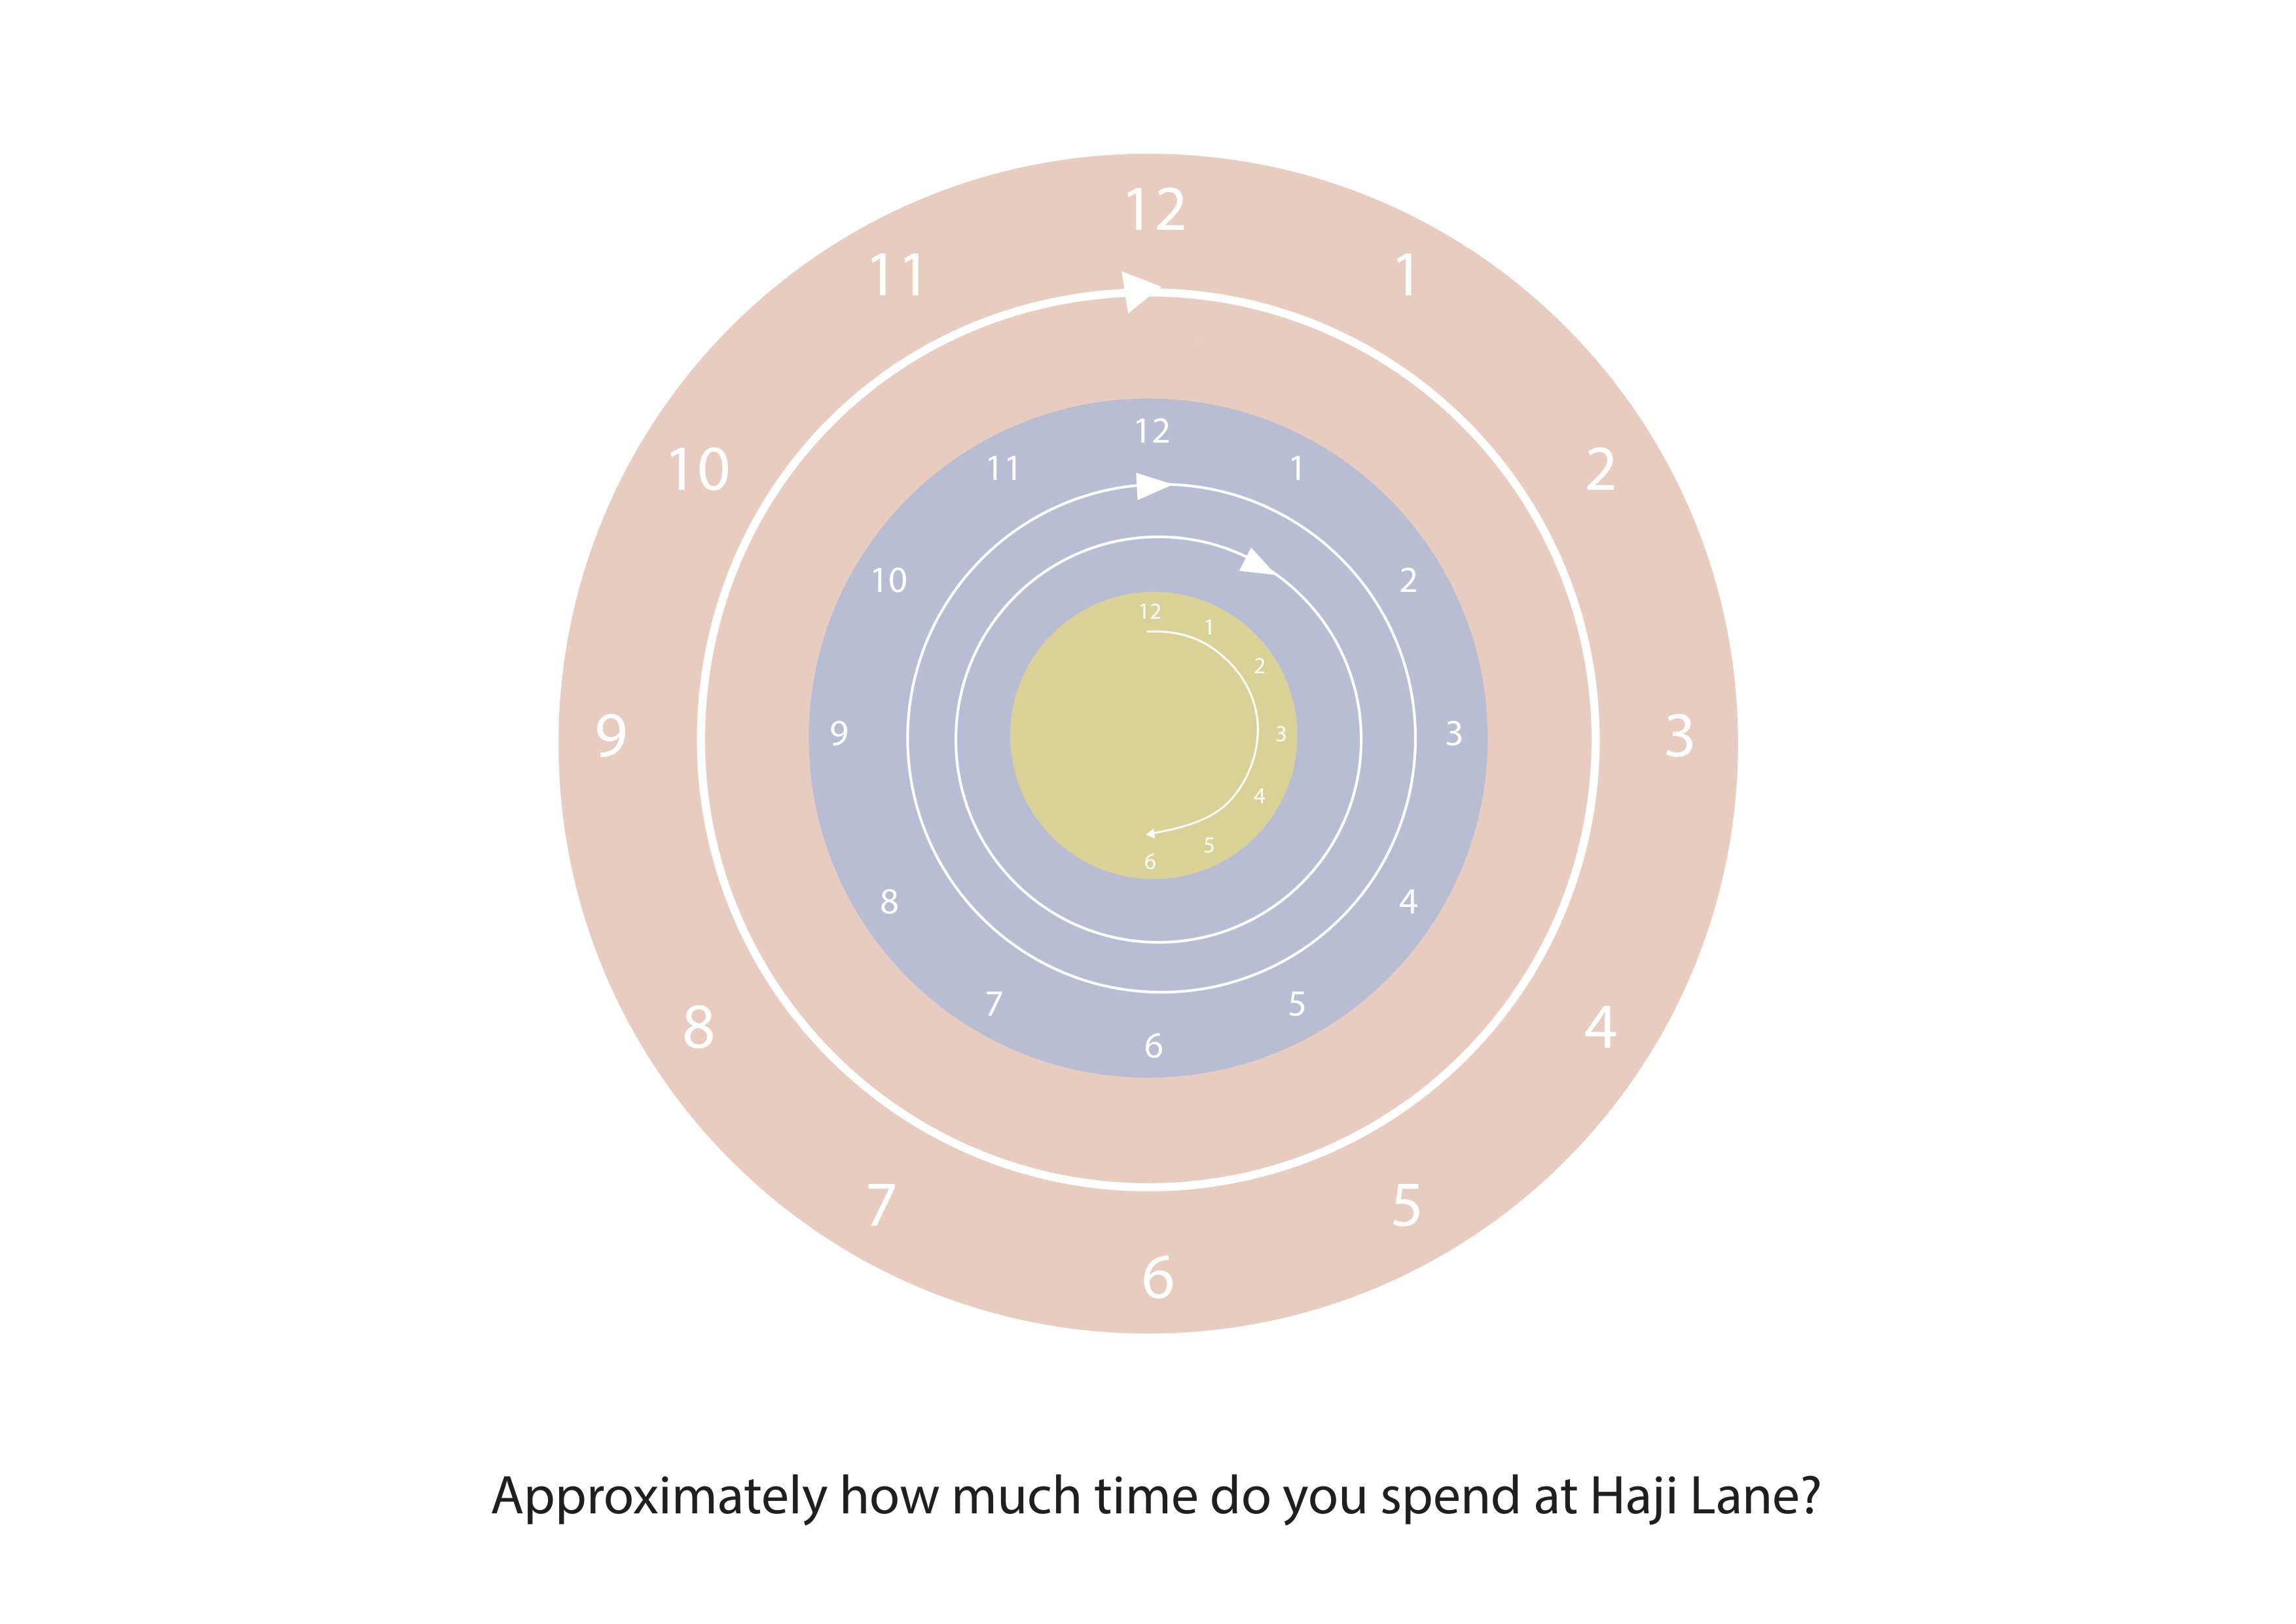
- Approximately how much time do you spend here?
- Do you take photos of the wall murals and do you know the artist?
On-site interview questions (shop staff/owners):
- What is your age and race?
- How long has this shop been around for?
- Why did the owner choose haji lane as a location to buy/rent a unit?
- Could you name me your favourite quality about haji lane/a unique quality about the place
- Regarding the wall murals, have you ever taken pictures of them and do you know the artist
- Are the items you carry your own products or are they commissioned and how do you source for them?
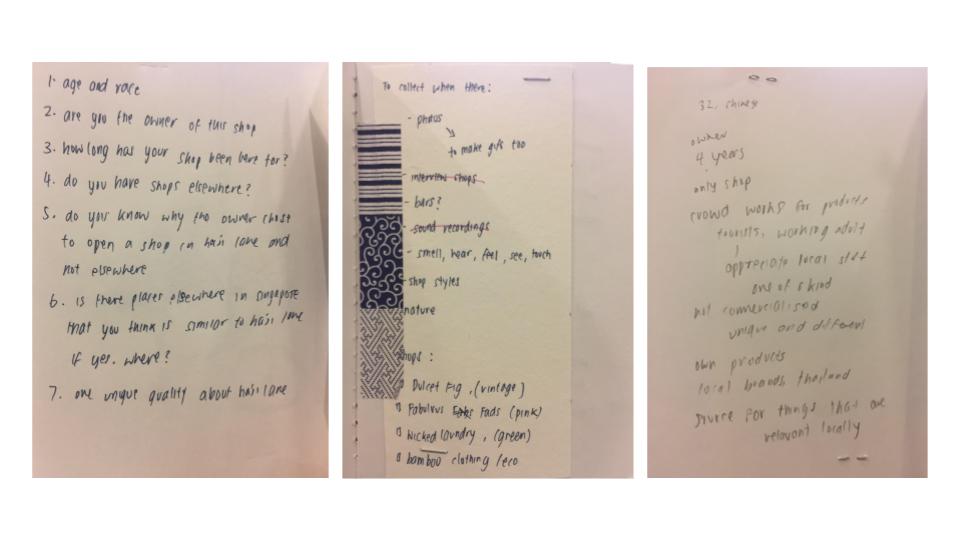
Jotting down notes + interview responses
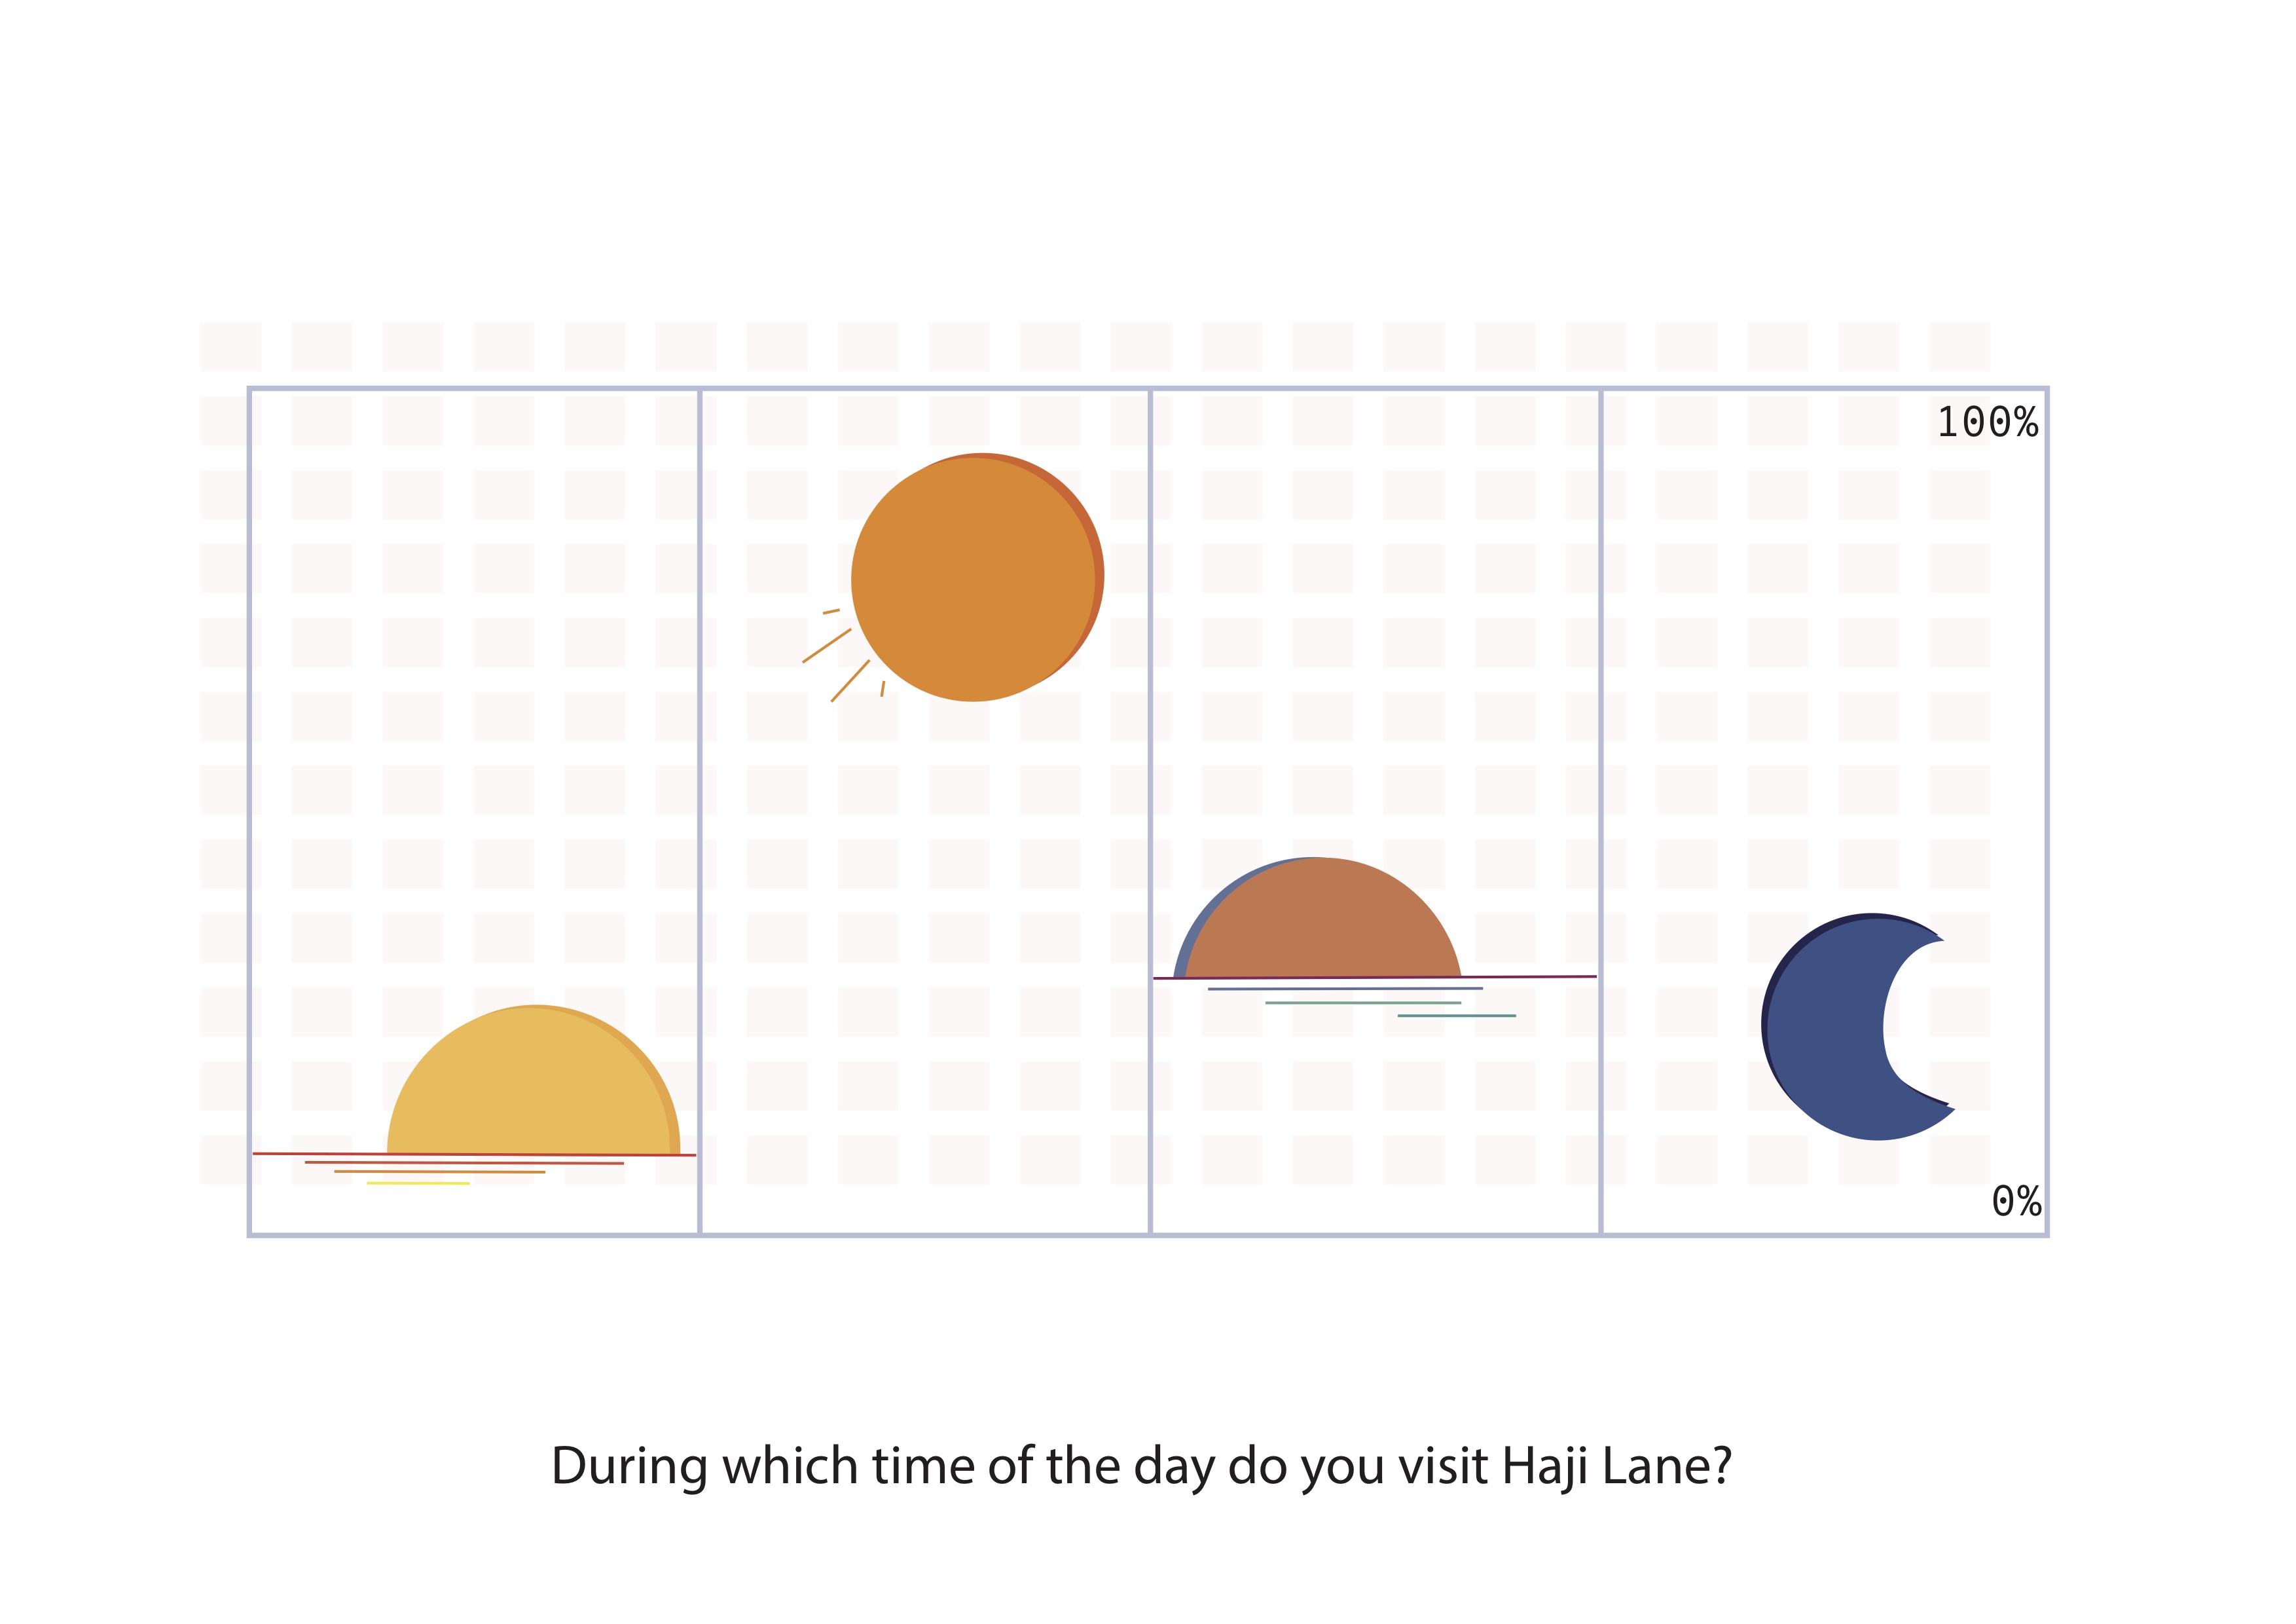
Aside from conducting interviews on site, I also created another set of questions for an online survey on SurveyMonkey. The quantitative responses I received were helpful in contributing to my quantitative infographics while the qualitative data allowed me to gather more unique selling points of Haji Lane.
Qualitative Data
Quantitative Data
Haji Lane – History
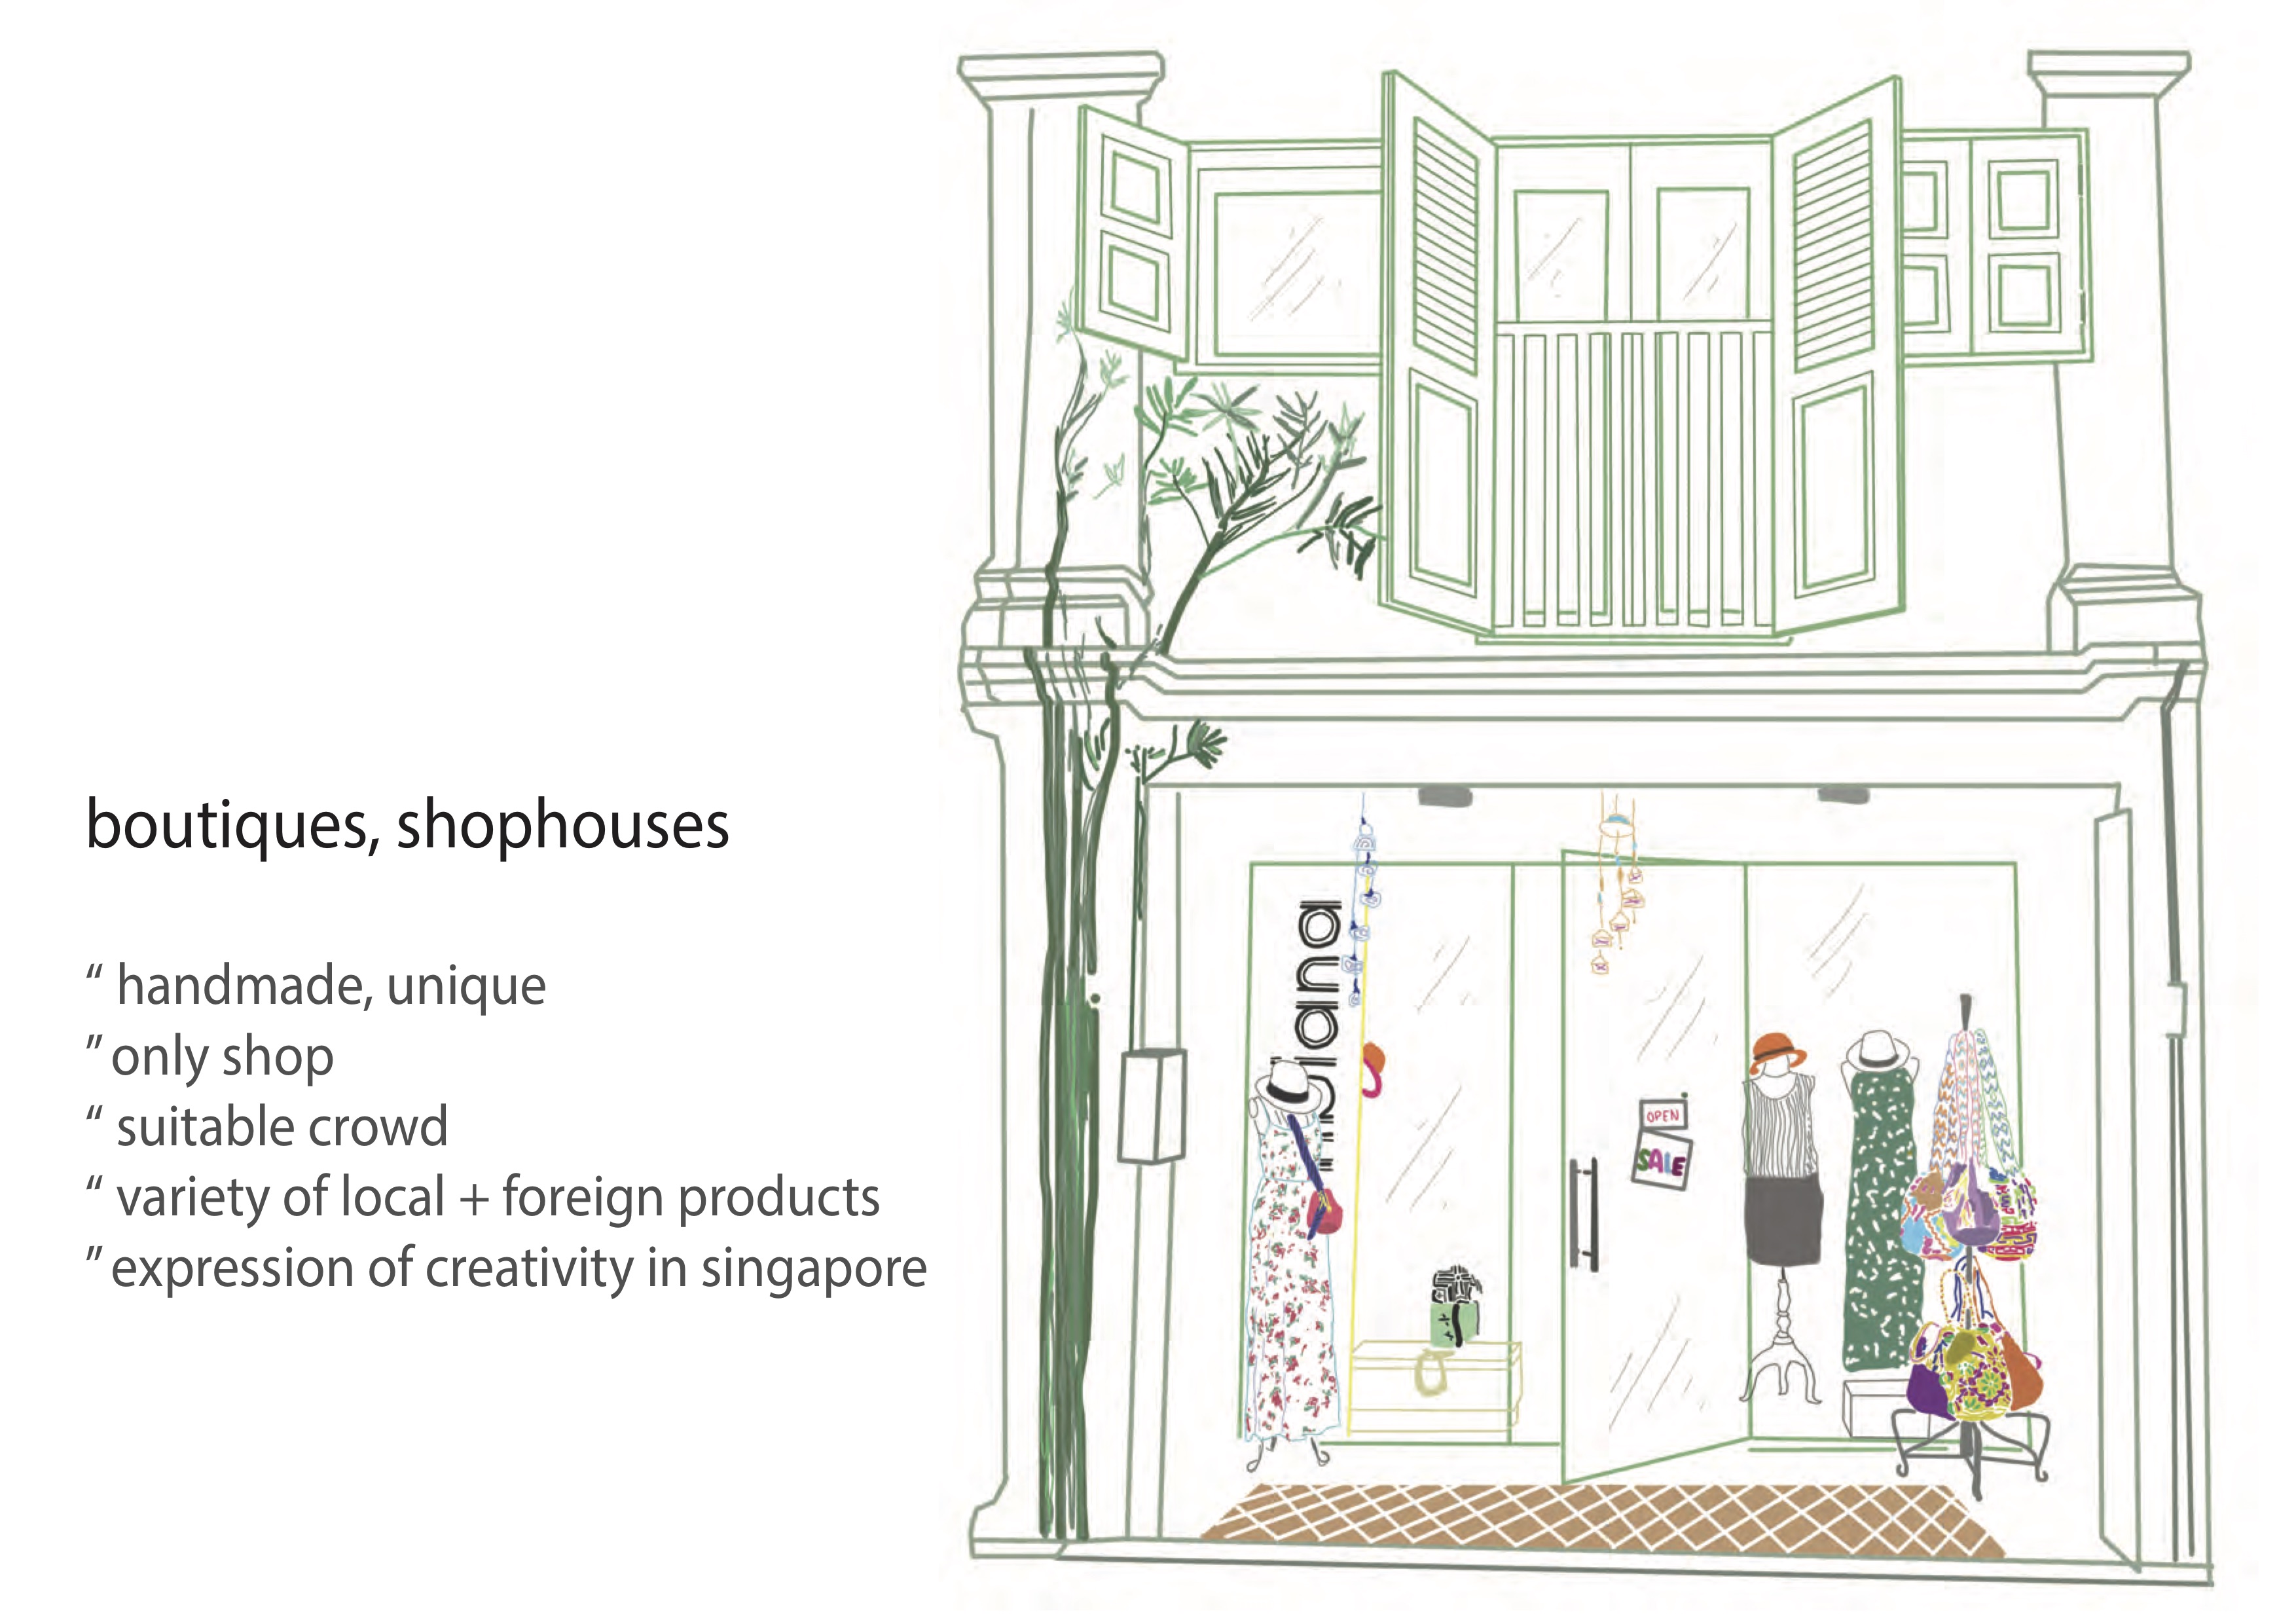
- Reputedly Singapore’s narrowest street
- Named after “haji” – the pilgrimage undertaken by Muslims
- Just over 4 meters wide, lined on both sides with centuries-old shophouses
- Buildings are of early shophouse style, characterised by minimal plaster ornamentations and low ceiling height
- In the past, they were used as accommodation for Muslim pilgrims transiting through Singapore
- Today, some of the shophouses have been beautifully restored
WEEK 8 CONSULTATION
Primary research method:
- on-site interviews
Secondary research method:
- online research
- history of haji lane
- TripAdvisor
Qualitative Data: can be presented through illustrations + sketches
- People’s favourite / unique quality about Haji Lane
Quantitative Data: can be presented through infographics
- Time spent there
- How often is their visit
UPS aka Unique selling point:
- street art, boutiques, bars
- combination of styles and character
Following this consultation, my next step was to arrange all the data that I have into an organised order for presentation.
Final presentation & Crit.
Here are my final slides for the research: Haji-Lane.pdf!
Joy mentioned that although I covered a large variety of different unique qualities, I can try to focus on one for part 2. The main point about Haji Lane as a creative space was brought through but I maybe I can consider the contrast between day and night at Haji Lane. Some classmates feedbacked that I had a good range of research methods and suggested that maybe I could look into patterns from the wall murals for my zine since they were eye-catching.
For part 1 of this project, I really focus on obtaining research and covered quite a few aspects of Haji lane as a whole so moving along I can now narrow down what I have. 🙂