
Plastic Fusion
The fusion of plastics through melting from the heat of an iron.
Materials:
- Plastic bags of various colour & opacity
- Cellophane
- Organza
- Felted wool
- Silver Glittery Thread
Instructions
- Place a baking paper and layer plastics over it.
- Cover with another baking paper and iron it over medium heat.
- Vary heat to achieve different results.
My Explorations
P L A S T I C F U S I O N
I first wanted to imitate the black background of space speckled with stars so I ironed a thin black plastic on high heat so that holes will form.
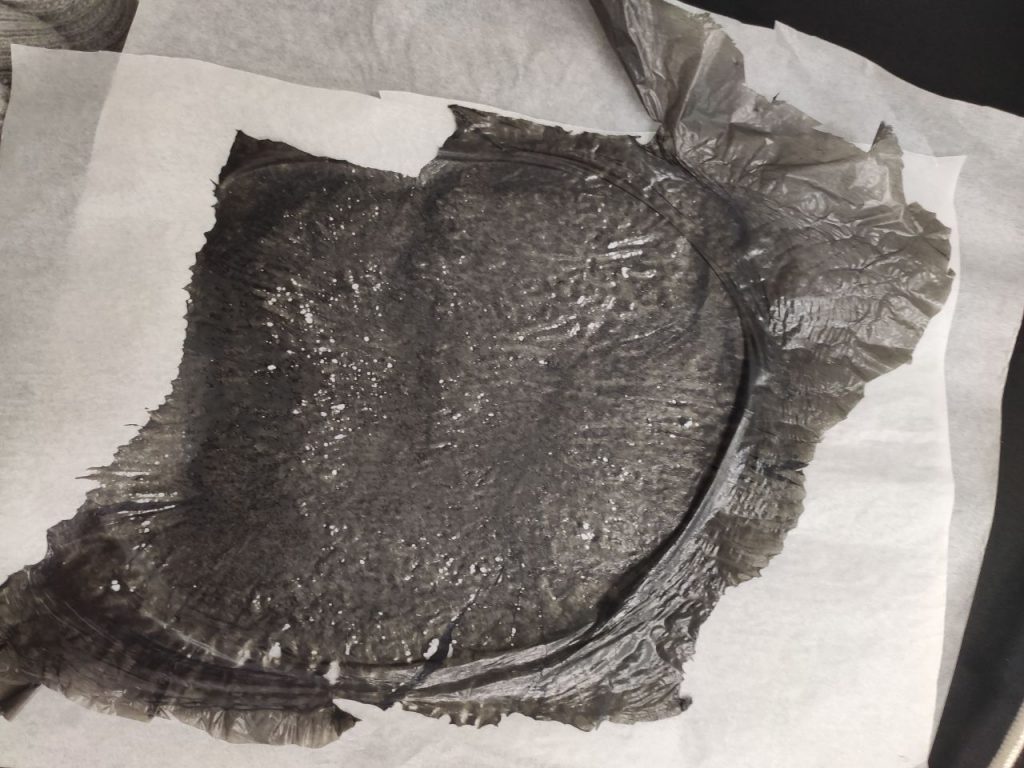
It did somewhat worked, so I place a small piece of organza over and tried ironing it.
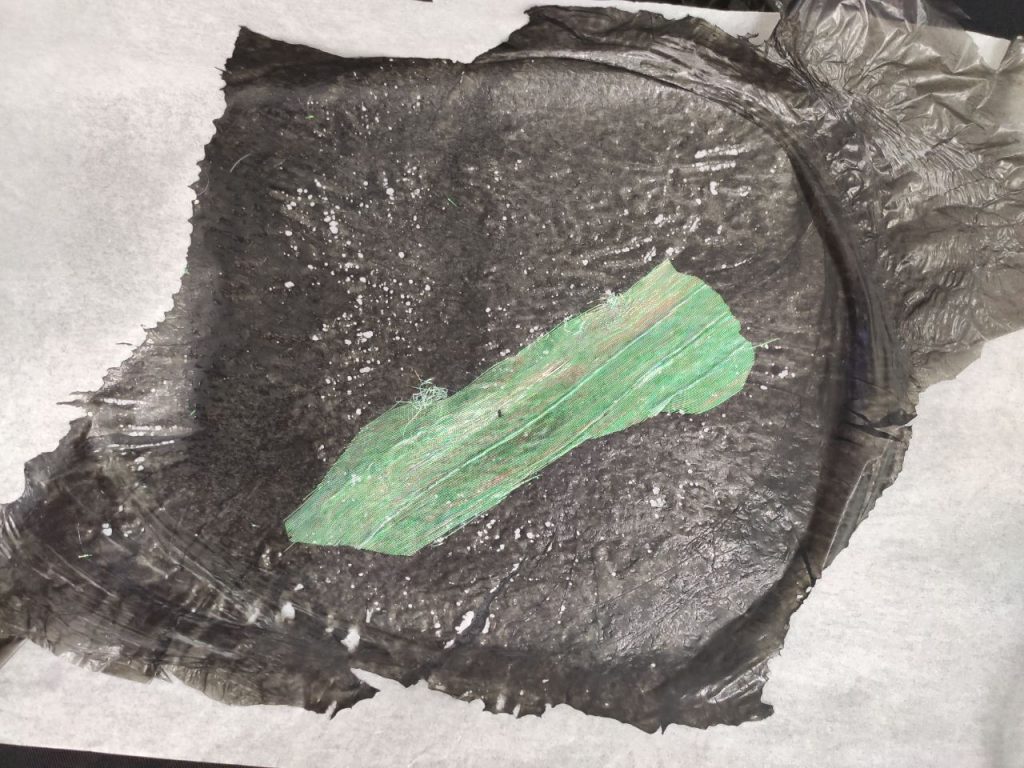
And it did stay, although it seems that it can be peeled out with pressure applied. I really like the look of it, so I continued layering it with organza and added a glittery thread to simulate constellations.

Tada! A starry view with aurora coloured nebulas.
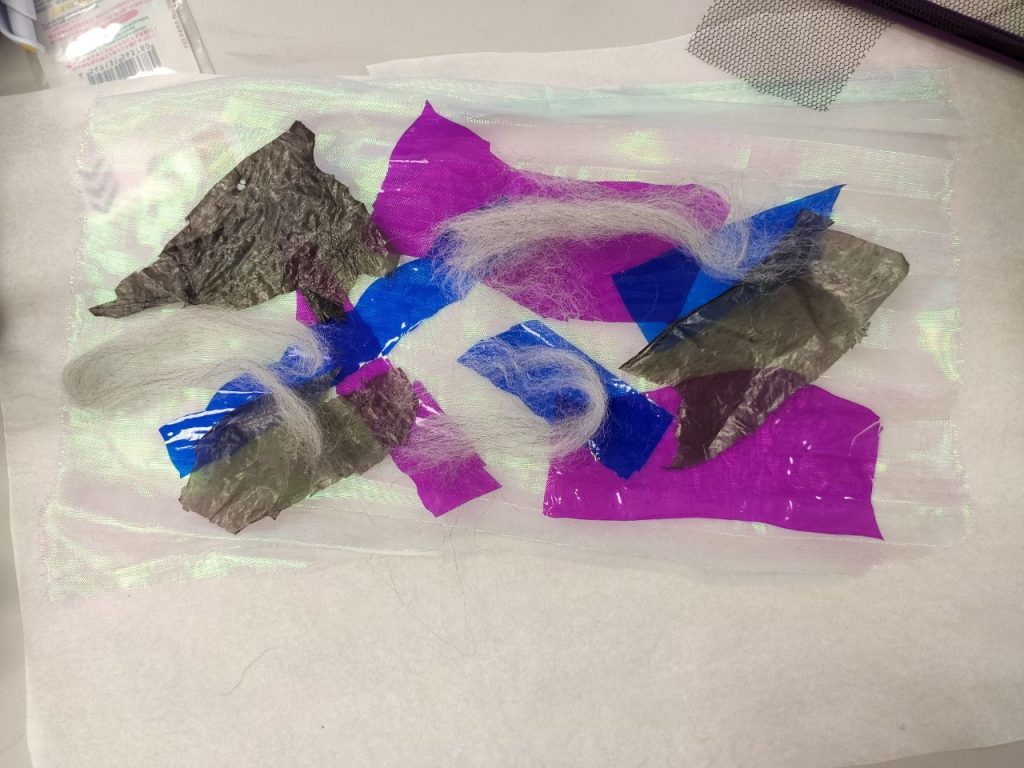
Next, I wanted to experiment with cellophane but since it is translucent, I will lose its opacity effect if I layered it over a coloured/dark background. So, I decided to iron it over the organza instead. I picked the galaxy colours magenta and blue.
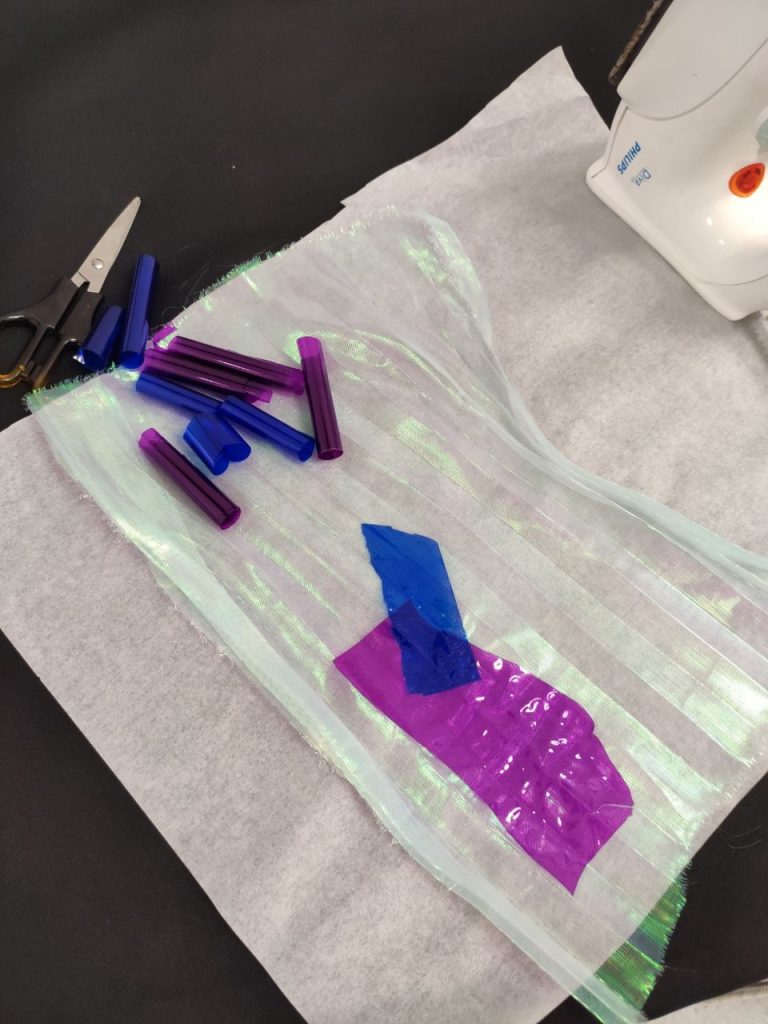
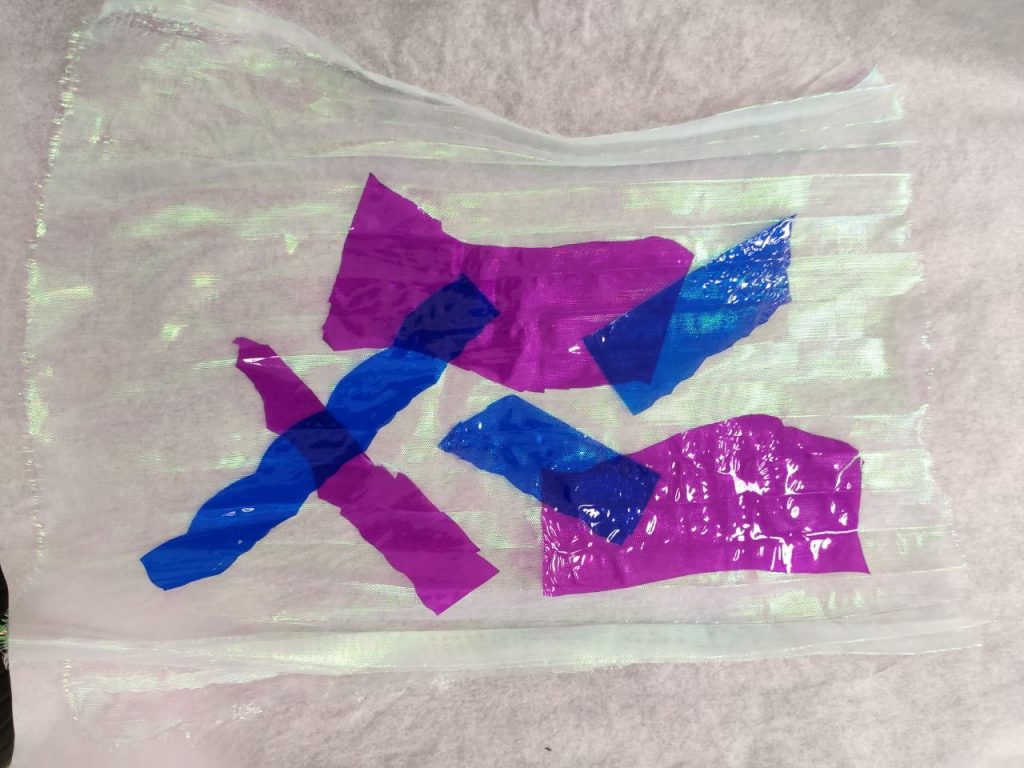
It kind of stays but again, I think can be peeled off easily if pressure is applied. I decided to add dark elements like black plastic from the trashbag and some grey felted wool. I place a transparent plastic sheet over in hopes that it will help stick the wool in place.
In attempt to make the transparent plastic not so visible, I made the settings to the maximum but I think it resulted in some of the cellophane warping and colour lost to the baking paper.
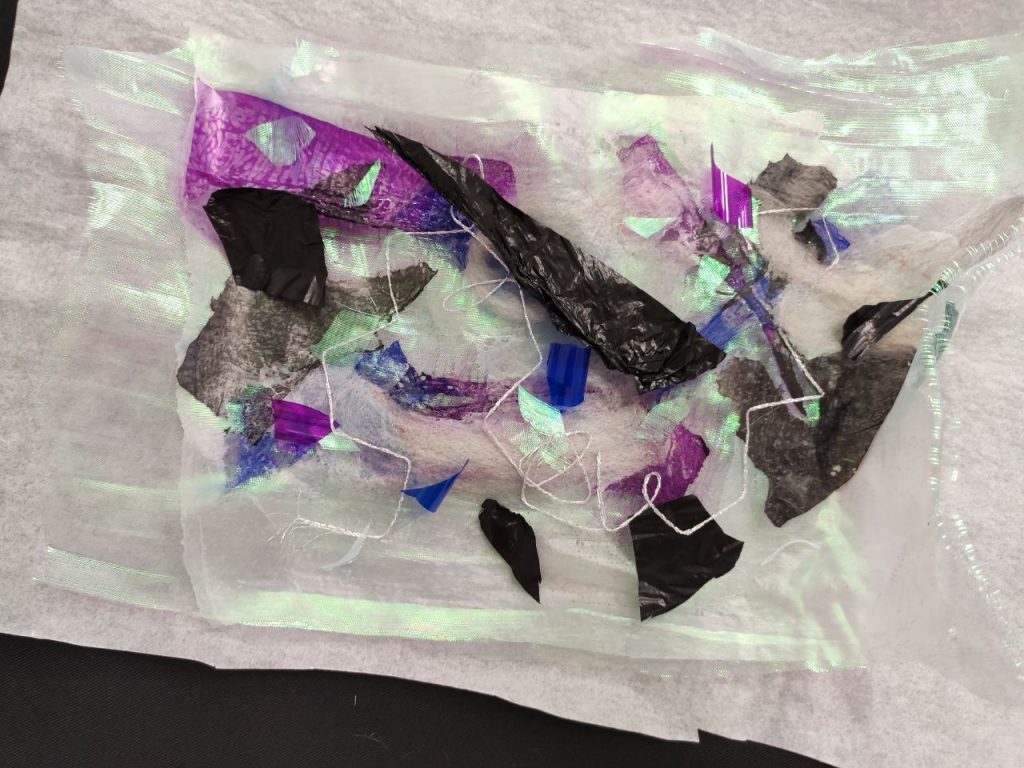
Hence, I decided to layer on a few more coloured plastic and cellophane, as well as organza bits and the glittery silver thread.
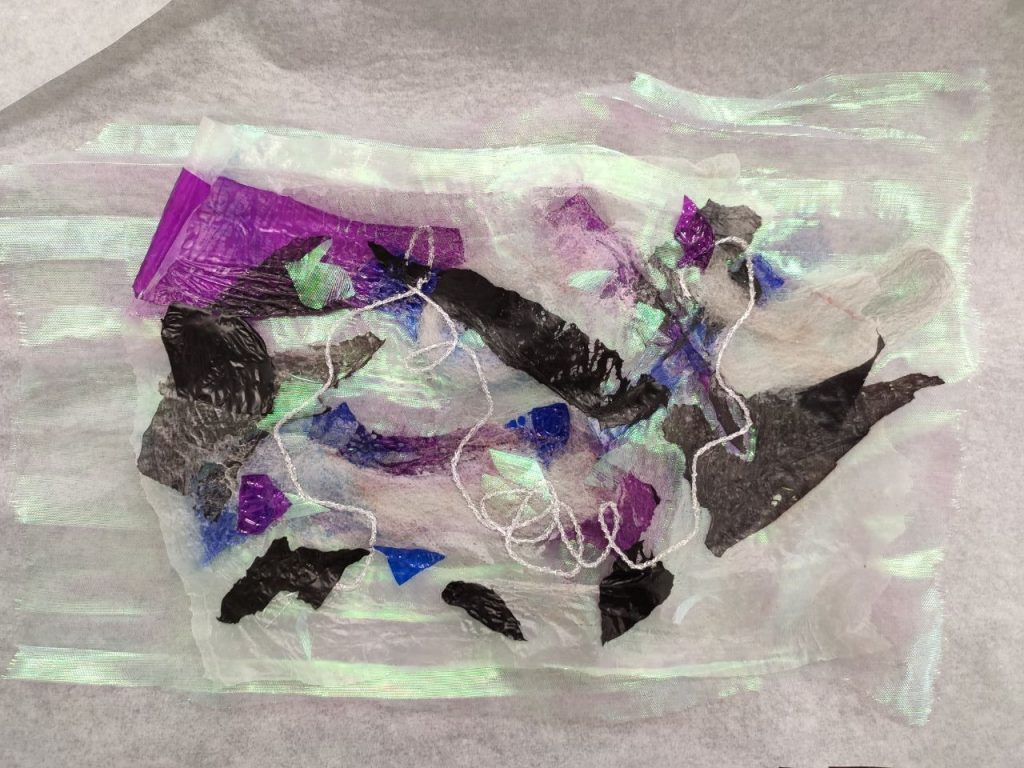
I am pleased with the end results and I think the different transparencies of the cellophane varied by the clear plastic sheet helps give depth to the work. The felted wool also gives it a cloudy nebula texture, accentuated with the holographic organza. Perhaps next time I will try with blue/magenta felt wool instead!
A P P L I C A T I O N S
Plastic fusing can make use of existing designs (i.e. on the plastic bag) to create more interesting patterns. The waterproof, flexibility and durability of plastic is also retained, making it suitable for bags.


Since it also acts as a fabric, it can also be used for fashion.

Water Soluble Thread Fusion
Materials:
- Yarn
- Embroidery Threads
- Felted wool
- Velvet textured yarn
- Silver Glittery Thread
Instructions
- Place a layer of water soluble sheet and start arranging the design atop of it.
- Place another layer of water soluble sheet on the design and pin it into place.
- Sew across the design in a straight/zigzag manner, ensuring the thread overlaps. The larger the gap between the threads, the more it shrinks.
- Wet the work to degree of desire. The wetter/more binder is washed away, the softer the end result.
- Mould it over something to keep in desired form and leave to dry.
My Explorations
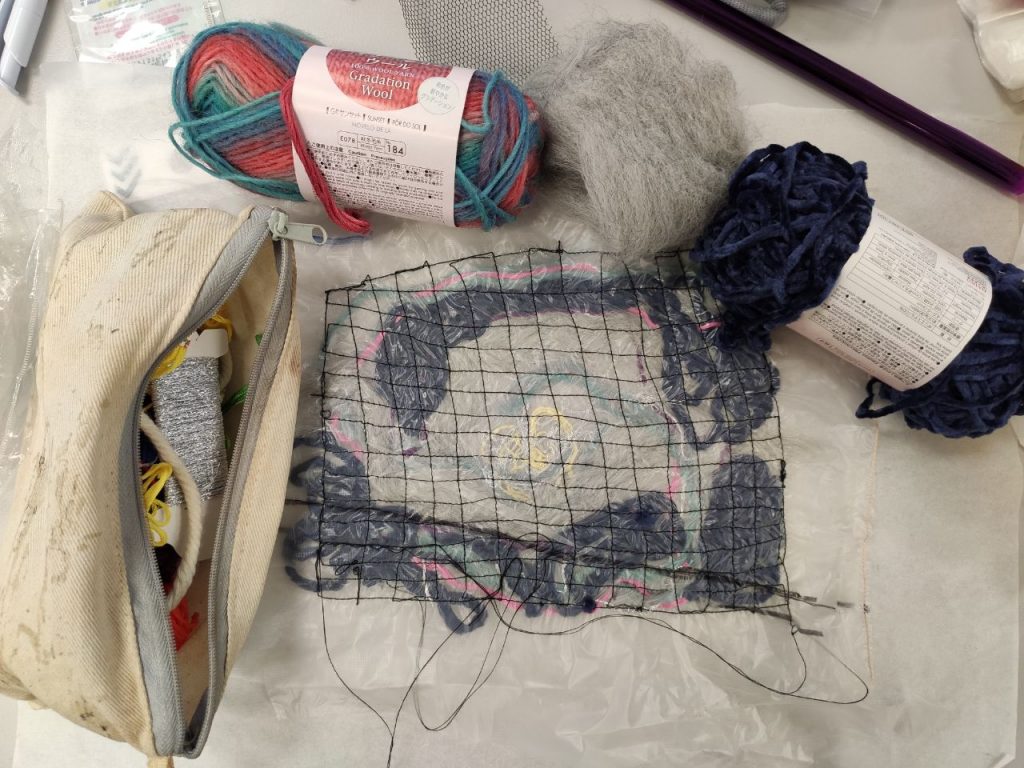
W A T E R S O L U B L E M E L D I N G
I forgot to take a picture before sewing oops but here is one after with all the materials I used. Basically I was aiming to make it look like a spiral galaxy with a bright center I made with white and pale yellow embroidery thread, with the ‘arms’ spiralling out which are hinted by blue yarn, pink and purple embroidery thread. I also tried adding grey felted wool and the navy velvet yarn for the dark background.

Next, onto sewing!
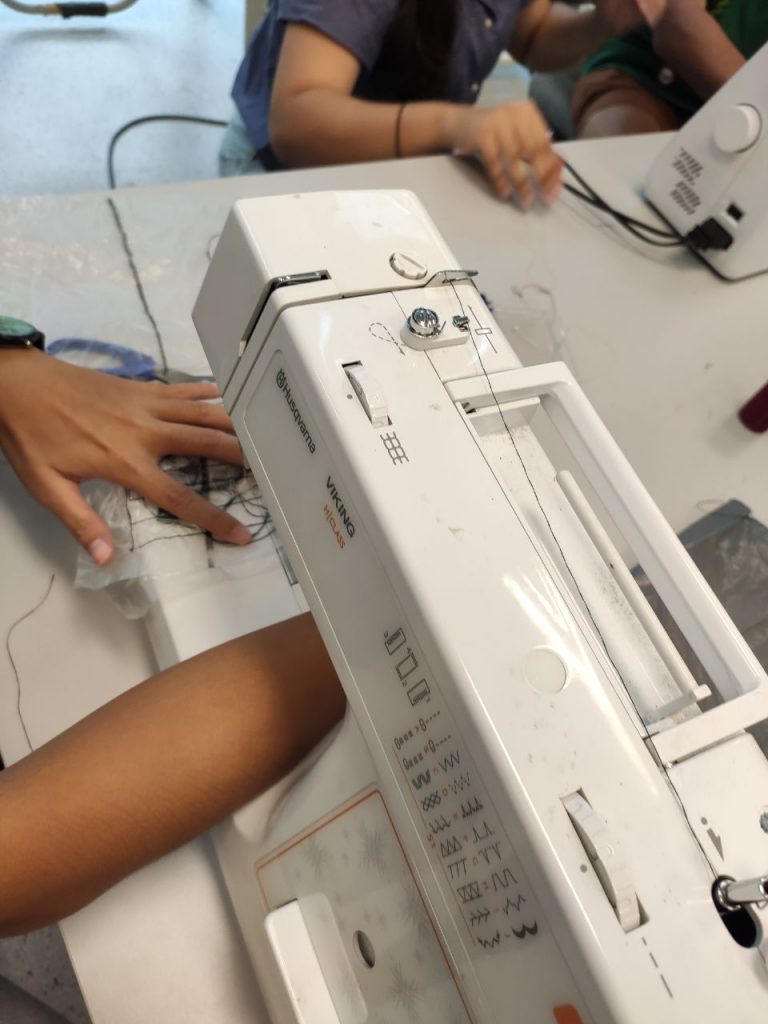
The setup for the sewing machine is quite different from the one at home.
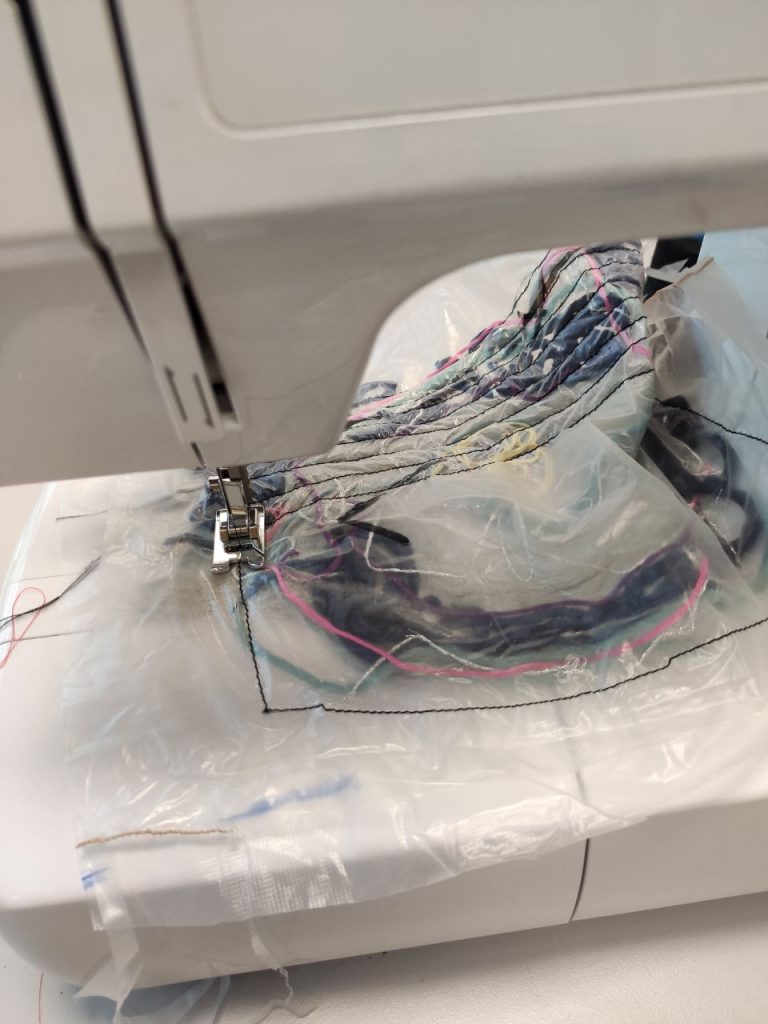
Sewing was a little tricky at the start for the turning points because I kept getting confused which direction the thread would go but eventually I realised it will always being sewing towards me.
I decided to go for a criss-crossed patterned as I think it will ensure the most uniform change when washed as I wanted my design to keep in place.
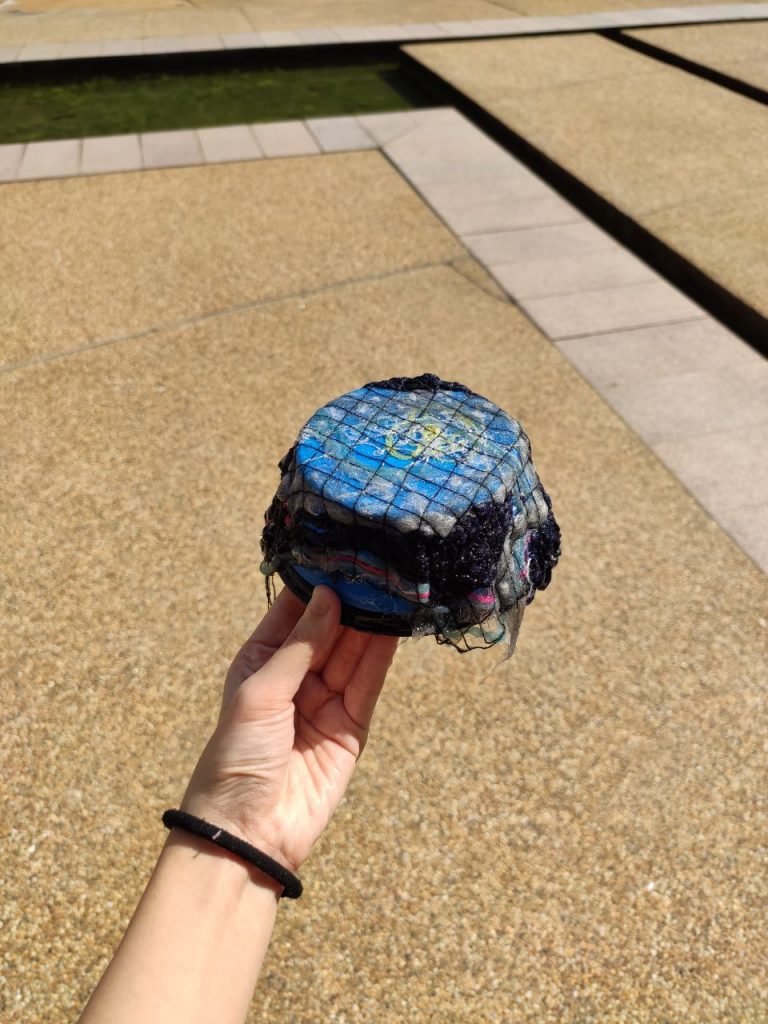
Lastly, I gave it a wash and was surprised how sticky and mushy the solution will be. It made quite a mess and was pretty hard to wash off, even from my hands. Nevertheless, I formed it over a small silicone bowl and I hope it will turn out as expected!
Update: It has dried in 3 days!
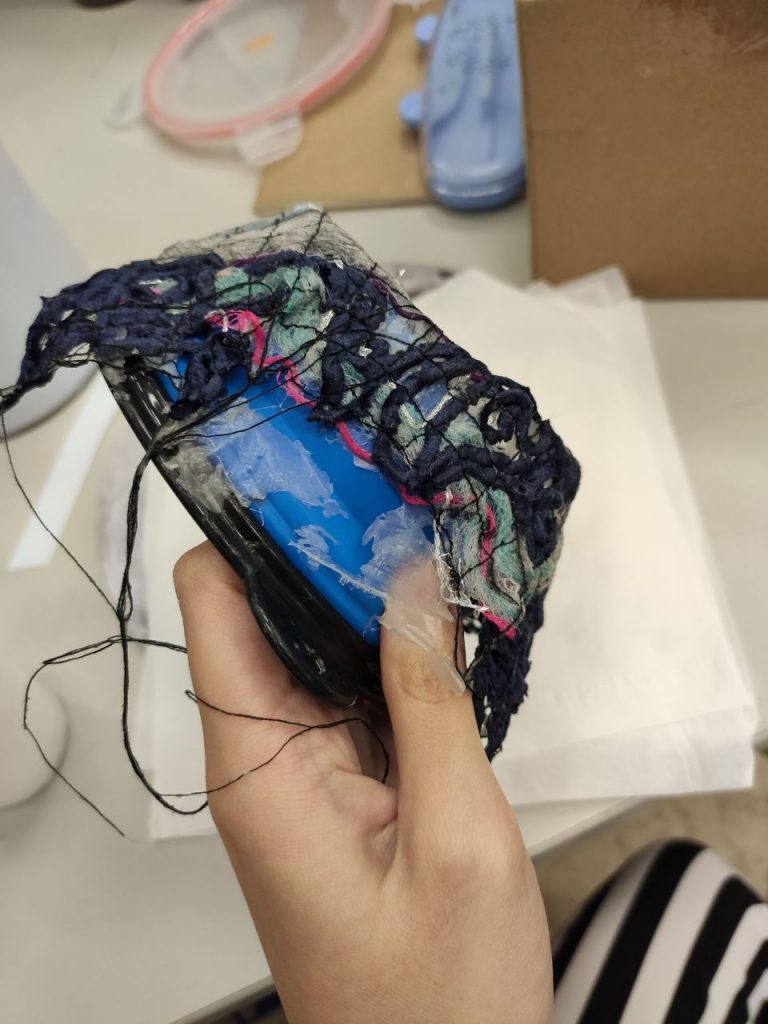
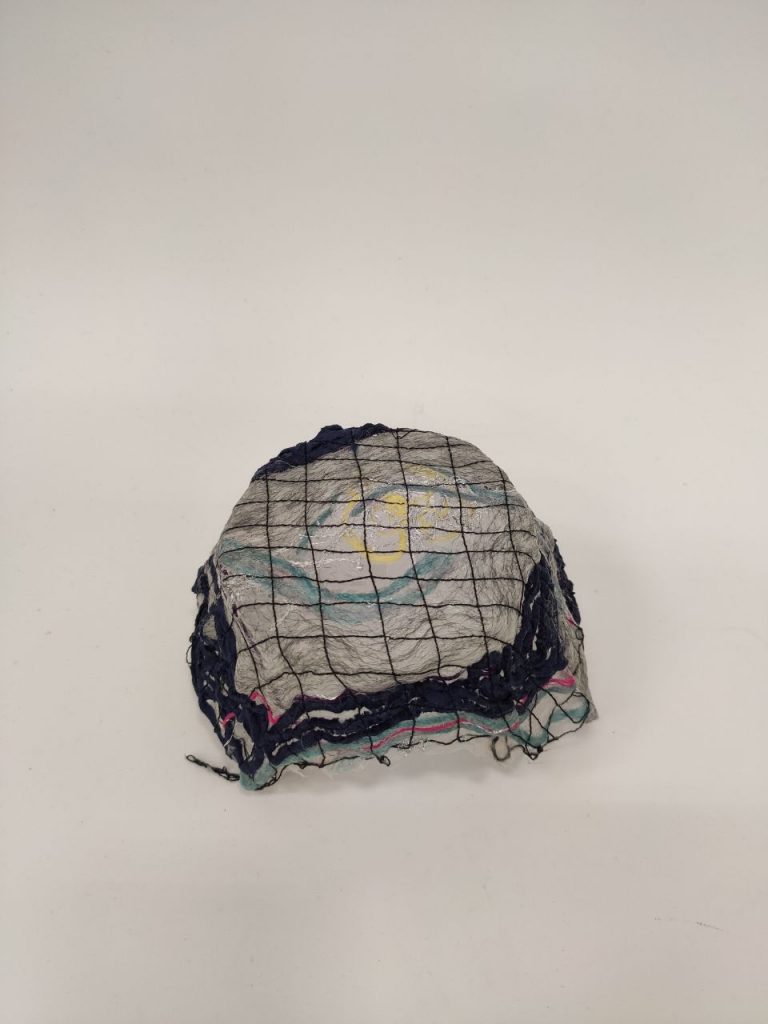
Removing the mould… I’m glad to see that the end product has not shrunk much.
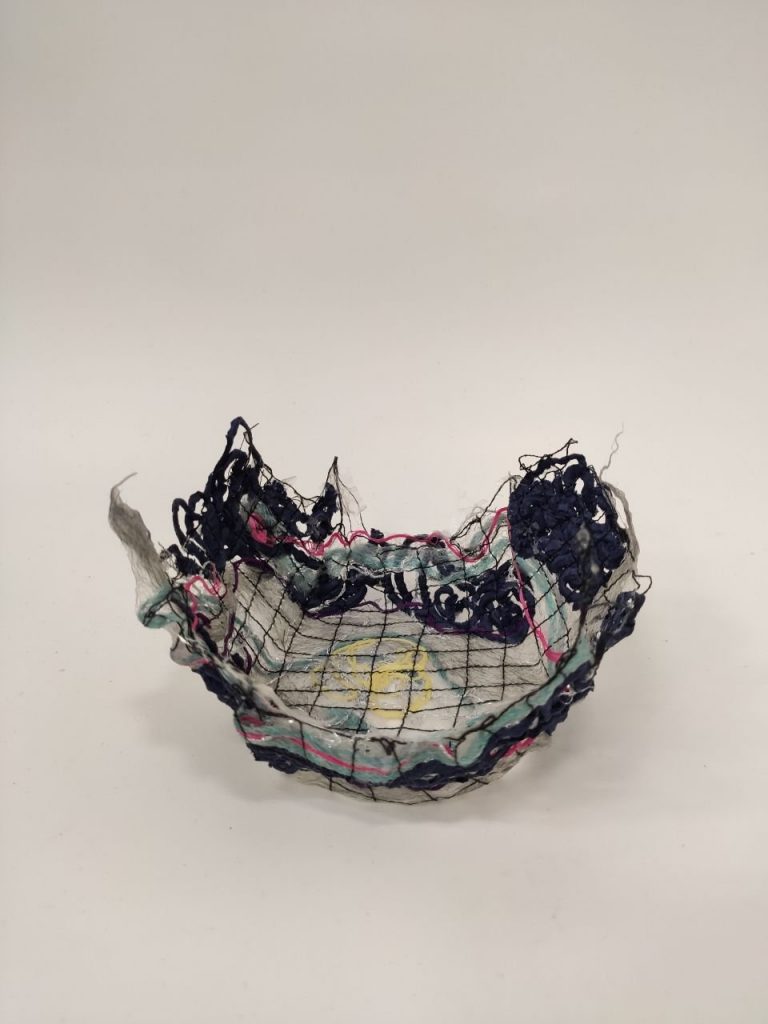
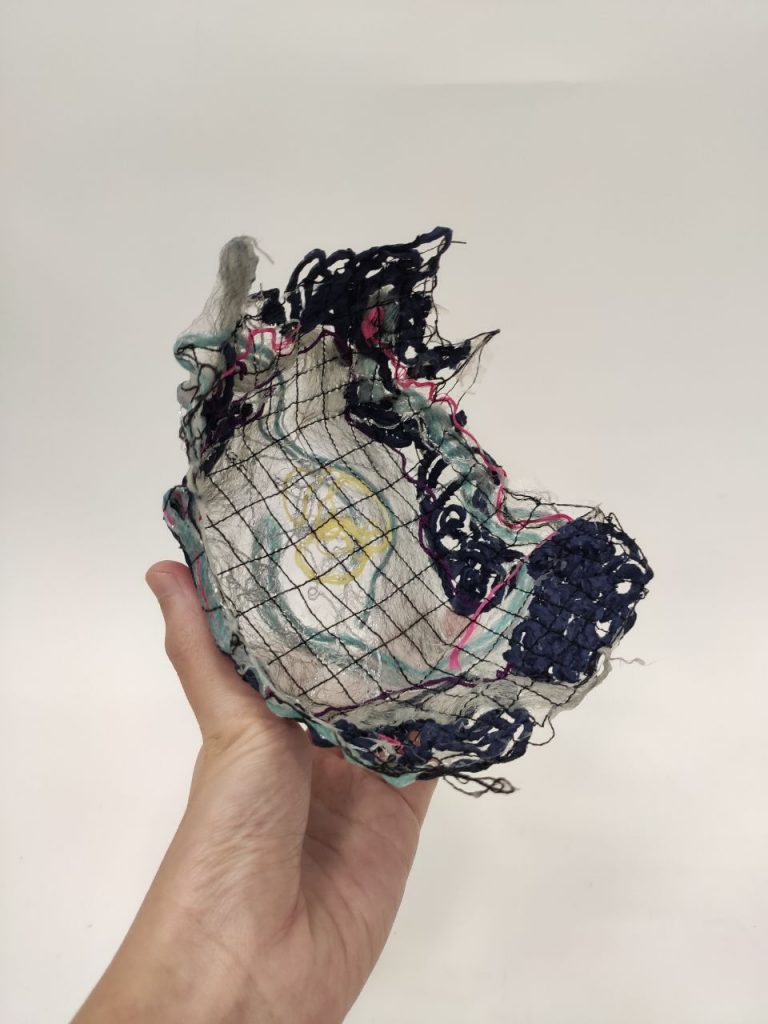
Overall, I am really satisfied with the end product, especially with the colour scheme I chose. I am really glad to have tried adding felted wool, which helps hold the thing together despite its wispy appearance.
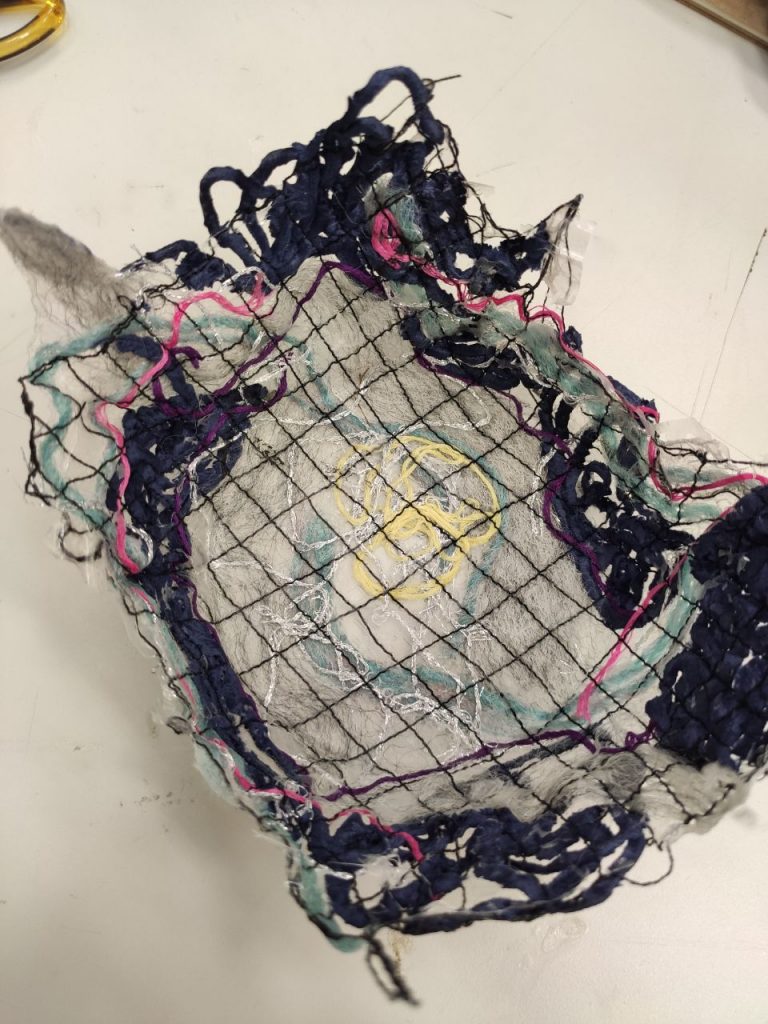
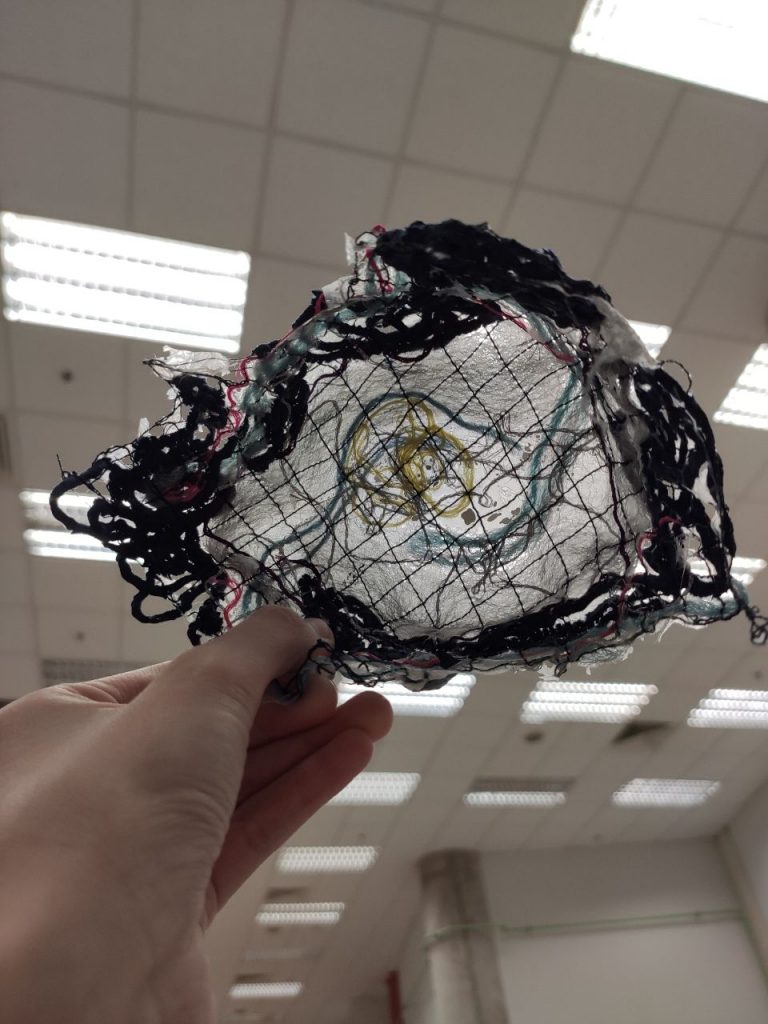
Light also passes through the felted wool! One thing to note though, is that the dark navy velvet yarn I used lost all semblance of its soft texture, which is quite a shame. I conclude that in using such methods, texture should not be considered as everything turns kind of stiff in the end!
All in all, I think this method has a lot of potential to be experimented with as you can pretty much add sandwich any material in between as long as the thread can be sewed across it!
A P P L I C A T I O N S
I think the beauty of this method is in its ability to add transparency into fabric.


It also allows the nature of threads to be held in place, resulting in organic 3D works.


