
Smocking
Method of fabric manipulation through the gathering of a section of the material into tight pleats and holding them together with parallel stitches in an ornamental pattern.
Materials:
- Medium weight fabric
- Needle and thread
Instructions
- Find a pattern online to follow.
- Draw out the grid using a ruler and lines to sew (with a different colour).
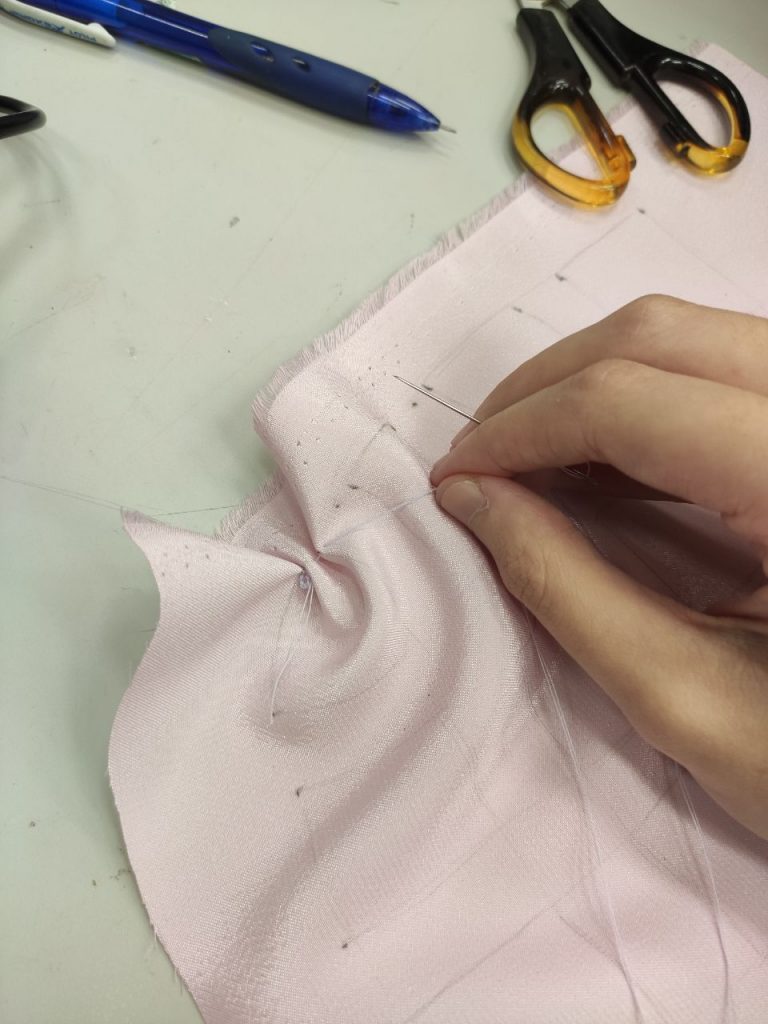
- Start by poking in and out at the first point and in and out at the second, fastening the thread so that the fabric from both points gather together. Do a loop through the fabric and knot them together.
- For separate lines drawn, poke in and out at the first point but do not fasten from the previous knot, simply leave it a little loose and do a knot. Alternatively, you can cut the thread from previous work and start anew, but it is much more time consuming.
- Follow with patience and complete the piece. Flip over for the pattern to be revealed.
My Explorations
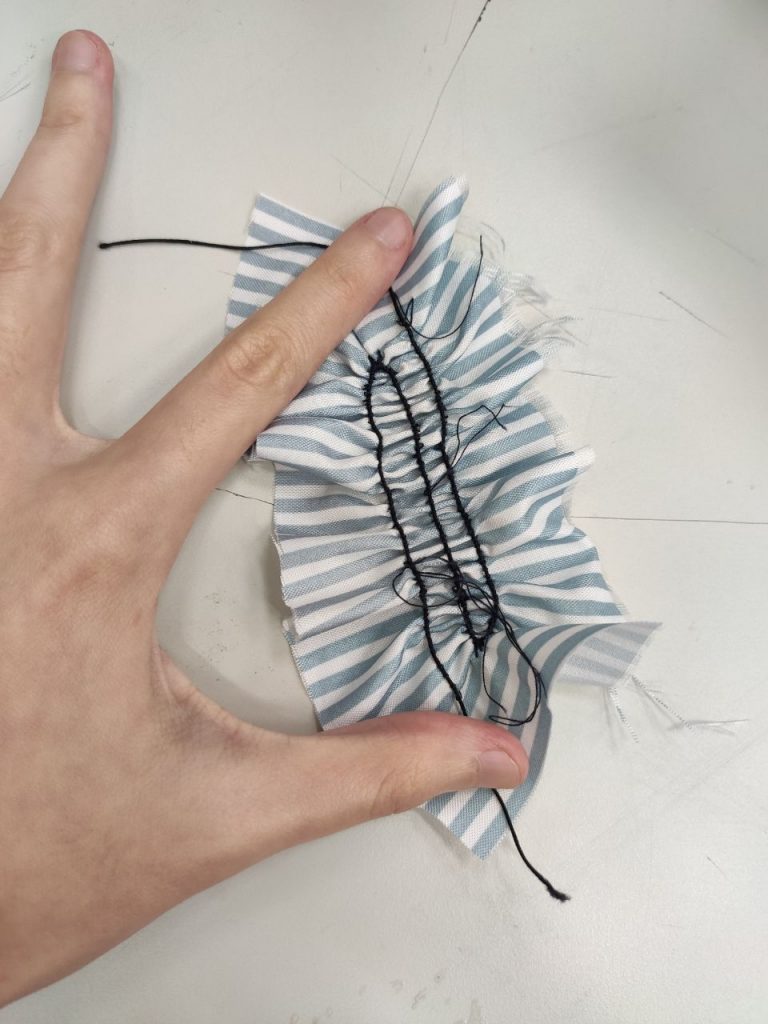
So I found online this ‘cross bones’ design with a pattern that seems pretty simple to follow.
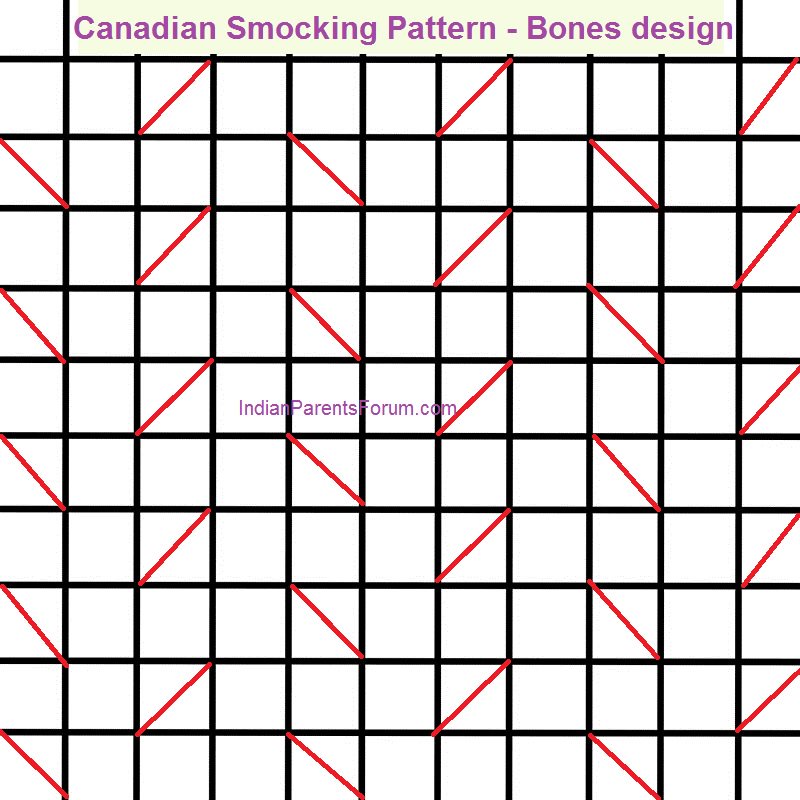
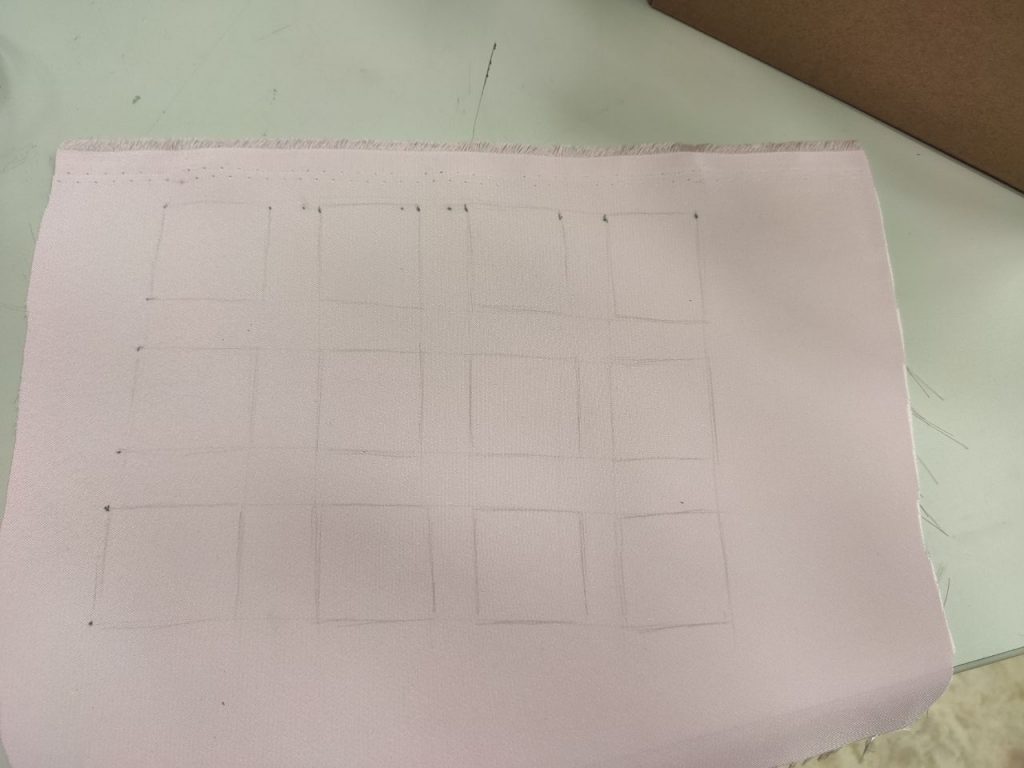
So I drew out the grid, erm looking back I realised for some reason I saw the grids in a diagonal manner instead of the square grid hahaha but I think the end result is similar.

I decided to use the grey chalk for the grid lines and a black erasable pen for the sewing lines, which I think it is quite essential so I won’t get confused later on.
My squares are sized 2cm x 2cm.
However, I do realised that my grid lines are not exactly equal I think as the fabric will move as I draw. Perhaps, next time I will weigh something down on the corners.
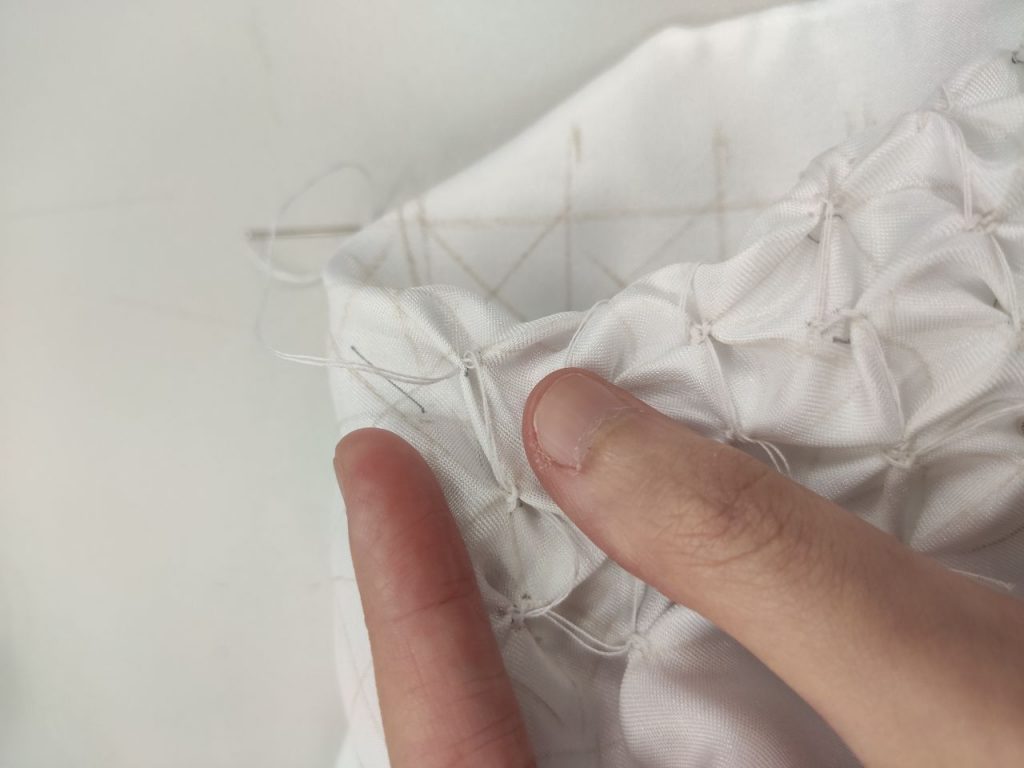
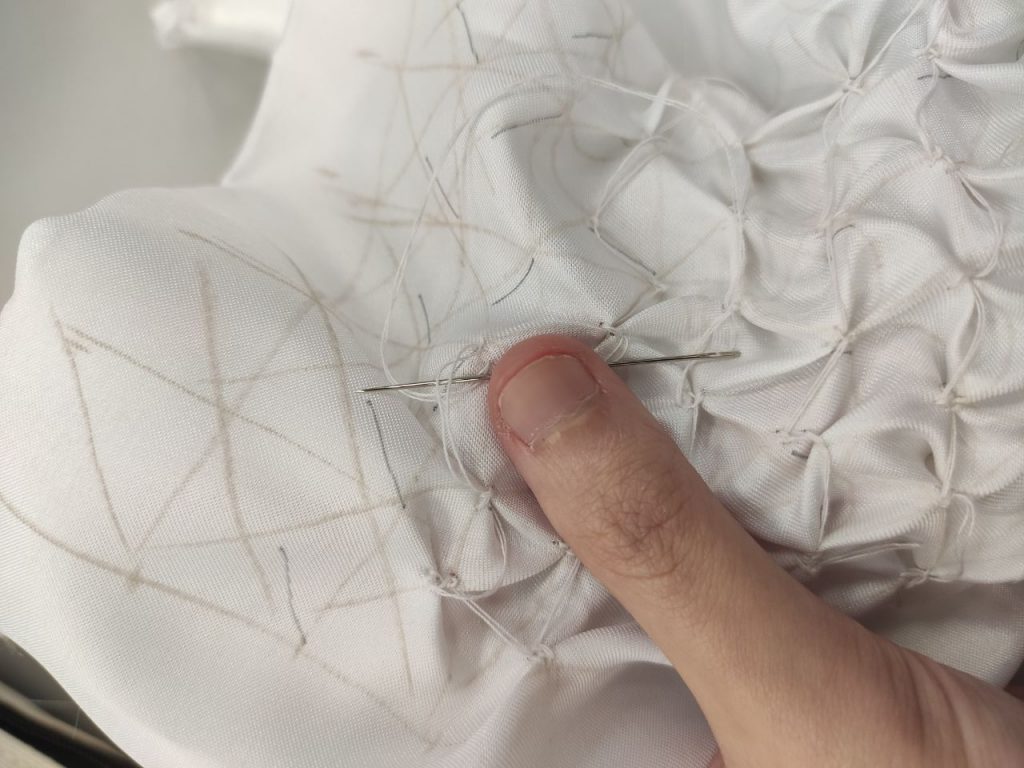

Honestly, I think I kind of understood how the gathering of the cloth creates such patterns and as such, did not encounter much issues during the sewing. I think it helps that the lines I have to follow are also obvious in colour.
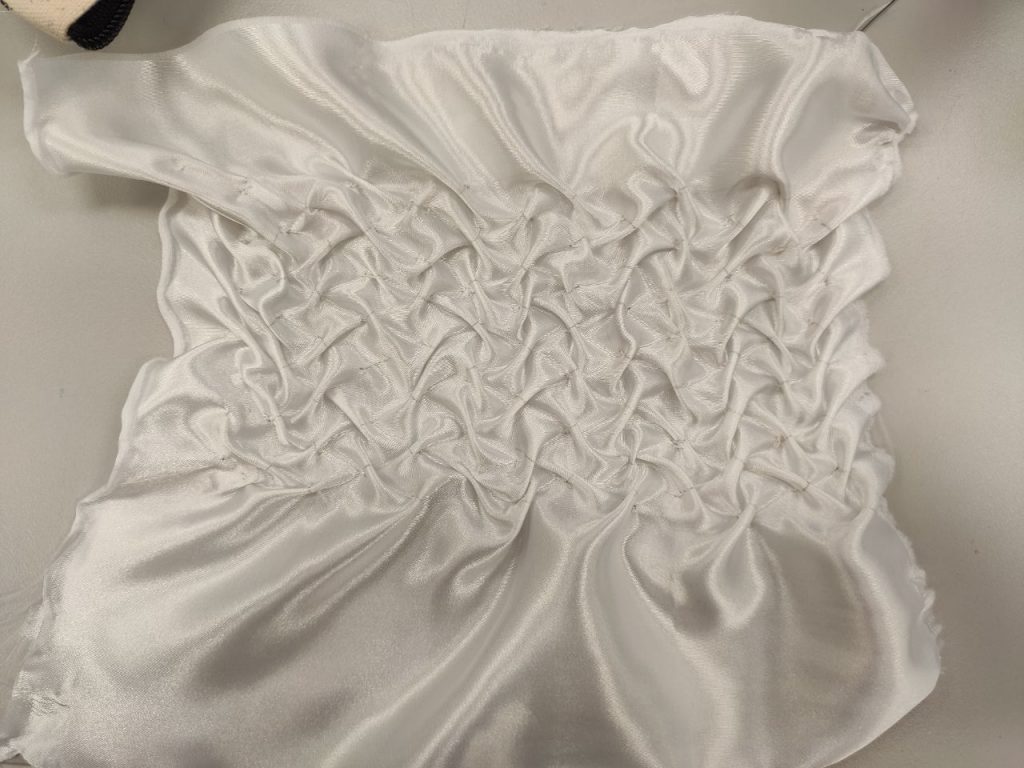
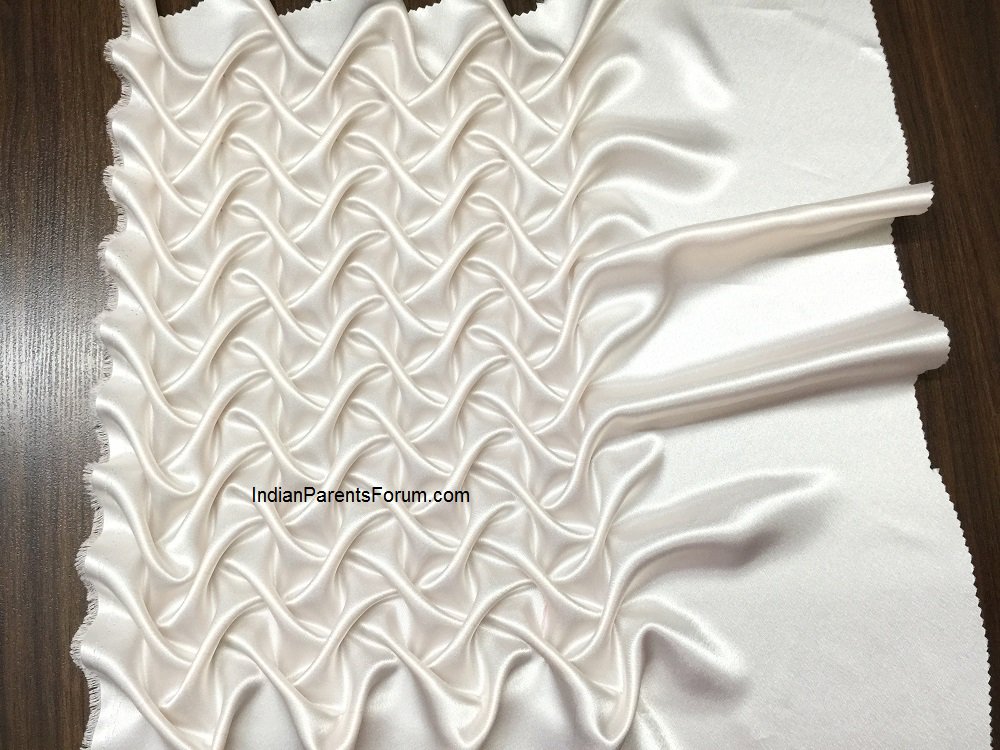
Despite my fastest efforts, I still took around 3 hours to complete this rectangular piece of size 18cm x 15cm.
I think the shiny texture of the cloth accentuates the curves of the smocking pattern. I realised that using the right weight of cloth is also essential, as if it is too thin(like sheer chiffon/gauze), there will not be enough stiffness to hold the pattern but if it is too thick(Like leather), it will hinder the gathering of material.
The pattern itself will also affect the outcome, the simpler the pattern – the thicker the material can be used.
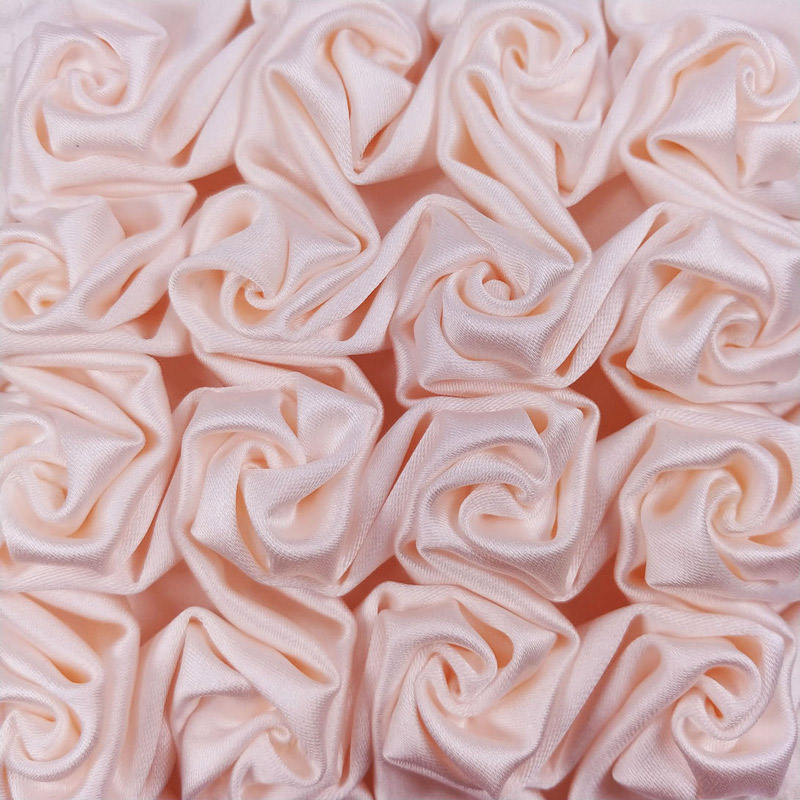
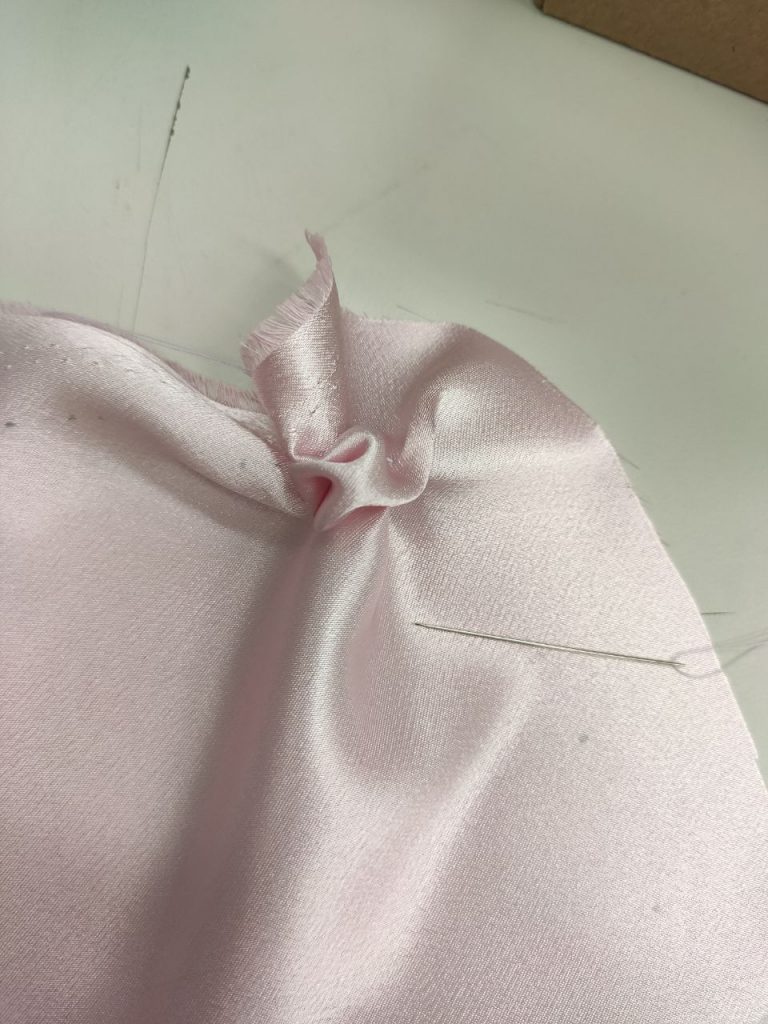
I kind of like the logic and sense behind smocking techniques, so I decided to try one more pattern – the rose pattern.
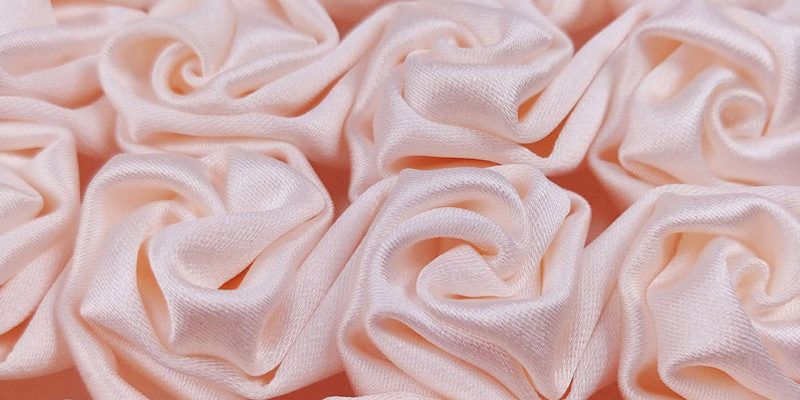
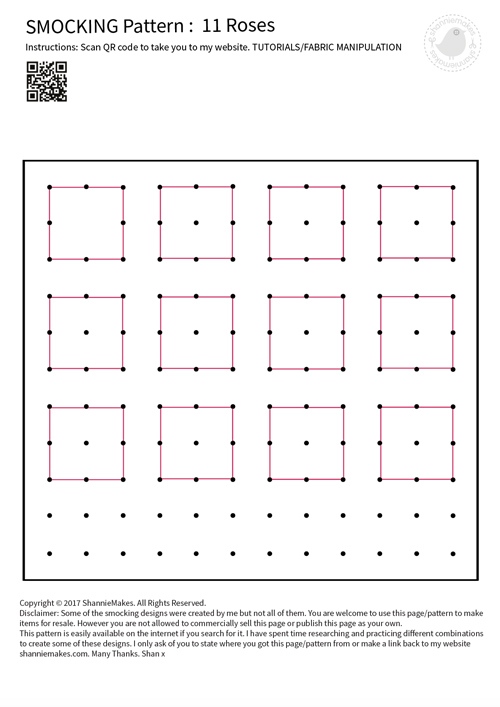
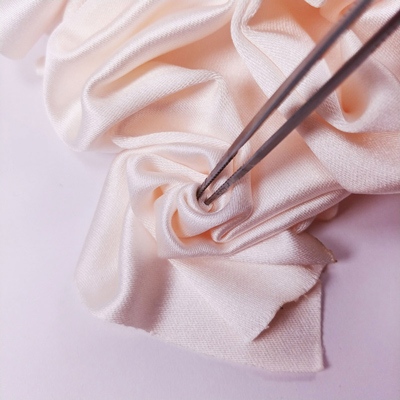
The pattern, once again seems simple enough, although the website did mention that afterwards the fabric have to be twisted with tweezers from the front and sewn in place once again.
So I did a quick sketch (kind of impatient oops) and figured out that I just need to poke the middle of each line so I don’t really have to draw them.
And I just started with the squares.
I sewed one square to test it out and I realised that my square might be a little small, but decided to carry on anyway.
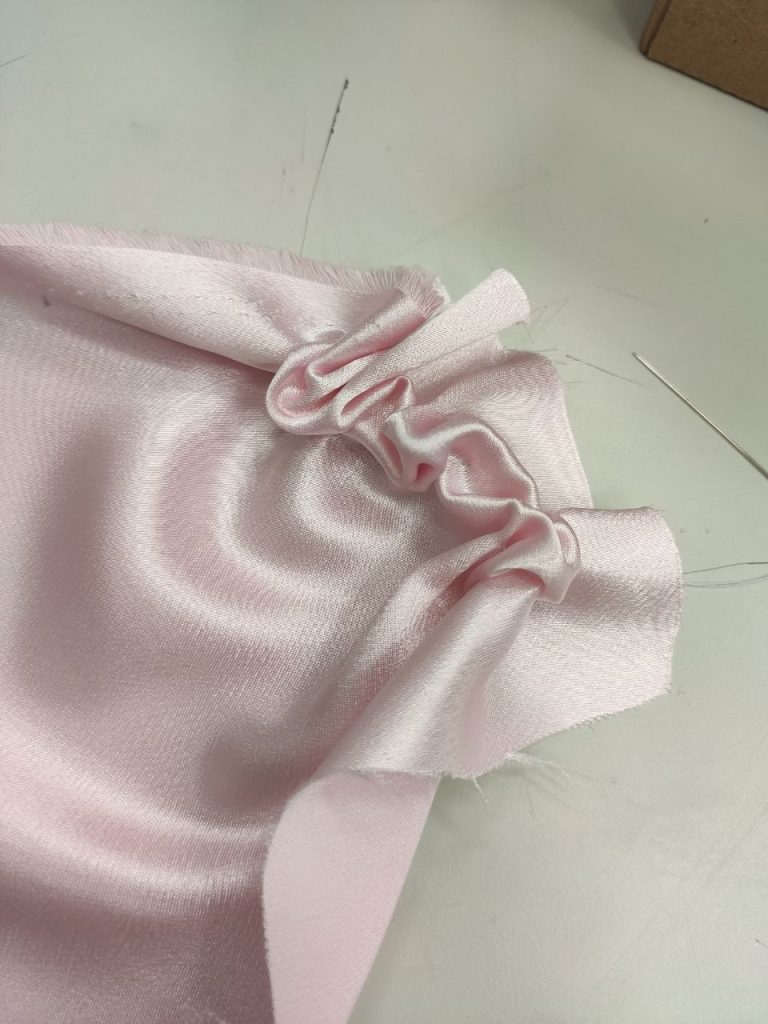
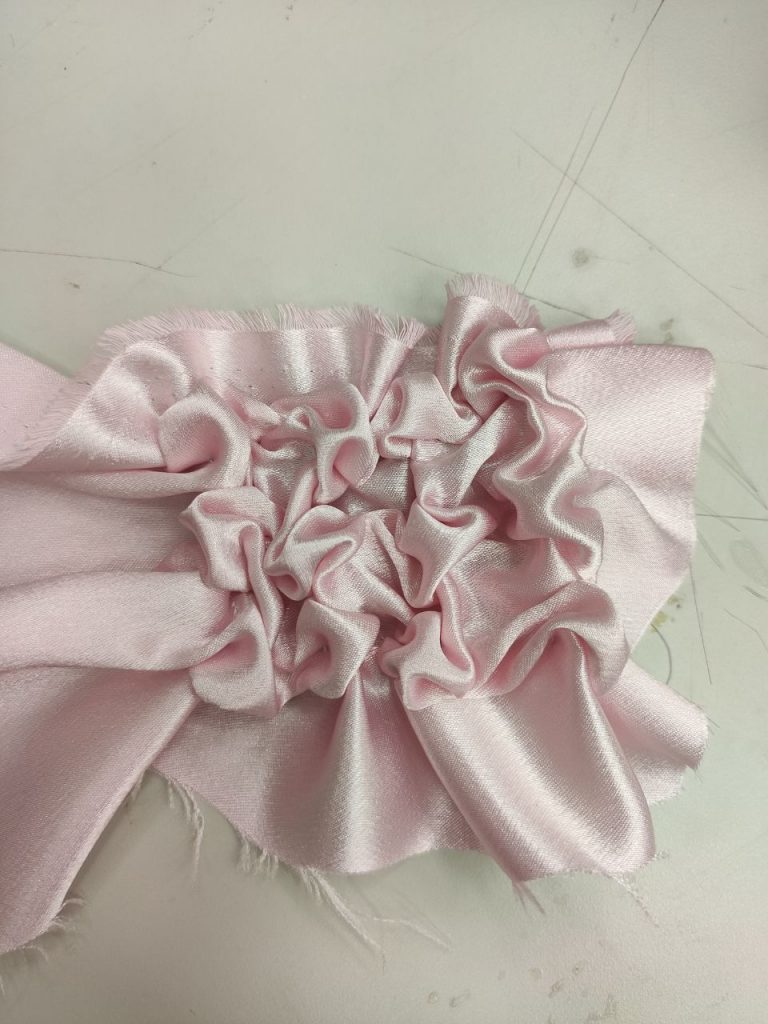
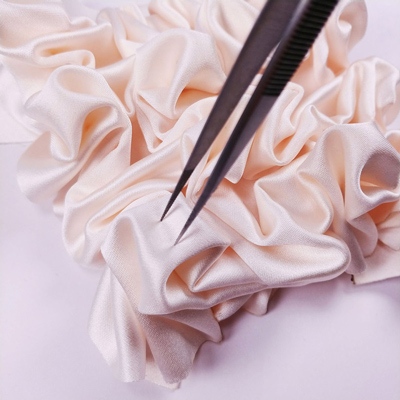
I think I took an hour to finish all 12 squares, which is considerably faster than the previous one. So it’s time to twist and sew! I was actually quite excited to try it and see if the end result will be as nice.

At first, I did not have a tweezer with me and tried to use a the needle itself but to no avail as it unravels easily. Thankfully, I managed to borrow a very suitable tweezer which can hold the fabric in place before I sew.

I would say it honestly looks much easier than the actual thing as there is some kind of method to twisting that will make it look like a rose, as other times the it will just look like spiral. Basically the middle part has to turn into itself to look like rose bud.
Also, sewing it into place is another issue, as sometimes it doesn’t quite looks the same when released or that the thread is too obvious in certain places. There was a lot of removing and trying involved.
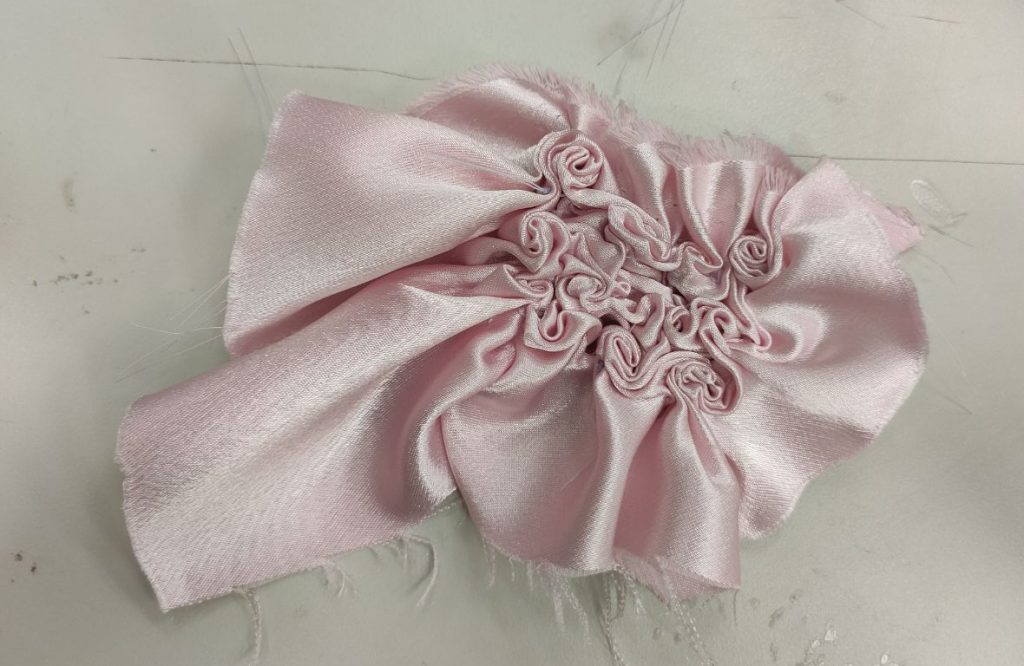
This took me another 2 hours to complete and although it really doesn’t look like what I expected it to be, I think it actually might if i used larger squares.
Still, I am glad I tried it out.
Overall, Smocking is a really intricate technique which although seems complicated, can be easily replicated by following instructions dutifully.
I really enjoyed the suspense during Smocking, as it is not an instant gratification technique, and requires you to complete at least half to see results. It can be frustrating but the end results is quite satisfying.
A P P L I C A T I O N S
Smocking gives fabric a 3-dimensional aspect, which is great for adding volume to cushions.

Smocking also cinches fabric, which is great for adding waistline to clothes.
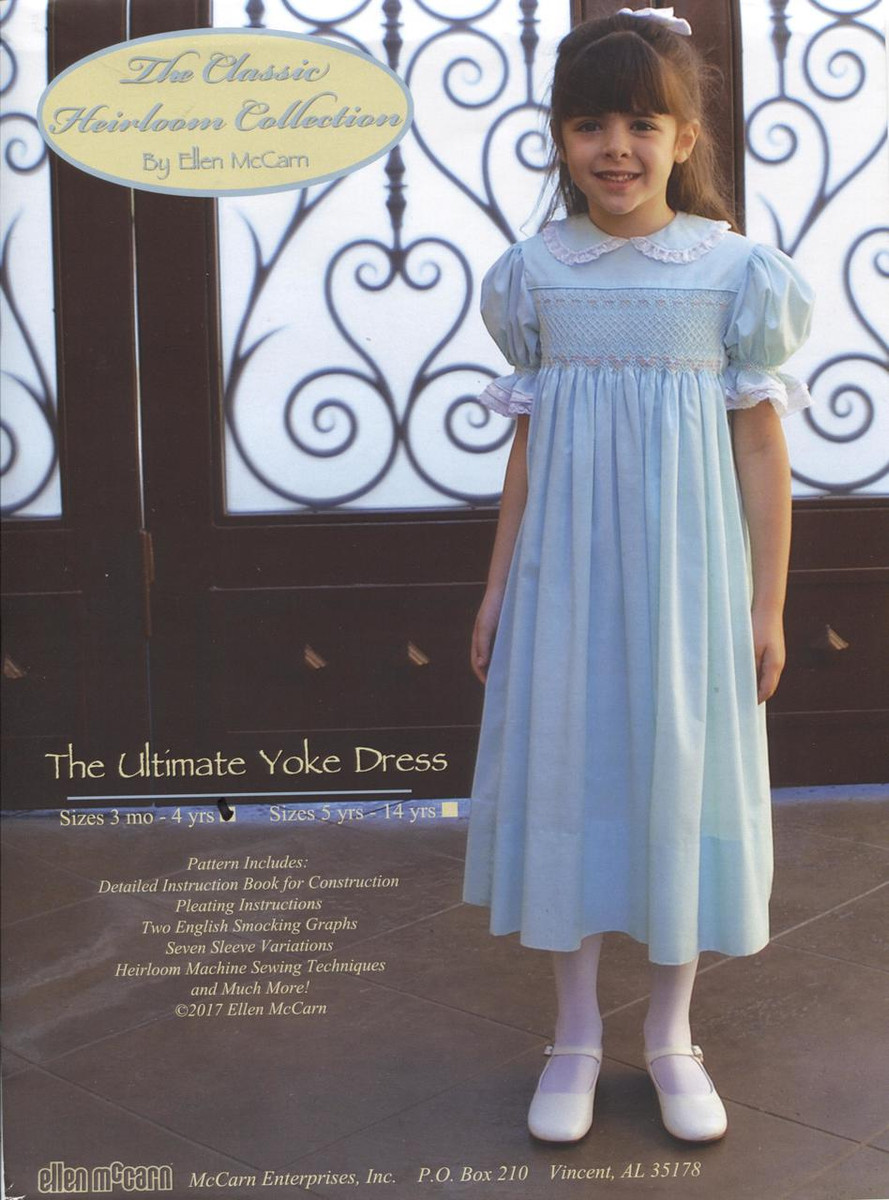
Although I think Smocking was mainly used for olden days children dresses, its geometrical form is also reused in contemporary fashion.


Shirring
Method of fabric manipulation through the gathering of a section of the material into tight pleats and holding them together with parallel stitches in an ornamental pattern.
Materials:
- Elastic thread
- Elastic band
- Fabric
- Sewing Machine
Instructions
- For stiff, thin fabrics, load the elastic thread into the bobbin of the sewing machine.
- Sew parallel lines to achieve a cinching effect.
- For thicker fabrics like leather, use normal thread to sew.
- Cut a piece of elastic band the length you would like the material to shrink to when unstretched.
- Stretch it out across the fabric when sewing them both together steadily.
My Explorations
First of all, I learnt how to change the thread on the bobbin and load it into the sewing machine, as well as prepping the sewing machine for use.
I decided to try sewing S-shape curves onto my stiff, thin fabric.
I would say it got jammed a few times which is because the too much fabric was gathered so it is important to stretch it out properly before sewing slowly.
A P P L I C A T I O N S
Shirring is commonly seen in fashion – myself owning one of these shirred tops! Due to their elasticity, they can show off your body shape when worn. They are also commonly used to cinch the waistlines of dresses to give it shape.

:fill(ffffff)/http://static.sg.zalora.net/p/glamorous-1379-6352701-1.jpg)


I think shirring is a great way to vary the form of the dress (i.e. tight at the top, flowy at the bottom) even though it is made out of only one fabric.
The raised/gathered texture of shirred fabric also gives it a bit of volume.