
Materials Exploration: Fabric Manipulation, stitching with elastics
What is Fabric Manipulation?
Techniques that reshapes the surface of the material. There are many ways to play with fabric and manipulate or control it so that it becomes more dimensional. Throughout history, people have developed different ways of altering fabric to provide contrasts, to create a sense of fullness, and create surface effects (giving textures). Some of these methods are very old, but contemporary fabric artists continue to use them and adapt them in new ways.There are many ways to manipulate fabric such as, stitching, smocking, pleating and shirring etc.
Types of Fabric Manipulation tried in class:
– Smocking
– Stitching with elastic (shirring)
Smocking
Smocking is a hand-stitching technique that gathers fabric into small shapes as the threads are pulled tight on the back of the fabric. The stitches are sometimes visible to help organize the folds in direct smoking.
Materials Used:
– Fabric (cotton, linen, cotton linen, velvet, chiffon, etc)
– Hand Sewing Needle
– Ruler
– Pen
– Sewing Thread
Experiment:
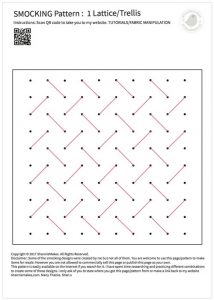
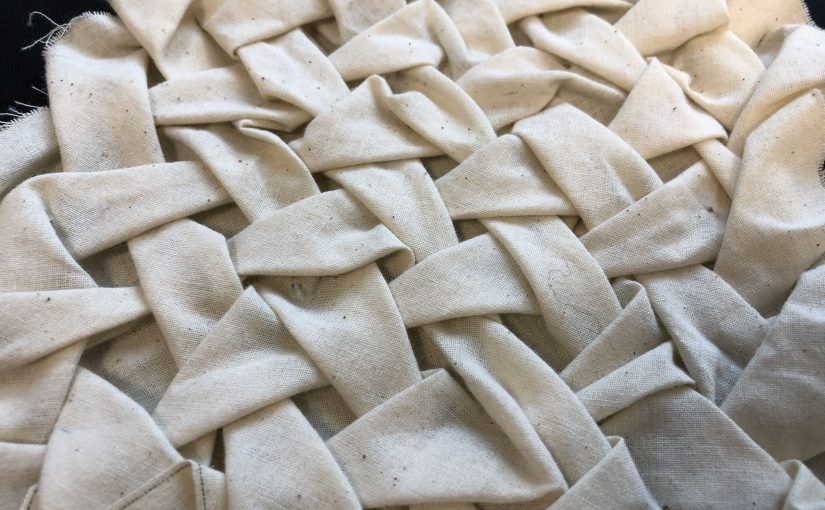
The pattern that I am interested to experiment would be call the “lattice” pattern. I love this pattern because unlike some of the pattern, this design creates a relatively flat surface after it is sew.
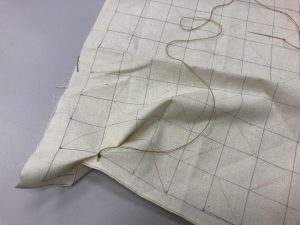
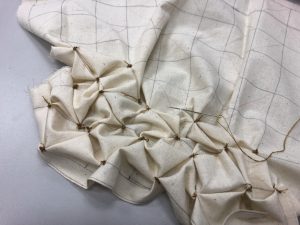
The technique to create smocking is quite straight forward. Start off by dividing your fabric into squares boxes. Do take note that depending on how big you want individual pattern to come out you adjust the dimension per boxes. The smaller the boxes the more compact your patterns would look:) Then, draw line (marking) inside the box following the template of your design and simply follow the direction and sew the corners point together. I did mine in alternate ways. column 1 –> column 2 –> row 2 column 1 –> row 2 column 2 and repeat:)
TADA!!!
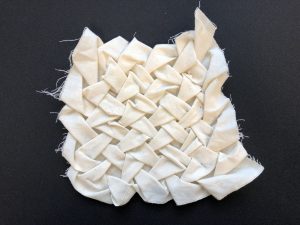
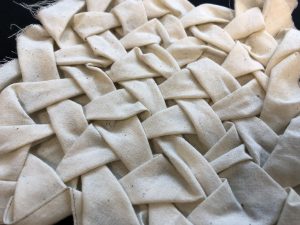
I really love the outcome of the fabric. It was a struggle at first because about 1/3 through the fabric you might not still be able to see the pattern forming and would doubt yourself if you’re doing it correct:) but don’e worry just continue and the patter would be reveal!!:)
Stitching with elastic (shirring)
Shirring is a magical technique that shrinks a piece of fabric and transforms it into something stretchy. It’s great for skirt waistbands, shirt hems and bodices. And all it takes is sewing a few rows of stitches with elastic thread. Test out shirring on a few different types of material and you might notice that the more lightweight the fabric, the better the result. Light cotton fabrics like voile will shrink more than, say, a quilting cotton. Fabrics like corduroy, wool and other heavyweights are just not shirr-able. Stick to the lightest fabric you can find.
Materials Used:
– Elastic Band
– Elastic Thread
– Lightweight Fabric
Experiment:
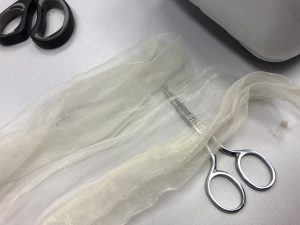
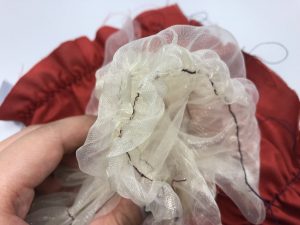
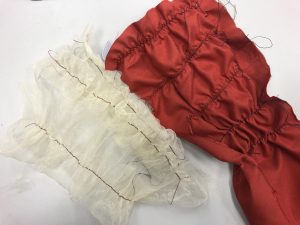
Since it was recommended that lightweight materials works well for shirring. I decided to try with this organza like material. It was really hard to control this material because the elastic thread does not get sew into the fabric easily and also while sewing with sewing machine you have to constantly pull the fabric so that it does not crumple up together once you let go.
TADA!!
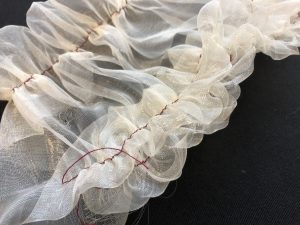
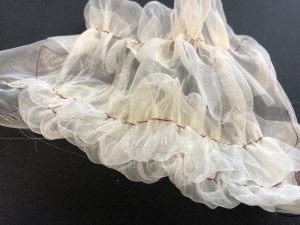
I really like the effect of this lightweight material as it create the girly dreamy like texture. I like how it is crumpled together through the elastic thread and also how soft feeling the folds gives out.

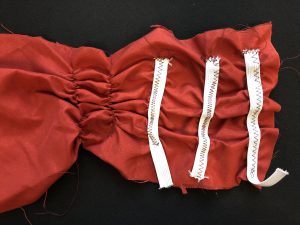
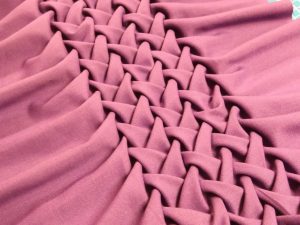
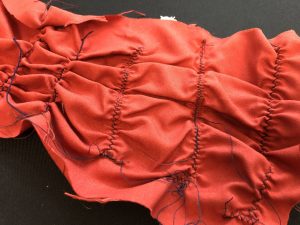
I decided to try with a more heavy fabric and non translucent material to see the effect of it. I experiment with both elastic band and elastic thread. The effect of the elastic thread came out really nice as the thread was already coil at a certain tightness on the sewing machine. However, elastic band requires us to pull the band tightly while i sew them onto the fabric through the sewing machine. If you did not pull it tight enough the crumple effect would not be obvious. Just like my sample, I tried a few times trying to pull my elastic band tightly but it still wasn’t tight enough hence the crumple effect was not very obvious:( A little tip I learn was to actually either hand sew, pin or sewing machine one end of the elastic band onto the fabric first to secure it. So that when we sew it onto the fabric through the machine we would just have to pull the band on the other and could use your free hand to slowly hold the fabric on the opposite of the sewing machine:)
TADA!!
Finish sample of the day:)