
Knitting
What is Knitting?
Knitting is a method by which thread or yarn is used to create a cloth. Knitted fabric consists of a number of consecutive rows of loops, called stitches. As each row progress, a new loop is pulled through an existing loop. The active stitches are held on a needle until another loop can be pass through them. This process eventually results in a fabric, often used for garments. Knitting may be done by hand or by machine. There exist numerous style and methods of hand knitting. Different types of yarns and needle may be used to achieve a plethora of knitted materials: these tools give the final piece a different colour, tecture, weight, and/or integrity. Other factors that affect the end result include the needle’s shape, thickness and malleability, as well as the yarn’s fibre type, texture and twist.
Types of Felting:
– Garter Stitch Pattern
– Stockinette Stitch Pattern
– Rib Stitch
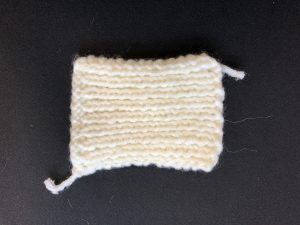
Garter Stitch Pattern
Garter stitch is one of the easiest and most common stitch patterns in knitted fabrics. You create garter stitch by knitting every row. (You can create garter stitch by purling every row, too.)
Materials Used:
– Yarn
– Knitting Needle
Experiment:
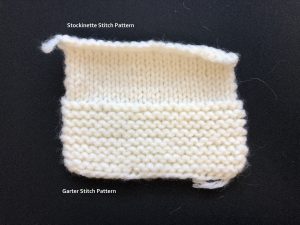
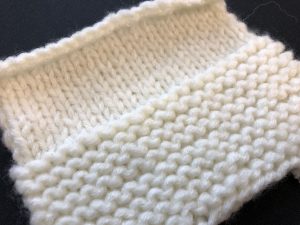
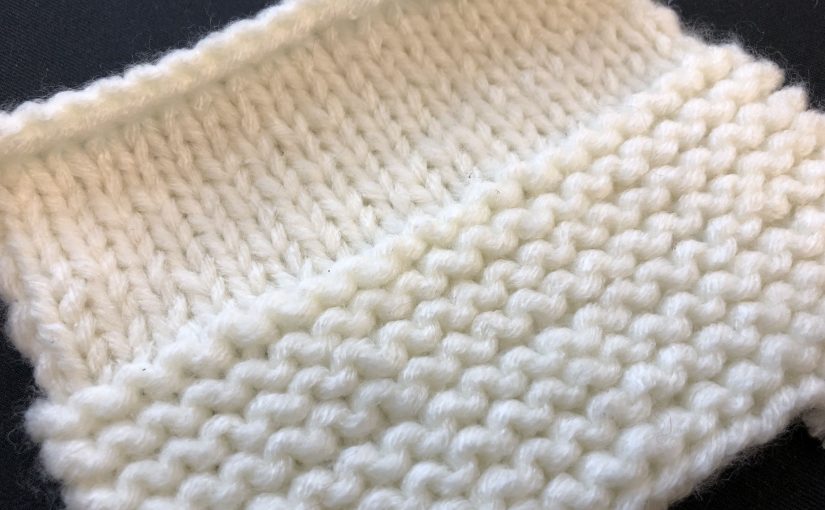
I experiment with white yarn I got from daiso to create the most basic knitting stitch which is the garter stitch (the one on the bottom) . I really love this stitch because it creates a thick but soft texture and it doesn’t curl up. It retains the flatness of the knitted outcome
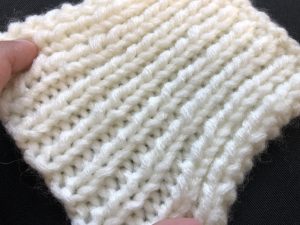
Stockinette Stitch Pattern
Stockinette stitch is a basic knitting stitch. To knit stockinette stitch, you alternate a knit row with a purl row. Meaning. Stockinette stitch (or stocking stitch) is everywhere: scarves, socks, sweaters, blankets, hats etc. Stockinette stitch make use of two side to create – the right and wrong side. Simply put it right side would be the front which is the side you want to show your intended design and wrong as the back side. Example. clothing, the right side would the side facing the public and outside and wrong side would be the inner side:) Hence in stockinette stitch you should have two different pattern on each side of your outcome:)
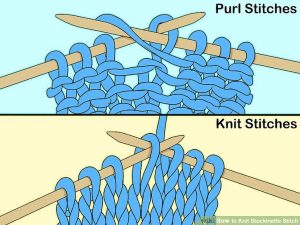
Right side – On the right side (front) we create the Stockinette stitch making use of knit stitch method
Wrong side – On the wrong side (back) we create the garter stitch making use of purl stitch method
Materials Used:
– Yarn
– Knitting Needle
Experiment:
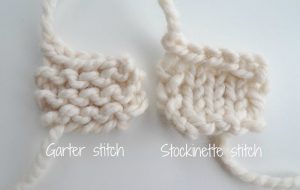
Using the same piece I tried with the garter design (bottom) with purl stitch I continue and create the stockinette stitch (top) using the knit stitch. After trying I am not really a big fan of it. even know the v like knit are very traditional pattern we see on knitted garments. the corners of the knit tends to curl up and the thickness of the piece is relatively thin compared to garter stitch where we use purl stitch on both side.
Rib Stitch
Rib stitch wasn’t really taught in class but professor Galina saw the knitted jacket that I was wearing and introduce me the name of the stitch which is called rib stitch. and she suggested that I could try this one because it is a combination of garter stitch and stockinette stitch just alternating them:)
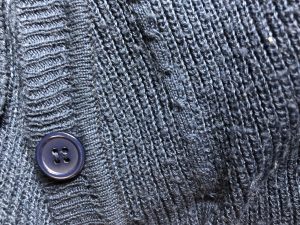
The jacket that I was wearing was made from rib stitch:)
The rib stitch consists of columns of knit stitches alternating with columns of purl stitches. To make a ribbed pattern, you change from knit stitches to purl stitches within a row — instead of alternating knit rows with purl rows (as you do when making horizontal stripes). Single knit stitches alternate with single purl stitches. There are different type of rib stitch:) 1 x 1 ribbing: Single knit stitches alternate with single purl stitches, creating very narrow columns. 2 x 2 ribbing: Alternates 2 knit stitches with 2 purl stitches. It pulls in slightly less than 1 x 1 ribbing.
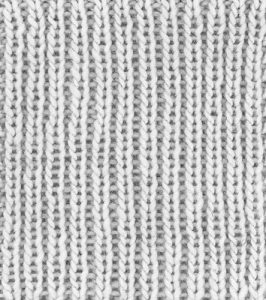
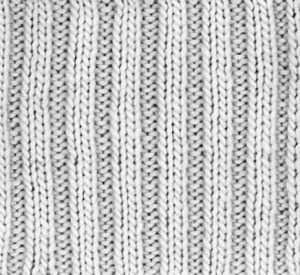
Left: 1 x 1 ribbing, Right: 2 x 2 ribbing:
Materials Used:
– Yarn
– Knitting Needle
Experiment:
I was so happy I manage to successful trying out this stitch:) what amaze me would be it being able to stretch! Because it is able to stretch you can find rib stitch around the wrist area of many knitted wears.
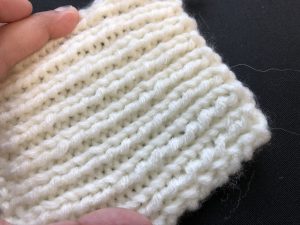
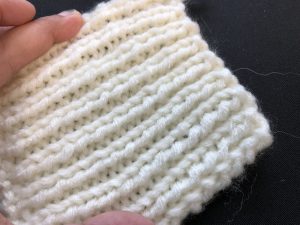
Pulling open the knit stitch you’ll be able to find the purl stitch in between:)
Making more Samples:)
After learning how to knit using the basic material which is yarn. We were encourage to try on varies materials:) I decided to experiment with copper wire, normal cotton fabric, plastic raffia string and well as changing colour of the yarn!:)
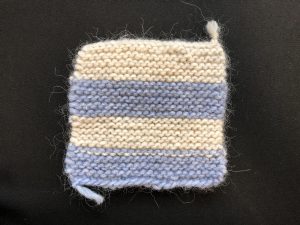

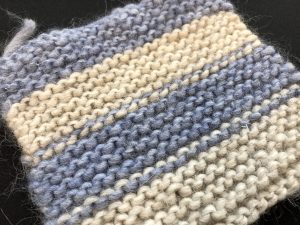
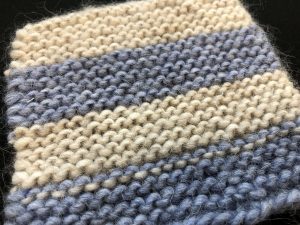
Colour changing was quite successful experiment for me. Although halfway through I made s mistake by changing the last blue yarn onto the right side there causing in awkward white yarn in between the batch of blue yarn. But overall I am satisfied with the outcome!:)
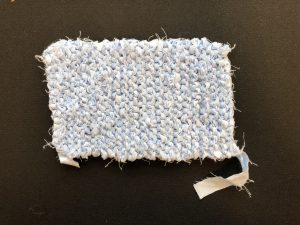
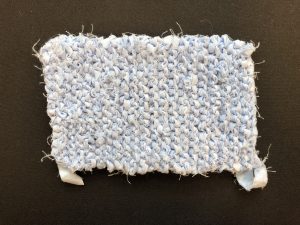
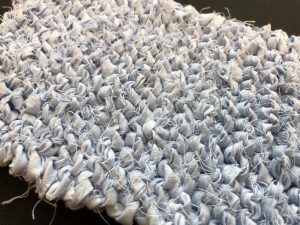
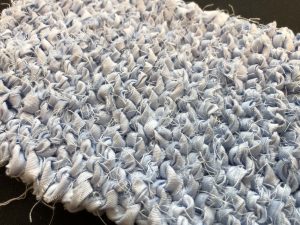
I creating my own “yarn” by cutting a piece of fabric into strips and connecting them by tying a knot at each end:) I decided to use garter stitch for this material because I want to create a thick and heavy outcome from a very thin and light characteristic the fabric originally have. I really love this outcome because by making my own “yarn” I create strips that are uneven hence when knitting them together it would not be of an consistent thickness in the stitches creating this semi crumpled uneven texture which I really love it:)
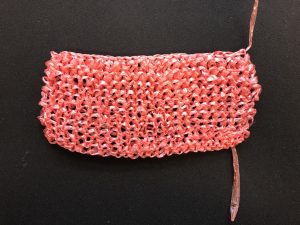
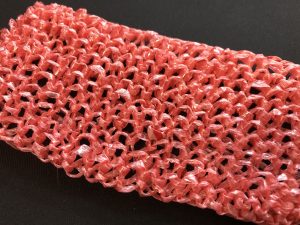
I use raffia strings as a representation of plastic because compared to plastic bag raffia string itself have a certain thickness to it. I was wondering if I knit using a string with a certain stiffness would be knitted piece be able to retain a certain shape if i were to twist the piece into a form. After trying I realized that even though raffia string are stiff they are still not strong enough to maintain a certain from probably because of the needle thickness I use the holes in between actually causing it to become relatively weak:(
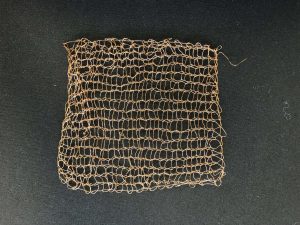
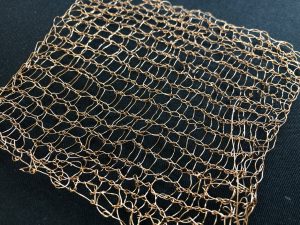
Last would be copper wire:) Since it is so hard to control the wire as it kept slip out from my knitting needle. So alot of patients is needed to knit with copper wire. Probably could watch some show while doing:) Anyway I like the outcome of the copper wire. Something that I am not very satisfied would be the holes in between. I was wondering if i were to use a much thinner knitting needle the holes would be much more smaller and the knitted piece would look more compact and stiffer. But by doing so, if also mean that it would take very long to create a piece since the wire are so thin. Making it compact we could most likely spent same amount of time i use for this experiment piece but result in a much much smaller piece:(