Not completed yet 🙁
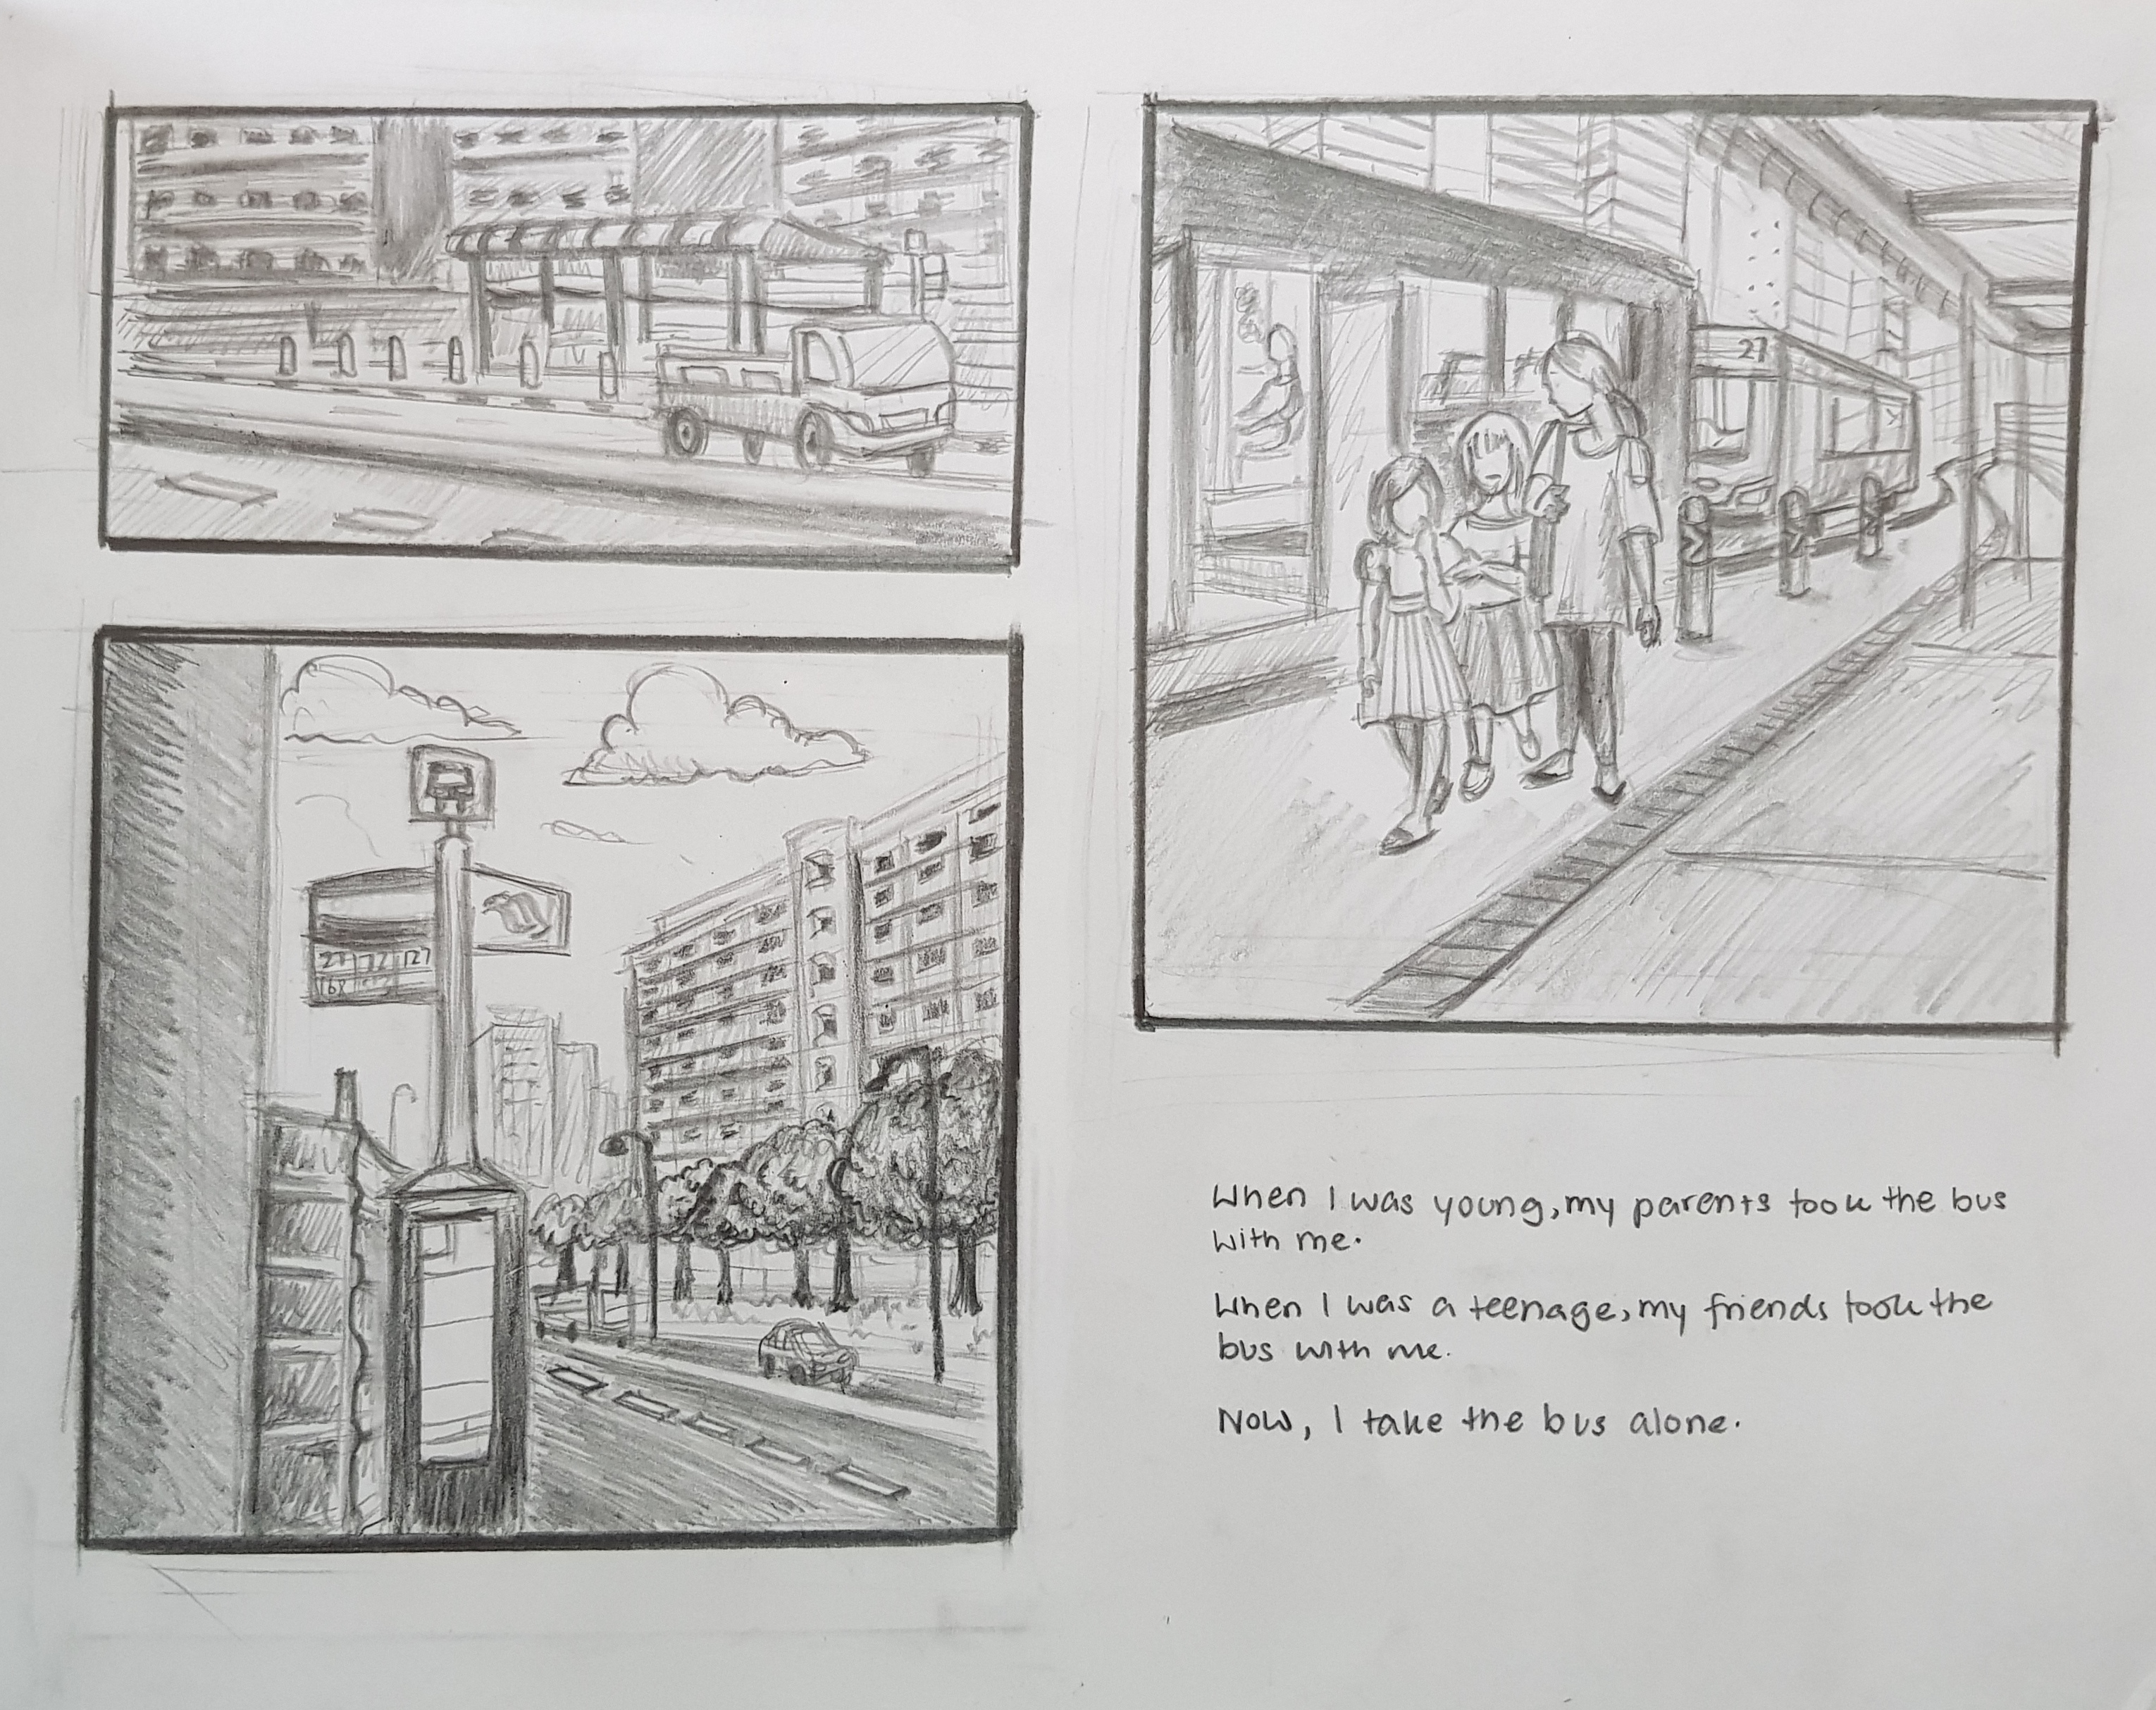
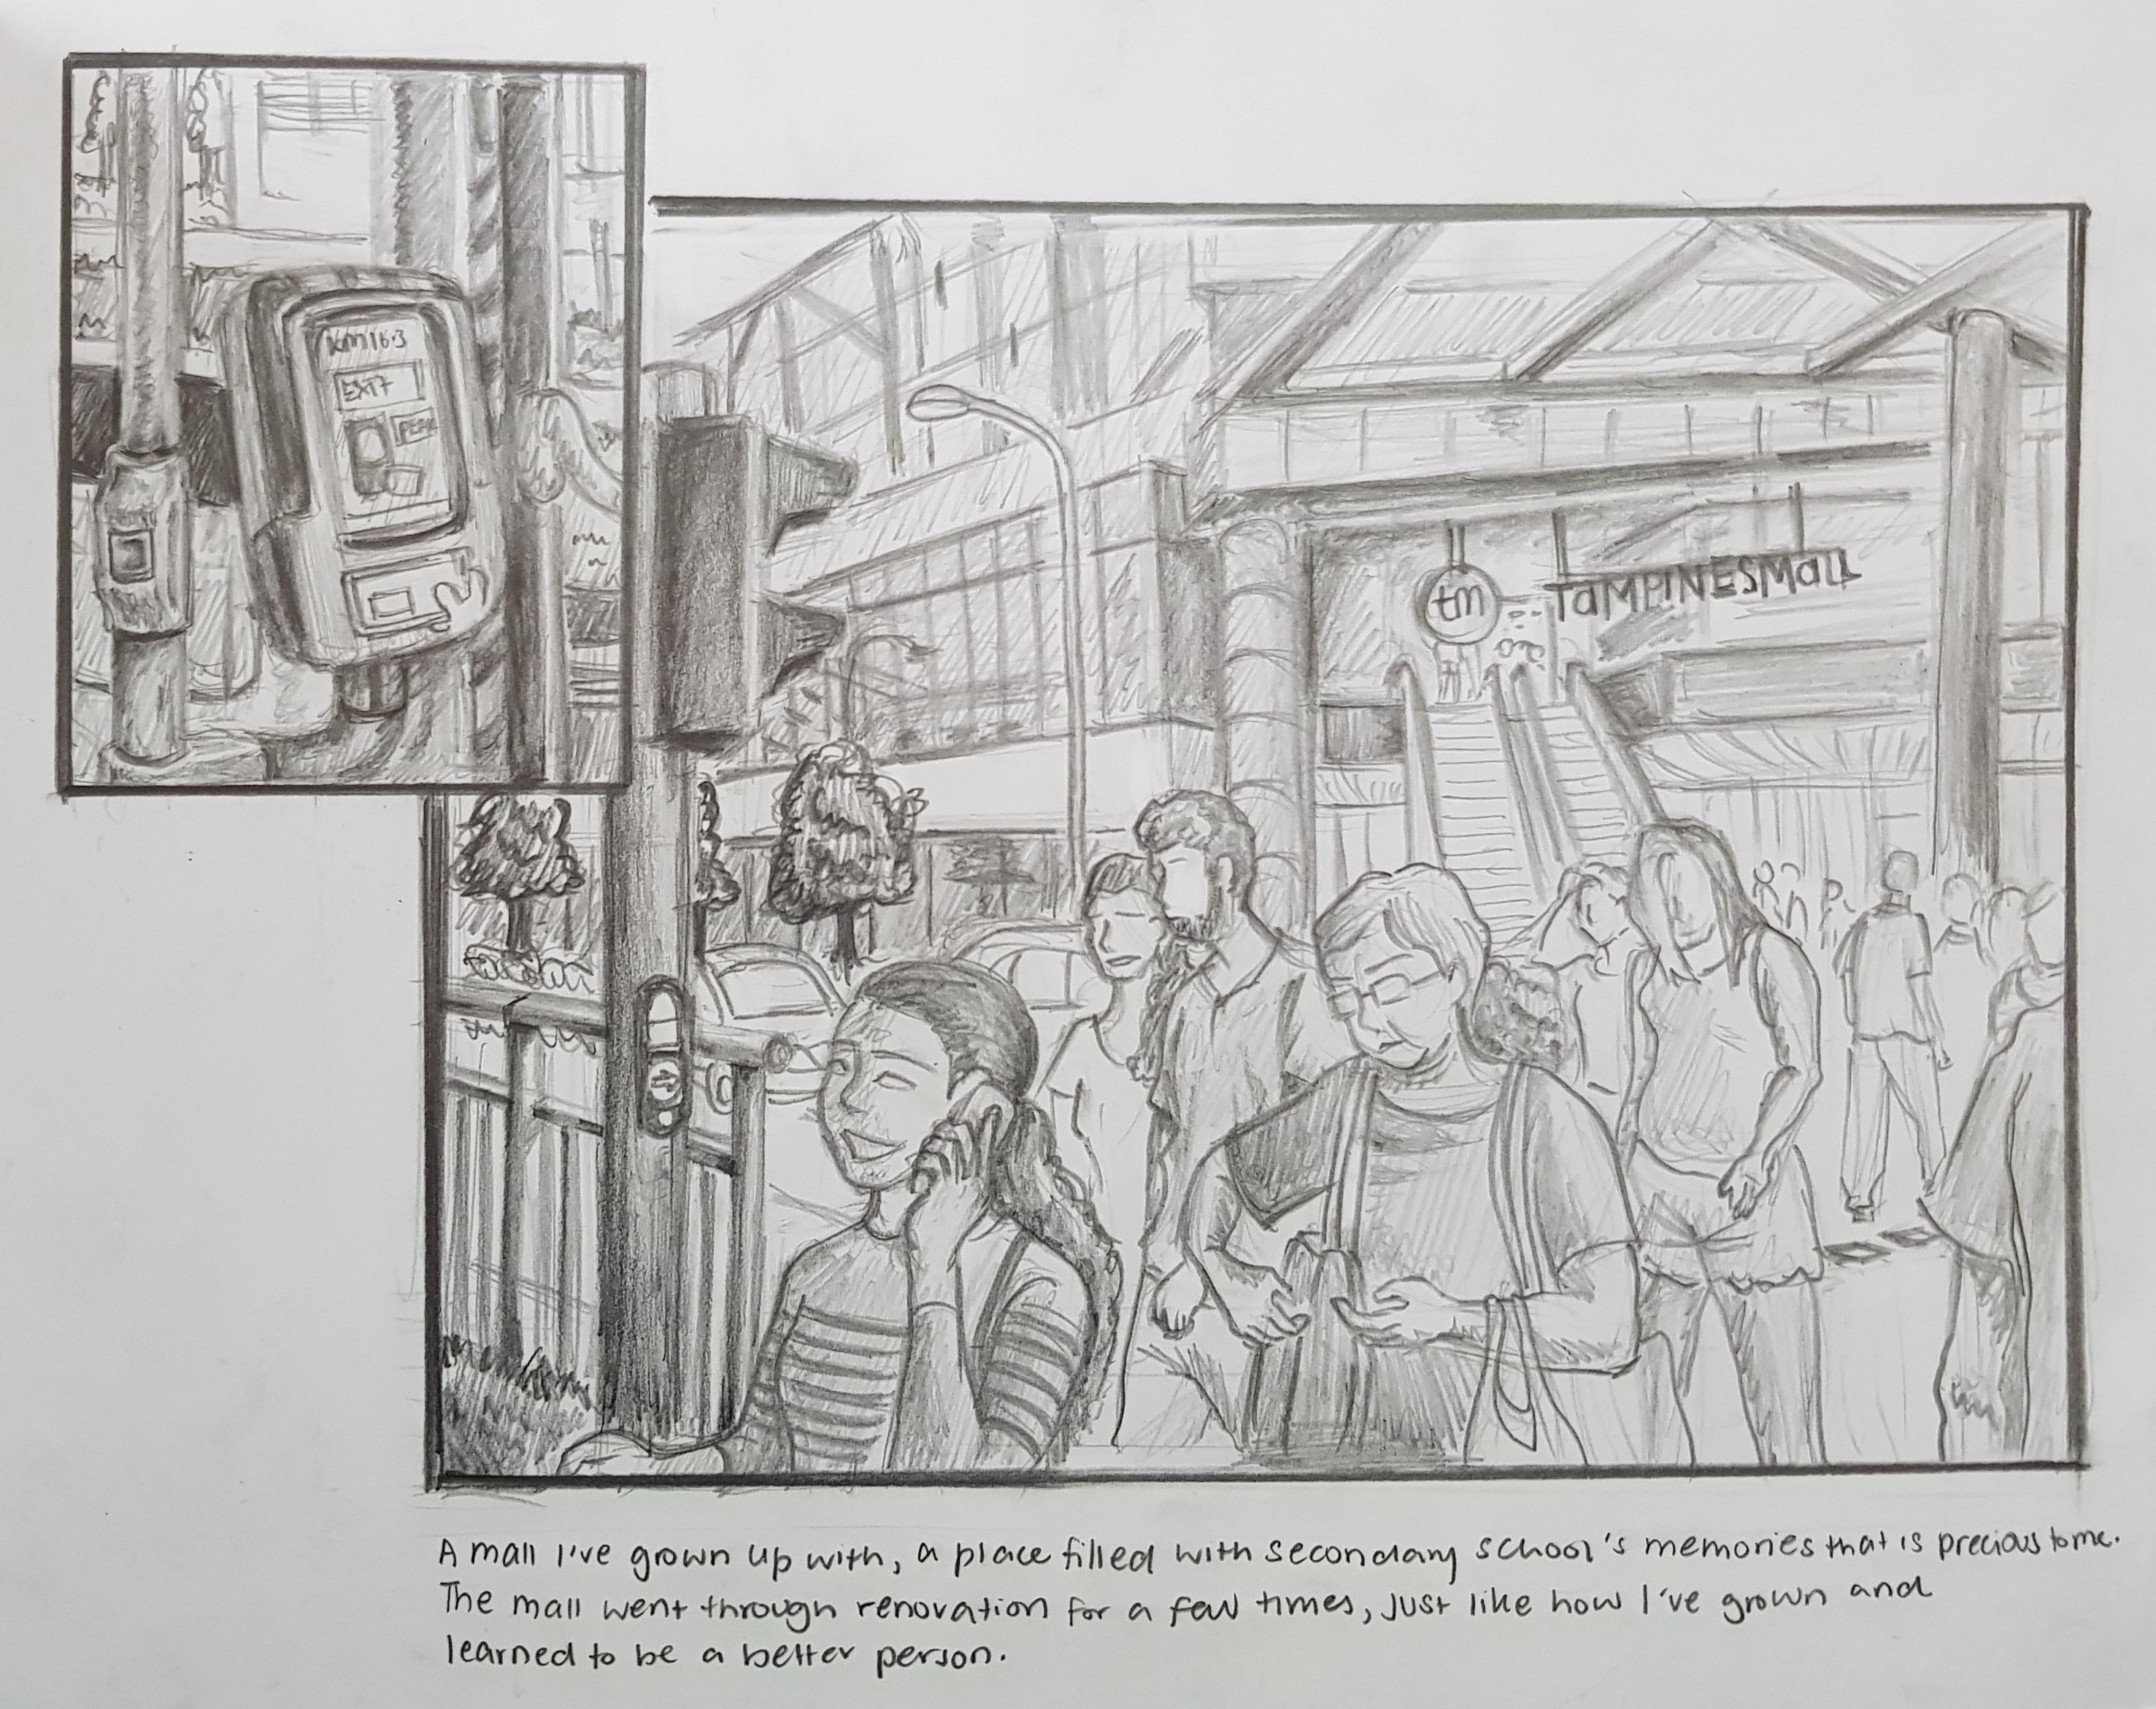
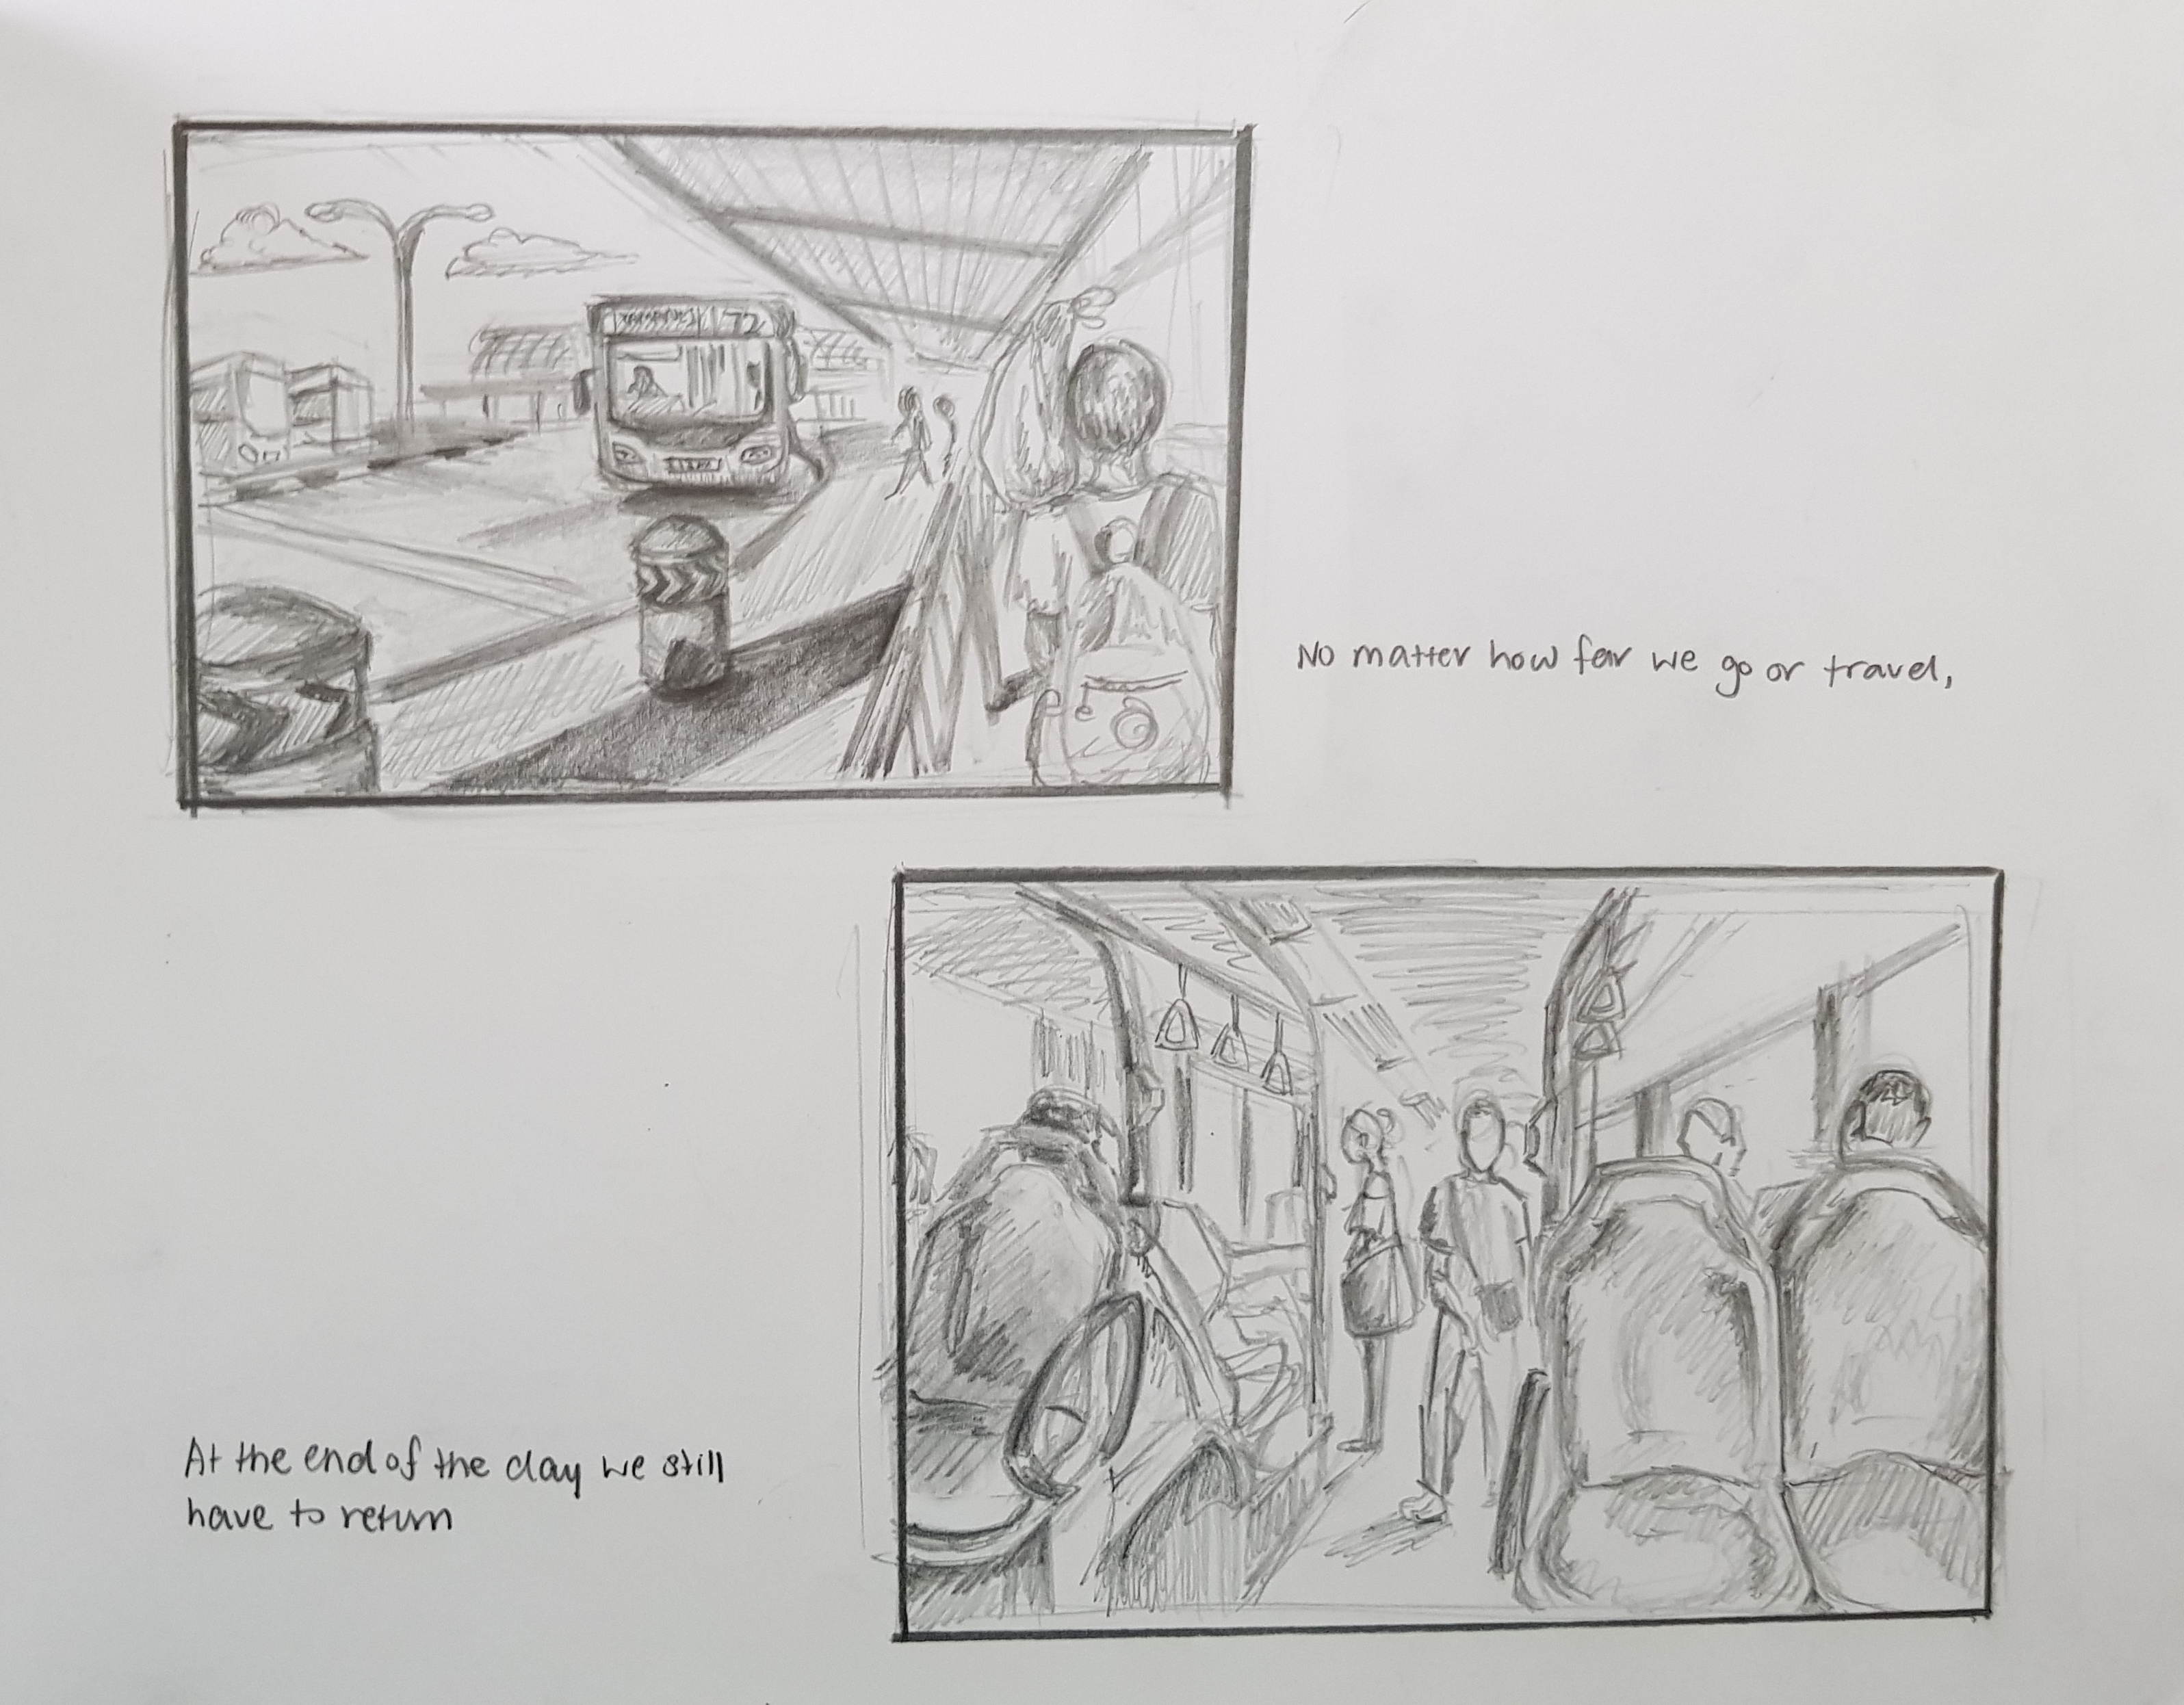
Half photo, half storyboard


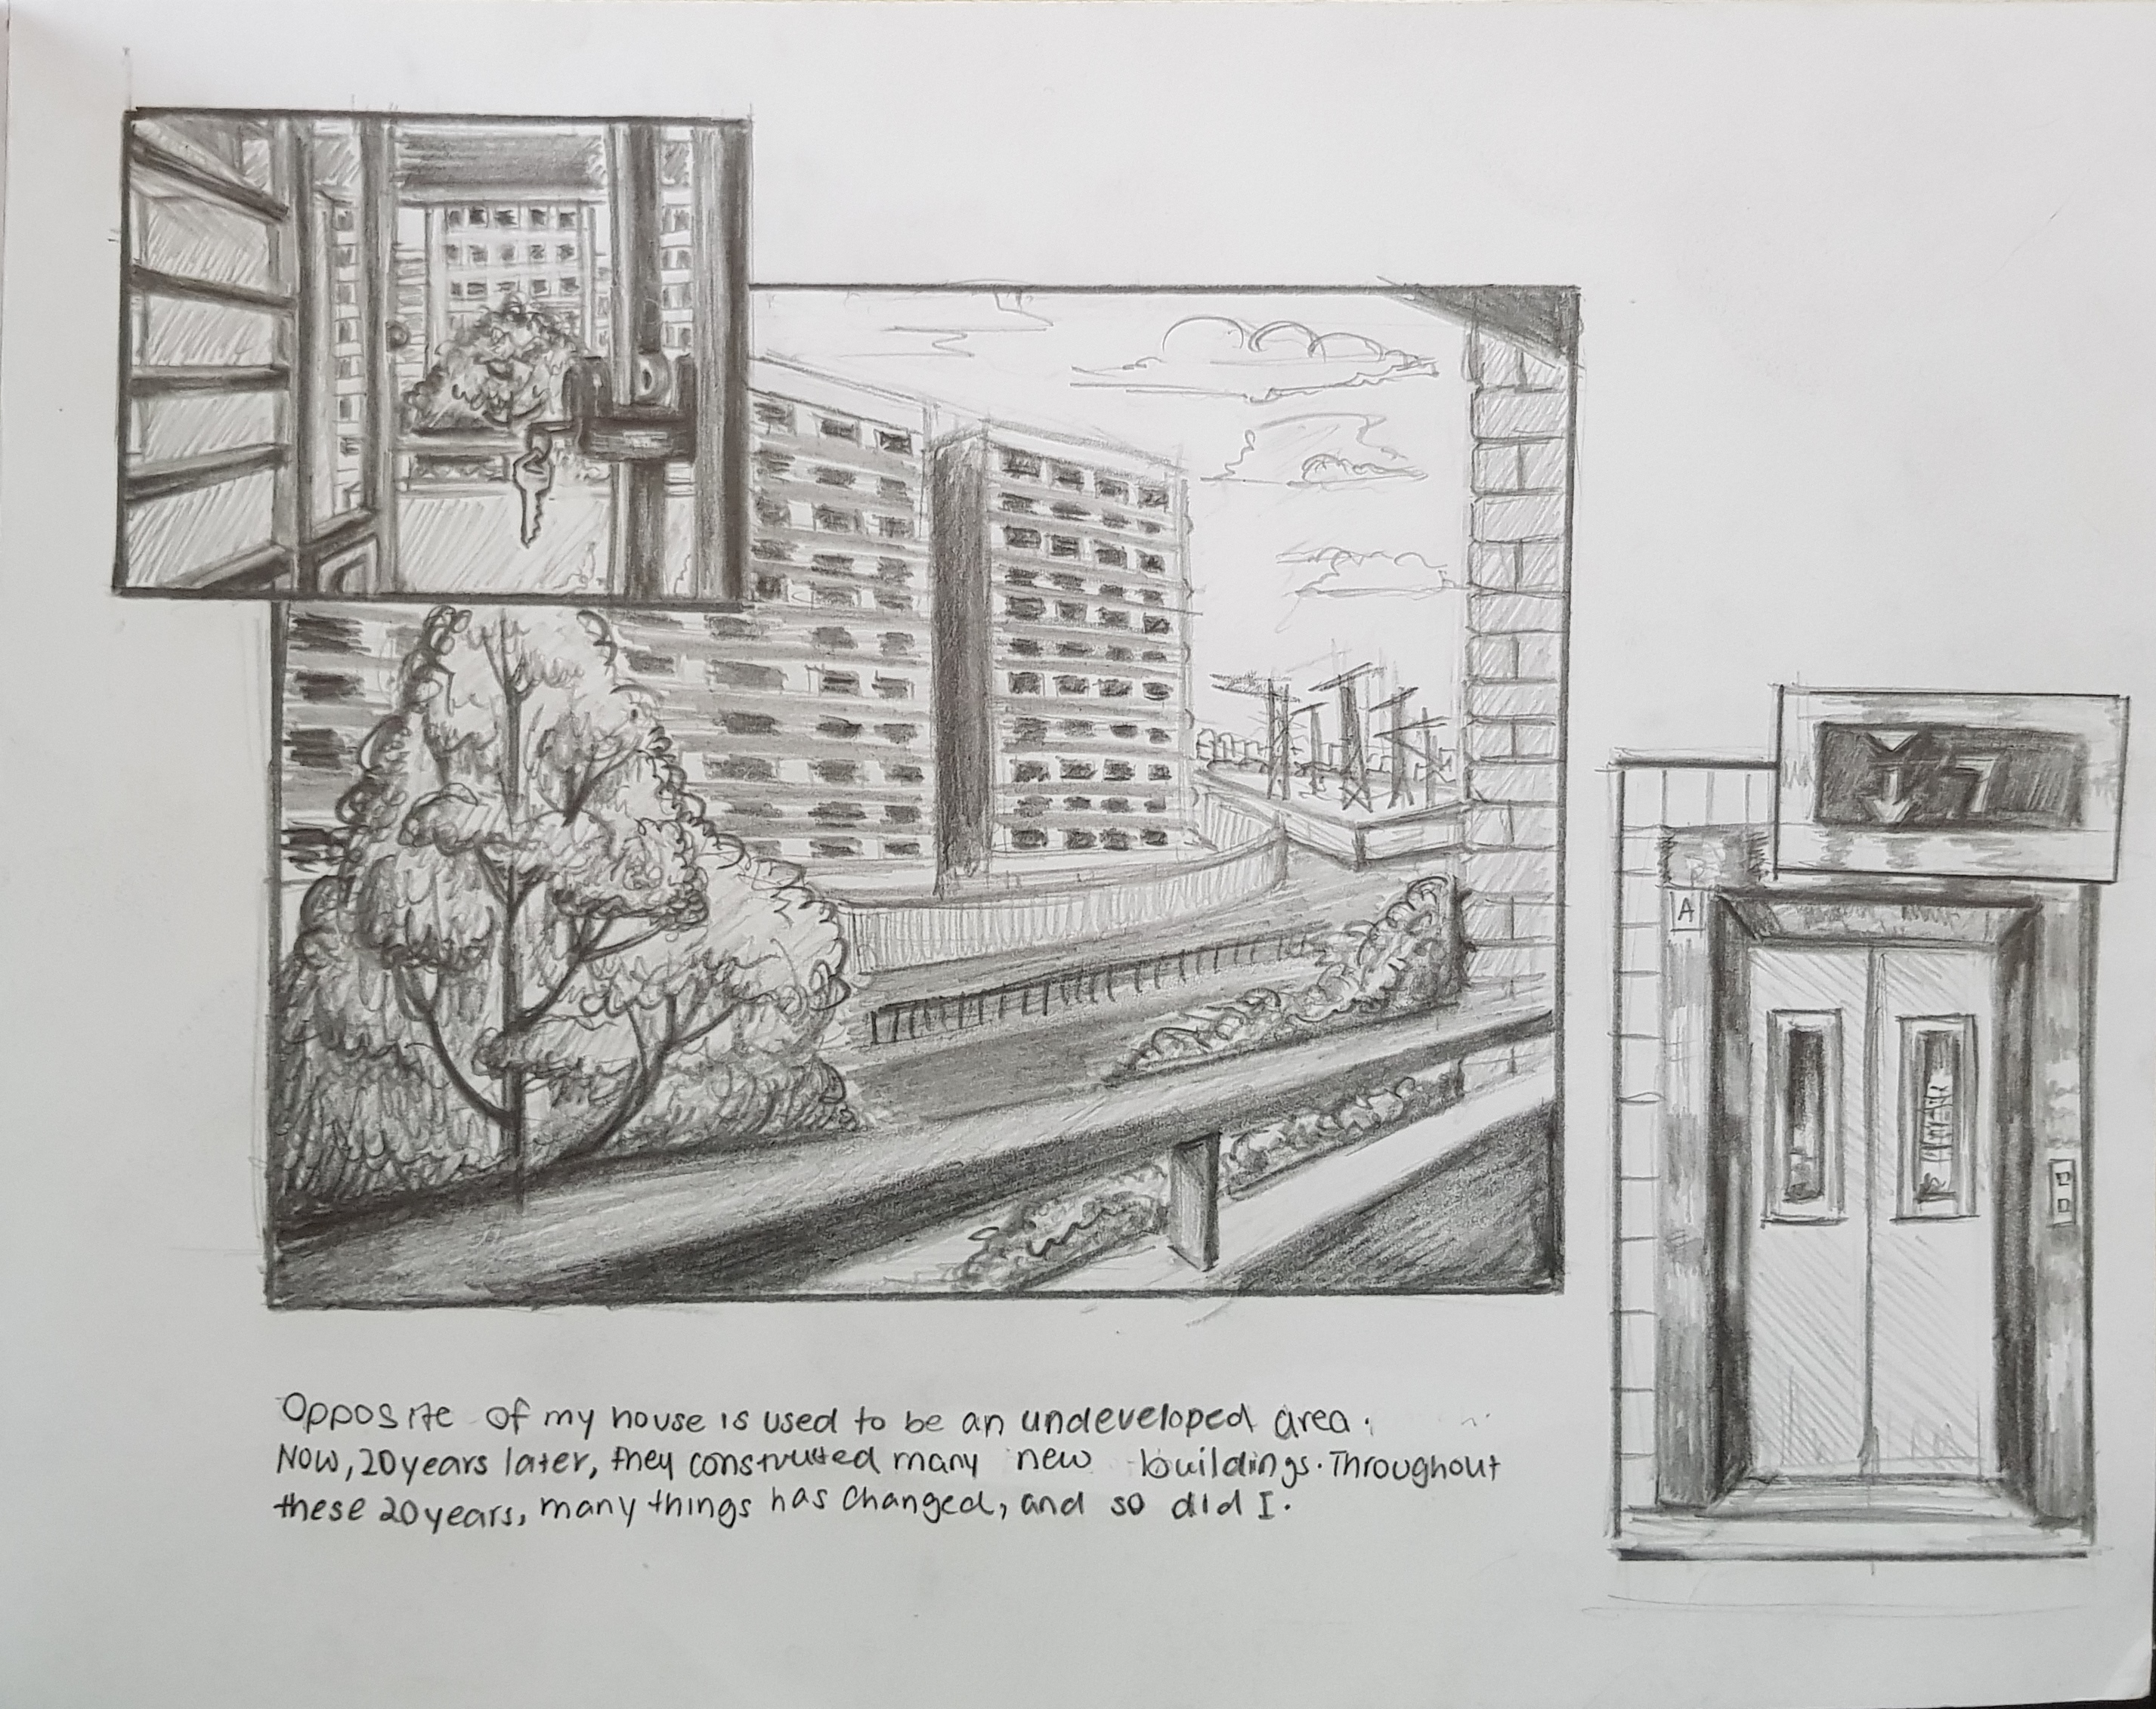
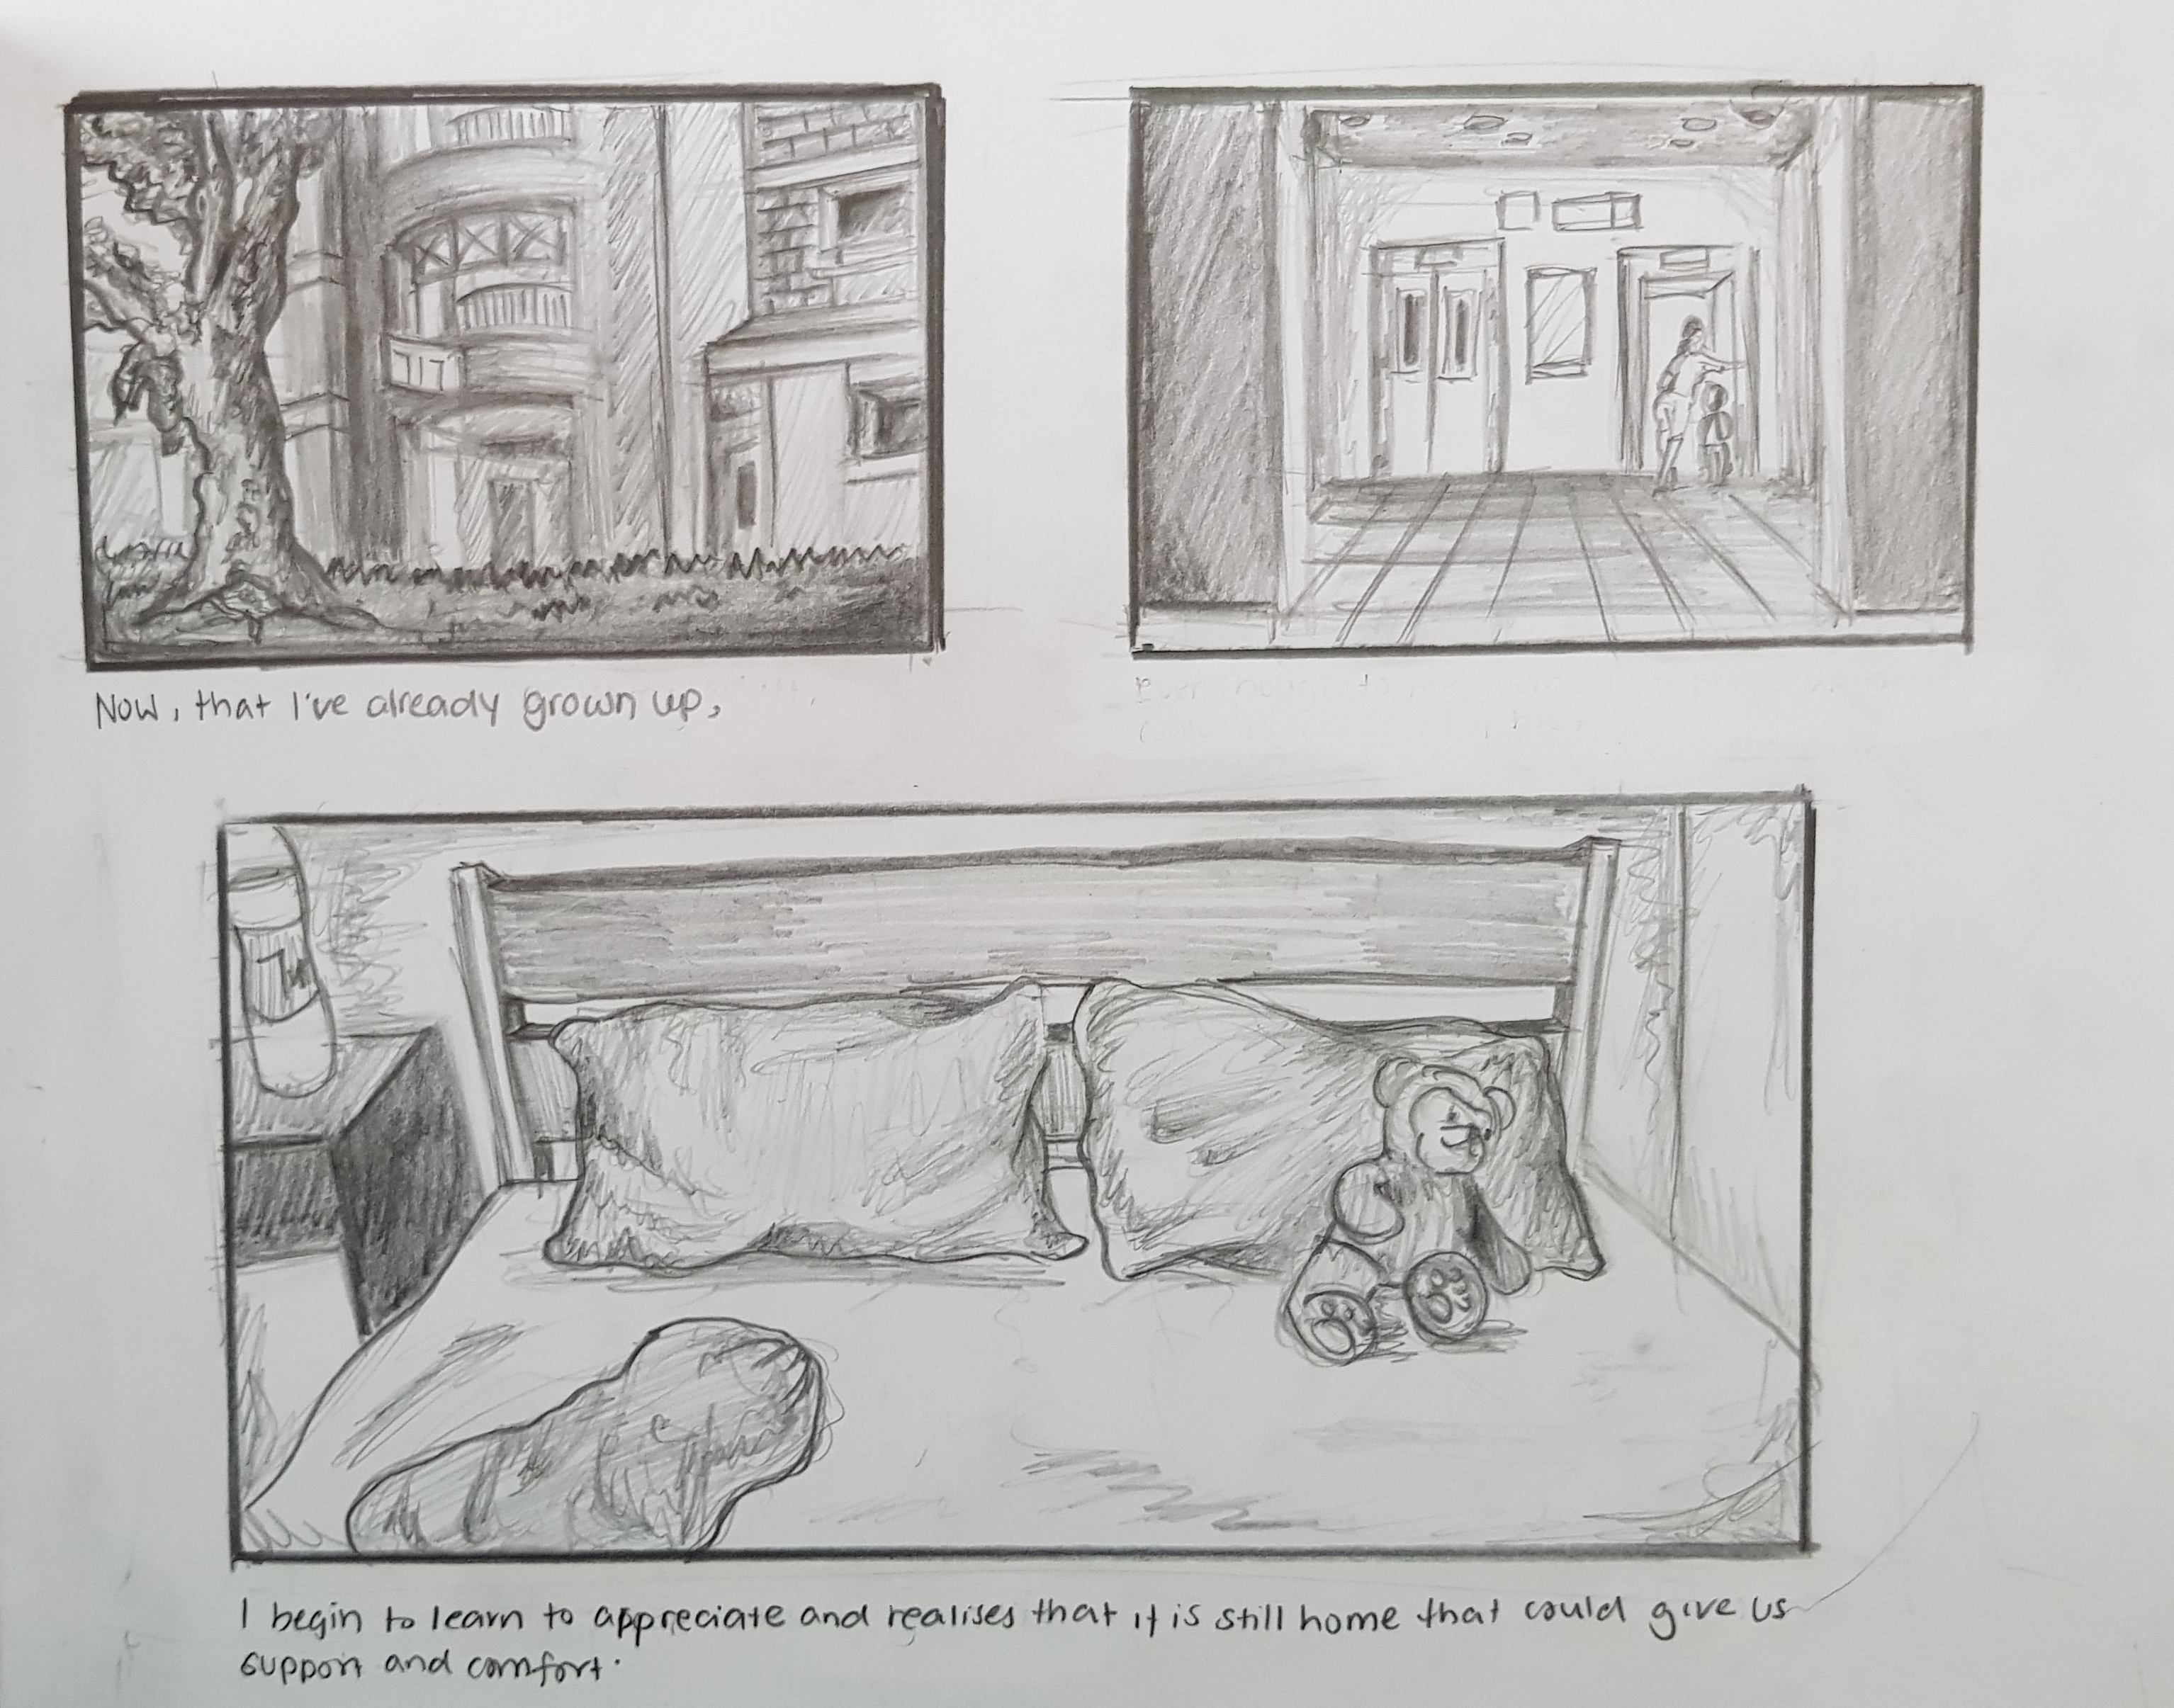
A place to keep my art and memories
Not completed yet 🙁
Half photo, half storyboard
Chosen Drawing (4 figure, 2 location, 2 still life drawing)
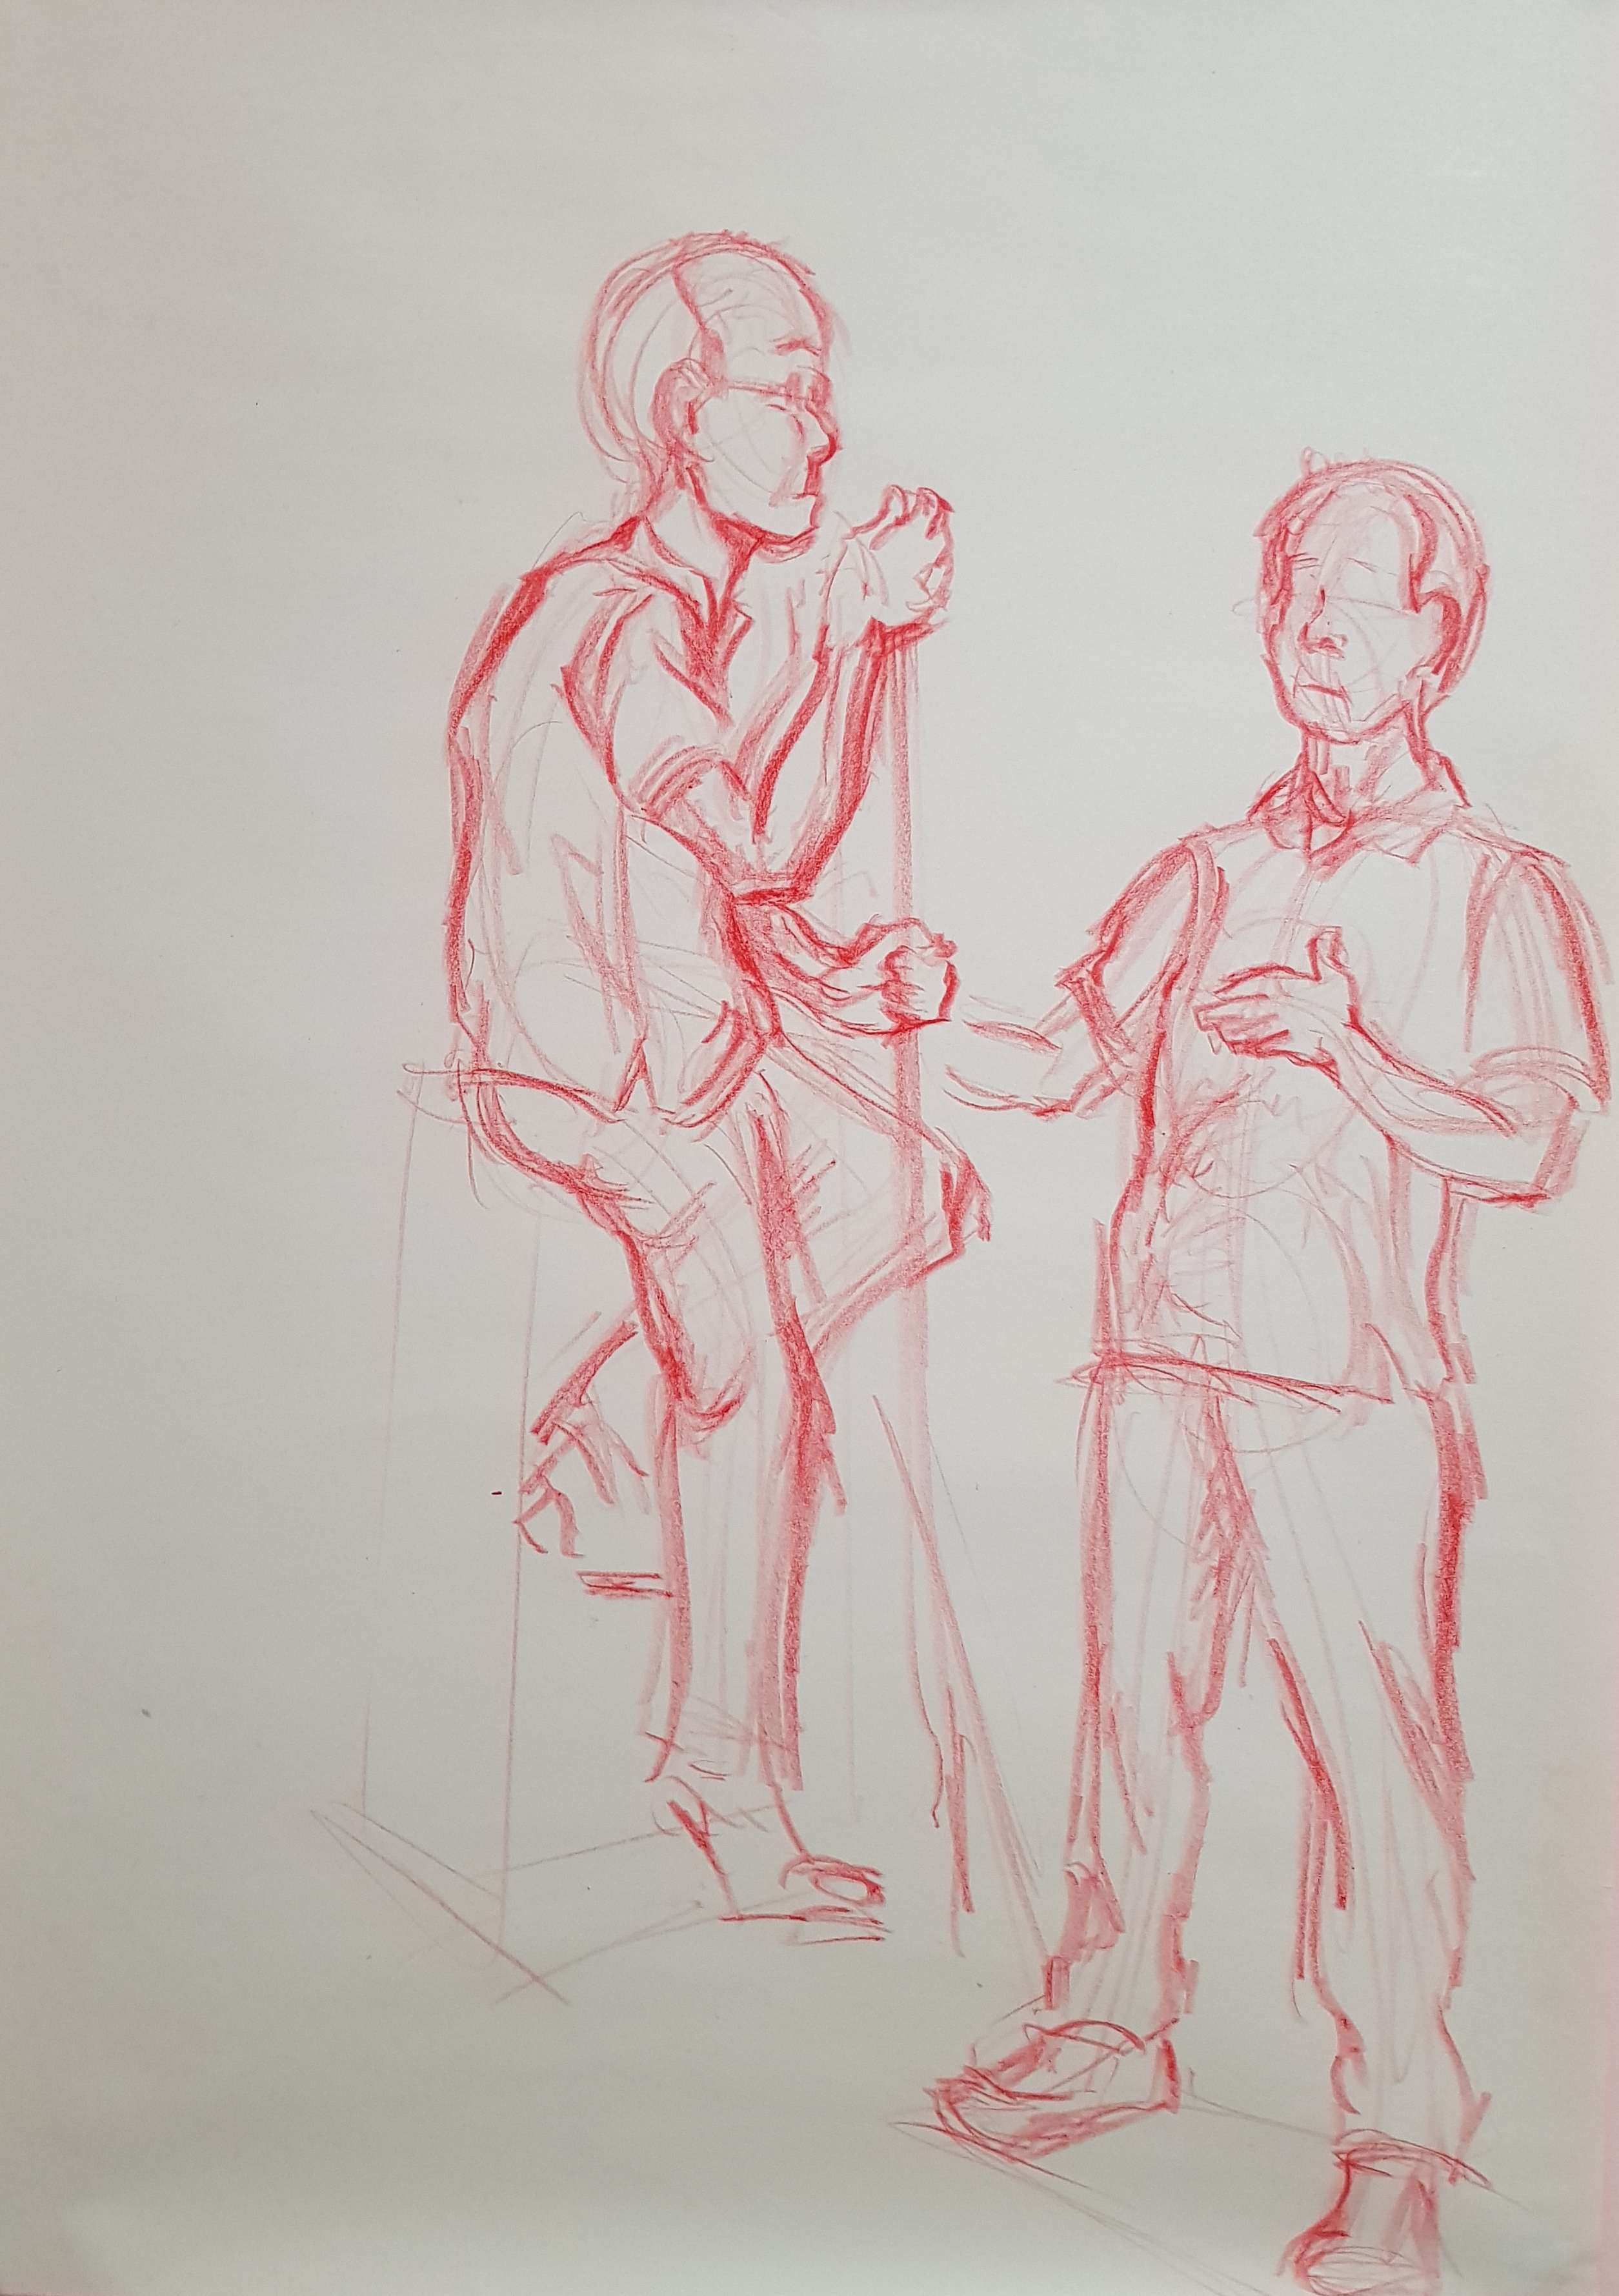
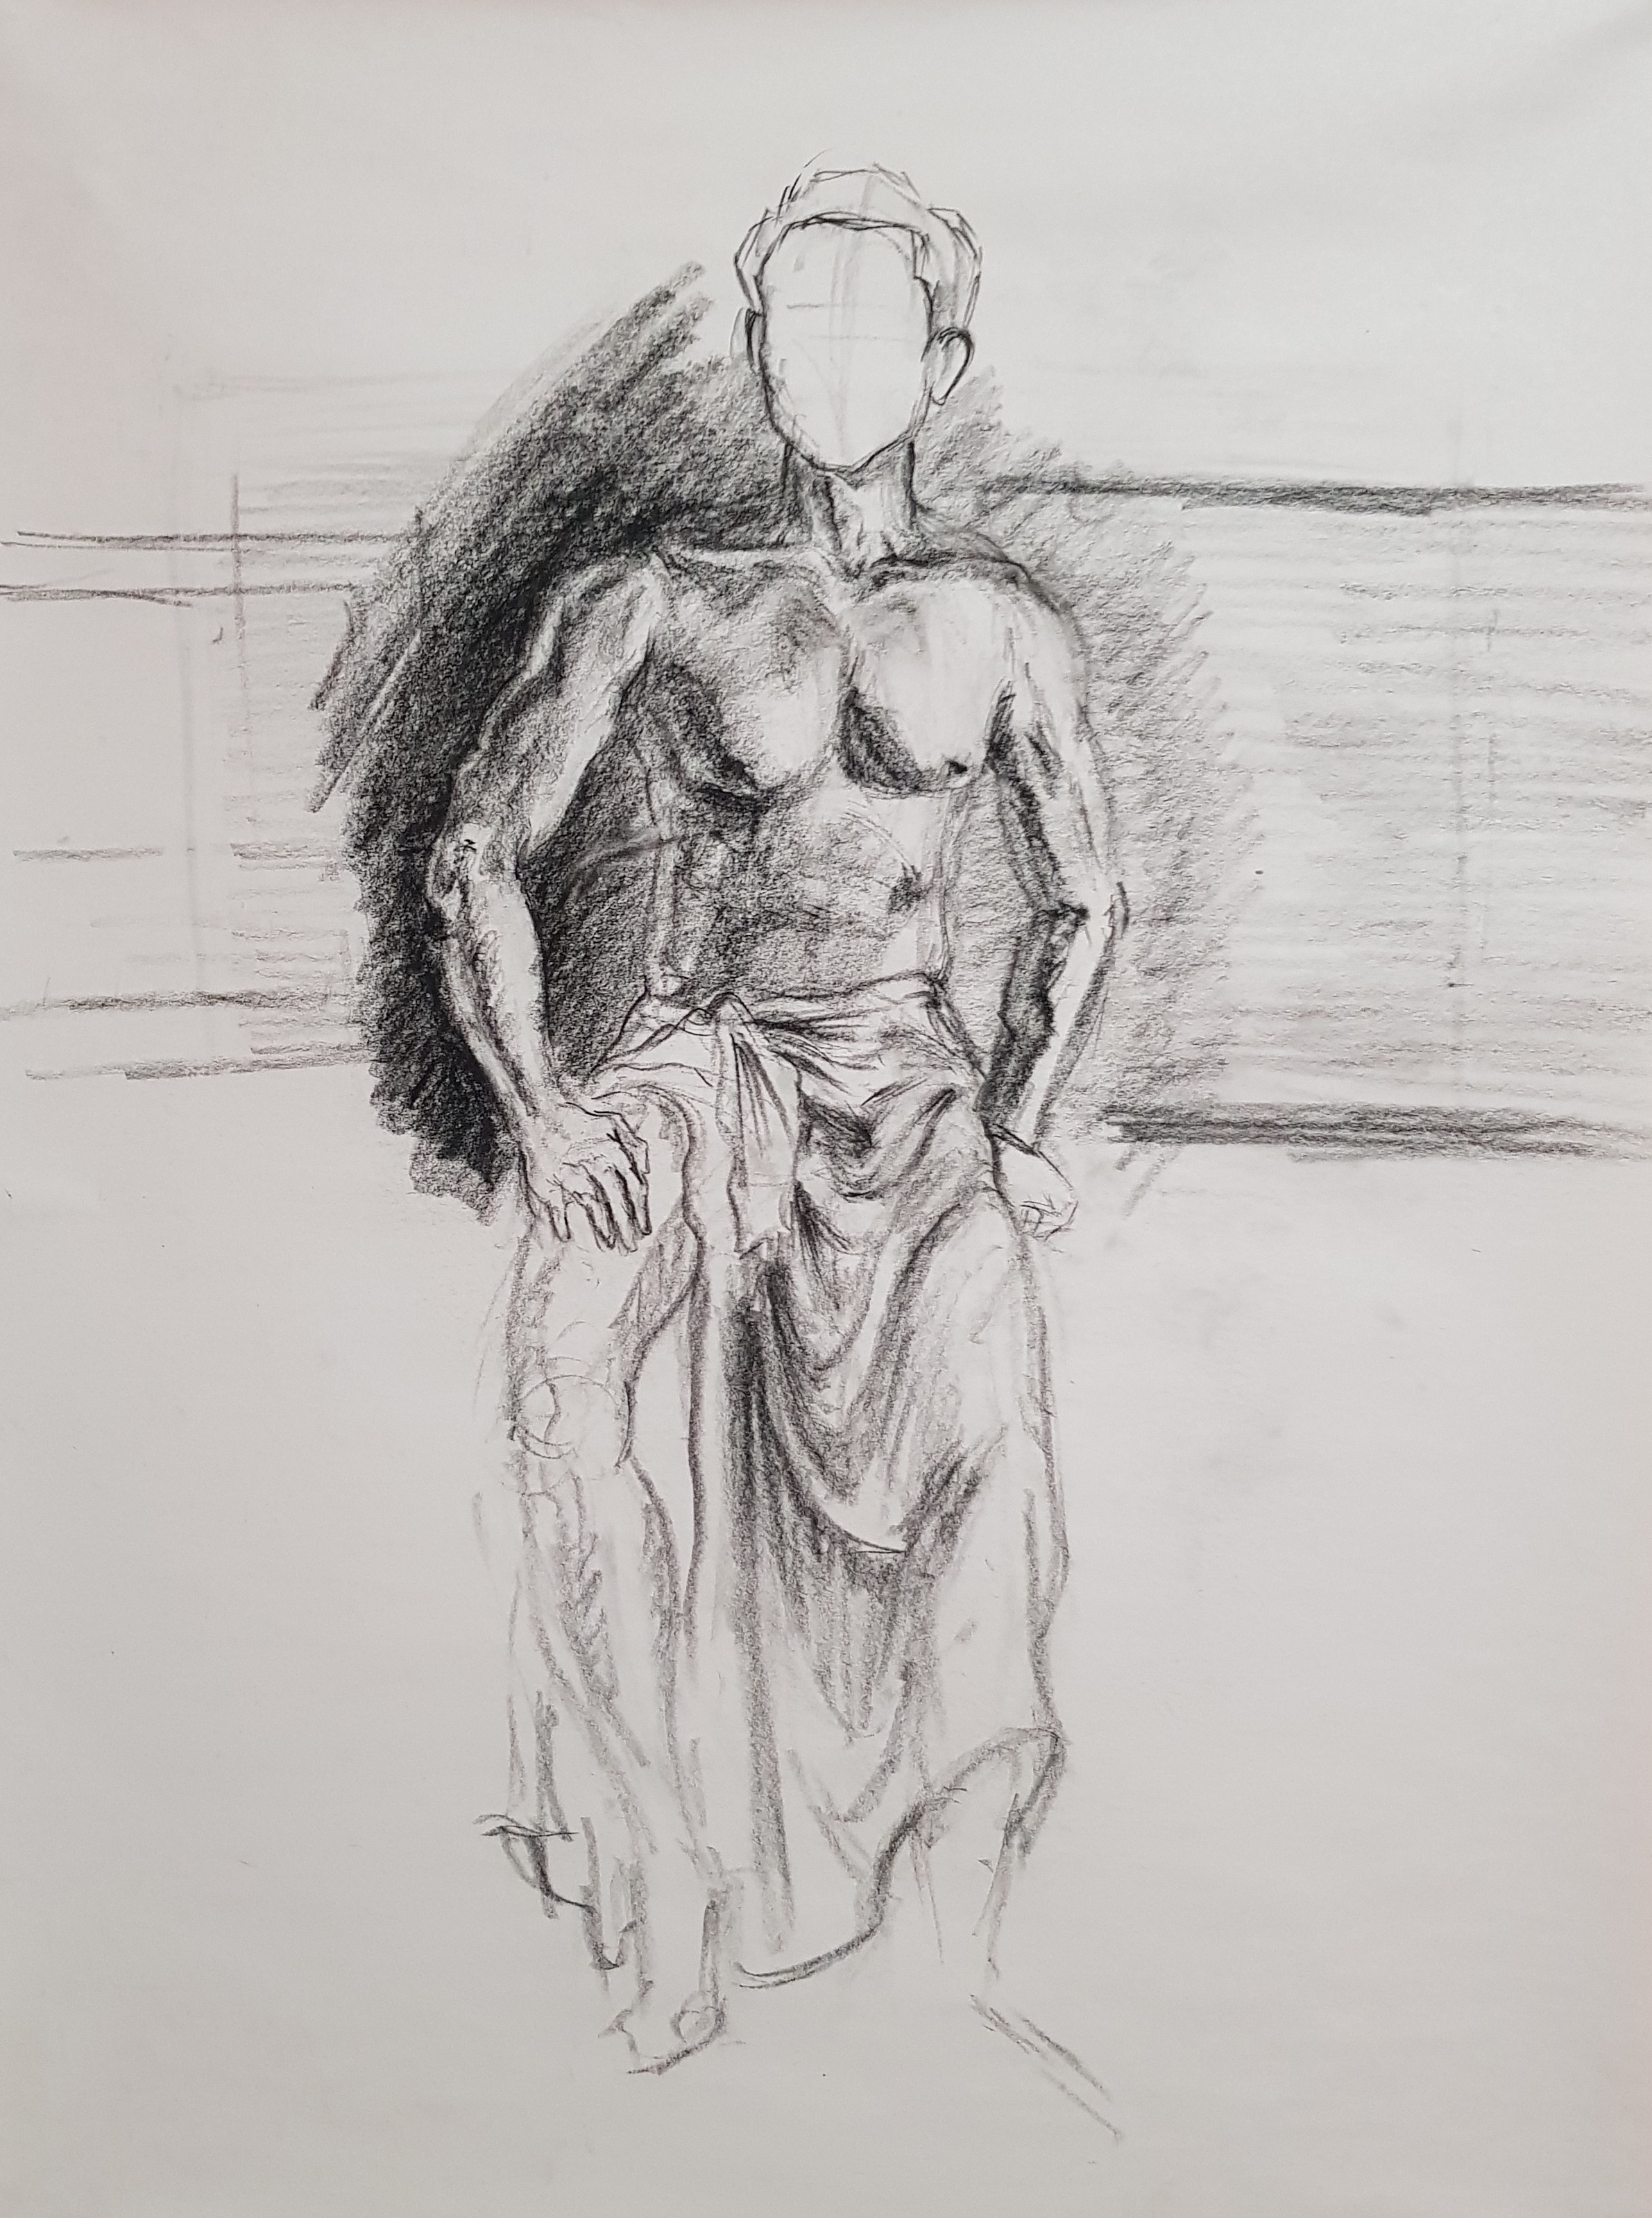
2 Long Figure Drawing
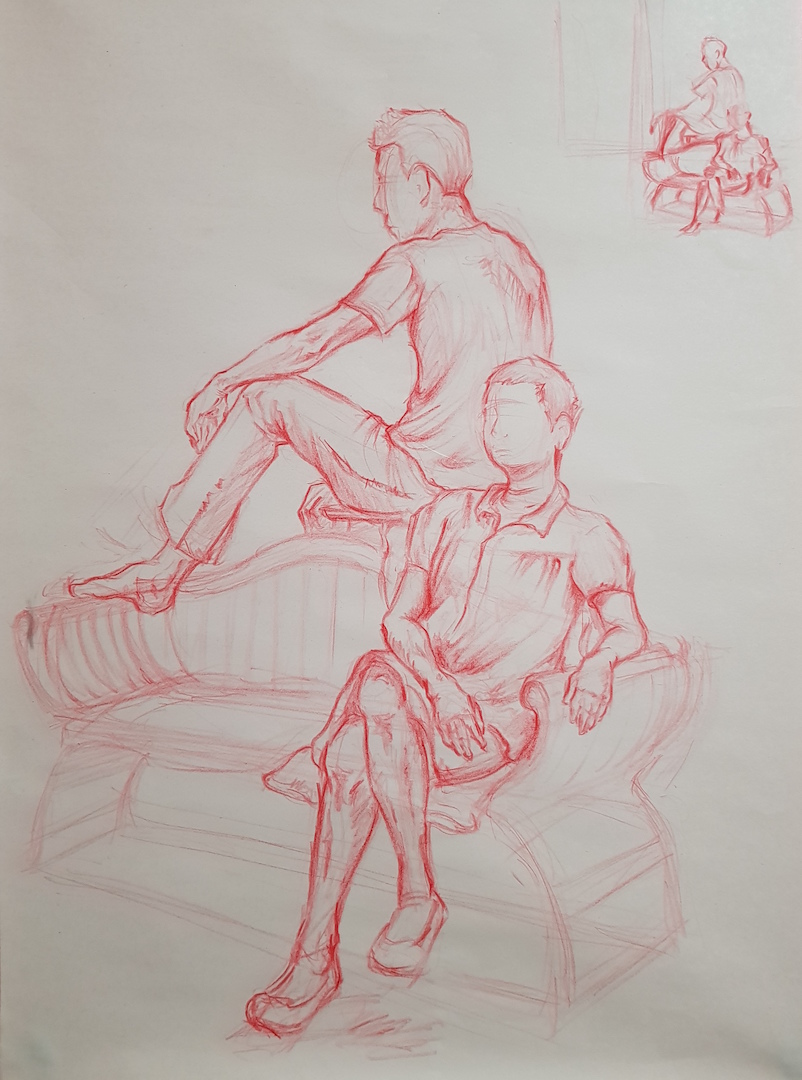
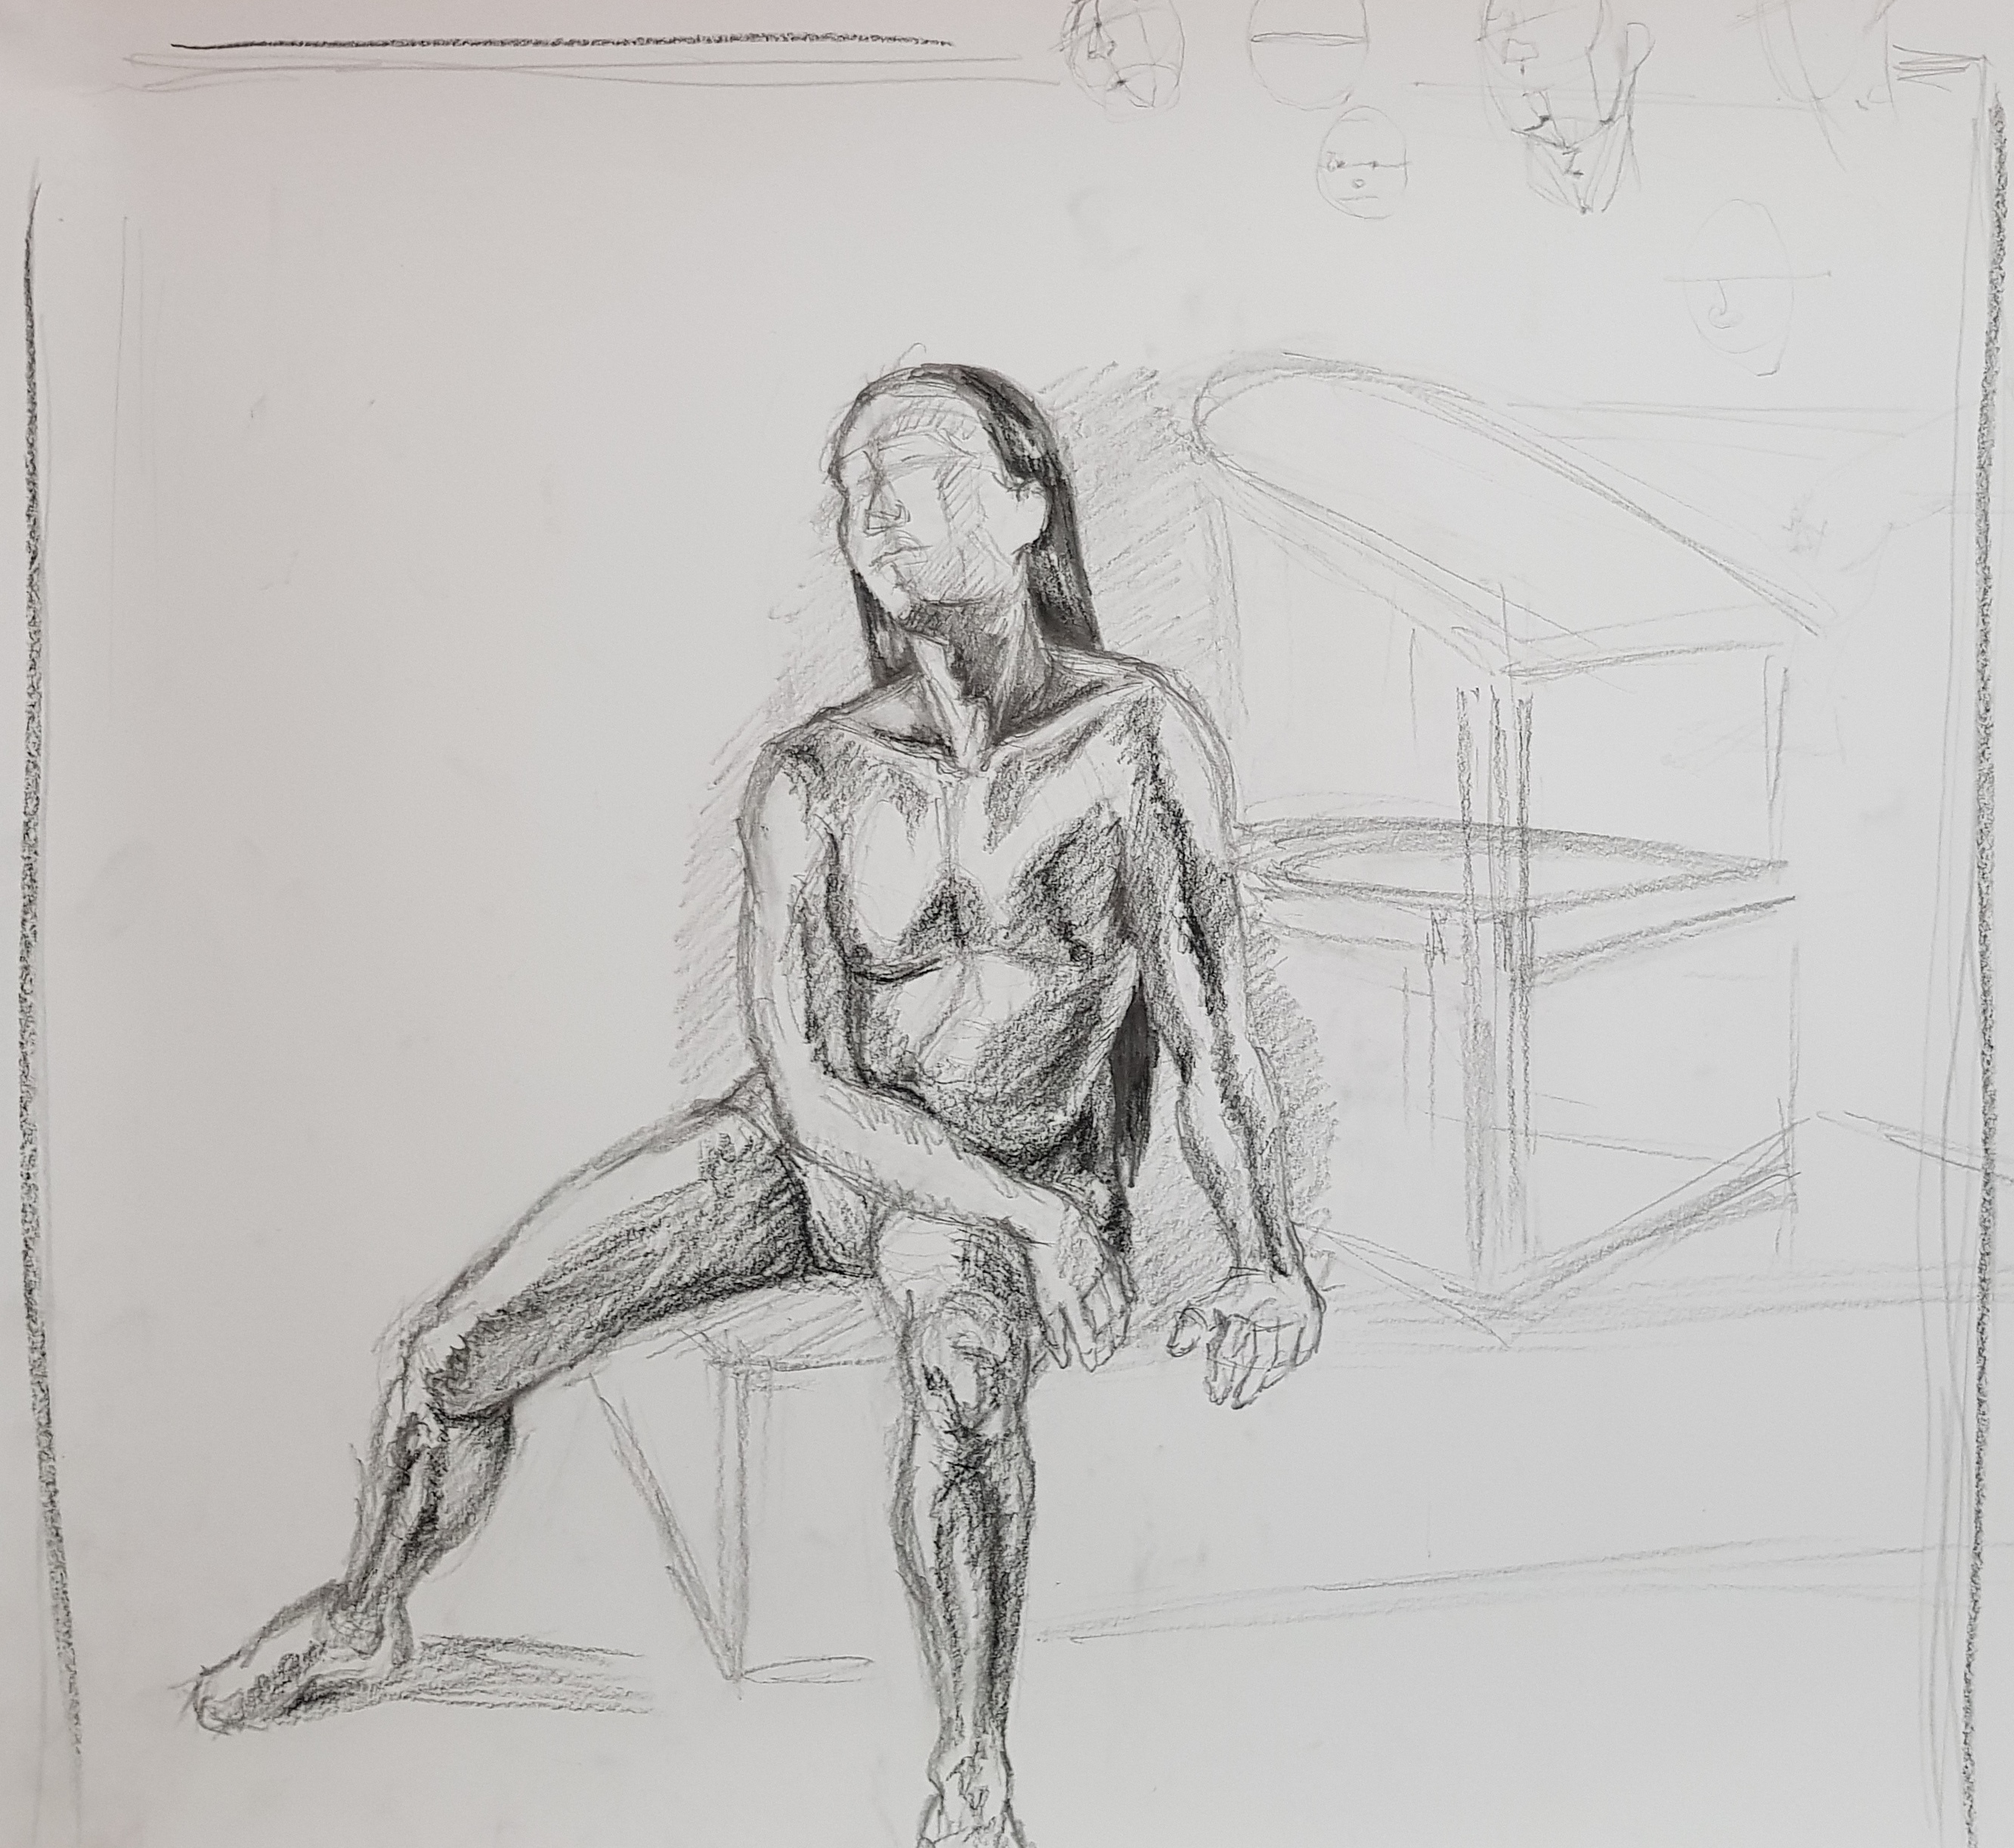
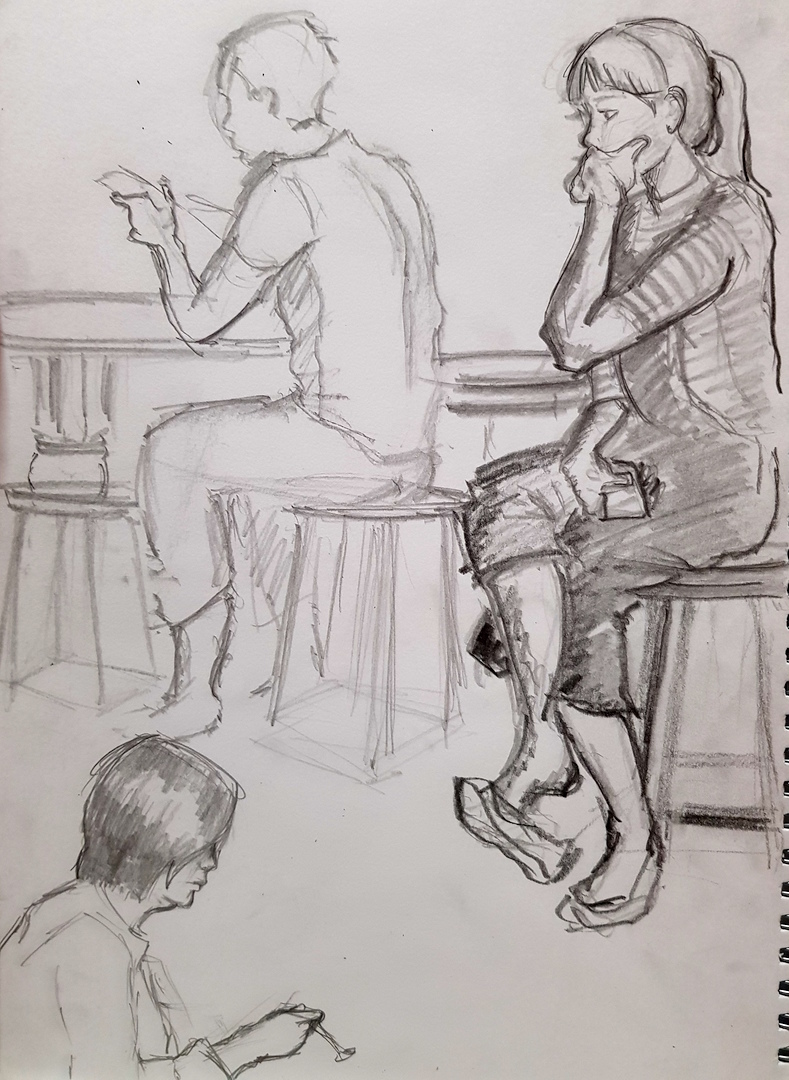
2 Short Figure Drawing

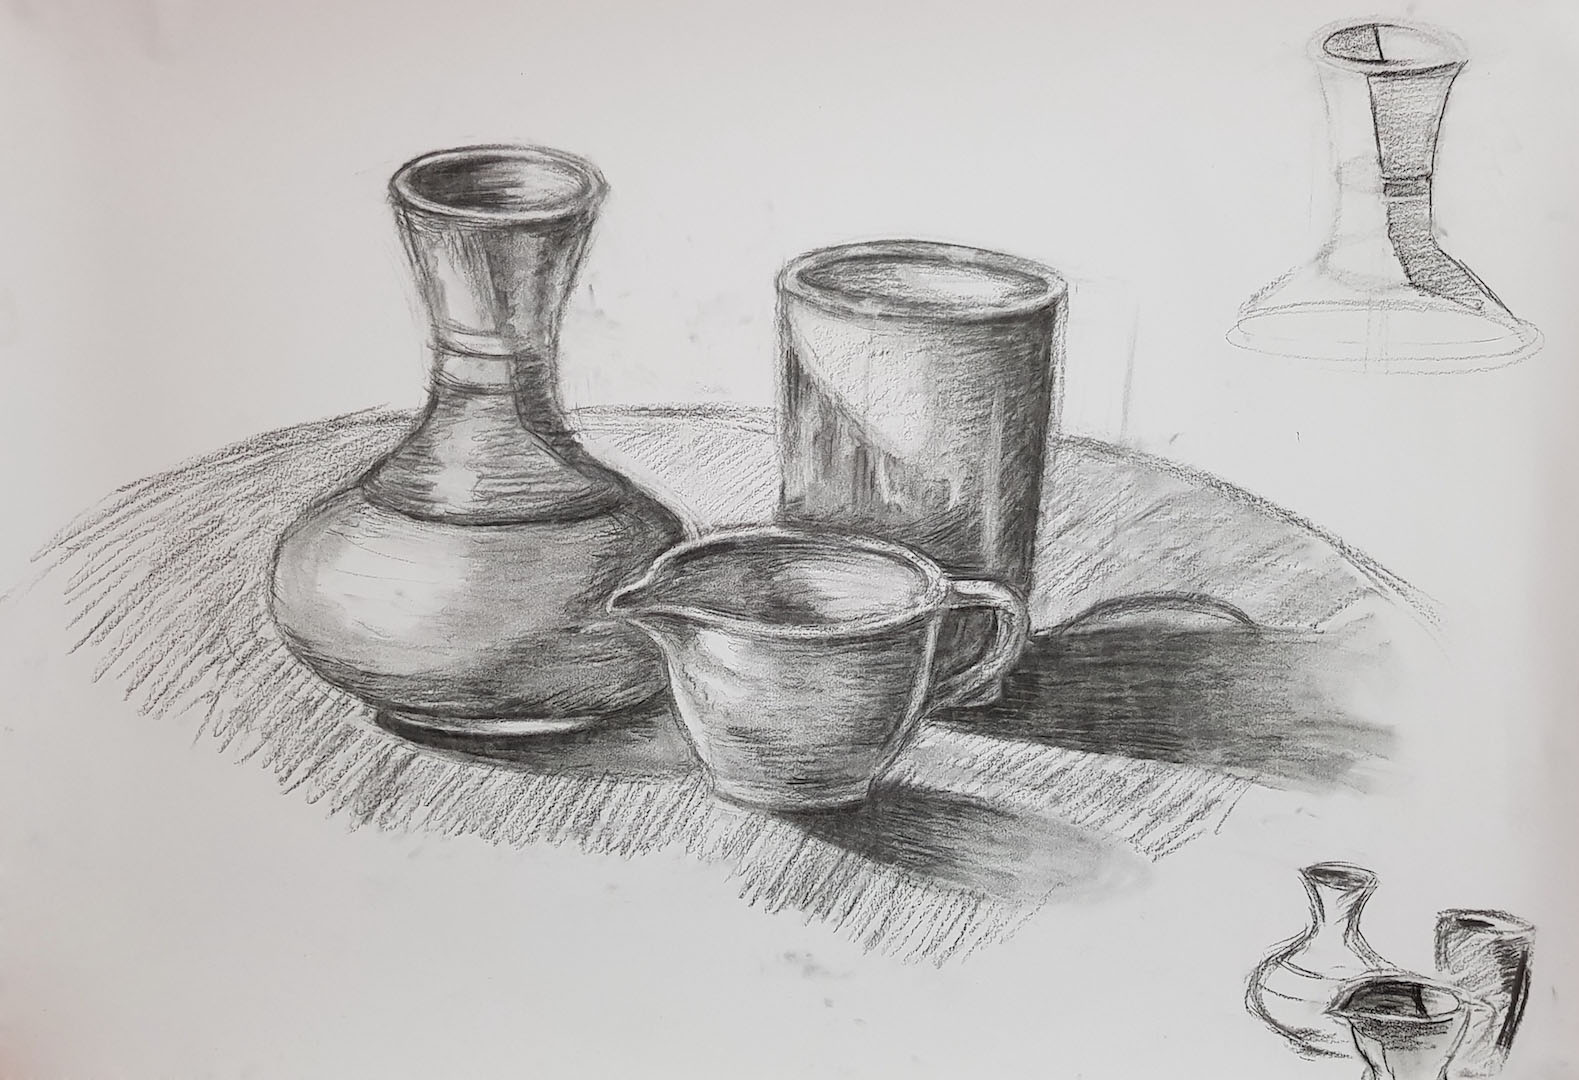
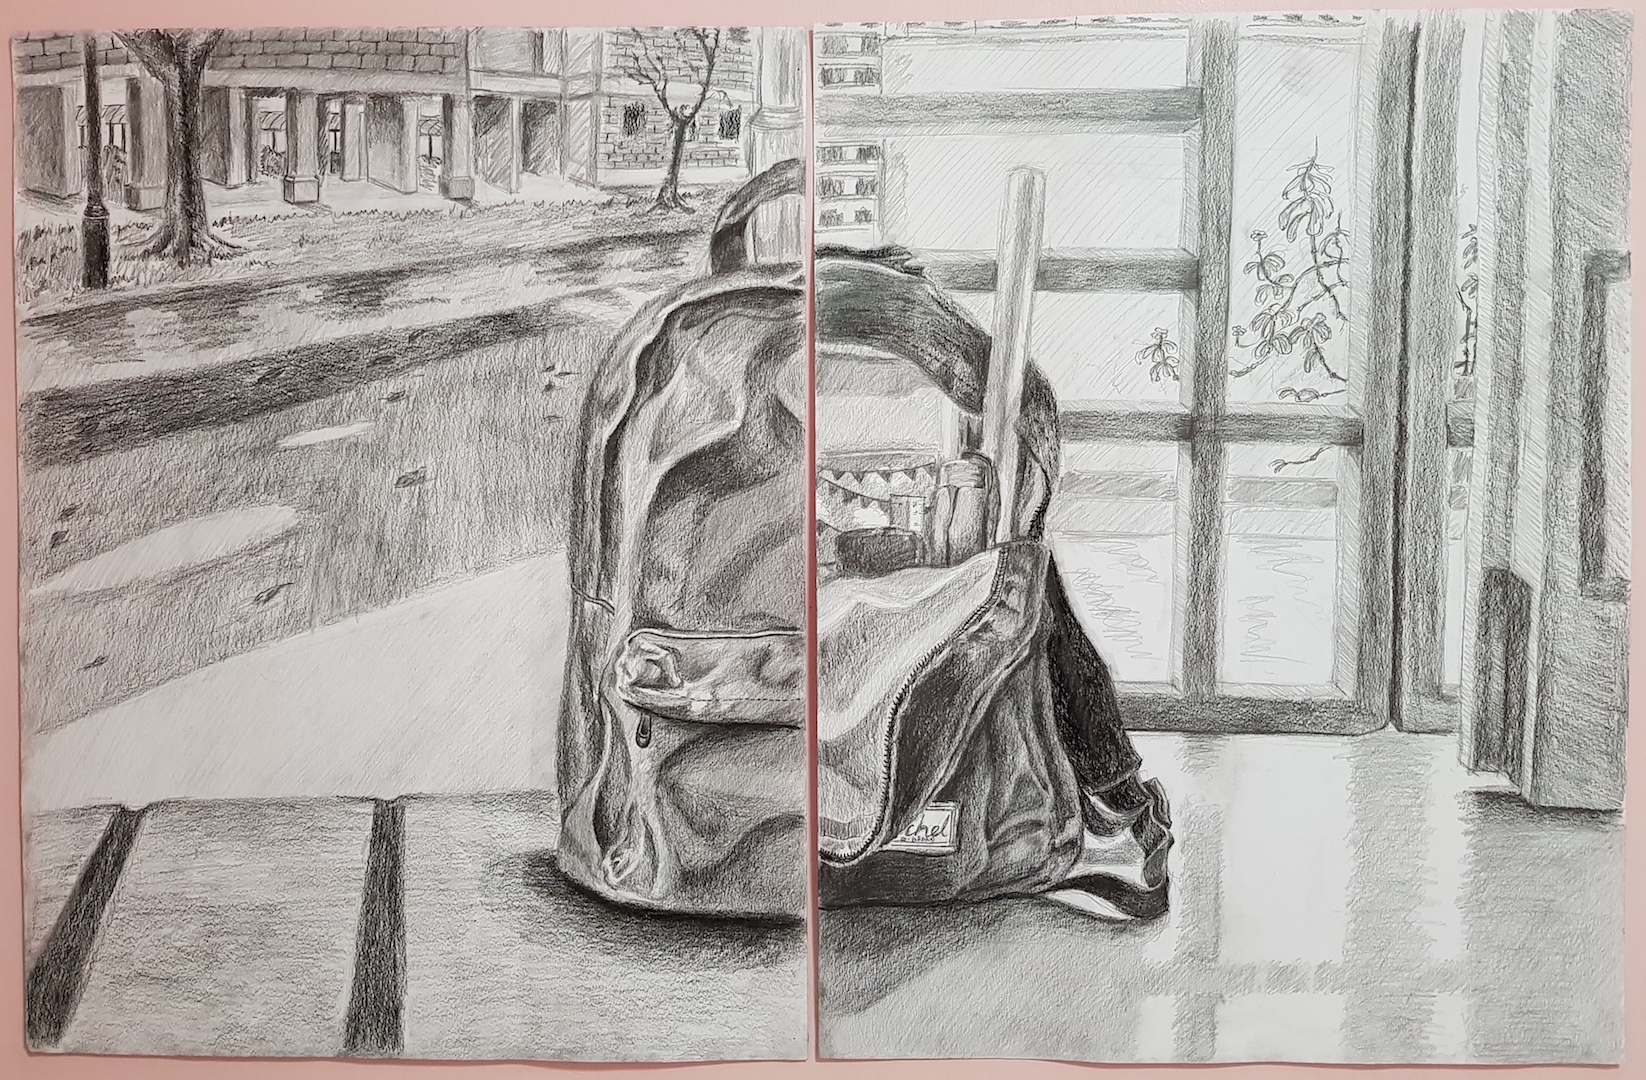
2 Still Life Drawing
2 Location Drawing
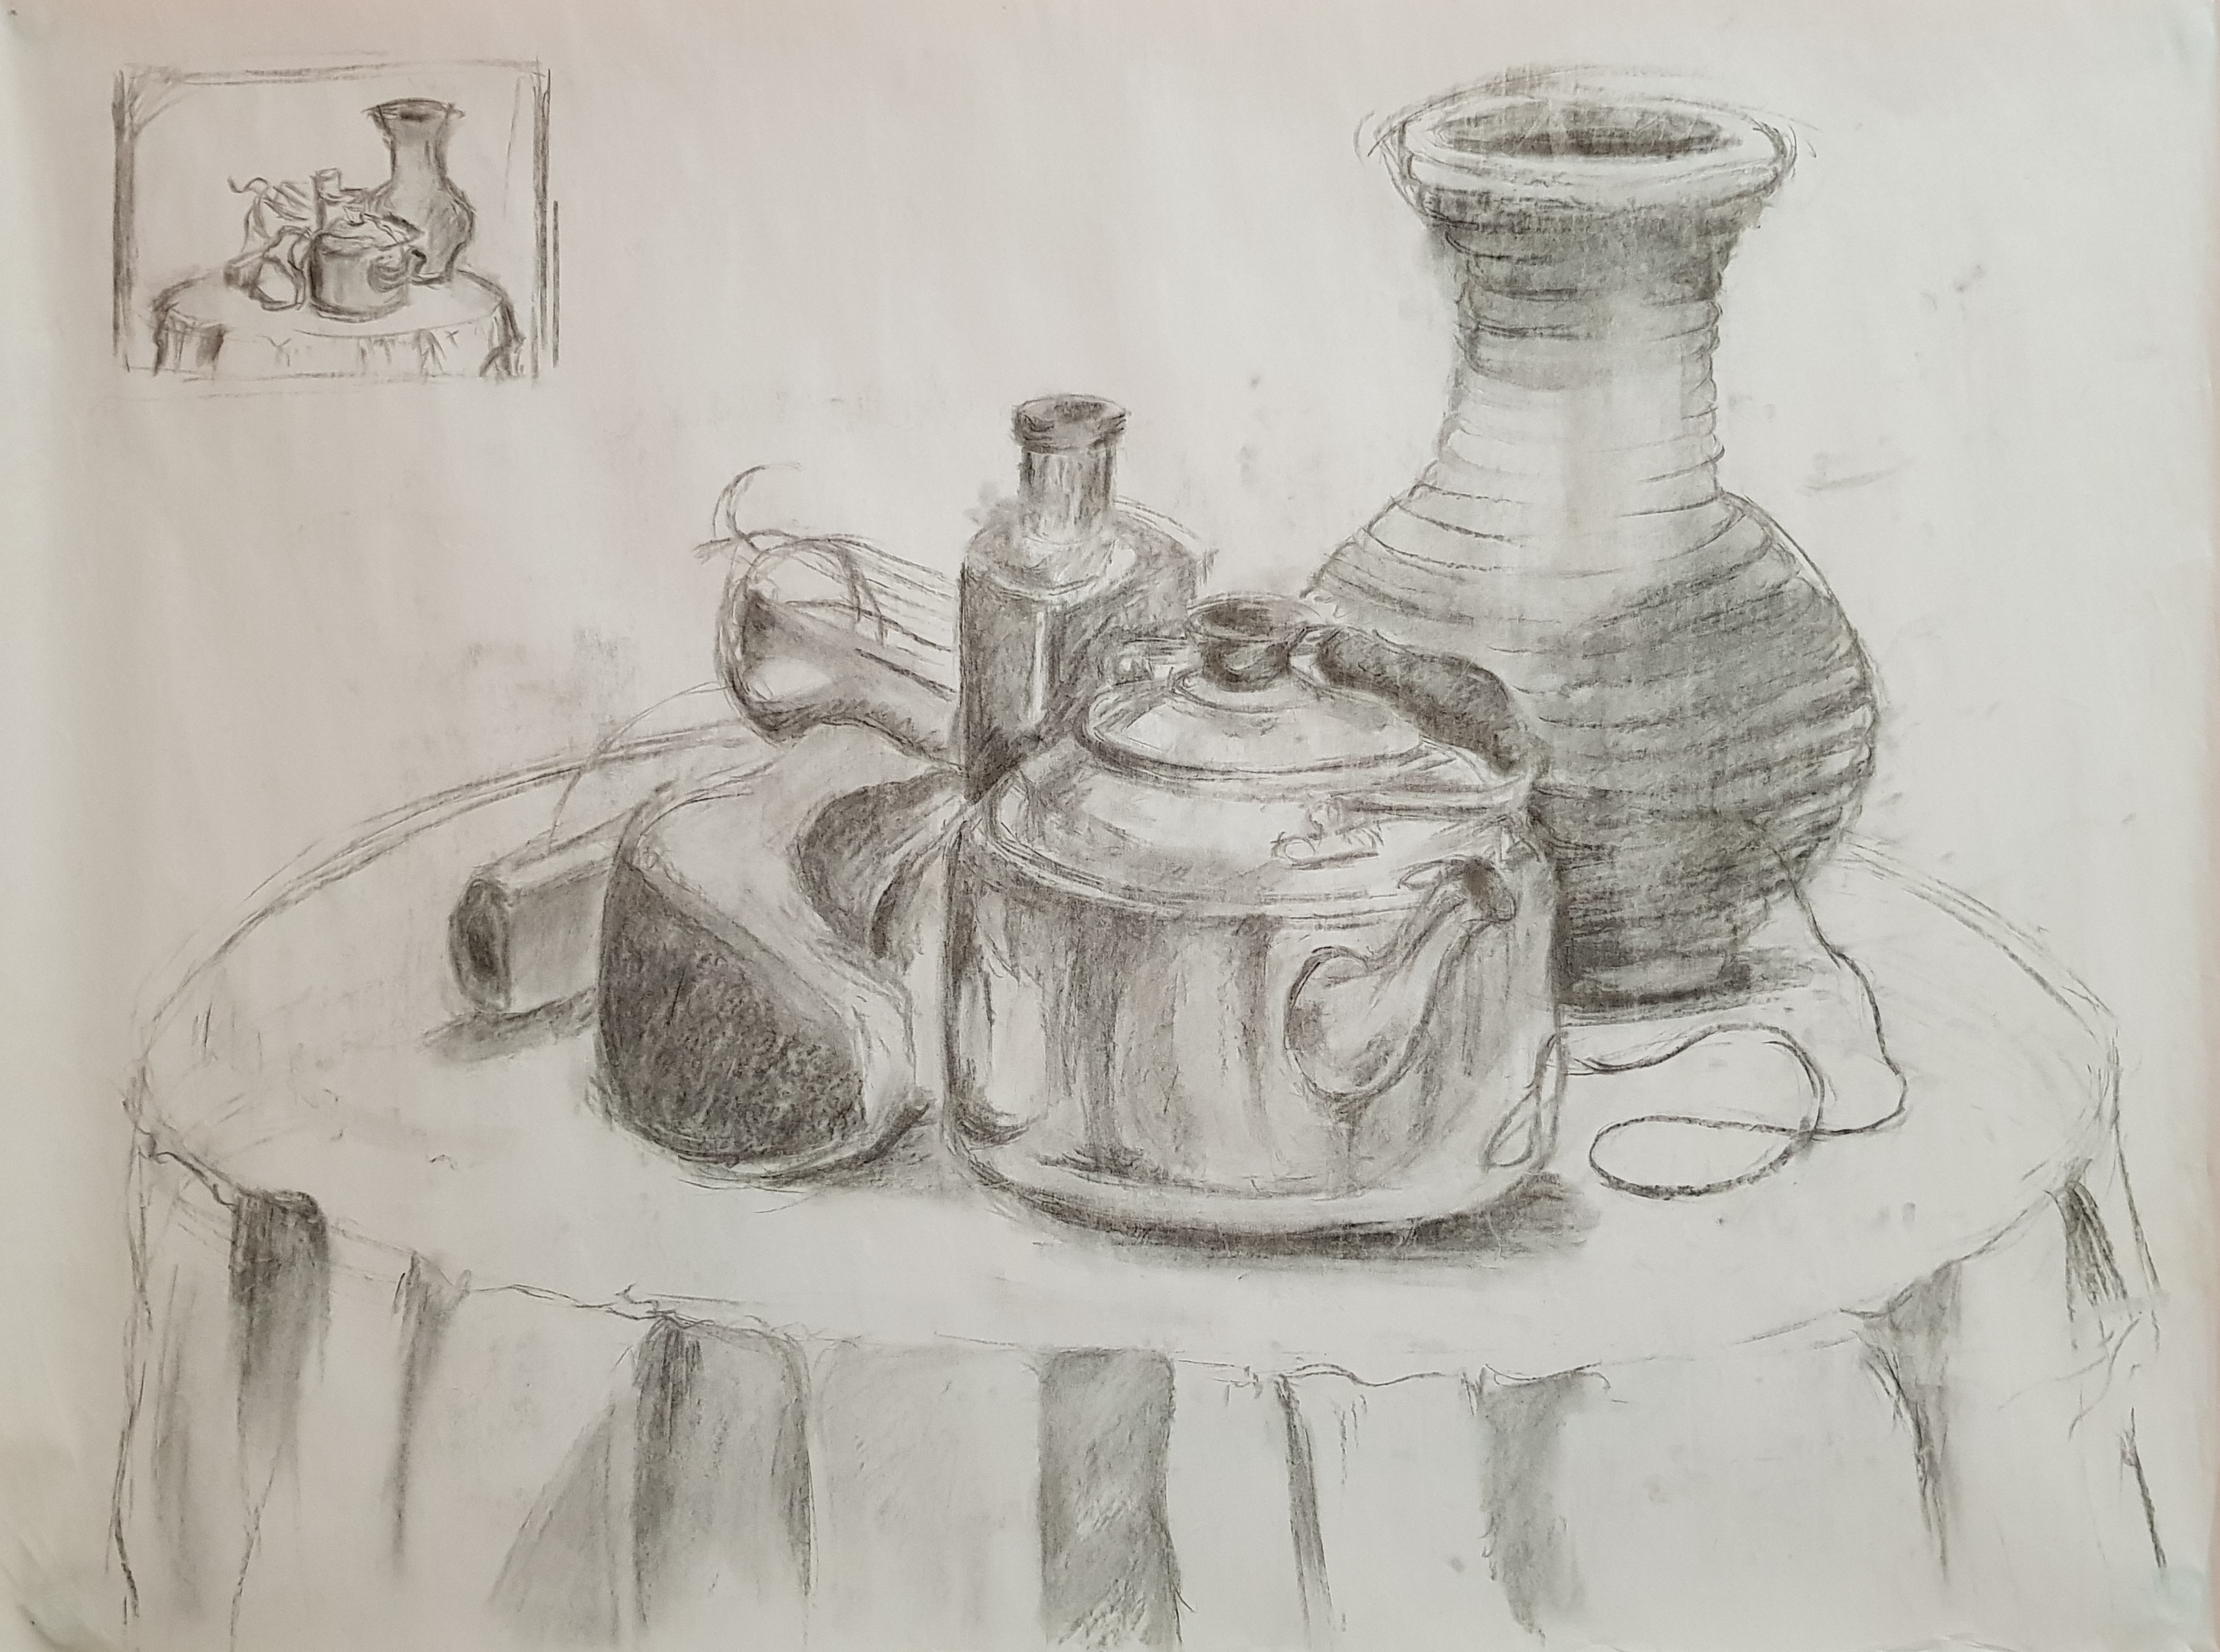
Week 1 (Still life)
In-class
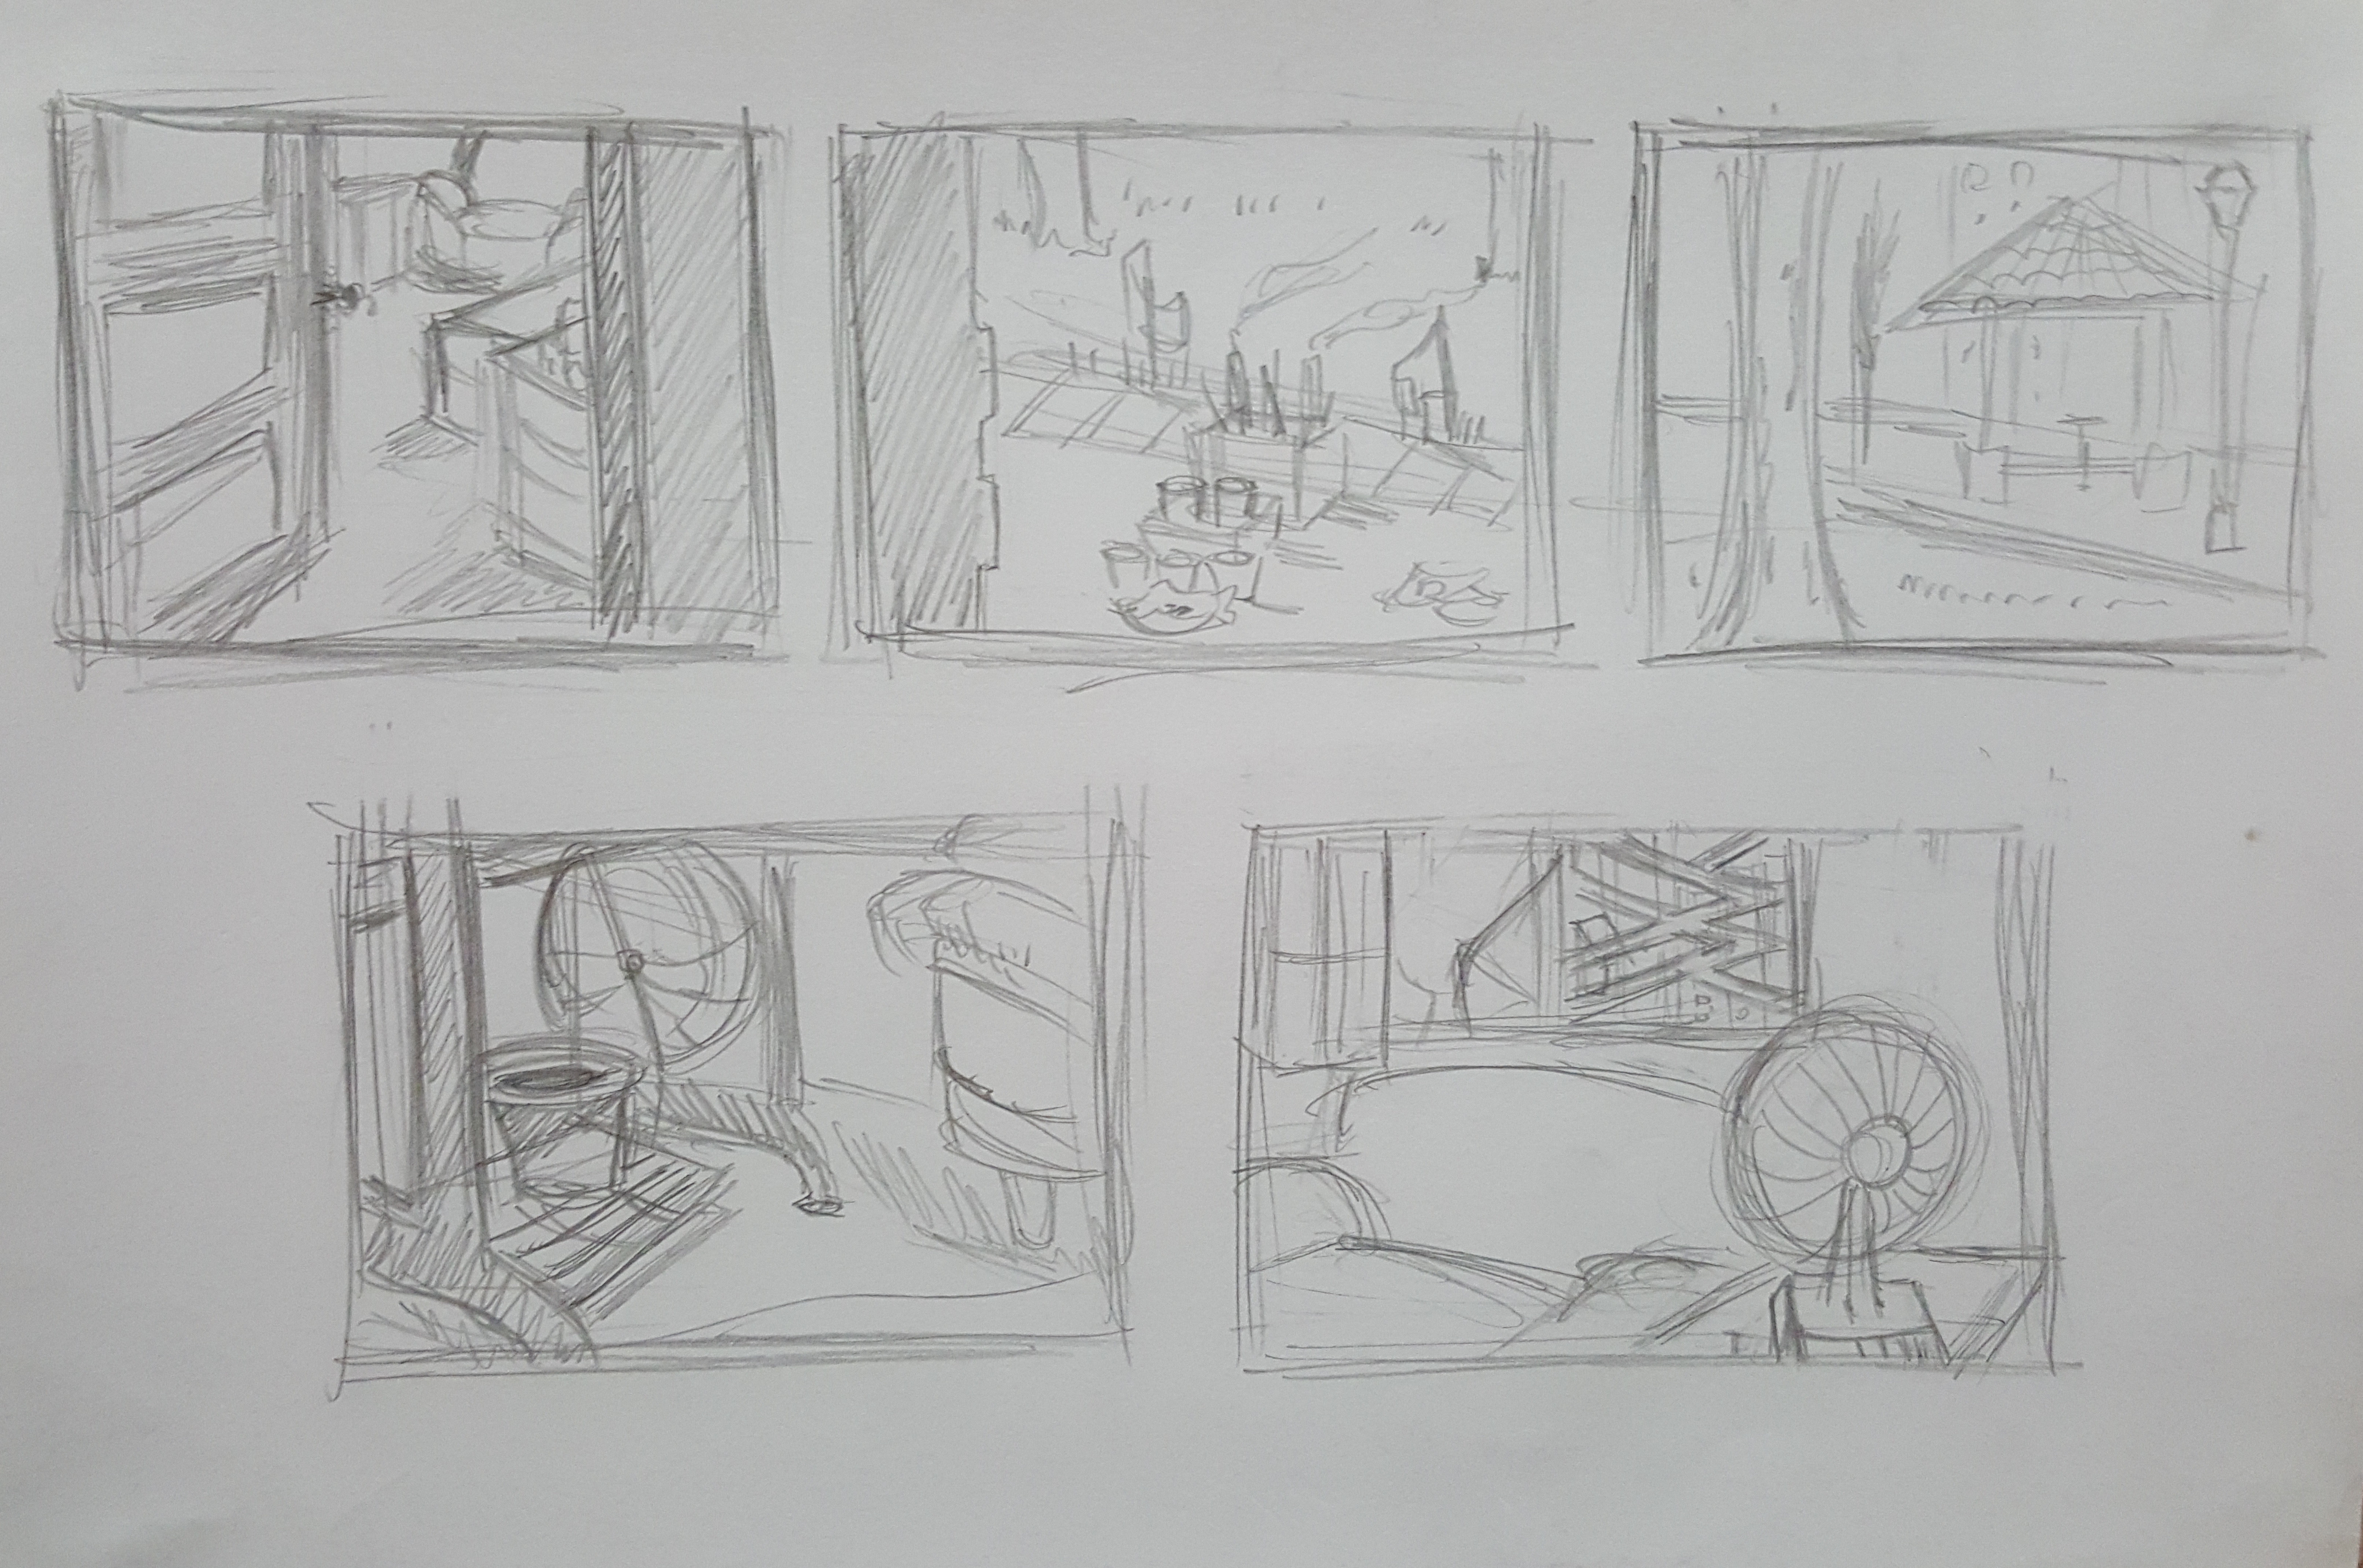
Week 2 (Composition)
In-class (composition thumbnails)
Homework (still life)

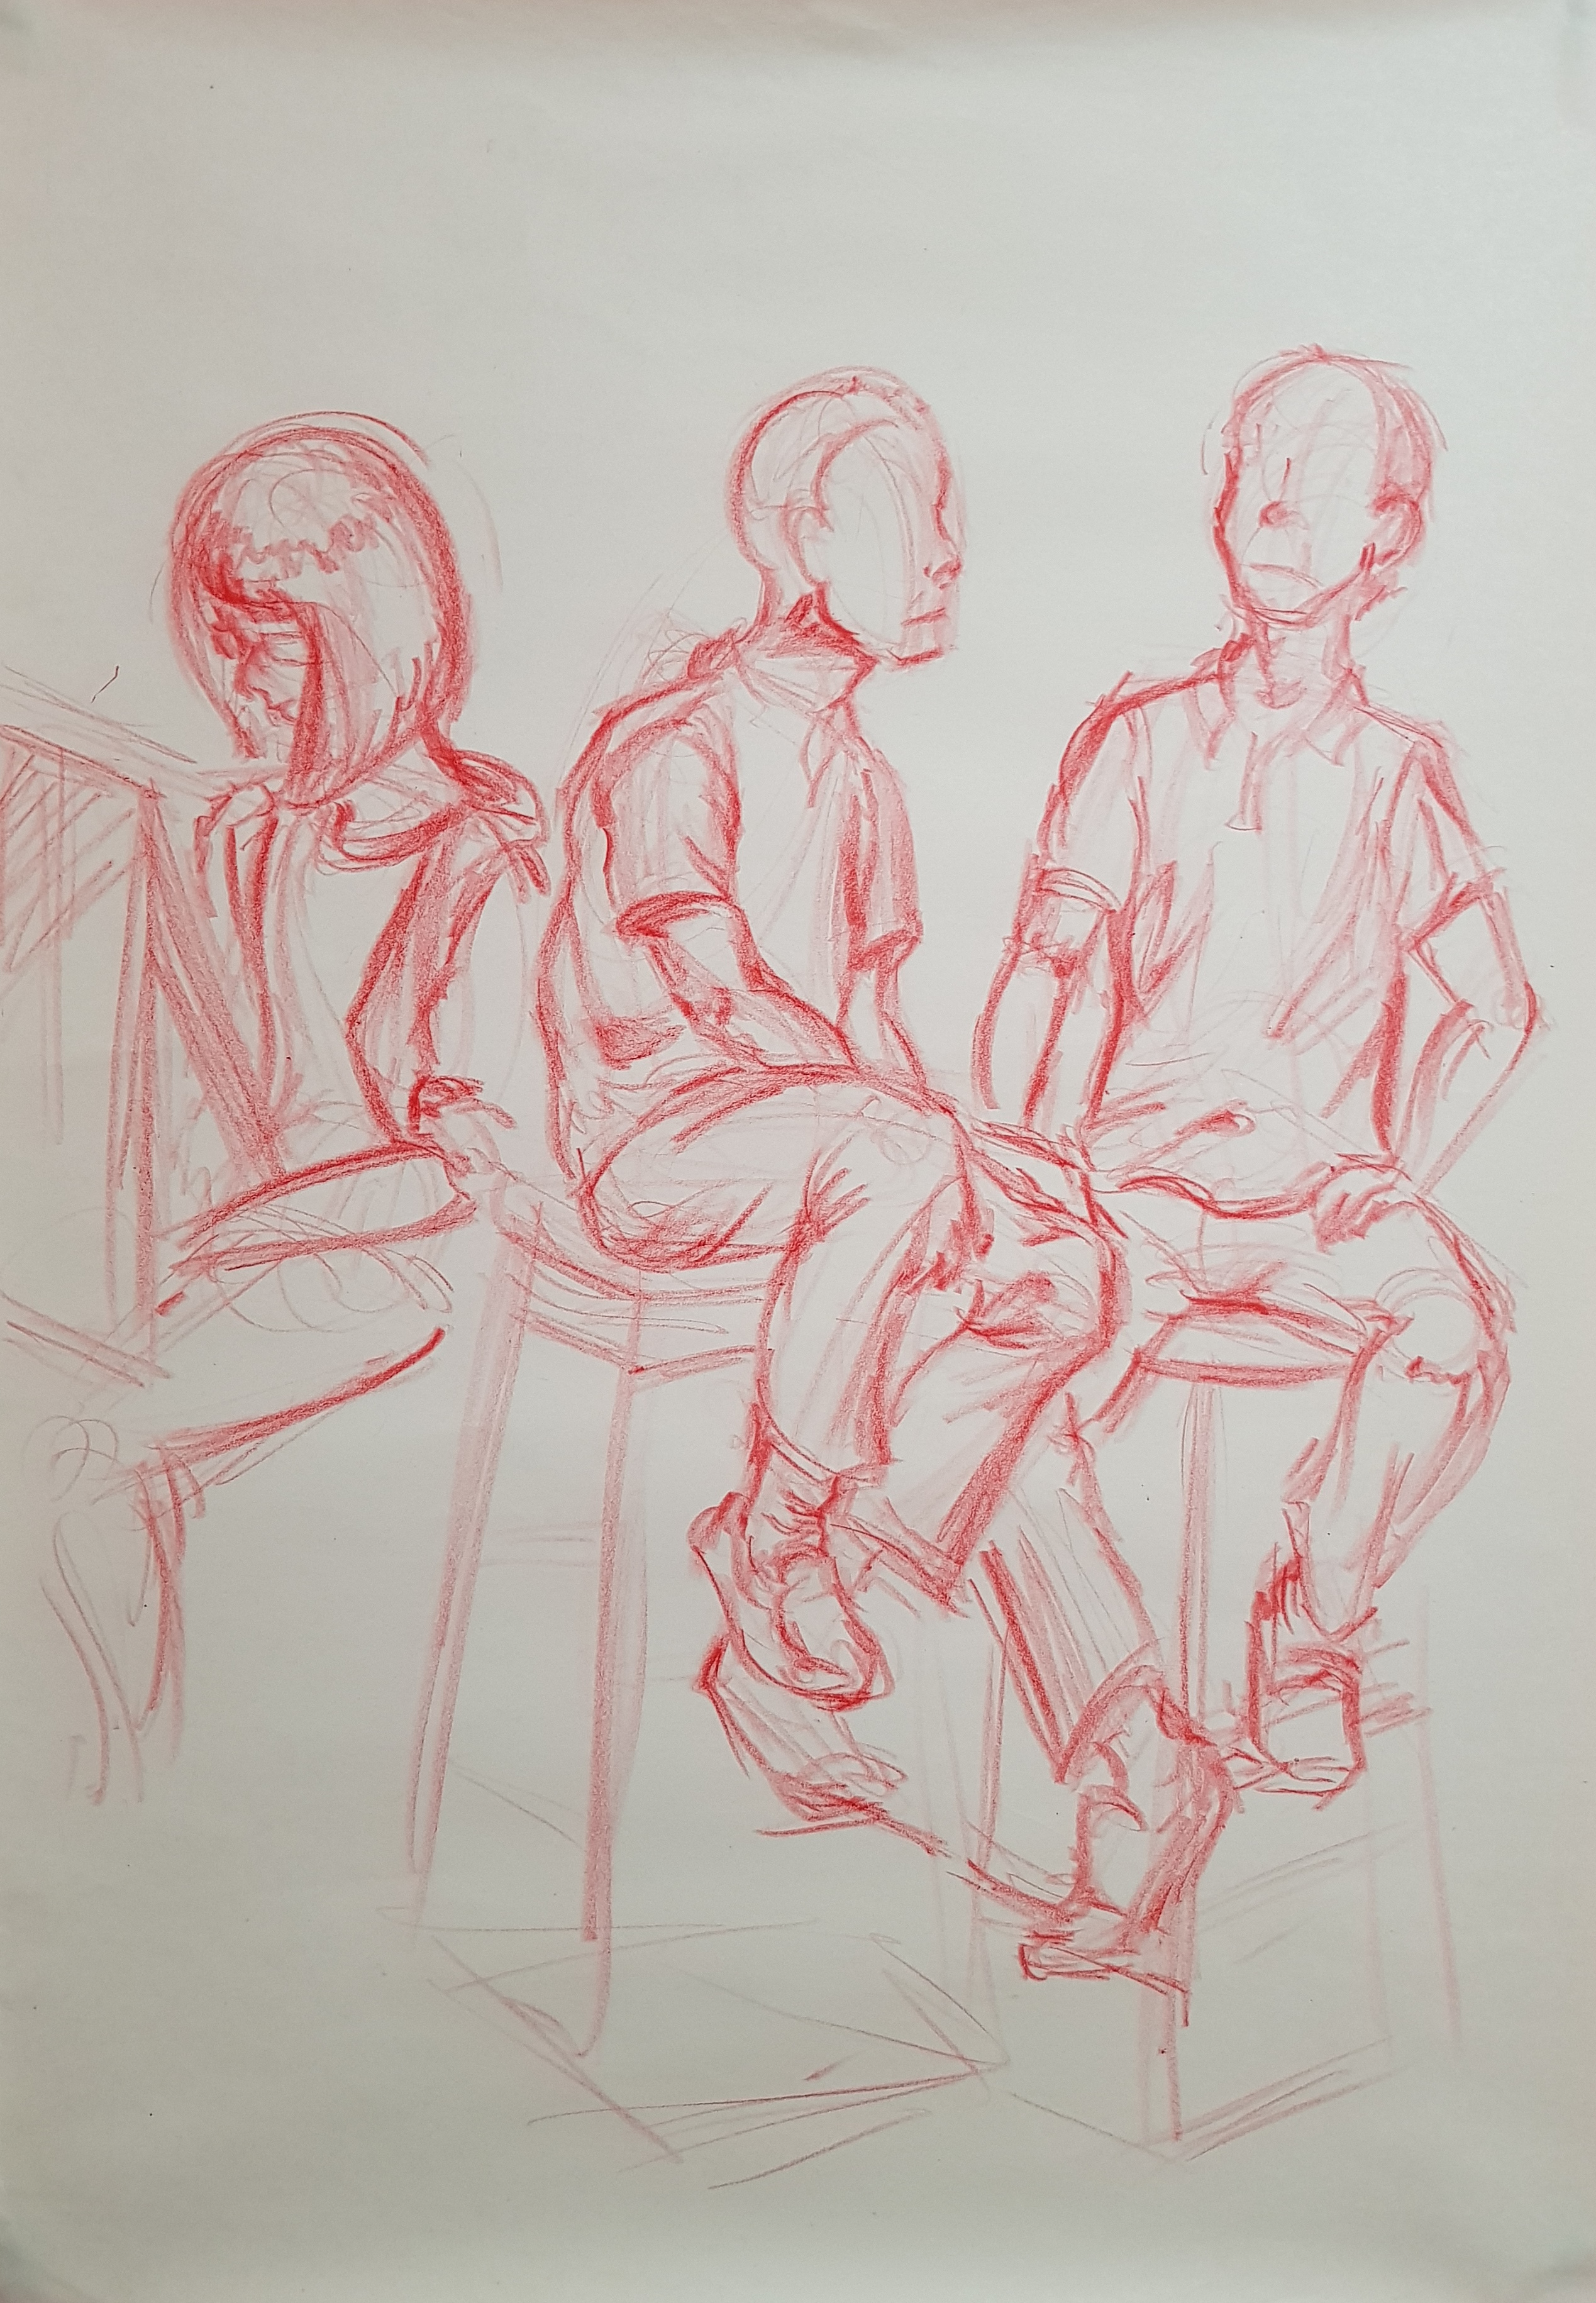
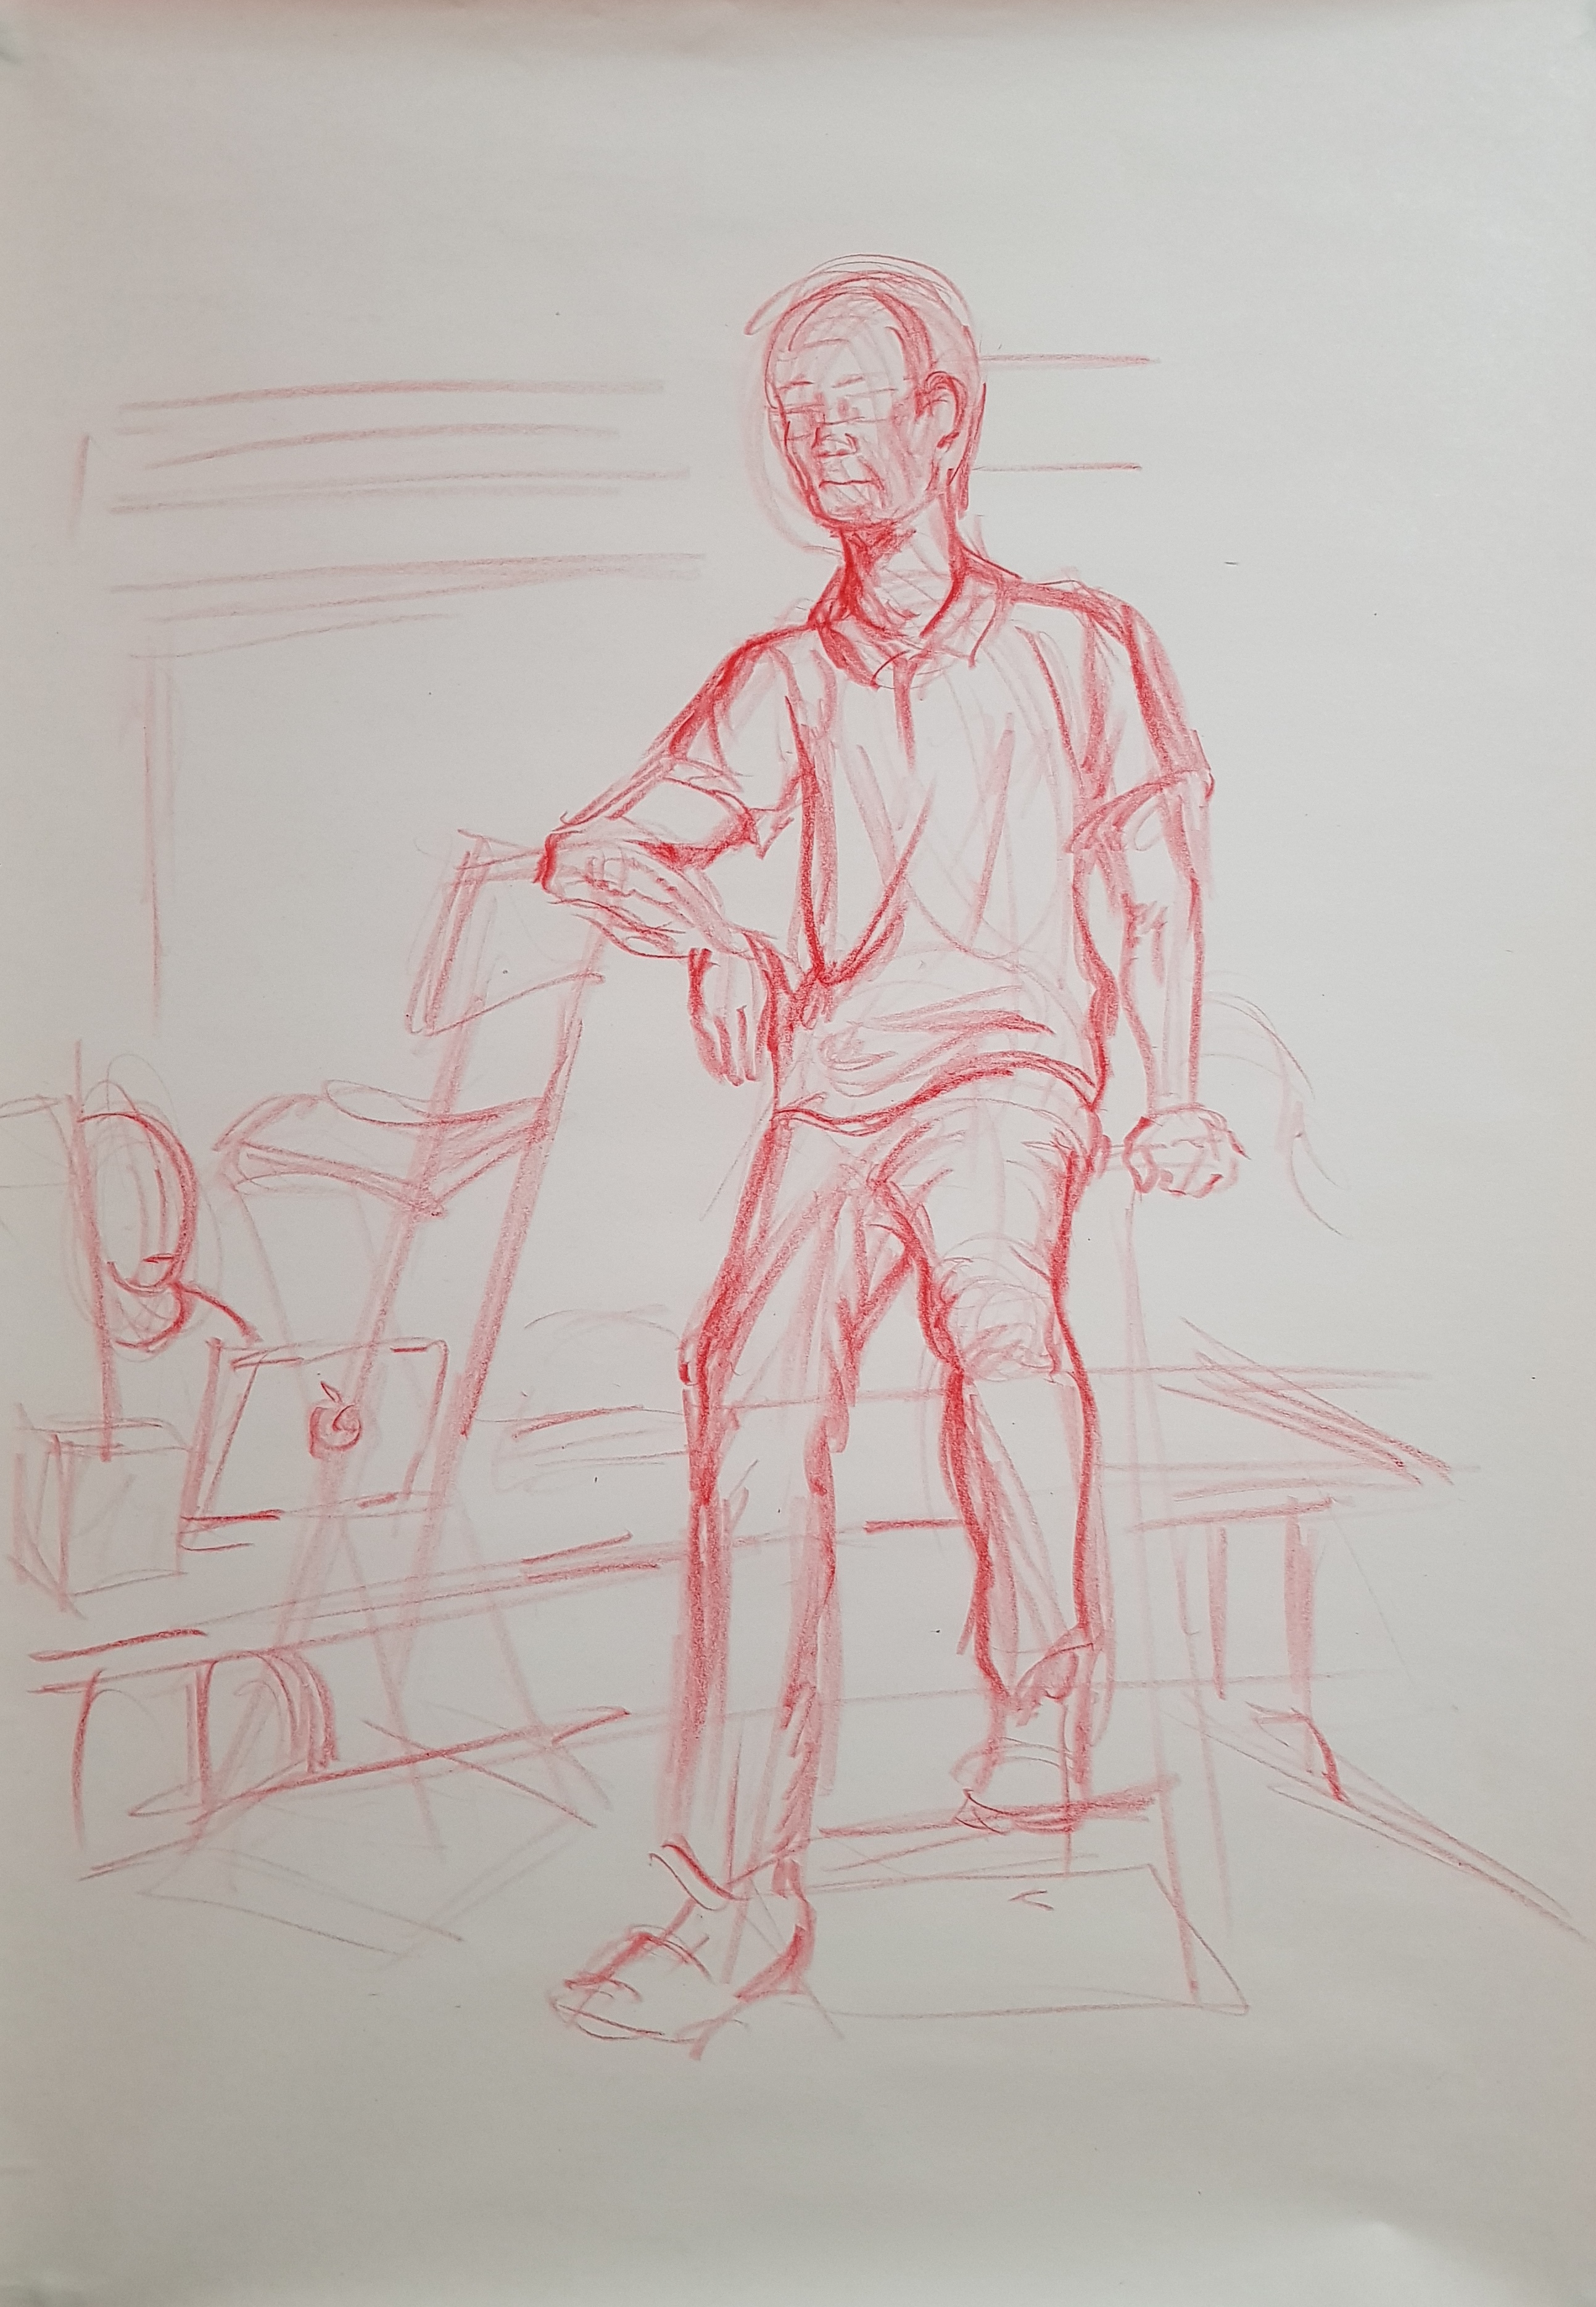
Week 3 (Figure drawing – Eddie)
In-class

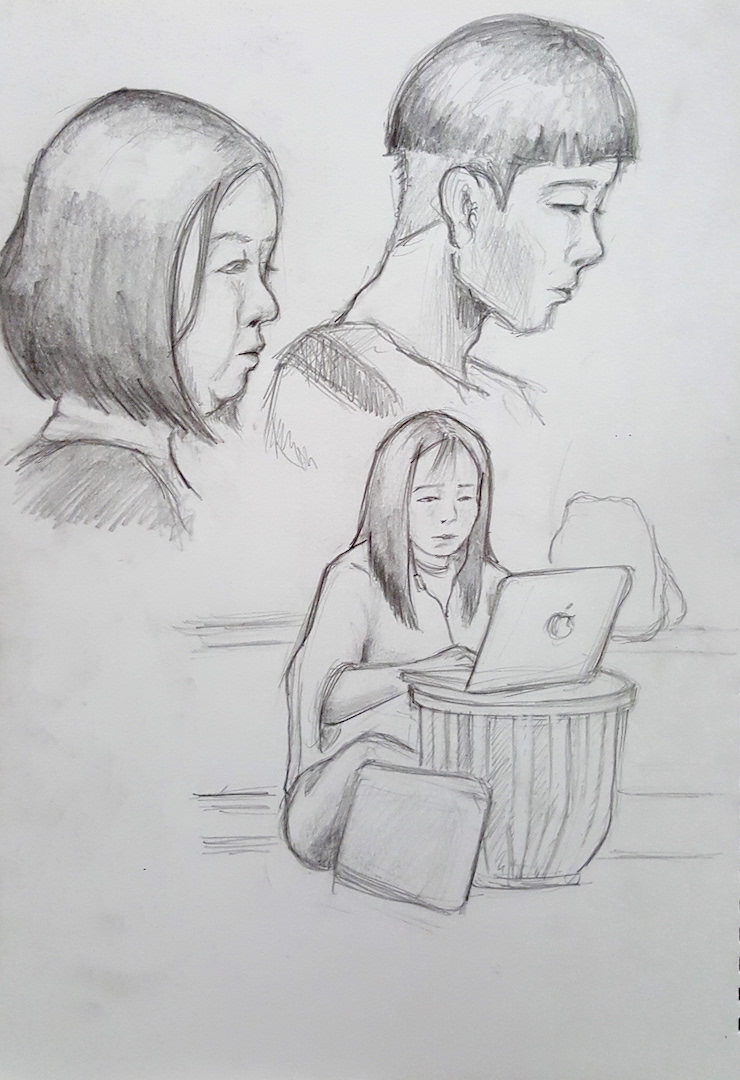
Homework (Something interesting)

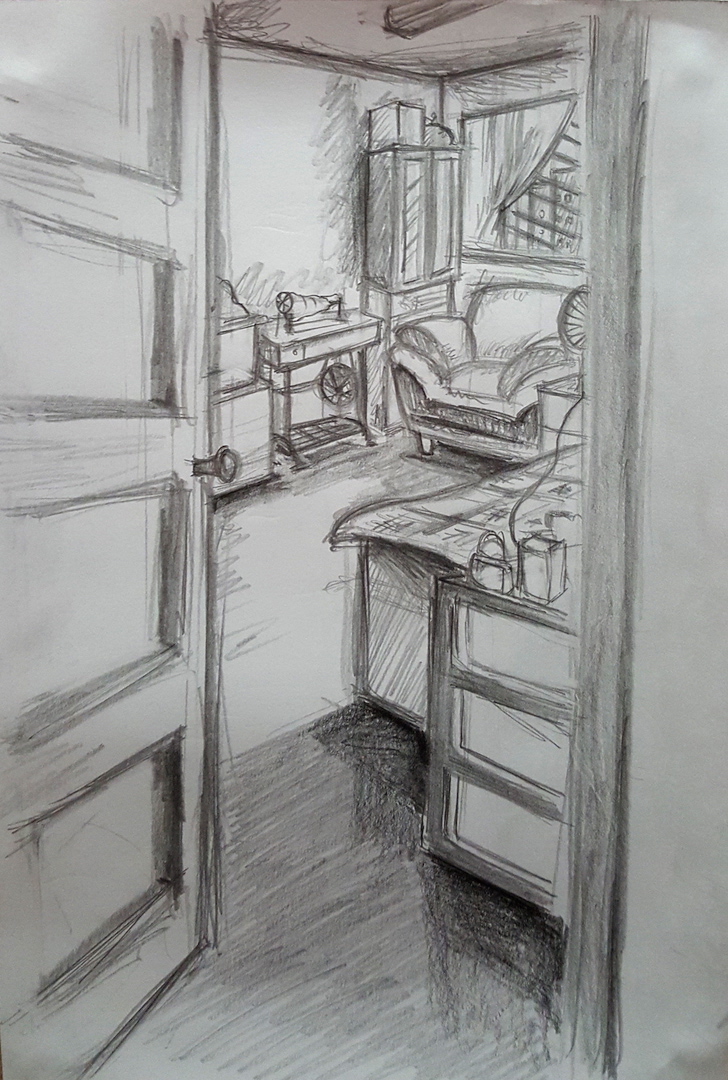
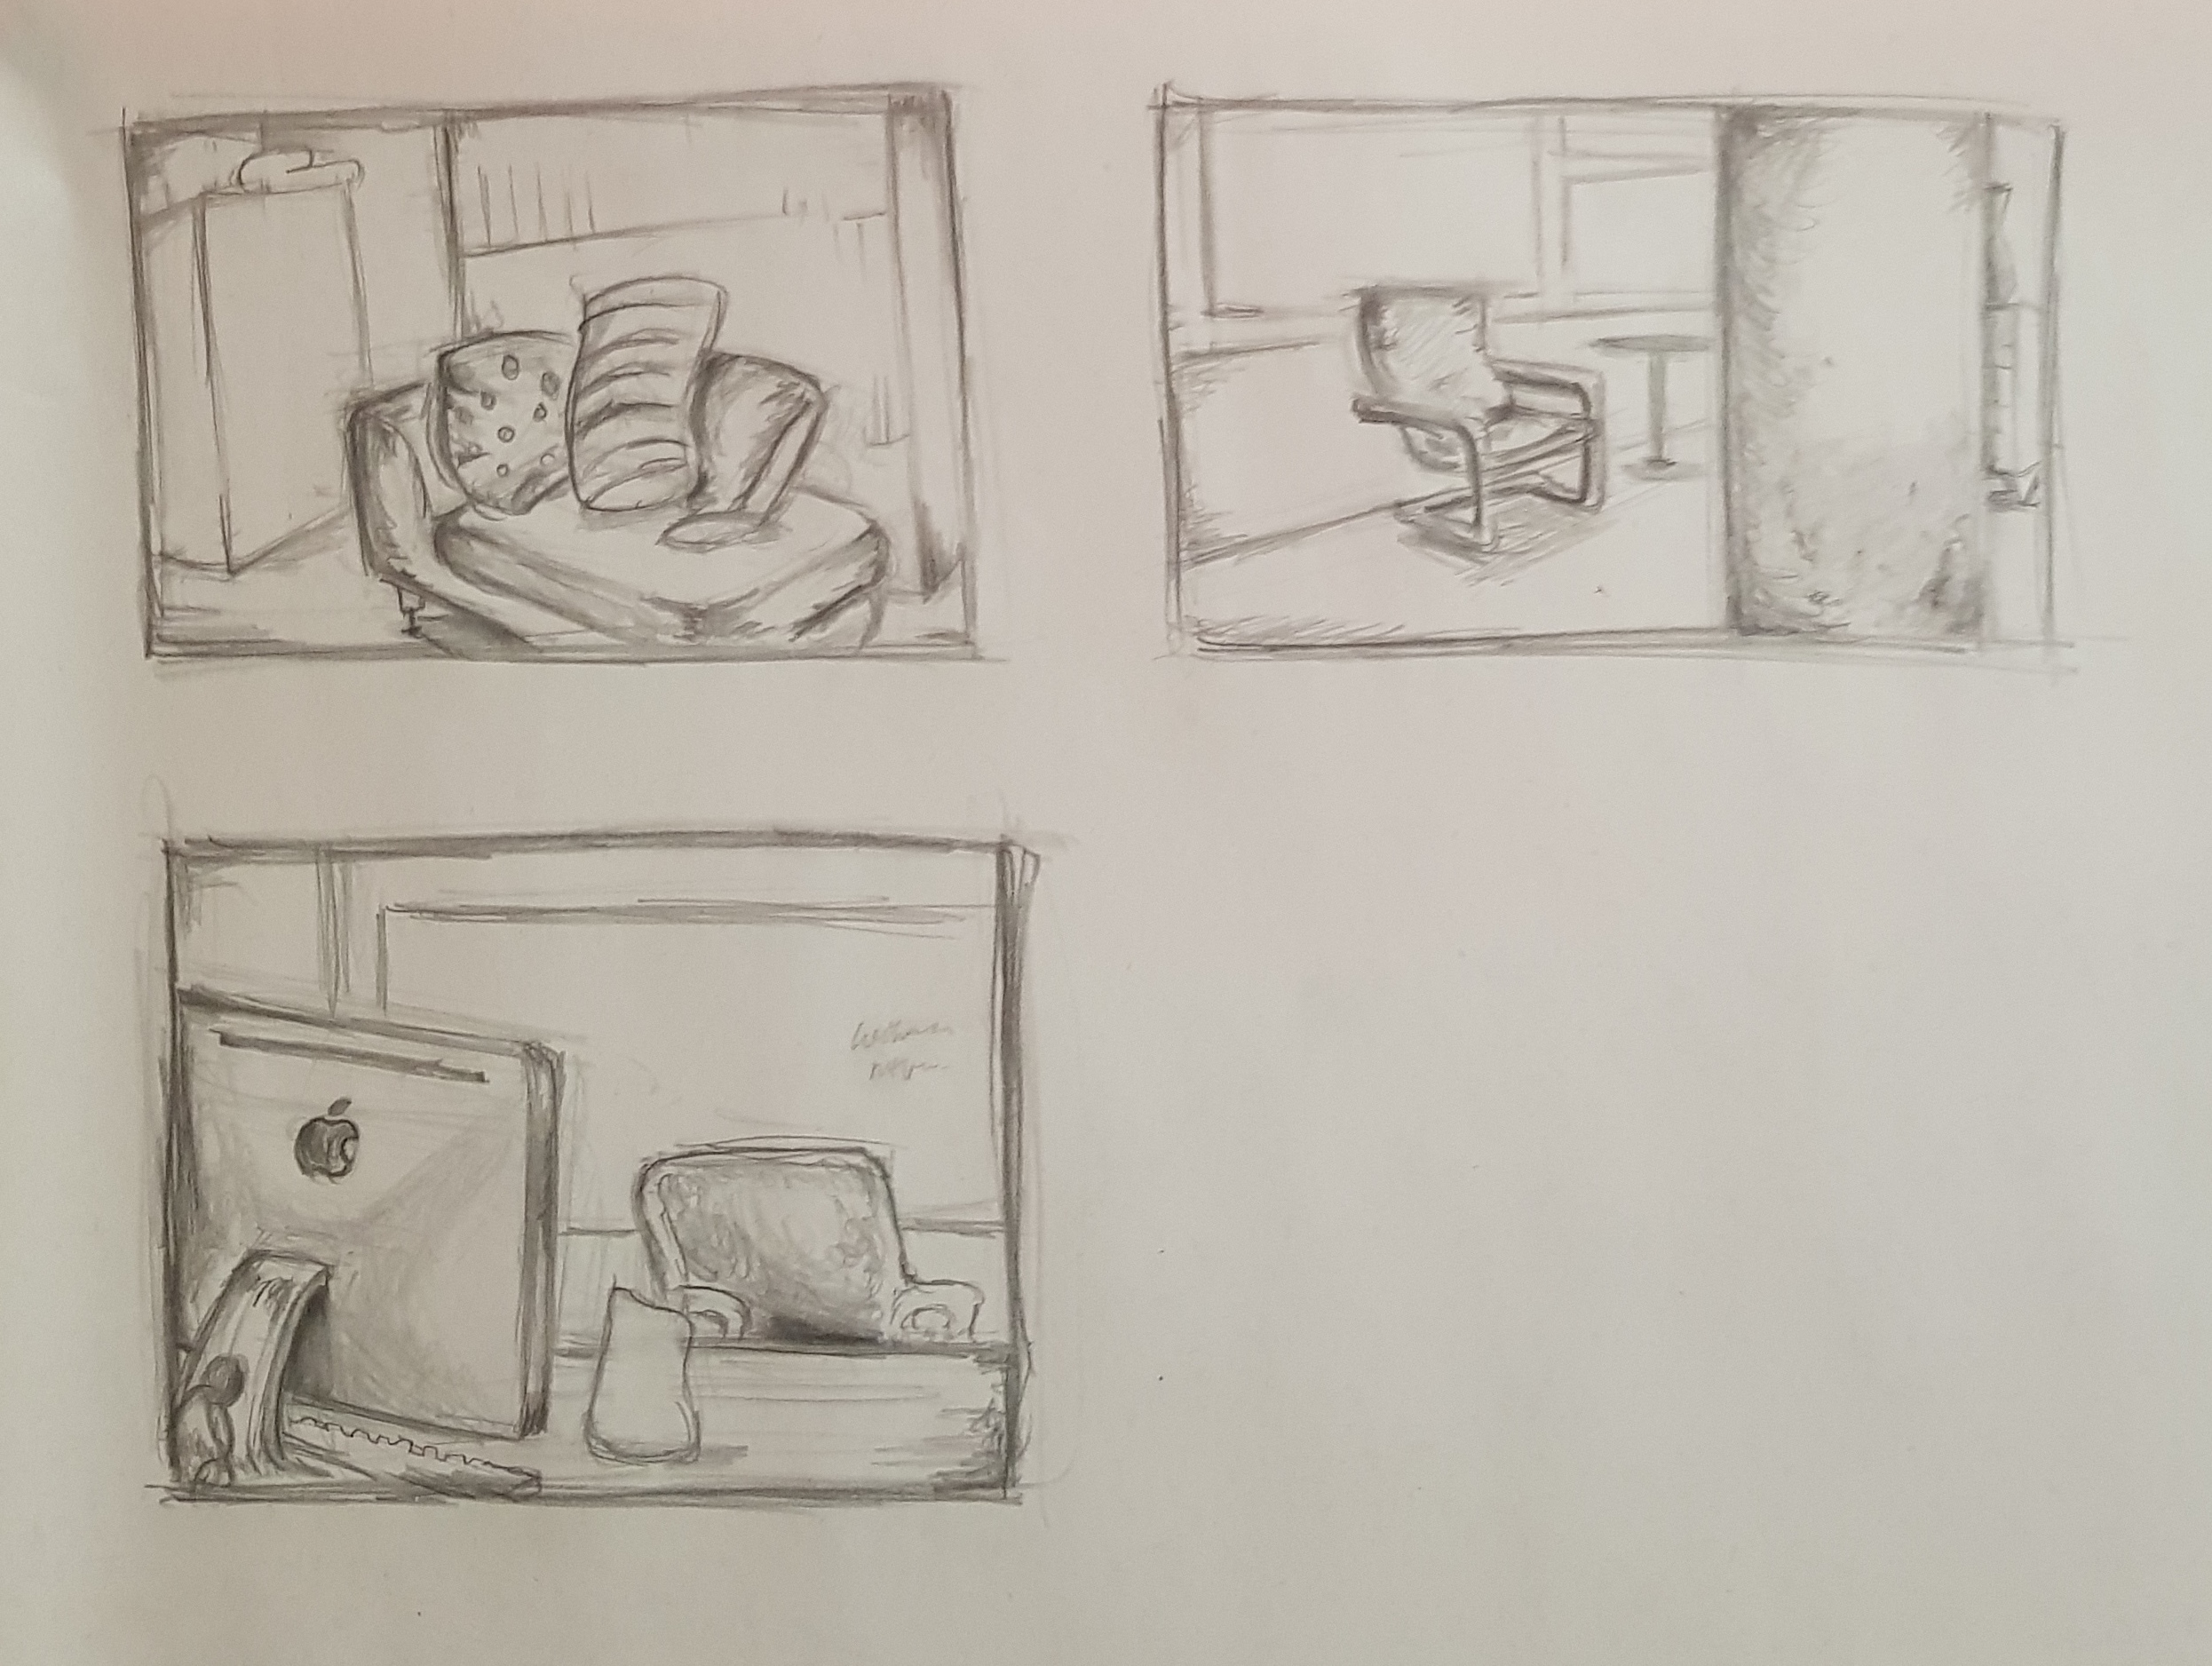
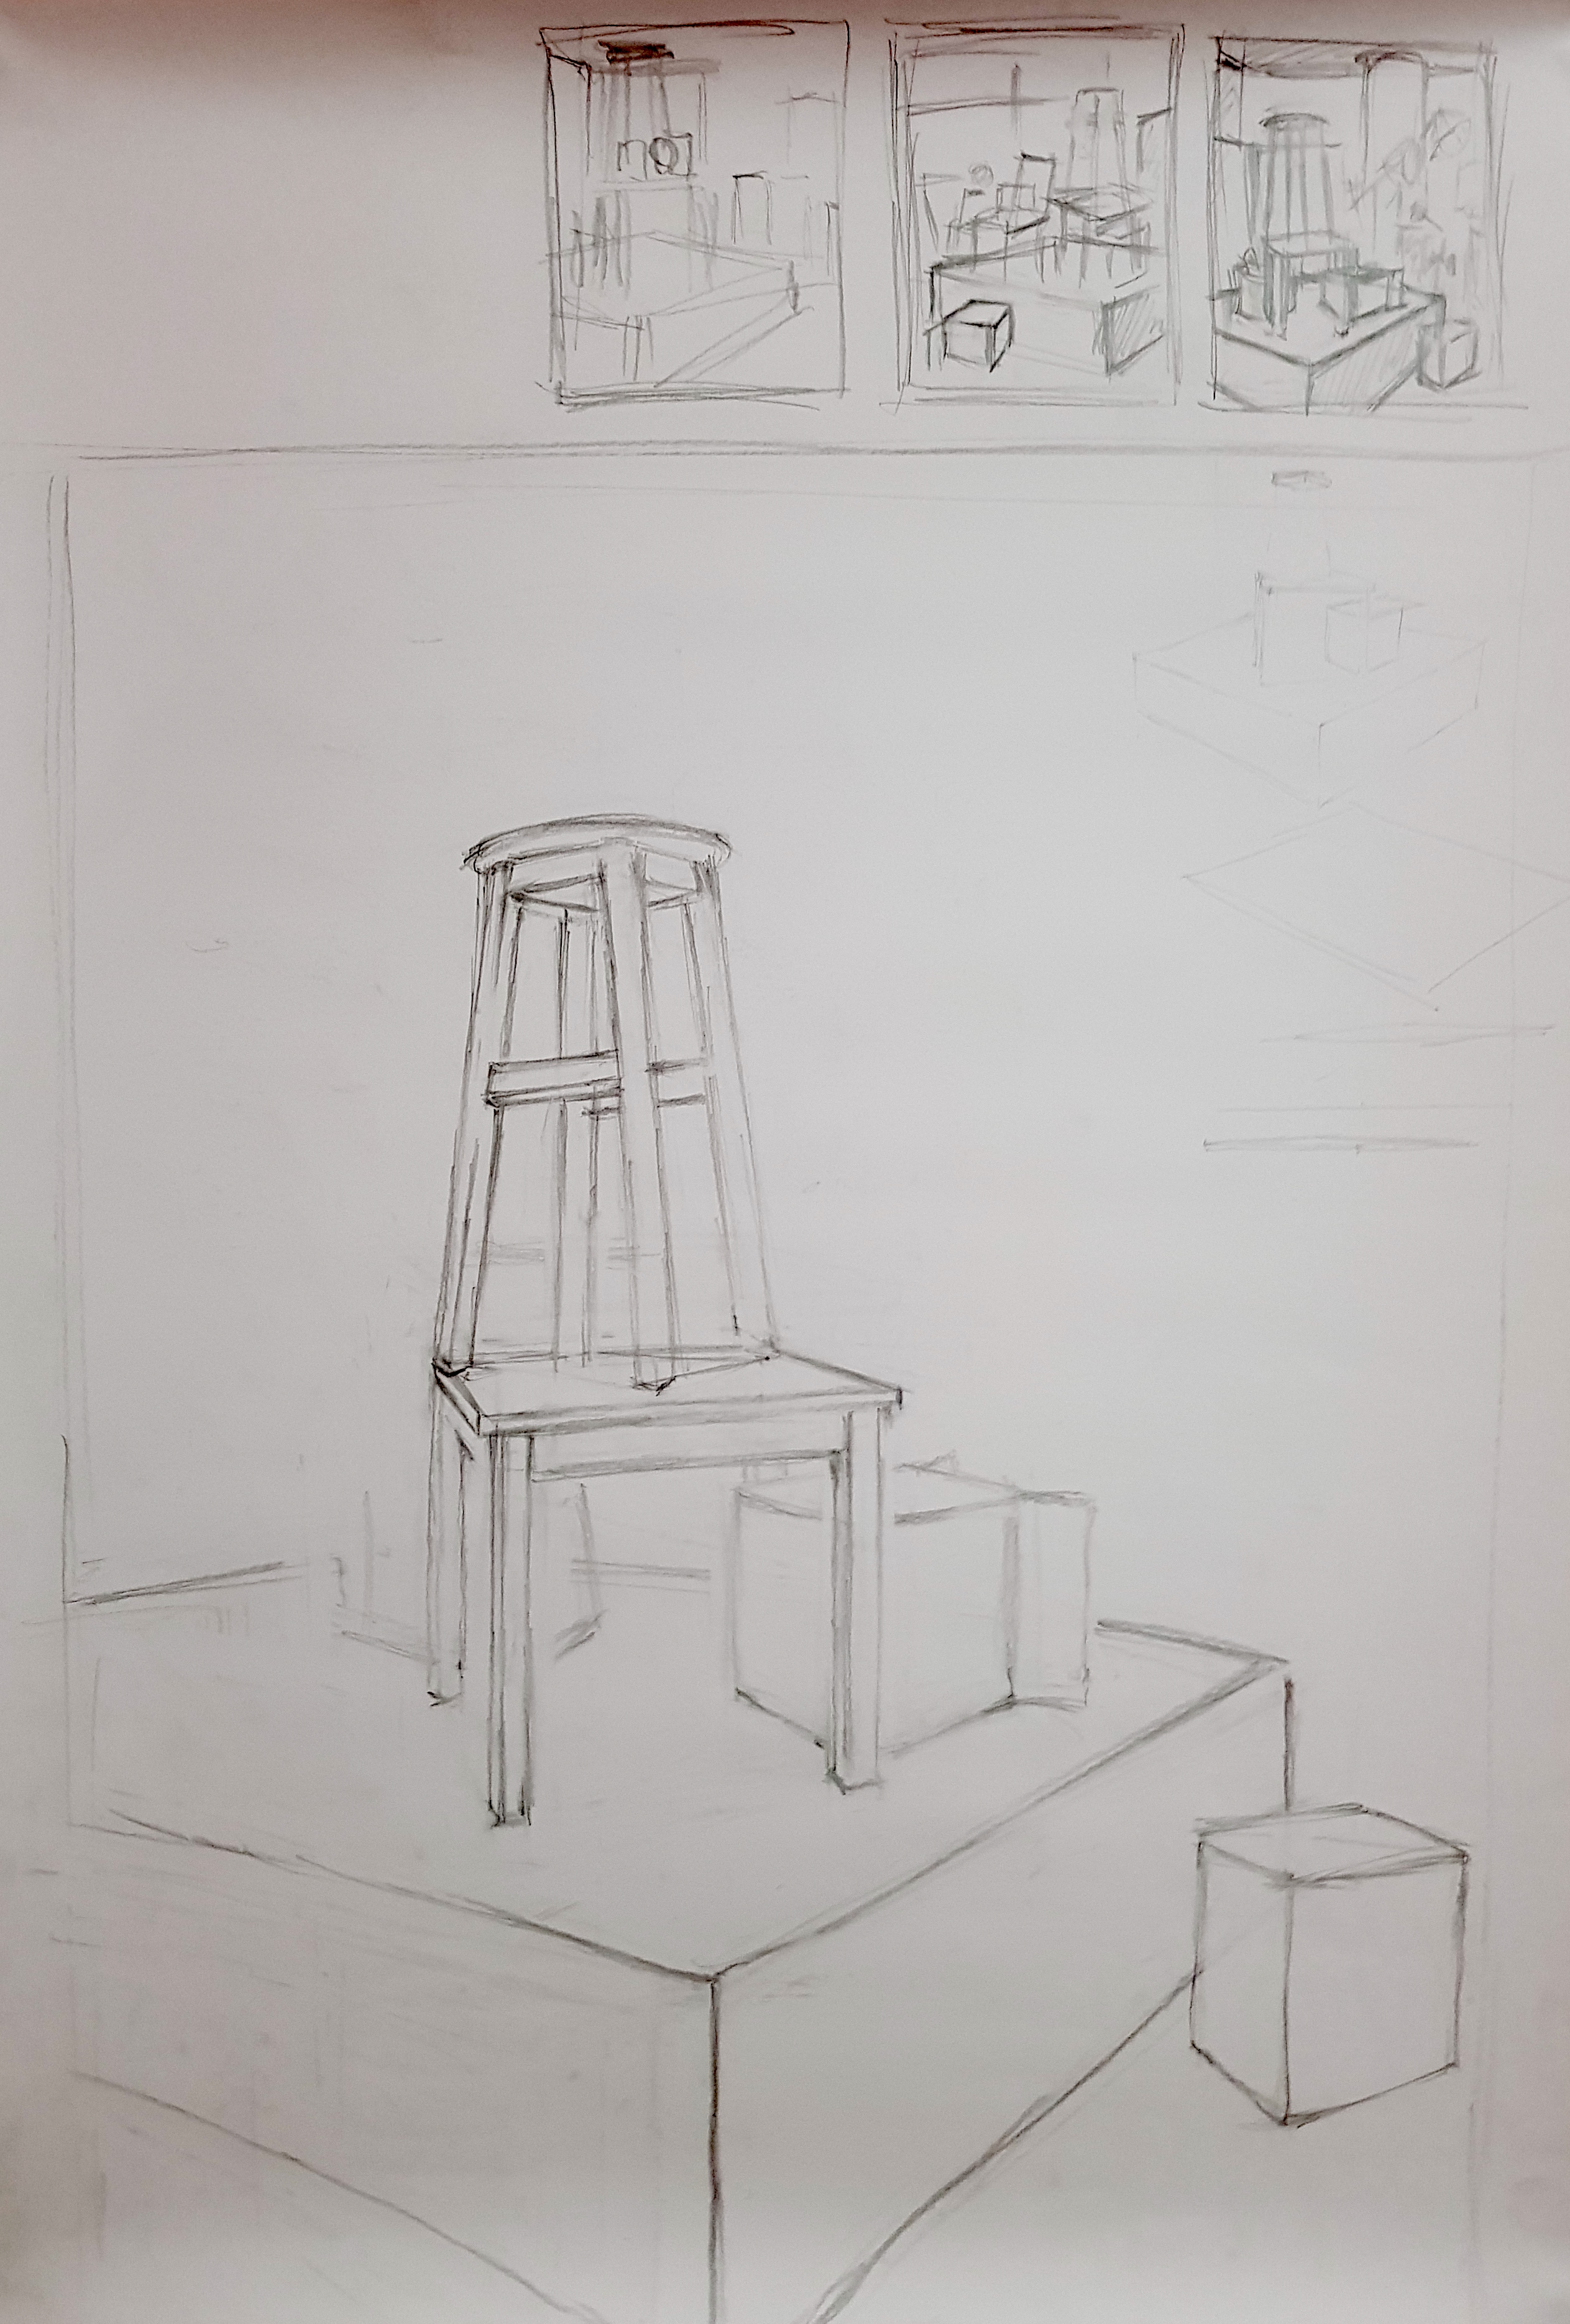
Week 4 (Perspective drawing)
In-class
Homework
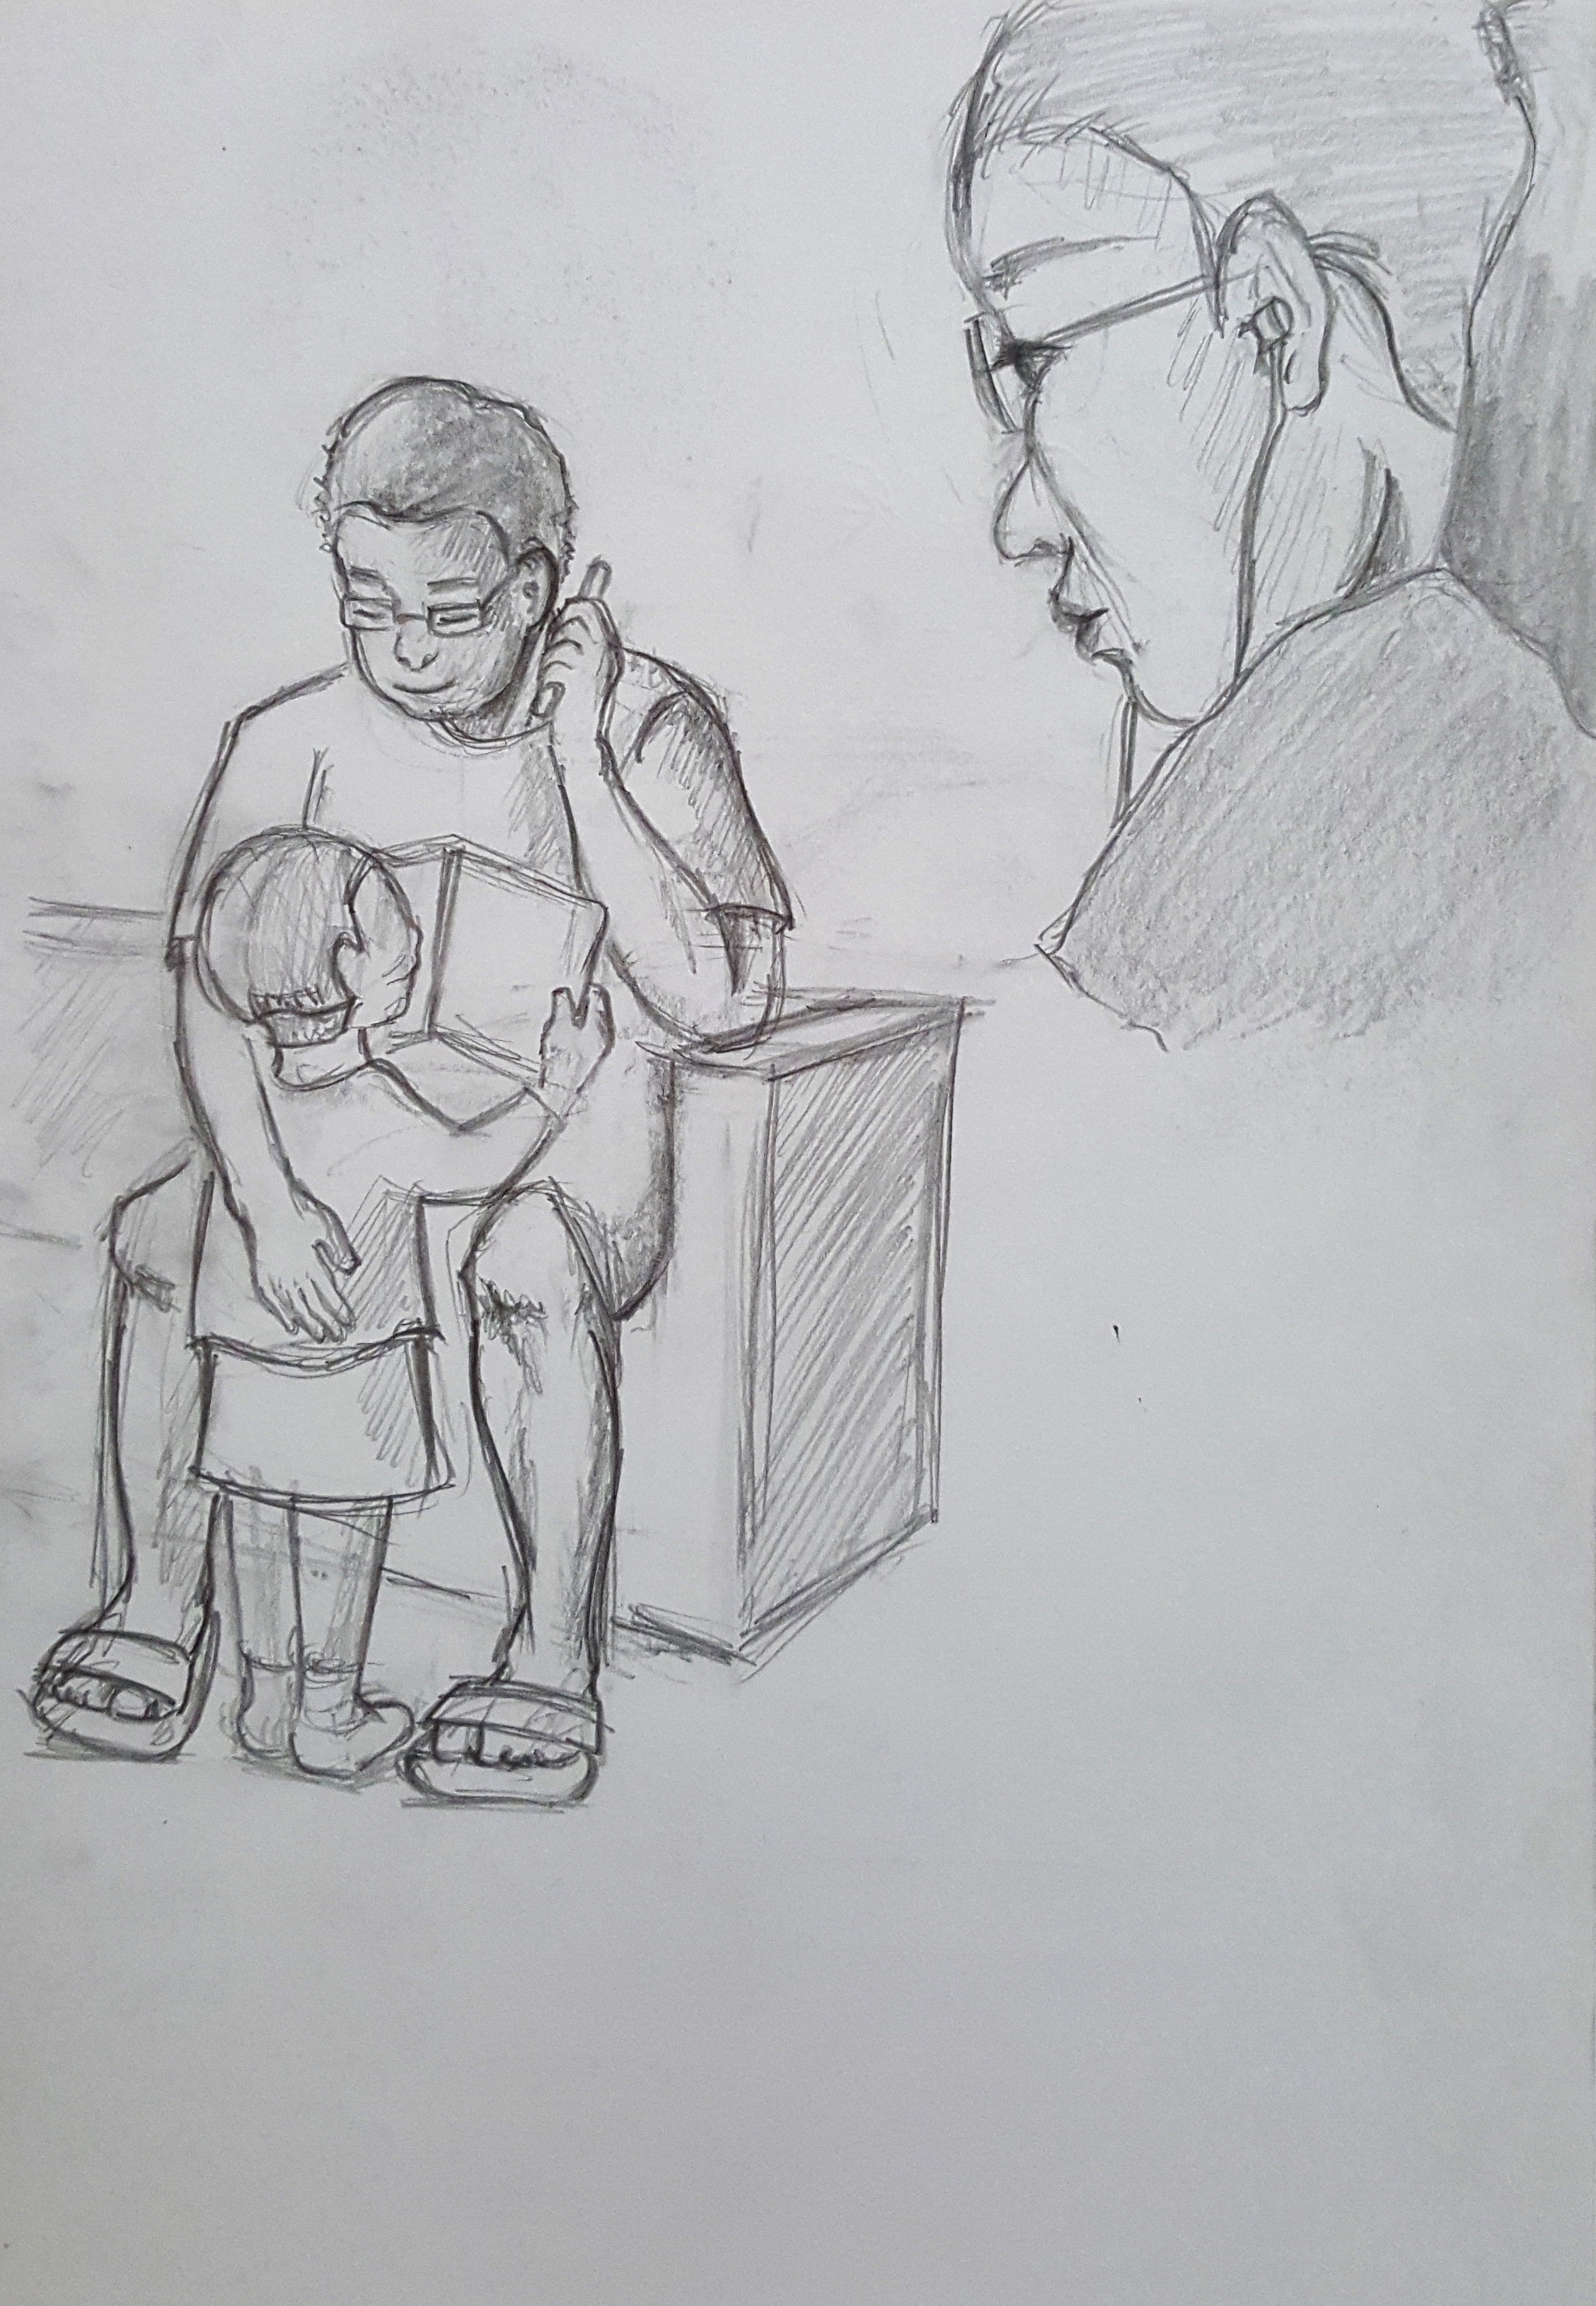
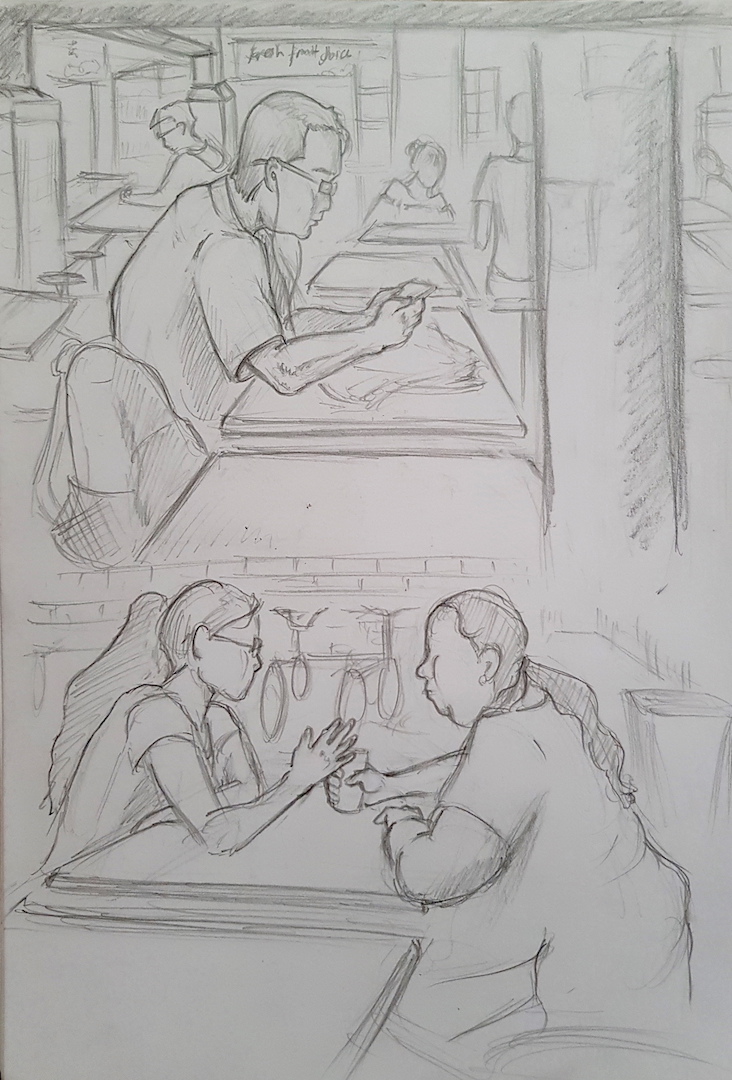
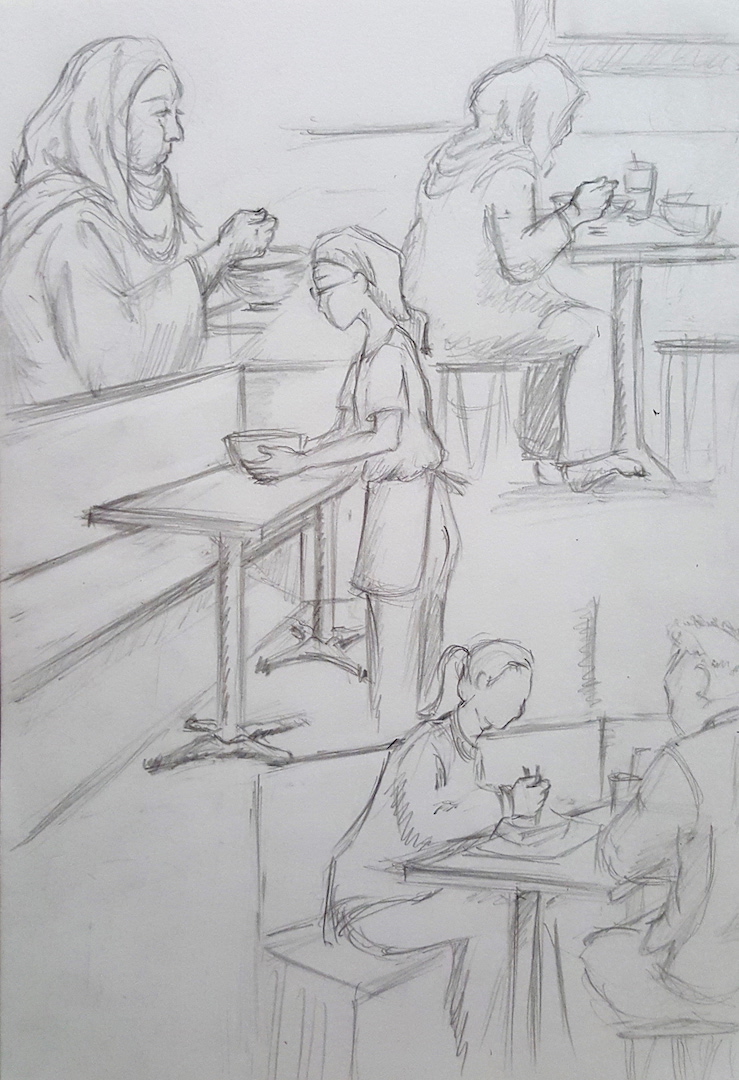
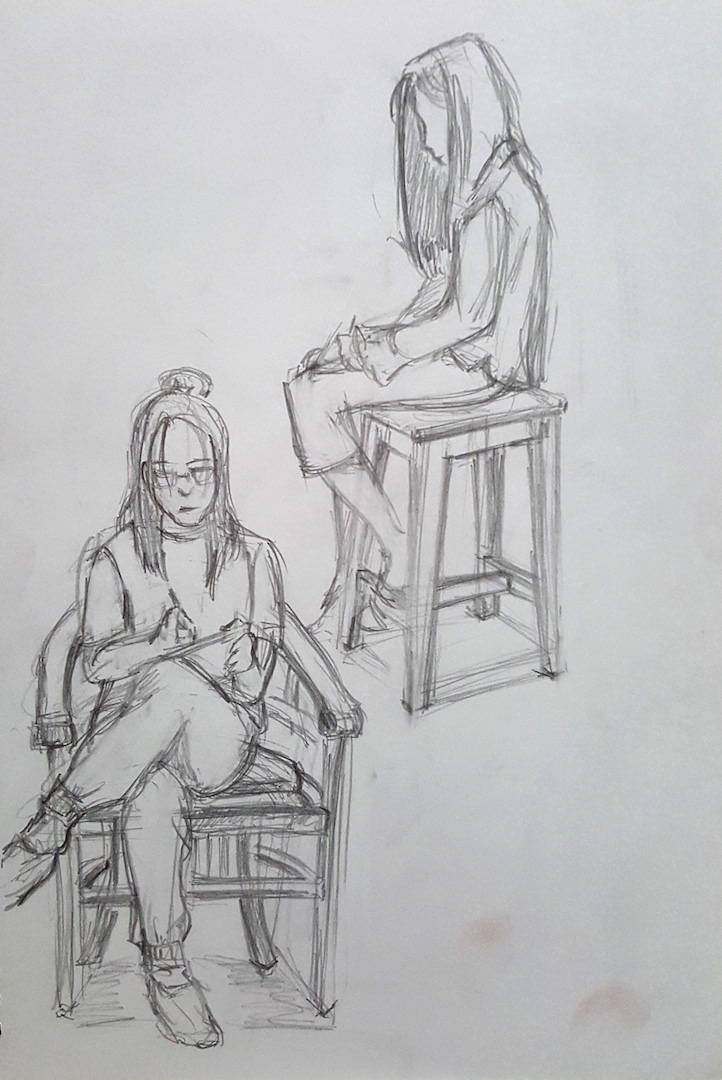
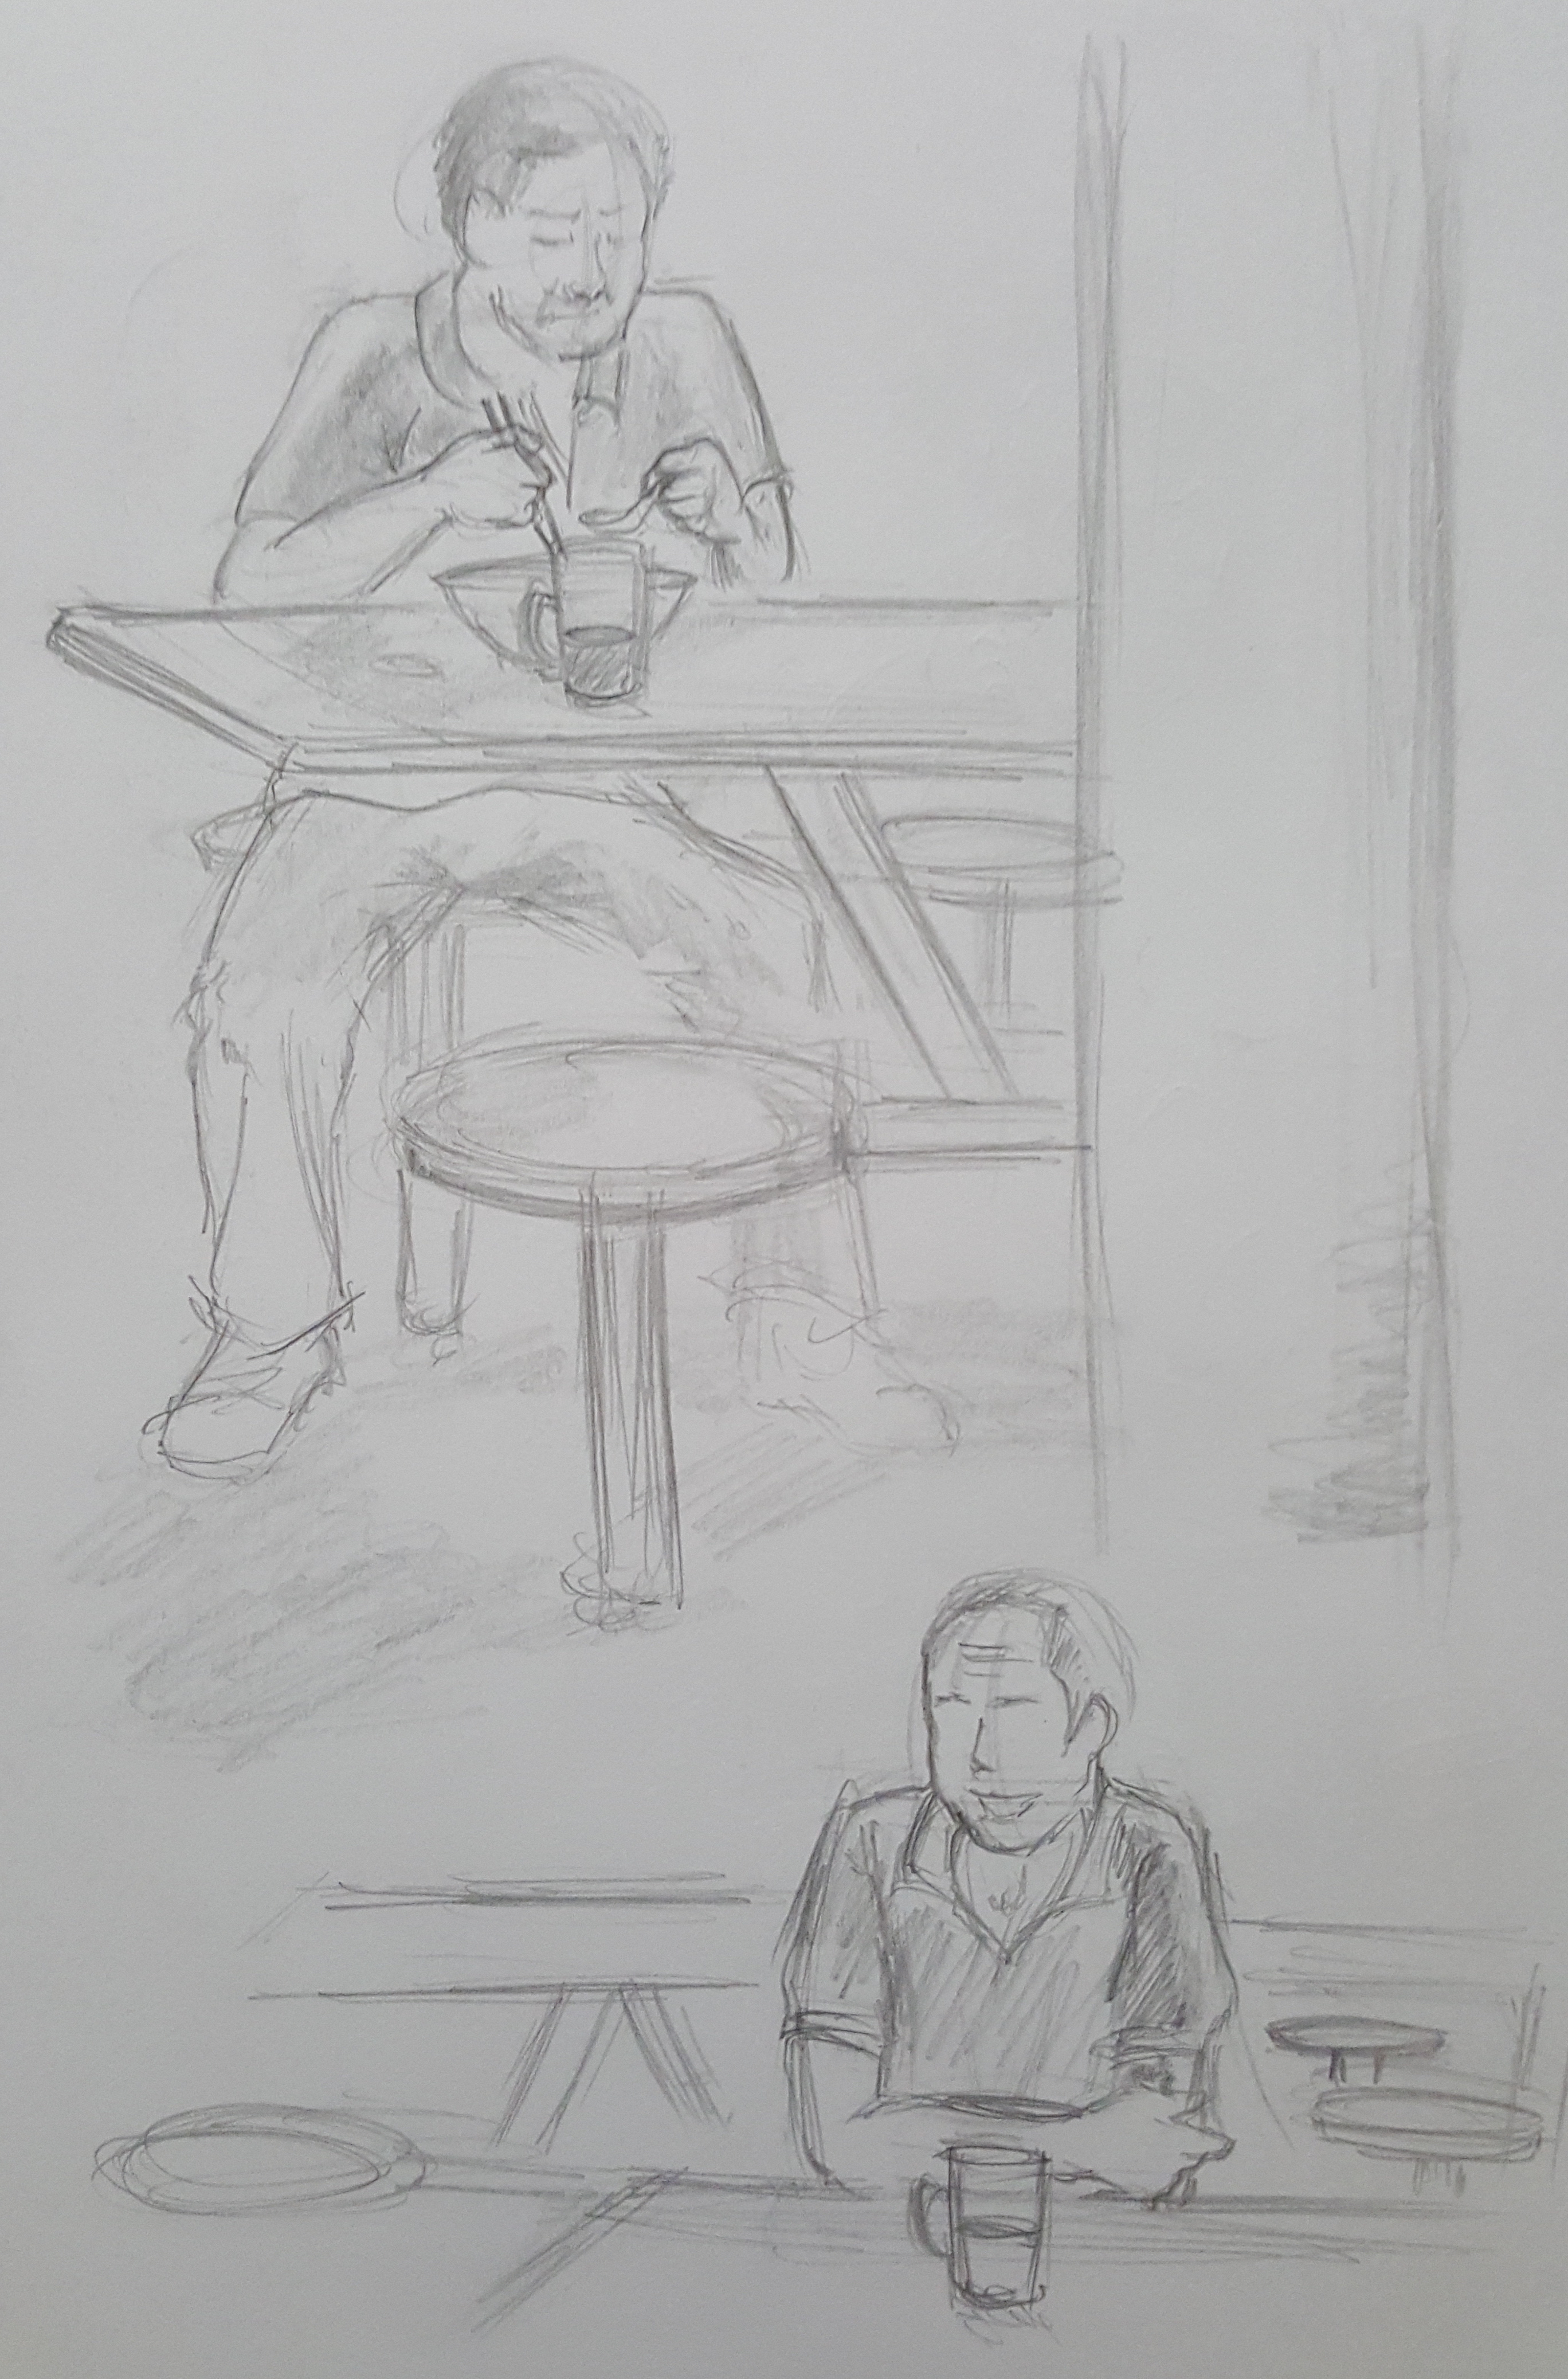
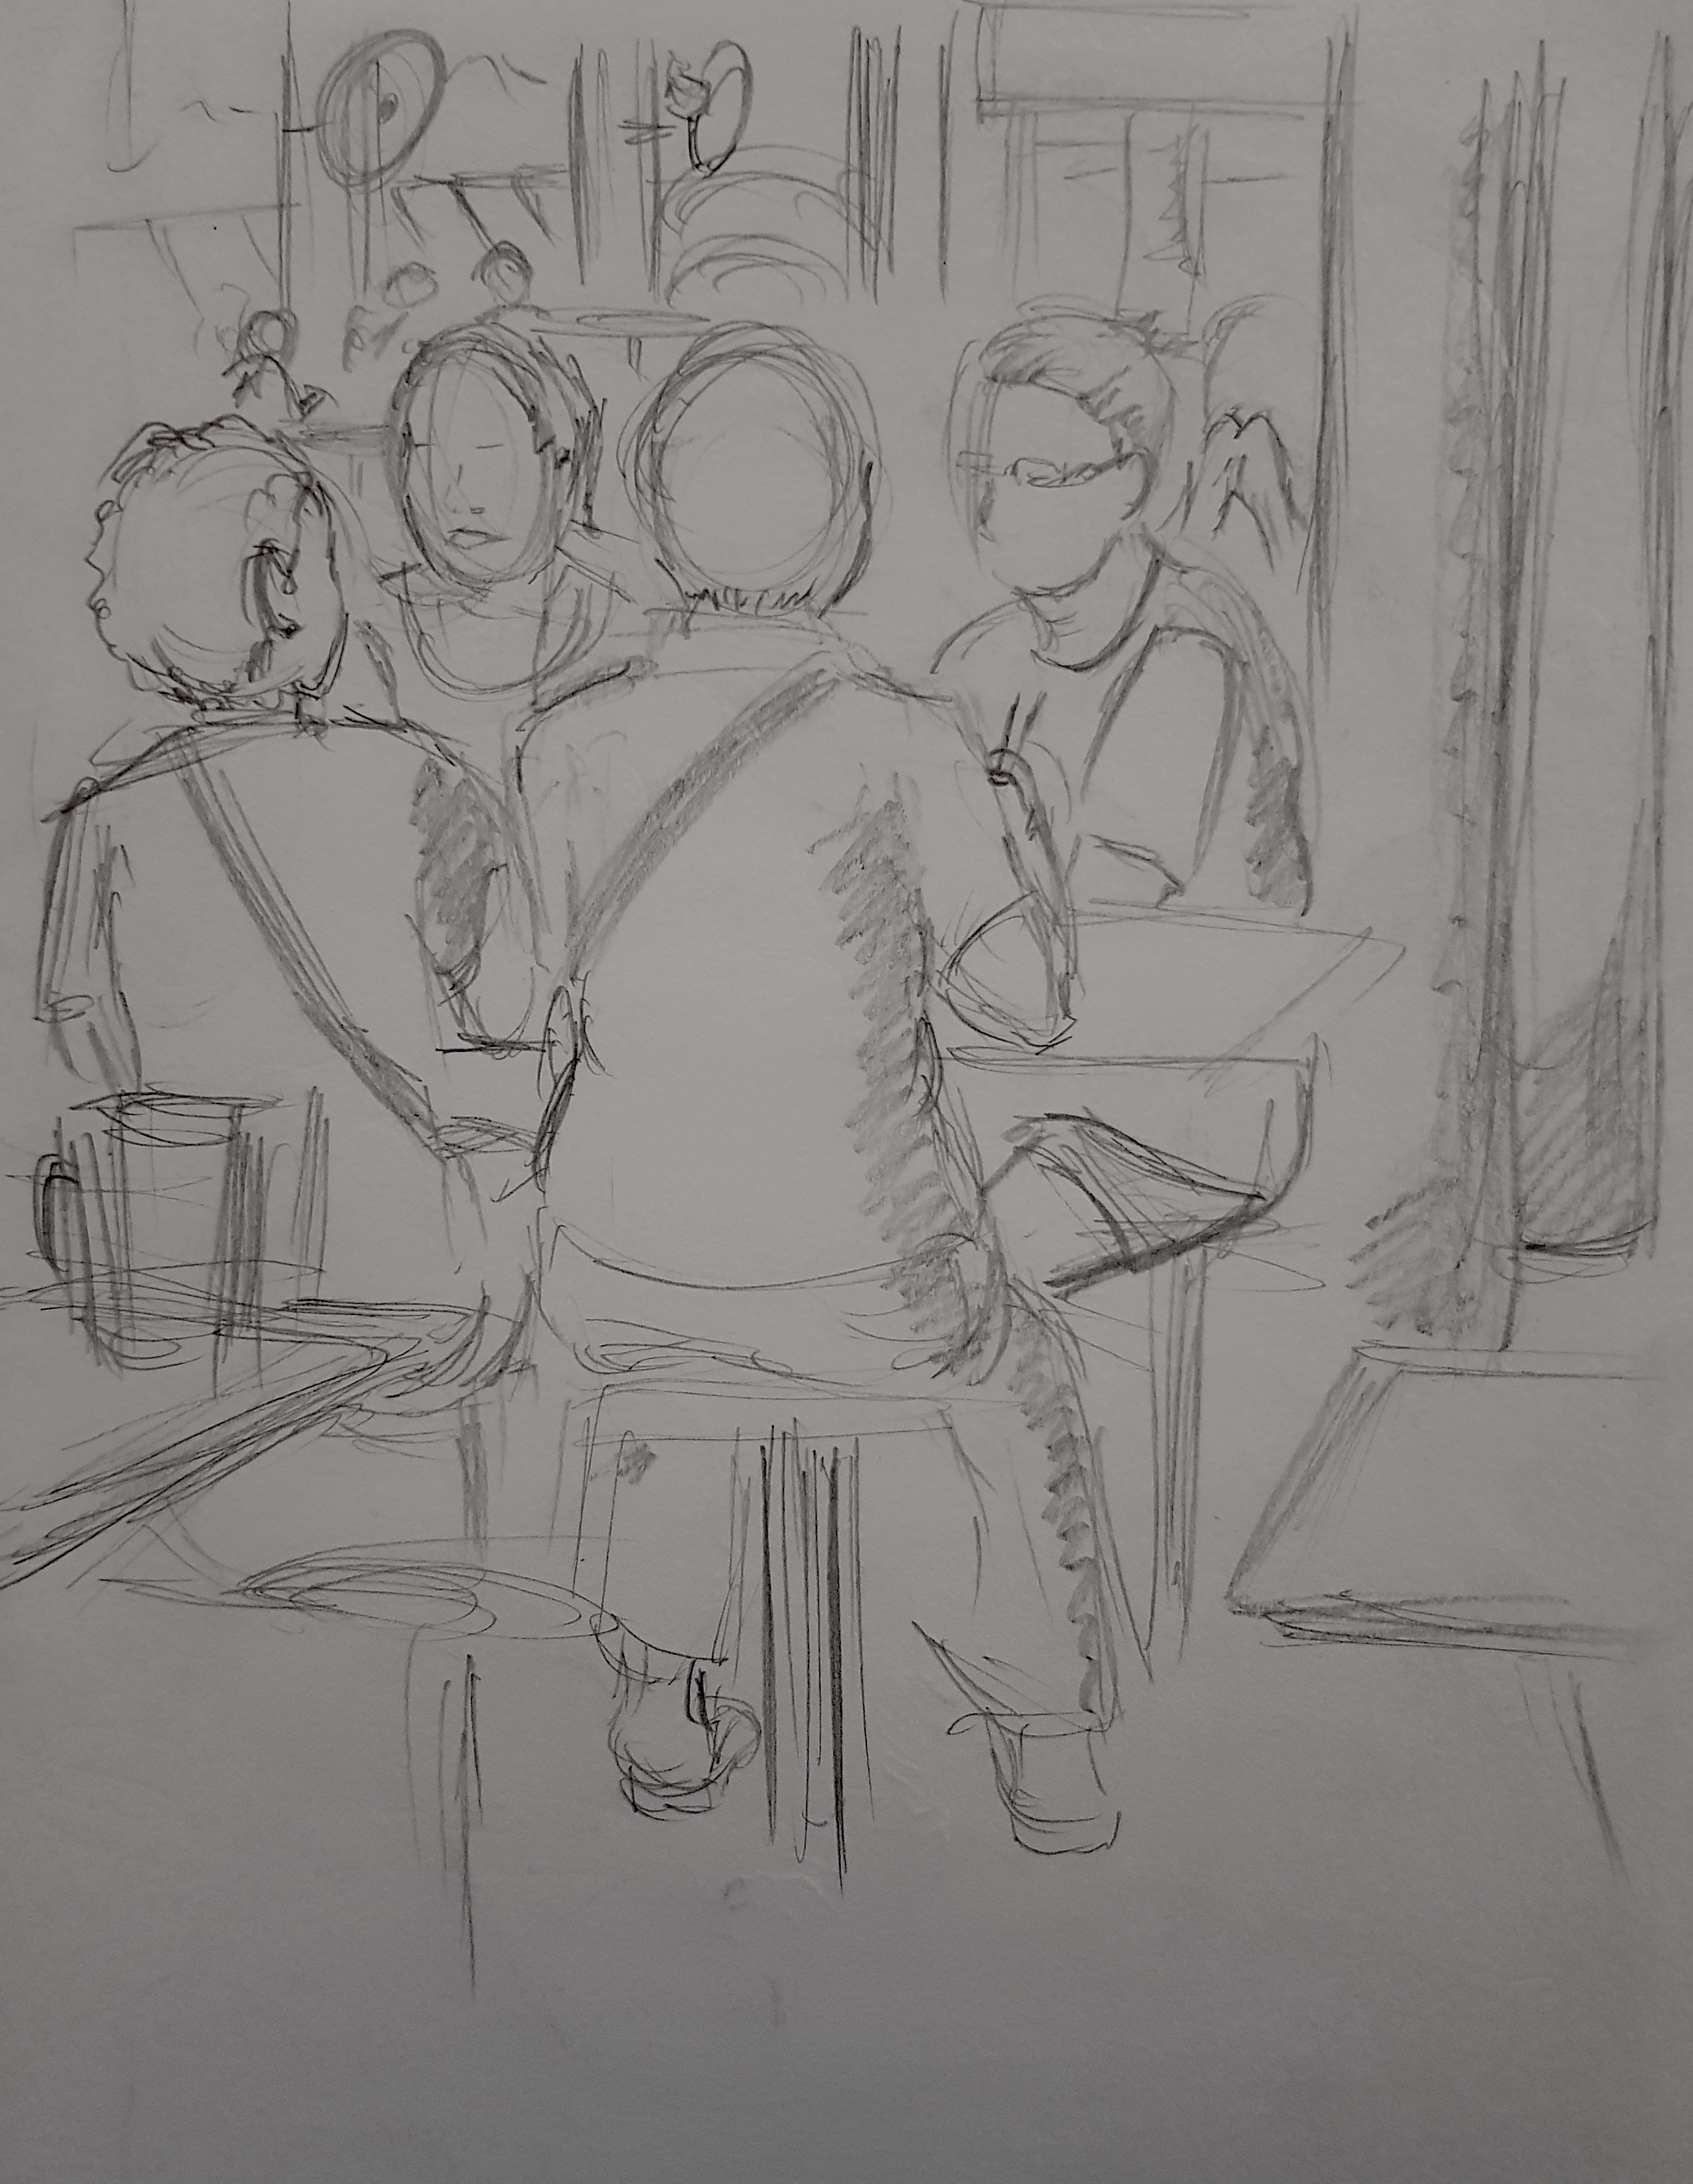
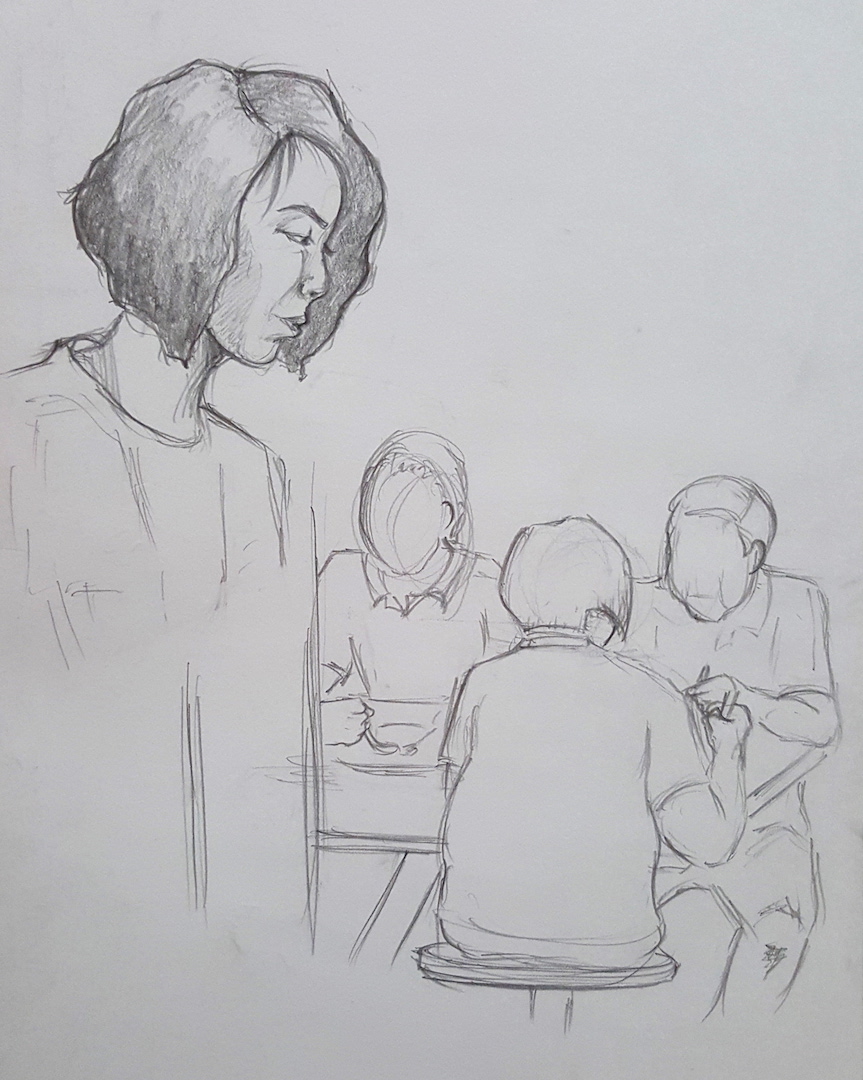
Week 5 (Coffee shop)
In-class
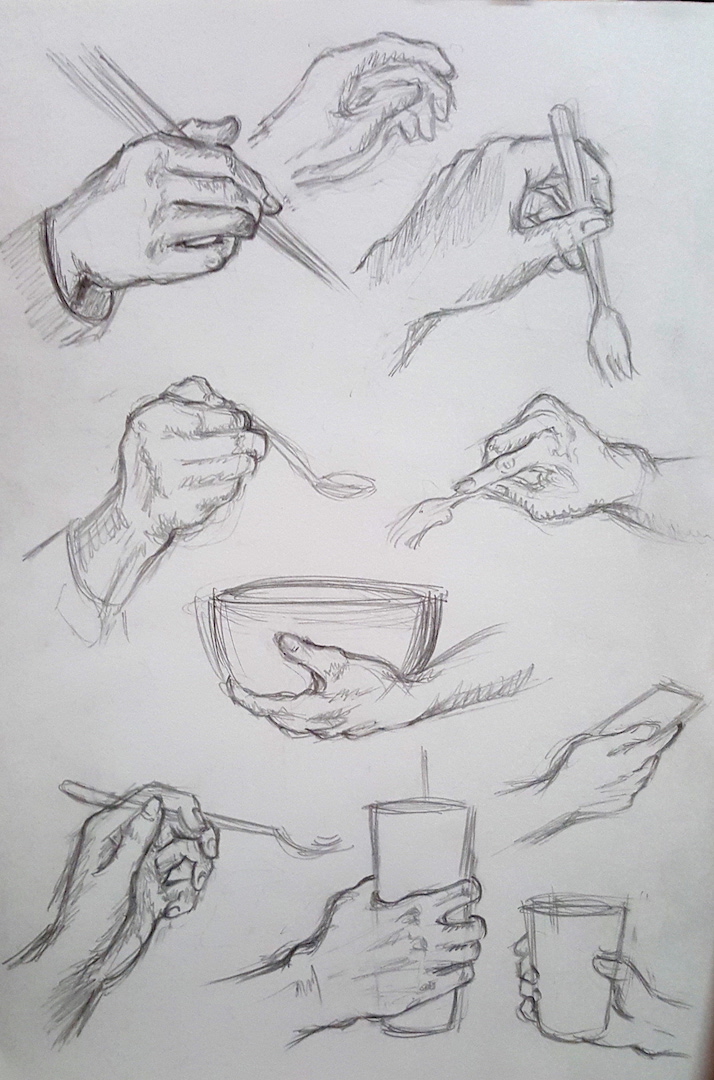
Homework (Hands)
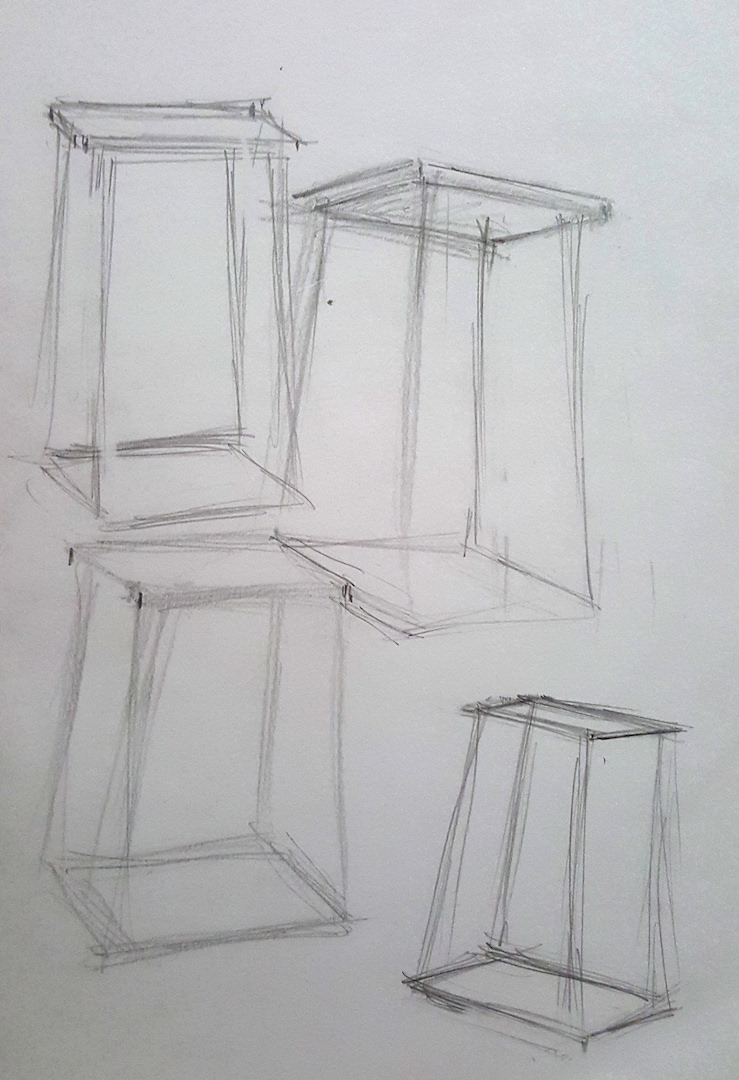
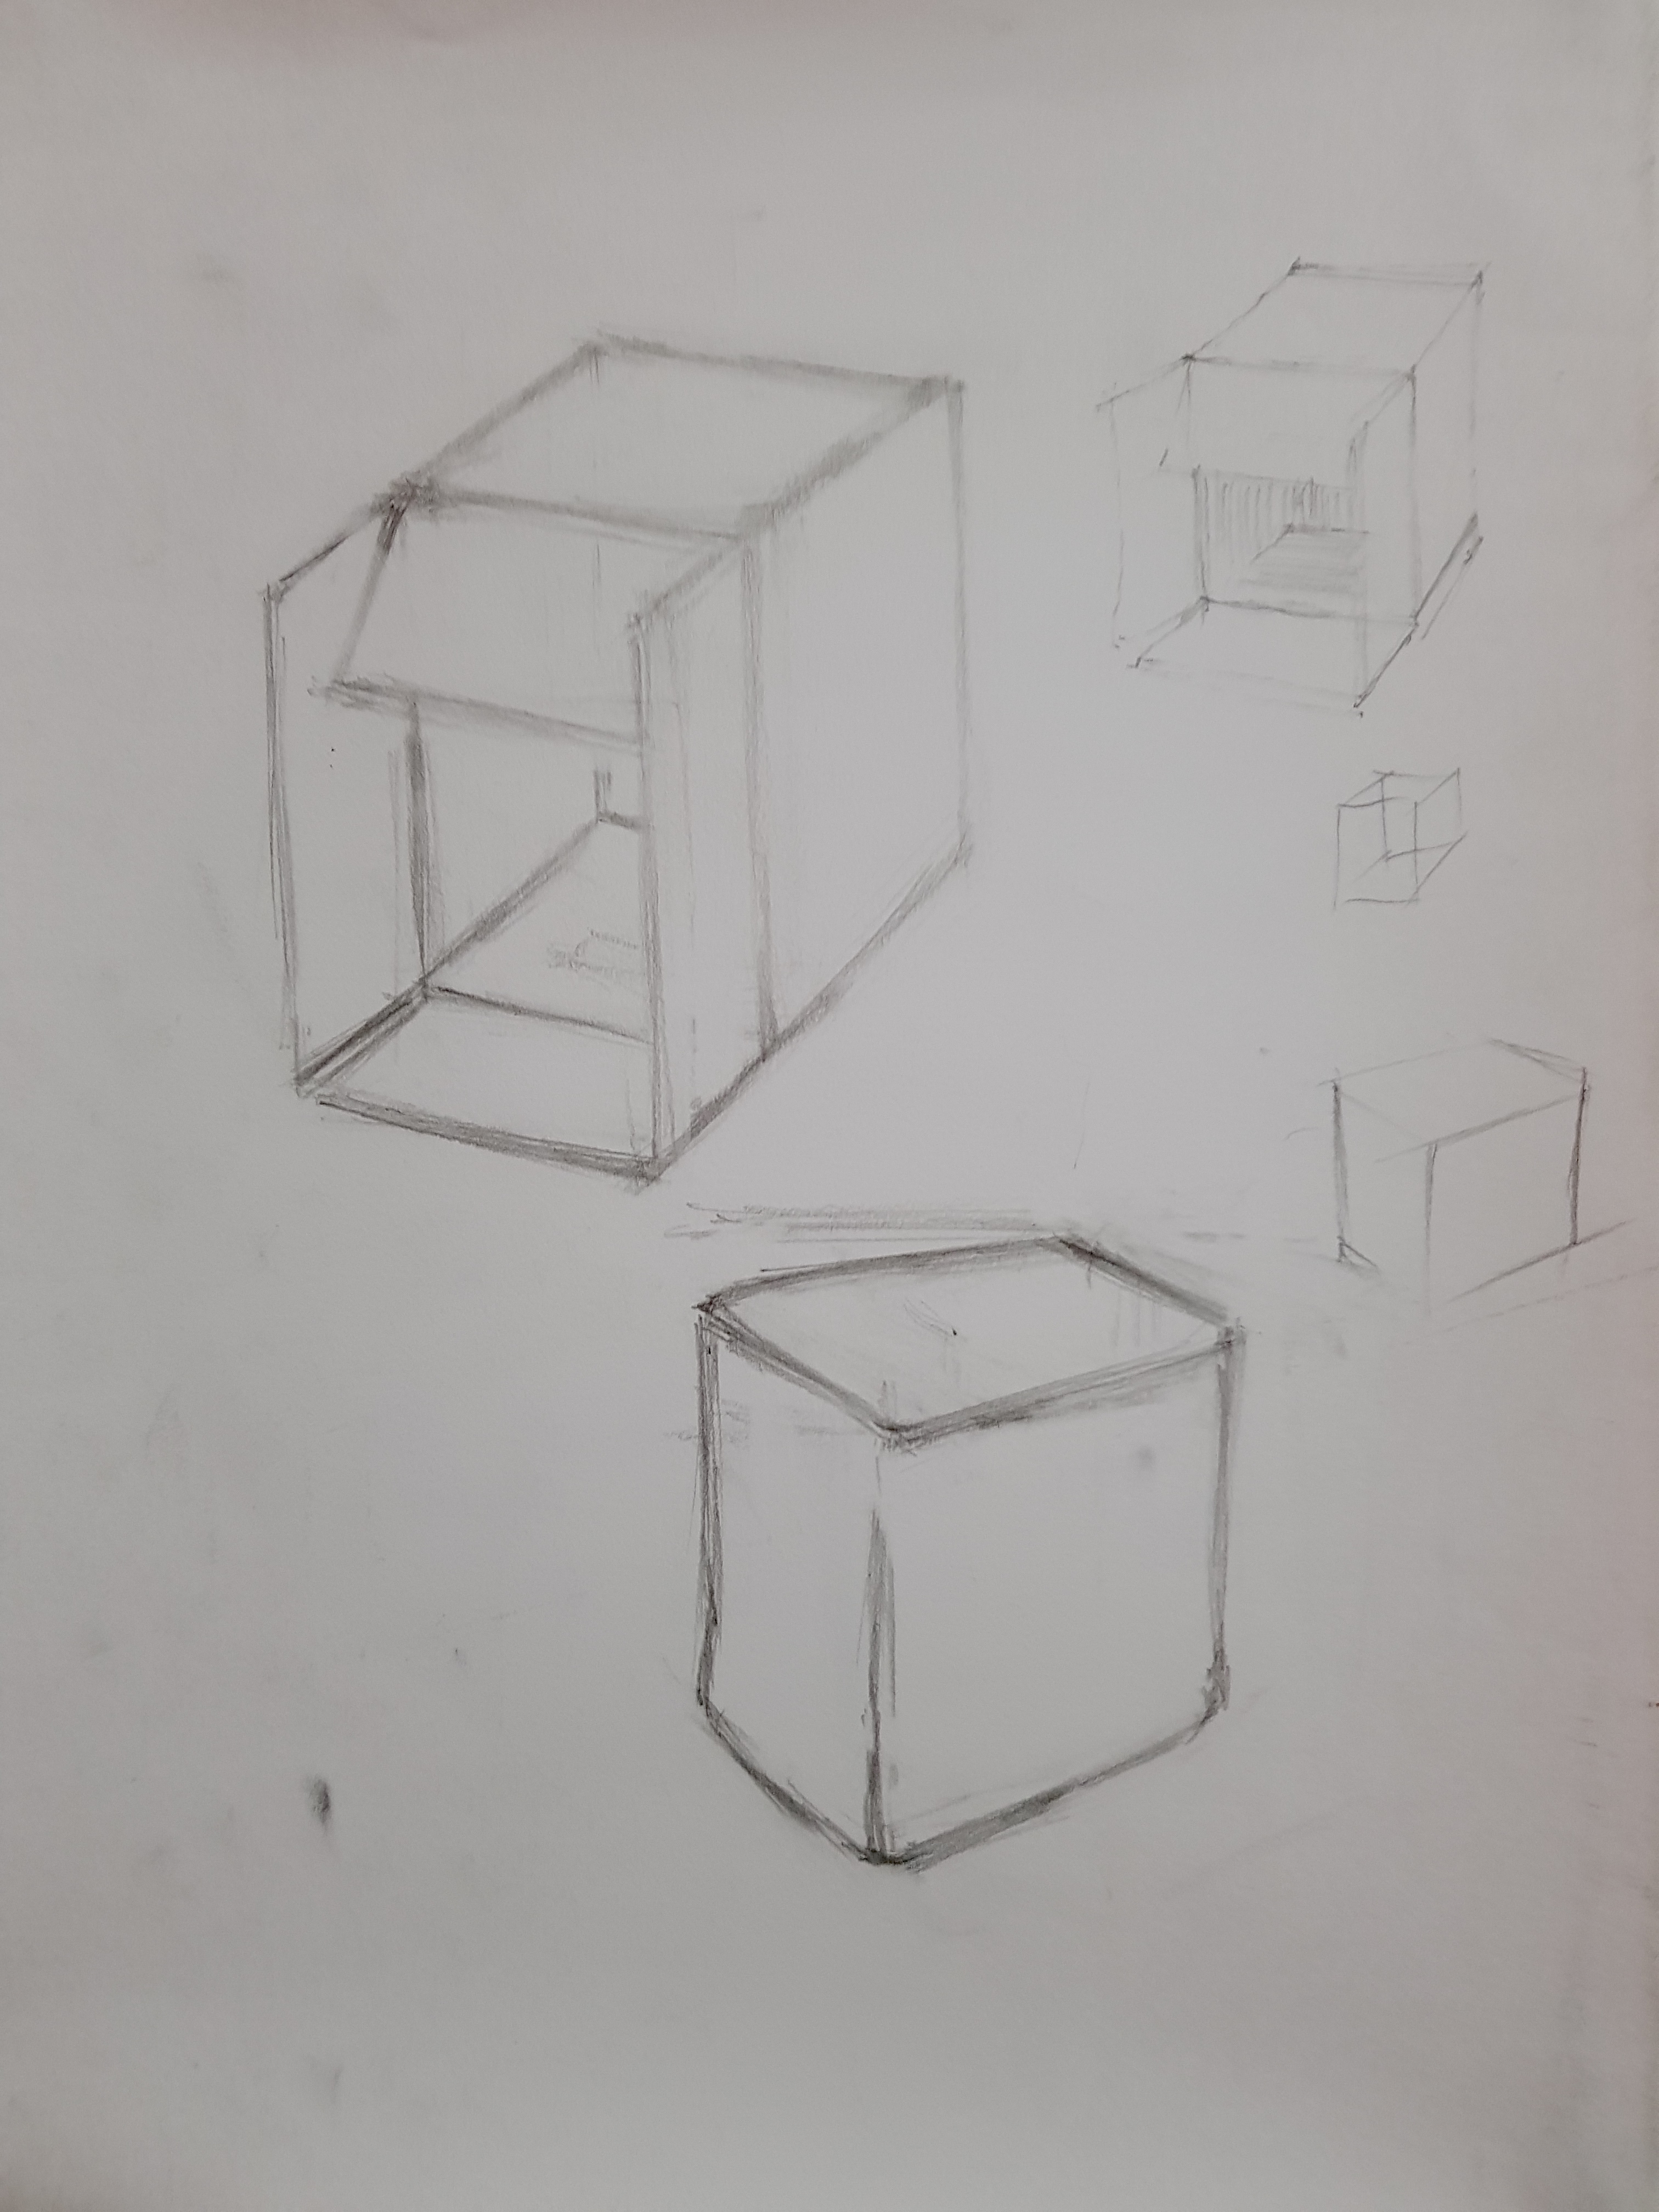
Week 6 (Planar, box perspective drawing )
In-class
Homework

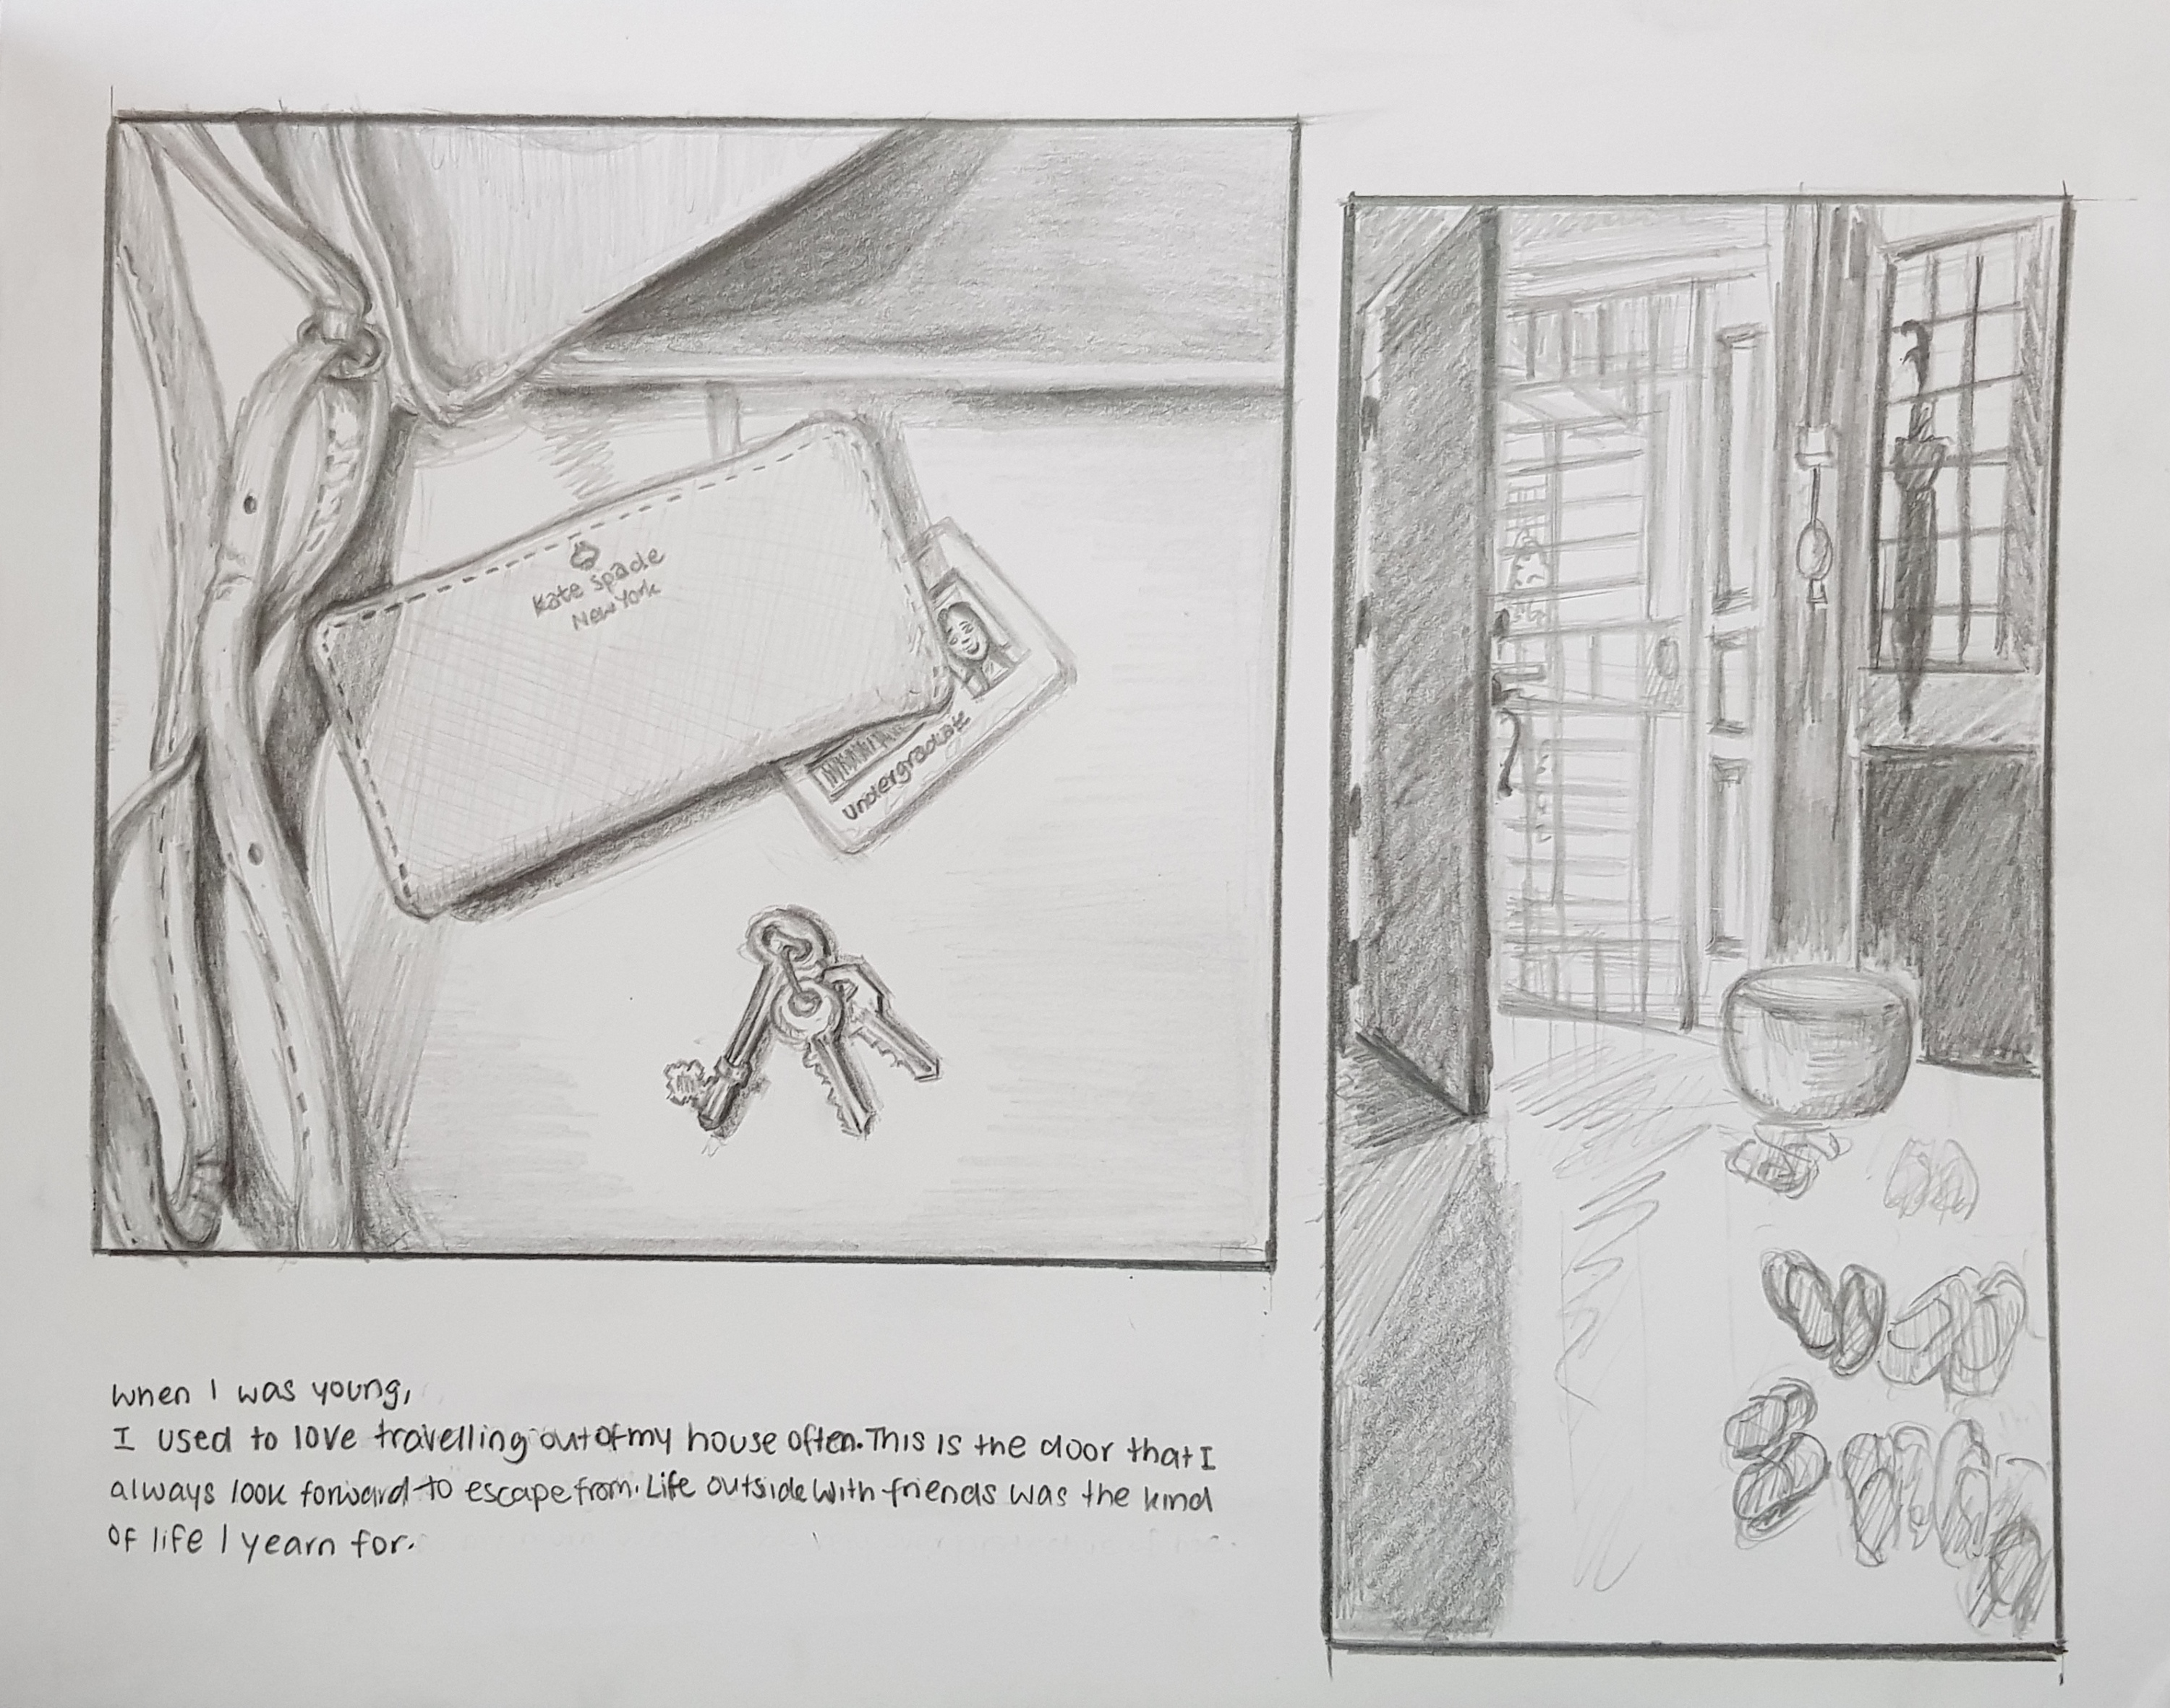
Project 1 – Sequential image narrative

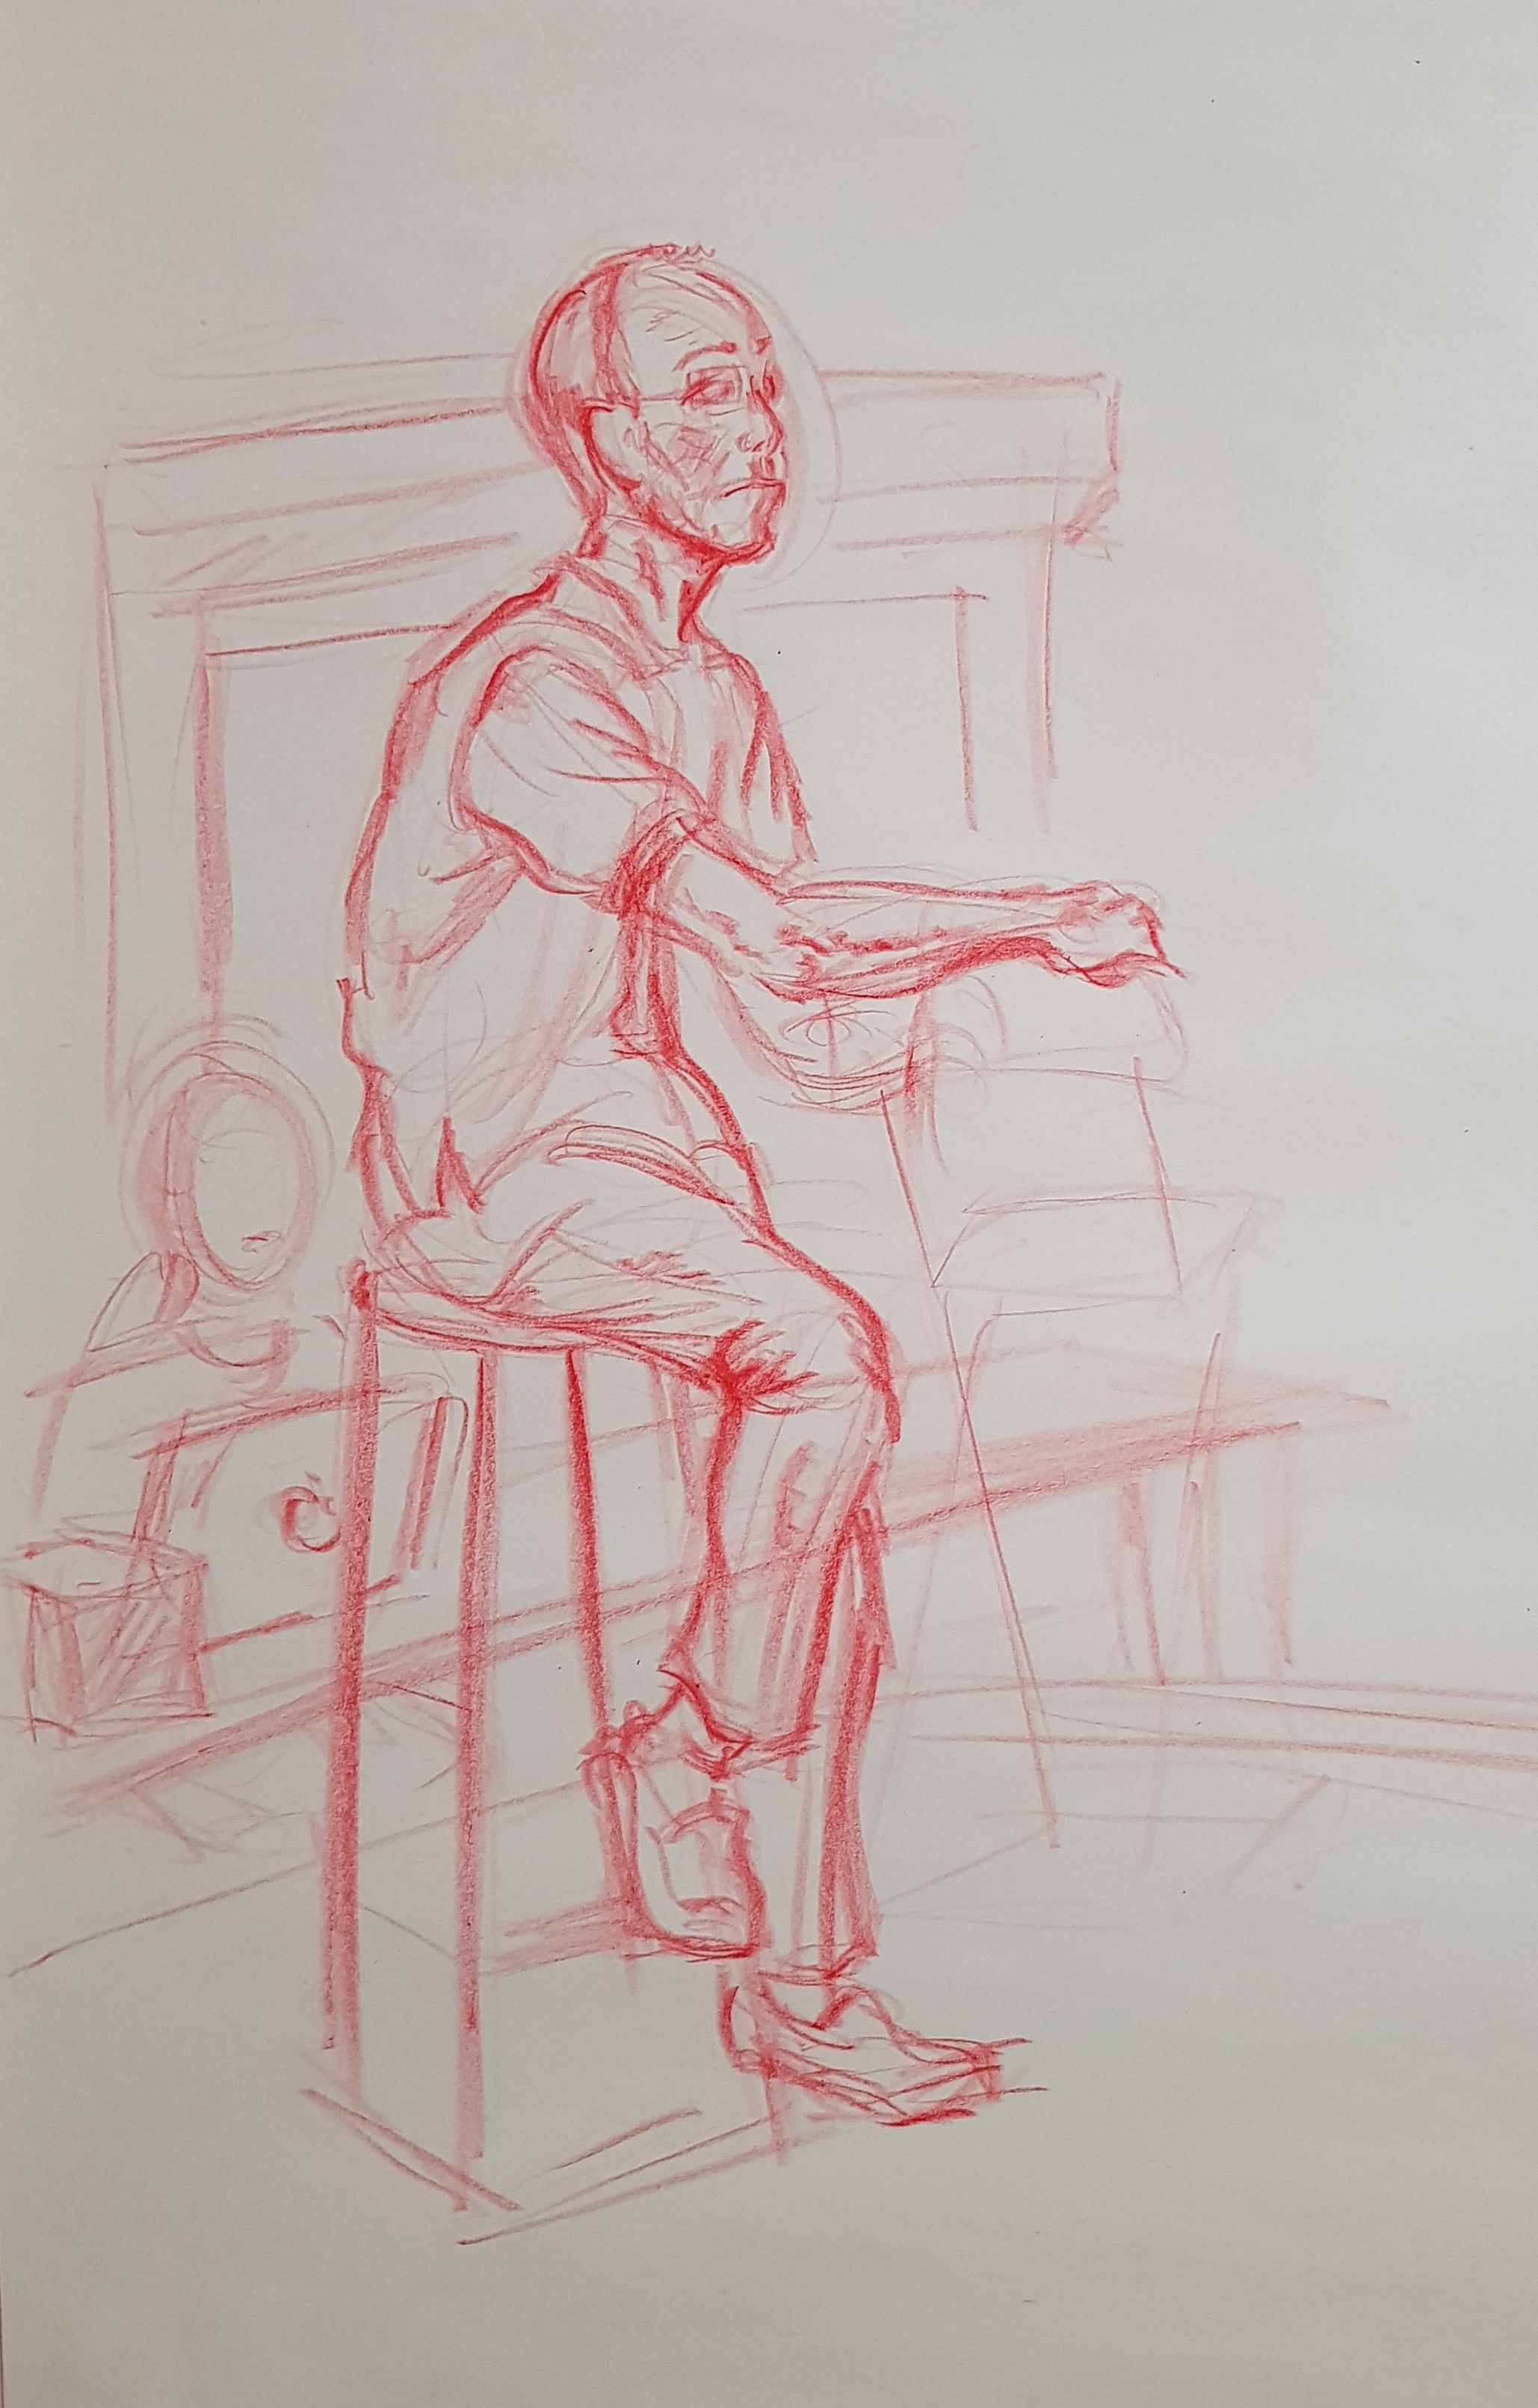
Week 11 (Figure Drawing – Nina)
Week 12 (Shading)
In-class
Homework

Week 13 (Shading)
Final Project (Diptych)
WEEK 1 (CONVEX)
For the first week I was still quite lost regarding about surface tension as this term and idea is rather new to me. I was also figuring out how to put all the techniques together.
The techniques:
-Vary in proportion
-Vary in size
-Vary in shapes
-Vary in axis
-No perpendicular or parallel
-Vary in arrangement
-Moderate surface tension
So, I tried out by making my clay while remembering all of this information in my mind. At first, I thought it is going to be easy but I was wrong! Moulding the clay requires a lot of control more then I’ve imagine. If not, dents will end up everywhere and not to mention that we have to mould before the clay dries up(I thought it was a one time thing, but along the way I’ve learn some methods to keep it moist so I can keep coming back to work on it and smoothen it again). Also, combining all the rules together was quite challenging as there are so many things to take note of! Its always like if I am able to do a few of the pointers, there will bound to be a few pointers I couldn’t meet. So my week 1 clay is quite disastrous AHAH.
Consultation

To improved on:
-Surface tension too high
-Looks more like 4 shapes instead of just 3
-Surface is too rough can be better polished
-Shapes doesn’t have any variation
-Proportion: 2 of the shapes are having similar sizing

To improved on:
-Surface tension too high (to help with that probably the middle empty space can be covered up)
-Some shapes are arranged in a way that is perpendicular which makes it look too ridgid
-Surface is too rough can be better polished

To improved on:
-Surface tension too high
-Try to avoid having limbs
-Try to avoid having shapes that are having a too strong characteristic (basically any edges, pointed tips, geometrical shapes)
Conclusion:
I have learn a lot form the consultation and critique session!
WEEK 2 (CONCAVE)

Good points:
Bad points:

Good points:
Bad points:

Good points:
Bad points:

After consultation, the far left is one that I would like to further work on towards my final clay.
WEEK 3
In this post I will breakdown and explain decisions I made for creating my final 6 expression sets of lines and mark making.
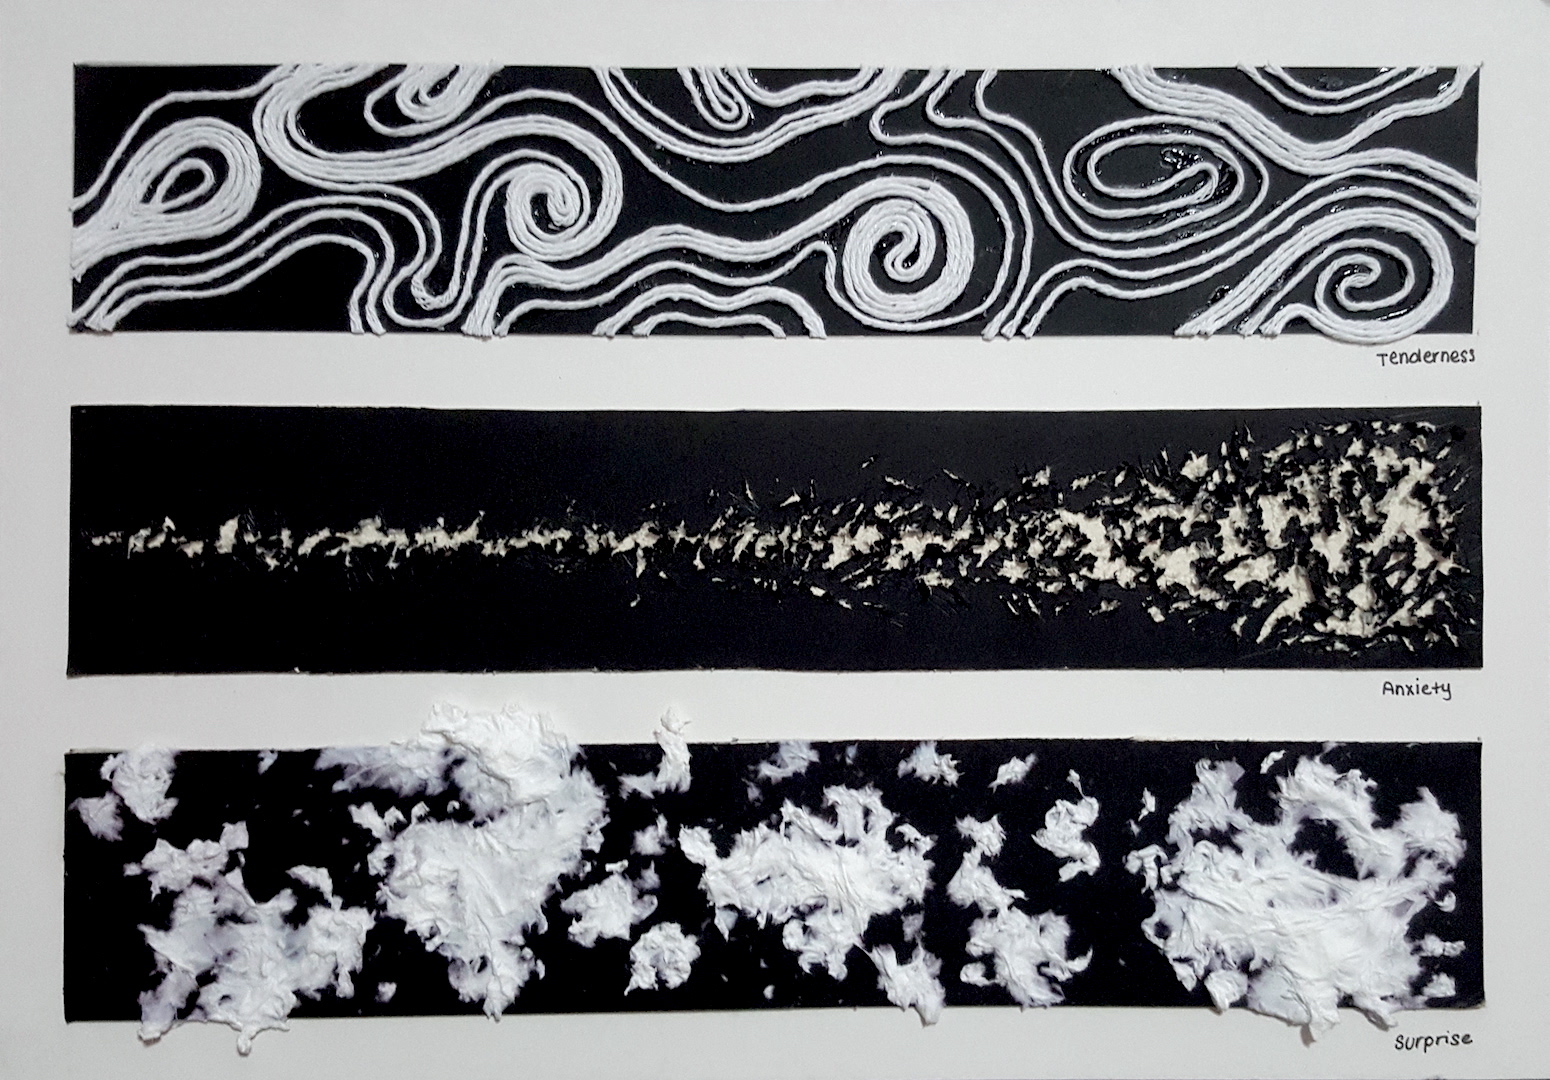
1. TENDERNESS – Gentle deep affection
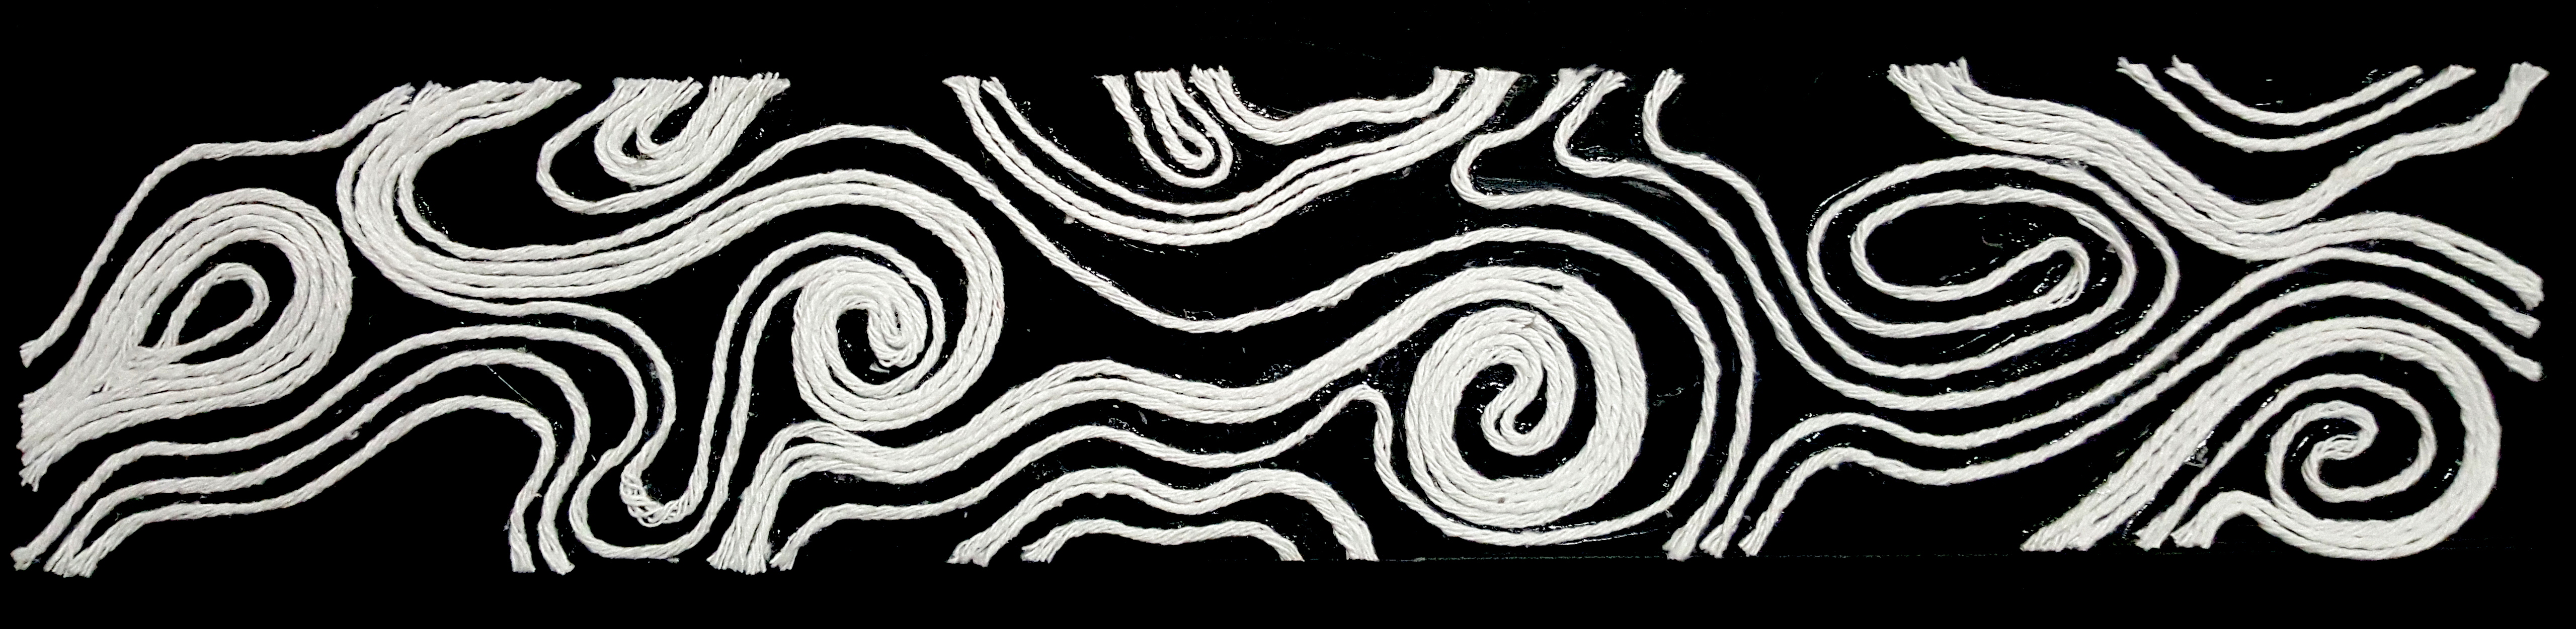
Inspired by the spiral patterns of nail polish marbling mark making techniques. I have decided to use thread as it is flexible and easy to manipulate, allowing me to create swirling effect. Thread also gives a sense of soft, long lasting never ending feeling, which is partially what I wanted to express in this art piece.
I have chosen to use curved wavy lines in this piece to bring out the happiness, free and peaceful feeling to it. The shallow soft curve also gives a sense of comfort and safety. By using both thin and thick lines, I want to convey to my viewers that even though the emotion tenderness may seems to be gentle and delicate, however it is such kind of affection that is always the most stable and strongest. Thus the thick lines is used to show a strong/deep yet gentle and comforting kind of relationship. There is not broken lines in this piece and it is all connected to convey a sense of long lasting. In this piece, you can see that in general the spiral is all going towards one direction, it is a subtle hint on love is always moving forward and can never be back tracked. Finally, the spiral design in this piece is created to signify protection and it is a deep affection that goes infinite.
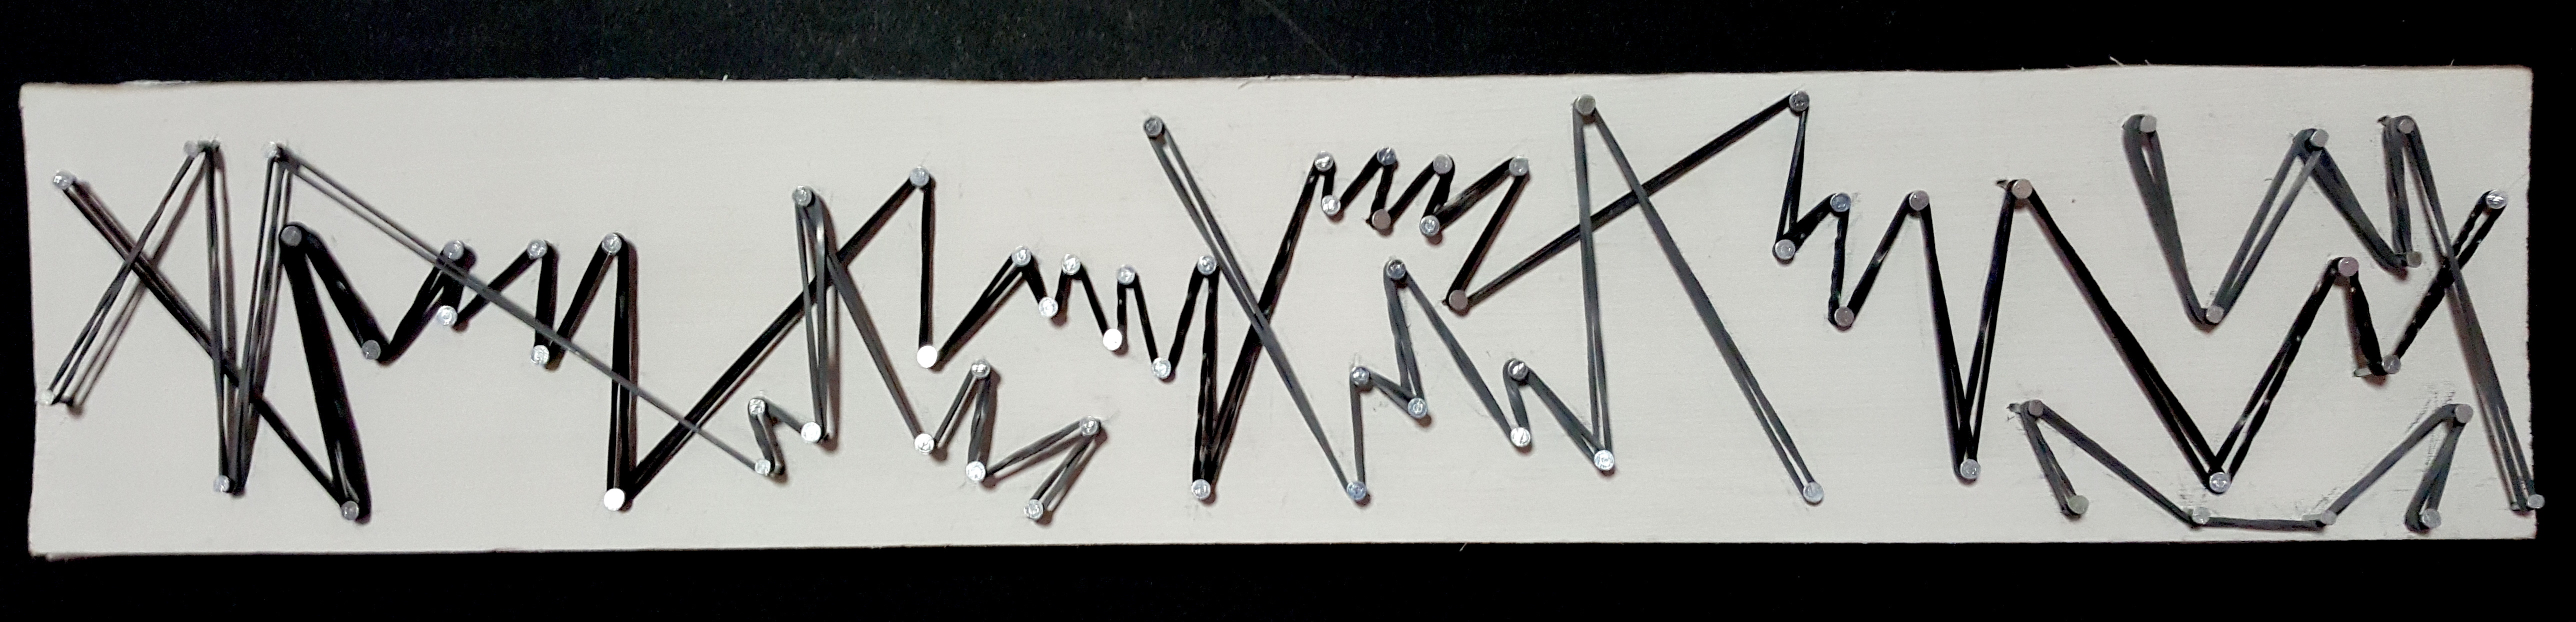
2. ANXIETY – Constant erratic nervousness growing into an outburst

By using nails scraping on to the mounting board, I wanted to channel the anxiety energy into creating this piece. The scraping process was carefully controlled so as to not ended up with it looking like aggression. Usually people tends to fidget and panic a lot when they are anxious. Thus, the used of nails scratching small patches bit by bit on the board conveys erratic, nervous and fidgeting sort of energy.
In this piece, patches are broken to show unstableness here and there. The densely populated patches and outwards carving at the end signify outburst. The anxiety started off as a thin stream and slowly becoming more and more nervous and eventually leading to a big outburst of uncontrollable emotion of break down. It is like how we always start to get nervous over something and slowly that emotion builds up, accumulate and gets even more intense and unbearable as time pass. Eventually when we couldn’t take the anxiousness and stress anymore, we breakdown at the end.
3. SURPRISE – A burst of sudden astonishment
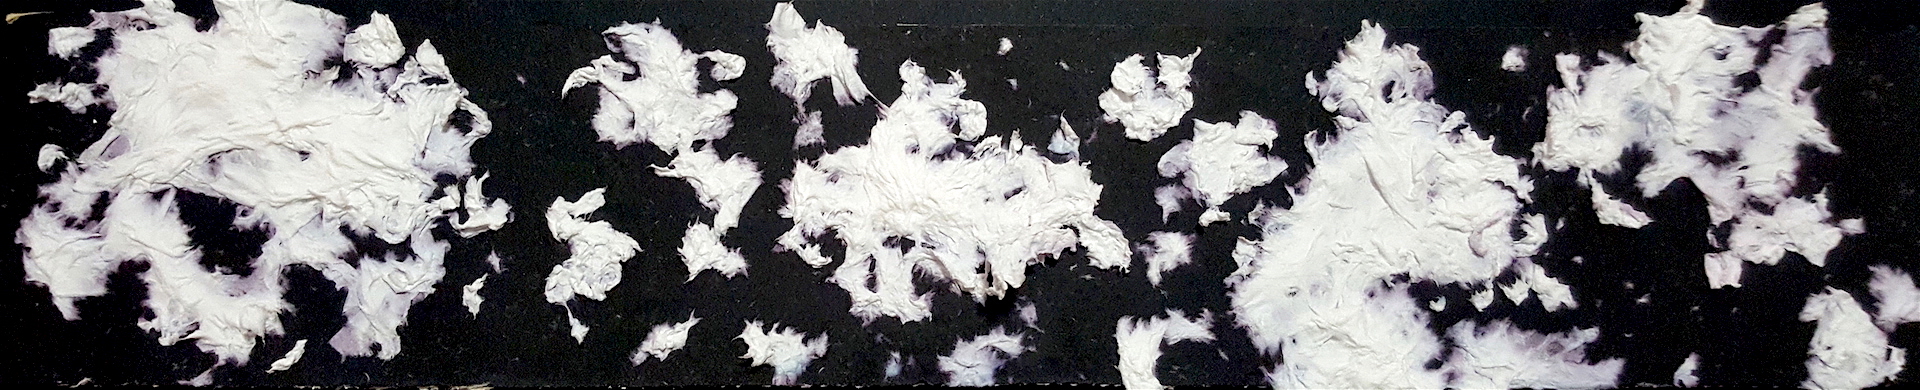
In this piece, I would like to express the sudden bursting of emotion when we felt surprised. Thus the technique used is literally wetting toilet papers into a ball and smash them on to the canvas to create burst and splatter effect. The patches form a pattern of having a main splatter and a lot of smaller splatters that is surrounding them going in an outward direction in many different angles to show the sudden surprises and unpredictability in this piece.
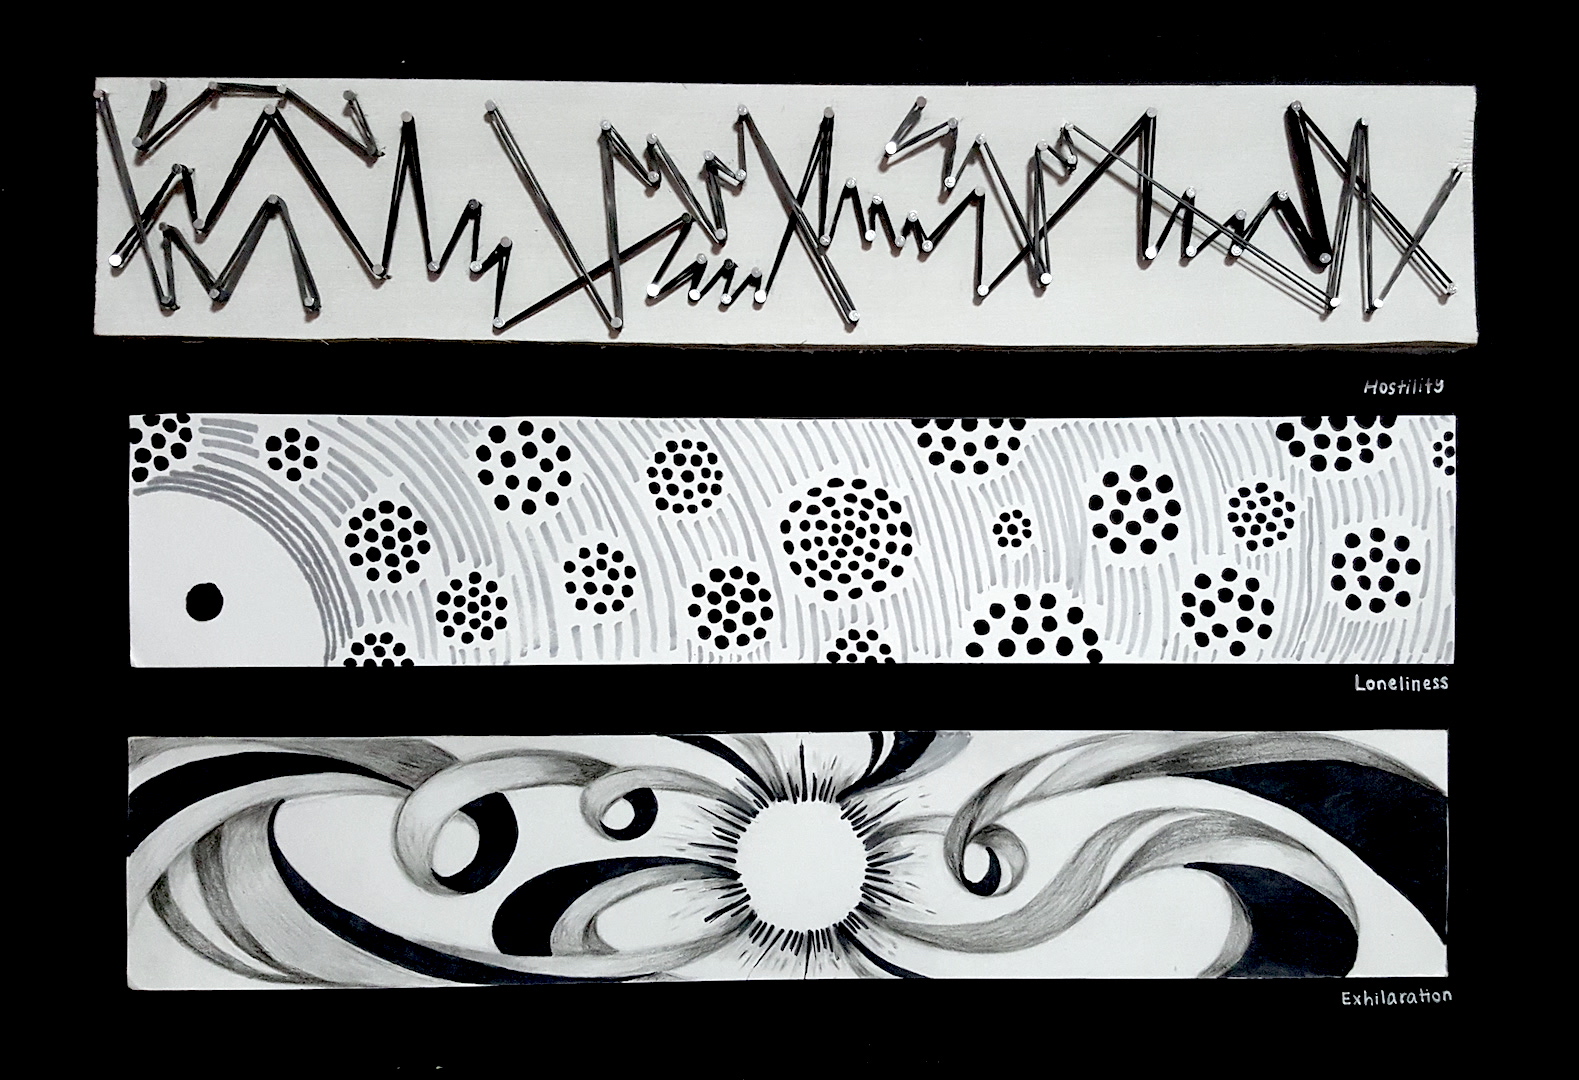
4. HOSTILITY – Tension between the oppositions
For this set of emotion, rubber band is used to show the meaning of tension. Hammering nails into wood is to signify aggression. Two coloured(grey and black) rubber band is used to symbolise two opposition parties that is in a hostile relation.
The acute sharp slashing line is done on purpose to show a sense of aggression and tension. The lines are going in all directions to show the emotion is very chaotic and uncontrollable.
5. LONELINESS – Left out
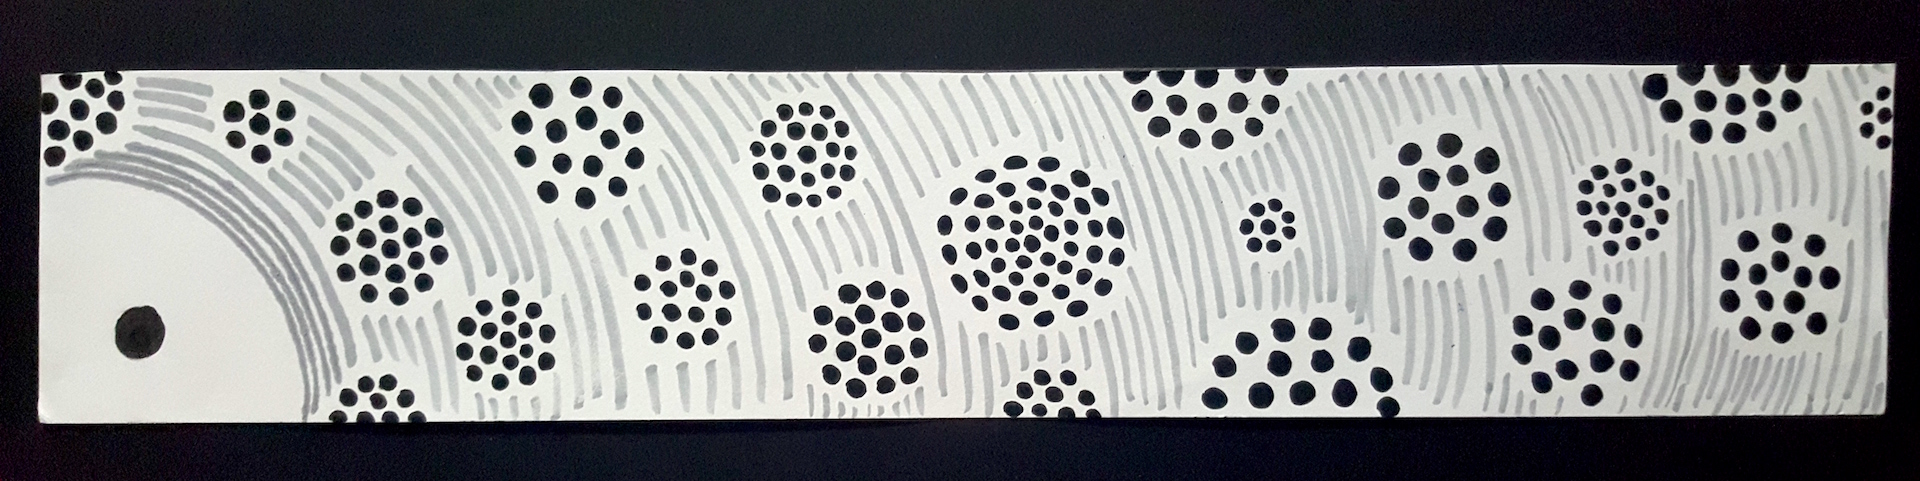
Decided to put one dot by a corner instead of anywhere else to show isolation and being lonely at one corner. All the other densely populated dots that is gathering together signifies the forming of cliques. I have used dots for both the isolated dot and clique bunch to show that all of them belongs to the same kind and yet one dot is being left out. The contrast of the gray curve lines and the white negative space act as a barrier in between the isolated dot and the clique bunch to show that the isolated dot is unwelcome and being left out by the bunch of cliques – there is a divided world between the isolated dot and clique bunch that can never be crossed.
6. EXHILARATION – Bursting excitement with prolonged happiness
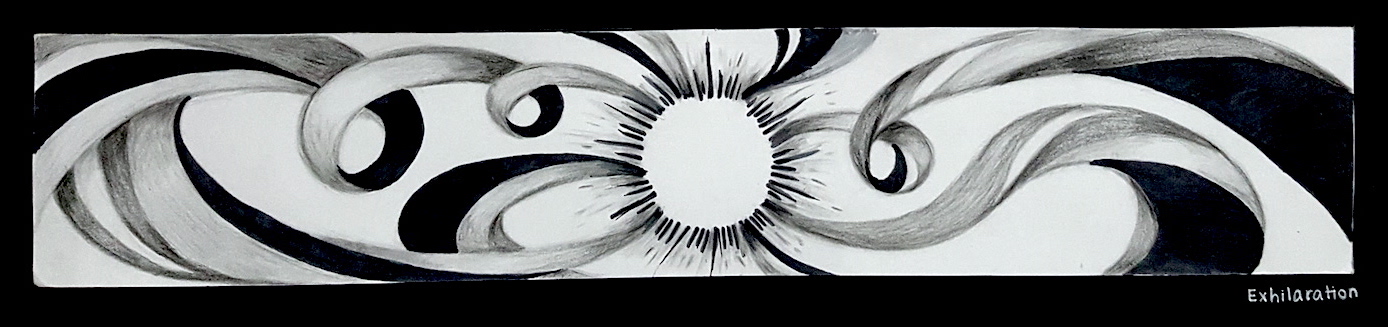
For exhilaration, I wanted to convey the roller coaster sort of feeling where by you started off with bursting of excitement and by the end of the event, even though the adrenaline is not as high, you still have this gentler happiness that lingers for quite awhile afterwards.
CONCLUSION (take away)
I started off feeling super lost as I’m not used to doing abstract. I always have the stereotypical thinking that mark making is just plainly ink and paint on paper. However, from this project it really allows me to widen my exposure to see mark making in a different perspective.
I always tends to be a very “play safe” person because I don’t really dare to take risks. However this project really pushes me to take risk and just explore possibilities, irregardless of the outcome. This is really the biggest take away experience for me.
Doing abstract art also allows me to channel my inner emotions and energy on to my art piece which is one of the things that I kind of enjoy through the process because we can express ourselves freely without restrictions.
Overall, it was quite a tough yet fun project and I’ve learnt to try and be comfortable with stepping out of the comfort zone. I’ve also learnt to be more aware of every little parts of designs because all elements matters and contributes to the outcome. Finally, I have gain a better understanding of myself throughout the entire project.