
joel
photoshop and audition
bryan

frederick

There are 38 posts filed in My Work (this is page 3 of 4).
joel
photoshop and audition
bryan
frederick

The third space to me is an infinite space for connection between people. Regardless of where they are, the third space could be defined as “a space with no geological boundaries” (Satellite Arts Project).
An interaction between one another despite being in different locations collapses boundaries in the third space. It involves defying distance similar to what we experimented with in our microproject 2, which is made possible with accessible advanced technology. Although the absence of physical contact may convey a lack of intimacy, I think space in terms or privacy and the scale in which the interaction is occurring in defines closeness.

Paul Sermon, Telematic Dreaming, 1992
A great example of an increase in intimacy through a private space is Sermon’s Telematic Dreaming where two beds are placed in different locations. According to Sermon, ” The ability to exist outside of the users own space and time are created by an alarmingly real sense of touch that is enhanced by the context of the bed.” The interaction with only one other individual will often hold greater intimacy in comparison to a group of people (e.g. Hold in Space)
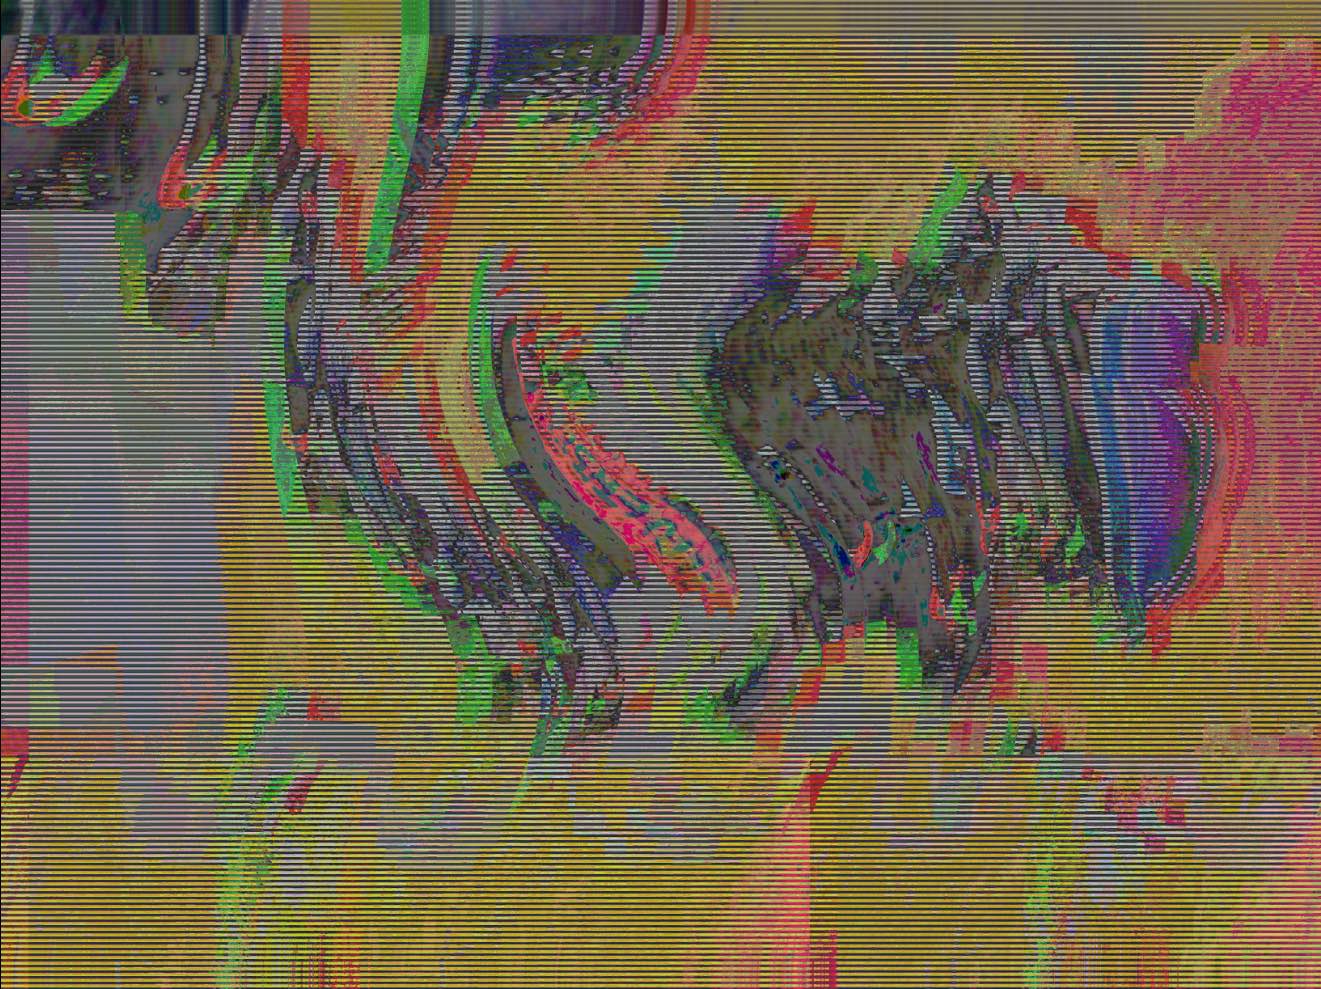
“Our sense of reality is fragmented and juxtaposed”
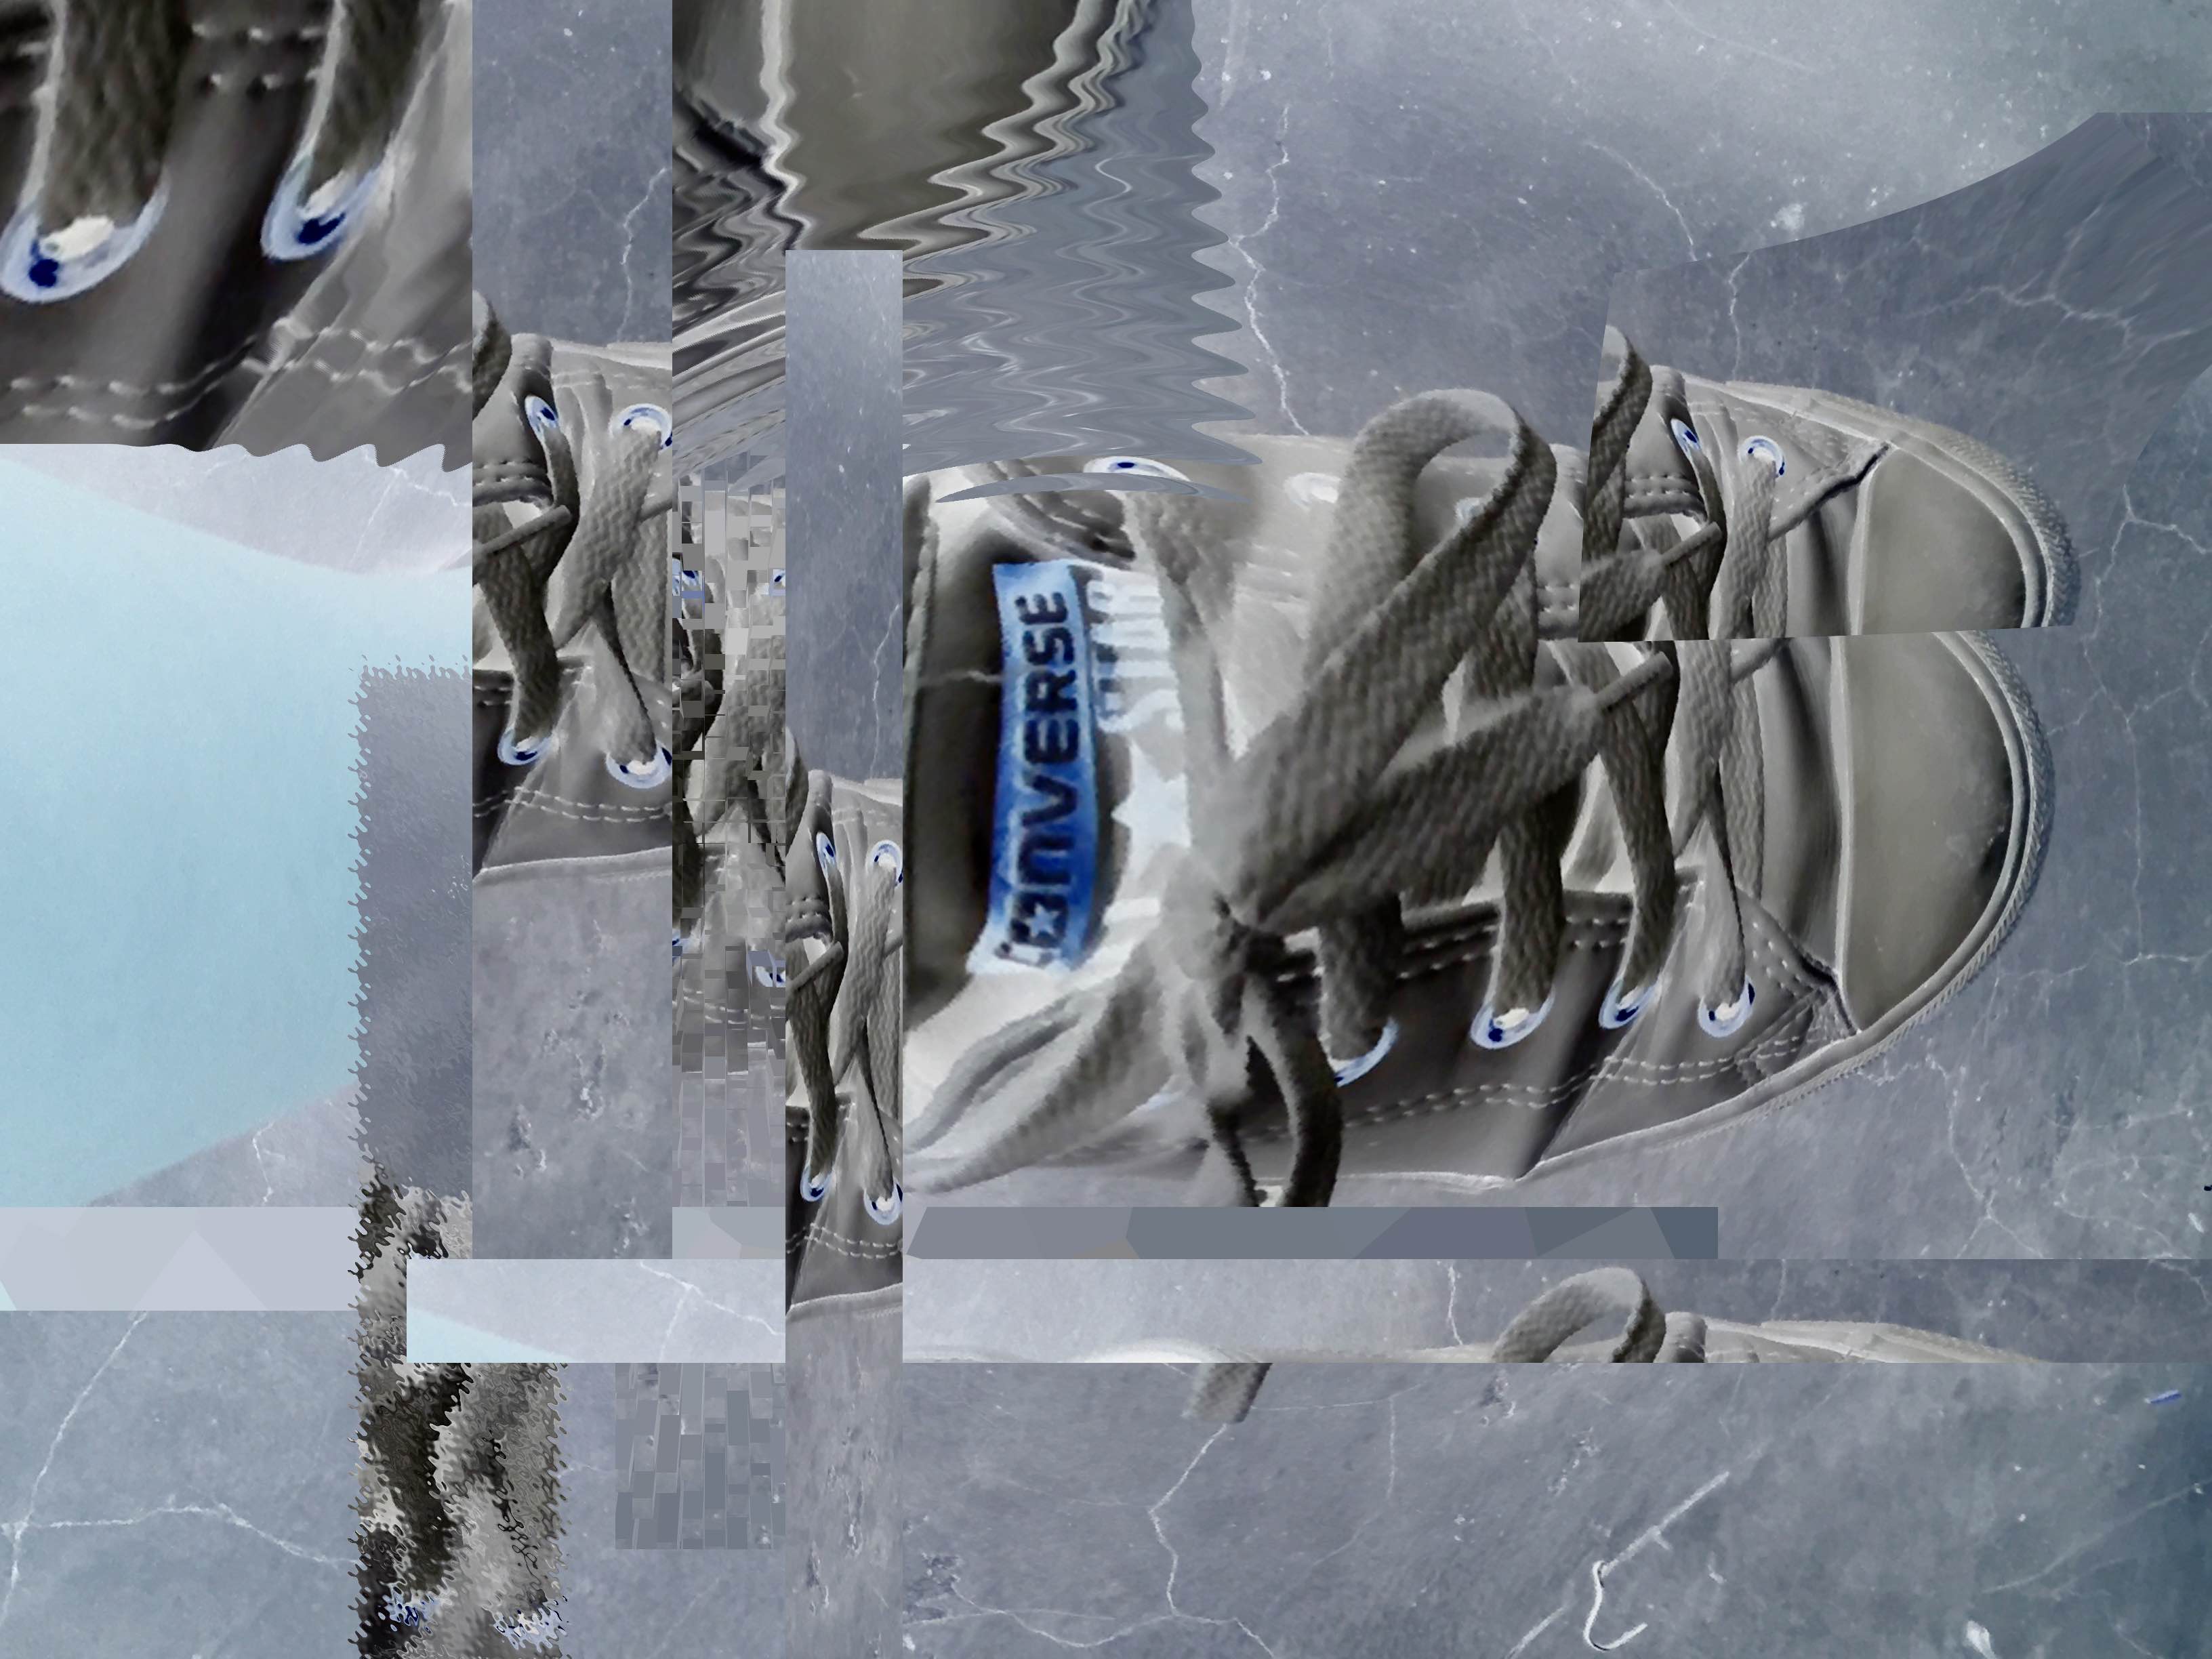
In our own interpretation of a third space, Frederick and I approached it from a two-point perspective where I became his “eyes” as he wandered through the library.
Our collaboration into combining our perceptions into one portrayed on two screens demonstrates connection through the synchronization of our movements simultaneously. The outcome allowed for a journey that cannot be experienced in real life because we were virtually in the same space but physically apart. As Randall Packer says, “this state of shared presence inhabits an entirely new way of seeing via a fracturing perception.”
Kicking off sem 2 with a new project, we were tasked to manipulate a basic 3D object volume with operative verbs that we picked at random. The verbs that I had chosen was bend, notch and array.
BEND~NOTCH~ARRAY
Bend: shape or force something into a curve or angle
Notch: an indentation or incision on an edge or surface
Array: display or arrange things in a curved manner
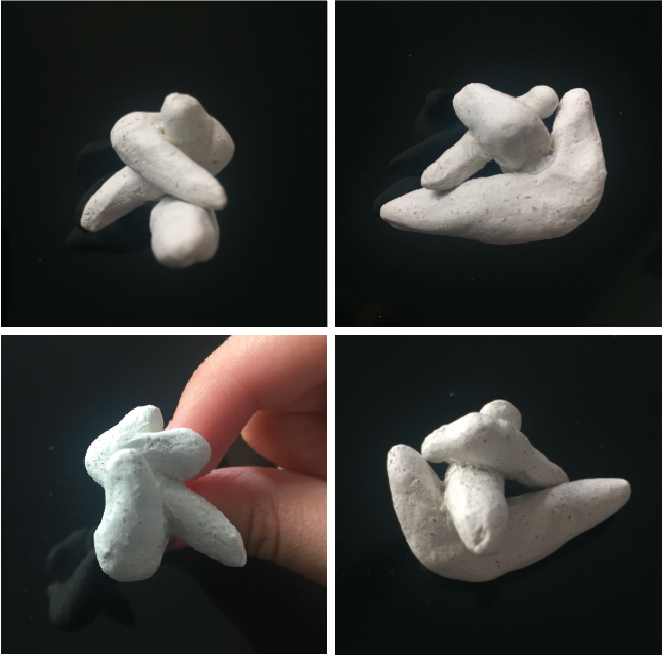
Diving straight into the assignment, we started moulding our modules to represent all 3 verbs out of clay. Although it was fun to work with clay, my modules kept breaking after the clay was dry so here are 2 of my initial modules, one of which I used as the final model.
First Module
Working with the terms, bend and notch, both my modules consist of 3 separate parts varying in size that are bent and notched together when they are cradled.
 In this first module, I took a more curved approach to the structure and hence although the modules are bent, they do not have a sharp angular edge. It turned out to somewhat resemble 3 ticks that are notched together at its curved edge. The module was sculpted with clay which was a great material to work with when creating curved shapes but is very fragile when dried because some of my other prototypes kept breaking.
Technical drawings

Right ~ top view
Left ~ bottom view
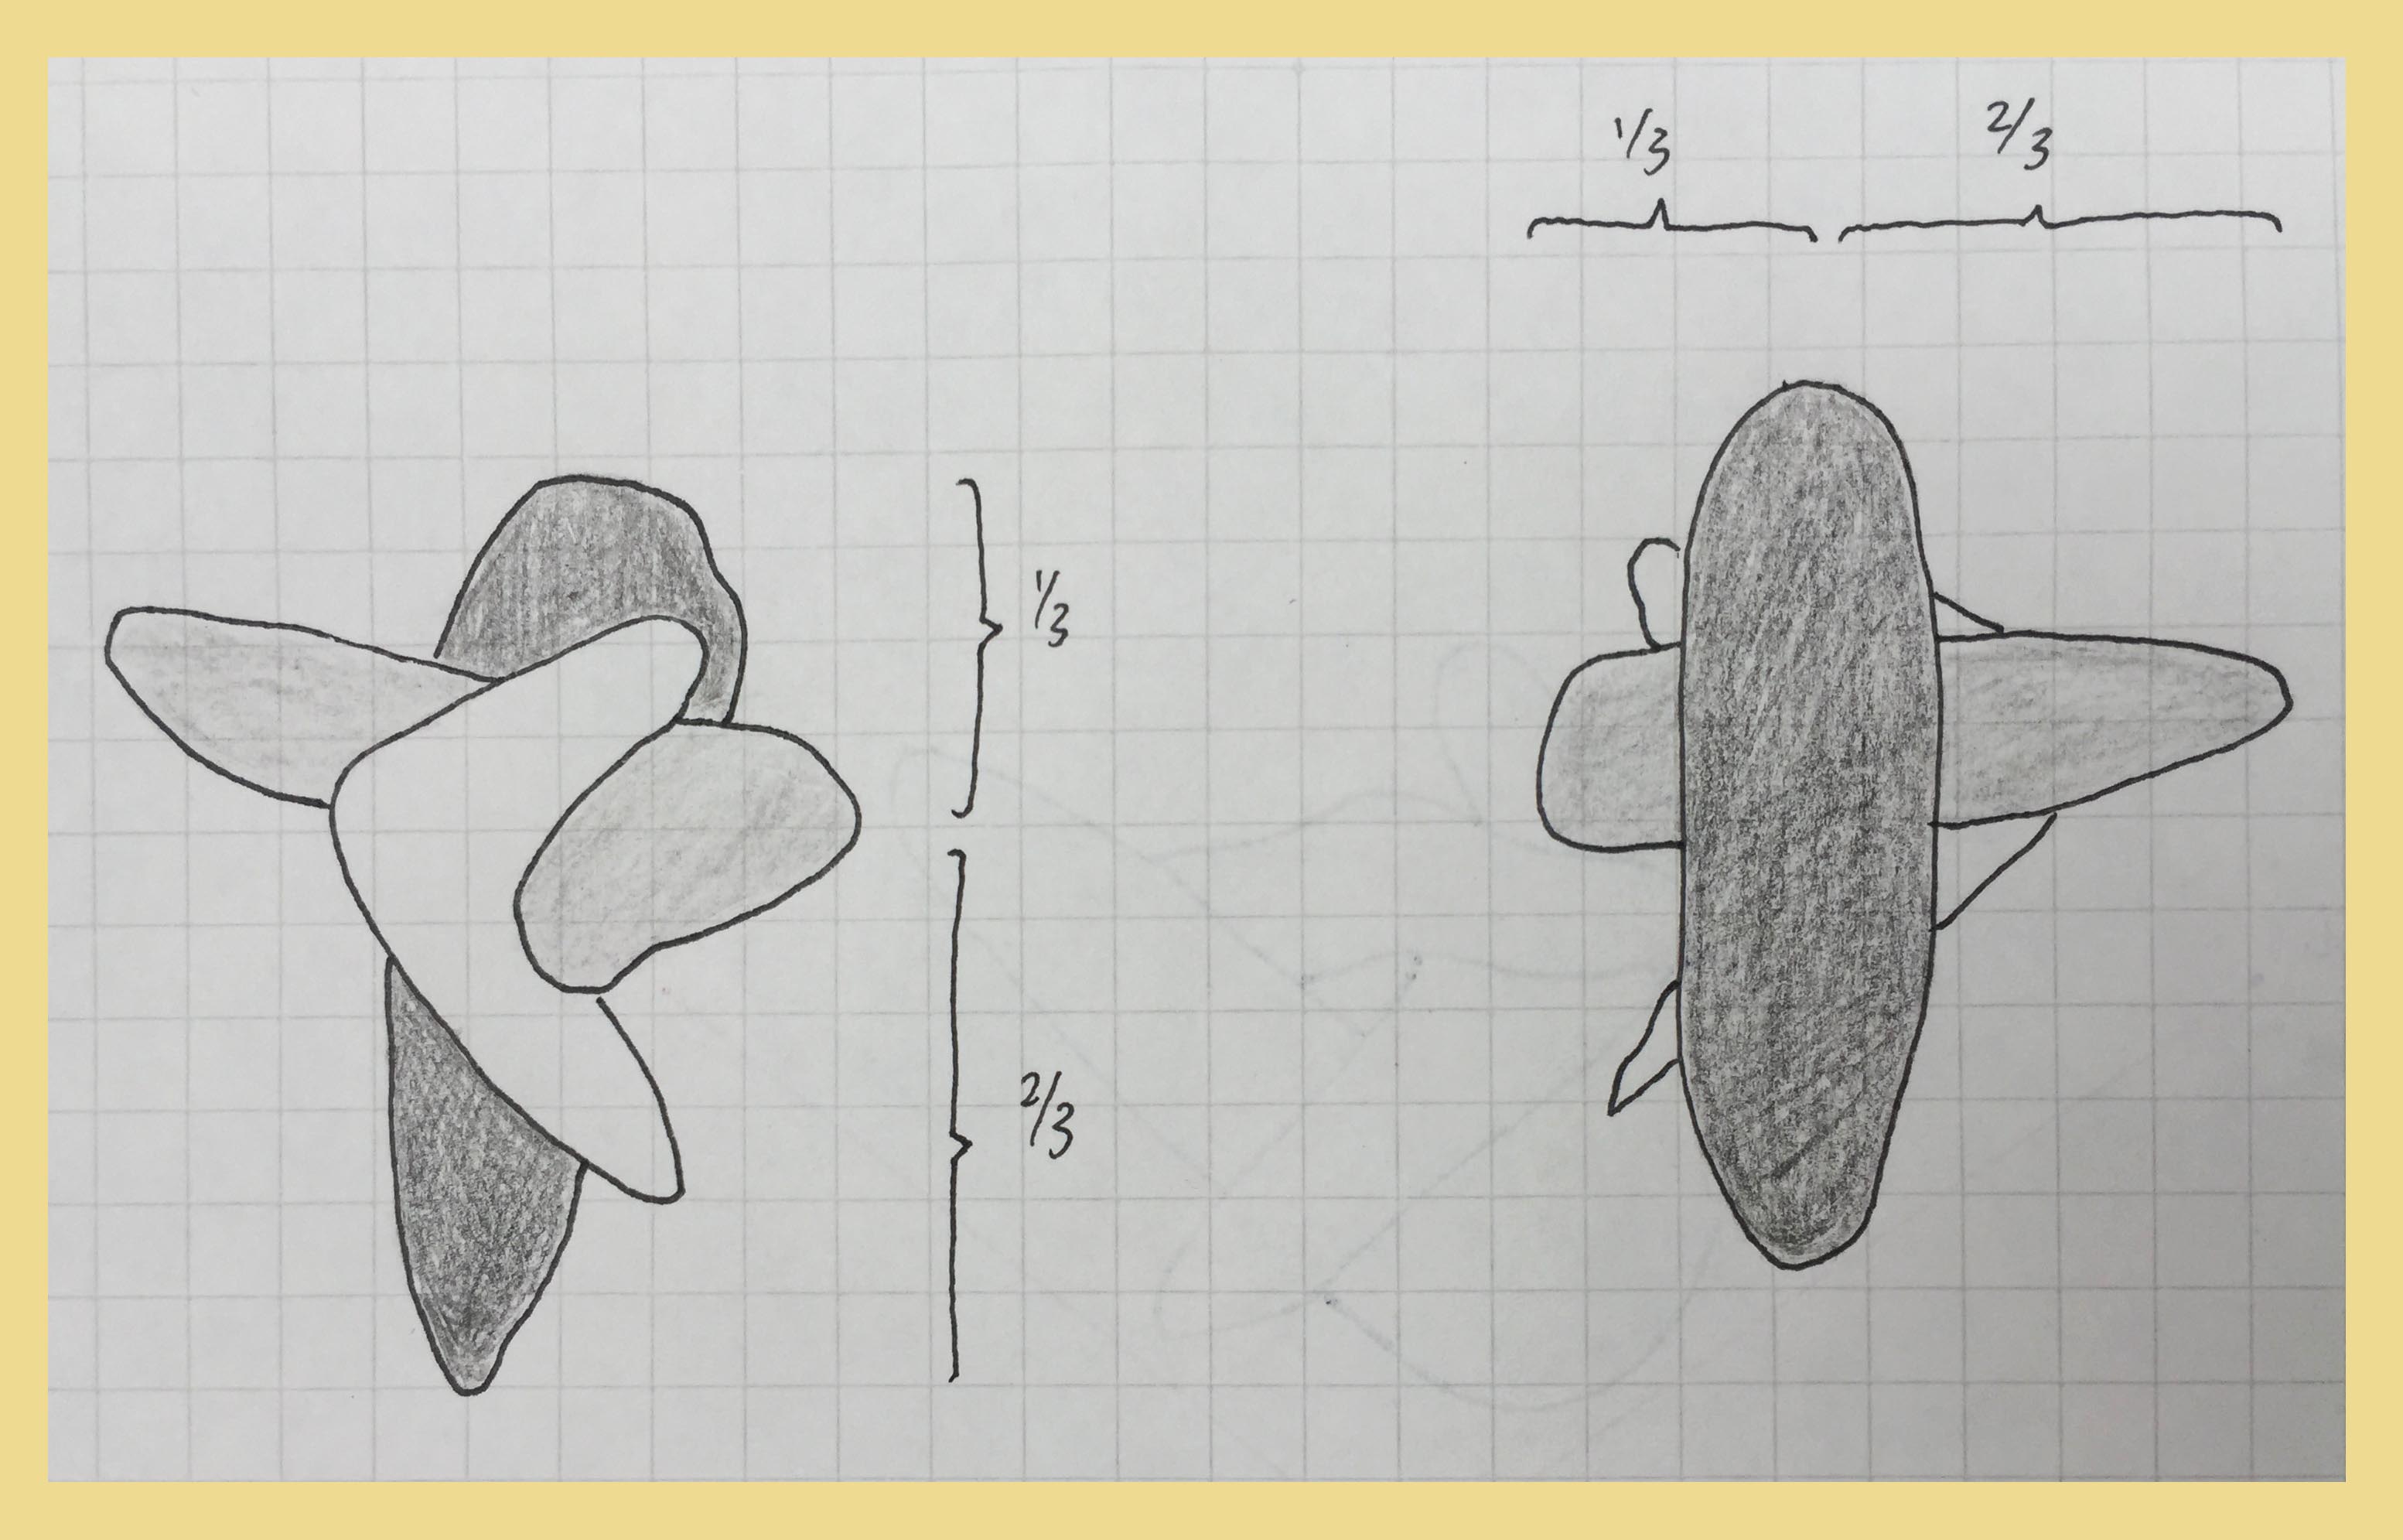
Plan ~ top & bottom
4 sides
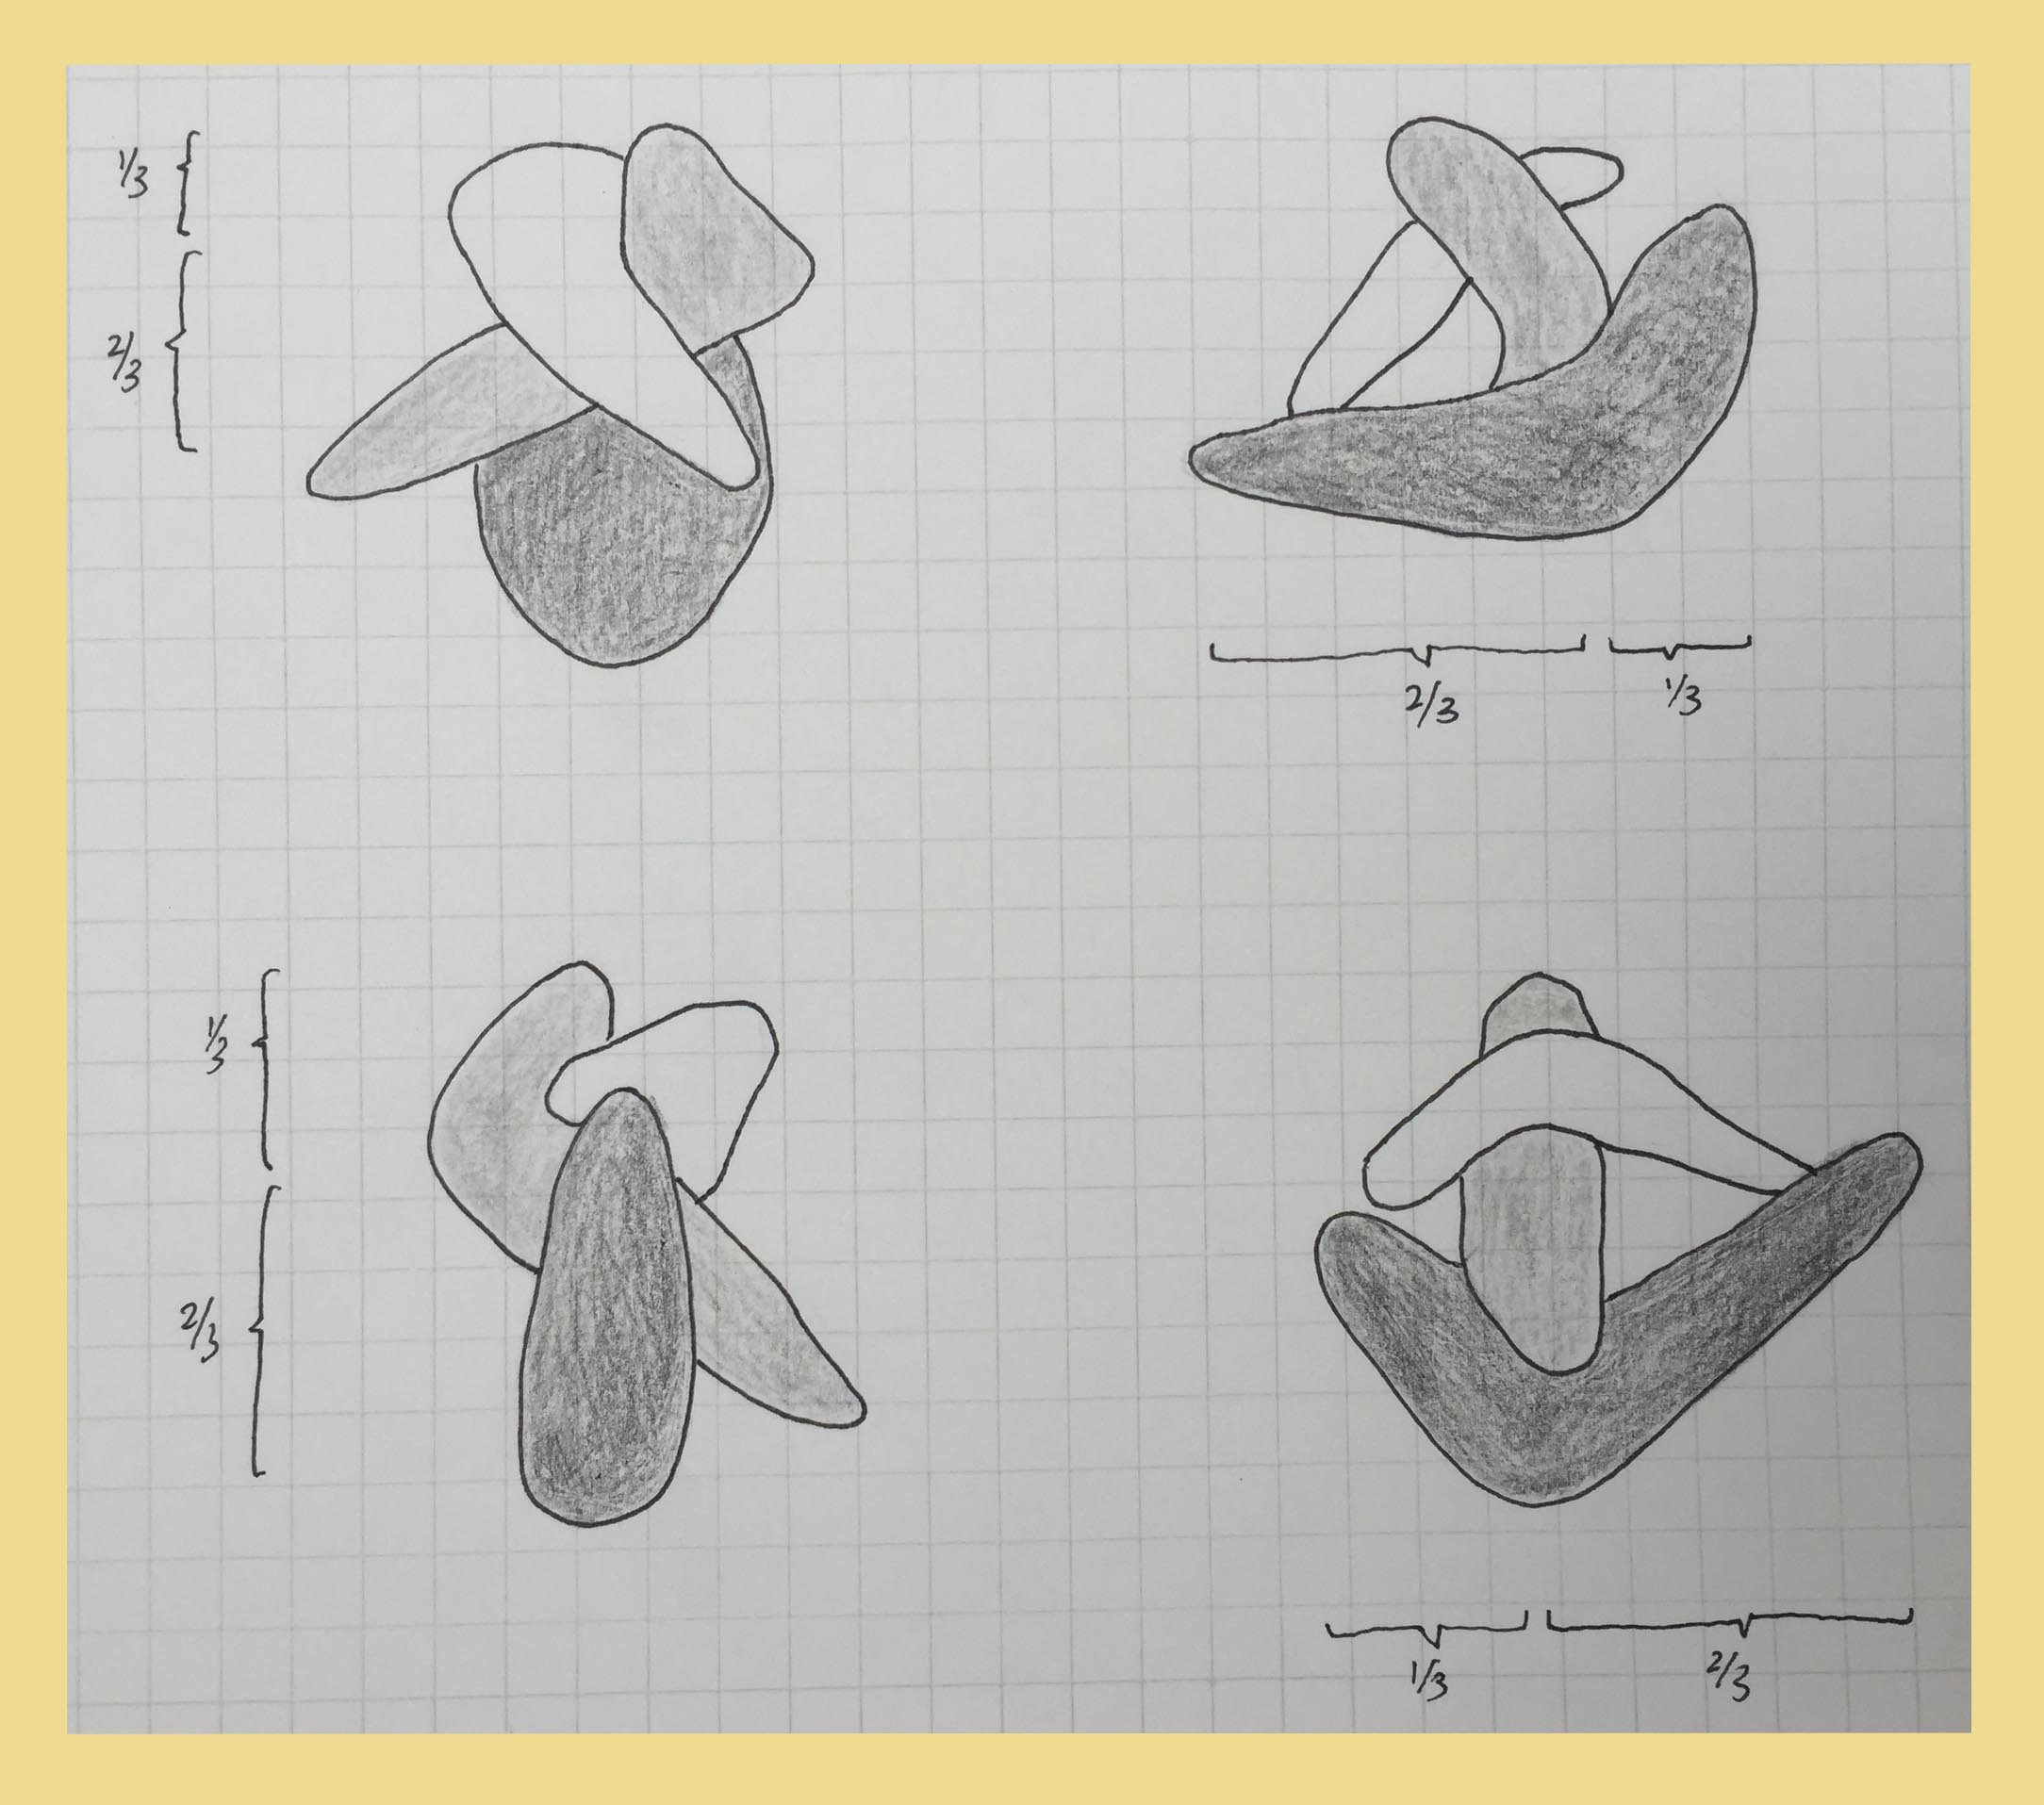
Elevation ~ 4 sides
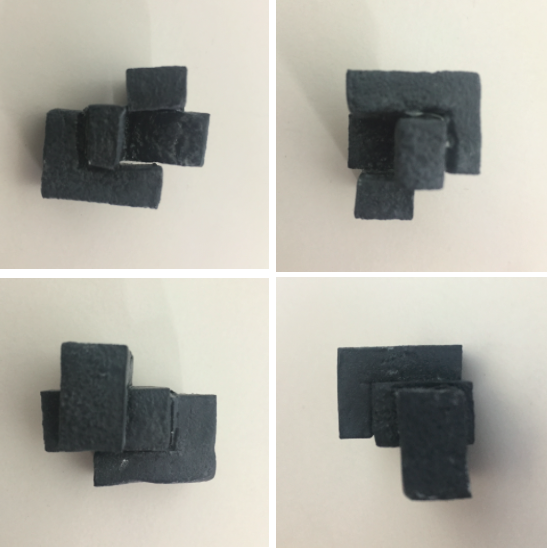
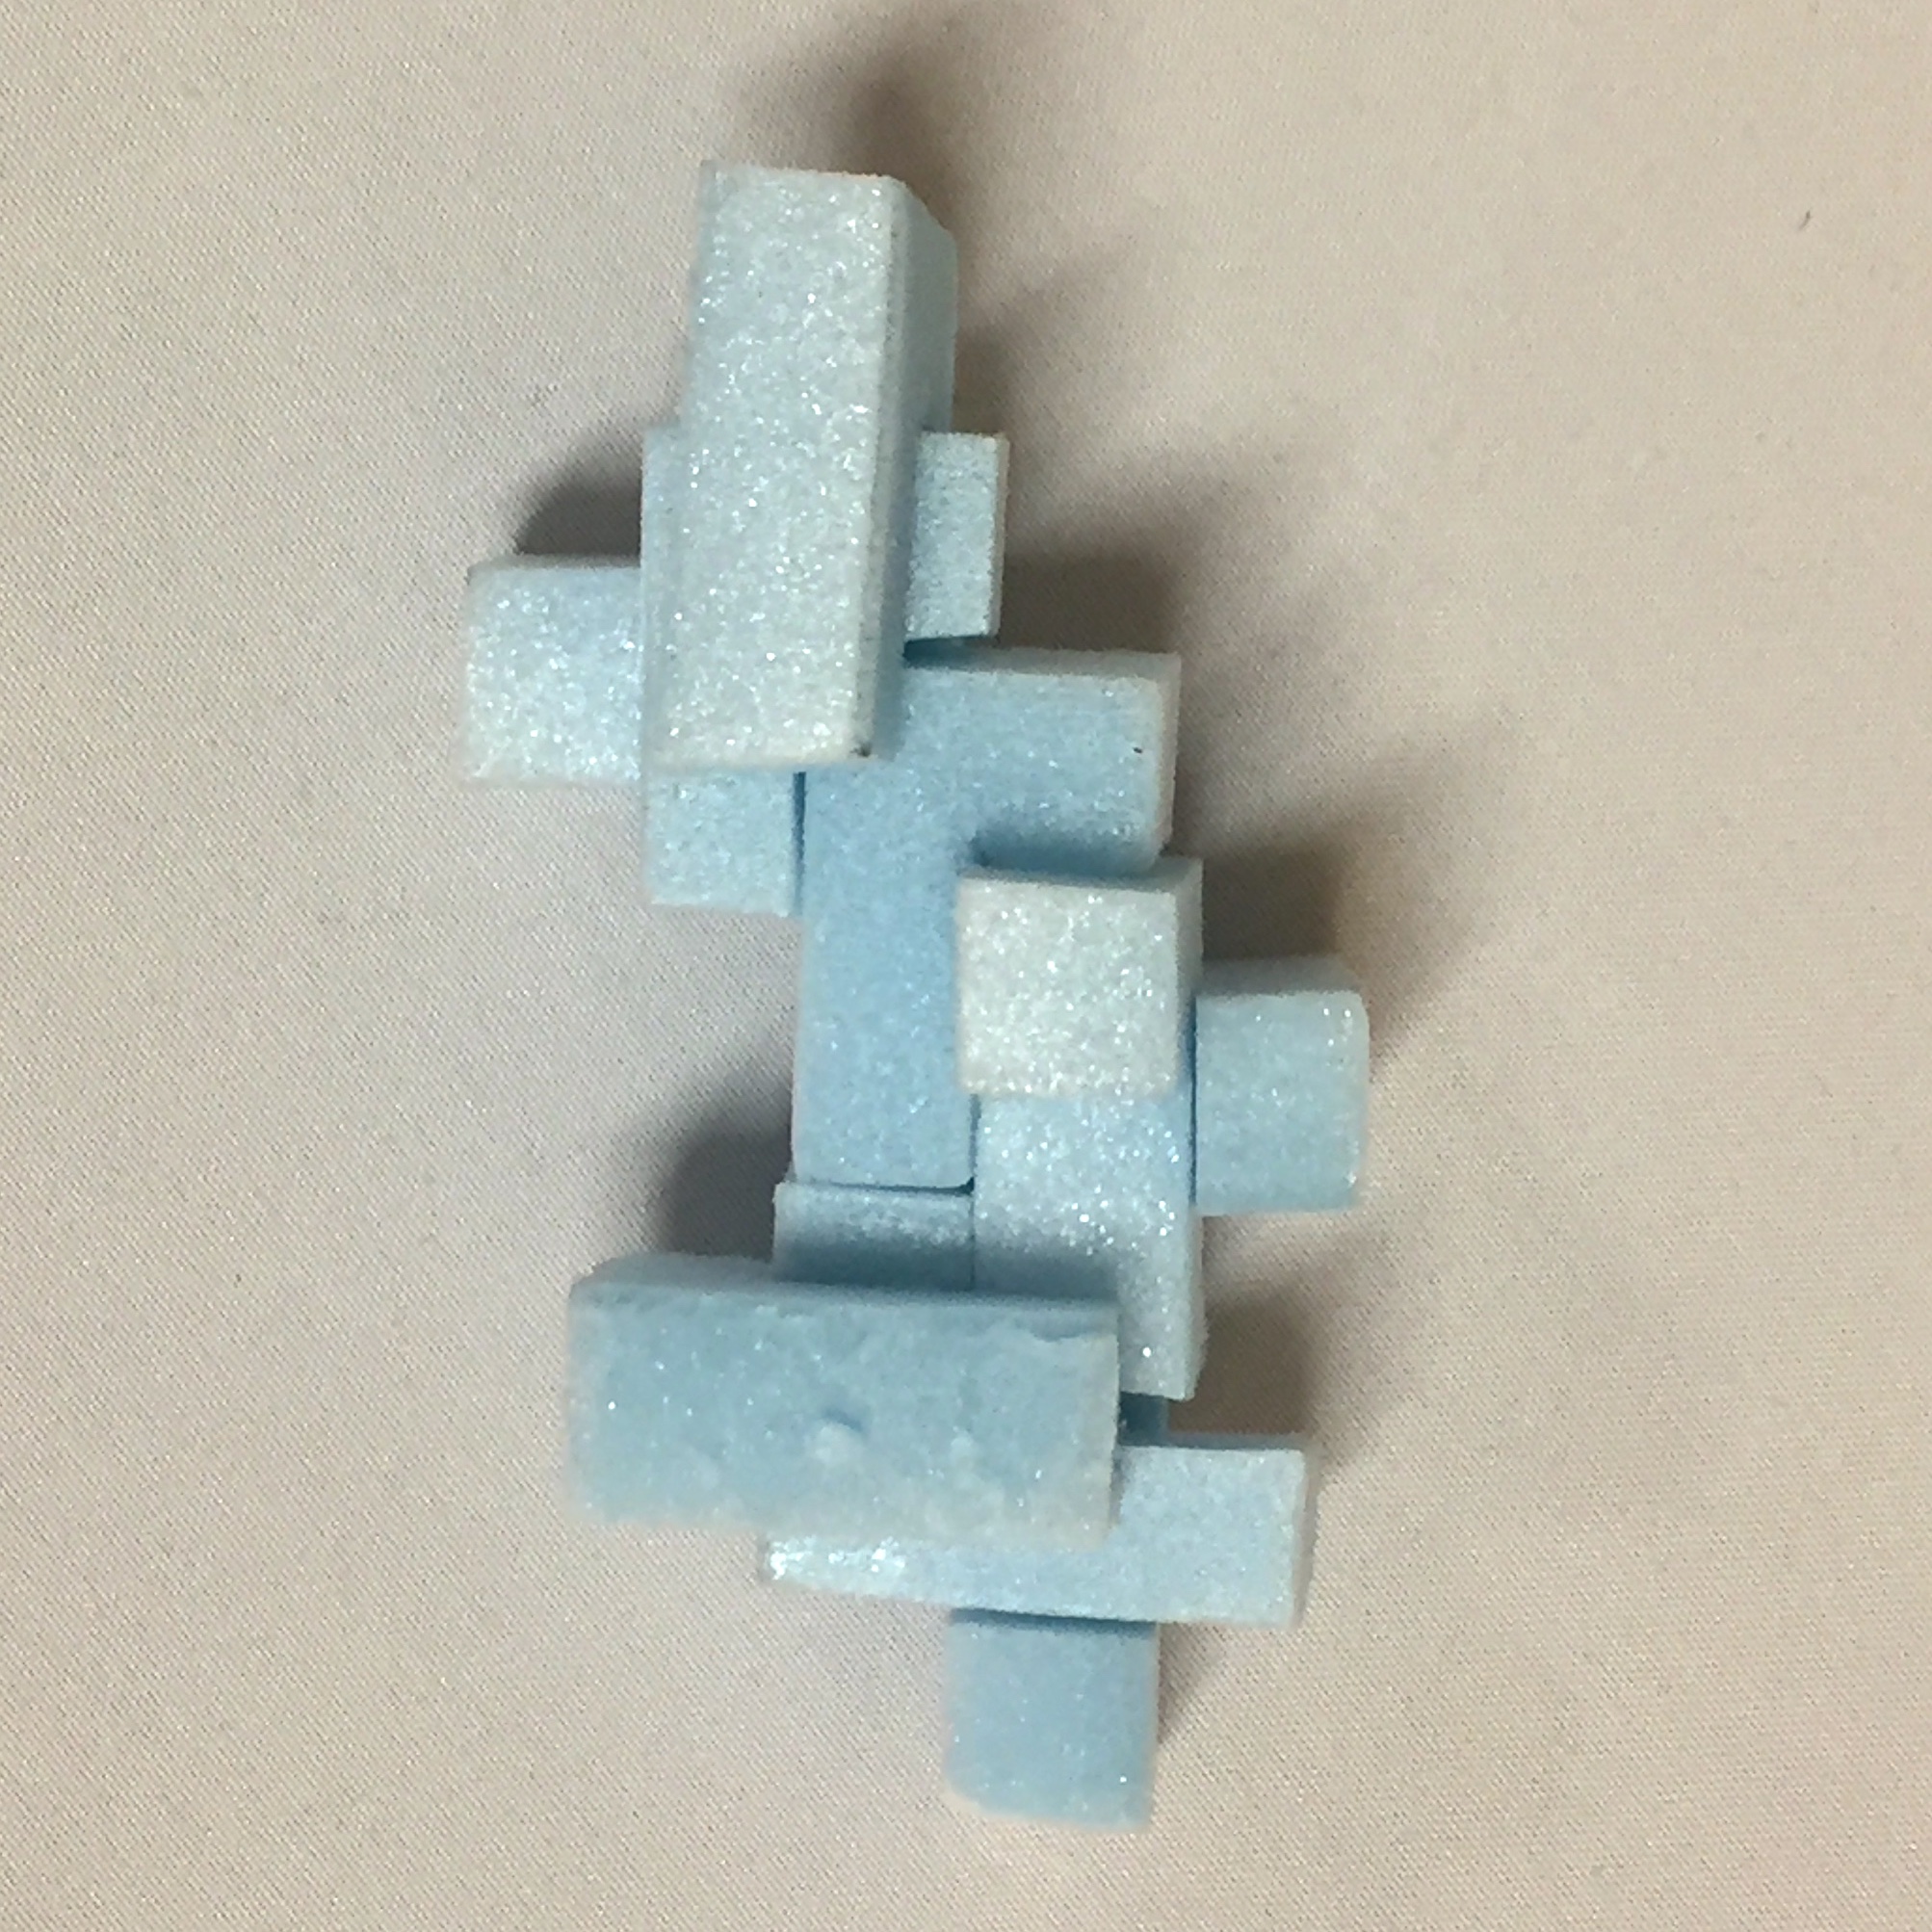
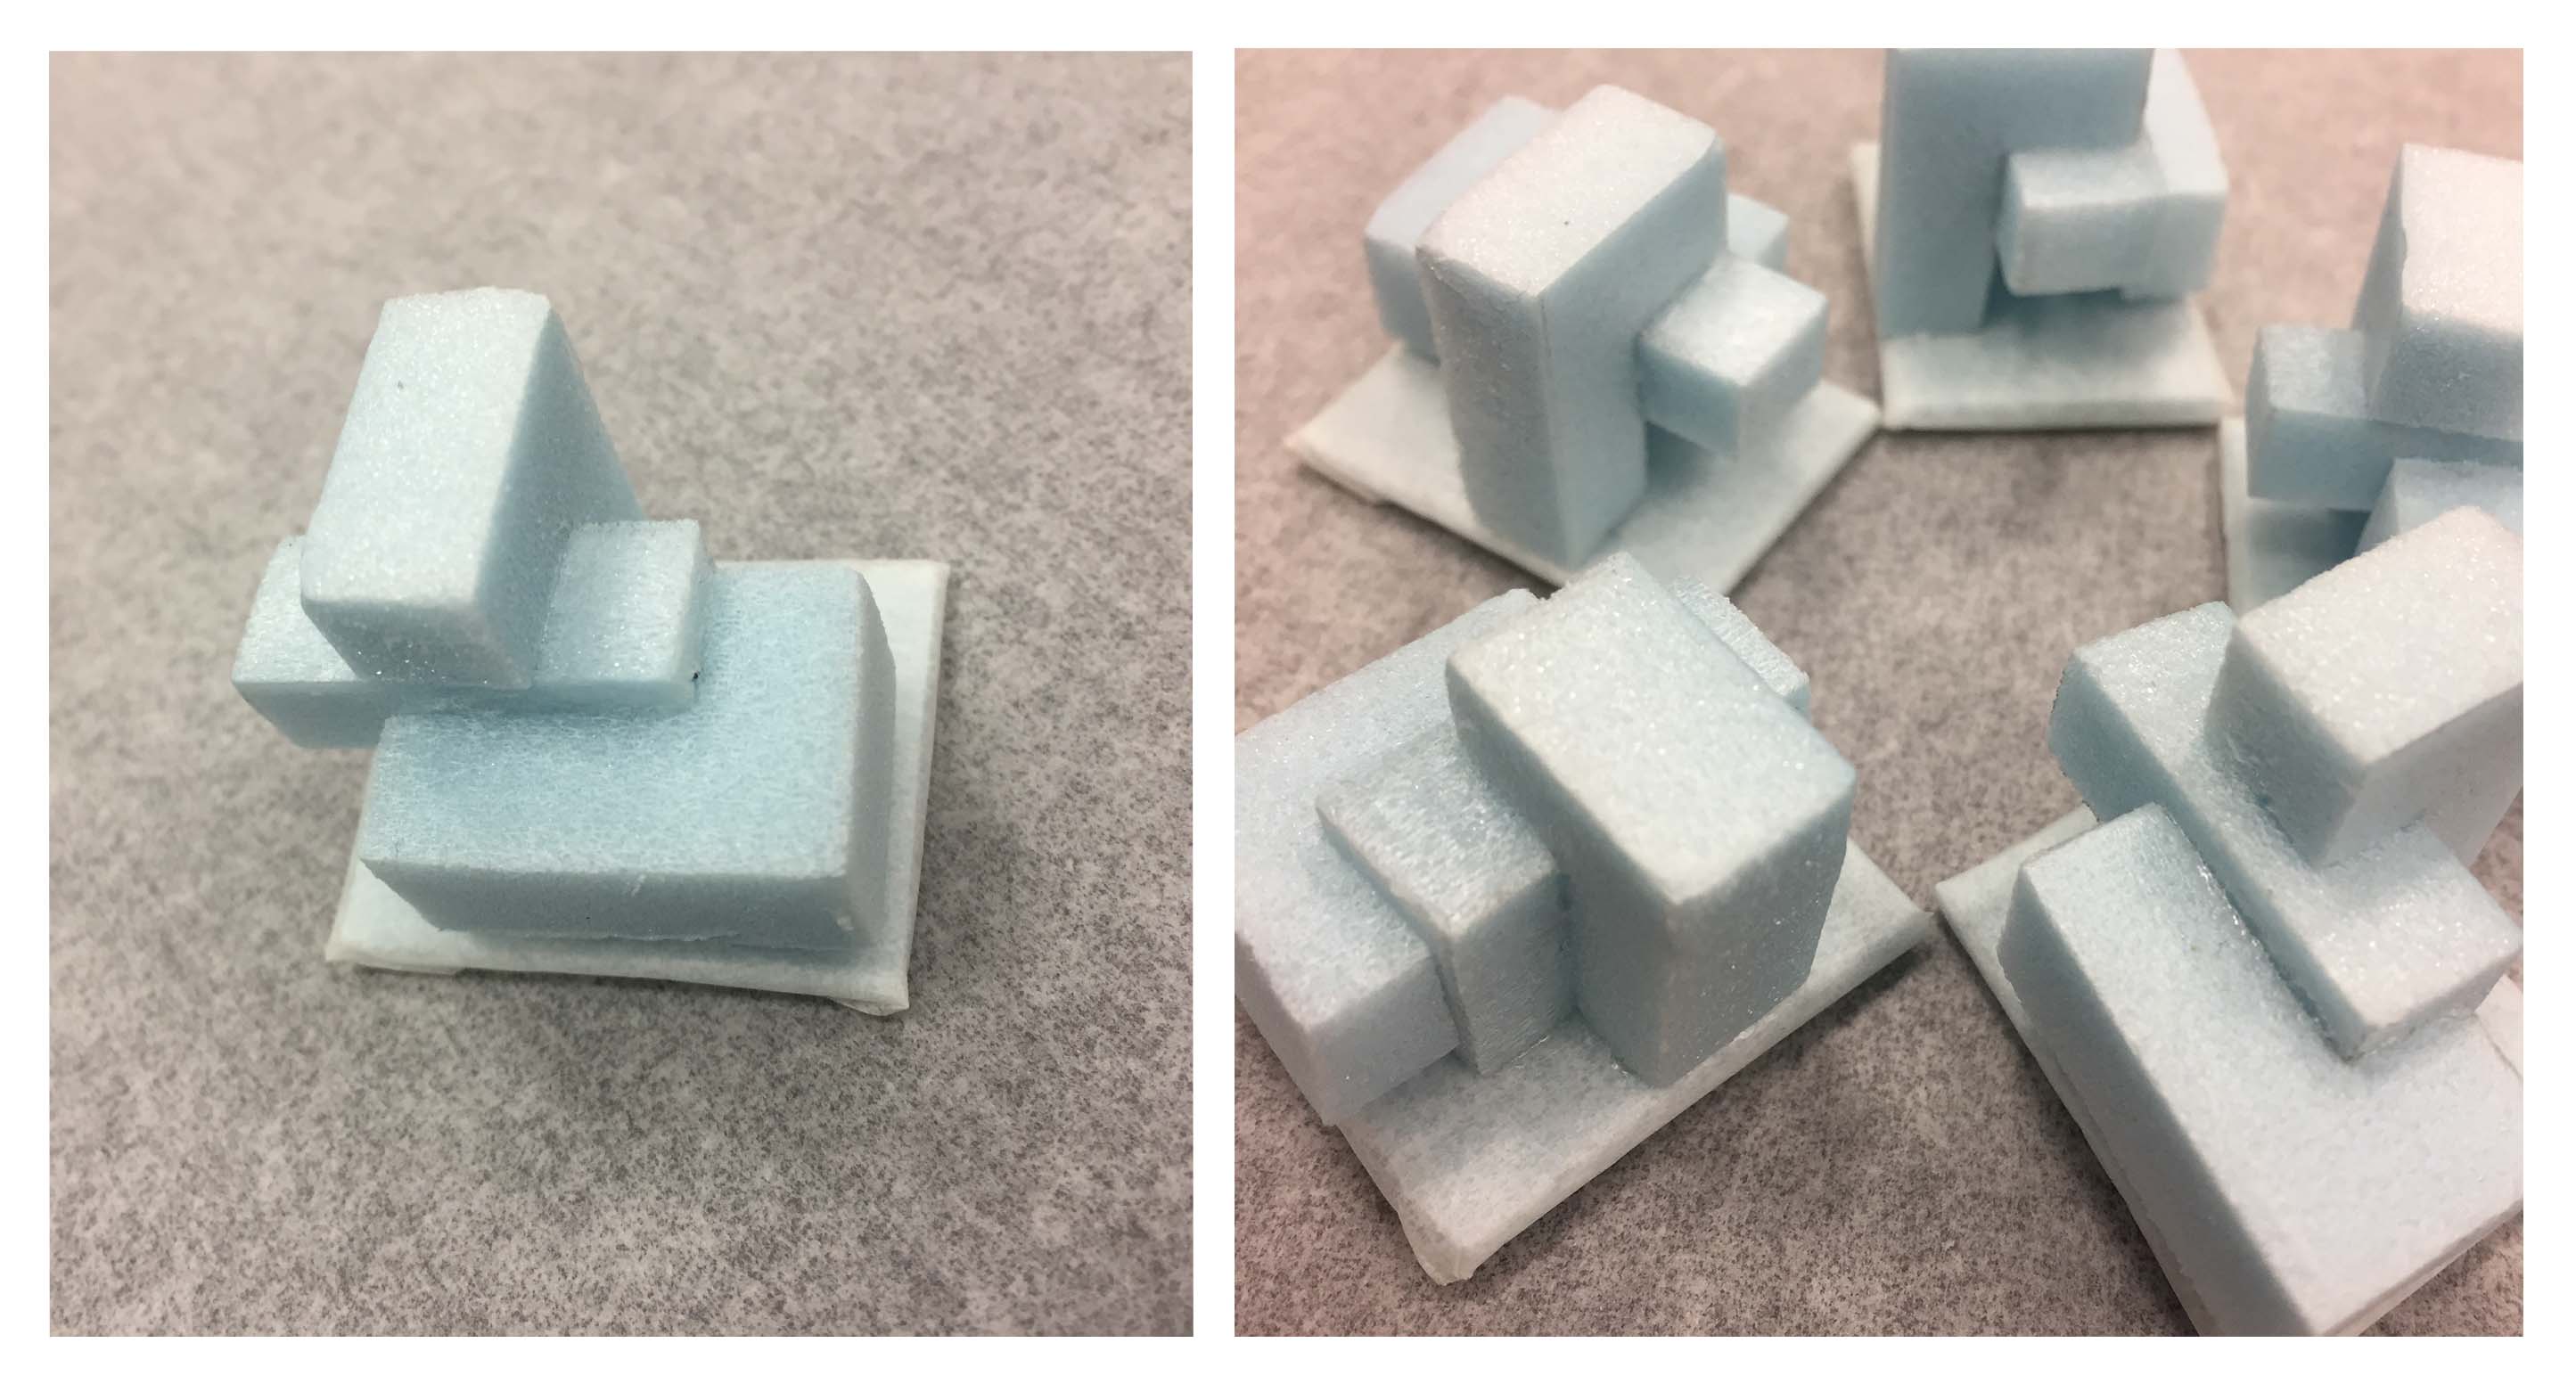
Second Module
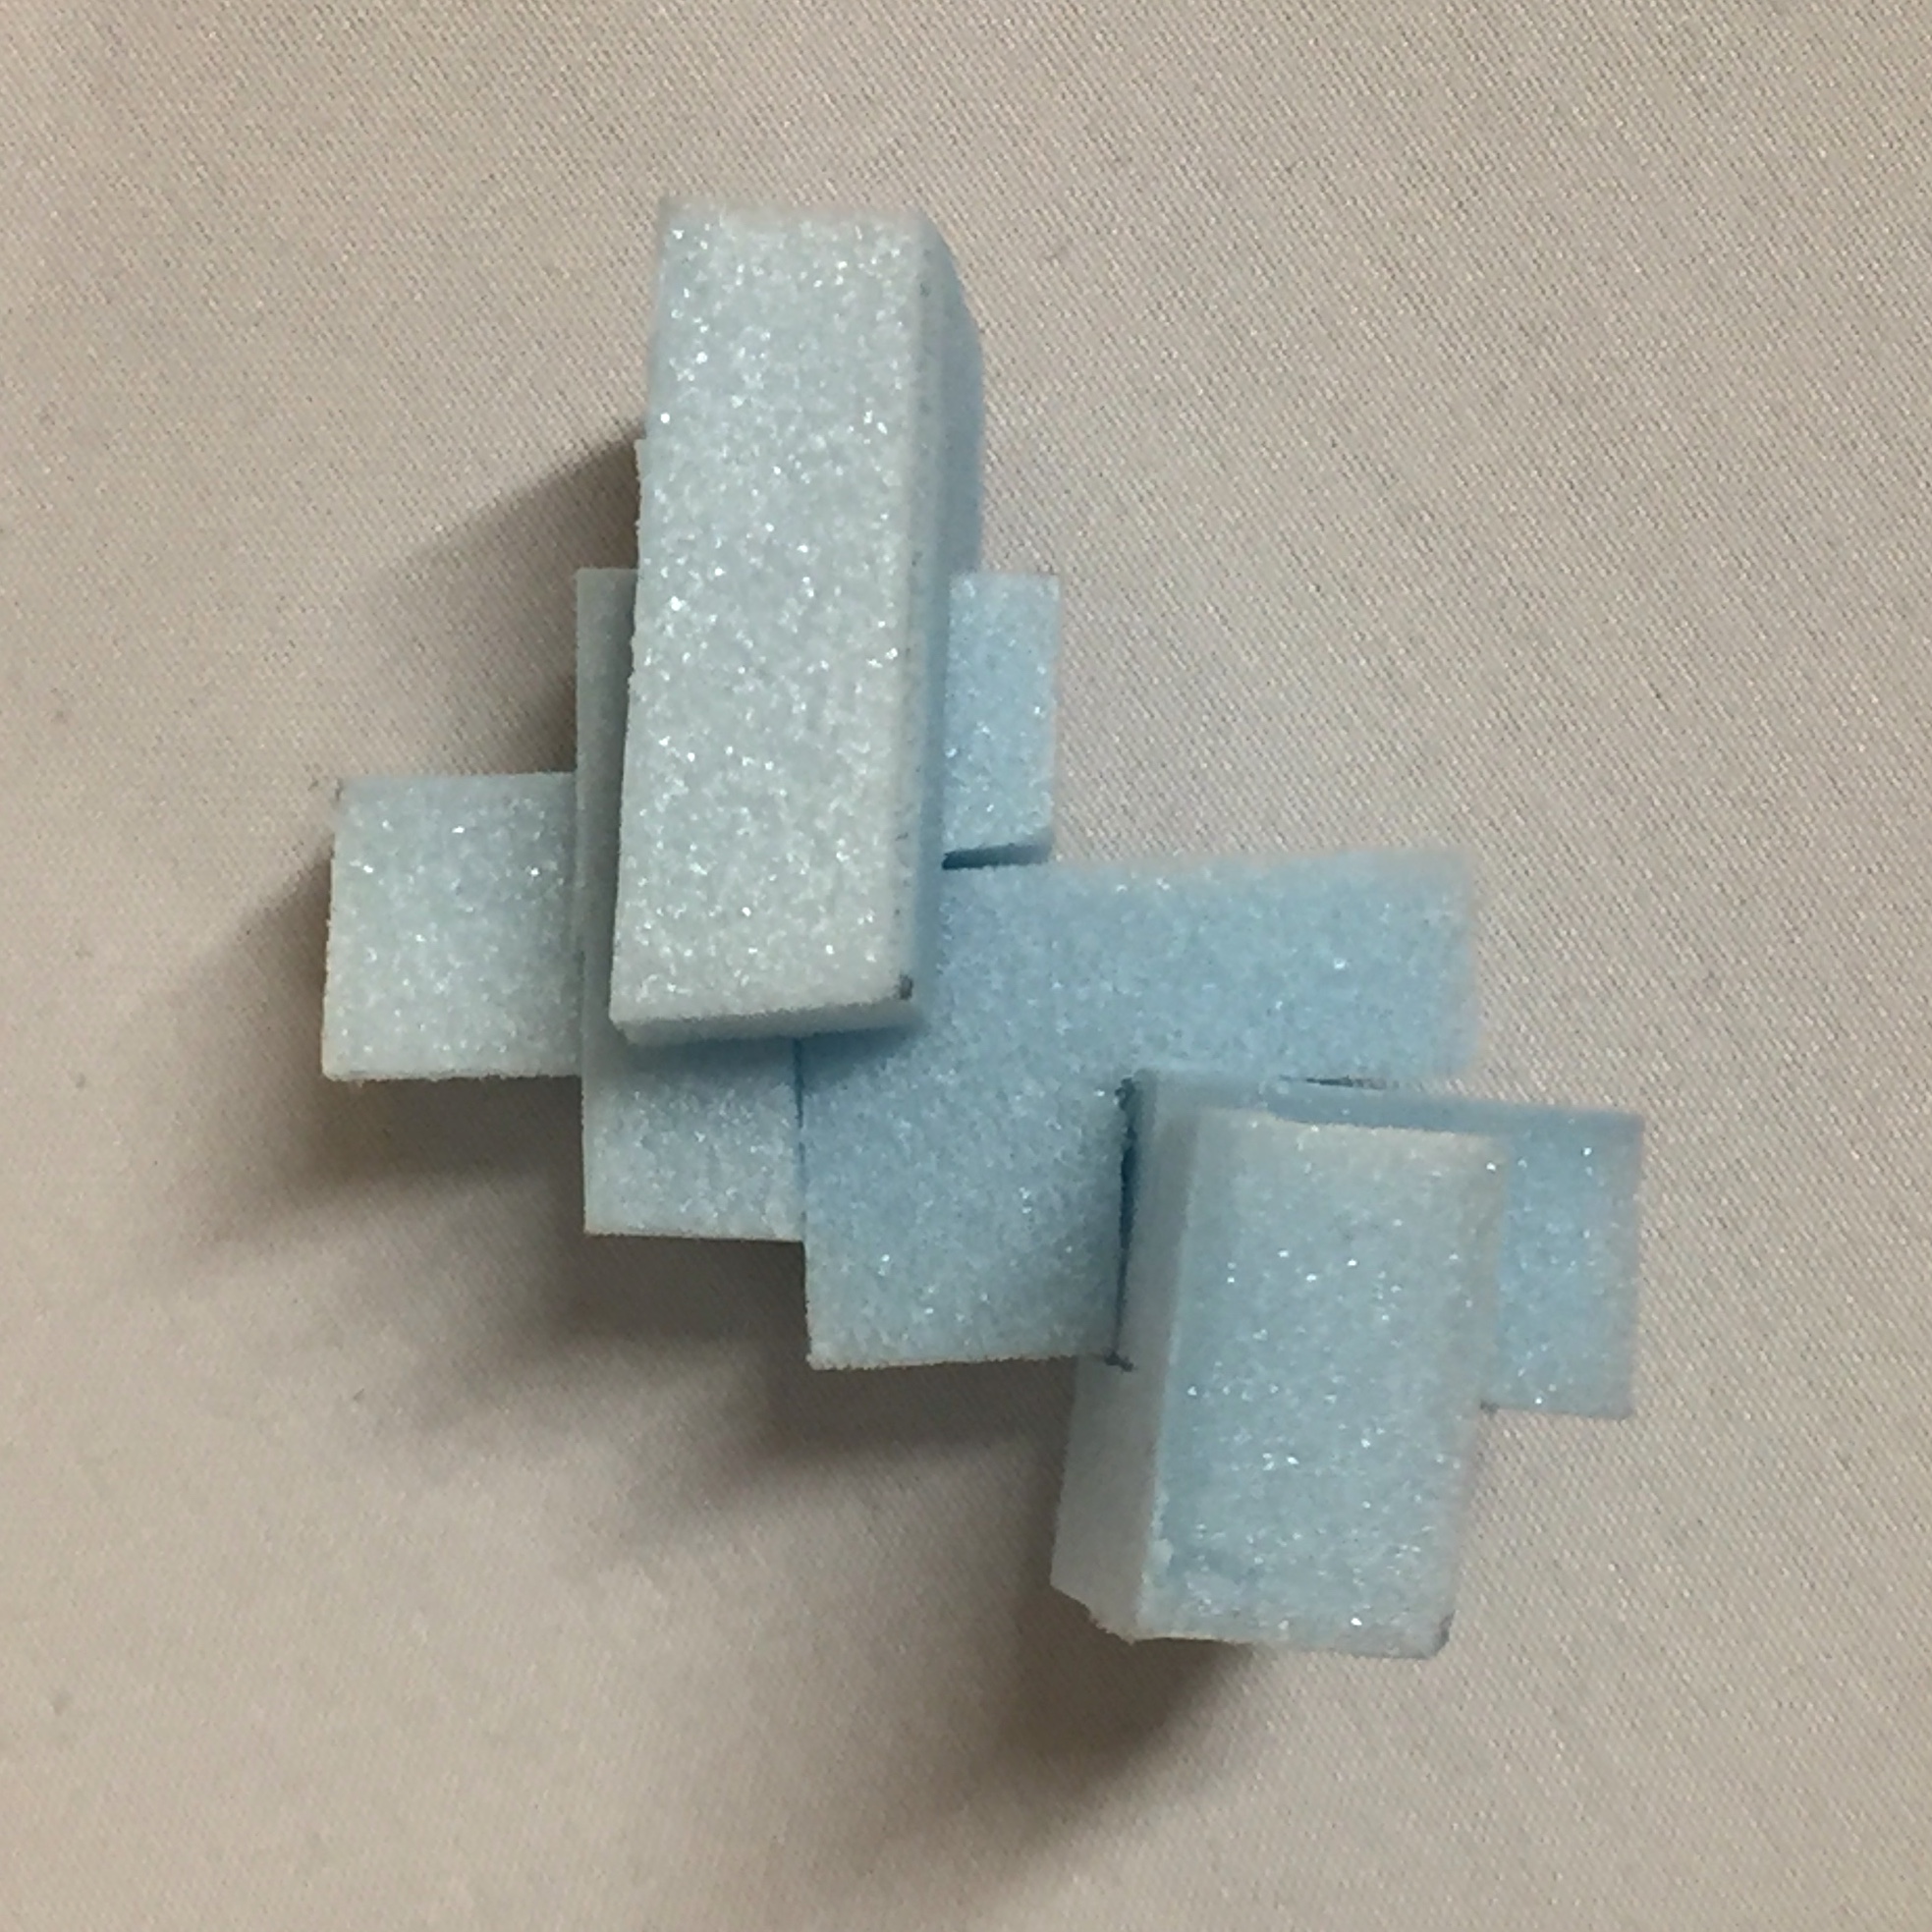
In this second module, I created it out of blue foam because it was a much more angular structure and it was easier to achieve its smooth edges with the foam cutter.
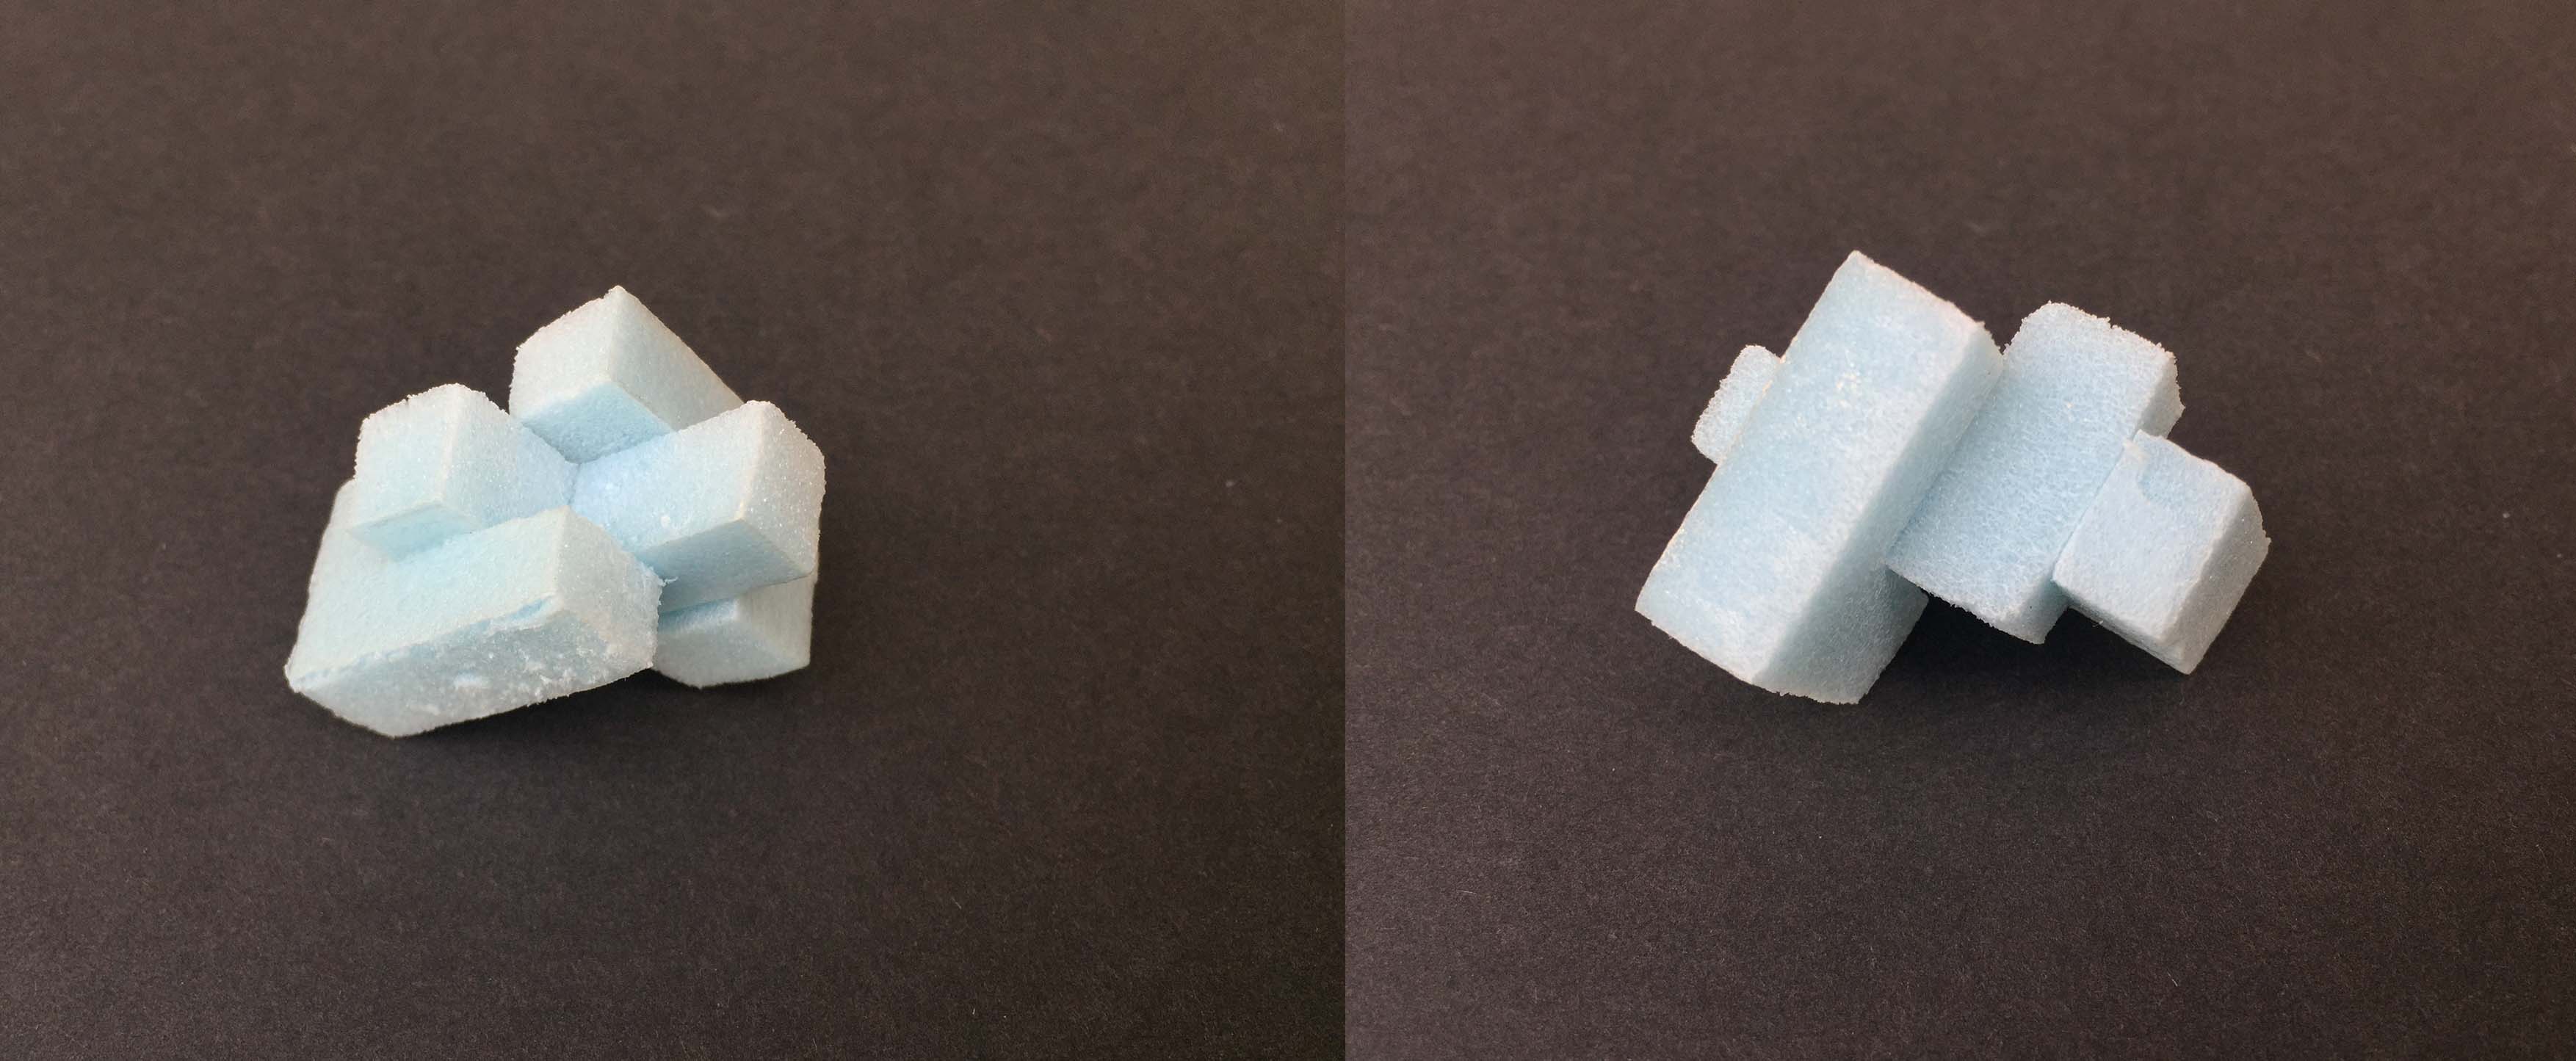
Similar to my first module, this one was again made out of 3 parts, each that was bent and notched together. The difference here is that the sizes for each part were kept the same.
Technical drawings
Right ~ top view
Left ~ bottom view
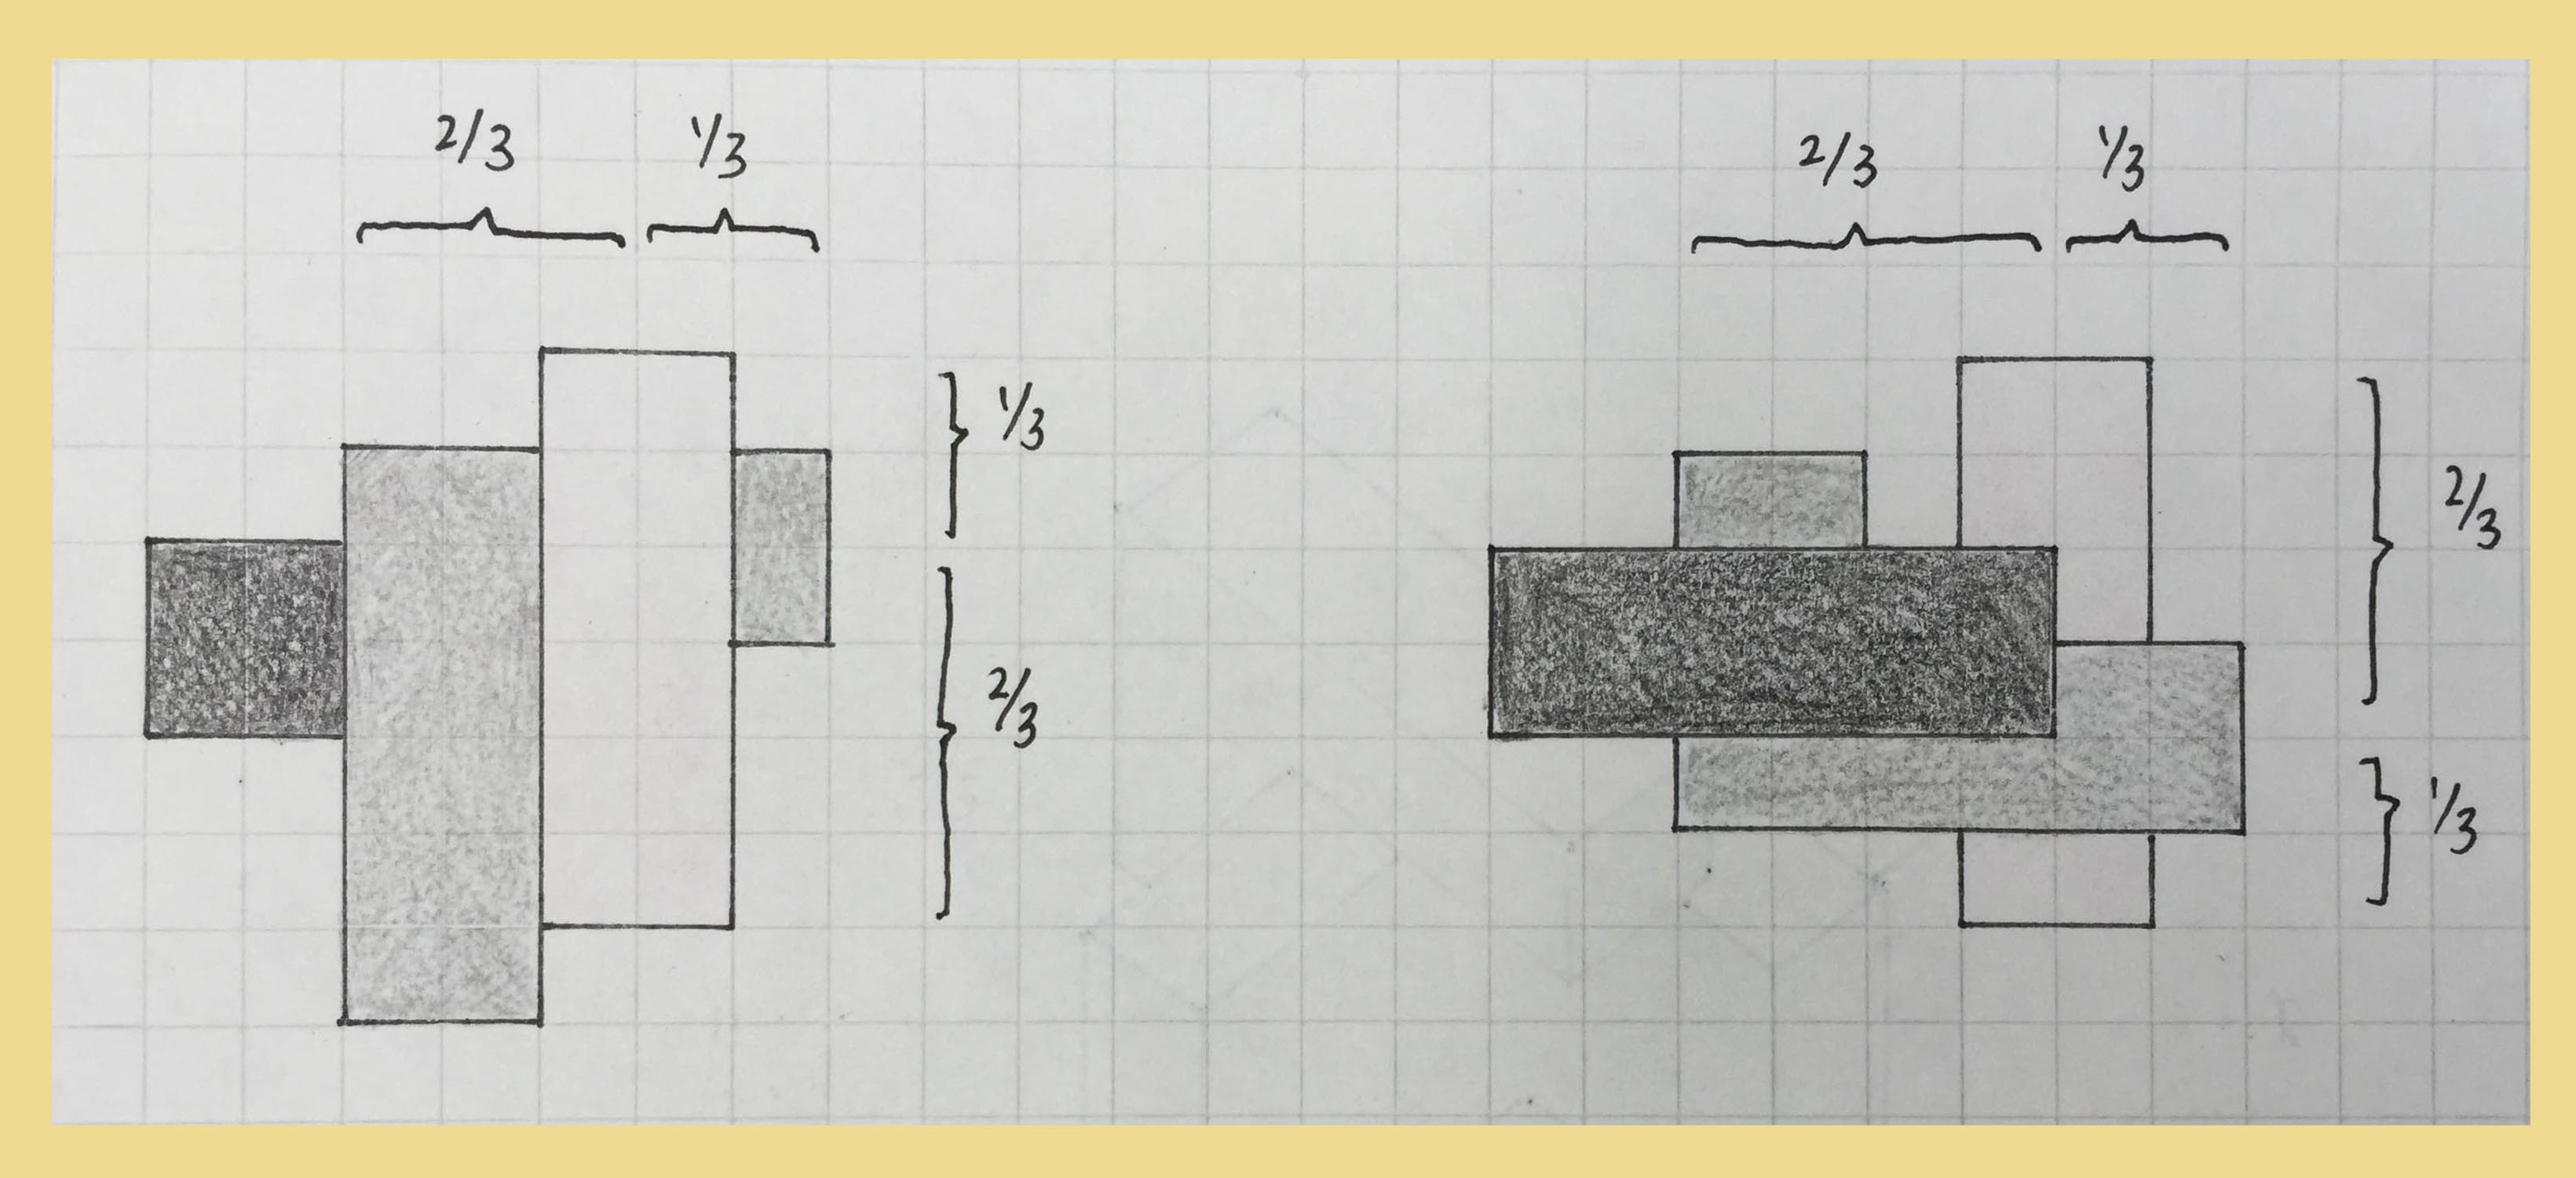
Plan ~ top & bottom
4 sides
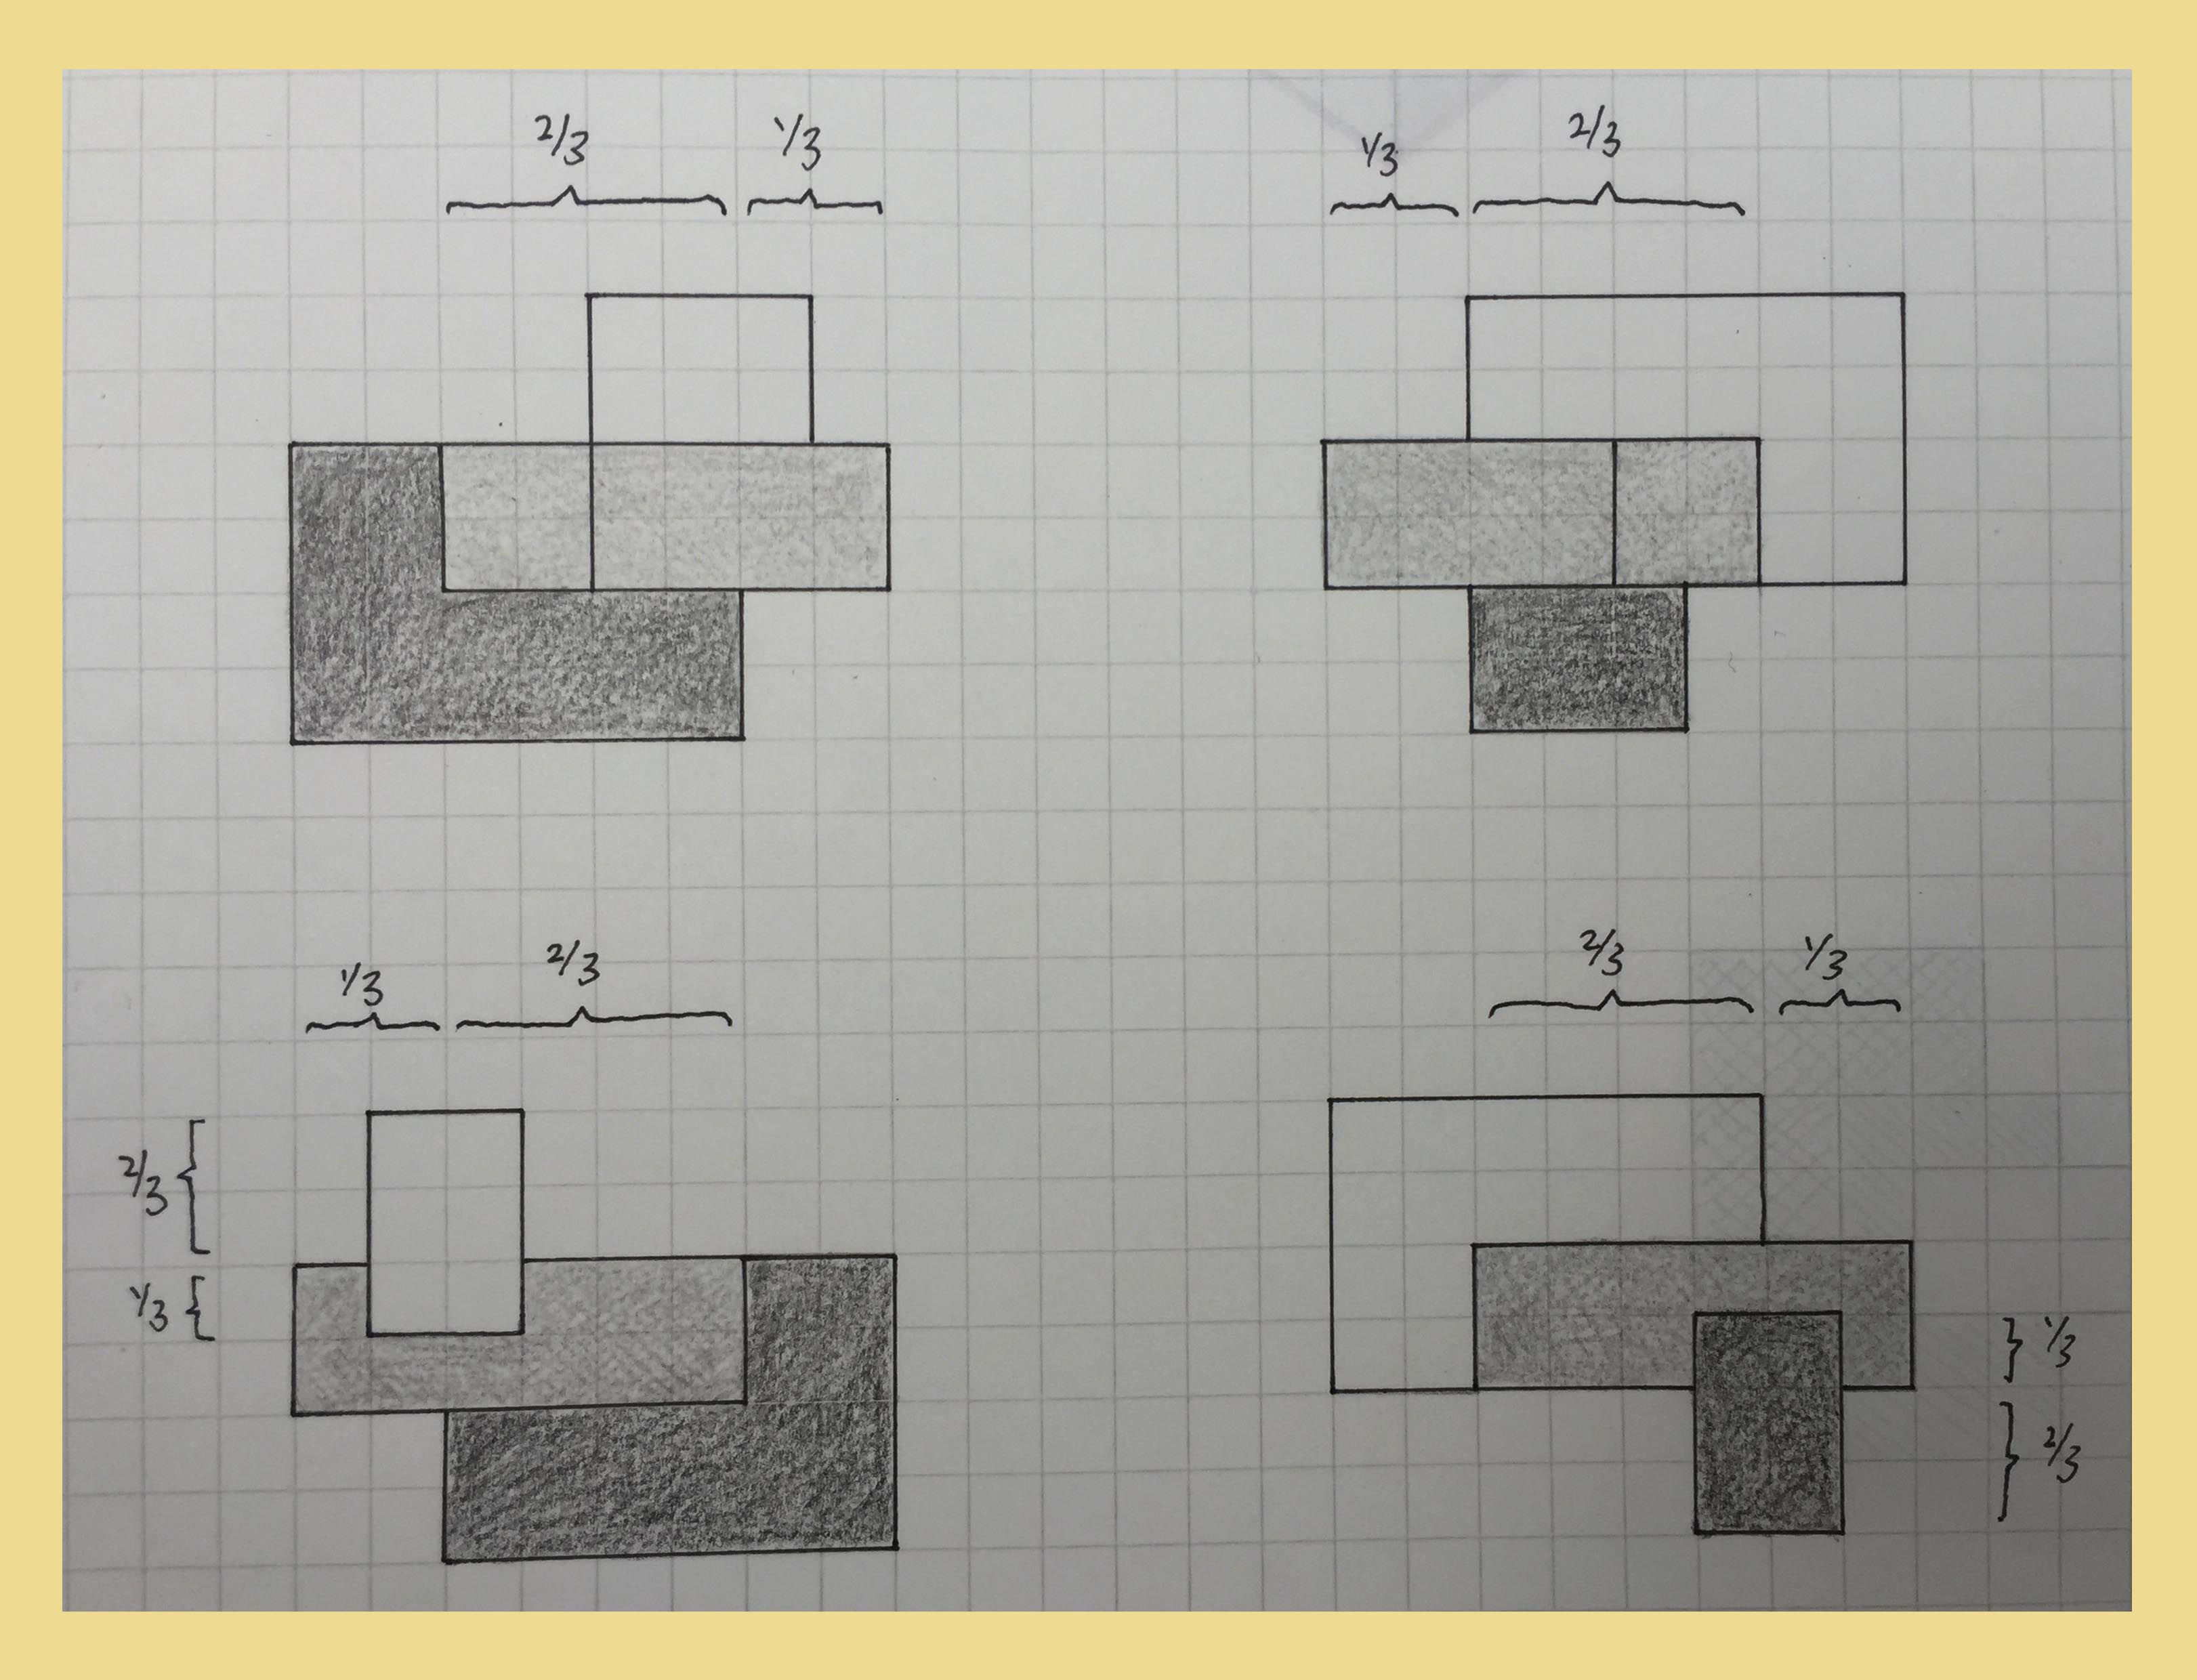
Elevation ~ 4 sides

Sectional cut

Section
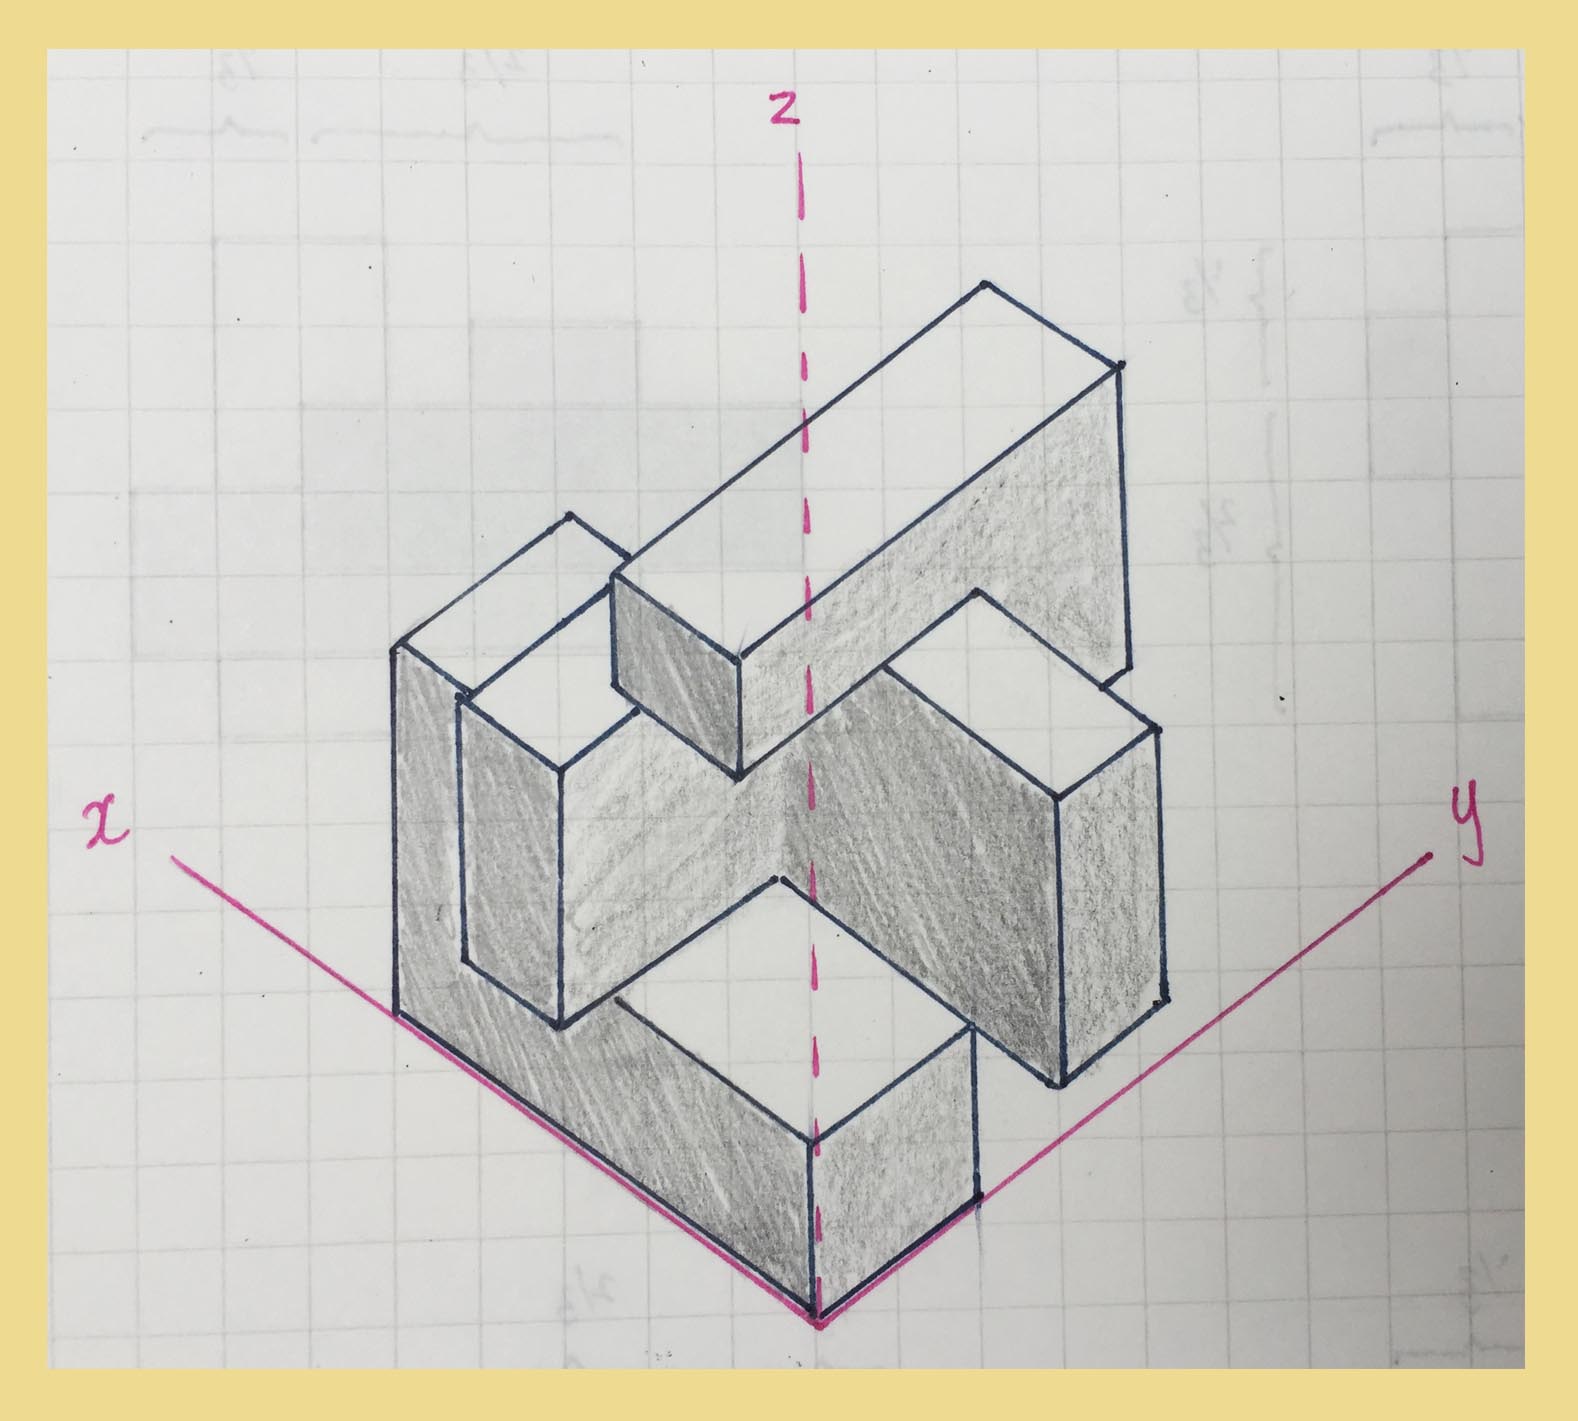
Isometric
After creating the individual modules, the next step to this project was to create an ice tray out of multiples of our model.
DUPLICATING WITH LATEX
Moving to the next step which was to duplicate our modules, we had the option of either working with silicon or latex. It was up until this point where I decided that I would go with my second module design as the individual pieces could notch with one another and fit into my final verb, array. After analyzing both modules, I also realized that the second one would be easier to duplicate as there were no gaps in between them.
Since the design of my module was rather “step-like” as there were many levels and also a void in the middle, I thought that working with latex would be better since I could really cover all its edges.
latex
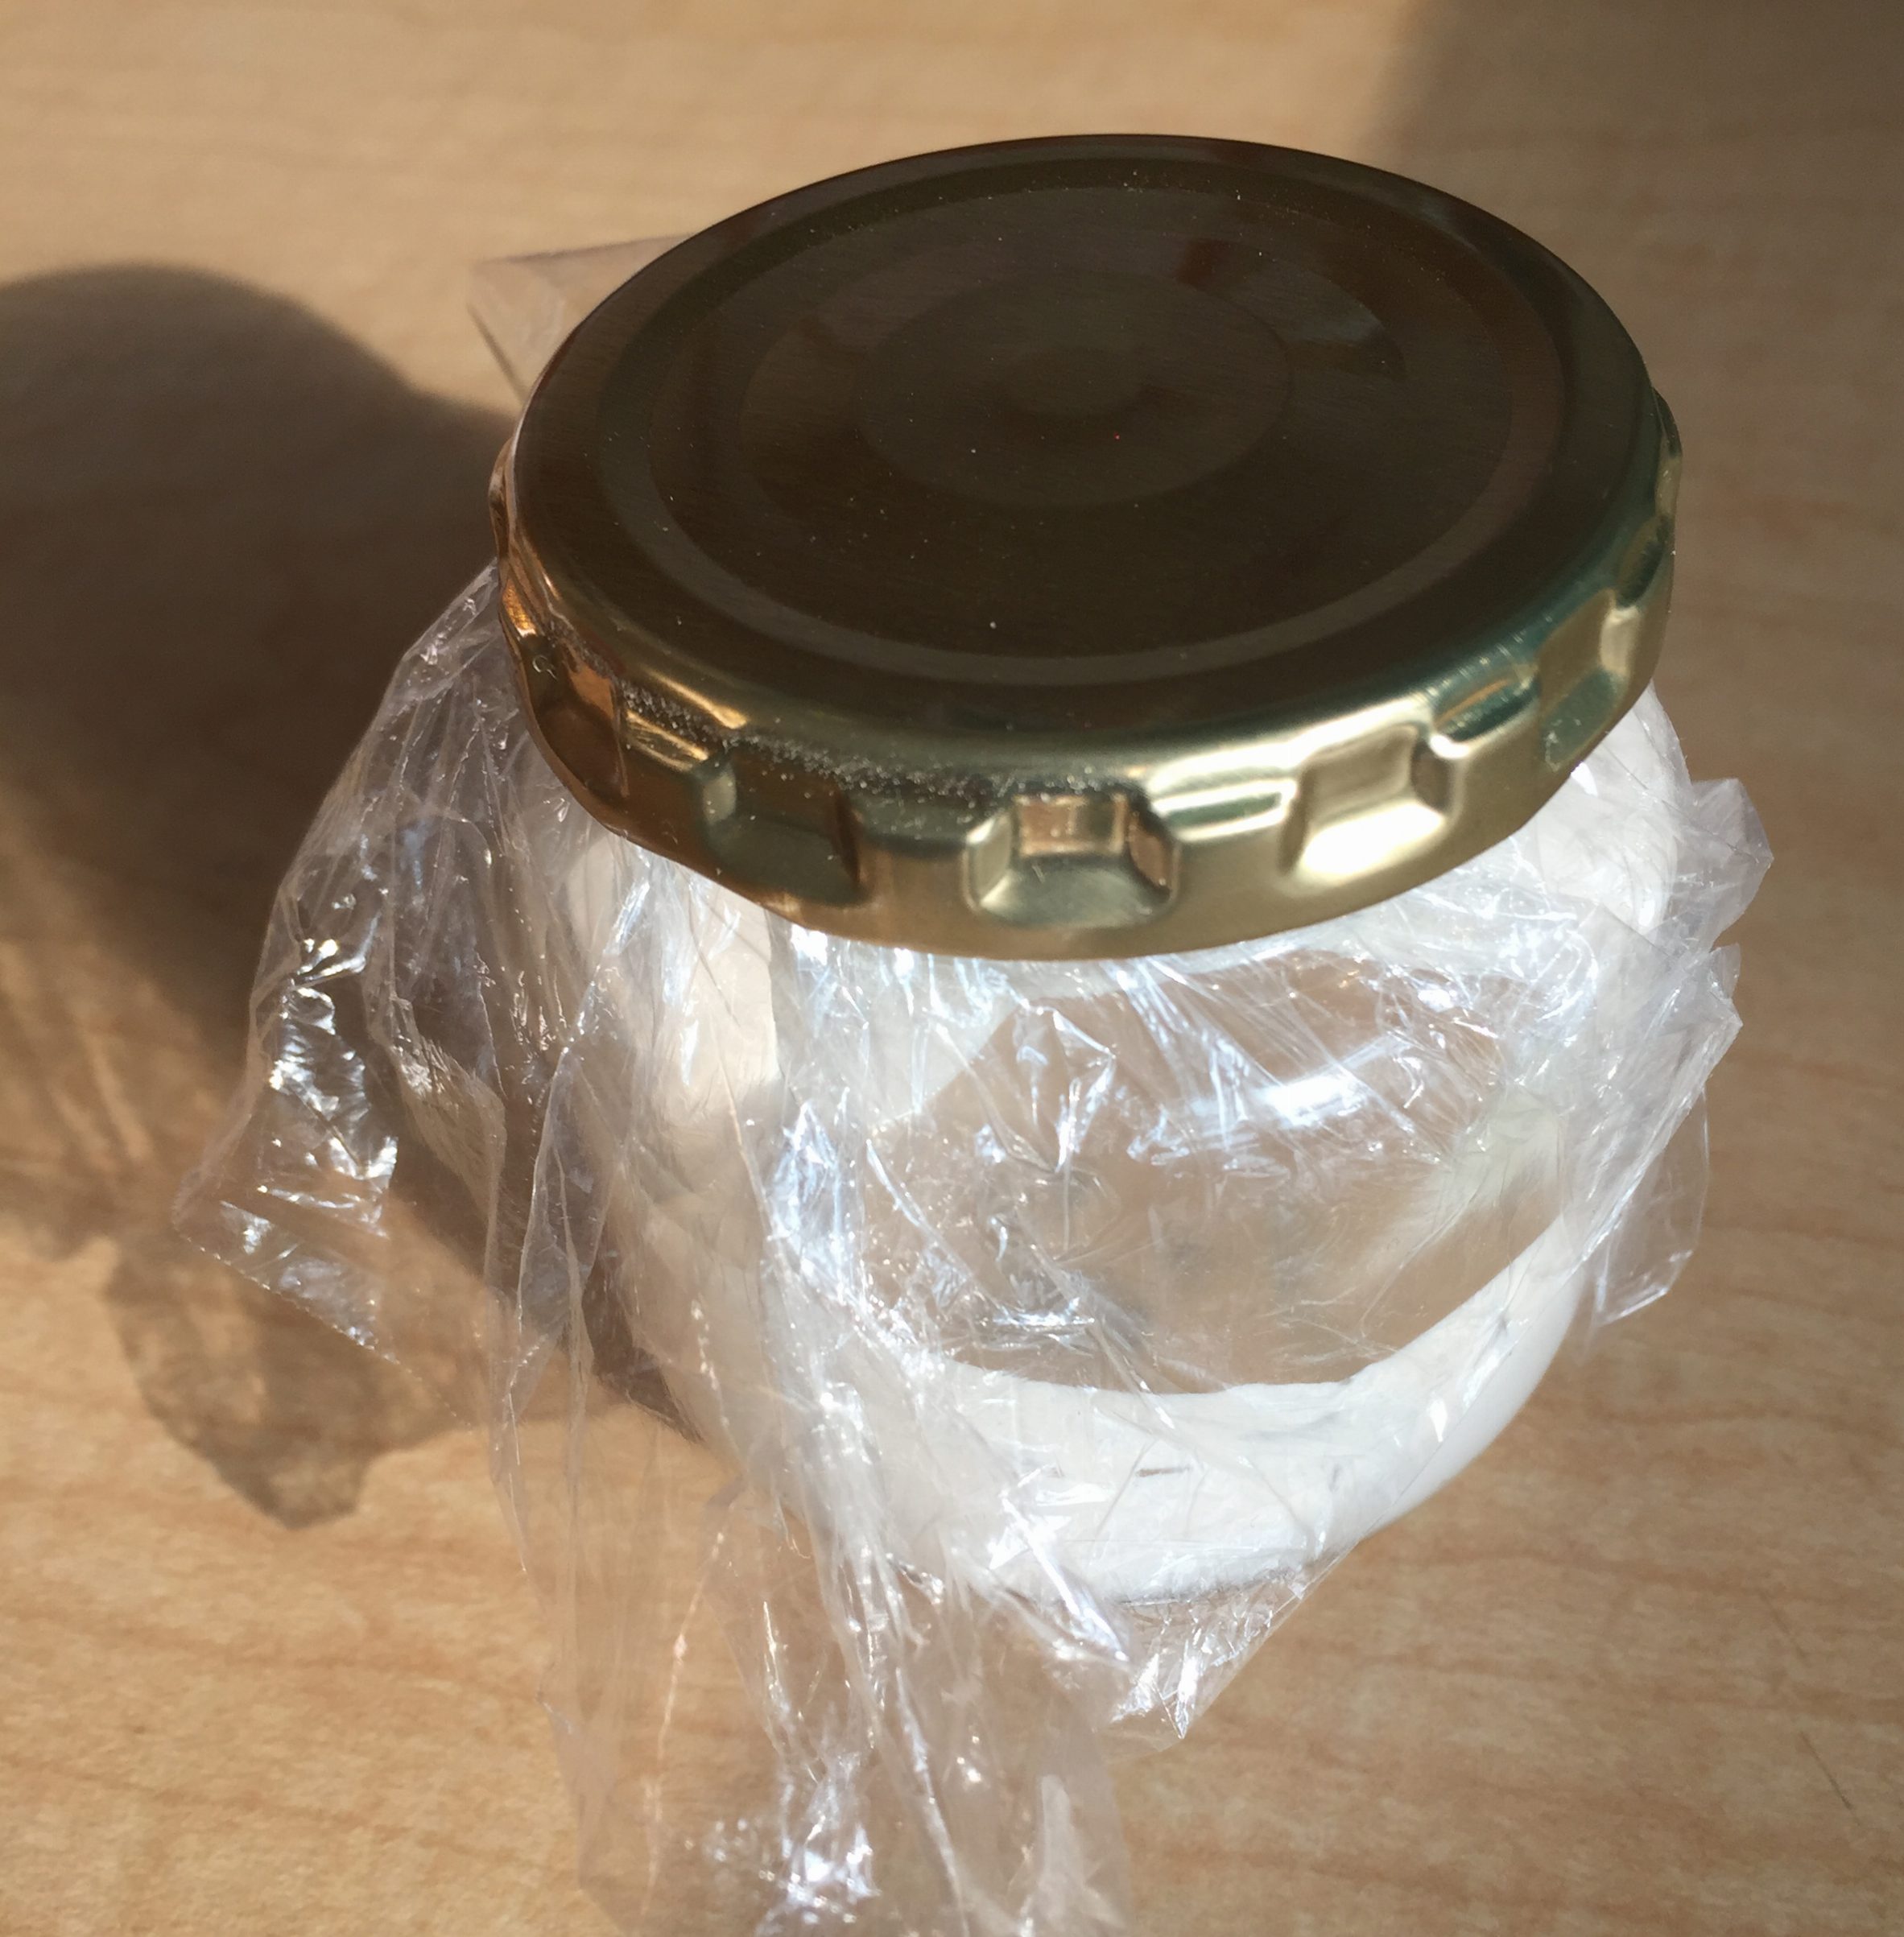
After applying a coat of baby oil to my foam model, I began coating it in thin layers of latex. Many many hours and many many layers of latex after, I successfully created a latex mould out of my module.

latex mould
After the latex mould was created, it was time for the duplication process to start with the use of plaster. After mixing the plaster powder with water, I poured it into the latex mould and waited 30-60mins for it to set before removing it.

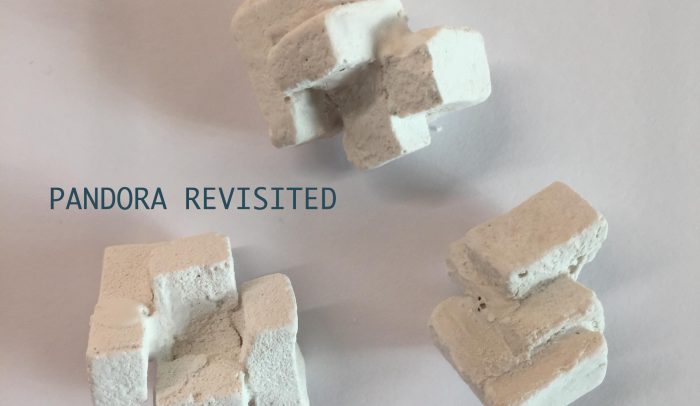
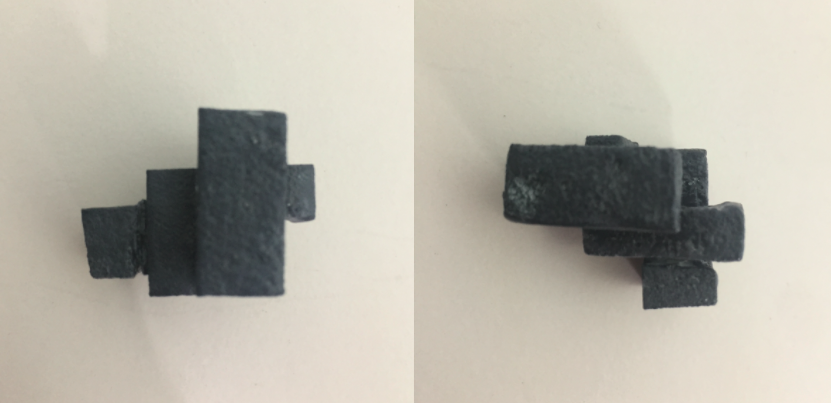
After repeating this process for 6 times, I ended up with 3 successful and 3 unsuccessful outcomes.
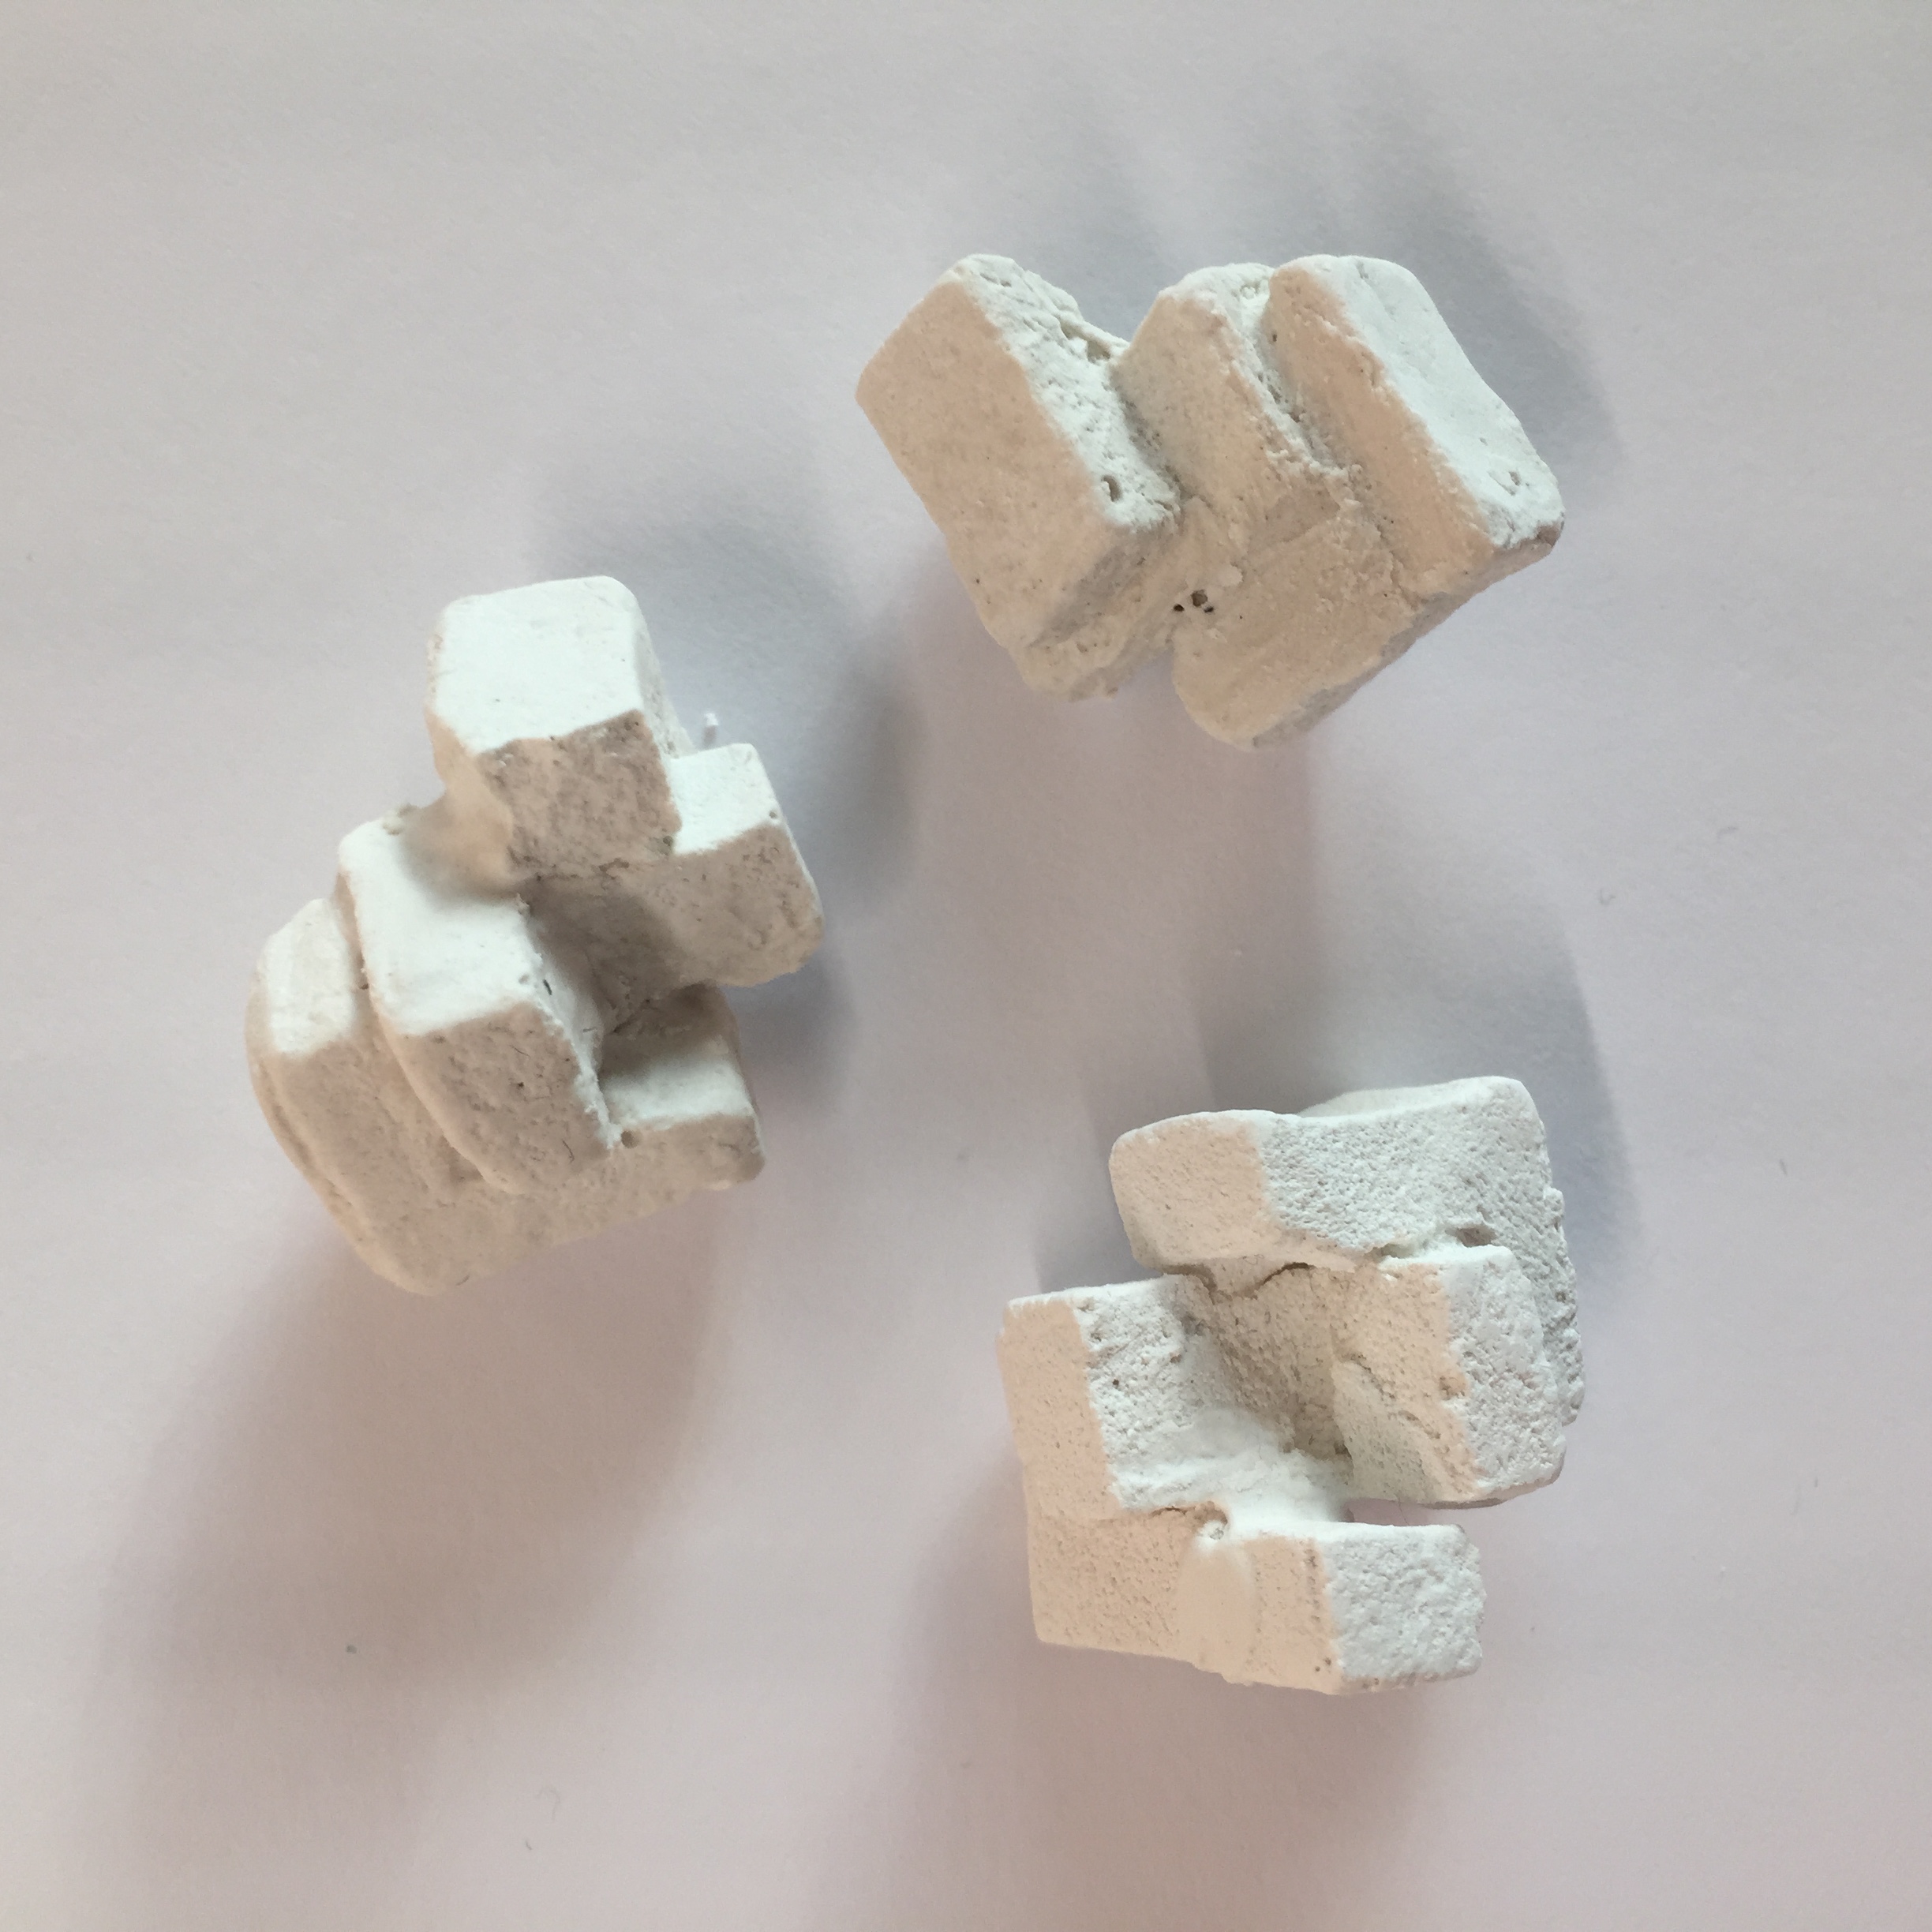
Successful attempts
Here are 3 of the plaster duplicates that came out alright. The surfaces were not the smoothest but they were still held together as one piece. The other 3, however, broke into pieces as I was taking it out of the mould. This occurred because the opening gap of my mould was quite small and hence I had to force the bottom parts out.
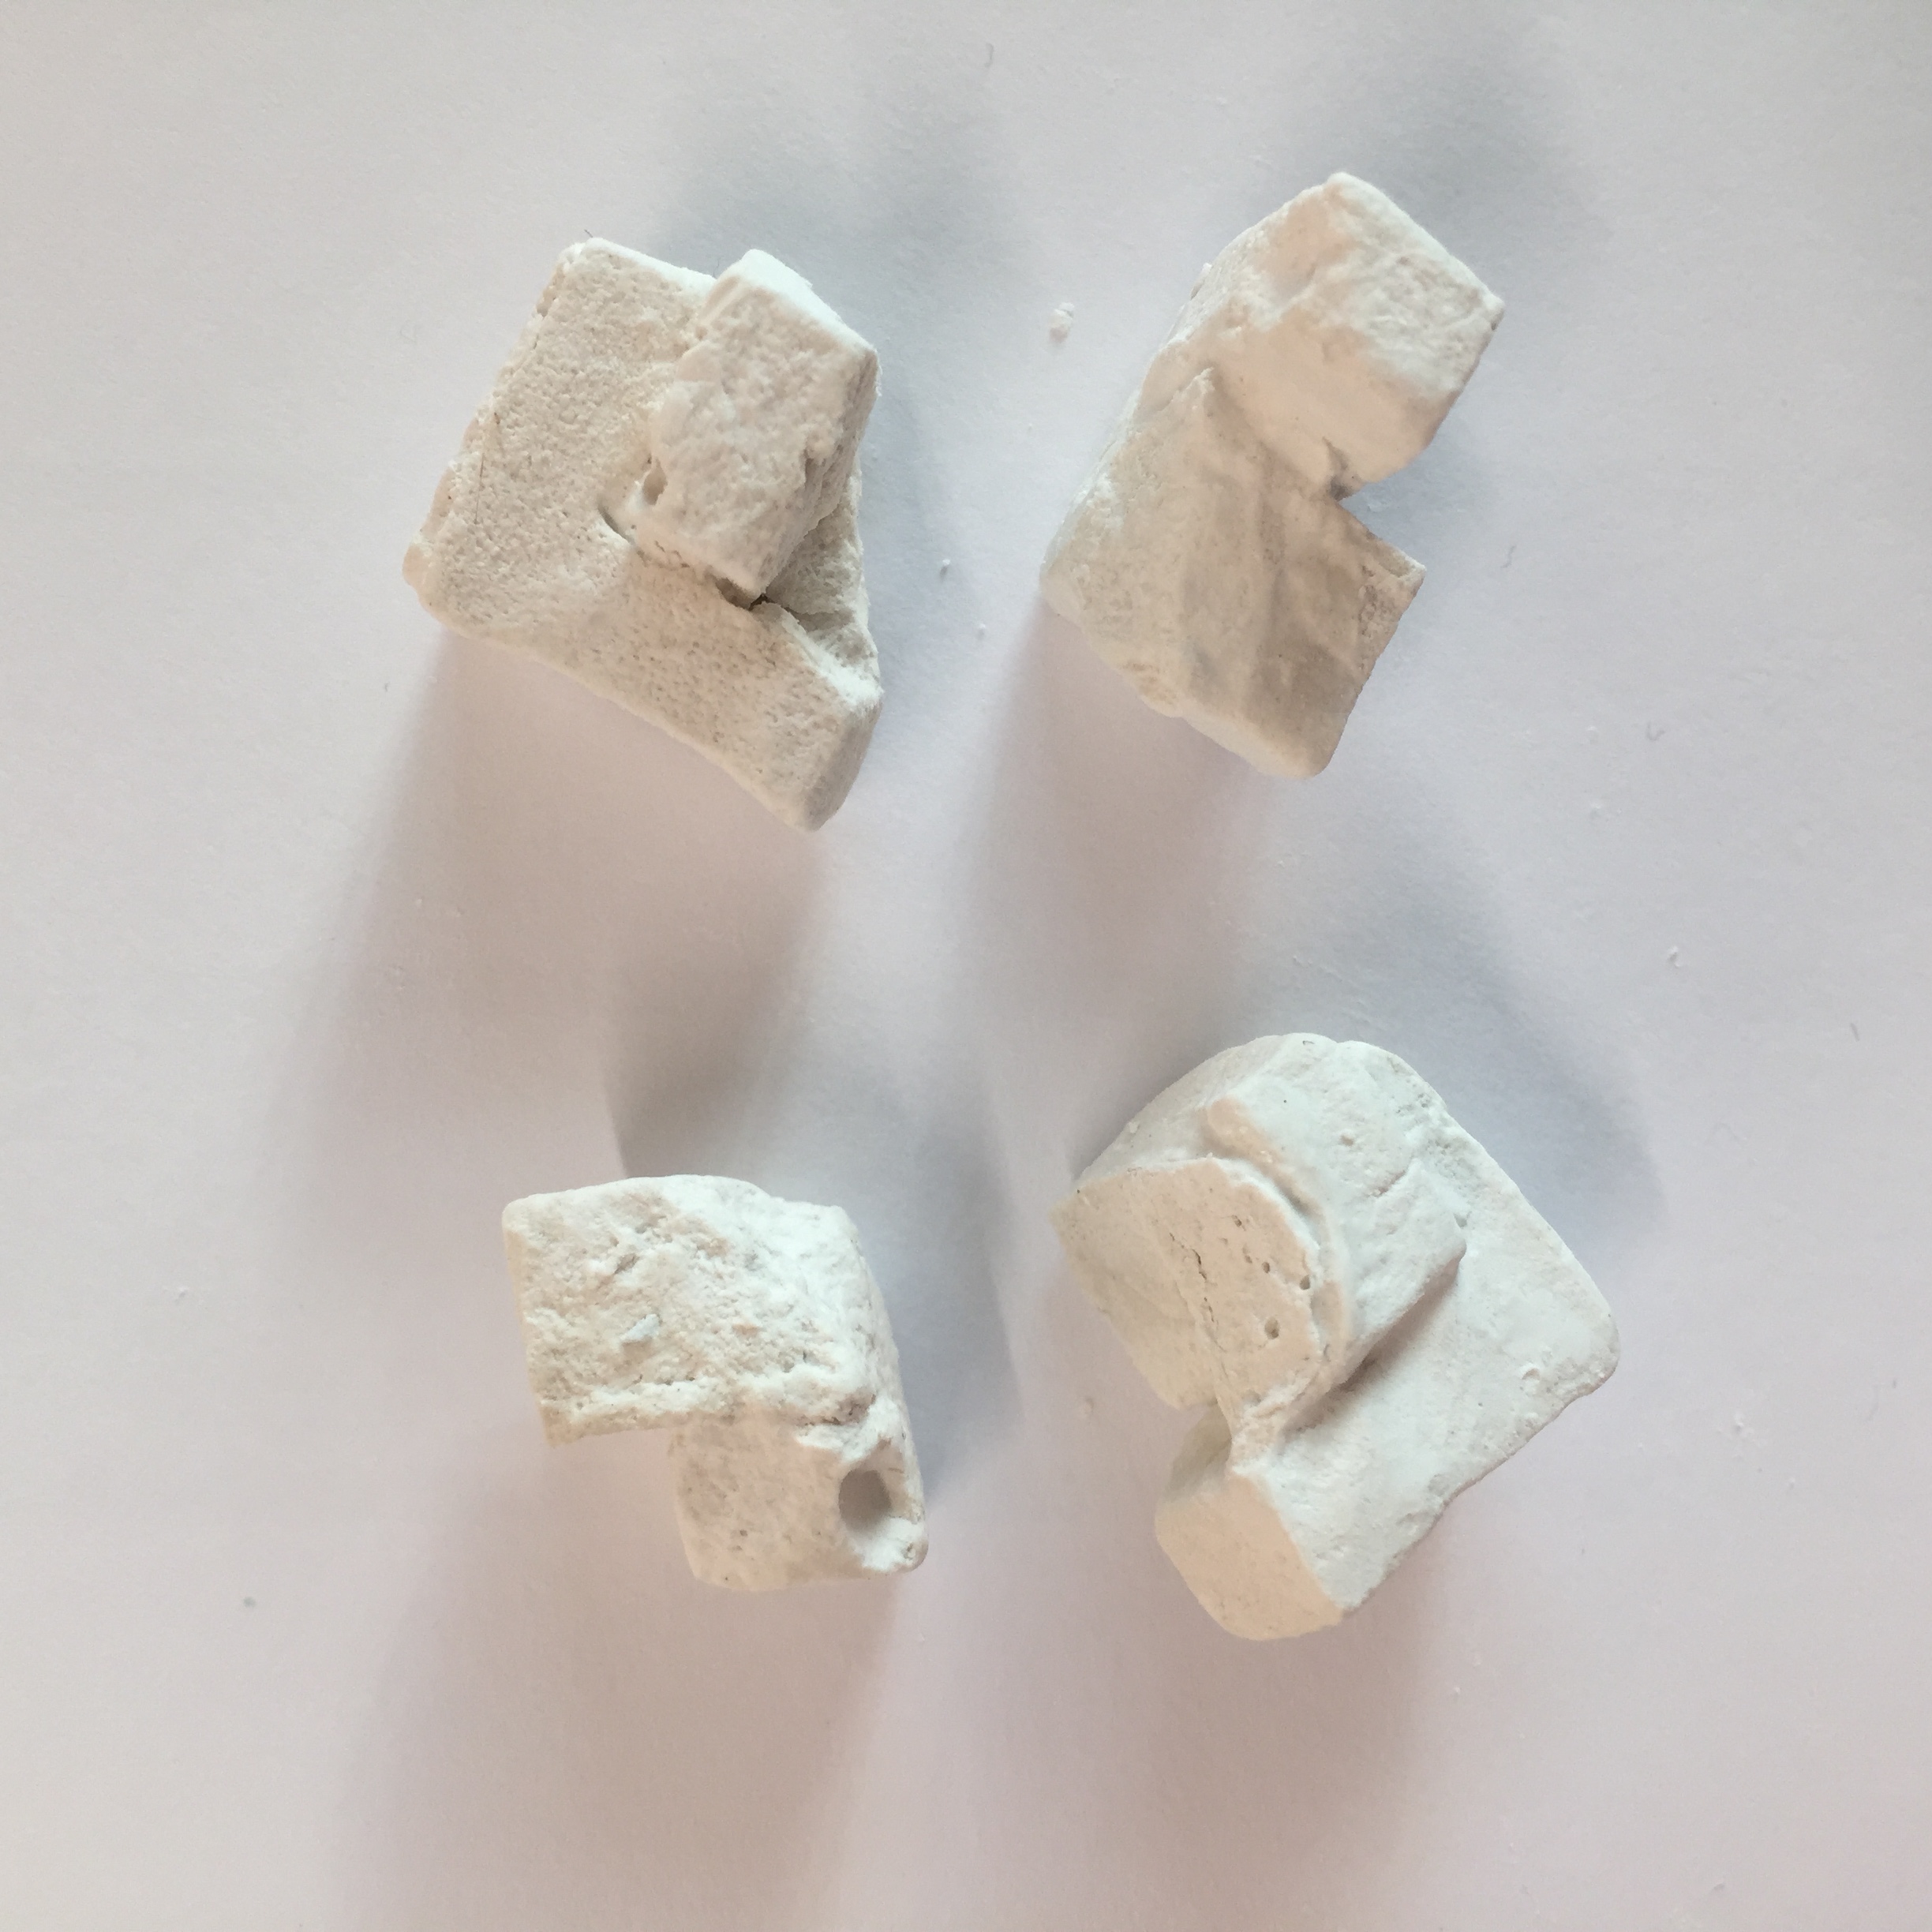
Unsuccessful attempts
Ice Module Arrangements
Arrangement 1
3 modules
Arrangement 2
2 modules
Arrangement 3

2 modules
Arrangement 4

2 modules
After multiple attempts at different arrangements, I found that it was actually simpler to notch together just 2 modules instead of 3.
Ice tray – Isometric drawings

individual modules
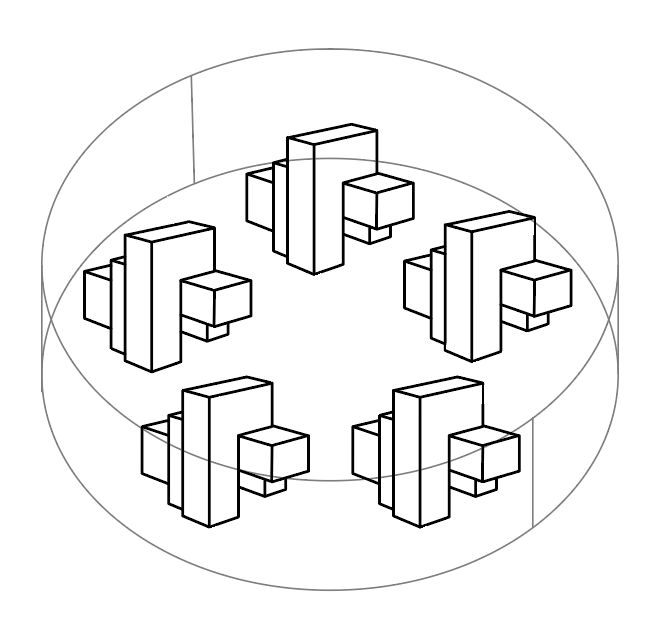
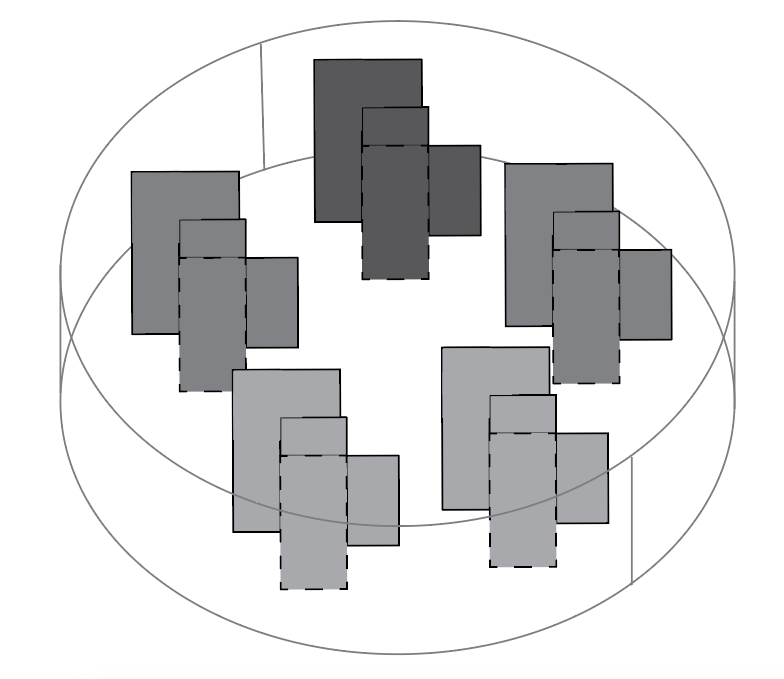
Final ice tray arrangement
This is my final arrangement for the ice tray placed in a circular manner so as to have them in an array manner.
Ice tray ~ Plan
Ice tray ~ section and elevation
Pouring in the Silicon
Although I did have my duplicates made out of plaster, I decided to use foam for the final pouring of silicon for the ice tray instead because the details were a lot smoother and neater with blue foam.
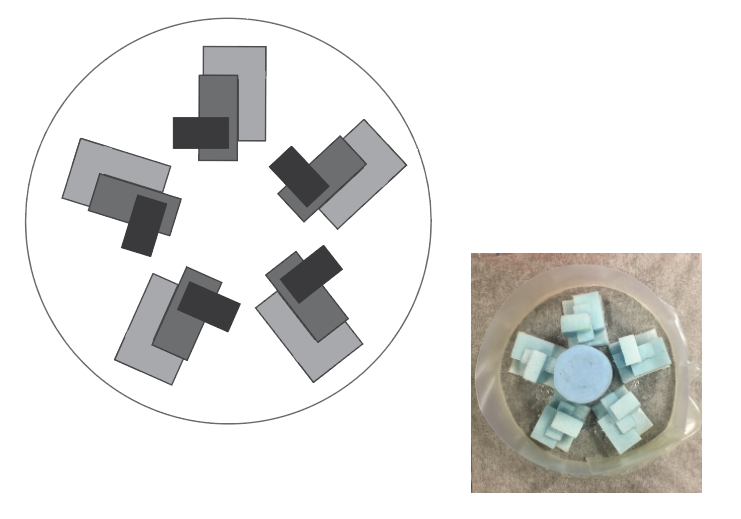
Due to the very angular structure of my module, it was going to be challenging for me to remove the modules from the silicon after it dries. In an attempt to fix this problem, I stuck each module onto a rectangular base, in the hopes of it creating a wider opening gap.
Rectangular bases
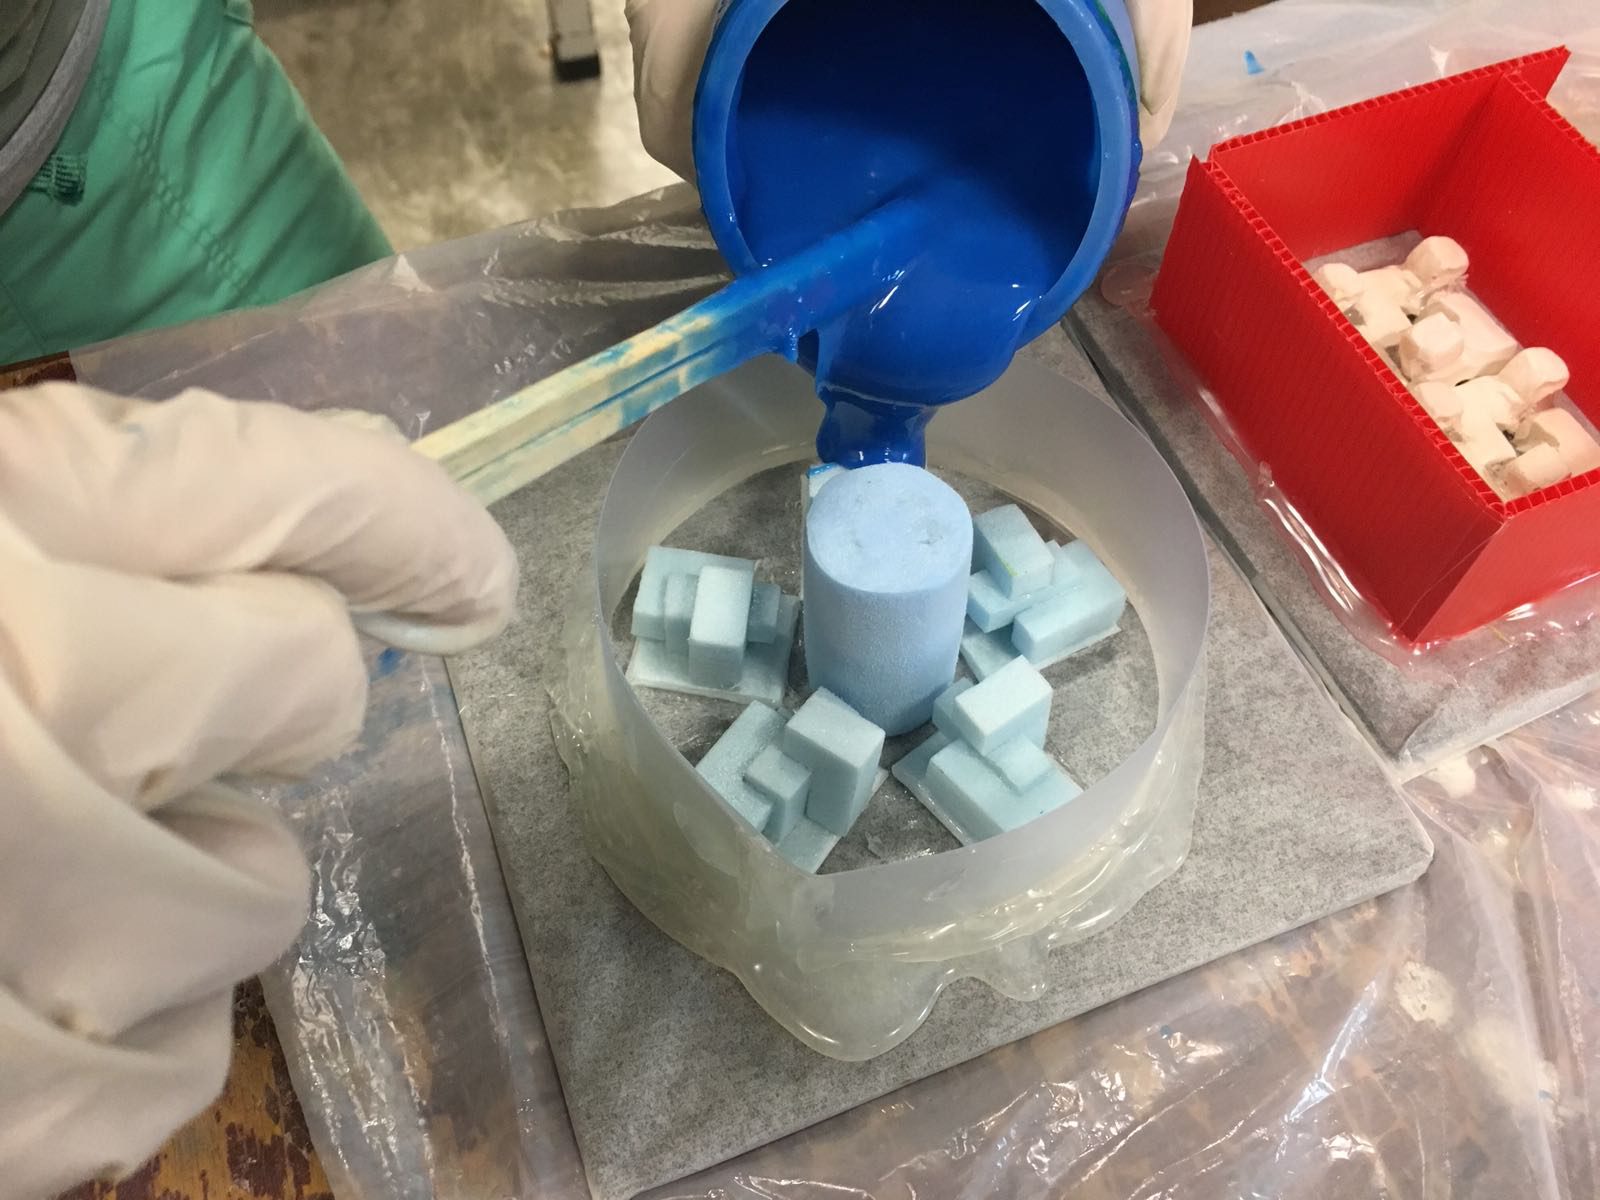
To save the amount of silicon wasted, I placed a cylinder block in the middle in order to occupy more volume.
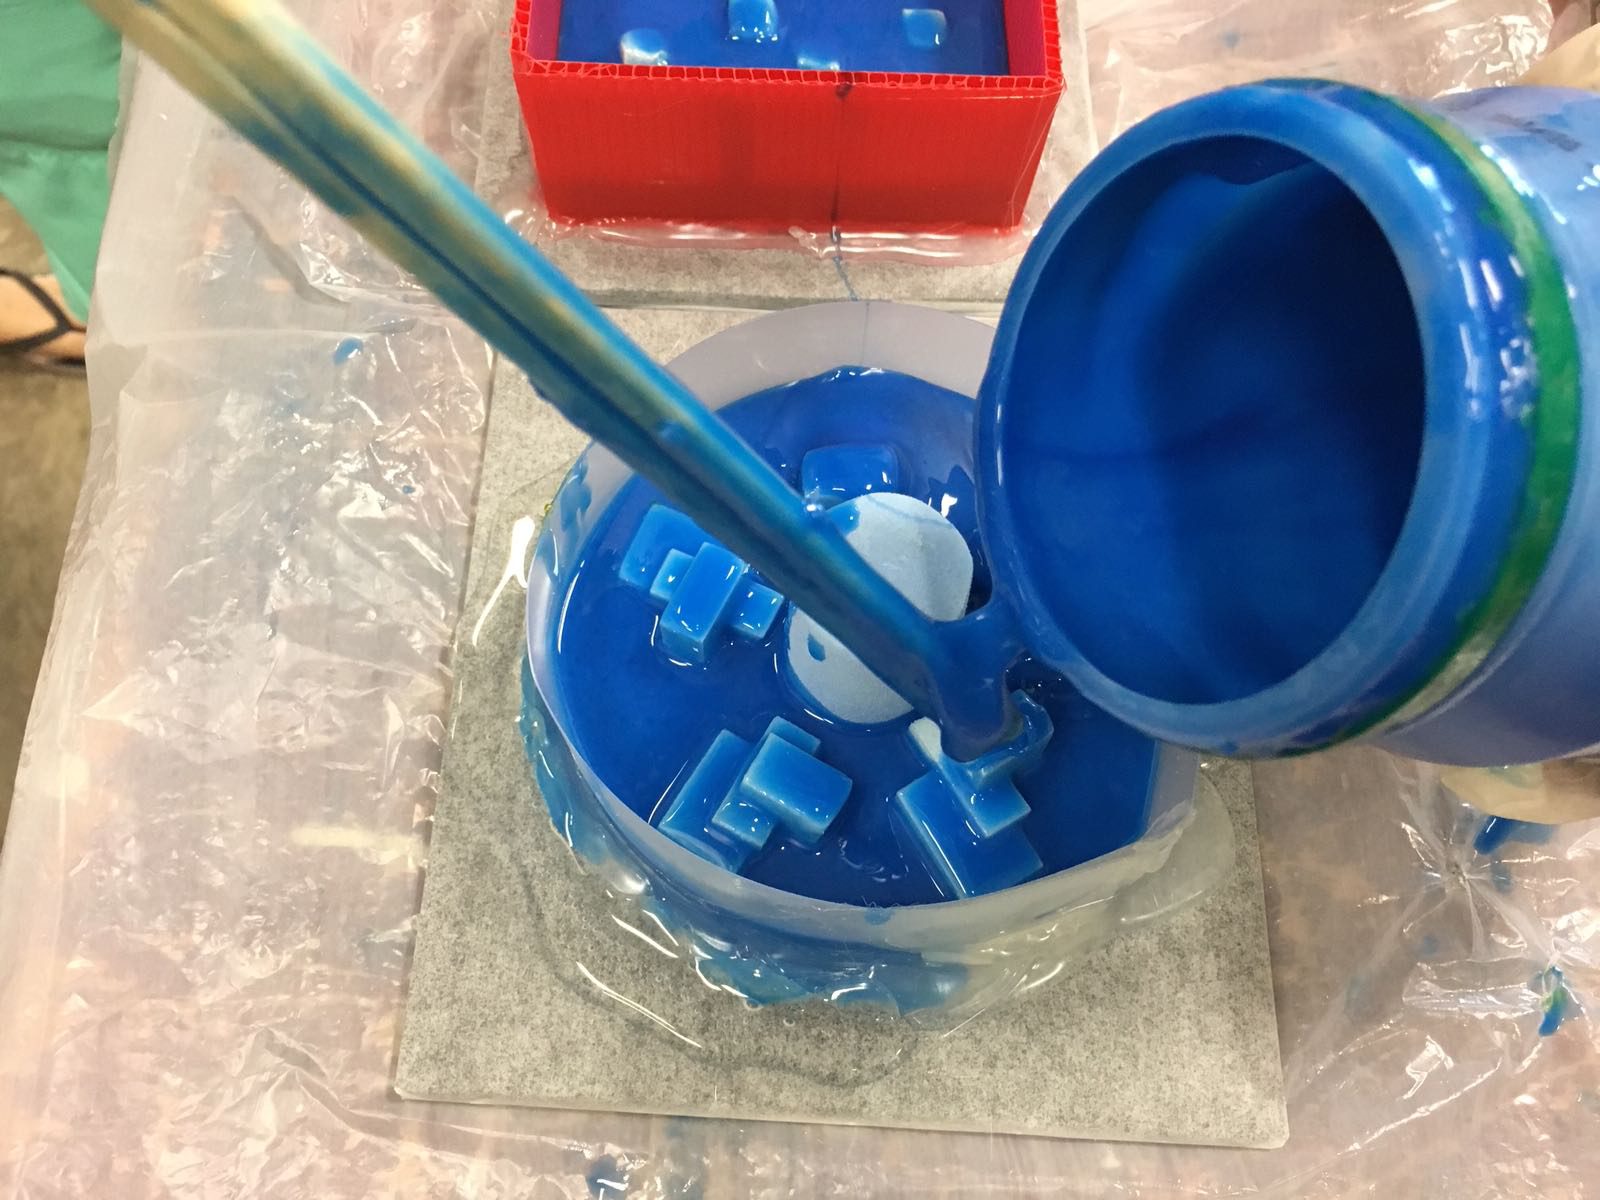
Unfortunately soon after the silicon was poured, two out of my five modules began to float up. The cause of this might because the glue used to stick the foam down hadn’t been dried enough yet, or maybe because the weight of the silicon between the voids in my module lifted them up. I was glad that I still had 3 other modules to rely on 🙂

Ice Making
Coming back to my silicone mould a week after it was poured, it was strangely still not completely dried and hence I left it for almost another week. Unfortunately, it still wasn’t completely dry, especially the areas around my modules.
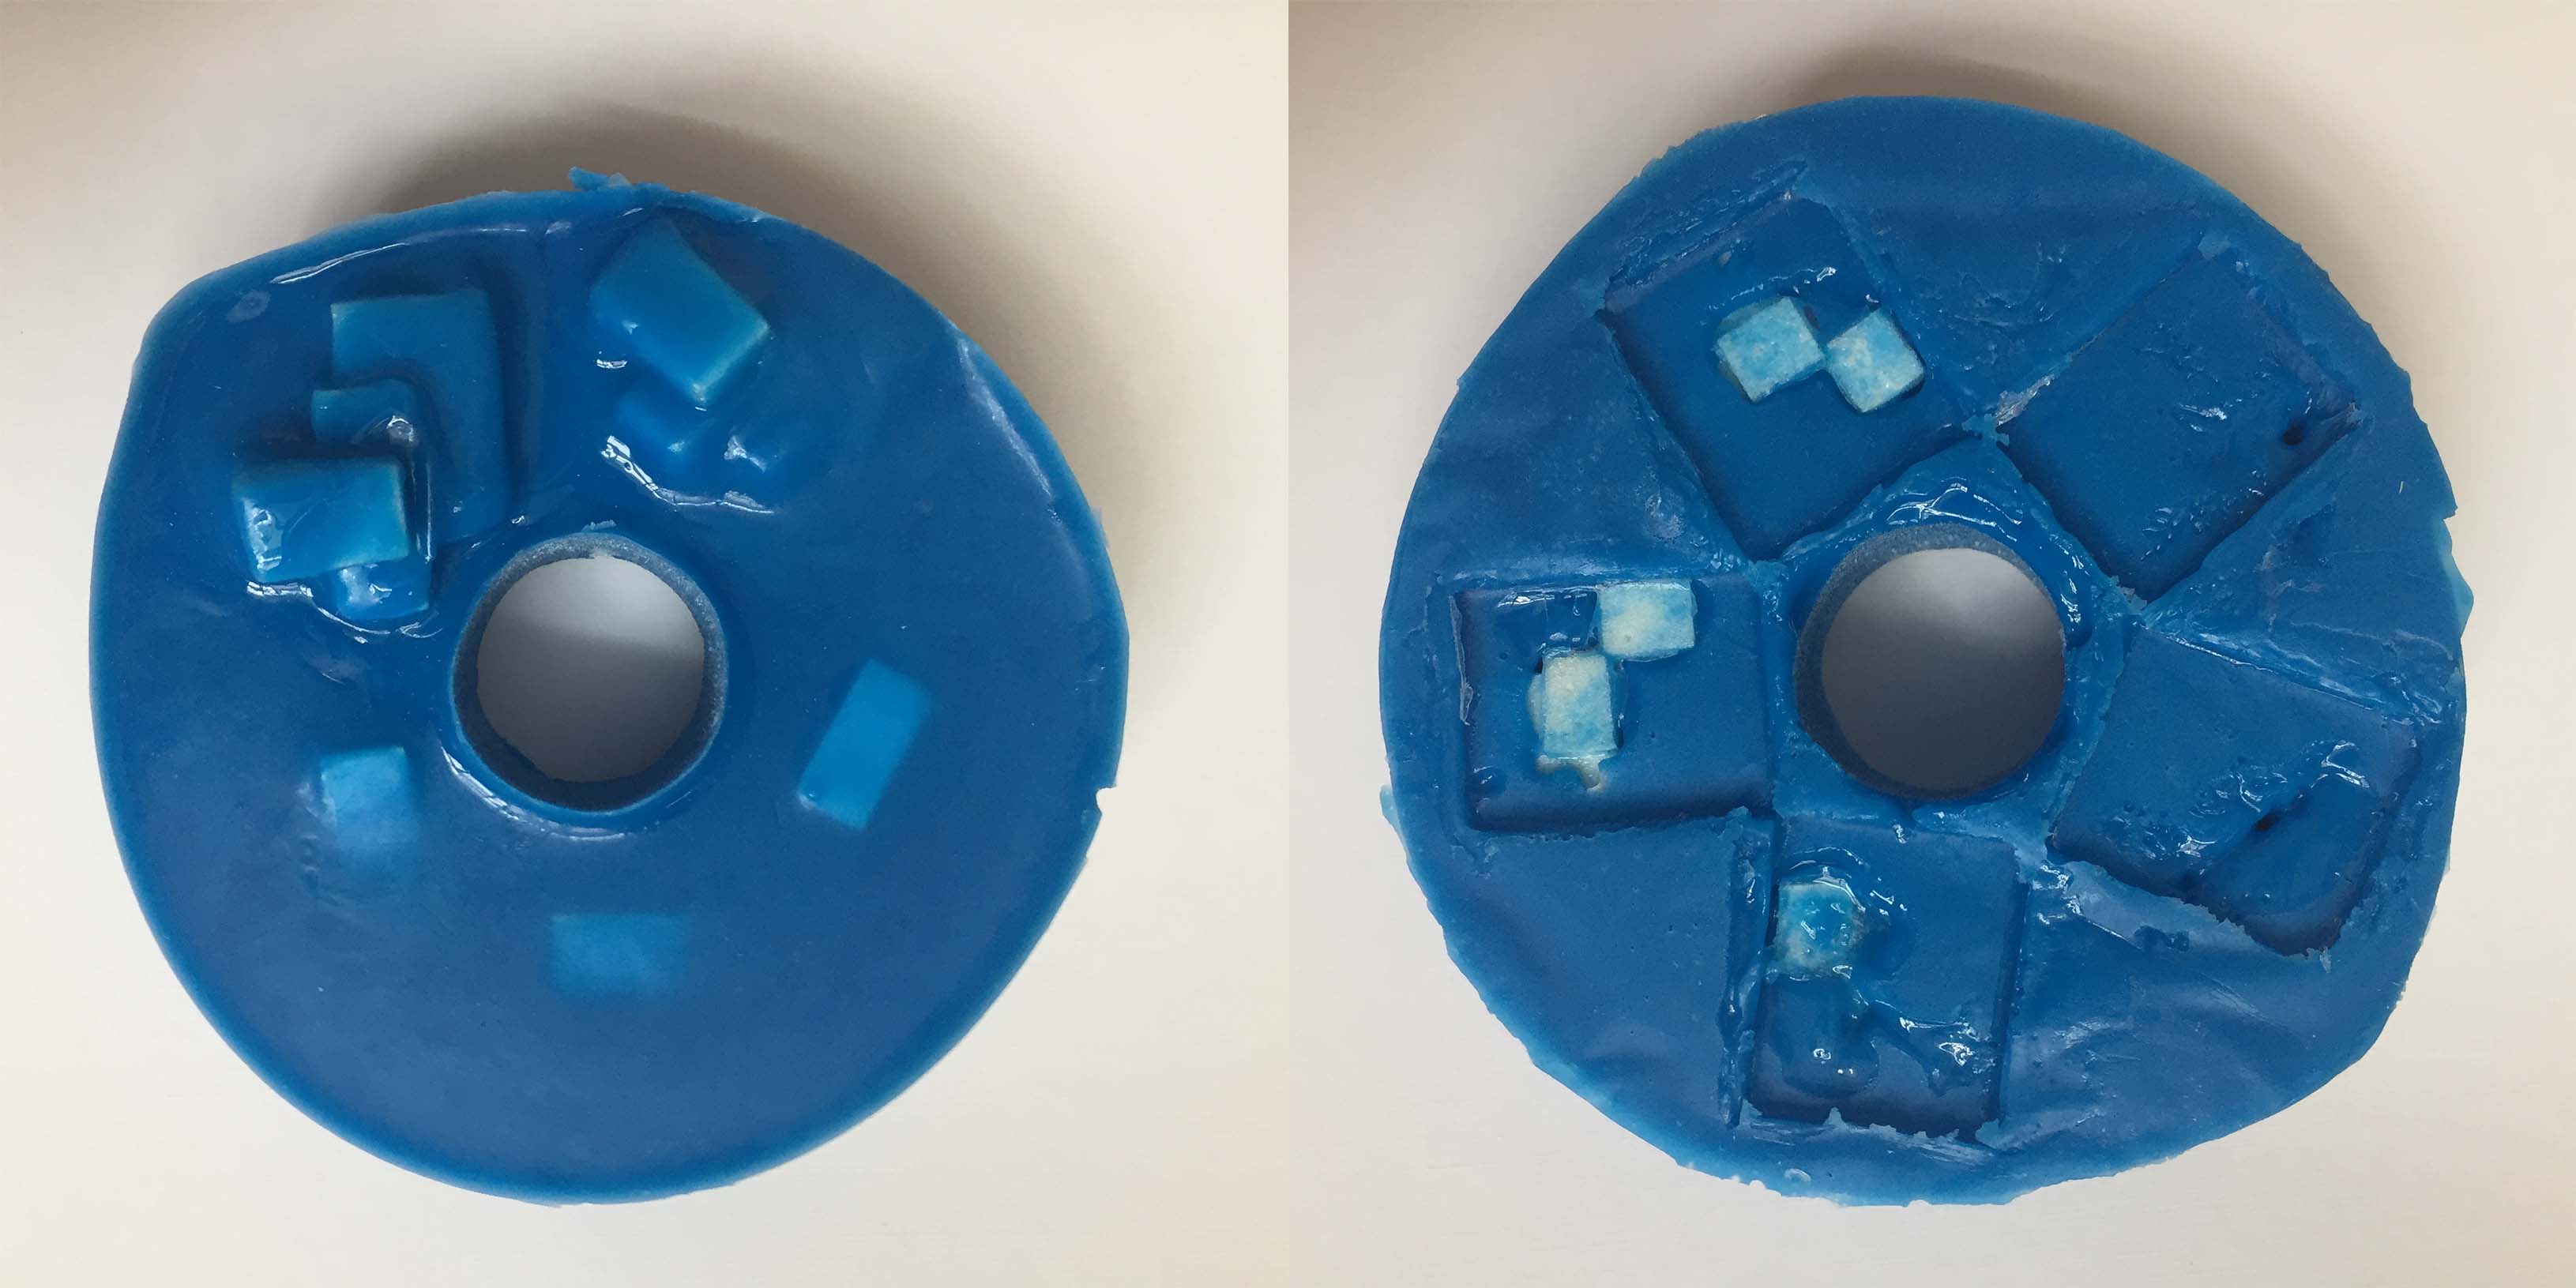

shiny bits = still sticky
Nonetheless, I proceeded to try making some ice.

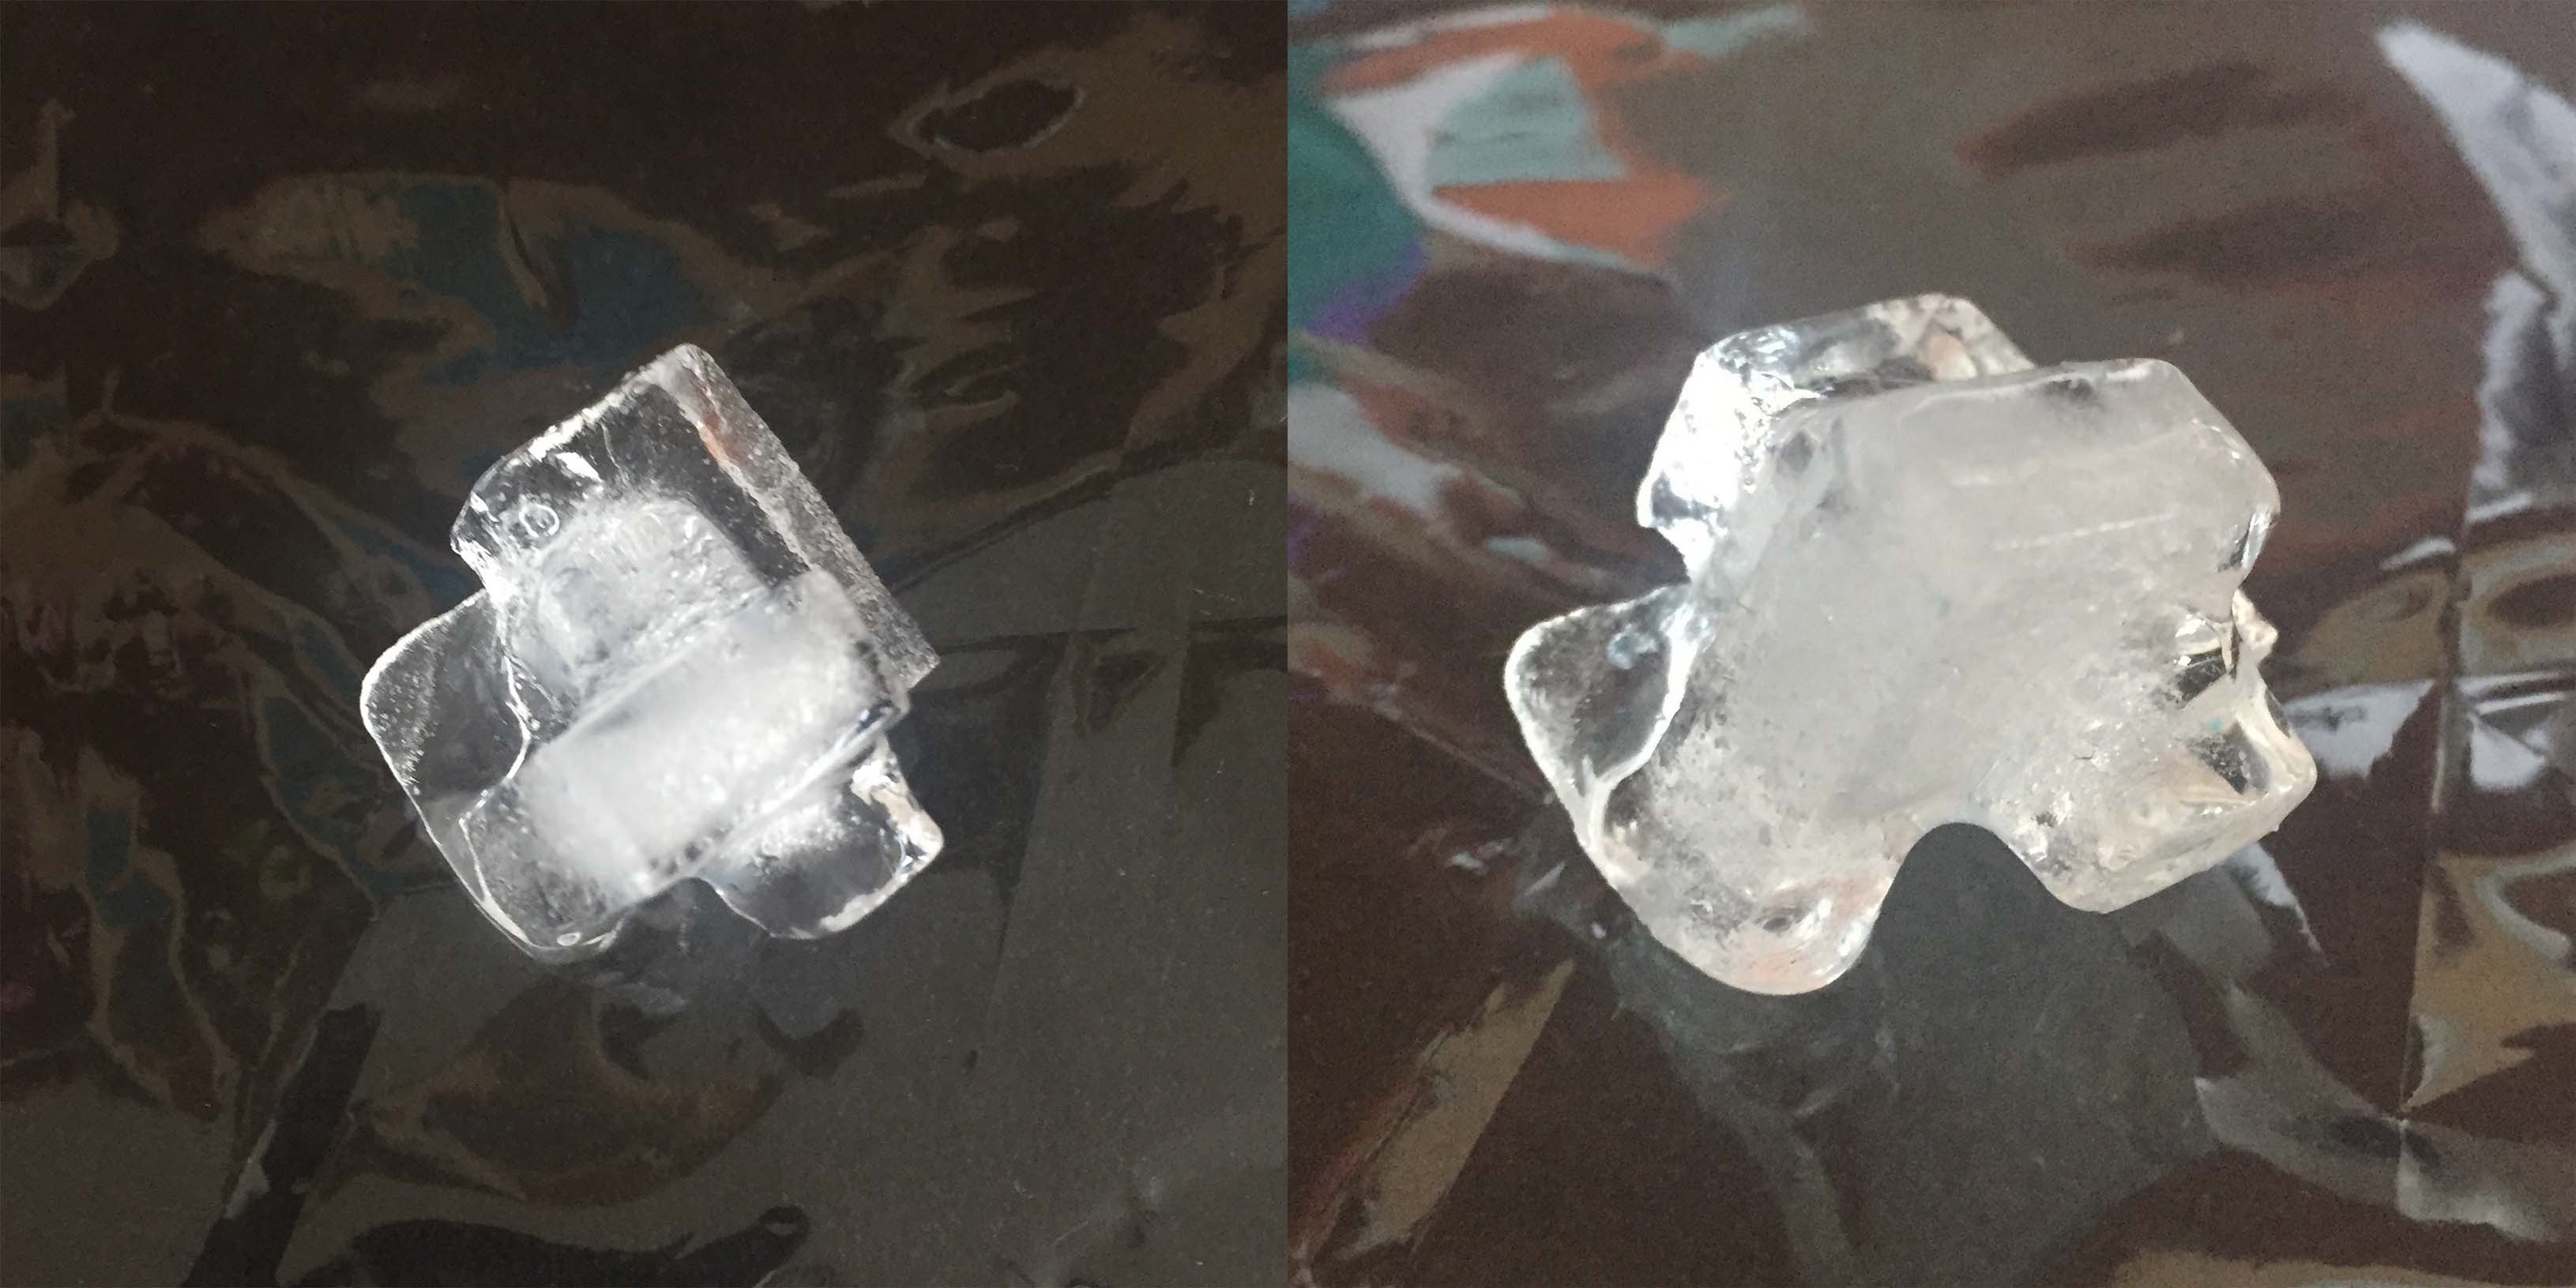
I would say that the overall structure of the module turned out pretty well except that some edges started to curve as it melted. During this first round, no silicon was transferred onto the ice. However, during my second round, the non-dry silicon transferred onto the ice cubes and hence it melted a lot quicker as I tried to wipe it off.
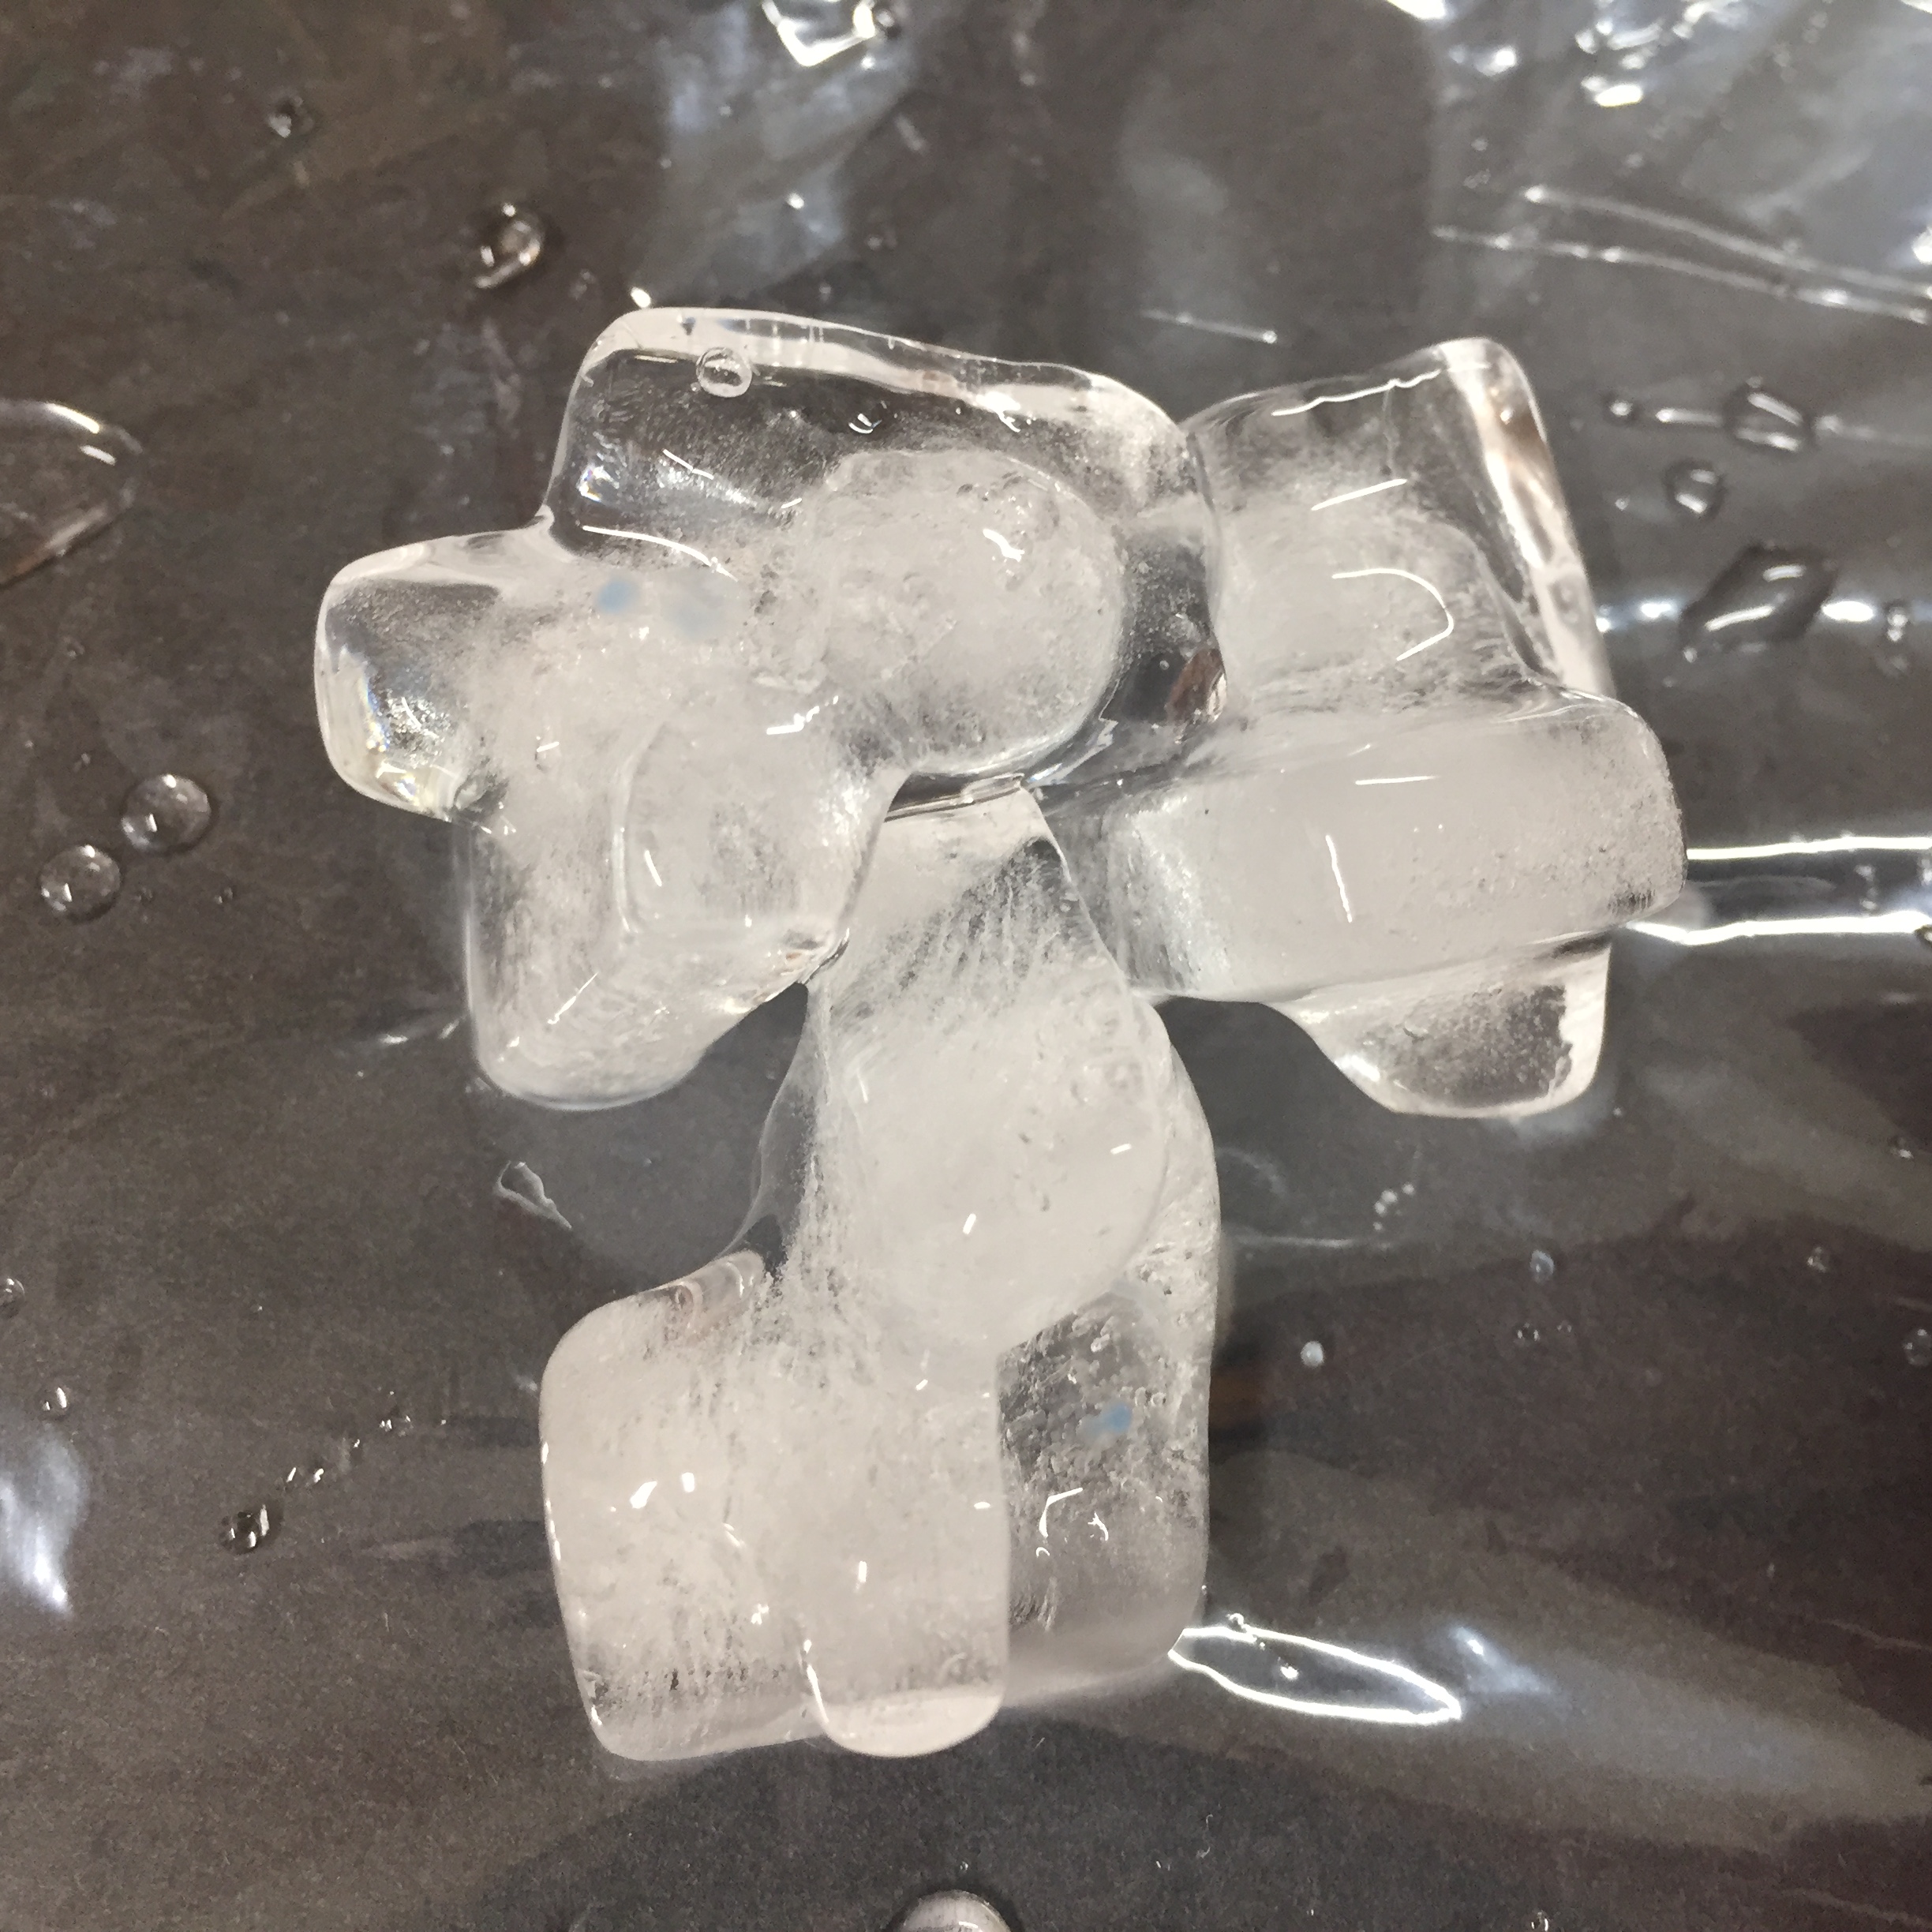
notching the individual cubes together
Despite some rather tedious process this project entails, I had a lot of fun throughout it all and I worked with mediums like silicon, latex and plaster which I have never experimented with before 🙂 A lot of trial and error went into this project which definitely taught me about thinking ahead for the success of future procedures.

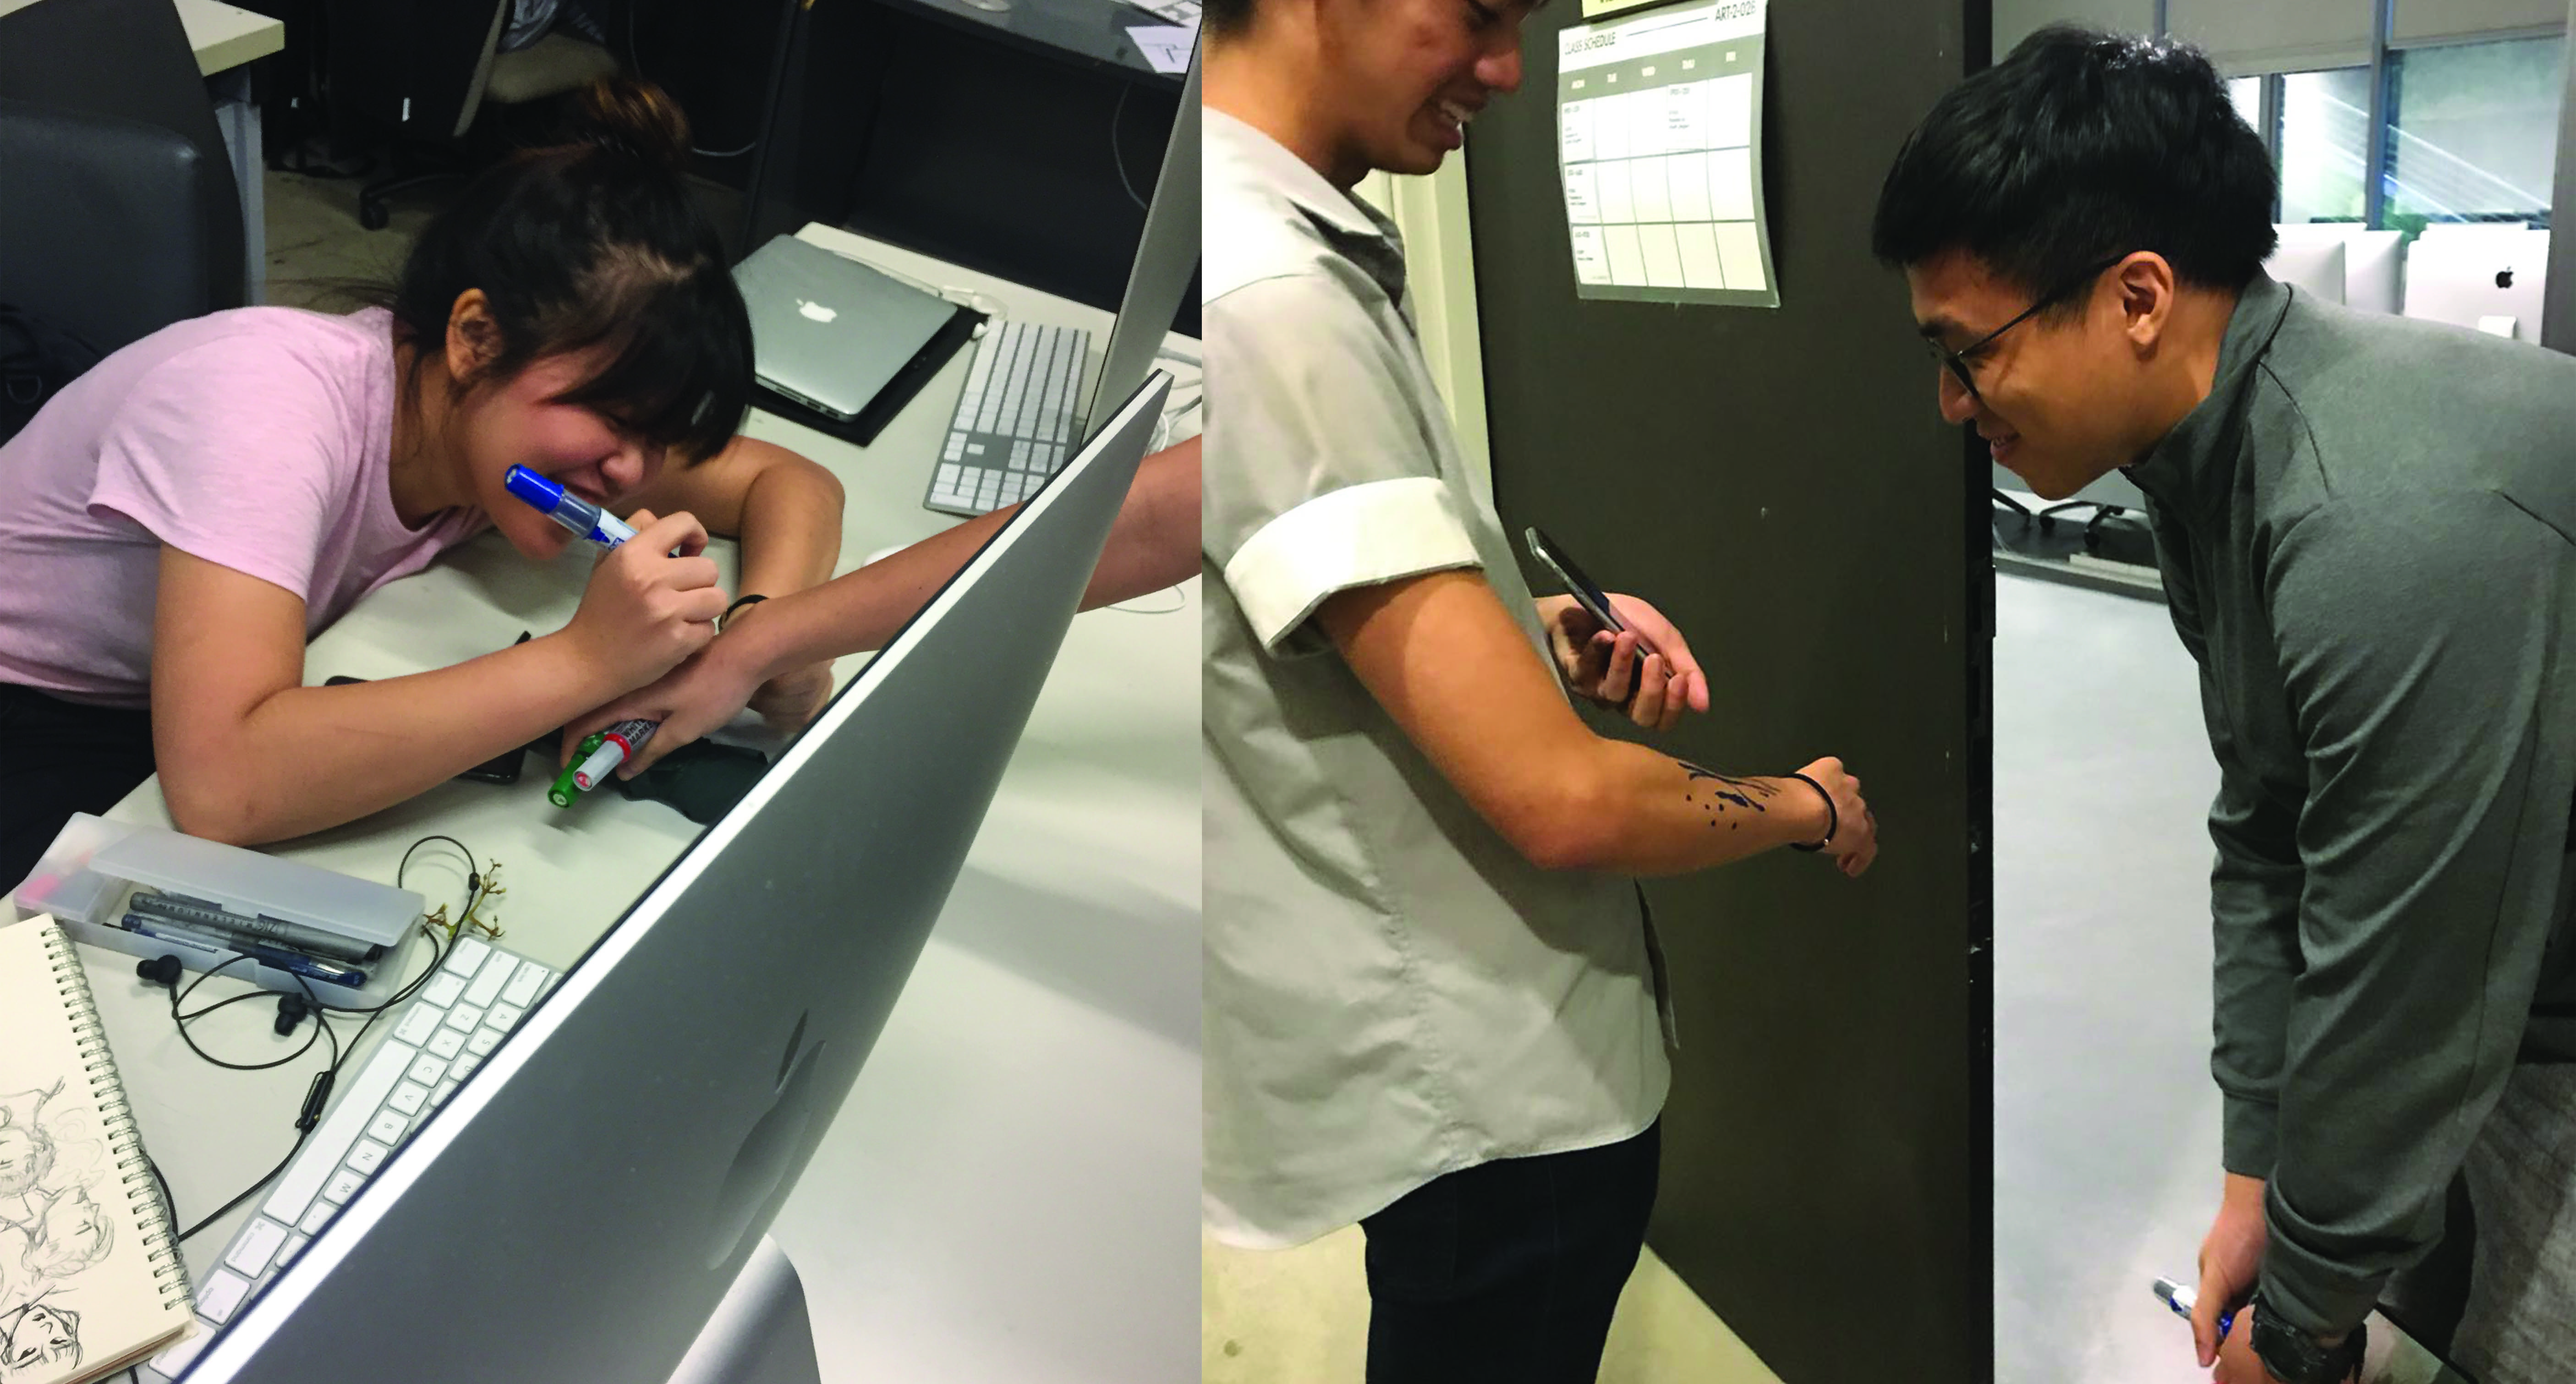
Drawing on each of our arms respective to the images that we had
For our micro-project 2, crowdsourced time-based art, the direction that my team went for was to gather a collection of visual reactions through simple, on the spot drawings. With a random image on each of our phones, we set out to people within the vicinity of ADM to ask for their participation. With the limitation of three markers, in the colours red, green and blue, they had the freedom to draw anything they wanted in reaction to the images we showed them.
This crowd-sourced project includes great qualities of D.I.W.O because it involves creation through a community of people. Unlike works that are created by a single artist, a collective artwork enables participants to possible inspire future participants. It allows for constant growth and redefinition of “the final product”. Instead of looking at the final outcome as whats valuable, the process is what tells a story.
“Everyday people are choosing to find their own examples of what they consider to be art, rather than just reading approved promotions by the mainstream press”
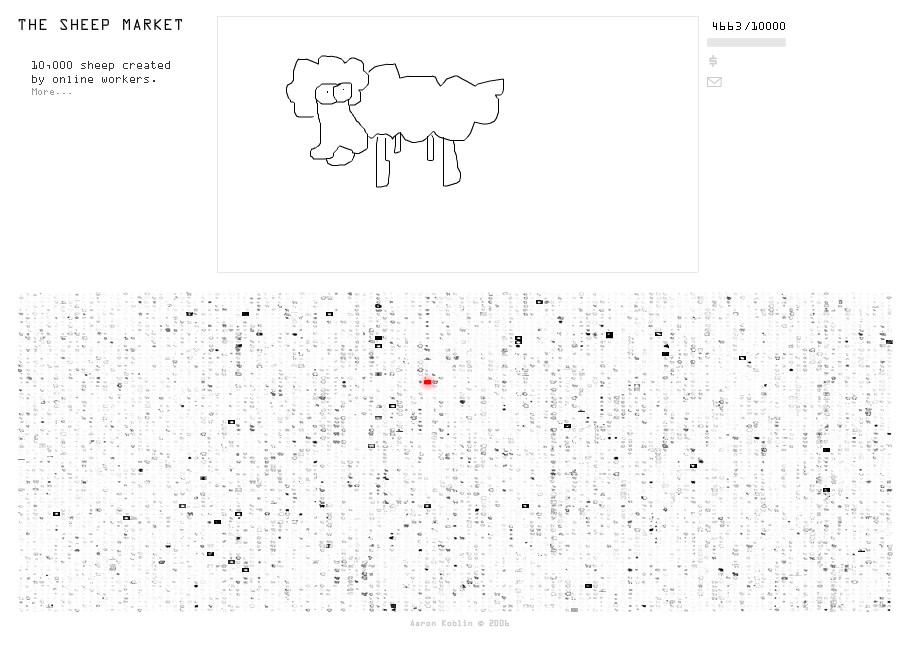
the sheep market
Similarly to the sheep market crowdsourcing project by Aaron Koblin, our project also involves the collection of drawings except not done digitally. Koblin’s work shows an example of crowdsourcing works breaking the boundaries of “art” and “artists” as anyone can create art. If our group possibly chose our images more strategically, our drawn outcomes could have been more unified.
Project 4, poetics of time requires us to create a final project that expresses one of the categories of time. Since it could be created with any medium of our choice, I decided to work with film and record a video. Below is a copy of my first very first project proposal draft. (Explanation of changes below!)
Throughout the start of this project, I really struggled with the ideas that I had and was indecisive about what I wanted to focus on. However, I did kind of have a filming/editing style in mind which was inspired by the artists in my project 4 research post. For the filming and editing, I knew that I wanted it to be quite raw in nature, capturing the moments itself without the input of additional background music or visual effects.
ORIGINAL IDEA
As seen in my original proposal, I wanted to create a video that expressed the inverse of time. Since there was no focus initially, I then thought of focusing on human behaviour/actions. After consulting with Lei, my plan was to film very close up shots of people in their natural state and try to capture the moments of sneezing, coughing, etc… With this focus, I proceeded to take test shots in the public space of a mall. Below is a compilation of some test shots.
During the filming process of these test shots, I realised that it was too challenging to capture the moments of natural human behaviours that I wanted; especially in a raw setting because the moment is unpredictable. It was also very awkward for me since I was trying to film strangers without them knowing. I also could not film them to the level of closeness within a frame than I intended.
FINAL IDEA
Moving on to another idea, I thought of filming something that could mark the end of this first semester and the new chapter in my life of staying at university. With this, I aimed to create a video that documents a day in my life specifically spent at hall. I took the DSLR around with me throughout the day to record everything and compiled it into a video filled with many short clips.
“day in the life of” // project 4 final outcome
falls under the category of edited time
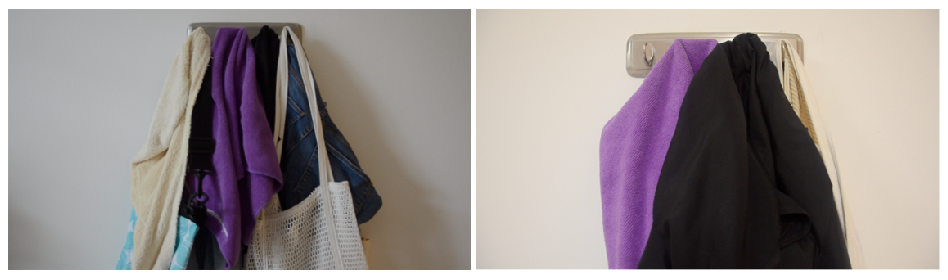
From morning to night, this video includes repeated clips of my window and the view when you step outside the door to show a progression of time throughout the day. Other repeated visuals included my shower basket, my bed, the view from when I am laying in my bed and the wall hook on my wall where my towel and shower bag hangs. Time stamps were also included to mark the time of day.
day // night

throughout the day
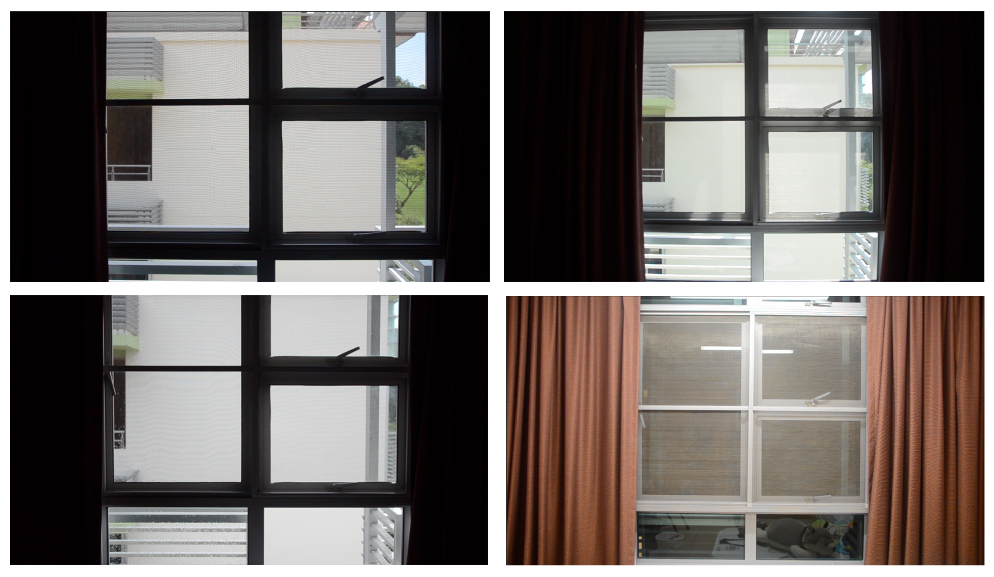
throughout the day
To sum up all the clips:
| Morning | – waking up – ceiling fan – window – brushing teeth – starting work |
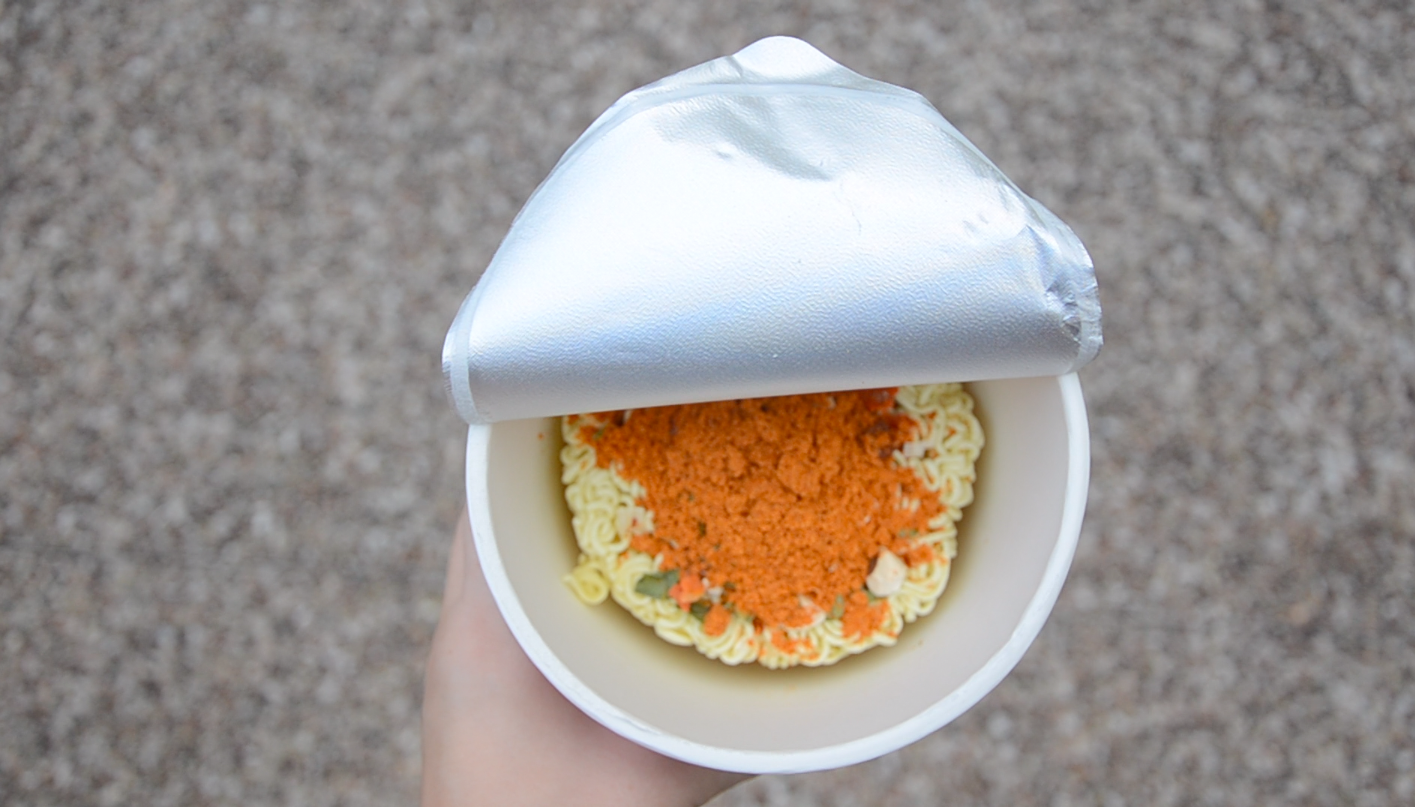
| Afternoon | – window – afternoon sun – cup noodle lunch – cooking cup noodle – enjoying cup noodle – back to work – nap time in the evening – waking up |
| Night | – receiving a dinner invite – window – heading downstairs – having dinner with friends – spending time with time – heading back up – shower time – watching tv shows/scrolling social media – lights out |
Throughout the filming process, I held the camera still in a single position without the use of a tripod for the effect of a presence behind the camera as well as to portray my day through my own eyes.
A few clips that I had to re-film another morning were the clips that turned out a little too dark and of bad resolution due to the lack of light. Initially, I had also filmed them out of focus to mimic the effect of me not wearing my glasses but it turned out even worse with the lack of light.

Out of focus // in low light
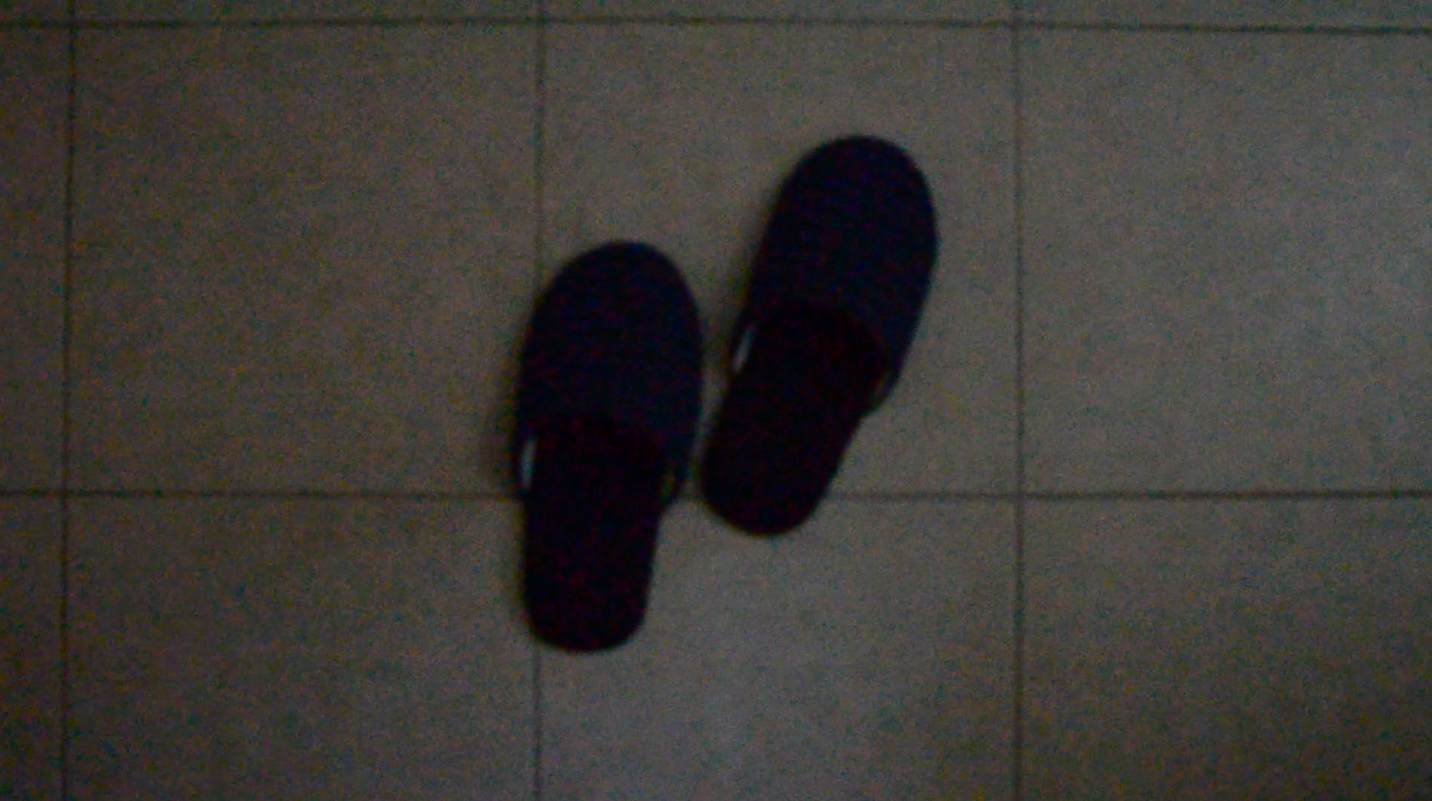
Out of focus // in low light
The audios present in the video were all ‘natural’ sounds that were present in my surrounding environment itself. I wanted to really capture the presence of motion and movement through the things around me that are often missed and overlooked hence for the lack of speaking and minimal movement of the camera.
As for the editing, I made decisions about altering the length of each clip when piecing everything together. During parts where I captured subtle motions such as natural movements and reflections within the frame, they tend to appear longer in order for the audience to appreciate the moment.
To sum up project 4, I really enjoyed experimenting with this style of filming and editing that I have always wanted to try. I am also glad that the outcome of this project documents this time in my life which I can look back on in the future. In the context that this video was shown in class and to an audience that is probably experiencing similar routines currently, I hope to have created something that feels familiar in some ways as they can relate to it.
Lastly, I had an amazing time during our last critique session admiring everyone’s amazing creations and development of their own styles 🙂
In different ways, space and time are organising principles of all art. In the context of films, space and time allow for the inclusion of motion. In the late 19th and early 20th century, the development of film medium led to a great influence on changing perceptions of space and time.
Measured time
Experienced time
Edited time
Biological time
Digital time
Running time
Singapore Gaga (2005) ” Tan Pin Pin
“If you see only one Singapore film, let this be it” – TODAY
Subject: Singapore’s aural landscape
Form: A 55 minutes documentary with English and Chinese subtitles
Context: Considering the subject of this film, it is very relevant in the cultural context of Singaporean as well as other races living in Singapore. In relation to audiences outside of Singapore, they can learn a lot about Singapore from this film
Content: This documentary reveals the unique characteristics of Singapore and captures moments that makeup what this country embodies
Asia (2015) ” Will Darbyshire
Short film created by Youtuber Will Darbyshire
Subject: Asia/Thailand
Form: 2:26 minutes edited short film, montage style
Context: Presence of Thailand’s cultural context, similar to other Asian cultures hence more relatable to audiences from these regions
Content: This video captures characteristics of Thailand whether its the food, people, culture or environment. It has been edited in a way whereby parts of a clip are removed to create a stop-motion like effect with matching audio
Formats from project 3:
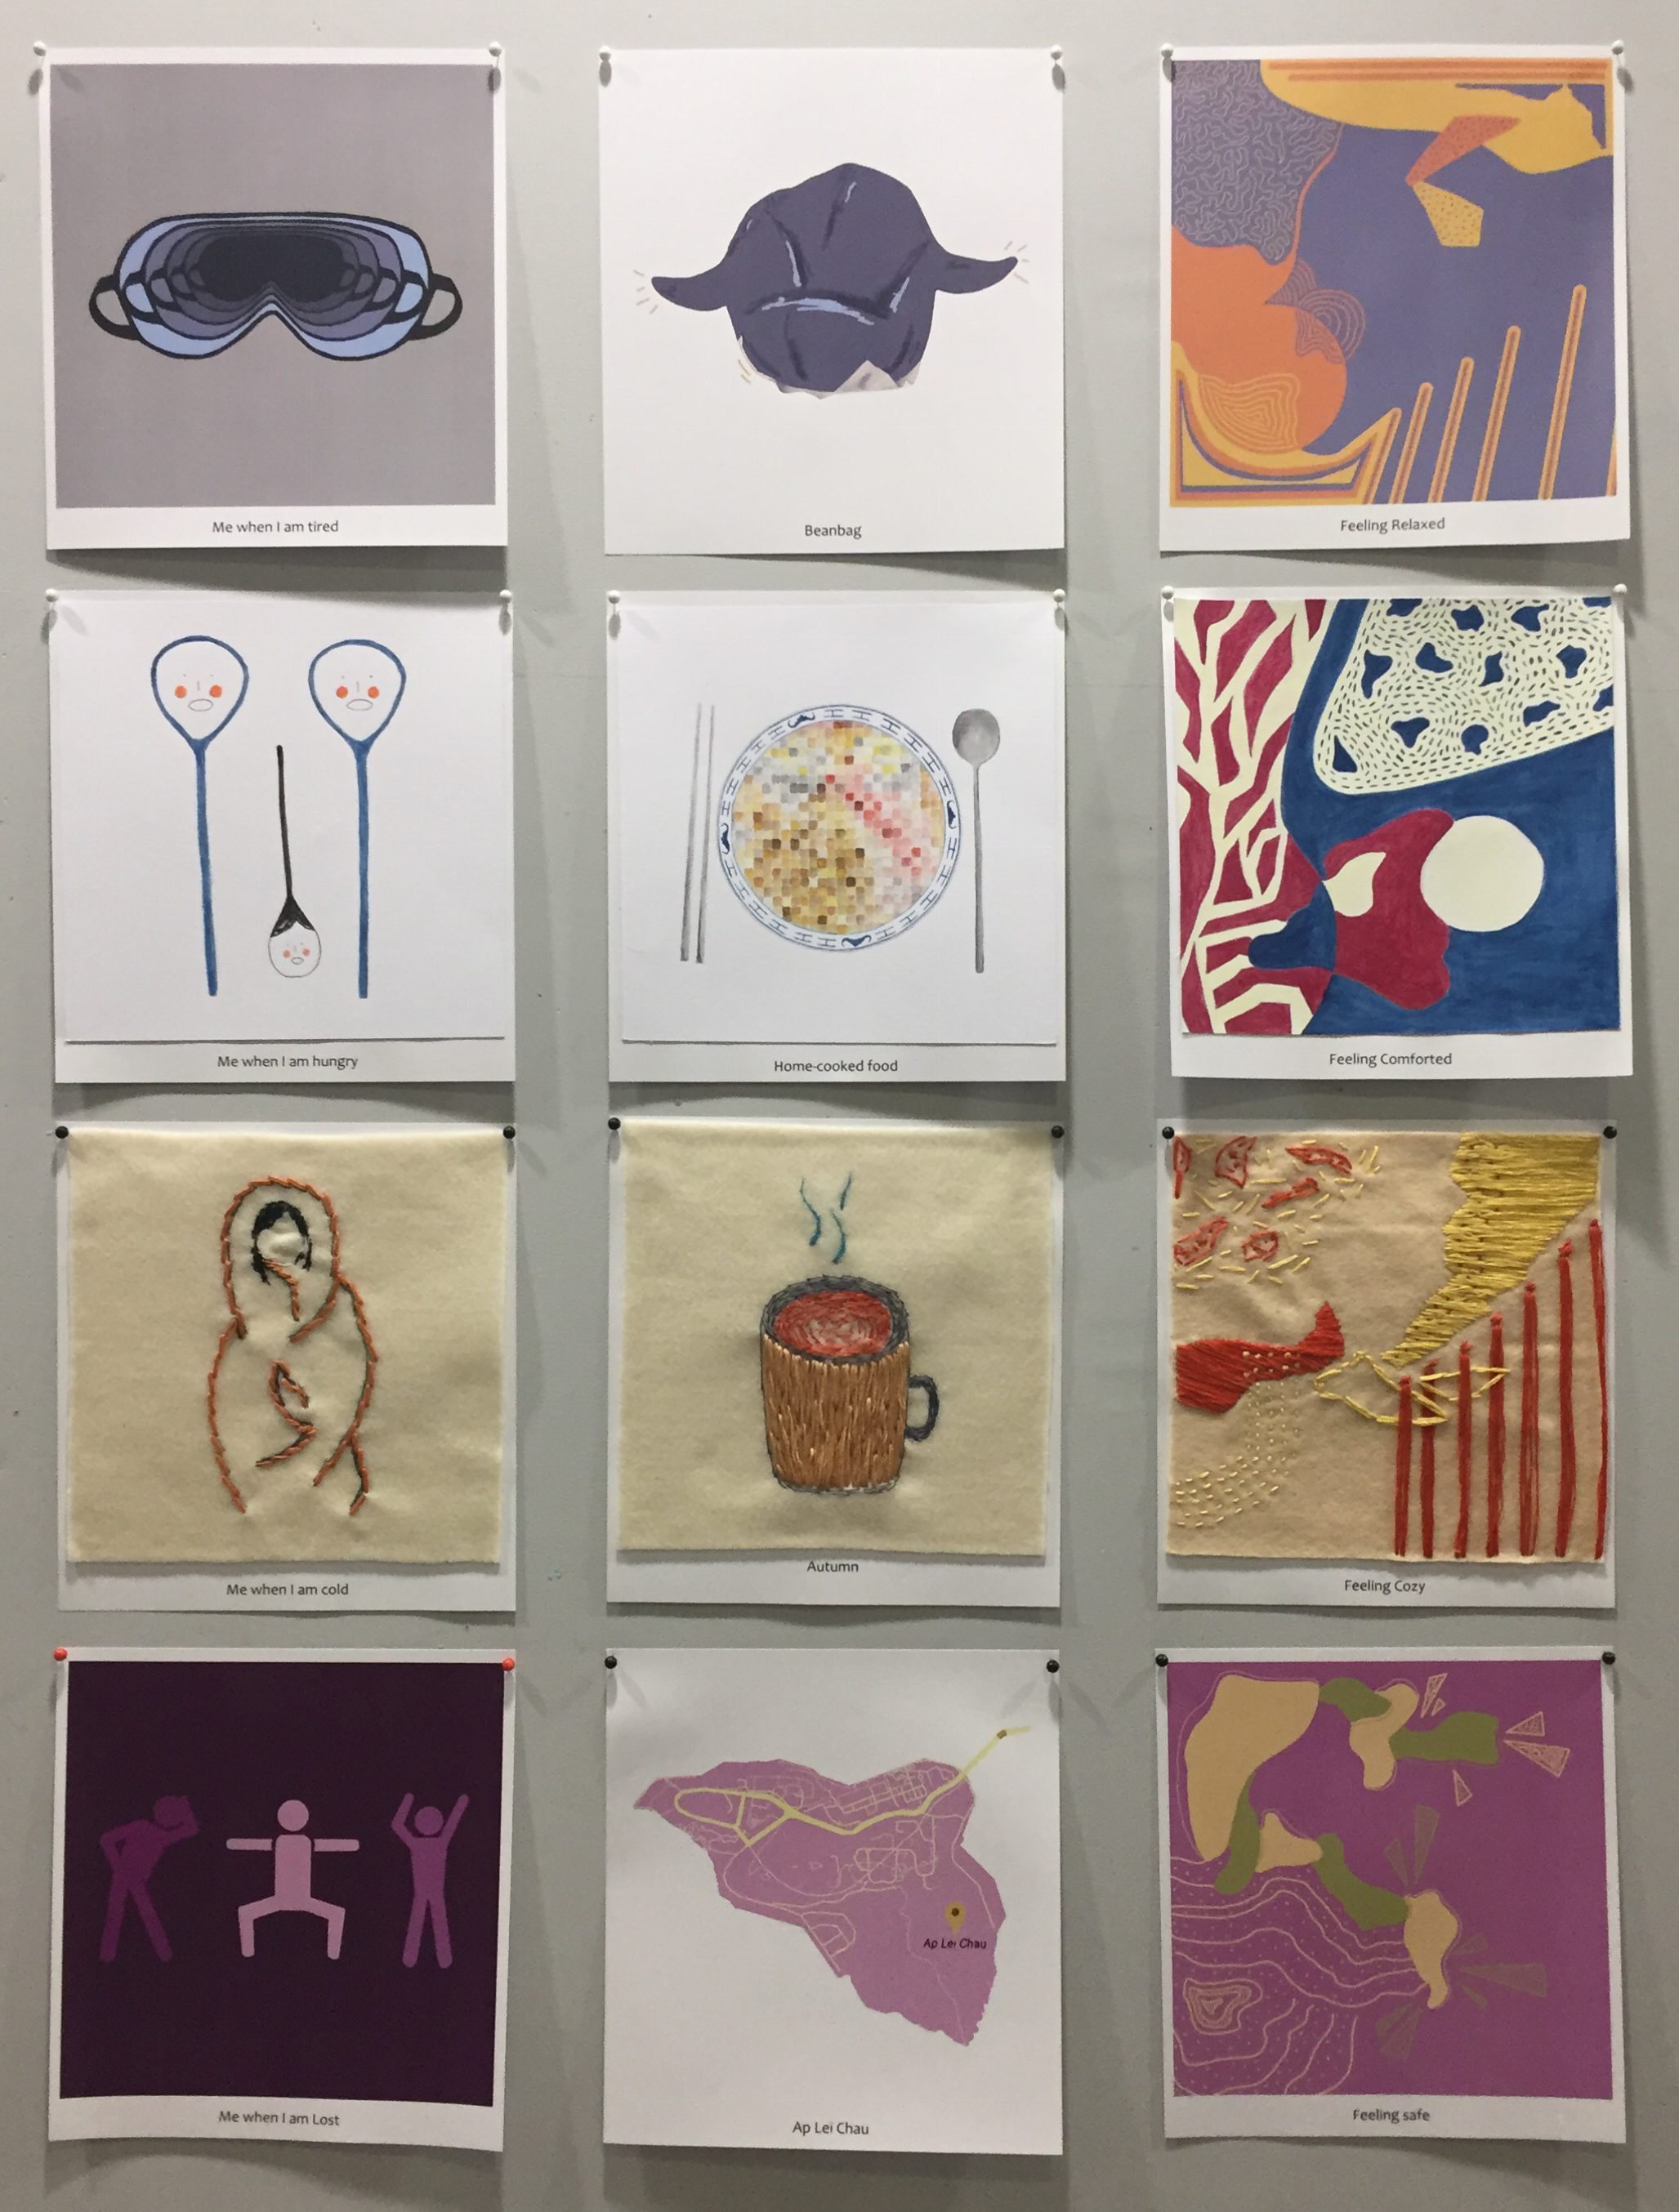
As the last third of this semester approaches, our final project requires us to create a total of 12 compositions. We were given the freedom to use any 2D medium that we wish in order to portray our “egos in different settings”. The 12 compositions will be split into 4 rows of threes and amongst each row, we had to represent ourselves, a setting and our reaction in that setting.
Since the style of this project was entirely up to us, the one rule we had to follow was to match our use of colours with various colour theories. Hence, I started this project with research on colour theories.
http://designingfortheweb.co.uk/part4/part4_chapter16.php
http://designingfortheweb.co.uk/part4/part4_chapter16.php
In the monochromatic colour scheme, the lightness and saturation of a single colour are altered. Derived from a single hue, a variety of shades and tones are achieved by adding a darker colour, grey or black. It can also be lightened with the addition of white.

https://30daysweater.com/ultimate-guide-color-theory-sweater-knitters-part-2-basic-color-schemes/
Colours in the analogous colour scheme are adjacent to each other on the colour wheel. Out of two colours, one is the dominant colour while the other is used to enrich the scheme. Since the colours are rather close to each other on the wheel, they do not create much contrast.
Analogous Harmony Warm and Cool
The warm and cool analogous harmony are differentiated through the warm and cool portions of the colour scheme. The range of colours from red to yellow can be paired together as warm analogous harmony while colours ranging from violet to green can be paired together as cool analogous harmony.
http://designingfortheweb.co.uk/part4/part4_chapter16.php
Made of two colours that are directly opposite each other on the colour wheel, the complementary colour schemes offer a great contrast between warm and cool colours. Its high contrast draws a lot of attention and is eye-catching.

https://designmodo.com/wp-content/uploads/2011/12/Split-Complementary.jpg
Expanding on the standard complementary colour scheme, the split complementary uses a colour and the two colours adjacent to its complementary. It provides high contrast but is not as strong as the complementary colour scheme. It is harder to balance in comparison to the other colour schemes.

https://www.homedit.com/triadic-color-scheme/
The triadic colour scheme essentially involves the use of three colours that are equally spaced on the colour wheel. The use of colours that falls under this scheme will look create contrast and look harmonious simultaneously. To allow for a nice balance, normally one colour will dominate while the other two will be used as accents.
In the midst of missing many aspects of Hong Kong after having lived there for the majority of my childhood, I decided to incorporate these feelings into my compositions as an overarching theme. After mind mapping on things that I am reminiscent of in Hong Kong (which can be found in my visual journal), I decided on the top few and came up with 4 equations.
First plan
As for the colour scheme of each row, I decided to stick with a base colour and use it to work with various colour schemes for each individual compositions.
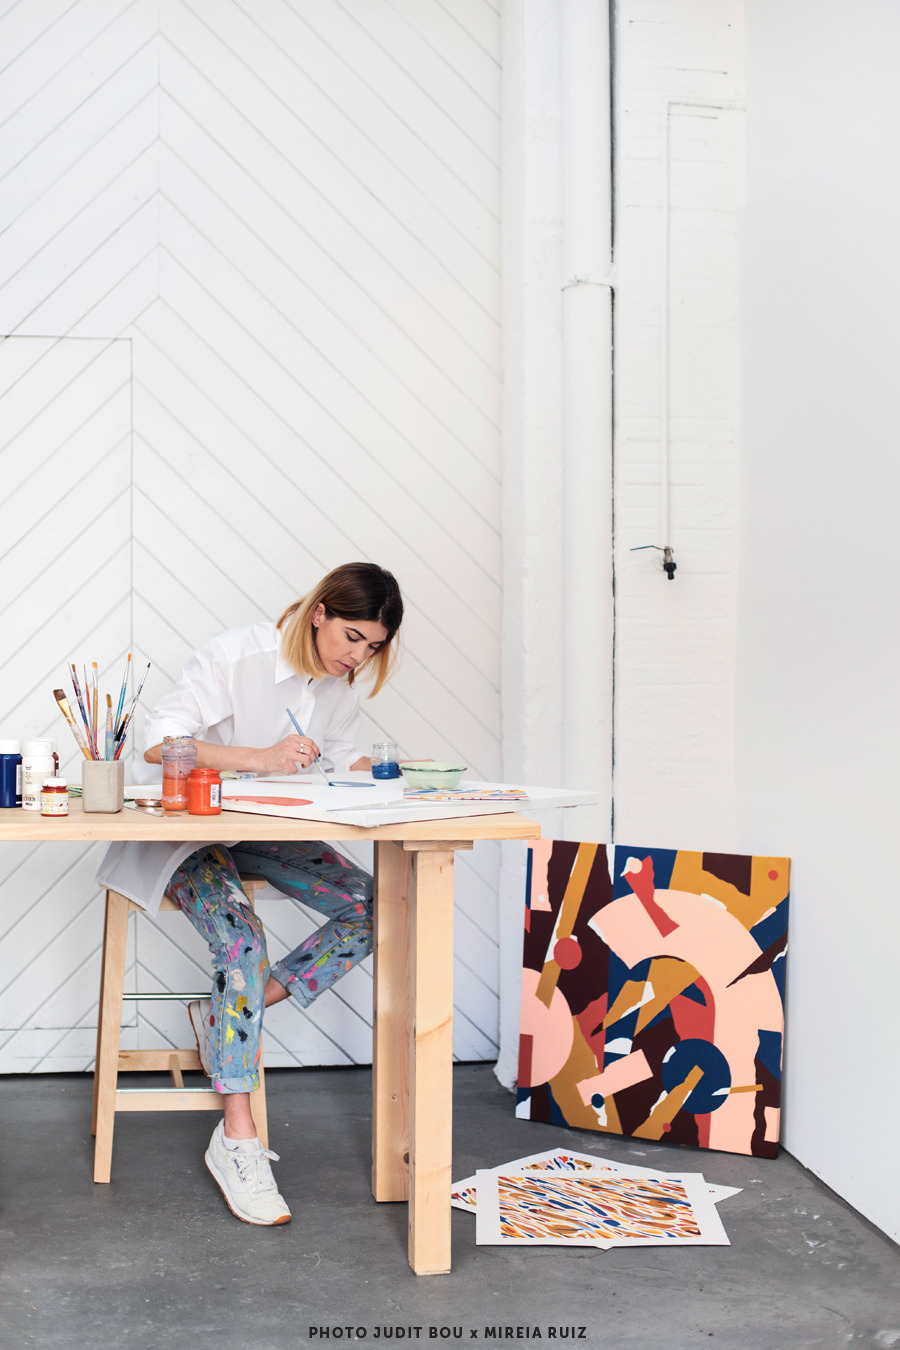
http://mireiaysuscosas.tumblr.com/
Mireia Ruiz was the inspiration for the last compositions of each of my four rows. During the planning of my compositions, I struggled with coming up with ideas for “me and my reaction to the setting” as I didn’t know how to express my emotions through the application of objects. Having stumbled across an interview with artist Mireia Ruiz in a magazine, I was intrigued by her abstract creations, especially her use of colours.

http://mireiaysuscosas.tumblr.com/
Although all her works were abstract pieces, the variety of form, colours, lines, negative and positive space present in her work really gave each painting its own unique quality. Thereafter, I was inspired to create abstract pieces to express my various emotions of me in my comforting setting.

My 1st row of compositions portrays the reunion of tired me and my beanbag which I use to always take naps on after returning from a long day of school. The layered placement of the eye mask was executed in order to convey the deterioration of my energy during school; further emphasised with the monochromatic scheme that creates a depth within the piece. As for the setting, my beanbag is ‘personified’ in the sense that I had given it arms as a way to show its openness and invitation for me to join it. Coloured in a dark greyish blue hue, its dullness shows the absence of a companionship which in this scenario is me.
| Tired Me | Beanbag | Feeling relaxed | |
| Colour scheme | Monochromatic | Complementary | Spilt complementary (blue, red-orange, yellow-orange) |
Eye Mask trials
After deciding on the second version amongst these two, Joy and I discussed during our first consult that the eye masks could be portrayed more clearly as eye masked and hence I added the straps for a clearer image.
Bean Bag trials
After my consult with Joy where she suggested I could try including features that related to the context of Hong Kong such as dim sum basket texture, food textures, etc…, the piece on the right was my attempt for that which didn’t work out quite well. Since I wasn’t able to capture the texture of a dim sum basket, I decided to go with the paper below steamed buns and dim sum dishes instead which is present in my final composition.

First Attempt // Final
The last composition for this row was the first abstract piece I tried to create. The piece on the right was my first attempt at it whereby the colours did not match well with the split complementary colour theory. Since I felt like the placement of lines and shape were also not as concise, I redid this piece which turned out to be the one on the right, that I choose for the final.
This second row portrays my cravings for home-cooked food since living in hall at university. The distressed looked on the spoons in the first compositions represent my longing for home-cooked food and the placement of it also resembles tears of desperation. As for the second piece, the image of home-cooked food has been pixelated in attempt to show that although I still have memories of it, it is currently not present in my life and hence blurred.
| Hungry Me | Home-cooked food | Feeling Comforted | |
| Colour scheme | Complementary | Triadic | Triadic |
The triadic scheme adopted in the majority of this row is blue, red and yellow. Specifically because blue and red to me are iconic colours that represent Hong Kong. To allow for the presence of both these colours, I had to include yellow for them to fit as a colour theory. Hence for the paleness of yellow.

Working with autumn as my favourite season out of the four seasons, I wanted to portray the cosiness and comfort that this weather brings me. Specifically for this row, I decided that I wanted to work with embroidery because it was suitable for portraying the theme of warmth and thicker clothes. The first composition is of myself being wrapped in a blanket as I do during the majority of autumn. Secondly, I conveyed autumn as my setting through an image of autumn being in a cozy cup of a hot drink.
| Cold Me | Autumn | Feeling Cozy | |
| Colour scheme | Spilt complementary (orange, blue-green, blue-violet) | Spilt complementary (orange, blue-green, blue-violet) | Analogous |
Orange used as the base colour to represent autumn, while the other two colours were used to create depth and shadow.

Photoshop sketches before embroidery
Digital draft of the third composition before embroidery
Before starting to embroider straight onto my felt, I created digital sketches and drafts of the compositions that I wanted to sew in order to get the measurements right and have a clear idea of what I was embroidering.
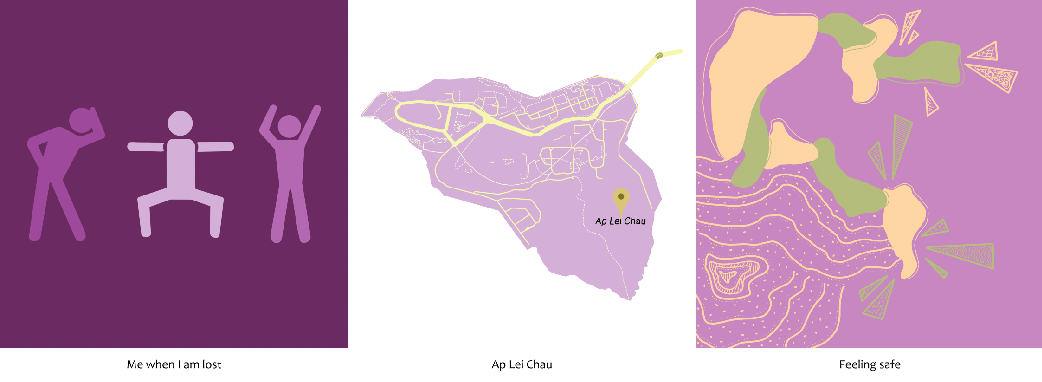
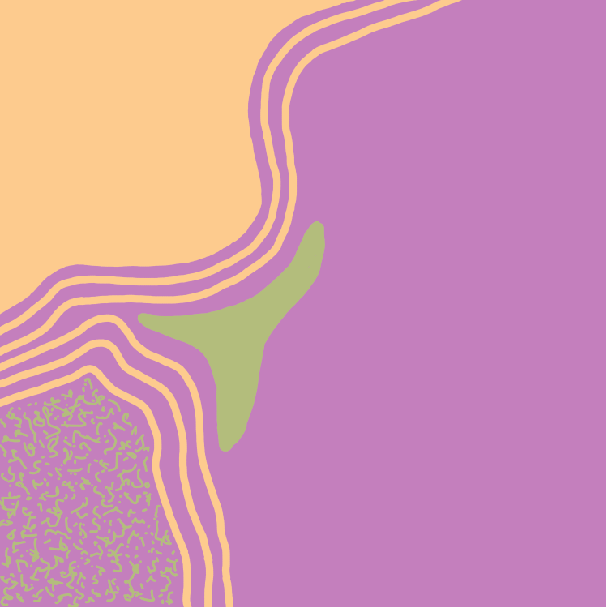
Lastly, my fourth row of composition encompasses my feeling of comfort and safeness on the island of “Ap Lei Chau” in Hong Kong where I have lived all my childhood. I portrayed myself being lost, which could be interpreted mentally or physically, with darker hues of purple to express a sense of mis-belonging. In the second piece of this row, the use of lighter purple was intended to express a sense of nostalgia.
| Lost Me | Ap Lei Chau | Feeling Safe | |
| Colour scheme | Monochromatic | Complementary | Spilt complementary (violet, yellow-orange, yellow-green) |
First attempt
During the process of creating my abstract pieces, I actually found it quite challenging to piece together lines and forms that would somehow look neat yet random. This process resulted in many half-completed pieces as I redid them.
To end of the first semester of foundation 2D, I really enjoyed implementing a style of my own into this project as well as experimenting with a variety of mediums. Although it was time-consuming and stressful at times, it was a great experience and I had a great time admiring the amazing work that my classmates created 🙂
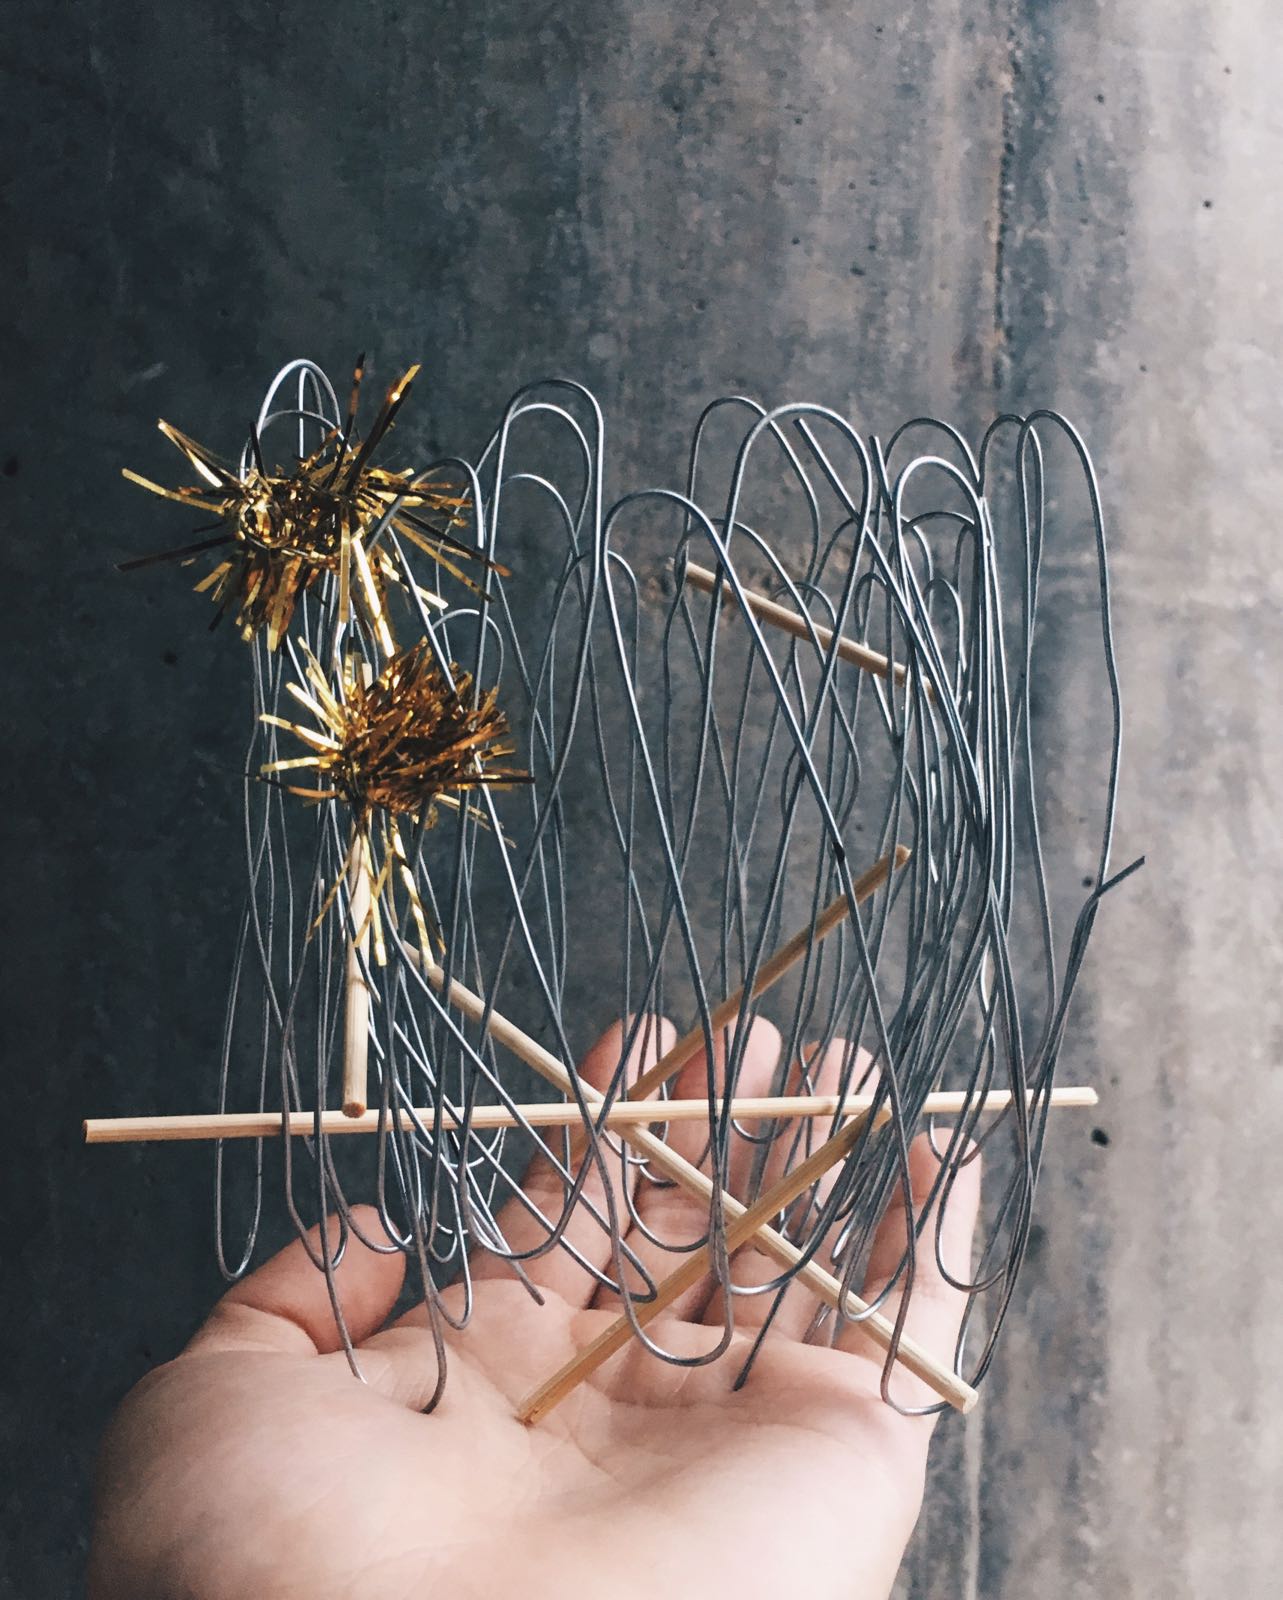
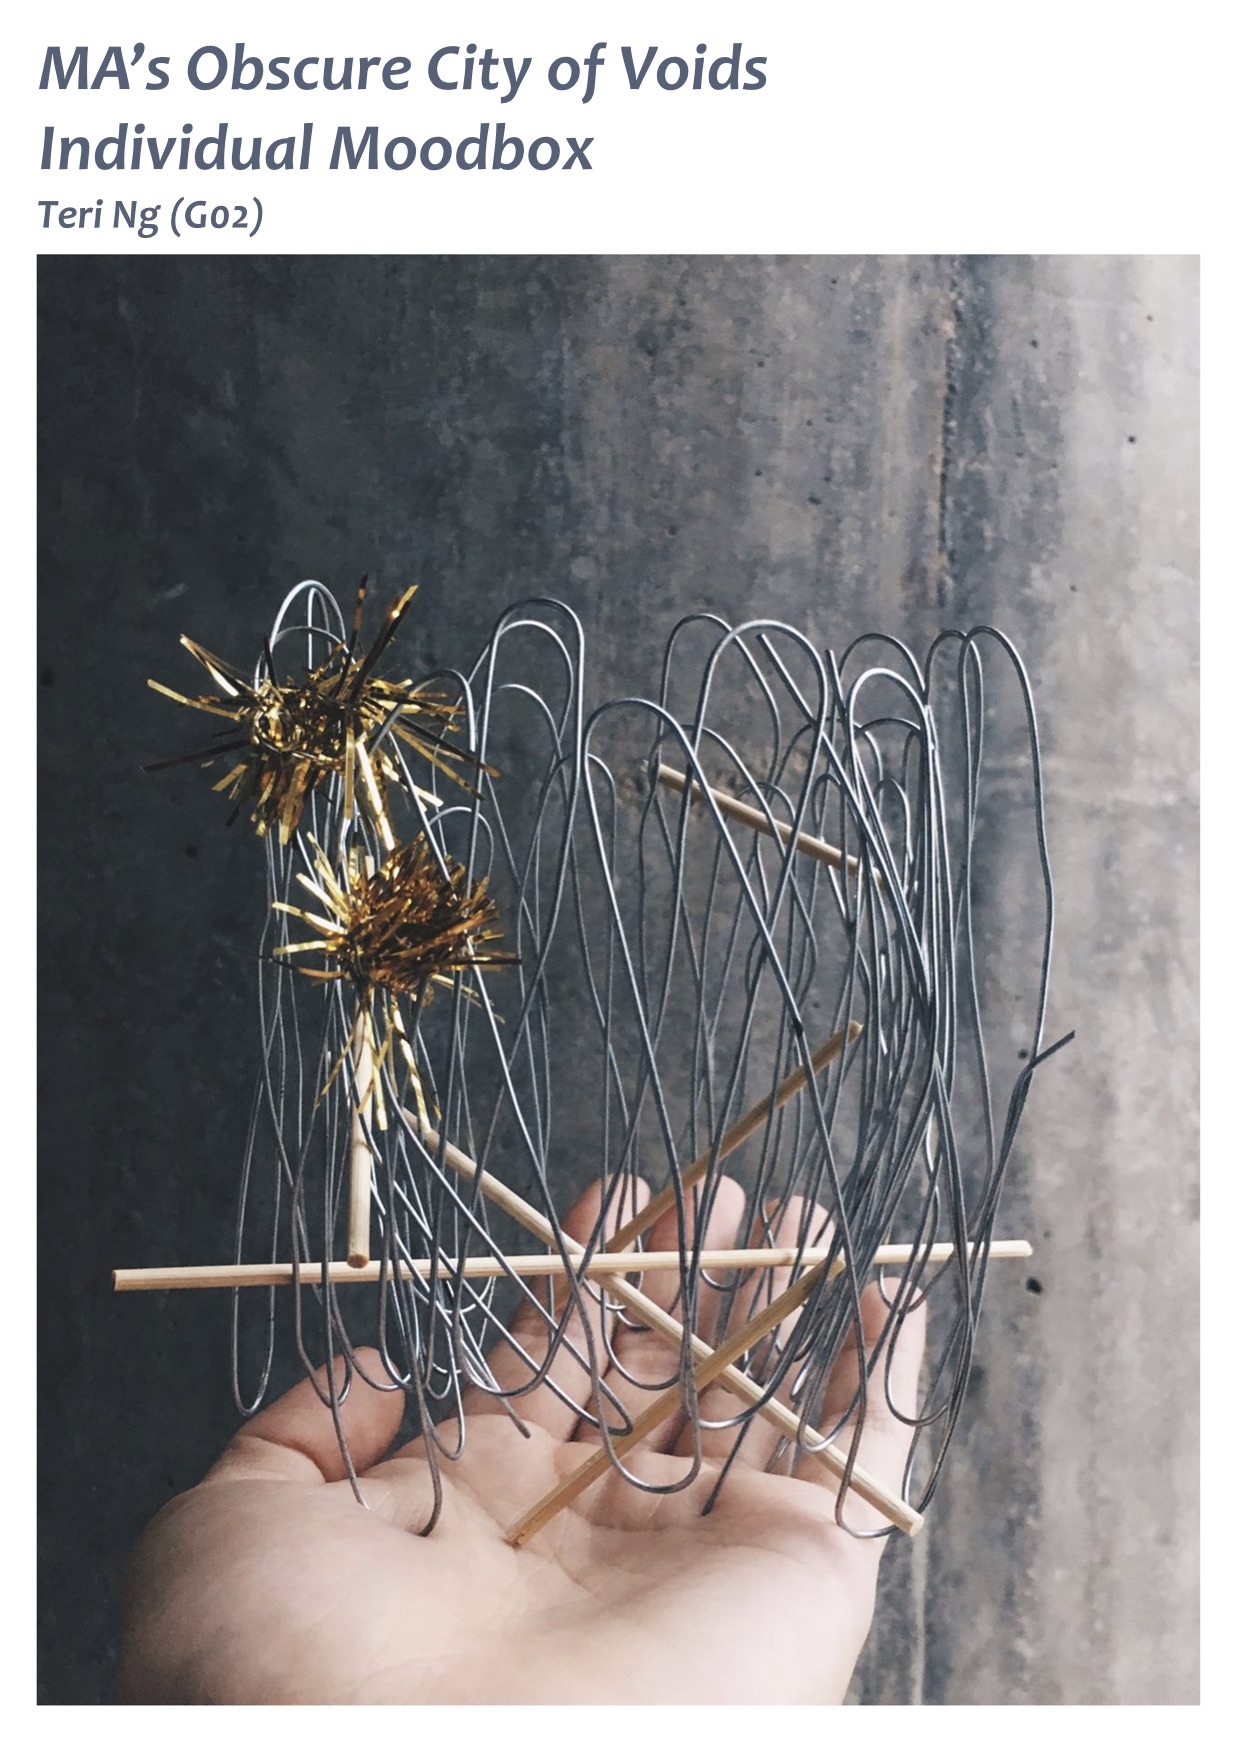
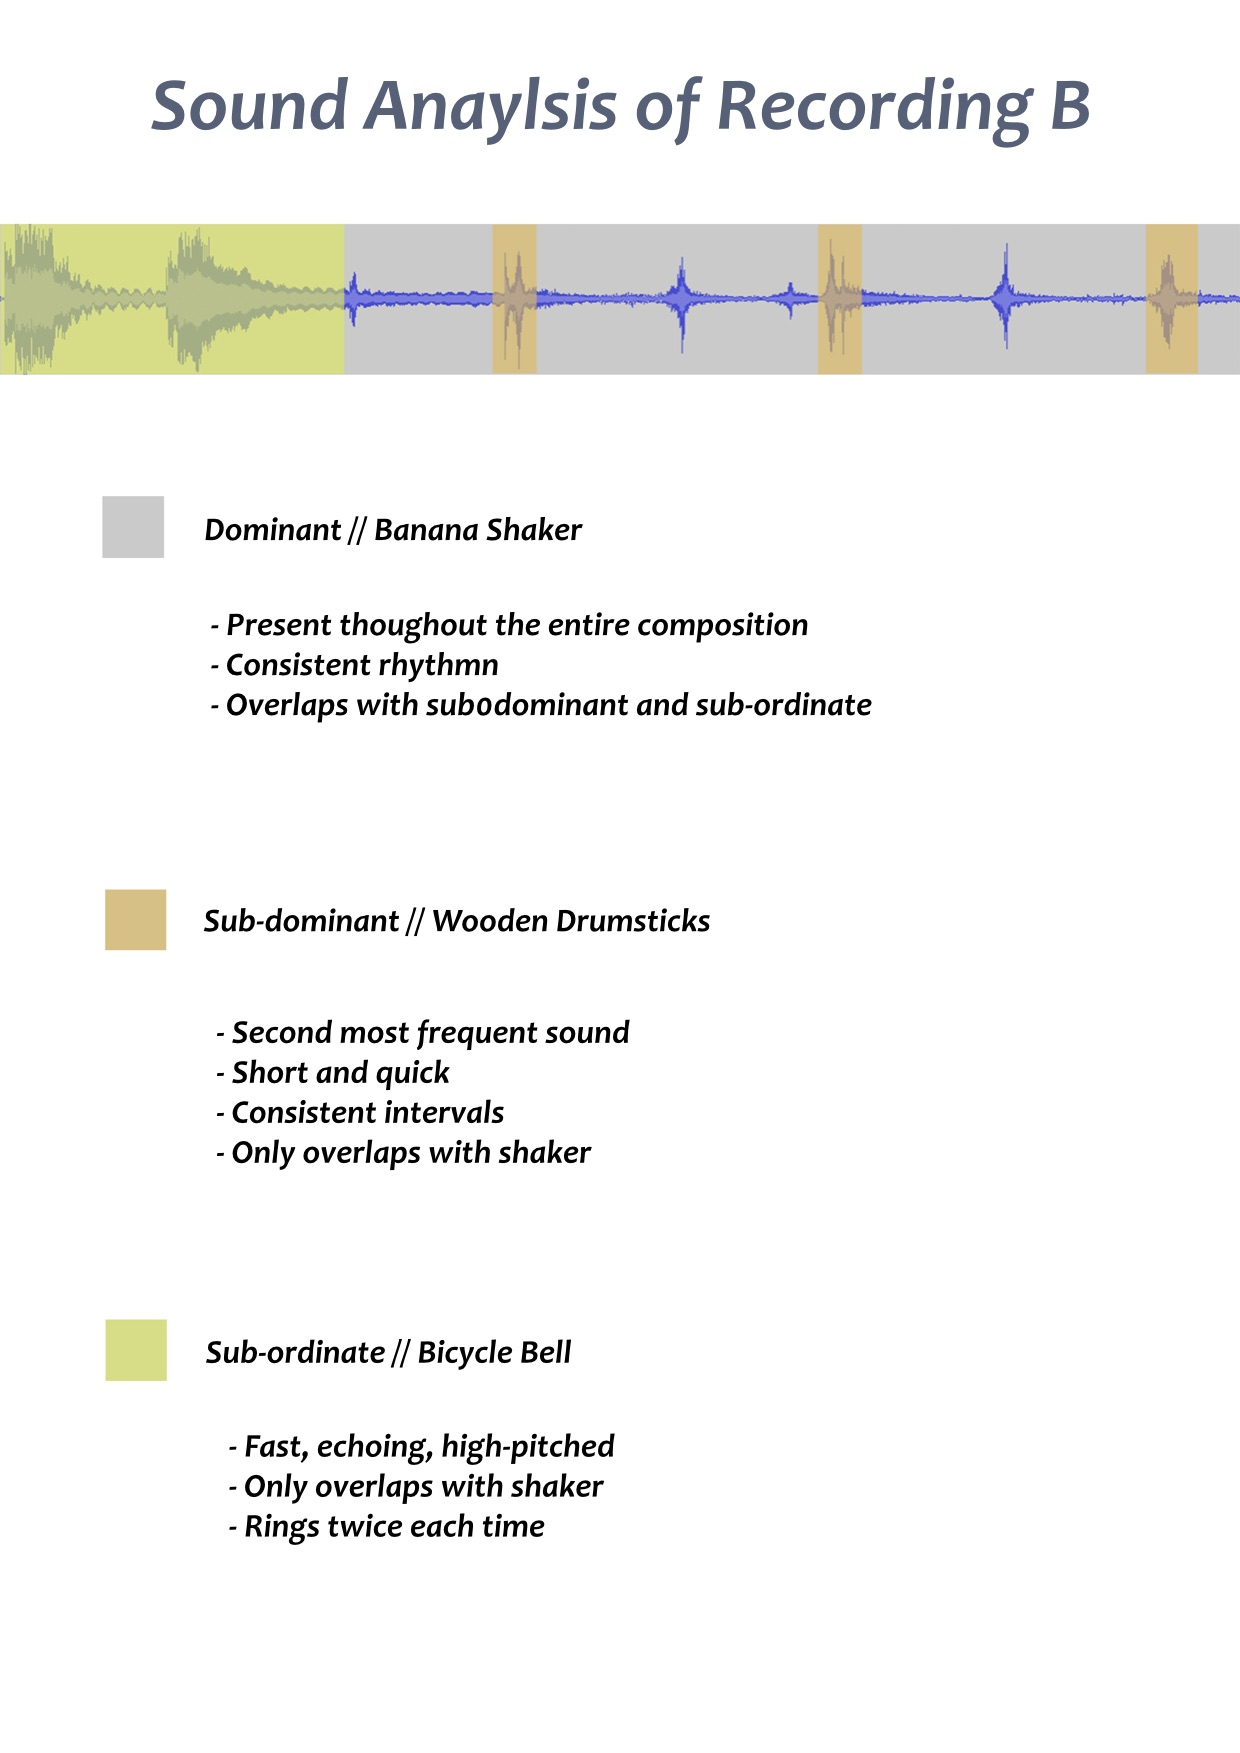
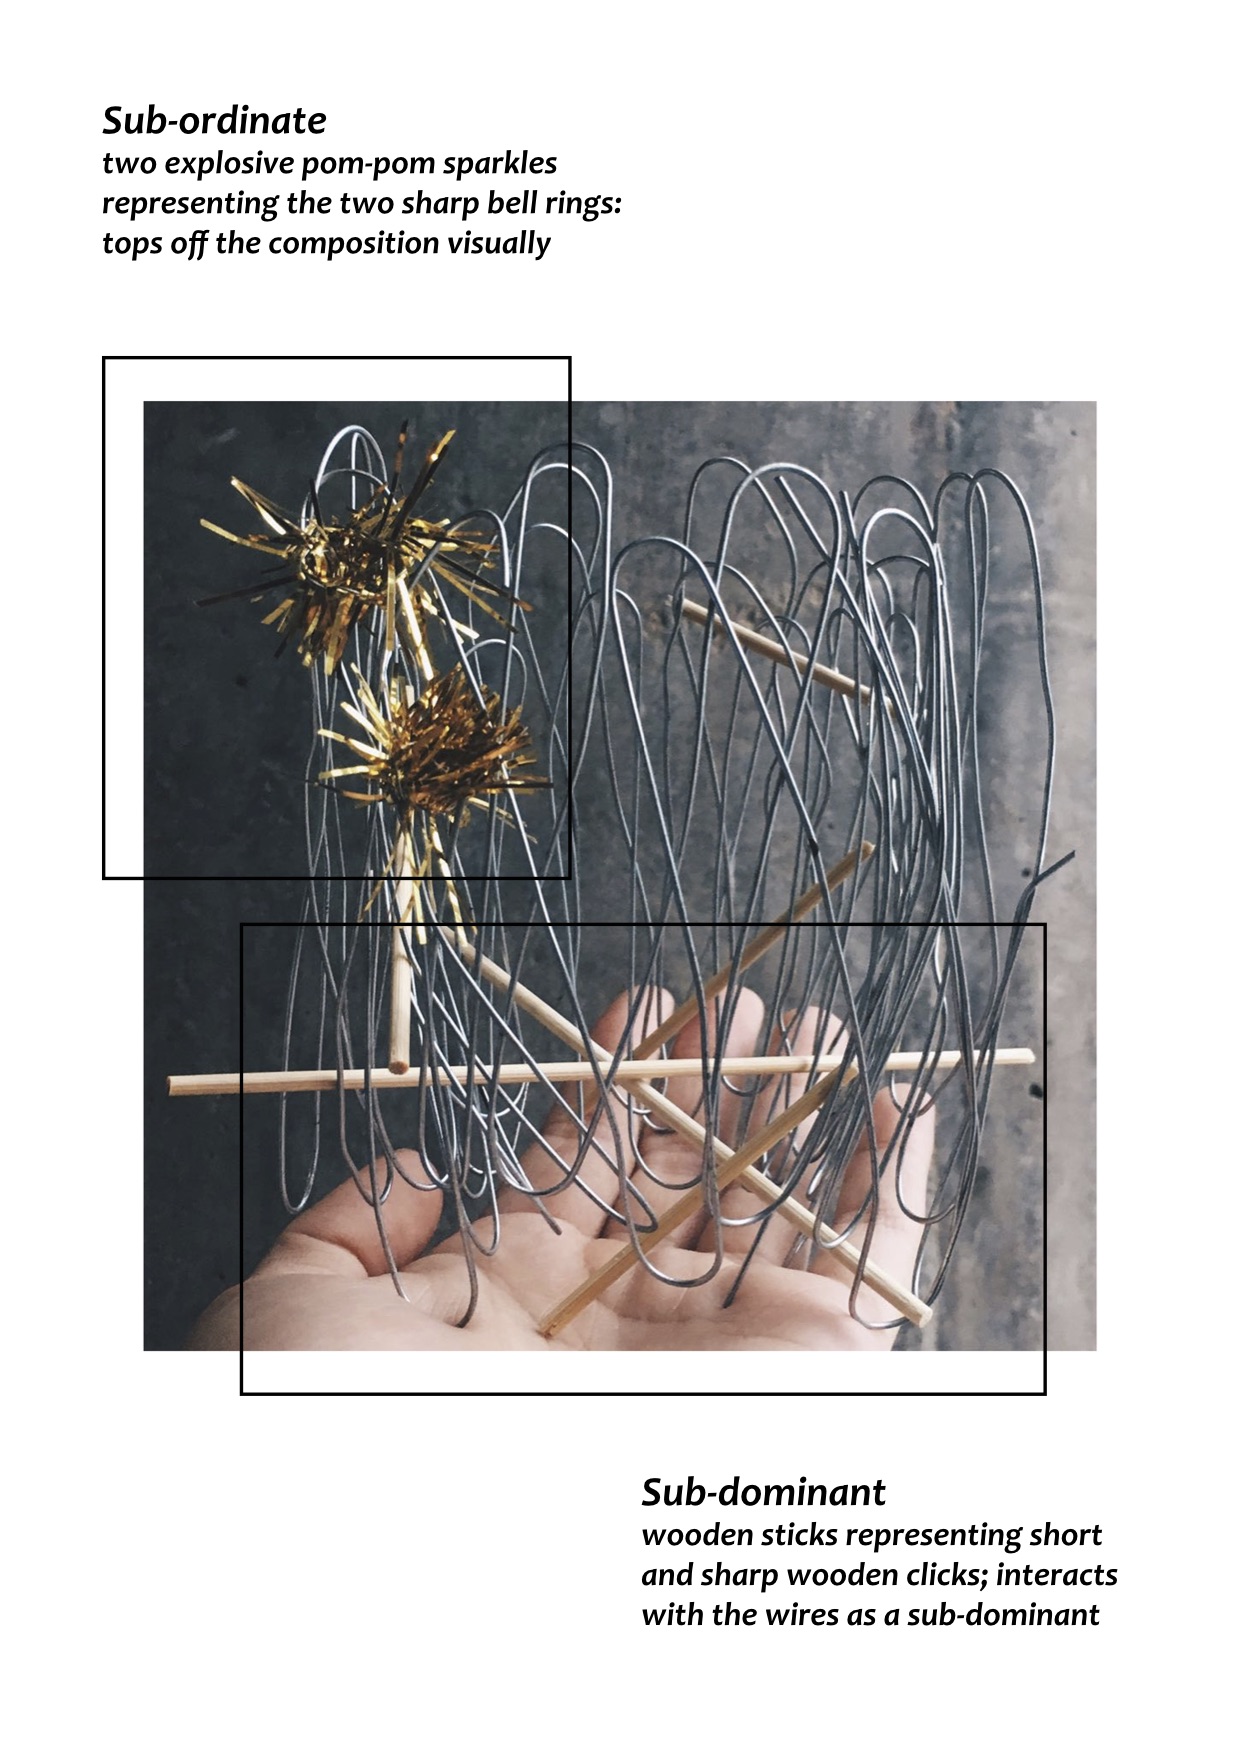
Amongst the 2 sound compositions that my group created, I worked with the second composition to create my moodbox.


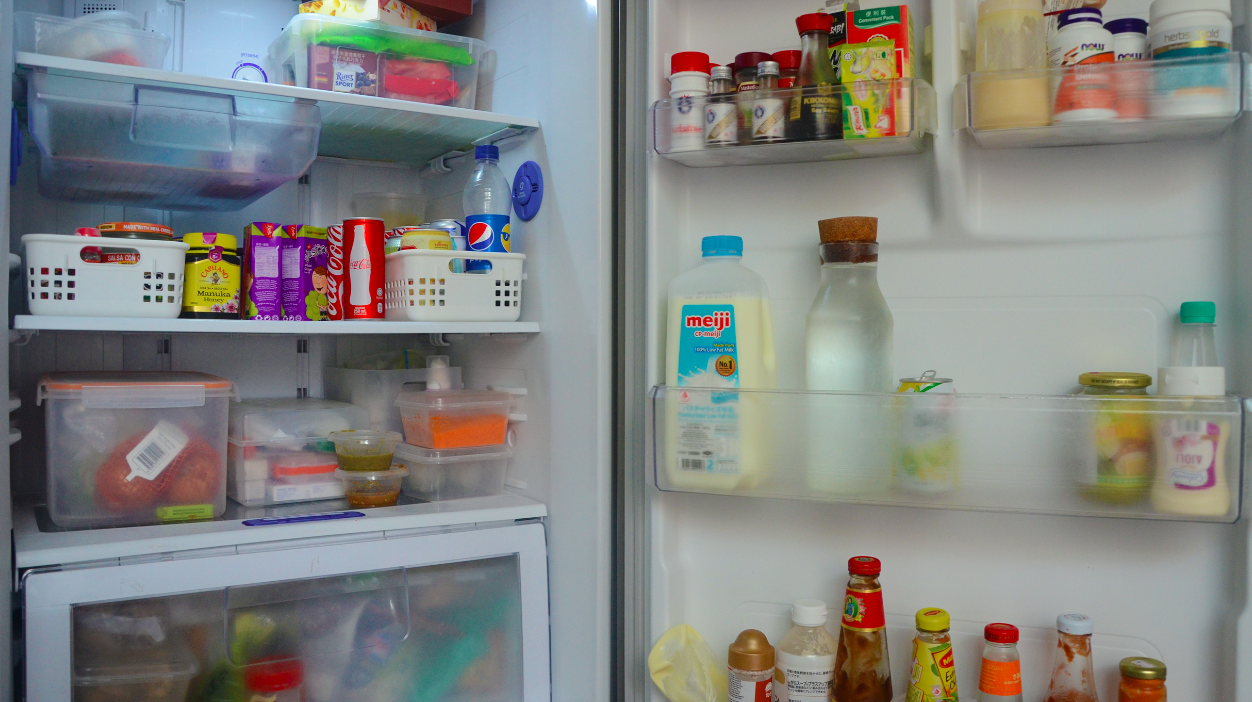
To kick off project 3, we brainstormed lists of places and sounds during class. Assigned to list locations where we’ve never been to, one of my favourite place that I thought of was a ziplock bag. However, upon tasked with project 3 which was to create a 3o second video about an encounter with my location, I felt a bit restricted working with a ziplock bag. As I progressed on getting started with creating my lo-fi storyboard, I decided to change my location to a fridge instead since it gave me a clearer space to work with.
For my very first lo-fi storyboard draft, I sketched an eight frame storyboard focusing on the fridge as a whole object and a literal interpretation of my first discovery with it. Since the focus of this project was soundscape, I decided that I wanted to create a video with edited sounds recorded by a zoom recorder over it.

rough sketch of draft storyboard // discovery of fridge
This storyboard embodies my first encounter with a fridge during the night as I am alerted by the fridge’s buzzing noise. I had envisioned for it to be a rather magical discovery.
After the first consult with Lei, she suggested that maybe instead of discovering the fridge as an object from its exterior, I could slowly reveal it from the inside. The discussion came to the idea of a miniature world occurring within the life of the fridge and we looked at some inspirations online. Inspiration was then taken from images like these below, but for my project will be altered to fit with the context of a fridge.

http://editorial.designtaxi.com/editorial-images/PoyMiniFig28102015/1.jpg
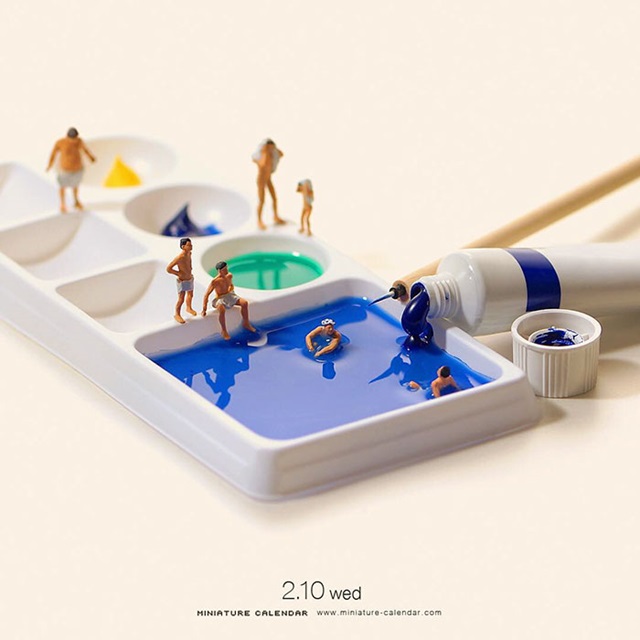
http://www.ebaumsworld.com/pictures/36-amazing-miniature-scenes-using-everyday-objects/85244657/
Inspiration was then taken from images like these above but food items will be altered to fit with the context of a fridge for my project.
Moving on to the new concept, I developed my hi-fi storyboard based on plans for my still images since it wasn’t possible for me to film a miniature life in the form of a video. Starting off with items that I could commonly find in a fridge, I used inspiration from images found online to help me plan out some possible activities that could occur.
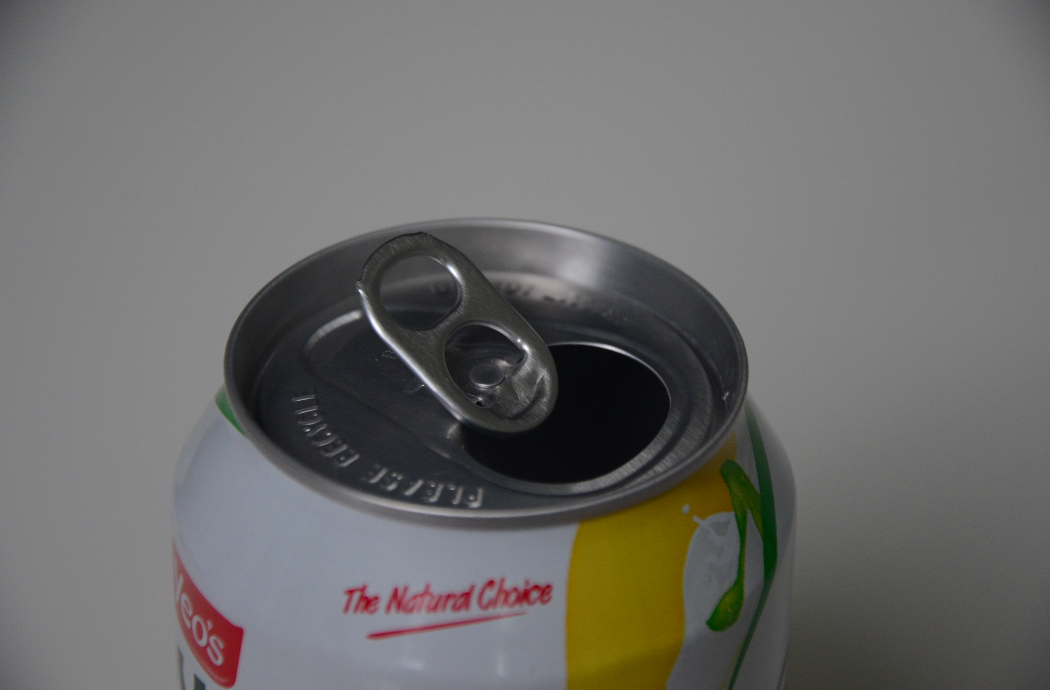
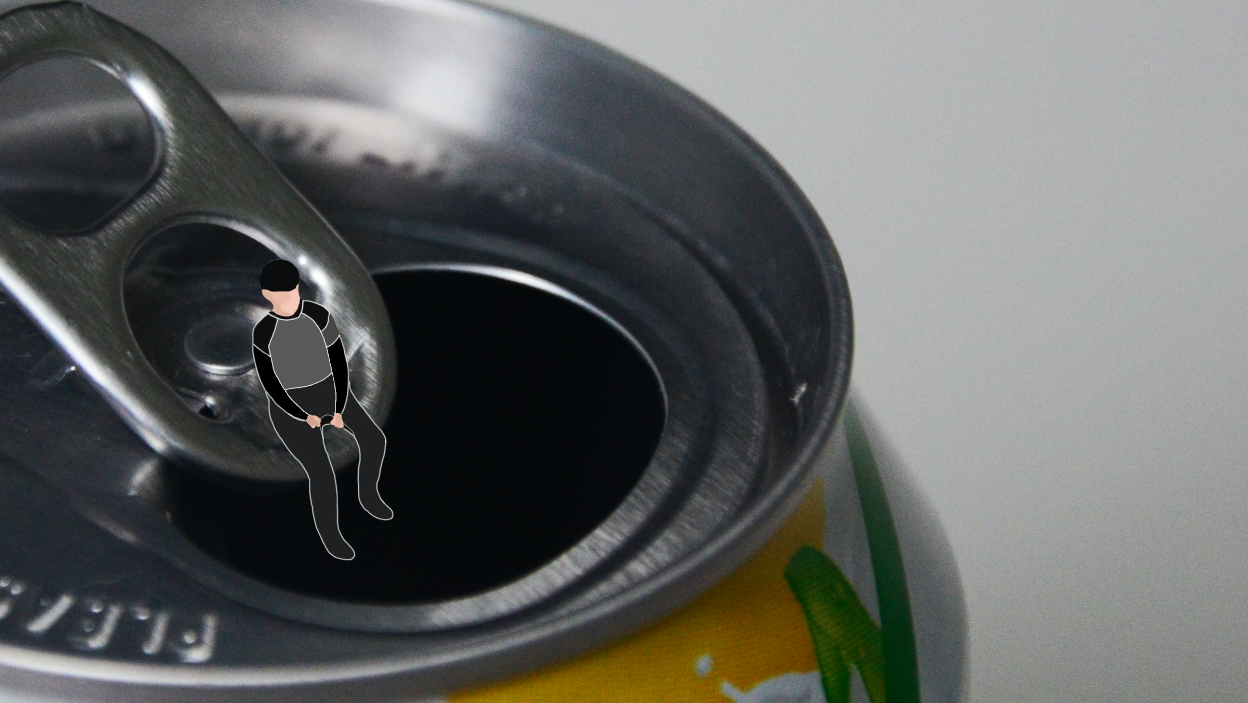
Can Drink
The transition of Sounds:
1. Pool sounds
2. Talking by the pool
3. Can opening
4. Placing can in fridge
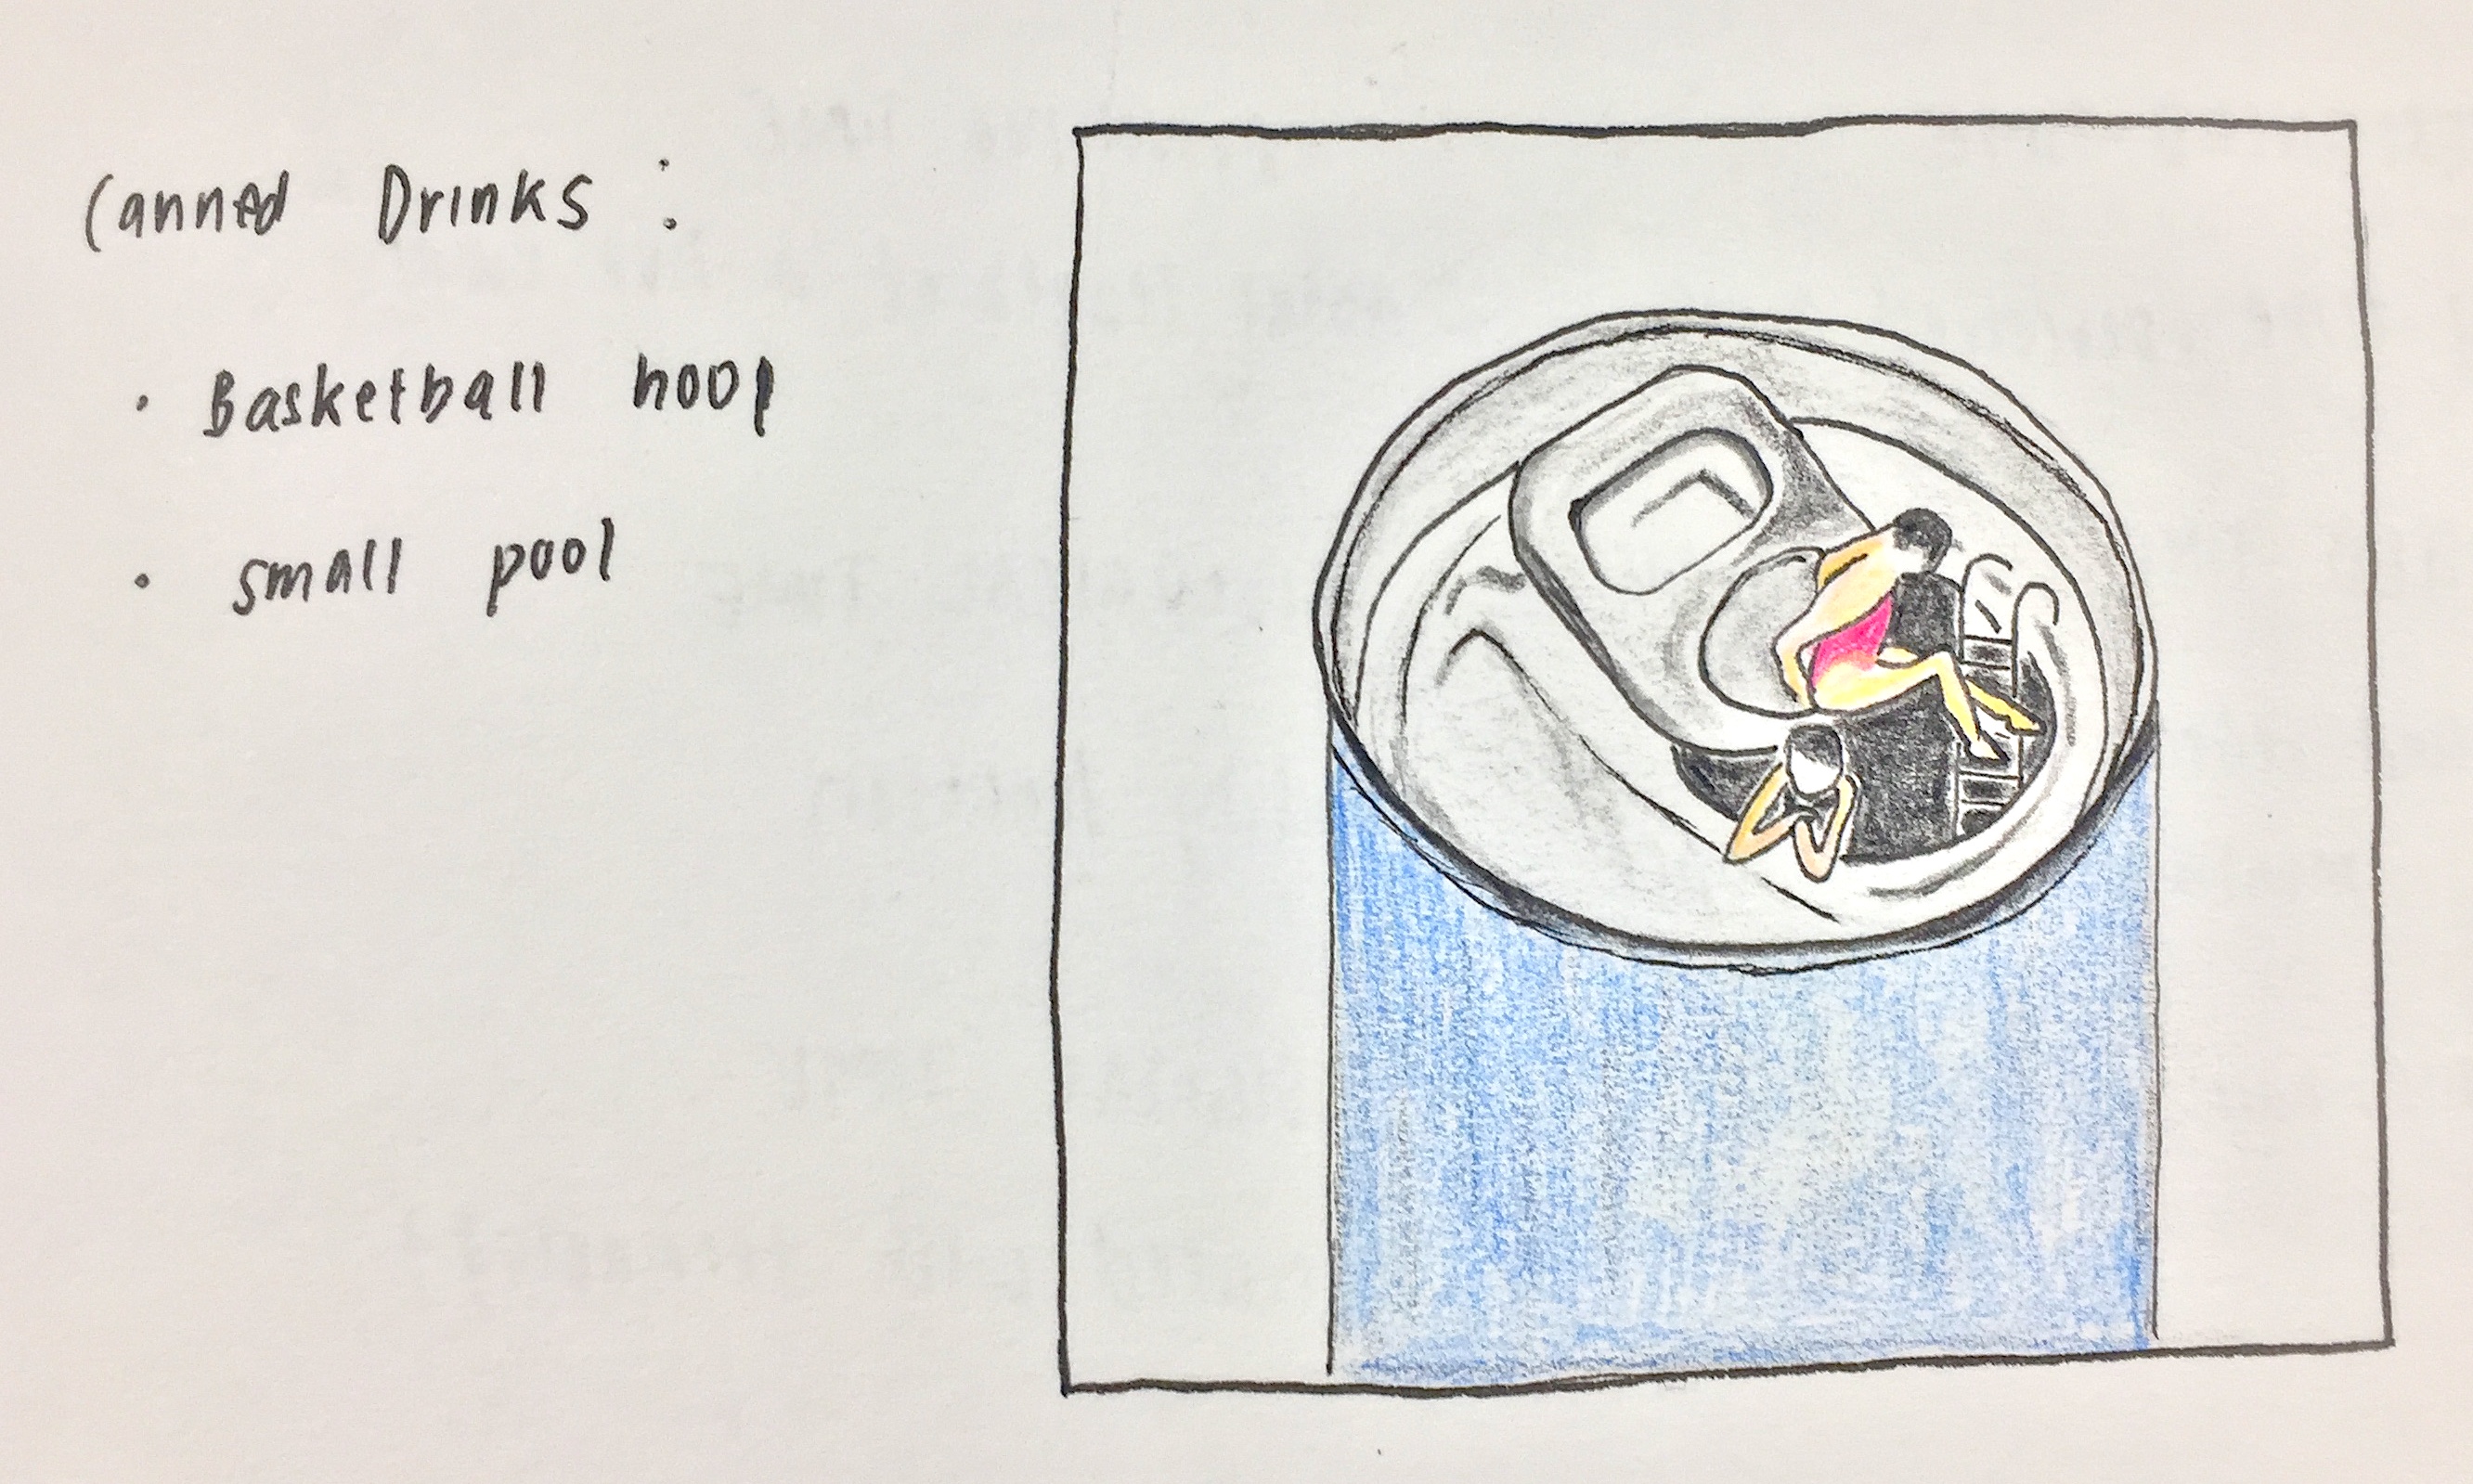
Can drink // swimming pool
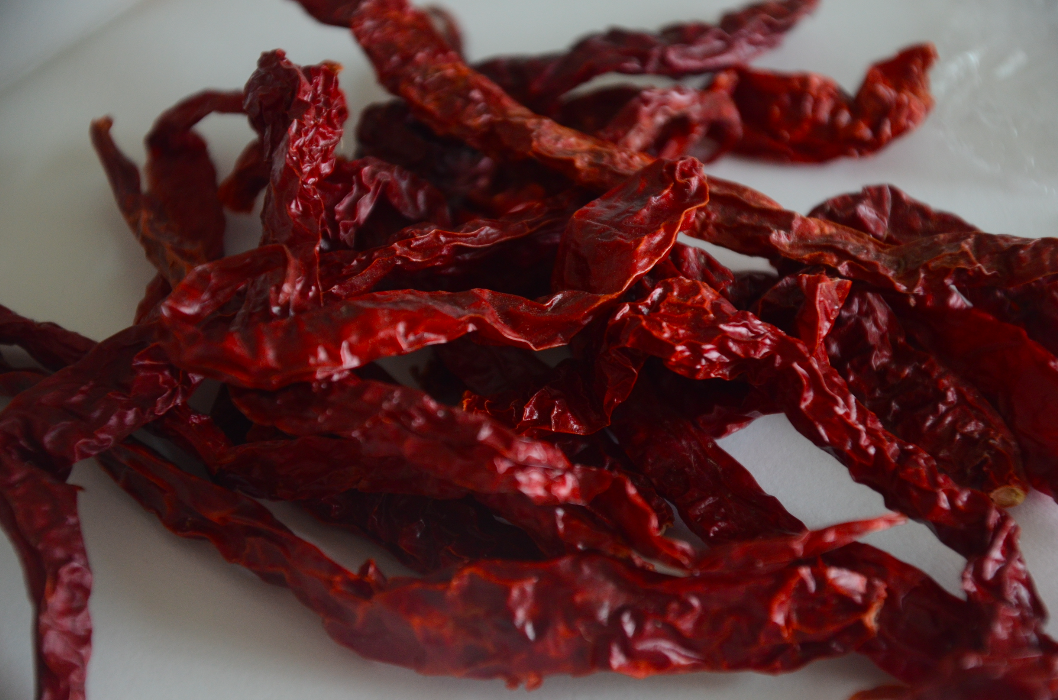
Dried Chilli
The transition of Sounds:
1. Rowing/water sounds
2. Conversation
3. Ruffling of dried chilli
4. Plastic sound from chilli packet
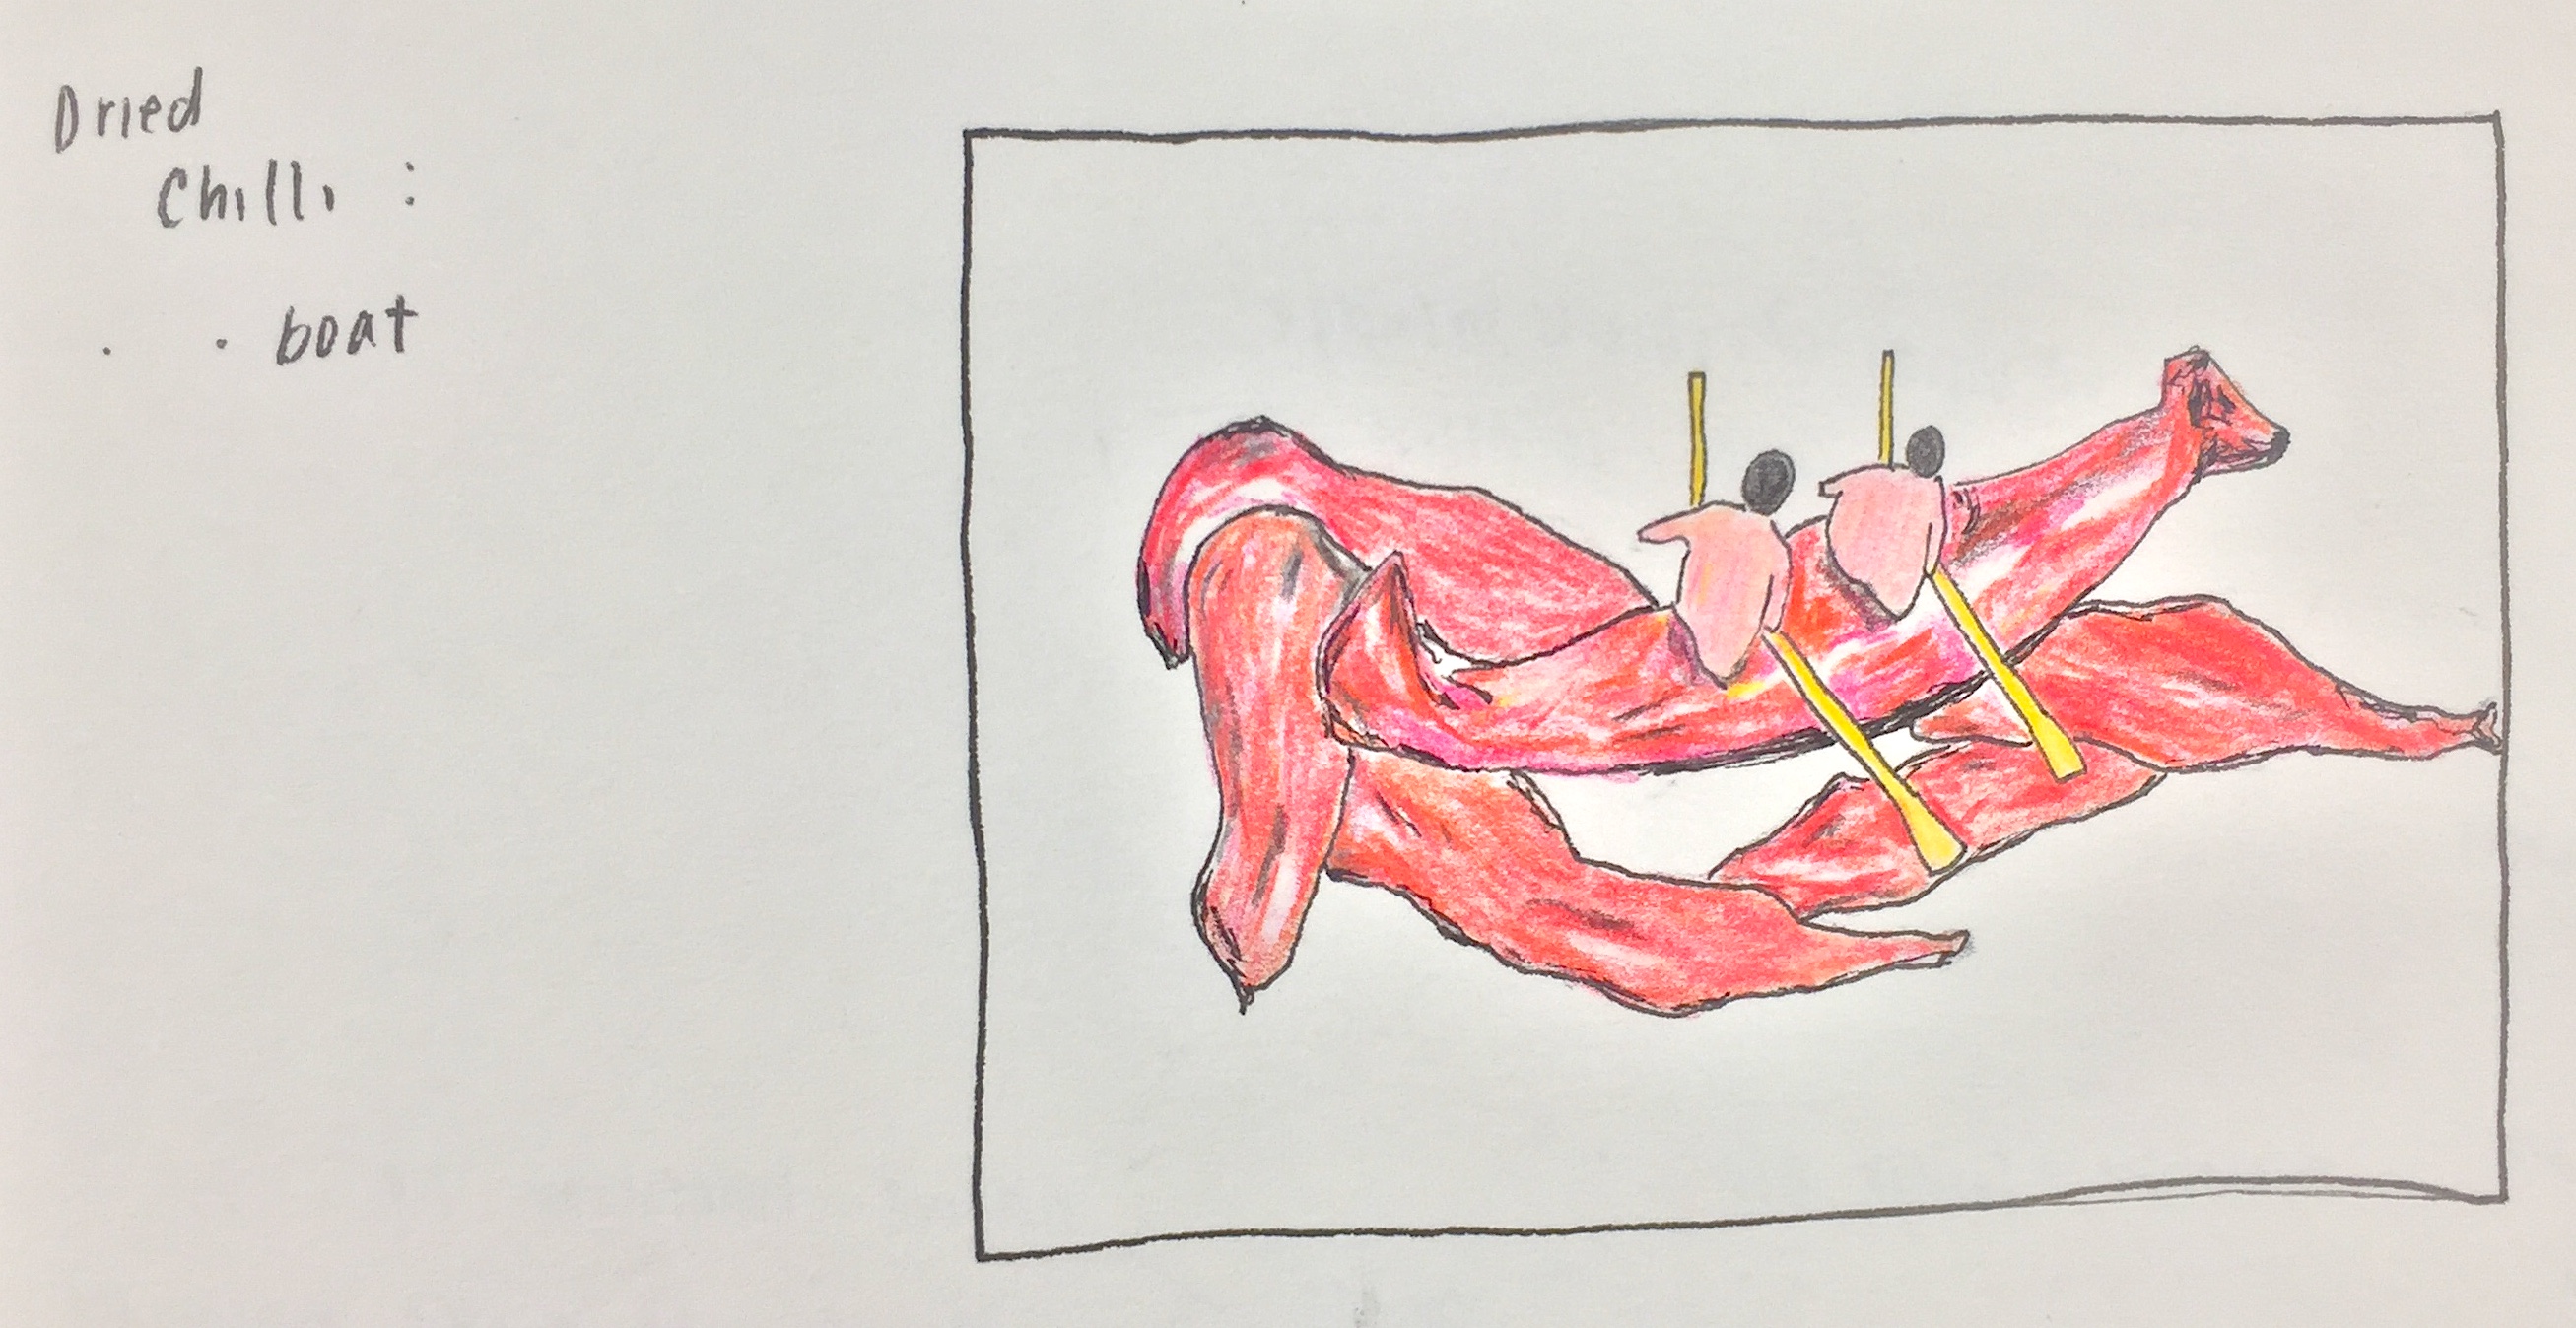
Dried chilli // rowing boat
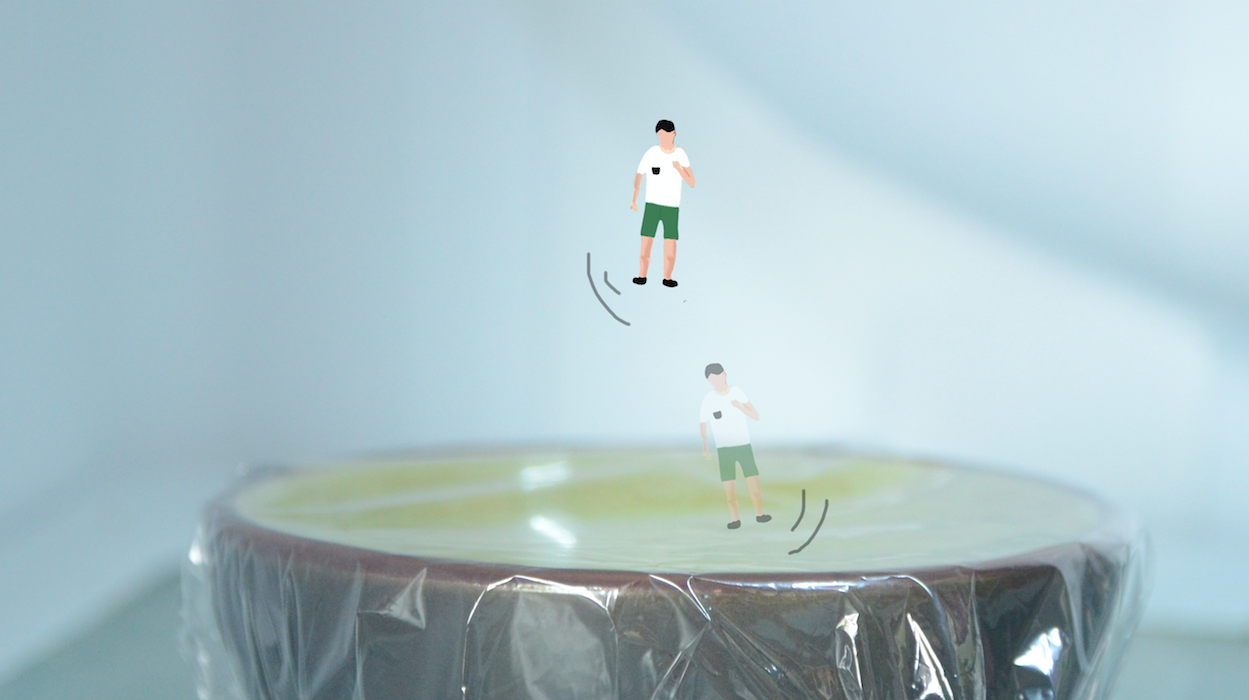
Trampoline
The transition of Sounds:
1. Cheering sounds
2. Bouncing on trampoline
3. Cling wrap sound
4. Rubberband over bowl
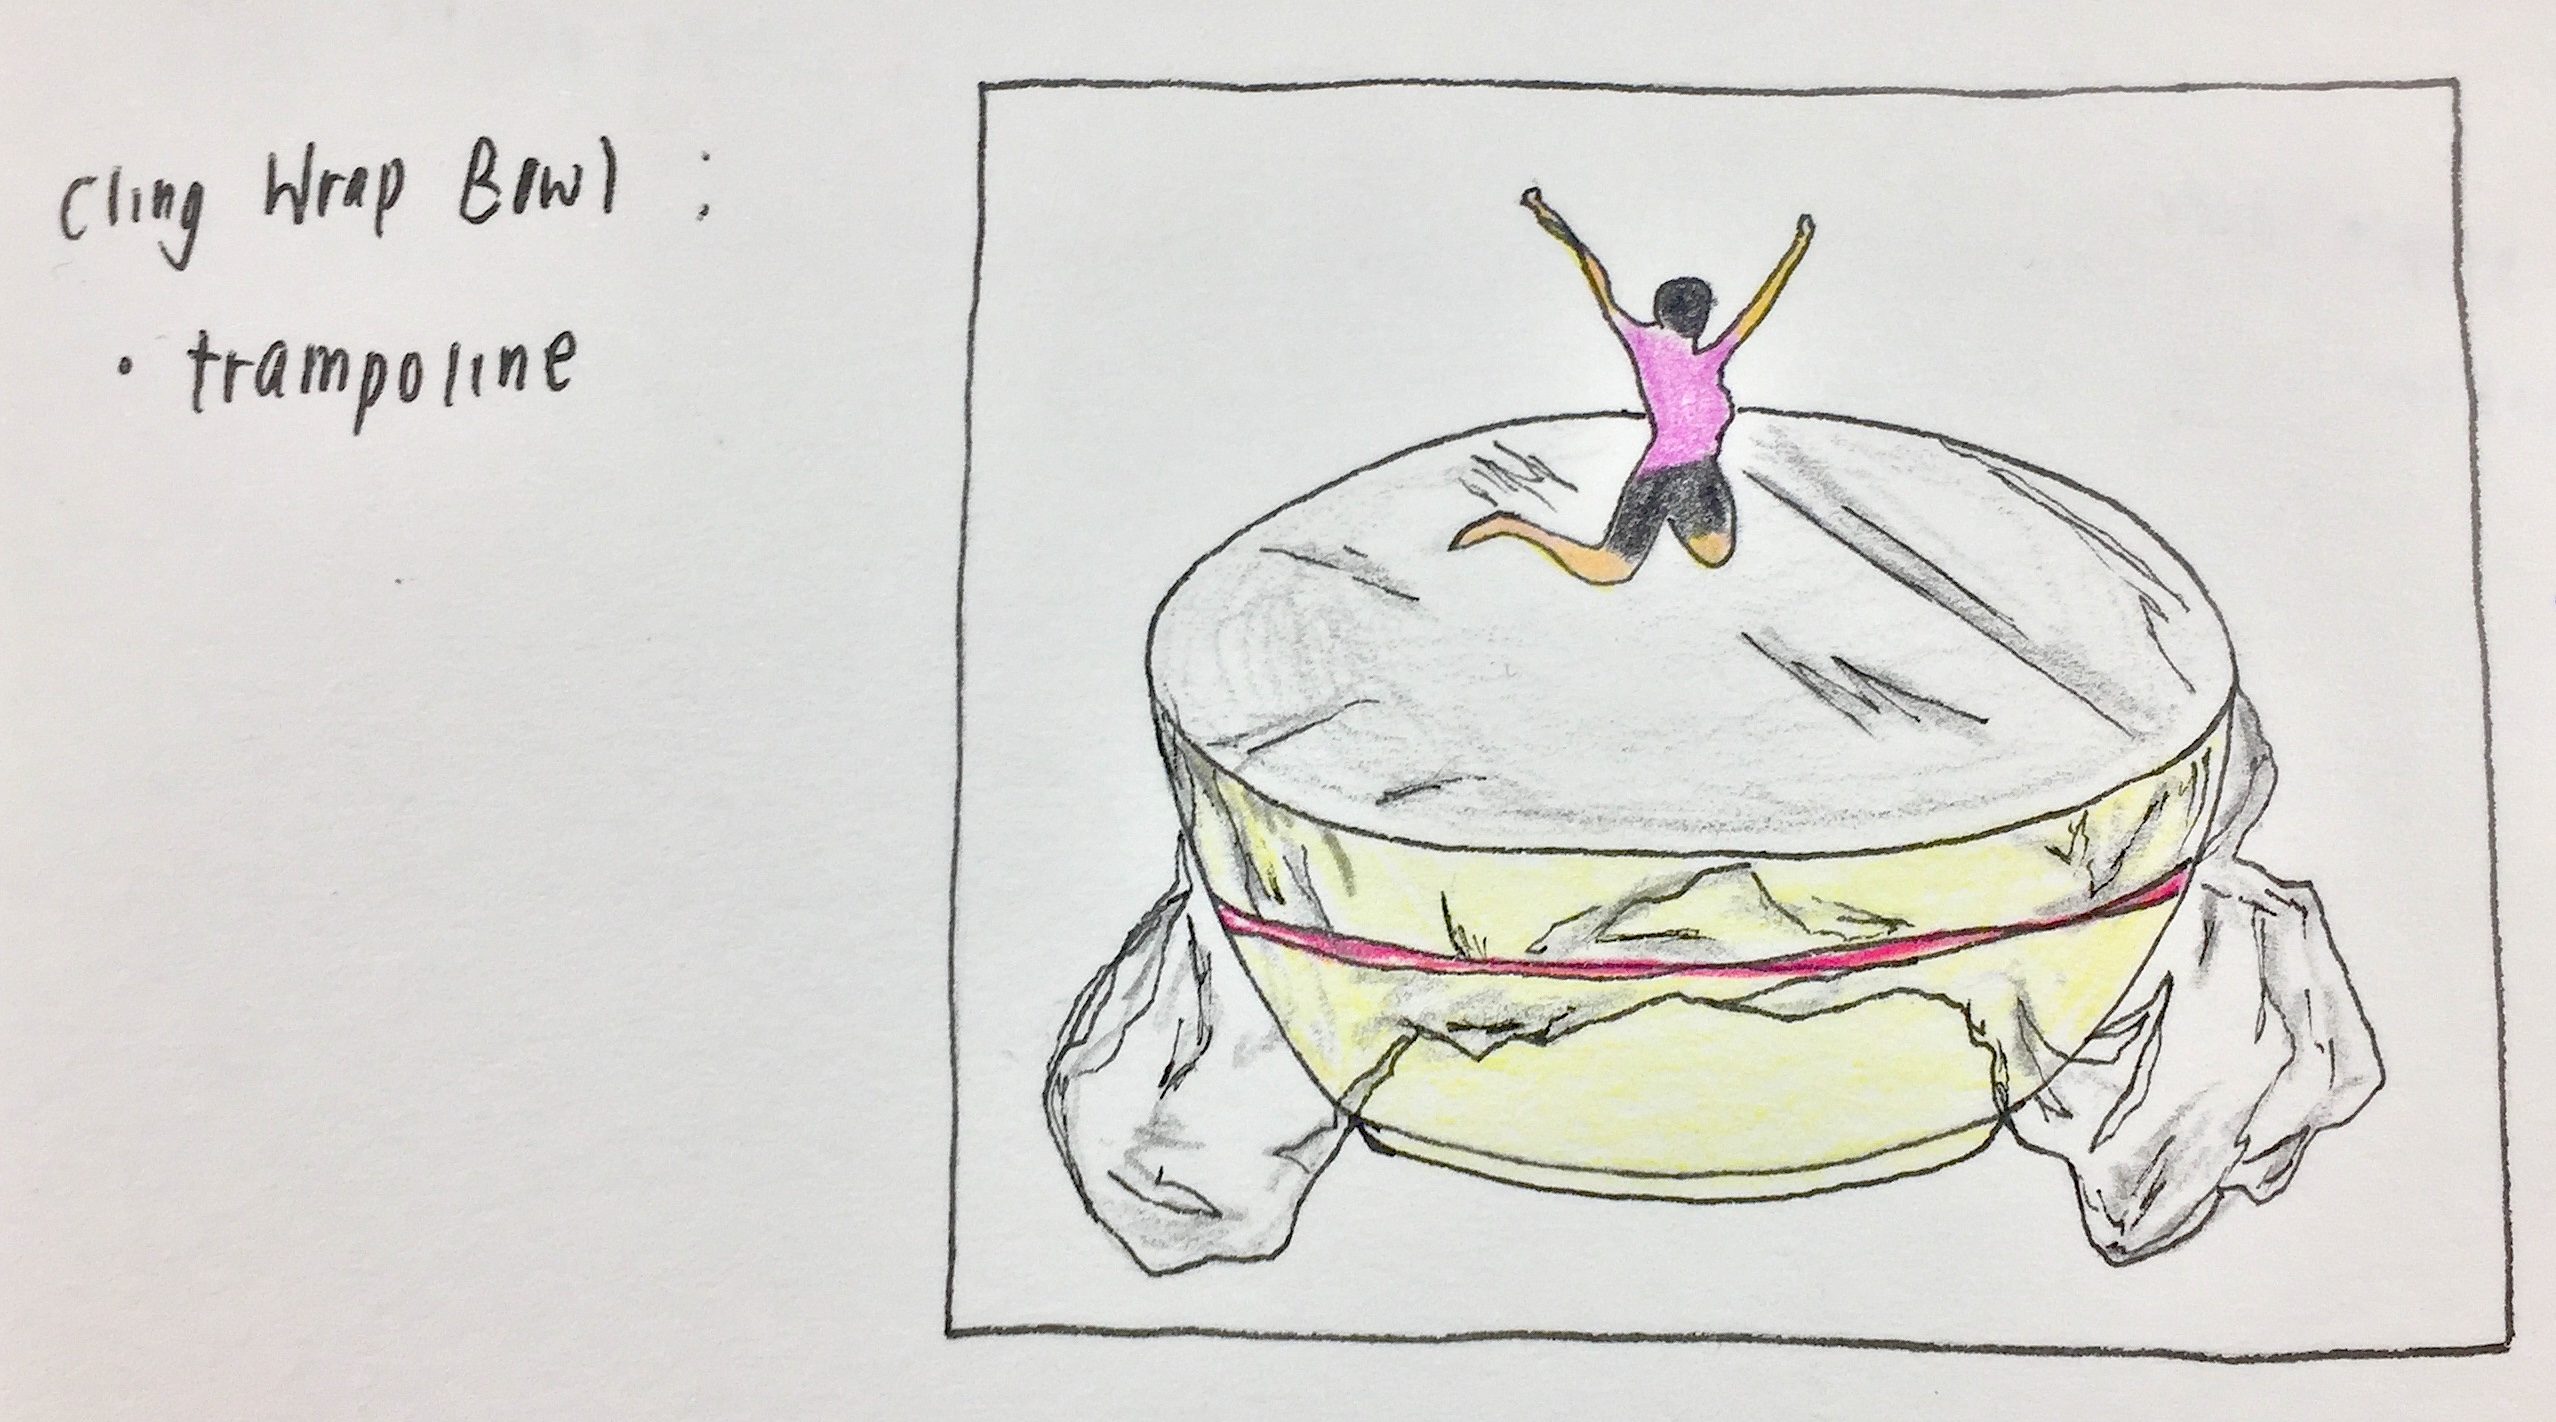
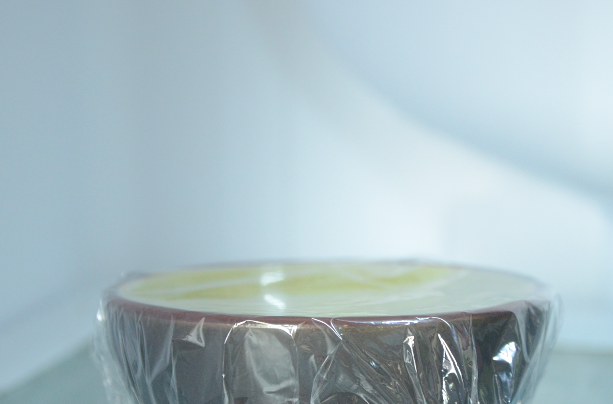
Cling wrap bowl // trampoline
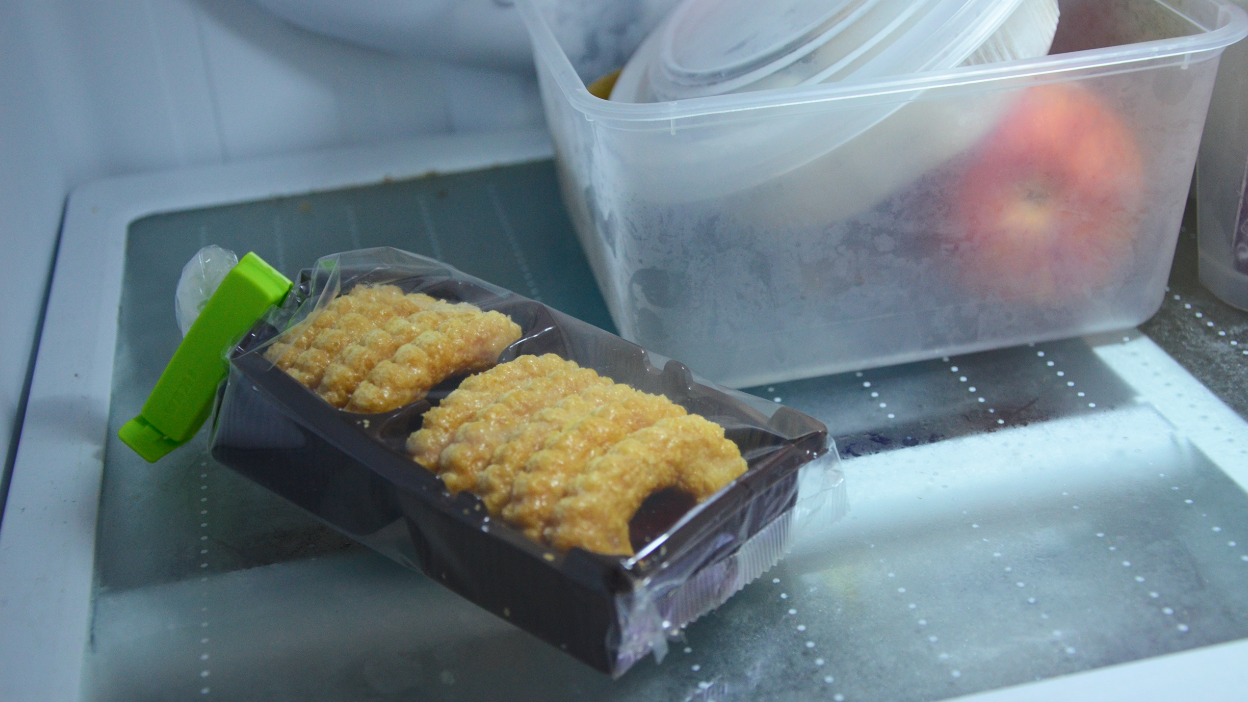
Since the plan now was to work with images, I arranged the order of my different scenarios in a way whereby the close-up images would be shown first, followed by the reveal of the location with a zoomed out shot.
| 1. Blank screen, sounds of pool area | 2. Can drink image, volume increases, the transition to boat sounds | 3. Rowing/water sounds, conversations, transition into cheering | 4.Trampoline image, jumping sounds |
| 5. Zoom out image of the can in fridge | 6. Image of dried chilli packet | 7. Cling wrap bowl sitting on shelf |
Images of my close up settings:
ended up removing this setting because the colors did not fit with the rest
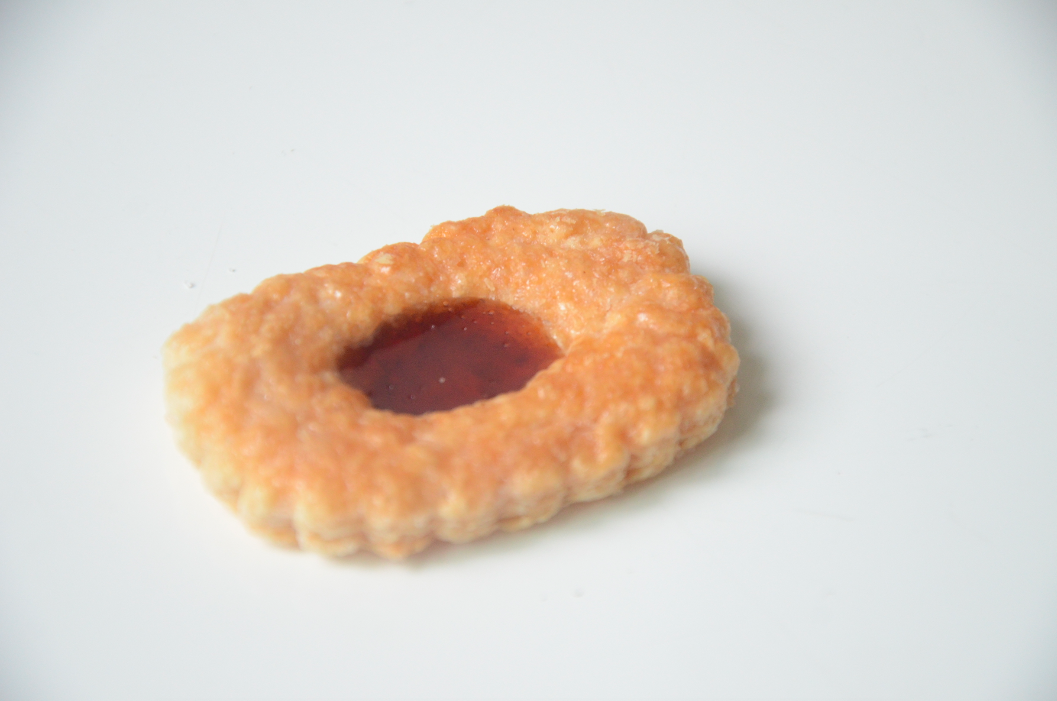
replacement of chilli scenario
additional scenario because video had to be a minute long
When I started the process of taking my images, I had originally wanted to use these tiny human figures that I had previously purchased at a very low price. Unfortunately, the quality of it wasn’t the best, especially the colours and how it had been painted. Even though including the actual figures would have included a much most realistic quality within the scenarios itself, I felt that the low quality of these figures ruined the visuals.
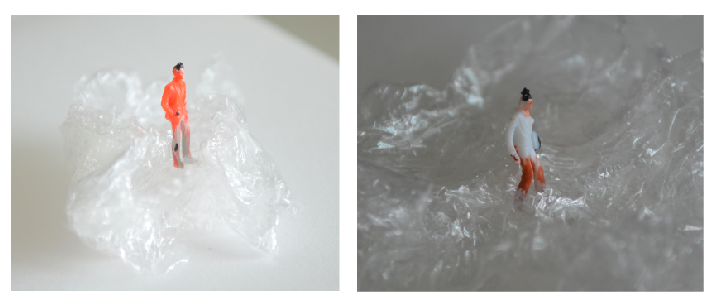
Hence, I resorted to photoshopping them into the close-up shots of the items and using them as a guide to creating my own illustrations of small humans instead.
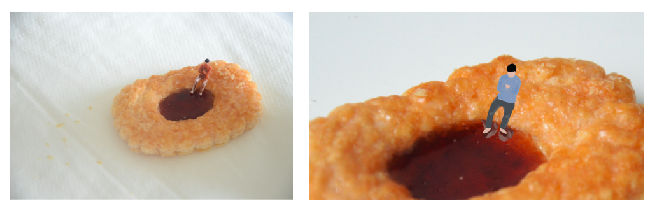
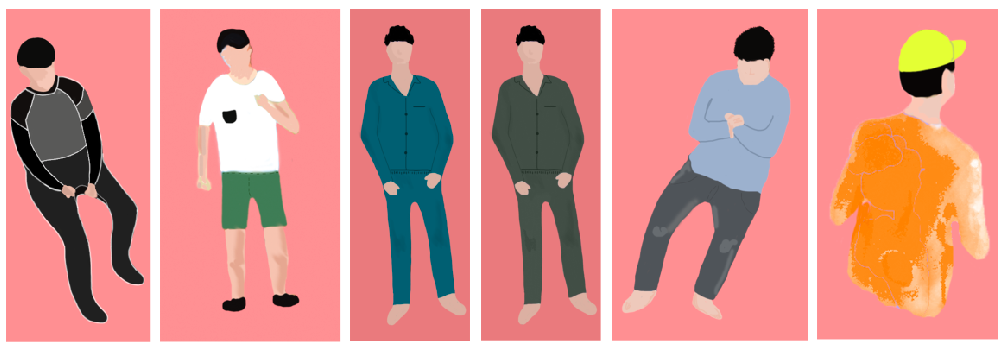
Illustration of humans for all scenarios
To create these illustrations, I painted over the previous images with the use of a Wacom.
Images of humans in the respective settings:
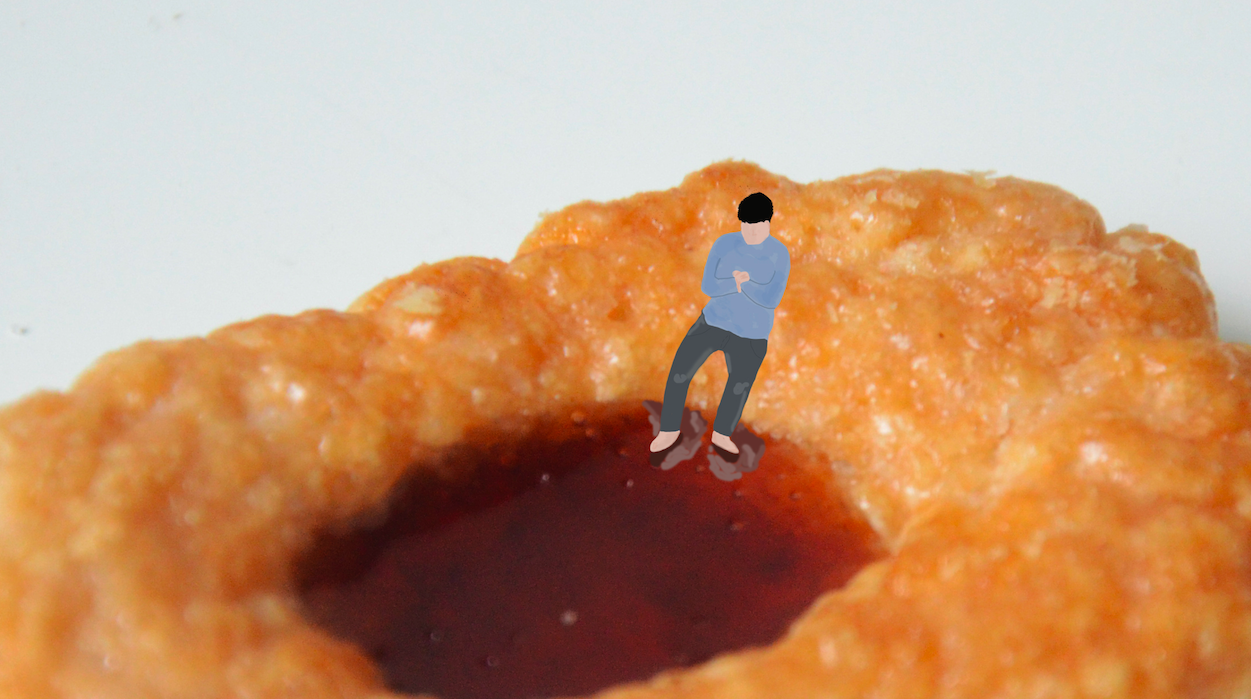
These 4 scenes appeared in the first half of my video with sounds that match according to the setting. The following half consisted of the zoomed out images that revealed the setting of a fridge.
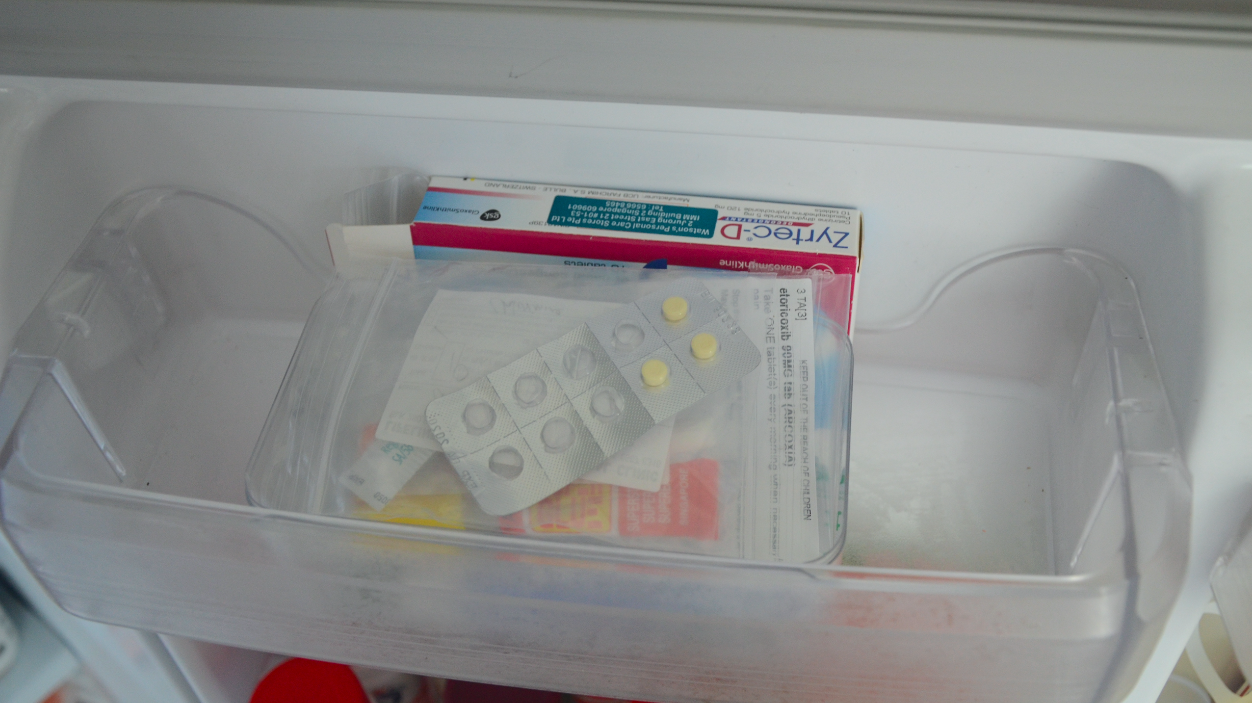
Images of fridge settings:

After editing all my images that were taken with a DSLR, I compiled everything in order with iMovie and inserted the appropriate audio over it.
During the critique, the feedback that I received was that the video would have been more realistic if the humans were not illustrated. I also felt that since we were limited to 1 minute, maybe it would have been better if I had stuck to 3 scenarios since it turned out to be a little rush.
To sum up project 3, I had a really good time experimenting with both realistic and illustrated qualities. Although the process was rather time-consuming with the photoshop and additional sound recording, I am very glad that I got to experience working with iMovie and piecing every part of this together.

My mama always said, “Life was like a box of chocolates. You never know what you’re gonna get.” – Forrest Gump, 1994
Tasked to pick four movie quotes and create a visual narrative that expresses each quote using found images, project two challenges us to break away from translating literature into visuals that are too literal. The artist influences for this project are from art movements such as Surrealism, DADA, and Russian Constructivism.
Surrealism is an art movement involving visual art and literature that grew out of the earlier Dada movement. Its emphasis was on positive expression and revolves around hyper-realistic styles. Art created in this art movement was a reaction against what people saw as a destruction wrought by the “rationalism” that had guided European culture through the horrors of WW1.

https://en.wikipedia.org/wiki/The_Empire_of_Light#/media/File:The_Empire_of_Light_Guggenheim.jpg
This surrealistic piece by Rene Magritte represents a fictional scene whereby day and night exist at the same time. Although portrayed in a very subtle manner, this piece allows me to appreciate surrealism.

http://www.joewebbart.com/
Another artist that I referenced for this project was Joe Webb. As an artist who works with collaging, the play on colour and scale in his works were very inspiring when creating my compositions.
The first movie that I looked at for my quotes was Mission Impossible Rogue Nation (2005). Although I gathered a total of 5 quotes initially, I realized that it was more challenging to interpret some of them rather than the others visually. Hence, only two out of four of my final quotes were from this movie. An example of a quote that I struggled with was “Sir, Hunt is the living manifestation of destiny, and he’s made you, his mission.” – Alan Huntley. When trying to develop ideas from this quote, I realized that not only was it a little too specific to the characters in the movie, the words had too broad of a spectrum that I struggled with visuals that could interpret it best.
“Human Nature, my weapon of choice…” – Soloman Lane, Mission Impossible Rogue Nation 2005
“What we’ve got here is a failure to communicate” – Cool Hand Luke, 1967
The approach that I took in creating my compositions was through dissecting various words in the quotes and piecing them together visually.
Composition 1

Final Tote Print
For my first composition that I had printed on my tote bag, this design portrays the ‘control’ in the first quote through the use of a vending machine as the main subject as well as a repeated pattern of joysticks in the background. Inspired by Rene Magritte’s Golconda, the inclusion of joysticks in the background creates depth. With the vending machine portraying choice and control over what the person wants, the context of ‘human nature’ comes into the content of the machine. Replacing the typical items such as food and drinks, I decided to work with elements of human nature which include emotions, senses and the physical human body. Emotions portrayed through the use of emojis, senses through the use of eyes, nose and mouth, and the physical body portrayed through the use of limbs.
Initially, when the application of halftone was compulsory, my composition looked very flat as a whole due to the lack of contrast. However, after we had the option of removing the use of halftone, I decided to only apply it in the background so as to not take too much focus of the vending machine.
Composition 2
In this next composition of the same quote, I wanted to portray control in the setting of a gamer playing a game. Using an image of a person holding a console to convey the control that they have in their hands, the weapons that are available to them on the screen shows imagery that reflects control over humans. The first one being a puppet master controlling its puppet, followed by images that represent mind control in the other two. The rippling background adds additional effect and focal point to the tv screen.
During the critique, it was brought up that the words within the ‘weapon’ frame were too distracting and it would have been better visually if I could find a different image to replace it.
Composition 3

The first composition for this quote was rendered through the exploration of communication which includes verbal and signs language. I decided to bring in a blender as the main focus because I was inspired by the use of a quirky object such as a vending machine in the first composition. Out of the many household objects, the blender was also one that produced a lot of noise which I thought was fitting since verbal communication is normally a failure when the environment is very noisy. Going against the norm of having hands pressing the buttons of the blender, I placed hands that form letters of sign language inside the blender. Although the five hands spell out the word ‘hello’, the messy blended motion jumbles the letters up to show a failure in communication. Another play of scale is shown in the smoke clouds that are placed by the wires on the bottom right corner.
Forming ideas that involve placing random everyday objects into a quirky context reflects a part of creativity that I really enjoy and hope to incorporate more into future creations.
Composition 4
Through this last composition, I portrayed the idea of realization that communication has broken down between two individuals in a relationship. Unknowingly, they are drowning each other literally and figuratively. Ironically, the person on the left is a lifeguard who is blind to see that he is drowning his friend. The weight towards the left of the composition portrays him as the dominating figure. The structure of the lifeguard house was also strategically placed to symbolize the form of a human body.

Compositions of the first quote on the top and second quote at the bottom.
Ending off this digital project manually, we experimented with the process of silk screening. Although long and tedious, the process was still very fun and receiving an outcome felt rewarding. Unfortunately, since a large portion of the process took place in the darkroom, I was unable to record as many process pictures. I do however have an image of my exposed silkscreen. Exposed at 18 seconds, my second attempt with fewer halftones was more successful as the contrast turned out a lot greater.

Exposed silkscreen
After washing our exposed silkscreen, the next step was to create prints with it. This involved the process of applying ink to one end of the silkscreen and using a squidgy to glide the ink over evenly by applying even pressure.

Ink on silkscreen before print
Since this was the first time I had tried silk screening, I learnt a lot about a new process of producing art 🙂
Improvements to be made
During the critique, it was mentioned that the outcome of two of my compositions was better, the vending machine and blender. Unfortunately, the other two did not portray the quote as well and it could have been because I kept going back to make changes hence losing the original meaning. Since the majority of some compositions were in greyscale, I could’ve contrasted them more to improve on its visual components. In conclusion, although I did struggle quite a lot in creating my compositions and making sure that the meaning of my quotes came through, I was pleased with the final result.