Hi!
Together with Amelia and Yuli, we made our elements for installation.
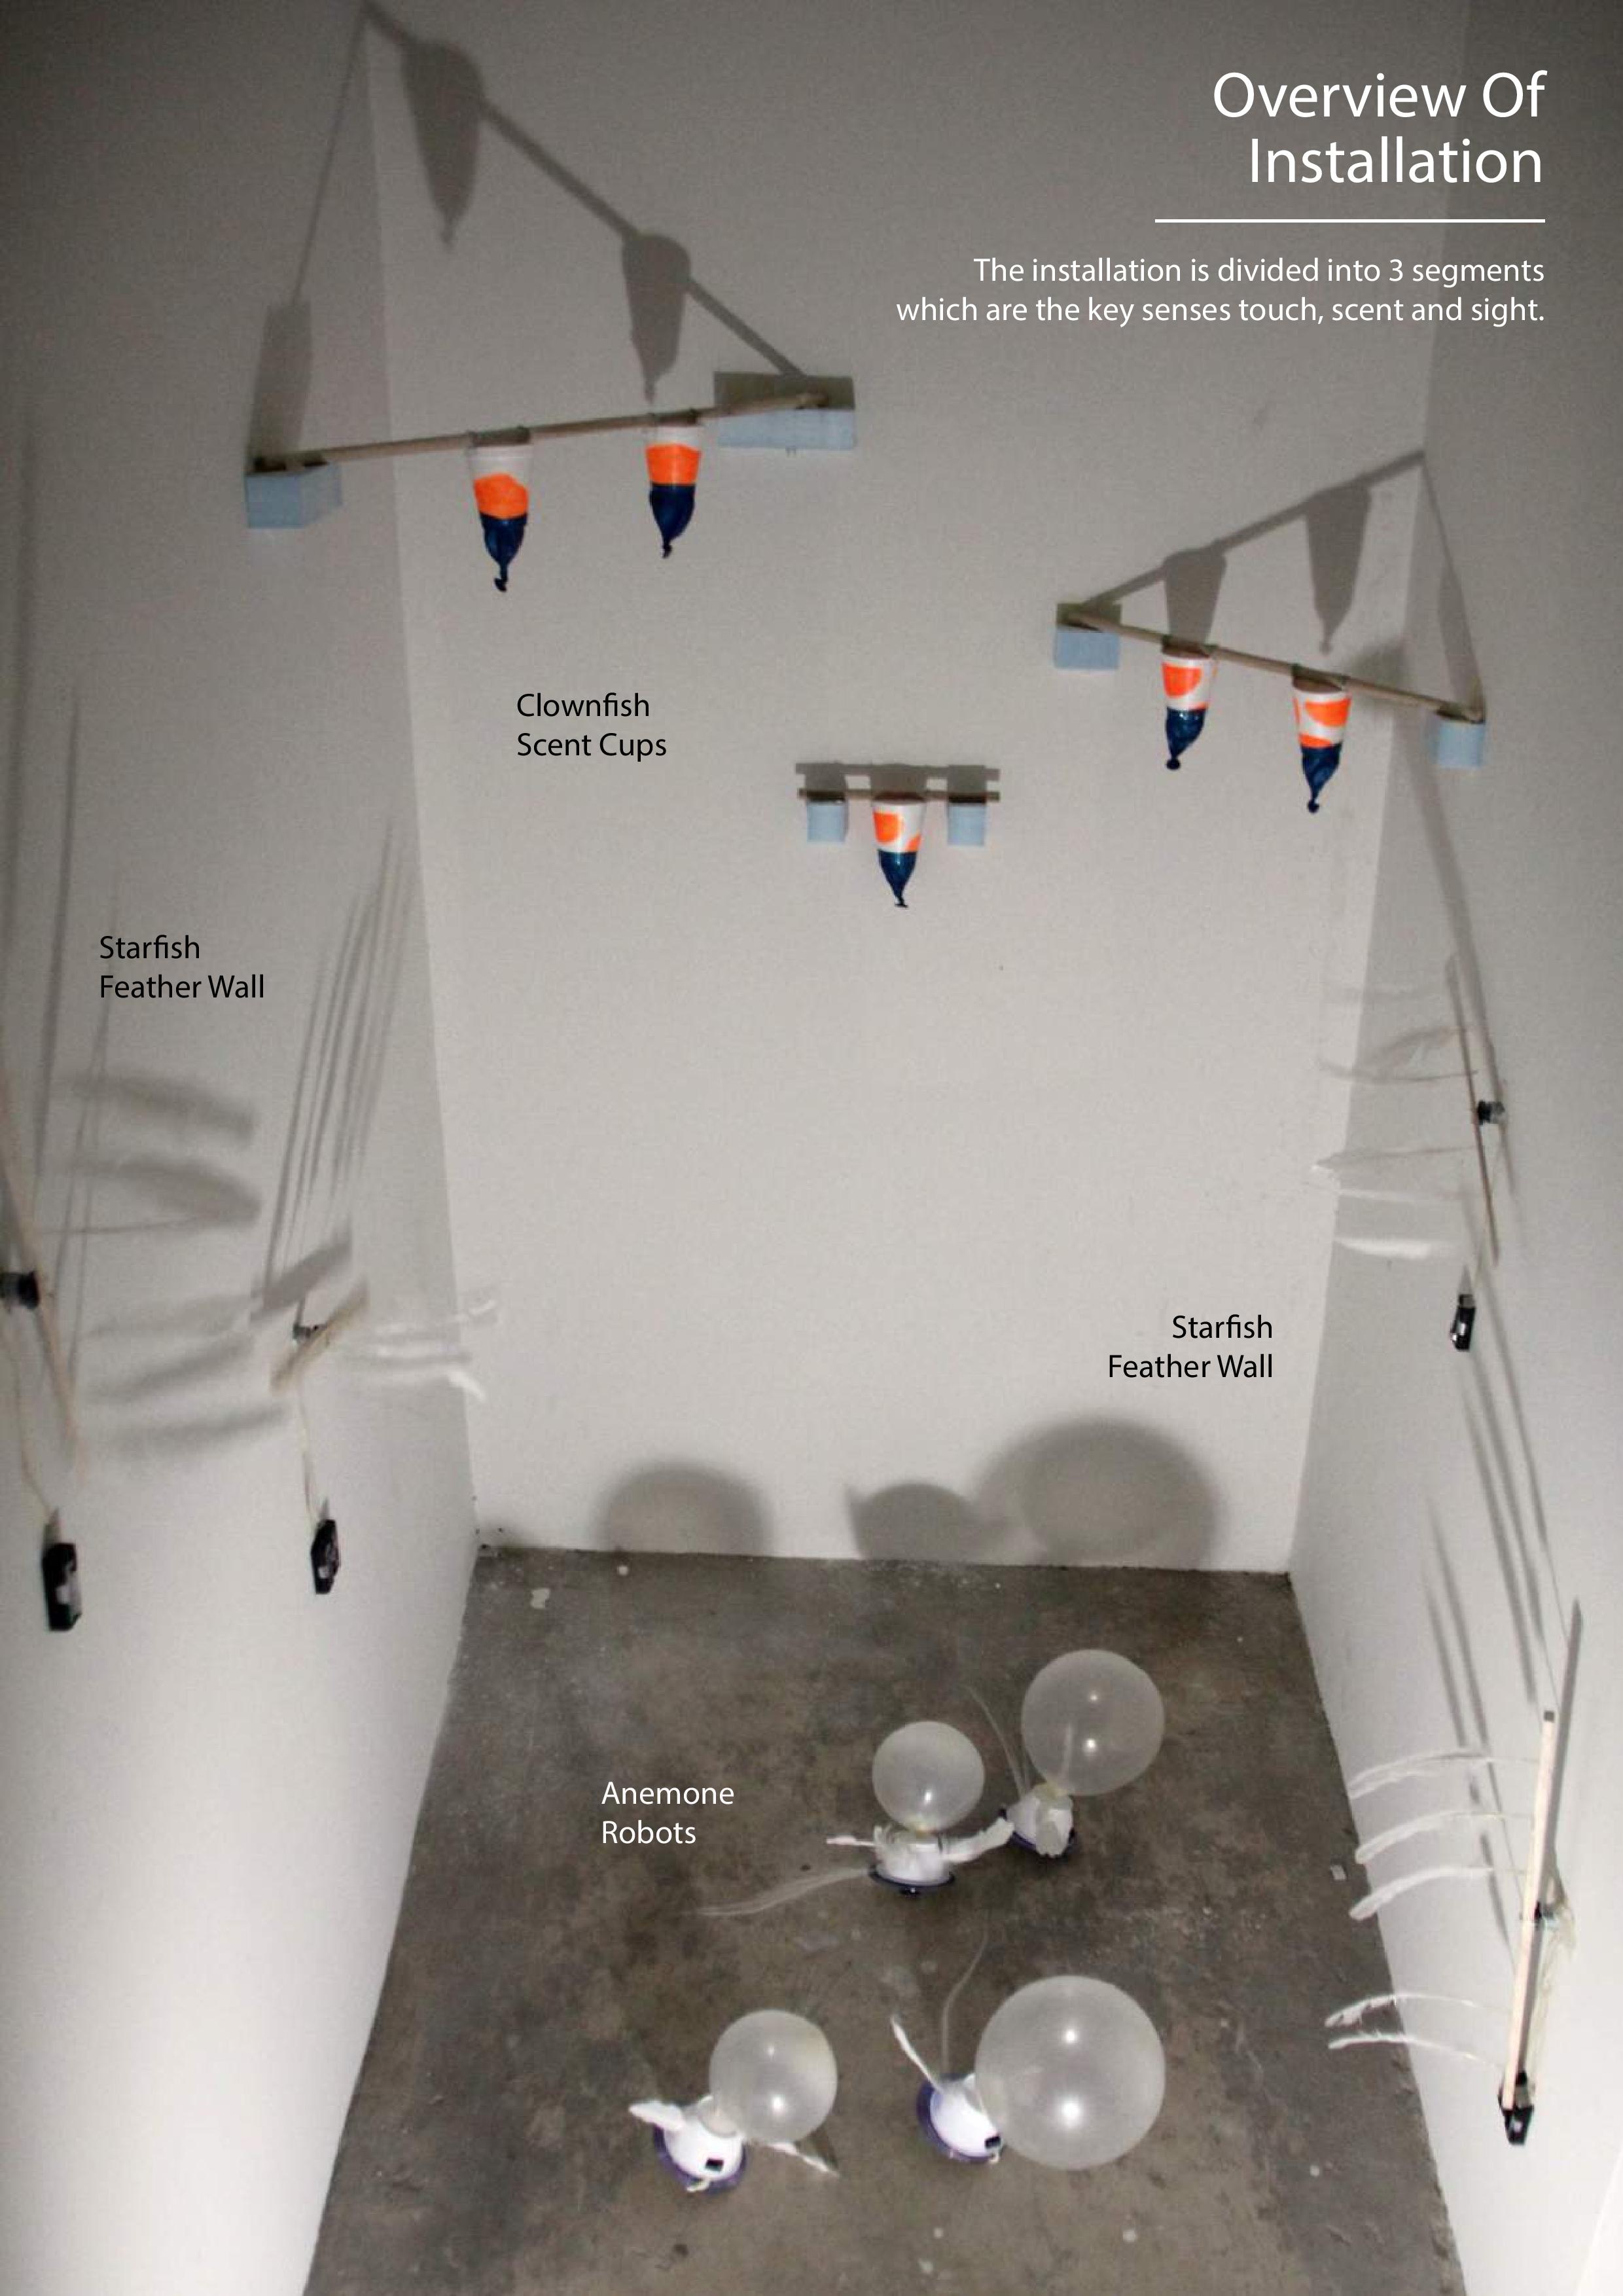
We are having three main elements:
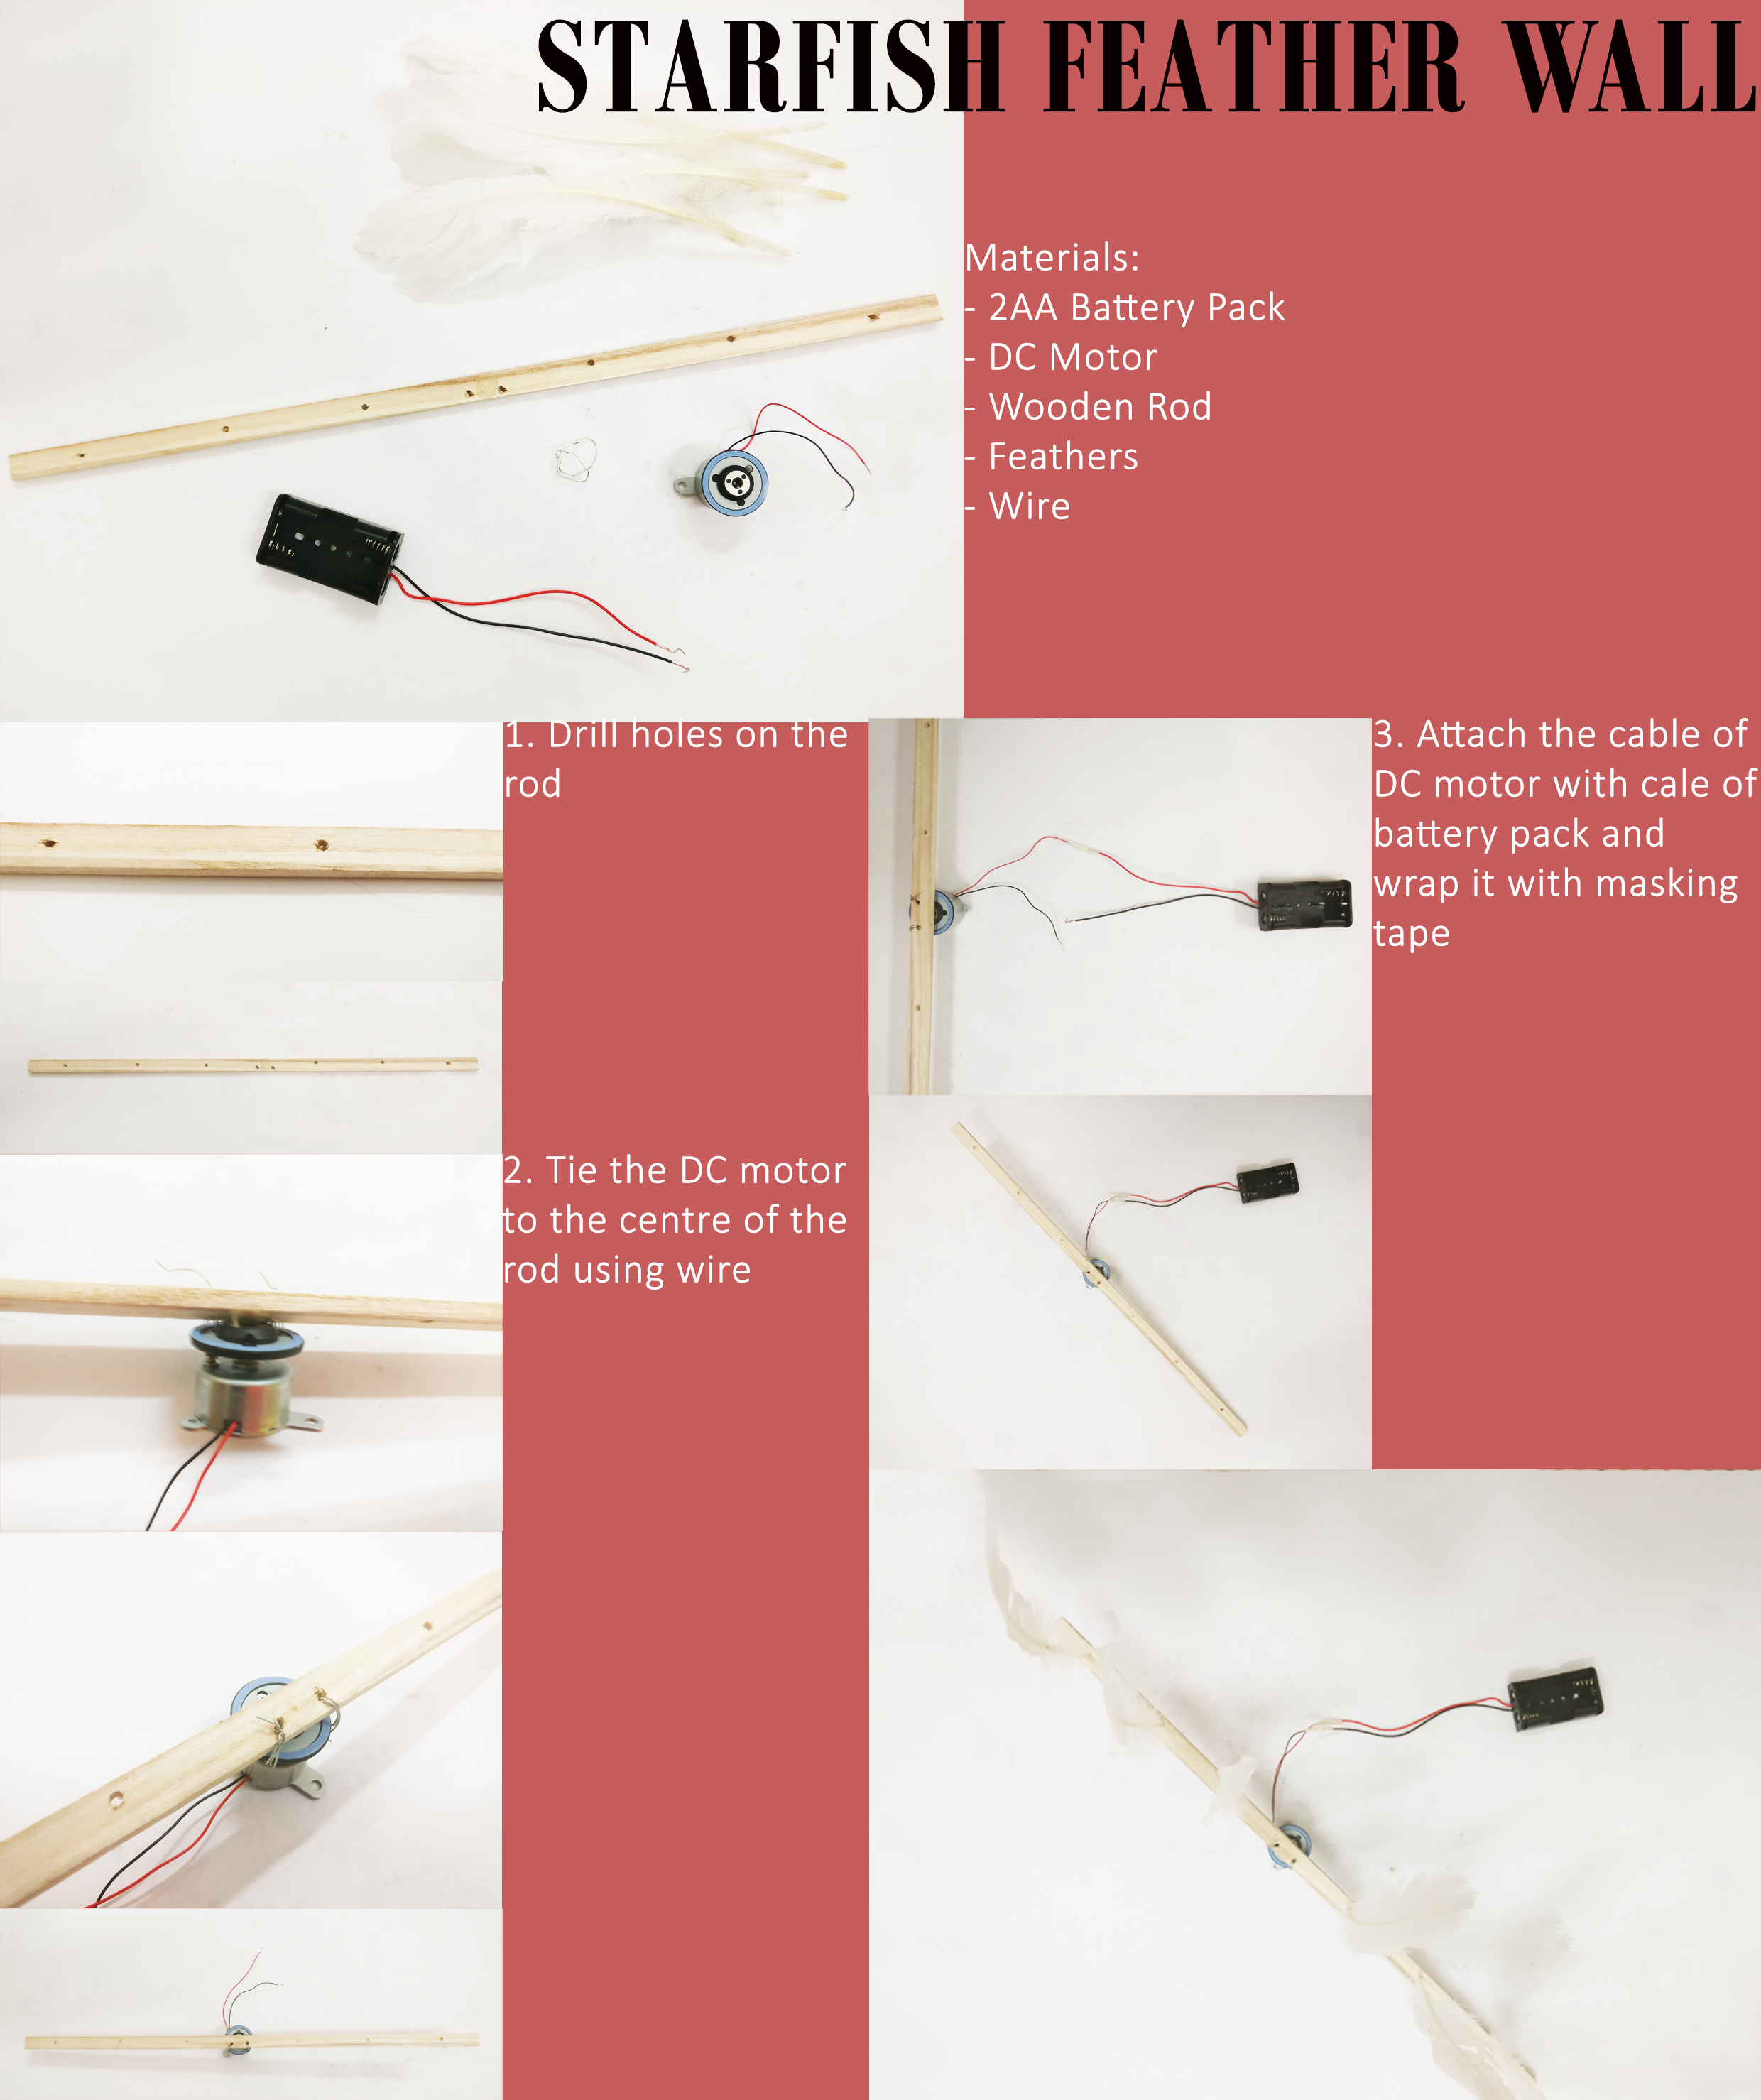
– Starfish Feather Wall
– Anemone Robot
– Clownfish Scent Cup
Here is the process of how to make each element:


Thank you!

Hi!
Together with Amelia and Yuli, we made our elements for installation.
We are having three main elements:
– Starfish Feather Wall
– Anemone Robot
– Clownfish Scent Cup
Here is the process of how to make each element:
Thank you!
Hi!
So Amelia, Yit Ling and I had separated the workload for each person to research more on one element of our installation.
So I am supposed to get the materials inspired by the ‘homemade Wobblebot’ bellow.
I went to Sim Lim and get the following:
– DC motor
– Battery pack
– Switch
– LED light
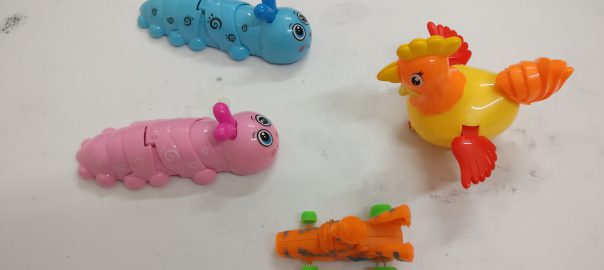
Other than that, I also want to try using some toys have the idea of taking out their materials for our robots.
I bought some car toys and did some experiment with balloon on it.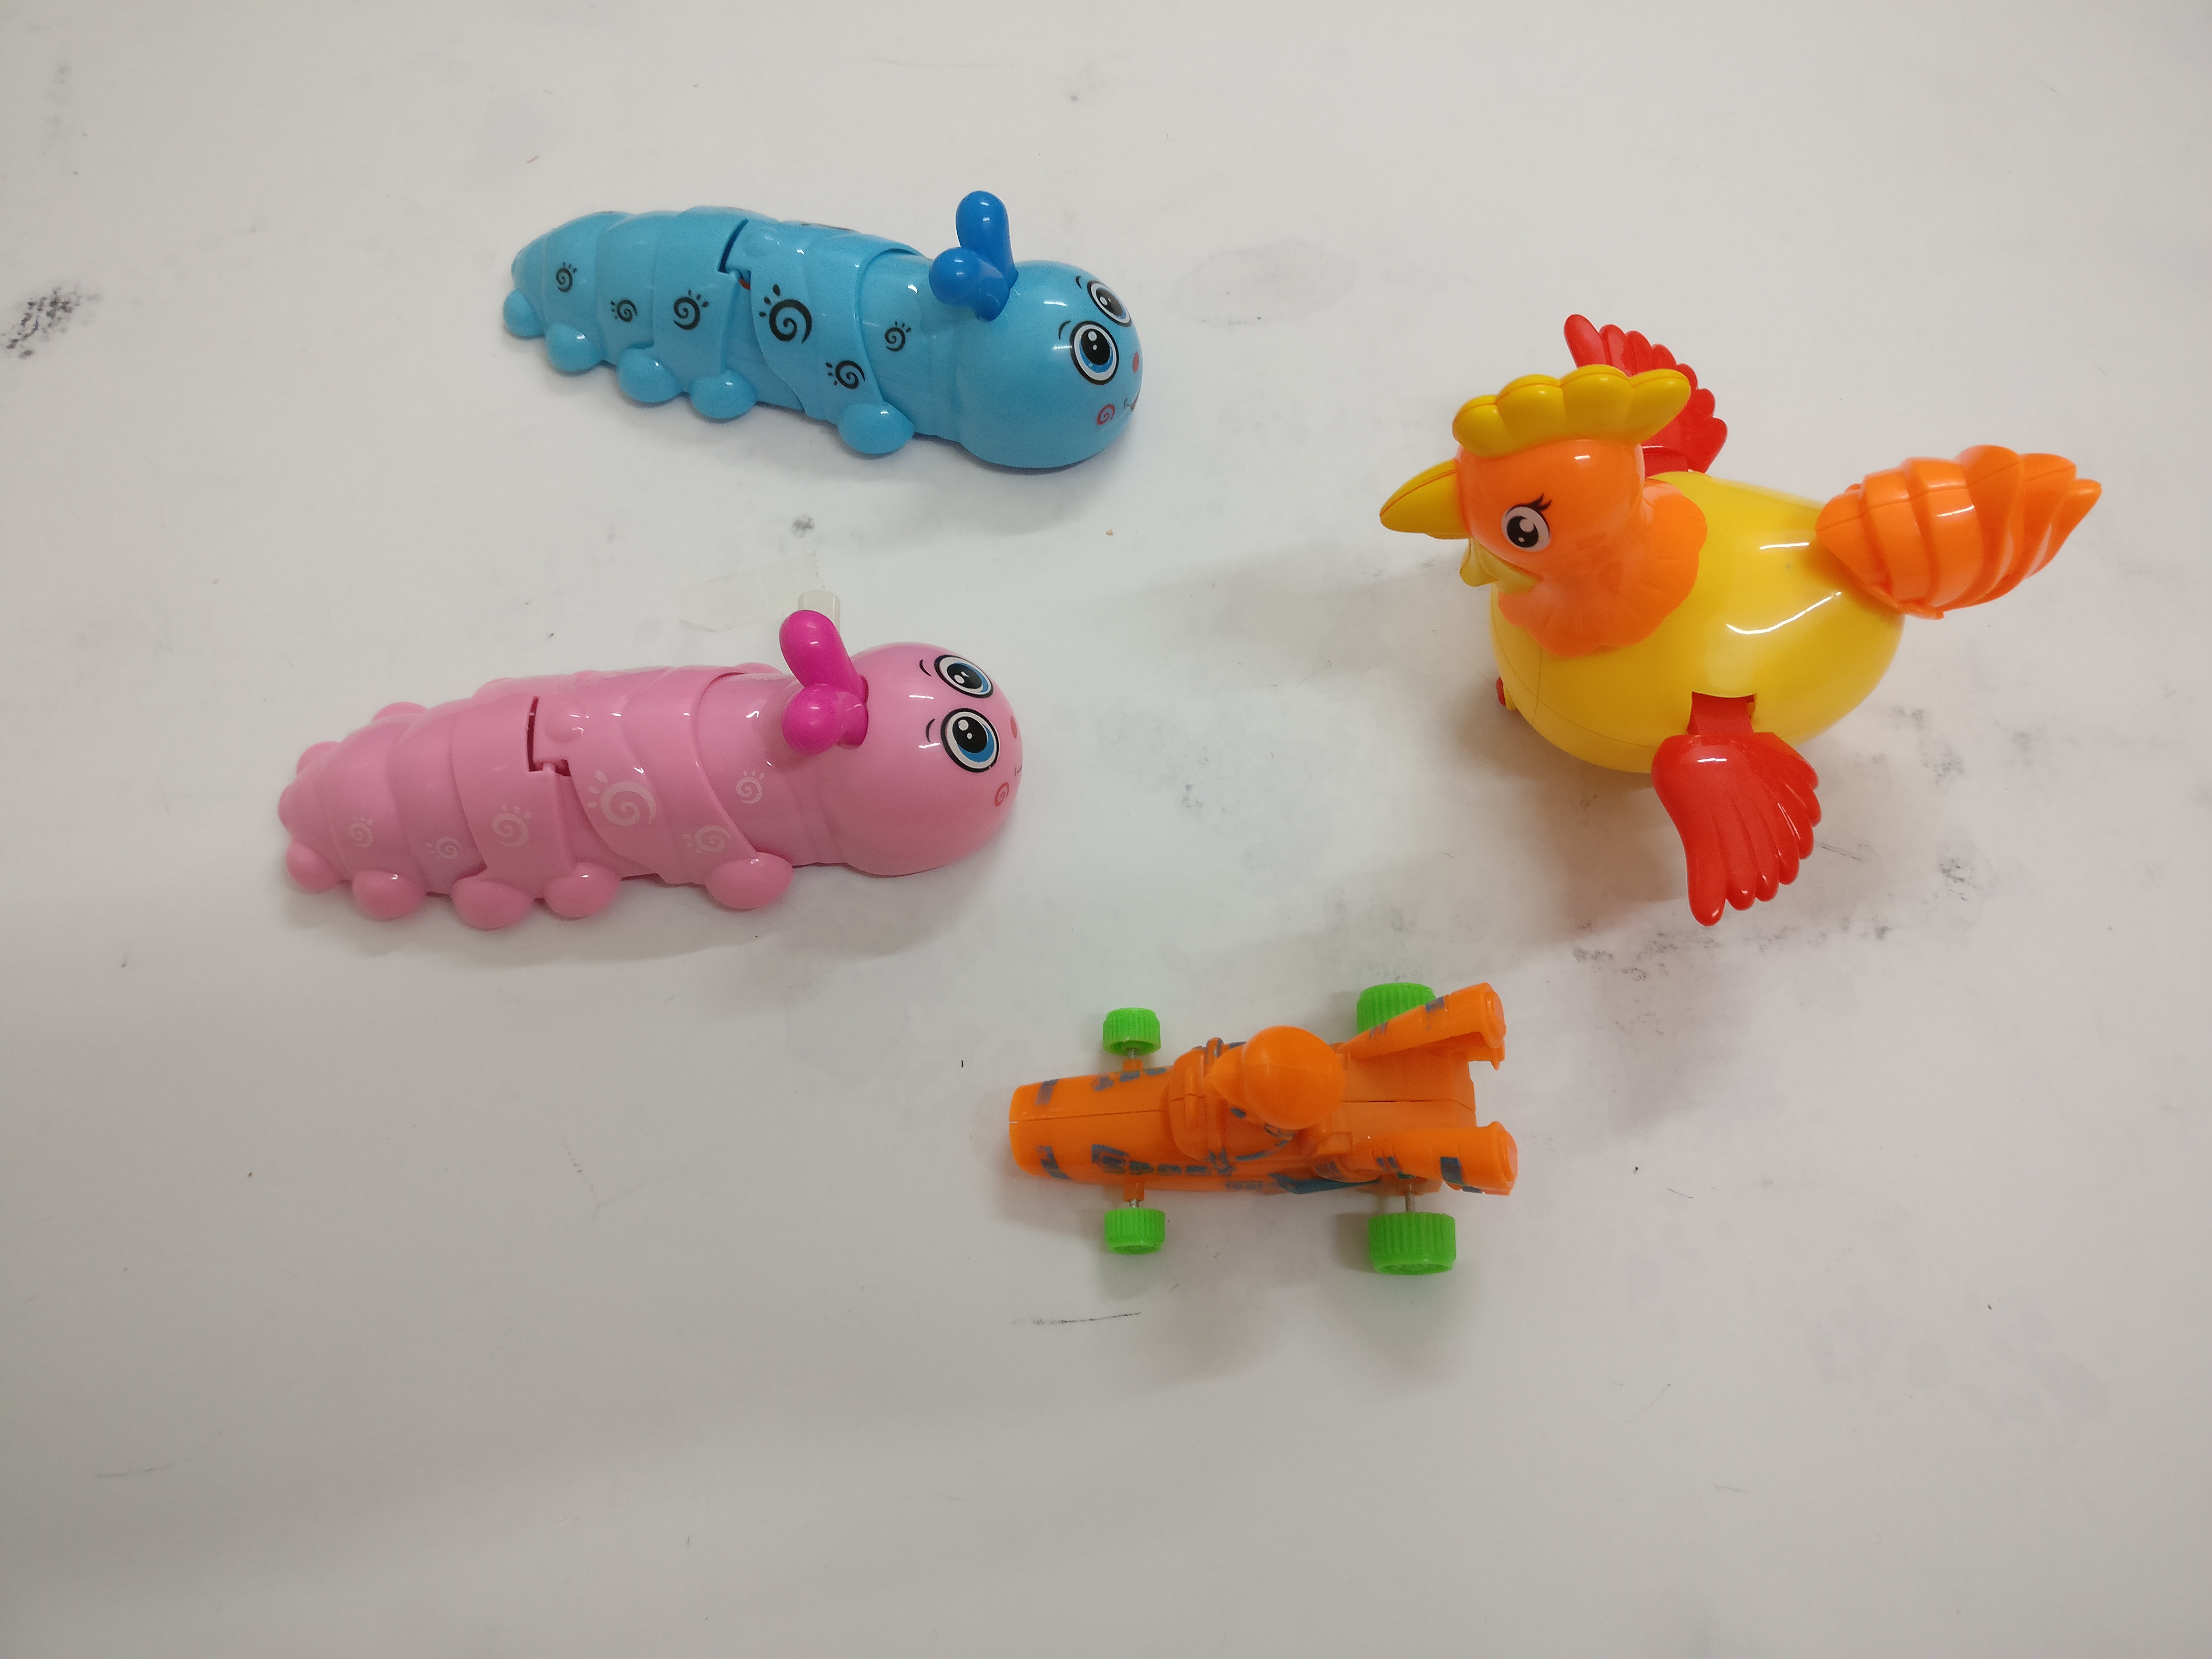
There are two types:
After attaching a balloon:
How it moves with a balloon attached:
For this one, the balloon tied to the head seem to be preventing the chicken from moving. It is because the head also plays part in moving along with the machine, as the head become to heavy the machine stops. Also, the big balloon on top but small wheels below make the center of gravity shifts up. It causes imbalance and thus chicken also tilts to the sides at some points of time.
This one is the most successful toy to be attache with a balloon. It keeps on moving despite the air resistance the balloon gave. It also has an interesting horizontal movement!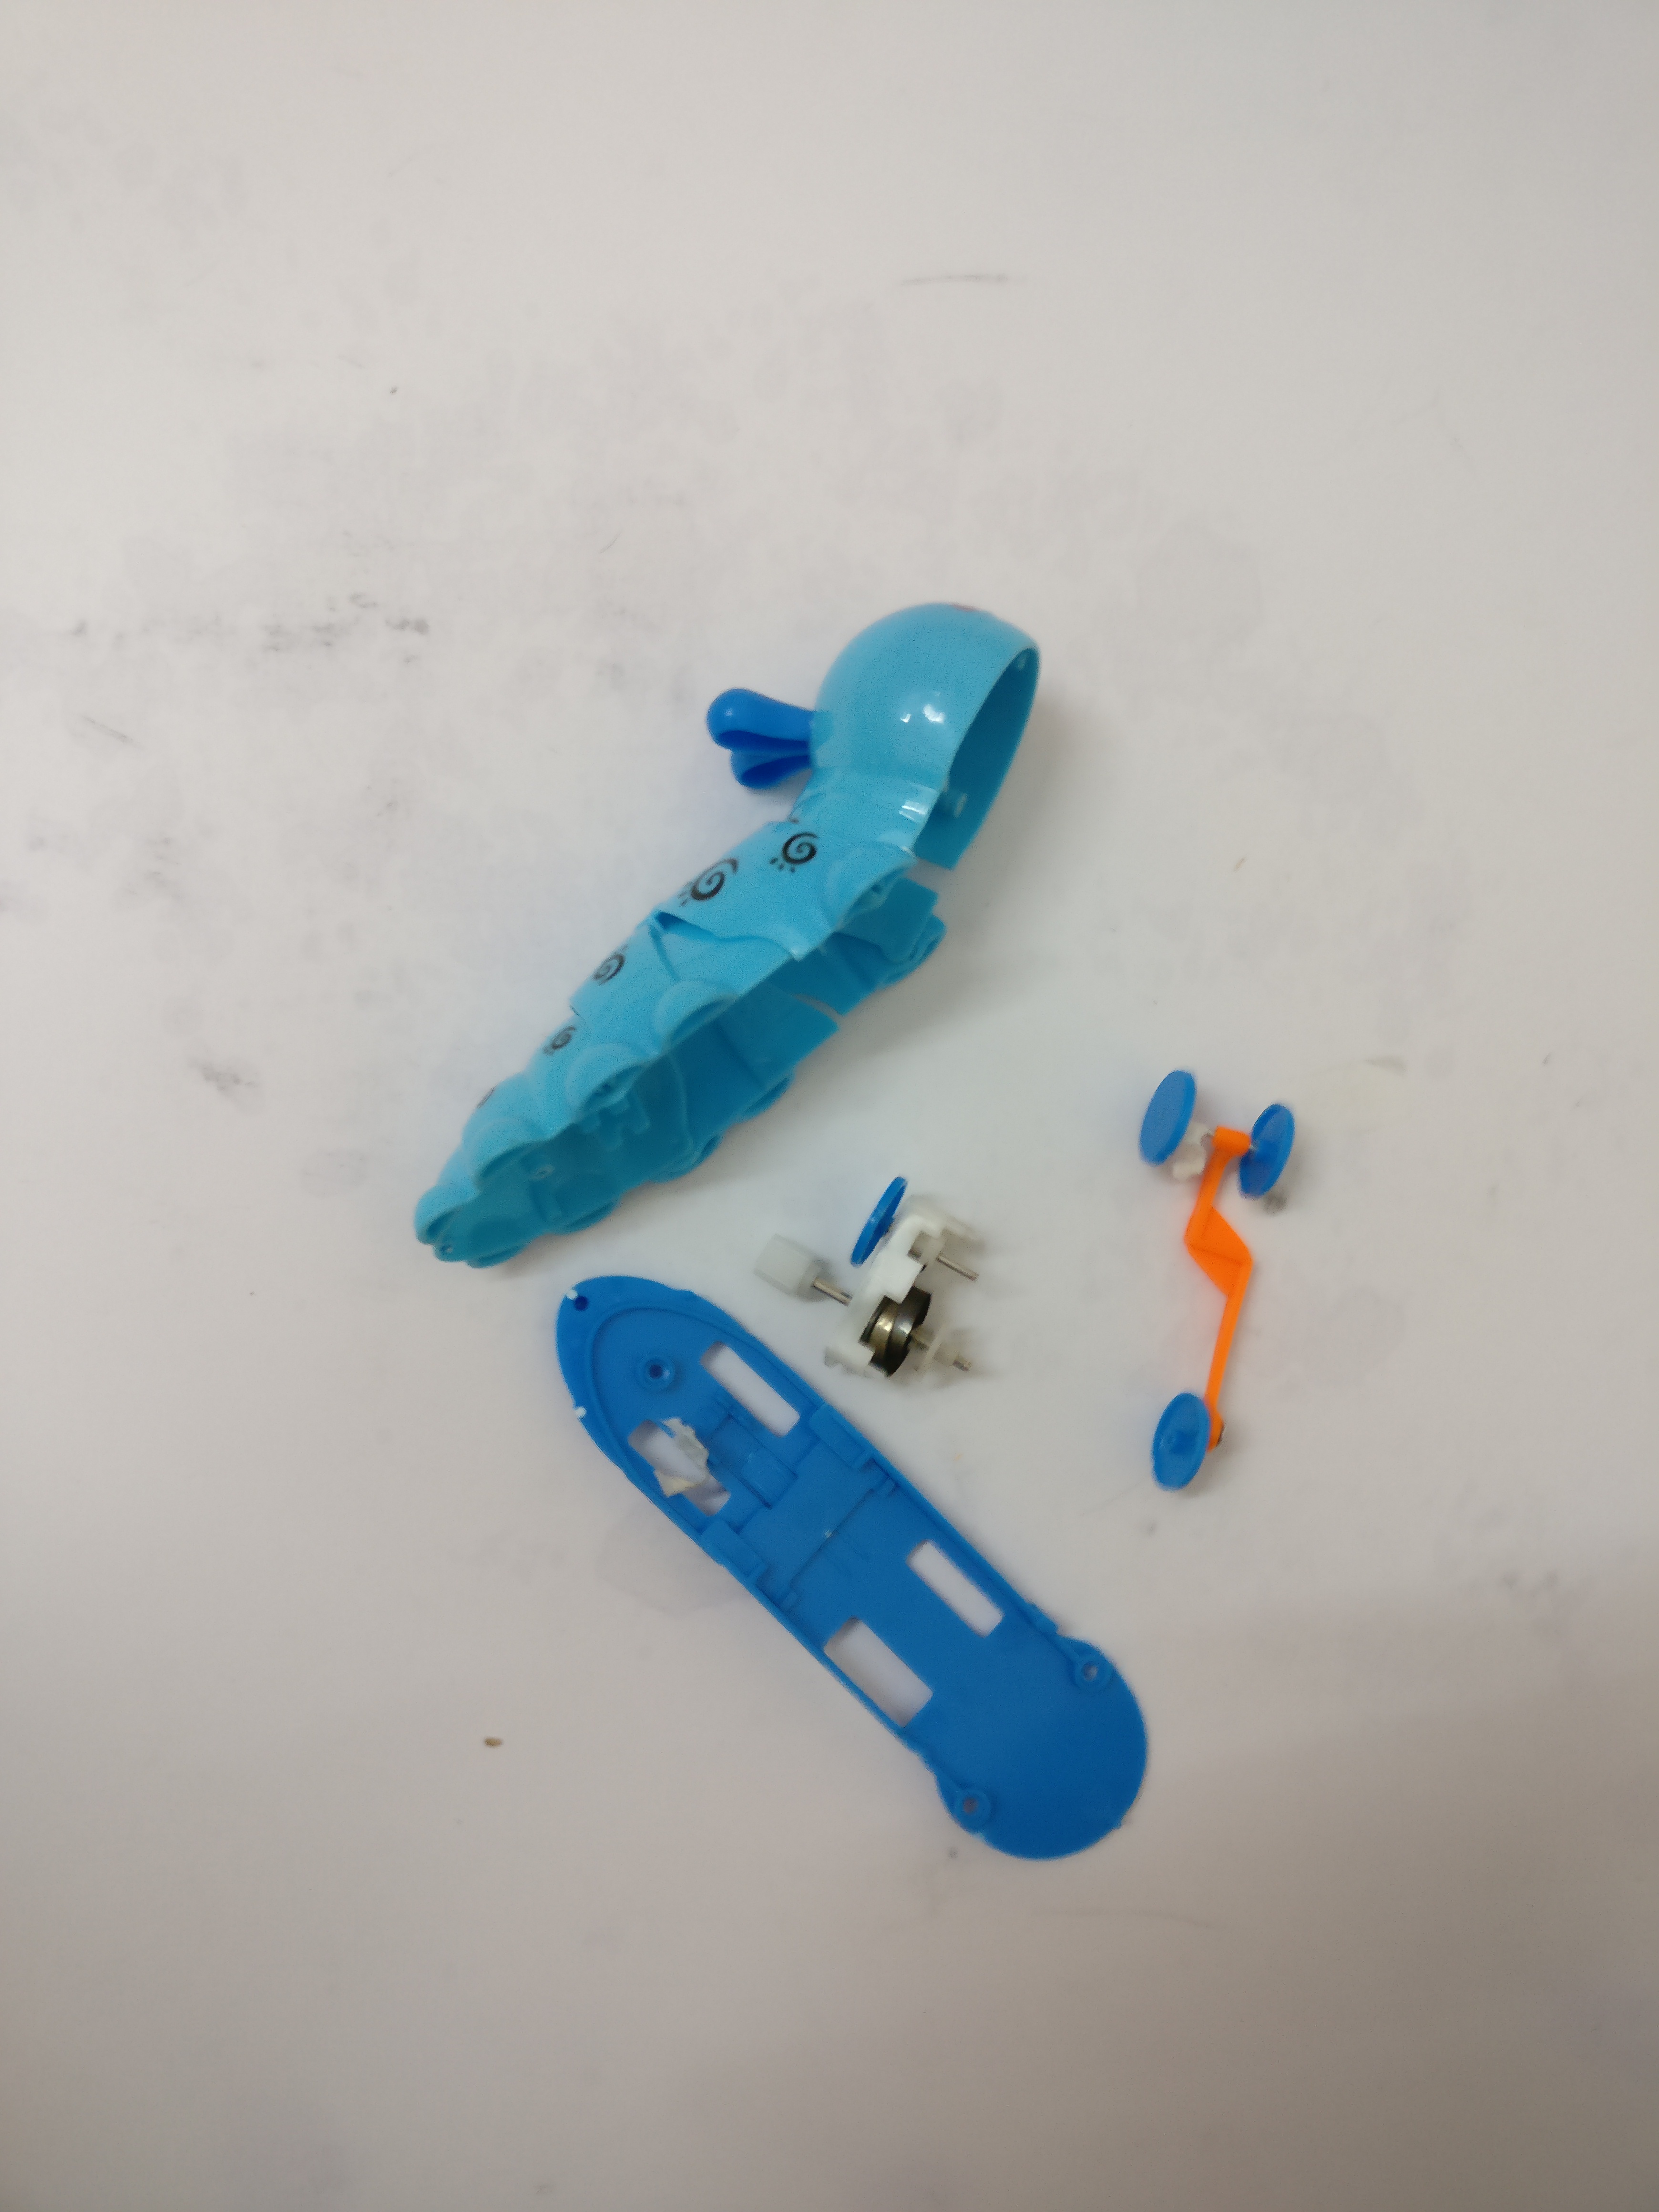 Then I also tried to dismantle the caterpillar and tried to take out the components and move it to customize it. However as the shape is designed for the caterpillar body, it does not work well when I put the wheel and dynamo on other items. So, nah it does not work.
Despite the caterpillar can actually moves, it is not convenient to keep on turning the gear of the toys or keep on changing the direction of the toys. So it is concluded that I should move on and try using DC motor.
I connected the circuit and assemble it! And yeayyyy it works!
This is our very first model prototype that brought to class.

Later on, we tried to modify it and changed here and there. We eventually changed into CD disk and cover the top with a plastic bowl!
So that’s the initial on how we get the Grenas robot!
Thank you 😀
(More installation process coming up real soon!)

Hi!
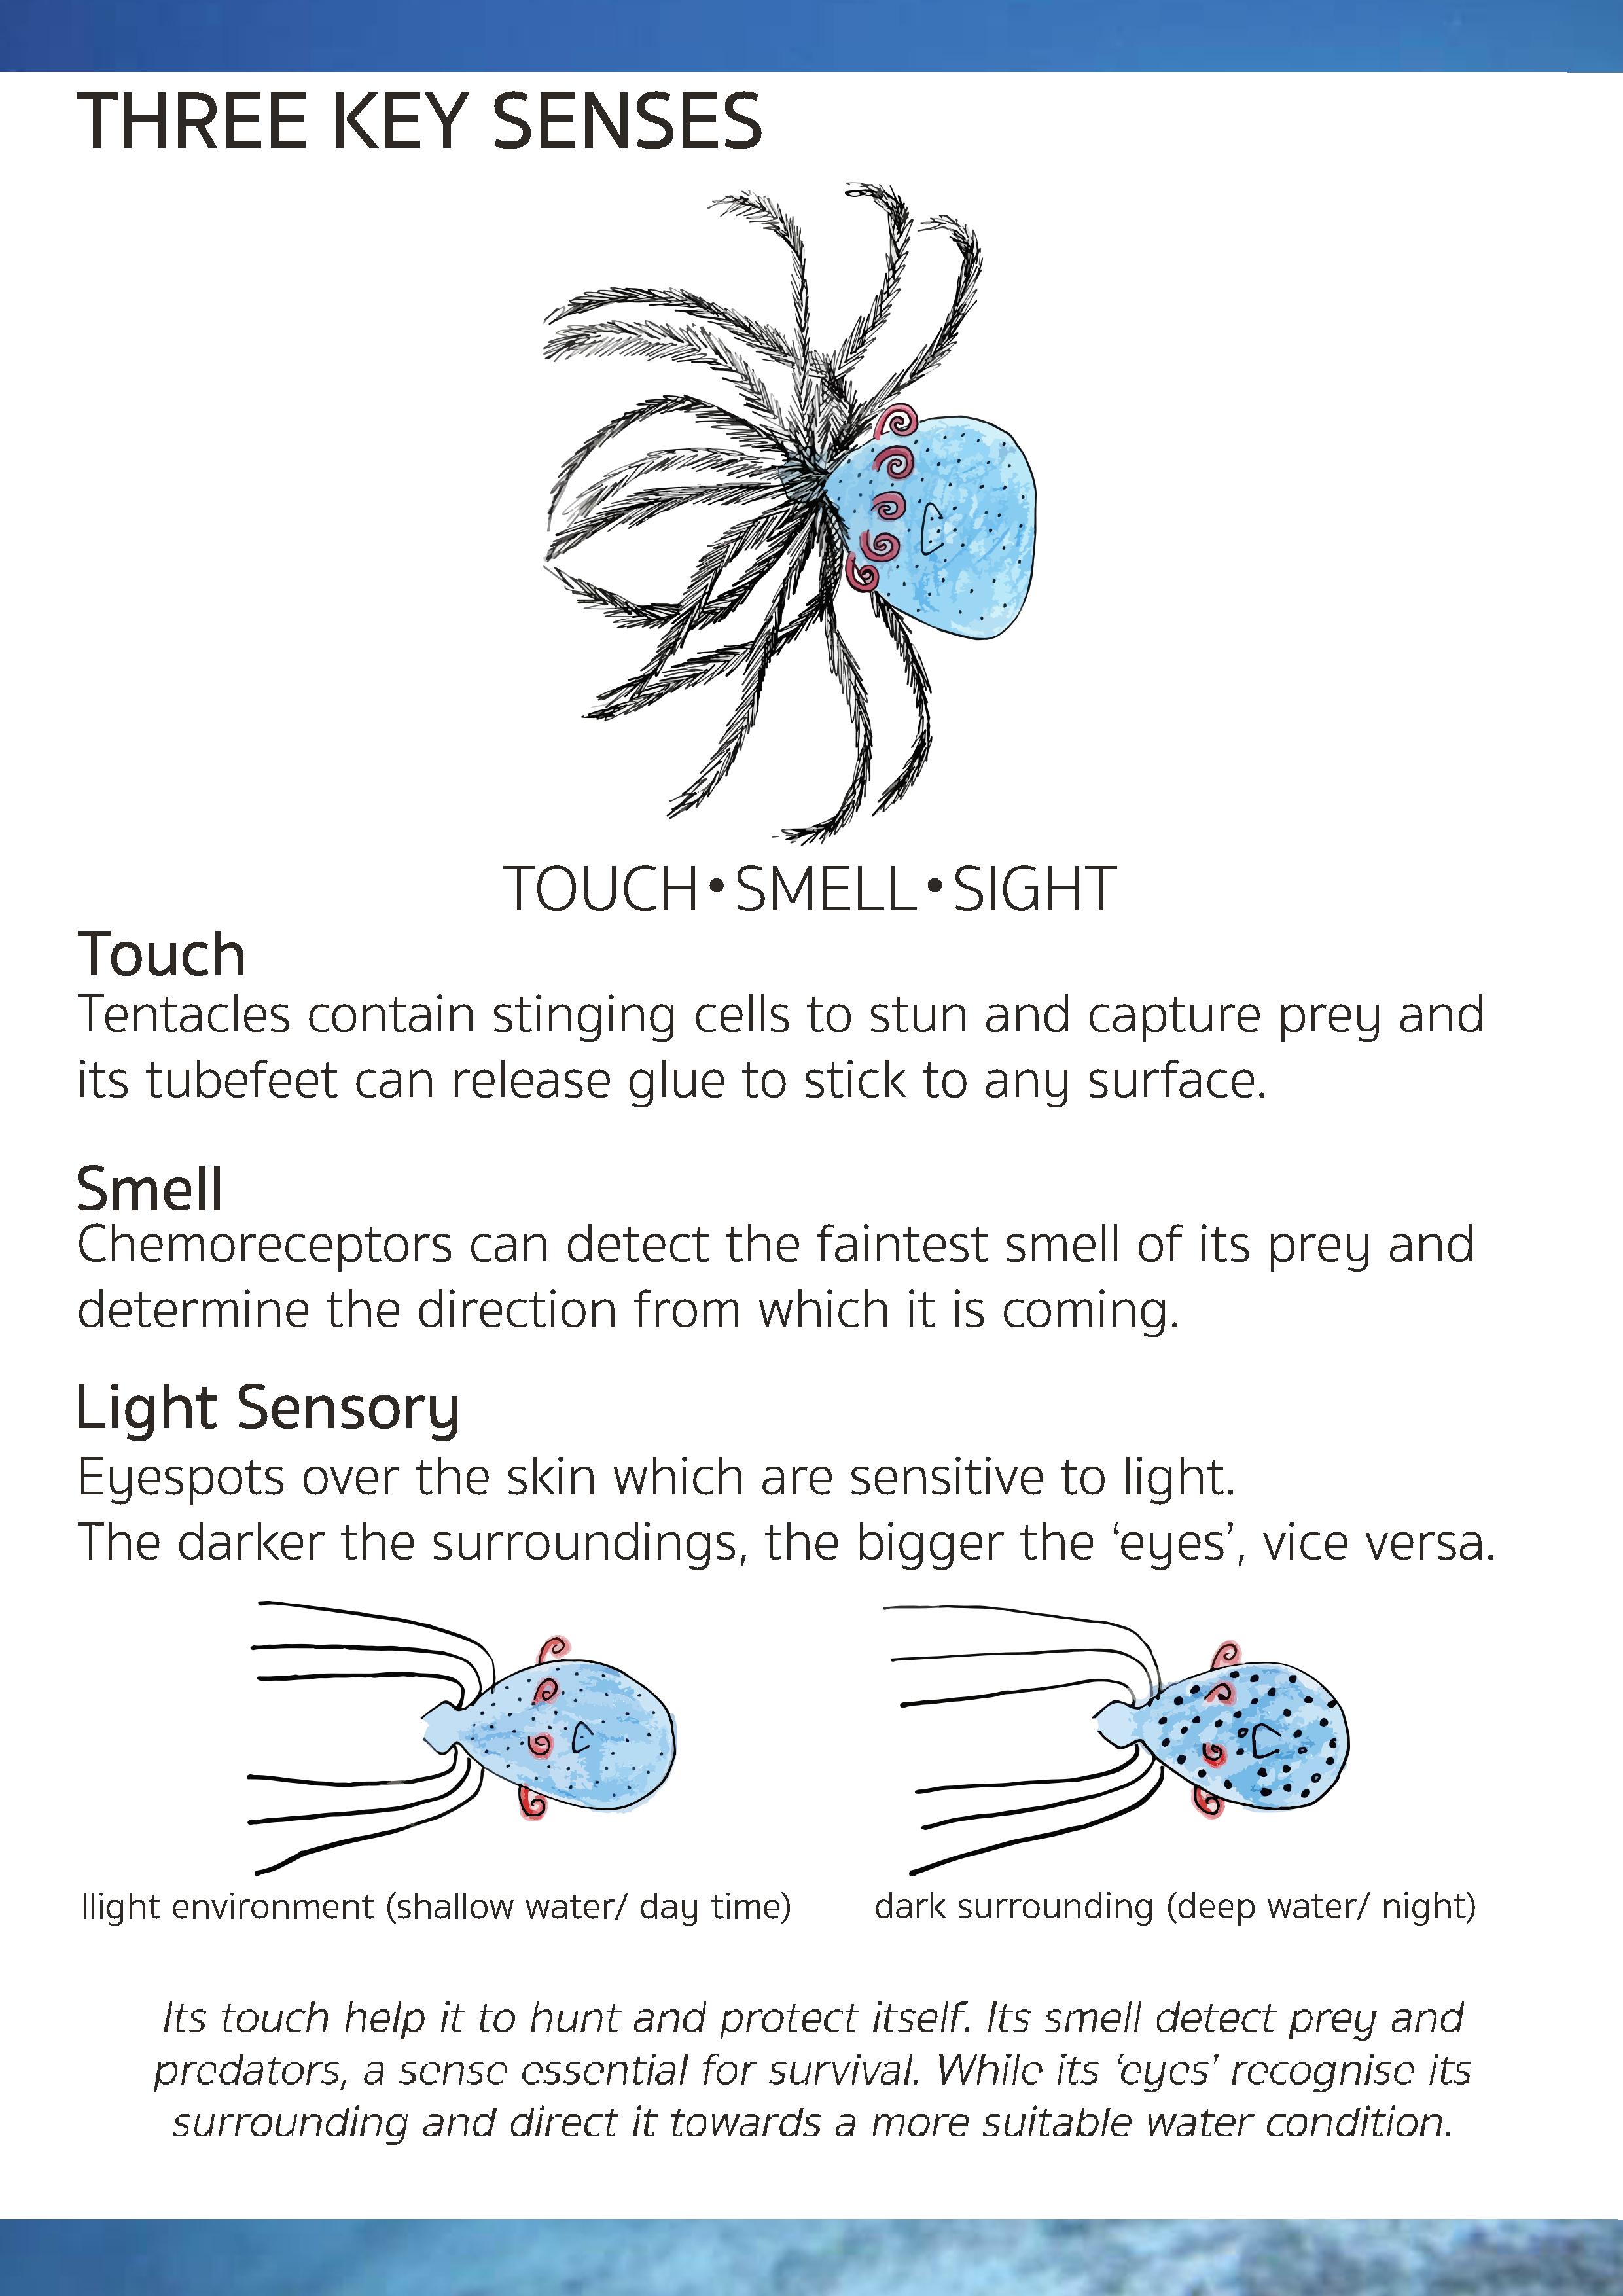
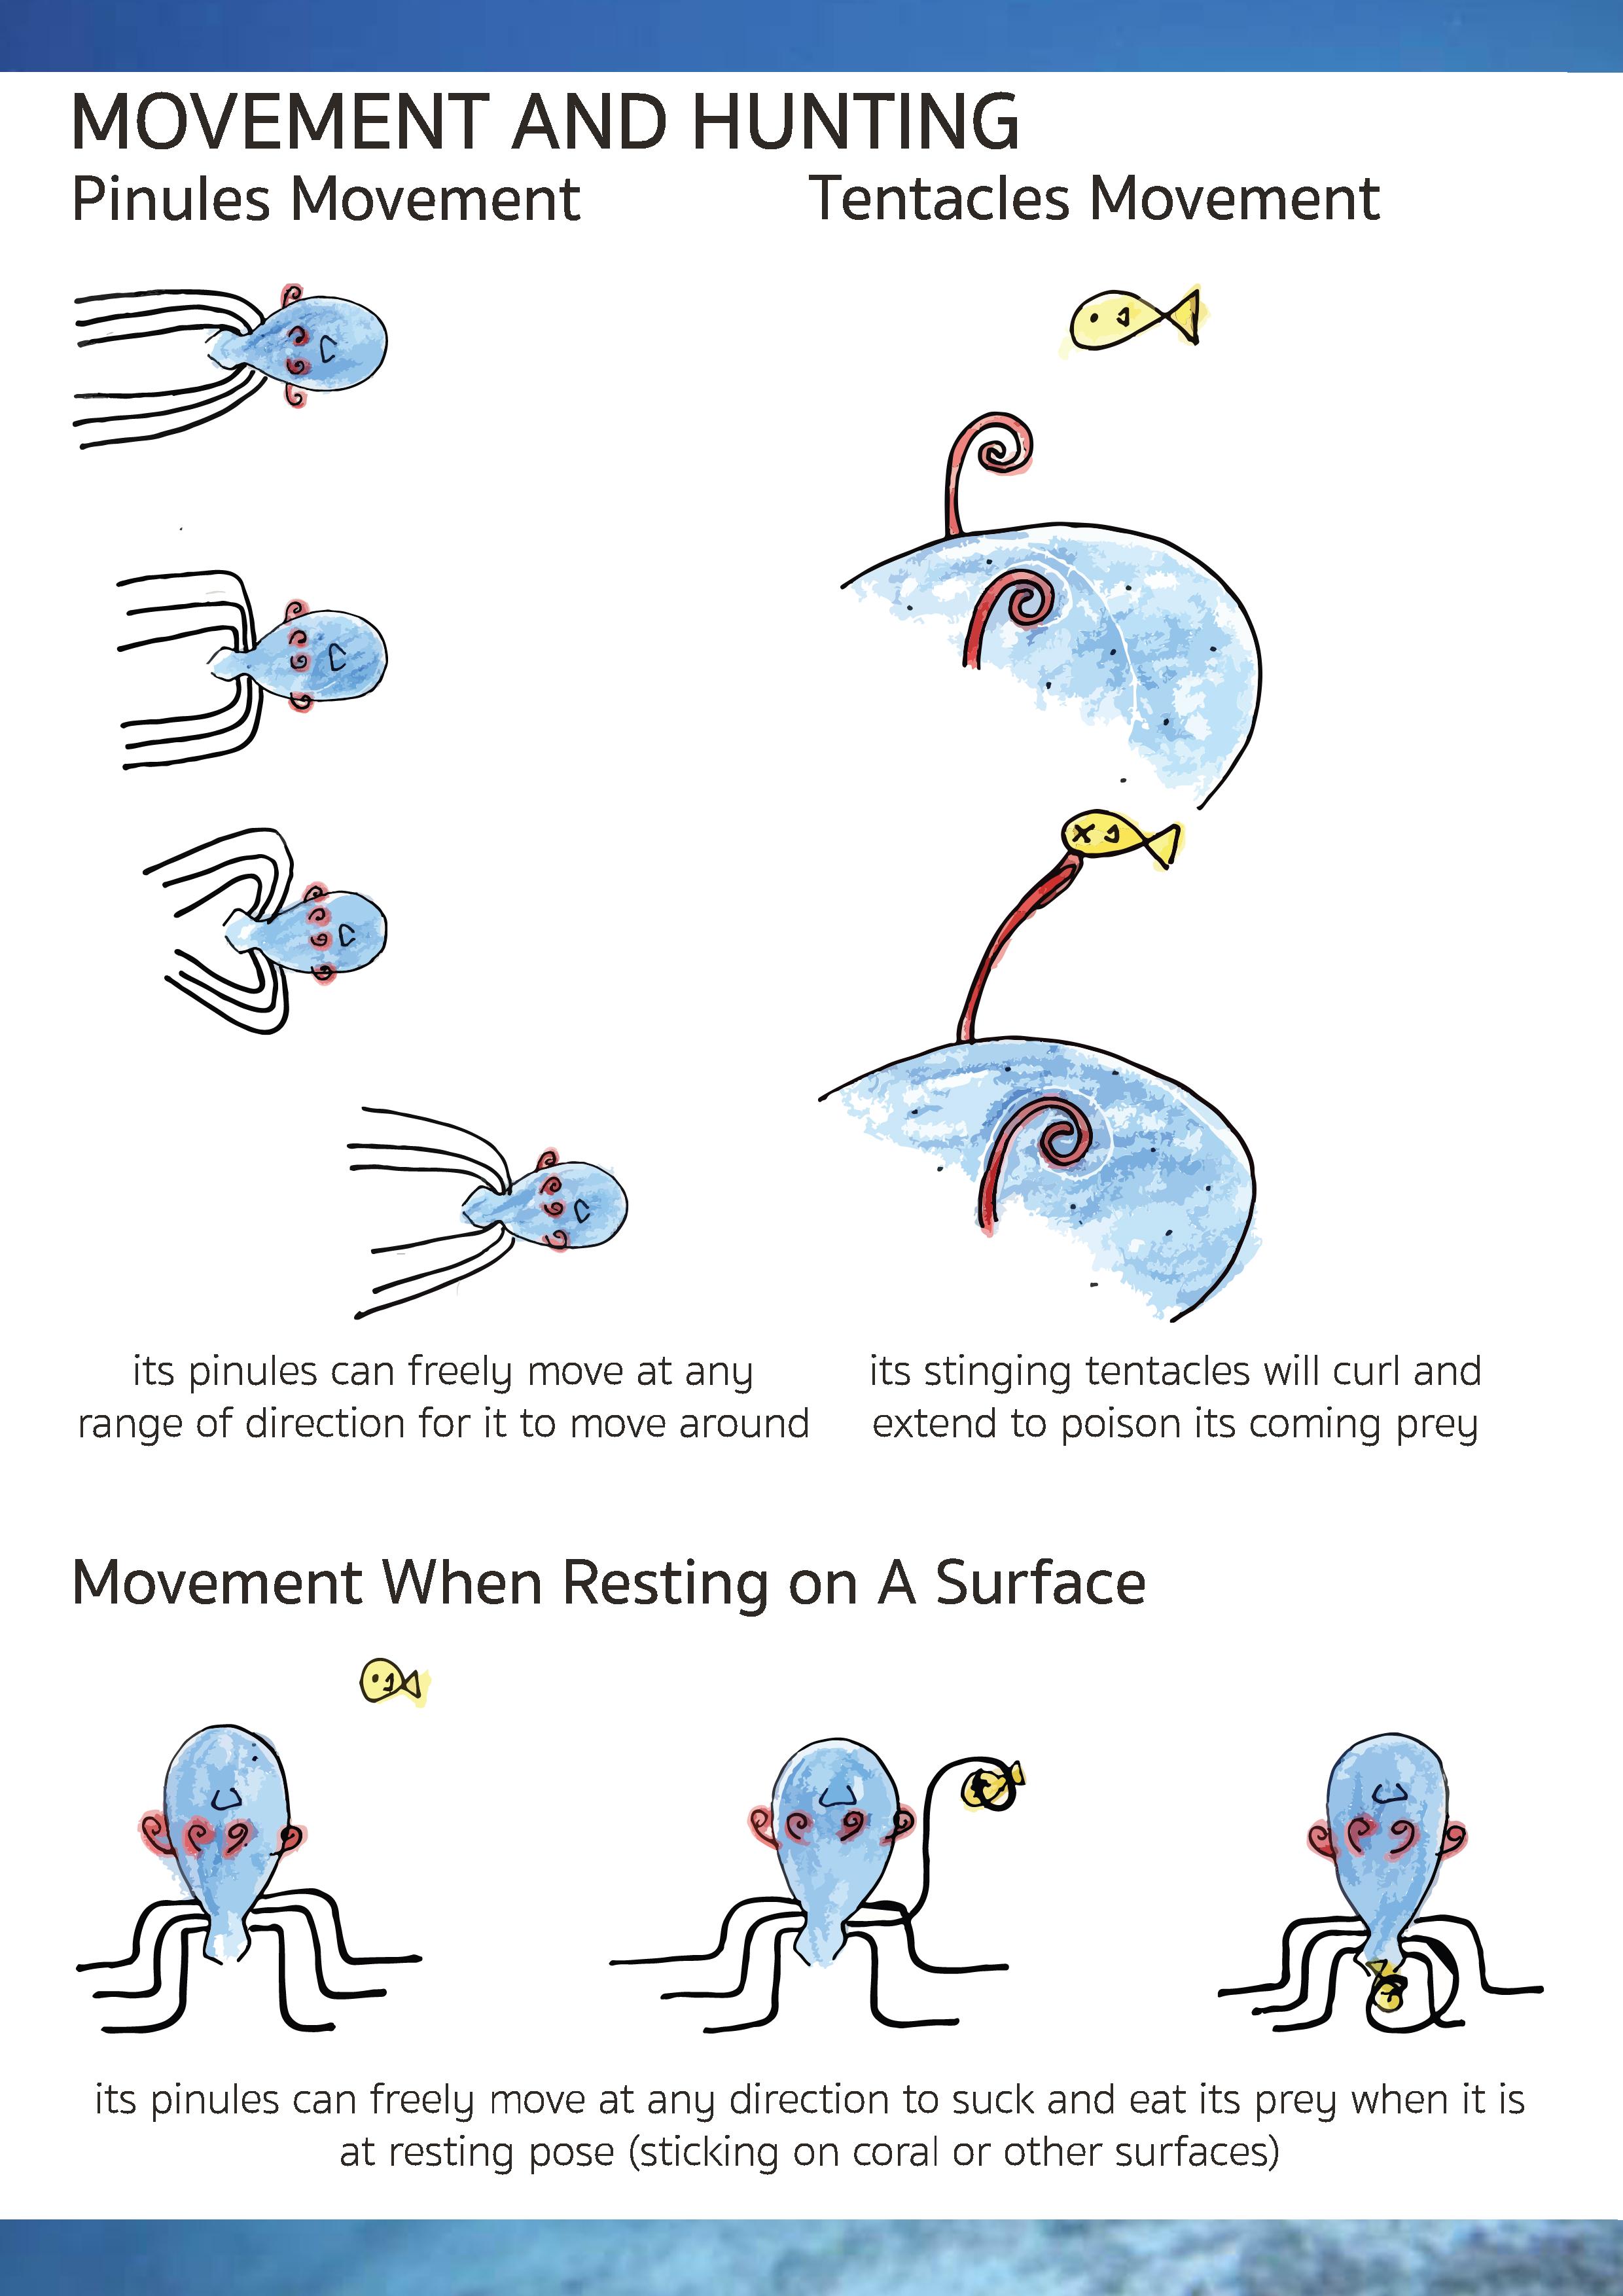
So for the final project, together with Yit Ling and Amelia, we created an animal avatar named Grenas. This avatar is the combination of three animals: sea anemone, anemonefish a.k.a. clown fish and starfish. (The ‘nas’ part of the name is actually short form of nemo, anemone, starfish.)
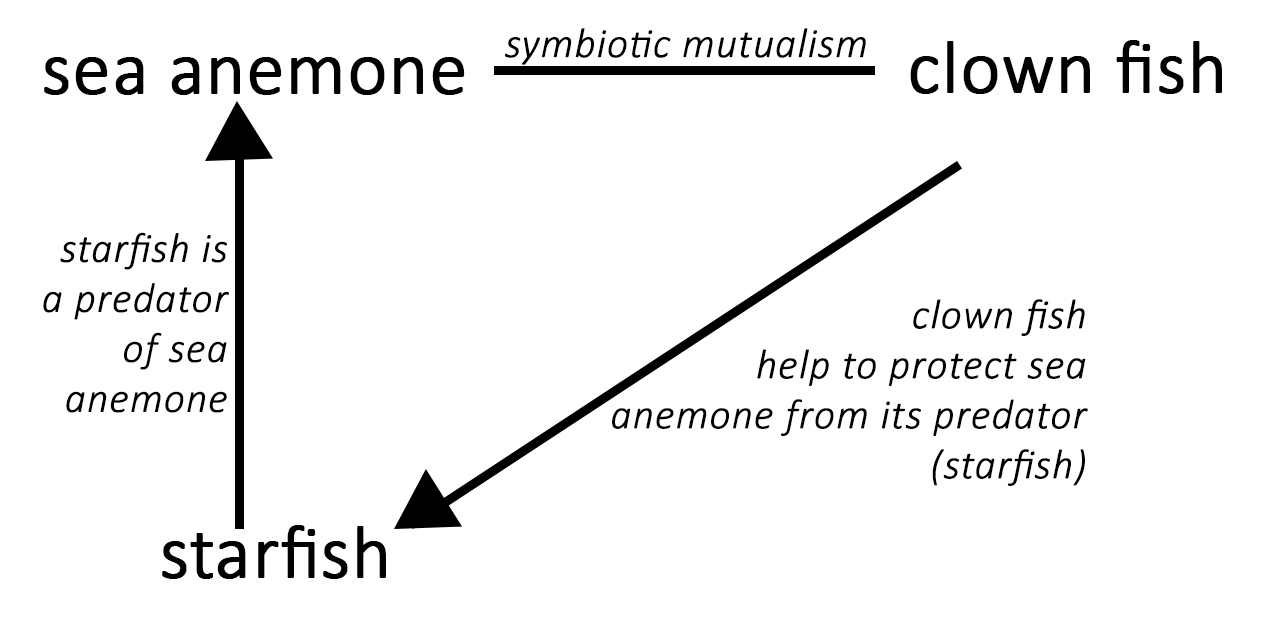
Relationship between the three creaturesHere is more details for our avatar! (click G5 Group F for the PDF version)


Thank you!
Hi!
Continuing the research in my previous post, we were asked to dance and move our creature’s movement! For my, it would be my anaNEMOfish (clown fish).
My movement was ‘fluid’ and it can move in any direction (except backwards). As the Nemo move and dance around the sea anemone, I imagine the movement to be circular and random in any direction. At the same time, the Nemo can swim up and down as well.
Then for my movement sketch, I drew it in random circular and wavy shapes. The light blue represents the fish swims at a certain level, then dark blue represents it swimming down (deeper) while the light green is the opposite (swim up).

Next we were required to visualise and produce our movement by sculpting mahjong paper. My paper sculptor is shaped based on the sketch. The closeness of the paper shows that the Nemo moves around quite fast. In reality, the speed is really depend on each species and size 😀

It was a surprisingly a refreshing session 😀
Thank you!
3D Project 3
Research: Clown Fish (aNEMOnefish)
In Class: The Nemo Movement
(coming soon)
Hi!
Okay so we are supposed to create our own sound texturizer, and looking through past years references, it is indeed not gonna be an easy one :’)
THE IDEATION
At first I tried to Youtube a lot of videos for inspiration.
This video is the one that somehow inspired and motivated me the most.
My favorite instrument is actually number 8 ‘Chateau Paulie’. It was not really an instrument but a village-sized art and musical installation.
It is basically the idea of using wind to move pipes which create sounds. And people can pull some ropes to adjust the ‘fan’ creating the sound they wants.
This makes me want to create a customizable sound texturizer.
My very first idea was to use water, and using the idea of water having different pitch when having different level. However as I thought more of it, I had the idea of sound travelling through water.
After some long thought, I finally decided to use the idea of sound texturized by being reflected through long tube and cylinder. And for the source of the sound, instead of the initial idea to blow something, I decided to move things around.
THE PROCESS
A. MATERIALS
First step is to find the sound reflectors: the carton cylinder and washing machine pipe.
Both have texturizing effect, with the washing machine pipe having a more hollow and deeper effect.
Next is to find the sound creator. I decided to make use of a biscuit tin can, creating a hole on the end to connect with the cylinder.

B. CREATION
Firstly, I drilled hole in the metal tin. It was quite time-consuming as we need to drill shape holes one by one before creating
Then, I created the insert part of the sound creator by dividing them into 3 different layers.


Next, is to create the support for the cylinder and tin, they are made of boxes.
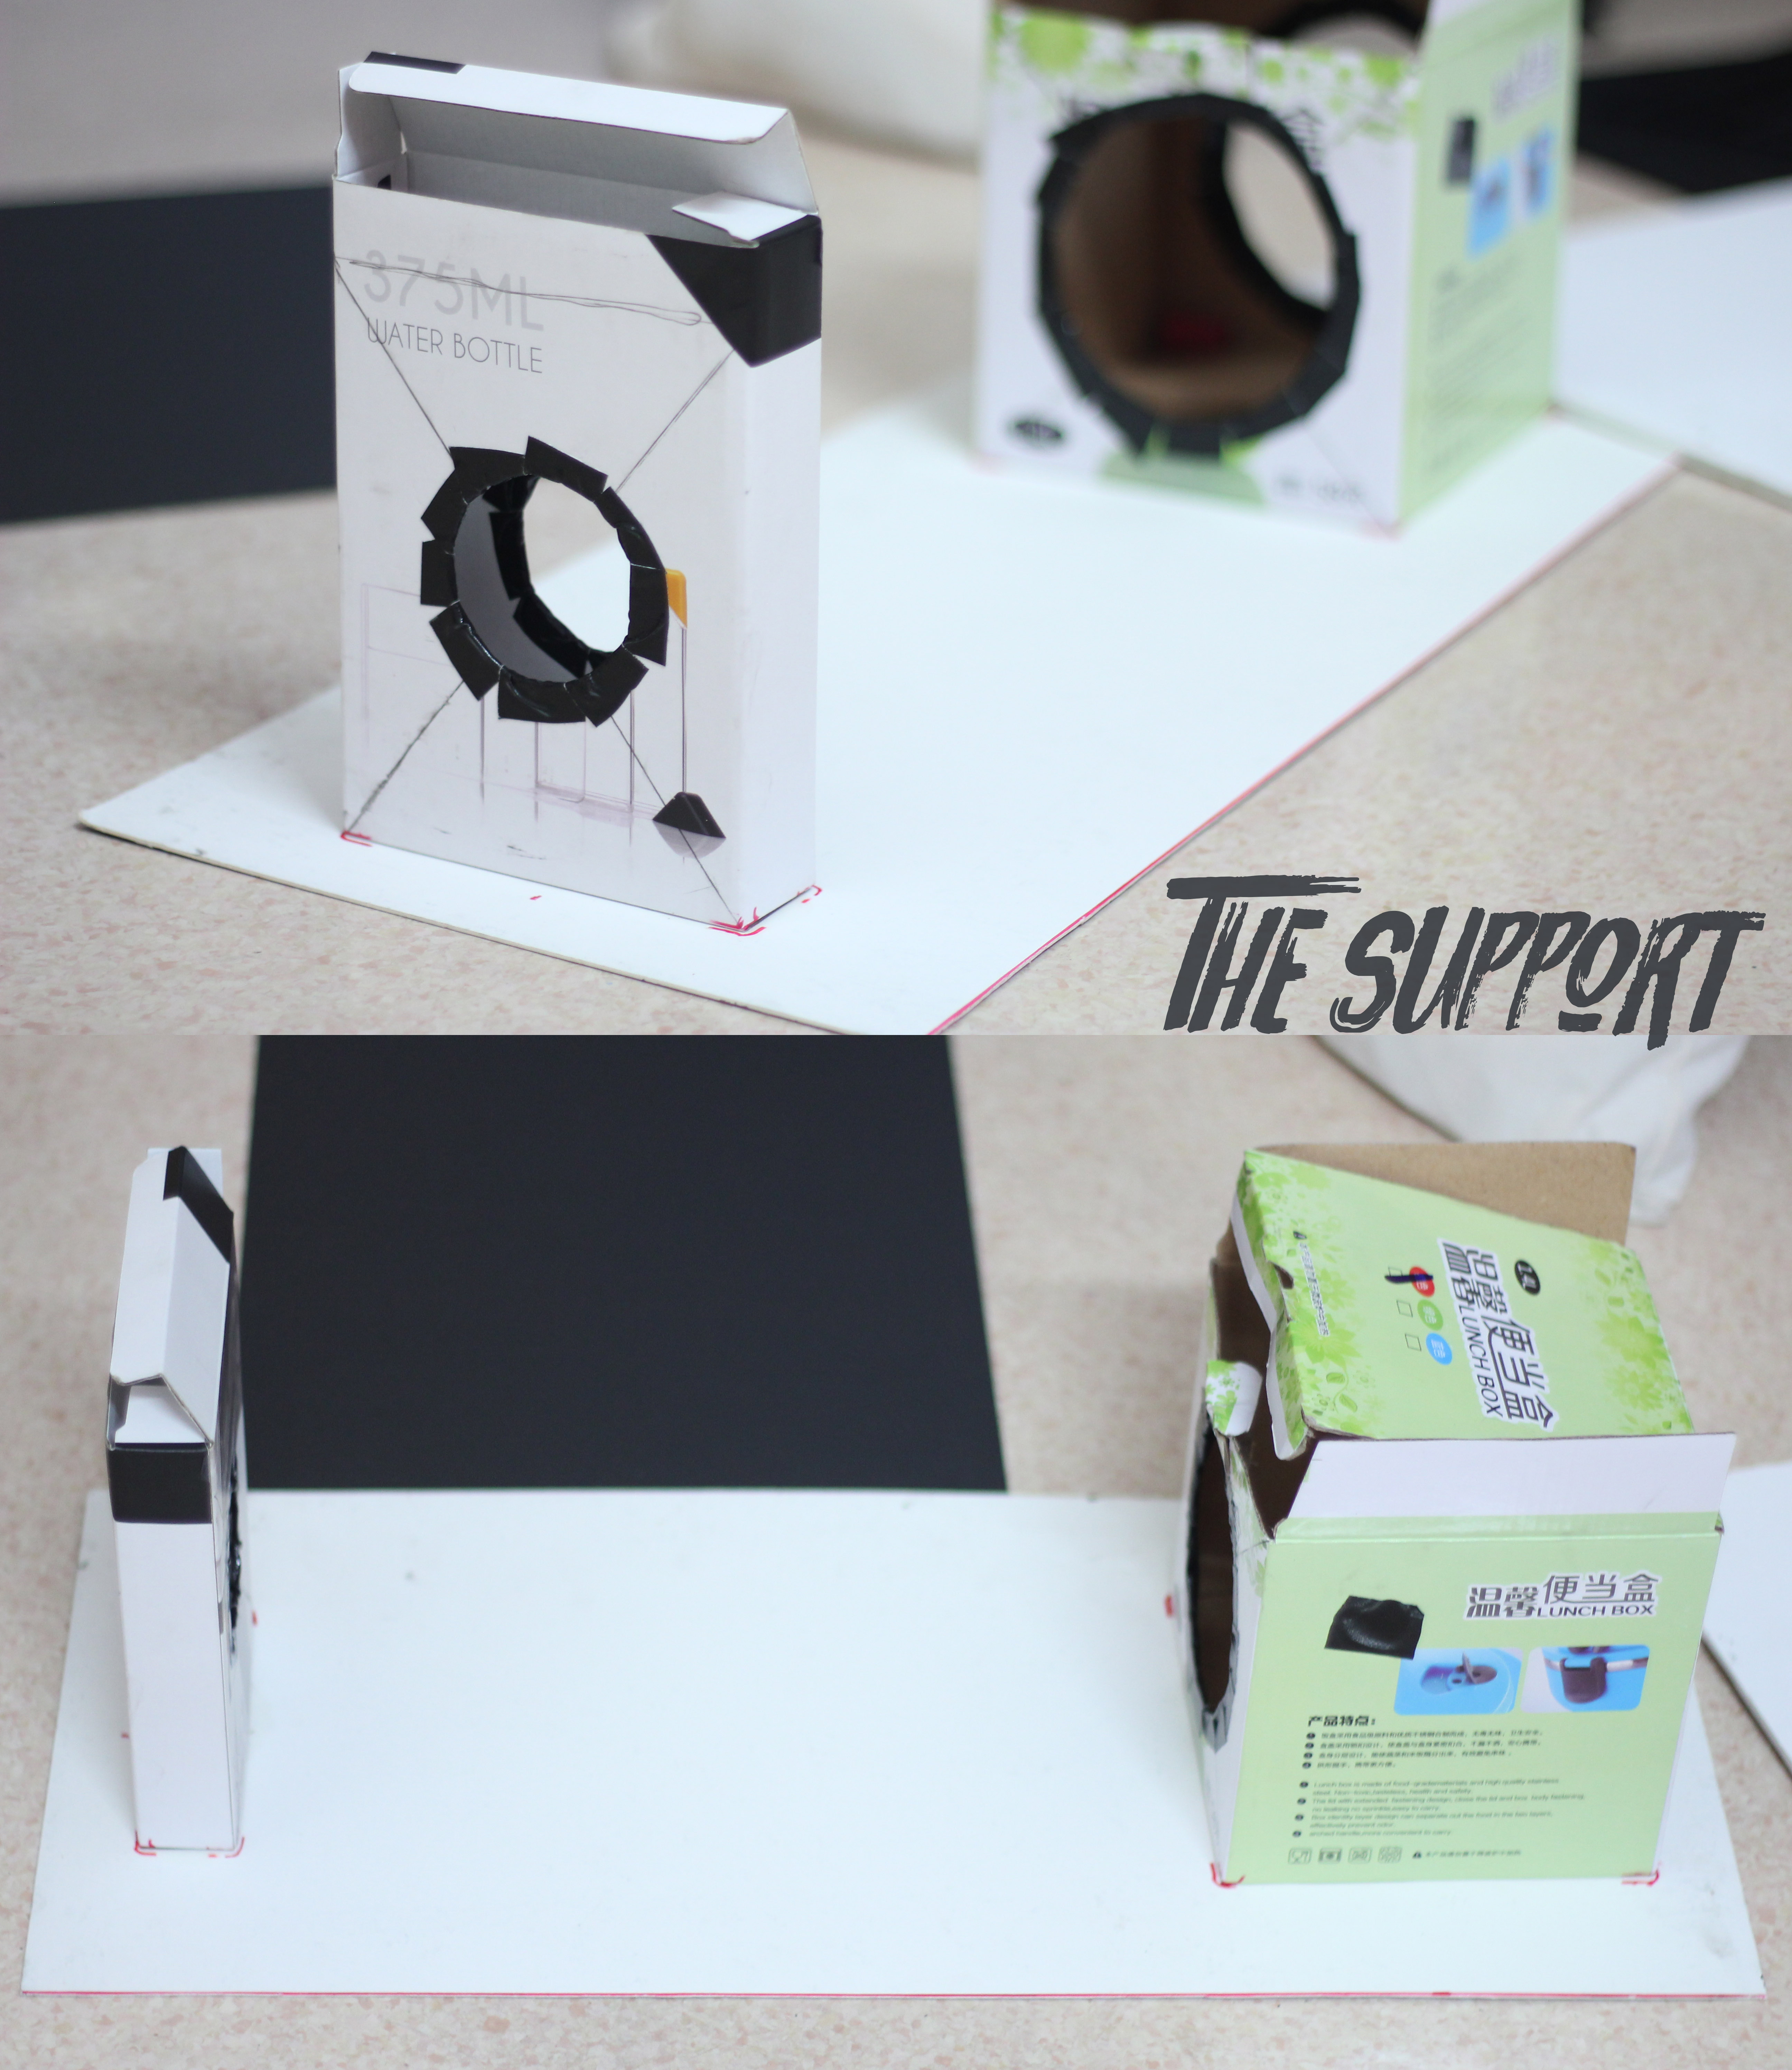
Then the next step is to connect the can tin—carton cylinder—washing machine pipe and put them on the support! YEAY
I also created ways to take out the components and allow customising them without taking out the whole thing.

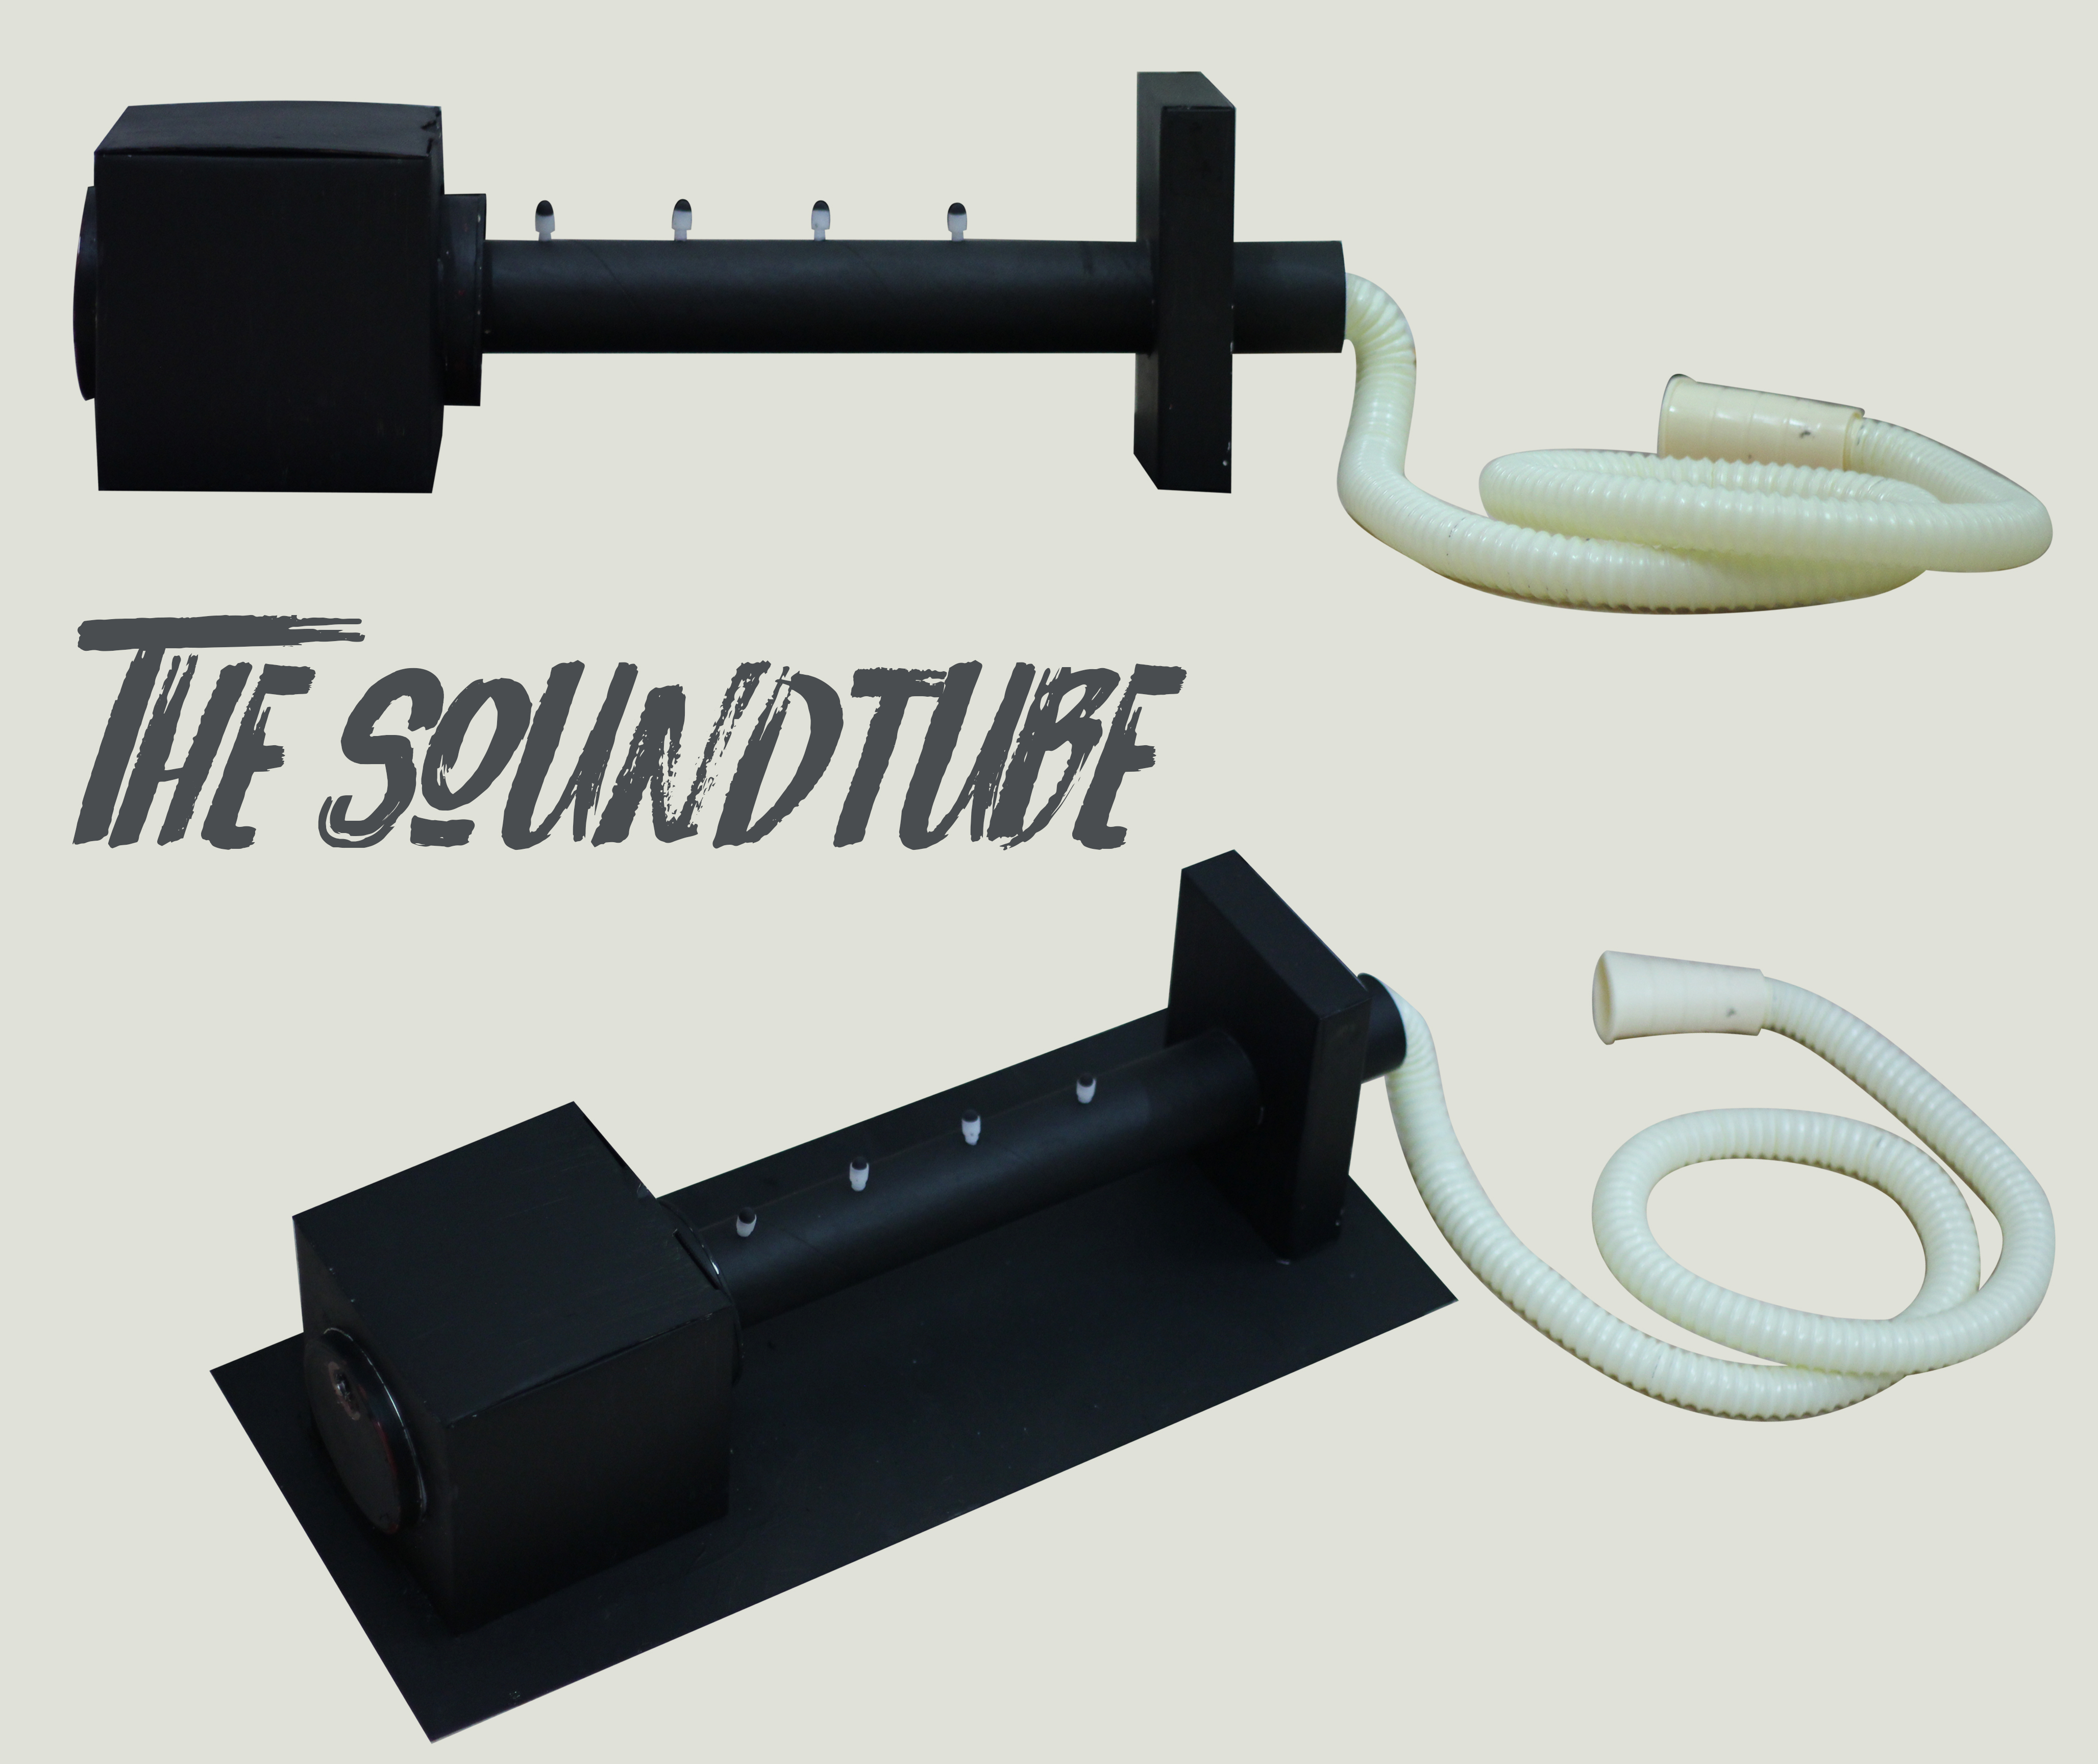
TADAA the Soundtube is created!
C. INNER COMPONENTS
I want to have various type of components made of different type of materials.
Ranging from those creating louder friction sound like coins and macaroni to those creating softer friction sound like foam balls and foam pieces.

D. HOW SOUNDTUBE WORKS
The player rotate the sound creator either to rotate it in one direction or changing the direction repetitively.
When it is rotated, the components inside the sound creator will create sound out of friction. This sound will be reflected in the carton cylinder, changing it’s frequency as the sound becomes deeper and hollower. Afterwards, the sound will further reflected inside the washing machine pipe before being heard by the listener.
The rhythm and beat are adjusted by modifying the tempo of rotation.
E. HOW SOUNDTUBE SOUNDS
(Precaution! Sound recorded are loud! Better lower your computer volume)
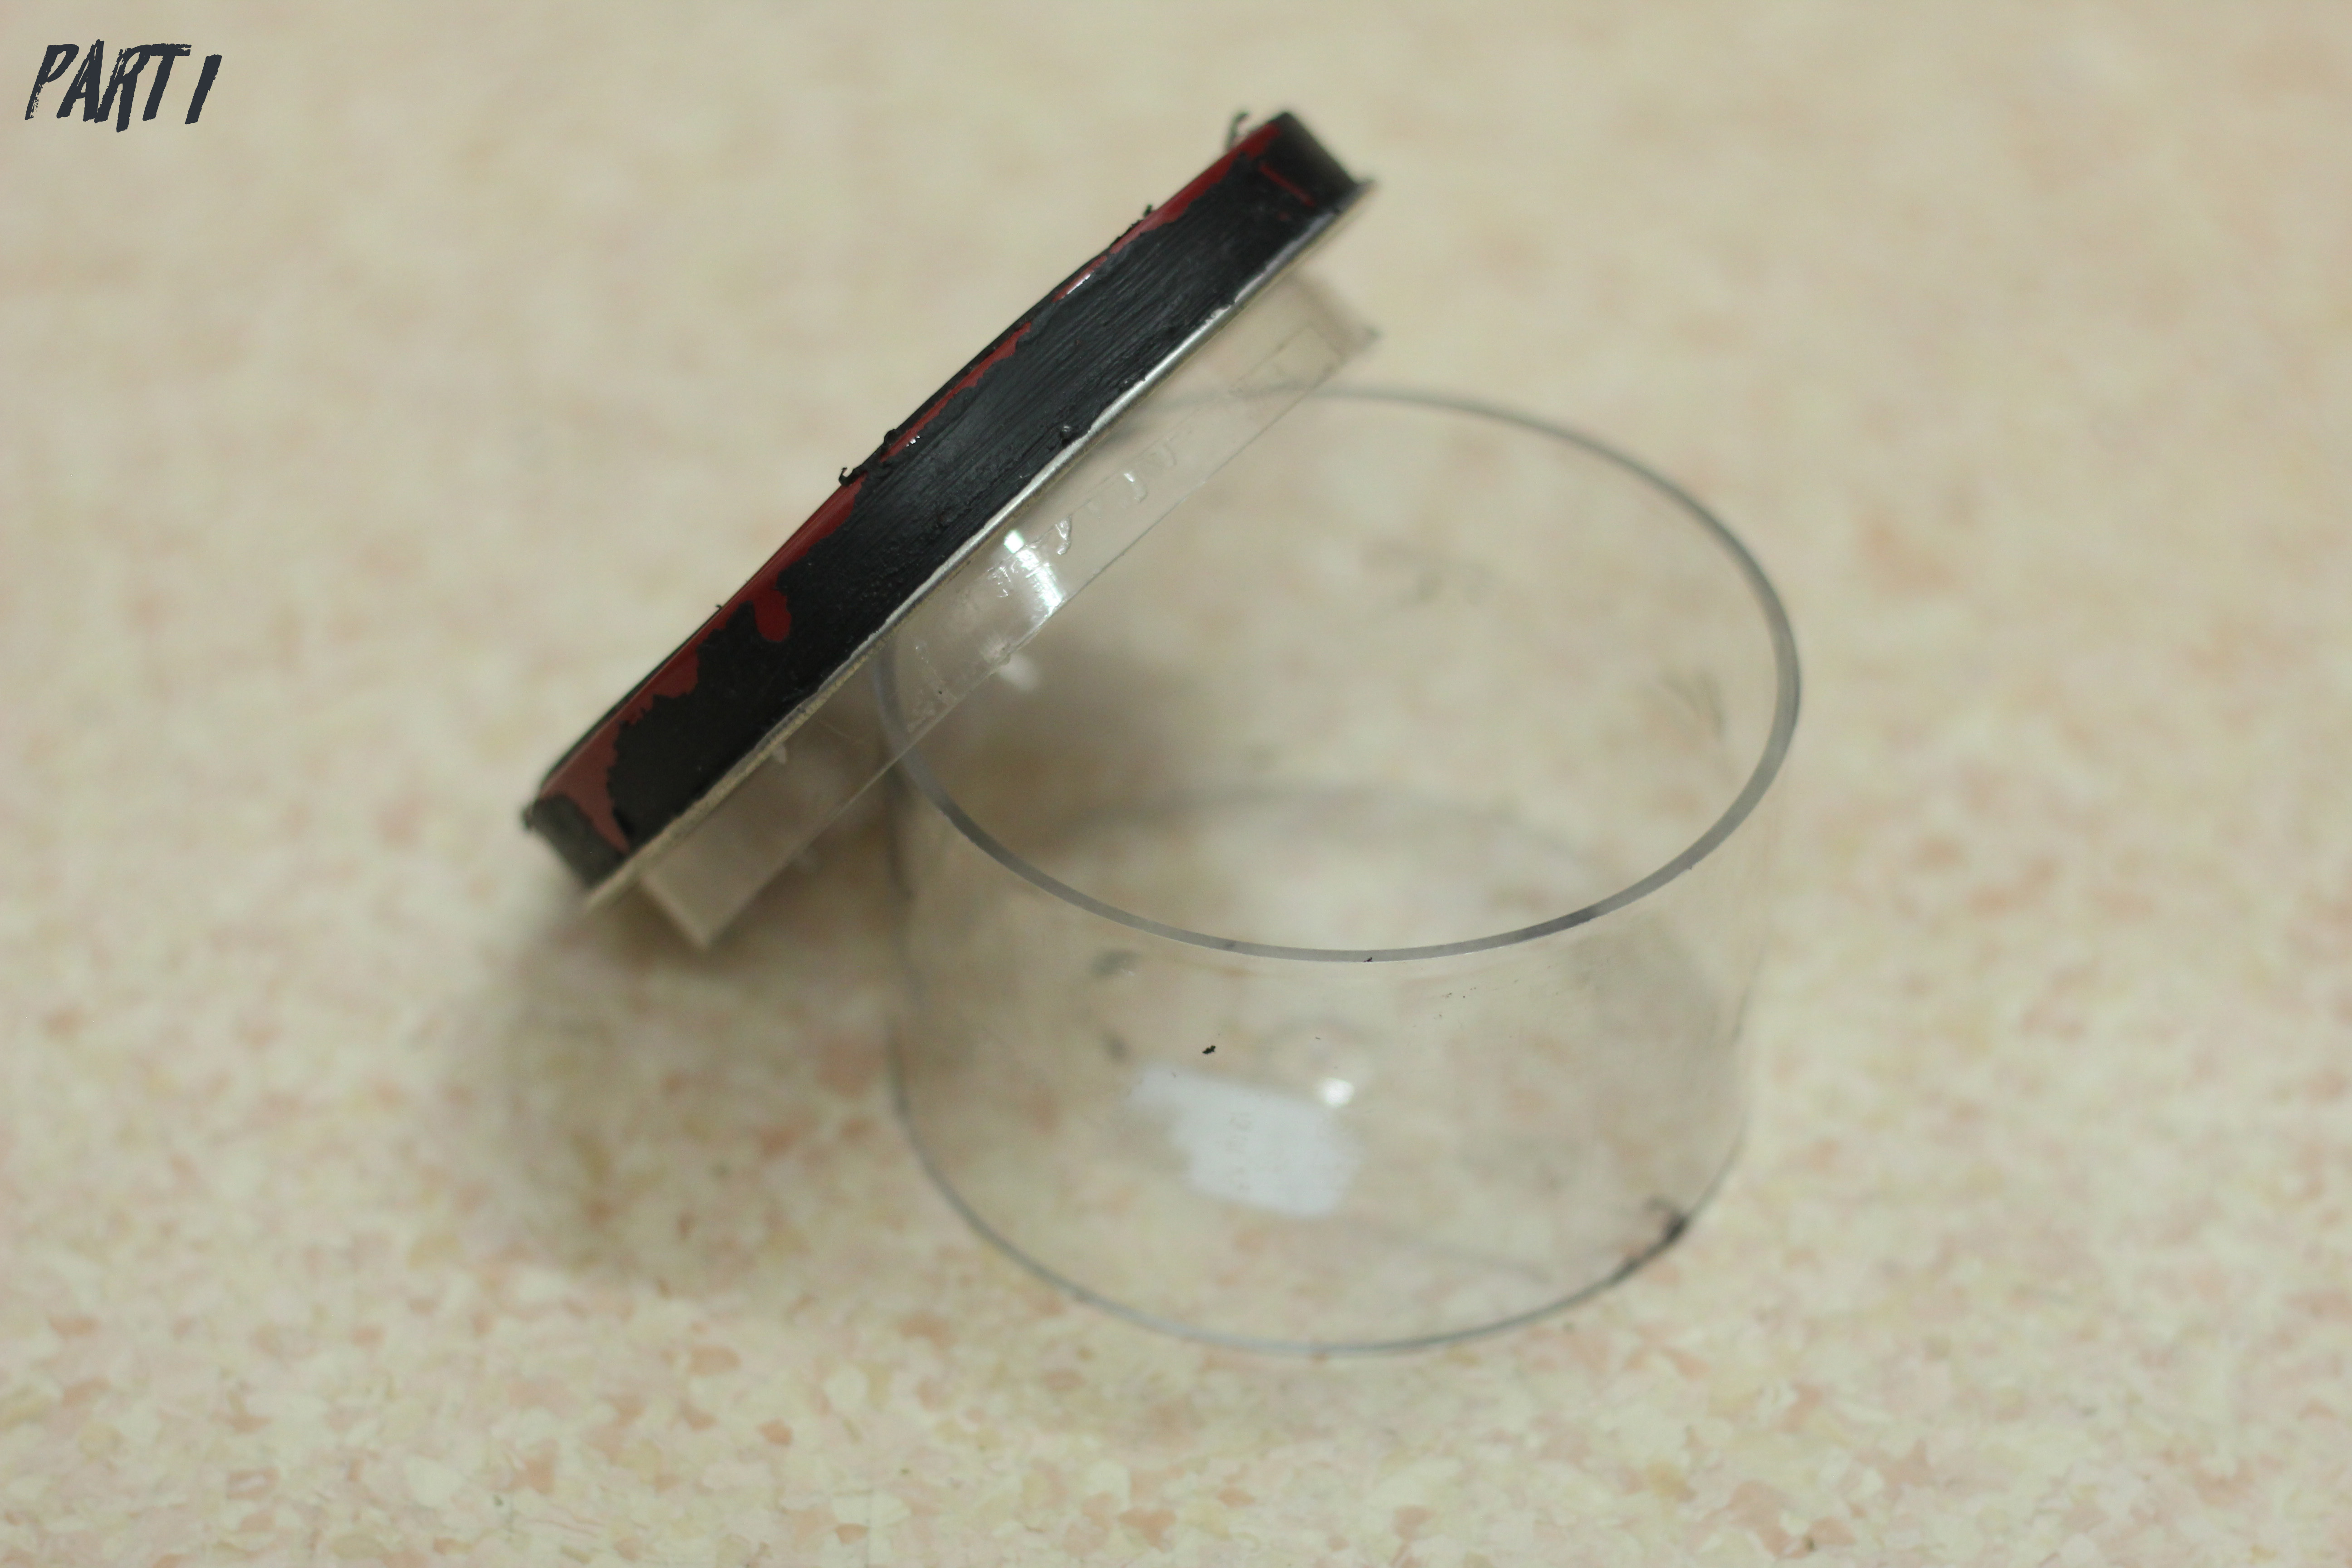
At first the plastic case was filled with water.
I expected the sound to be like when I shake the plastic case only:
However after realising that the plastic case kind of dampen the water sound and the rotation create much slower movement than shaking the plastic case (which result in less intense sound being created). The sound became like this:
As the water sound became really soft and almost unheard, I decided to use solid components as the friction sound is louder.
And here is some different experiments on sound recording of the Soundtube!
Finally, out of curiosity, I put in my phone inside the whole sound creator and set an alarm and recorded the sounds.
Conclusions:
Thank you!
3D Project 2
Research: Hearing and Touch
In Class: Sound Fabrics and Soundscape
Inspiration and Process: Sound Texturizer Trial and Error
Final: THE SOUNDTUBE
Hi!
A soundscape is a sound or combination of sounds that forms or arises from an immersive environment.
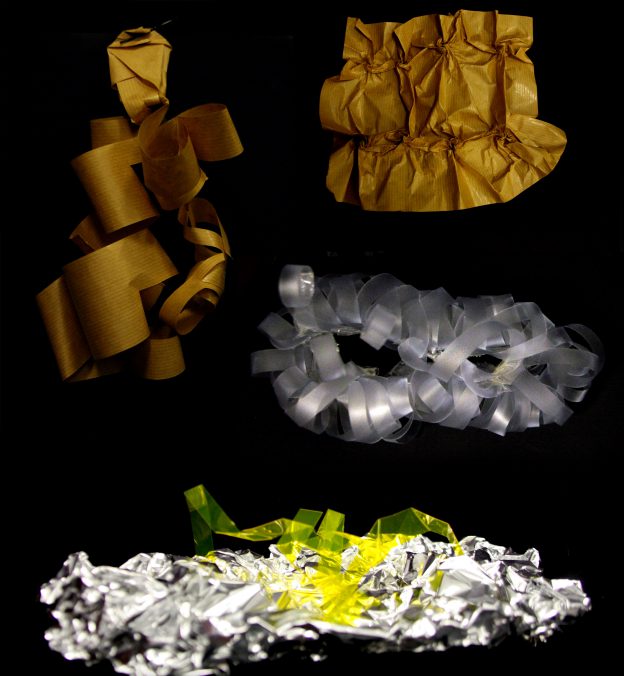
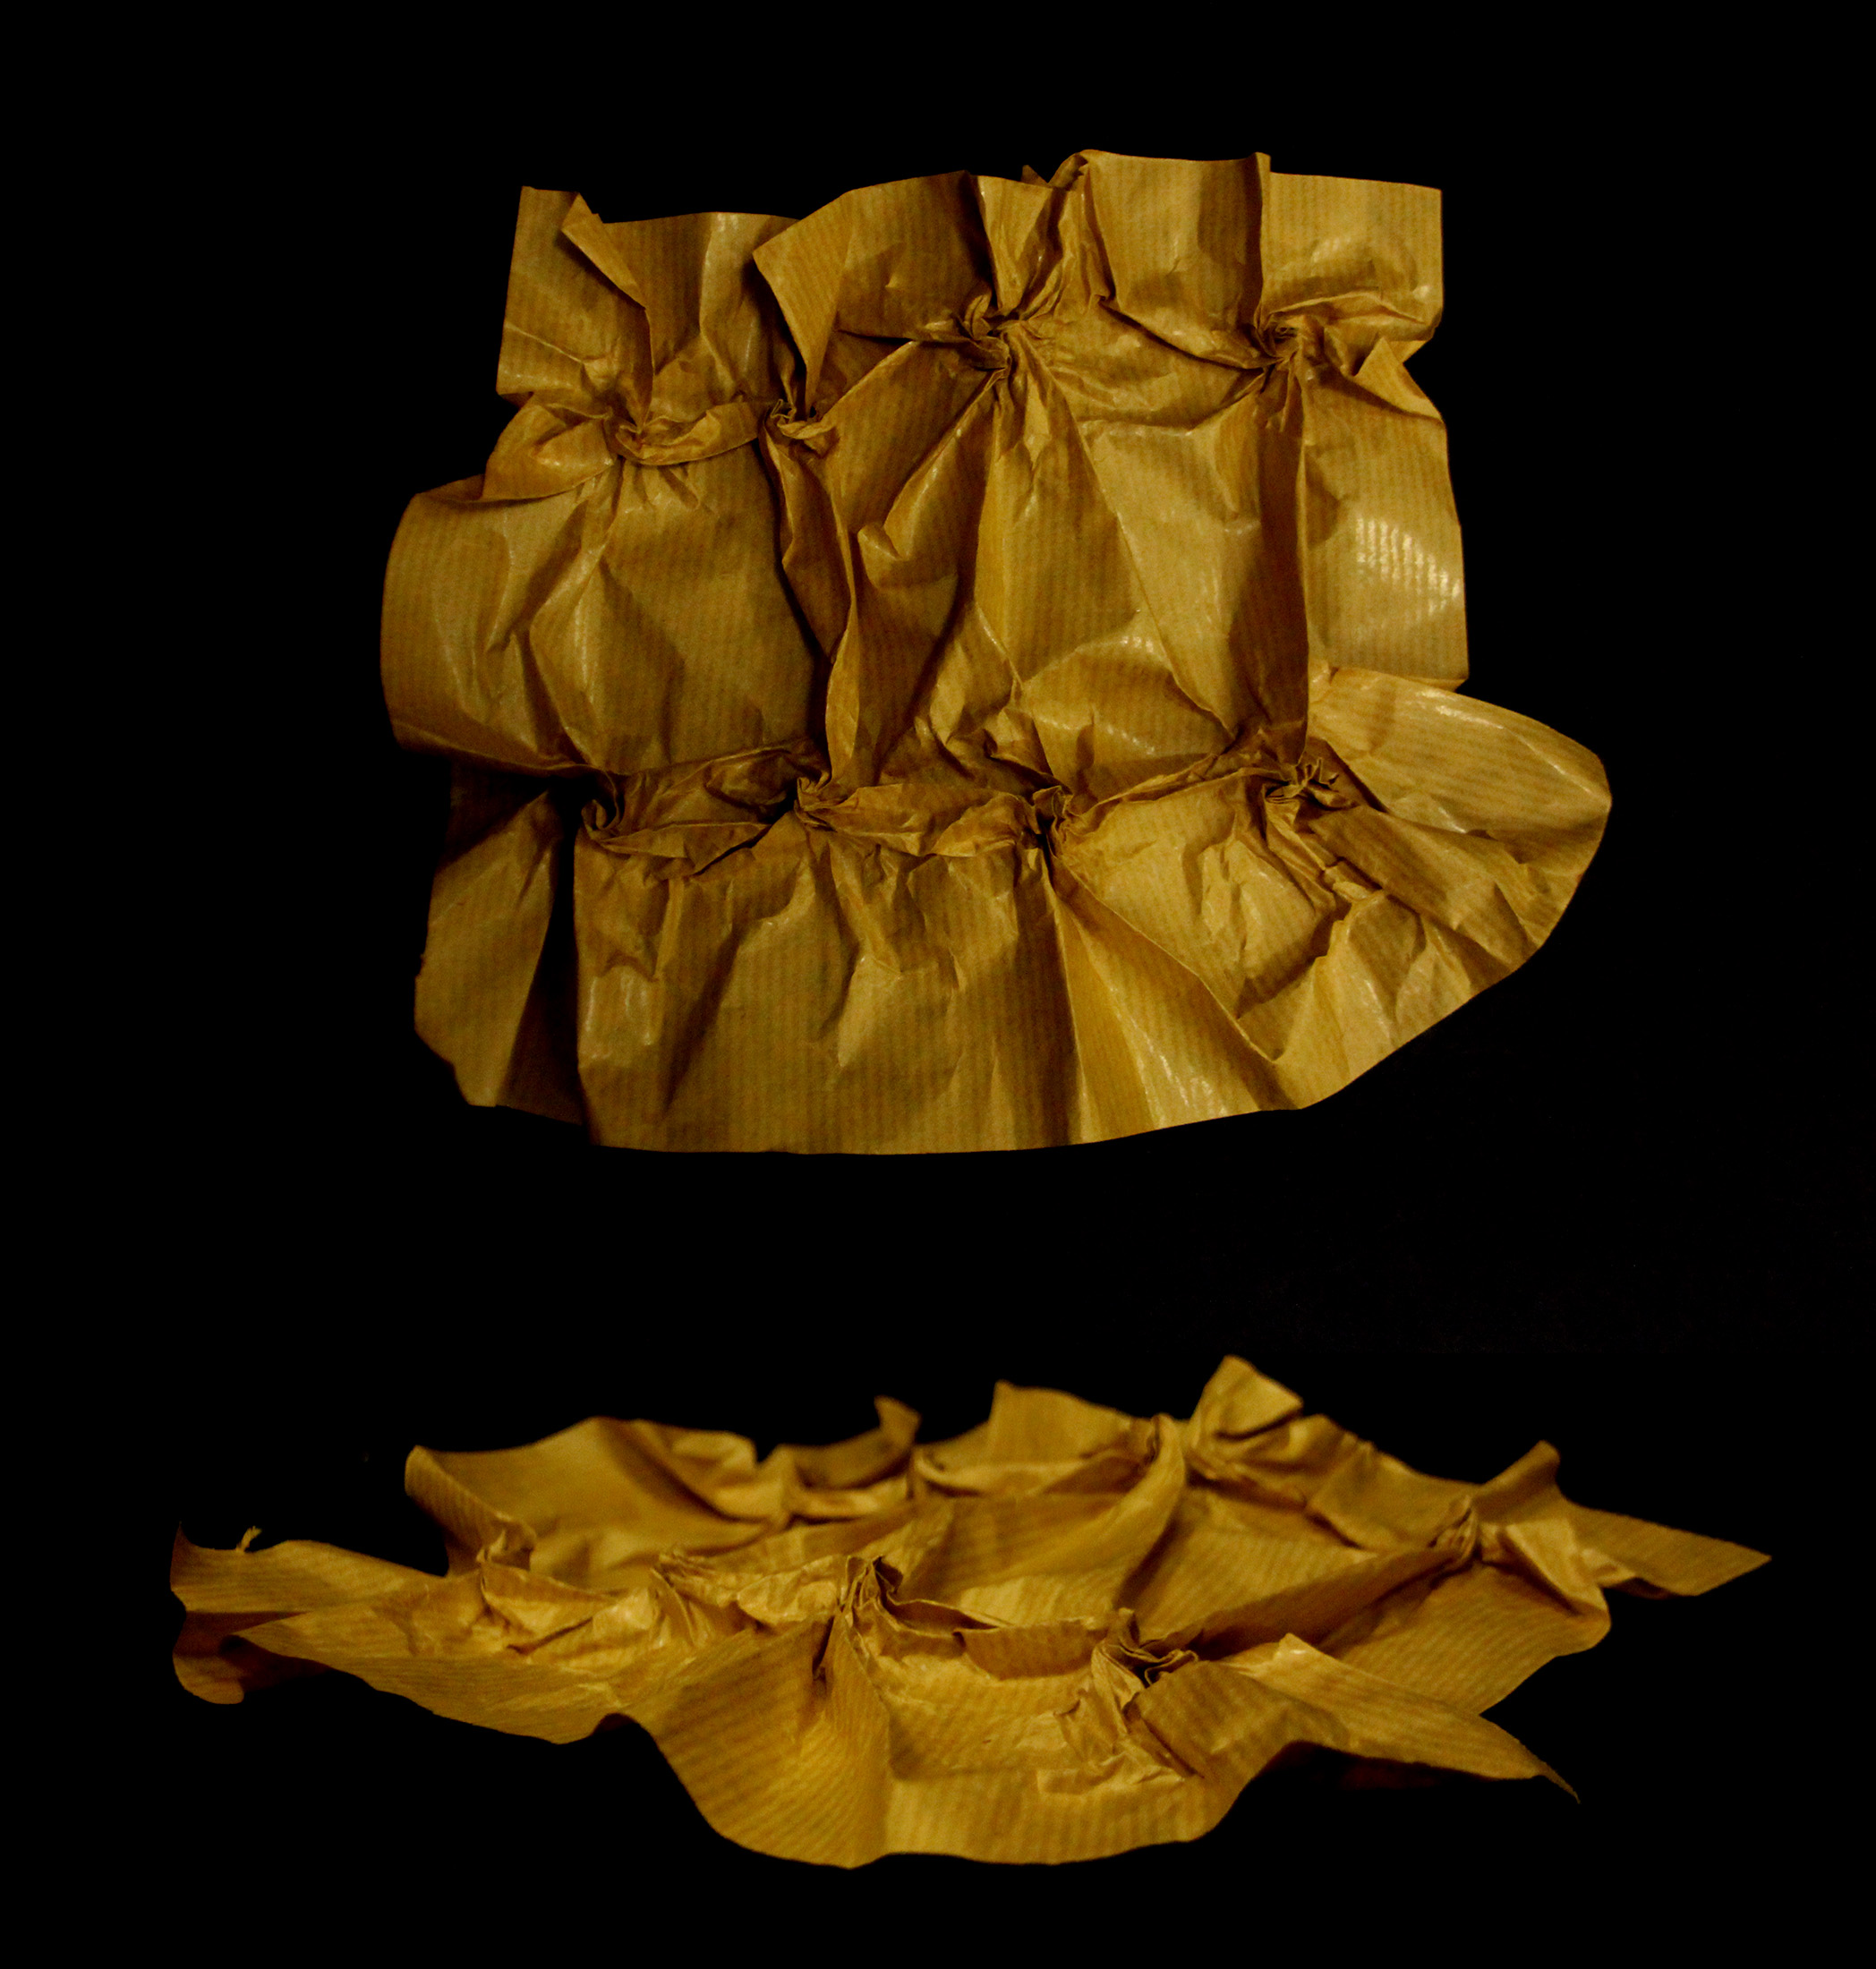
Part 1: In class Activity – Sound Fabric
During the in class activity, we listened to some sound and used the brown paper to express it in 3D form, sound fabric.
Pleasant sound: ADM Water Fountain
This sound is pleasant for me as it is somehow calming and give me the feeling of a japanese onsen and mountain area. So relaxing.

For me each water drop feels like it is in the shape of a line being curled (spiral) as it falls on another water surface.

I also feel like there are two significant water sound:
-the dominant one with lower pitch and heavier feeling
-the much less dominant with higher pitch and lower intensity
As such, I separate it into two main part (with roughly same overall size to say that both are equally important. One has thicker width representing the one with heavier feeling and the other has thinner width representing the lower intensity. Both has the same principle of spiral as each sound shaped like that in my mind.
The shape is being hung and the composition looks like it has a movement from up to down, representing the ‘fall’ of the water.
Unpleasant sound: Buzzer alarm
This sound is unpleasant for me as it is the sound of my annoying alarm. It really gives me the cringe and feels like each buzz is pierced through my hearing.
So the twirl and pointy part represent the annoying and endless cringe of me whilelistening to that alarm. Each twirl represents one buzz and it is being twisted as it sounds like my hearing is being crumpled by it. I put them at constant distance as the duration between each buzz is constant. Also, the shape is a closed square showing that the buzz is enclosed and keep on repeating endlessly.
Part 2: Soundscapes
After the lesson, we were asked to create two A4 size soundscapes for two soundscape (can be different from in class activity).
Pleasant sound: ADM Water Fountain (same as previous part)
I decided to use the same sound as somehow, I like it more as I listen more to it. And somehow the sound sounds like the rain sound while I am inside a car/ room. It reminds me of my hometown, Bandung and childhood when I was inside a car and it was raining. It’s like being inside a warm and comforting place, feeling secure even though it was raining outside.
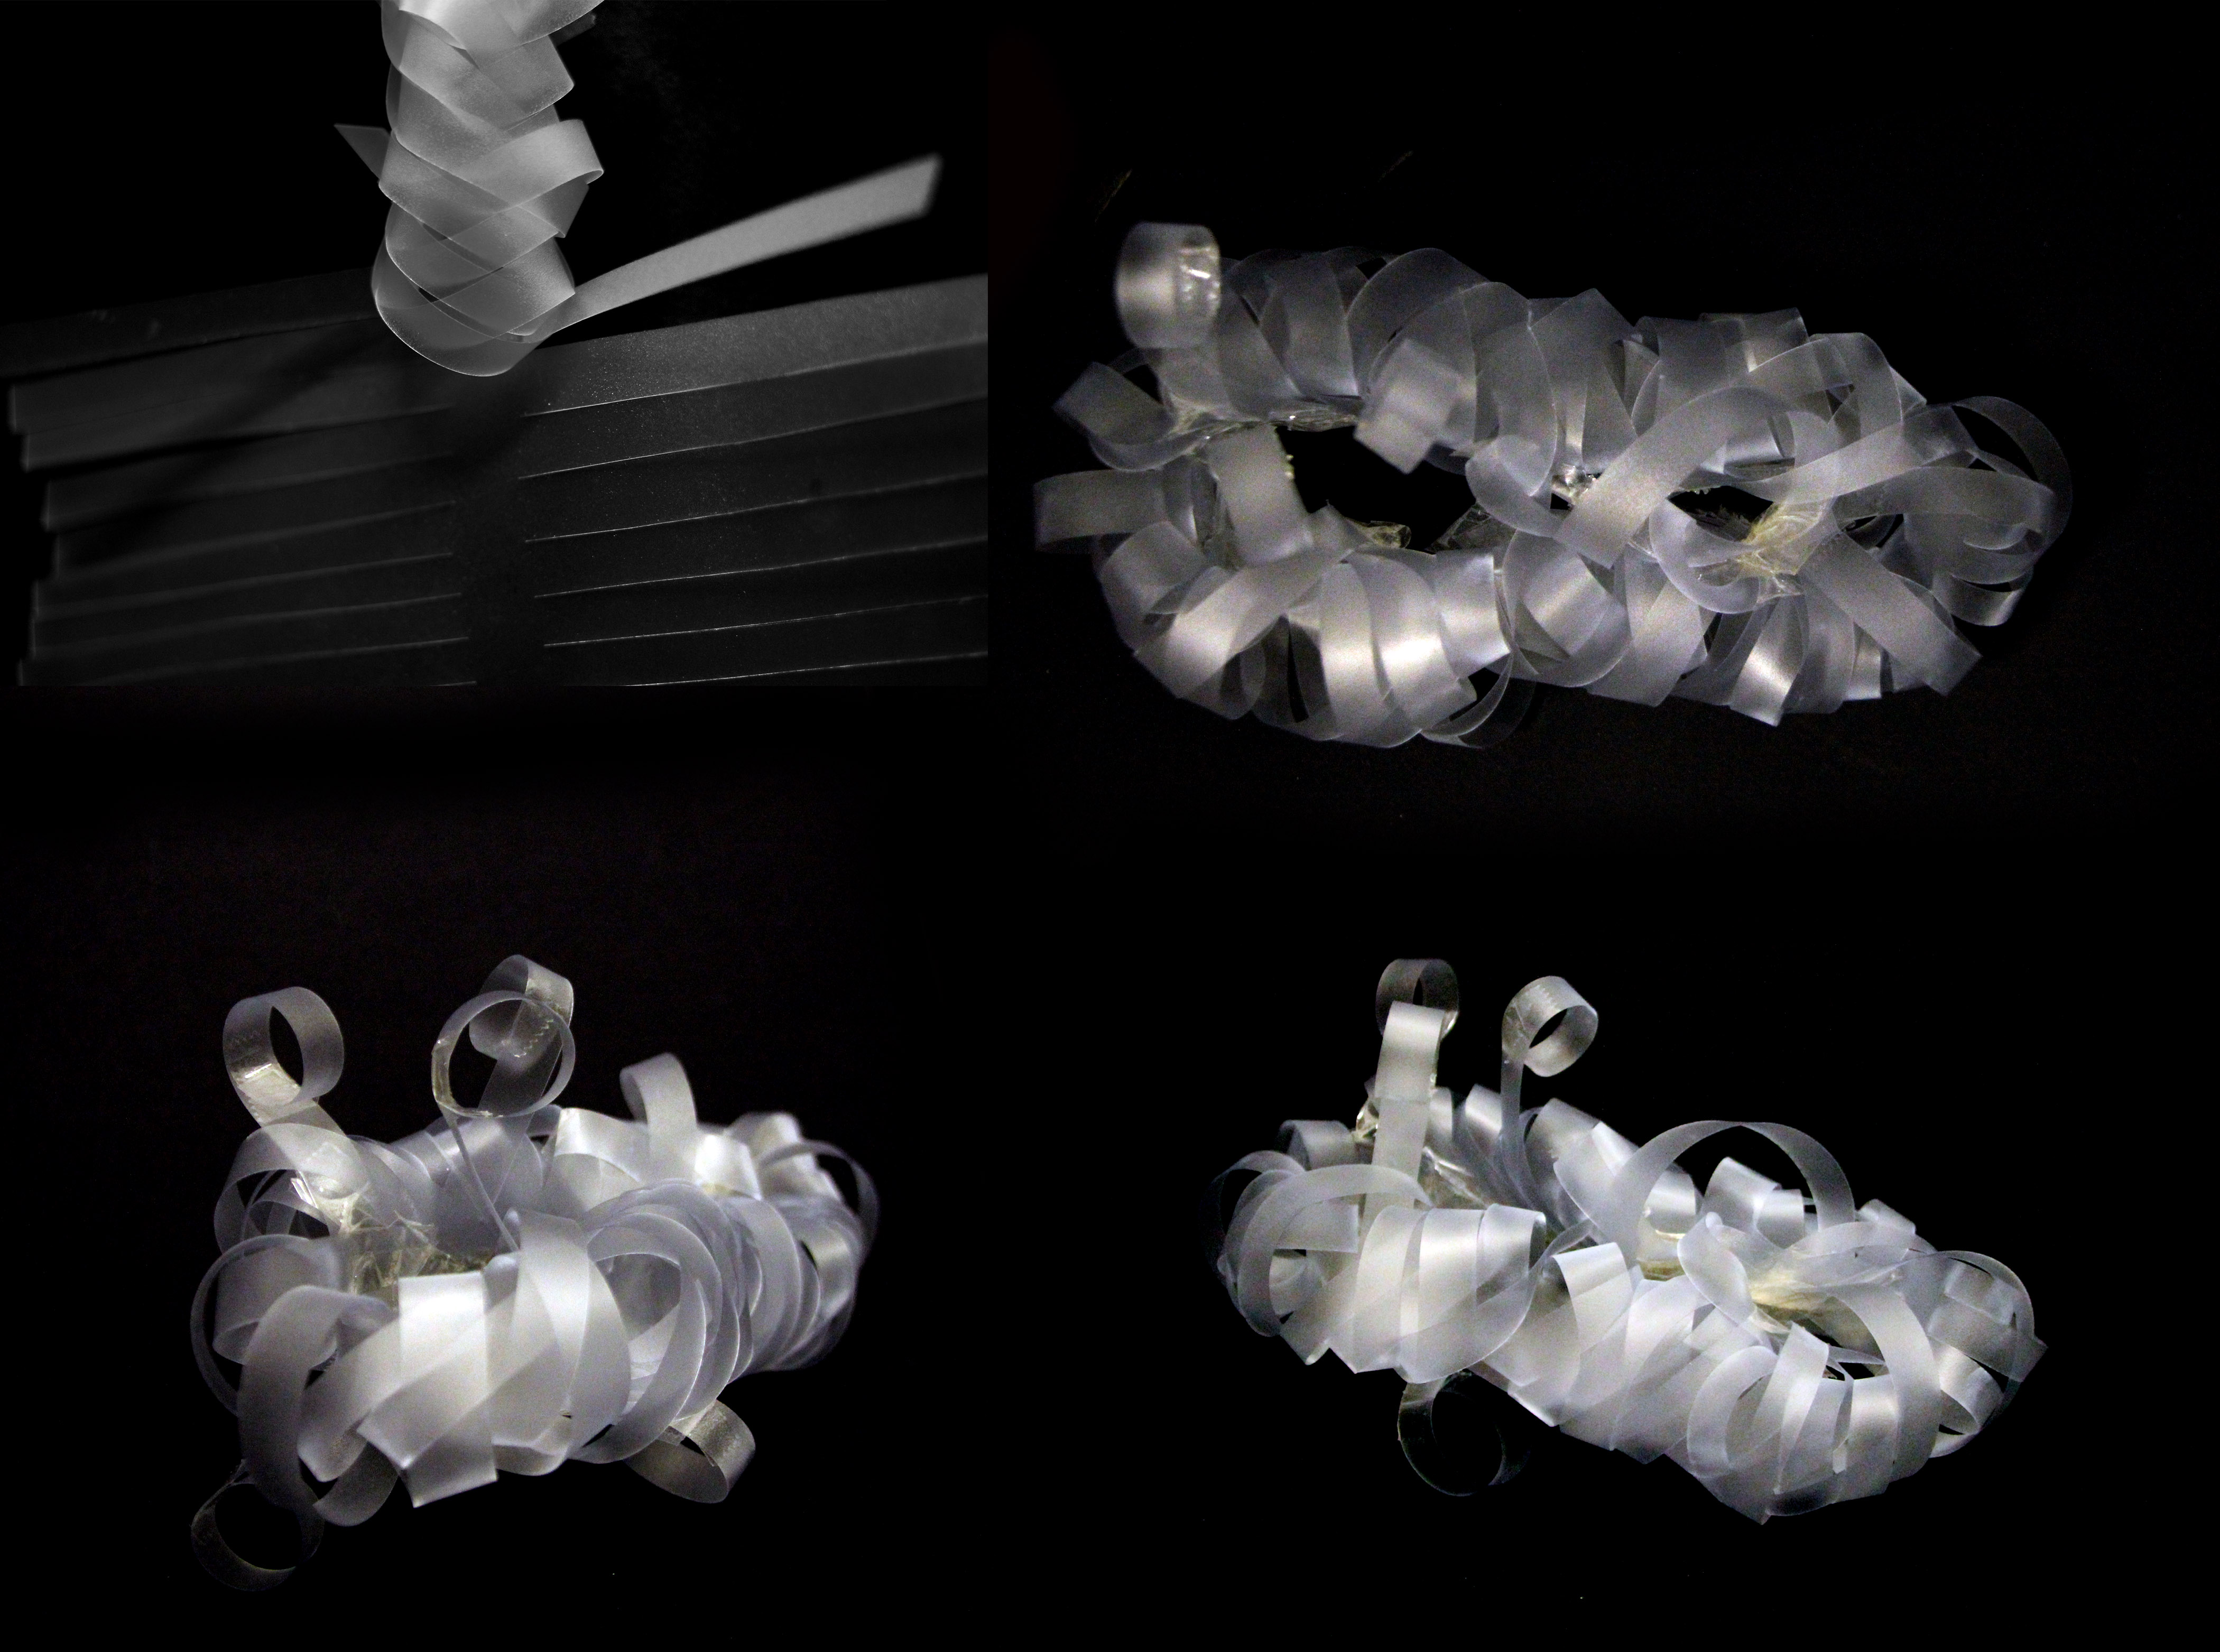
I decide to use that thick plastic material that has a kinda neutral pitch with a quite heavy sound as previously I wanted to use thin plastic (the sound is too high pitch) or paper (the sound too light).
Still keeping the concept of the spiral, I cut all part to lines and spiral it. Then I connect both end to create an enclosed shape which represent the endless loop of the water as long as the fountain is turned on.
Unpleasant sound: Rolling Chair
This sound is unpleasant as it is quite annoying. Somehow when I listen to it, I picture myself studying/doing project in a room and there is someone who keeps on rolling the chair, disturbing my concentration.
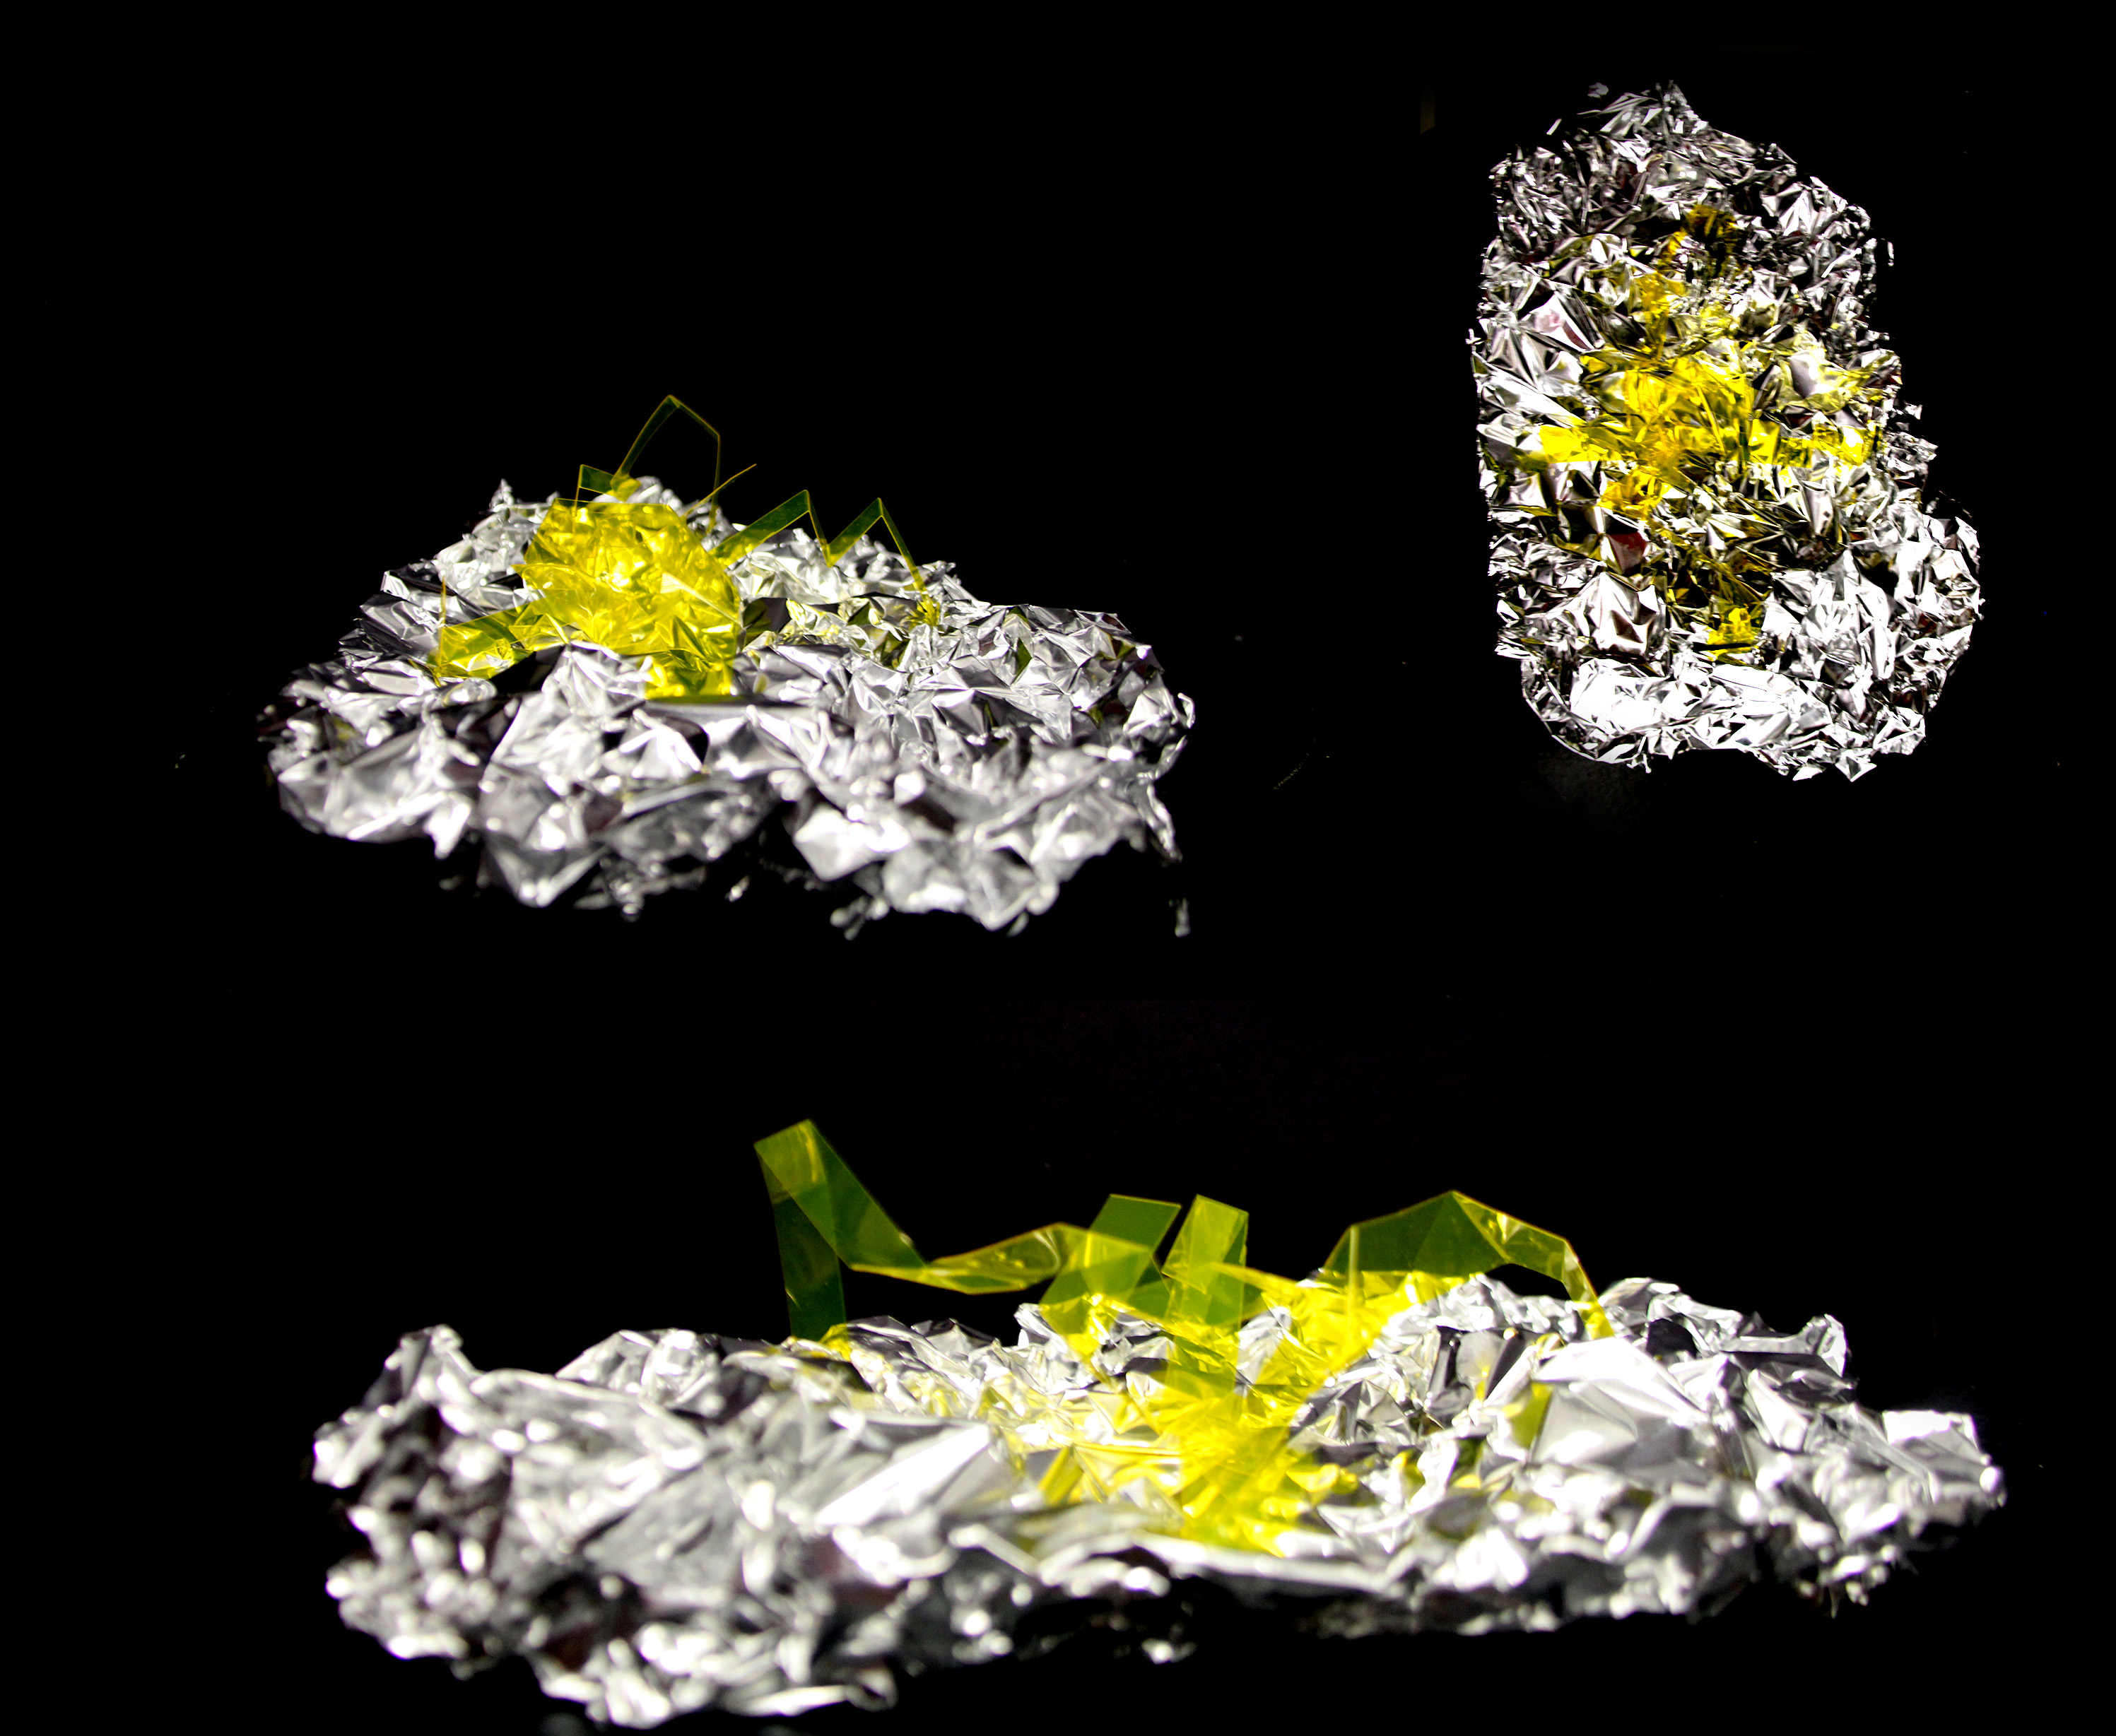
The sound of the rolling chair gives the sound of heavy friction between the wheel and surface. As such I used crumpled alumunium foil to show the uneven sound and friction. I chose this material as it has the friction with heavy feeling if i move my hand brushing through it.
And then there is the ‘ngik ngik’ squeaking sound from the chair. This sound is not so significant hence it is only represented by small strip of transparent colored paper being folded into random direction unevenly (as the ‘ngik’ sound is uneven and irregular. I chose the material as the ‘ngik’ sound was clear and the color is not so dominating and can blend with the foil.
It was actually a fun activity for me as I have to try new things and use my imagination. Some sound evokes random memory while some just sound like a common sound with not much significant memory :D.
3D Project 2
Research: Hearing and Touch
In Class: Sound Fabrics and Soundscape
Inspiration and Process: Sound Texturizer Trial and Error
Final: THE SOUNDTUBE
Hi!
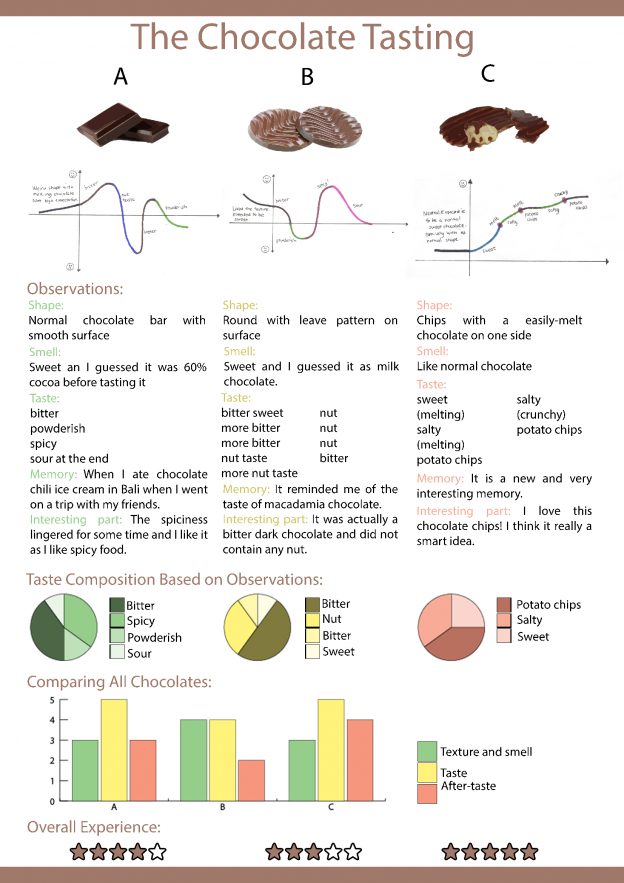
On our very first 3D lesson, we had some fun and unusual experience. We were asked to blindly try 3 different chocolate. YUM 😀
CHOCOLATE A
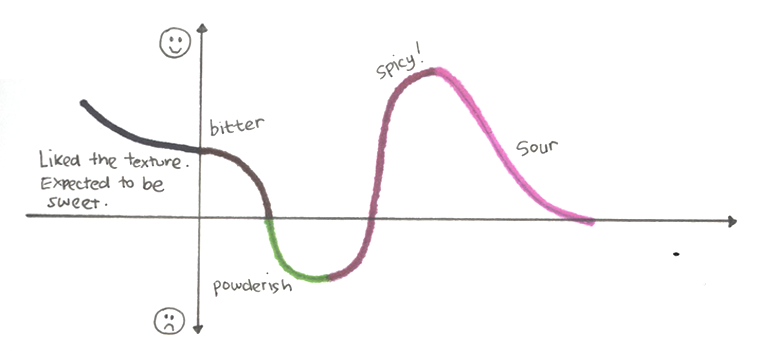
When I touched it, it has the shape of a normal chocolate bar with smooth surface. It didn’t melt easily, I guess it was not milky. It smelled sweet and I guessed it had 60% cocoa.
At first it tasted bitter, slowly become powderish and suddenly spicy (which I like) but end up giving the sour taste at the end.
Well, I the moment the chocolate became spicy, I remember the time when I ate a cup of chocolate chili gelato in Gelato Gusto, Bali with my friends. To try a spoon was okay, but to finish a whole cup was memorable. It was a weird choice as I remember enjoying the first half of the cup but later forcing myself to finish the other half.
CHOCOLATE B
The shape was round with leave pattern on the surface. It smelled sweet and melt quiet easily, guessed it was milky.
However, it tasted very bitter and I savoured it (I like dark chocolate) until I started to taste nut and more nut which I do not really like. After sometimes the bitterness returned and turned powderish at the end.

The moment I tasted the nut, I remembered eating a macadamia chocolate, not really remembering the details of when and where.
Actually, the chocolate was dark chocolate and there was no nut at all. I did not know why did I tasted nut when I ate it.
CHOCOLATE C
The shape is of a chip with an easily-melt chocolate on one side. I thought it was normal and the chip was plain (I didn’t feel the texture of the salt somehow).
It was sweet at the first bite and I could feel the chocolate melted and I tasted salty, chocolate melted and I could taste potato chip, salty, crunchy and potato chips again. I love the taste, it just keep on getting better. (Thanks for letting us eating it)

This chocolate-potato chips is a really new and
