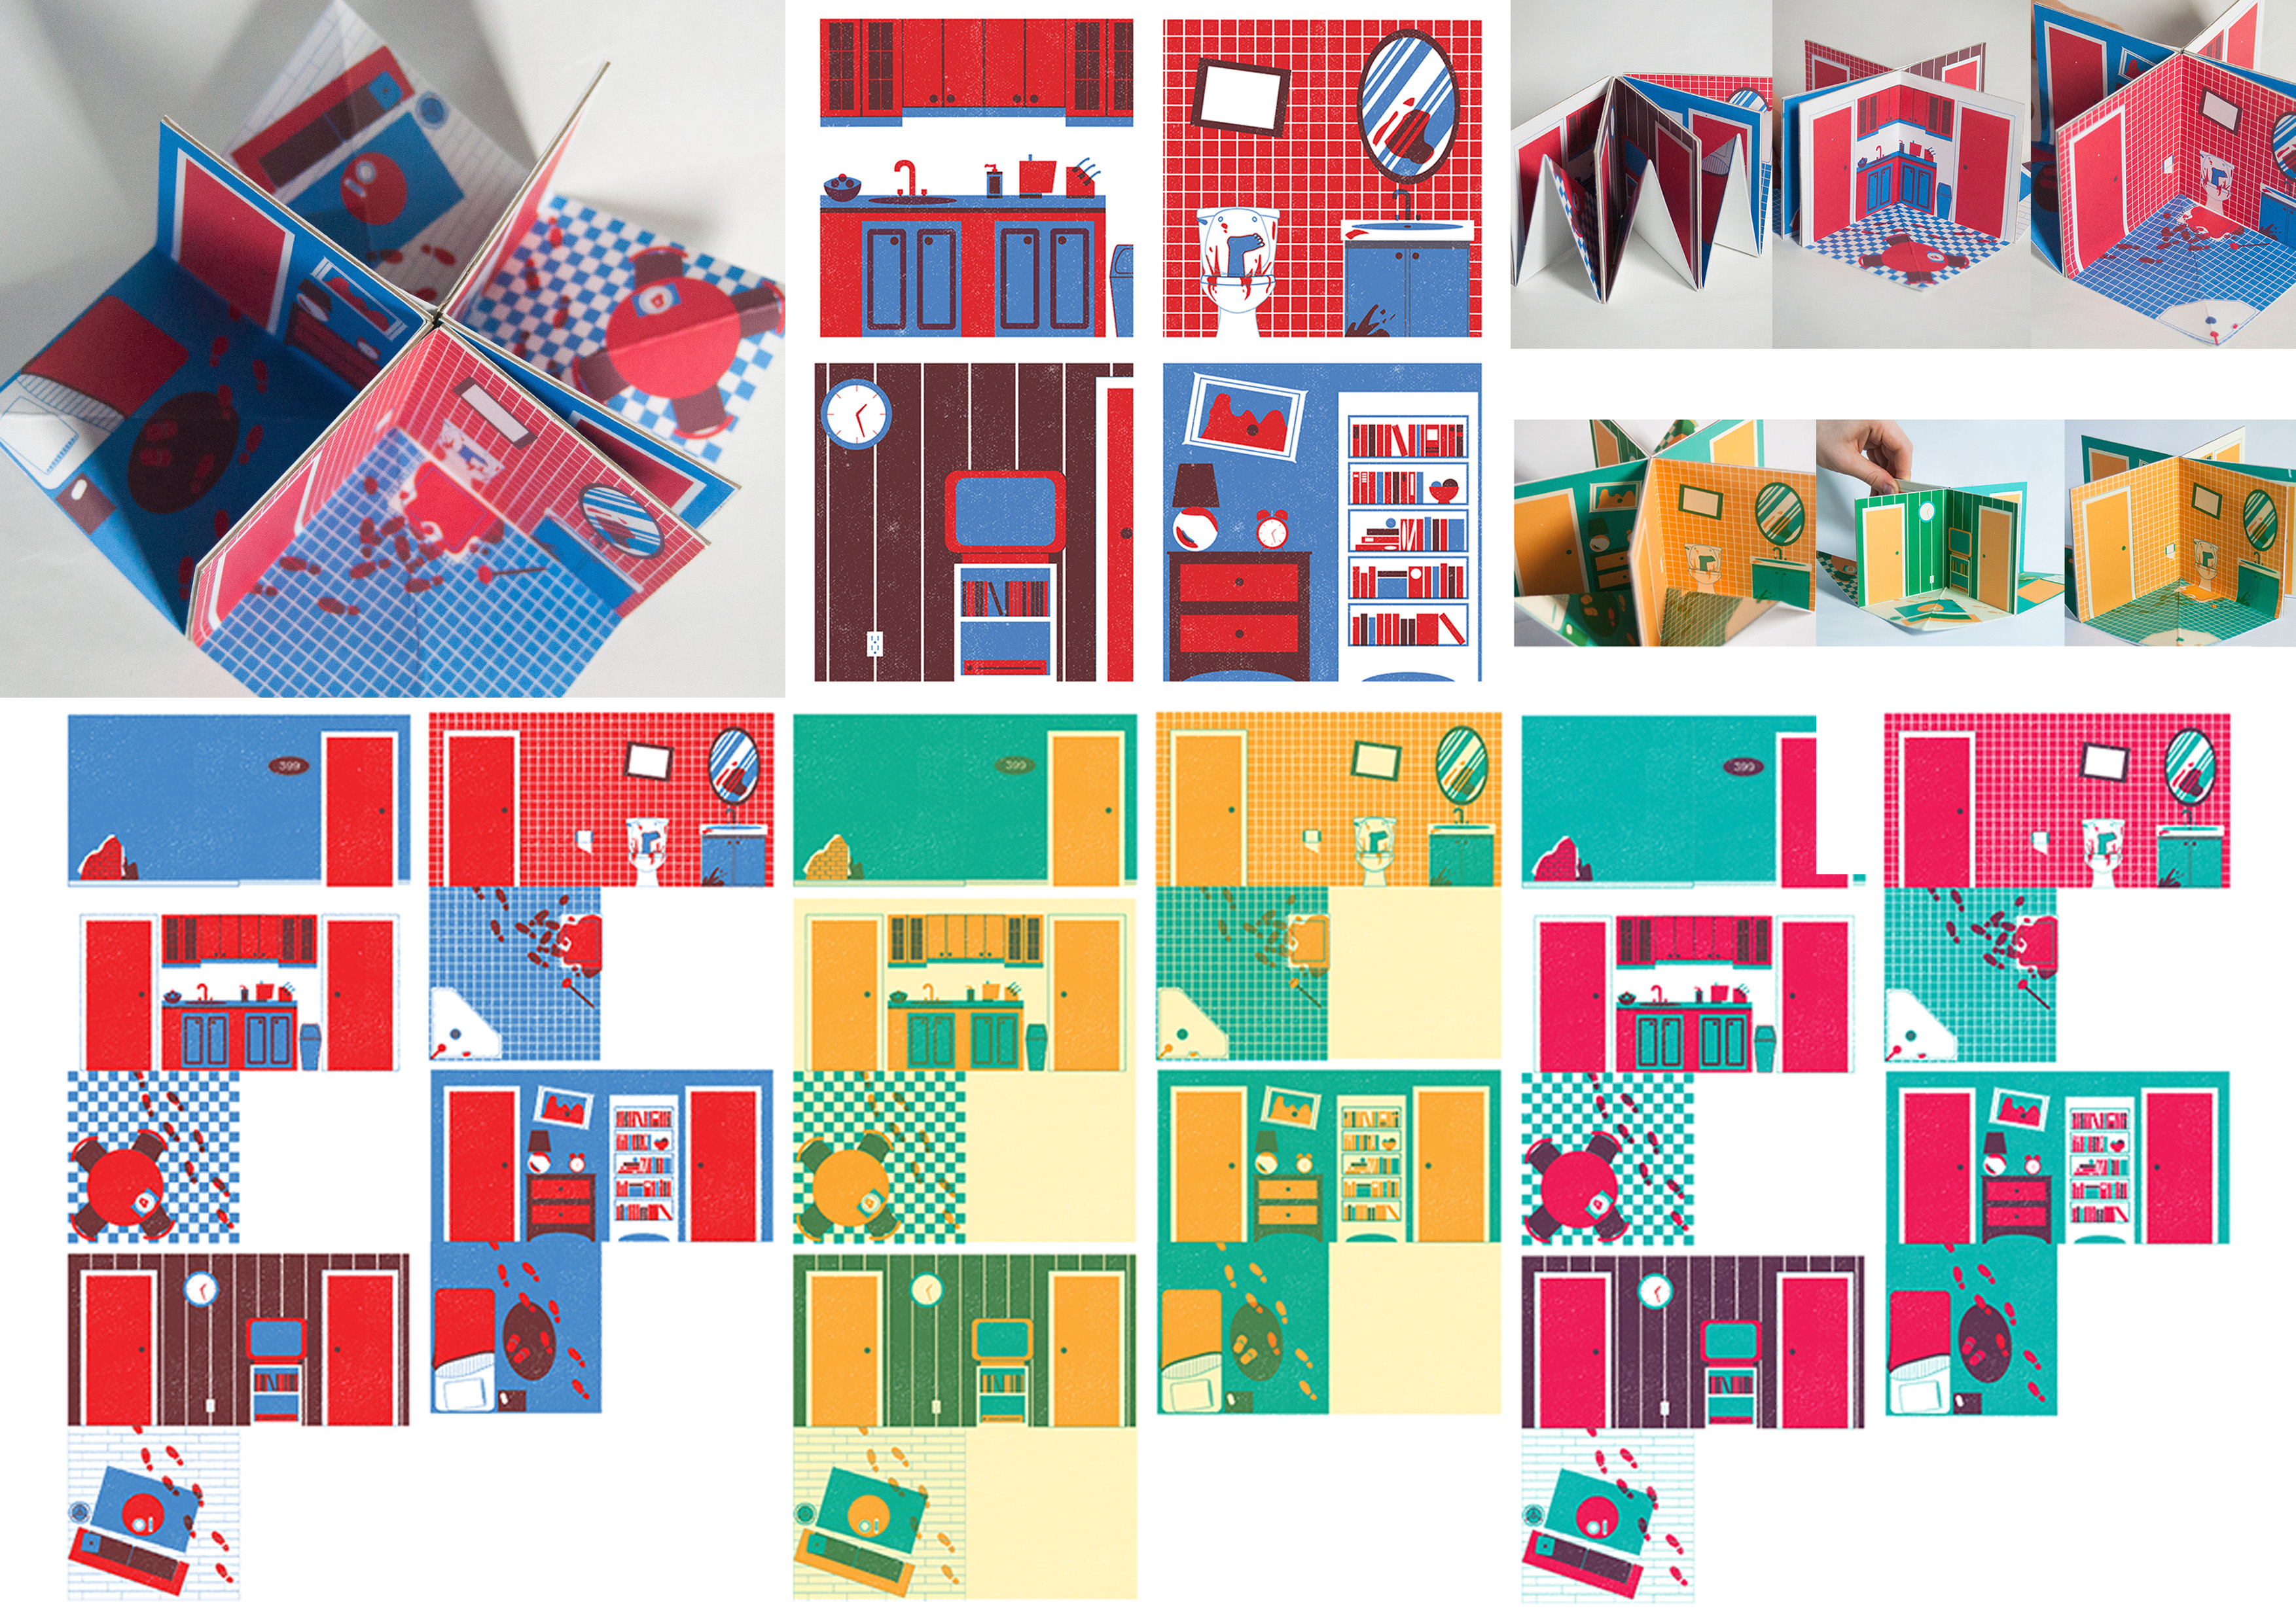
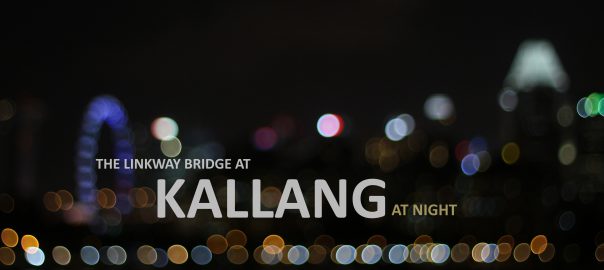
The Singapore Sports Hub LINKWAY BRIDGE at Kallang is a zine about the bridge introducing itself to the readers. Attempting to make itself more known than it currently is.
After doing my research for the zine, here is the process of the zine!
At first, I tried 2 color palette for the zine. The orange one is because I want to make the bridge feels cheerful and welcoming for the reader. While the pink and mint color is inspired by the Mindset zine, it gives me the sweet and calm feeling. However, the orange combination is not so nice and I decided to progress with the other one.
In general I use circles and geometrical shapes. I also use one color for each shape and restrict the color palette into 4 colors (other than black and white).
For the writing and content, I decided to play around the concept of the Linkway Bridge introducing itself to the readers. As such, the fist-person point of view (of the bridge) is used.
BACK AND FRONT COVER PAGE
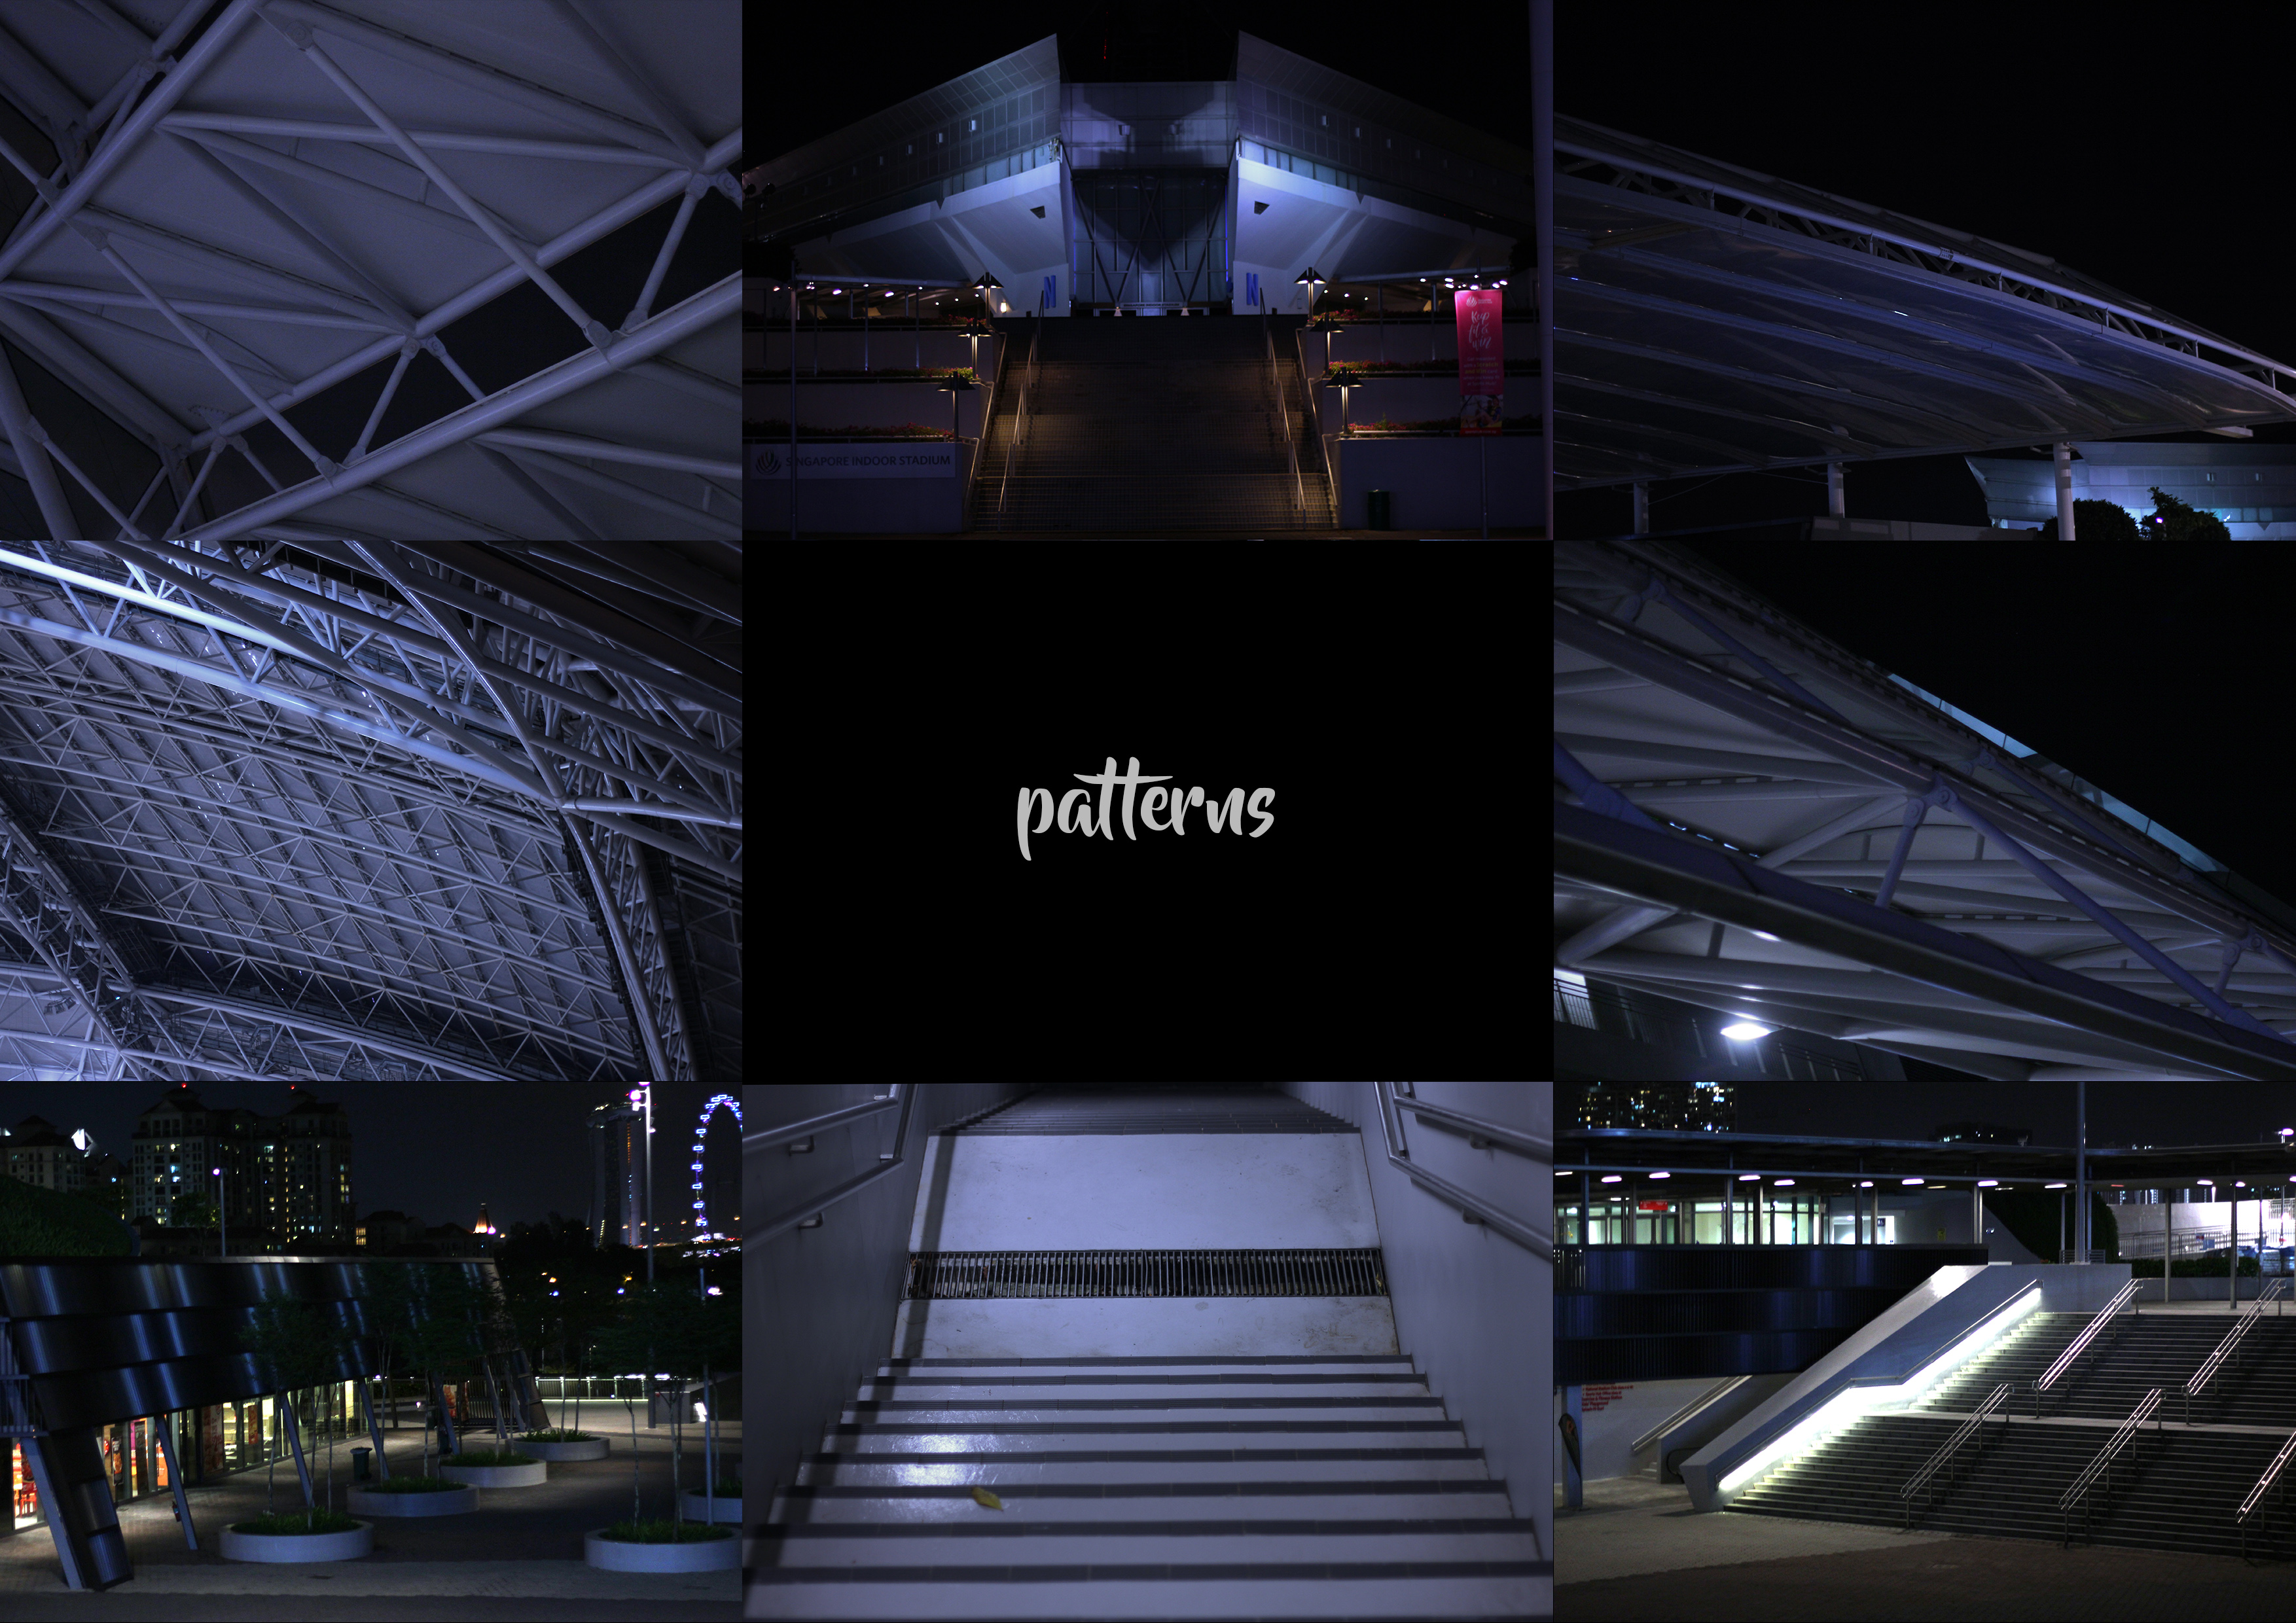
For this cover page, I collage some photos of the patterns that has been edited and image traced. I arranged them into 4 groups of 4 in which 3 are arranged vertically and one horizontally.
The ones arranged vertically feels like a fence and preventing the eyes from looking too long at it, unconsciously directing it towards the ‘freer’ part which has the title. Also added is one big and one smaller circle in diagonal line to further guide the eye to the zine title. The most dominant color is the dark pink which is put around the title area to further focus the eye around.
Hierarchy: circle with title (1st), images of pattern (2nd), big circle (3rd)
First draft
Feedback:
– Need to add the location of the bridge, my name and social media username.
Second draft
Improvements:
– Added the missing information
– Reduce the transparency of the title circle Feedback:
– Font size not consistent for the names
Final
Improvements:
-Changed the typeface and size for some texts
-Readjust the all the font position
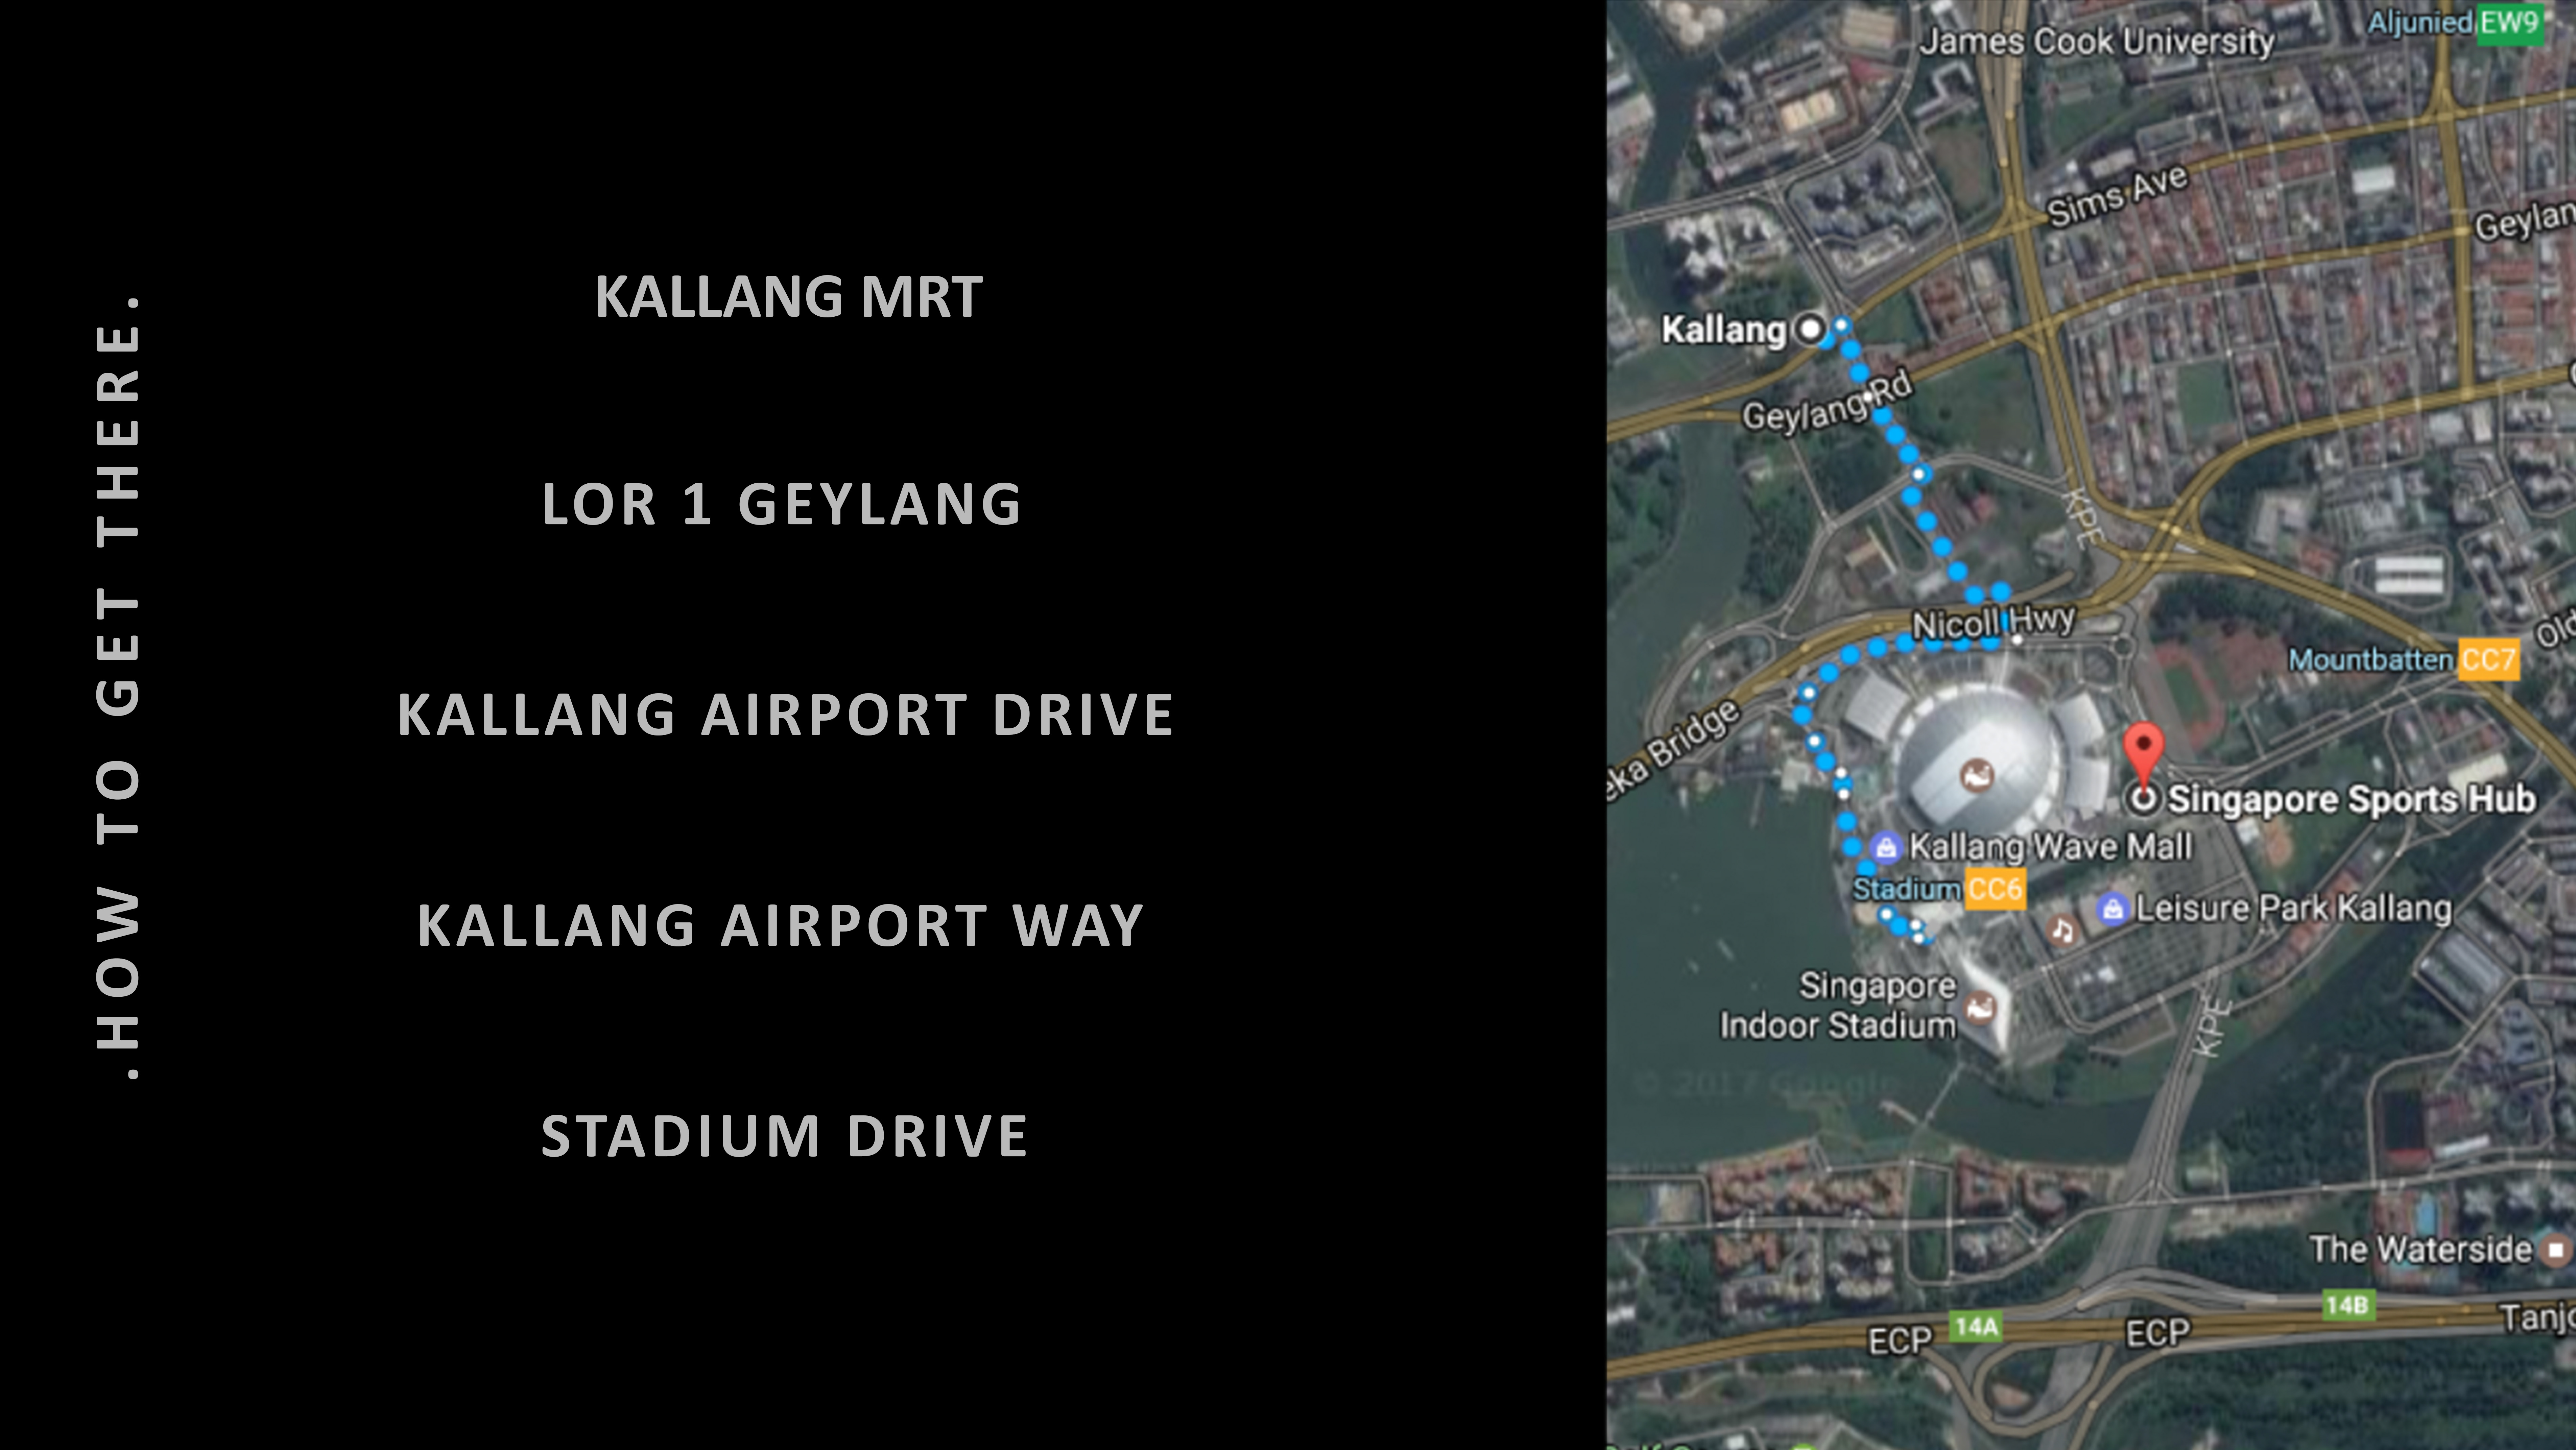
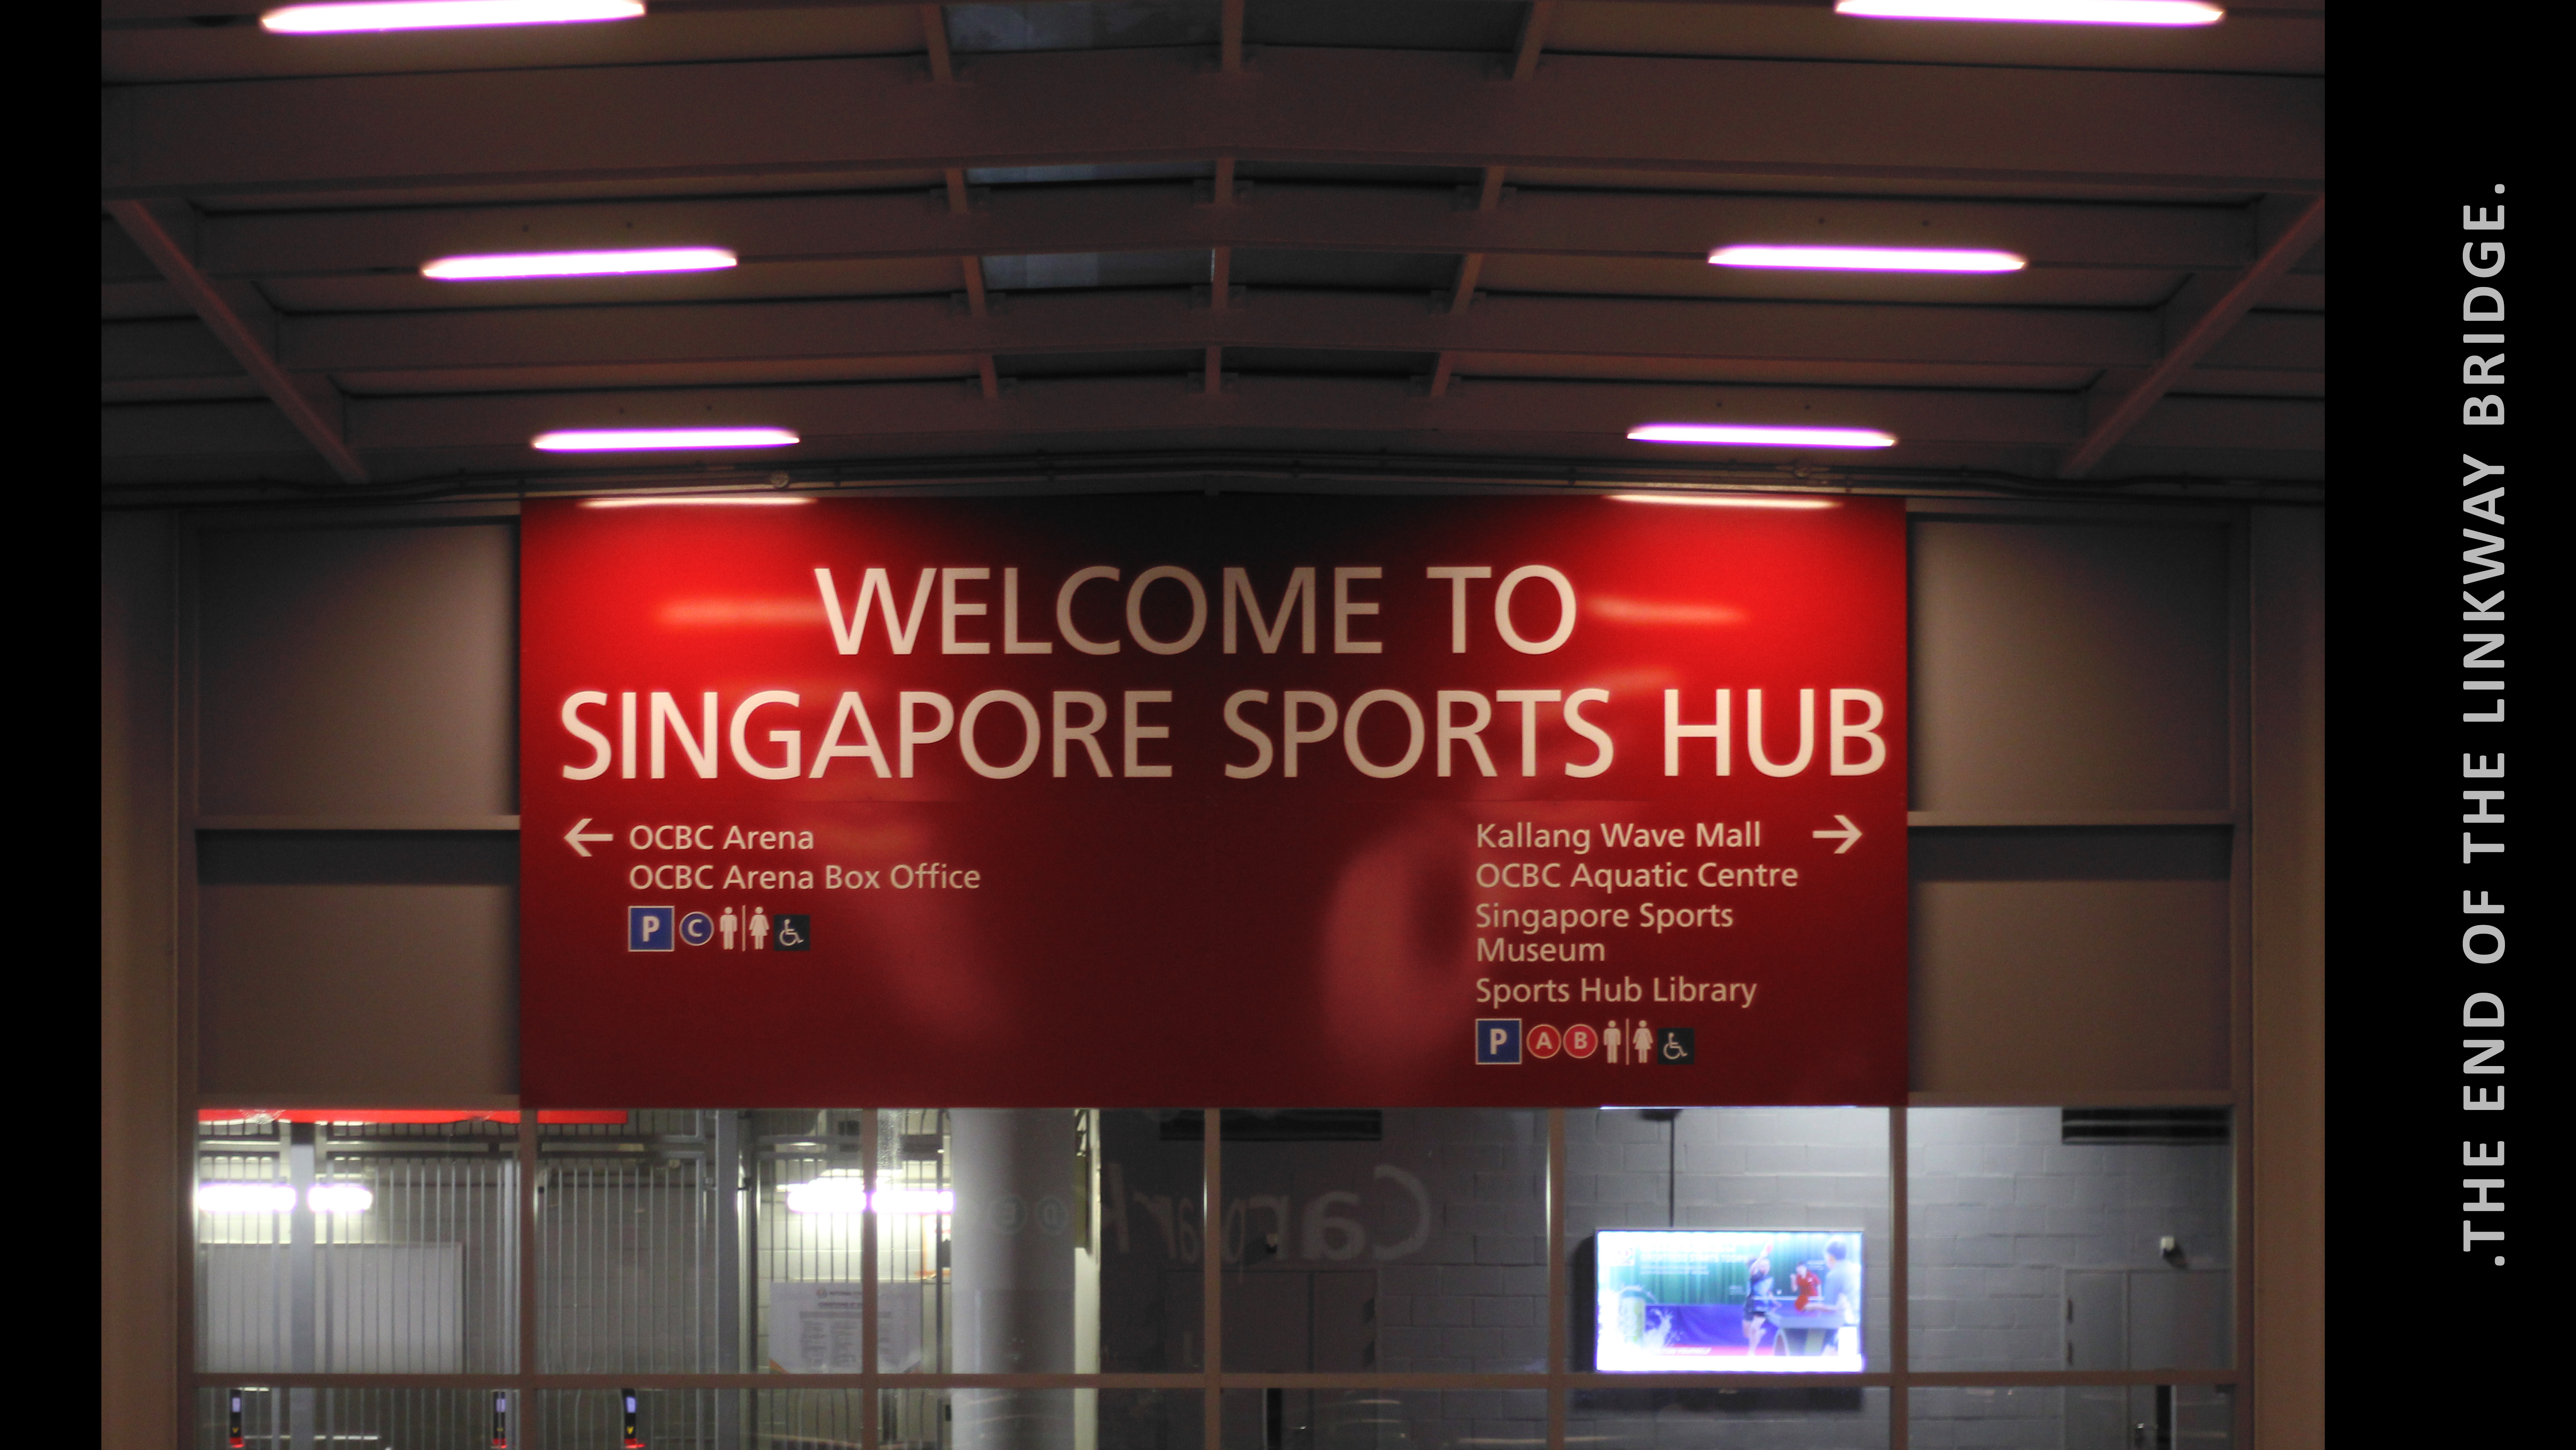
PAGE 2 AND 3 For the first two content pages, I want to start by telling the basic introduction of ‘who’ (read: what) the bridge is on page 2. Then on page 3, I am putting brief introduction about how to get to the bridge from Kallang MRT.
As for the visual to support this, I put the walking map from Kallang MRT to the bridge. This serves as the start of how one’s meet the bridge: KNOW HOW TO GET THERE!
Attempted to lead the reader’s eye in this order:
– title ‘Who Am I?’ (1st text hierarchy)
– the sub-title (2nd text hierarchy)
– going down from the Kallang MRT diagonally up to the Singapore Sports Hub
– the body text on the right down side (3rd text hierarchy)
First draft
Feedbacks:
– The typeface for sub-title is not suitable as it looks too futuristic which does not suit the concept of my zine and the other typeface.
– The illustration style as the visual is having different style from other pages which use photos.
– Should add dark green shape behind title to make it consistent like other pages as well as adding more green to the spread
Second draft
Improvements:
– Changed the typeface for both the sub-title and body text
– Also changed the visuals by finding satellites photo taken by Google Map and edit it out
– Add the overprint effect on the visual to match it with the rest of the zine
– Changed the title color into white to make it more stand out
– Added the dark green shape behind title Feedback:
– The logo is not clearly seen due to the dark green color
– Need to rephrase sub-title
-The leading of the body text paragraph is too wide and should try to change the alignment to left
– The drop cap is not suitable as the leading of the paragraph is too wide
Third draft
Improvements:
– Changed the color of the sub-title into white to make it more visible than the body text
– Readjust the shape of the dark green shape behind title to fit the new 2 lines layout
– Balance the length of the sub-title in two lines to not making it to long
– Made the logo more visible
– Right align the body text and adjust it to be inverted triangle shape
Final
Improvements:
– Edit and finalize the content of the body text
It took the slow me more than an hour to edit the Google map photo to make it be traced properly by AI :’)
PAGE 4 AND 5 For the next content part, I want the bridge to question the reader about their familiarity and knowledge on the bridge. It consist the two questions and the correct answers follows by facts about the answers.
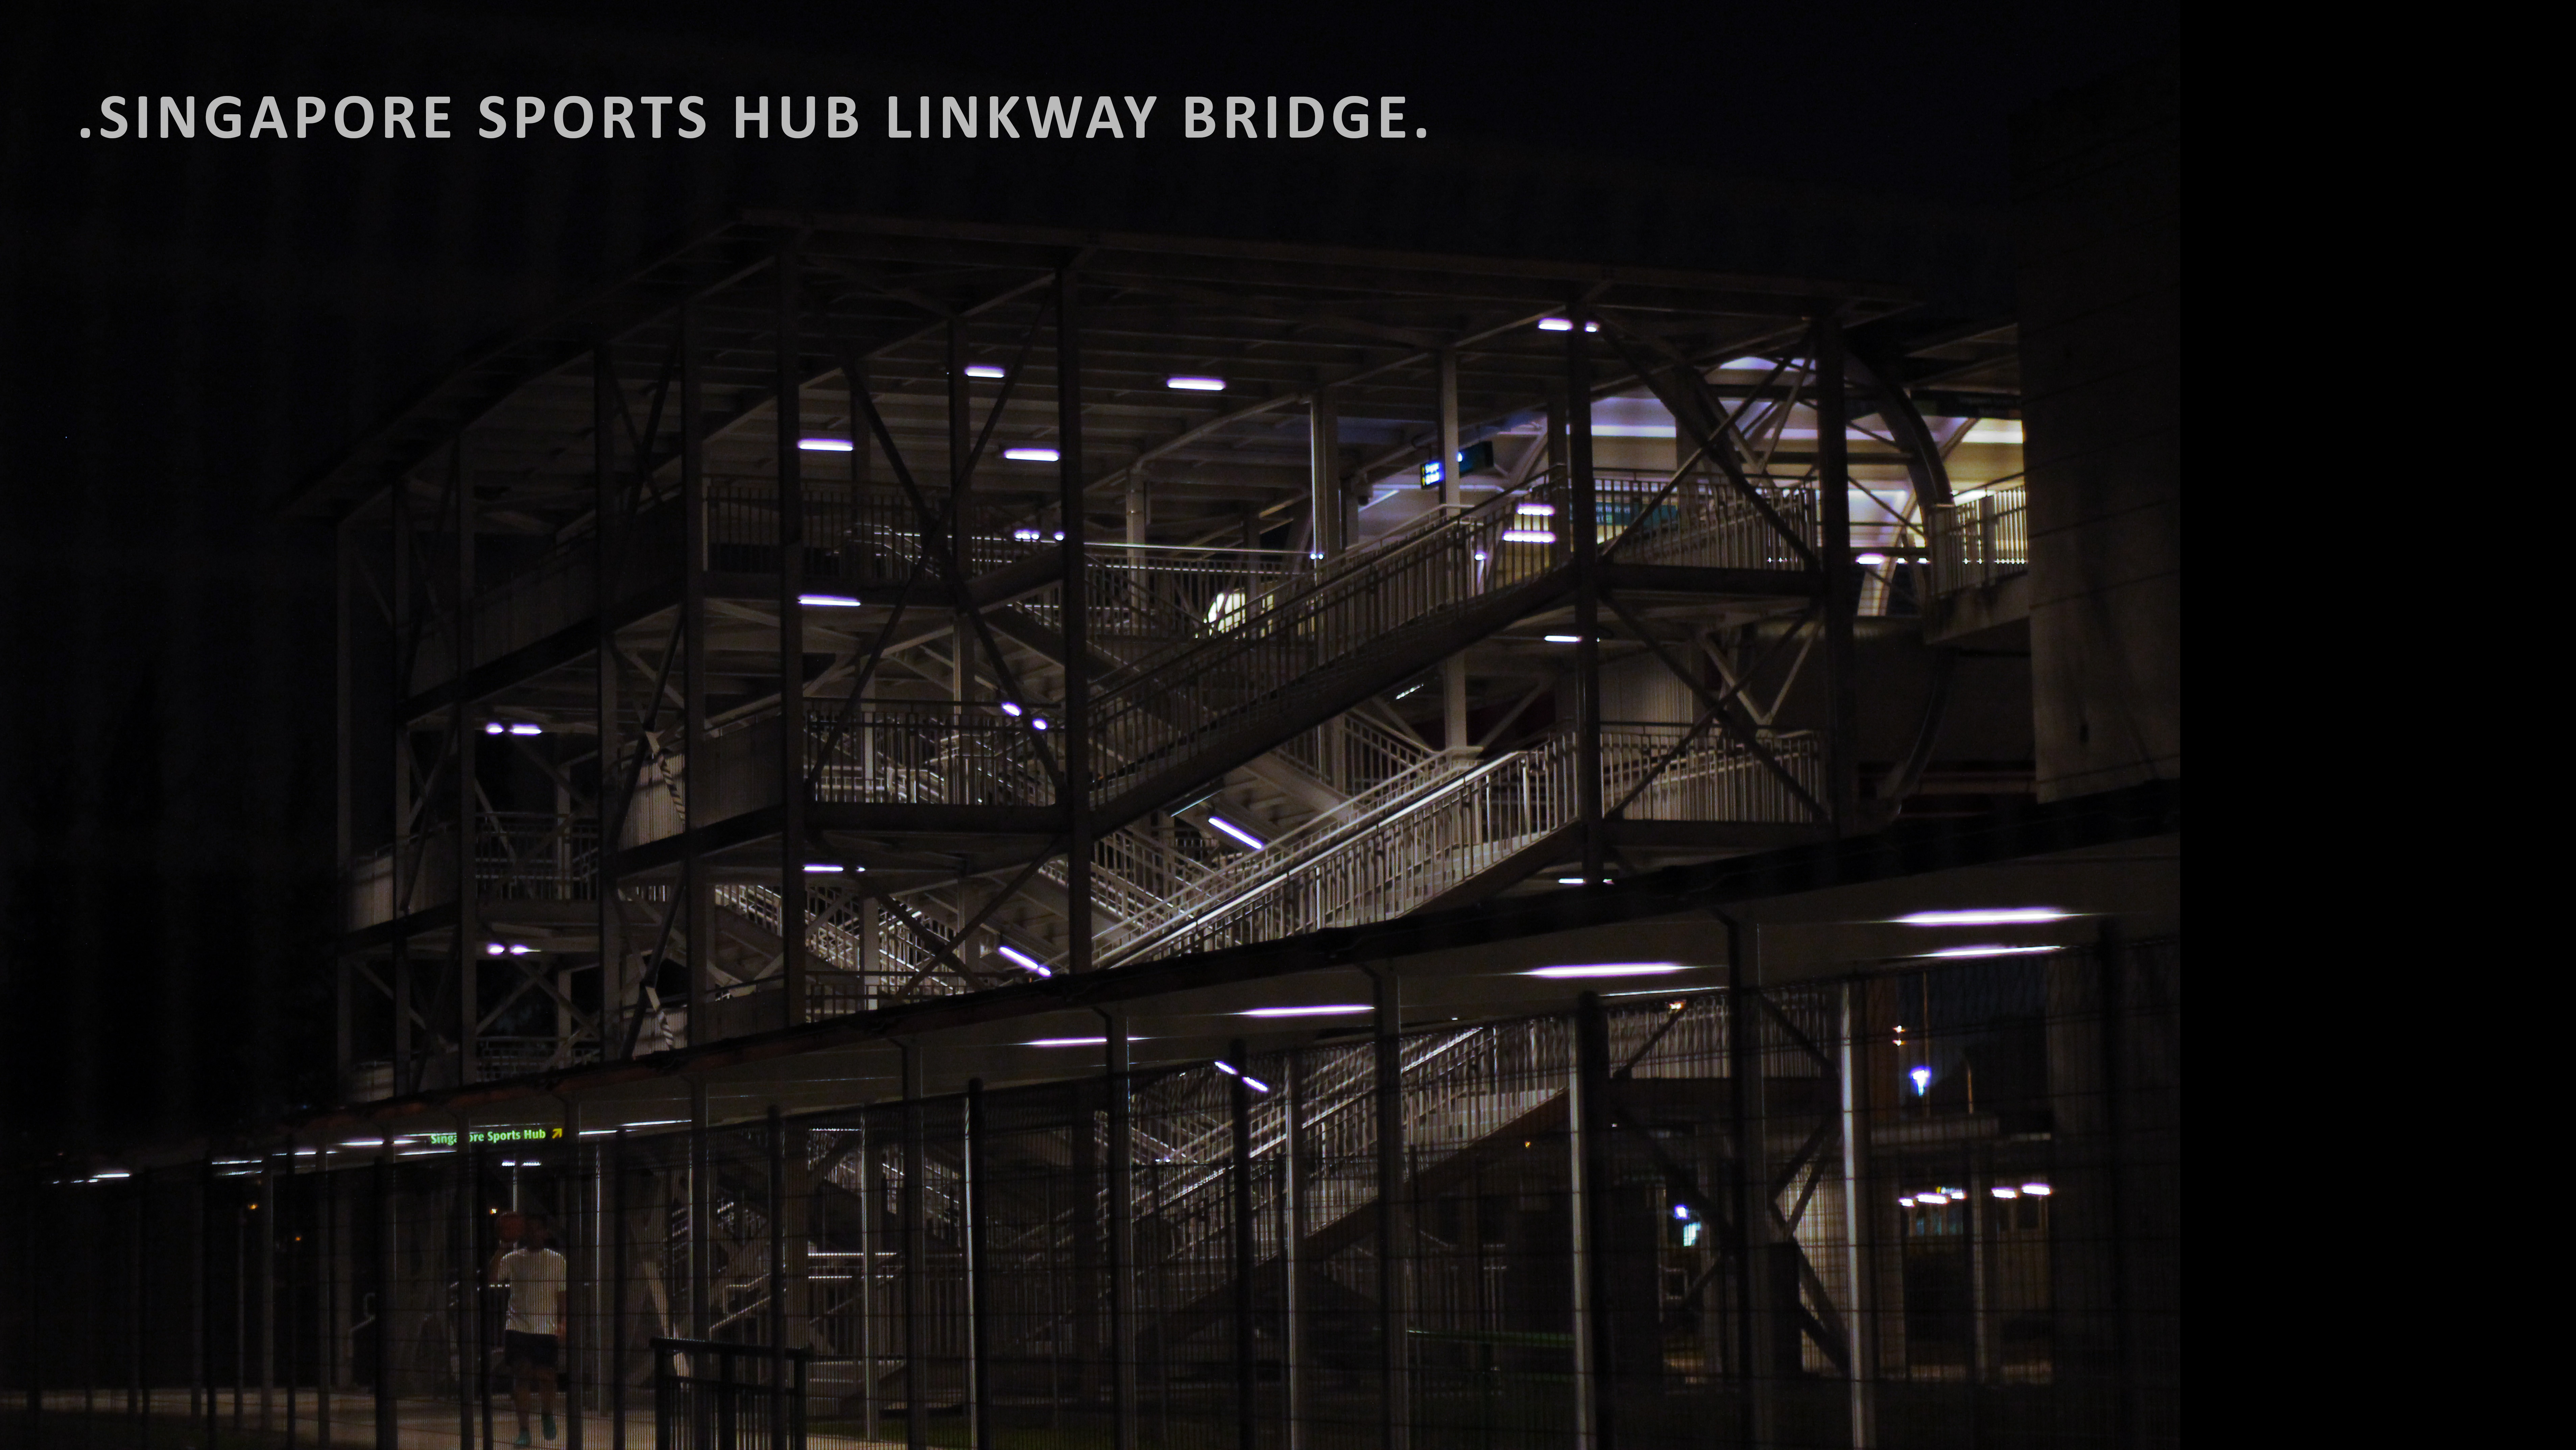
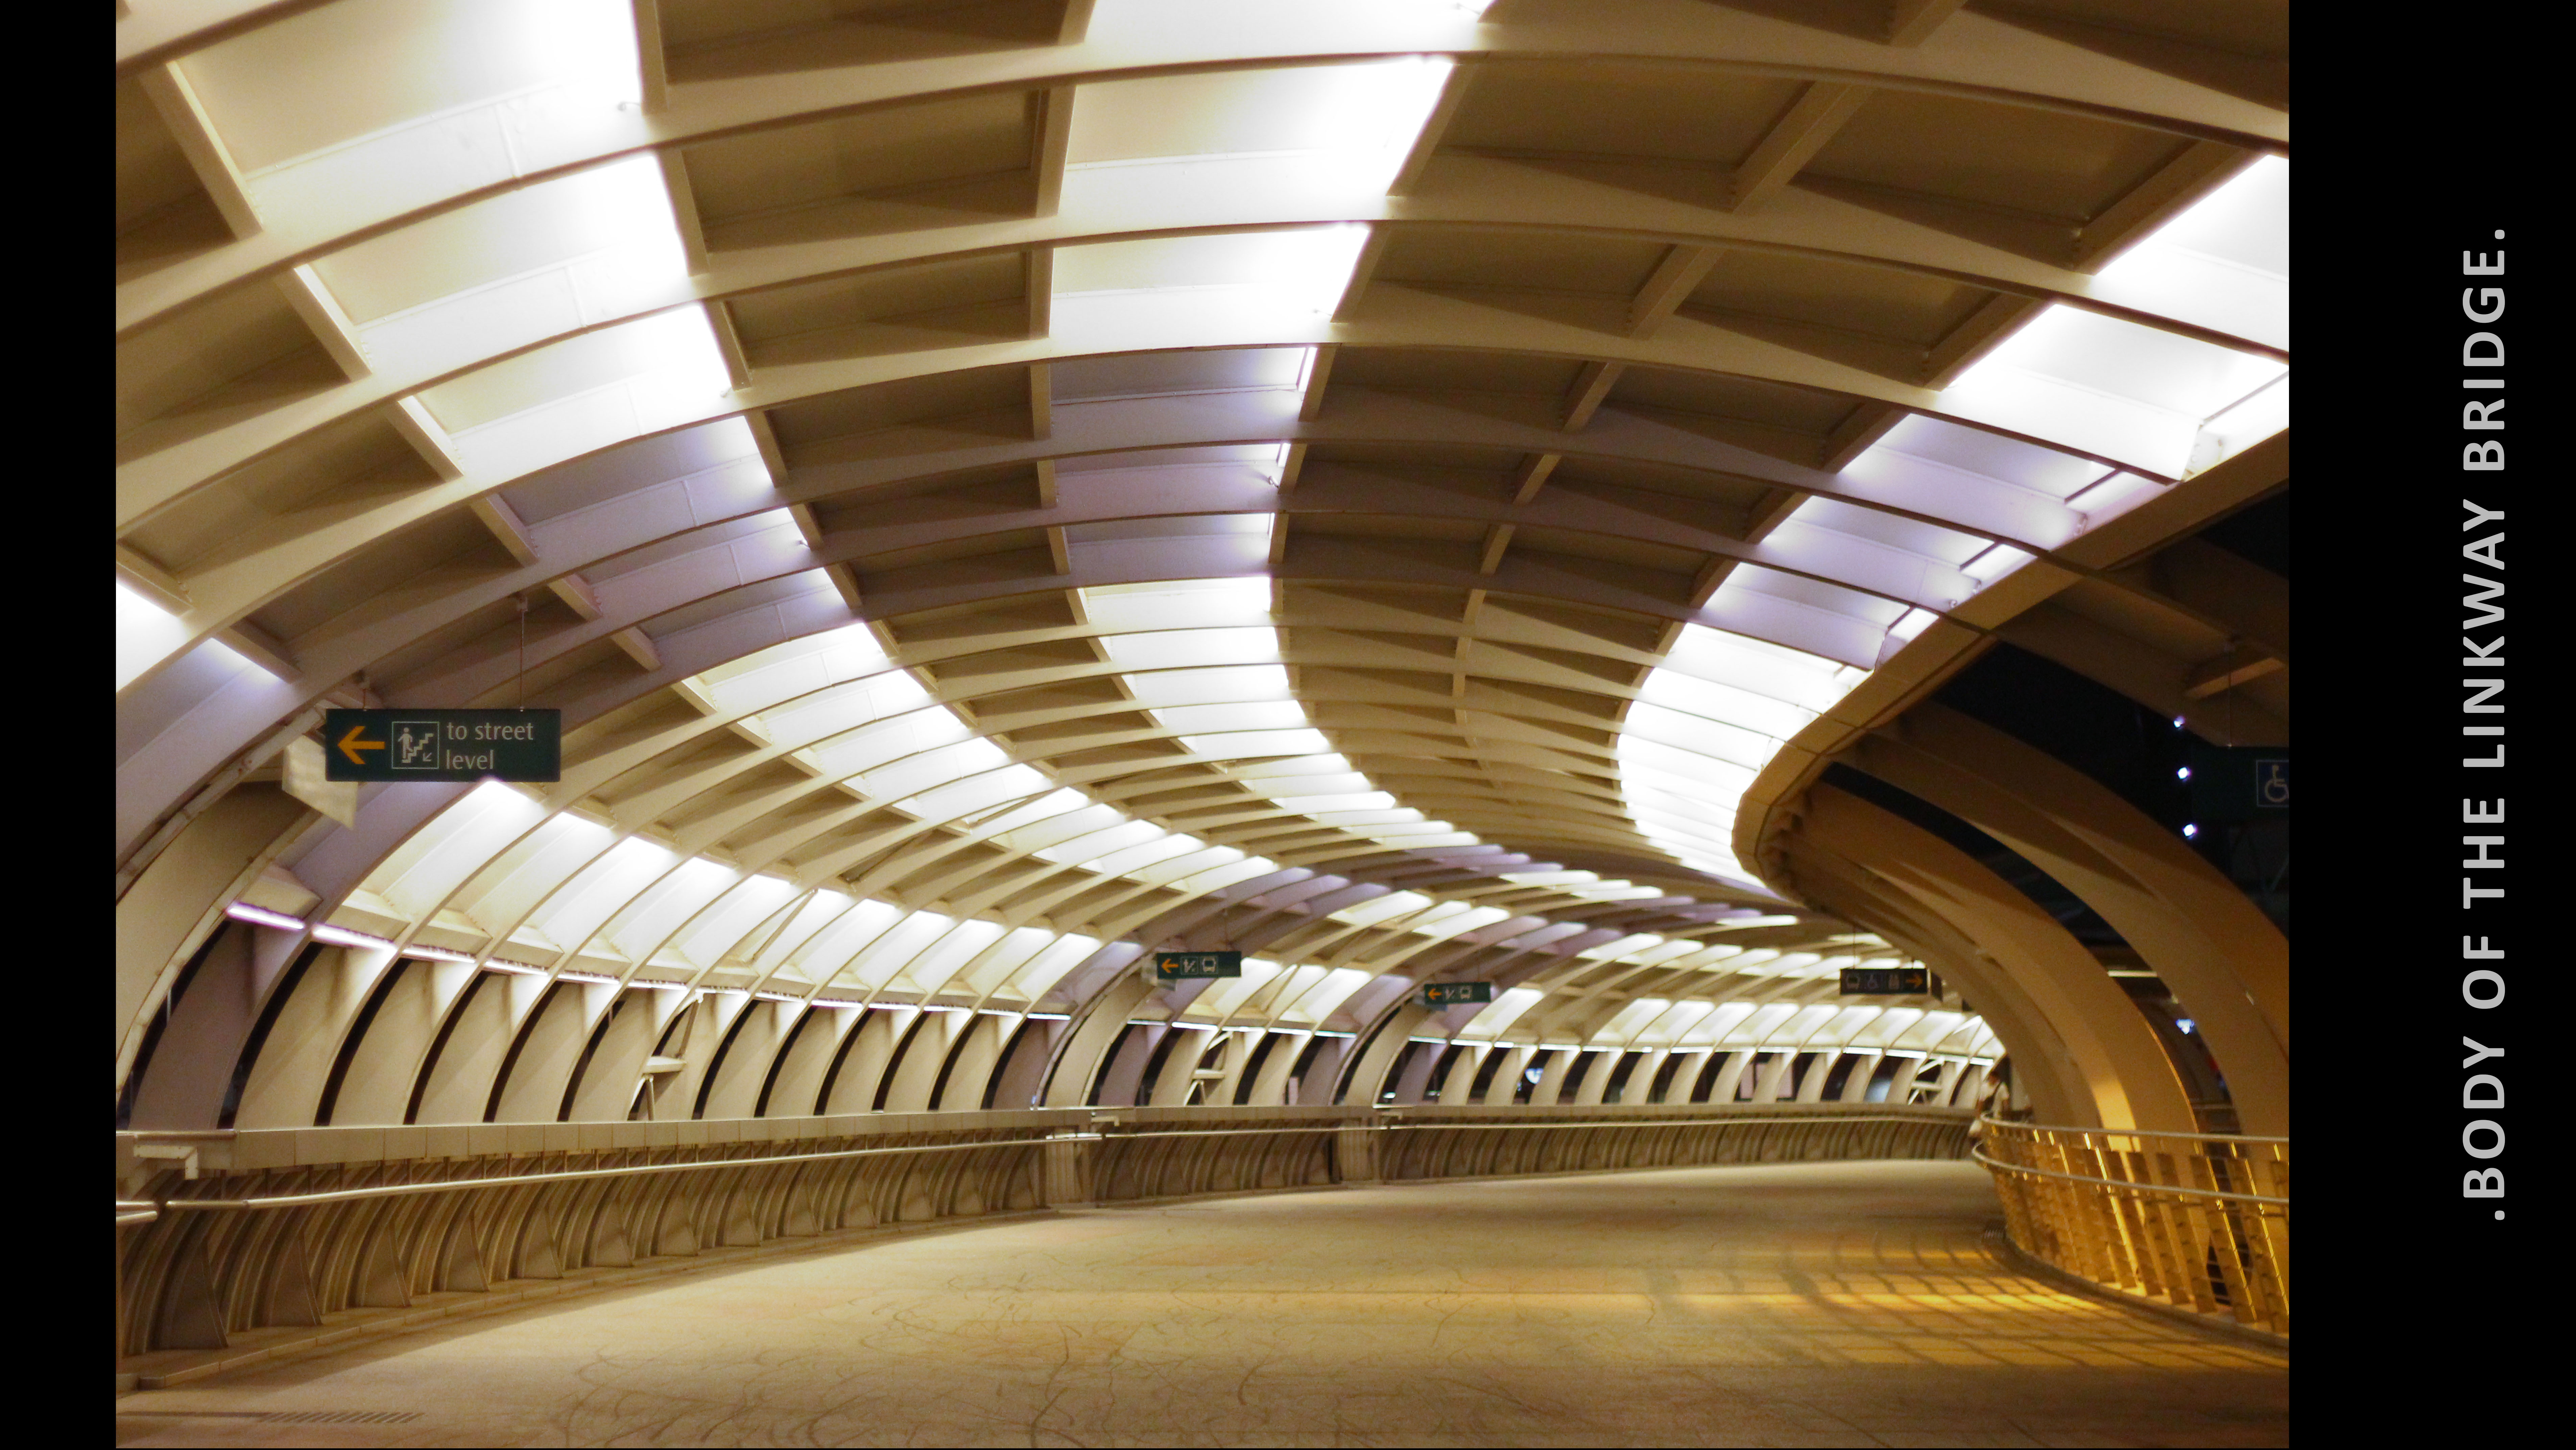
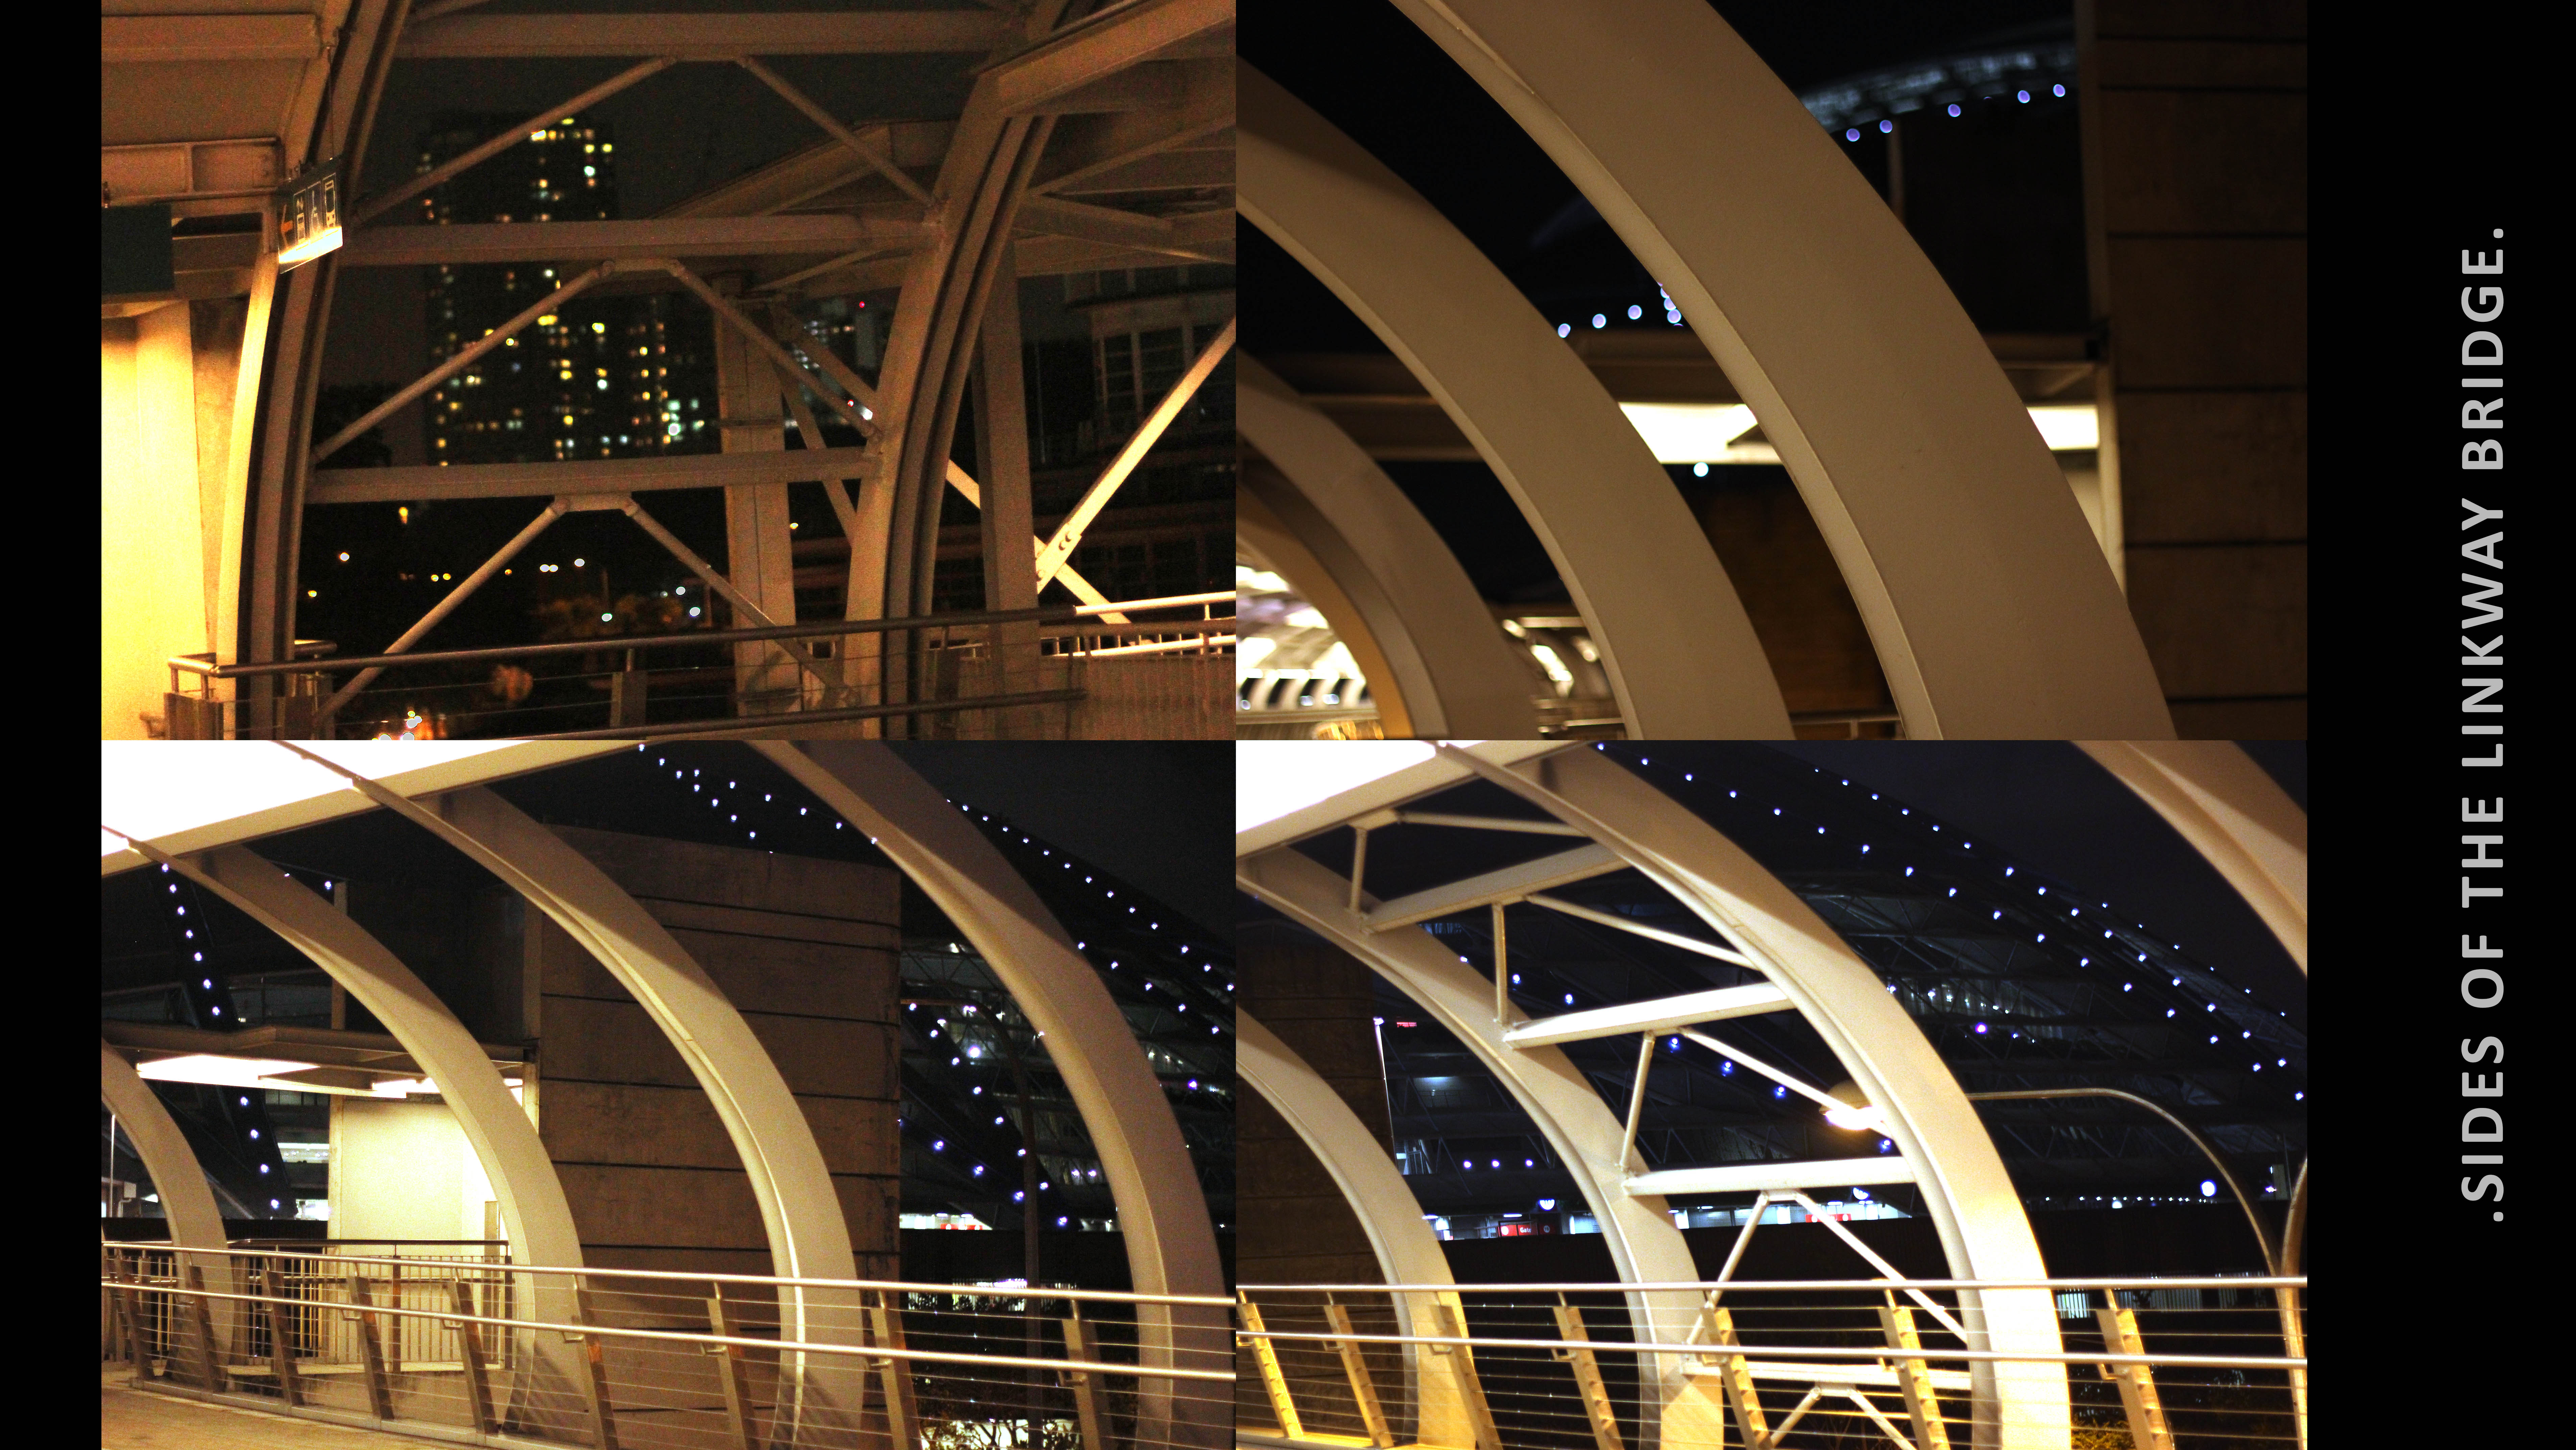
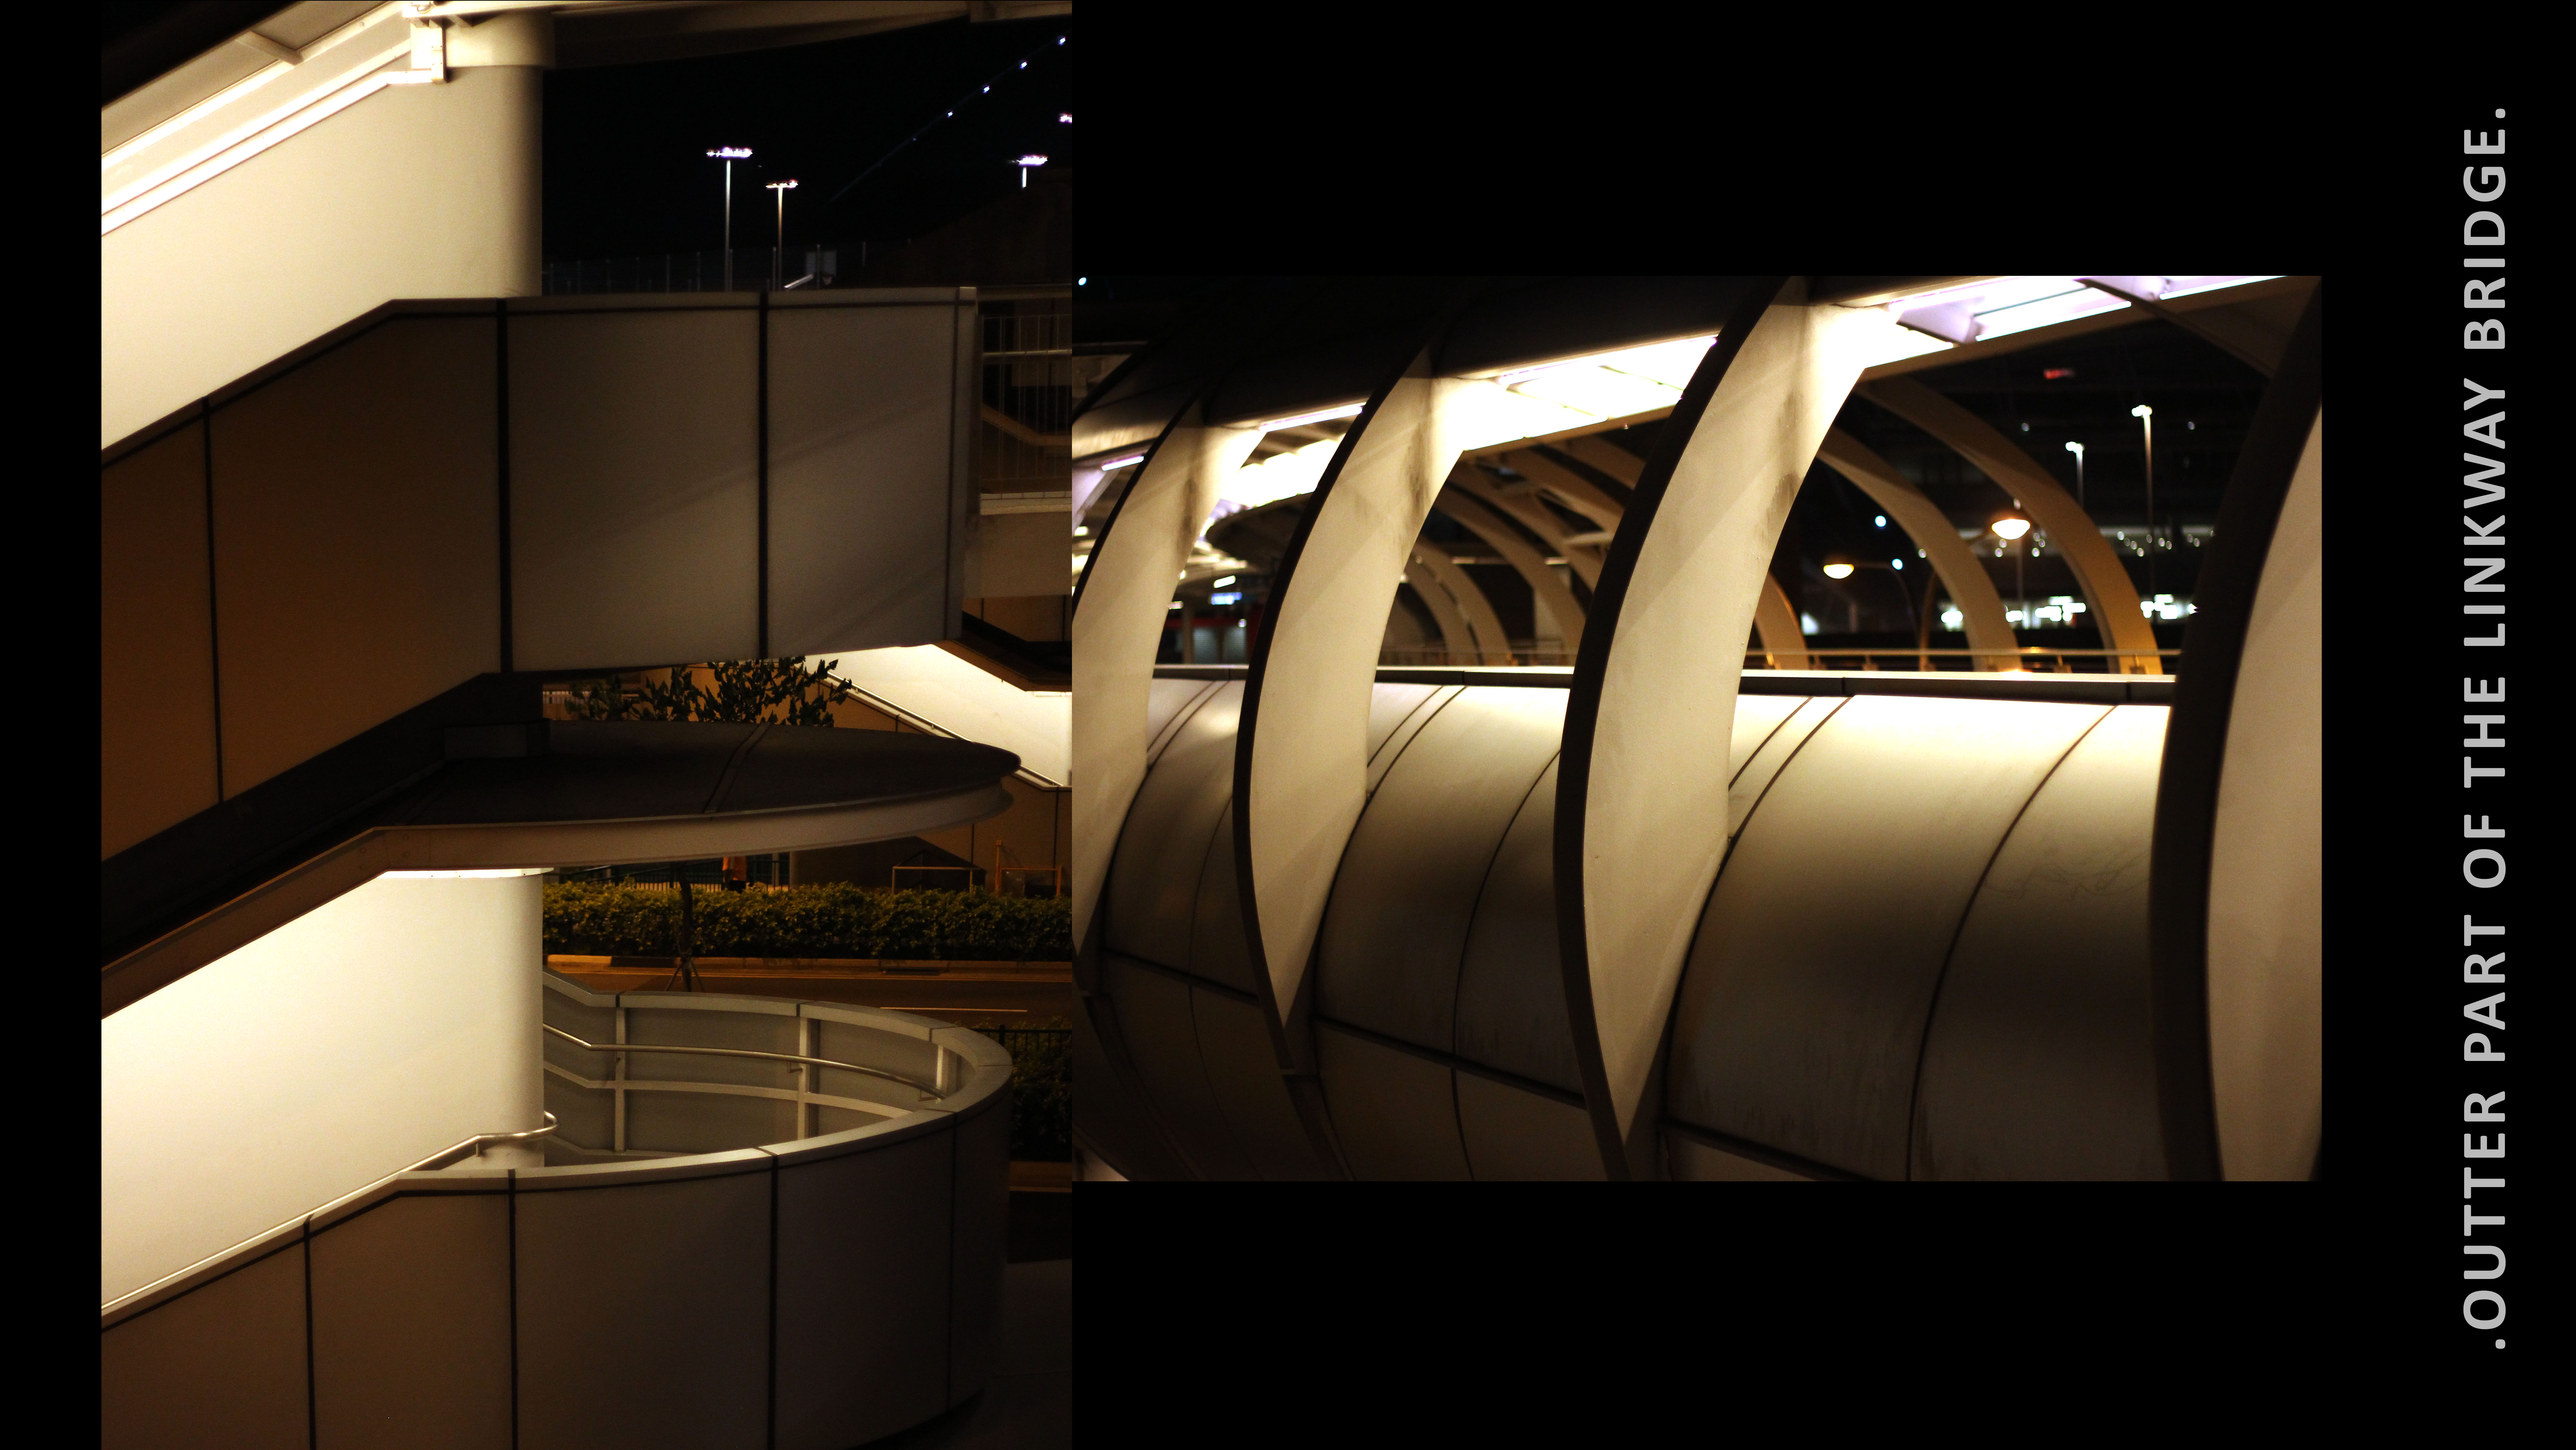
As for the visuals, I put the bridge seen from outside to show the next step of knowing someone: KNOW HOW IT LOOKS!
Attempted order of element read by the readers:
– title ‘How Well Do You Know Me?’ (1st text hierarchy)
– sub-title (2nd text hierarchy)
– the circle of questions on the left side
– follow the horizontal leading ‘line’ created by the bridge image from left to right
– the ‘ARE YOU SURE?’ in circle path
– finally the big circle of answers and facts (3rd text hierarchy)
First draft
Feedback:
– The typeface for sub-title is not suitable
– The answers should be different for both questions
– The ‘ARE YOU SURE?’ is okay as it visually looks like part of the bridge
Second draft
Improvements:
– Changed the typeface for both the sub-title and body text
– Changed the title color into white to make it more stand out Feedback:
– Readers are drawn to the bigger circle on the right first before reading the question due to its big size
– The sub-title looks different from previous pages (look inconsistent)
– Leading is too wide for the answers and facts
Third draft
Improvements:
– Changed the color of the three circles, making the big circle least dominant color of mint green and strengthen the circles color on the left side to the more dominant dark pink
– Adjust the sub-title font size
– Reduce the leading of the body texts
– Shifting the ‘ARE YOU SURE?’ more to the lft to shift the weight of the colour more to the left side in attempt to shift the reading order
– Changed the correct answers for question 2
Final
Improvements:
– Changed the color of the sub-title to white to make it consistent throughout the zine
– Edit the content (questions and answers) and finalize it to be the correct ones based on primary and secondary research
Took the bridge out and edited the color in Photoshop for a clearer monochrome image trace
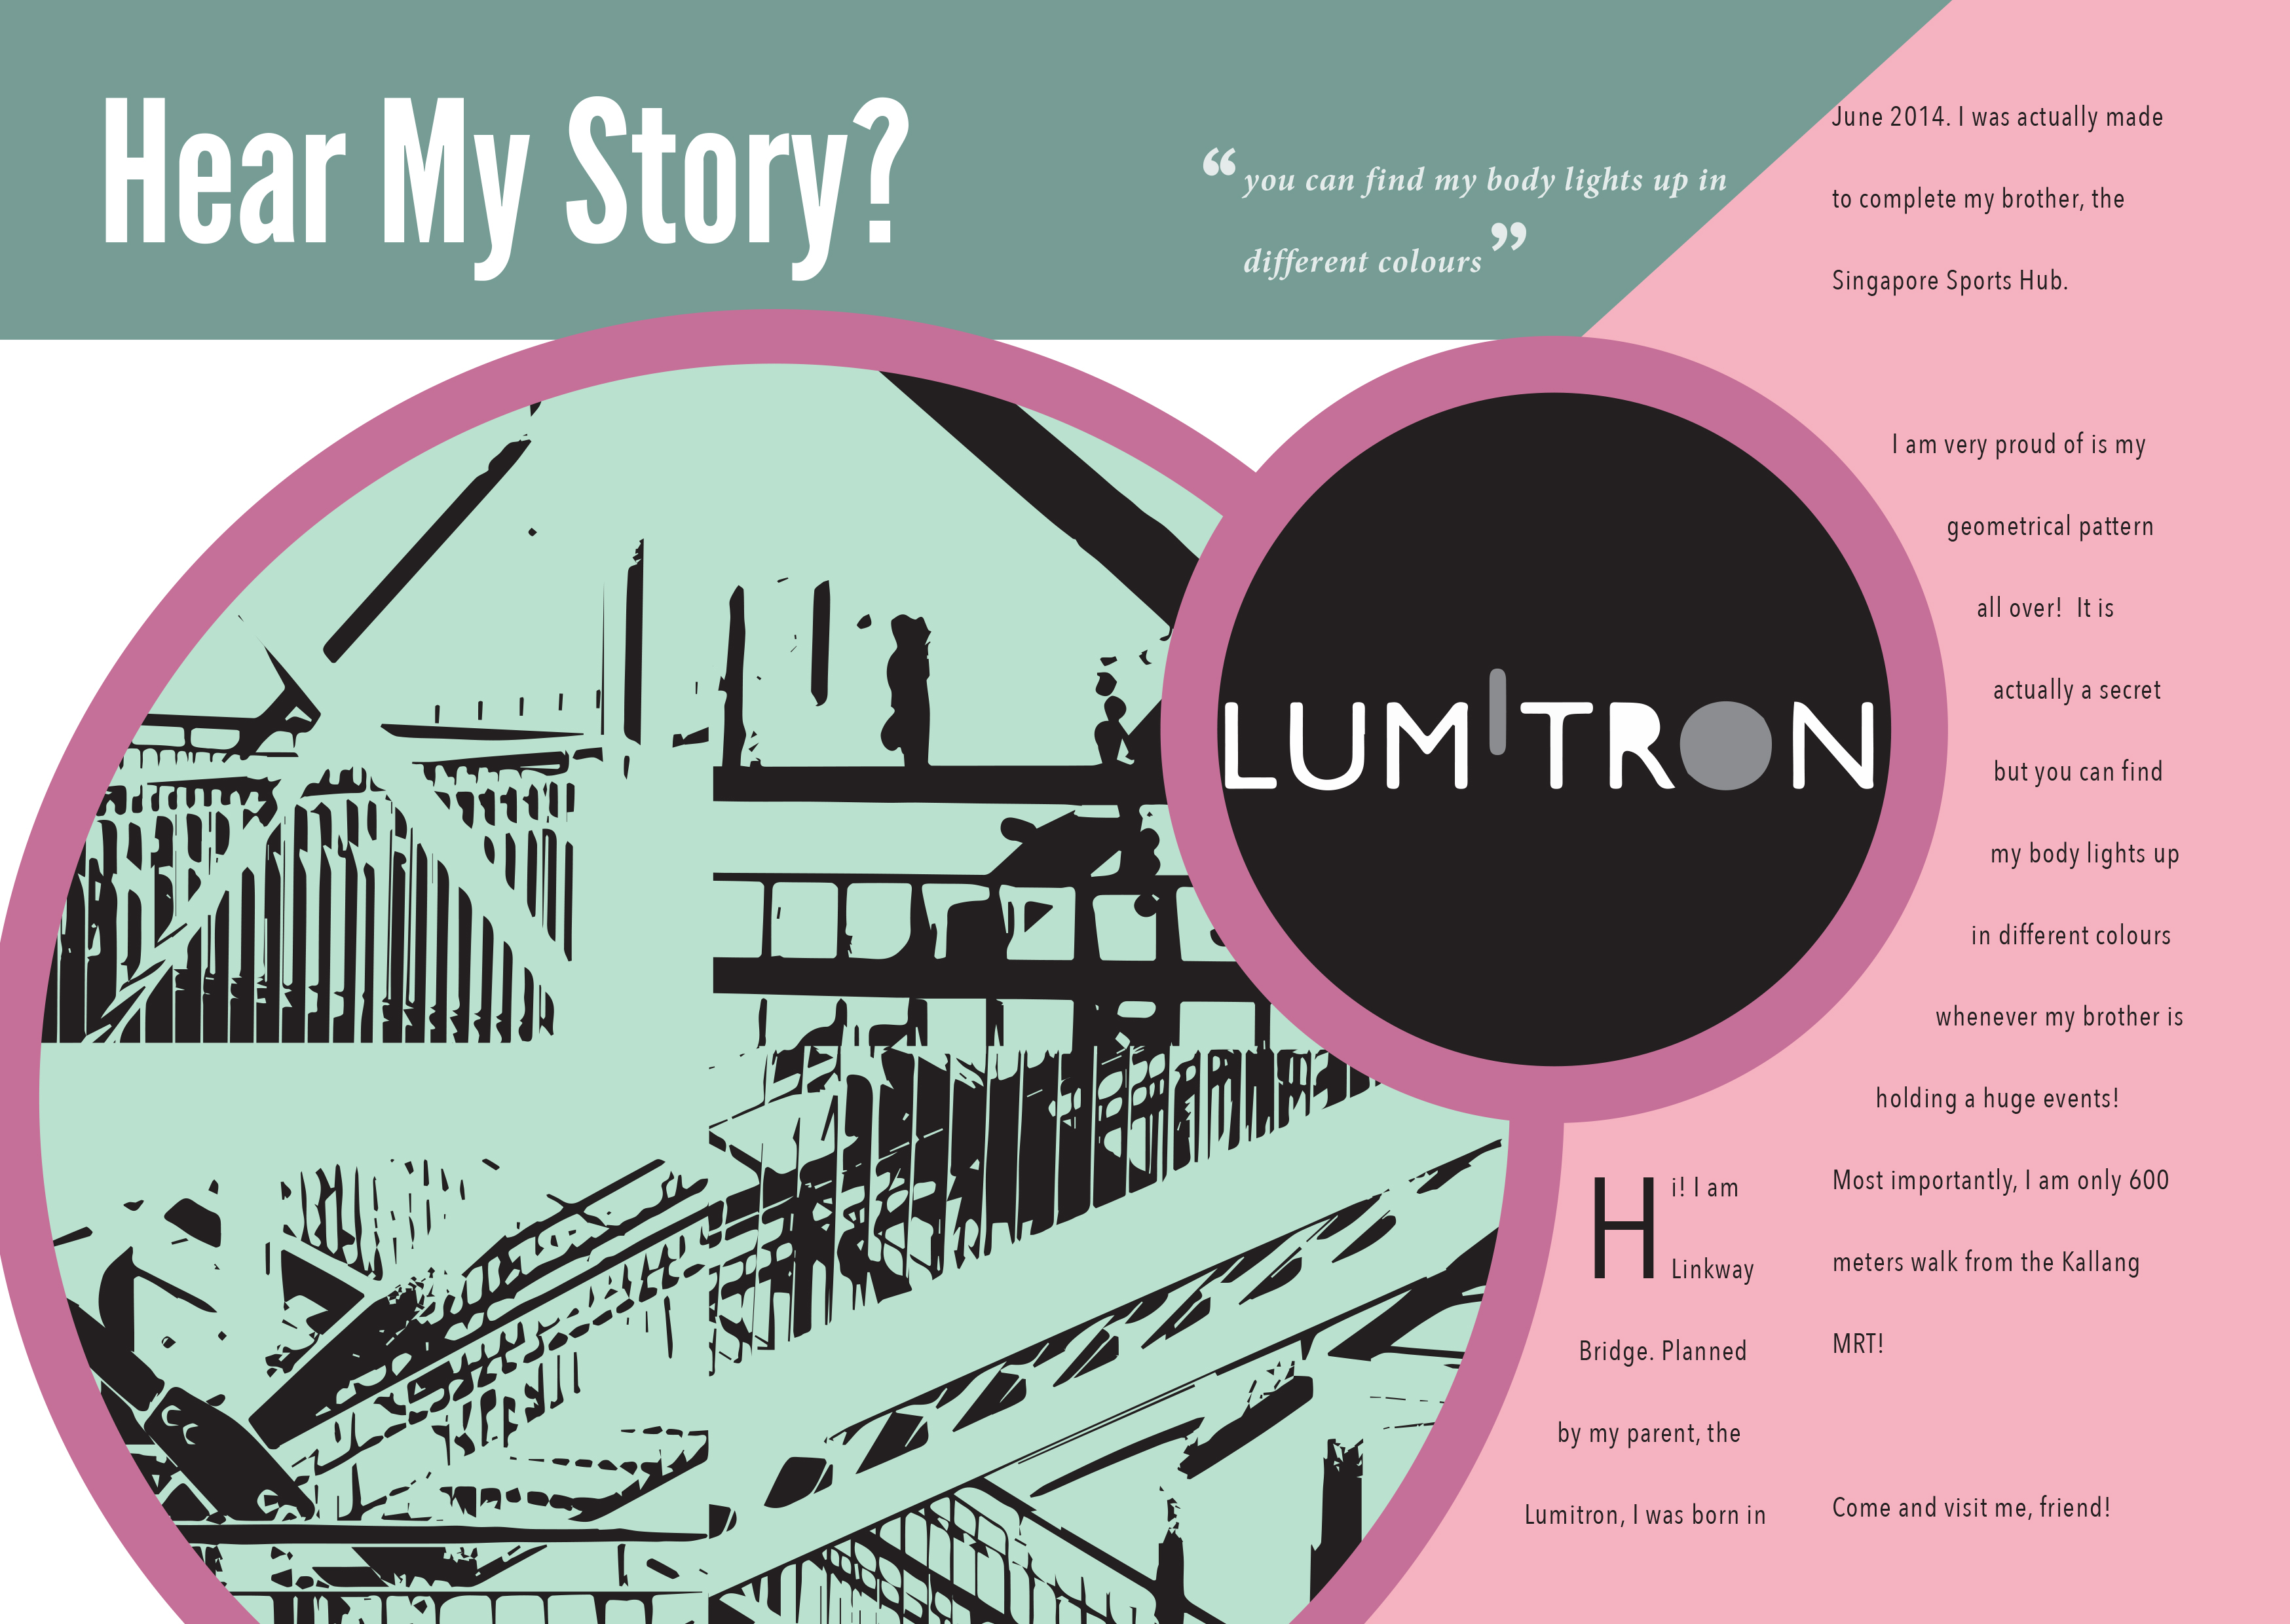
PAGE 6 AND 7 Finally, I want to end the zine with the bridge telling the reader its story and letting them to know more facts about it through his narrative.
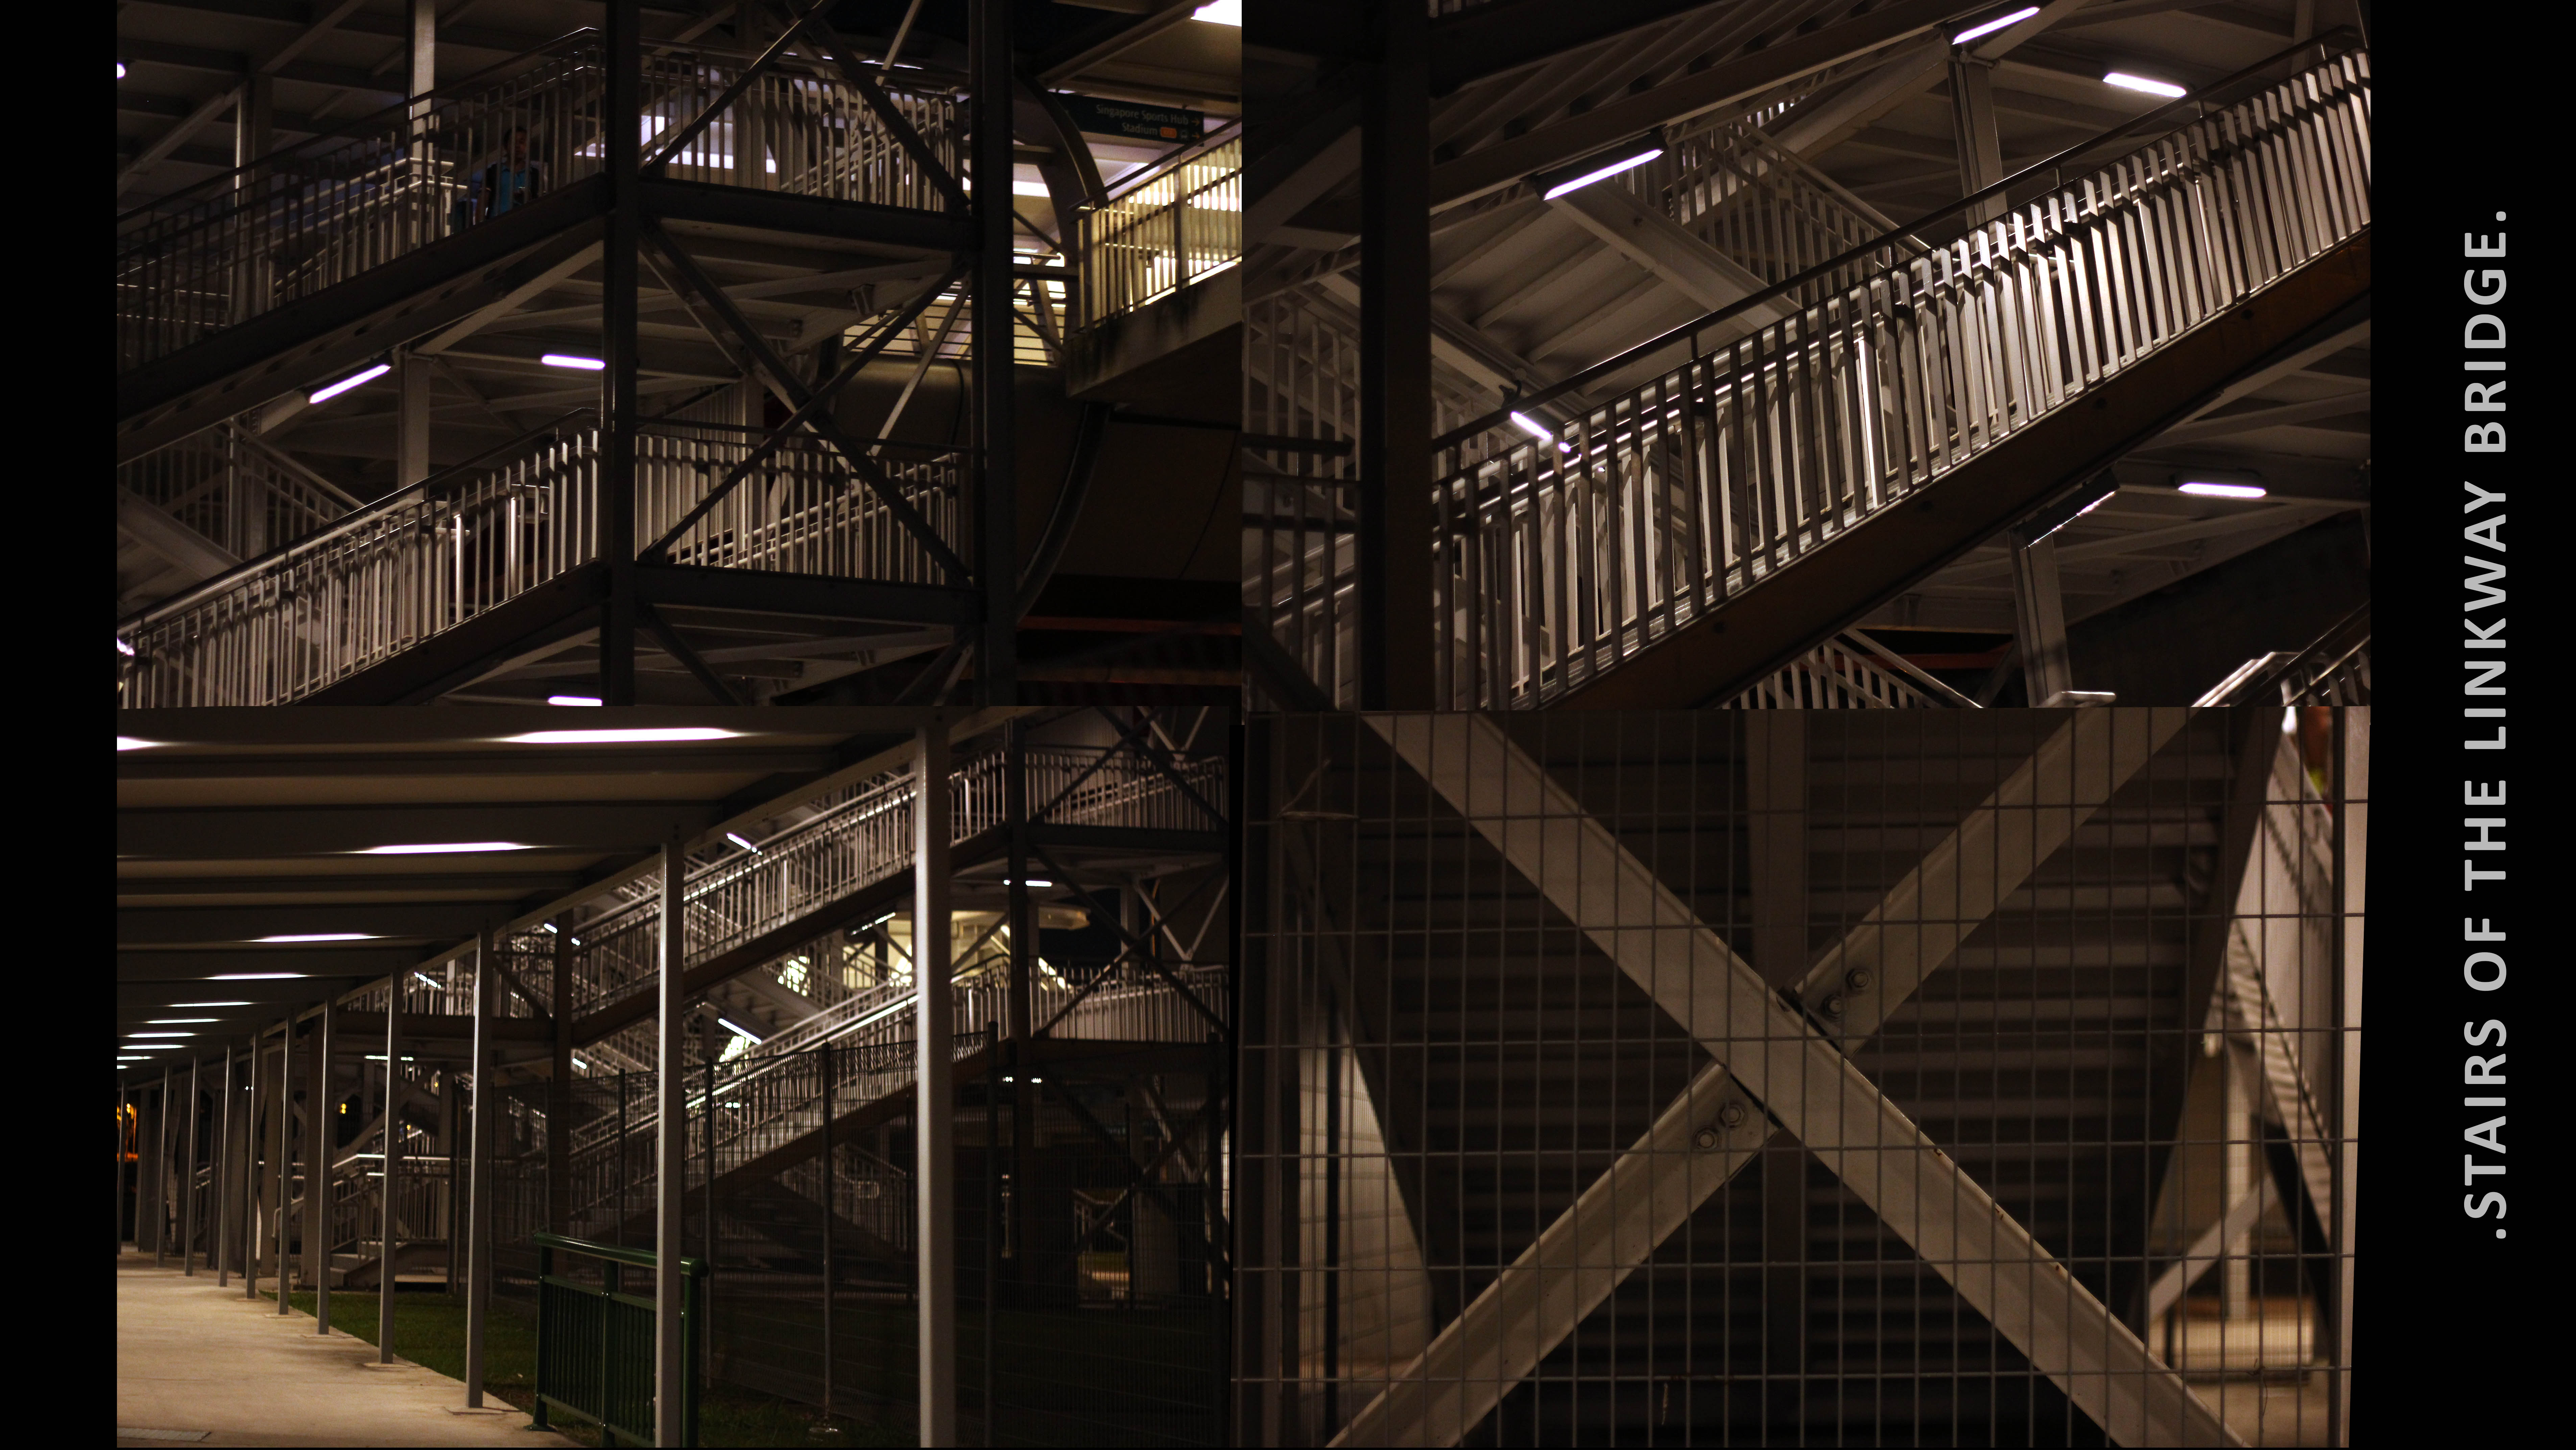
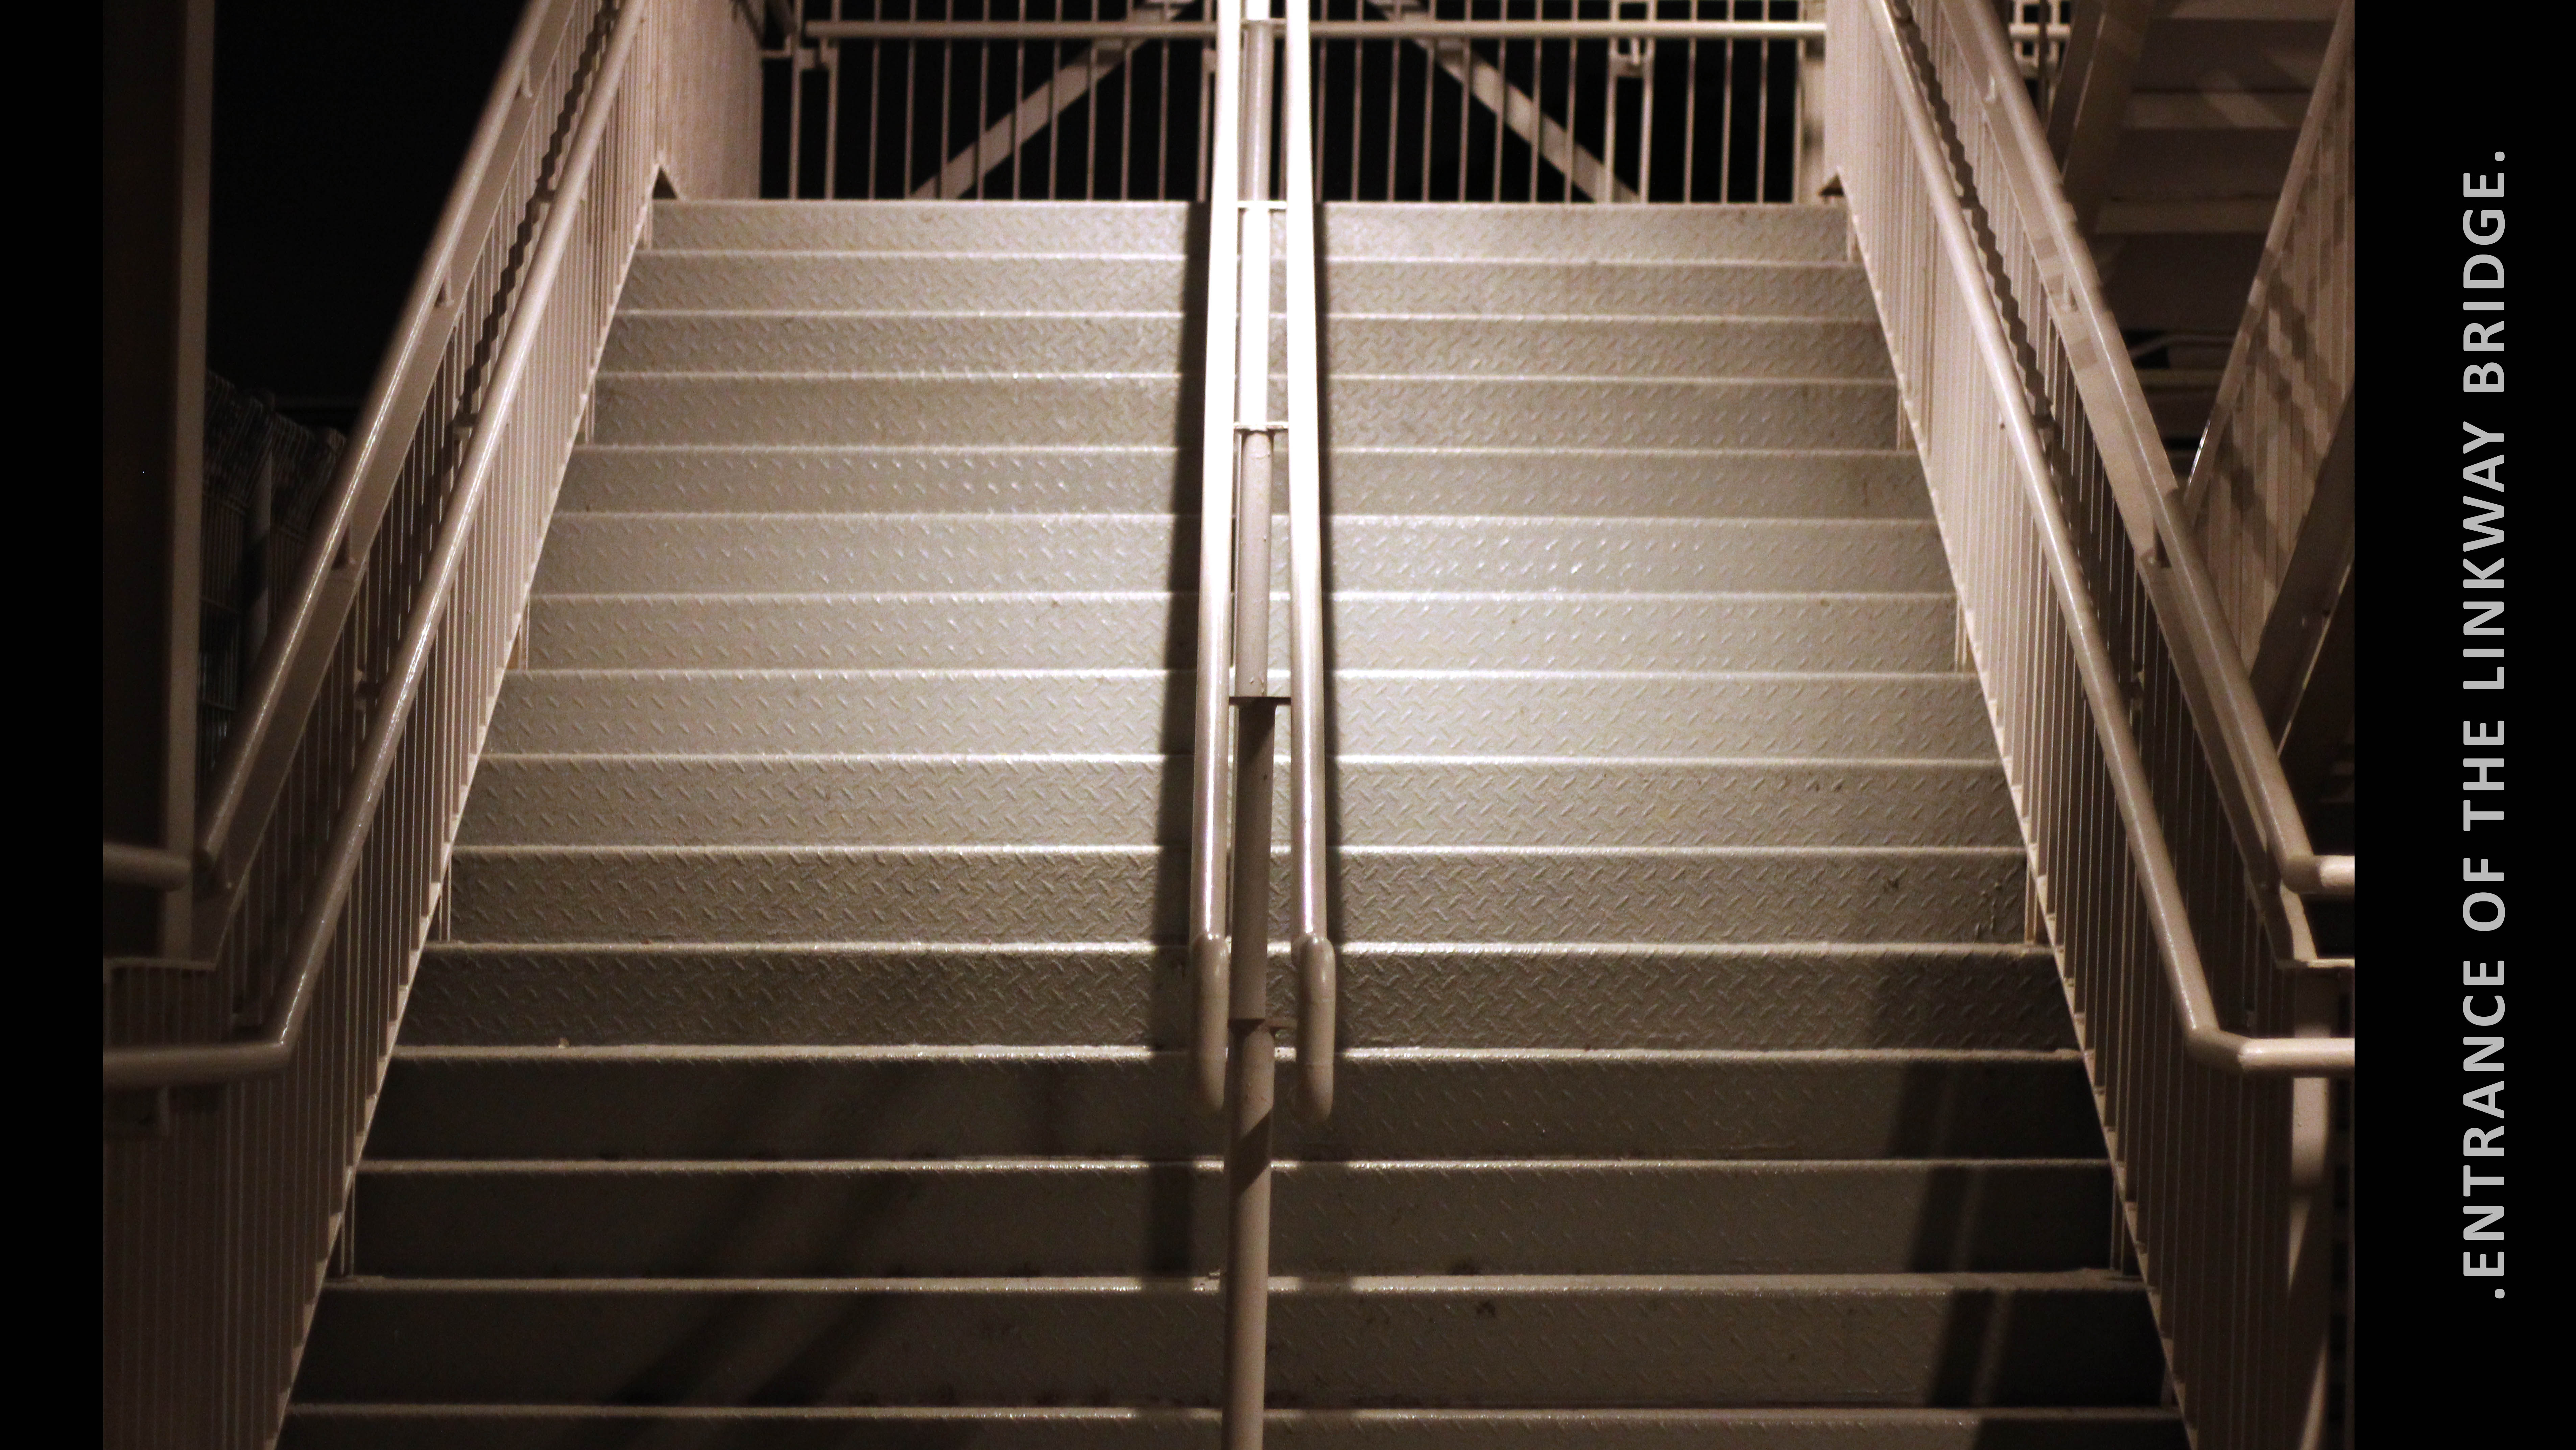
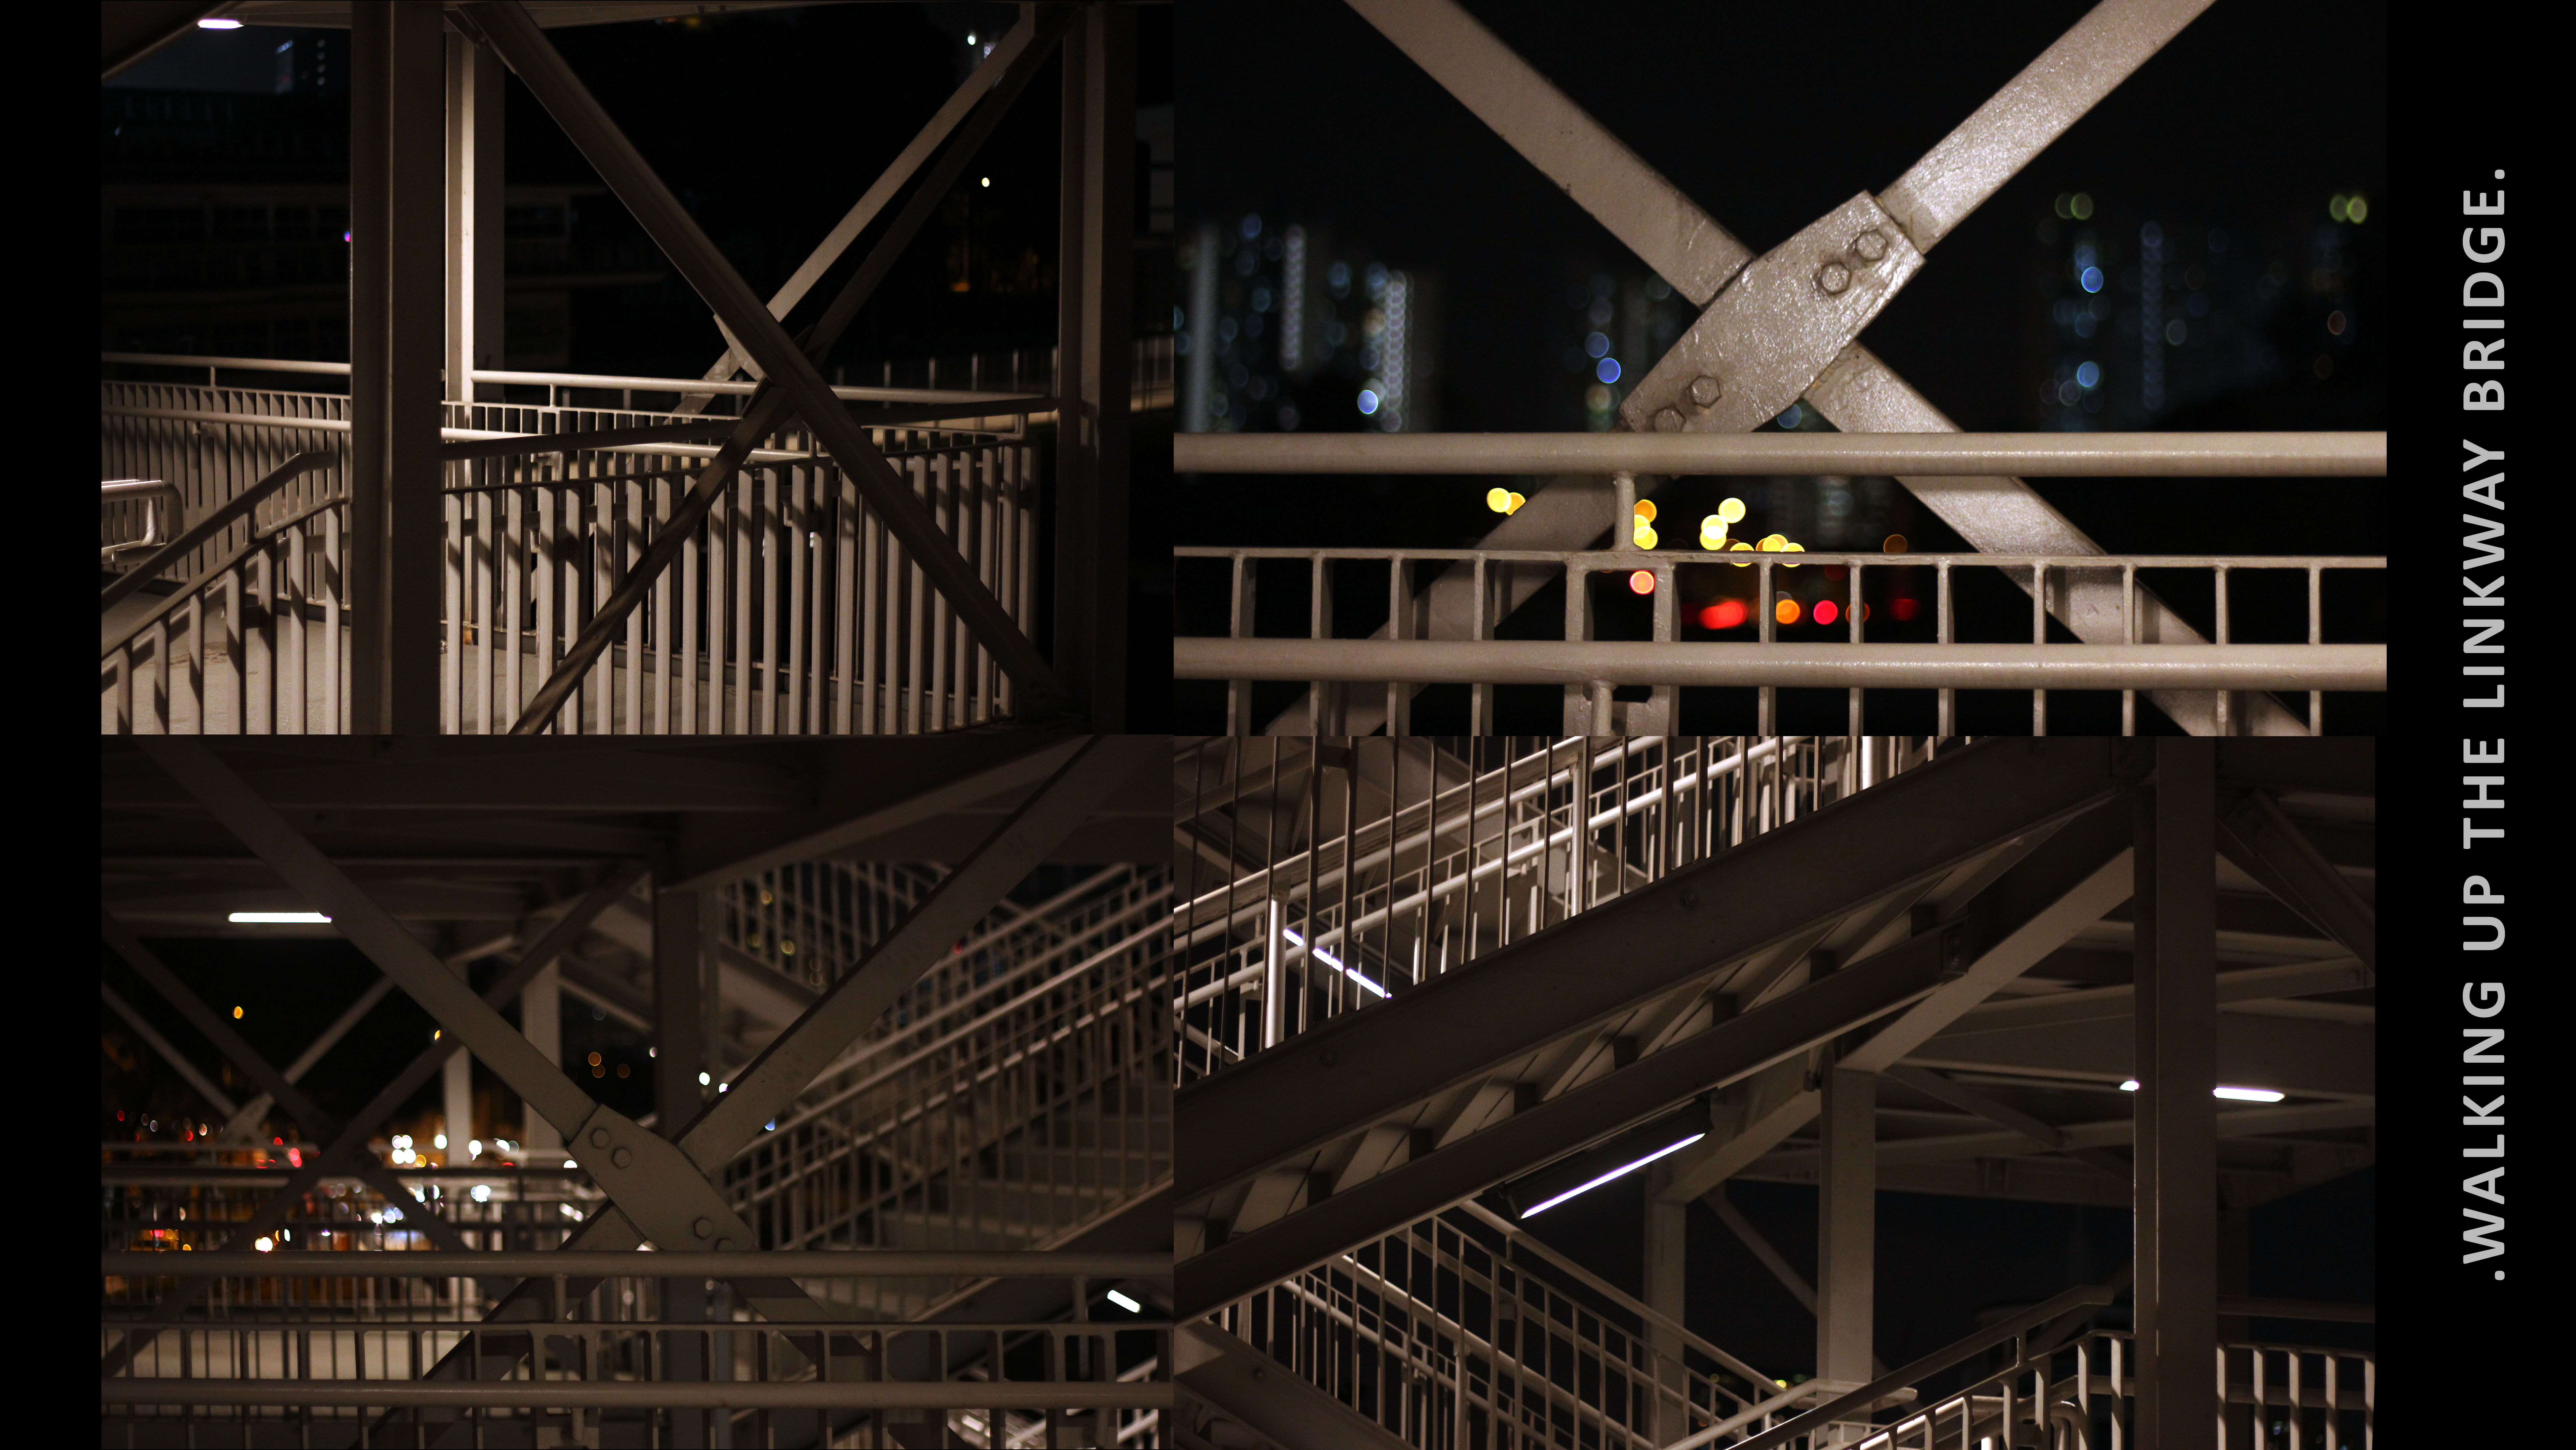
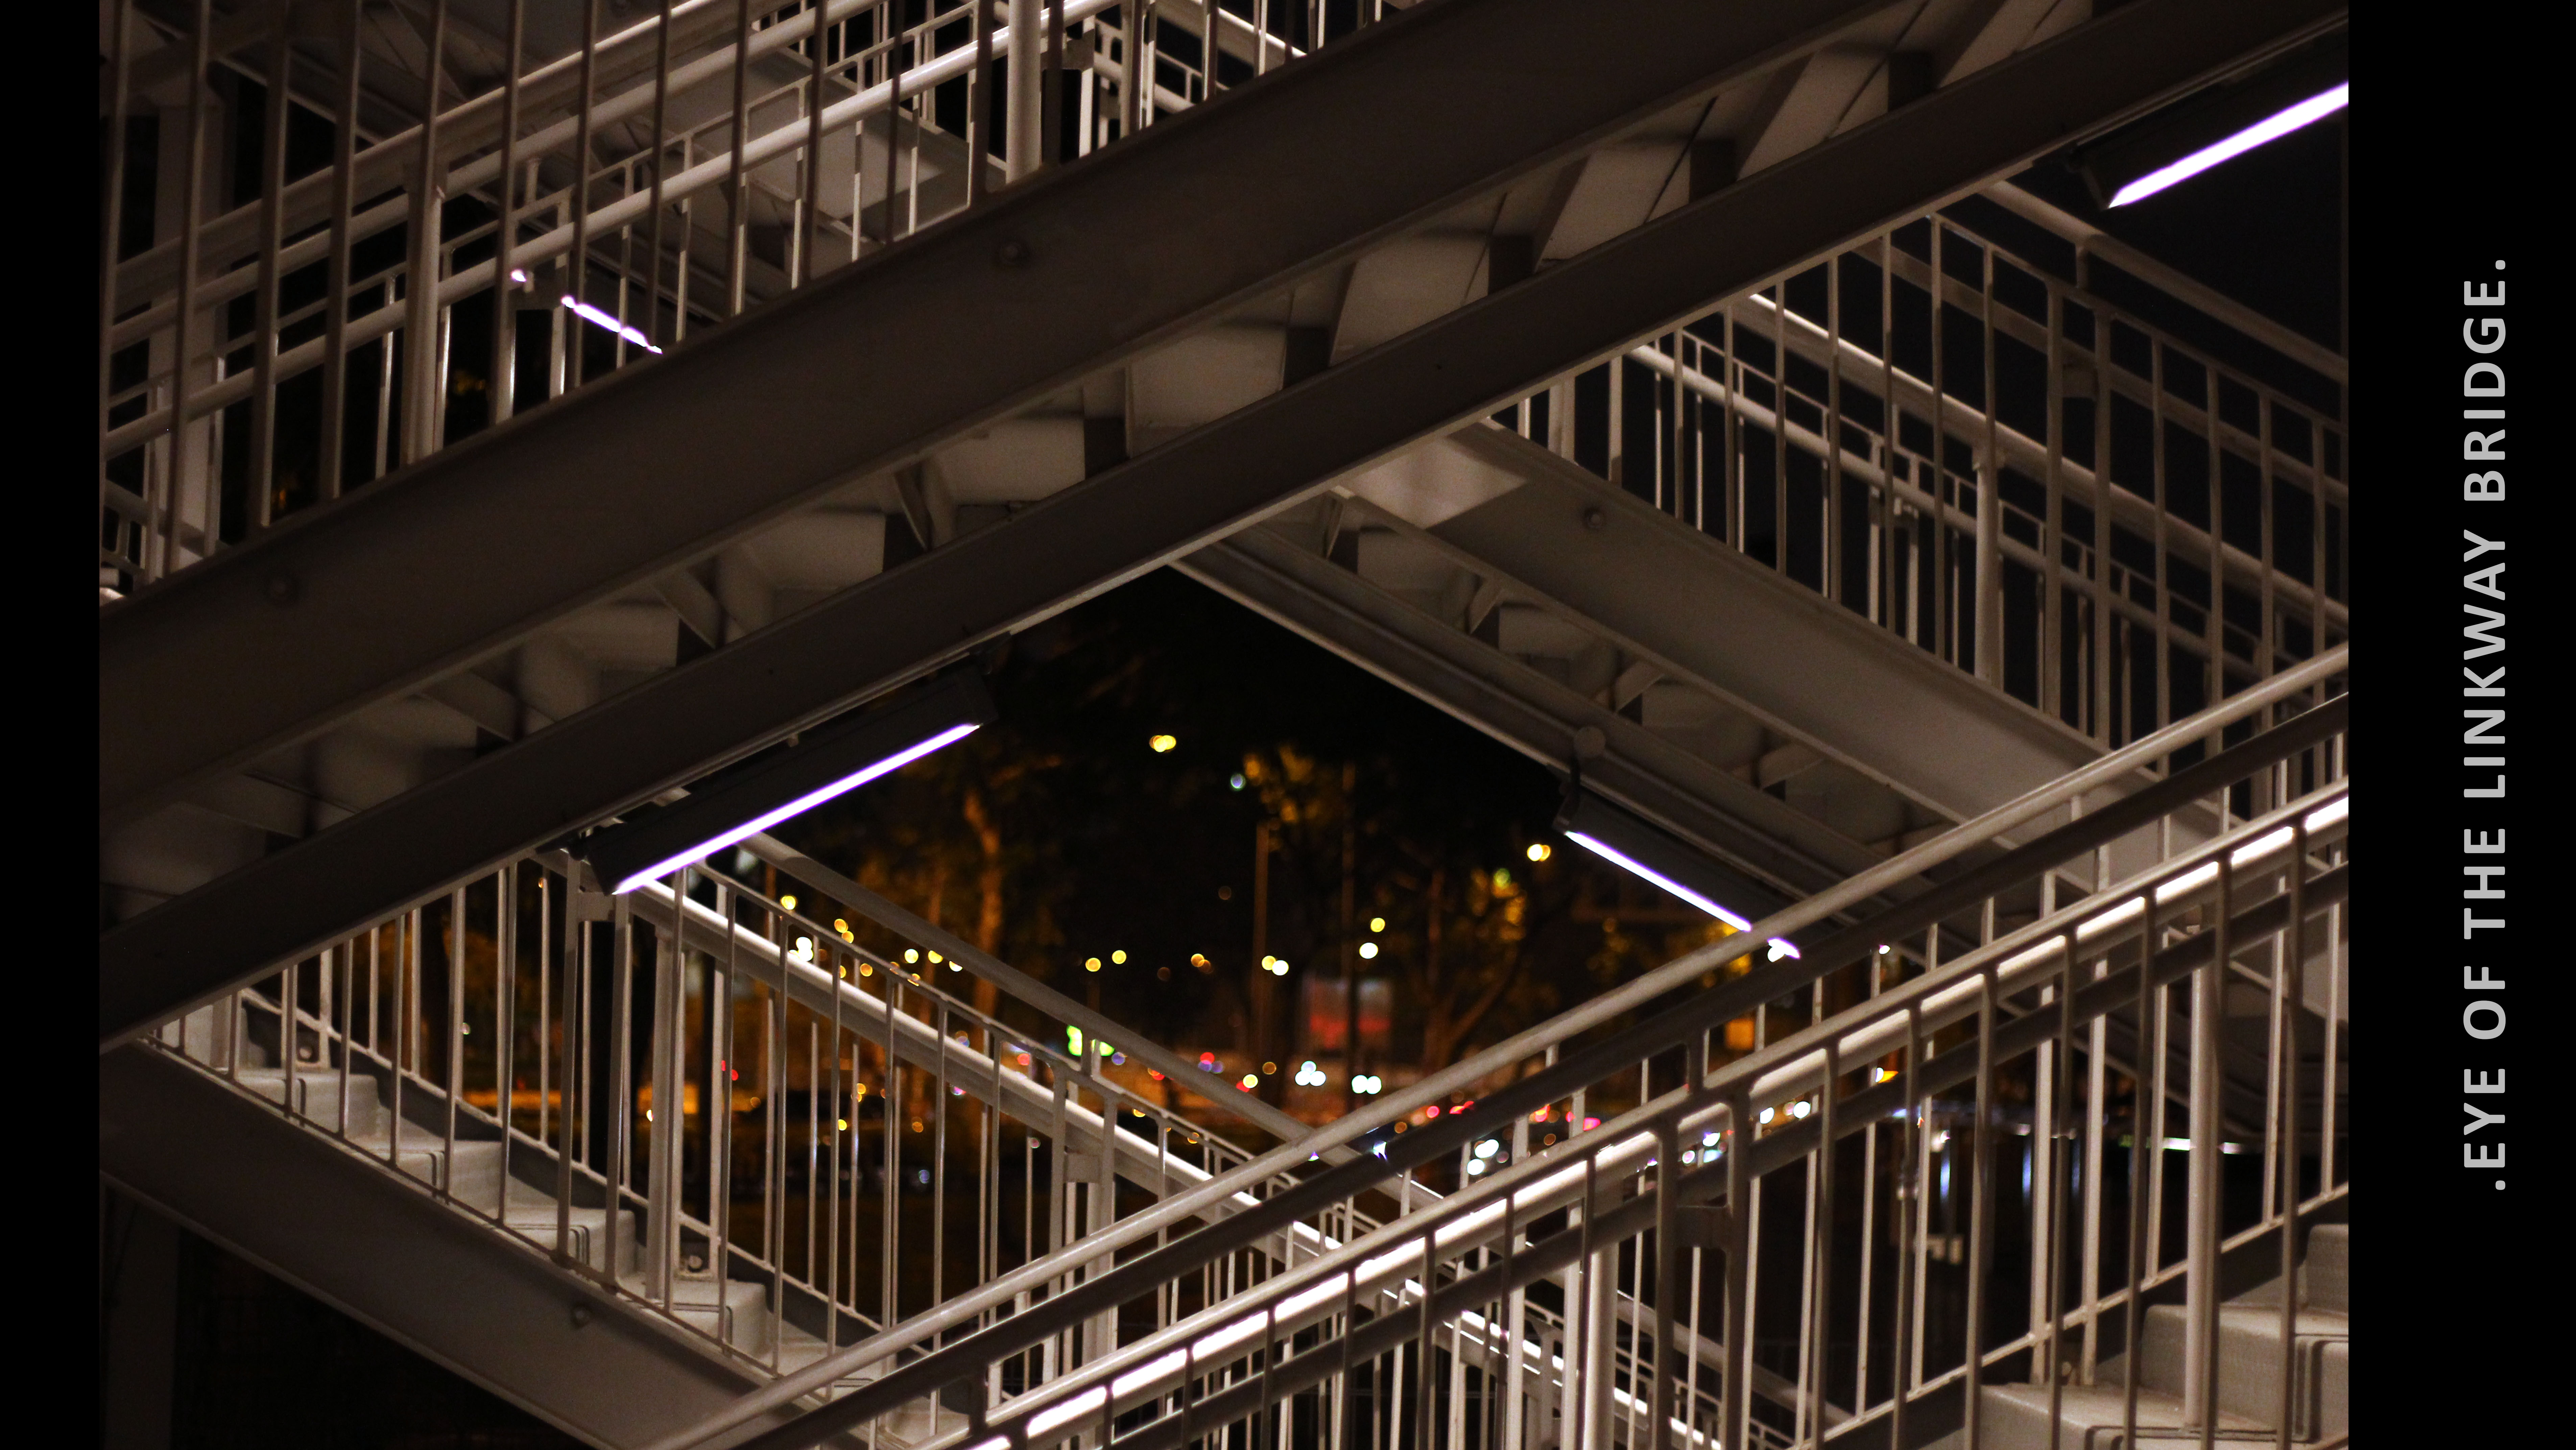
As for the visuals, I put the details of staircases of the bridge. This is to serve as the next step of knowing one: KNOW HOW THE INSIDE! I chose staircase to represents the beginning of knowing the bridge as people will need to start go up the staircase (or lift) before start to exploring it.
Attempted to lead the reader’s eye in this order:
– tile ‘Hear My Story?’ which finalized to be ‘This Is My Story’ (1st text hierarchy)
– the big circle contains images of the bridge
– leading diagonally up to the smaller circle of ‘Lumitron’
– vertically up to the sub-title of the quote taken from the body text (wnd text hierarchy)
– Finally the narrative body text by the bridge (3rd text hierarchy)
First draft
Feedback:
– The image should be bigger to occupy more space of the spread (two-third hopefully)
– The typeface for sub-title (quote) is not suitable
– The body text content is still filler text
Second draft
Improvements:
– The image size is increased. Attempted to maintain one circle but the shape become not nice and tried to made it ellipse but it looks inconsistent compared to other pages of the zine. Hence, added a new smaller circle with the name of the designer company
– Changed the color of the title and sub-title to make it more stand out
– Changed the body text content into draft narrative from the bridge’s point of view Feedback:
– Change the title from a question into a statement
– The sub-title font size should be increase to make it more obvious 2nd hierarchy instead of same size as the body text (3rd hierarchy)
– Change from two column into one column as the left column is too narrow
– Reduce the leading of the body text paragraph, to much empty spaces in between body text
– Remove drop cap if the leading remain too wide
-Try to avoid ‘widow’ (in the 2nd paragraph) by having at least two words on the last sentence of each paragraph
Third draft
Improvements:
– Changed the title into a statement
– Increased the sub-title font size
– Changed the body text into one column
– Reduced the leading of the body text and keep the drop cap
– Made sure there is no more ‘widow’ Feedback:
– The narrative actually got cut off and the last paragraph is not included
Final
Improvements:
-Finalize the content of the narration, rephrased and cut unnecessary information to make sure all apt info just fit nicely
DIFFICULTIES, TAKEAWAYS, ETC.
For this project, my greatest difficulty is to decide which style to use. Whether I wuld go photographic or more illustrative. I really love all the photos of the patterns (mostly monochrome I took) but I also love the baby pink-mint green color combination. But I cannot combine them nicely and end up having to choose either one. And finally I decided to go with the lovely color and ‘gave up’ the photos to image trace (ended up editing all of them for a clearer image trace).
Another difficulty is for me to keep everything simple and white. Being me, I have the tendency to add more and I am used to feel not satisfied until every single (especially white) space is filled! But this zine is very simple and I was so tempted to add more but I kept on telling myself ‘less is more’, ‘less is enough’, ‘give more breathing space’, ‘white is fine’, etc! So ya, I had to maintain, which I did by the end :’). So I guess maybe it is a takeaway for me, to learn to keep things simple 😀
I also learnt more on hierarchy and how to lead the viewer’s eyes more! They are unusually interesting and I really glad I know them more now 😀
In term of technicality, this project added me new knowledge of InDesign! YEAY!
I also learnt more in using AI, Photoshop, and Premier Pro (well, editing the documentation video was fun)! Oh, and I also enjoy photo-hunting more now 😀
So to conclude, although there are more things that can be improved, I am personally happy of all the progress and proud of the zine that I have! And I would like to take this opportunity to thank Ms Shirley for supporting and giving constructive feedback and opinion! Thank you!
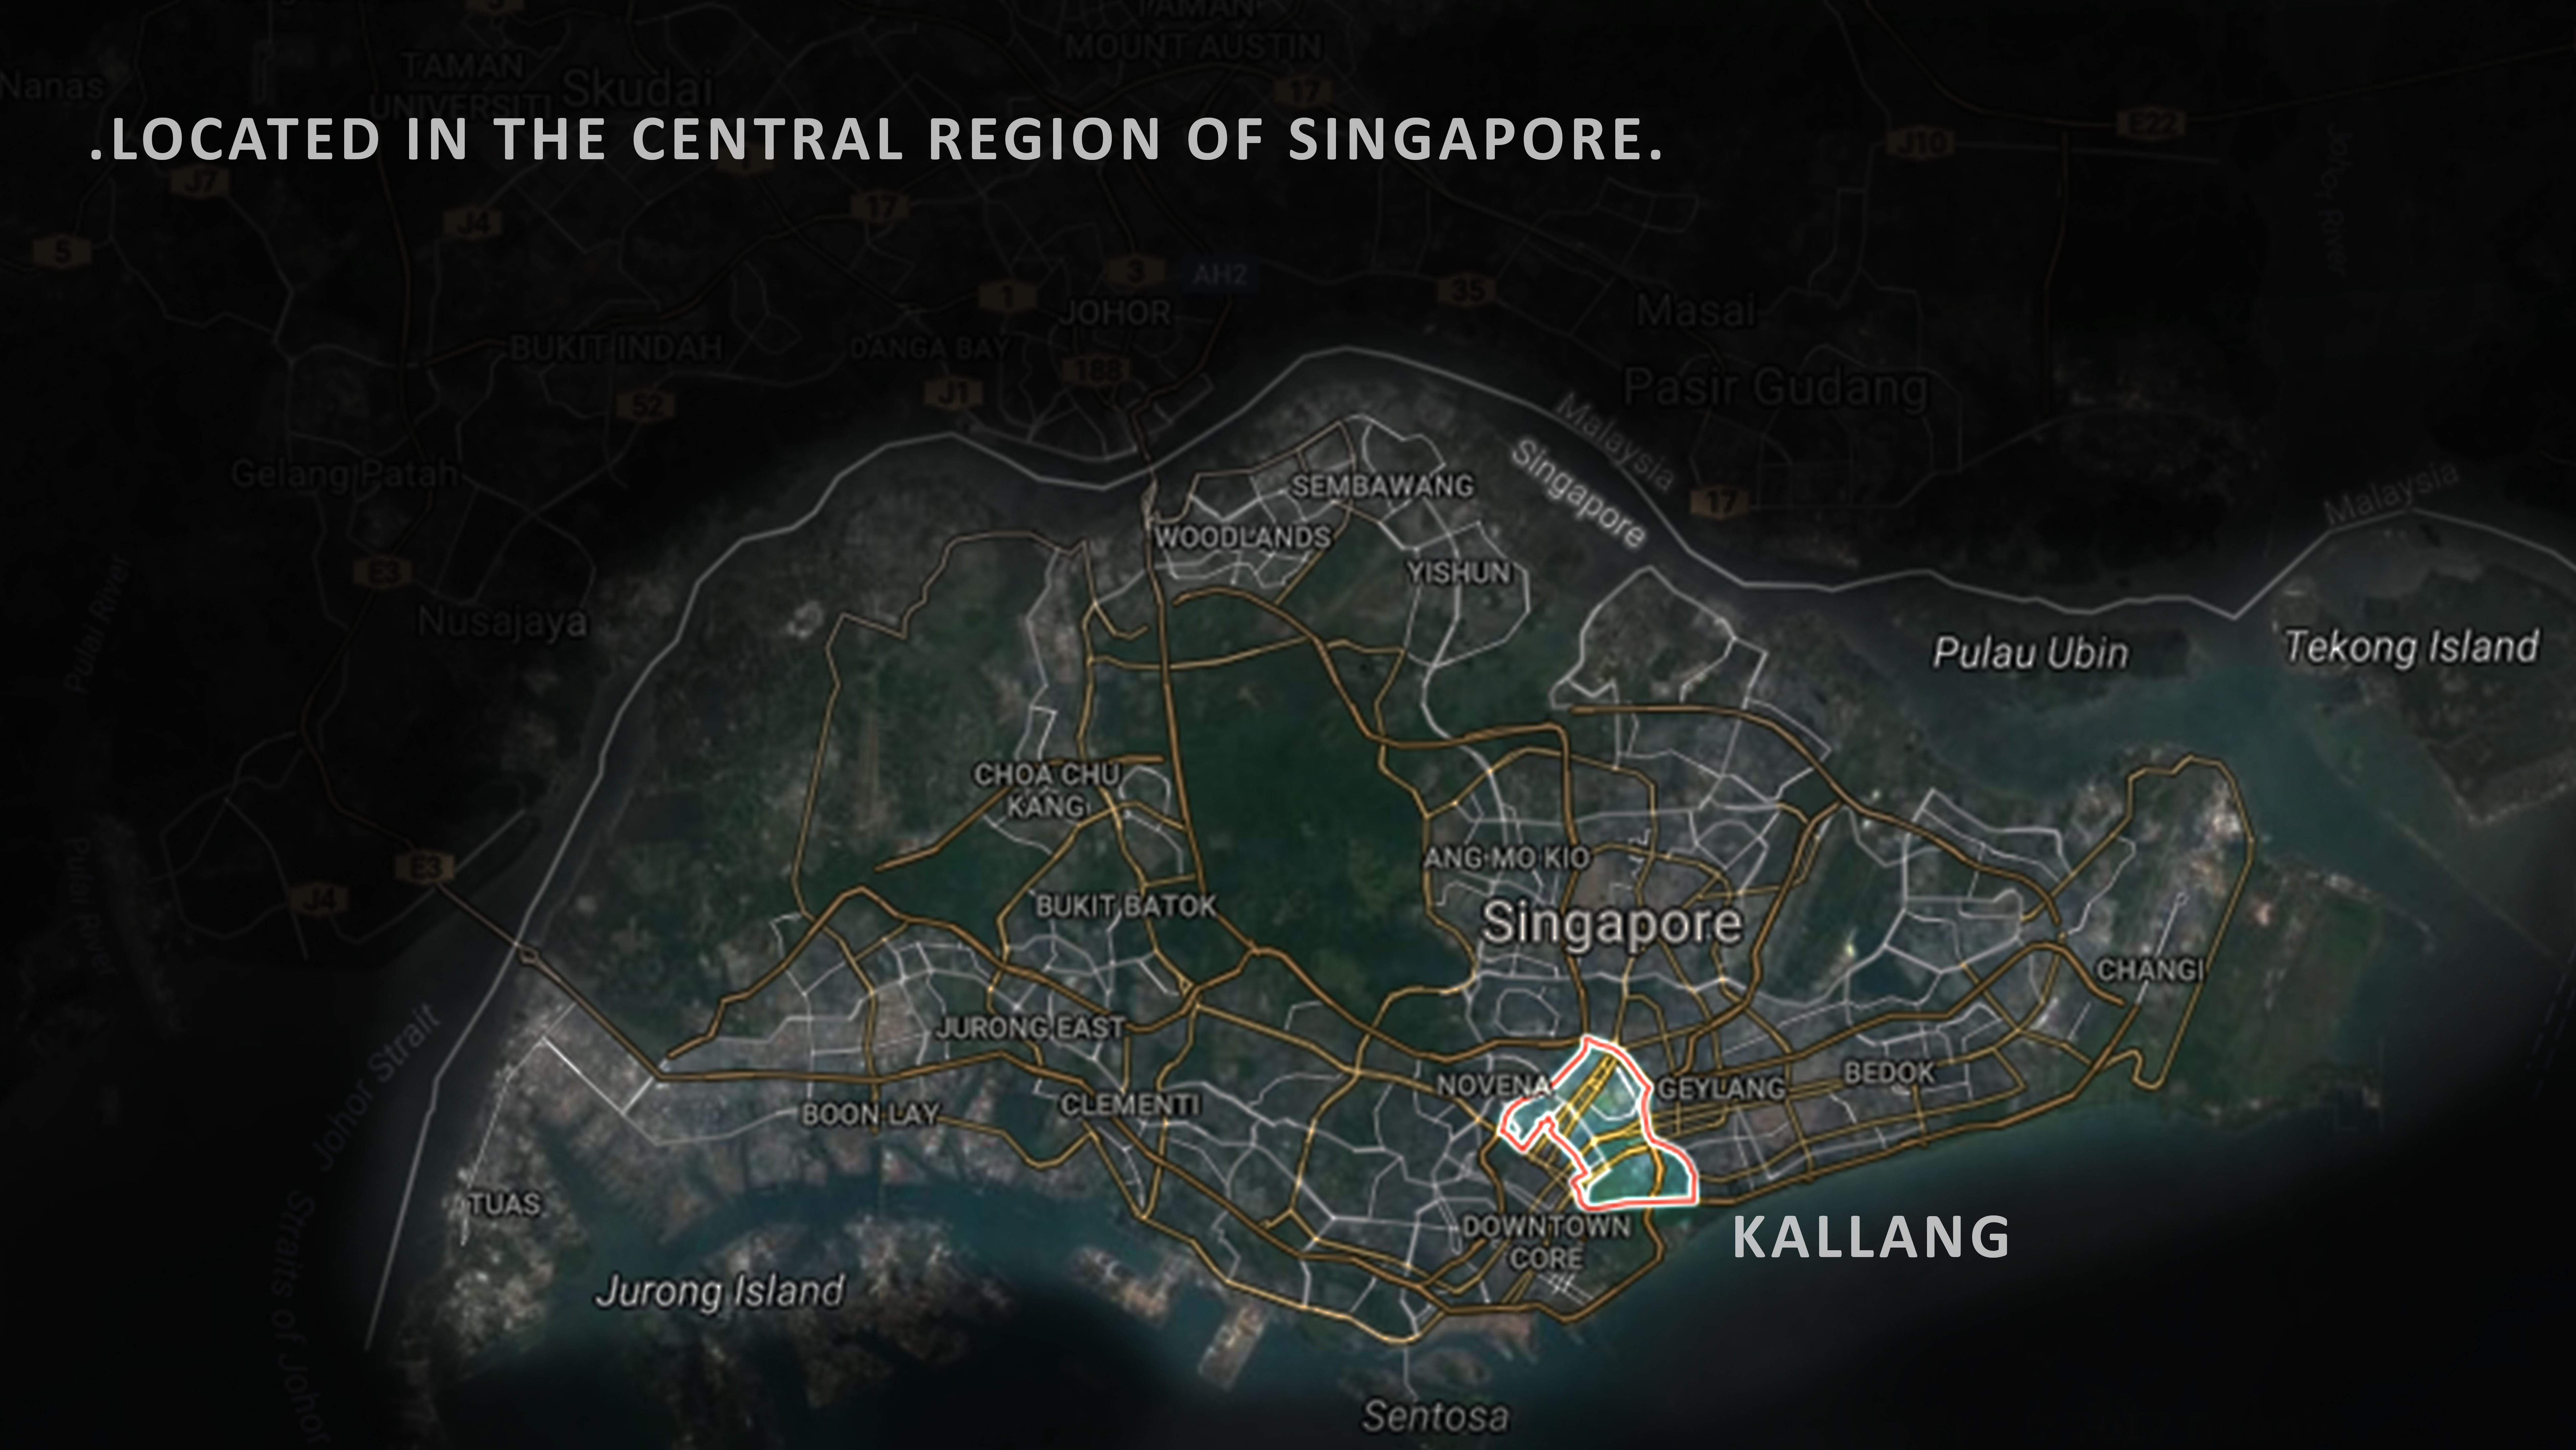
So for the zine research, I went to the do a primary research on Kallang area, which I posted here. Initially I planned to have the zine on the Singapore Sports Hub but on the way I found the Linkway Bridge which finally become my main topic for the zine. Its geometrical pattern and environment enchanted me.
Then, I decided to do more secondary research on this Linkway Bridge.
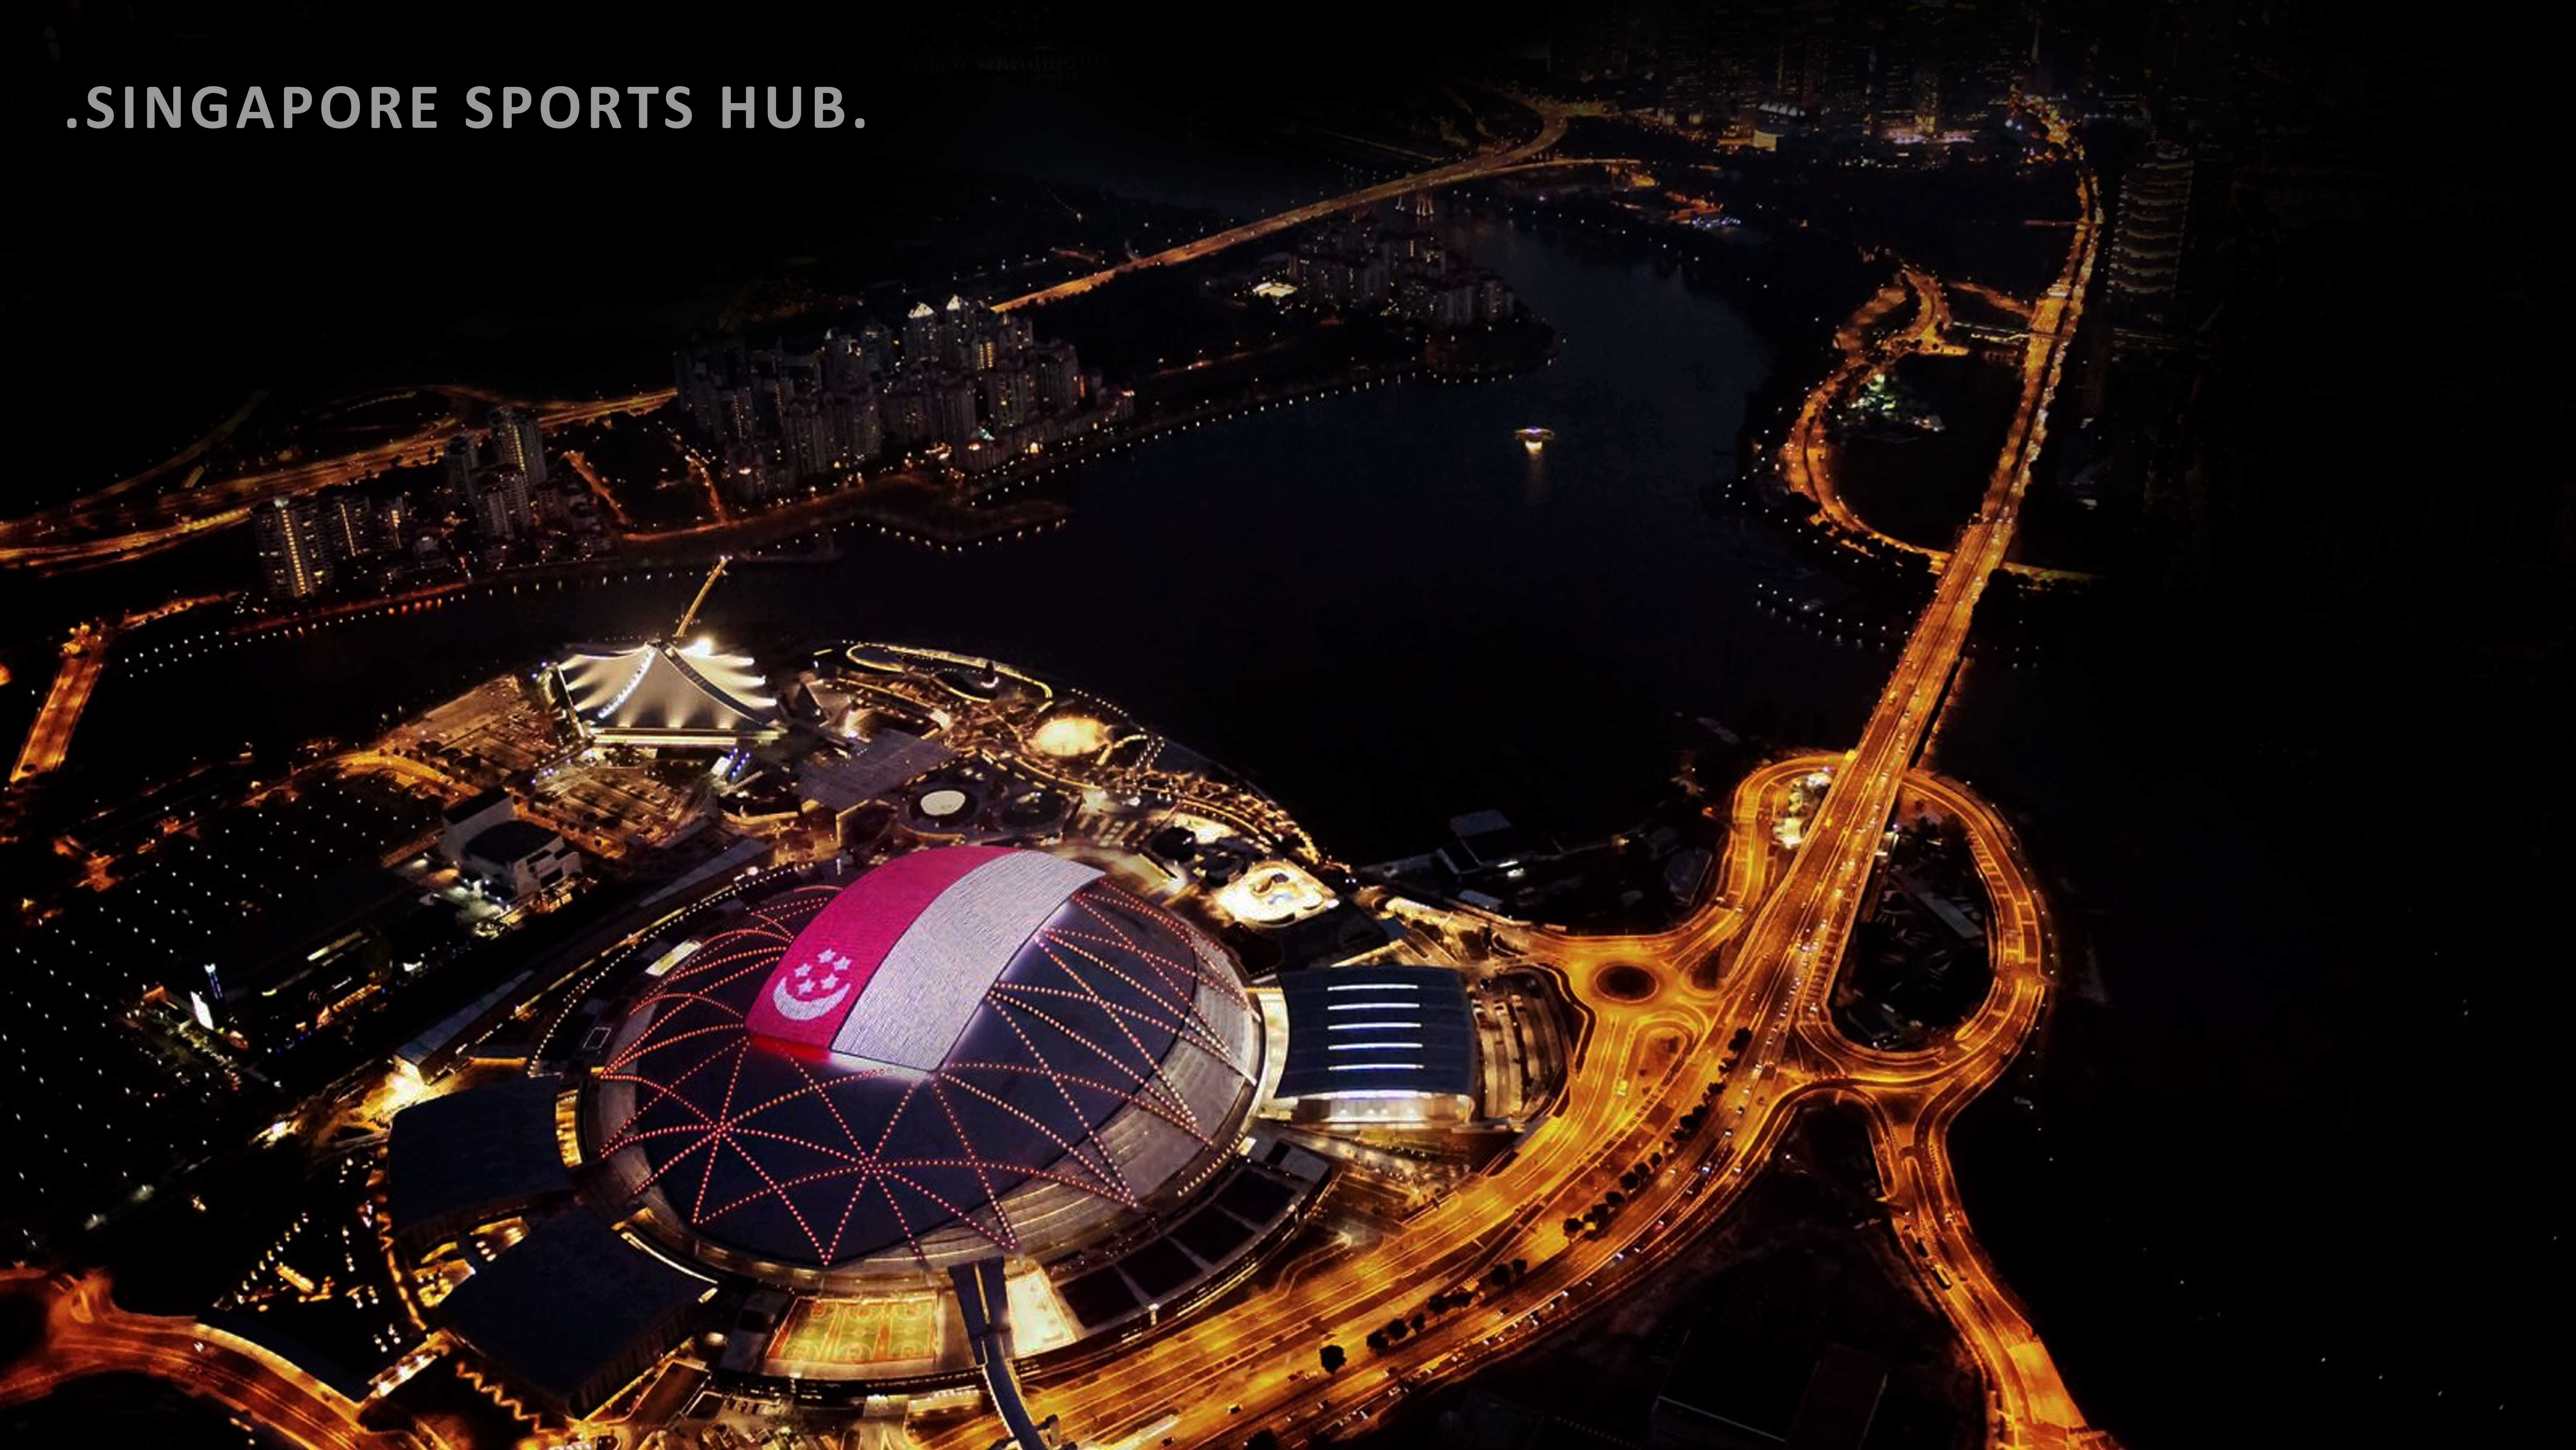
The bridge is located for about 800 meters from Kallang MRT. It connects the Singapore Sports Hub from the Nicoll Highway. It was built together with the Singapore Sports Hub, the costruction was completed in June 2014 and were officially opened on July 26, 2015. It was a project done by The Lumitron, where they designed and planned the lighting.
I intended to put some survey questions and decided to went back for more detail primary information and then ask the survey around in the Singapore Sports Hub area.
For the first question, I decided to ask the number of entrance/exit to the bridge.
The results are 10, with the description:
– 1 main entrance from Nicoll Highway (consist 4 sets of staircase)
– 1 main exit which is the connection to the Singapore Sports Hub
– 4 staircases on one side of the bridge (2 exits to Stadium Drive & 2 exits to Nicoll Highway)
– 4 lifts on the other side of the bridge (2 exits to Stadium Drive & 2 exits to Nicoll Highway)
Secondly, I decided to ask the length of the bridge.
To check on this, I first use Google Maps and put two points at the two end of the bridge, roughly it measures between 140-160 meters.
Then, on my second visit I measure the time I took to walk normally from one end to the other end. It took me 2 minutes and 14 seconds.
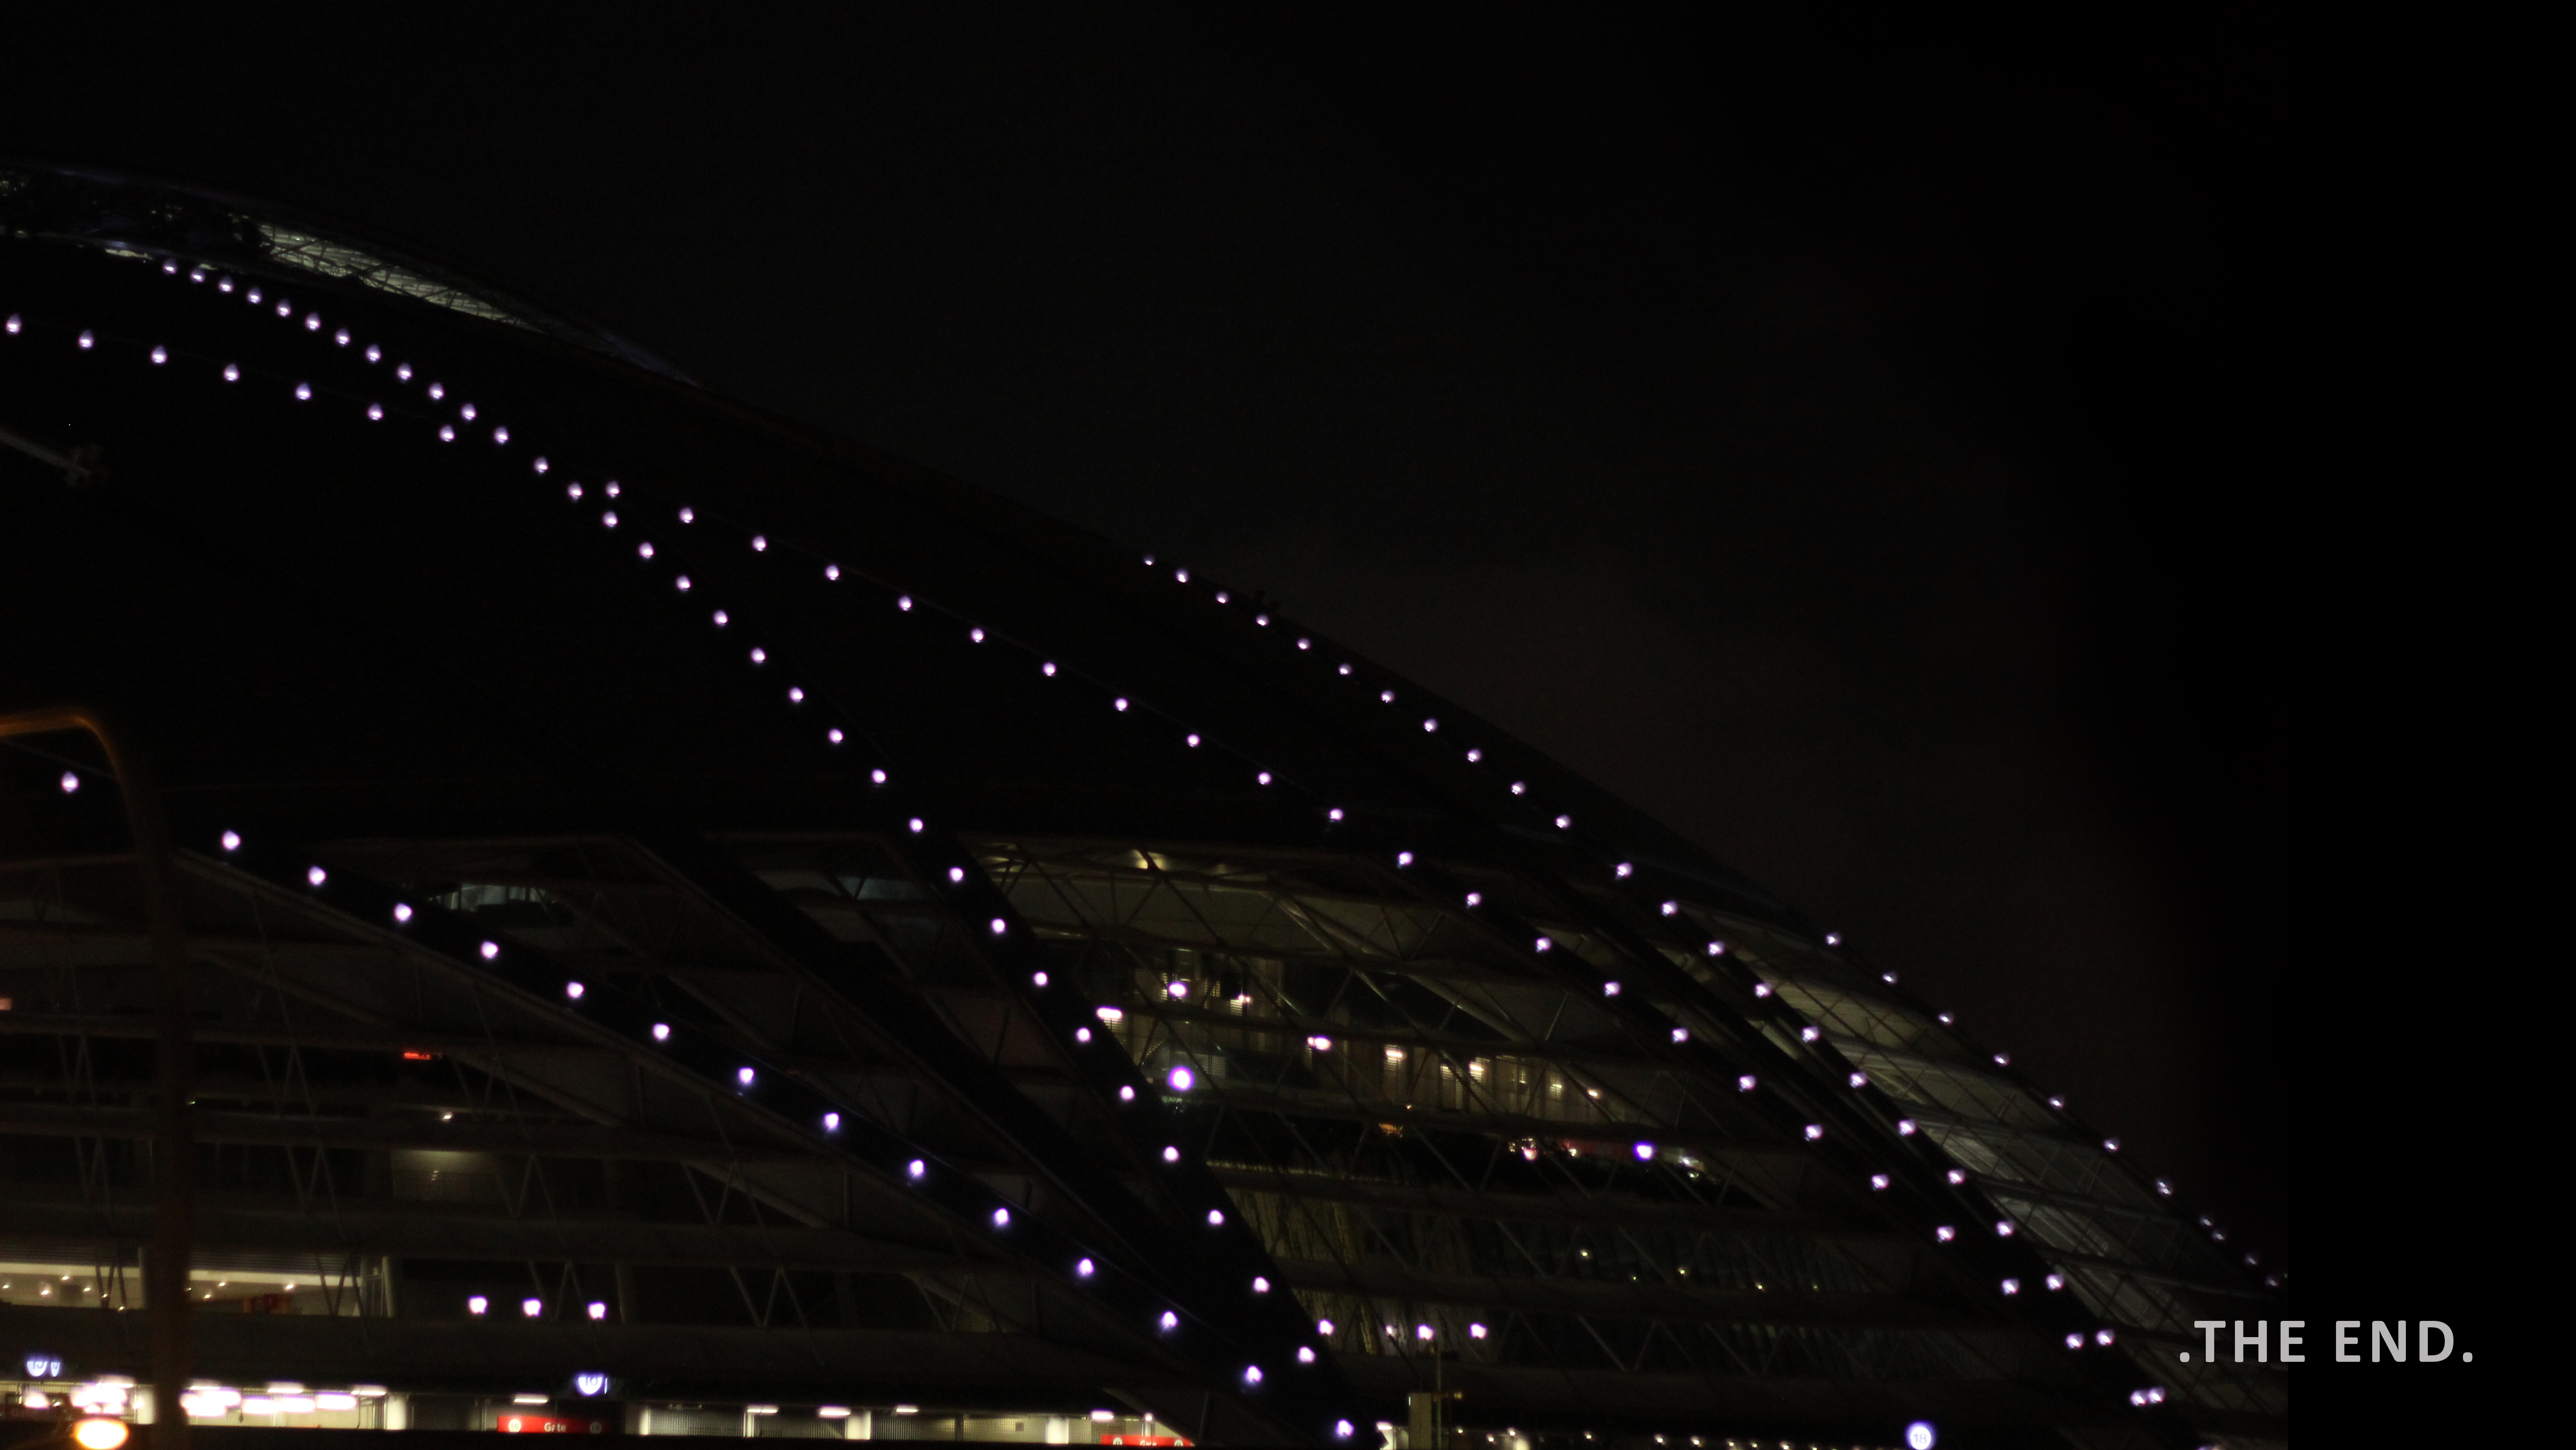
Here is a 3 minutes video summarizing the walk from Kallang MRT to the Linkway Bridge!
And here is a 4 minutes video of the Linkway Bridge!
They were my first two ‘documentation’ videos. I really hope you enjoy it!
Thank you!
So, for the Zine final project, we were asked to find 5 zines as references. I get them by browsing through many websites and the five I like are taken from Behance, the source link is linked to the title of each zine.
Zine Risografia E Serigrafia From this zine, I like the idea of two analogous colors being combined together. Not necessarily having same proportion in every page and not necessarily one being more dominant either.
An Experiment in Risograph From this zine, the idea of risograph attracts me, maybe it is the analogous color combination also. But from here, I learnt and researched more on the effect of overprint. And I hope I could implement this effect in my zine.
The Art of the DJ Zine This zine inspired me to convert real photo into the illustration kind. I planned to do this by editing the photo in Photoshop then using the ‘image trace’ function in Adobe Illustrator.
Mindset The complementary colors of this zine really catch my eyes and I love how it gives me the feeling of strength yet sweet..? I sampled my zine theme color from this zine.
Crime Zine For the proportion of my mainly 2 complementary colors, I decided to follow this zine. It looks balanced yet actually each spread has one more dominating color.
So I decided to implements those interesting elements for my zine.
Style and effect of pages uses a kind of risograph and overprint from Zine Risografia E Serigrafia and An Experiment in Risograph
Style of the photos uses image trace effect like The Art of the DJ Zine
Colors sampled from the Mindset
Proportion of colors inspired by the looks balance composition of Crime Zine
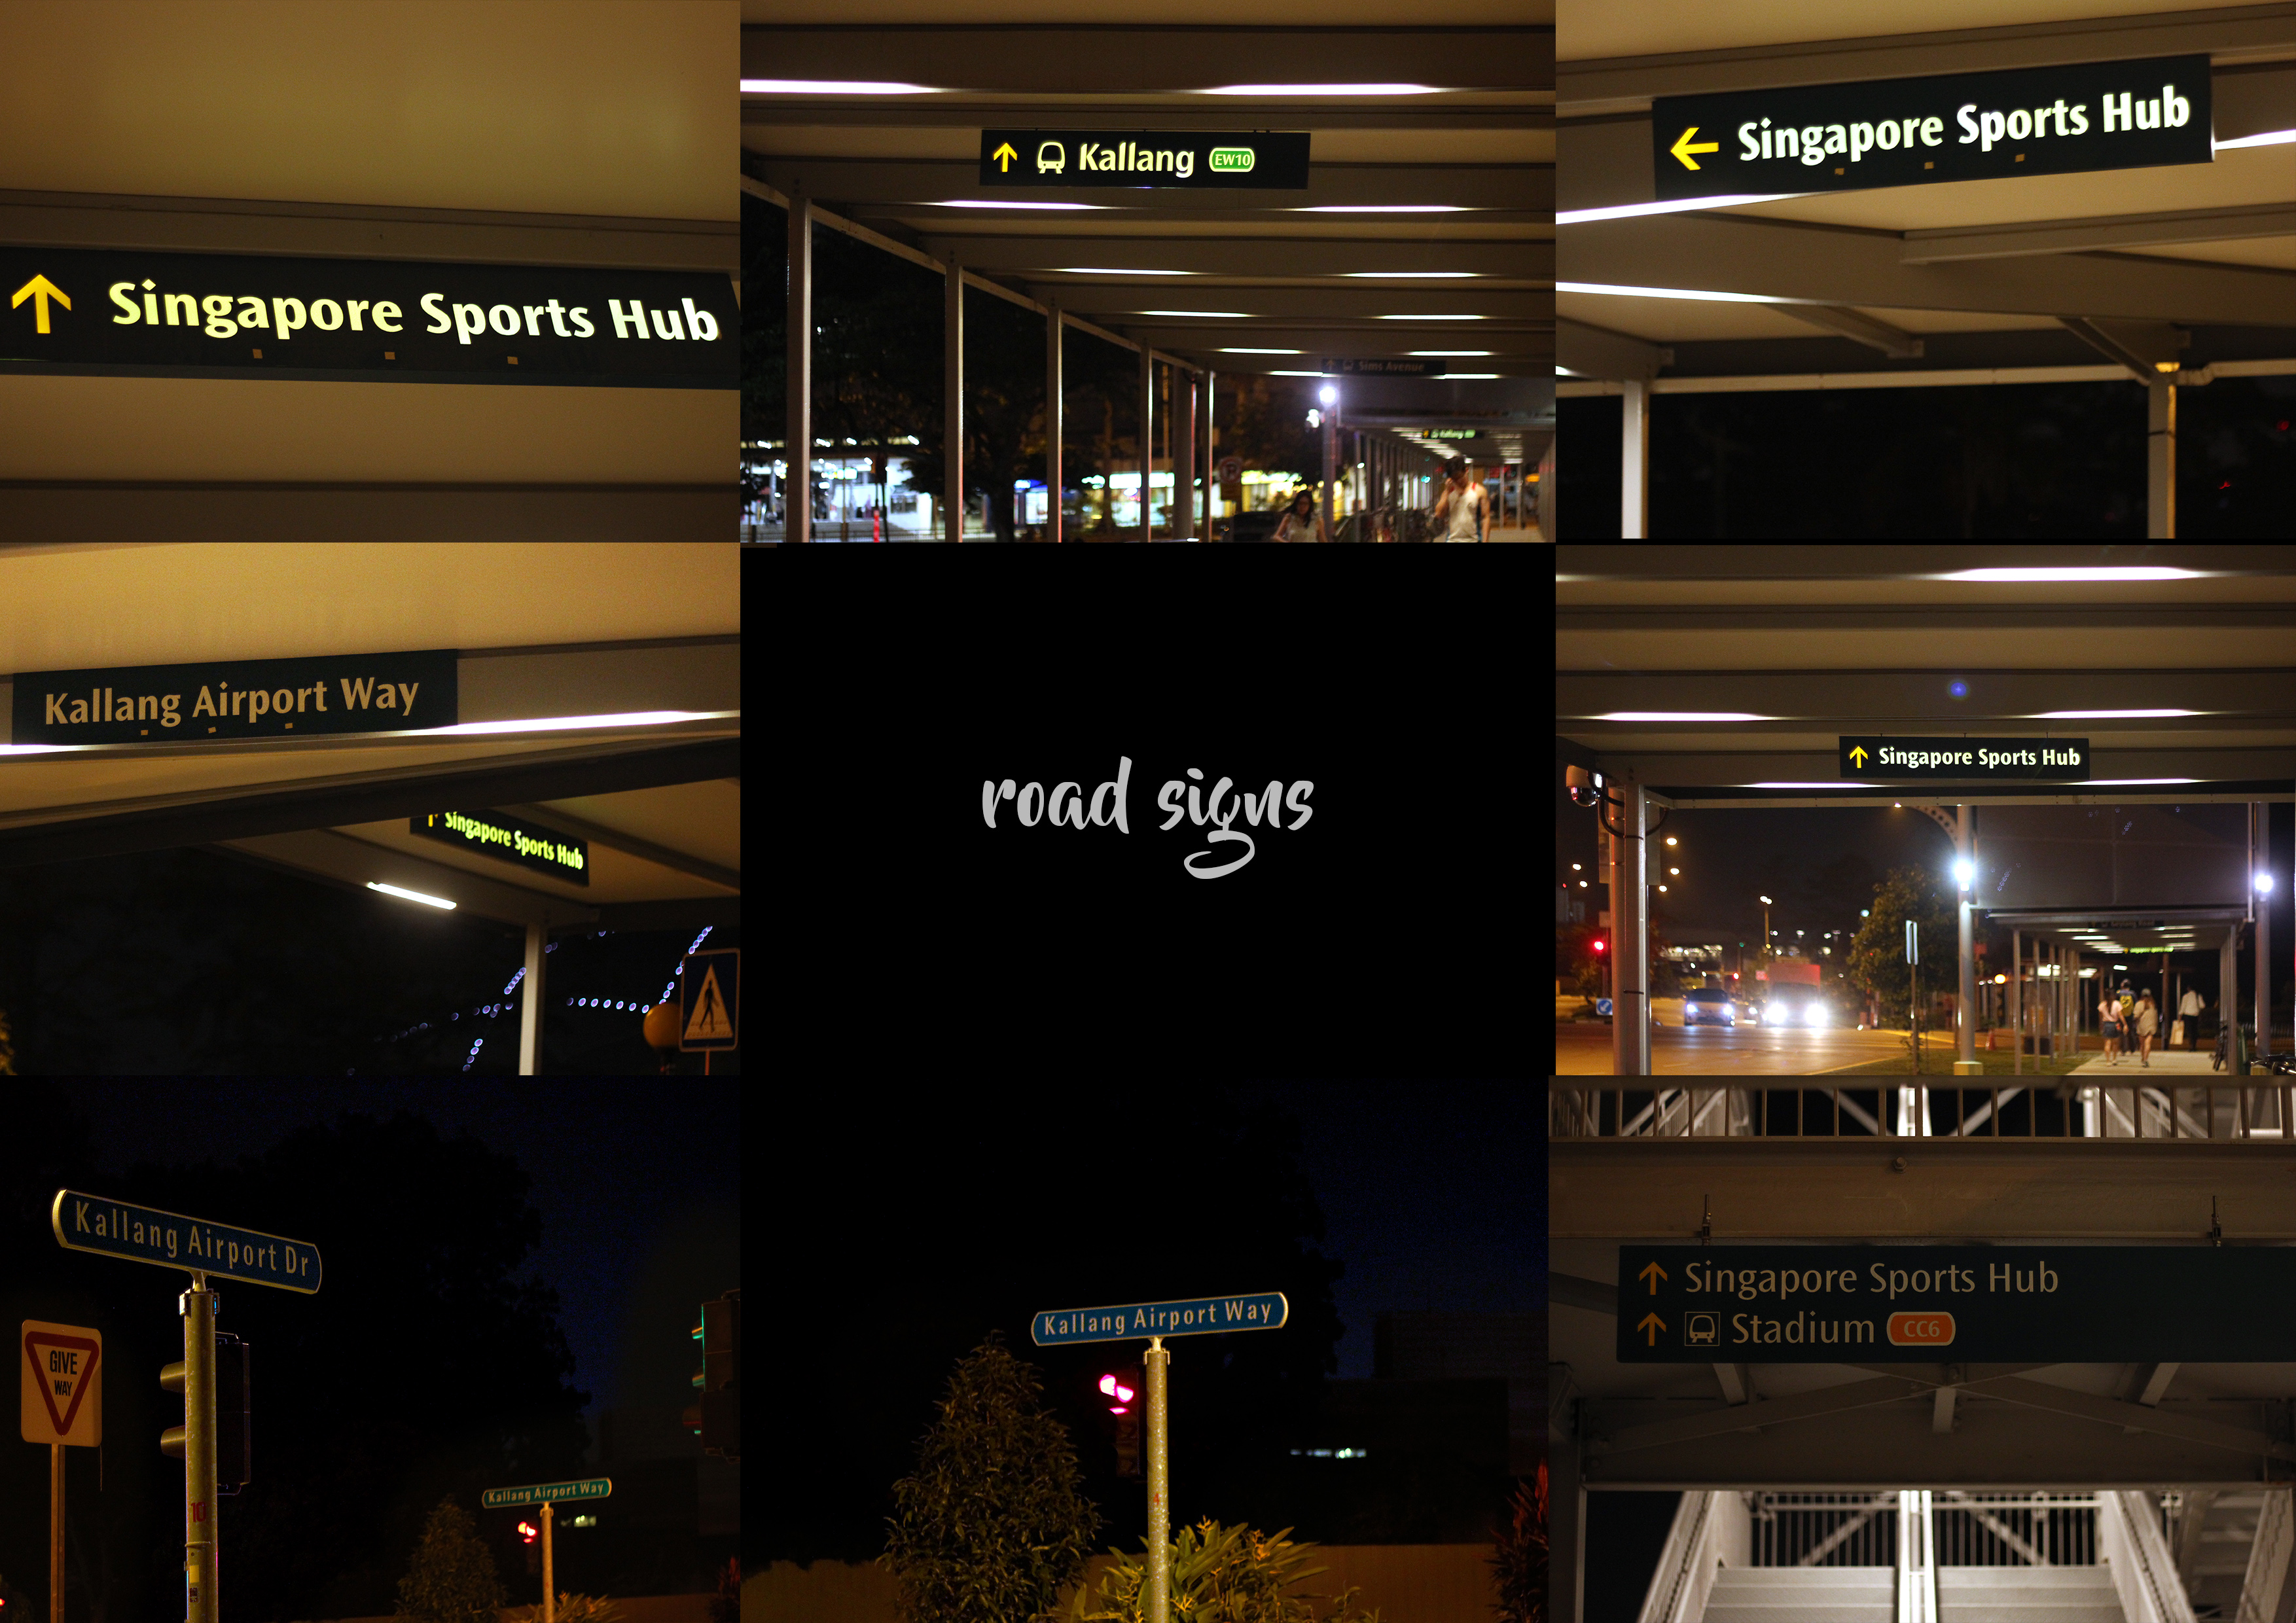
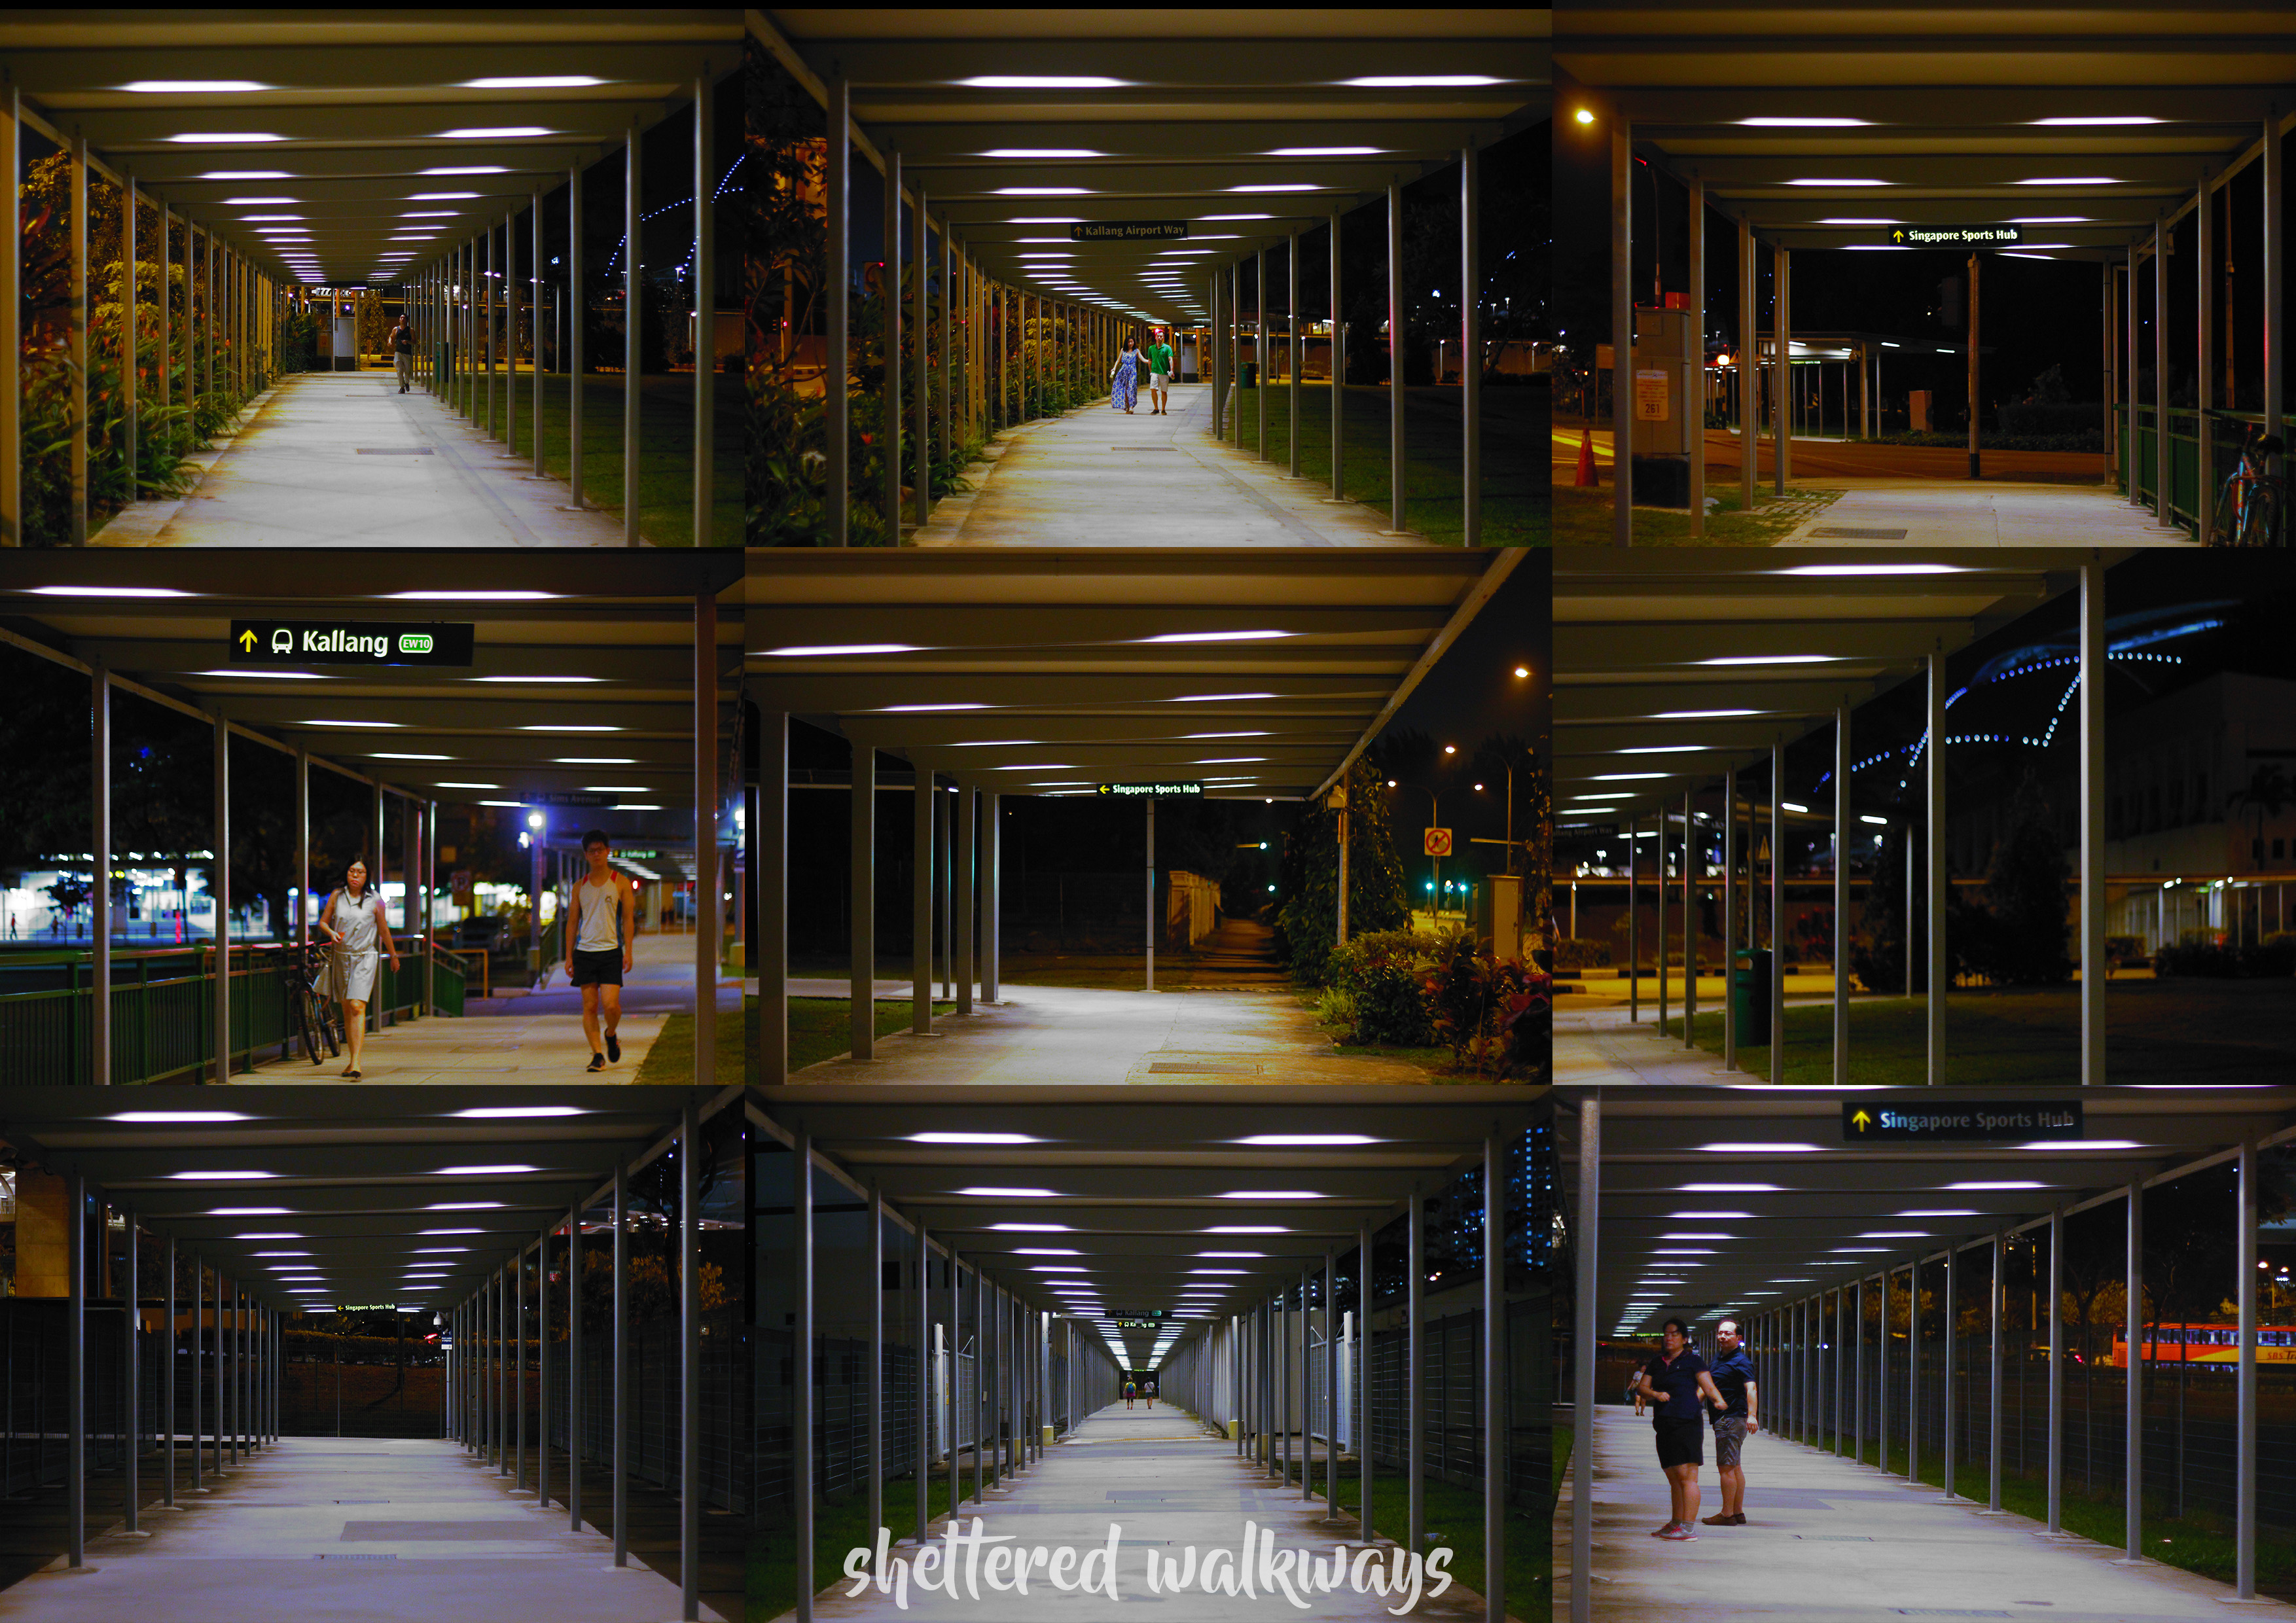
I decided to walk over the sheltered walkway to Singapore Sports Hub (SSH). And ya it was my first time walking there from Kallang MRT. And the way was fully sheltered except when crossing the roads.
On the way, there was some restaurants on the side of the road, and I considered to went there during the day and use ‘food of Kallang’ as one of the research.
The walk continued and all I saw was the sheltered way, not many cars and pedestrians. Just like normal Singapore at night. Significance are the sheltered way and road signs.
The Road SignsOn The WayThe Sheltered Walkways
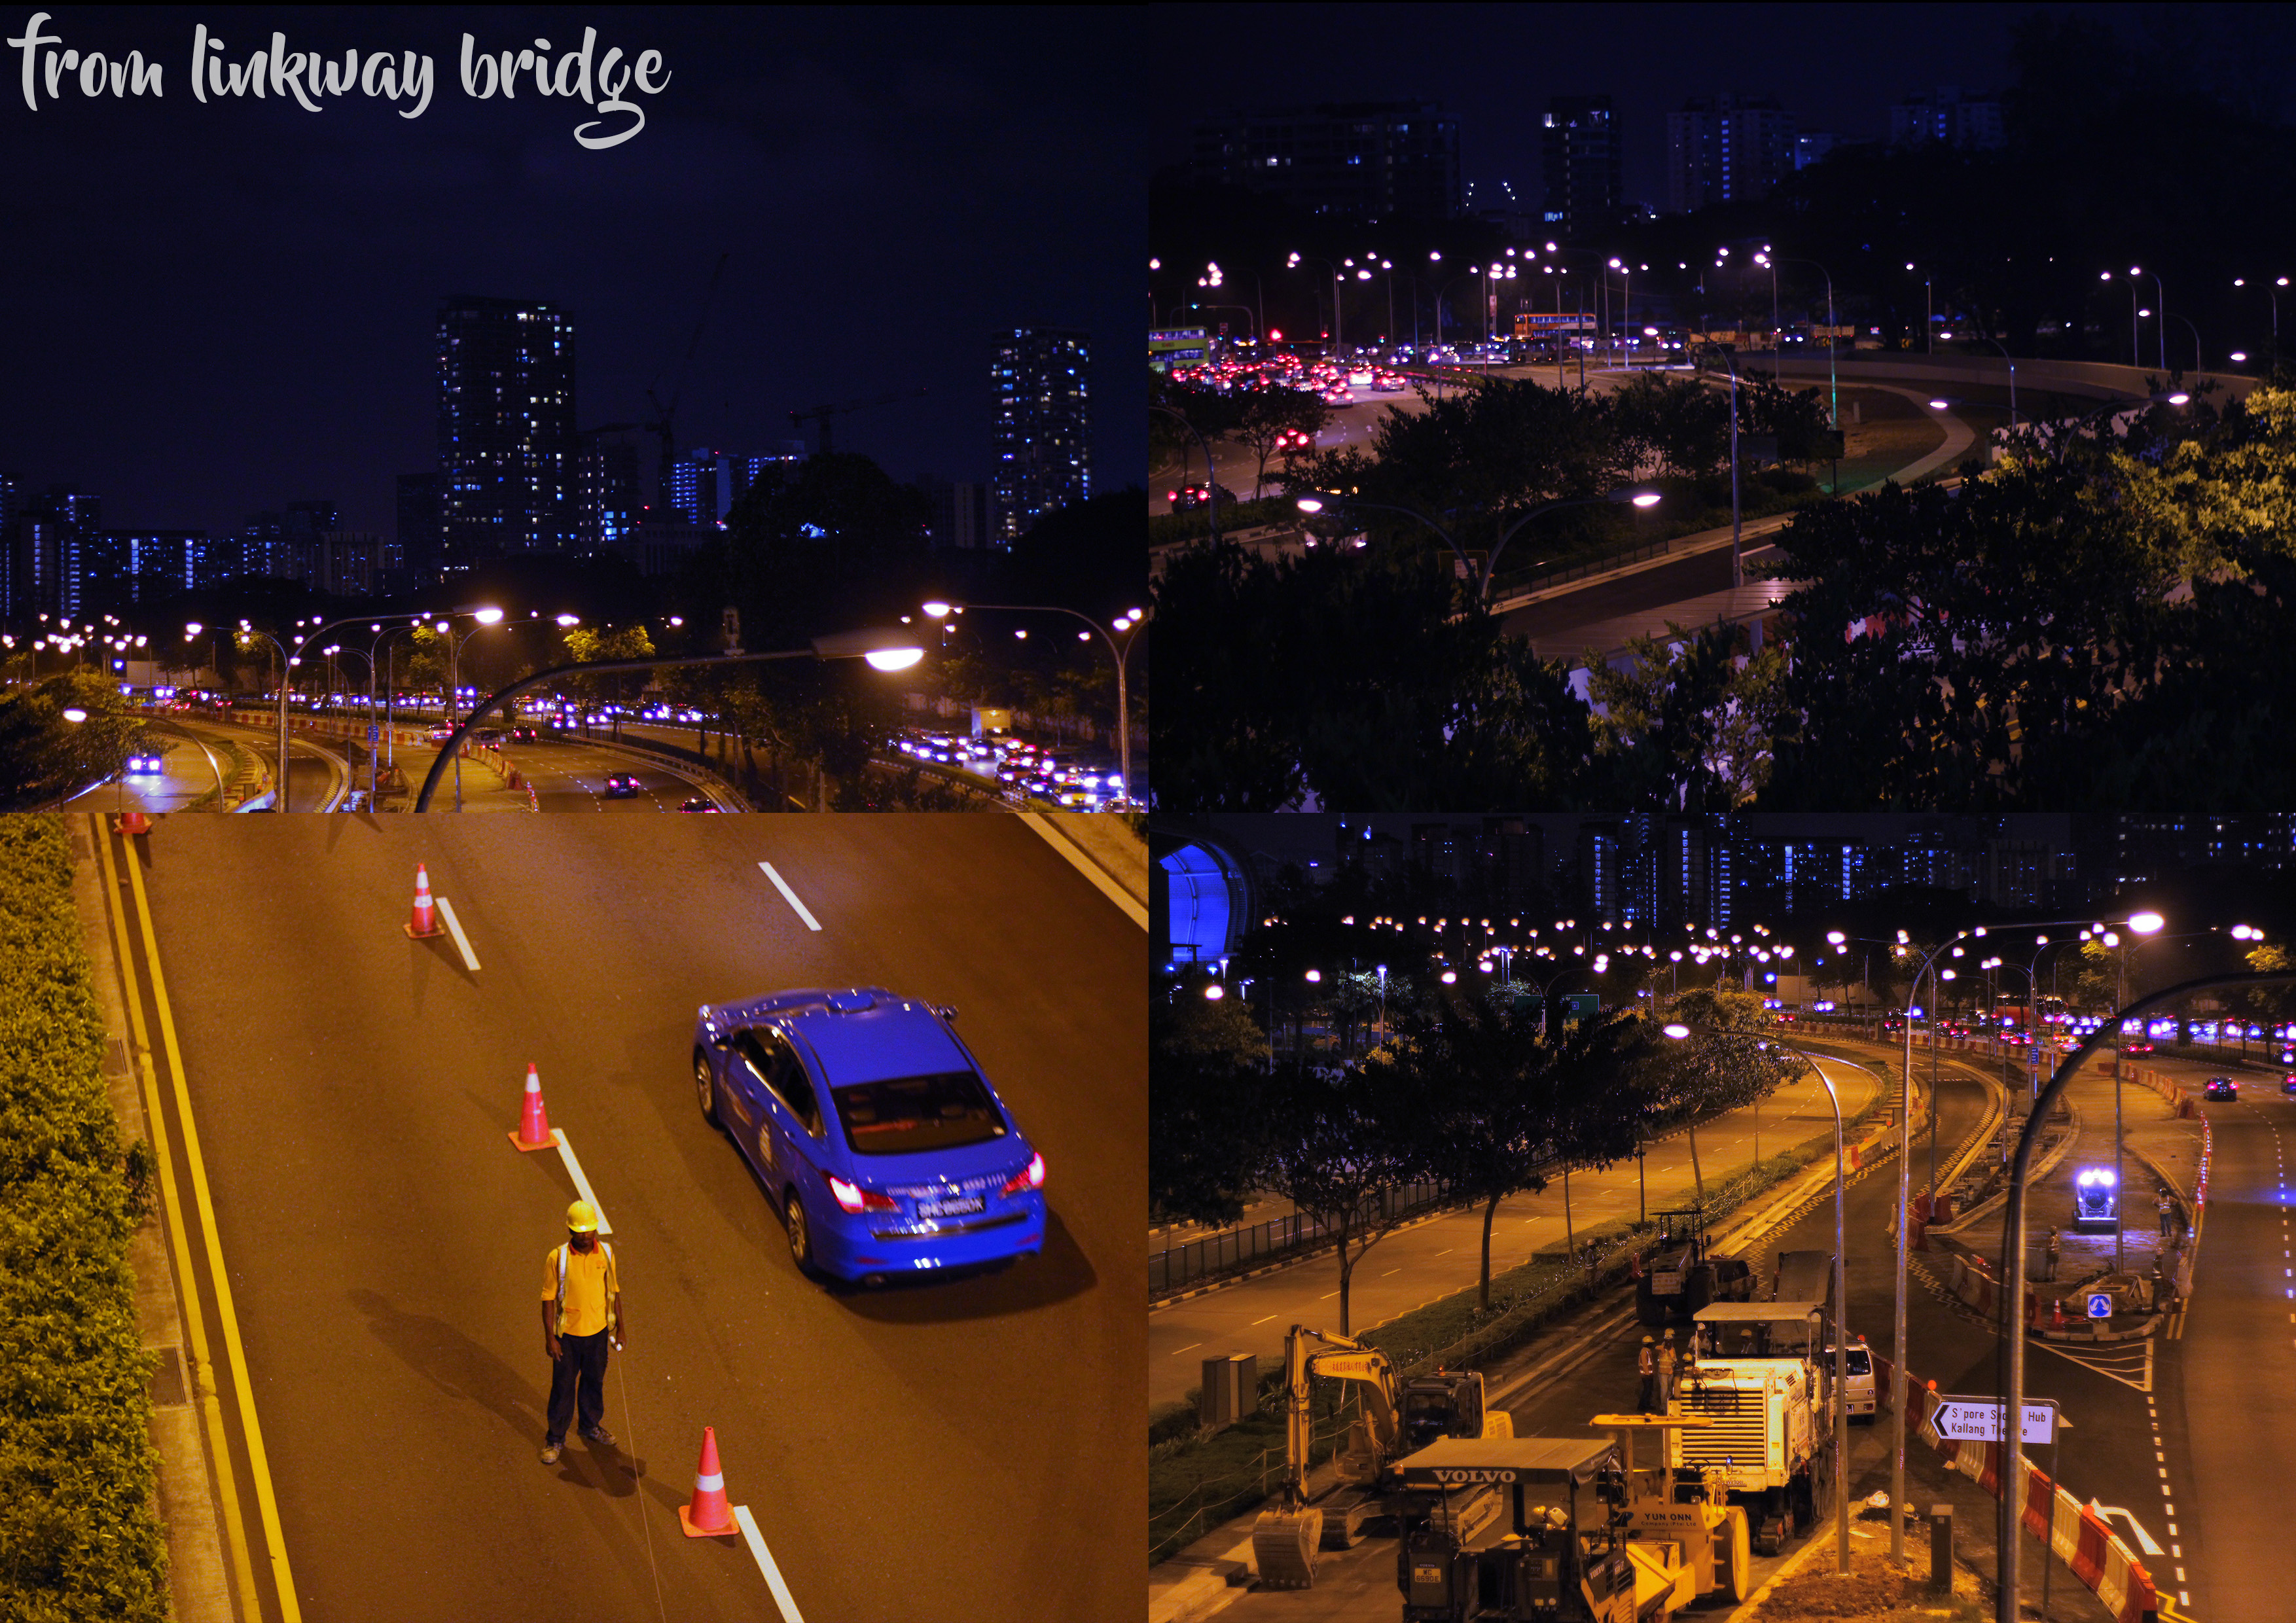
As the sheltered way finally reach Singapore Sports Hub, I reached the link way bridge to the SSH. The bridge has geometrical shapes in its architecture. I ended up taking a lot of pictures of the bridge. I didn’t thought there would be such interesting bridge. I chose the linkway bridge as my main focus. For complete photos, the slides are posted here.
View from The Linkway Bridge
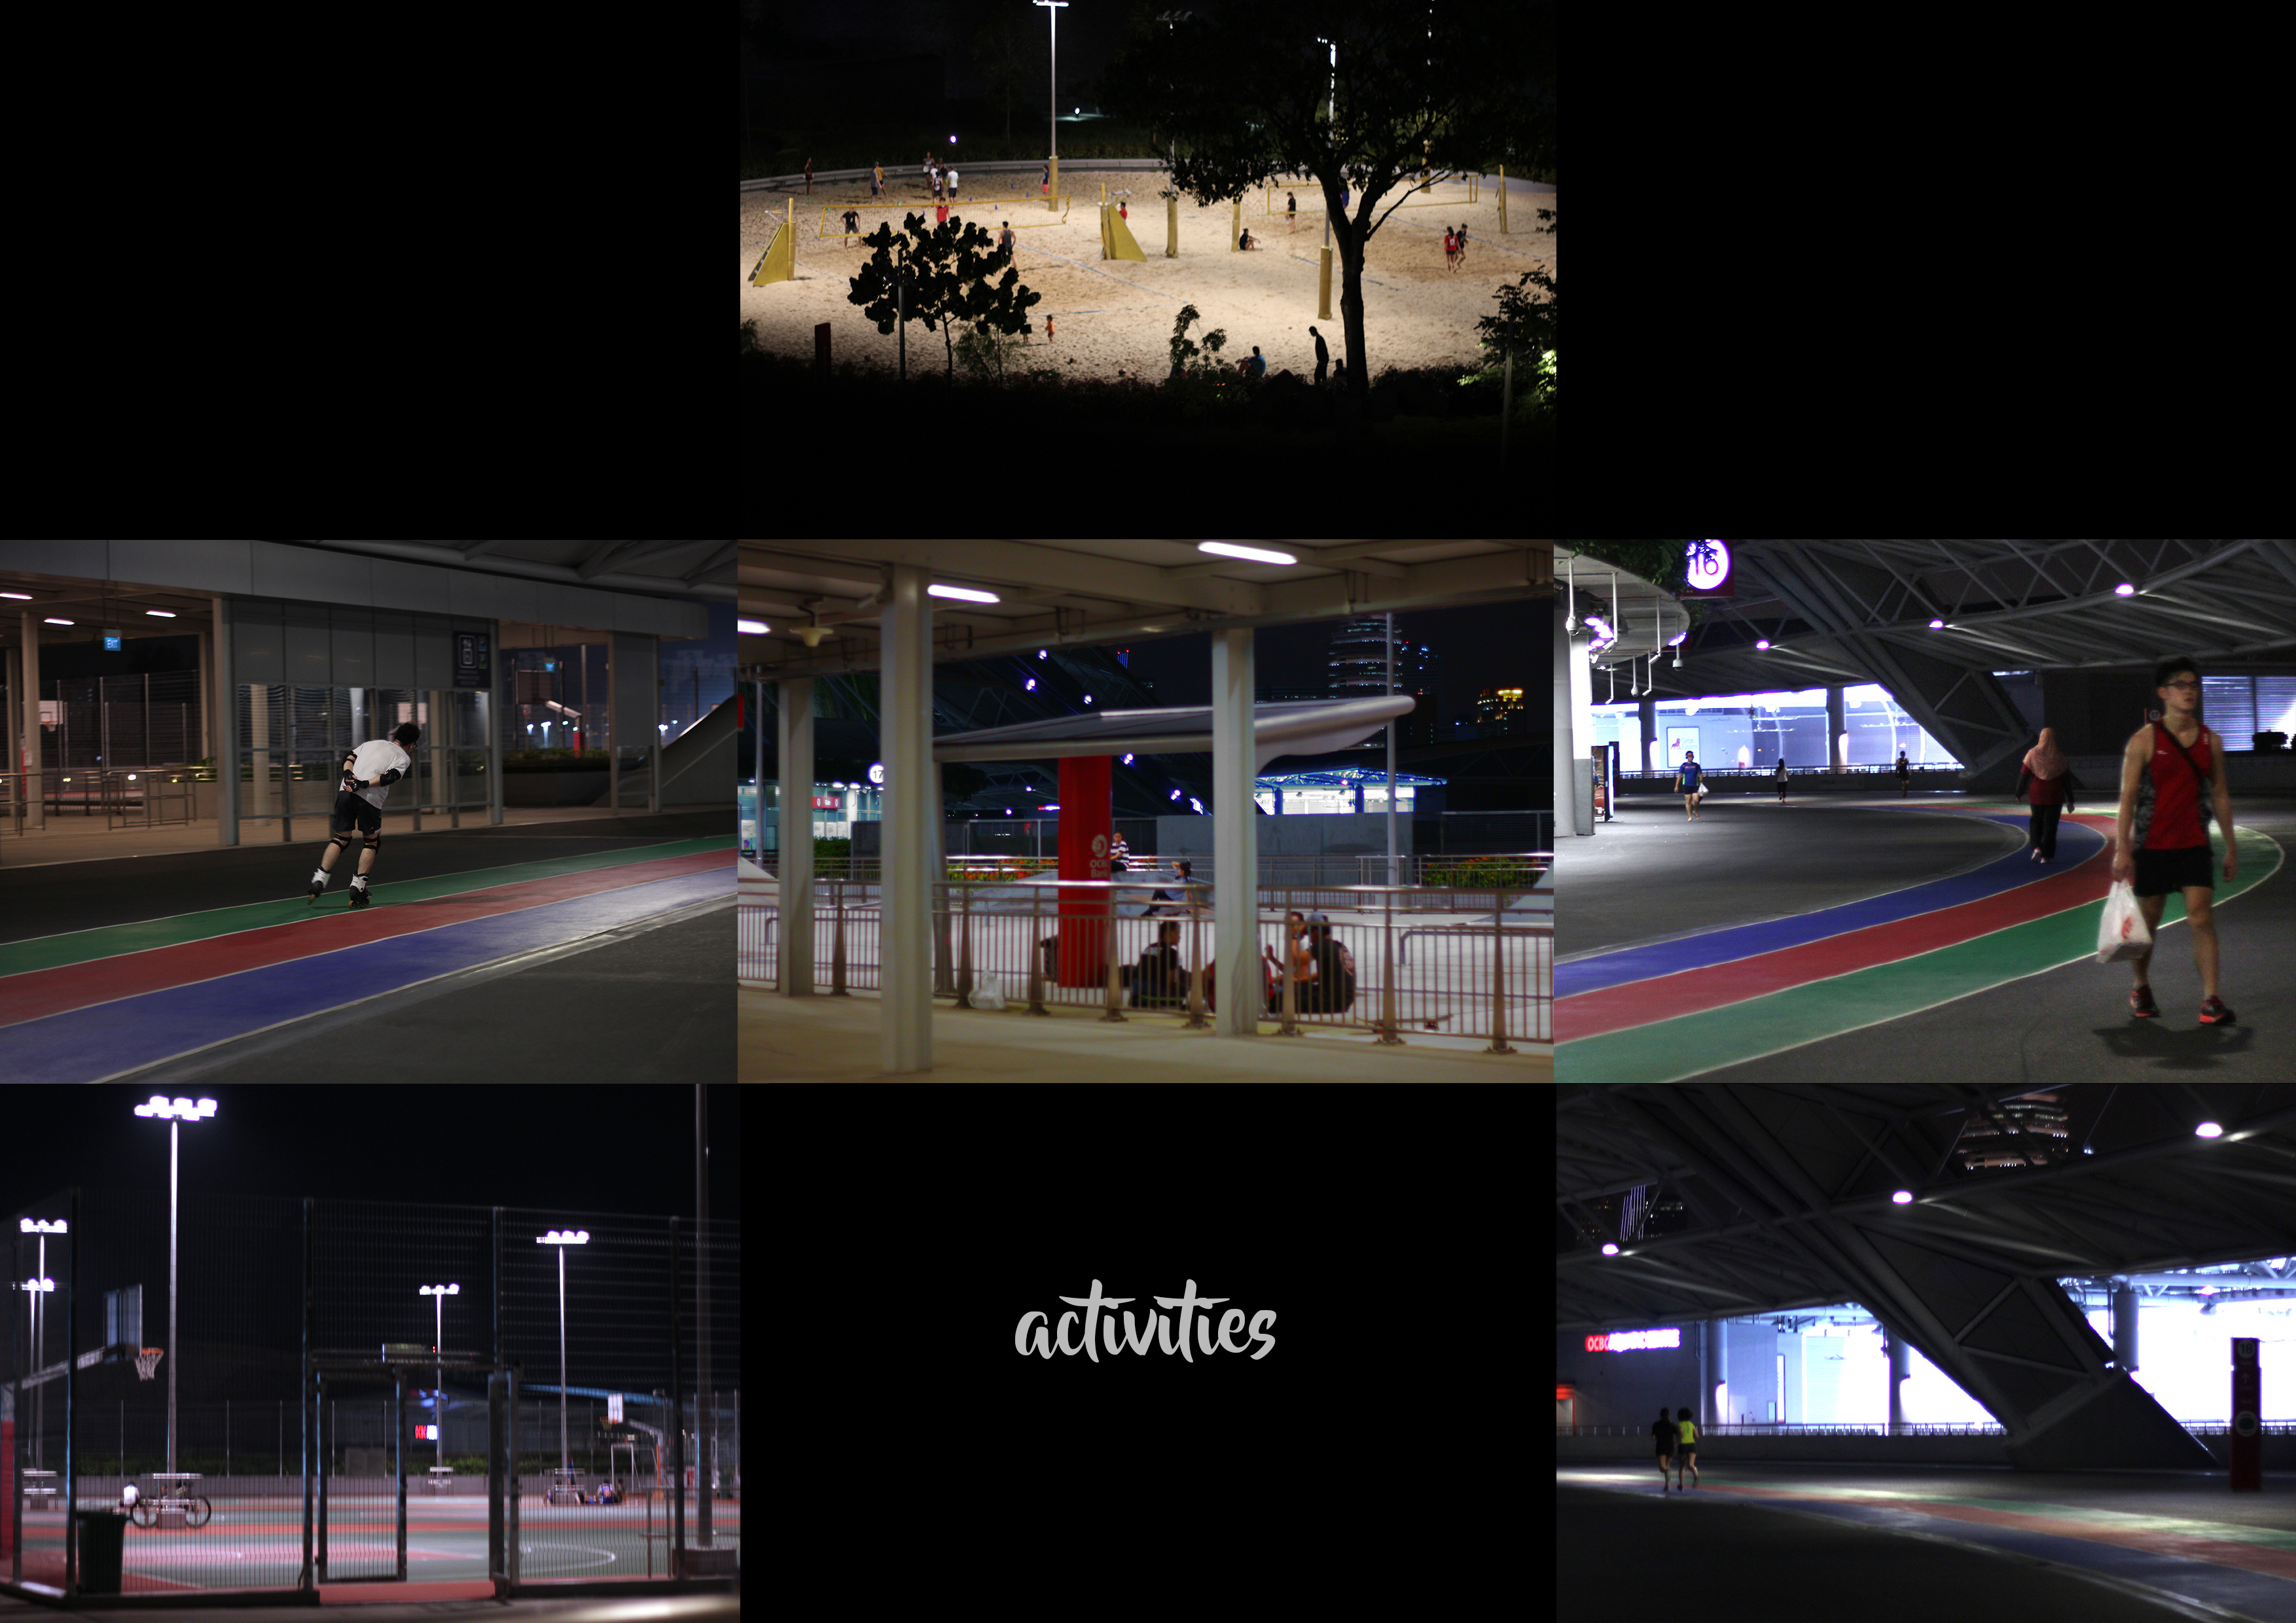
Continuing the journey, I finally reached the SSH. Having not explored the place before, I didn’t know that they would have outdoor field and arena for sports (thought all indoor). As expected, there were groups of people exercising and playing games around. I intended to approach them but they seemed occupied and tired..? So ya, I decided to do the interviews on my next visit when it is not the end of the day.
Some Activities
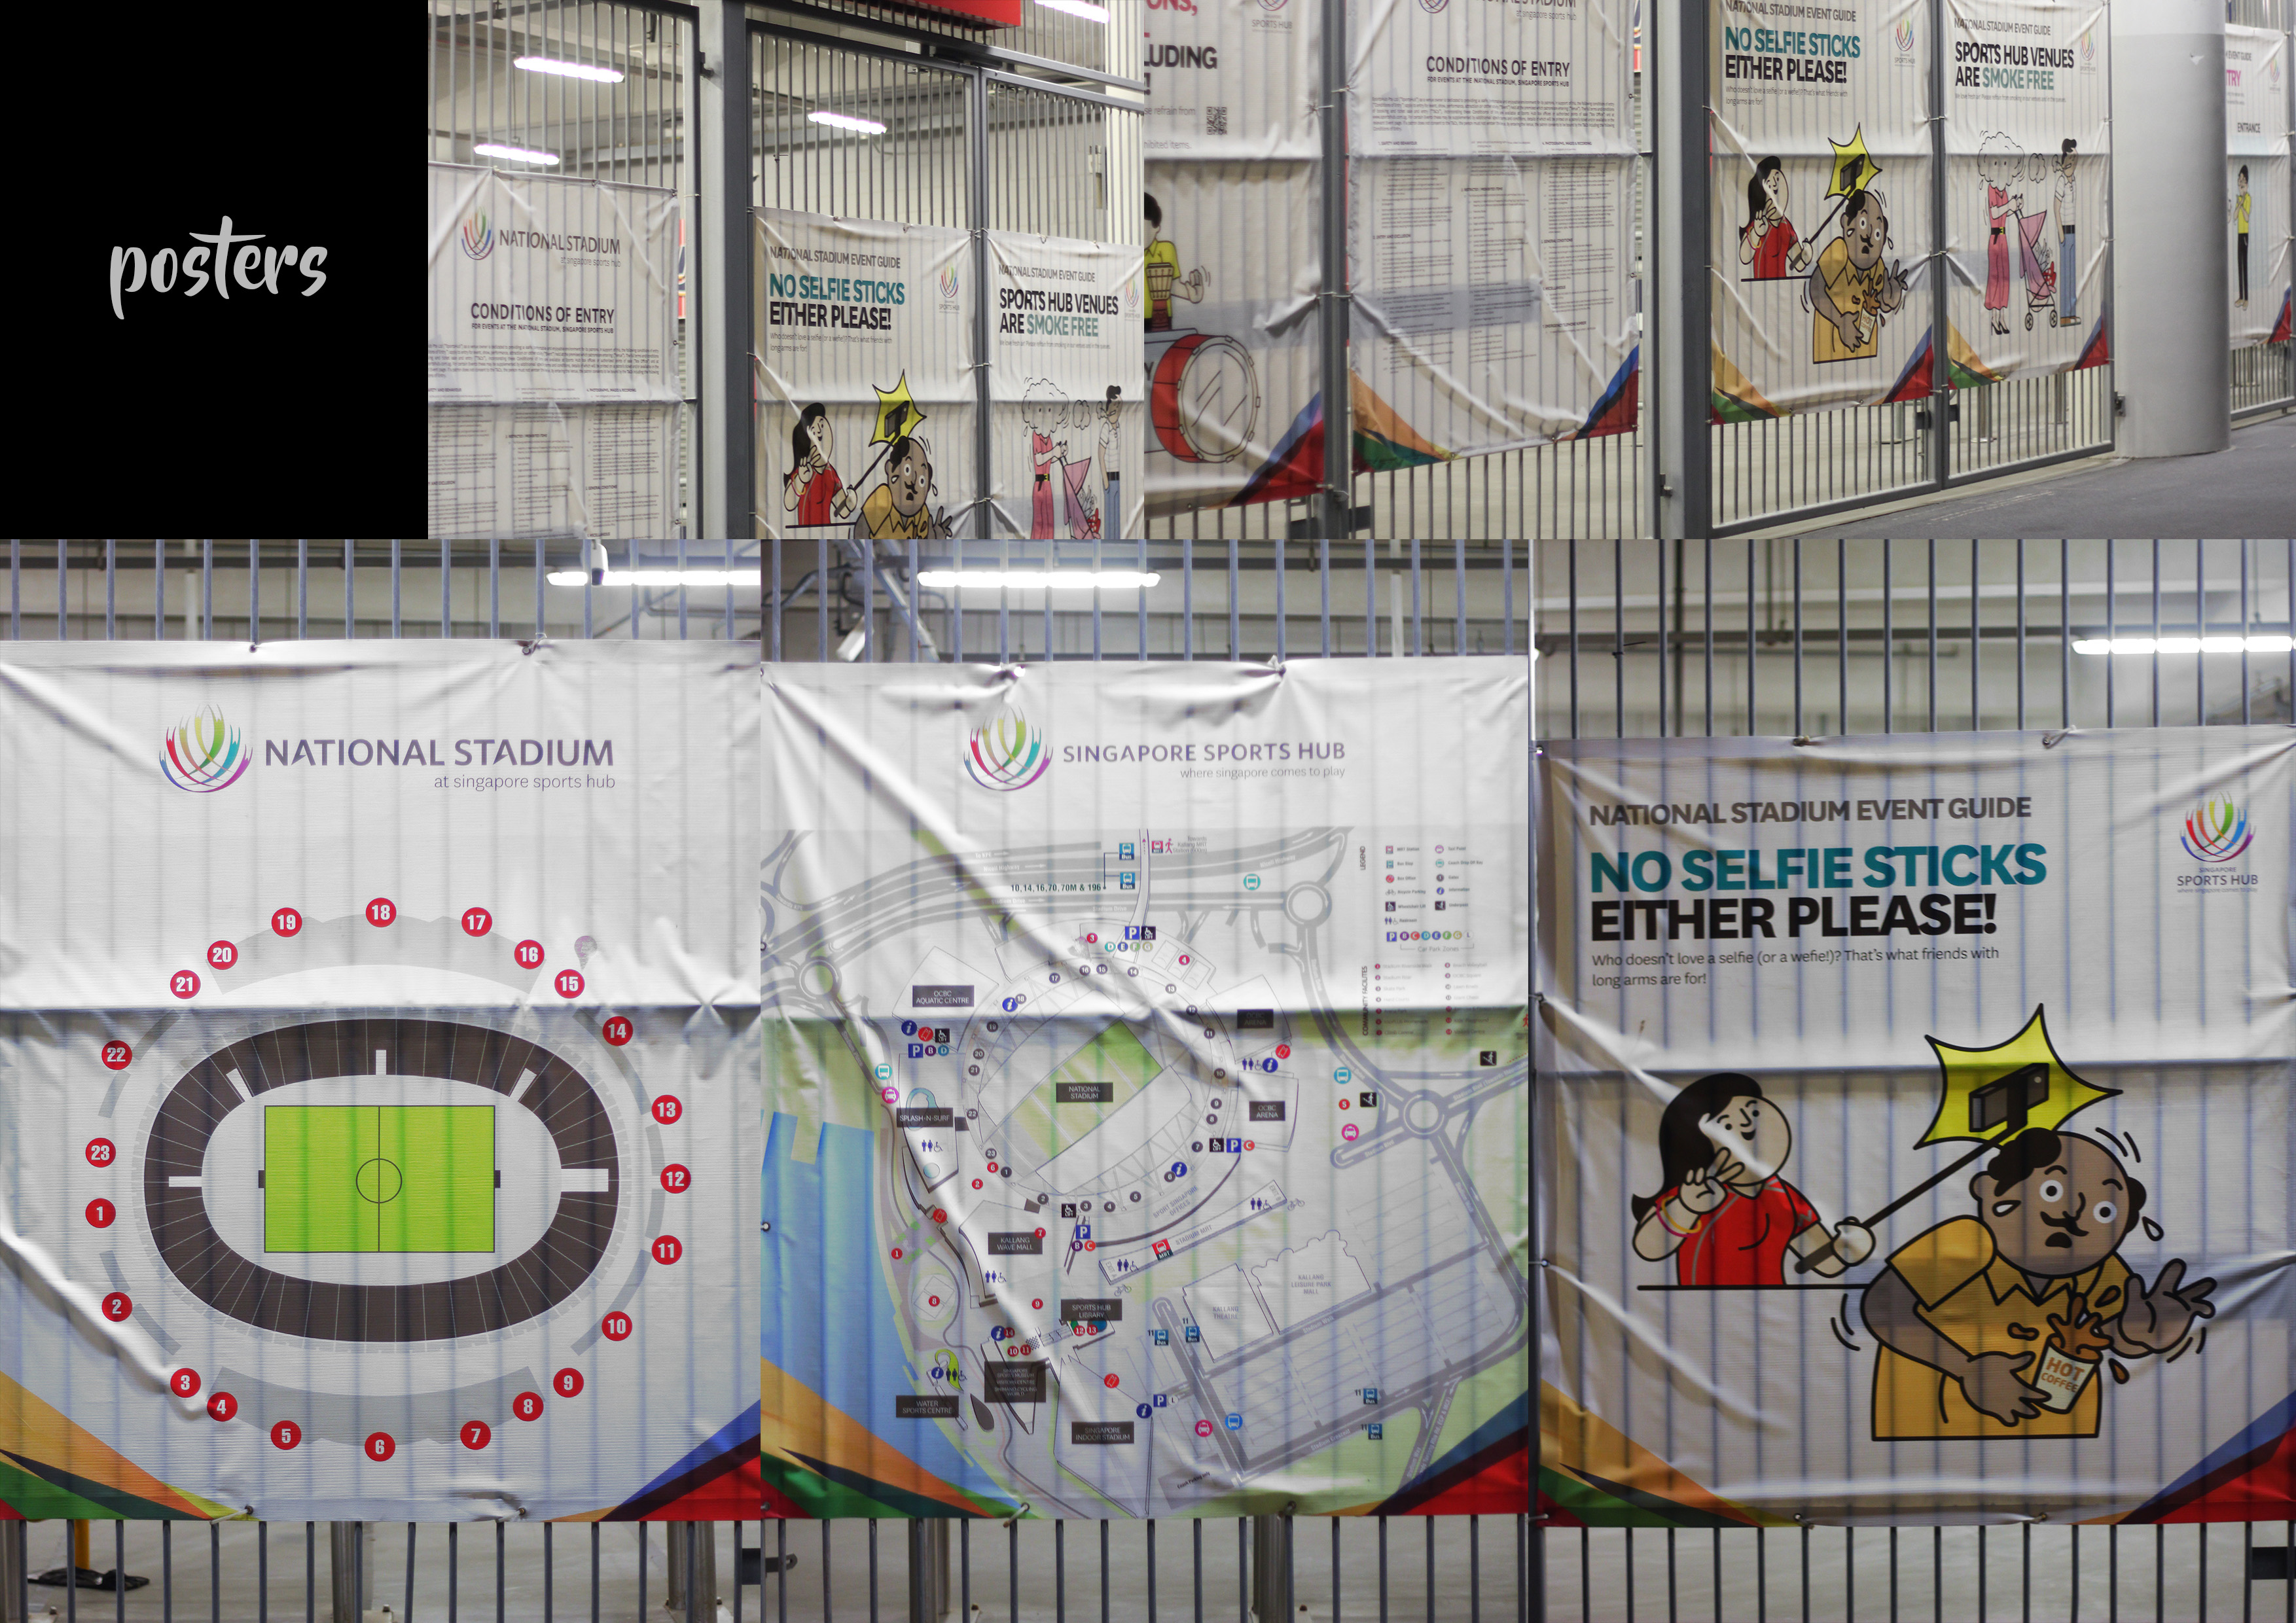
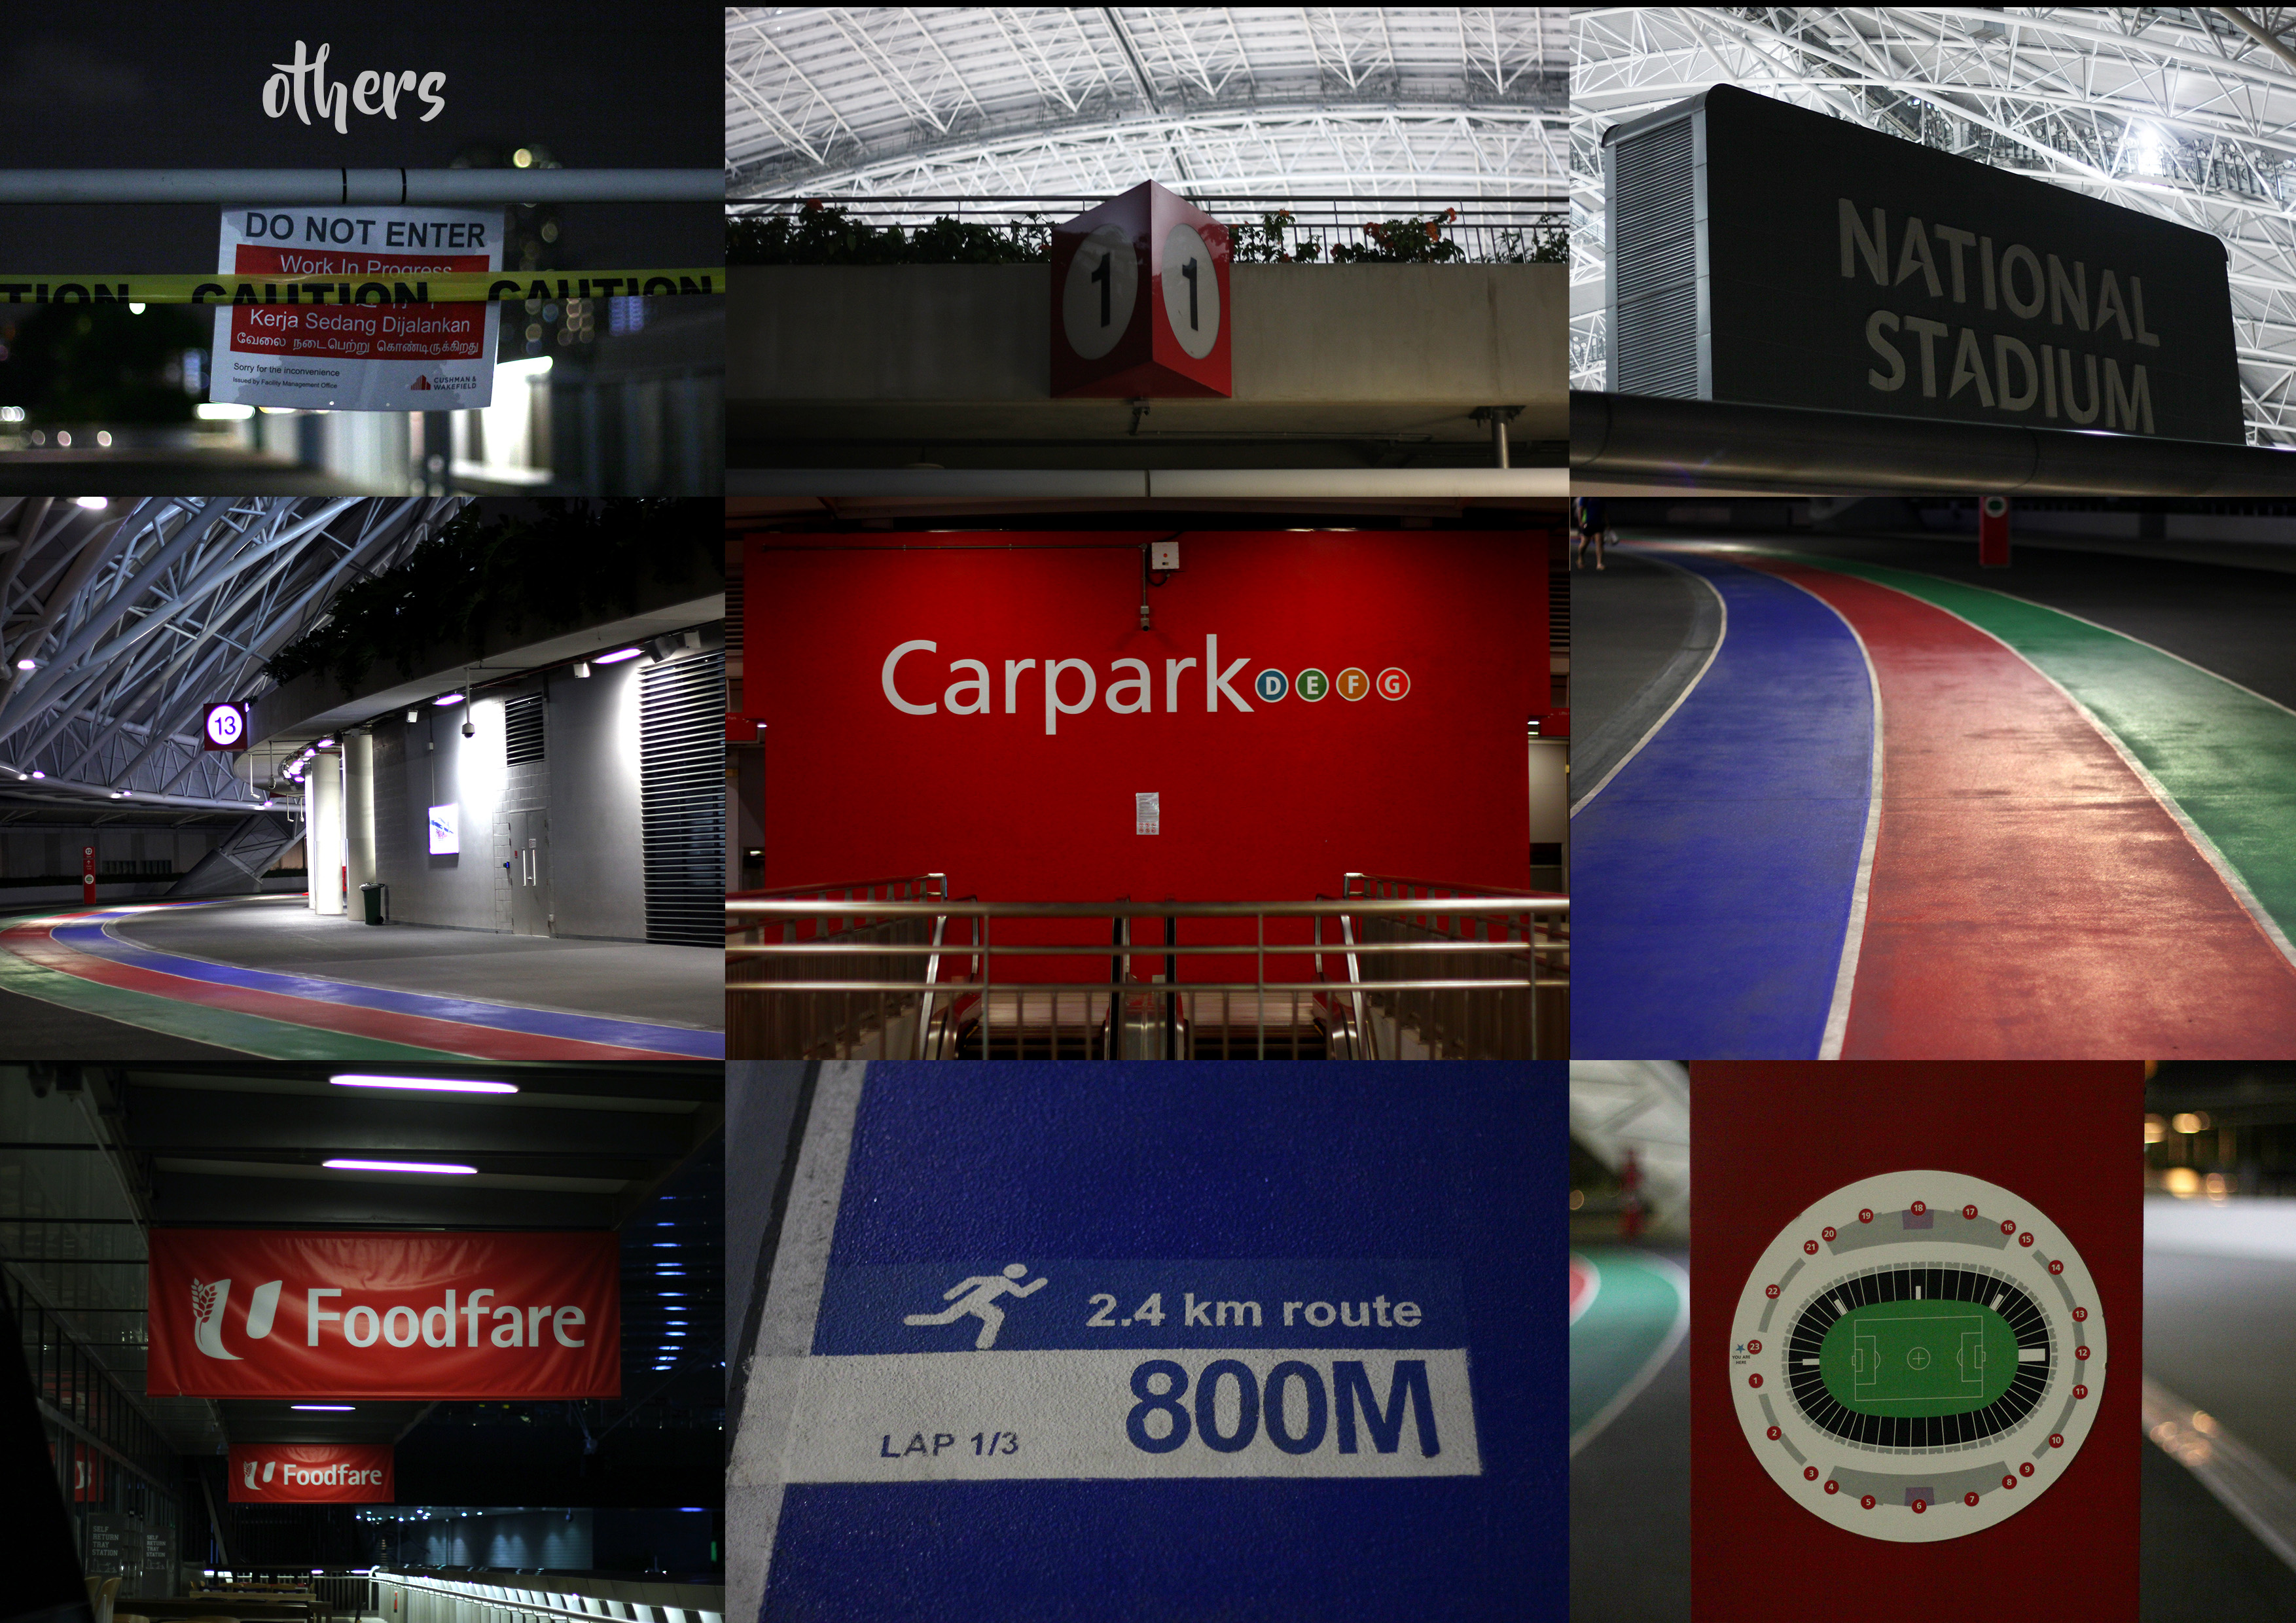
Then I continue to explore the SSH and took some more pictures.
Some PostersOther Interesting DetailsSome Architectural Patterns
Continuing the visit, another interesting and pretty thing I found was the night view of Singapore from the rooftop of SSH 🙂
The Pretty Nightview
Then, I needed to catch the MRT and walked my way to the Stadium MRT. Taking some pictures along the way.
Some Shiny Lights
And apparently even the MRT has a lot of geometrical pattern!
Overall, it was a short yet interesting trip for me. There were some elements that I want to explore more. So far the most interesting part is the architectural pattern of the linkway bridge.
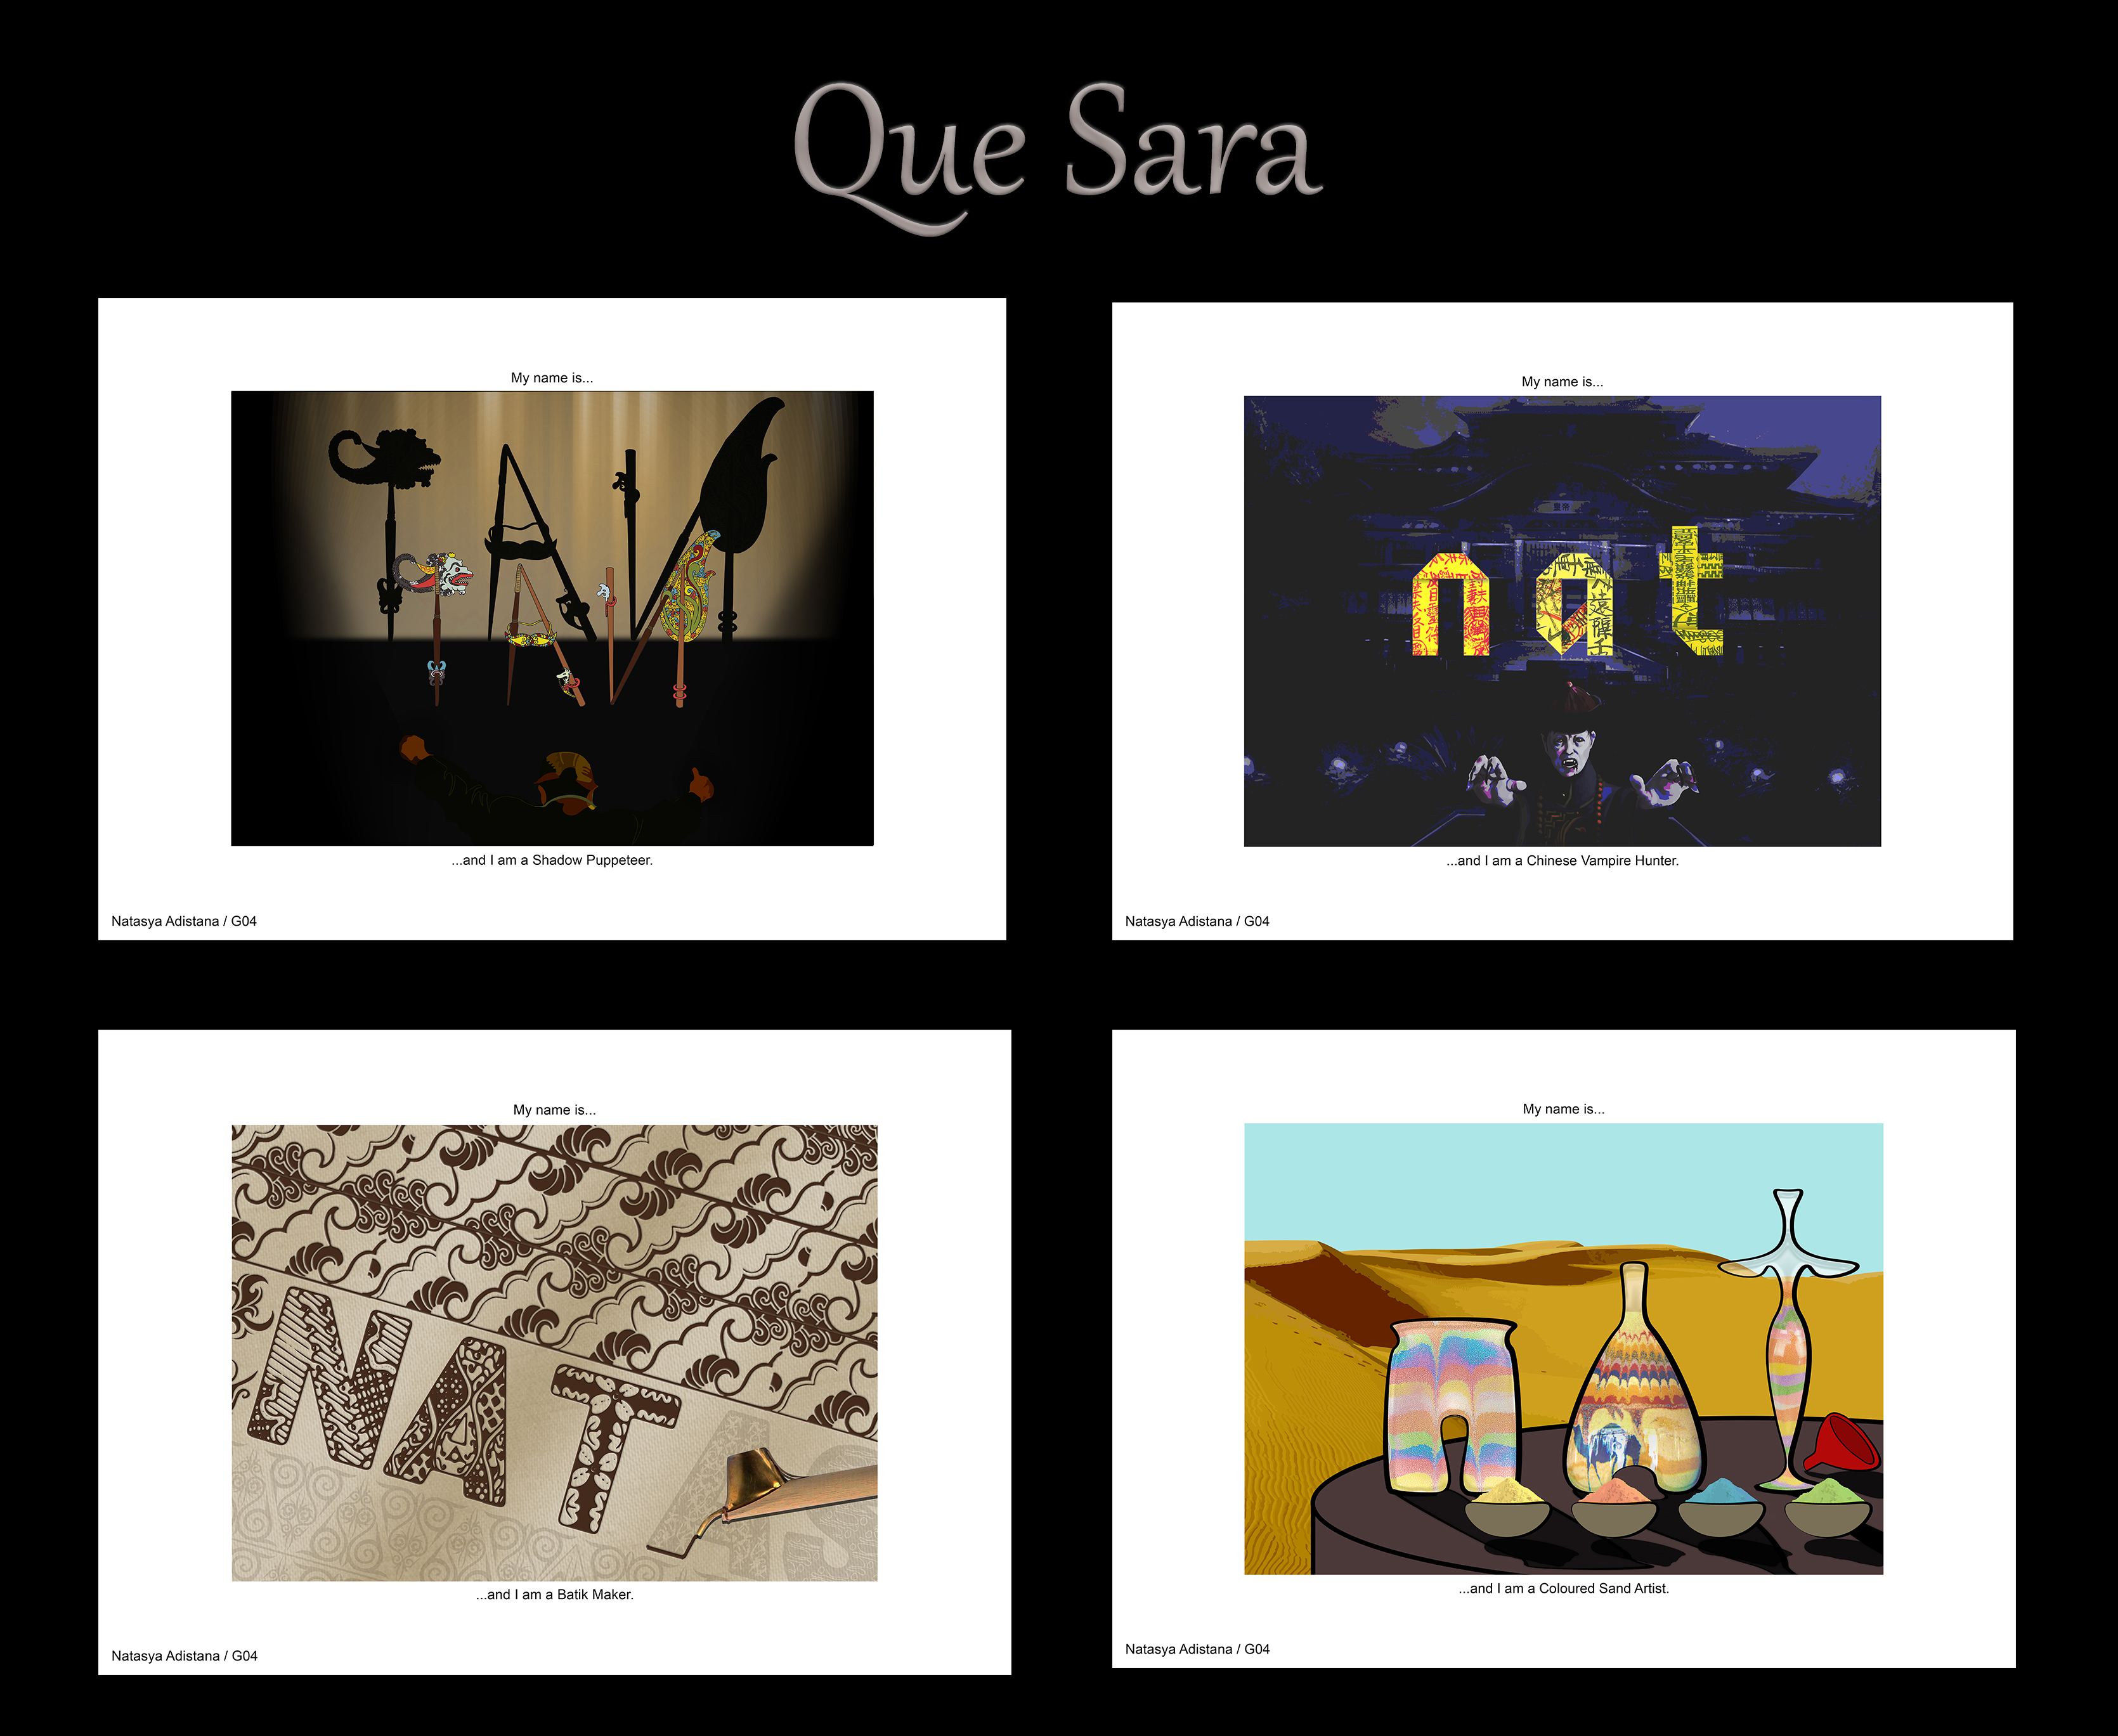
Here is the final submissions:
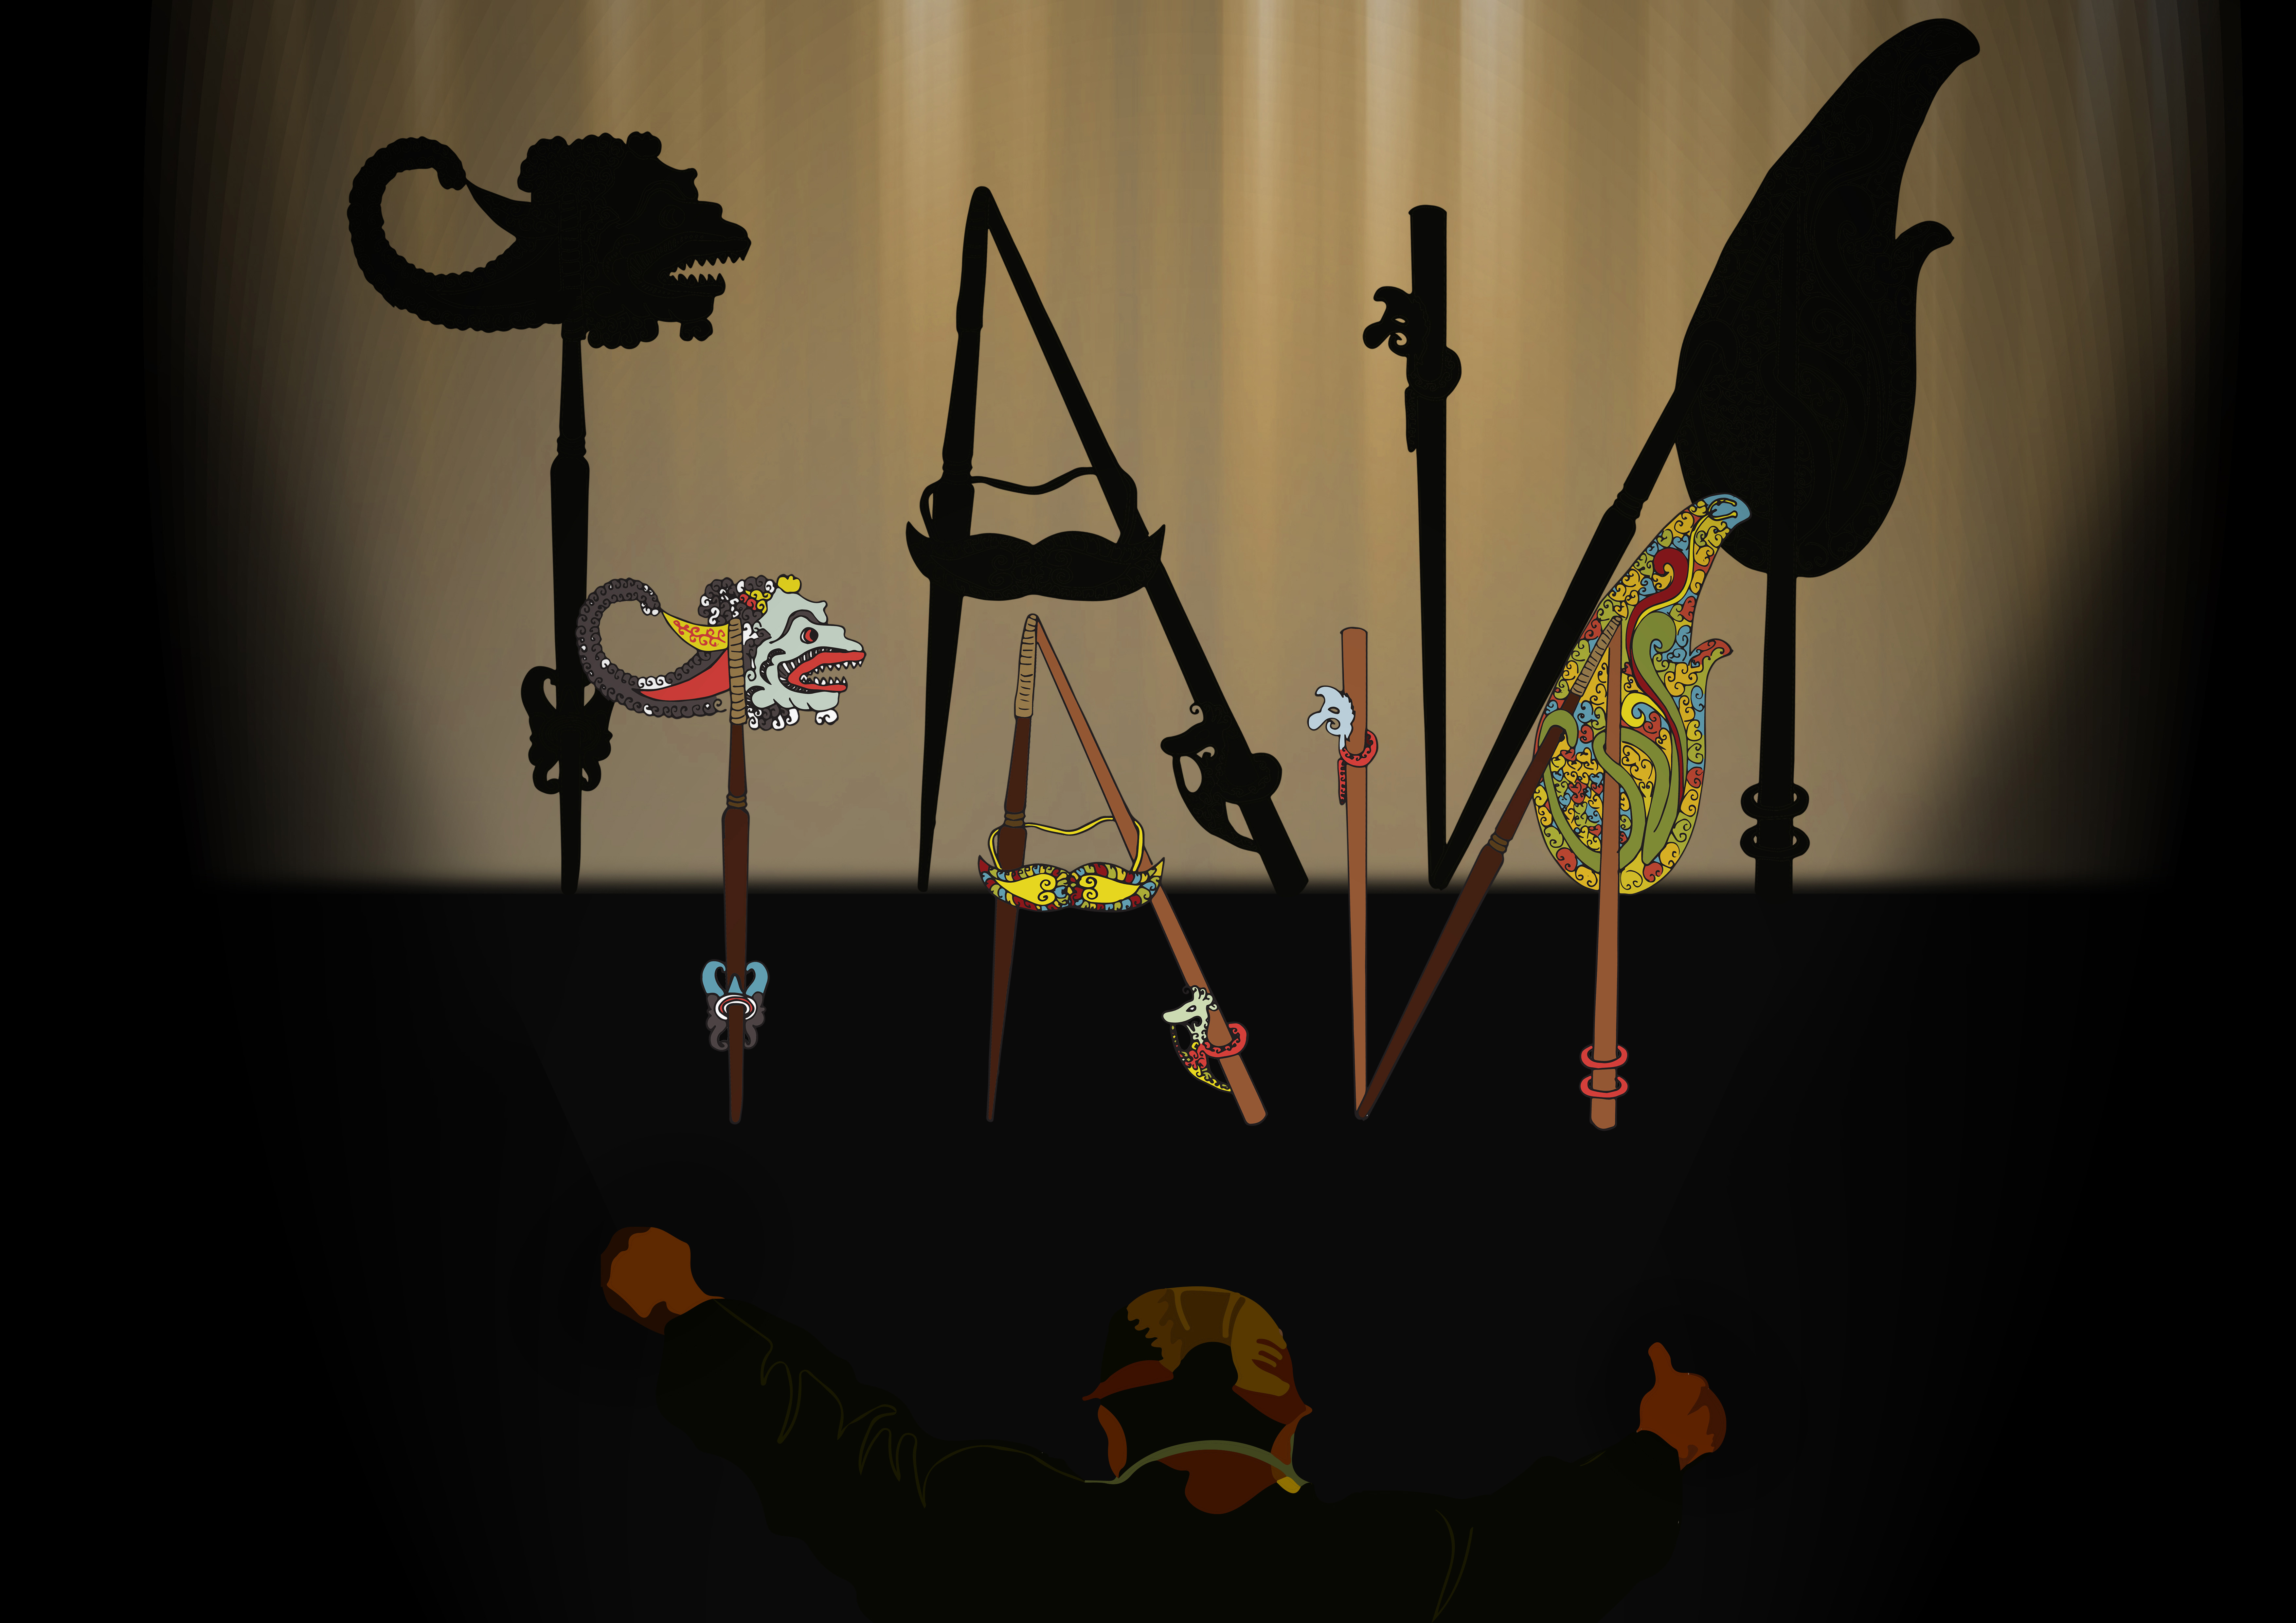
All is inspired by culture in different countries.
My batik maker and shadow puppeteer are Indonesian traditional clothing and show respectively.
While the vampire hunter is related to Chinese belief about ghost.
Ad the coloured sand artist is souvenir art from the Arabian countries.
Reflection:
It was fun learning new different stuffs. During this project, I learnt to use Adobe Illustrator much more extensively than I ever before. I also learnt the feature of ‘timeline’ in Adobe Photoshop to create gif. file format. I also feel that I learnt a lot more in term of composing and arranging element in each page. It was a tough job to do, practicing it is tougher than knowing the theory alone.
Other than technical skill, I also learnt to keep on doing until the end as I honestly feel that there is no ending in art. Like even after I think I have finished my composition, I end up changing it after some other time. And this process can just continue until I am satisfied. I realize actually this can go on and on if there is no deadline for the artwork. I might find another better composition for the above submissions one day.
There is no such thing as the best composition, there is only a better one as one keep on learning and improving themselves.
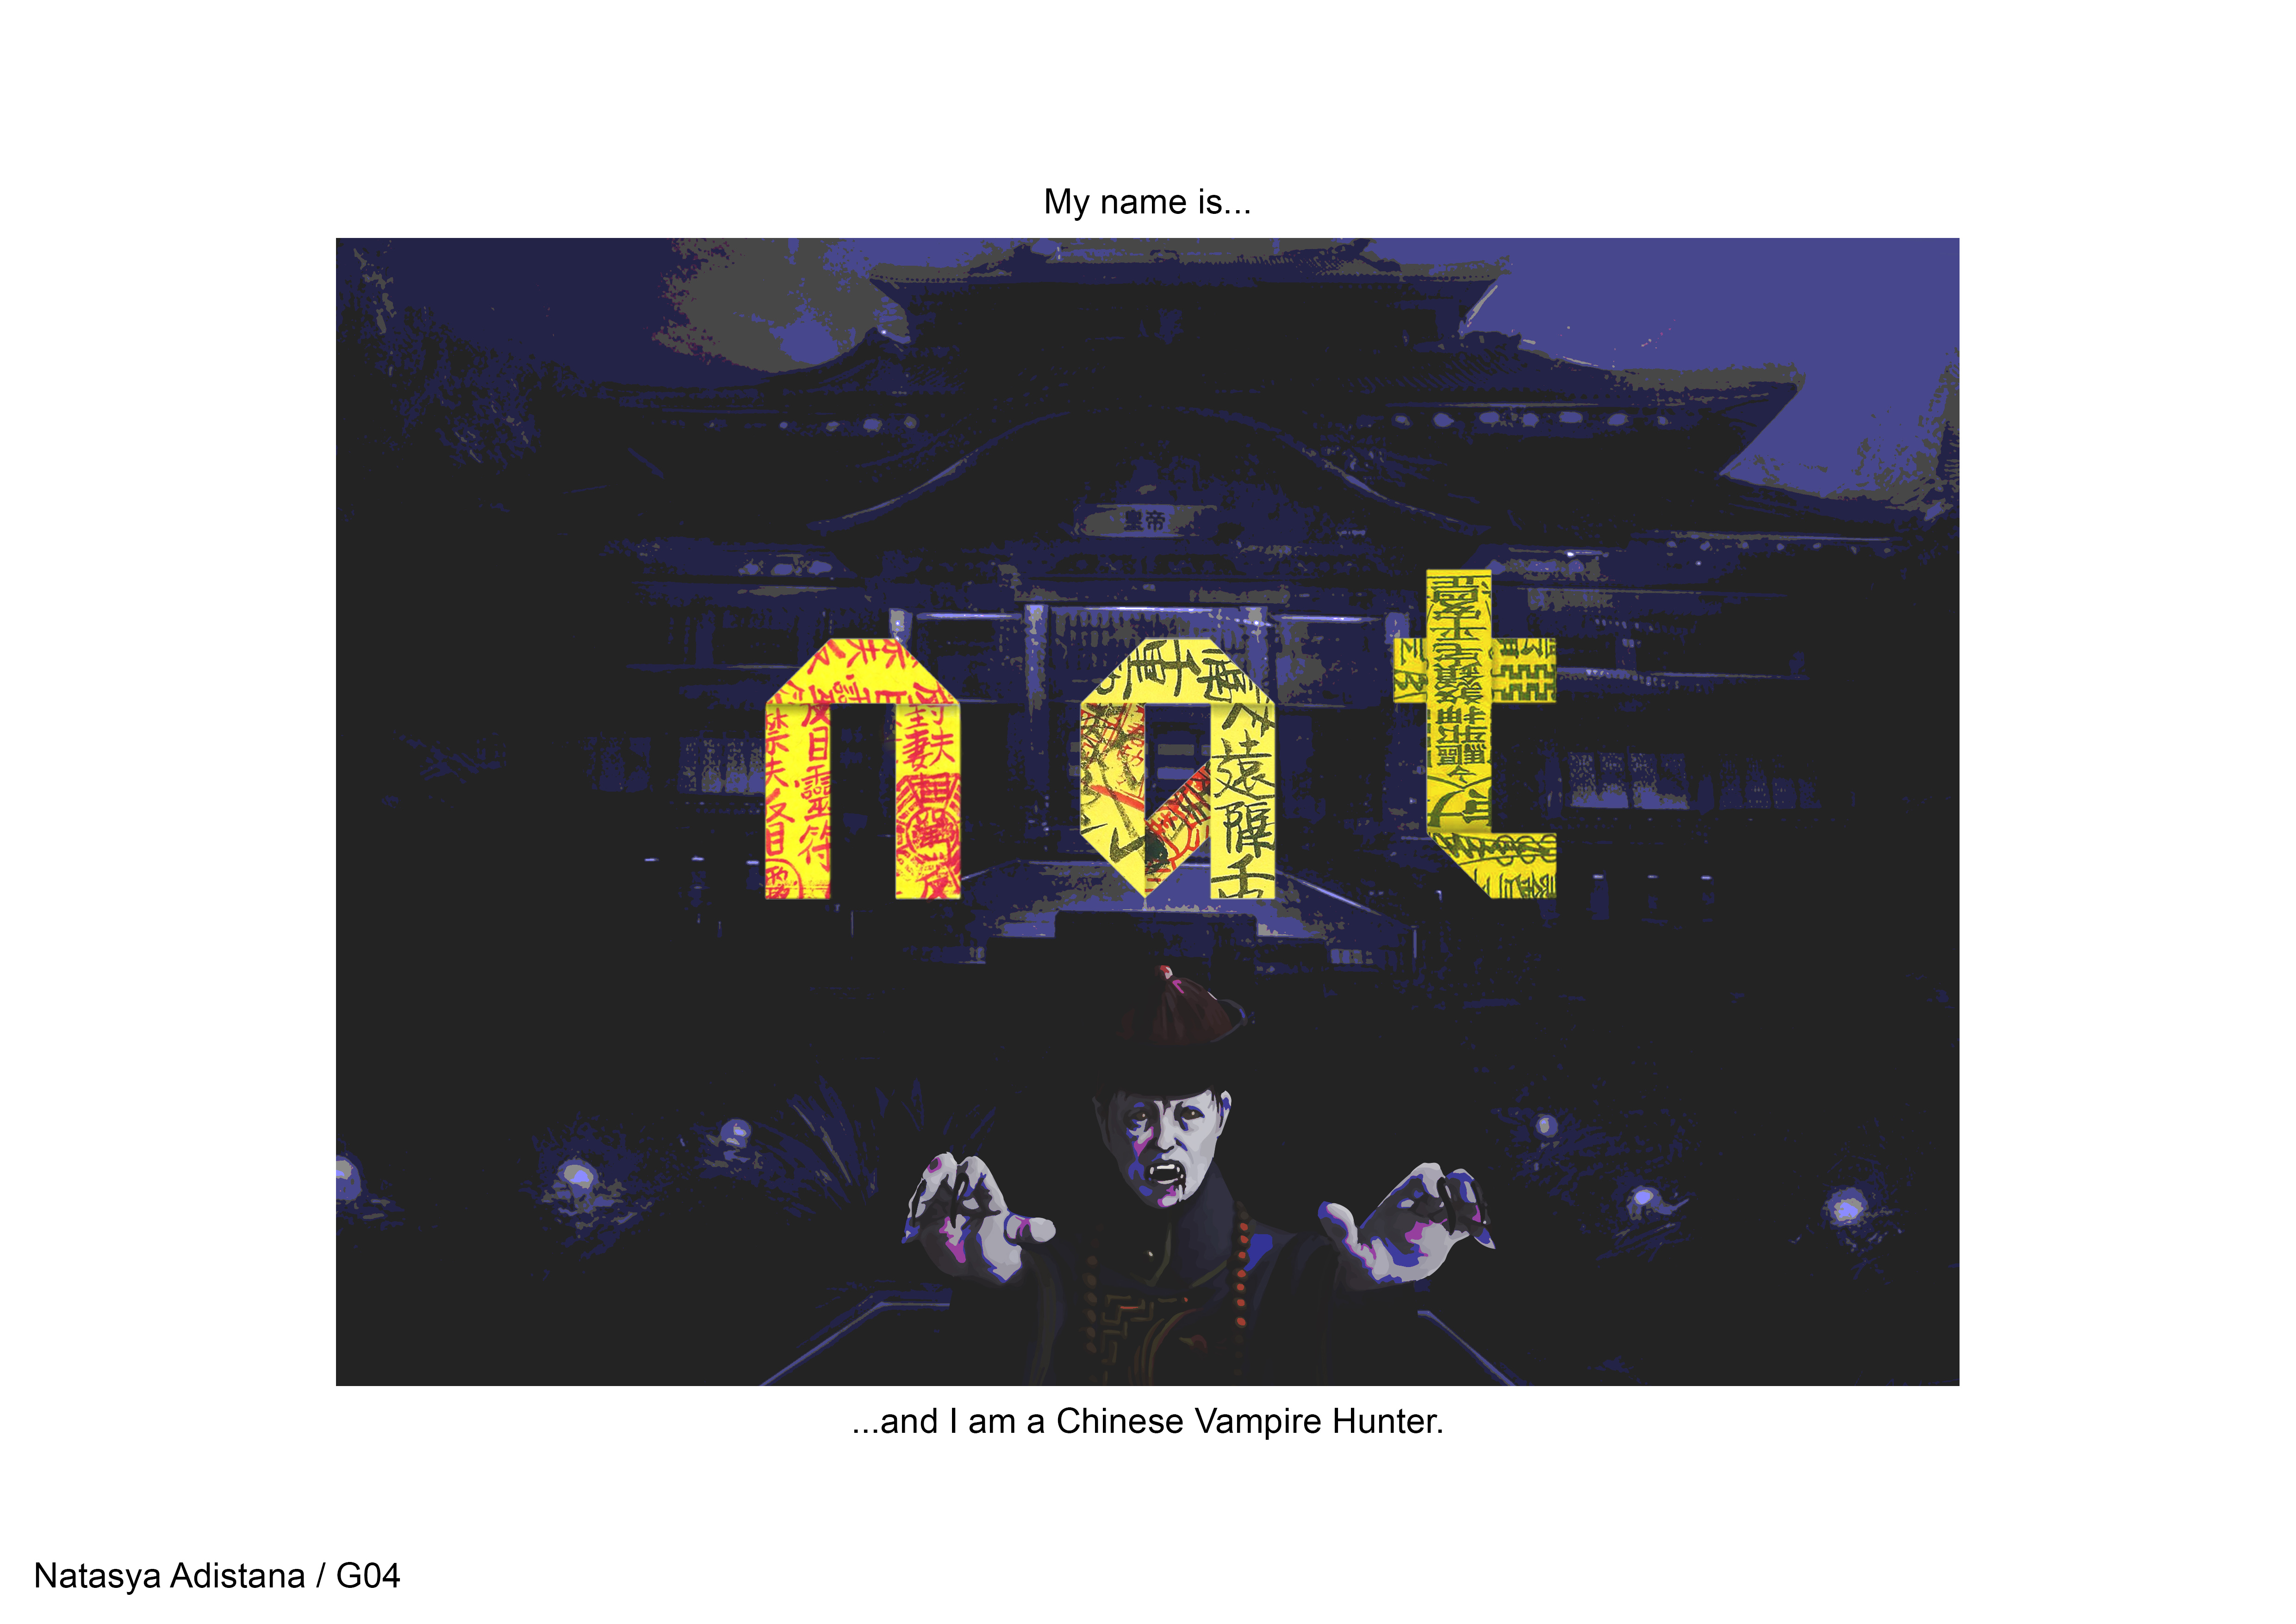
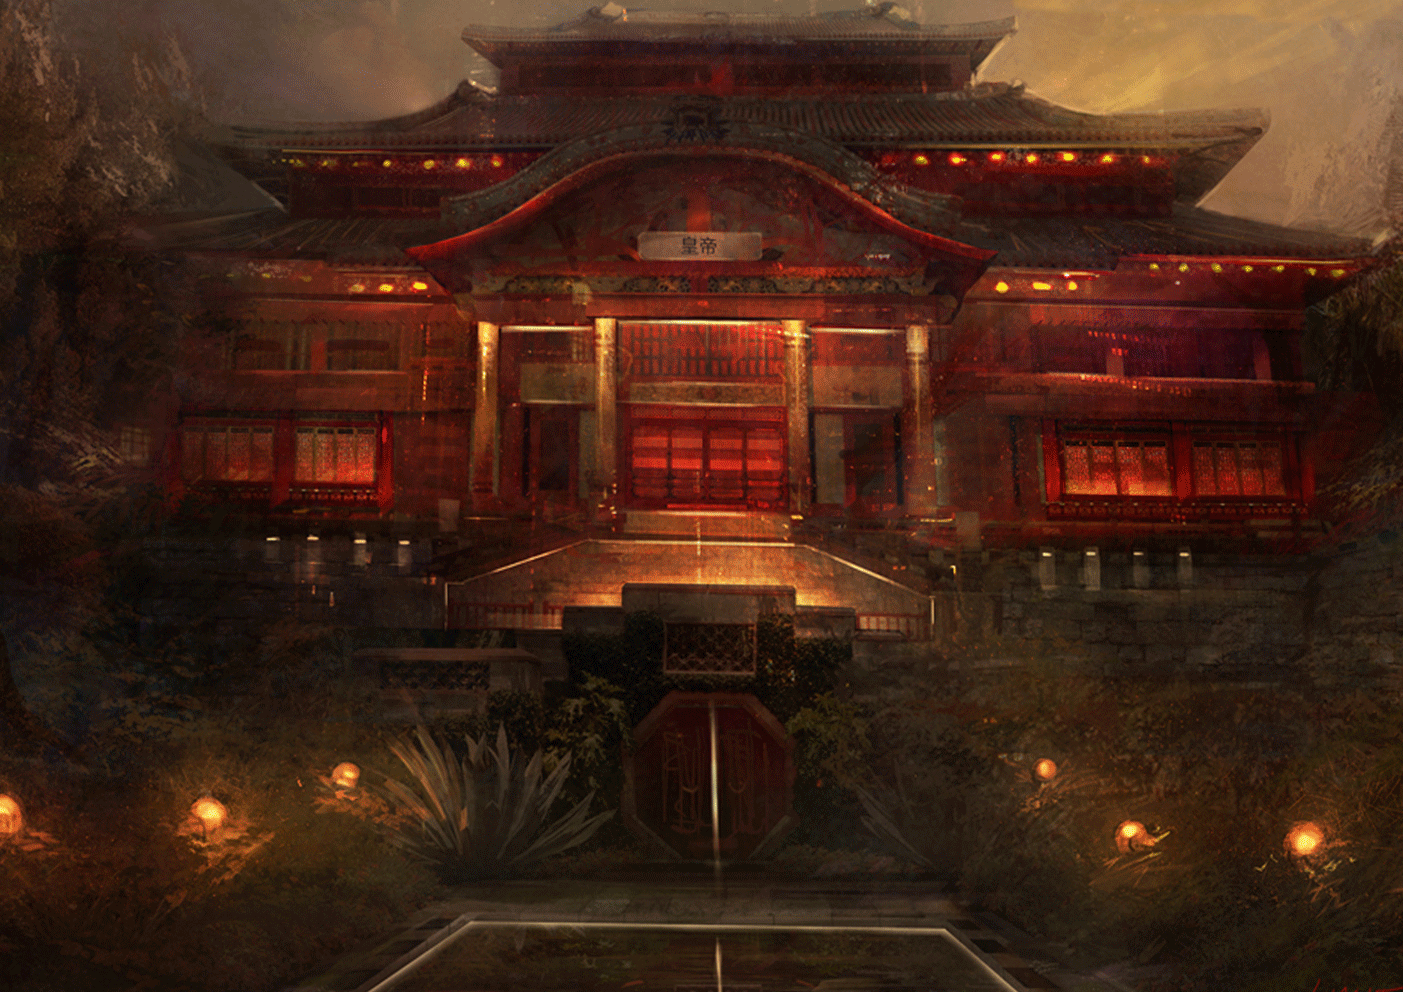
Chinese Vampire Hunter (initial idea was Ghost Hunter)
Ghost Hunter Brainstorm
Honestly, this is the most exciting ones. I researched ghost from different countries in Asia.
After consultation, I realized that we are supposed to take elements from the ghost hunter, not the ghost itself ._.
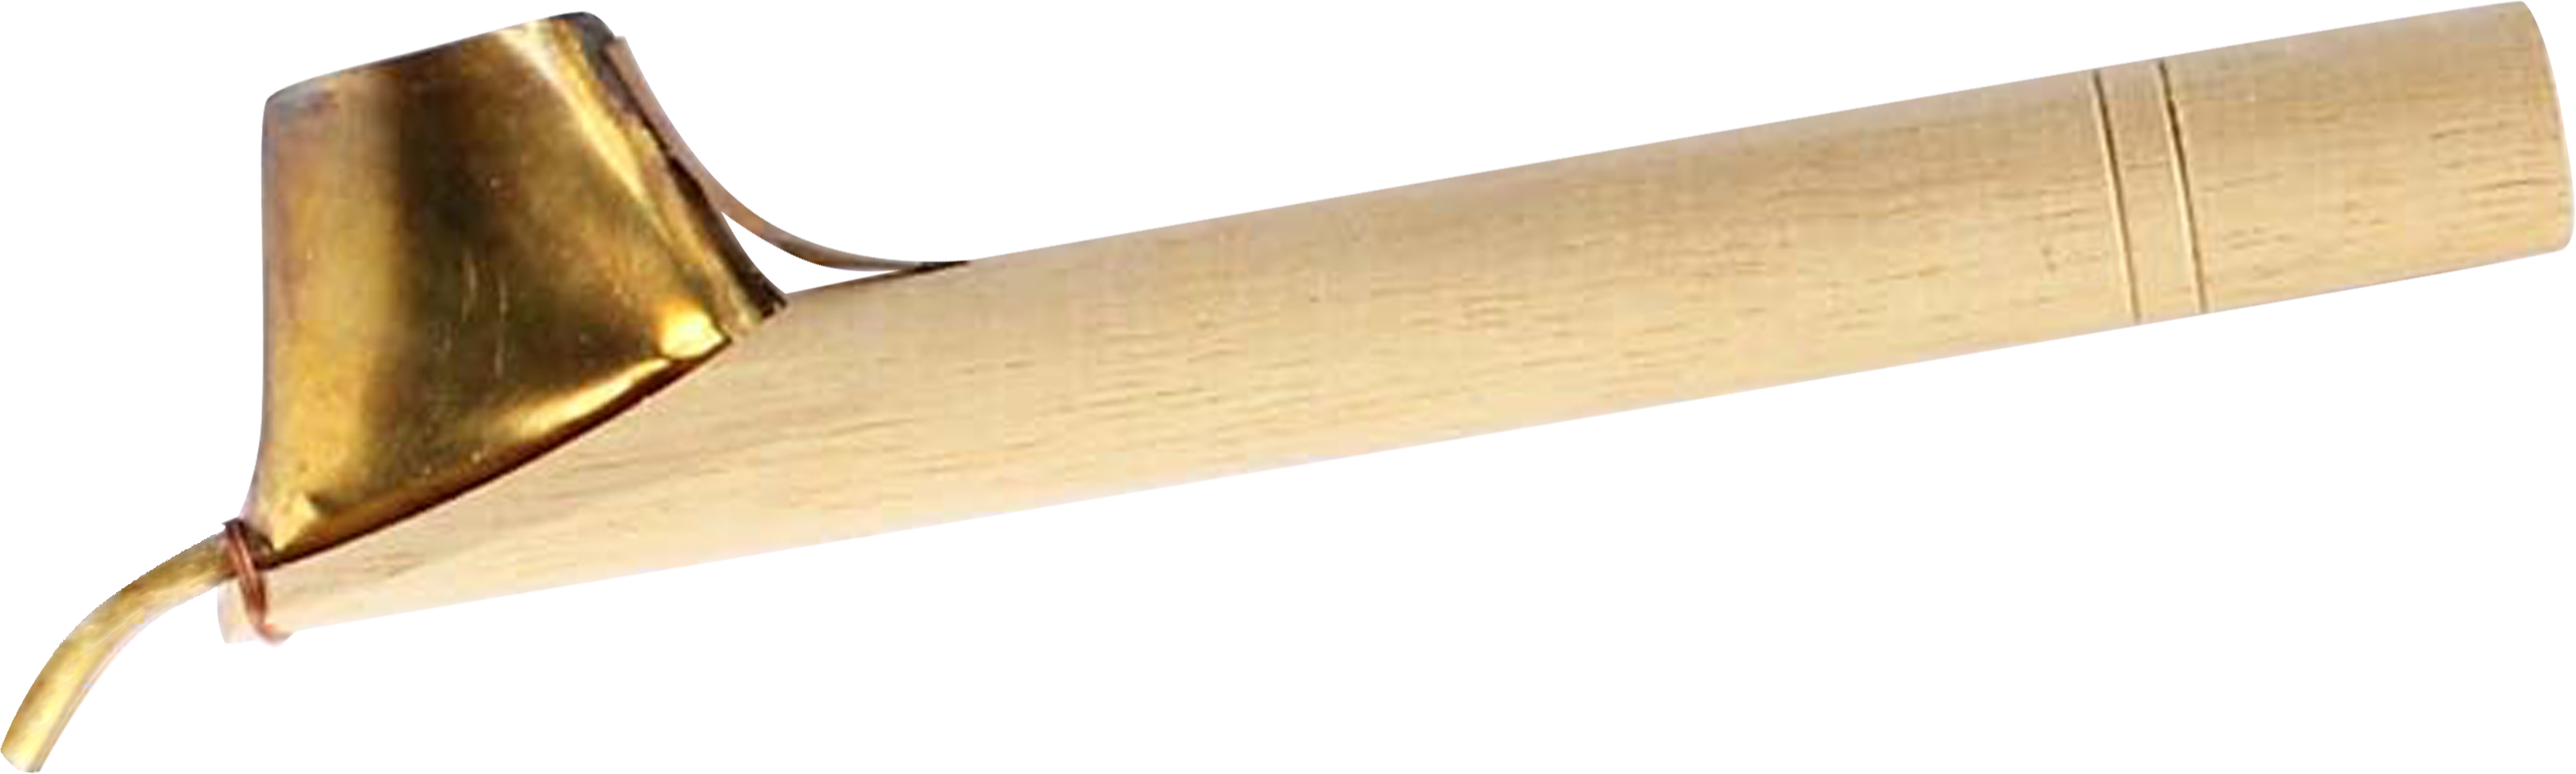
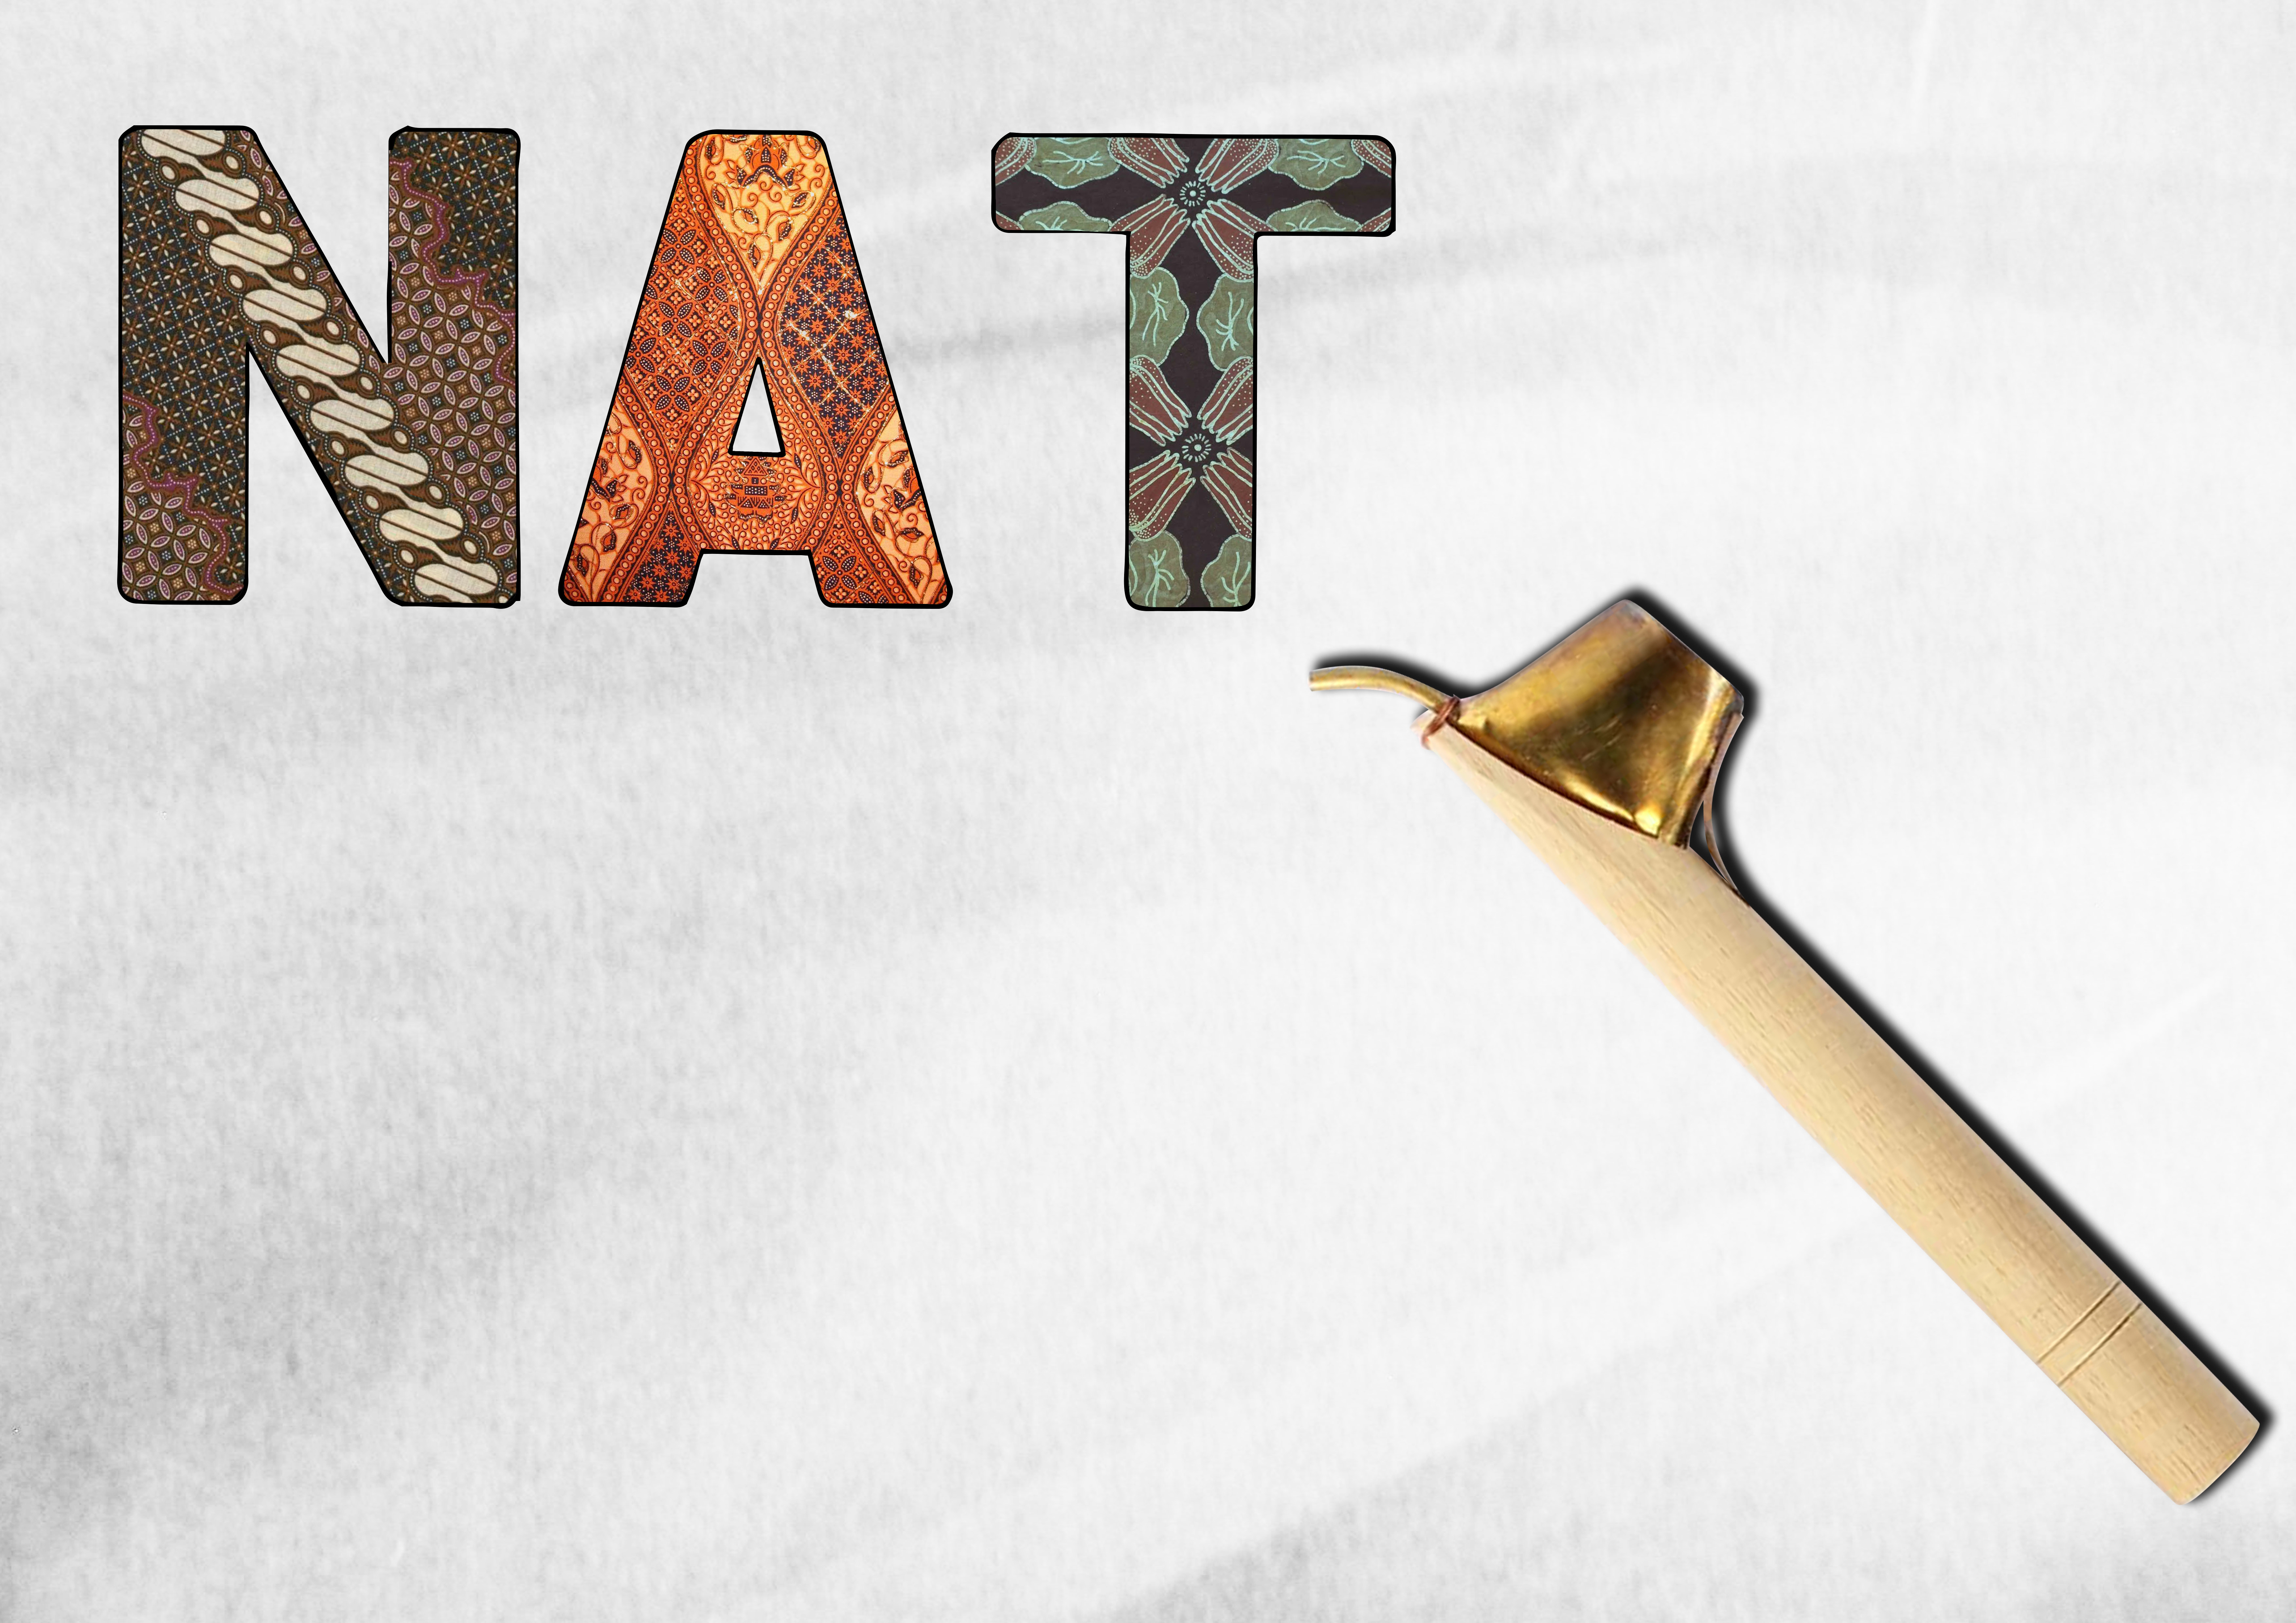
A significant amulet is the jiangshi paper to banish Chinese vampire. Hence I decided to go with it as the main component.
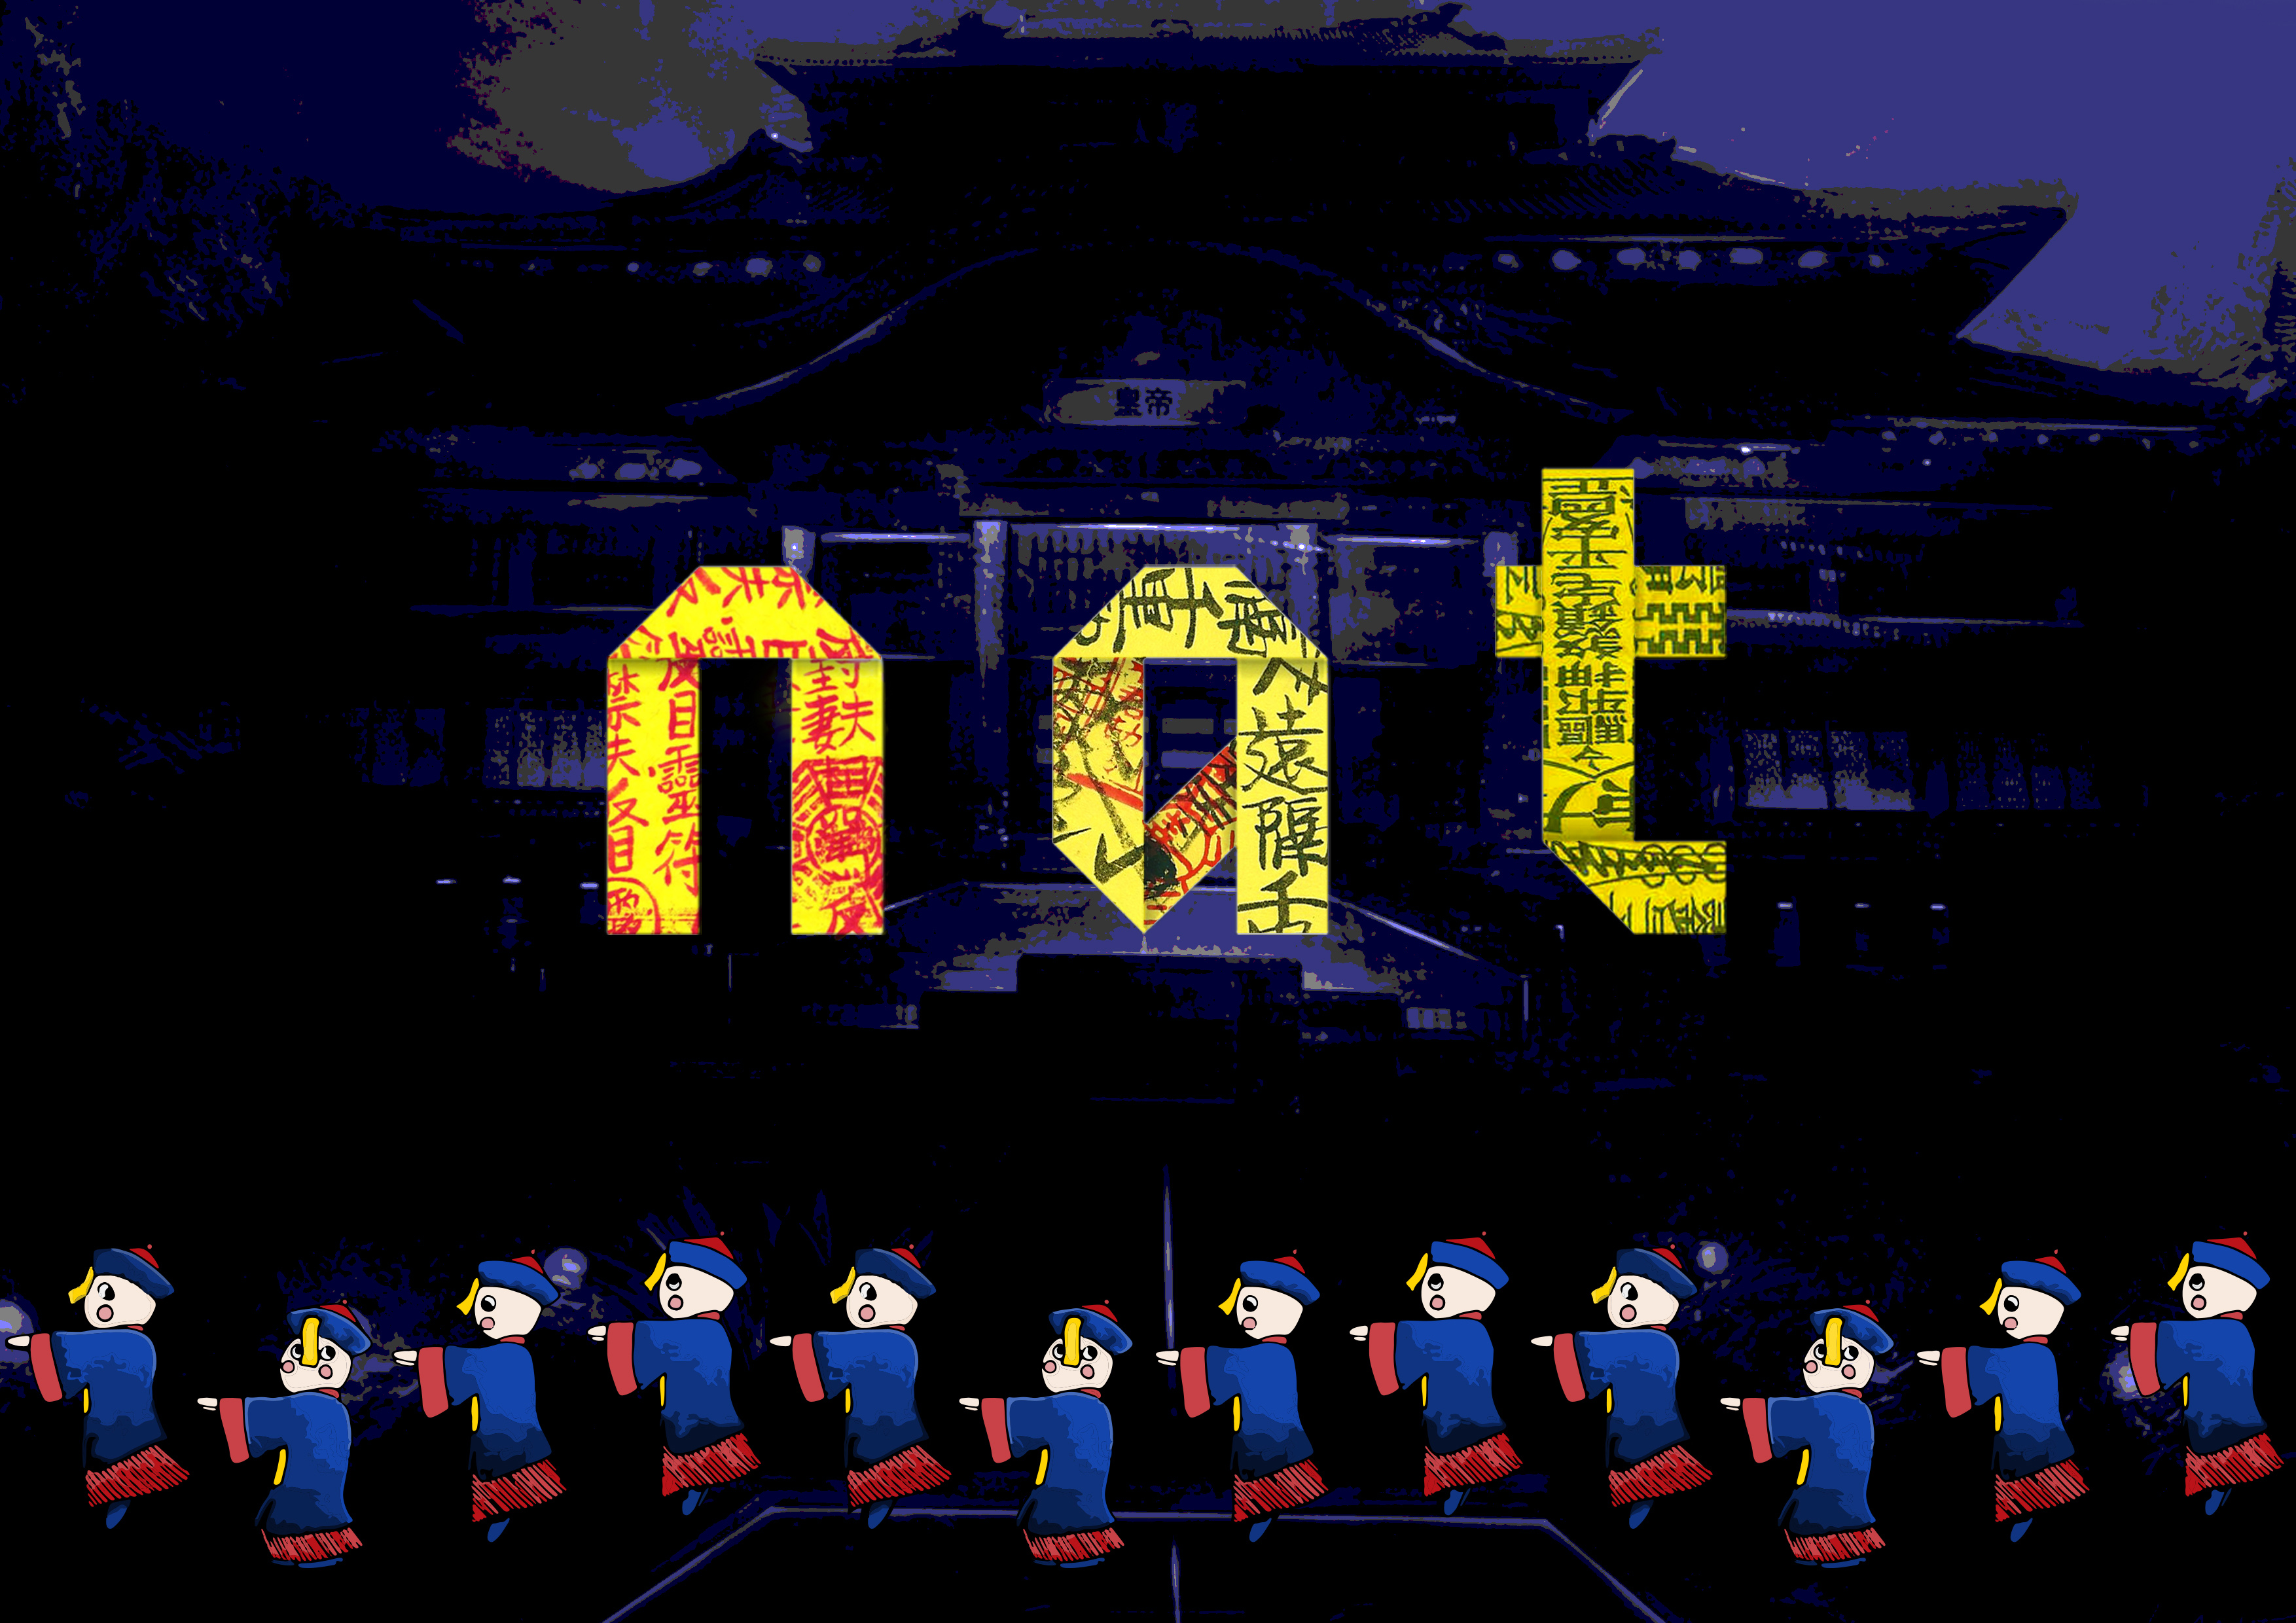
In order to make the message clearer I added the Chinese vampires in the composition. and decided that the job is more specific as Chinese vampire hunter.
Elements:
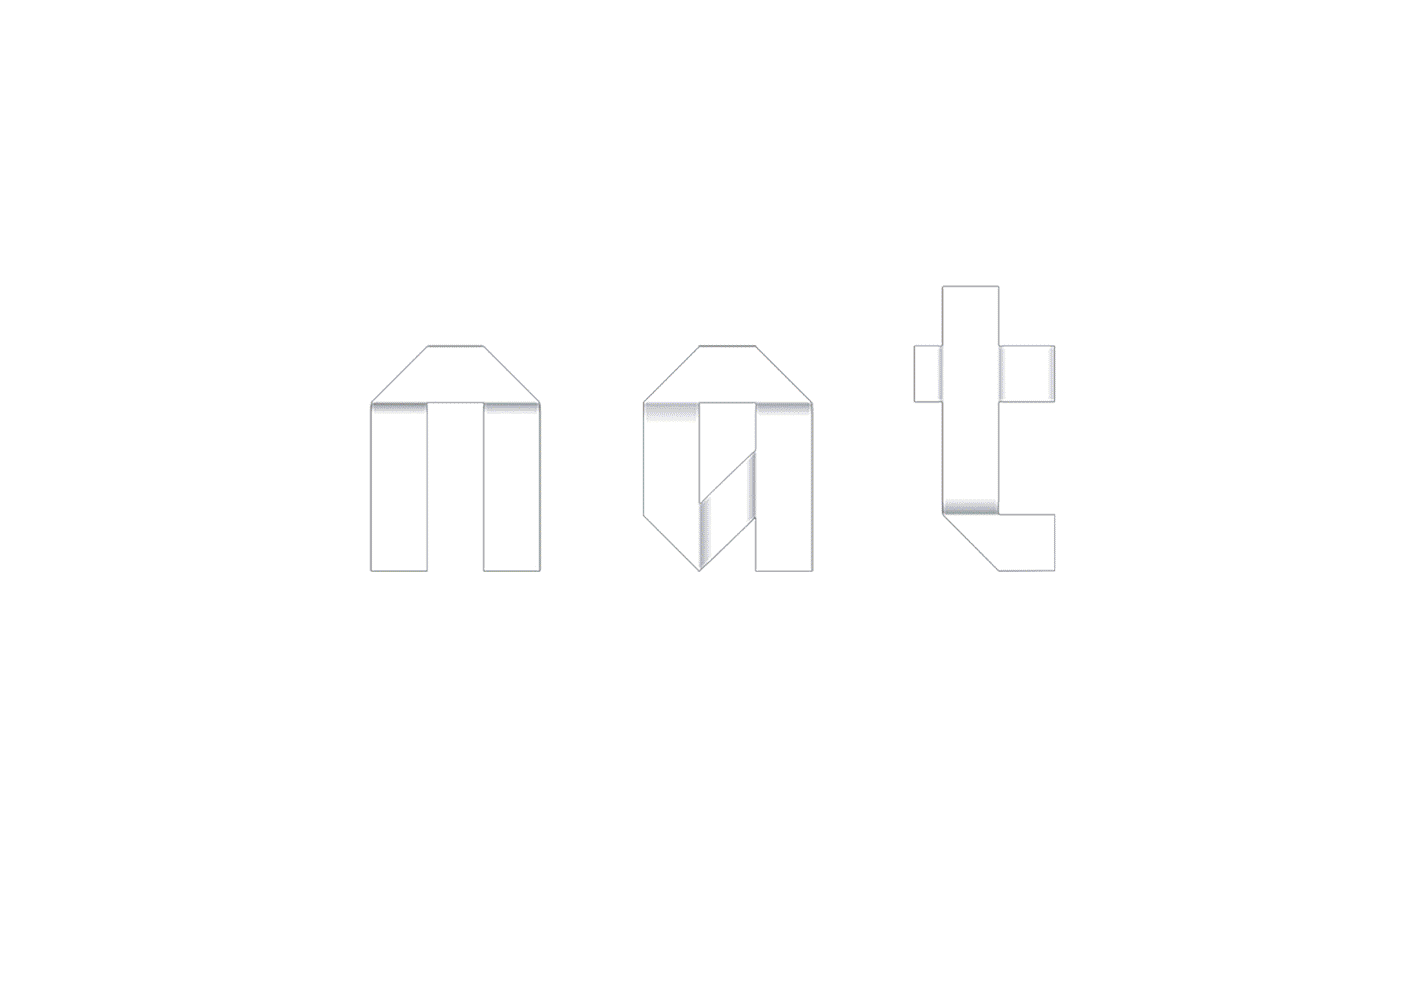
– Jiangshi paper folded in origami font (digitally made)
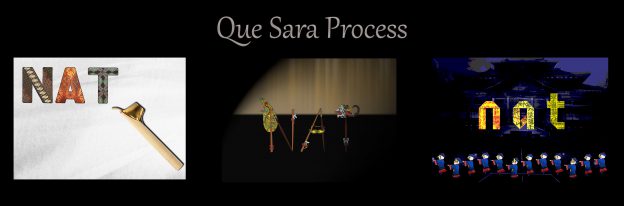
NAT process
– Chinese Vampire (sketched, digitally traced, digitally colored)
Vampire process
– Scary haunted Chinese house (digitally edited)
Background process
Here is the first composition:
Chinese vampire hunter first composition
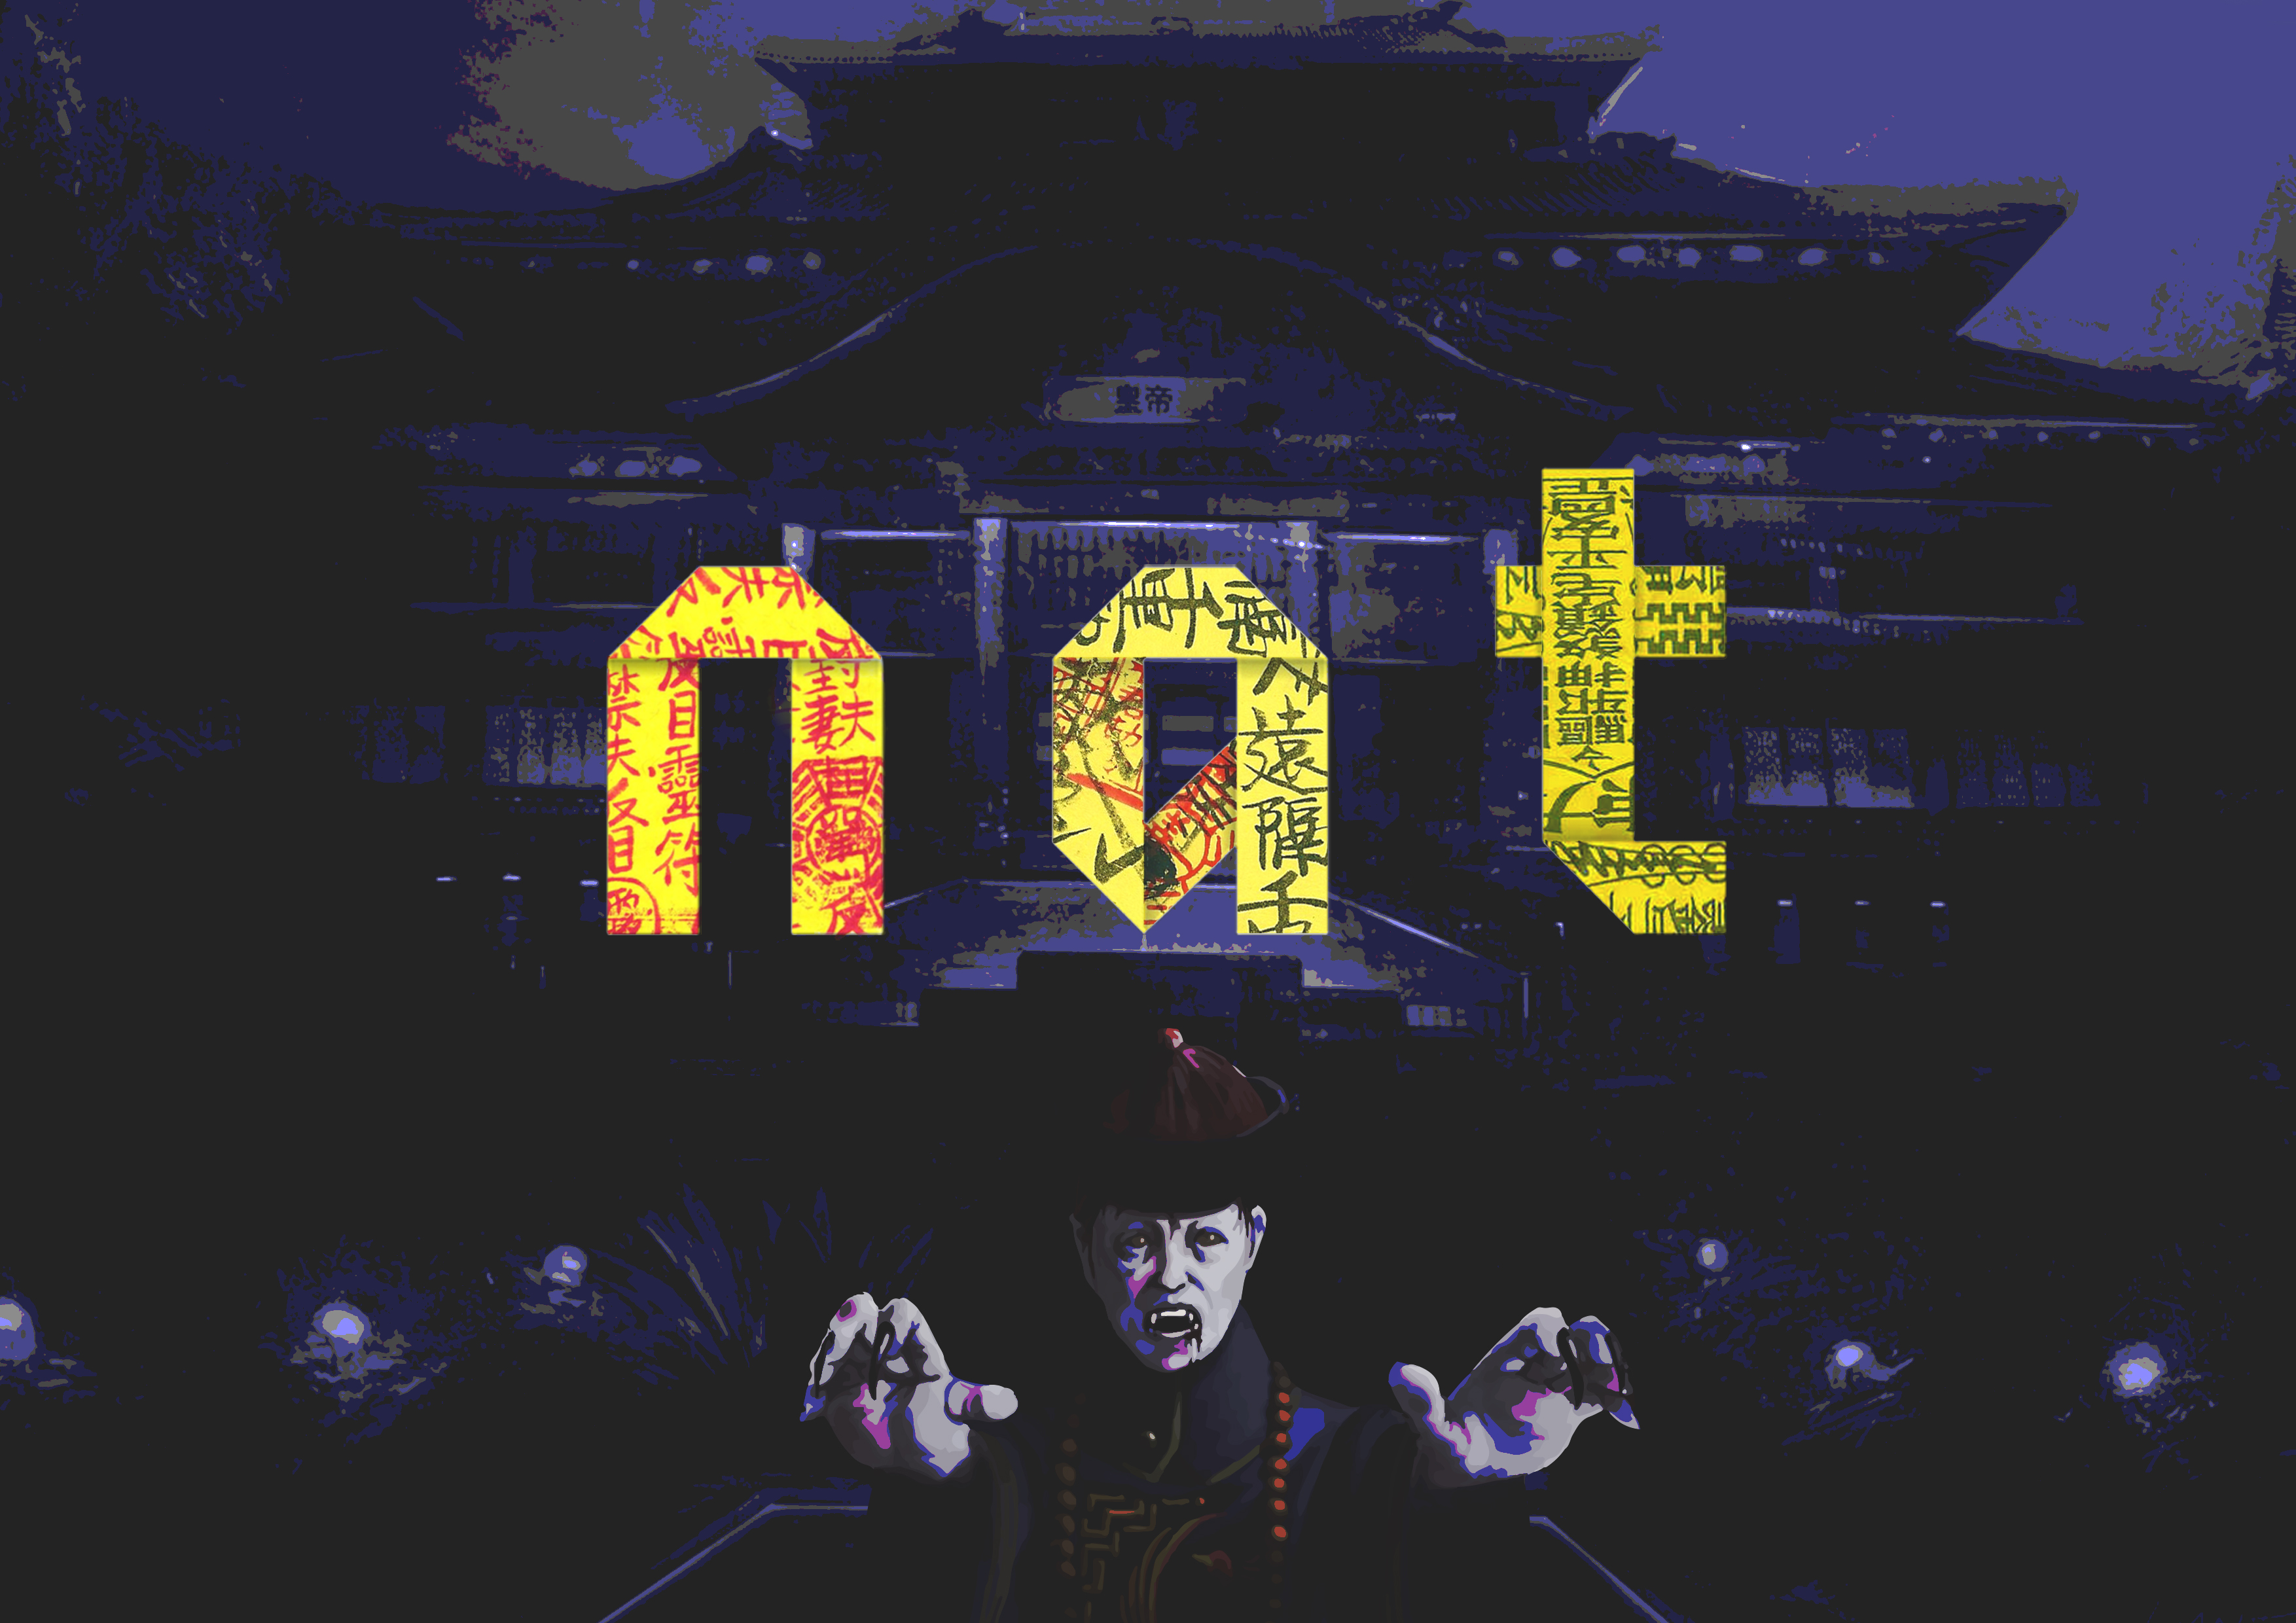
However I realized that the vampires are too cute, lively and colorful for the composition, hence I decided to change the vampire into a more realistic and dull color one.
Chinese vampire hunter process
Chinese vampire hunter final
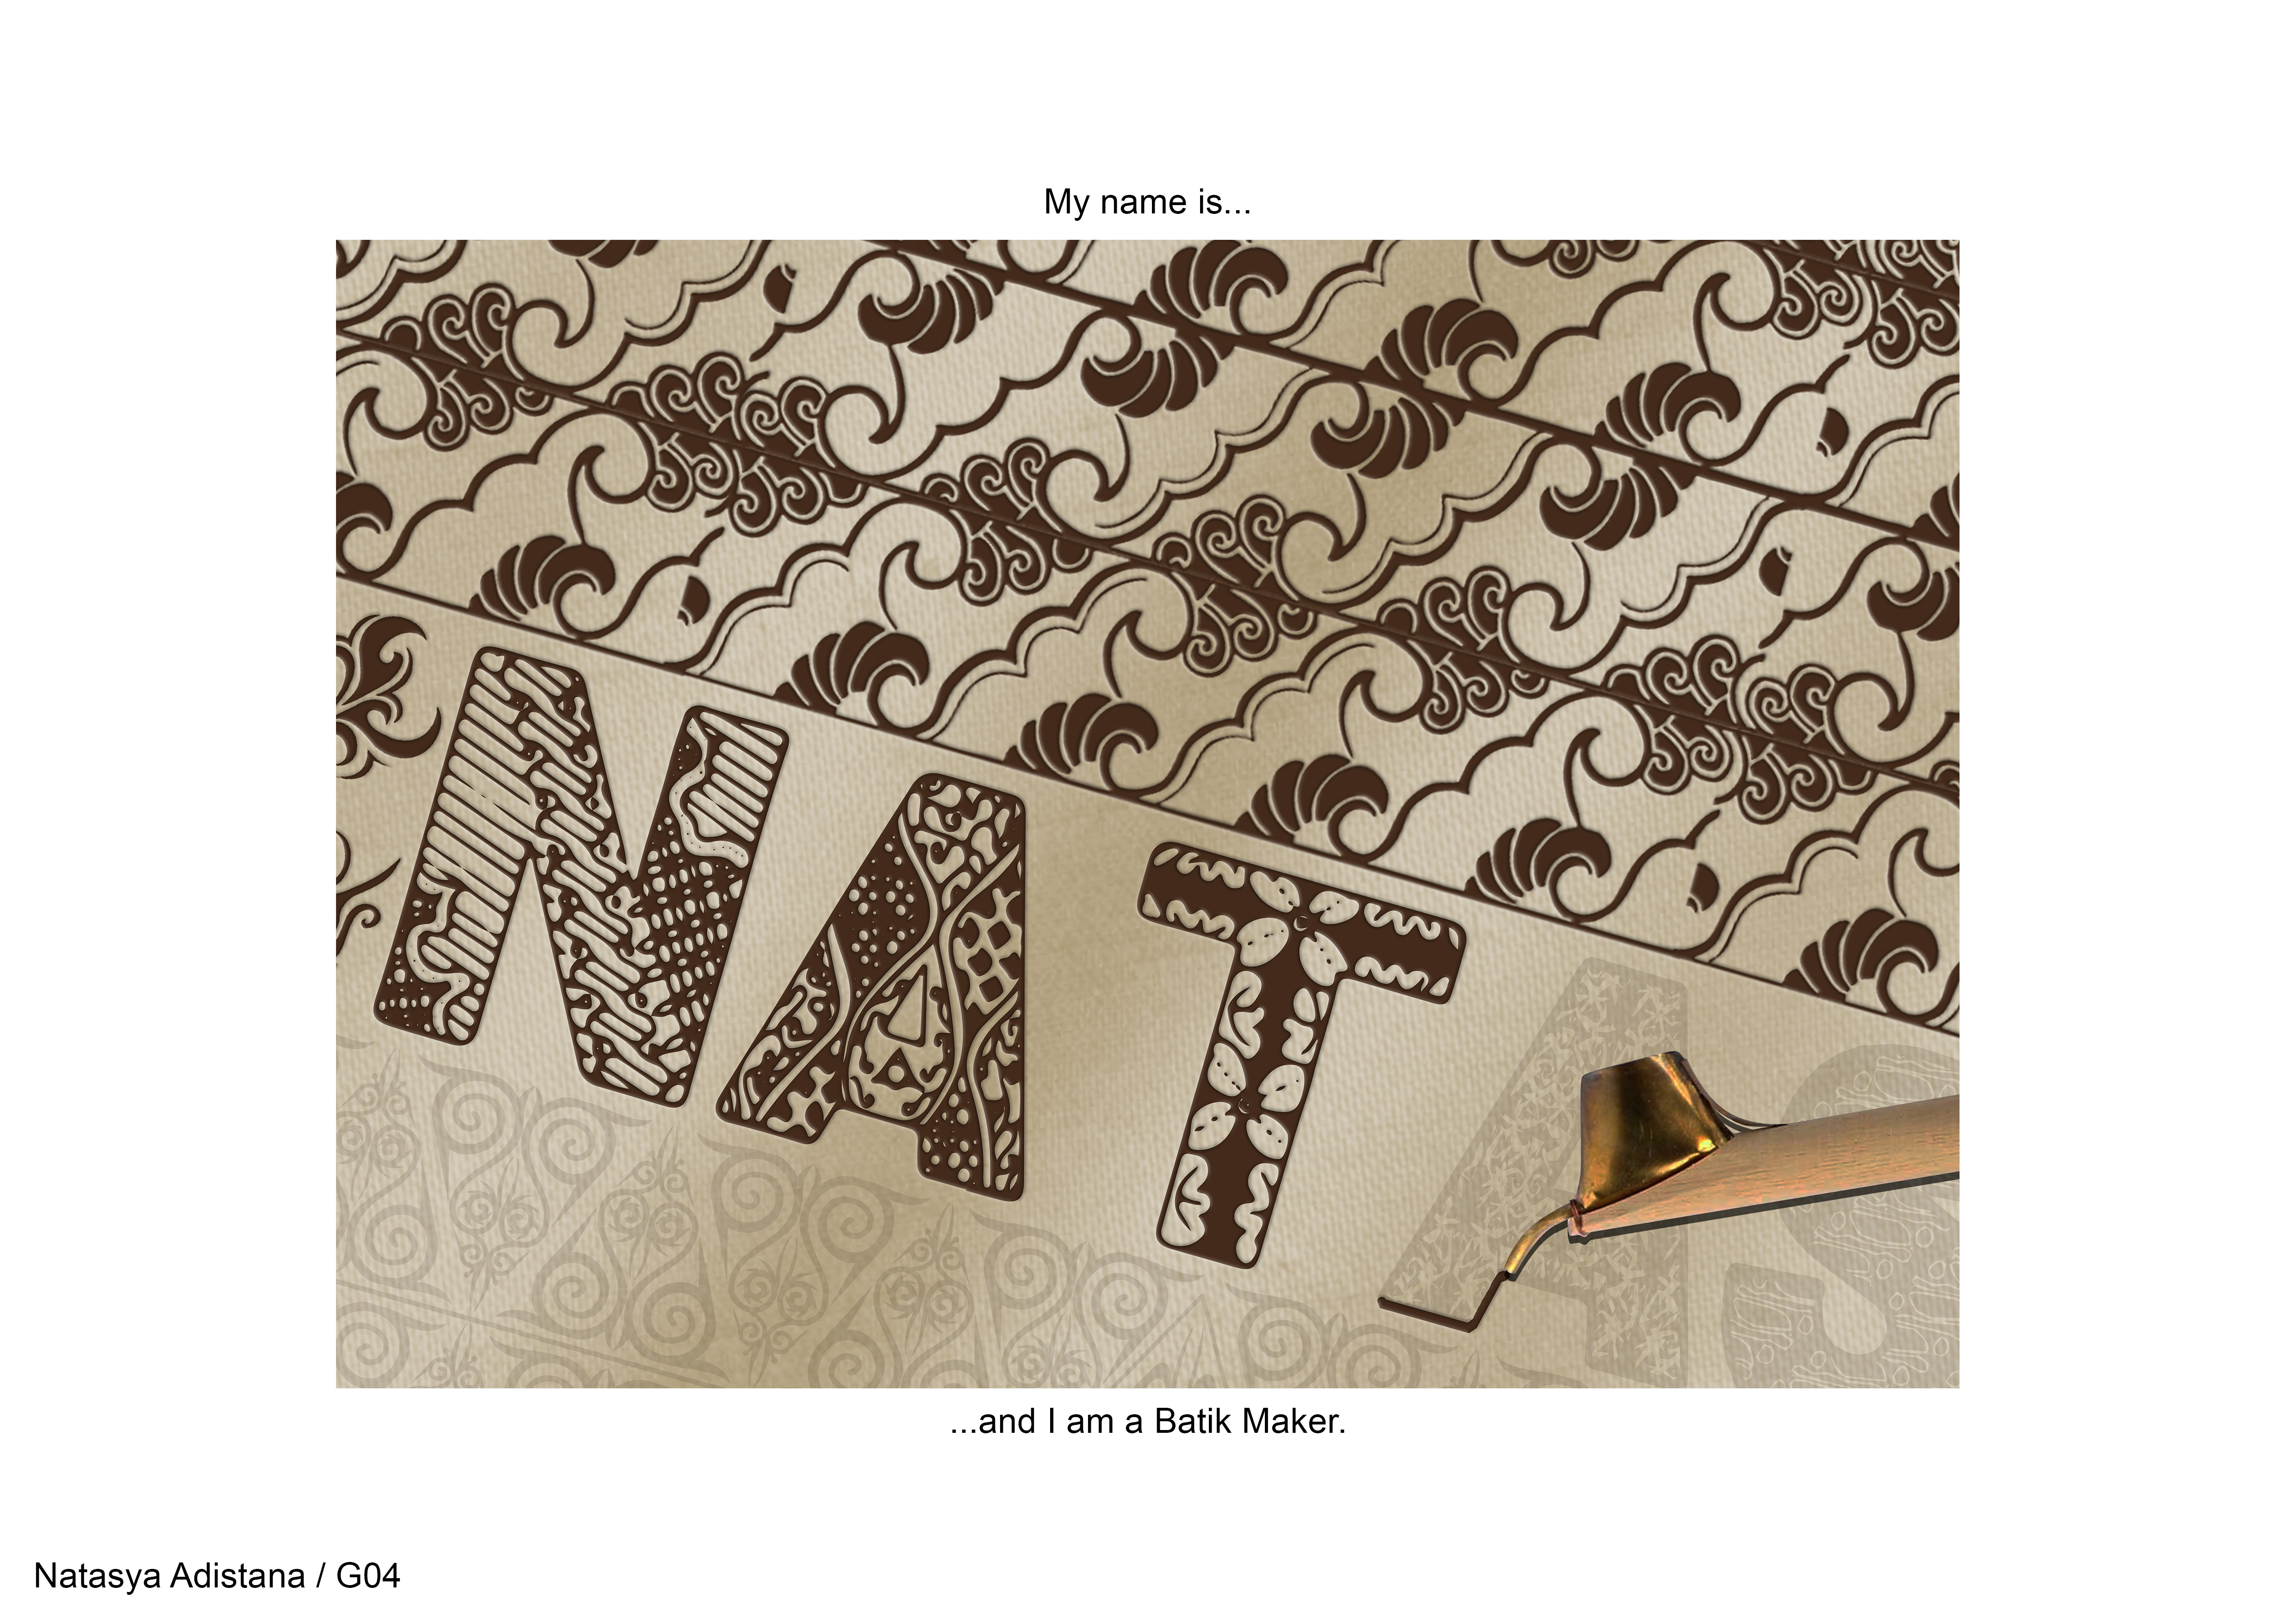
Batik Maker
It is mentioned that we should ‘cloth’ the fonts, and somehow I thought of Batik, Indonesian traditional cloth. I decided to use this idea and become a batik maker.
Batik brainstorm
I felt that the composition is to plain and not interesting. After more time trying out, adjusting the angles, layer effects, background etc. I finally found a better and final composition.
Batik maker process
Batik maker final
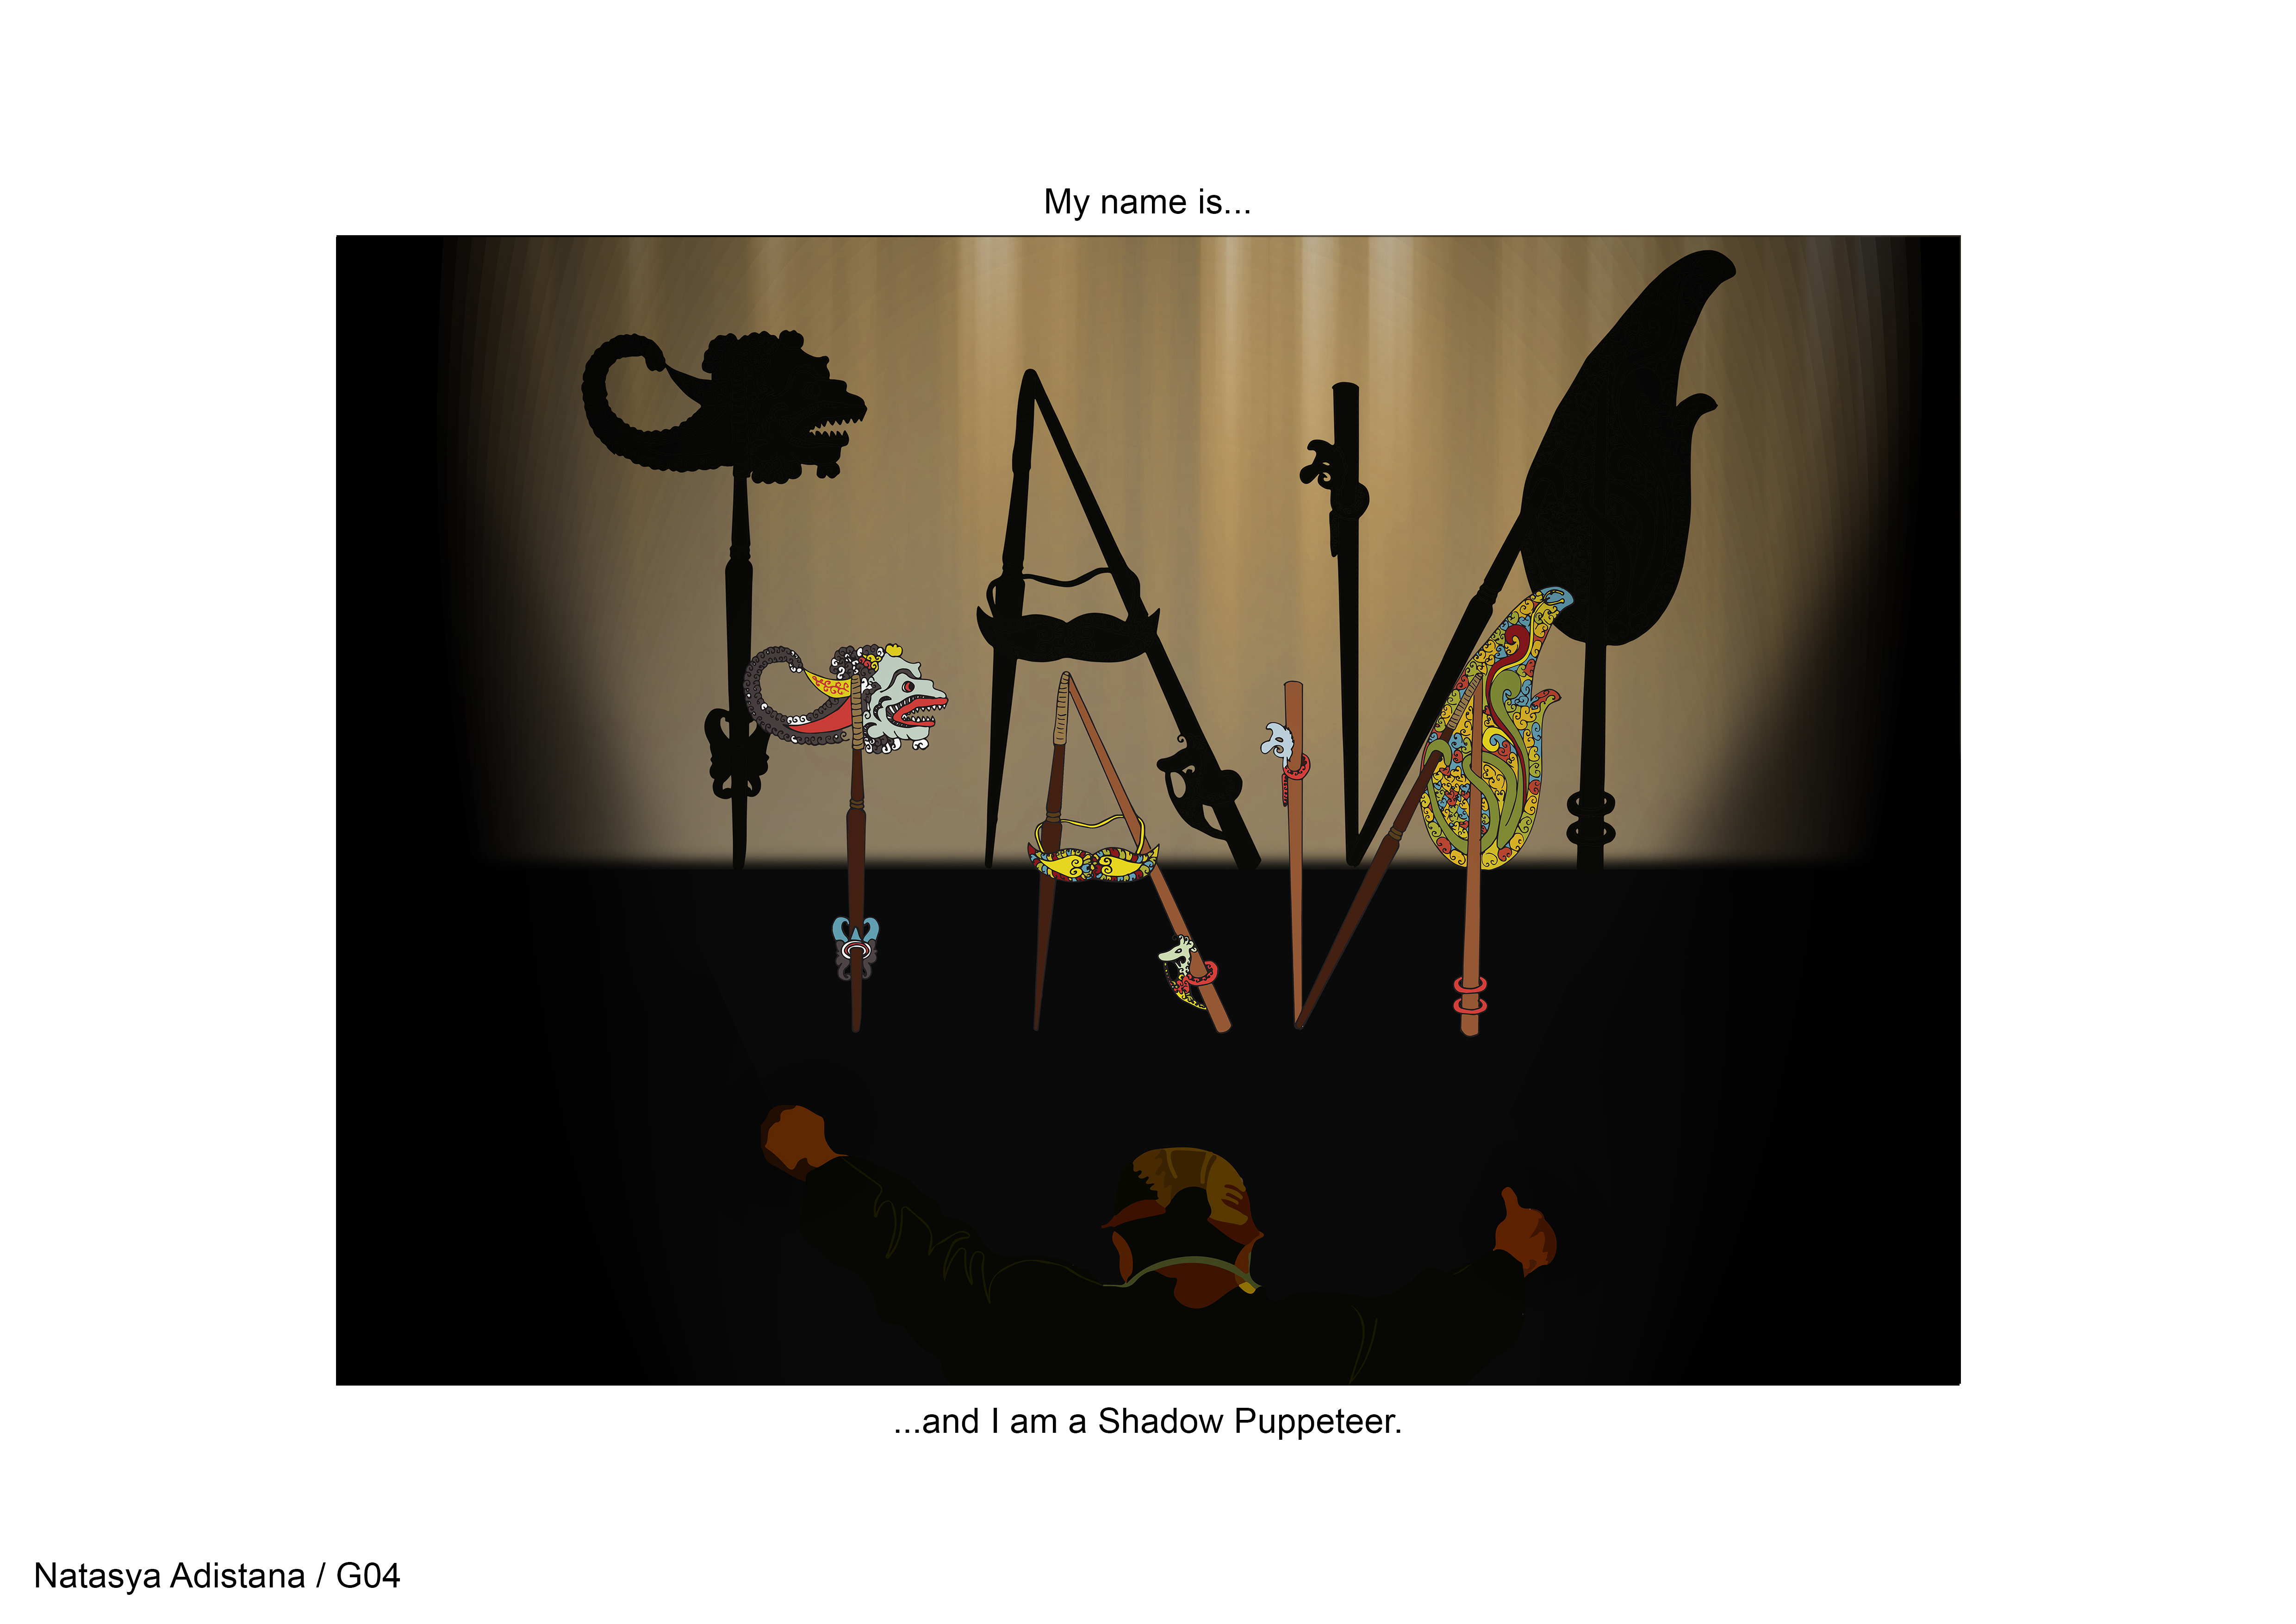
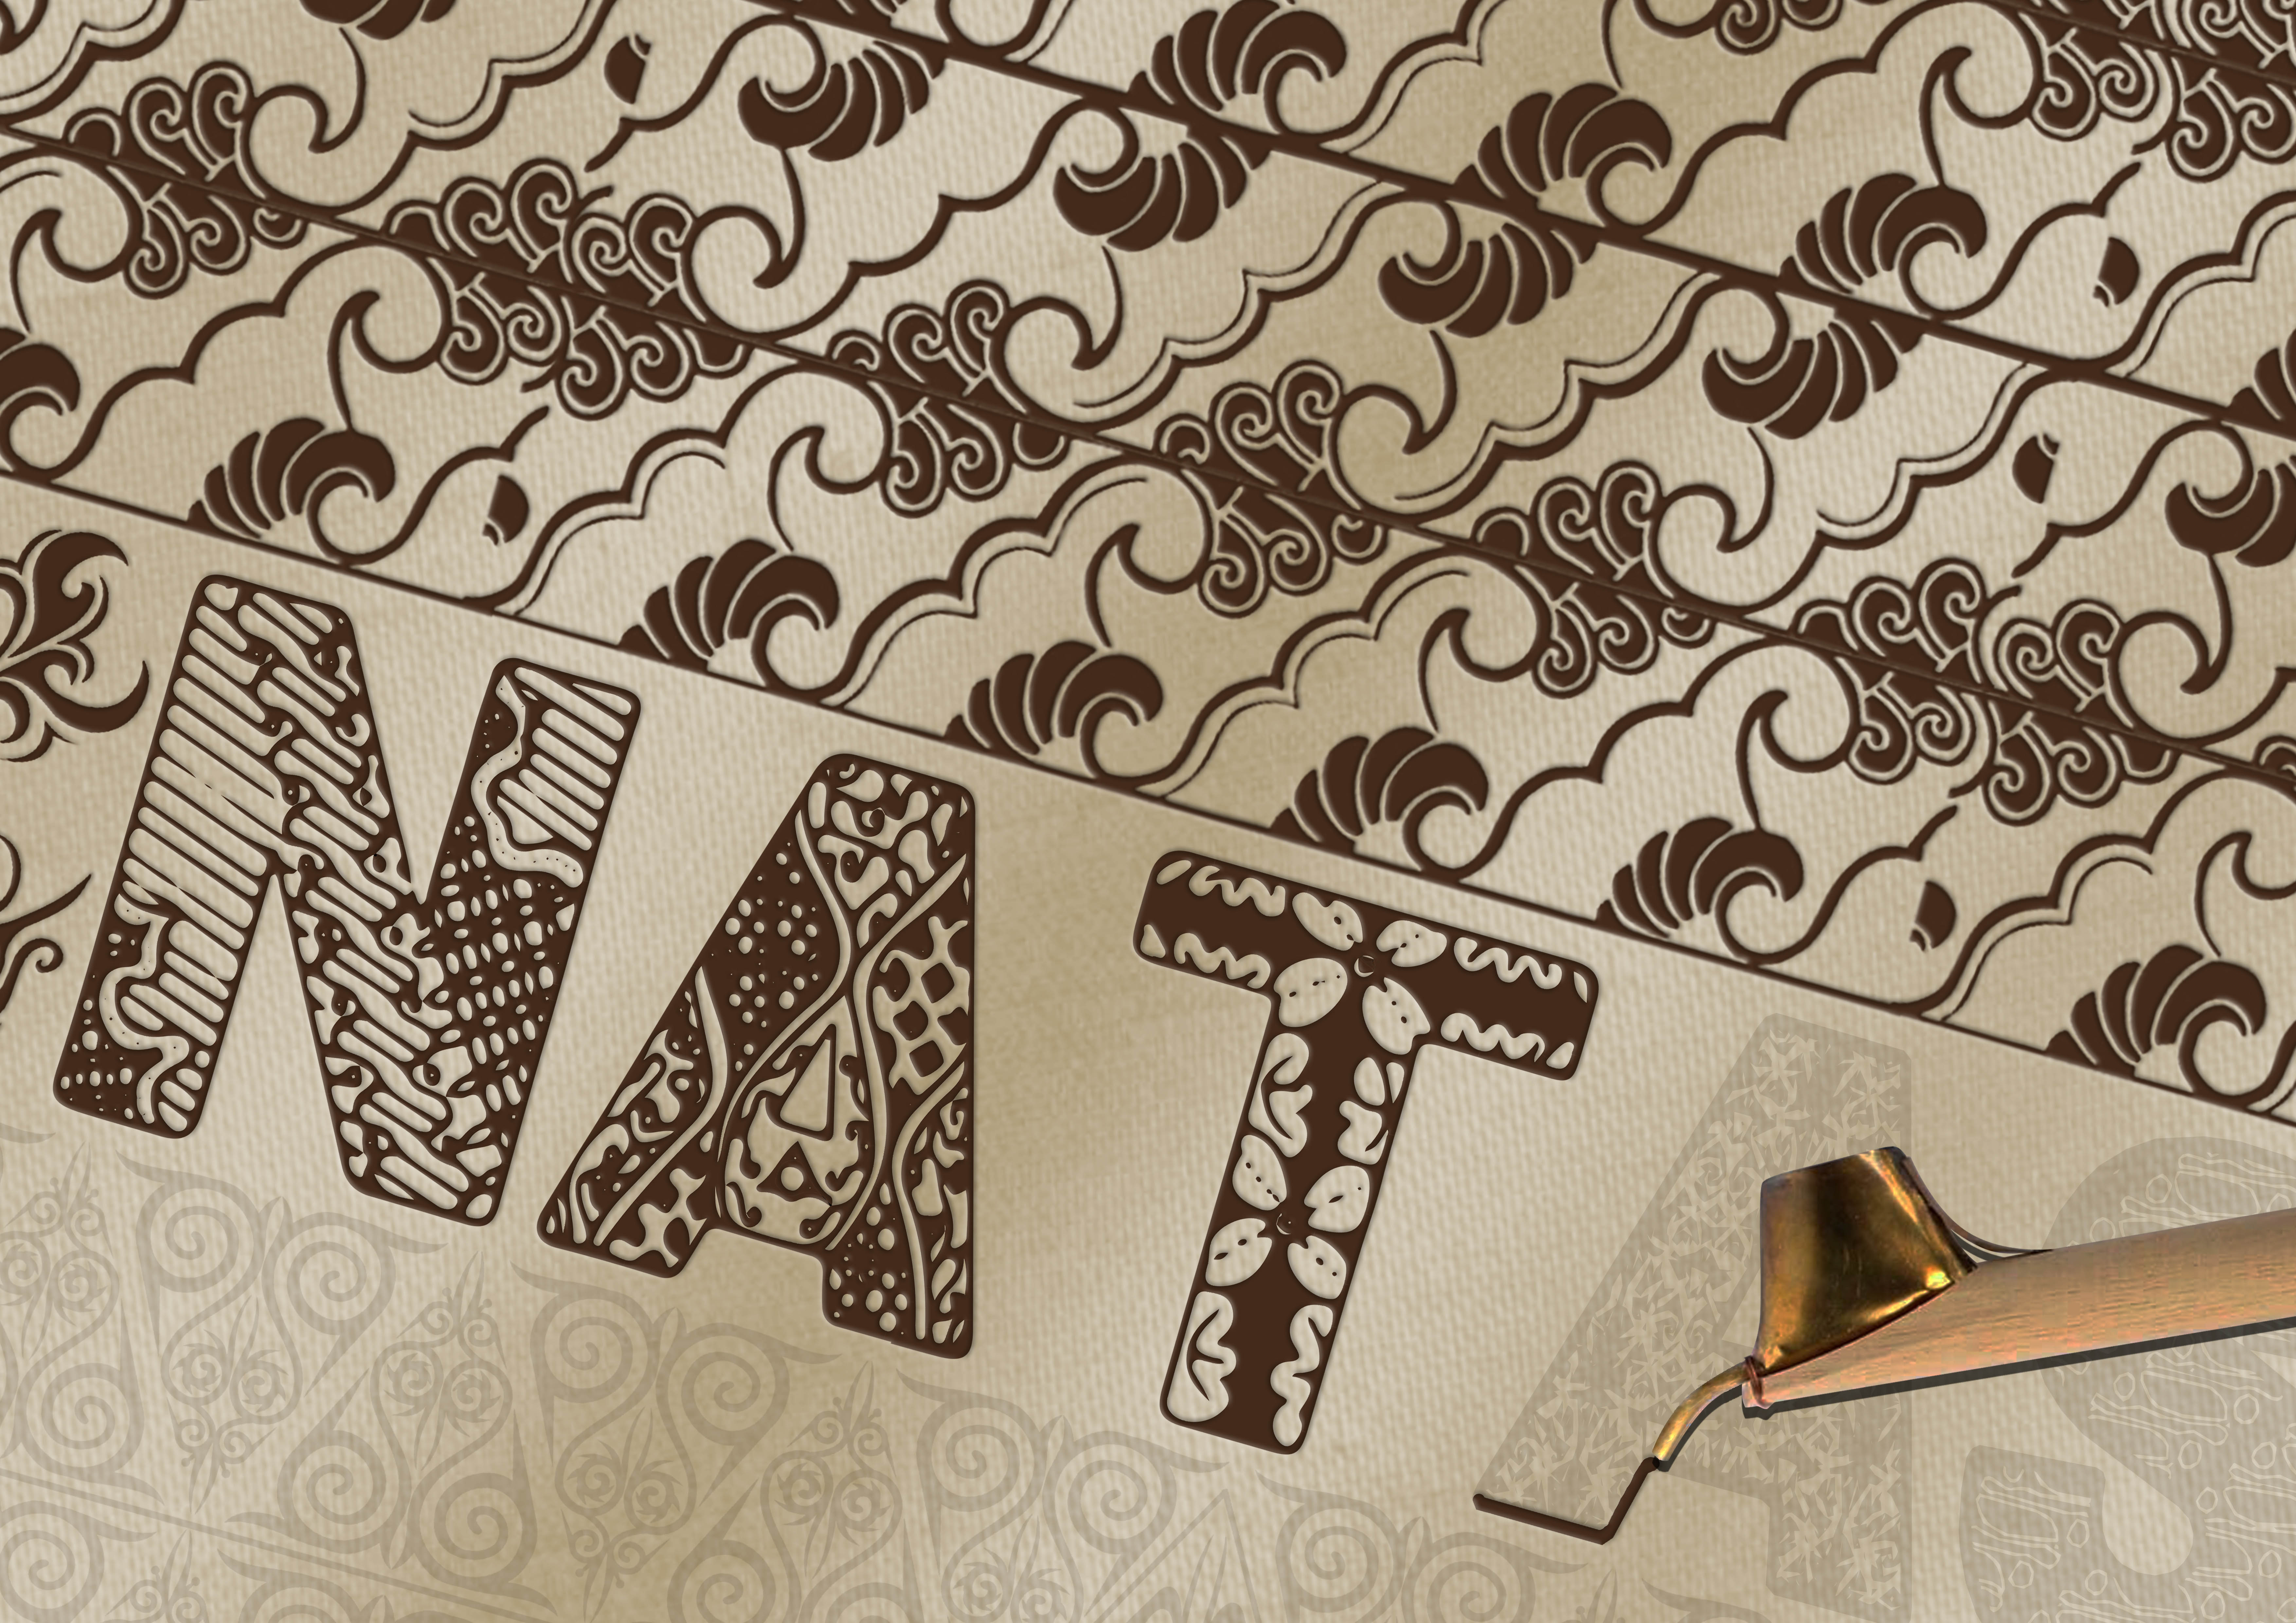
Shadow Puppeteer
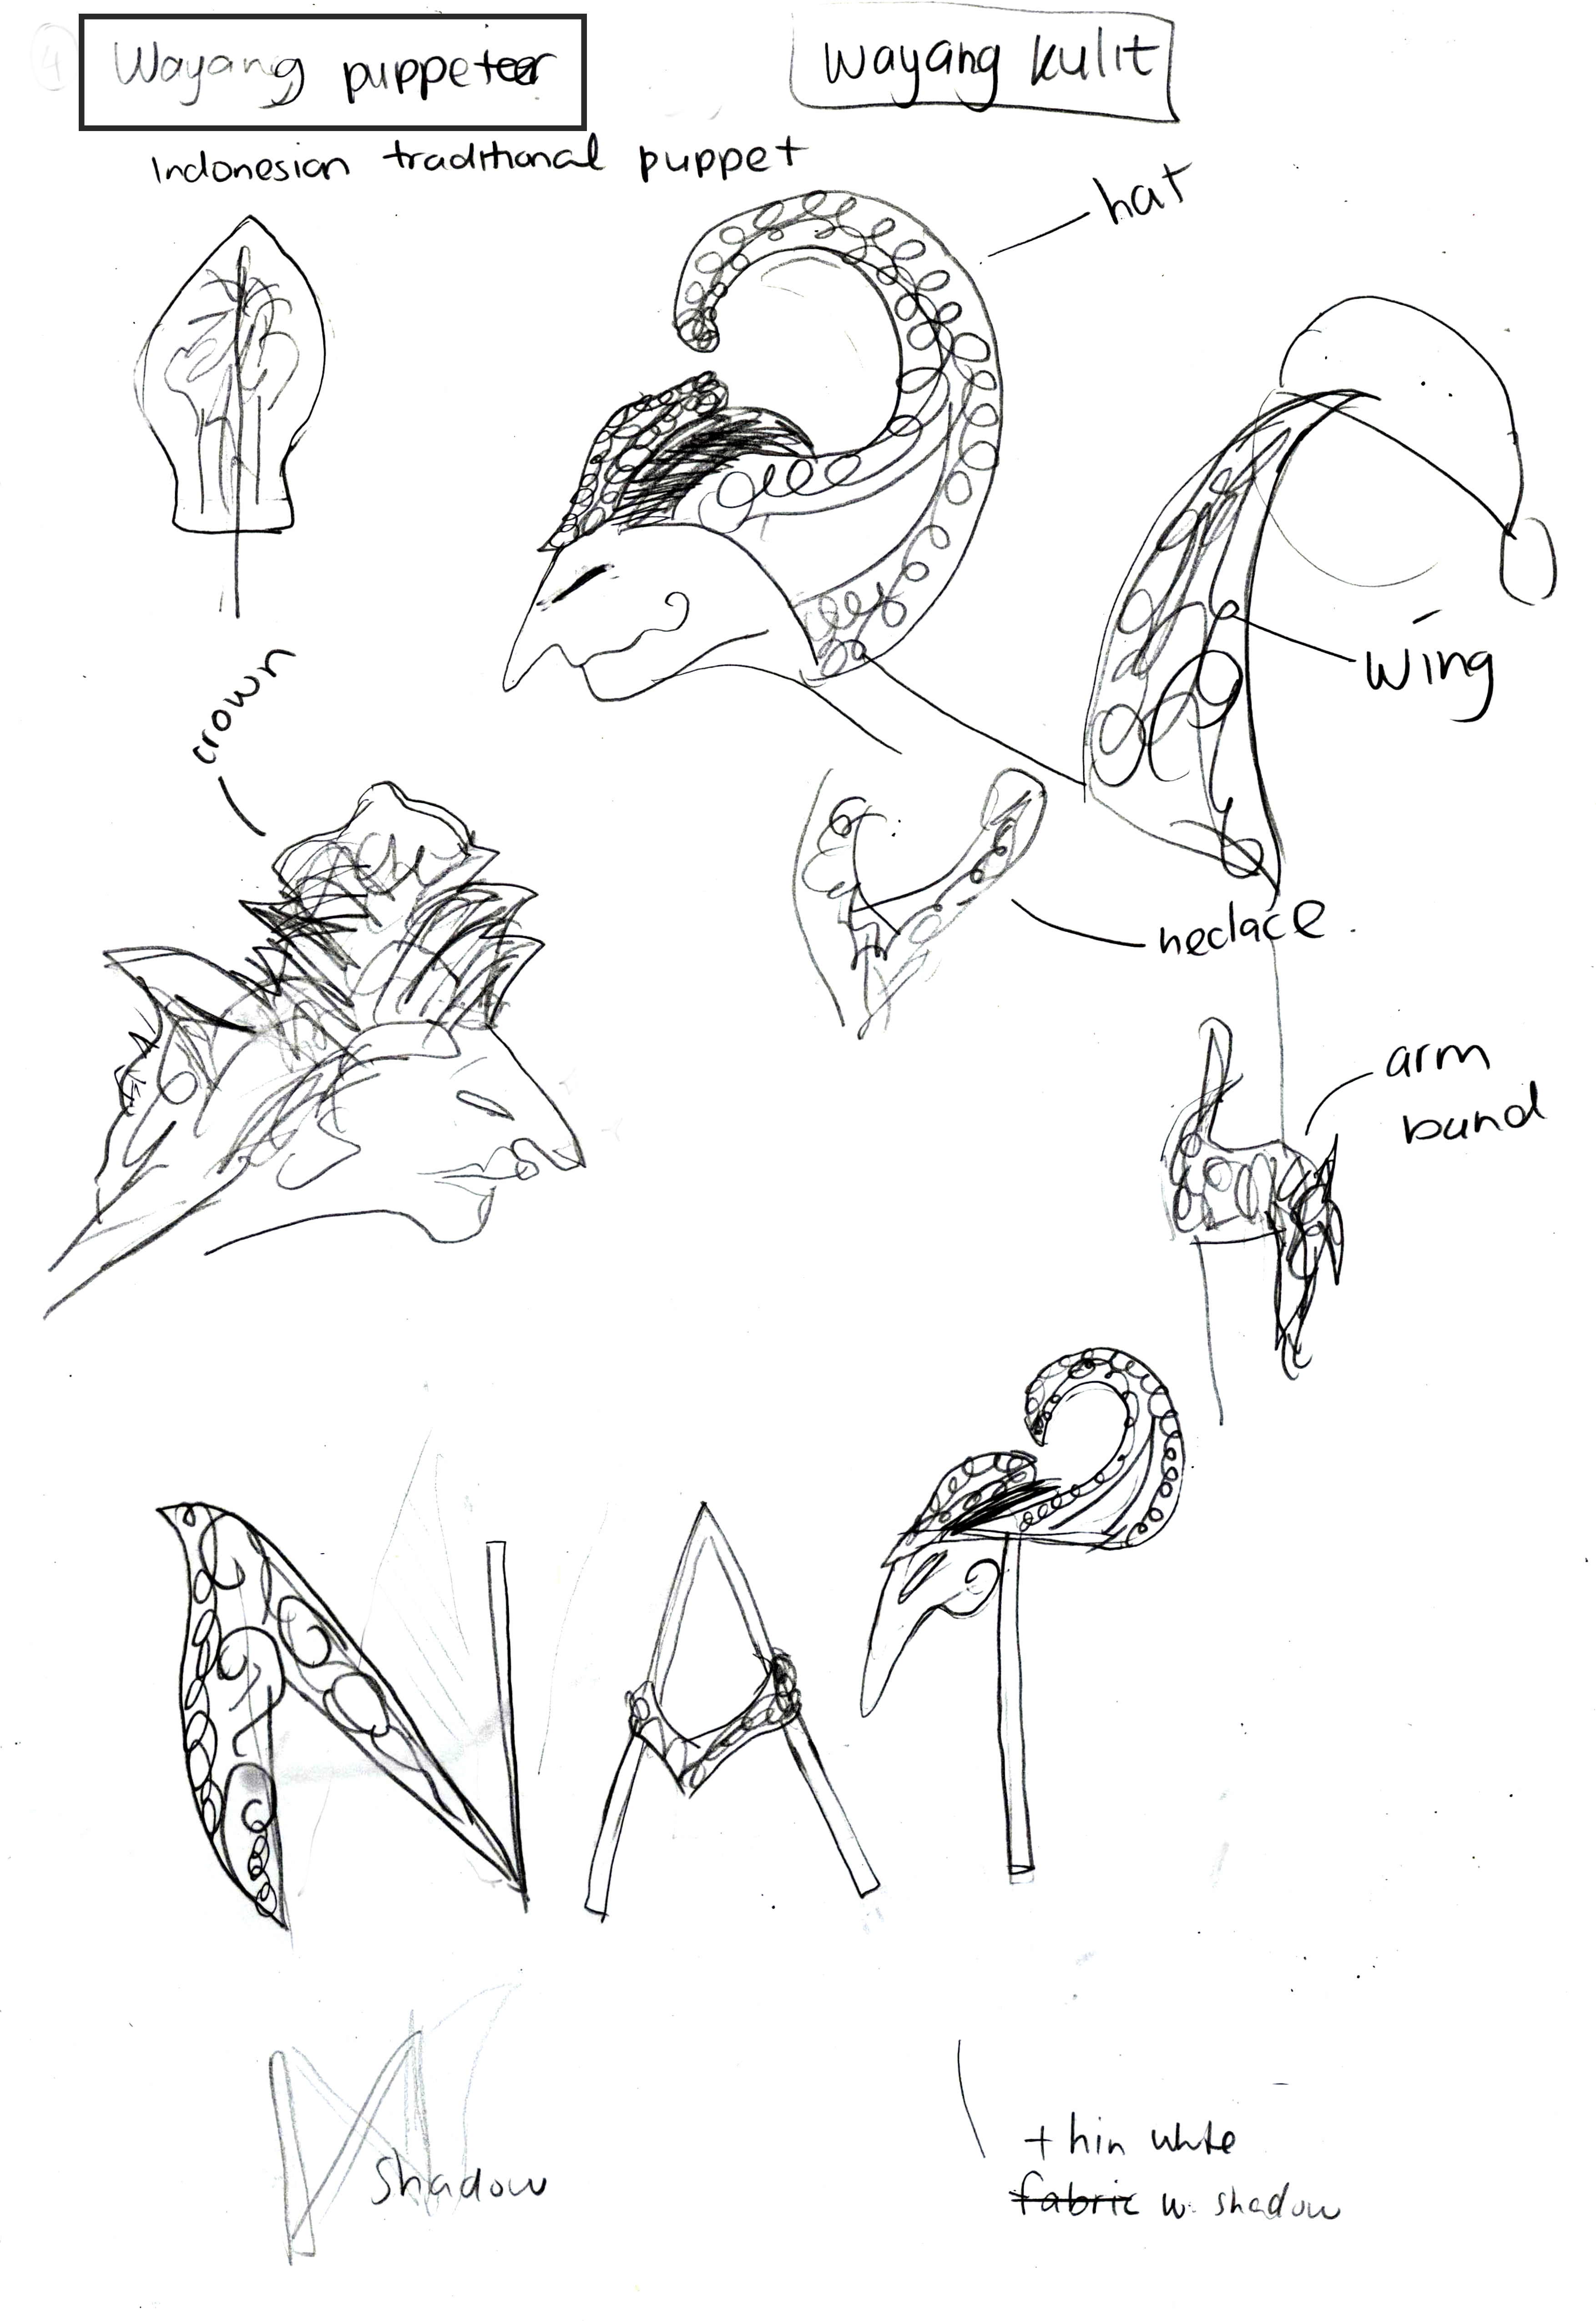
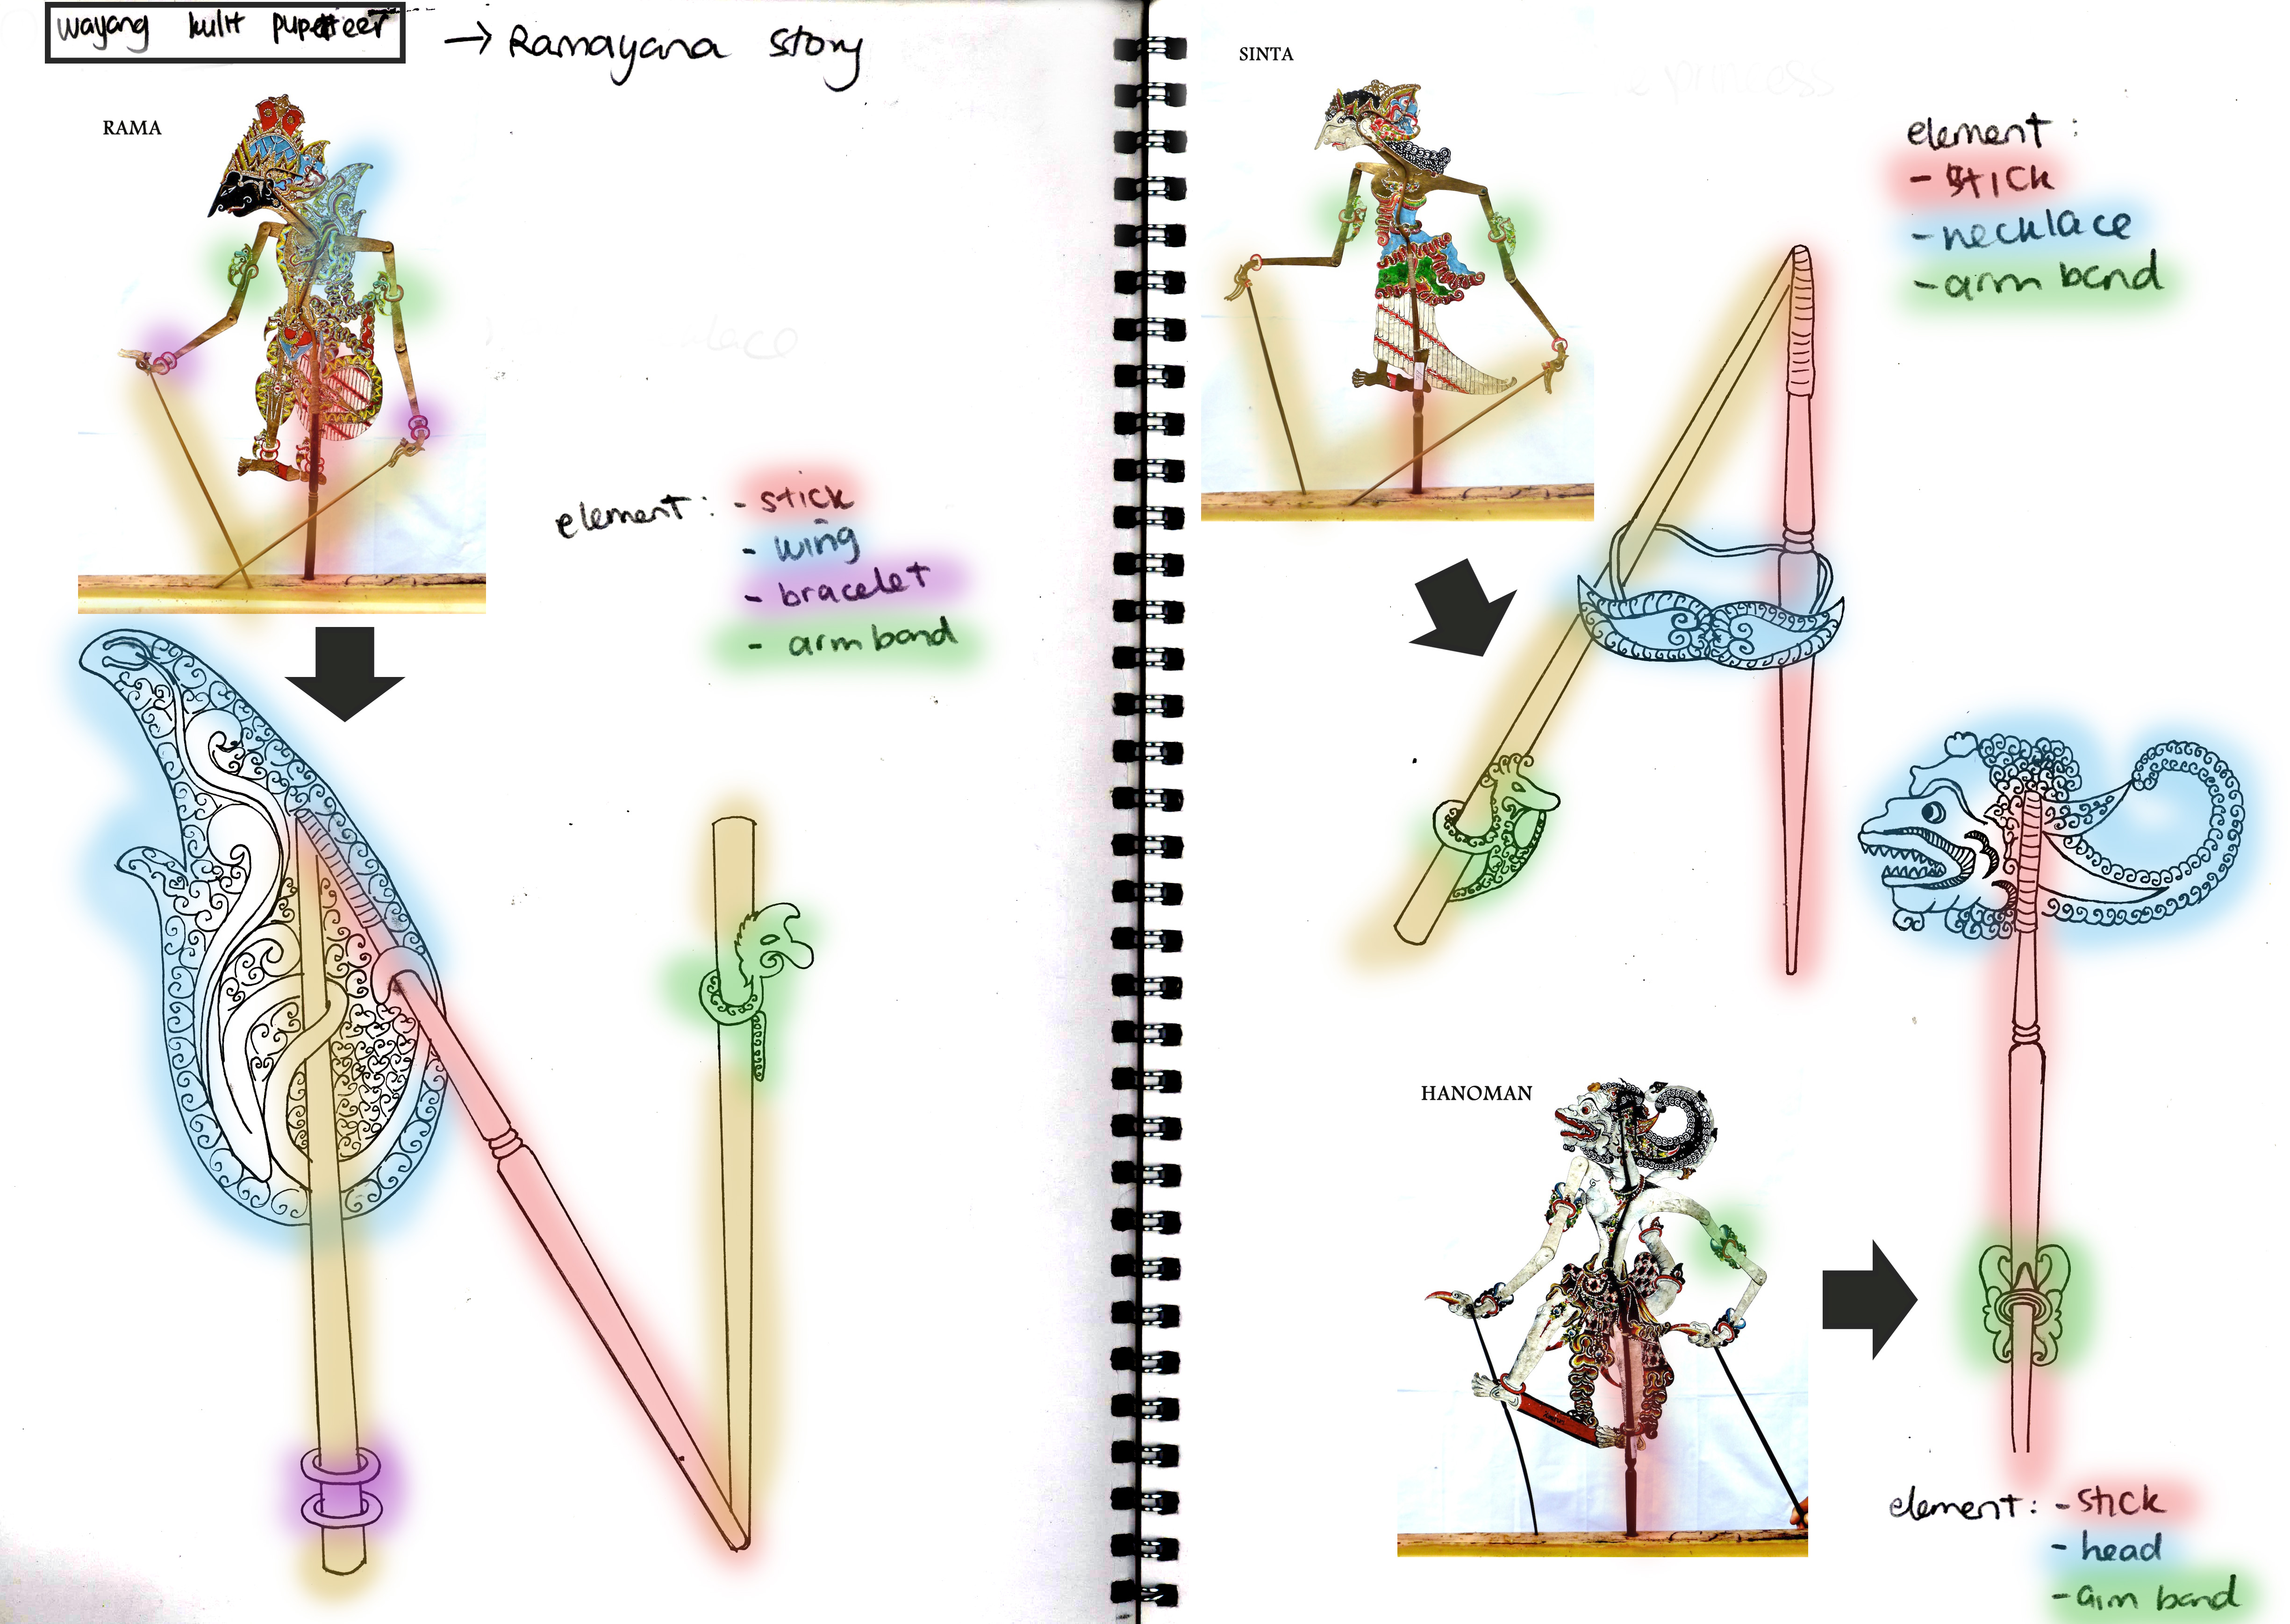
Another interesting Indonesian culture is the shadow puppet (Indonesian name: Wayang Kulit).
I decided to use the important characters from the famous story of Ramayana: Rama, Sinta and Hanoman.
Shadow puppet brainstorm
For each letter, I want them to have these elements:
– Main stick
– Arm band of the character
– Specific element of the character
– Stick to move hand around (if necessary)
Shadow puppet characterization
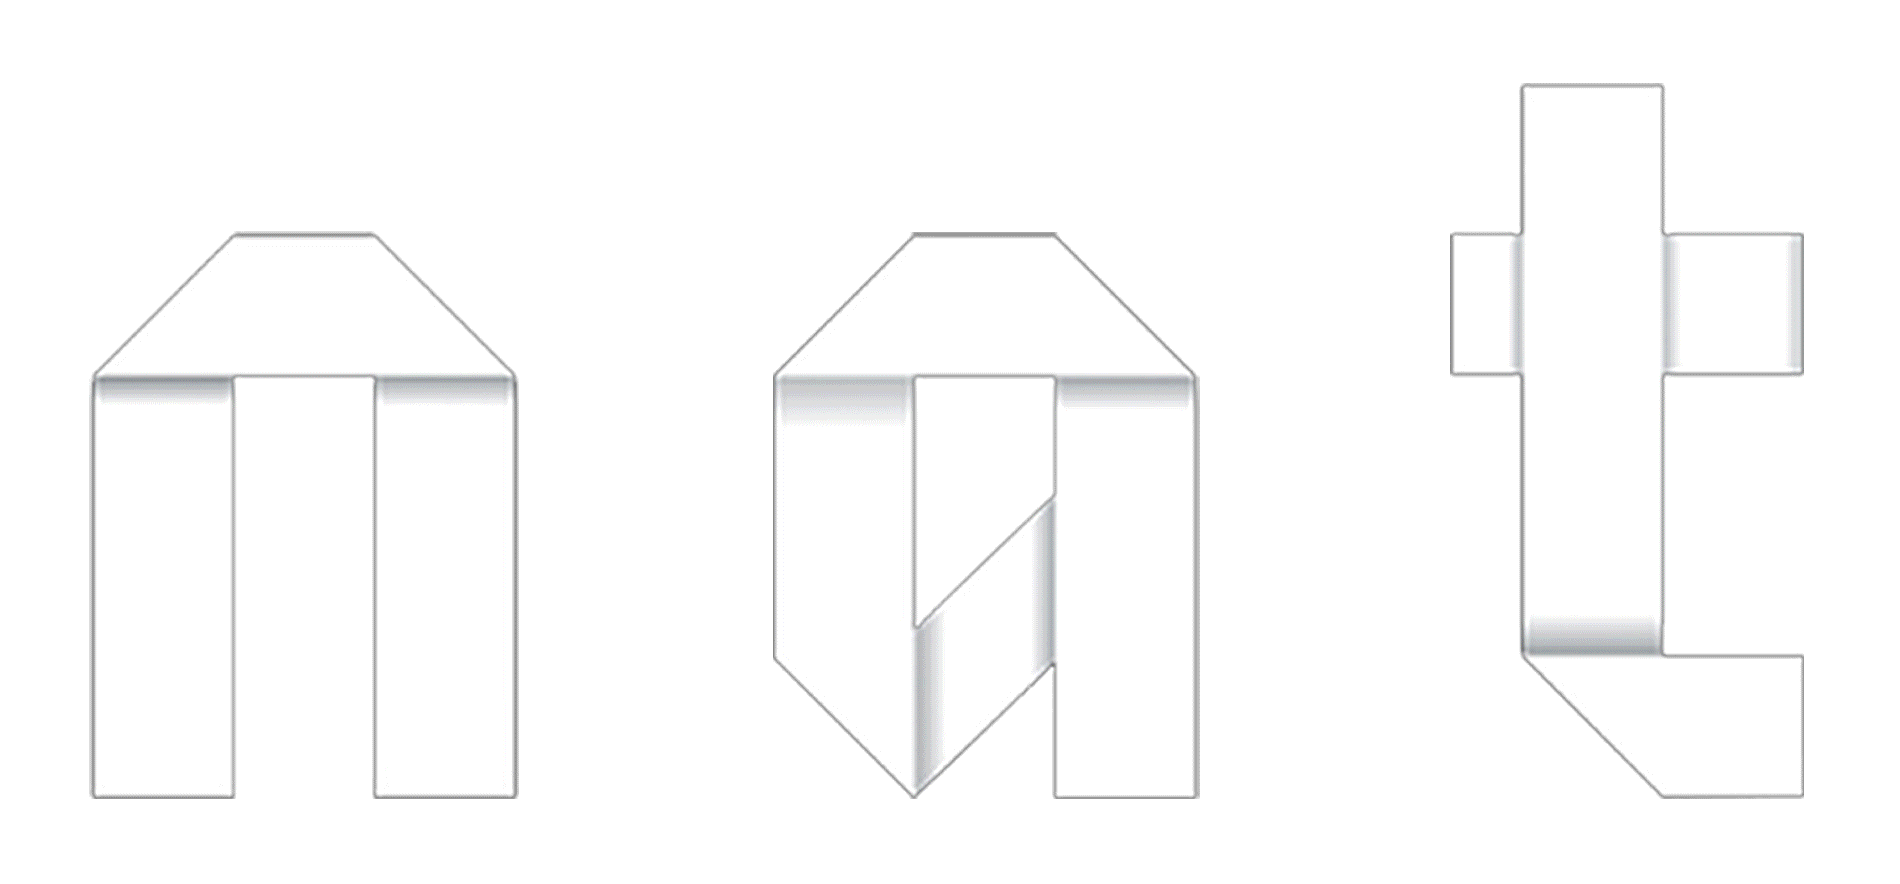
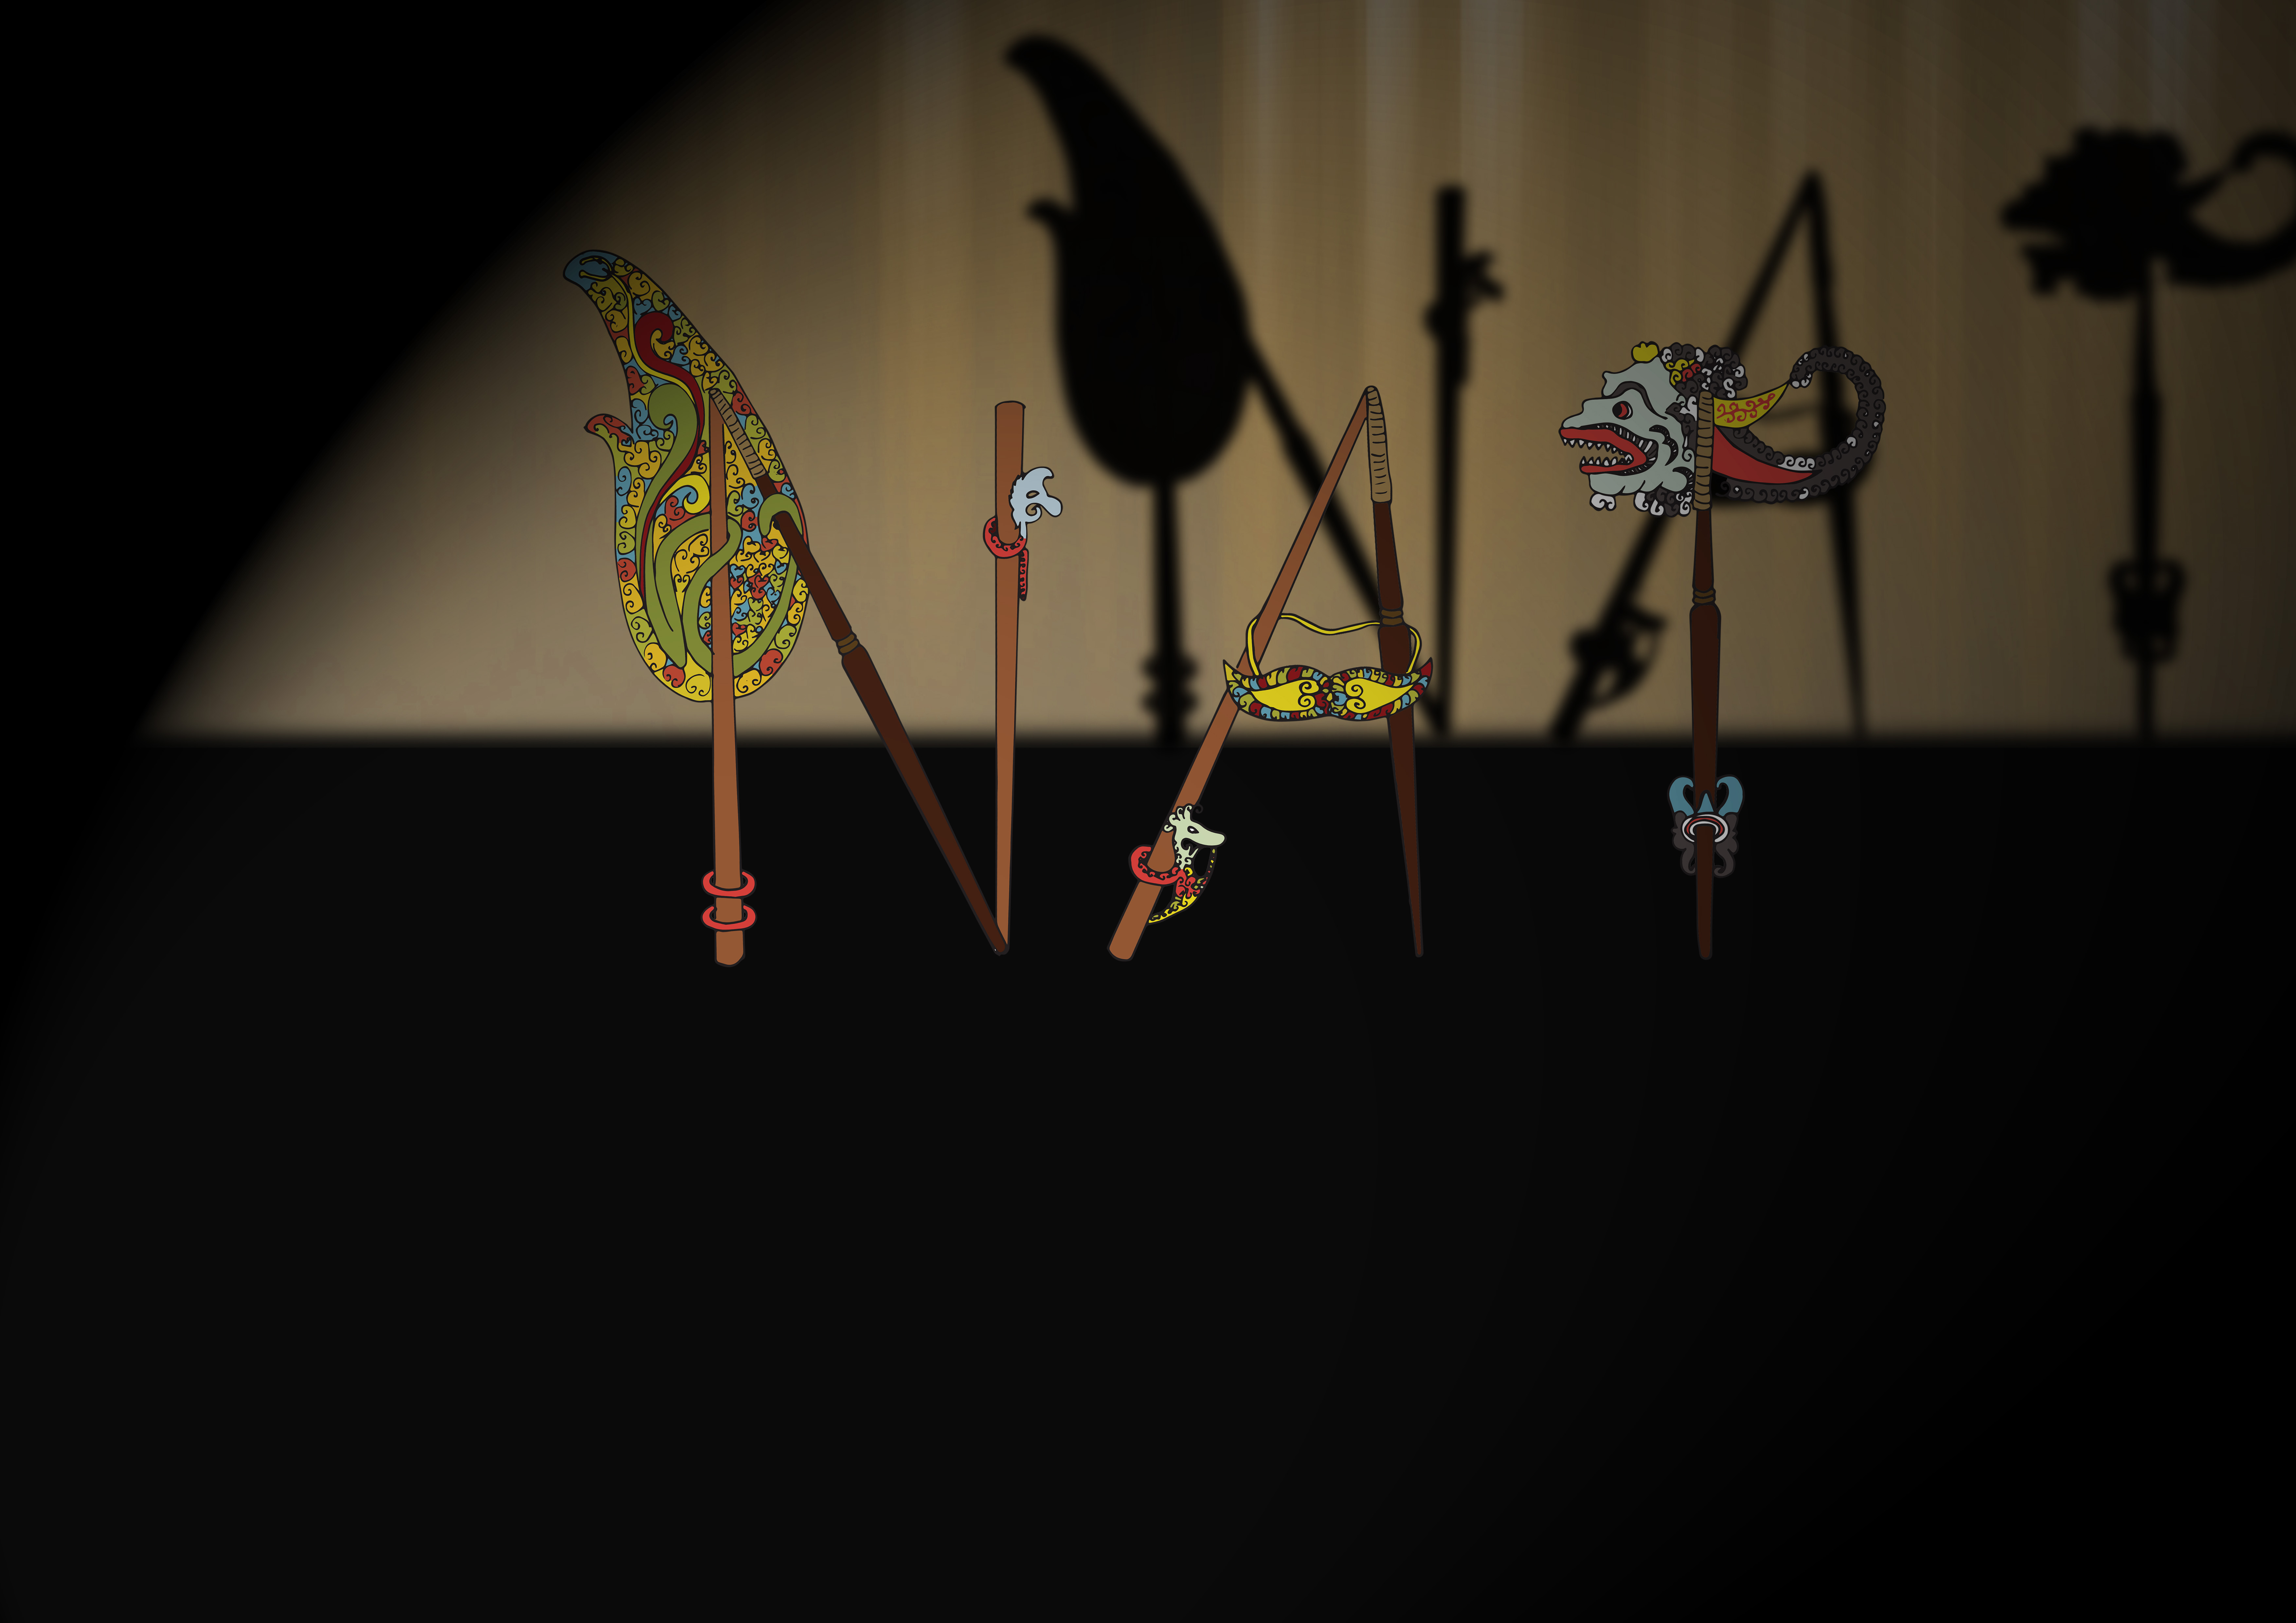
I finally created the first composition, as it is shadow puppet, I thing the following elements are necessary:
– the puppet
– the shadow
– the light
– the screen
Each letter was sketched, digitally traced and digitally colored.
Shadow puppeteer first composition
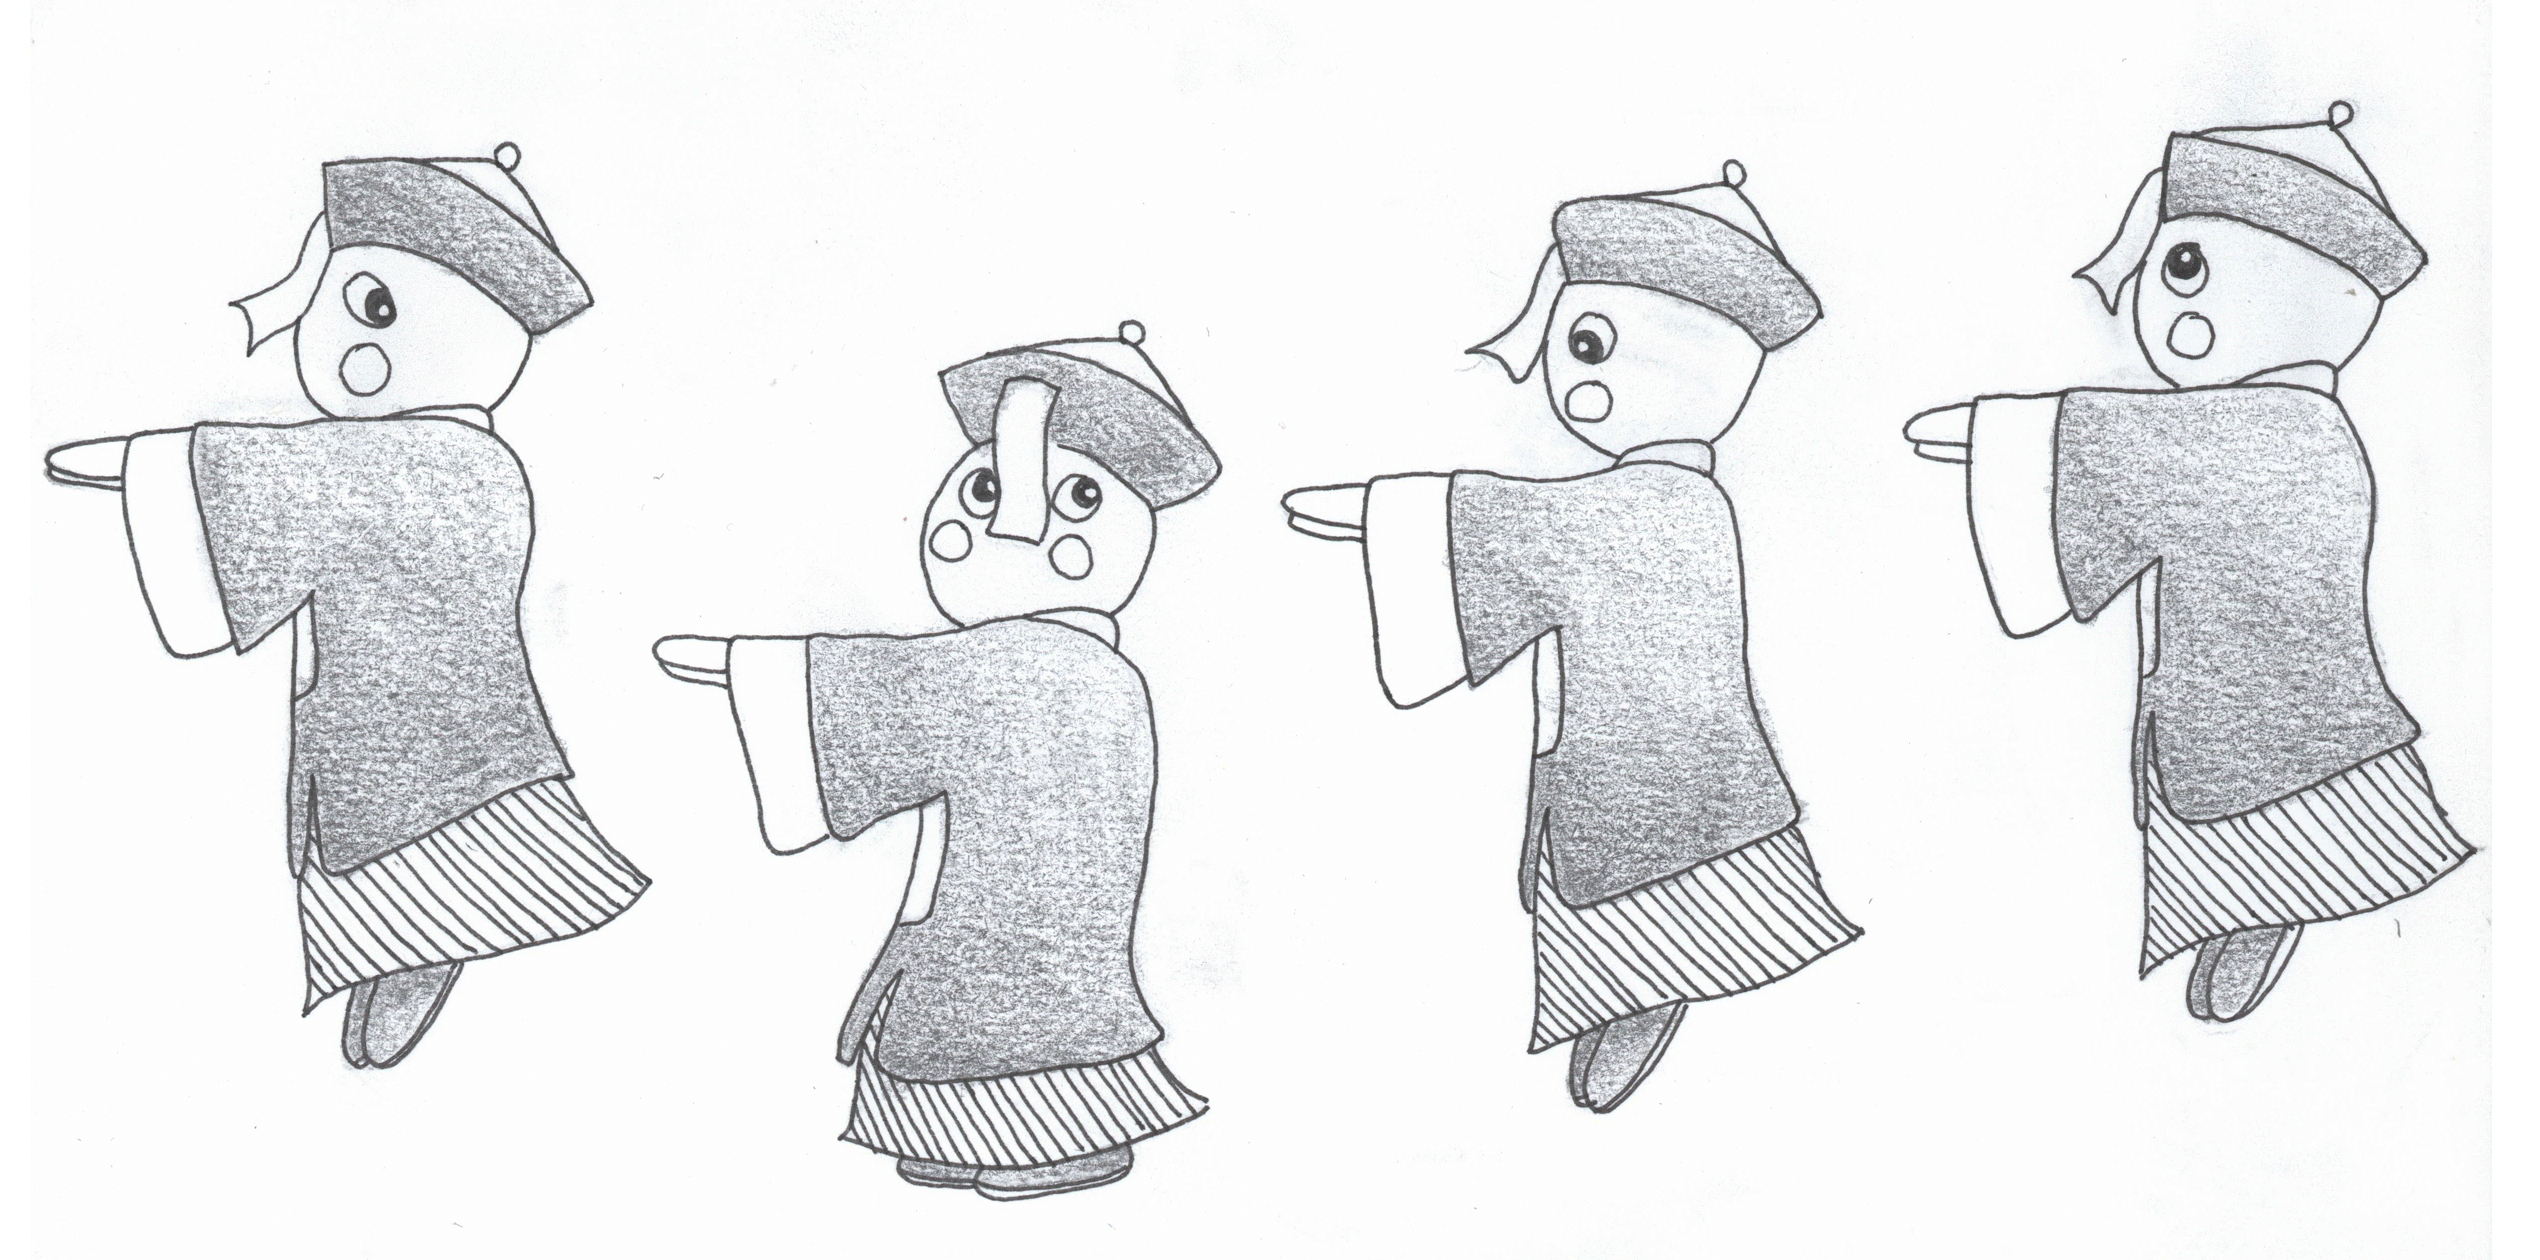
However I saw this composition as too simple and too many dark color with no significant purpose. It also seems like stick in the shape of font being lighted, not really like shadow puppet. Hence, I added the puppeteer and change the angle of the light source. Also, I invert the font horizontally as it is supposed to be the behind-screen view of the show (it will be read as NAT from the audience point of view). I had a feedback that it might be read as ‘TAN’ instead of ‘NAT’, but it actually is okay as my Chinese surname is Tan (adisTANa).
Shadow puppeteer process
Shadow puppeteer final
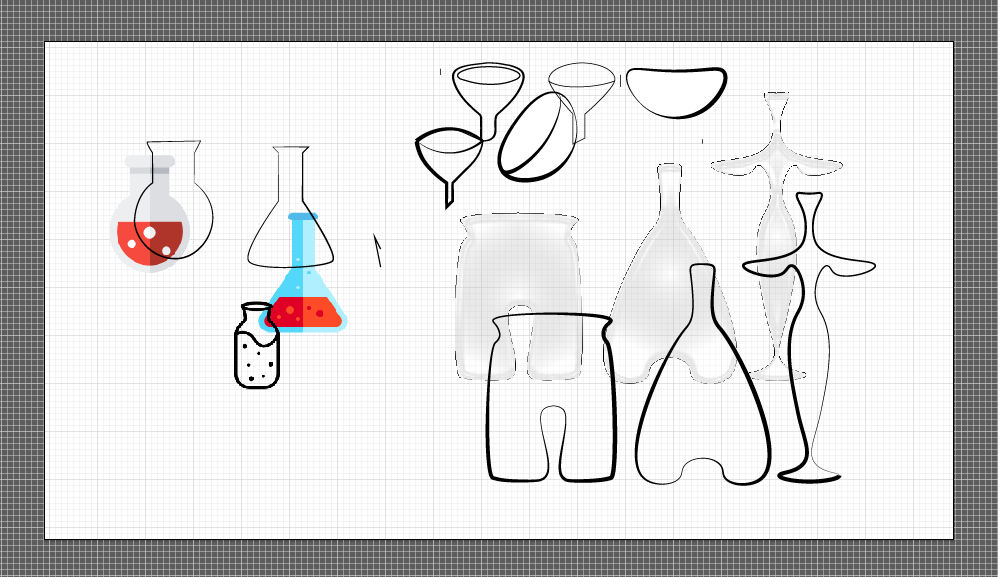
Coloured Sand Artist
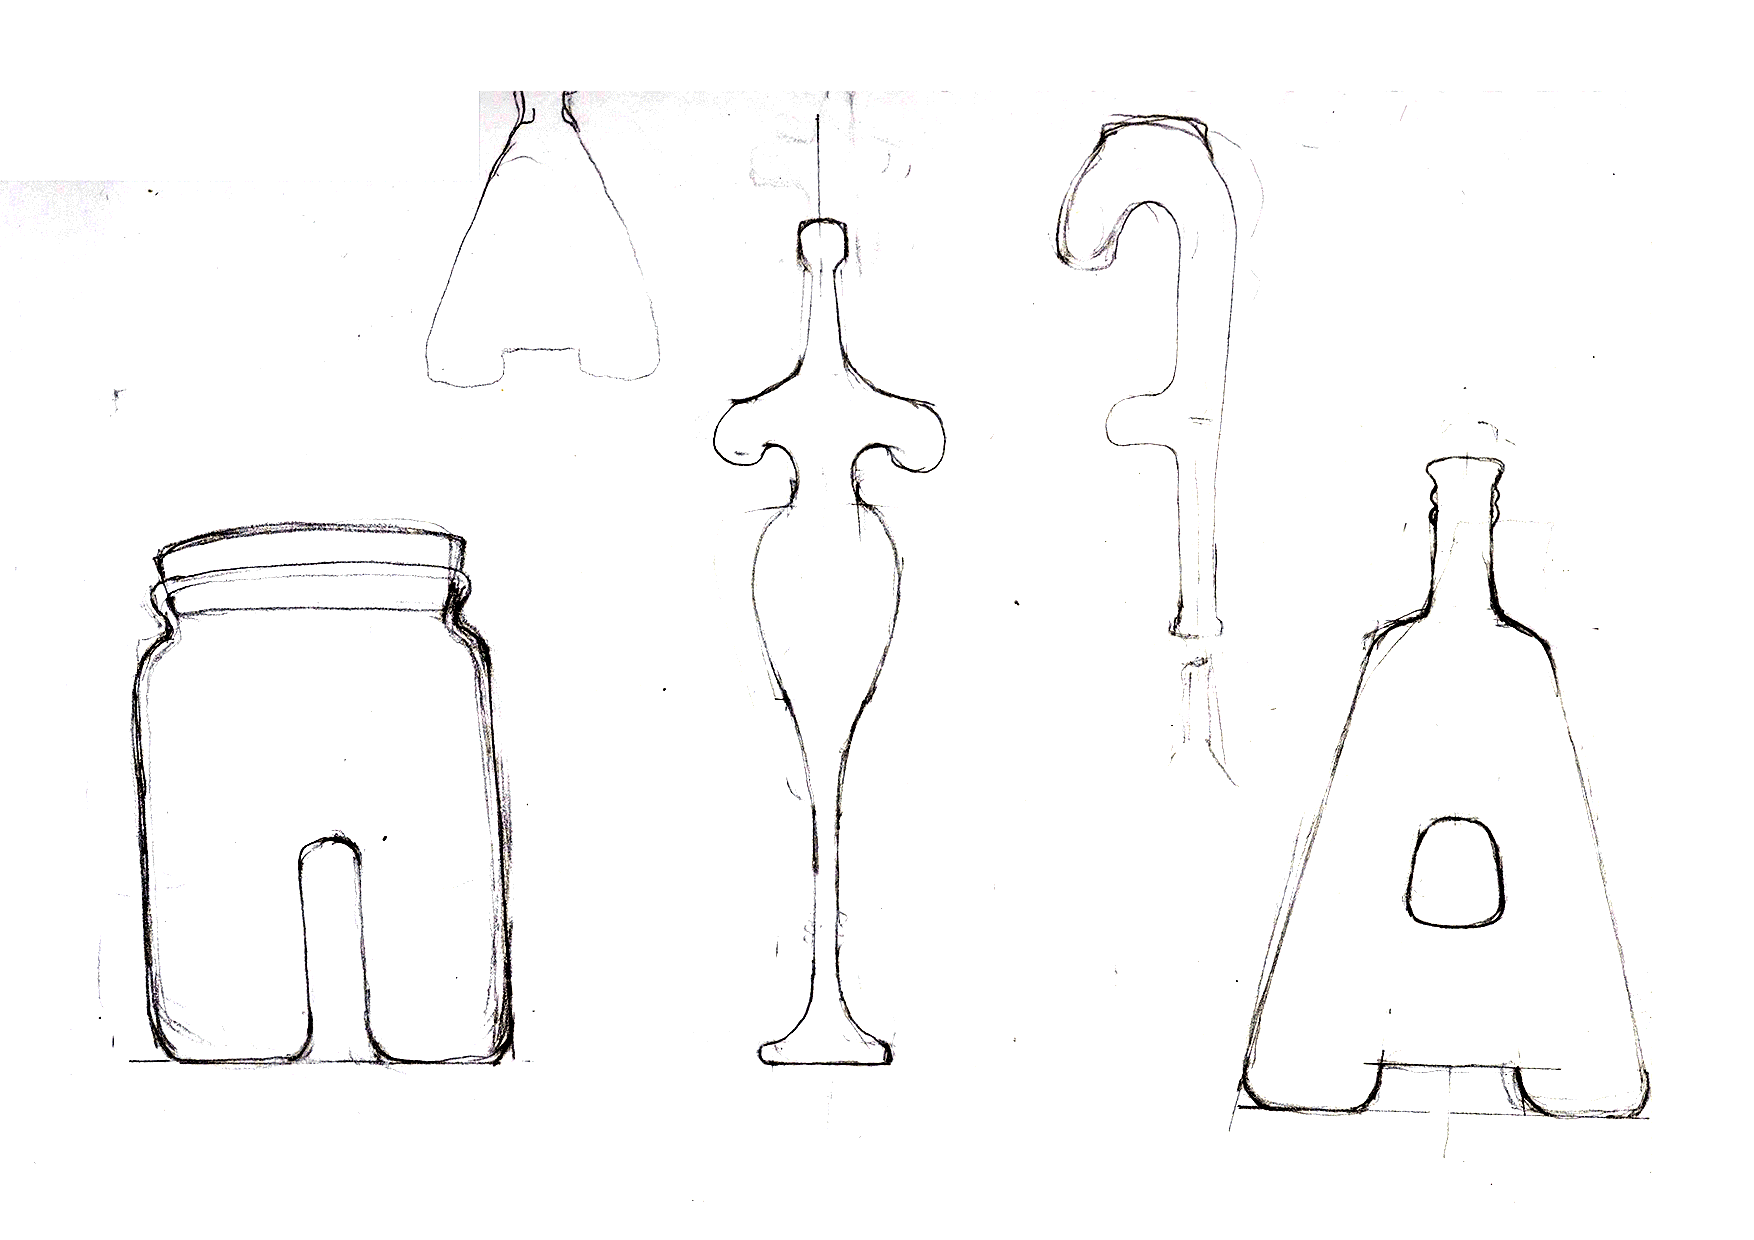
For the last job, I decided to go for another culture. I saw my photo when I went to Dubai and thought of what culture I could remember. Then the idea of coloured sand artist I met at market popped up. I think it is a really interesting job which required skills and practice.So for each letter, I want it to be one bottle of coloured sand art. The shape of the container is the shape the letter.Element:
– Glass container in the shape of the letter
– Coloured sand inside the containerEach letter was sketched, digitally traced, digitally colored and edited.
Very first sketched of the letterThe elements were digitally tracedColoured sand artist processColoured sand artist final
For the final submissions and reflection click here.
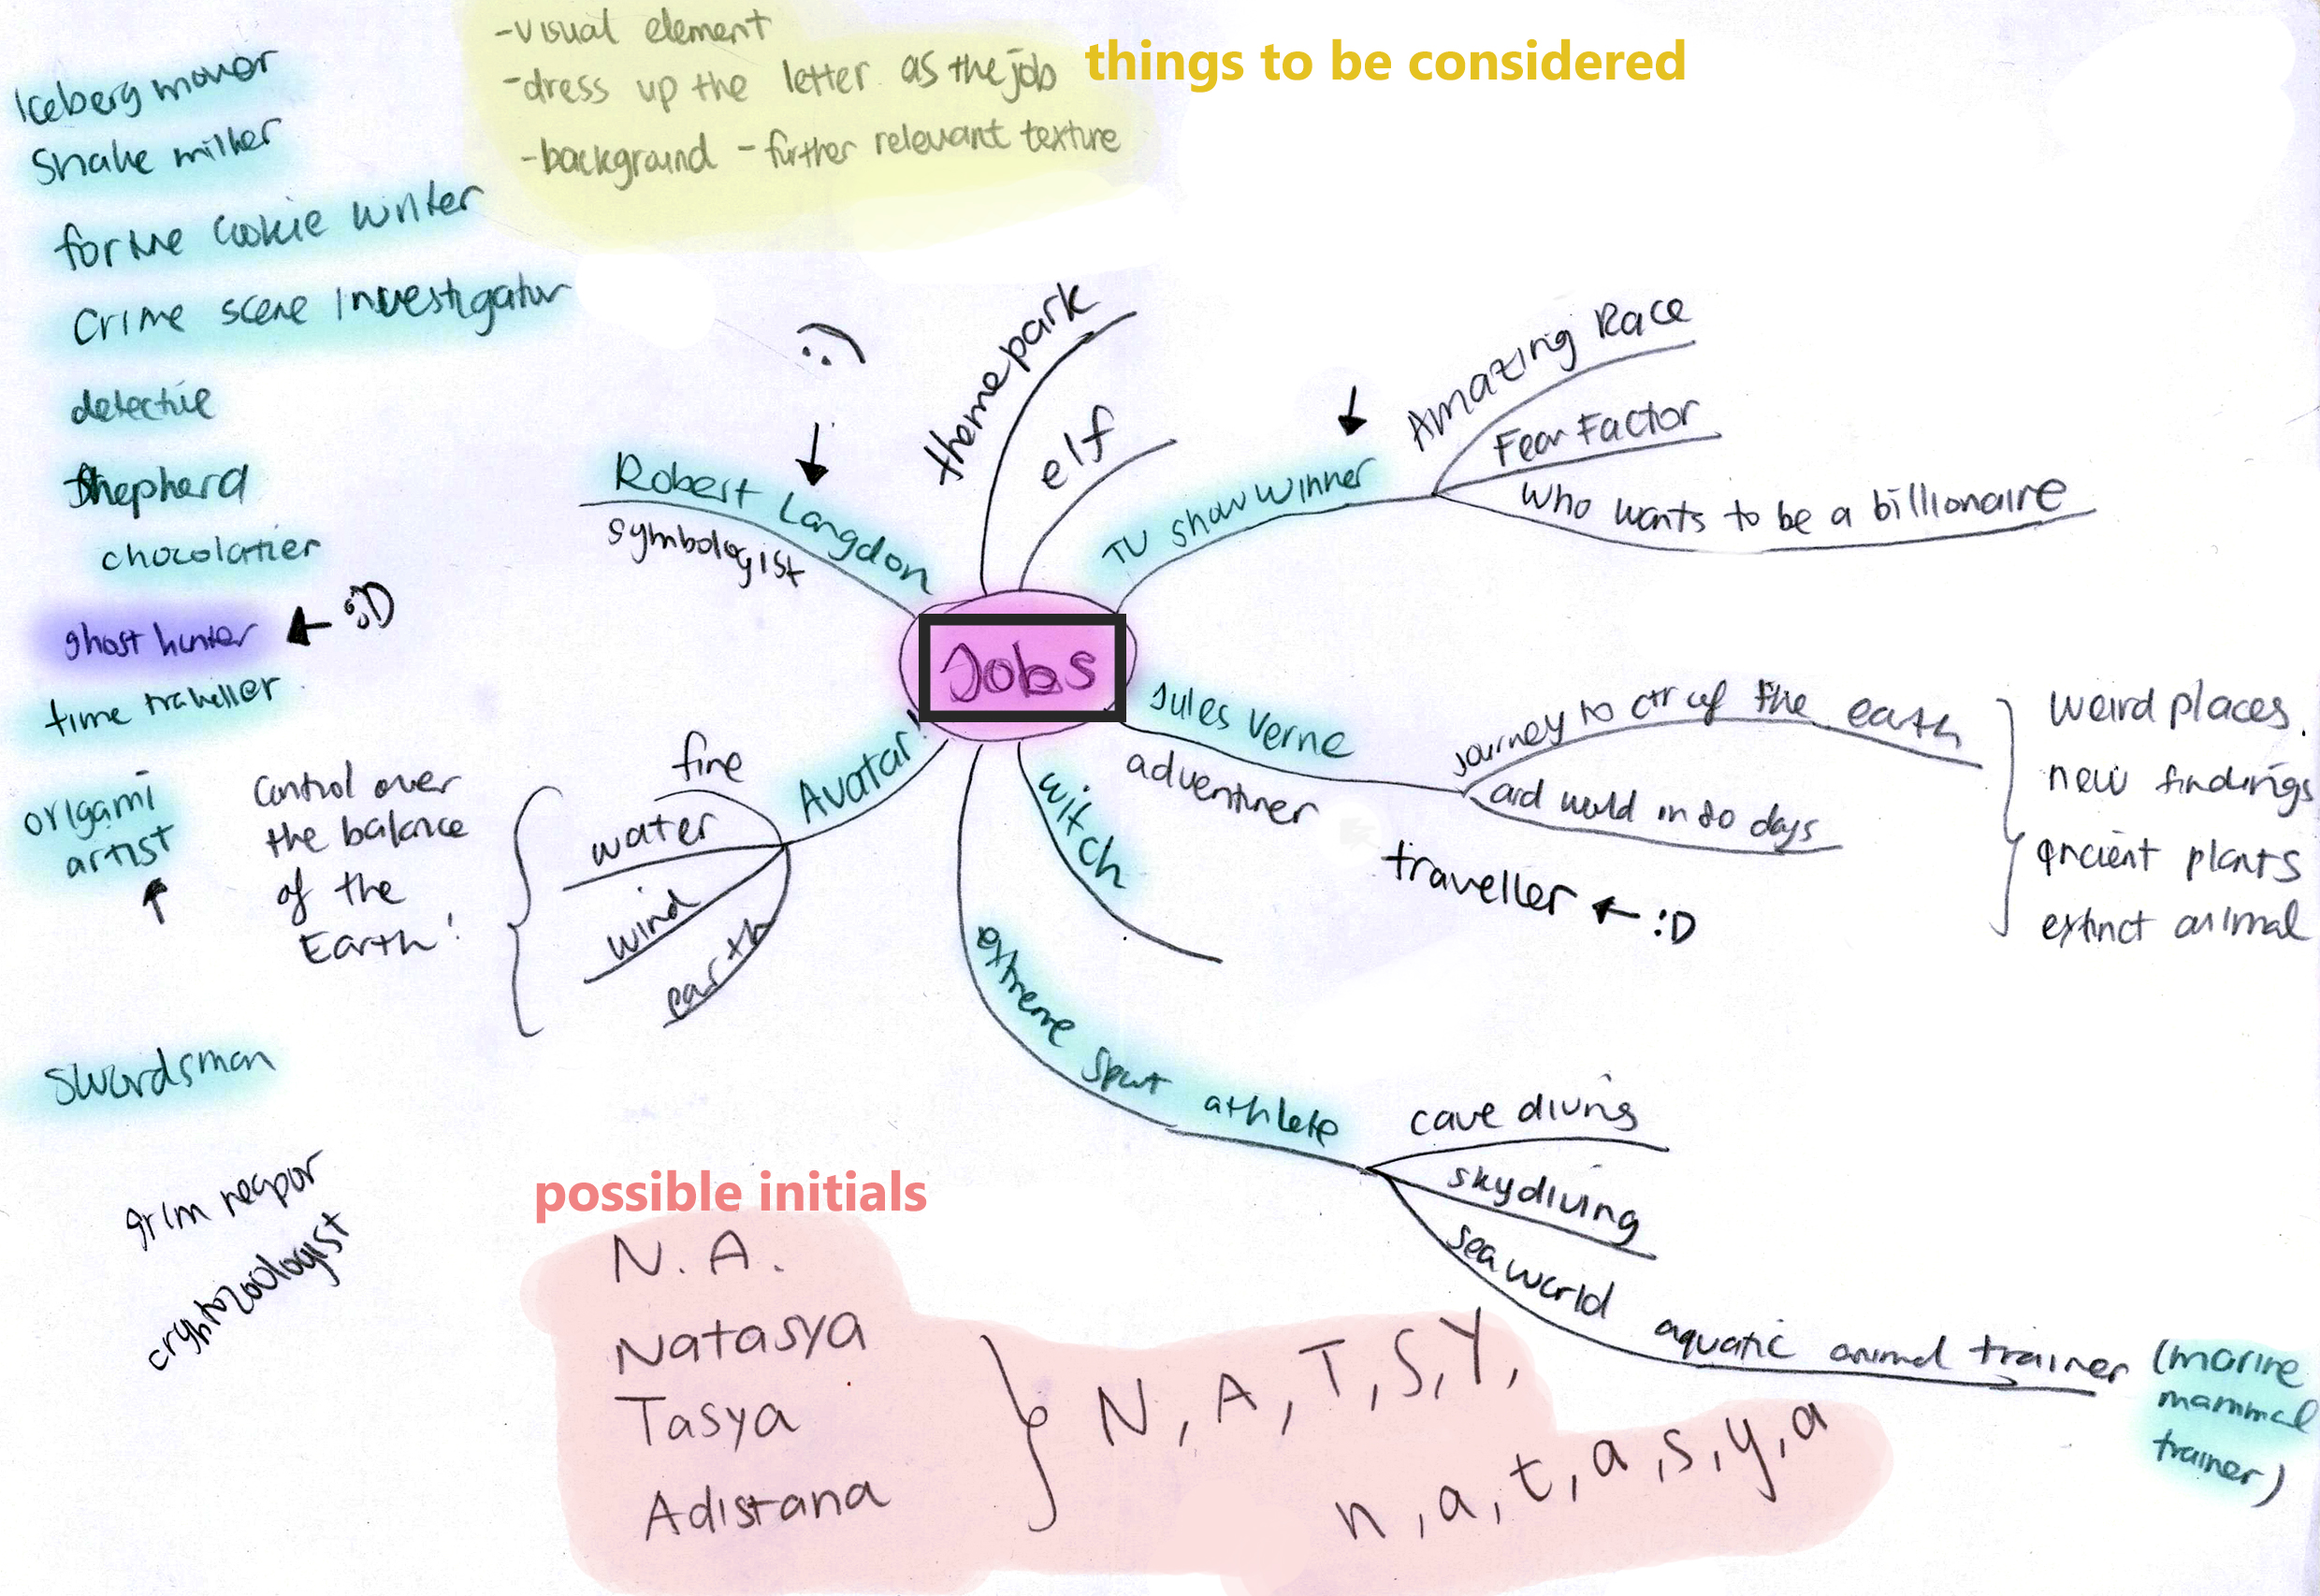
So at first I brainstormed all the possible job that I am interested to do.
Job Brainstorm
With all the random and scattered list, I narrowed down into (not based on any particular order):
Robert Langdon
Being a fan of Dan Brown’s novels, I want to be Robert Langdon, a professor of symbology and go for many adventures. He is someone who interpreting iconology, deciphering symbols and code.
I first thought that the term for the job is ‘symbologist’ but it appeared that no such vocabulary in the dictionary. Well, I can be him.
Symbologist Brainstorm
I researched and looked for various symbol that can be modified to letters of my name. Also thumbnailed some possible composition like:
putting my initial in between random symbols
editing famous historical artefact with symbols and add my initial to it.
E.g. the tablet in the film Night at The Museum
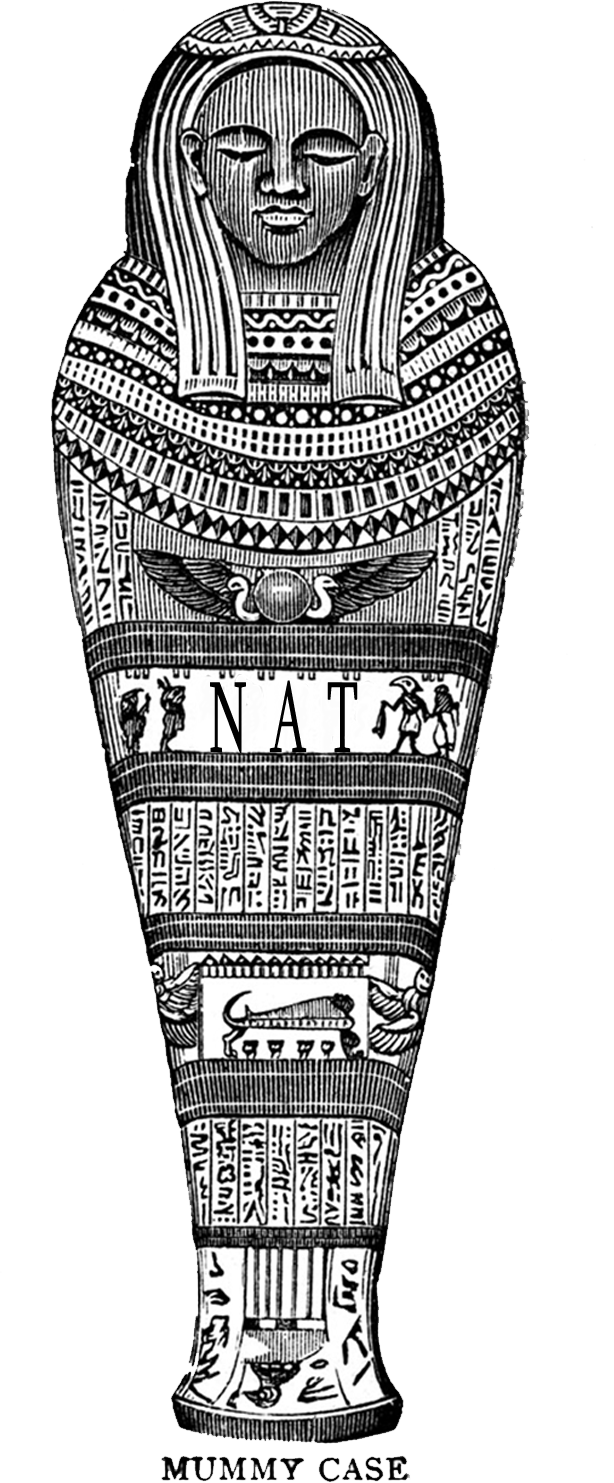
The Golden Tablet of Pharaoh Akhmenrah
The gate to an ancient city with my initial
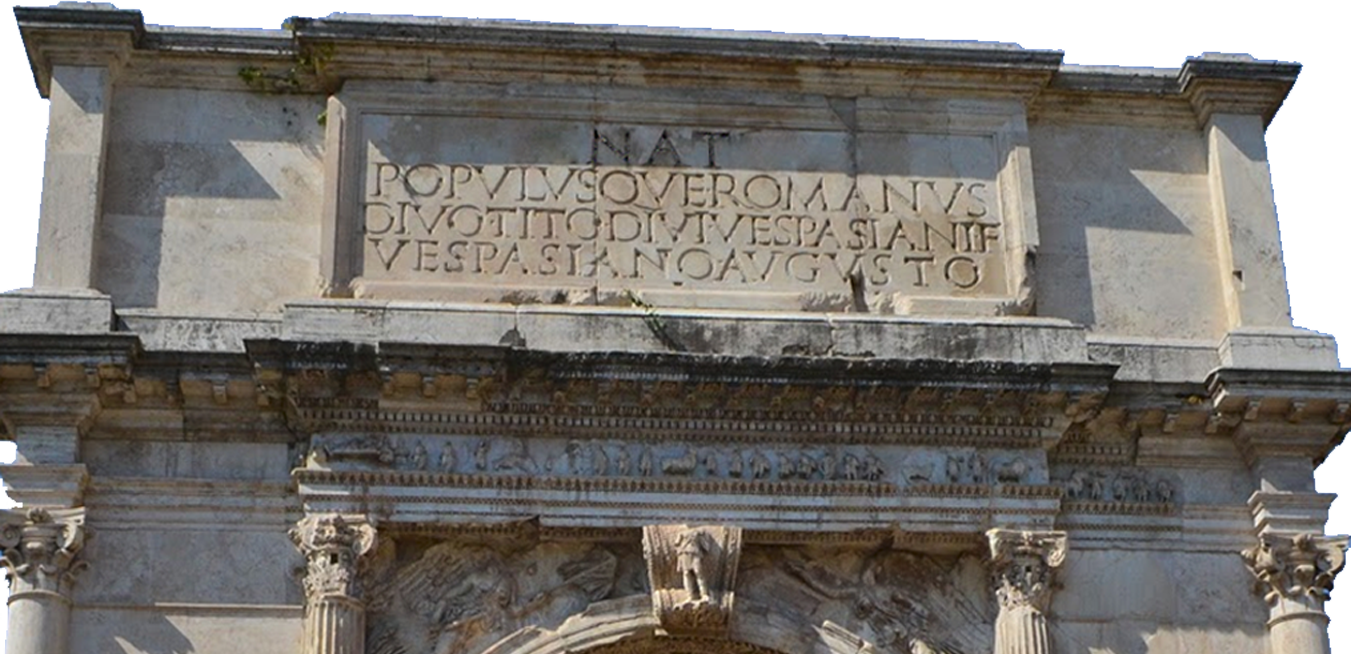
Cemetery or graveyard or mummy case with my initial
Out of all four, the one I want to made is honestly the last one. Until I realised that it feels like preparing my own grave (literally)………
So I decided to pause working on this job……… for good.
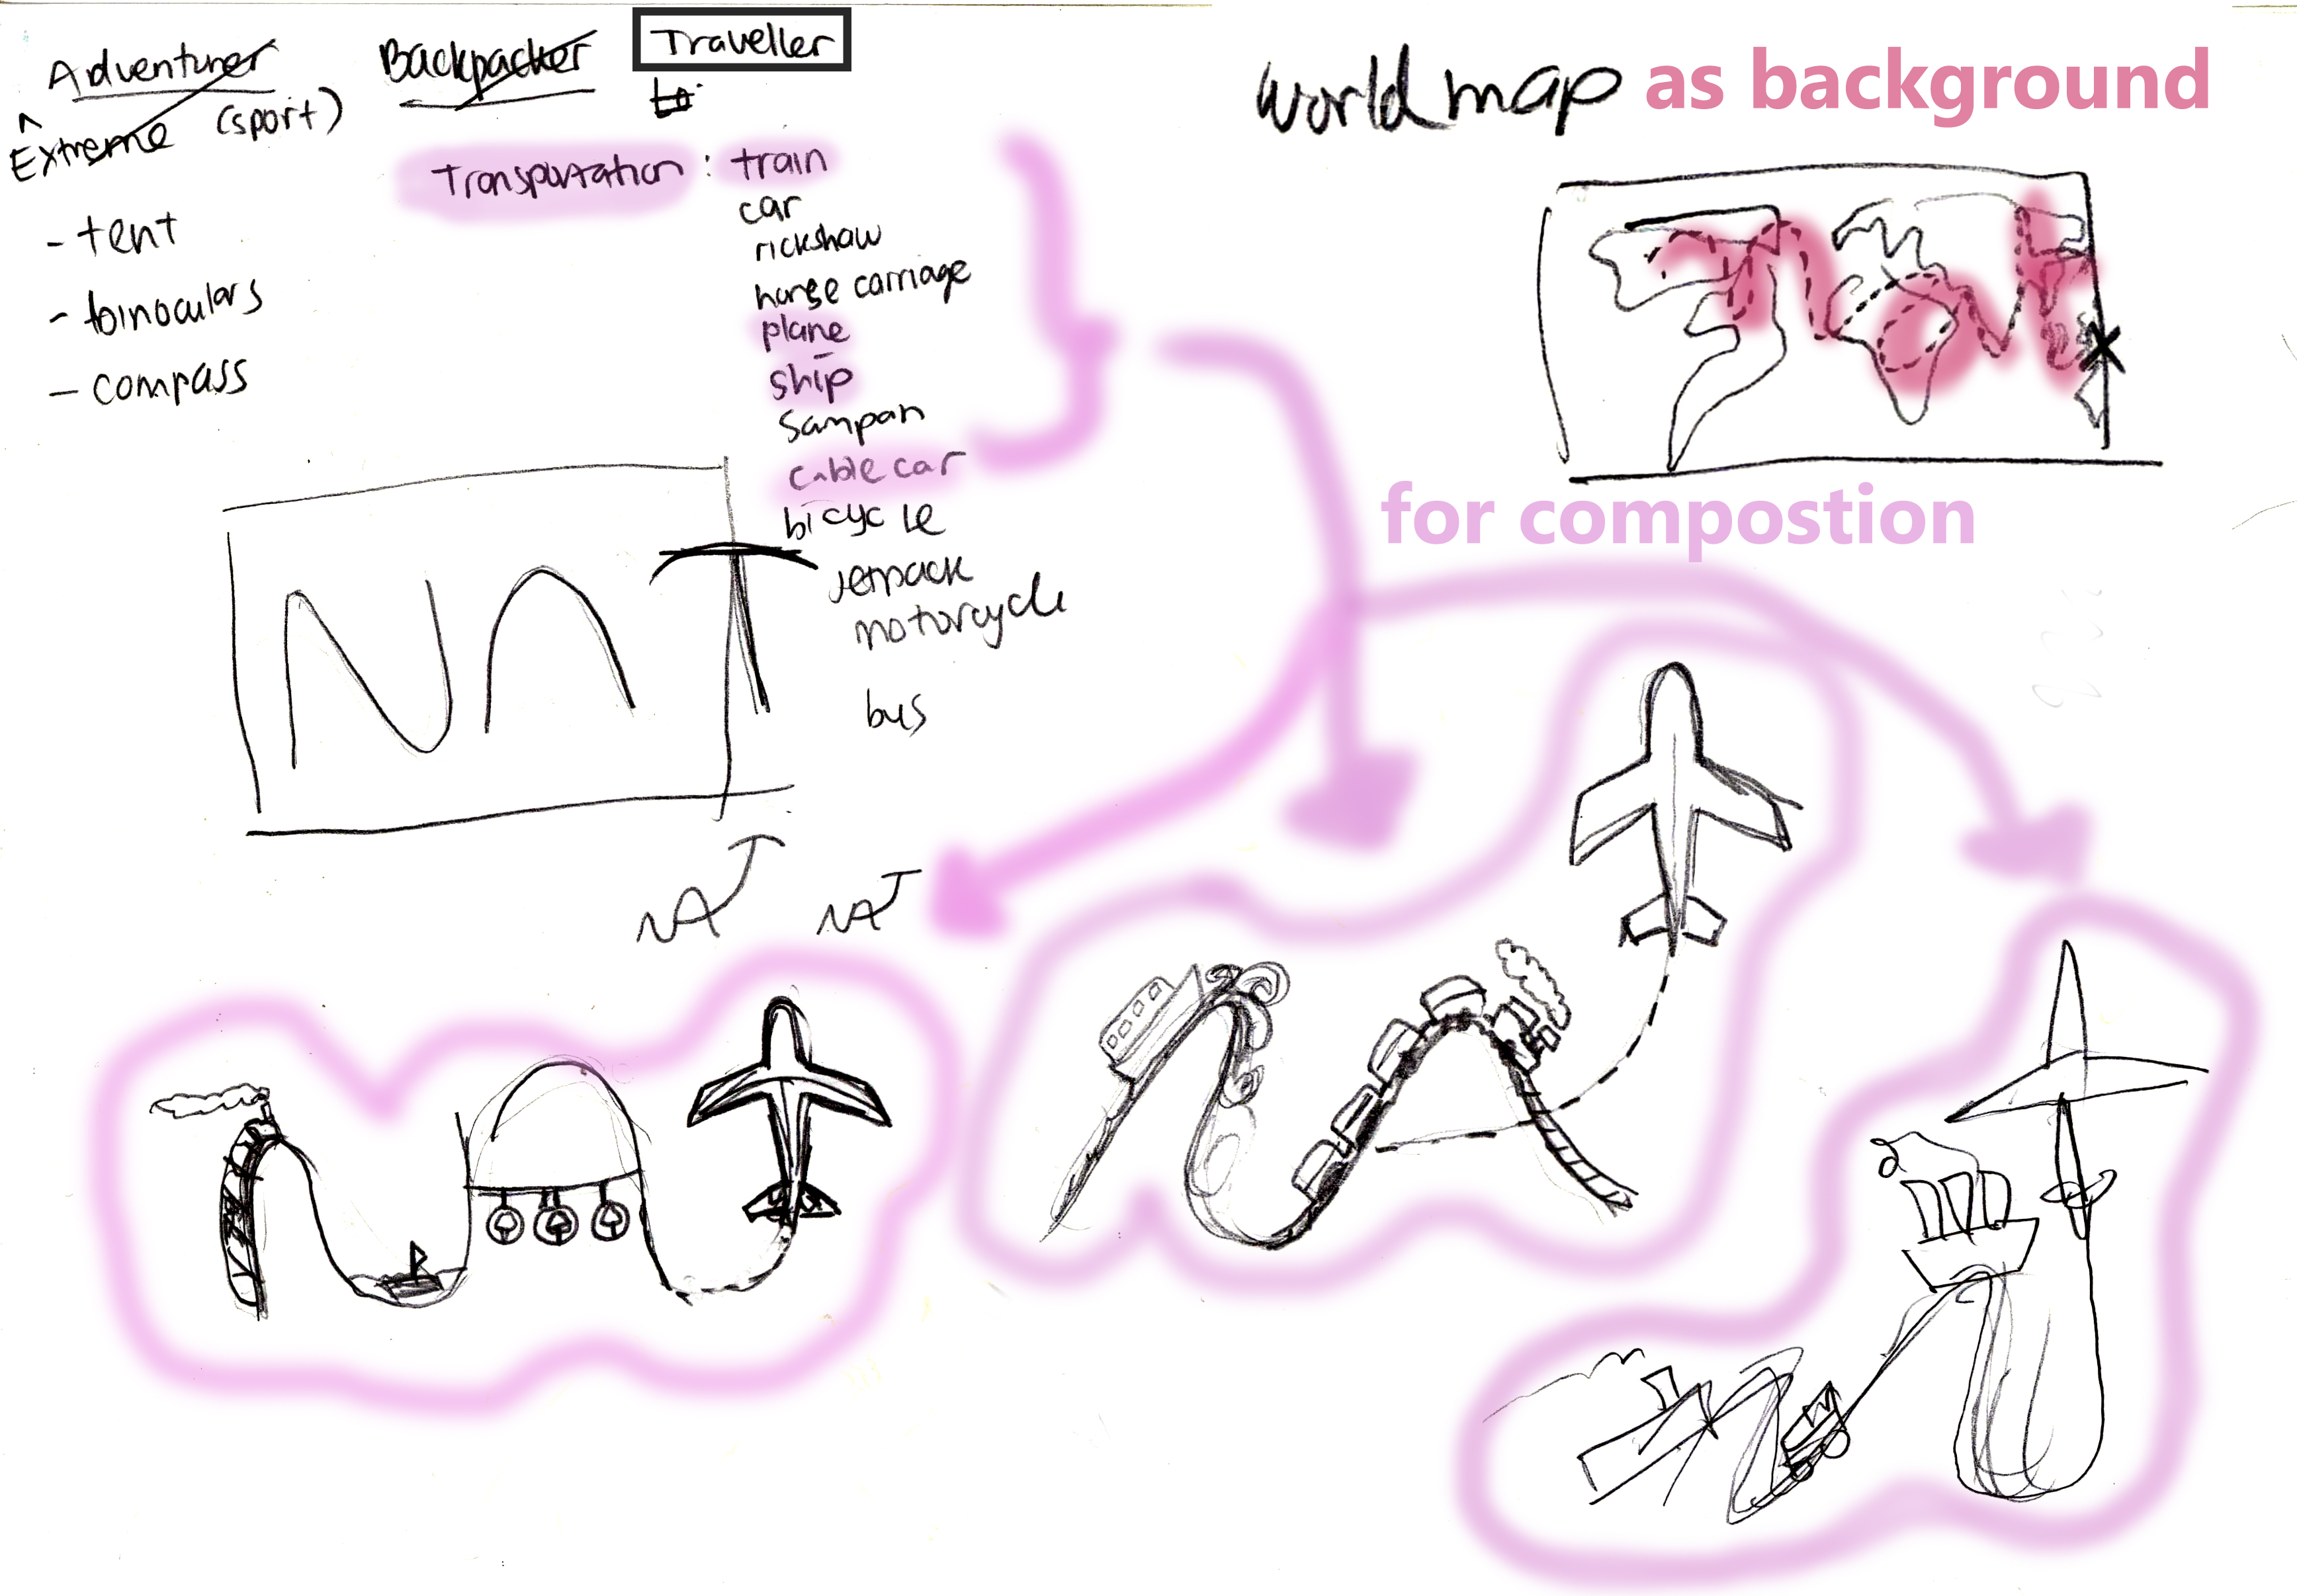
Jules Verne
Another job inspired by novels, I want to be an adventurer or traveler. Things like weird places, new findings, ancient plants, extinct animals are somehow appealing to me.
Traveler Brainstorm
Identical with different modes of transportation to travel, I listed down possible transports. I also drafted ‘NAT’ using different lines related to water, air and soil transportation (train, ship, airplane). Decided the background ca be a world map, and the lines can be red showing the path or plan of a journey.
However I did not pursue this composition further as I found more interesting ideas coming up for another job.
Witch
Well, I can’t help to want to be one. Especially Elphaba of the Wicked, somehow I am weirdly attracted to her character. (?)
Avatar!
Not the movie Avatar. It’s the animated television series Avatar: The Legend of Aang. The bender for fire, water, wind, earth. Control the balance of the Earth. Another one I can’t let go…
TV Show Winner
Participating and winning amazing TV shows like Amazing Race, Fear Factor, Who Wants to Be a Millionaire? are some of my childhood dream I cannot say no to. Spent time to watch them routinely weekly. So nostalgic.
Extreme Sport Athlete
Extreme sports like cave diving, sky diving etc is another things that attracted me. But reflecting on the reality, I just hope I could do them at least once before I die.
Marine Mammal Trainer
Free Willy! I have been liking marine mammal especially dolphin since little, being their trainer seems fun.
Here is another list after browsing through the internet, looking for weird and unusual job.
Iceberg mover. Might have save Titanic. Who knows?
Snake milker. Aaaaaaa so interesting I cannot! I like how a snake’s skin feels.
Fortune cookie writer. It’s all a lie.
Crime scene investigator or detective.
Shepherd.
Swordsman. Zoro of the anime One Piece. Sword Art Online.
Chocolatier. Childhood game and dream job.
Ghost Hunter. Another one inspired by childhood movie.
Time Traveller.
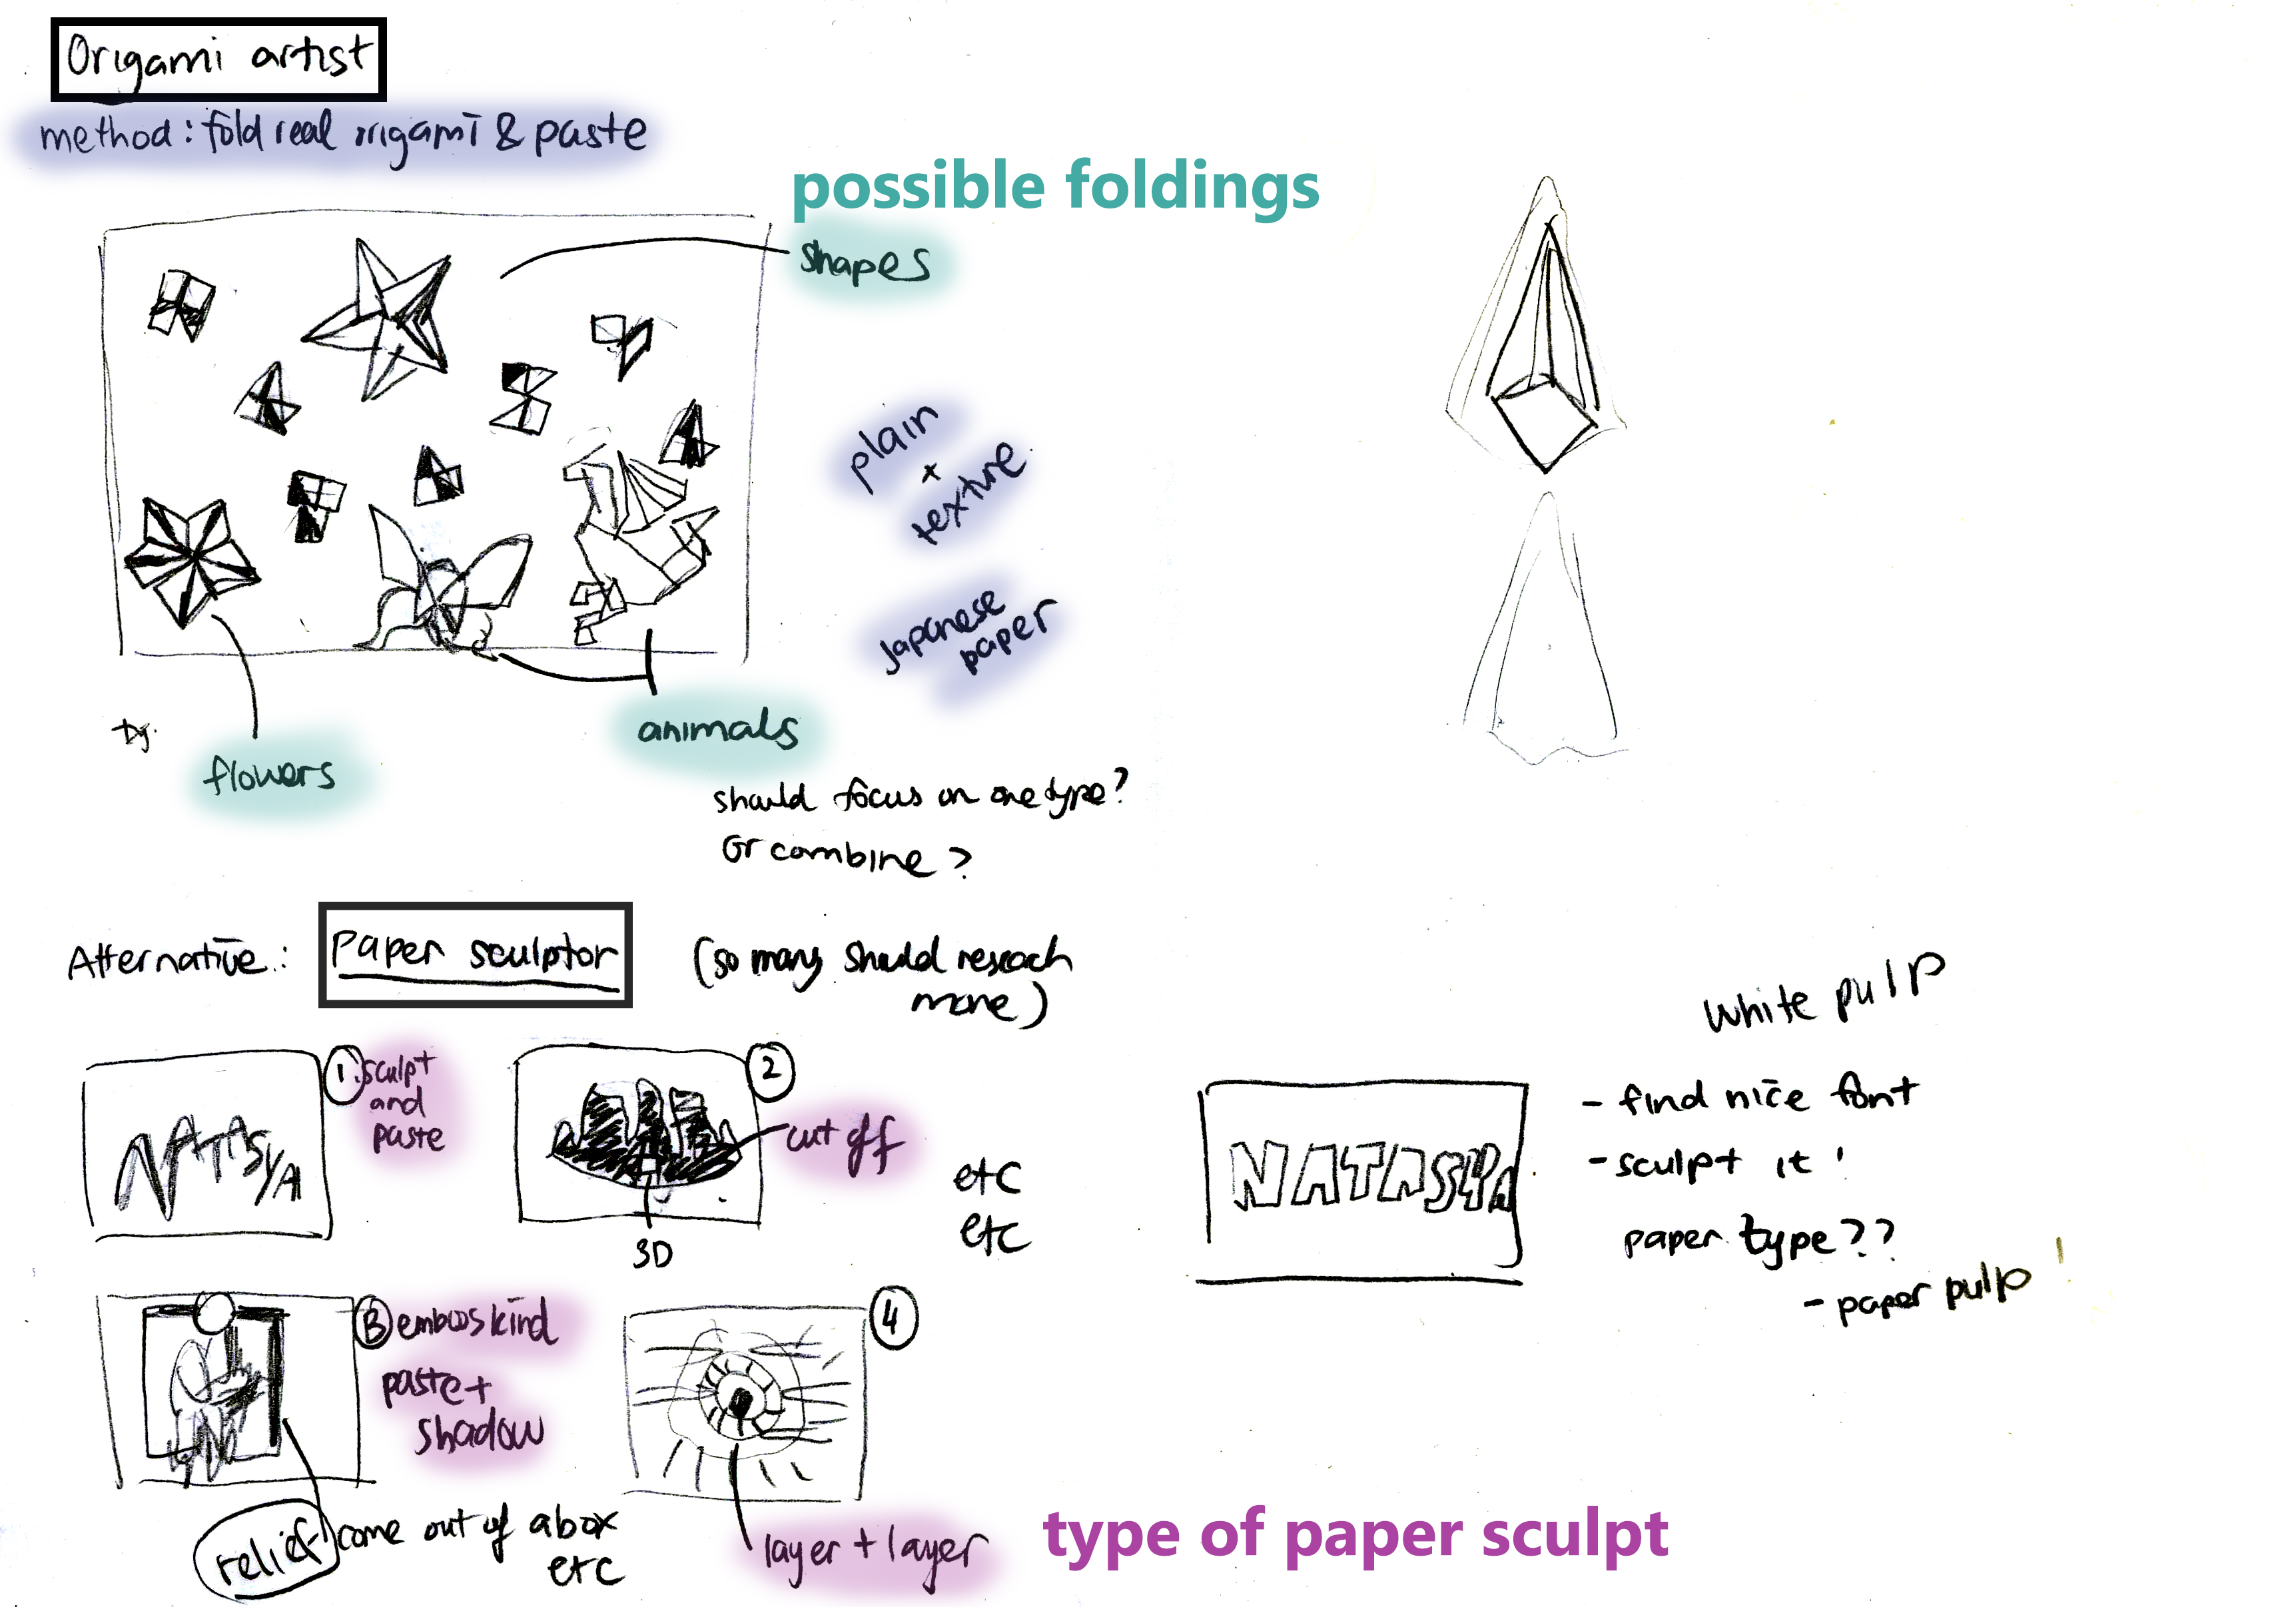
Origami artist and paper sculptor. Origami Artist and Paper Sculptor Brainstorm
For origami artist, I planned to fold real origami, paste it on paper and take photo of it. After consultation (thanks Shirley) an interesting idea was to hang it instead of pasting it. Then, the paper can use texturised Japanese origami paper with plain background to contrast the elements.
As for the paper sculptor (initially was an alternative for the origami artist), there are so many different type of paper sculpt.
I planned to create layers of white paper with the shape of NAT. And I did the draft.
Paper sculptor experiment
However I decided to not do it for the real thing as it feels too plain and I could not find a nice composition other than a plain classic one.
Later on the options evolved and I ended up having these as the finalised ones:
Hi!
This is my final project for 2D Foundation I: Ego.
For the concept, I divided my ego into myself in four different places and different role.
1. Carefree + Singapore = Discipline
For the first context I want to show myself as a student. And the main place for my education is Singapore as I first got the opportunity to study there 2011 in Singapore until now. I used the addition sign as it is something that Singapore culture (especially education culture) is really an essence that has been constantly added to my life as a student.
Carefree: It represents myself as a student before coming to Singapore when I was more free and able to do anything I want without thinking much of the consequences. I was much more selfish and ignorant towards my studies back then. The carefree ness in me was represented by the position of the paper. Its orientation is not align to show my carefree ness and how I trying to escape learning. The crumpled rice paper also represents part of me. The colour is mainly orange to show my immaturity and pink to represent actually my love to study which make me want to escape to normal way and finding my own learning.
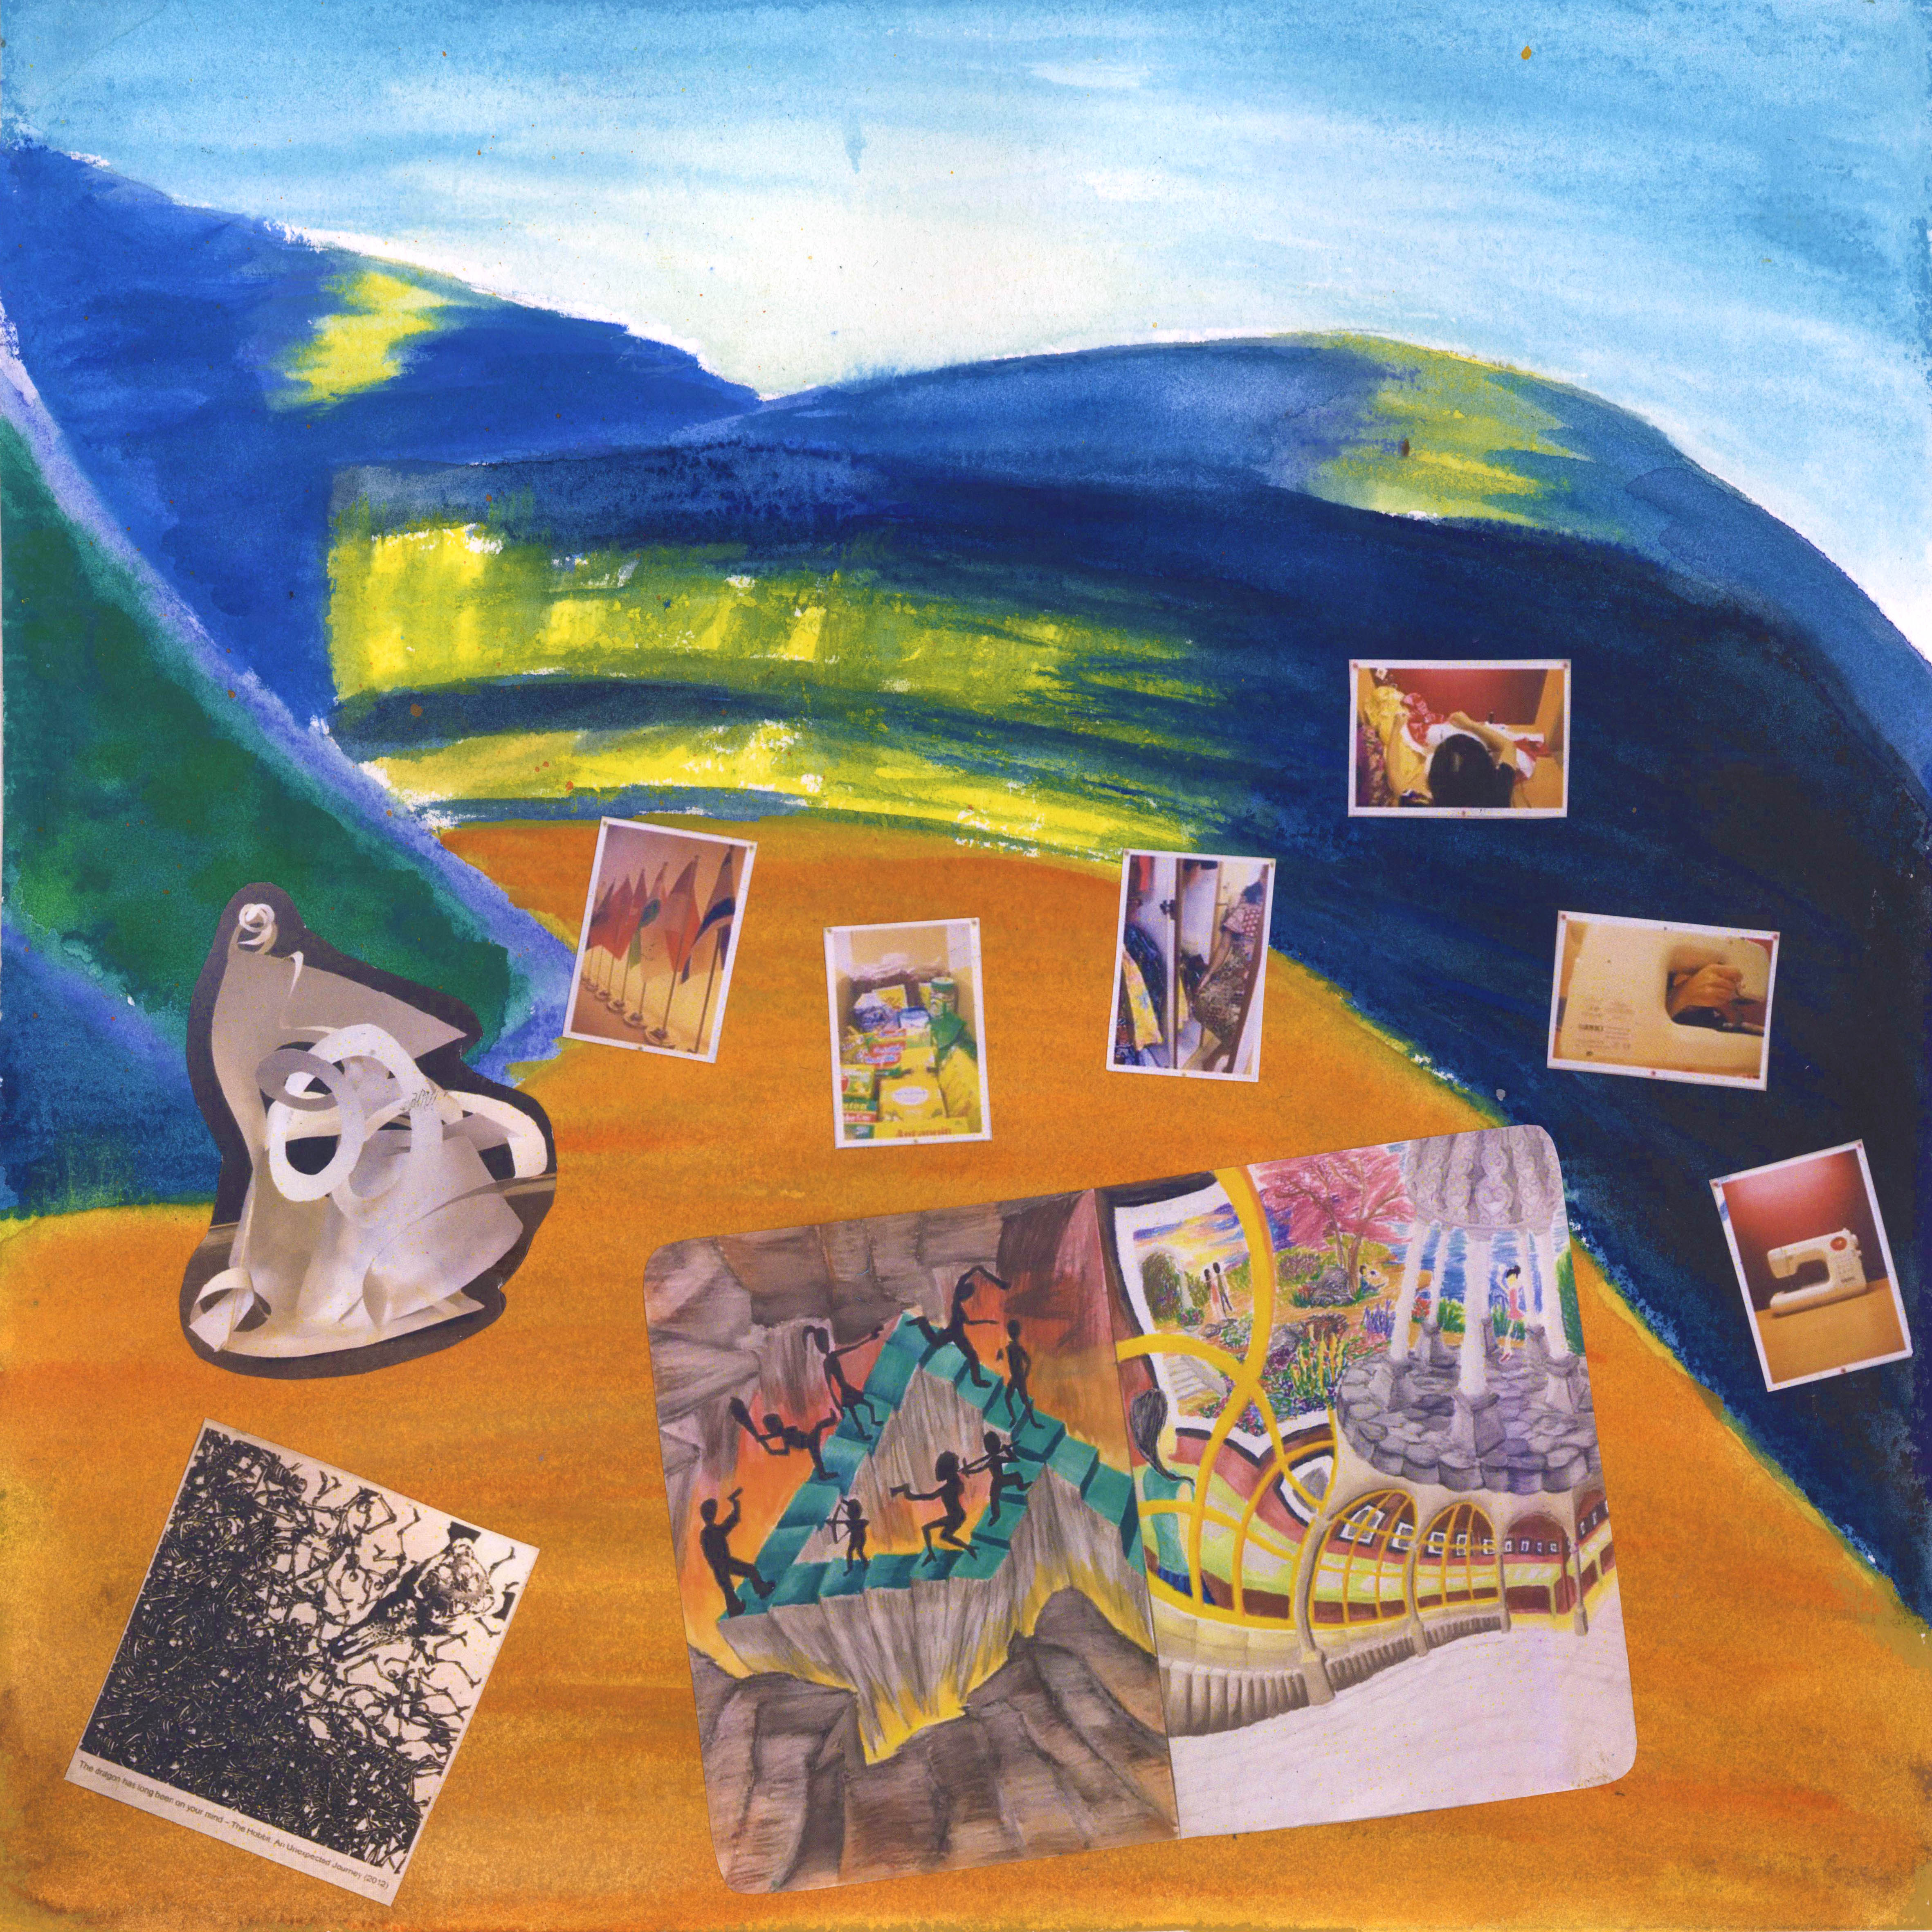
Singapore
Singapore: As a student, my Singapore includes pictures of the hostels I stayed before together with the schools I went to. I put wire mesh on top of it to represents the rules and confinement I feel in Singapore. There are many rules like curfew and study time. As such, I felt that me in Singapore is confining and limiting in many ways here, especially in term of physical freedom. It is really different from back then when en I was able to freely do whatever I wanted, including in what CCA I want (not what I need) and how I want to spend my leisure (not feeling guilty for not studying). The colour blue represents intellectual which is how I see Singapore education. And not only that, these were the period when I had my ‘blue’ period that has shaped me the way I am now (not only as a student, more as a person in general) and as such I personally feel this colour is most suitable for my Singapore.’
Discipline
Discipline: It shows me what I have become after years immersing myself with the education culture of Singapore. As can be seen, the rice paper that previously represented me as ‘Carefree’ is greatly influenced by the blue colour of Singapore. At the same time, the pink paper is now weaved into the wire mesh, representing that I am following the rules and regulations especially in the way I am learning. Also, the orientation of the paper is right as well which means as a student I am more on the right track now. The colour is combination of the both previous panel. Showing how as a carefree student I integrated to Singapore education system and slowly but surely becomes a more discipline person. There are many ways and aspect where Singapore has influenced me and discipline is one of the most significant one as a student.
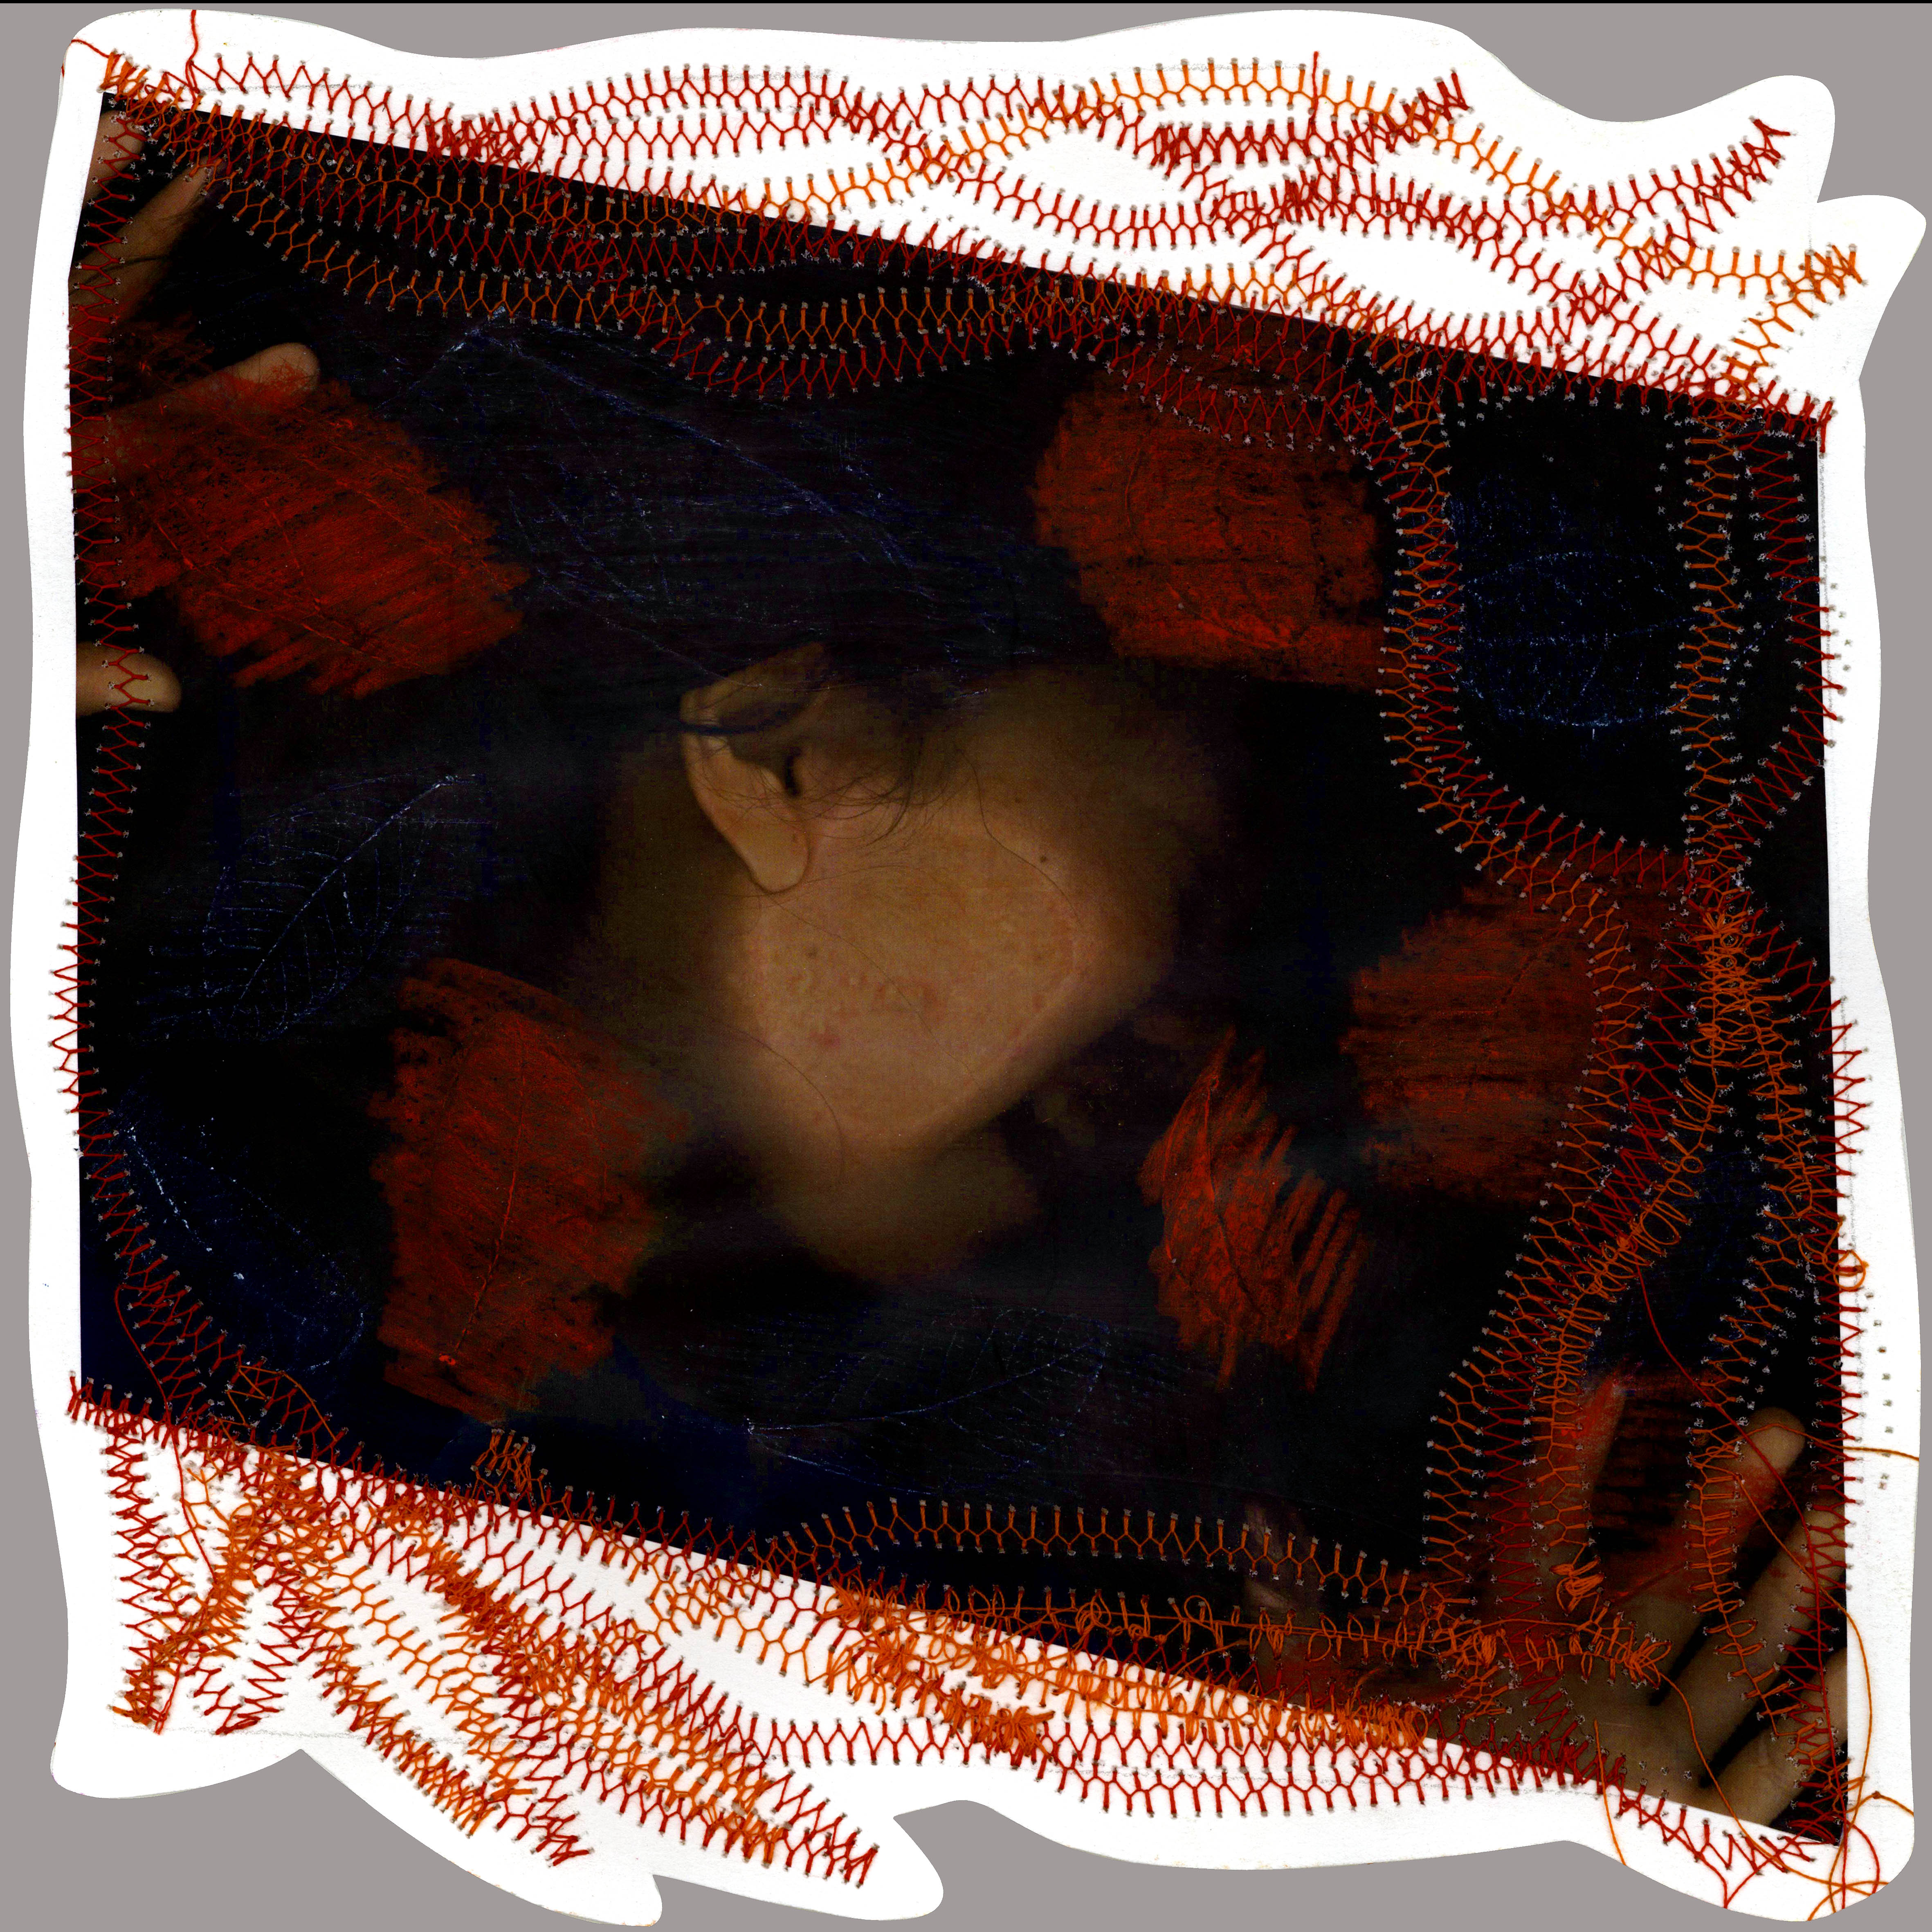
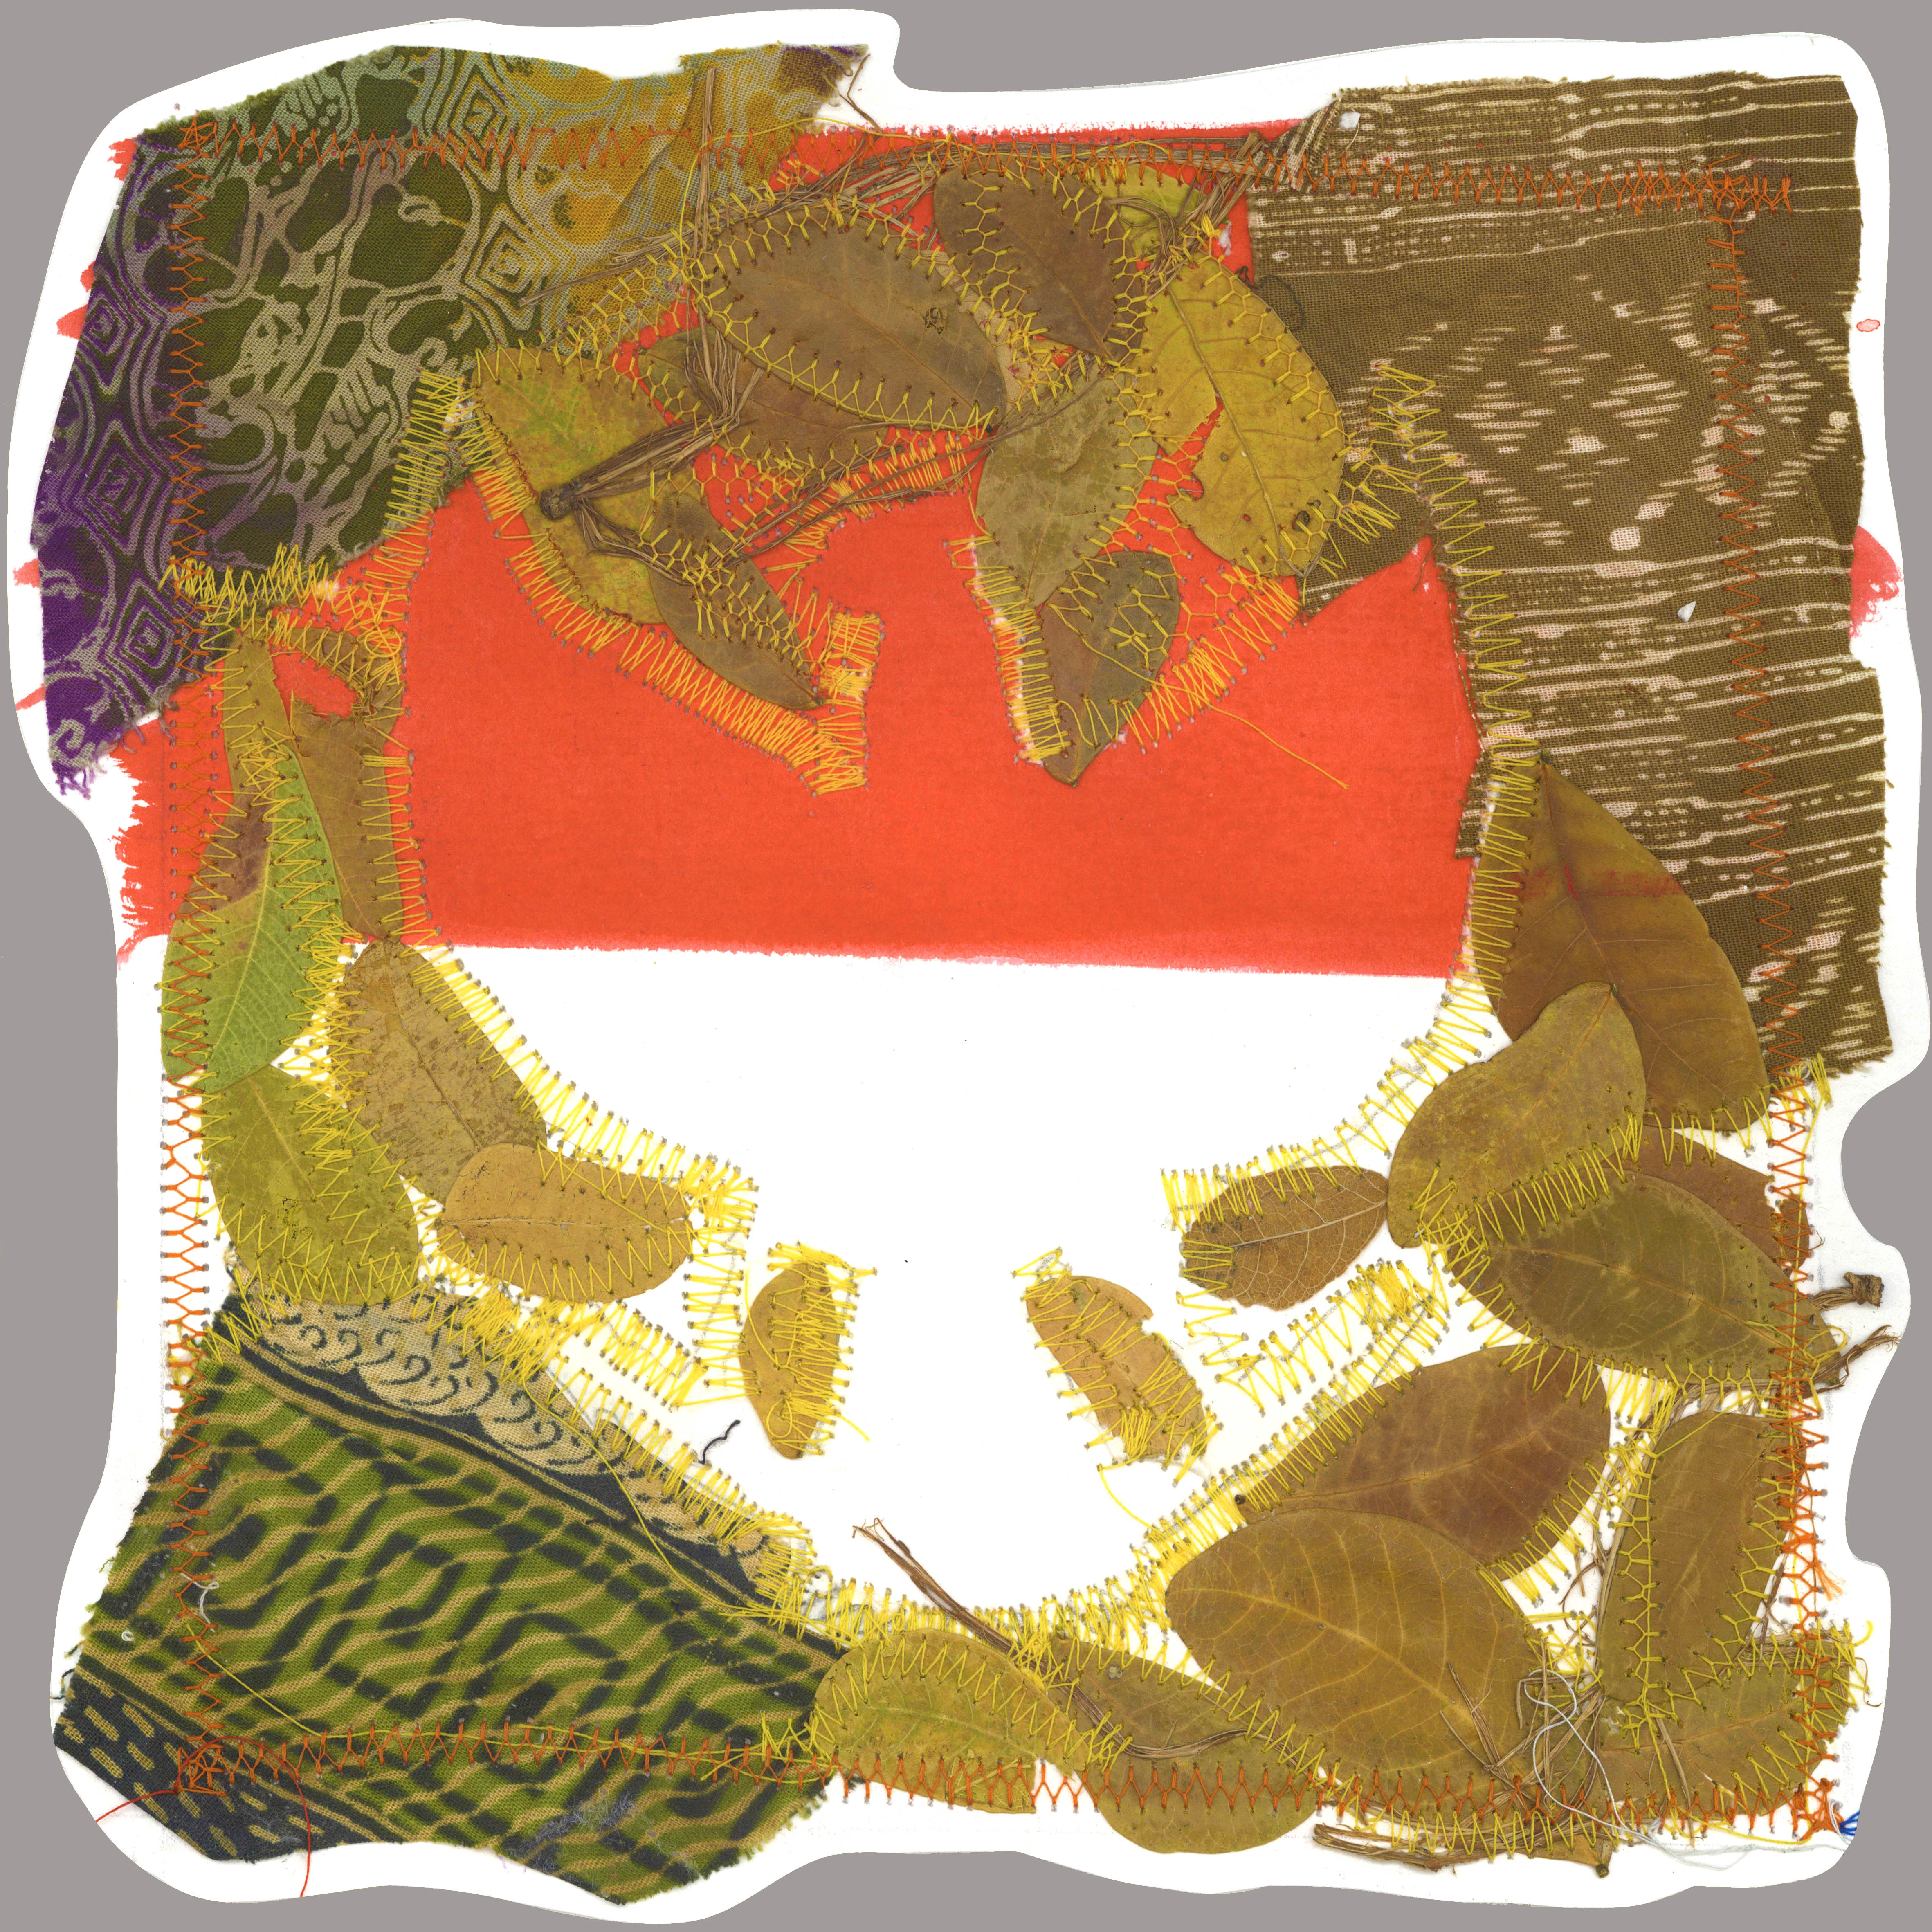
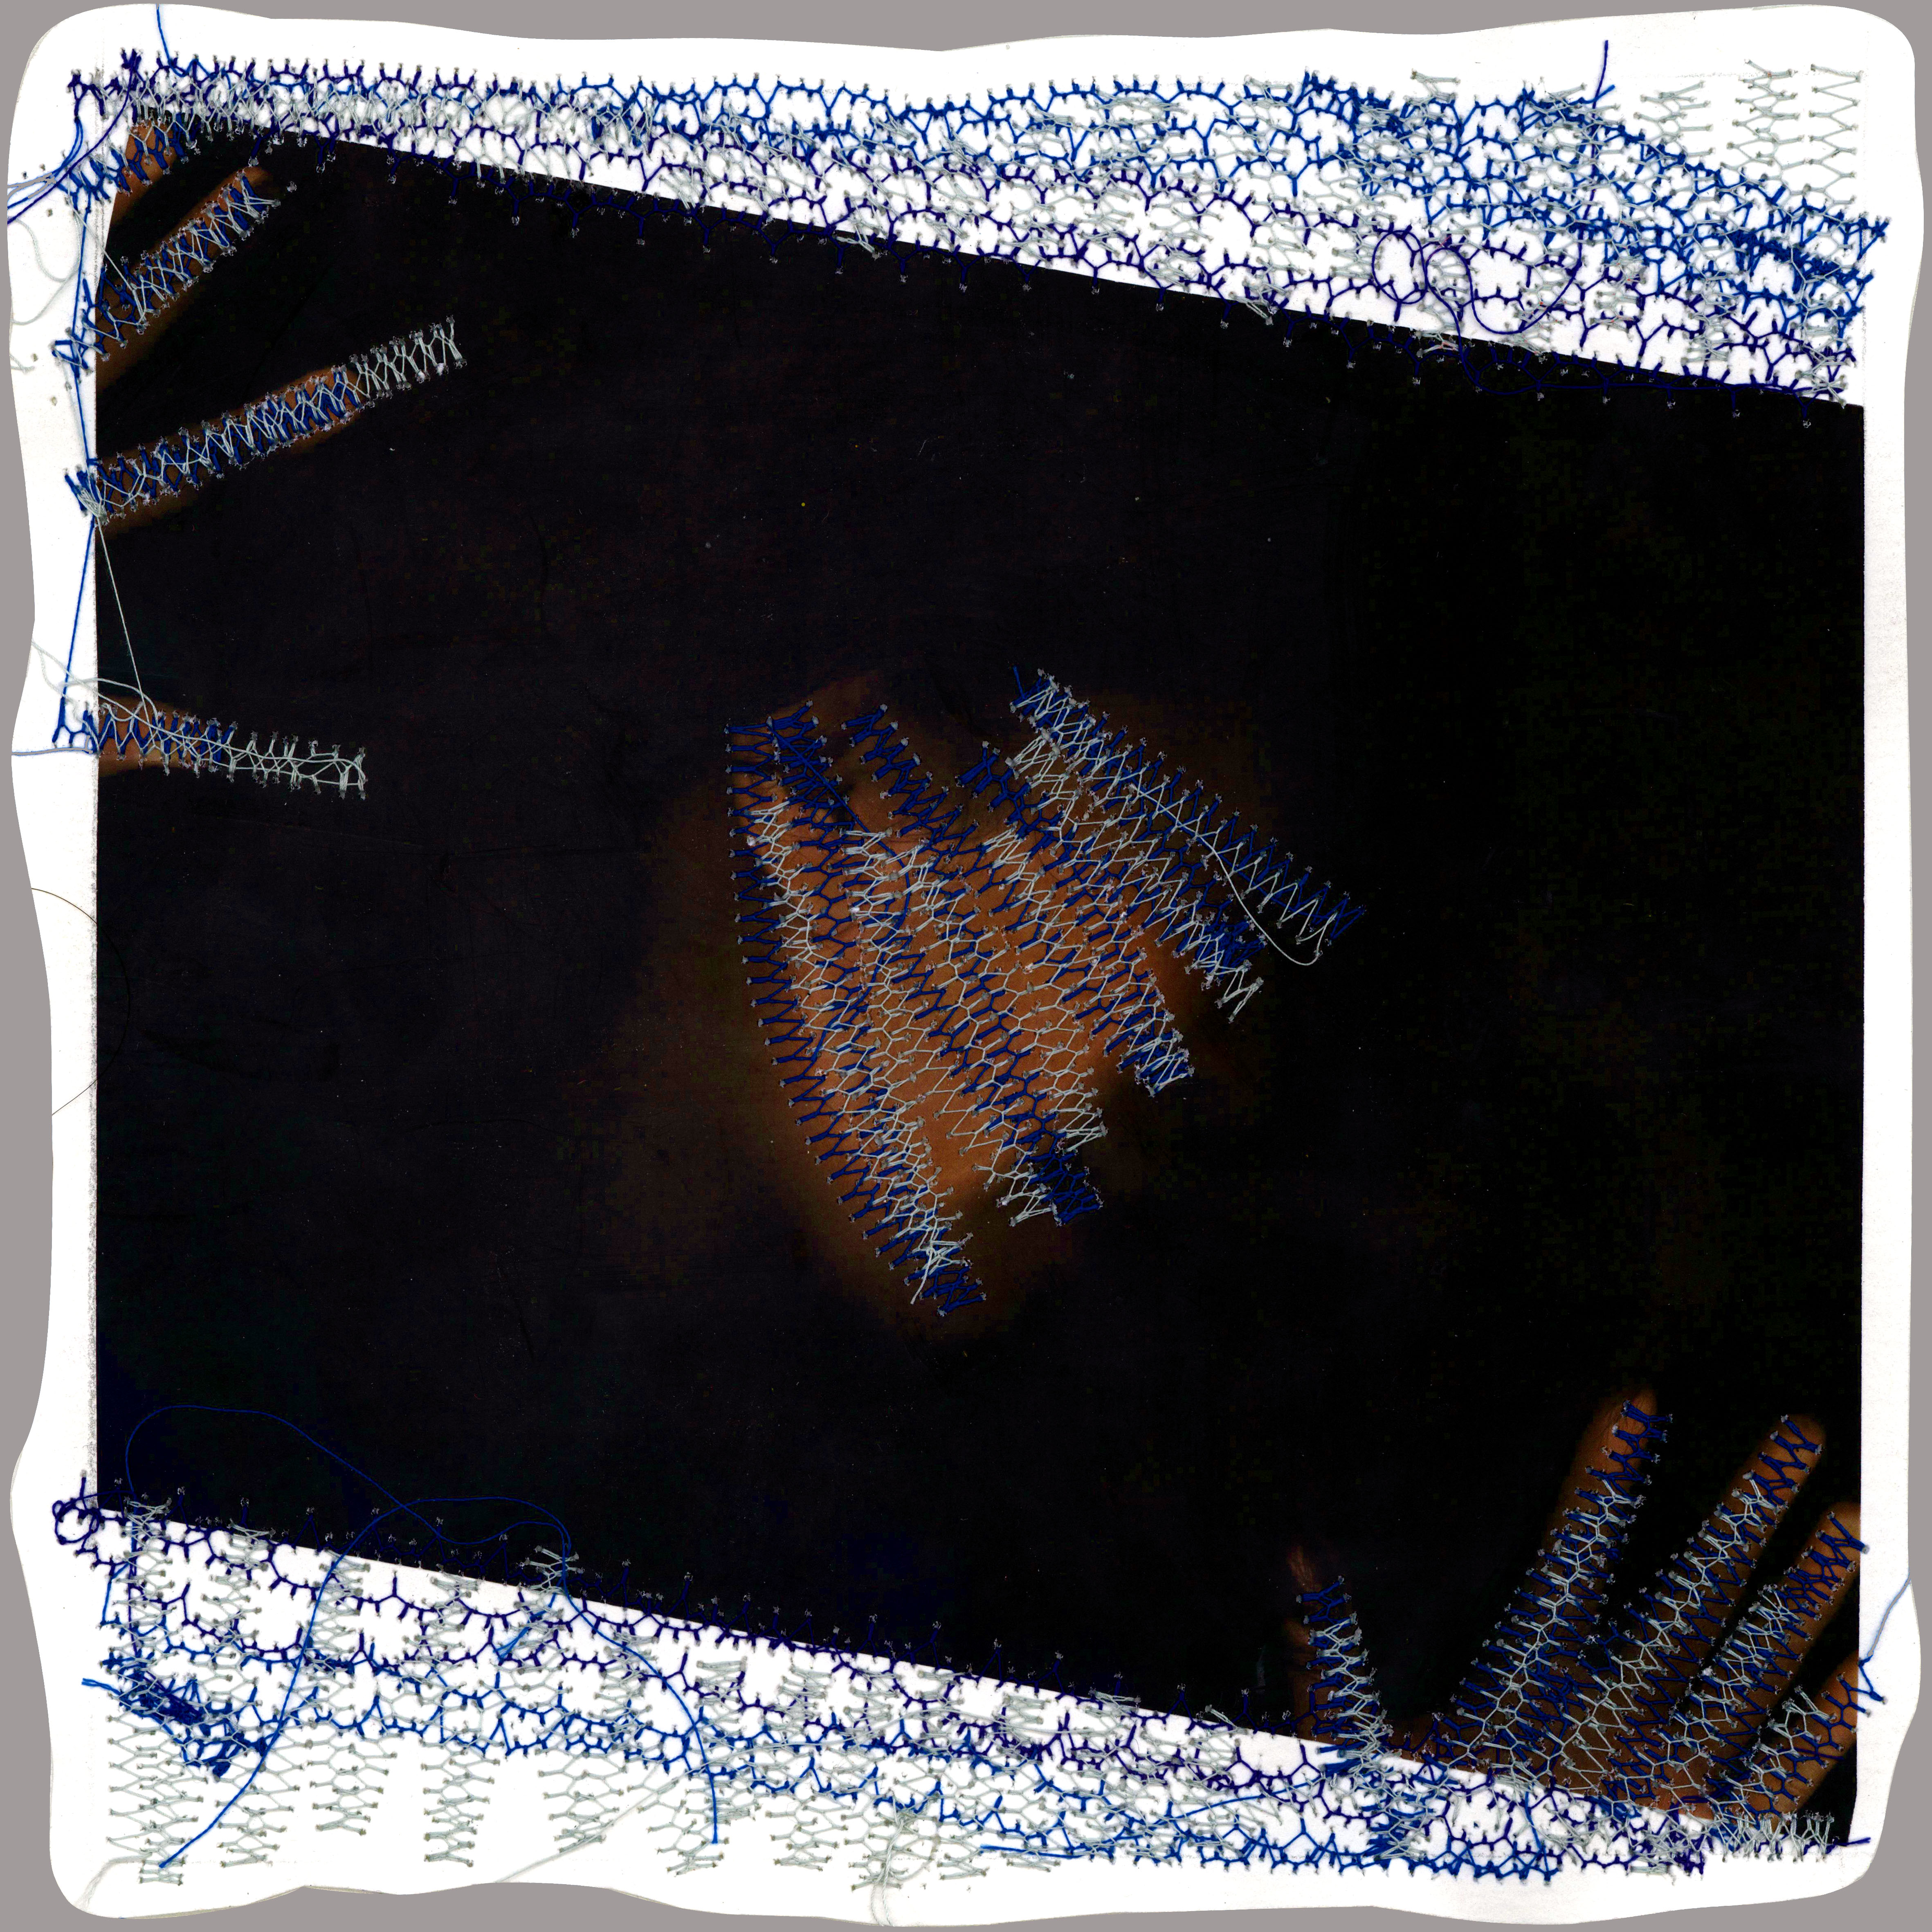
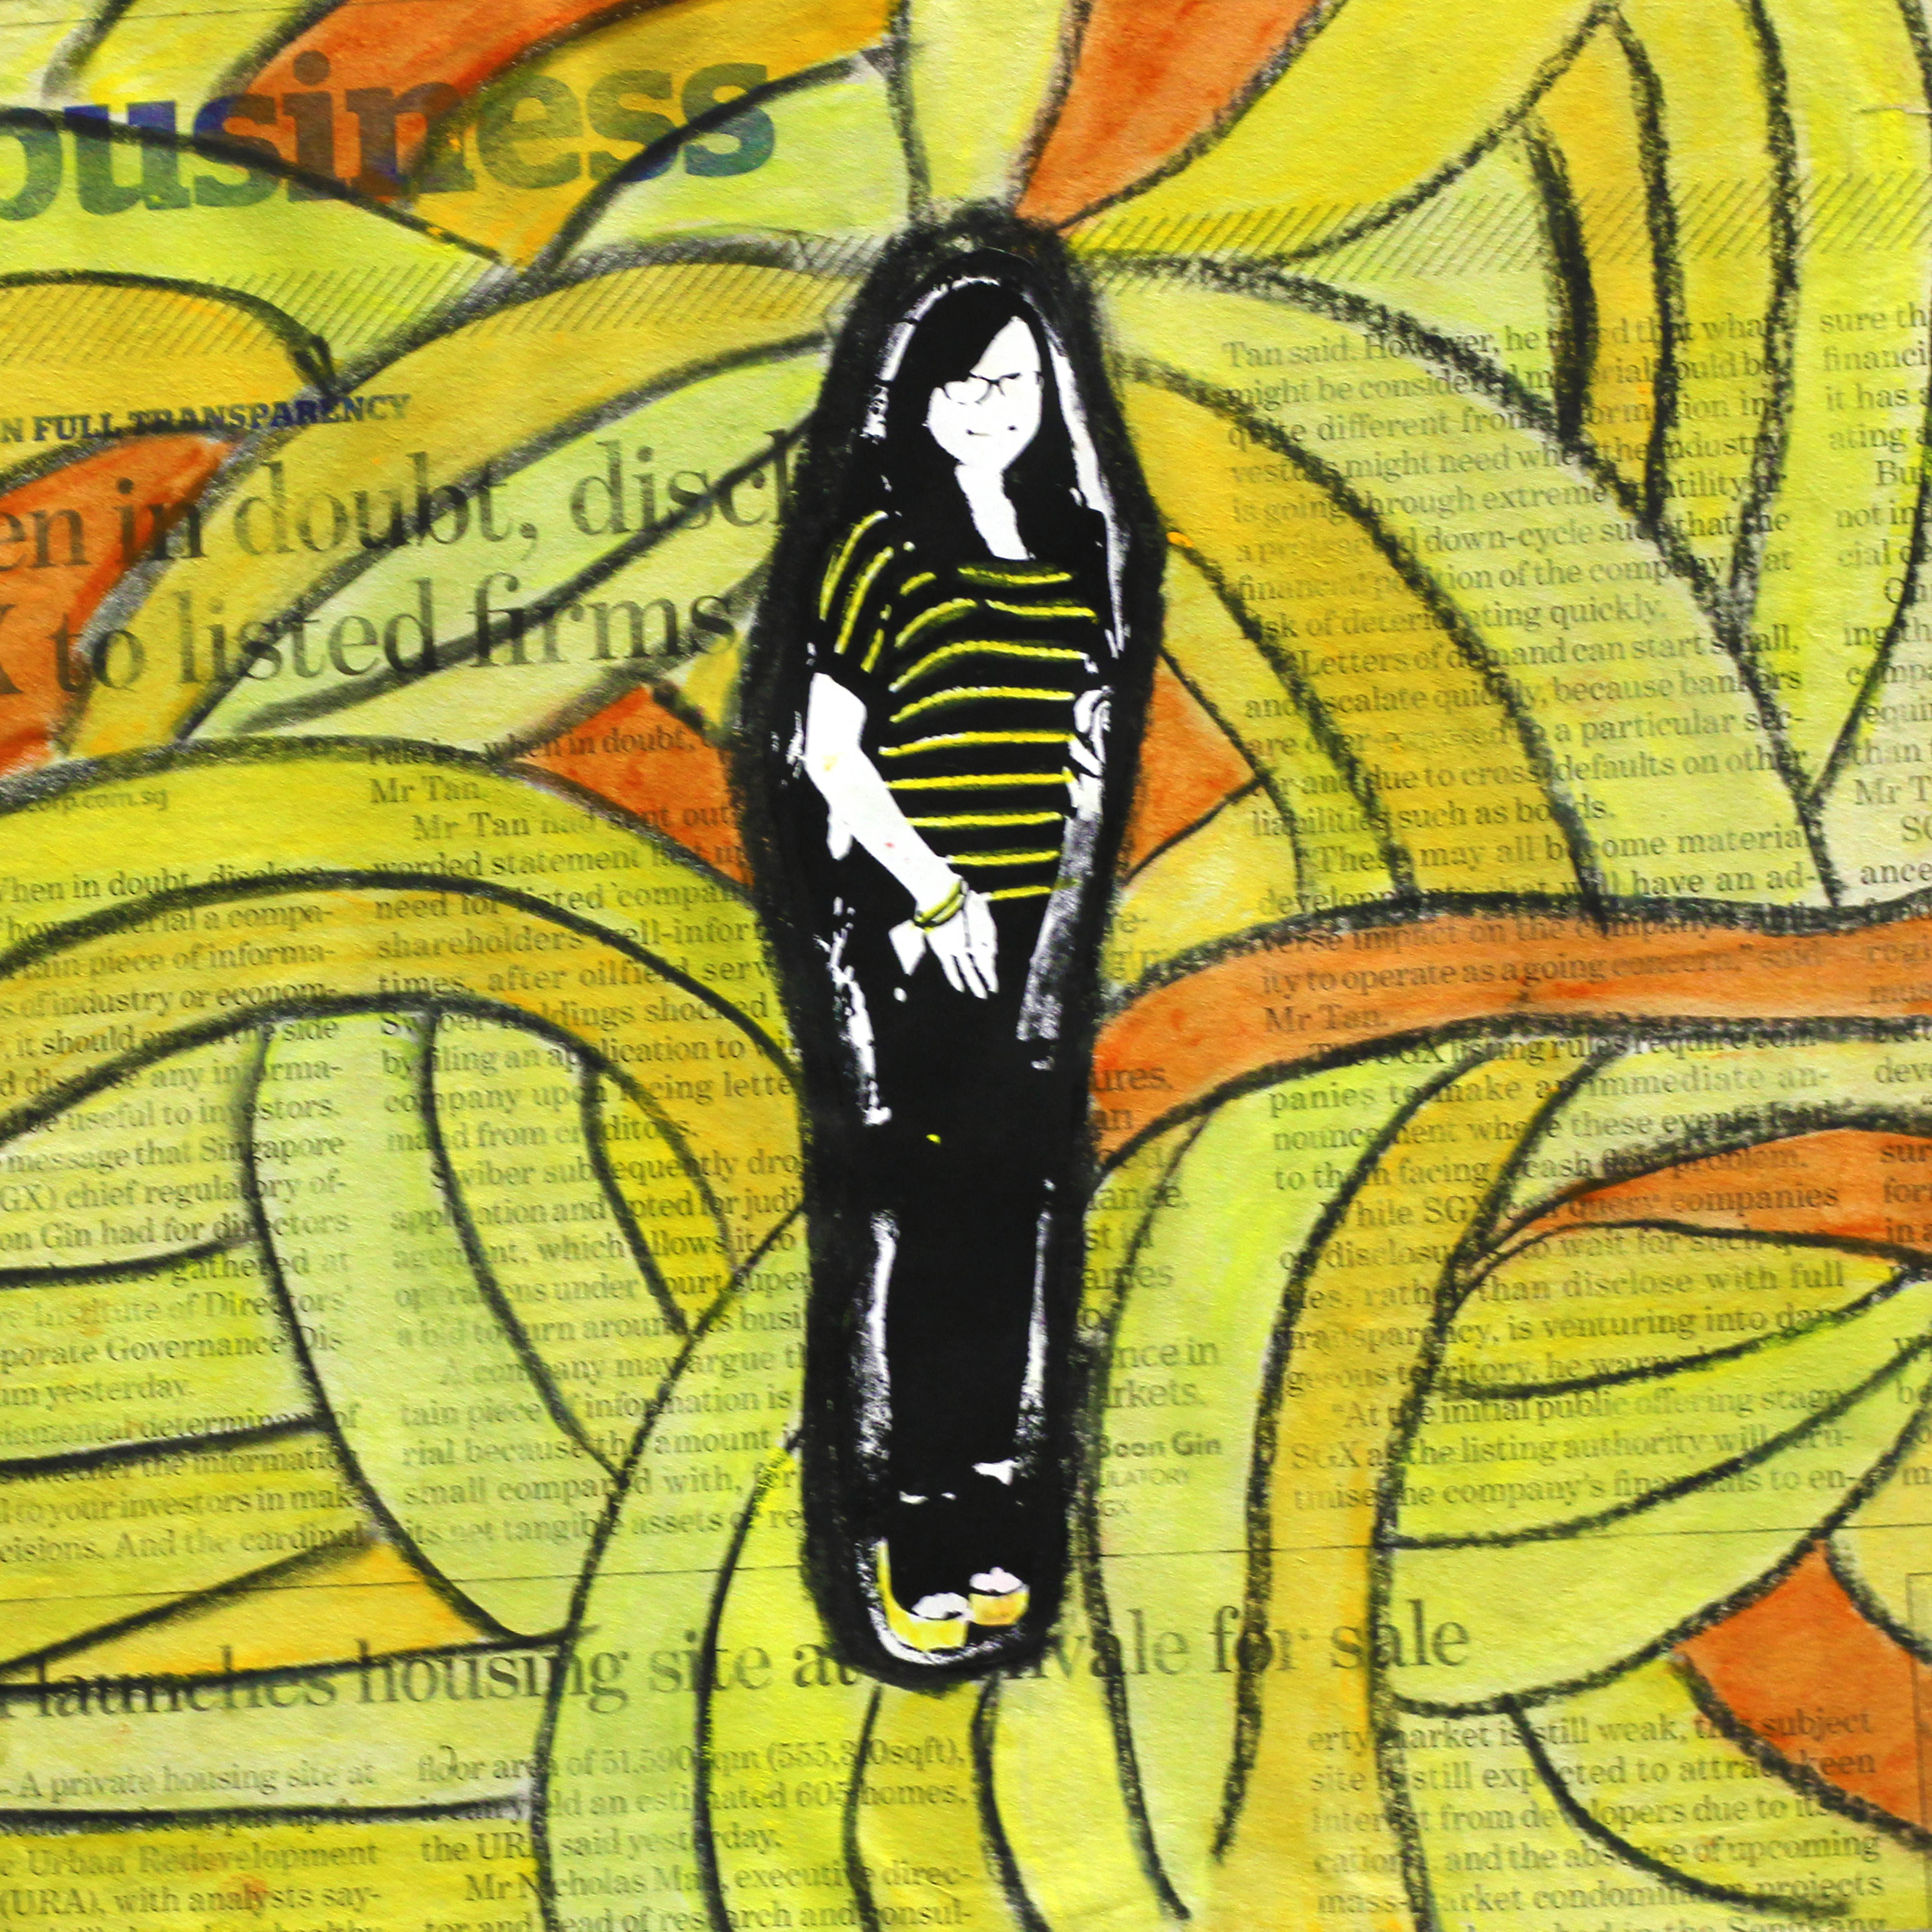
2. Expressive – Indonesia = Faceless
This time my role is as an Indonesian. Even though I have been living in Singapore and become more-like Singaporean (especially the way I think), I am still a proud Indonesian. The sign is subtraction sign to show what will happen to me if Indonesia is taken out of me.
Expressive
Expressive: I want to show that I am someone with many ways of saying things (sometimes I unconciously do exxagerated gesture when I am excited), something that I show most of the time when I am speaking in Indonesian. It is a scanned picture of me trying to be expressive and conveying many emotions, added by red and orange pattern to even enhance the idea of expressiveness as both are striking colours which show energy, excitement, and fun. Also added by pattern from leaves and twigs which represents my Indonesia to show that my expressive trait is something that has been nurtured from my identity as an Indonesian.
Indonesia
Indonesia: The main idea of my Indonesia is batik and nature. I want to combine the first thought when people see Indonesia and what is mine. I used google image to search Indonesia, the very common result are the photos of many natural tourist spots in Indonesia. And personally my first thought was batik. As such, the main characters of my Indonesia are nature and batik. In addition, the red-white background which is the Indonesian flag colour, I pasted batik and leaves and twigs (represents nature) to create the shape of Garuda Pancasila, which is the national emblem of Indonesia. The colour is around yellow-green. Green for the nature and yellow is around the gold colour of Garuda Pancasila. While the red colour also serves as the transition from the ‘Expressive’ previous composition.
Faceless
Faceless (defined as lacking character or individuality): It is the same picture as the ‘Expressive’ however it gives different feeling as the colour theme is changed. It has the pattern of pale blue to show the blueness. While part of the face and fingers are sewed on with thread to cover the identity and show the idea of facelessness. At the same time, blue colour psychologically represents the lack of emotion, coldness and aloofness as well as the idea of sadness. In short, it represents my blue misery and loss of identity and characteristics of me, in the case that Indonesia is ever taken out of me.
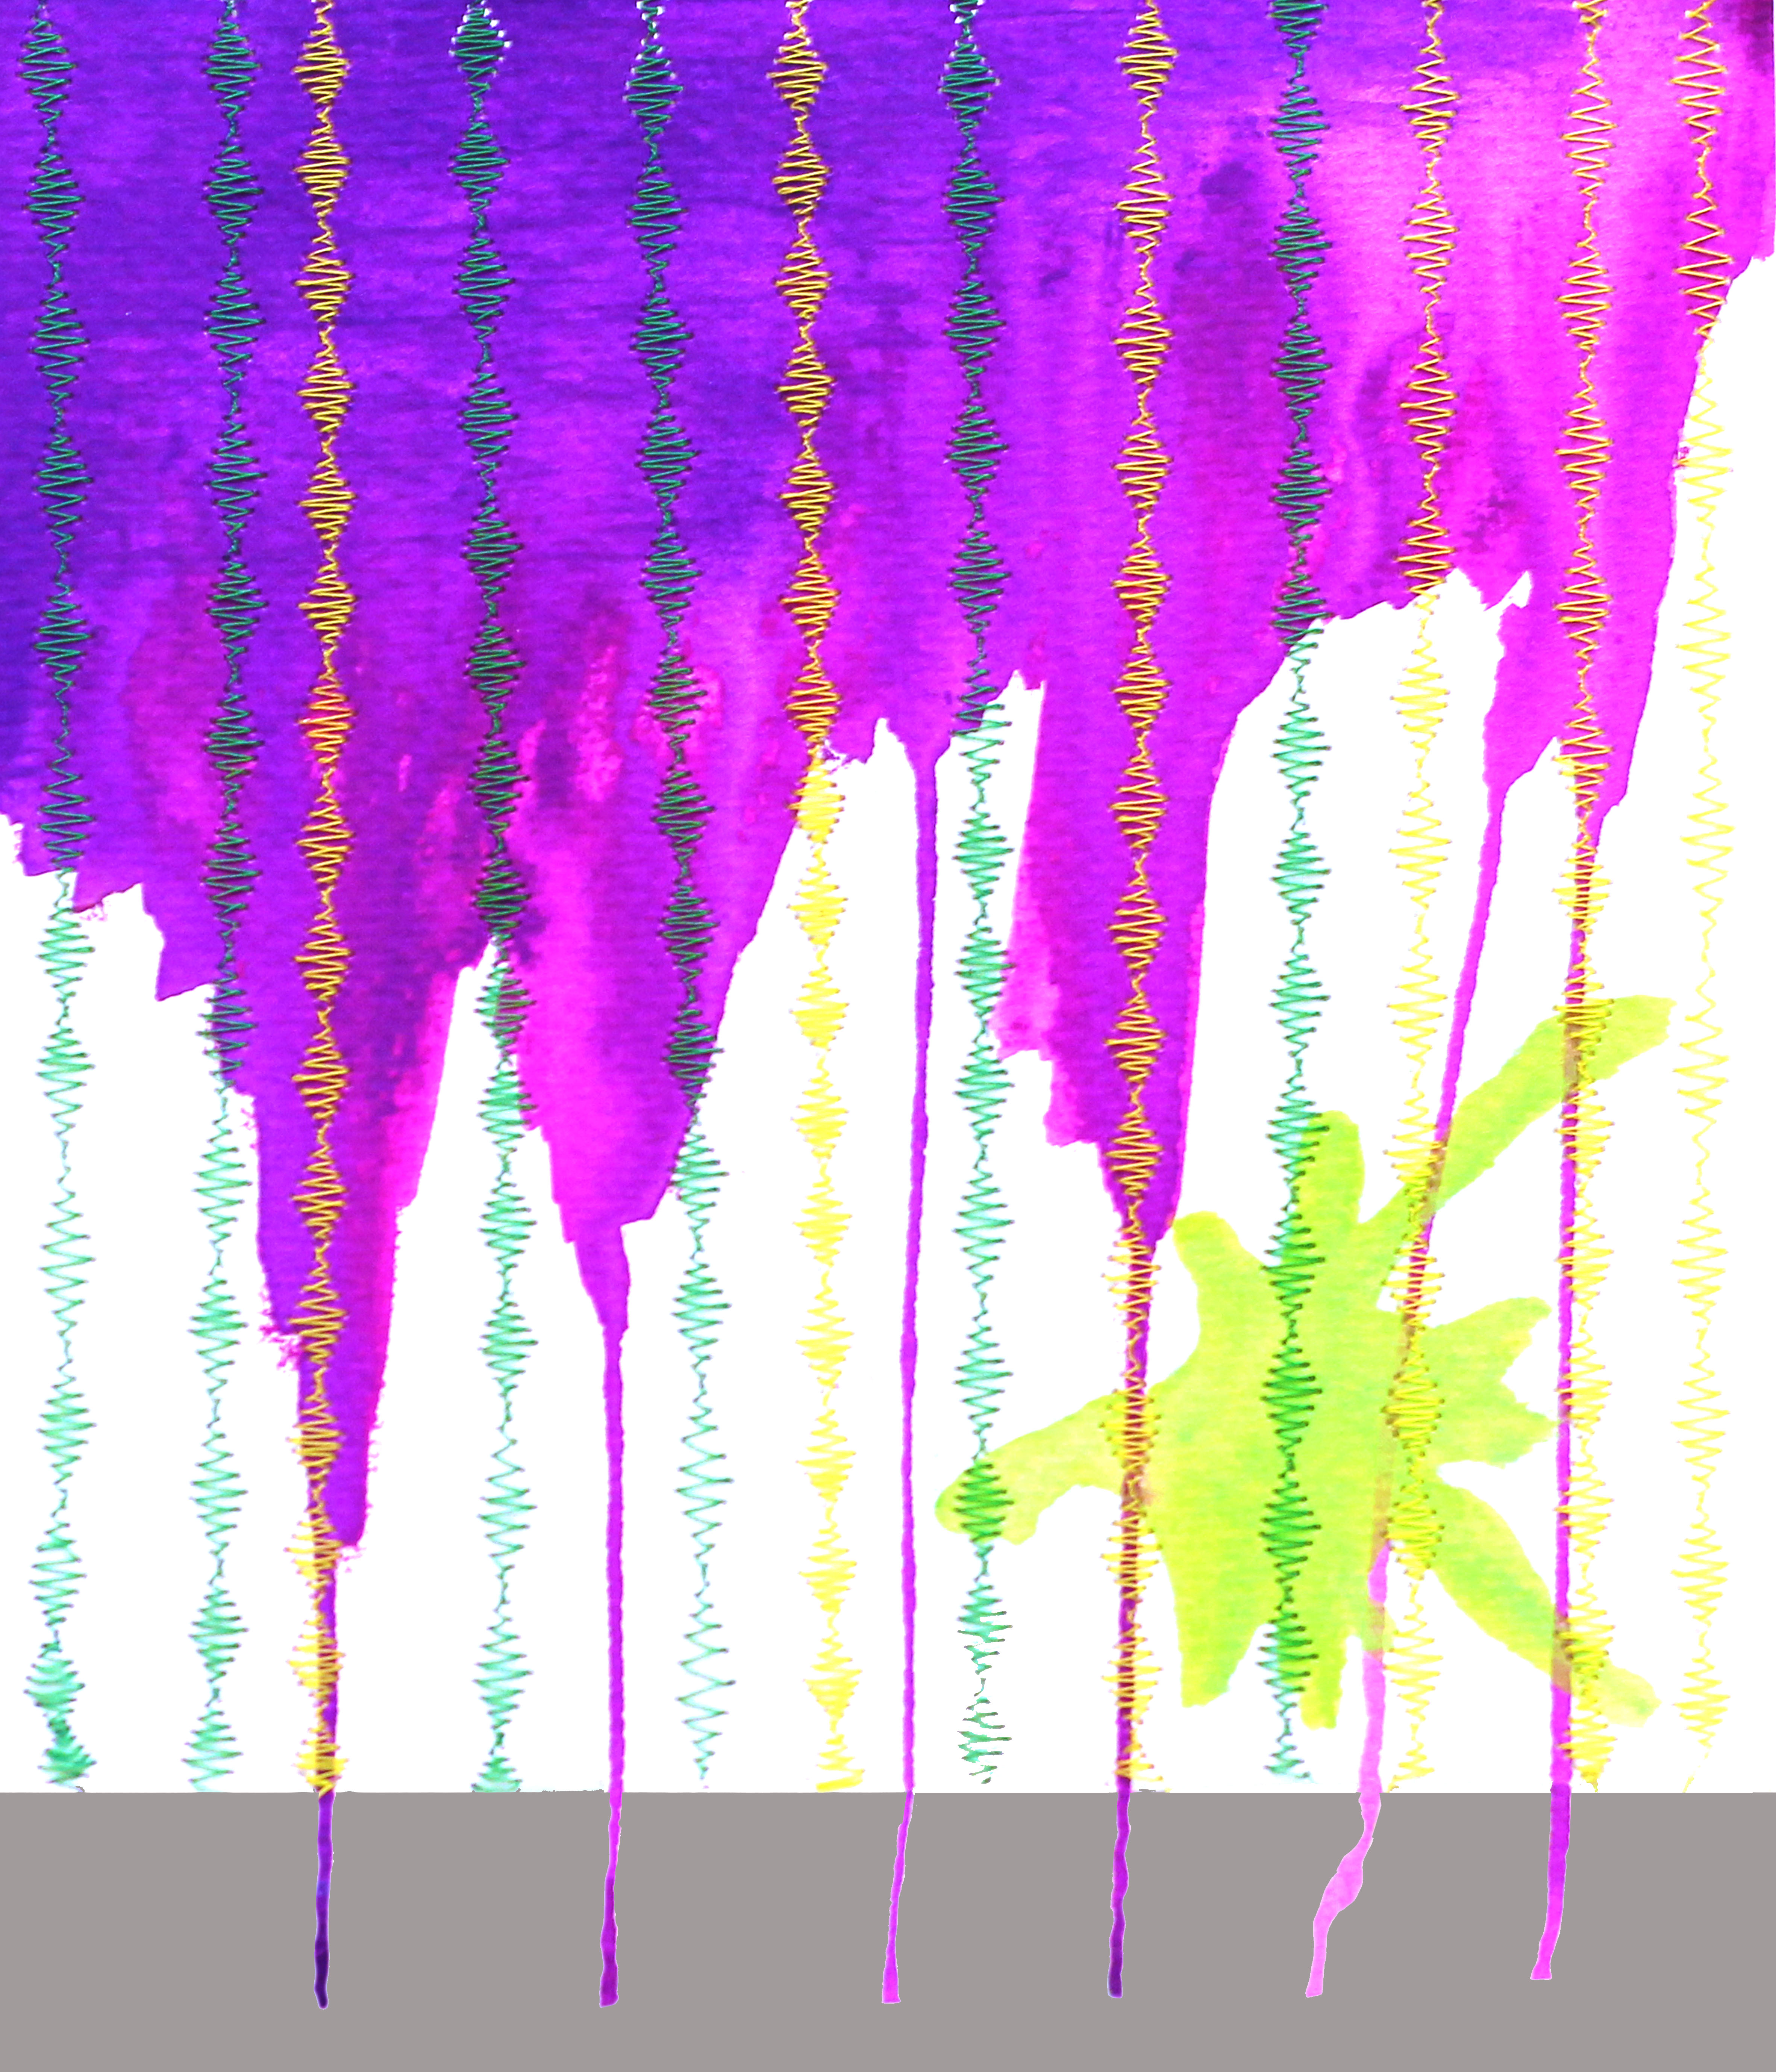
3. Creative x ADM = Passion
This is my role as an artist. The place is ADM as it is the place I learn most about art. Actually I never thought I will go to an art school, it was a hobby and I didn’t learn art formally before. But I can say that being able to enrol to ADM is one of the best blessing I ever received in my life. I use multiplication sign to show that the way my passion for art is really raised in ADM, and it is something that will keep on repeating and going on. As such, it is not merely adding for me, but much more than that hence multiplication.
Creative
Creative: Creativity is personally what I feel as an important characteristic that every artist to have, something that I want to keep on developing along the way. It is represented by the purple violet paint drip and yellow green paint splash. I used red violet as the main colour as it means creativity, imagination and passion which for me really describe the creative. On the other side I contrast it with yellow green to get the complementary harmony which add vibrancy, energy and visibility to the creativity. Meanwhile, at the same time exist the vertical yellow green pattern which represents the routine and repeated habit (not creative) in order to contrast the striking creativity and normal.
ADM
ADM: A very important place for me as a growing artist is ADM. The ADM is represented by the drawing of ADM building. Also, at the same time I personalise it by adding photos of various different projects that I have done during my Foundation period. I also used complementary colour to emphasise on the vibrancy and energy that I personally feel in my ADM journey so far.
Passion
Passion: Handling the many projects and assignments from ADM, a very important drive that has kept me going is passion. The very first thing that remind me of passion is fire, which is the red shape in the middle of the composition. The colour of the surrounding is the combination of the previous 2 composition (half left from ‘Creative’ and half right from ‘ADM’). In a way, this composition is really the summary of me as an artist at the moment. And also my hope for the burning desire to stay along my whole journey.
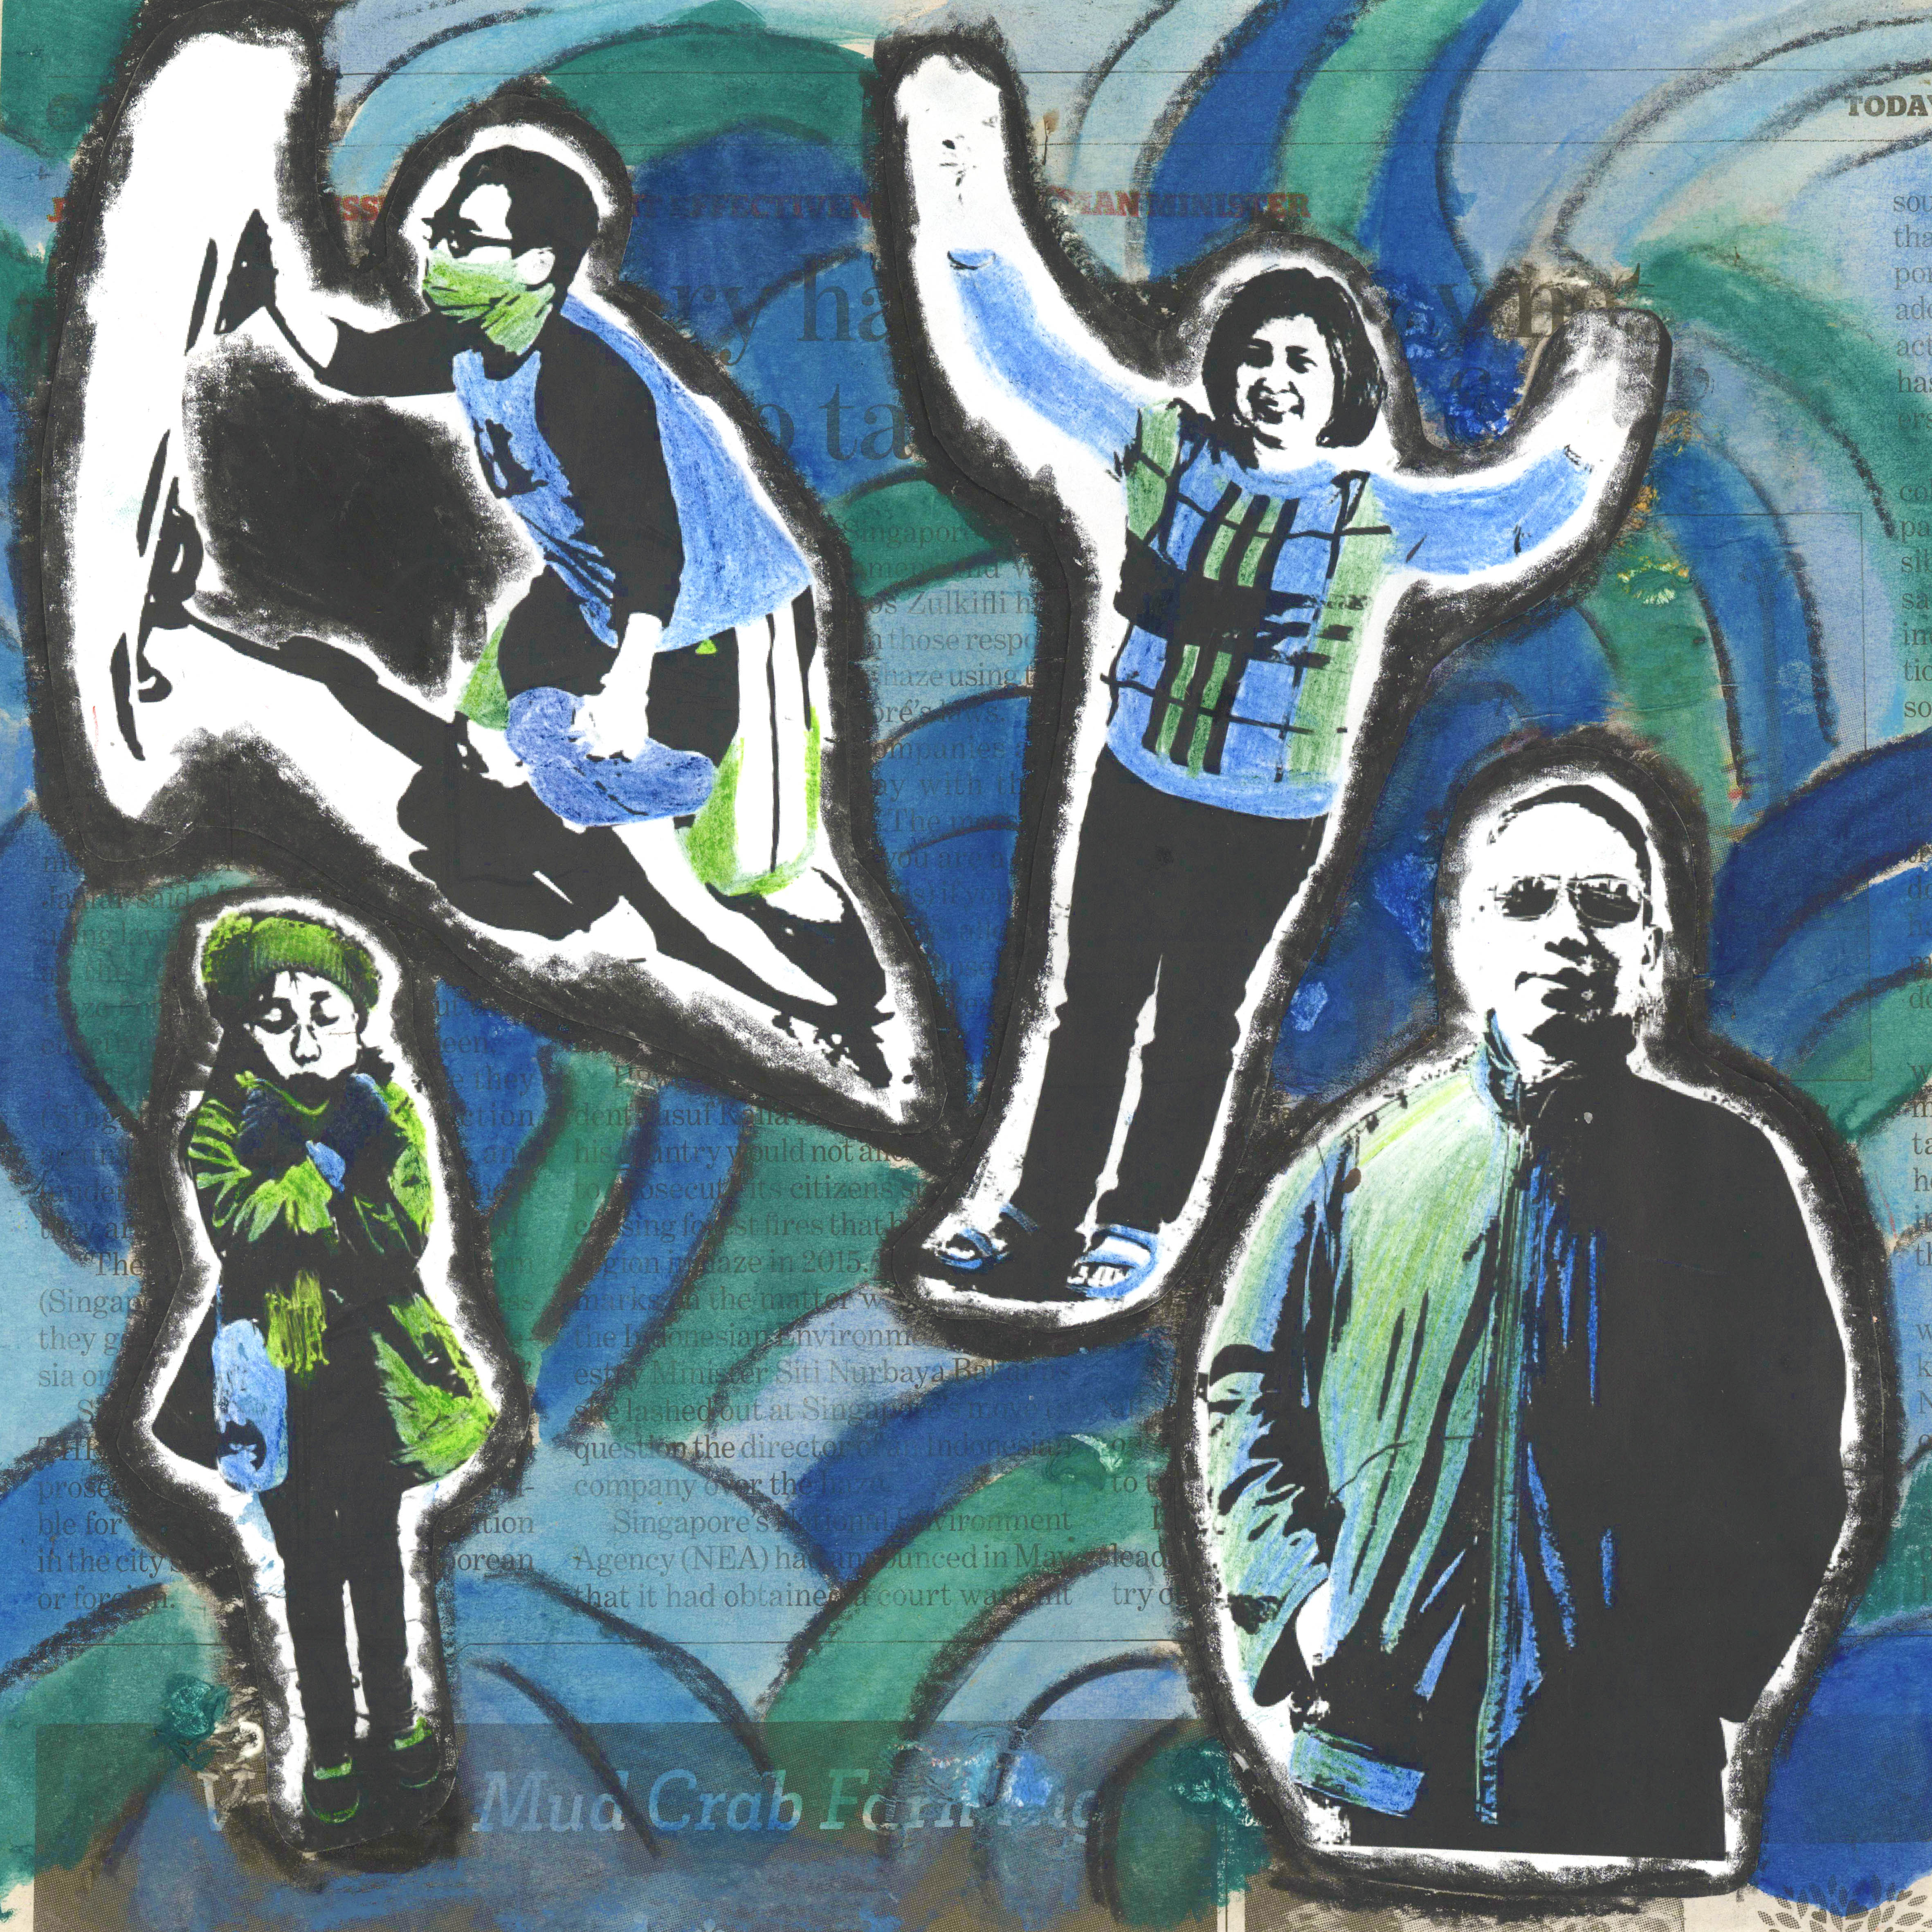
4. Me + Home = Complete
Lastly, it is my role as a person. I used addition as my home is really a very important piece that I need to complete me as an individual.
Me
Me: It is simply just me. I tried to keep it simple and really choose a simple colour to keep it mild because I really want it to simply say ‘Hey it is me! Everything here is just me the way I am!’.
Home
Home: For me, home is not merely the hose but more to the people in it. As such, my home is represented by the collage of my family member in their own way how I see each of them. For my Dad, I see him as someone who always try to be seen as a serious person (but he is not) that I chose his picture while wearing shade that makes him looks more serious. My Mom is someone who always cheerful and happy in every situation. My younger brother is an adventurous person who always want to try new things such as the sand board he is holding when he first play it. Then my little sister is a very girly and cute girl who likes to do different poses and asks me to take pictures of her, like the one she is posing on the composition. So my family is basically home for me. I choose the colour blue green as I when I google search: family gathering poster, many of the poster are blue and green, which I feel suit my family also.
Complete
Complete: I really want to show that me and home is complete and enough for me. I used black and white family photo layered by acetate paper of three primary colour of red, yellow and blue. As these colours are primary colours, I want to show that this composition is a primary, significant and important for me as a person, which is my family and I.
So yes, those are my Ego for Foundation 2D final project. For me, it is a very personal project that maybe only me can fully understand the feeling and meaning behind everything. But I really hope you can understand it as well. This final project really made my 2D journey more private. Sadly, I think this will be my last post for 2D Foundation I this year. I would also take the chance to thank Ina as a very supportive and positive tutor. Thank you for reading, I hope you enjoy this post :’D.
2D has been fun :’)

 The Singapore Sports Hub LINKWAY BRIDGE at Kallang is a zine about the bridge introducing itself to the readers. Attempting to make itself more known than it currently is.


