3D | “Stargazer”

WELCOME BACK AGAIN!

Here’s my precious final model – “Stargazer” and sketch analysis! Please click to enlarge the image and enjoy~

1 2


Material Application


4

“Let It Shine”
A teardrop that glistens in the moonlight. A clean, elegant and structured piece of jewellery that is suitable for both casual and formal gatherings. This pair of earrings is made of clear crystal and paired with gold studs to give a sophisticated finish.


5

“Stargazer”
In the city we live in today, it’s difficult for us to see the stars with just our naked eye. Ever wondered what’s in a sky full of stars? This optical instrument that is made of gold and crafted polished teak wood will bring you to the world we call heaven.

Thanks for reading!! Byeeee

3D | Curvilinear 2D Sketch Analysis

Hello I’m back!

Here are the 3 sketch models that I had done for the Curvilinear Exercise before achieving my final model. Please click on the images for a clearer view.

Model 1 / Boxer Club

Welcome to Boxer Club, have you sign up yet? If you have not, you should. But anyways, introducing our new equipment which is a 2+1 stress reliever punching bag!!!! Woohoooooo. The sphere is the speed punching ball, the cylinder is the heavy punching bag! Whereas for the cone, it’s a support for both of the equipments heh.


Model 2 / The Elephant

The circus elephant – the cone, is balancing on a wooden log – the cylinder, and juggling a ball – sphere with this trunk! Elephants are awesome. But, circus elephants is a sad sad thing.


Model 3 / Stargazer (Final)

I love this model the most and so I’ve decided it to be my final! My initial plan was to make a Gramophone, but I felt a Telescope is much cooler. The cylinder that is wedge between the cone and sphere allows the Stargazer to rotate and look at different views which is amazinggggg. I’ve always wanted a telescope but… honestly what can you see in Singapore with all the city lights turned on??? So i’ll just make do with my digital mini Stargazer.


I hope that you guys enjoyed my models! & this marks the end of Curvilinear Volumes.  Time to ZZZzzzZZzzzz.

3D | Final Model Submission

WELCOME BACK!

Here’s my precious final model and sketch analysis! Please click to enlarge the image and enjoy~

1

2

Material Application

Didn’t touch my 3D skills for like… 2 years and I’m sooooo glad I still remember how the software works. Bless the person who created the 3Ds Max software. So here’s what I’ve come out with for my application!

3

Close up 1 copy

If only I get to live in this house. Life would be sooo awesome (wood fan 4eva) 

4

How ya like my popsicle mold with a STRAW. Cool idea huh? Thanks Arianne for your brain cells.

Anddddddd. This marks the end of Rectilinear Volumes. Next to come, and to conquer – Curvilinear Volumes!

3D | Sketch Models & Analysis

Hello!

Here are the 3 sketch models that I did before achieving my final model.
Please click onto the images to have a clearer view.

3D Submission-023D Submission-033D Submission-04

Model 1
Ms Cheryl mentioned that my model has 1 Dominant and 2 Subdominants. I was told to make my dominant even bigger so that it has more presence than the rest. Whereas for my subordinate, the length is similar to my subdominant, therefore I had to reduce the subordinate’s size even more.


3D Submission-053D Submission-063D Submission-07

Model 2
Ms Cheryl really liked this model (i’m not sure why). She said that this was very interesting… I thought that this model reminded me of a hammer. But yes, I tried working on this model to make it as my final piece but I felt that it didn’t look as interesting.  


3D Submission-083D Submission-093D Submission-10-103D Submission-11

3D Submission-12

3D Submission-13

Model 3
This model is my favourite among all the pieces that I did. However, Ms Cheryl mentioned that I still have 1 Dominant and 2 Subdominants in this model (so frustrating i can’t get it right!!!) Anyway, she was really nice as she helped me in restructuring this model.I hope that the above infographics is not so confusing… I tried my best to show the changes made! As you can see below, there’s a massive change in the 3rd model. 3D Submission-14

So that is how I achieved my final model! Thank you guysssss, time to sleep.

3D | Sketch Models 1

Hi all,

Here are my first few 3D models! They are not the improved ones as these are sort of the first drafts and I will be including the comments by Ms Cheryl from today’s consultation. Well actually she mentioned that majority of my models has very confusing SD and SO… But anyhow, I will just post my progress since I already took the effort to photoshop and brighten each picture :p

*please click on the picture for an enlarged version*
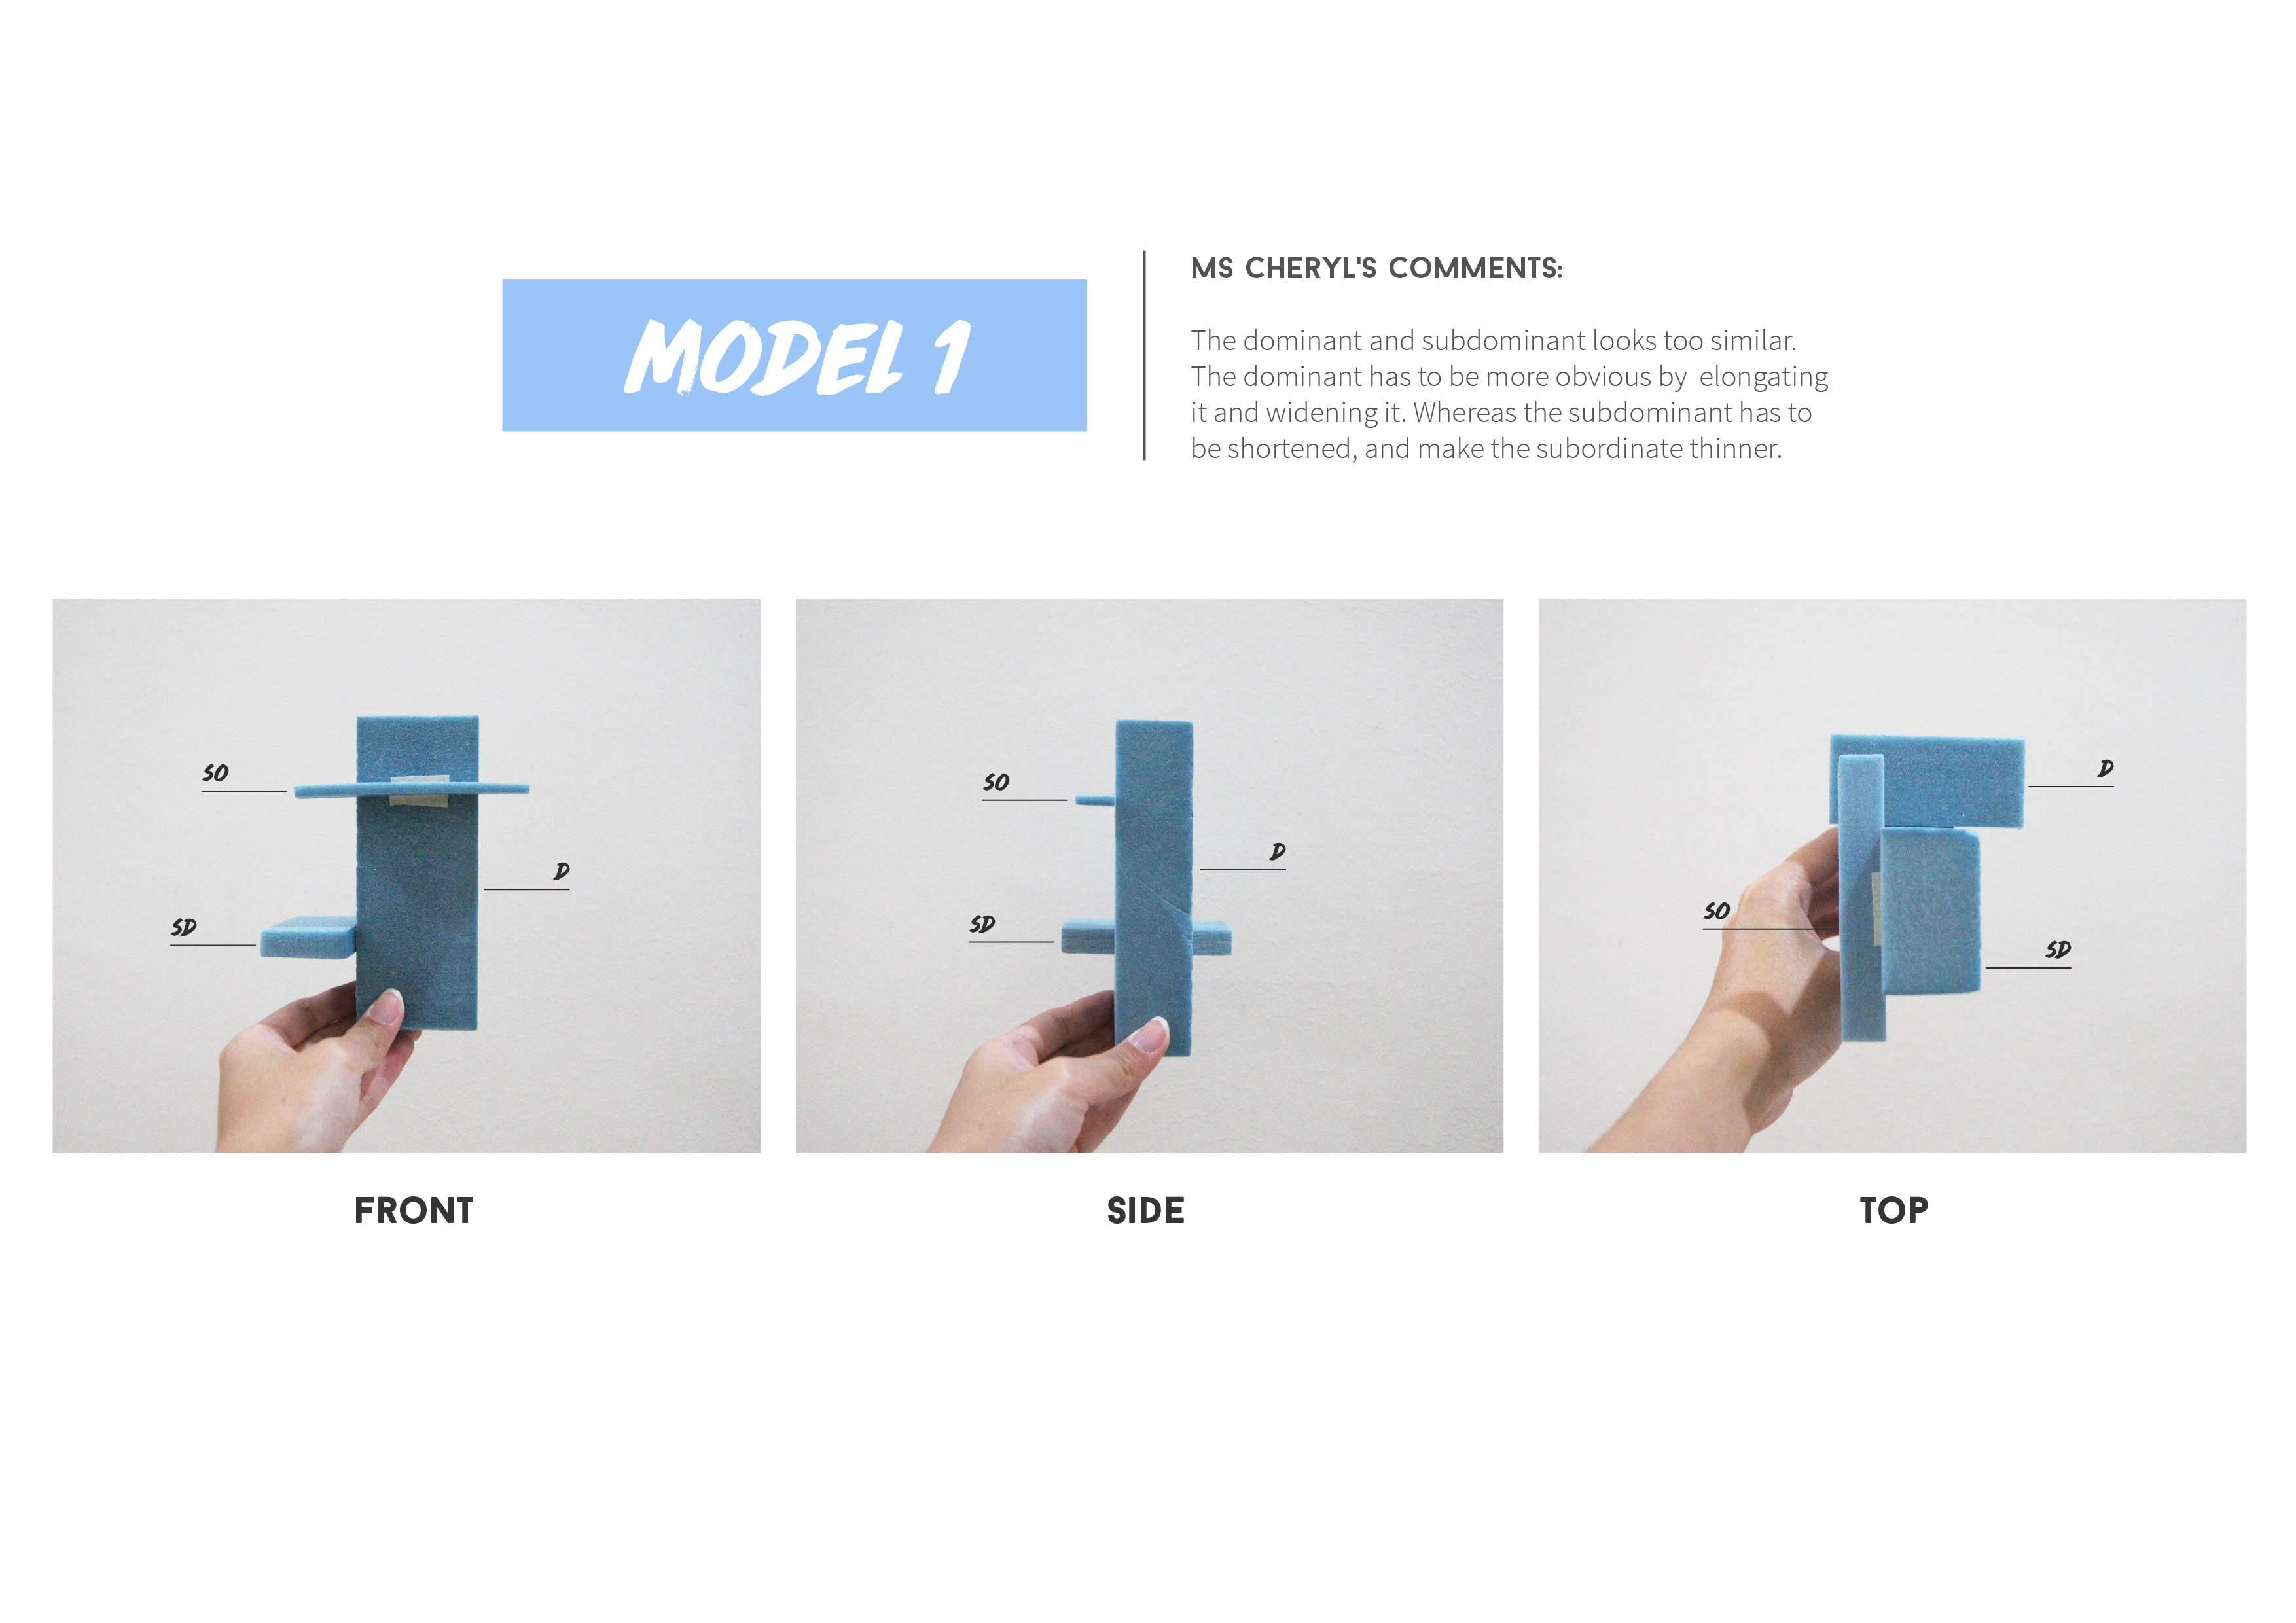
 

Model 1model-1
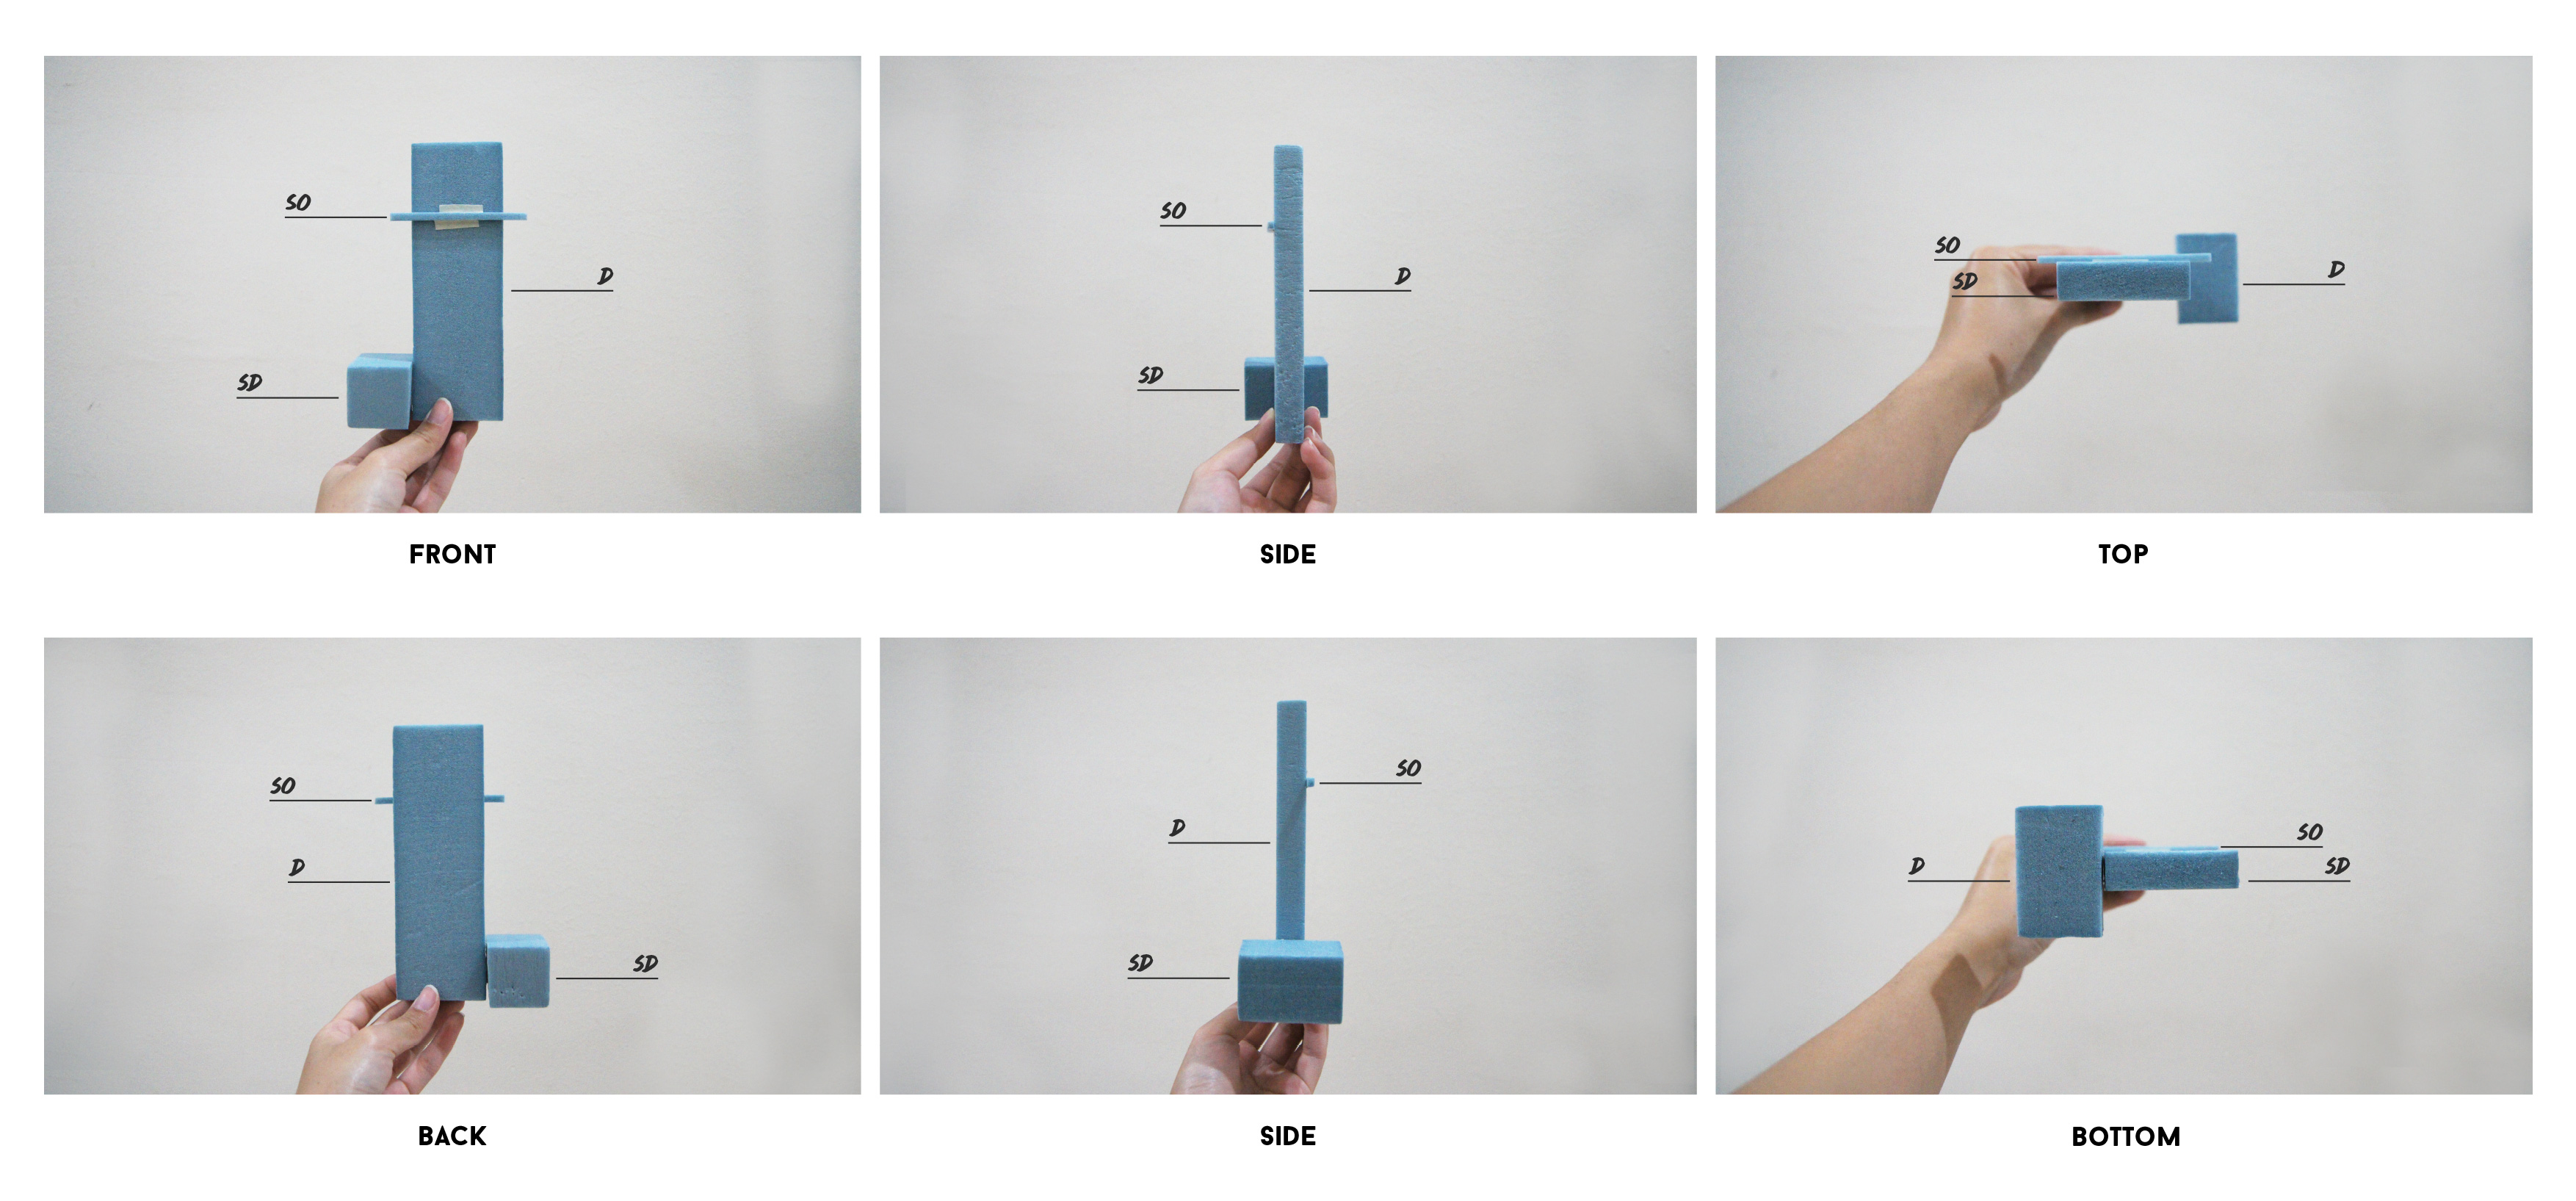
No comments on this. I guess Ms Cheryl didn’t like this hmmm.
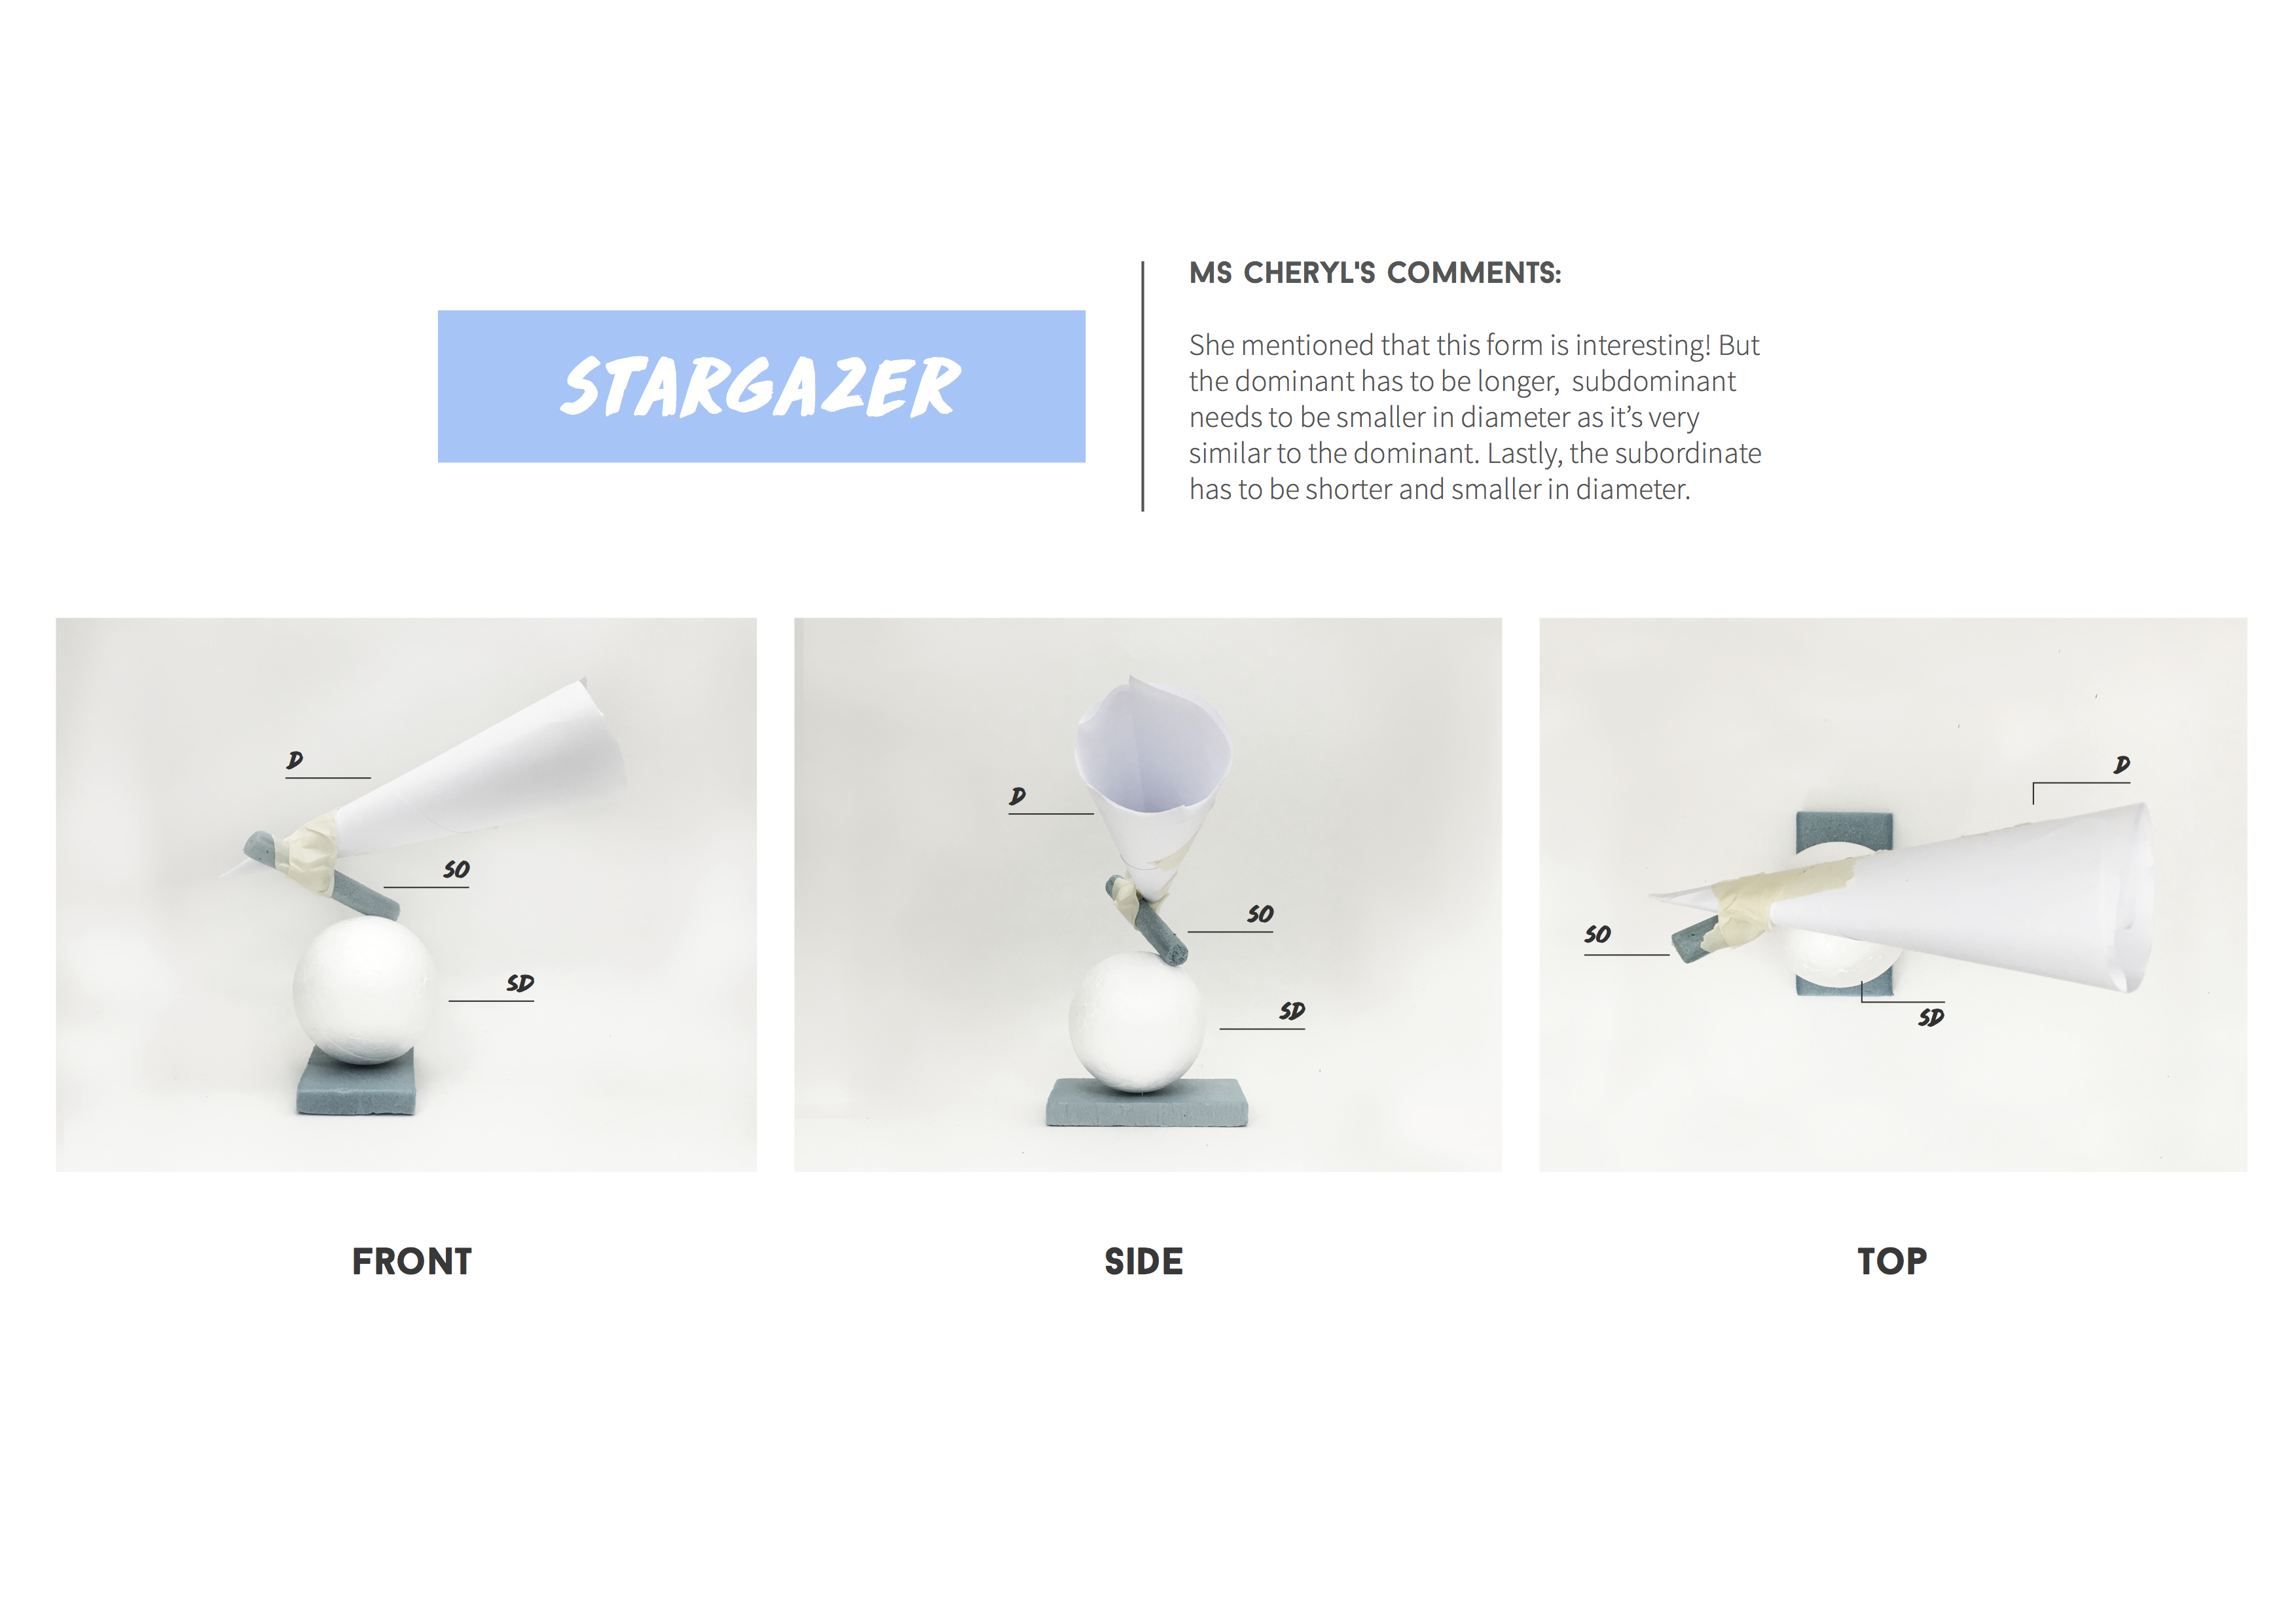
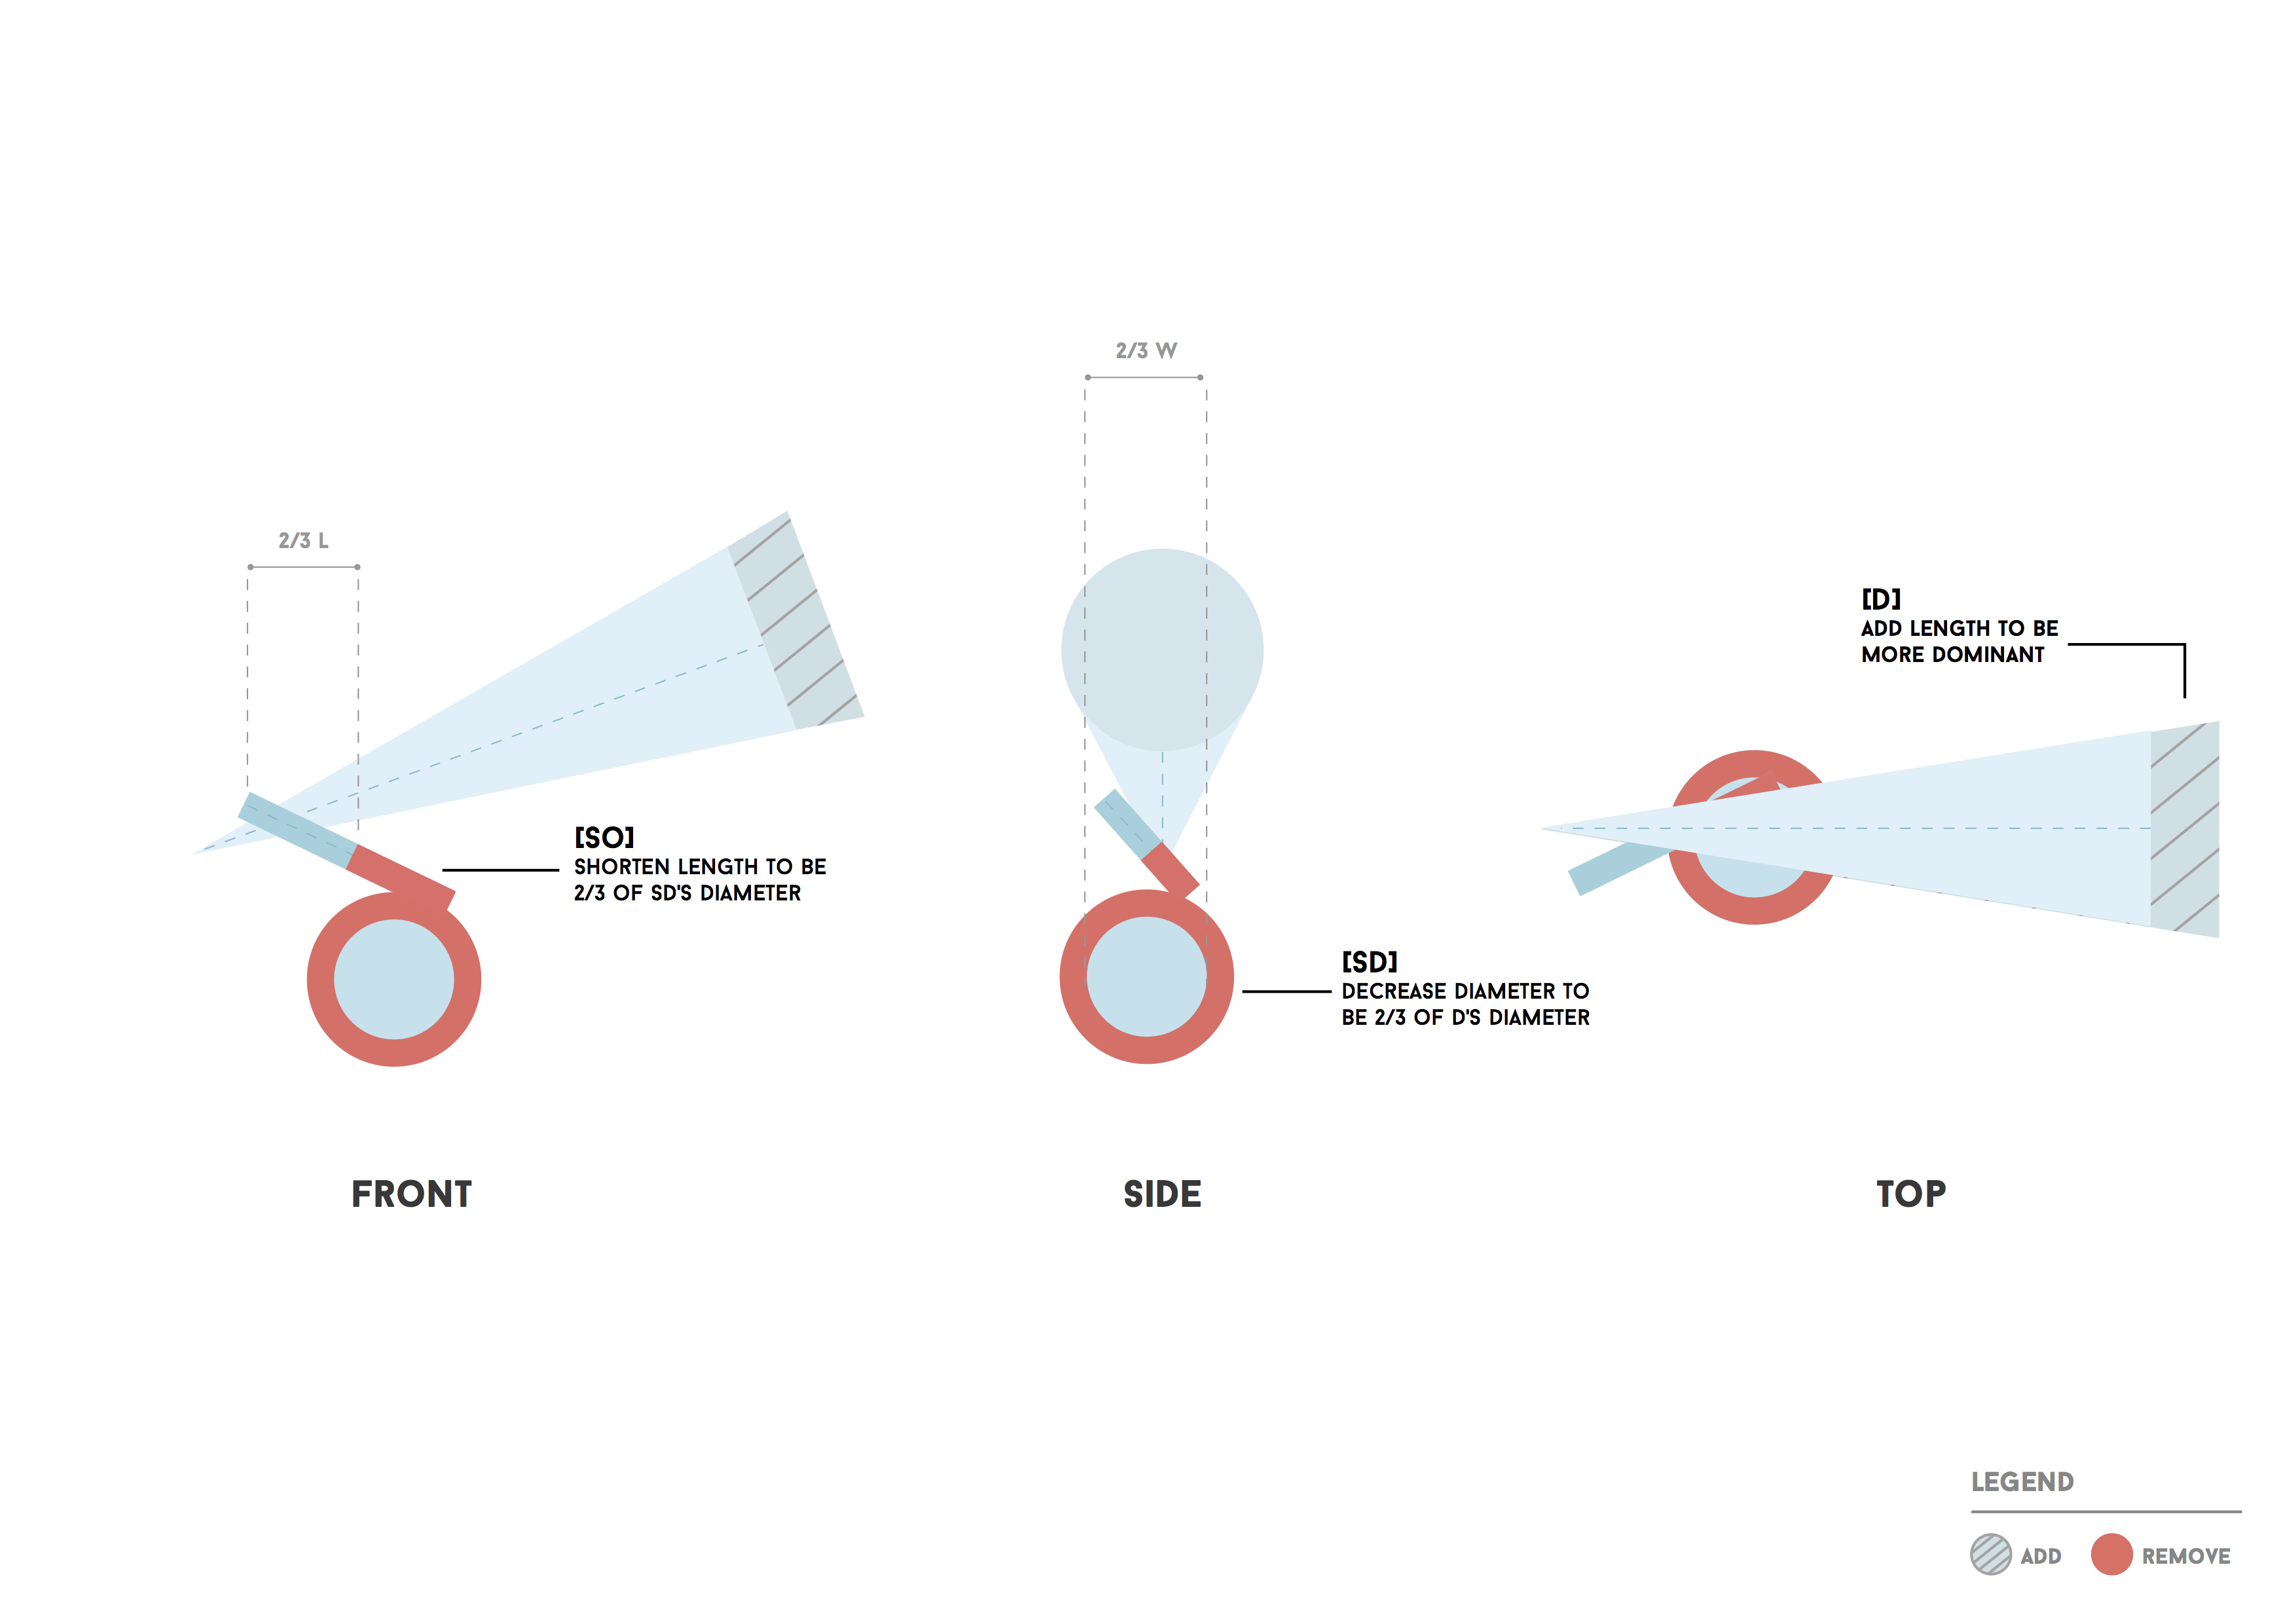
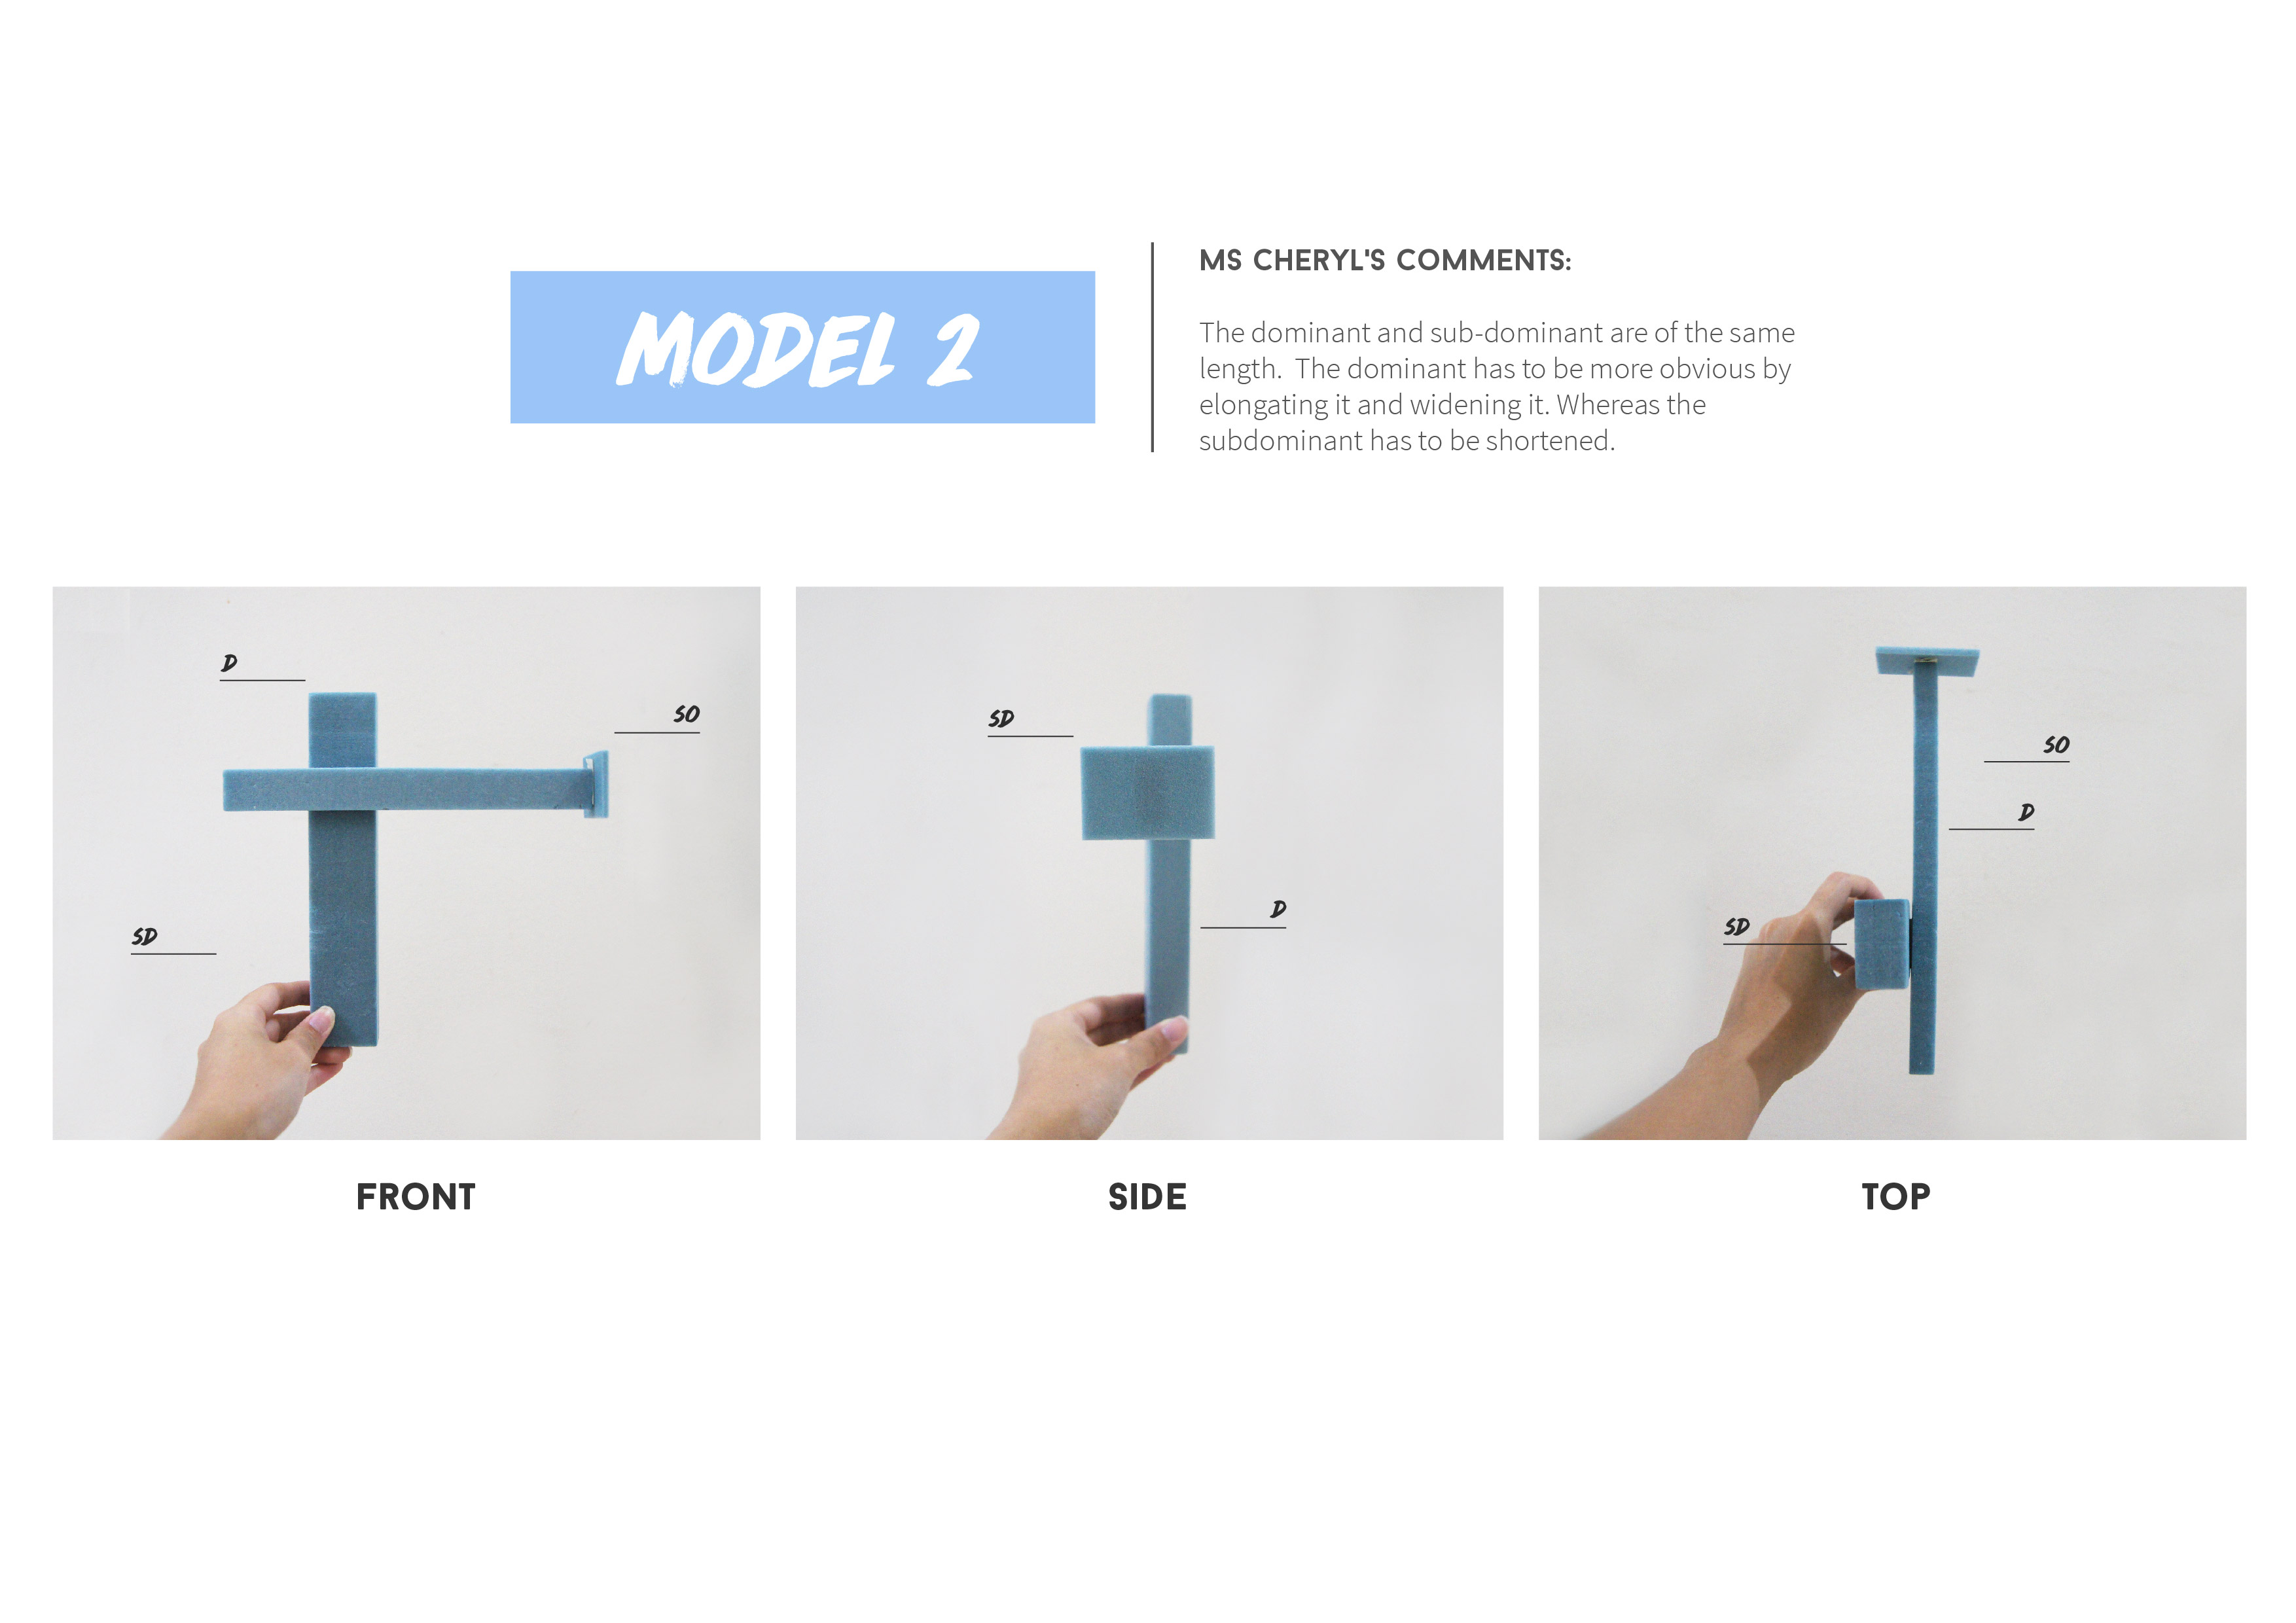
 

Model 2

Model-2Lengthen my D. Shorten and trim my SD thinner. Whereas for my SO, make it thinner and smaller. The SD will be piercing through the SO so that it can be seen from all views (only if i’m doing this for my final)
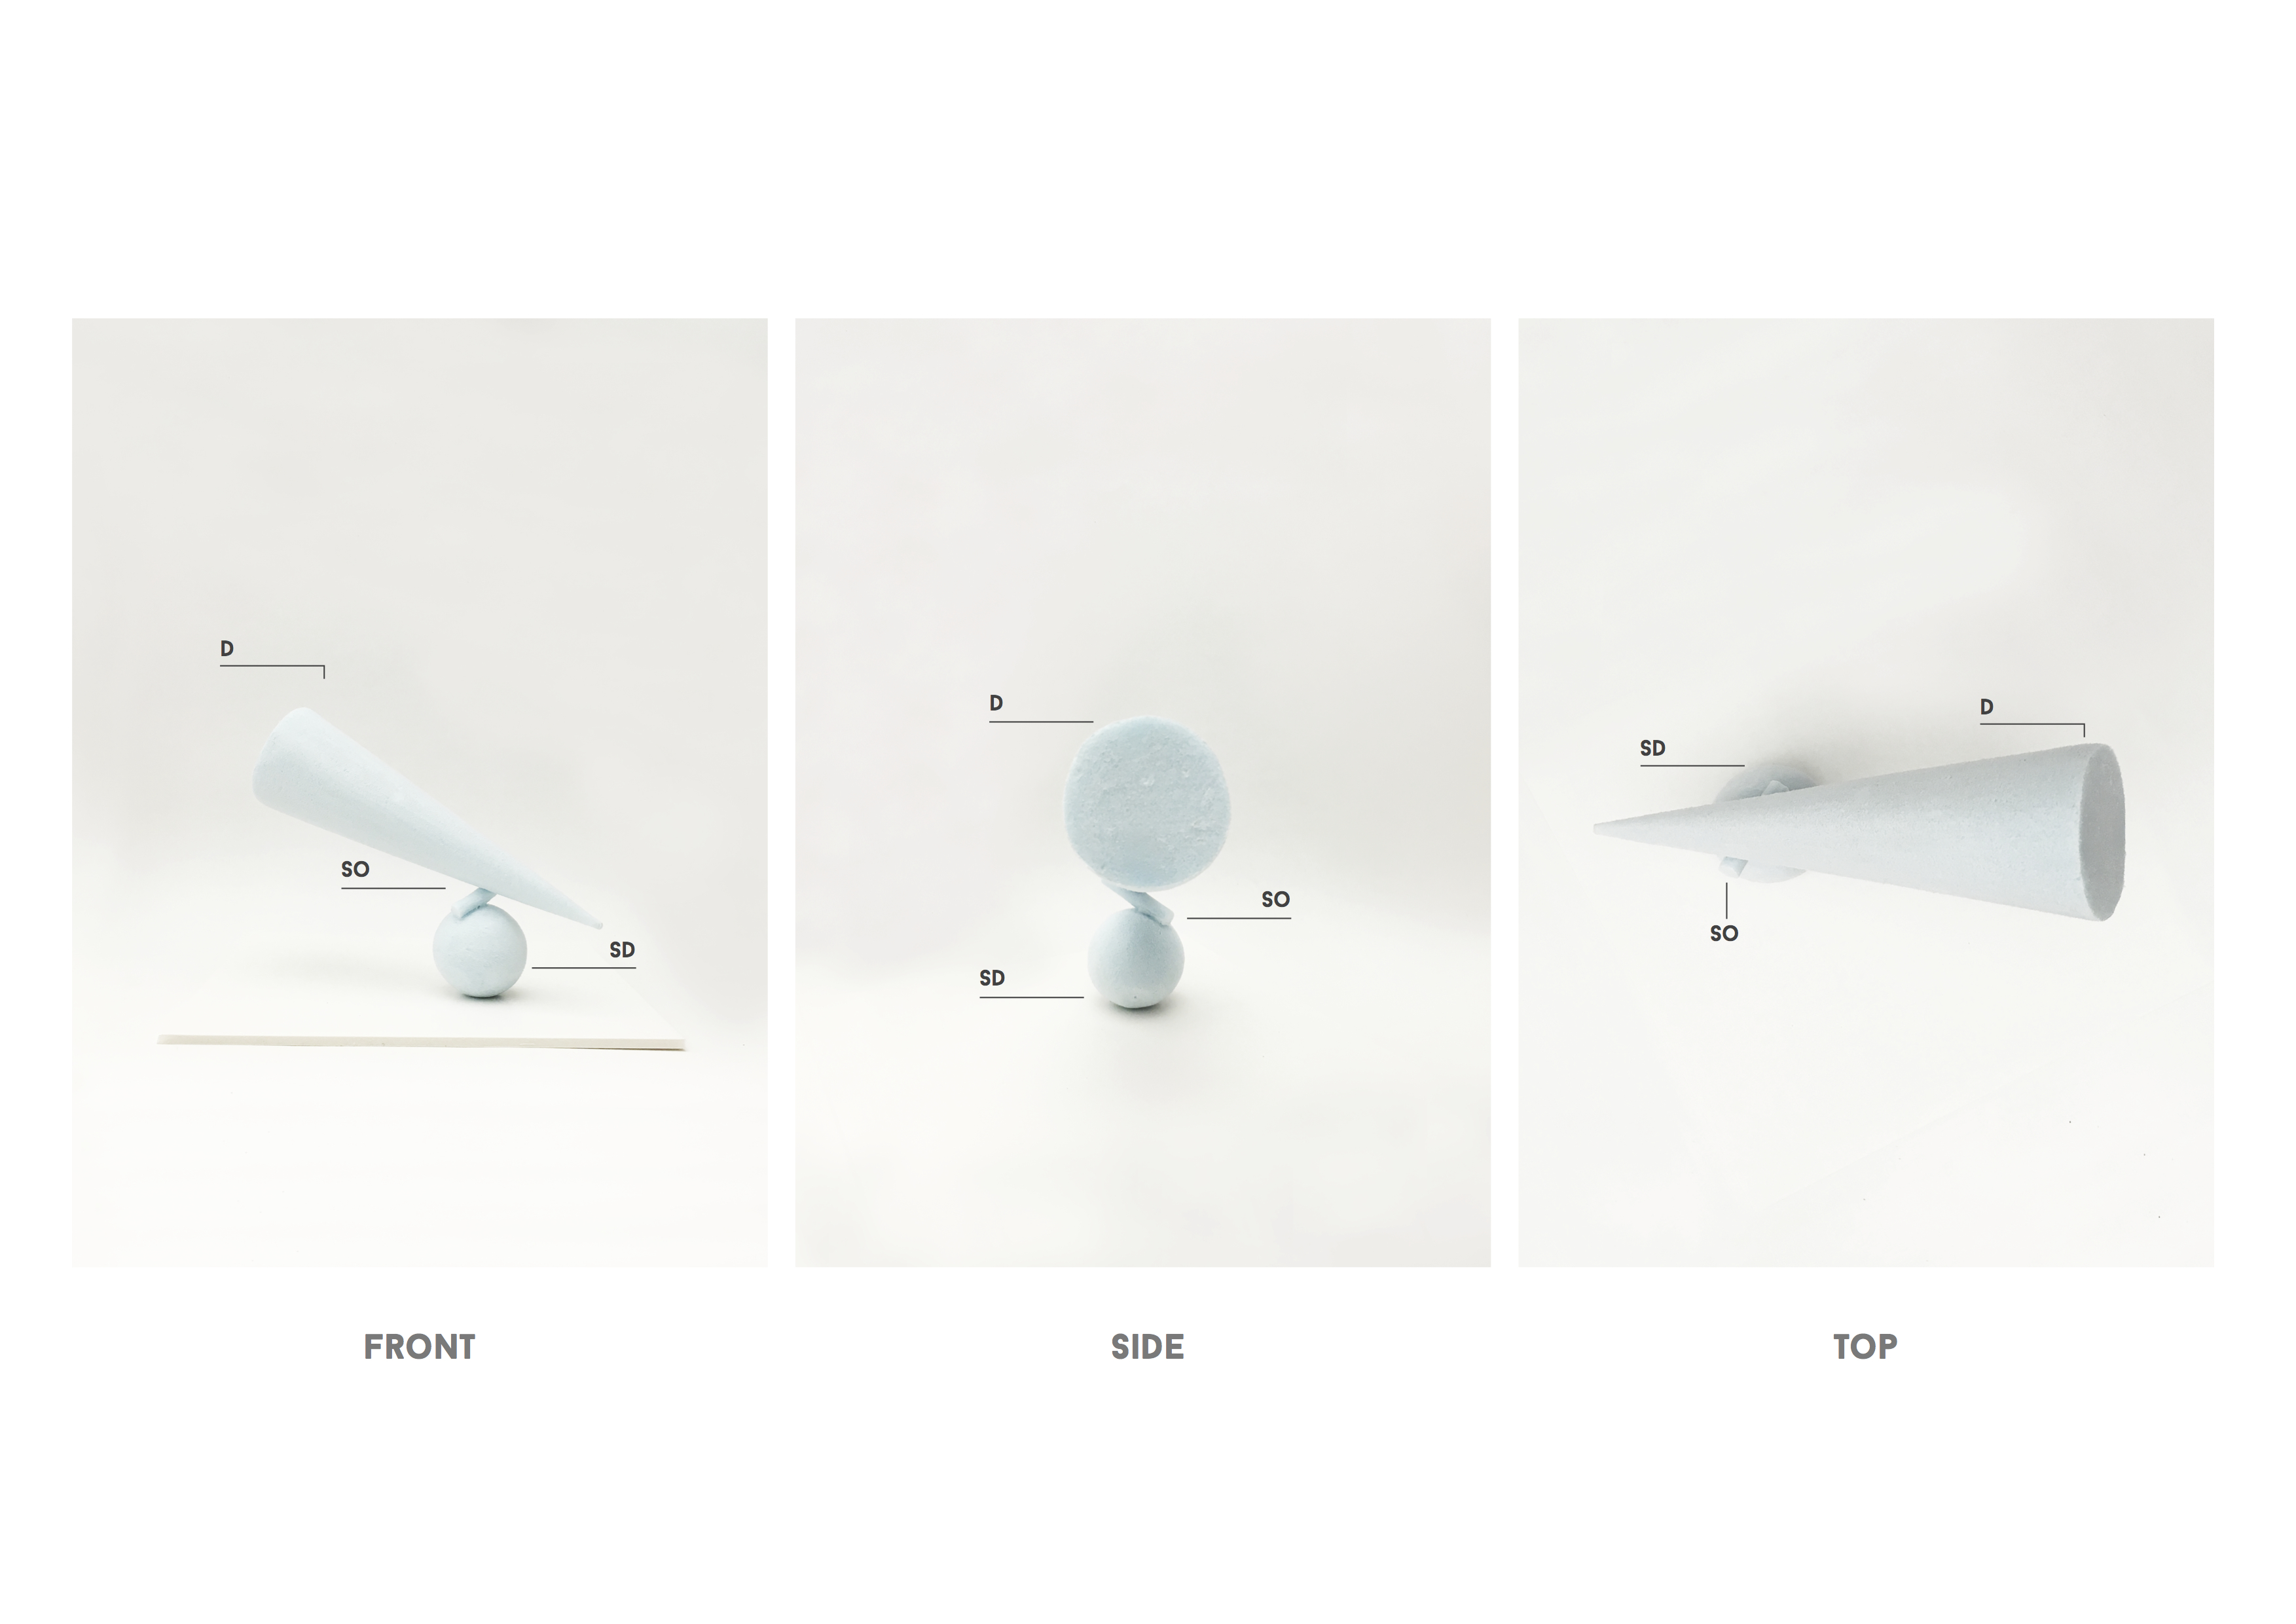
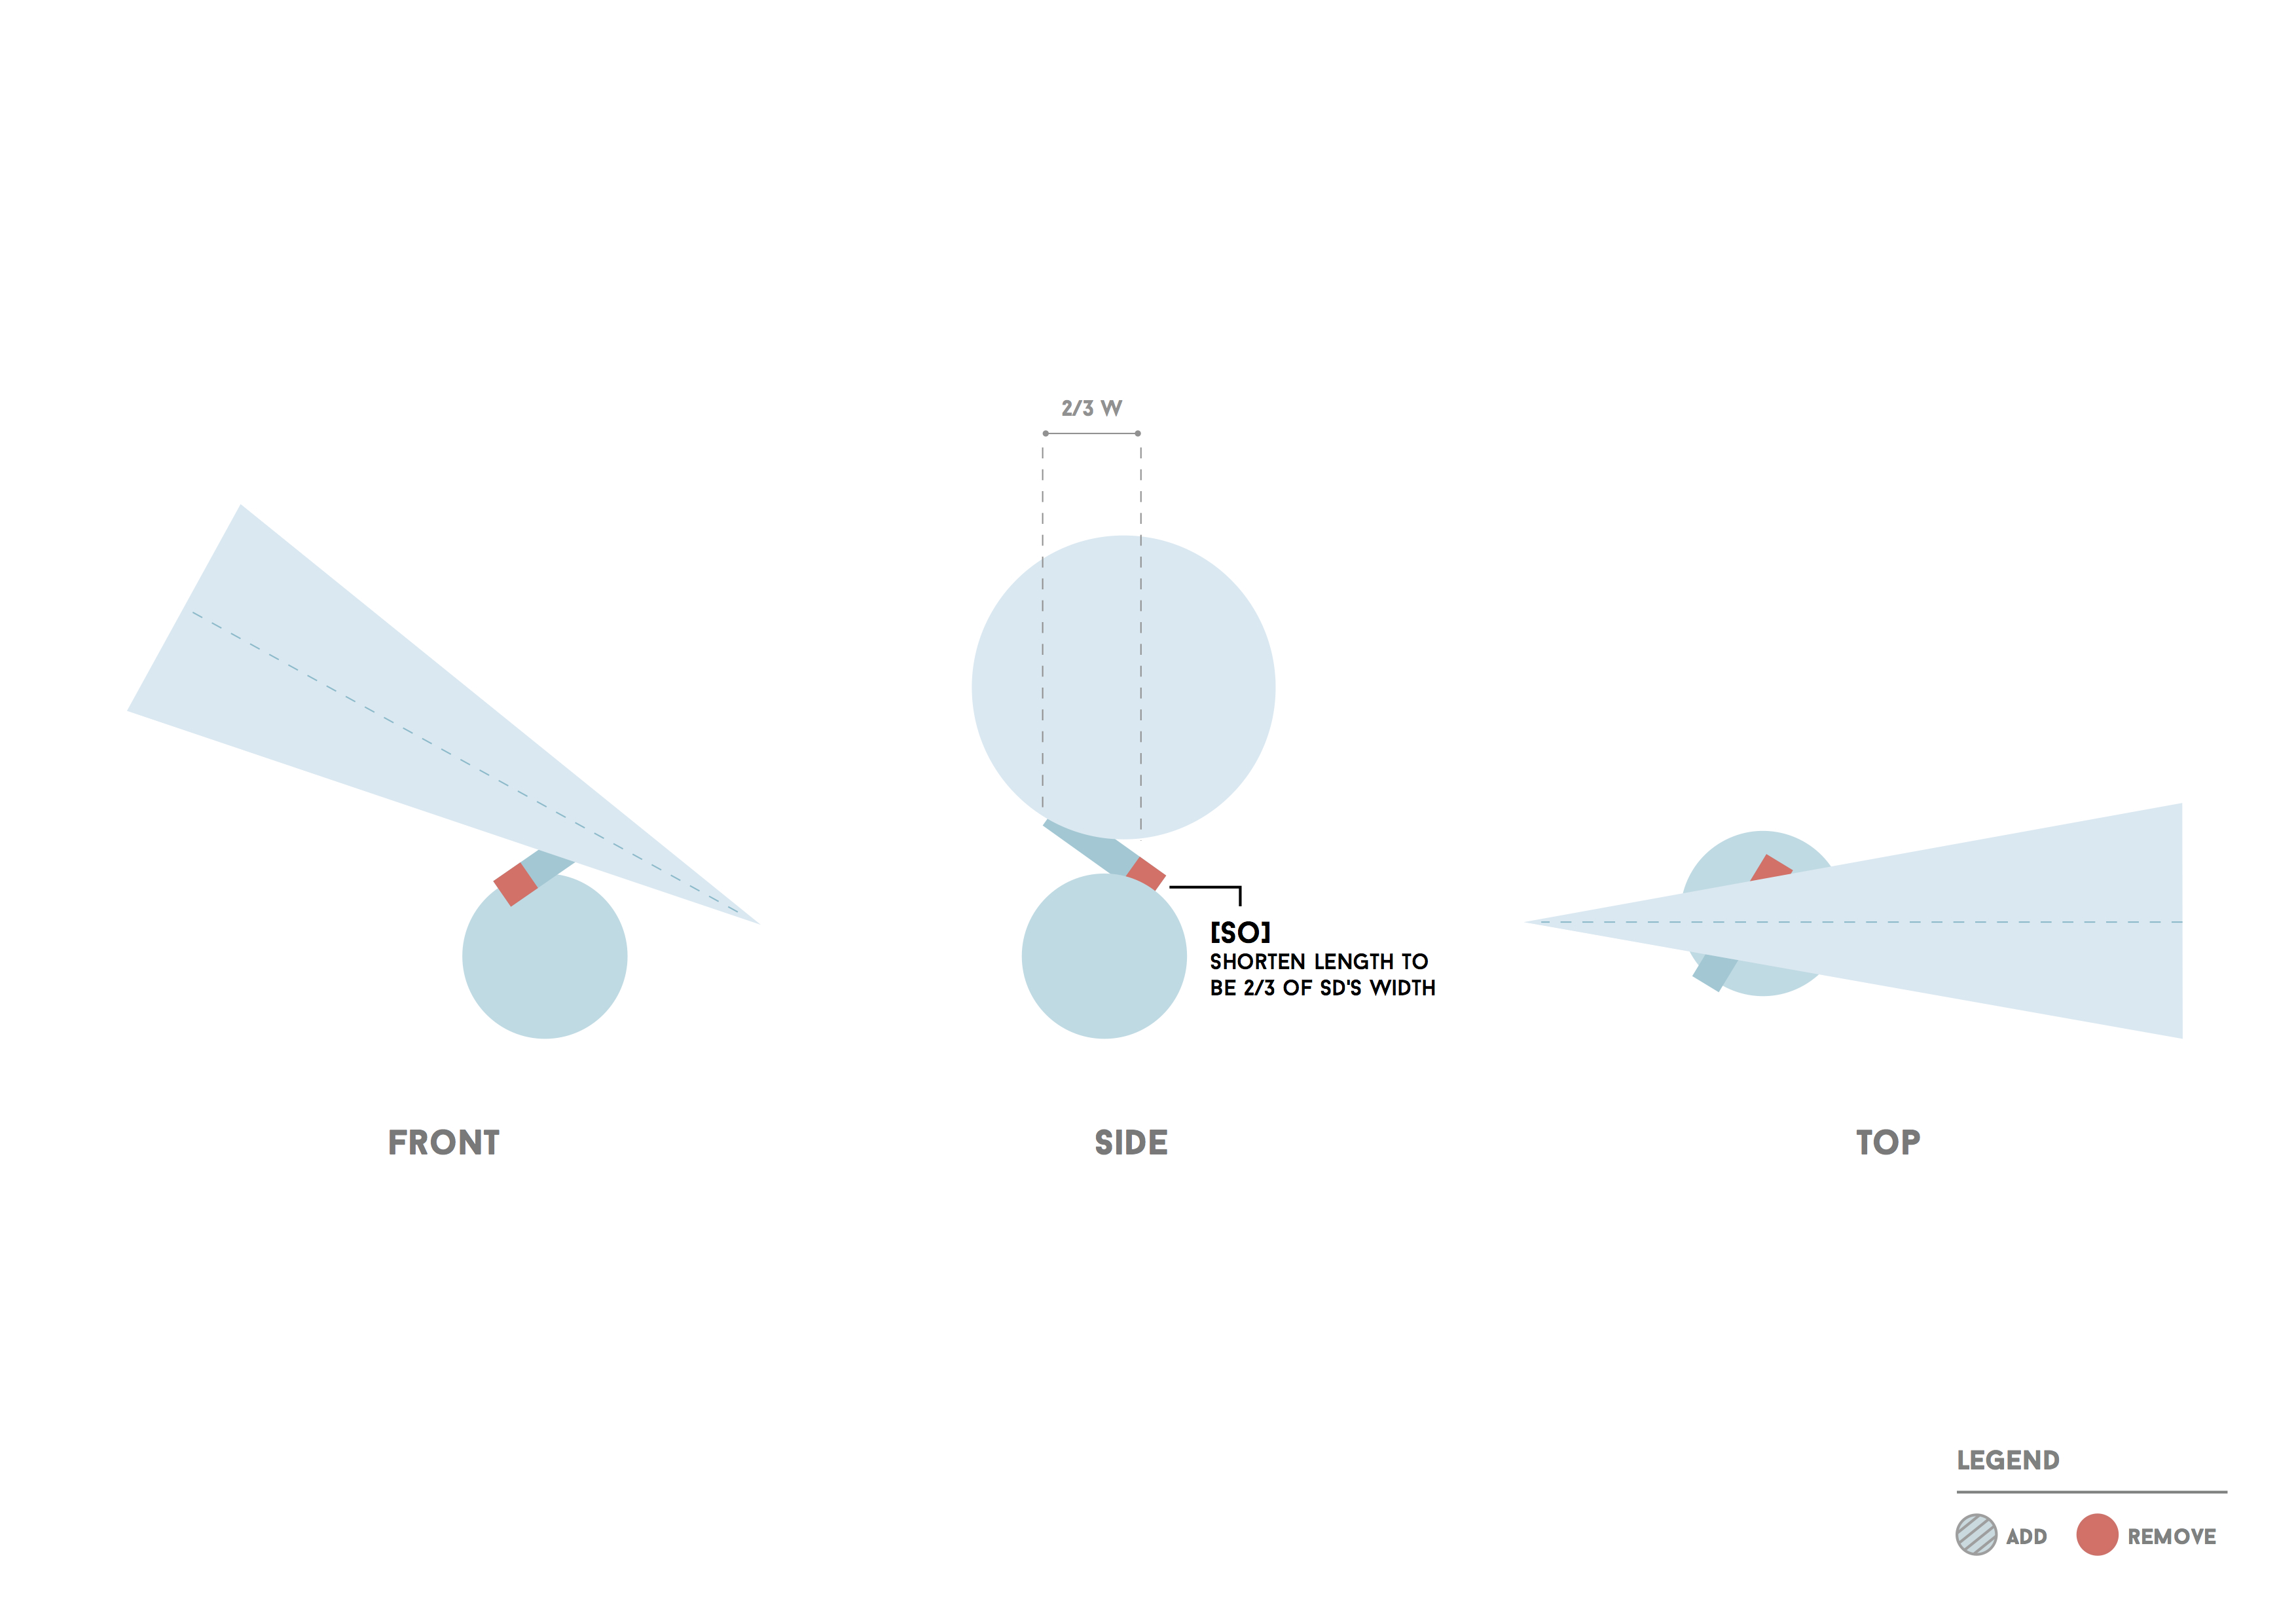
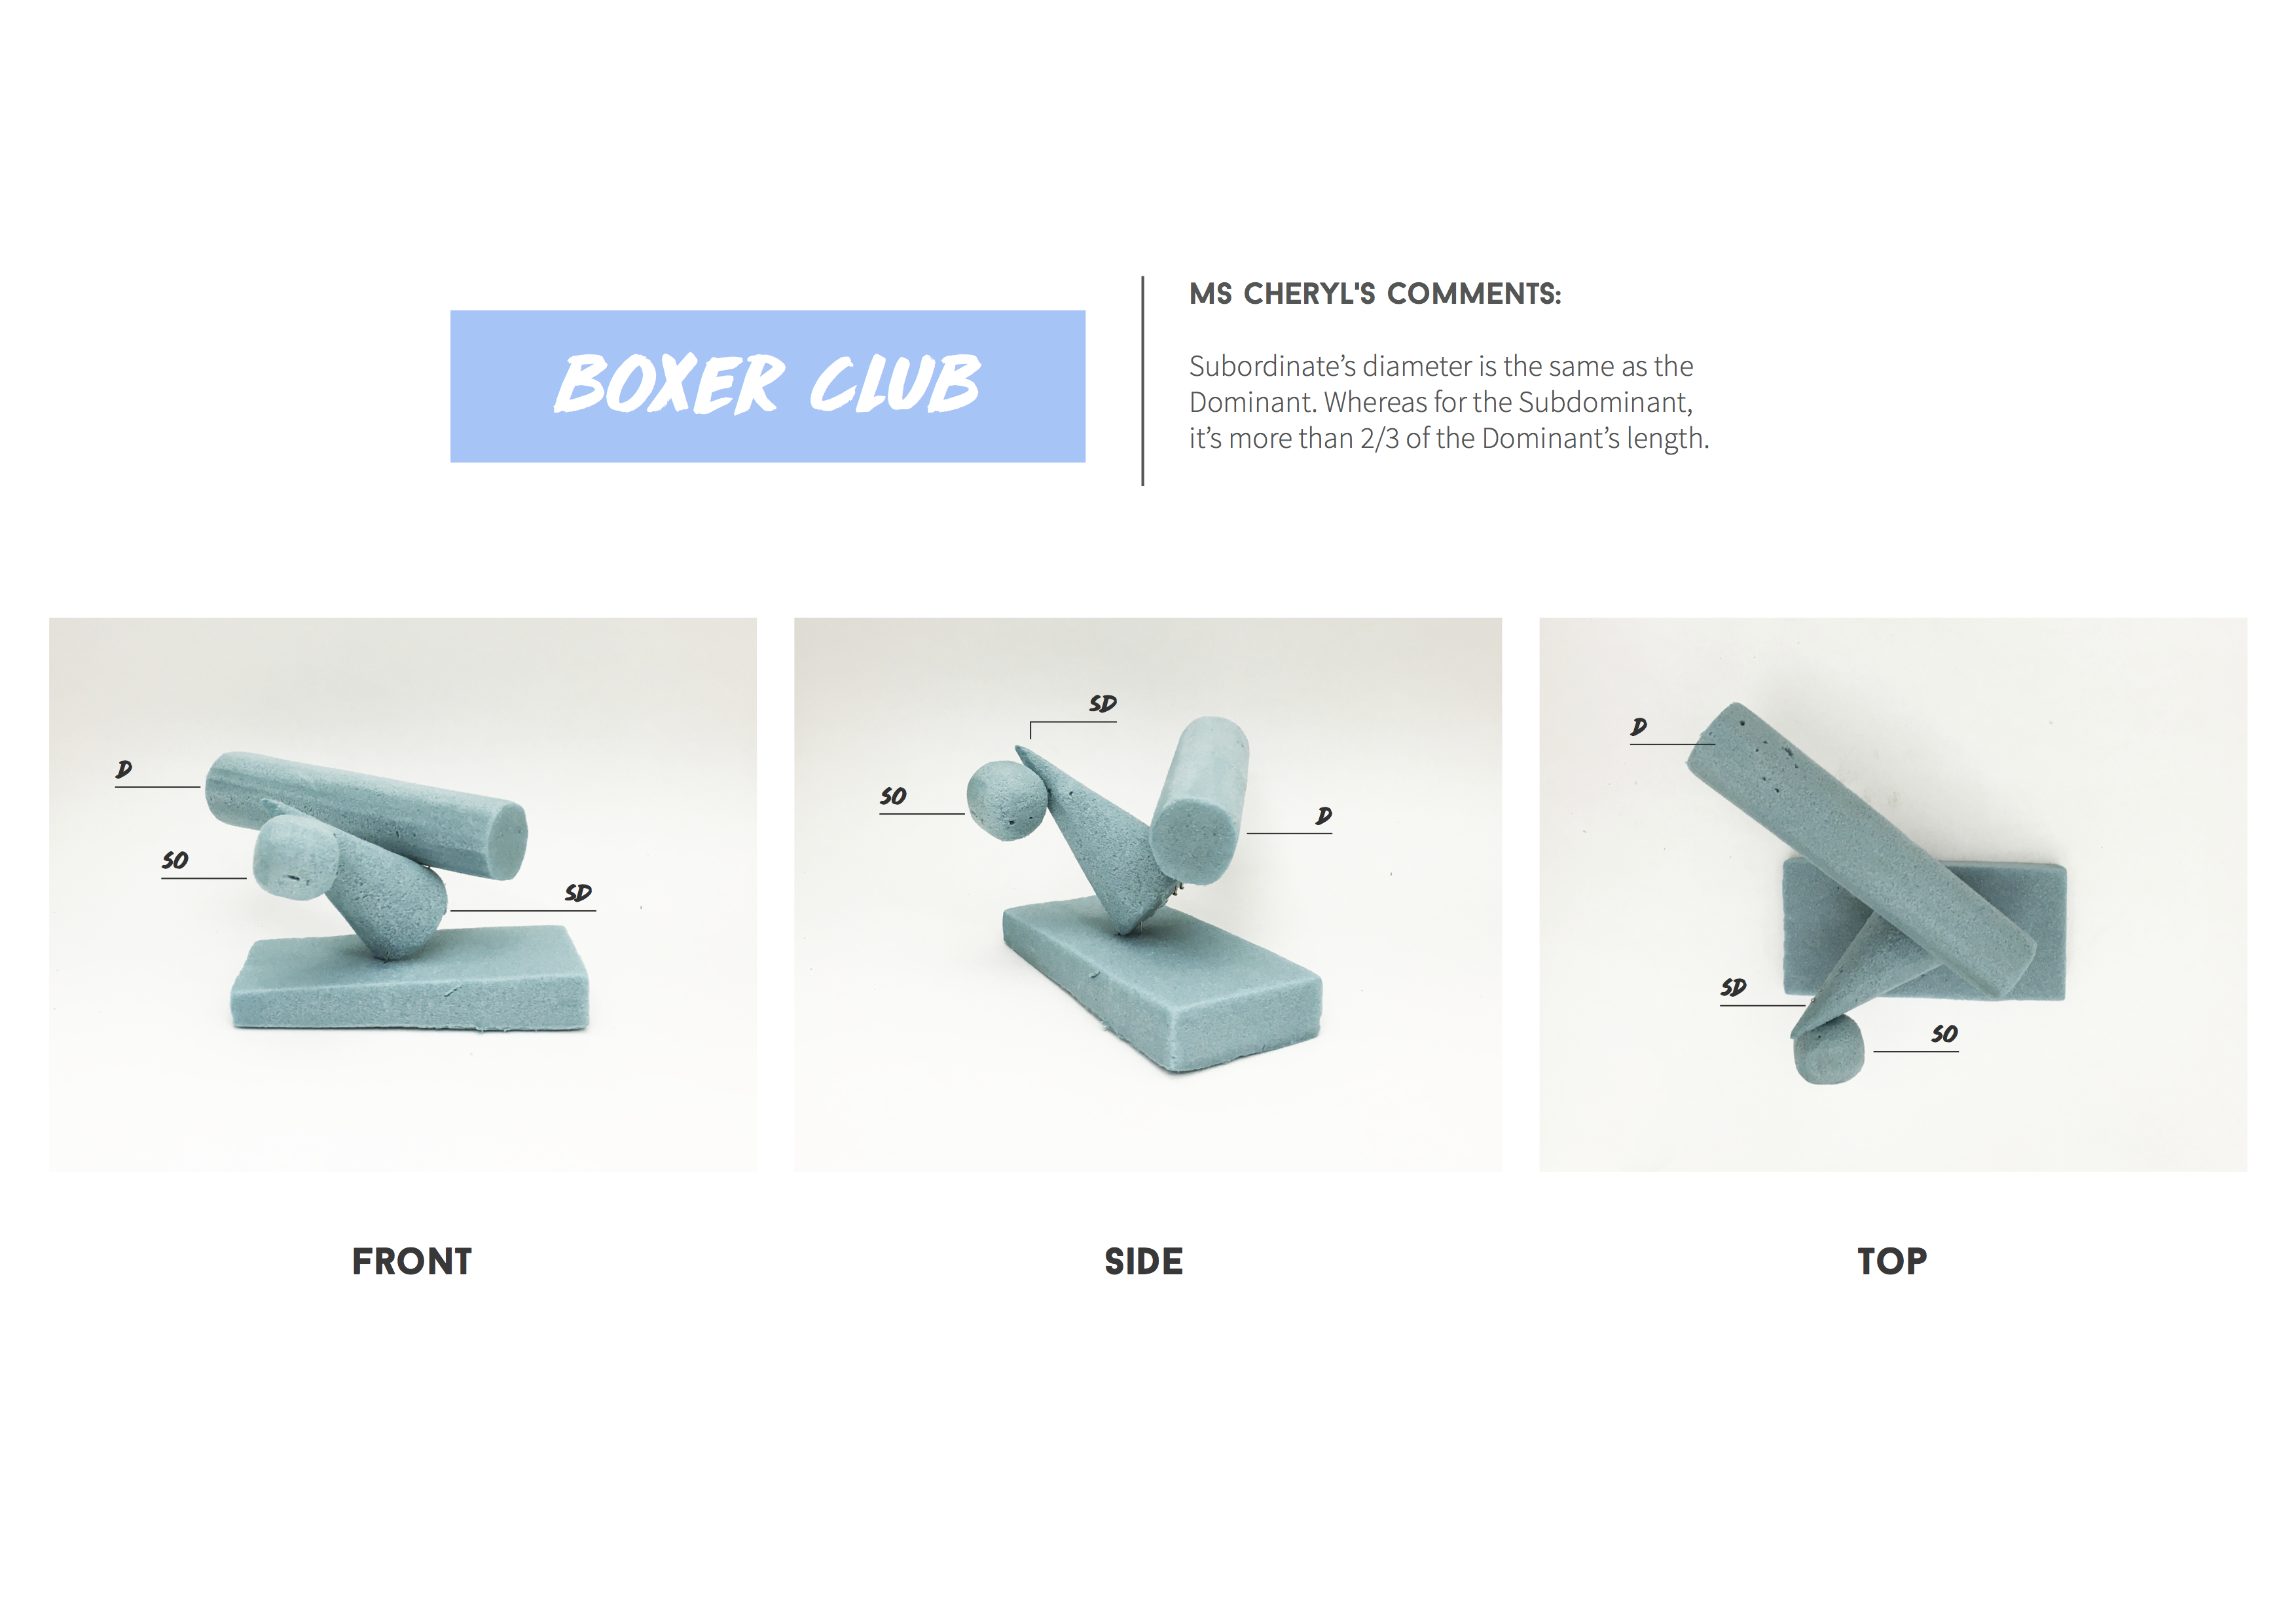
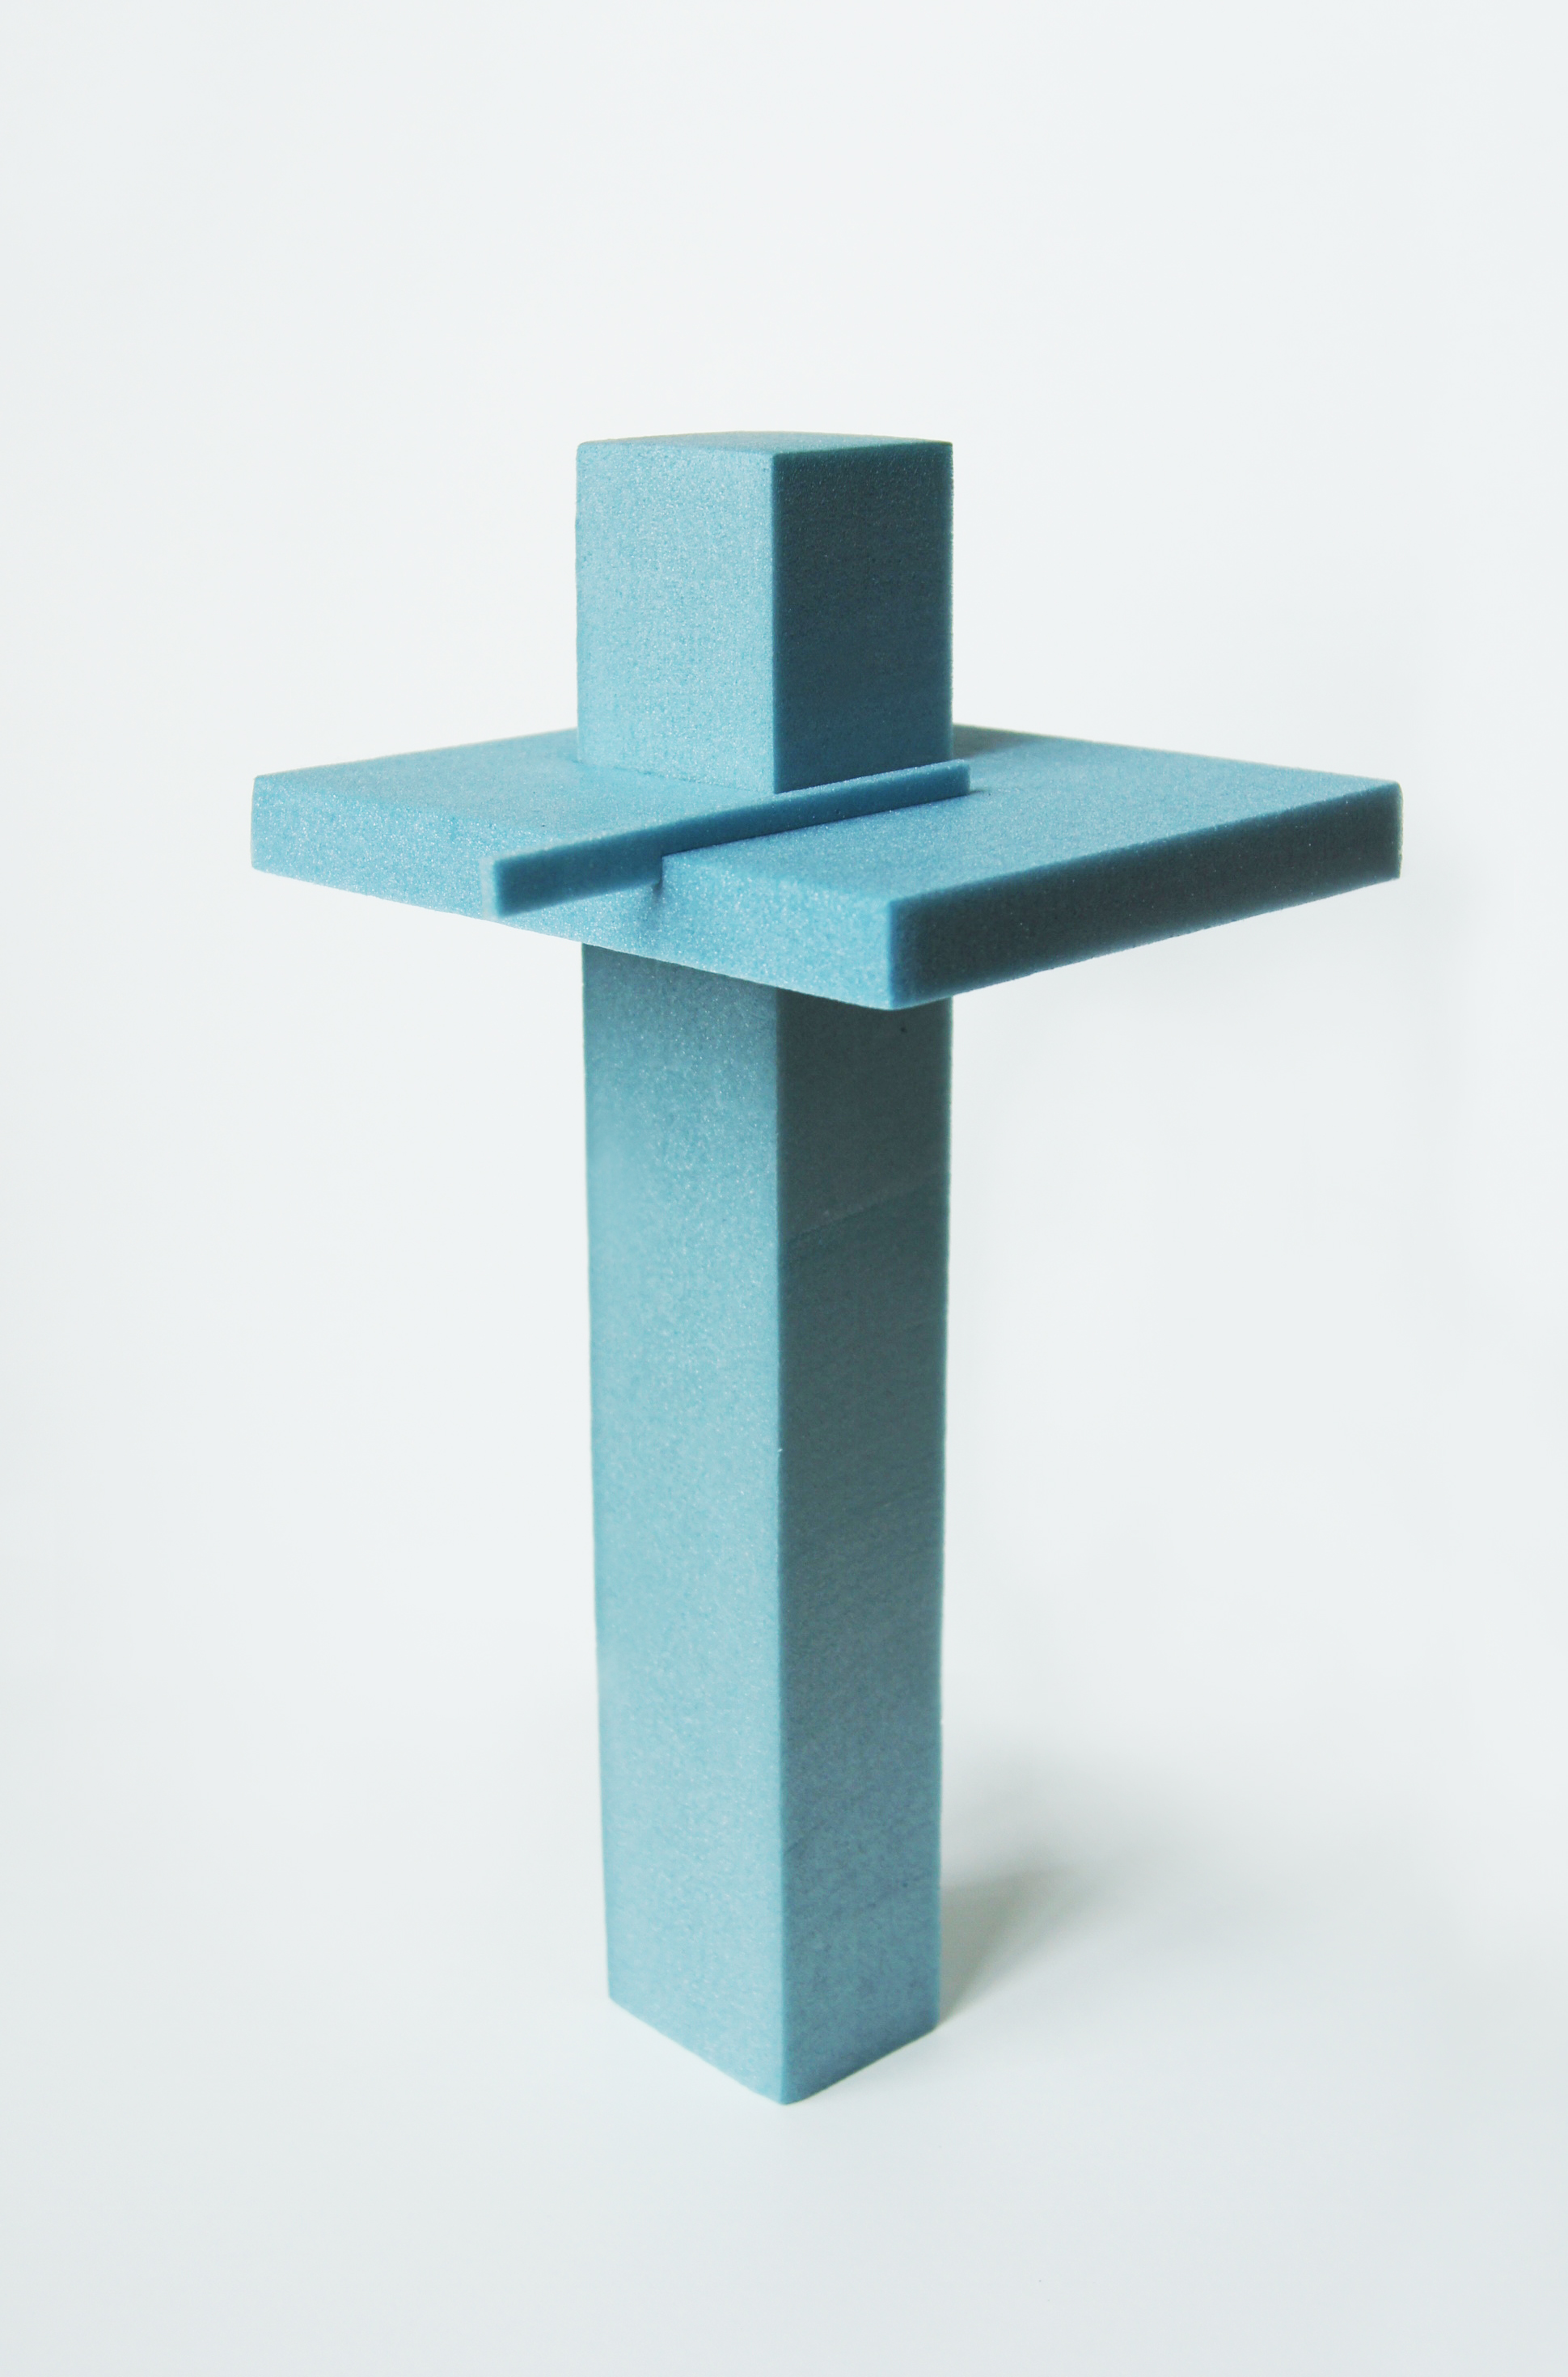
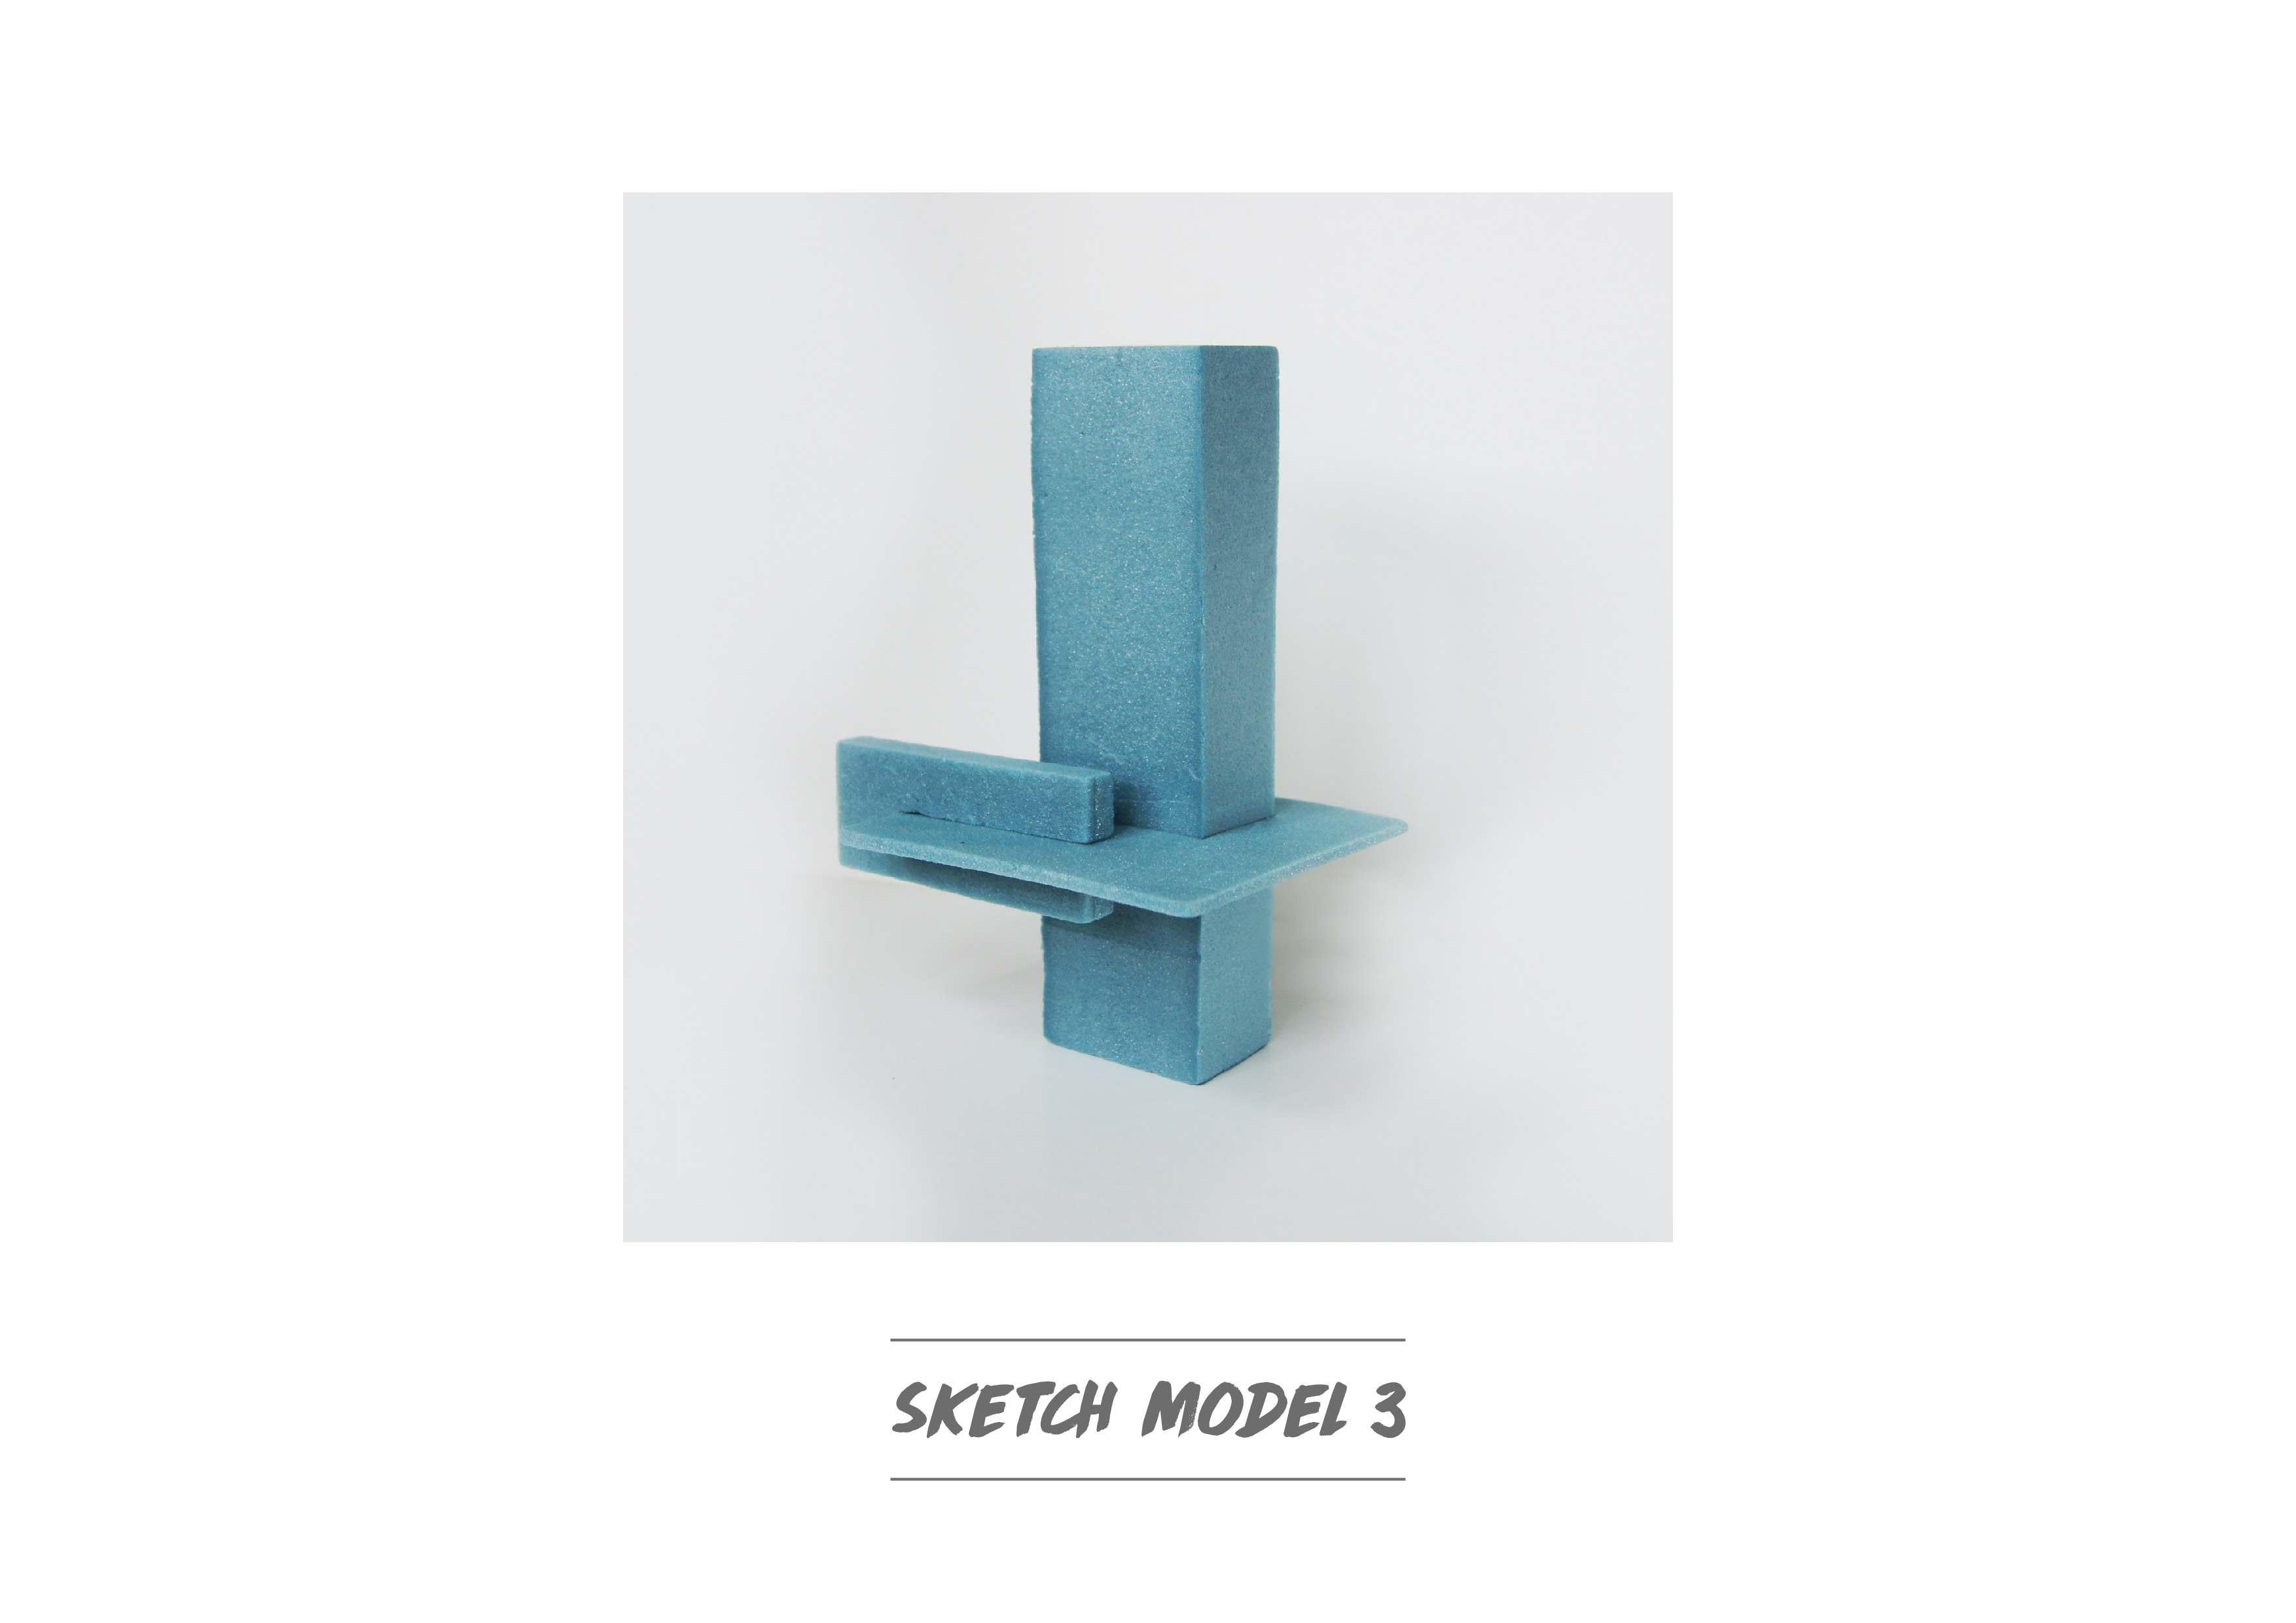
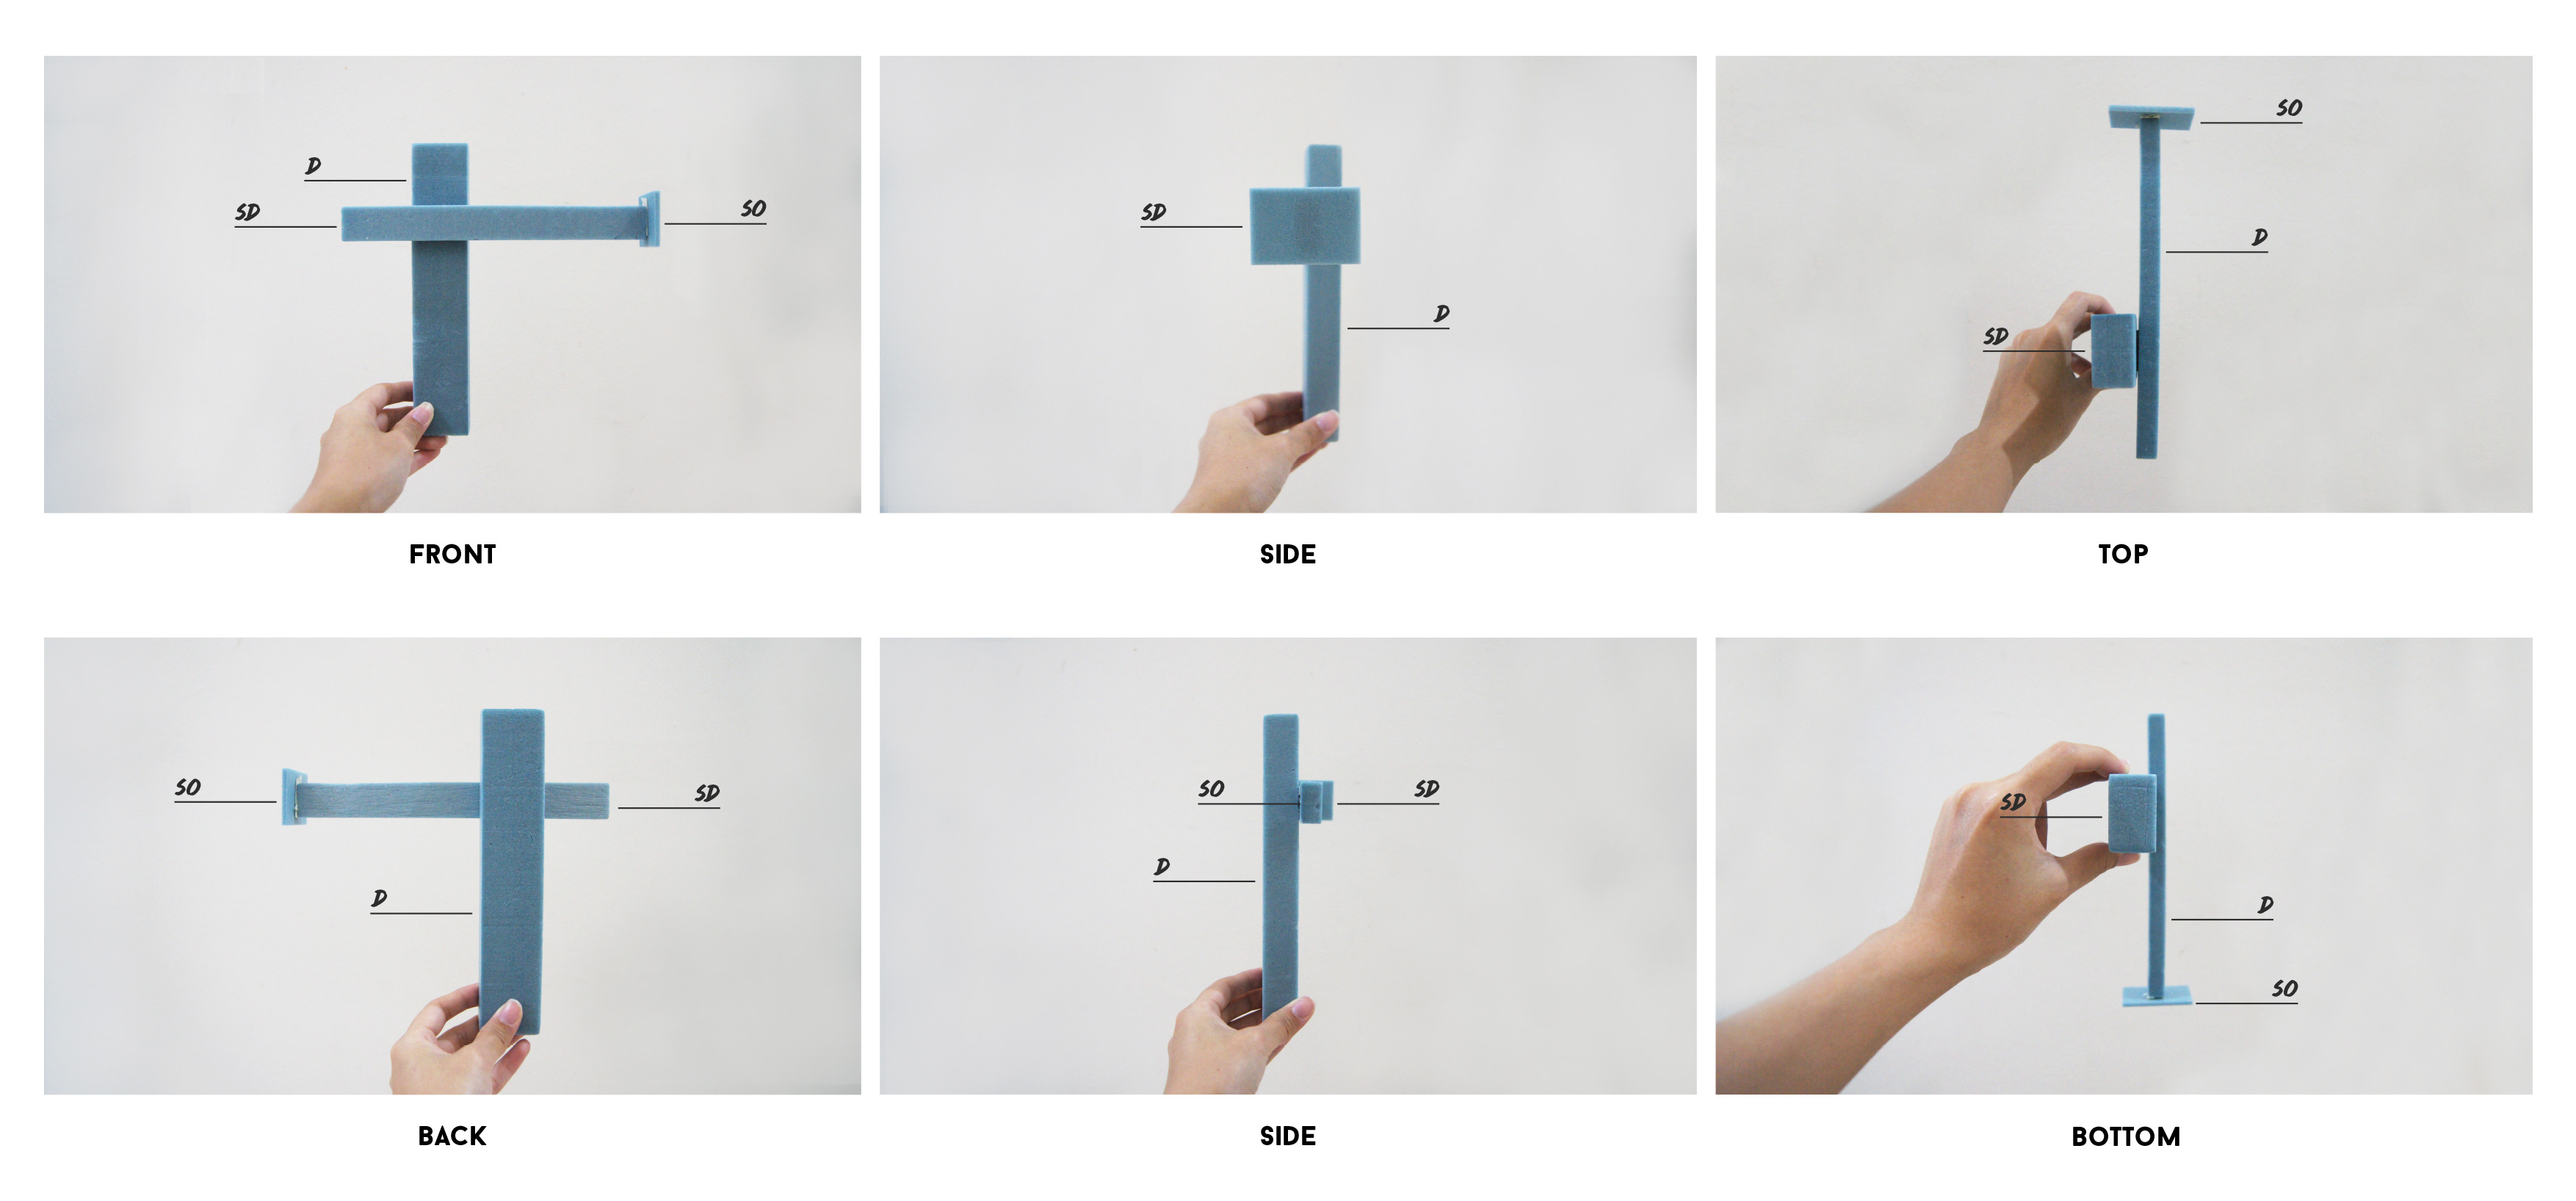
 

Model 3

Model-3Ms Cheryl mentioned that my D and SD are quite similar, and my SO is not obvious enough. Therefore suggesting to shorten SD’s width and SO to be thinner.
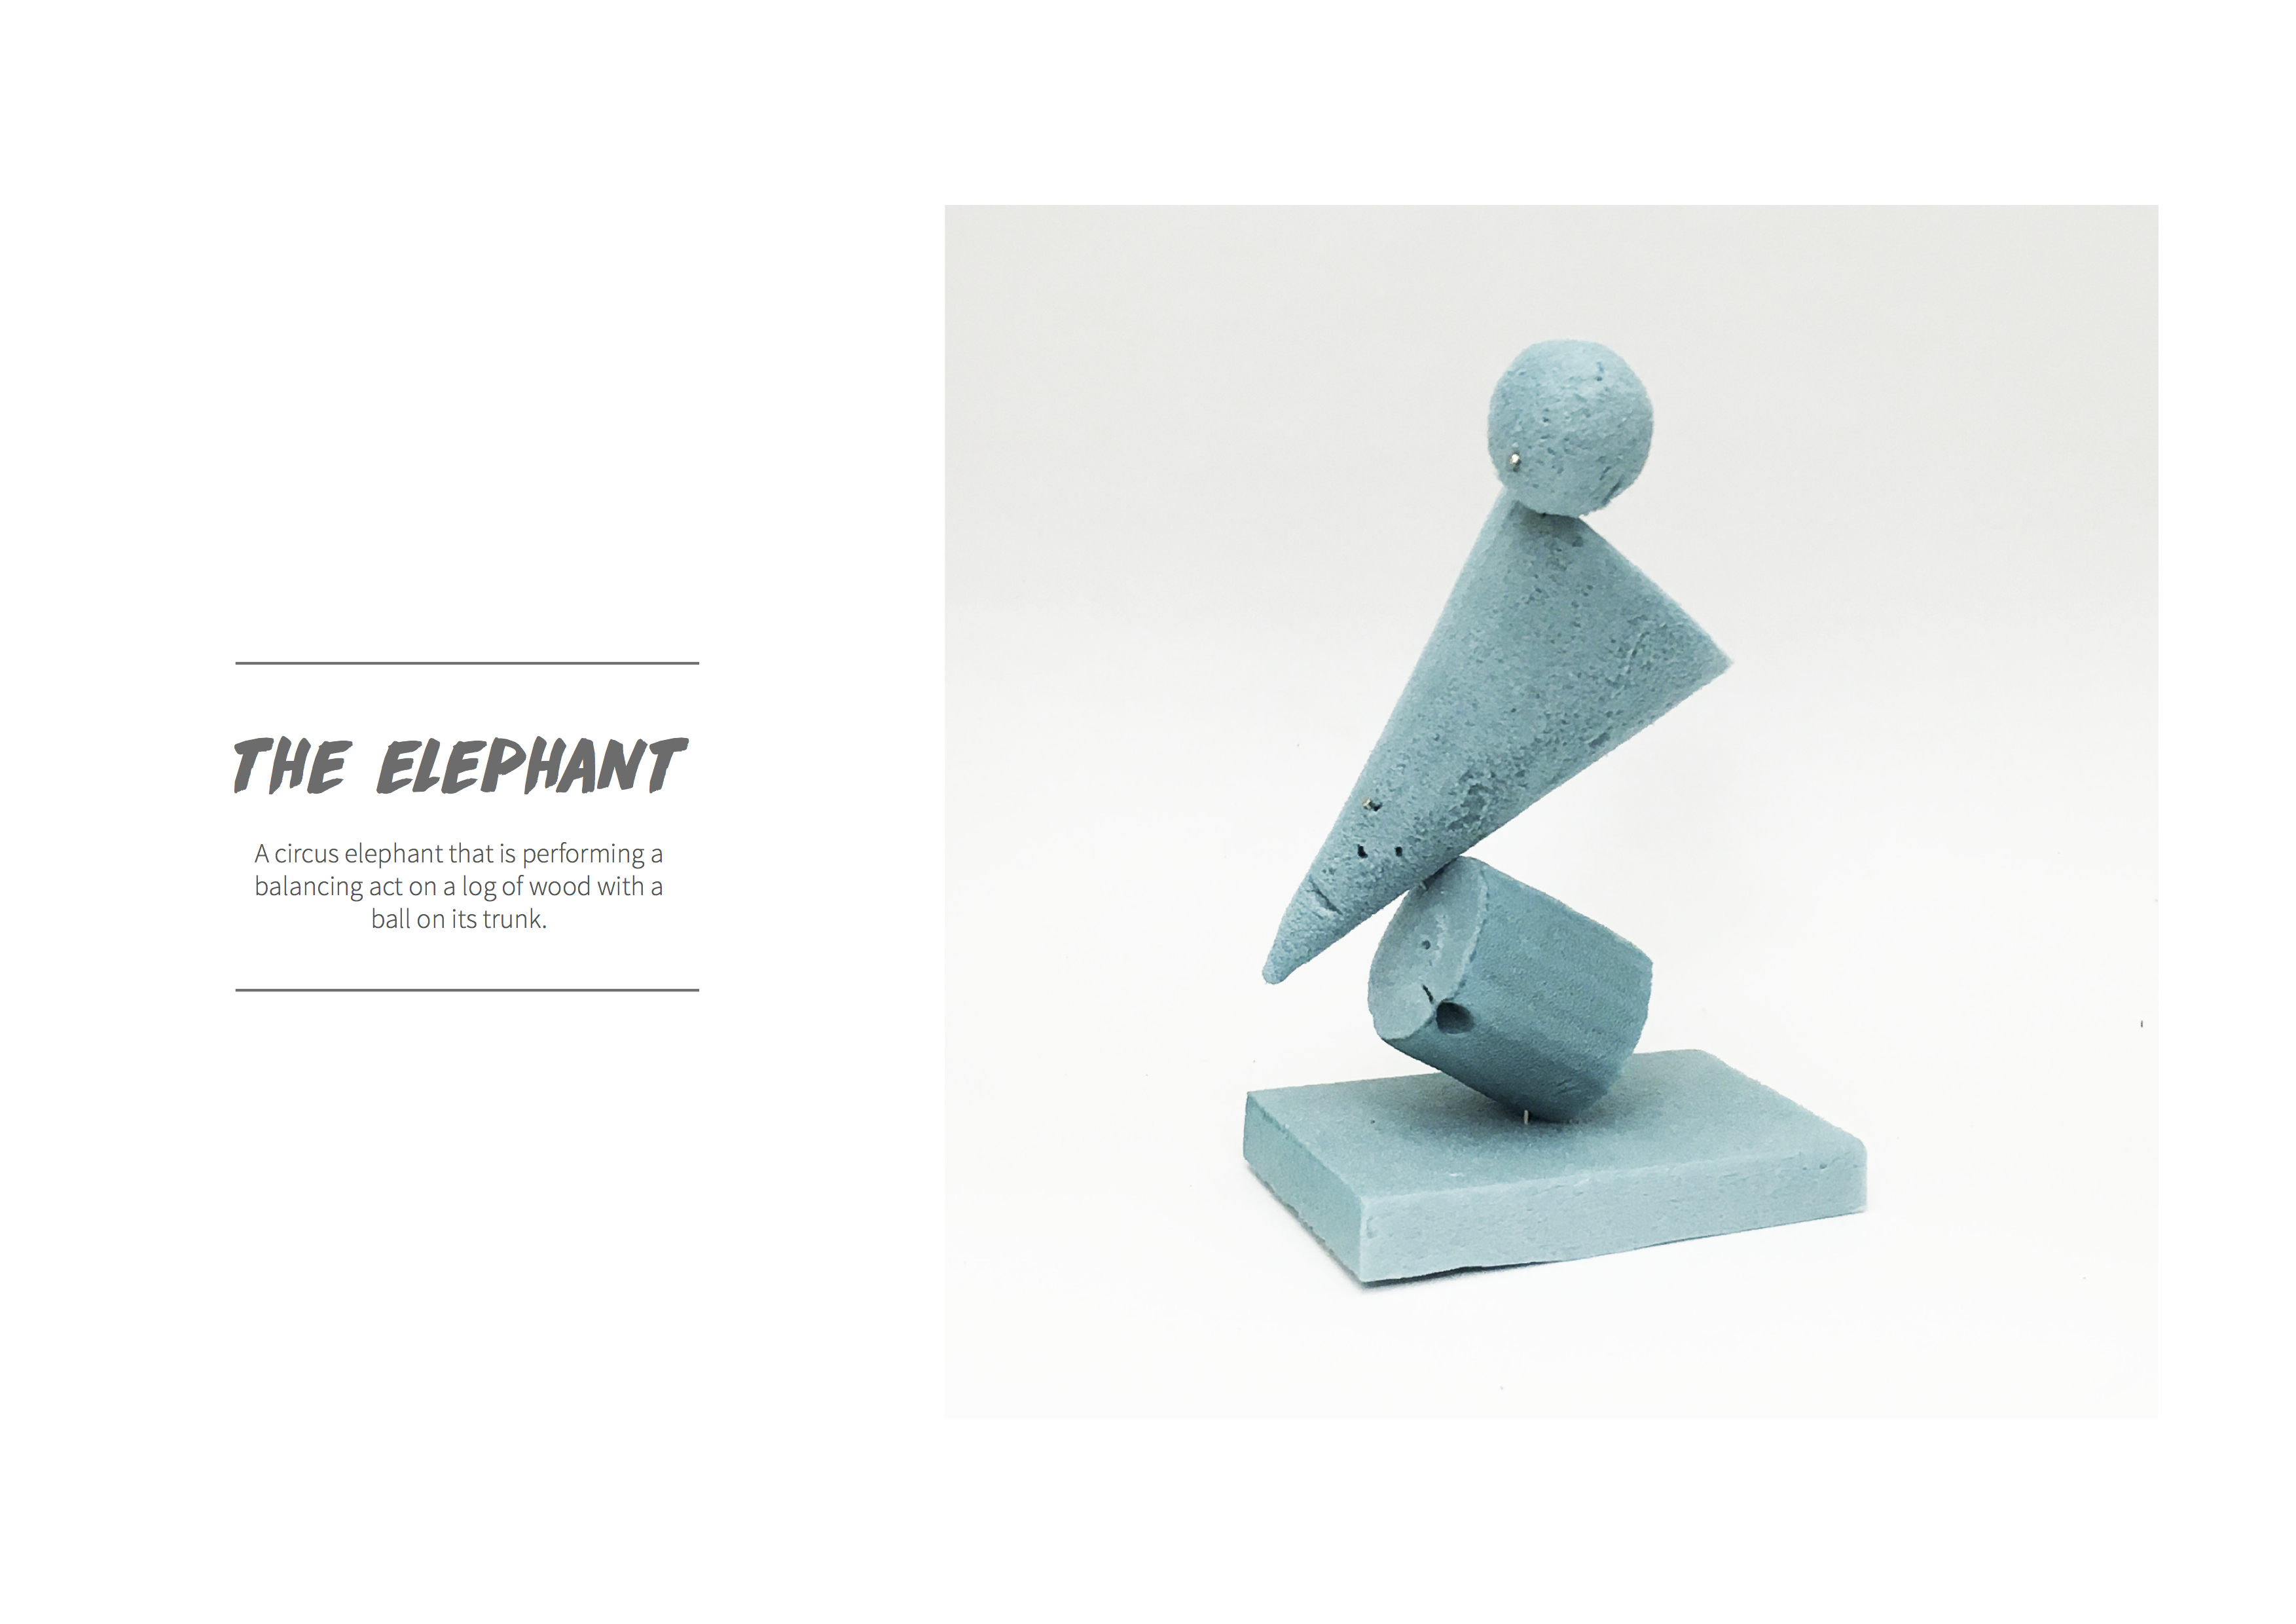
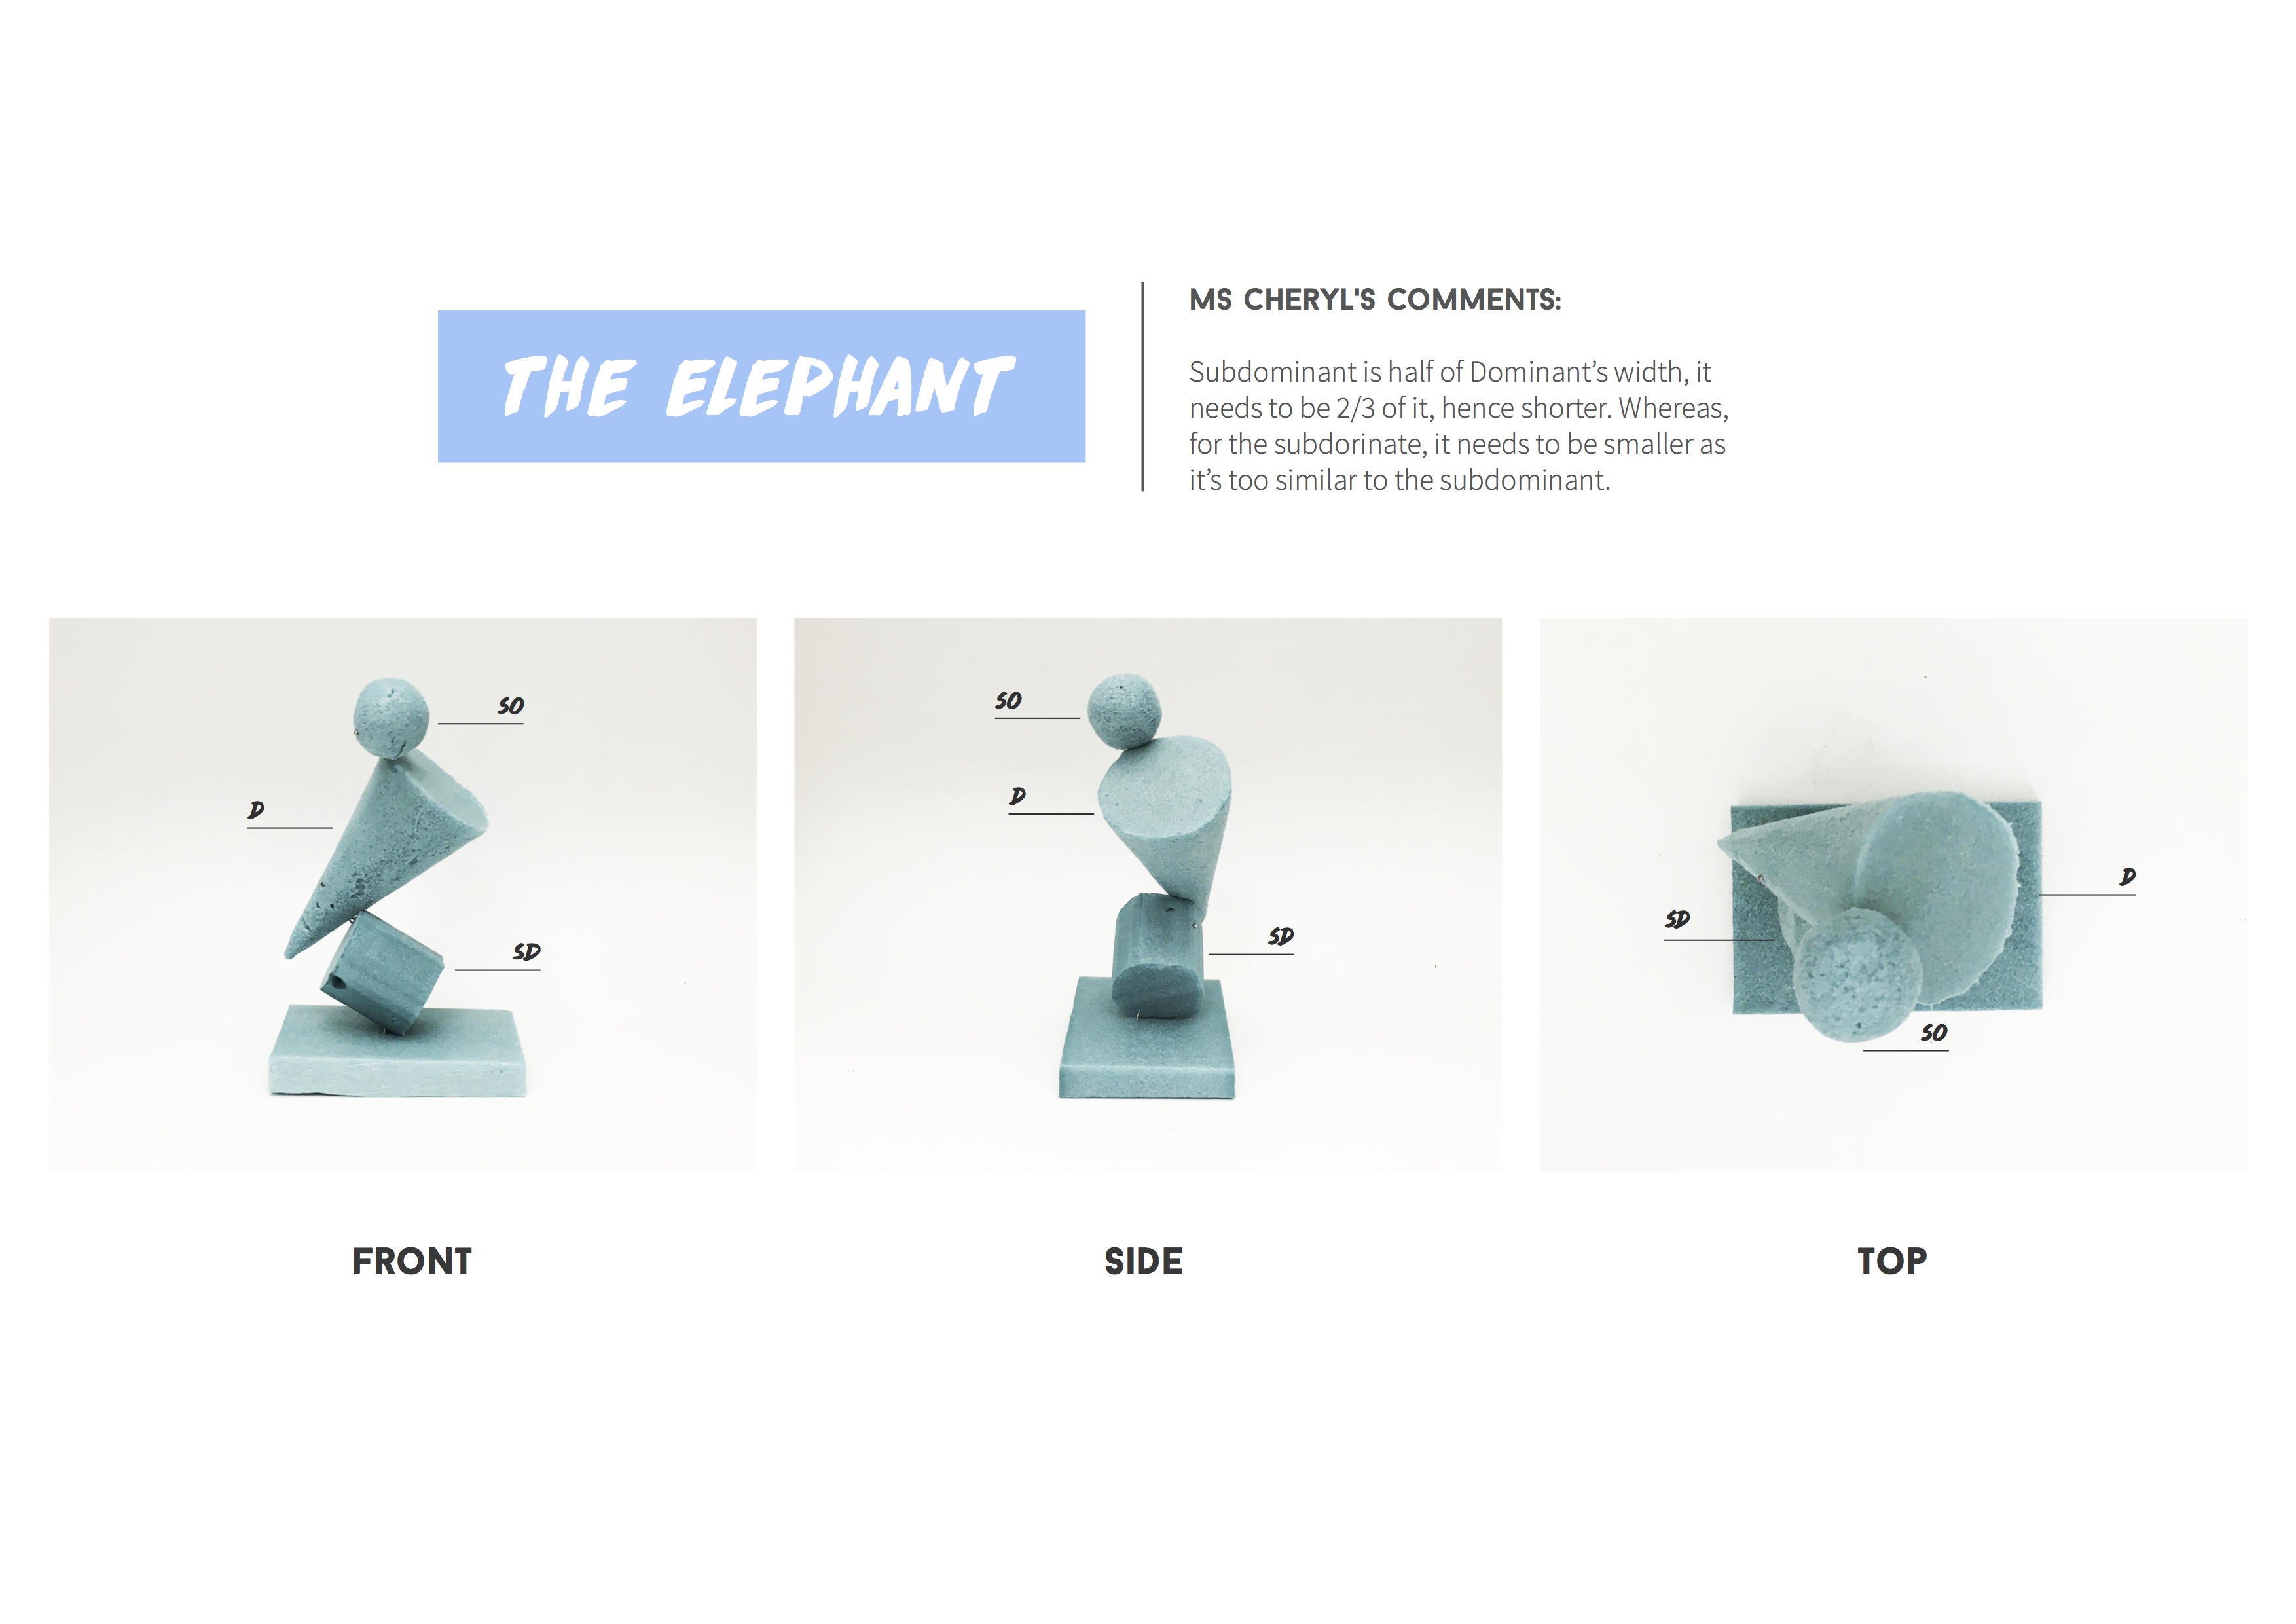
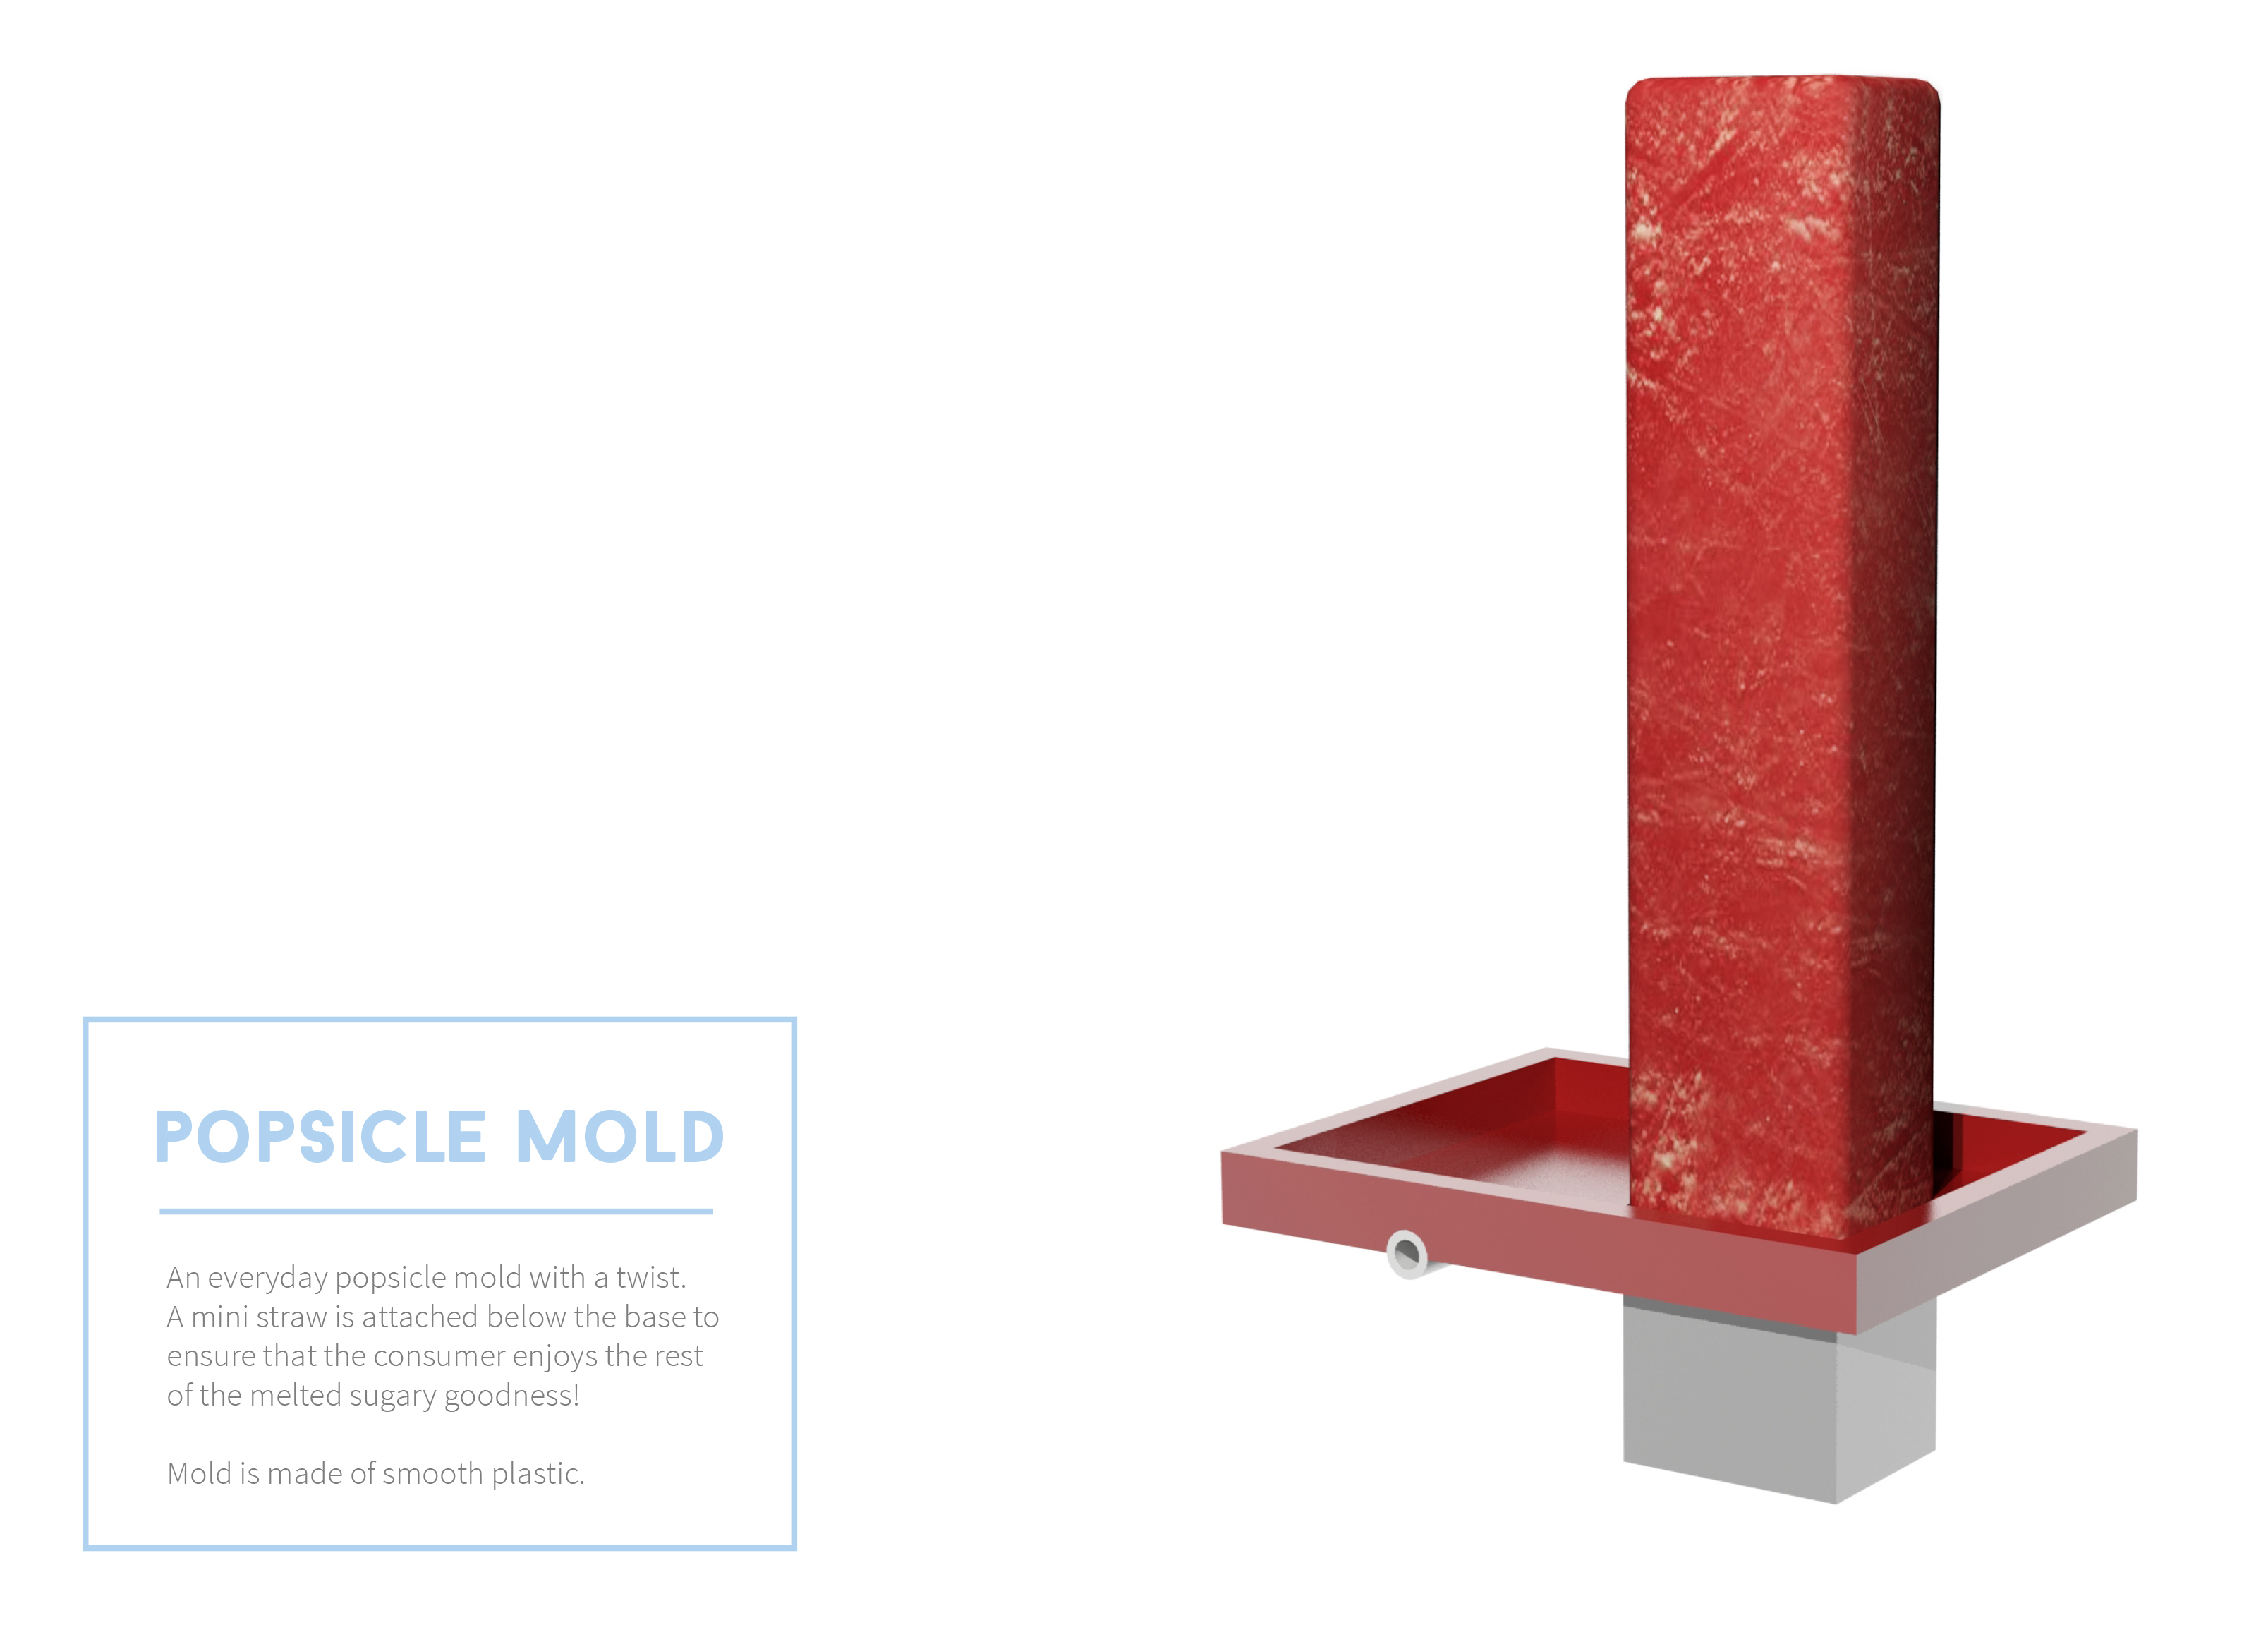
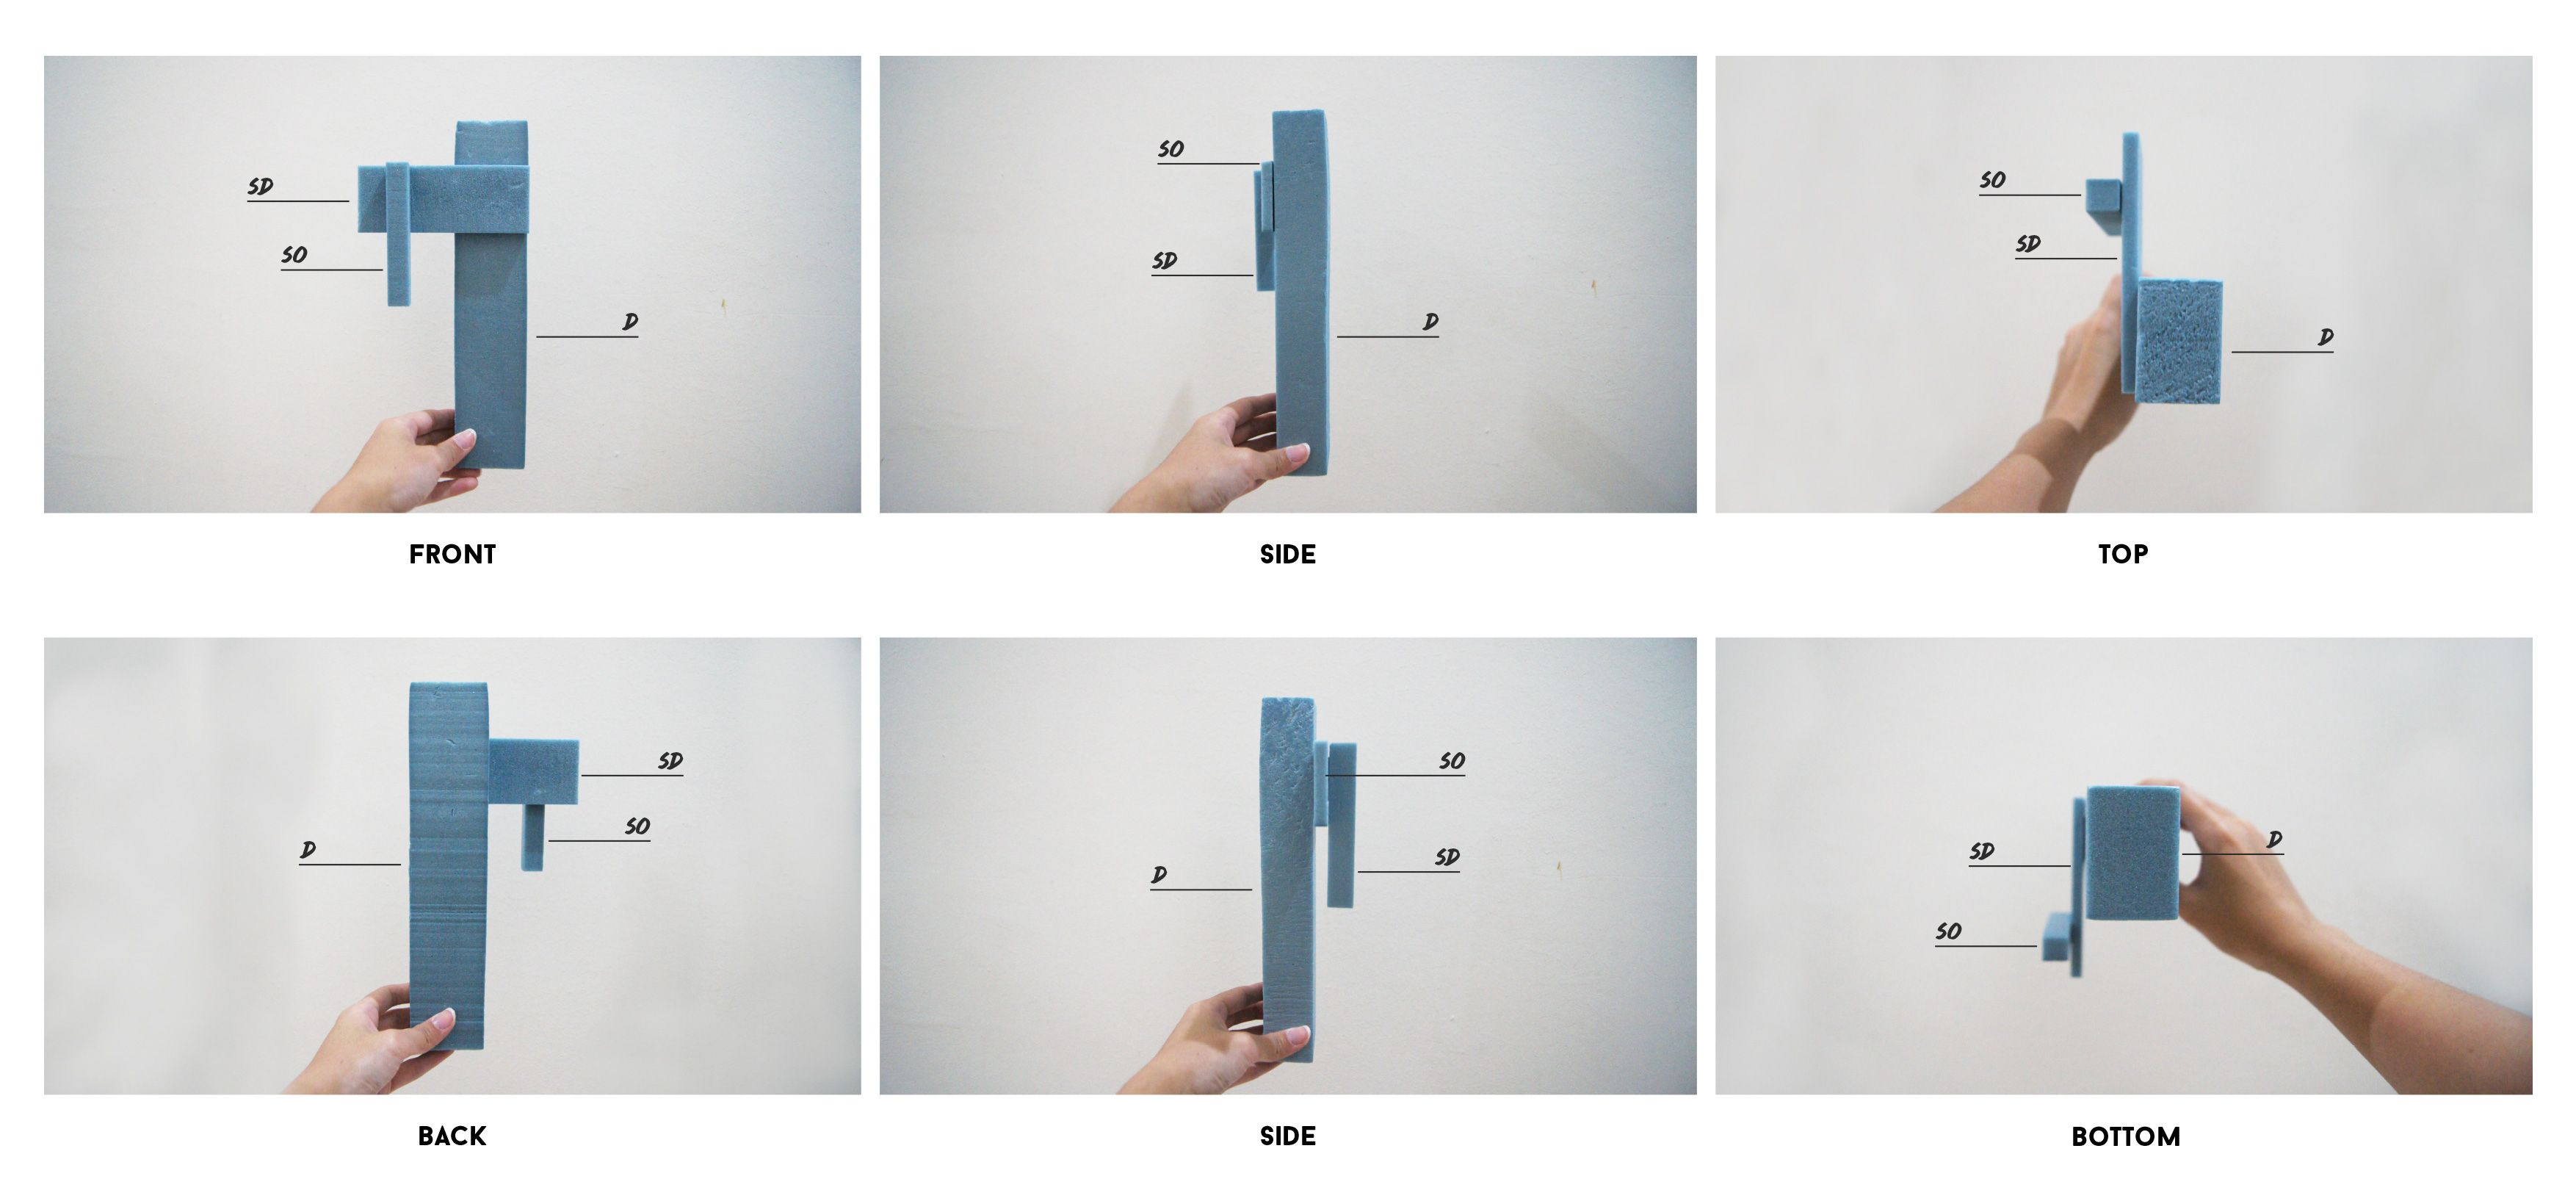
 

Model 4

Model-4
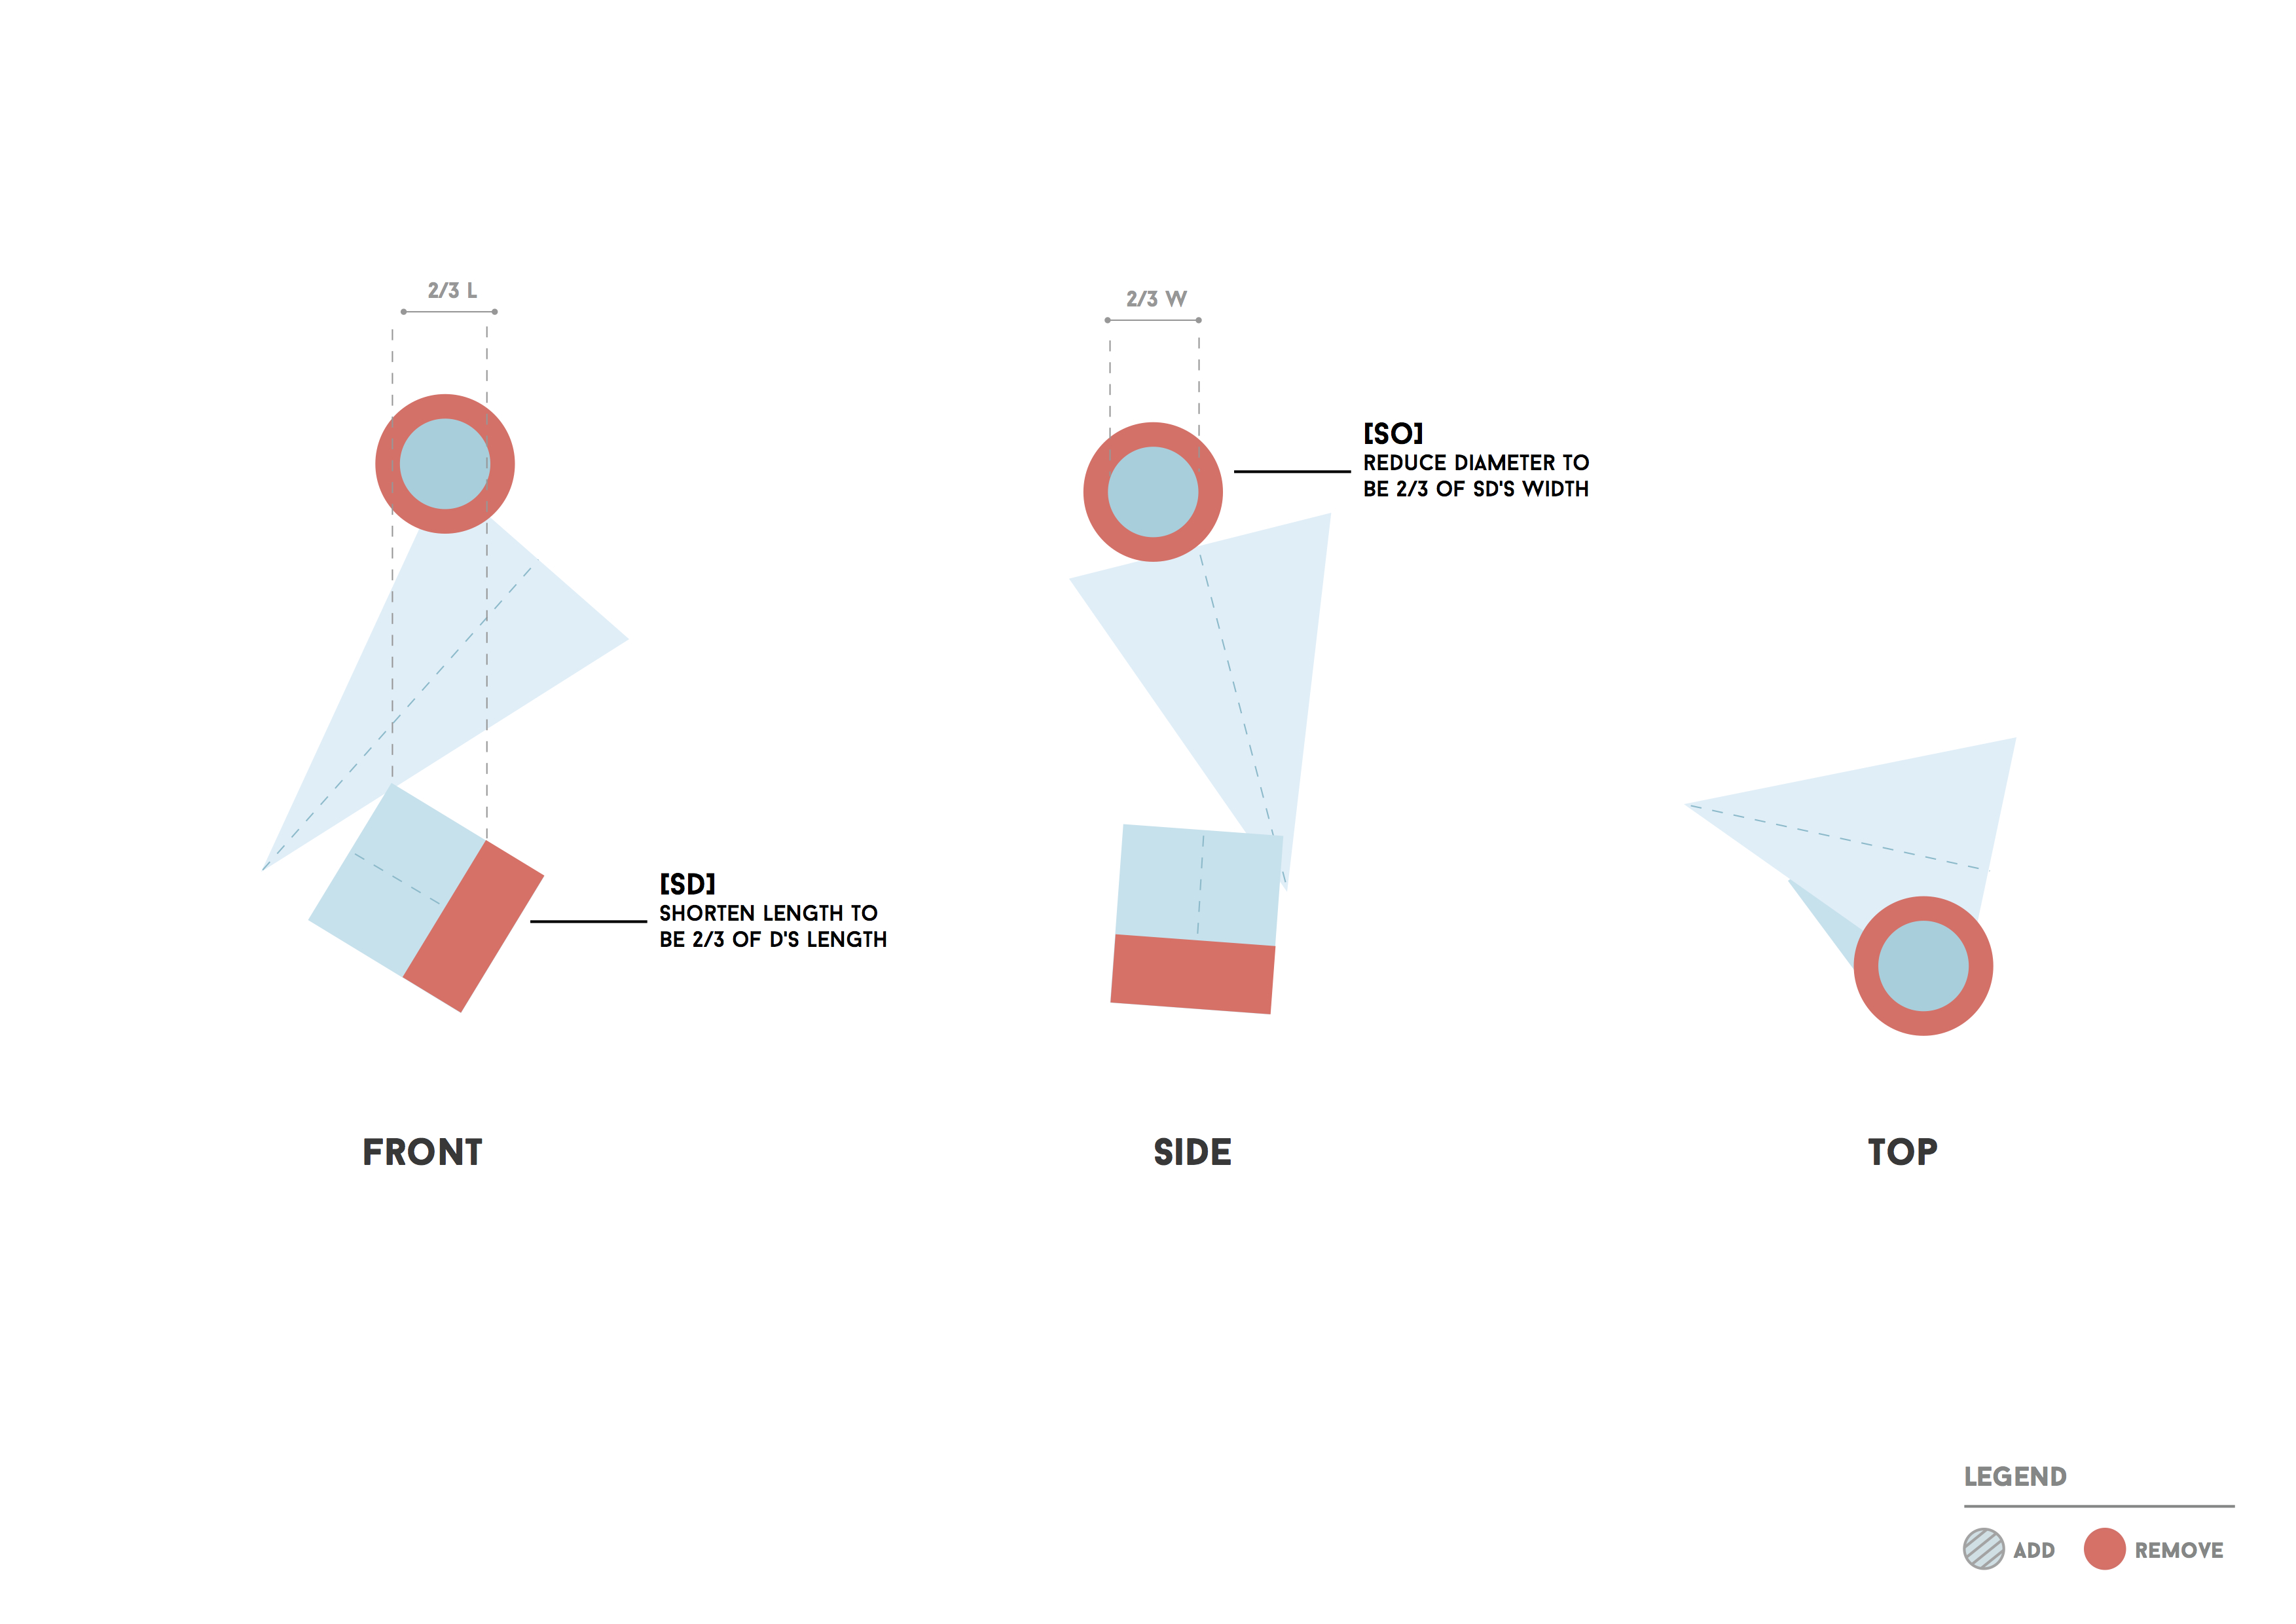
Ms Cheryl mentioned that the D is not obvious enough, and I’ve to make it bigger. For my SO, it’s too long and I’ve to shorten it.
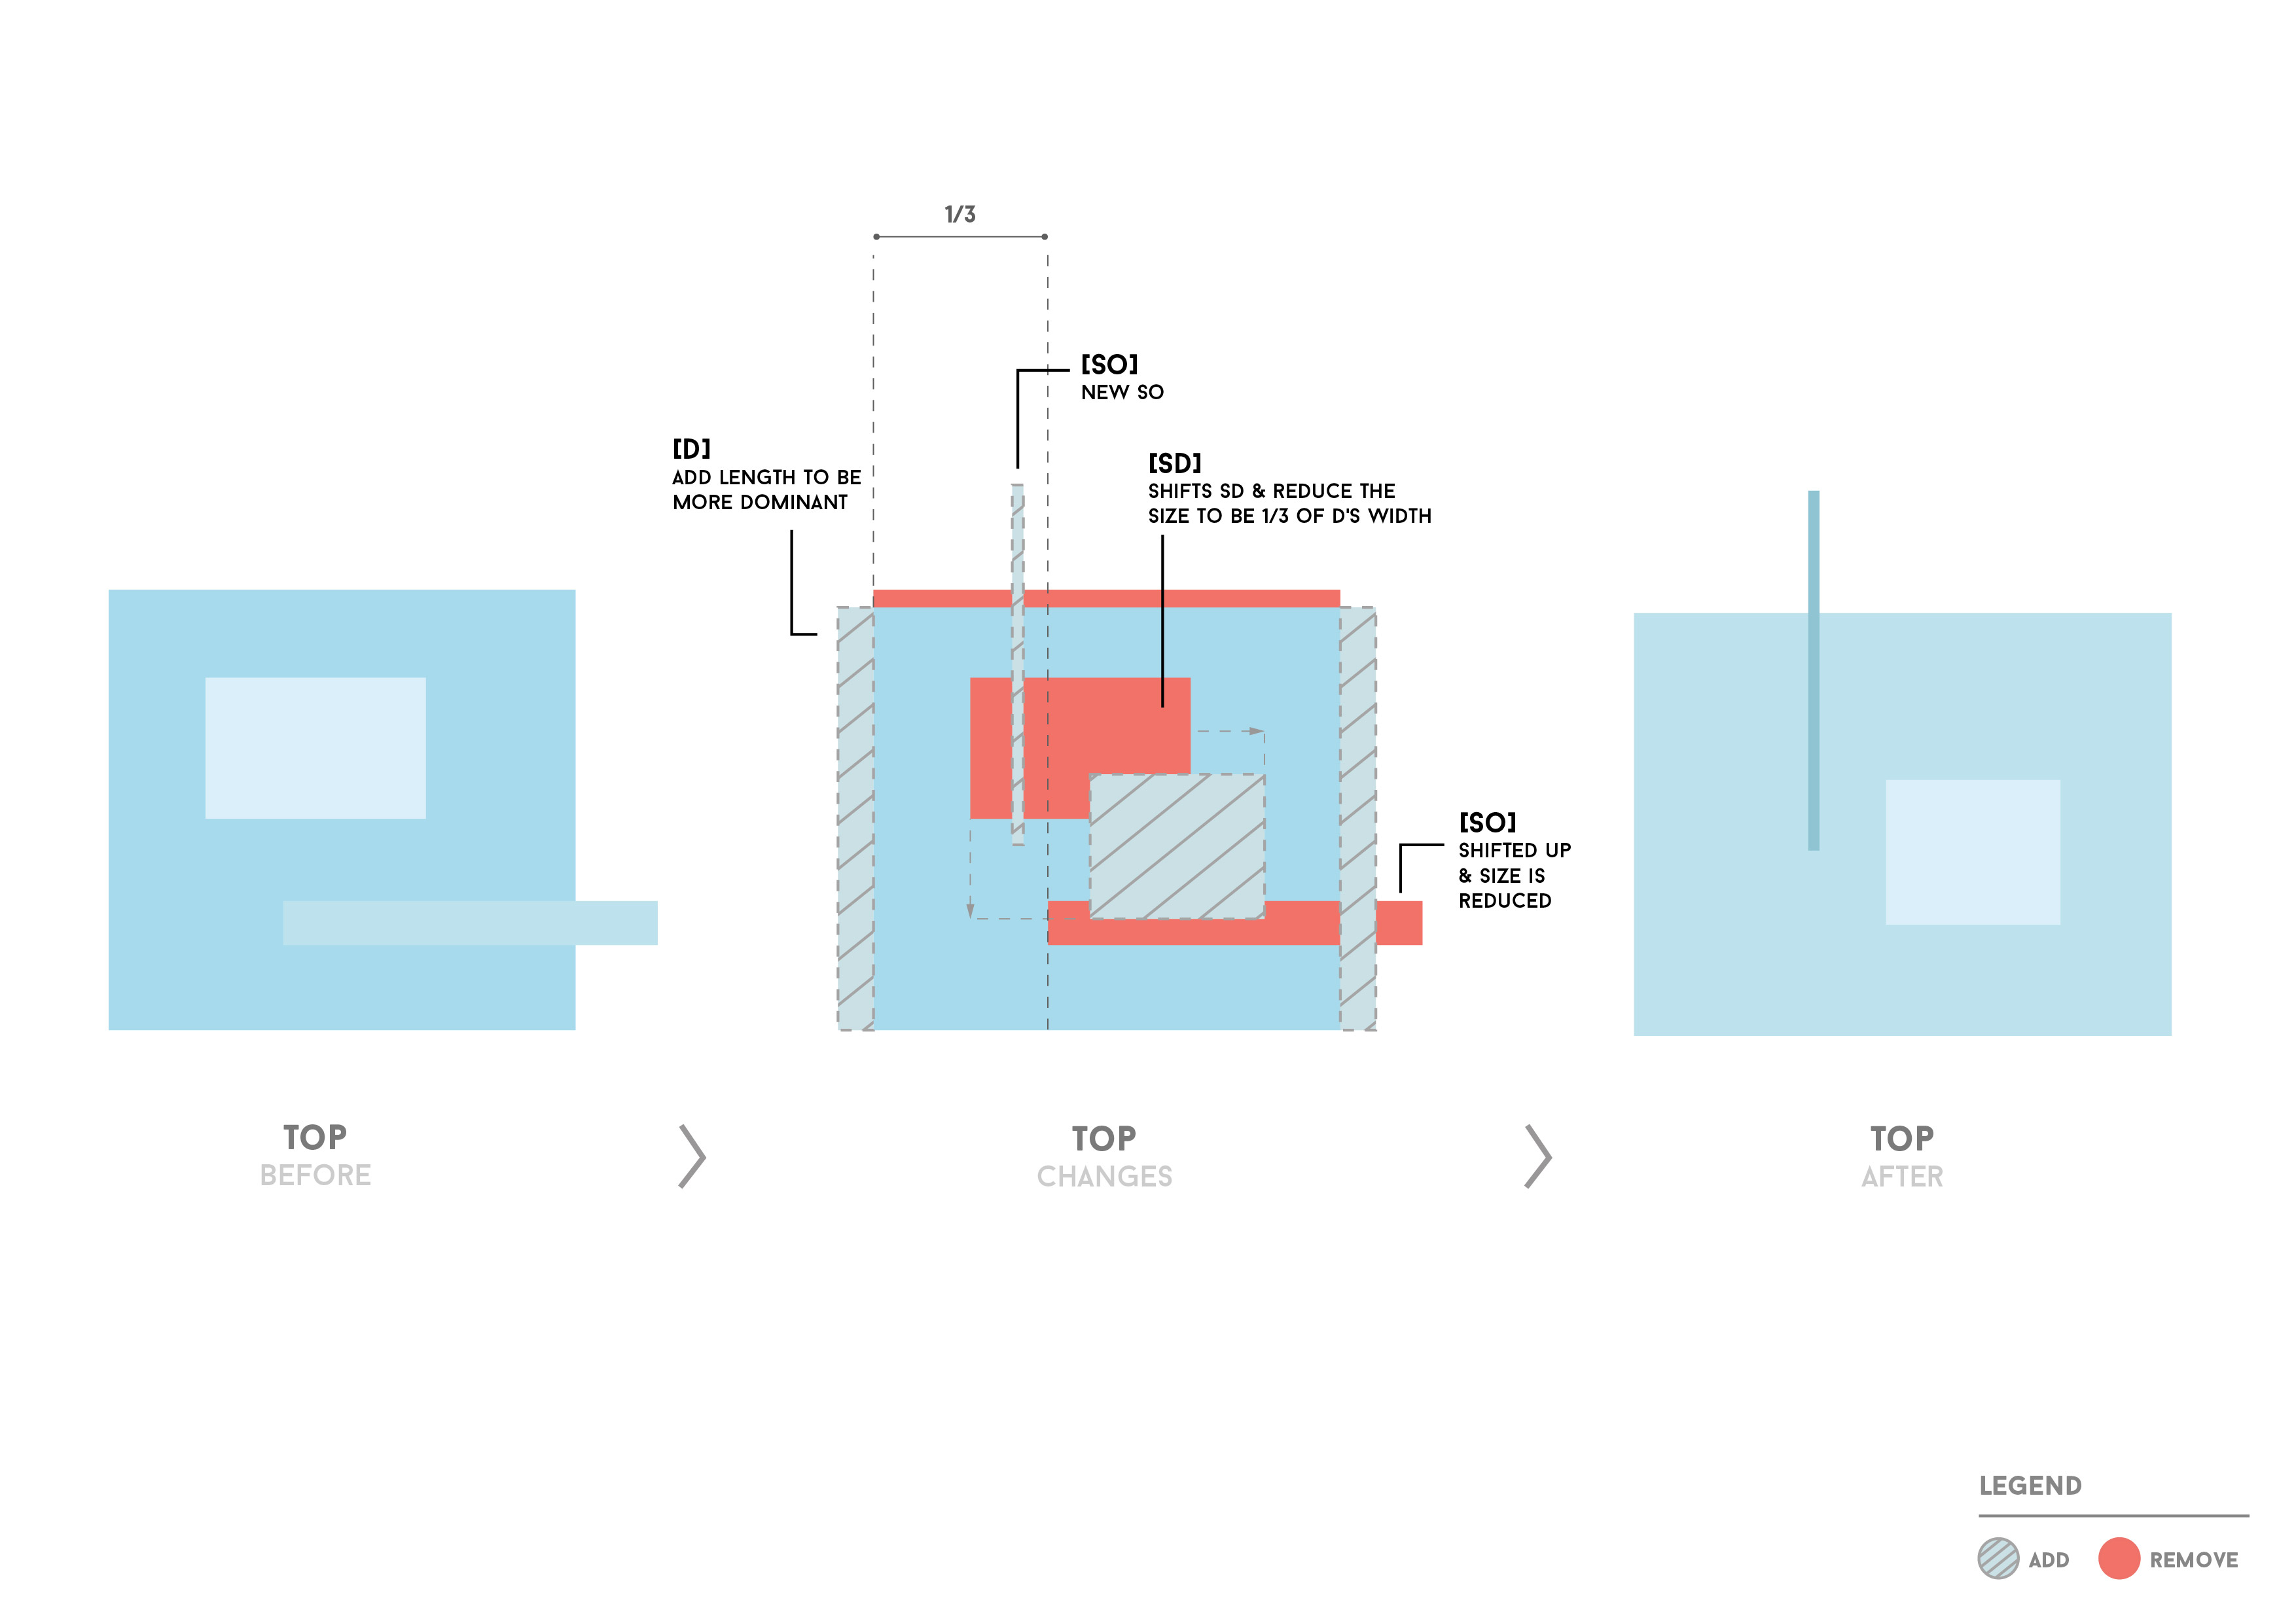
 

 Model 5Model-5

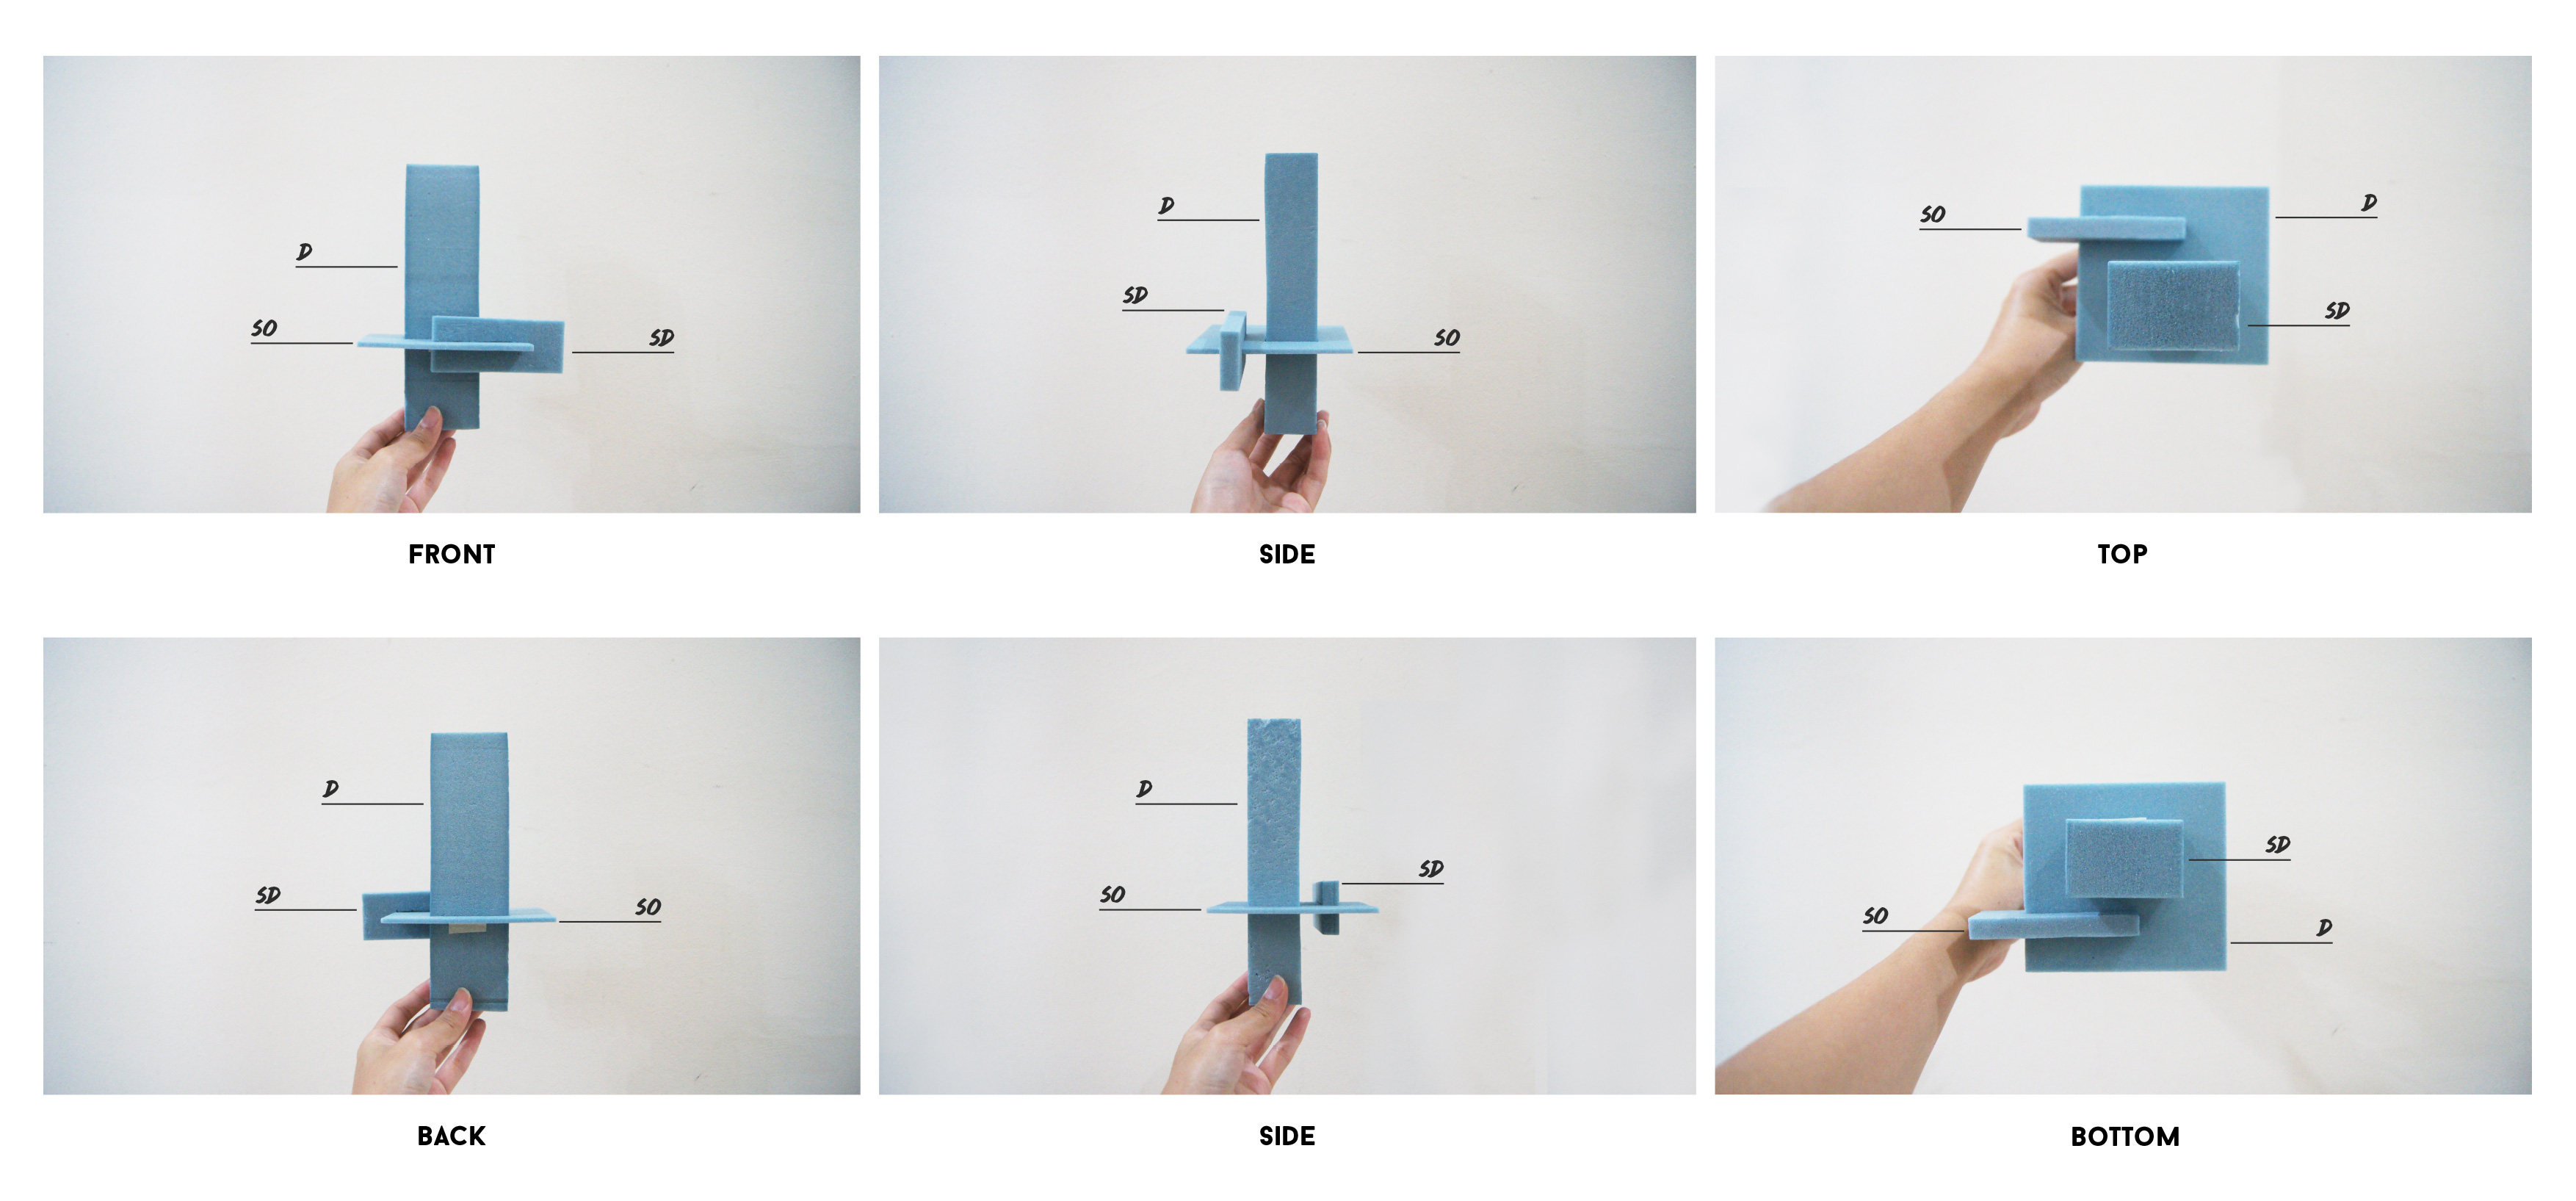
Among all my models, this is my favourite as I really like how balanced it looked. However, Ms Cheryl mentioned that this structure is quite bad as she can’t really tell which is which LOL. As she said that my SD and SO is very confusing. So… she sort of gave suggestions to help me to restructure and work on this model. But I’m not done with yet as I’m still working on it. I will post it up on the next post!

So stay tuneeeee.