

P L A S T I C F U S I N G
Materials: Wax Paper, Iron, Plastics


P L A S T I C F U S I N G T E C H N I Q U E
- Choose pieces of plastics that you would like to fuse
- Place plastics in-between wax paper
- Start ironing until you’ve reach your desired fusion results.

Trial 01 – Fairprice Mini Bag
At every asian household… you would definitely have loads of plastic bags chuck at the corner of your house. *thanks mom* So, it seems that I only have Fairprice plastic bags and I guess the colour theme that I’m going with would be White, Red and Blue for now?
I was really excited to try the fusing of plastic as I’ve never really done it with an iron before. Previously I had some experience playing with acrylics only, with a hot air gun. And this iron technique gave me quite an unexpected result!


And tadah! The red little handle was actually from the Kopi that I had in the morning. Guess it came in handy eh? It was interesting how the plastic wrinkles as it stays under the heat for longer. And honestly, I was quite taken aback when it started to shrink! I really had no idea the plastic would shrink that much under heat, and it made me realise that I’ve to be more alert while ironing so that my plastics wouldn’t turn into a dried prune hahaha.
Trial 02 – Ink Bag
For this bag, I knew I wanted to make something circular. I tried to do some mix media by drawing some lines on the plastic with permanent marker to see if the heat would melt the ink or something unexpected would happen. I guess the results shows that it didn’t turn out as I expected it to be hmmm. Now it’s just some wrinkly circle bag!
I realise that the thickness of your plastic plays a huge part in the shrinking process. If the plastic is thicker, it doesn’t shrink as much compared to thinner plastics. *we learn new things everyday*


Trial 03 – Four Leaves & Fairprice Collab
Since I brought a super huge Four Leaves plastic bag… why not try and fuse it to see where it goes? And here I present you, the collaboration between Fairprice and Four Leaves! Alright alright, the part before ironing is always the toughest as I’ve to try to make sure both of the plastic stays together which is really difficult. I tried various methods of folding to make sure it logo and the shape stays exactly where I wanted it to be before ironing.

And tadah! Ok this is another discovery. Apparently the baking paper has to be changed quite often as some of the ink from the previous plastic has stained the wax paper itself, thus leaving some ink residue on my plastics. *note to self* And the bag didn’t turn out as adorable as I thought it was gonna be like. Though, the branding on both sides are on point! Haha. I tried, I tried. Next, I’m really excited to try some beautiful cellophane papers! I’m sure the colours would look great.


I finally went to get my cellophane paper and was so excited to try it out!
I knew the colour scheme I wanted to go for, which is Dusk – the colours of twilight and sunset. I tried to mimic the colours of it by buying similar cellophane paper colours. Keyword… I tried. But it’s close enough I guess?

Maybe the colours I chose seemed closer to this photo instead… Anyhow, here we go! Oh and I had no idea cellophane papers were so expensive!? It’s like $2.20 per roll, damn I thought it was cheaper.


Again, the tricky part was trying to make sure the cellophane were flat so I could iron it nicely. They just kept rolling! And again, the results weren’t what I expected them to be. I wonder, why they didn’t shrink as much compared to the Fairprice plastic bags? Is it the heat? It can’t be the thickness as this papers are much thinner than the fairprice plastic bags. Or is it because, it has lesser plastic percentage in it? Hmmmm. But yes, I wanted them to blend well together but I just seemed choppy. I guess one way to make it more smooth was to tear the cellophane buy hand, so it doesn’t have precise cut ends which accentuates the borders. And here are some of my test pieces!
Sorry you might be a little giddy as I’ve to flip the image upside down so that it resembles the sky gradient even more. I didn’t realise that I’ve been looking at it the wrong way the entire time haha, now wonder it doesn’t look like how I envisioned it to be. Now it looks better when it’s flipped!

Test 01
This piece was had a transparent plastic as backing, and it’s cut nicely with a pair of scissors. My first ever Dusk that I tried to captured, it’s the most wrinkly and has the most obvious edges.

Test 02
Still, cellophane paper are cut nicely with scissors. This was ironed against white plastic as backing which I thought would give more vibrancy to the colours as it’s against a white background. And yes, I guess it kinda did? I used more cellophane paper to overlay it, in hopes that it will start ‘blending’. Now it just reminds me of the agar agar jelly that I used to it sigh.

Test 03
My favourite piece of all! Finally I decided to forgo my scissors for this and started tearing the cellophane paper with my hands. And guess what! It sort of gave a smoother flow as the cut is not as precised compared to the others. This is just one layer of cellophane paper, layered against each other without any backings. Oh and I feel that this piece resembles a silhouette of a mountain! Does it? Please tell me it does haha.

Test 04
I really liked how the torn edges worked out, so I forgo the scissors again. I placed about 2 layers for the lighter colours, which were the yellow and magenta. And guess what! It turned the magenta into orange. I guessed I’ve accidentally overlayed too much on the magenta. Folded the edges at the side because I wanted the end product to look neater, was contemplating if I should cut it into a square?
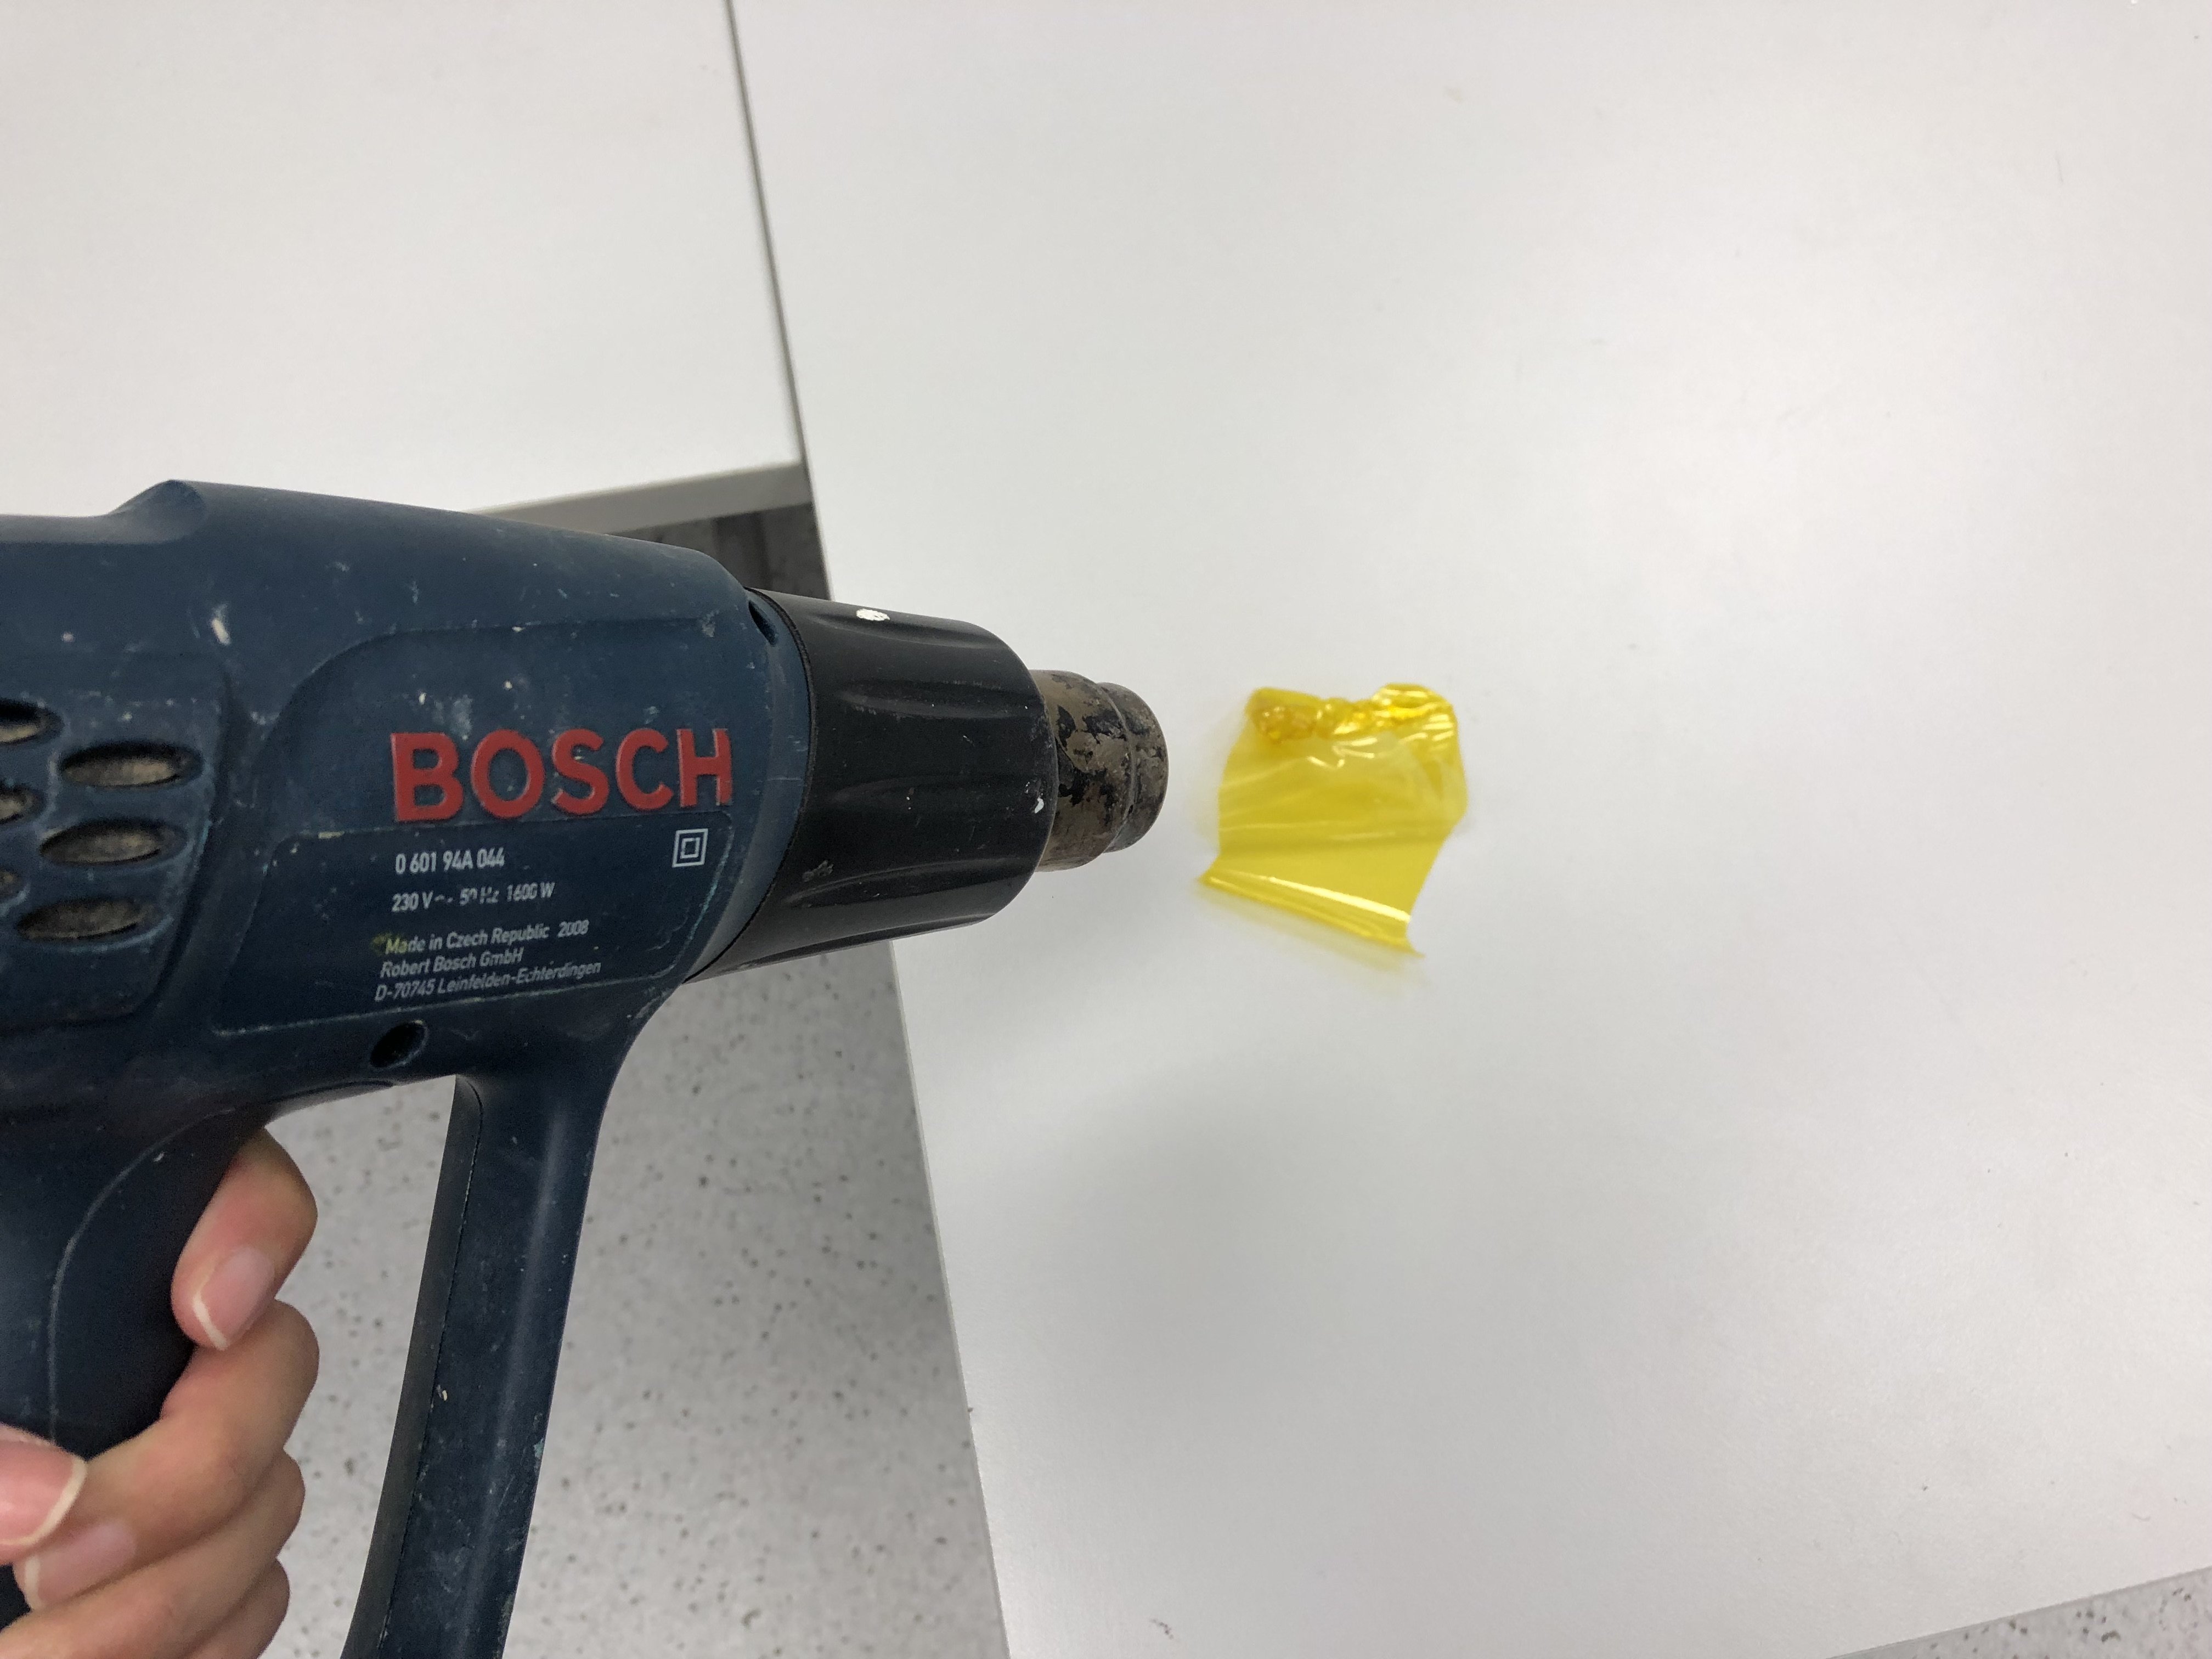
I’m gonna bring my cellophane papers and try it with a hot air gun when I’m in school. It could probably give me the blended, warp-y, desired effects that I wanted!
/ Update! *
I’m back again! And I’ve finally tried to fuse the plastics together with a hot air gun. The results are so much better as the plastic literally fuses with one another, unlike when it’s ironed, it’s just layers together. As you can see, I really tried to create a wavy texture, hopefully it could mimic the wispy clouds in the sky.
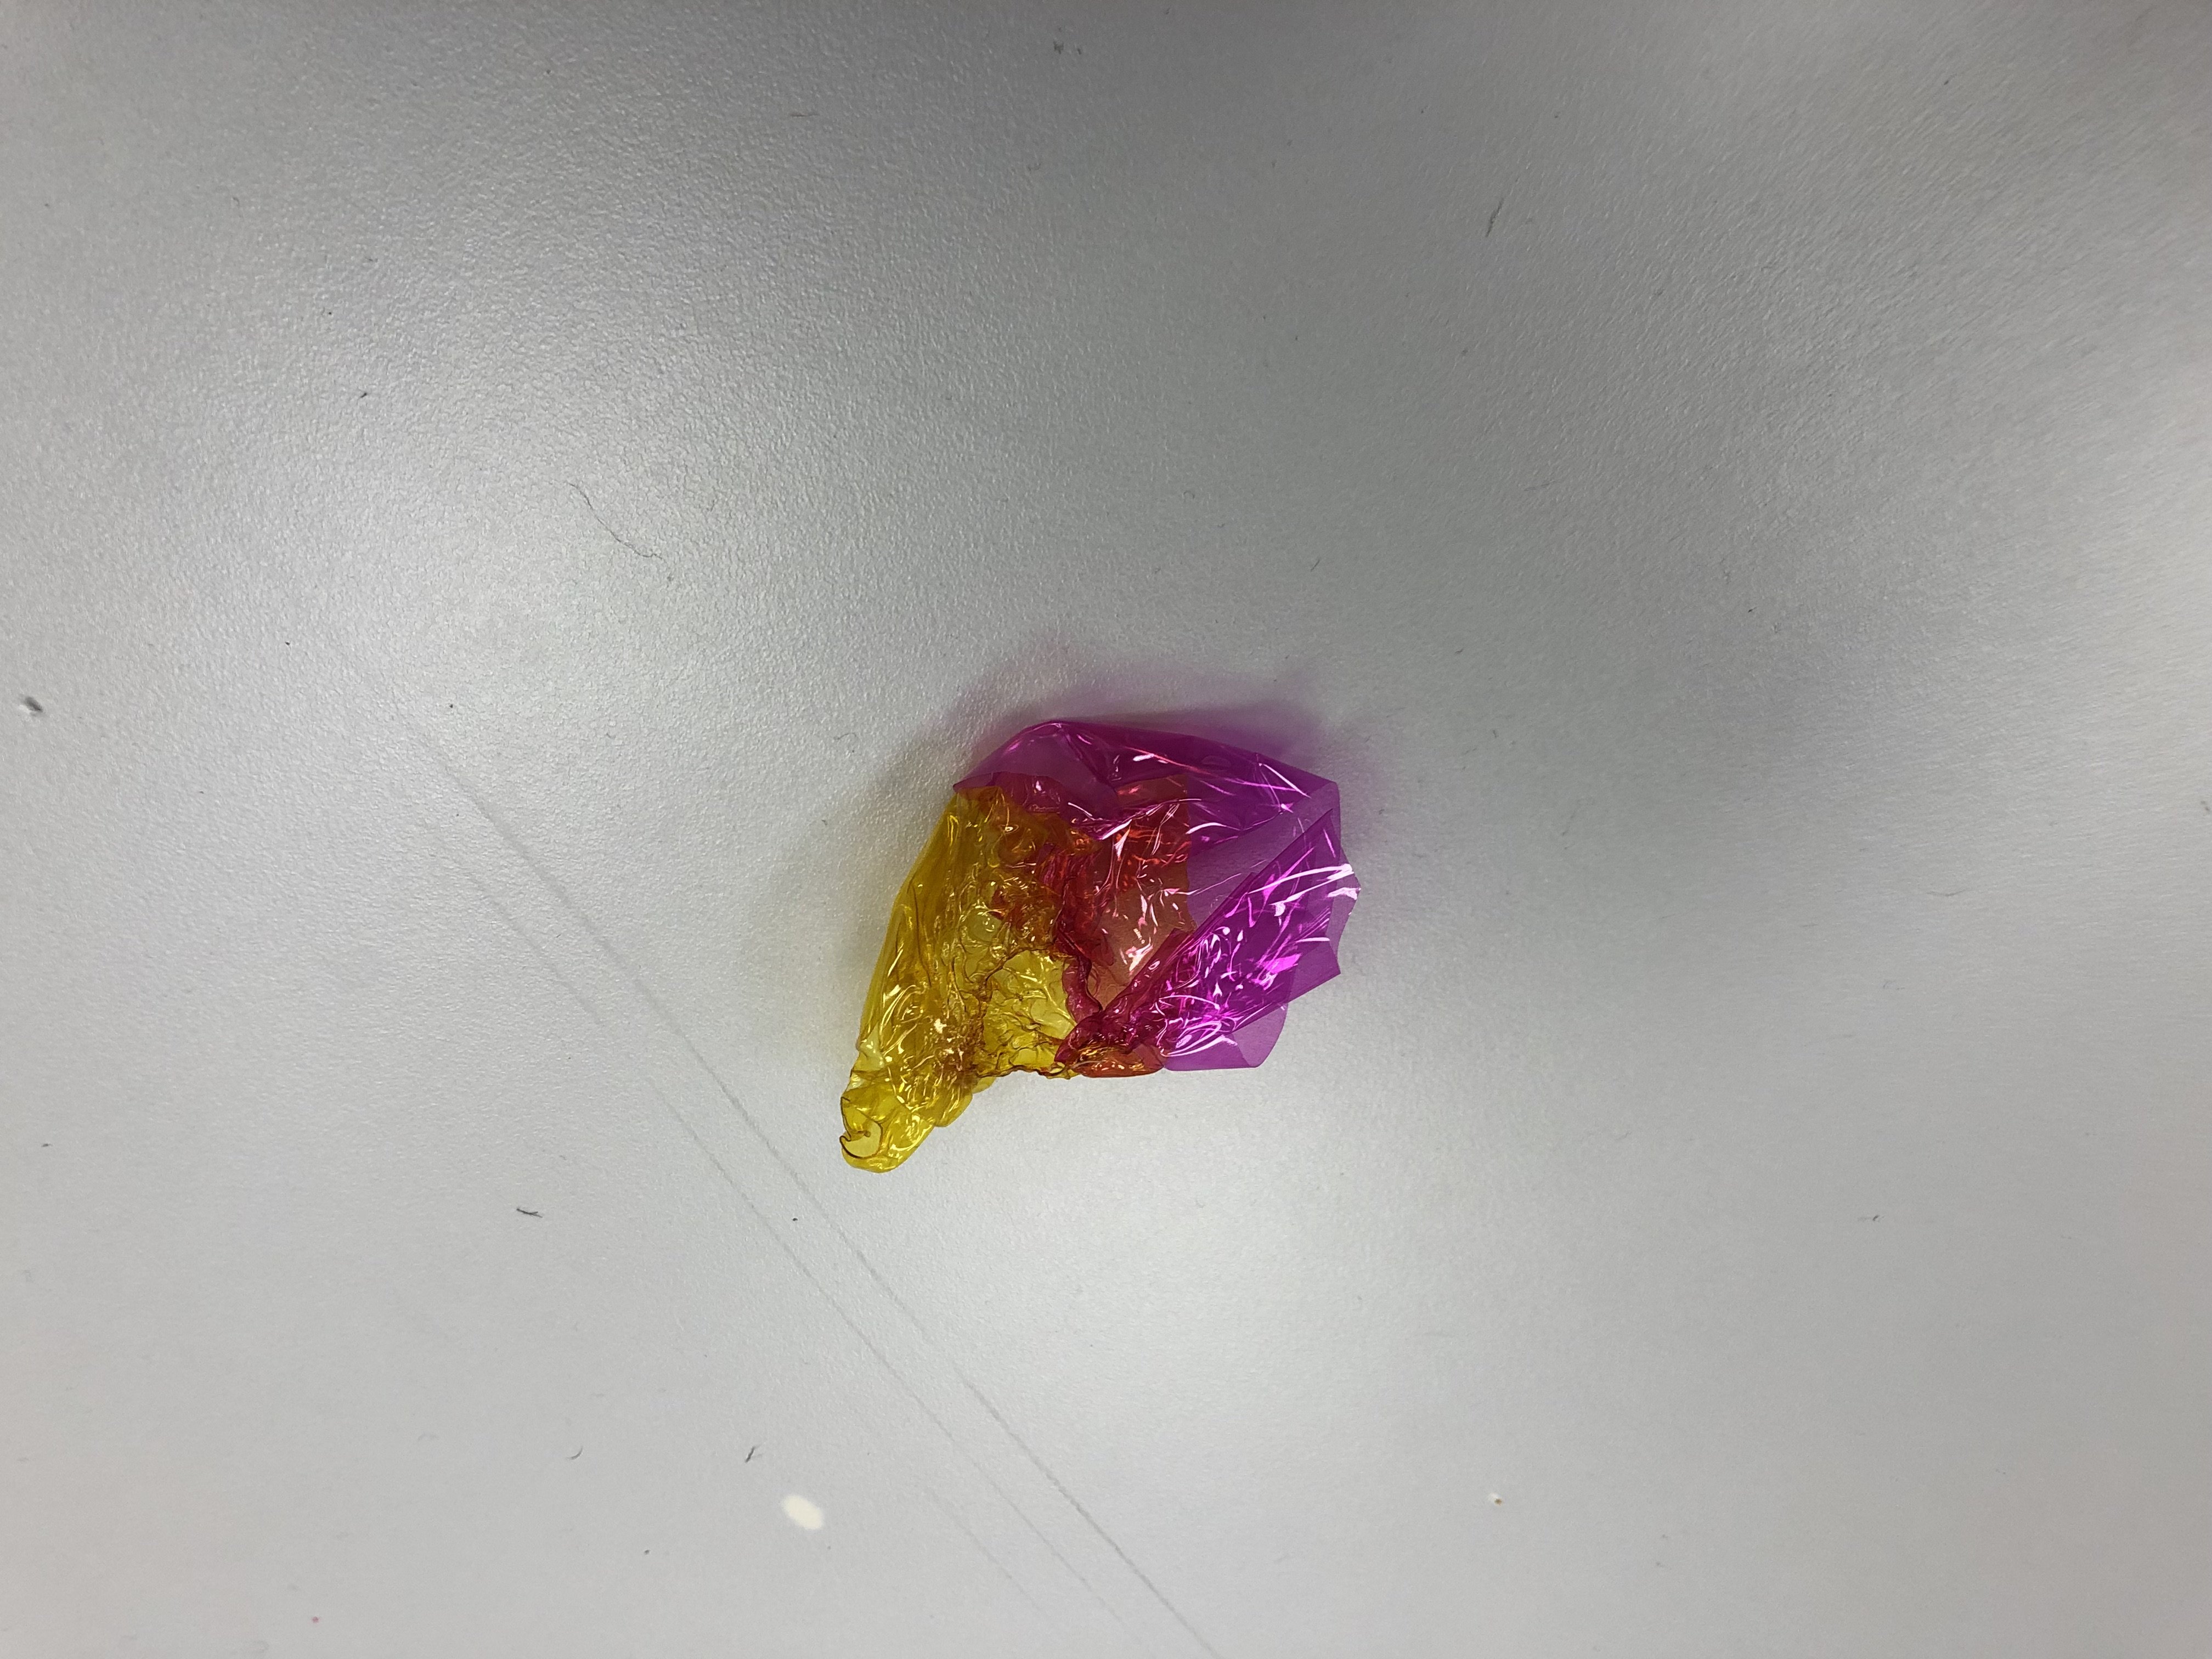
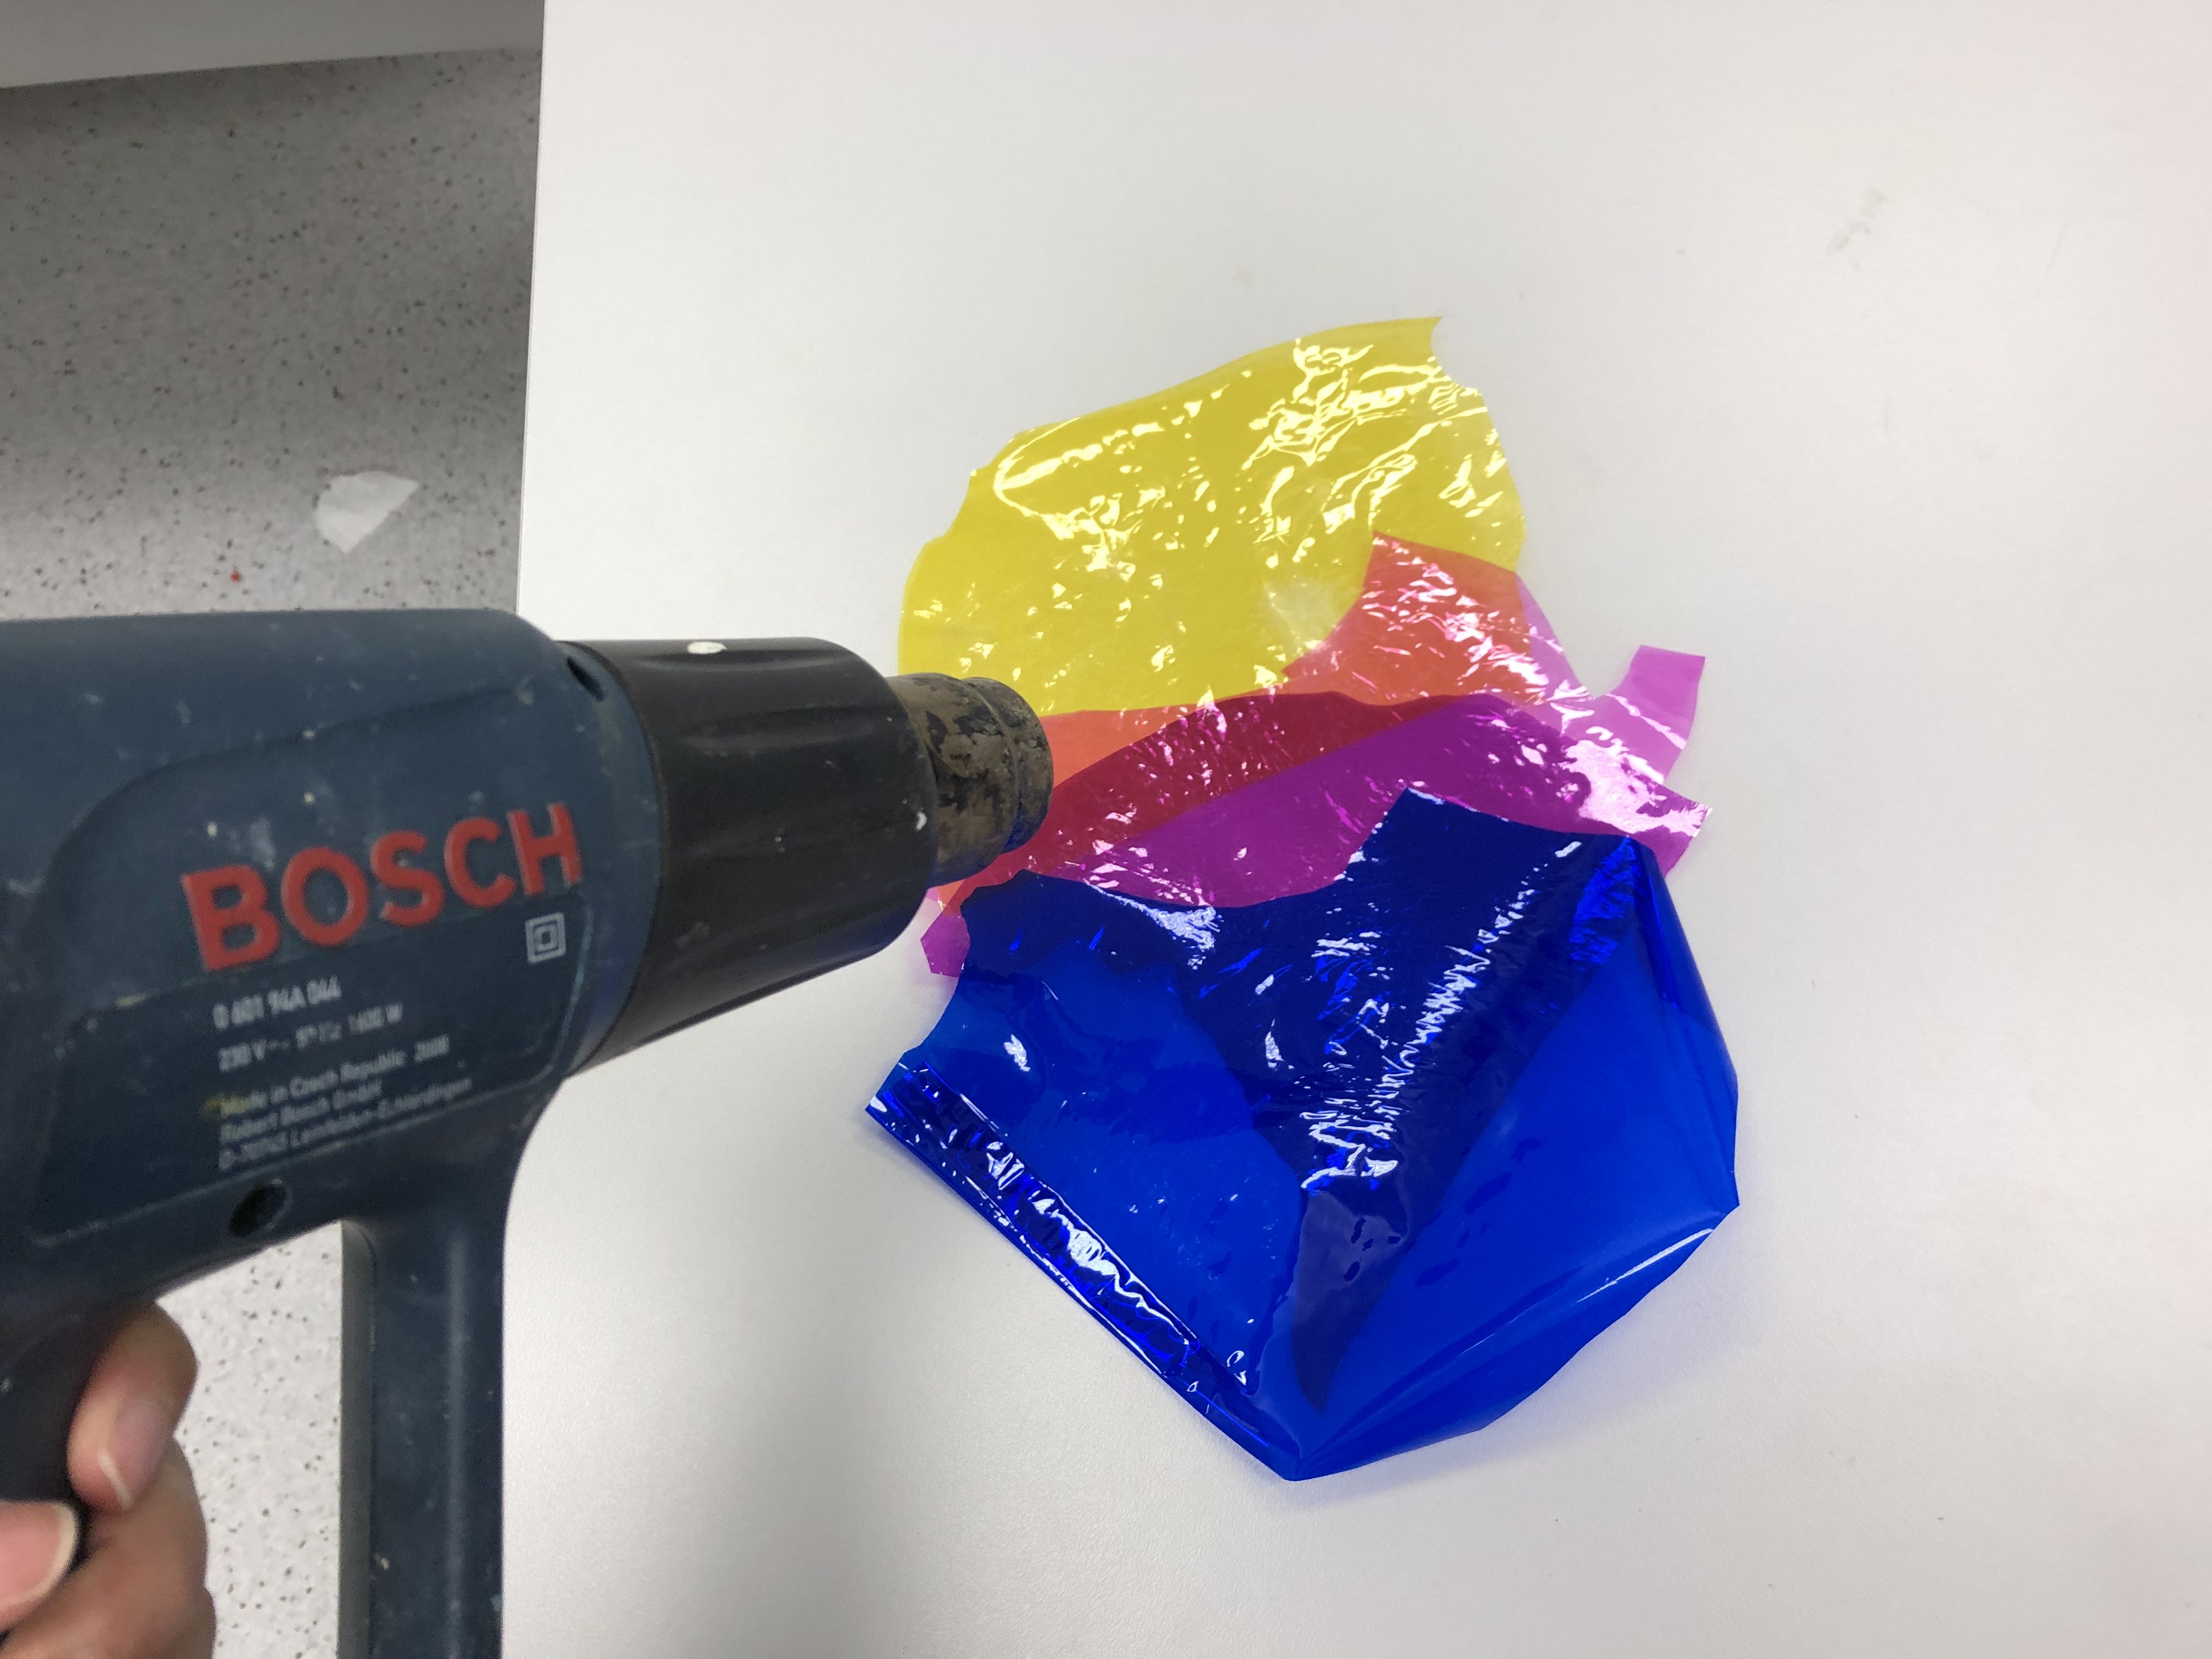
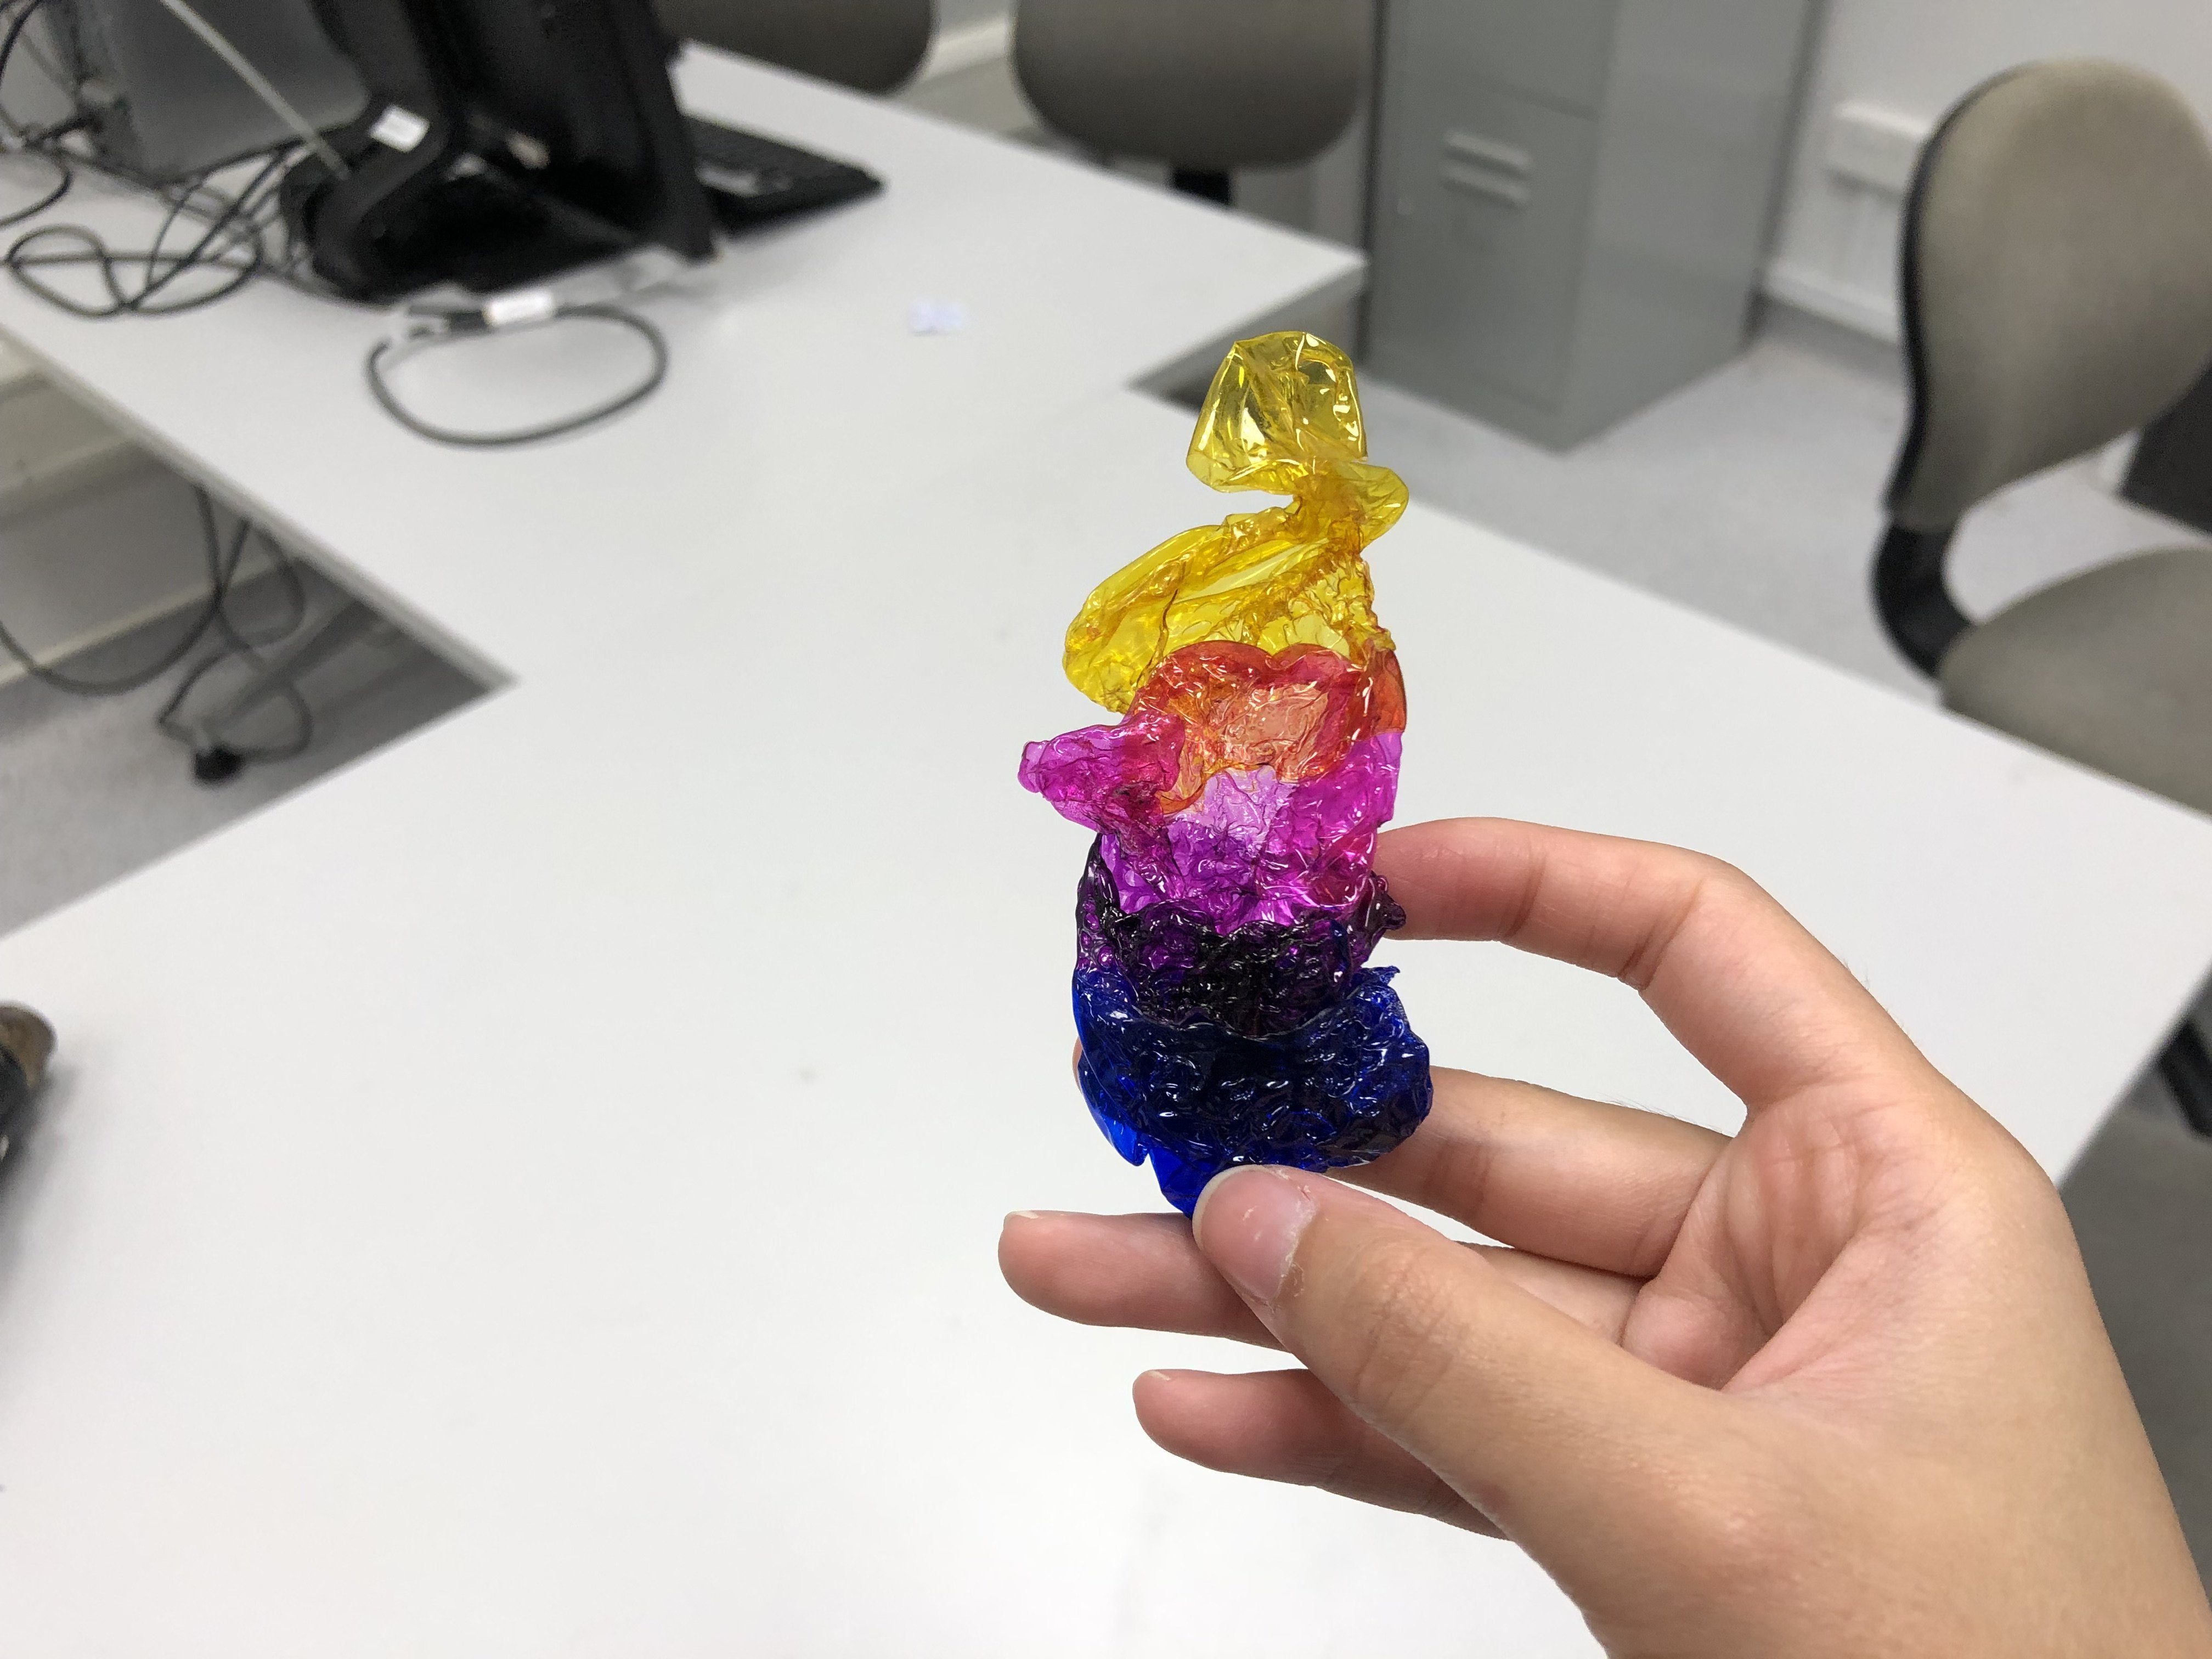


Overall, I definitely prefer the effects made by a hot air gun as it’s much more natural. But for the cellophane, I can’t simply use hot air to melt it directly as the cellophane paper will separate from one another. I would have to iron first, to stick them together – then use hot air gun to fuse them together.
Plastic fusing is a really cool technique as I’m able to achieve various effects simply by using different tools such as an iron or a hot airgun 🙂 I’m interested to see how this technique will help me in the making of my final project!