Mind Your Gap (Azizah & Celine) – Project Development Body Storming


Take 1 starts from 0:03

Take 2 starts from 1:00

  • What did you learn from the process?

Due to the instructions being unclear on our part, the tester was unable to gauge how the car would be affected by them wearing the glove. There was no connection as we did not react fast enough in creating the right environment, but even then, the only result would be the car moving forward. It creates a lacklustre experience for the user, and they are mostly unclear of their purpose in this installation. There is no emotions evoked from this experience and there is nothing much to be taken away from it.


  • What surprised you while going through the process?

Firstly the comment given by the tester about using the gloves to control something, makes the tester  feel like a god which allows her to control the movement of the object just by moving her hand.

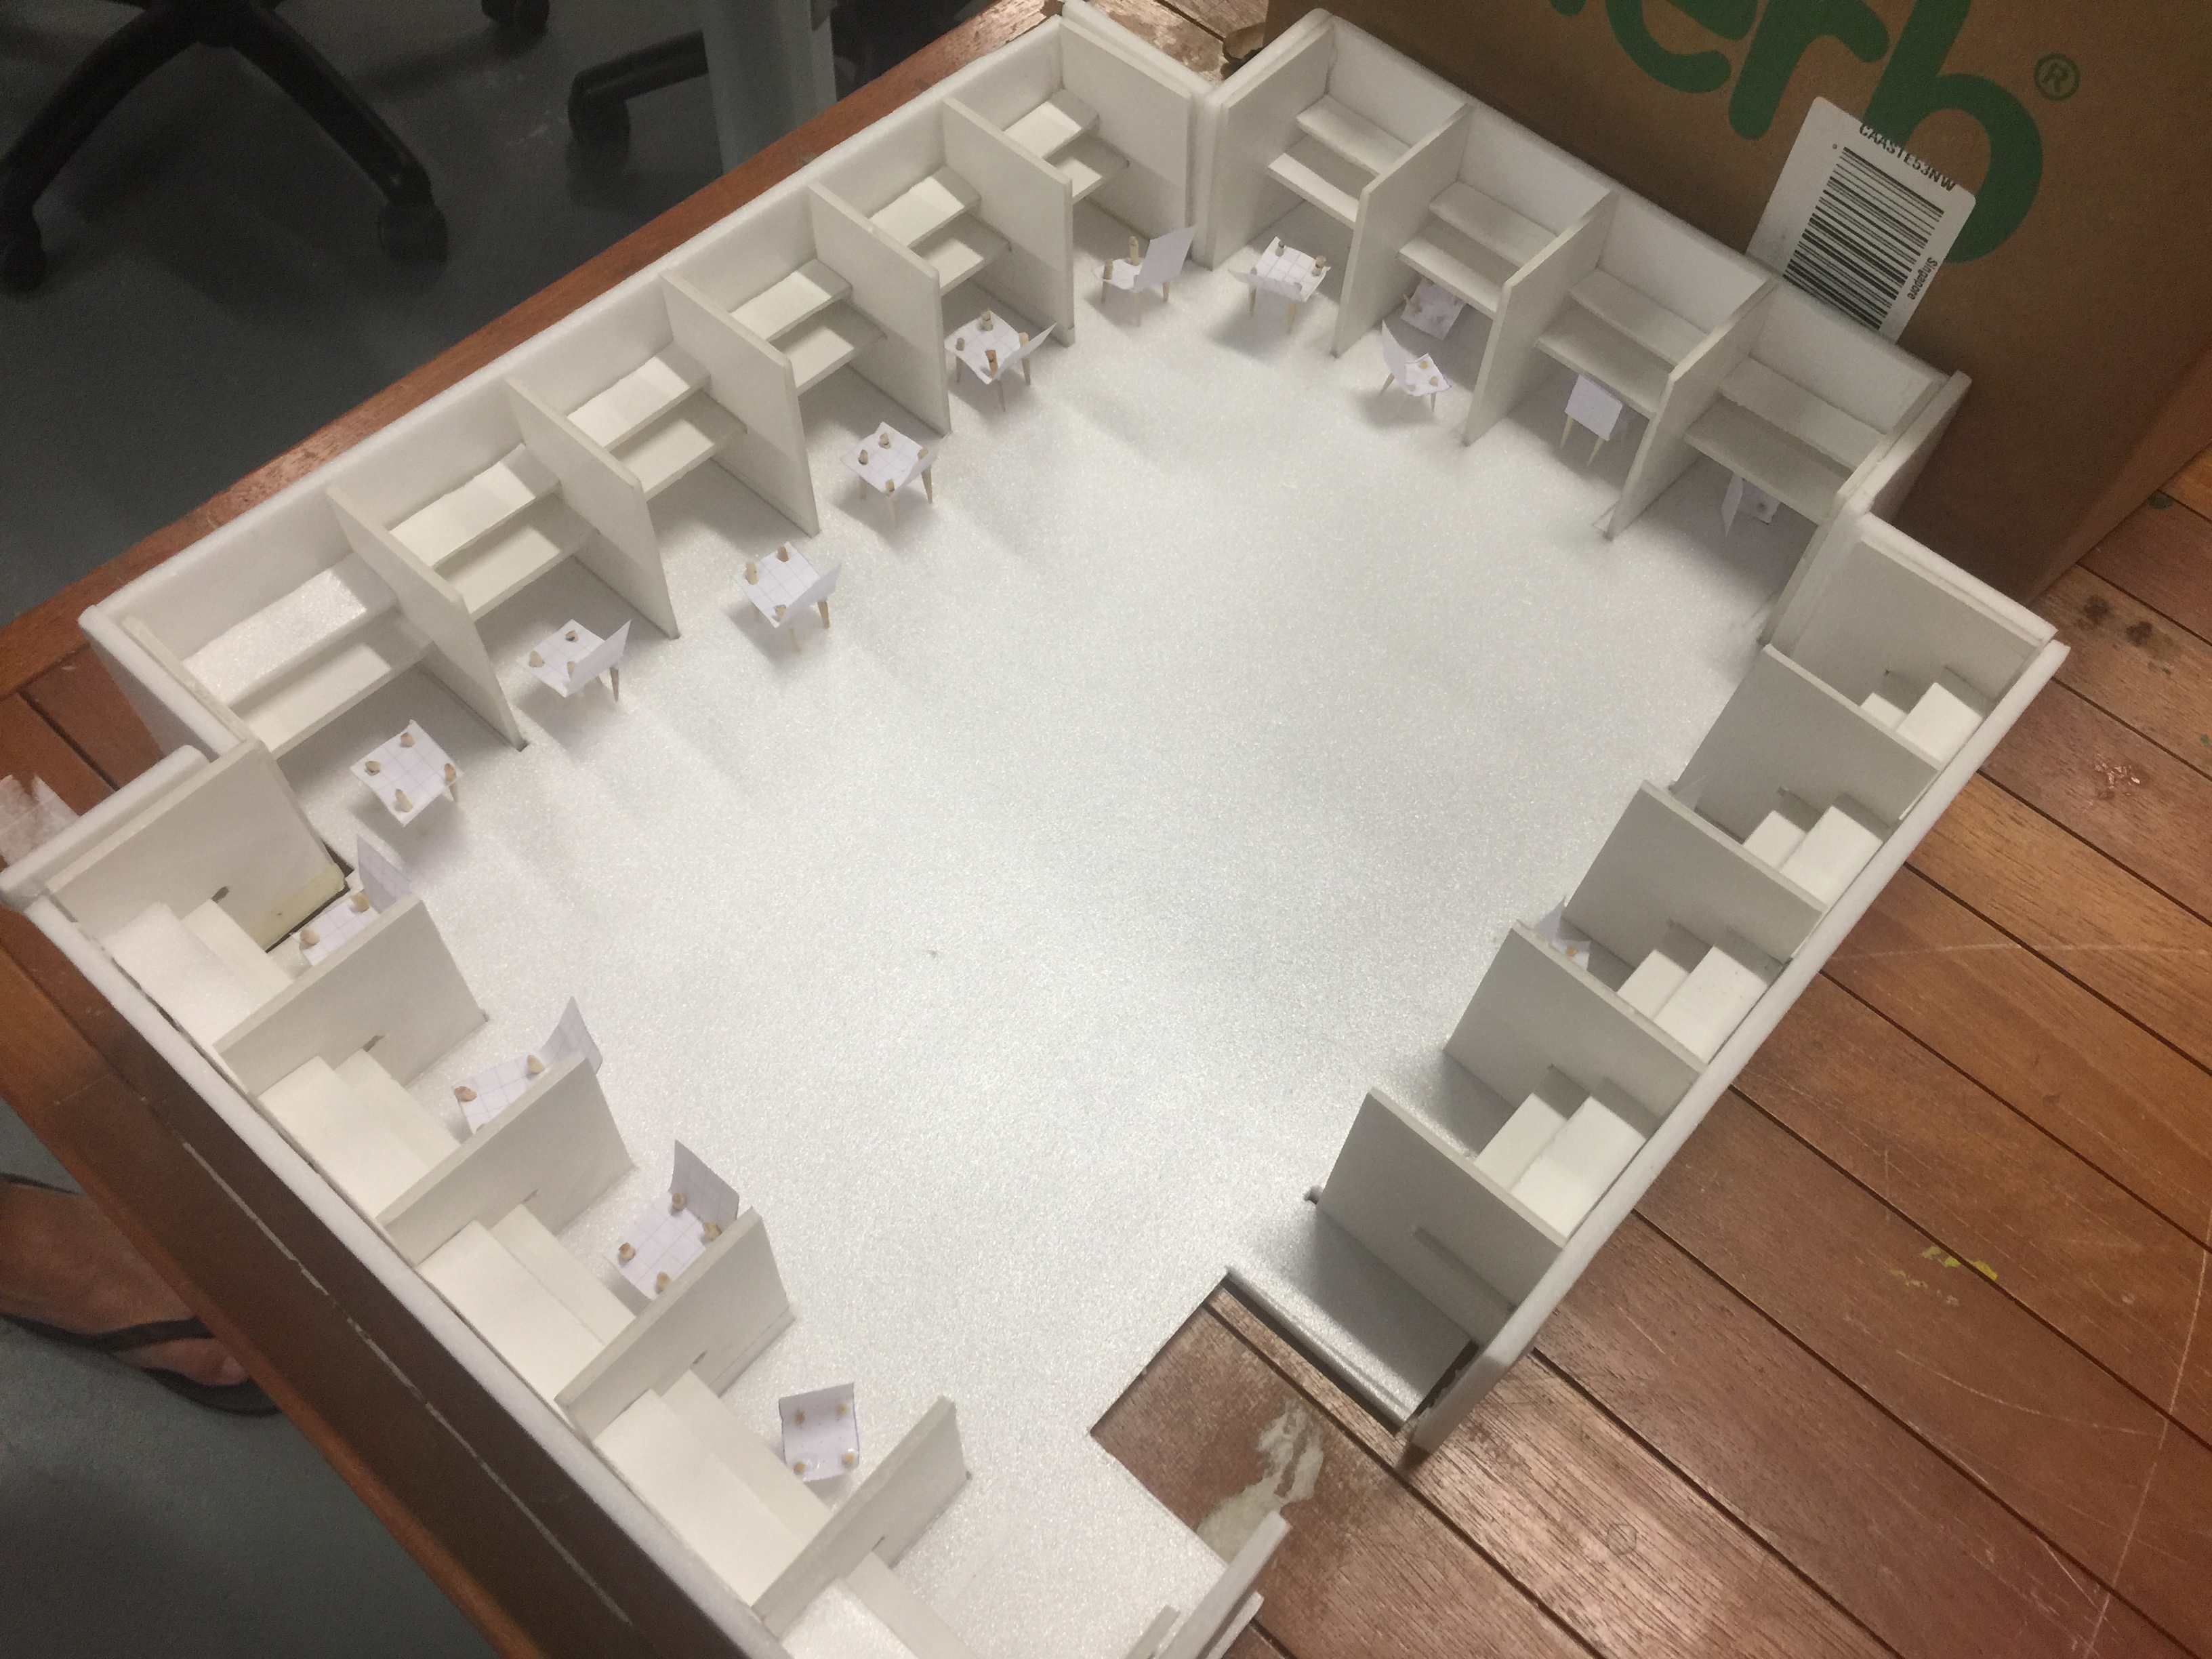
Secondly, not many people know the concept of tailgating, especially if this is an installation that is supposed to be meant for all ages to participate in, younger participants will not be able to understand the concept behind it.

Thirdly, when participants interact with the game, they might not find it engaging and immersive. This is due to the limitation of the interaction, which only requires the participant’s hand to move forward. In interactive media, one needs to be able to engage with the object/game/installation, making it fun or having a concept that is deep enough to be in engraved in people’s minds.


  • How can you apply what you have discovered to the designing of your installation?

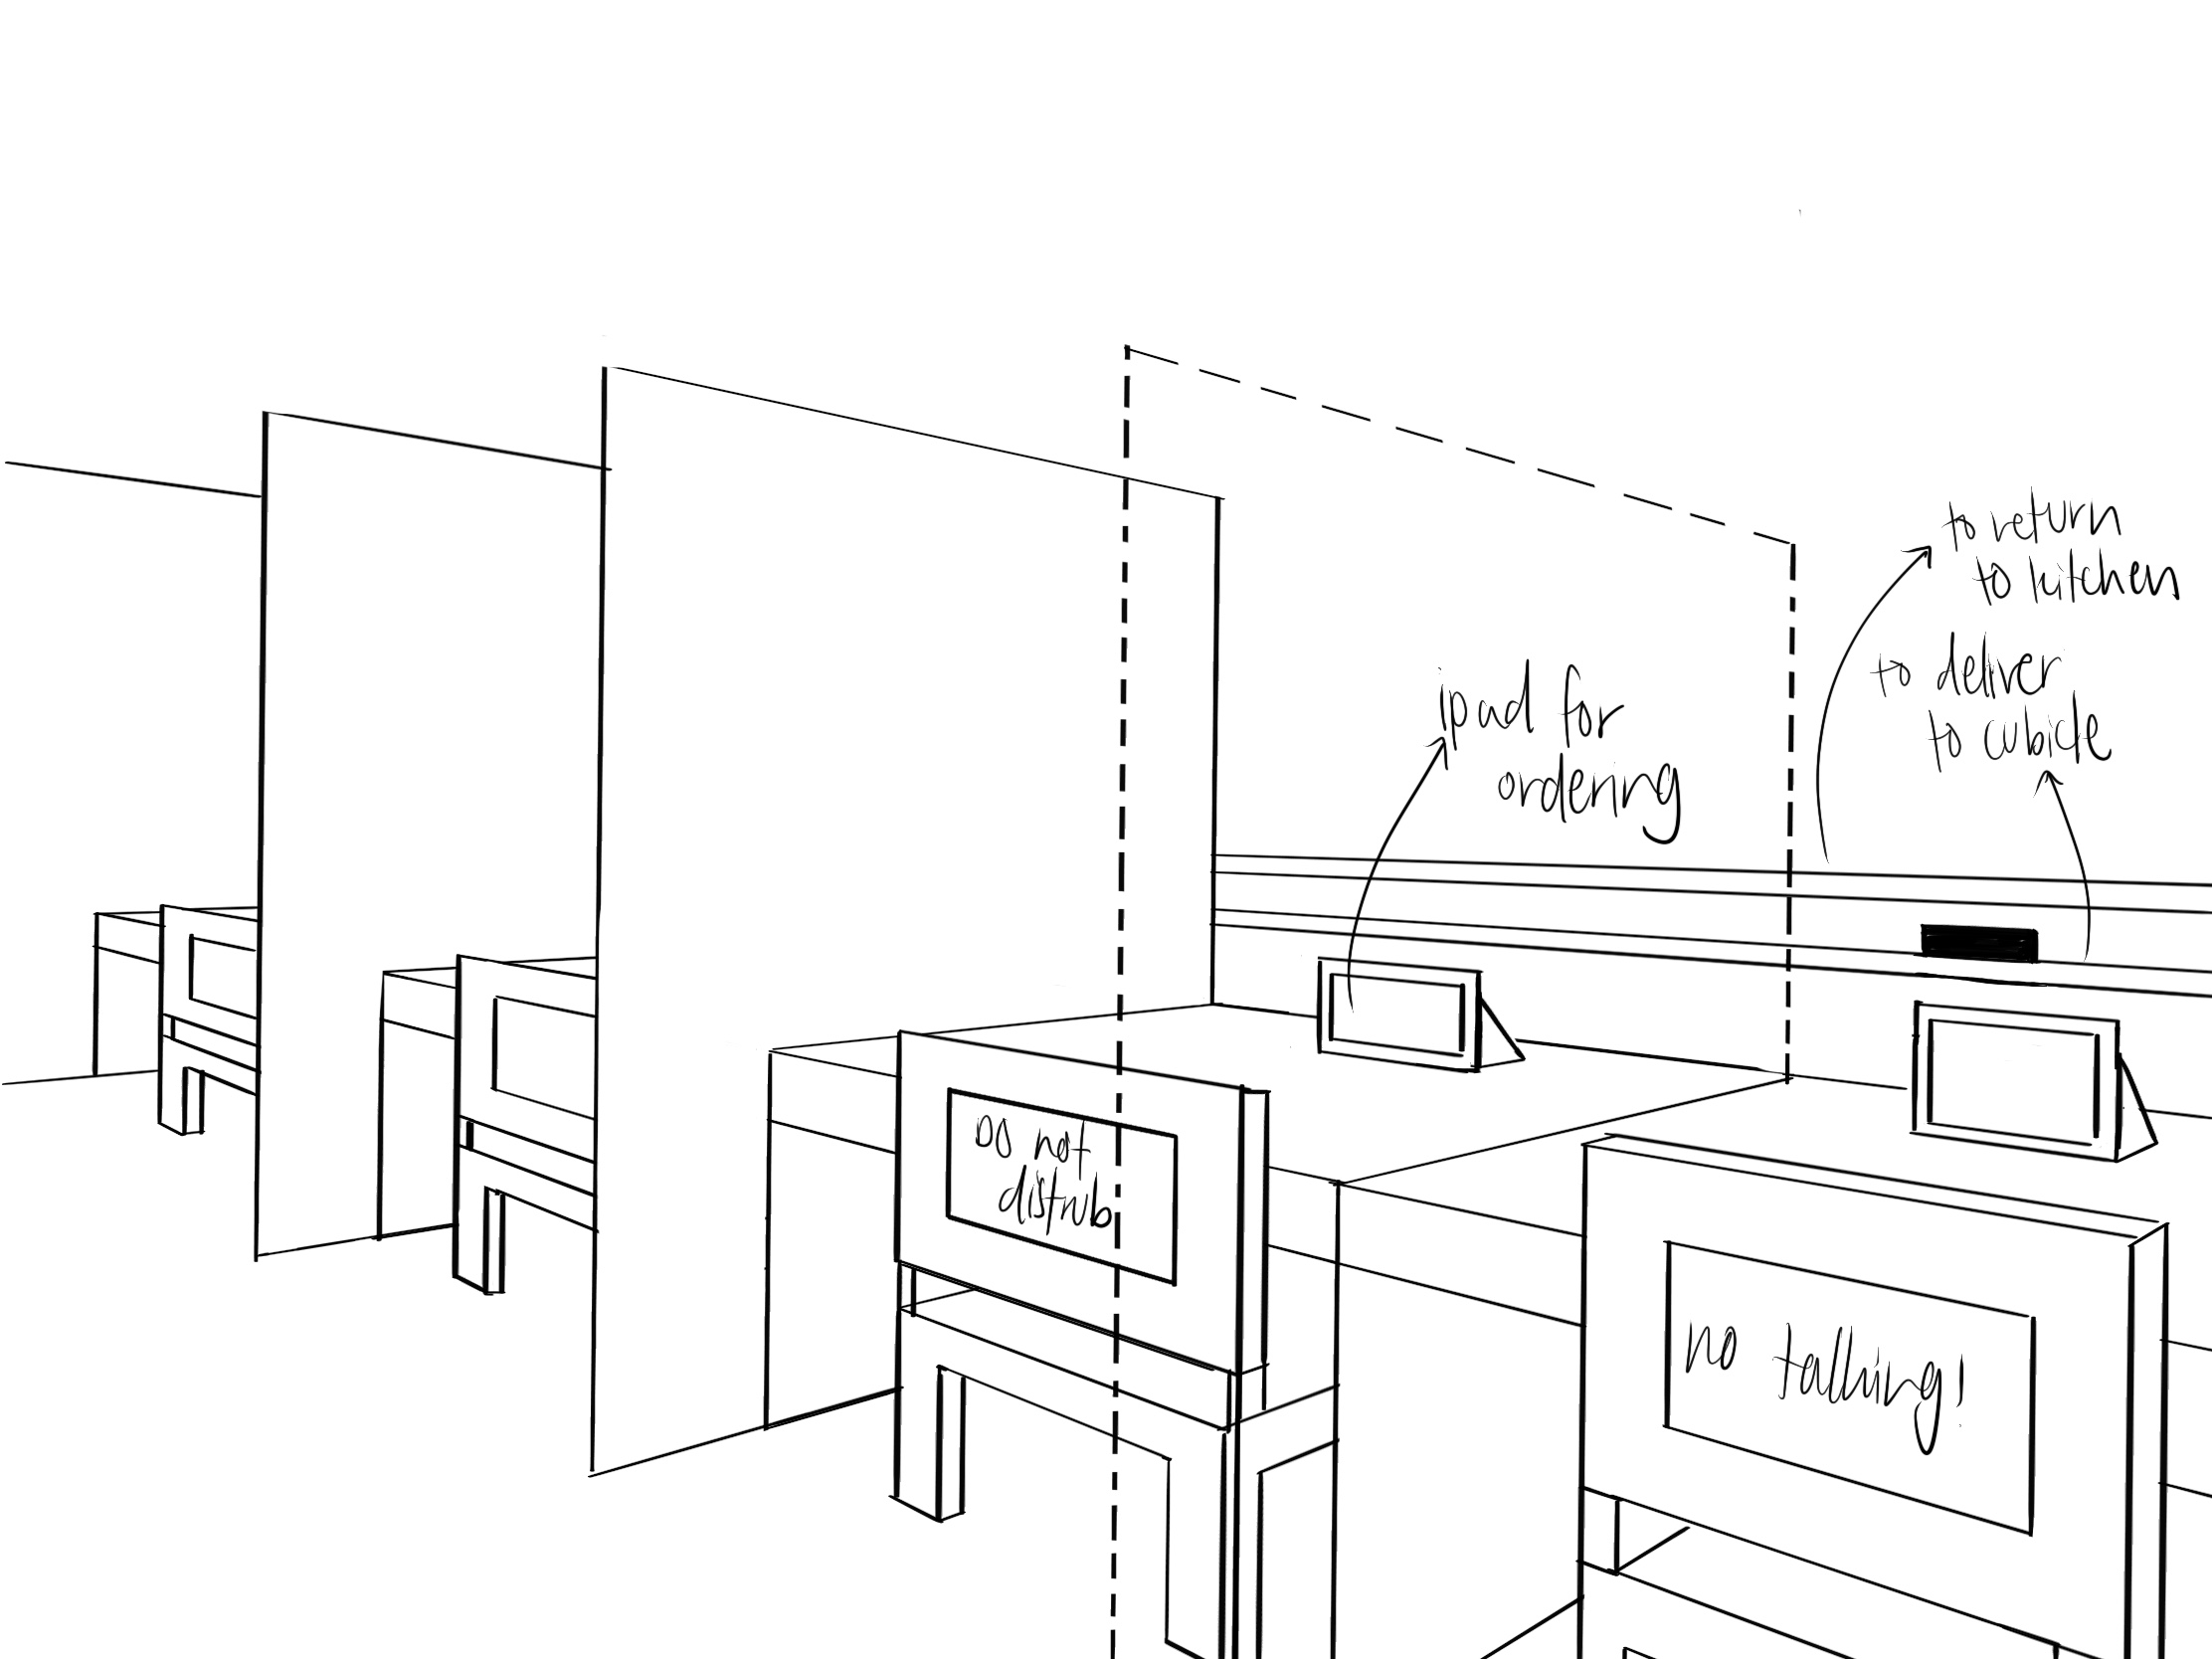
Upon reflection, we have decided to think of a new concept that would be more clearer (in terms of instruction) and engaging from the participant point of view. We will also put in mind the intention of the interaction when developing our concept so that participants are able to understand the message that we want to convey.

Group 4 | Prototyping Part 2

Our logo

Firstly, we came up with our logo named rertrEAT, a place for solo diners in NTU. Why we came up with retrEAT or the narrative behind retrEAT is shown in the image below.

During our presentation, we tested out the message with our classmates. Instead of saying “I’m dining solo, please…”, we changed it to “I’ don’t FOMO, I just…” and “I’m not anti-social, I’m just…” to fit into the millennial slang. Here are what some of them wrote:

Then we proceed on with our prototype. Here is a rough sketch by Tuyen.

Physical prototype, done by all of us. 

Feedback given was:

  • Most of the classmates enjoyed being able to write the message at the back of the chair. It felt something personal and people will know whether to approach or not.
  • It seems like a lounge instead of a canteen.
  • Can create better designs for logo and the message.
  • Maybe this space can be used for events such as having introvert talks by famous people.

Group 4 | Prototyping

In the previous post, we mentioned that we want to revamped our point-of-view. Hence this is our new point of view:

From our new point of view, we wanted to create a solo dining experience for NTU students to understand why some people prefer to eat alone and also reduce the judgement of eating alone.

Below are the user journey:

So we created 2 prototypes, a poster and a space for solo dining. 


Elizabeth created this poster, including the copywriting. This poster will be placed outside the space to give an introduction to extrovert student, before experience eating alone.


And the rest of us (me, Glenn, Tobi and Tuyen) created the space for solo dining. Tobi and Tuyen created the chair. I sketched out the space and worked with Glenn in creating it.

The final outcome of the space

Breakdown of our process:

Aerial sketch of the space, done by Azizah
Perspective sketch of the space, done by Azizah
Chair that was created by Tobi
Tables and divider, done by Azizah (before Glenn input the conveyor belt)


During our presentation session, there were a few suggestions on how can we improve the space, such as a window to allow student to look outside while eating or a open concept table in the center of the space. The class even give some existing examples of dining solo such as the ramen stall or dining in the dark and more. However what was really missing is the narrative behind our concept.  That was something that our group had to really think about.

After our presentation session, we discussed on the narrative behind our concept. And here are some narrative that we thought of:

  1. Introvert brings an extrovert friend to come into the space → to understand and empathise why some people prefer dining alone 
  2. A place where the introvert students are able meet and have a meal together in a quiet space
  3. A place of introverts to date

After much discussion, we really wanted people to understand why some people prefer eating alone and not being judged when eating solo, which really brings back to our point of view.

“Introverted NTU students need to be empathised with while eating in school to as it helps feel less self- conscious

Then we also thought of how can we make the extrovert people really empathise on introverts, by creating a small section of the space which gives a  opposite experience as compared to eating alone. 

The small section to give students the experience of a crowded canteen

In this small section, we thought of having students to wear a headphones that contain the loud noise of canteen. There will be puppets to blocked their way, to show the crowdness of the canteen. And the visuals on the side will be a situation in the canteen during peak period.

And on the other side of this small section will a quiet and peaceful space, where the introverts prefer to be.

Final outcome of the edited prototype

However, this was totally off from what from what we were expected to do. Hence, in our next post, will focus on our narrative behind our concept, refine version of our prototype and some visuals. 

Soft Goods Prototype

For the second assignment, we are task to do a soft goods prototype using paper. So the first thing that I thought of is a make-up bag. Reasons why I decided to go with this:

  1. My sister make up bag

    My current make up bag does not have lots of compartment 

  2. My sister has a huge pile of make up, but she only carries her lipstick wherever she goes


Above are existing make up bag/pouches. There are variations type of make up bags, hence I decided to go for something that is more personalize, something that I need in a make up bag.

Functions/some things to take note while sketching:

  • Divider
  • Zipped
  • Compartments
  • Small & light weight
  • A mirror, maybe.
Sketches

From previous assignment, I find it quite easy and fast to draw the details in orthographic view. Hence, did the same way for this assignment.

Most of my sketches are in rectangular shape. I explore variation of compartments, wether to have it in portrait or landscape. At the start of my sketches, I explore mostly on 1 and 2 tiers of the bag. Then, when ideas started to strike me, I started sketching 3 tiers of the bag, which allows more things to be put inside it.

Process

I start by doing the base (image at the top). I had 2 different sizes of the base so that I can work between those 2 and roughly know what is the size that I want to achieve. Then I did the brush compartment (image at bottom left and bottom center). While doing, the compartment, I use my stationary as a guide for my brushes and other make-up items. Then I did the last compartment (image on the bottom right), with my stationary in it to see wether the size fits. Lastly, I combine all the different parts together.

However, I felt that it was too bulky and I decided to cut down its size.

The focus of this process is to get the correct size. Hence, while I was doing this, I kept going back and forth from the box to my hand. Other then depending on my hand size, I also put in some of my makeup.

After finalising my prototype using paper, I move to art card and development my prototype. There are differences when using art card. One of it is the increase in size. Hence I had to change the steps of making my prototype. Previously, I started with the base. But now, I start with the brush compartment, then the base and the zipped compartment. Another difficulty I face was, I kept using tapes to combine all the parts together. However, some parts did not stick together and glue gun is the solution to this problem.