Here’s the link to my presentation!: https://docs.google.com/presentation/d/1edSm1qGE8wo3aXE8376PPfKS8RyZhAsk8E9VgvYYiJA/edit?usp=sharing
Thank you!
Here’s the link to my presentation!: https://docs.google.com/presentation/d/1edSm1qGE8wo3aXE8376PPfKS8RyZhAsk8E9VgvYYiJA/edit?usp=sharing
Thank you!

Following this, I made some revisions to this rough model by drawing over photos taken of the model. This was helpful as it was easier for me as the sketch model helped me to visualize these changes in real life.
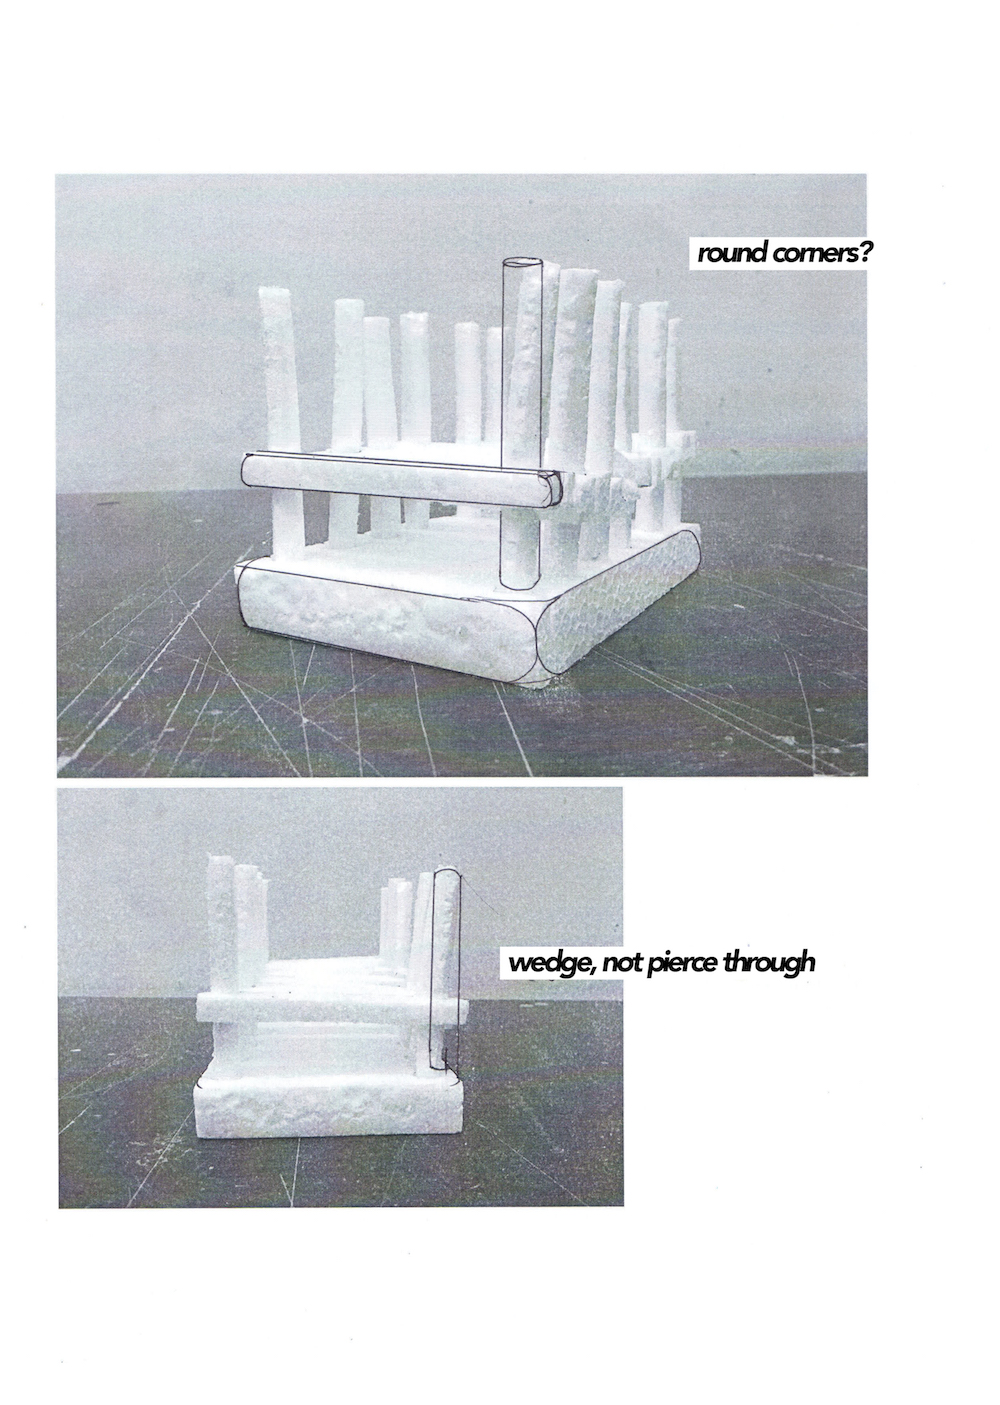
 I thought about going with either a very rounded feel (by rounding out the corners of the base and beams), or a more angular, sharp feel, with the tips of the beams being slanted at an angle. I also decided to have the beams be wedged instead of pierced through after referencing actual boat docks.

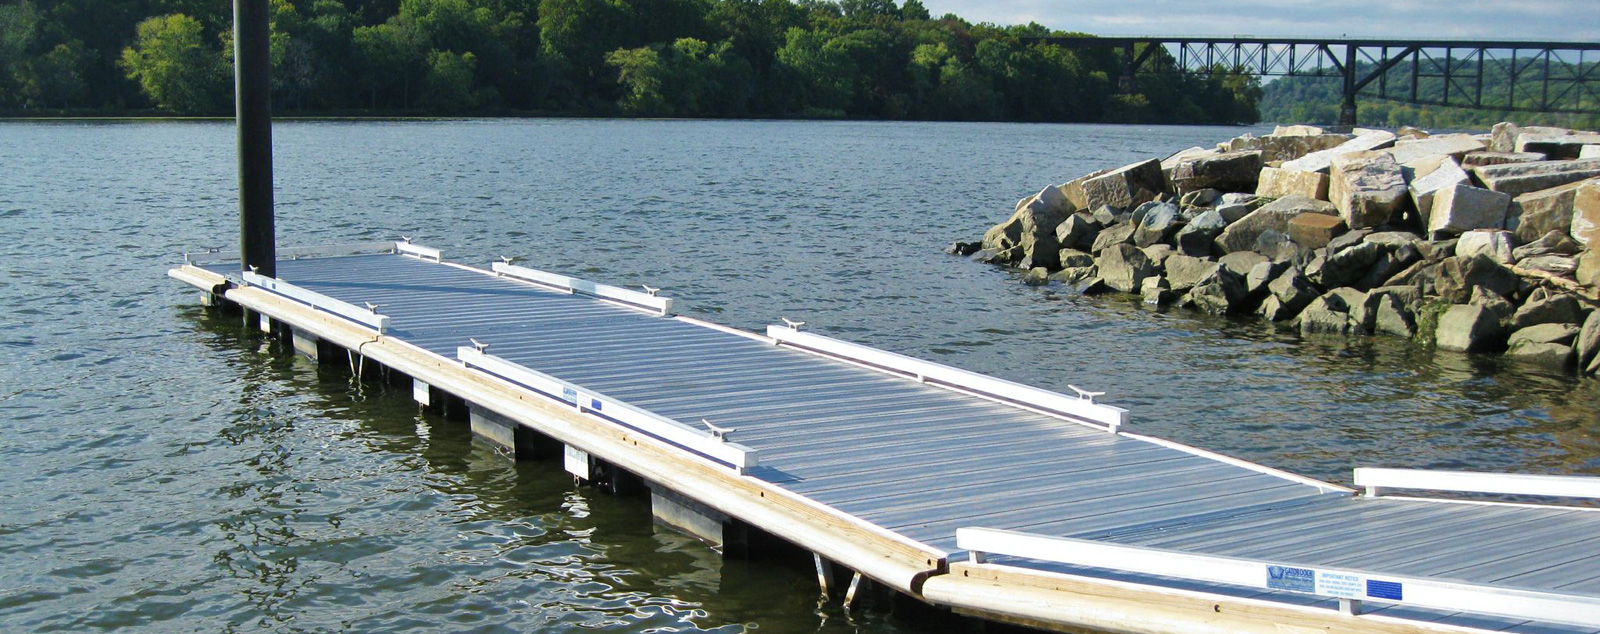

I also decided to slope the latter part down, after looking at the ramps on boat docks above.
On to the making of my model!
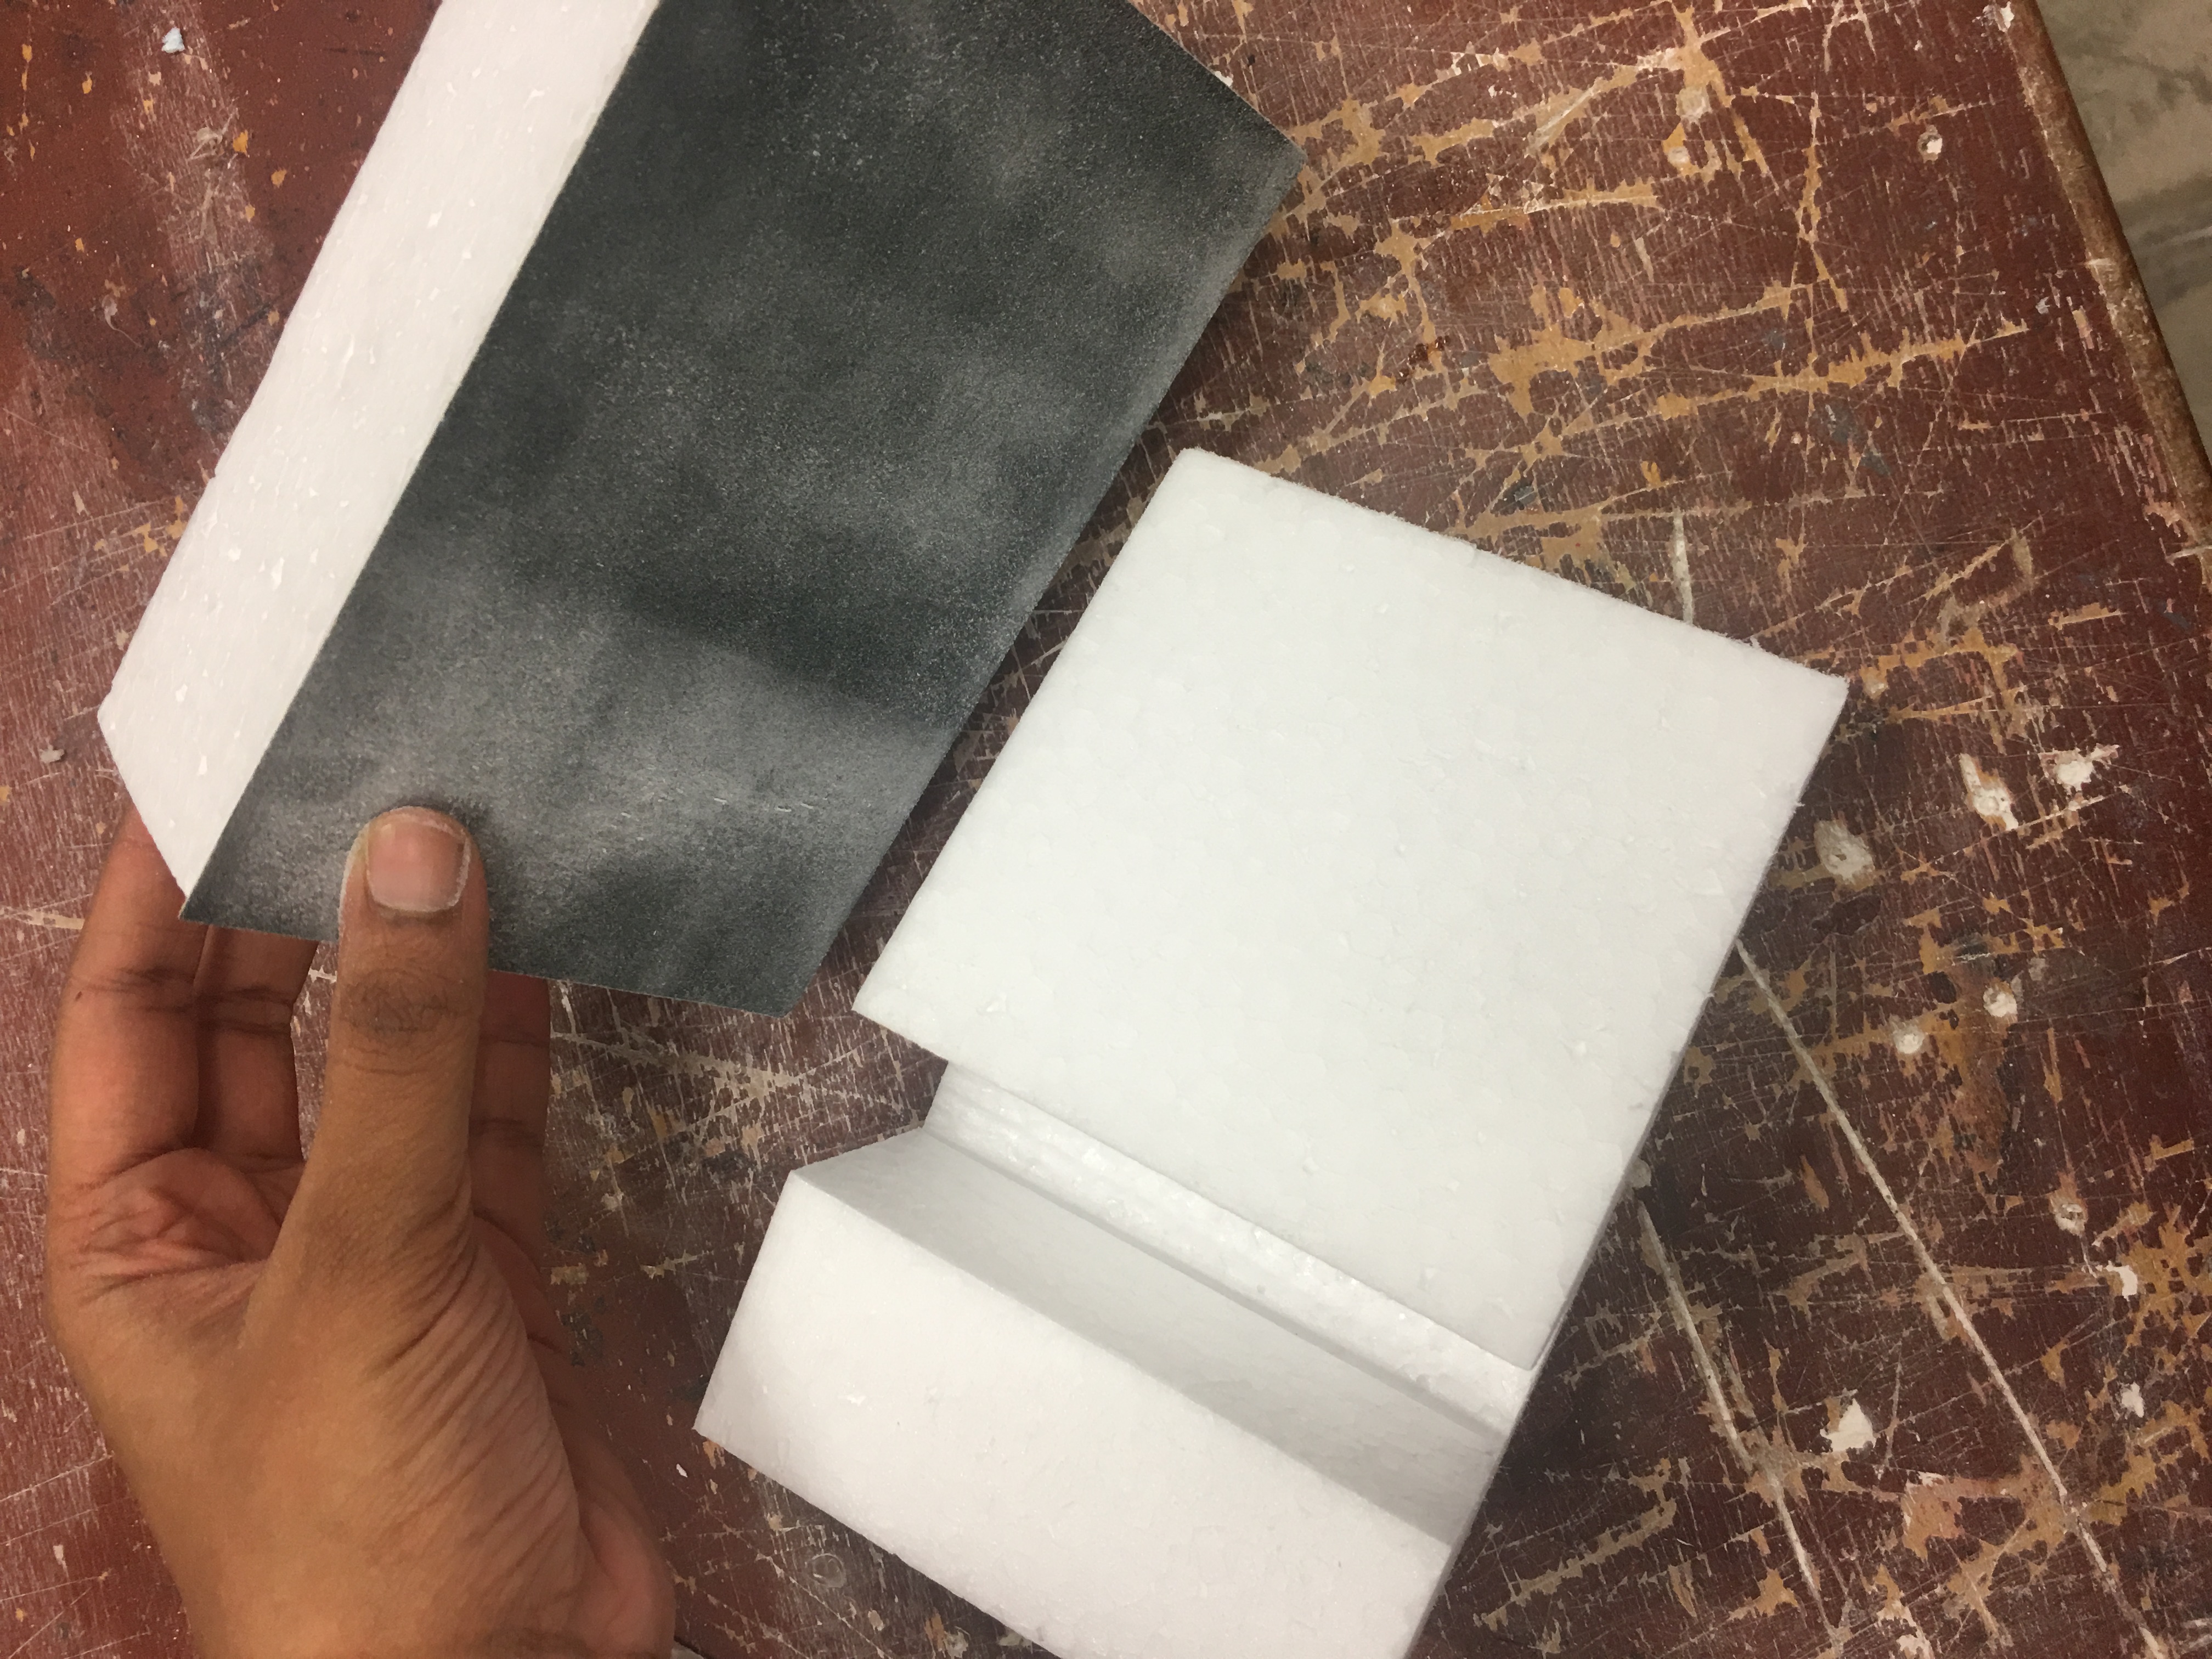
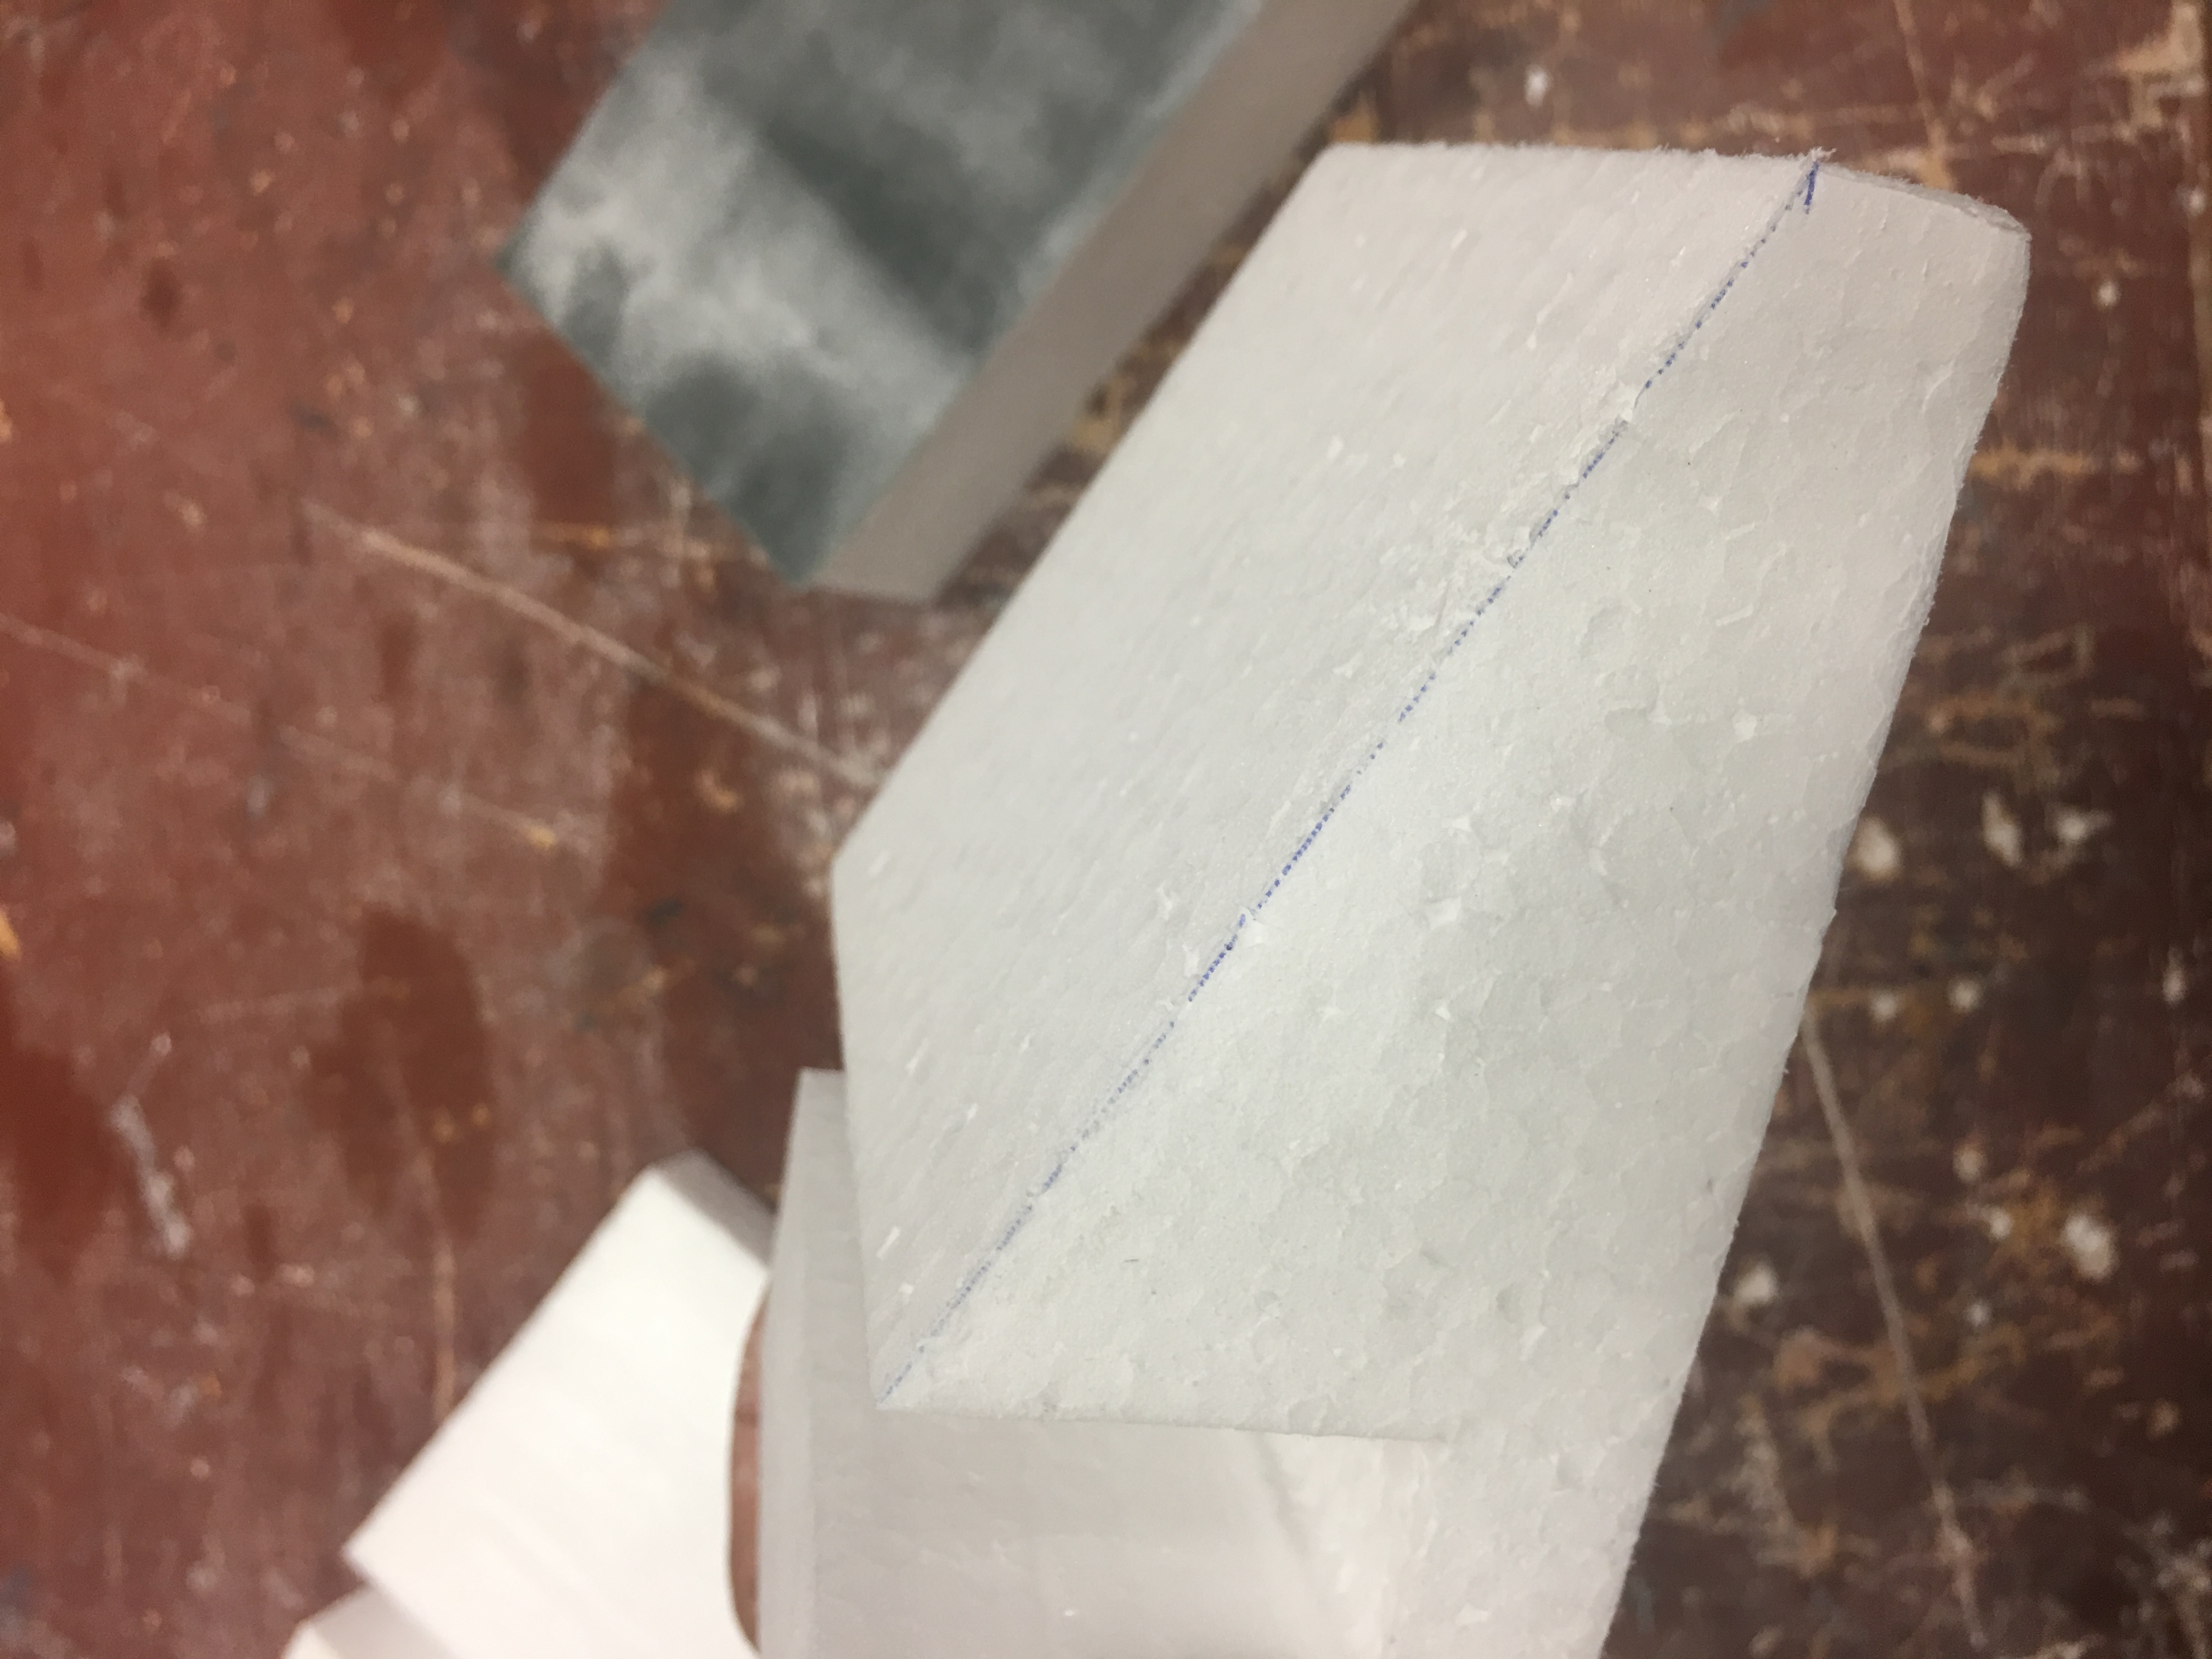
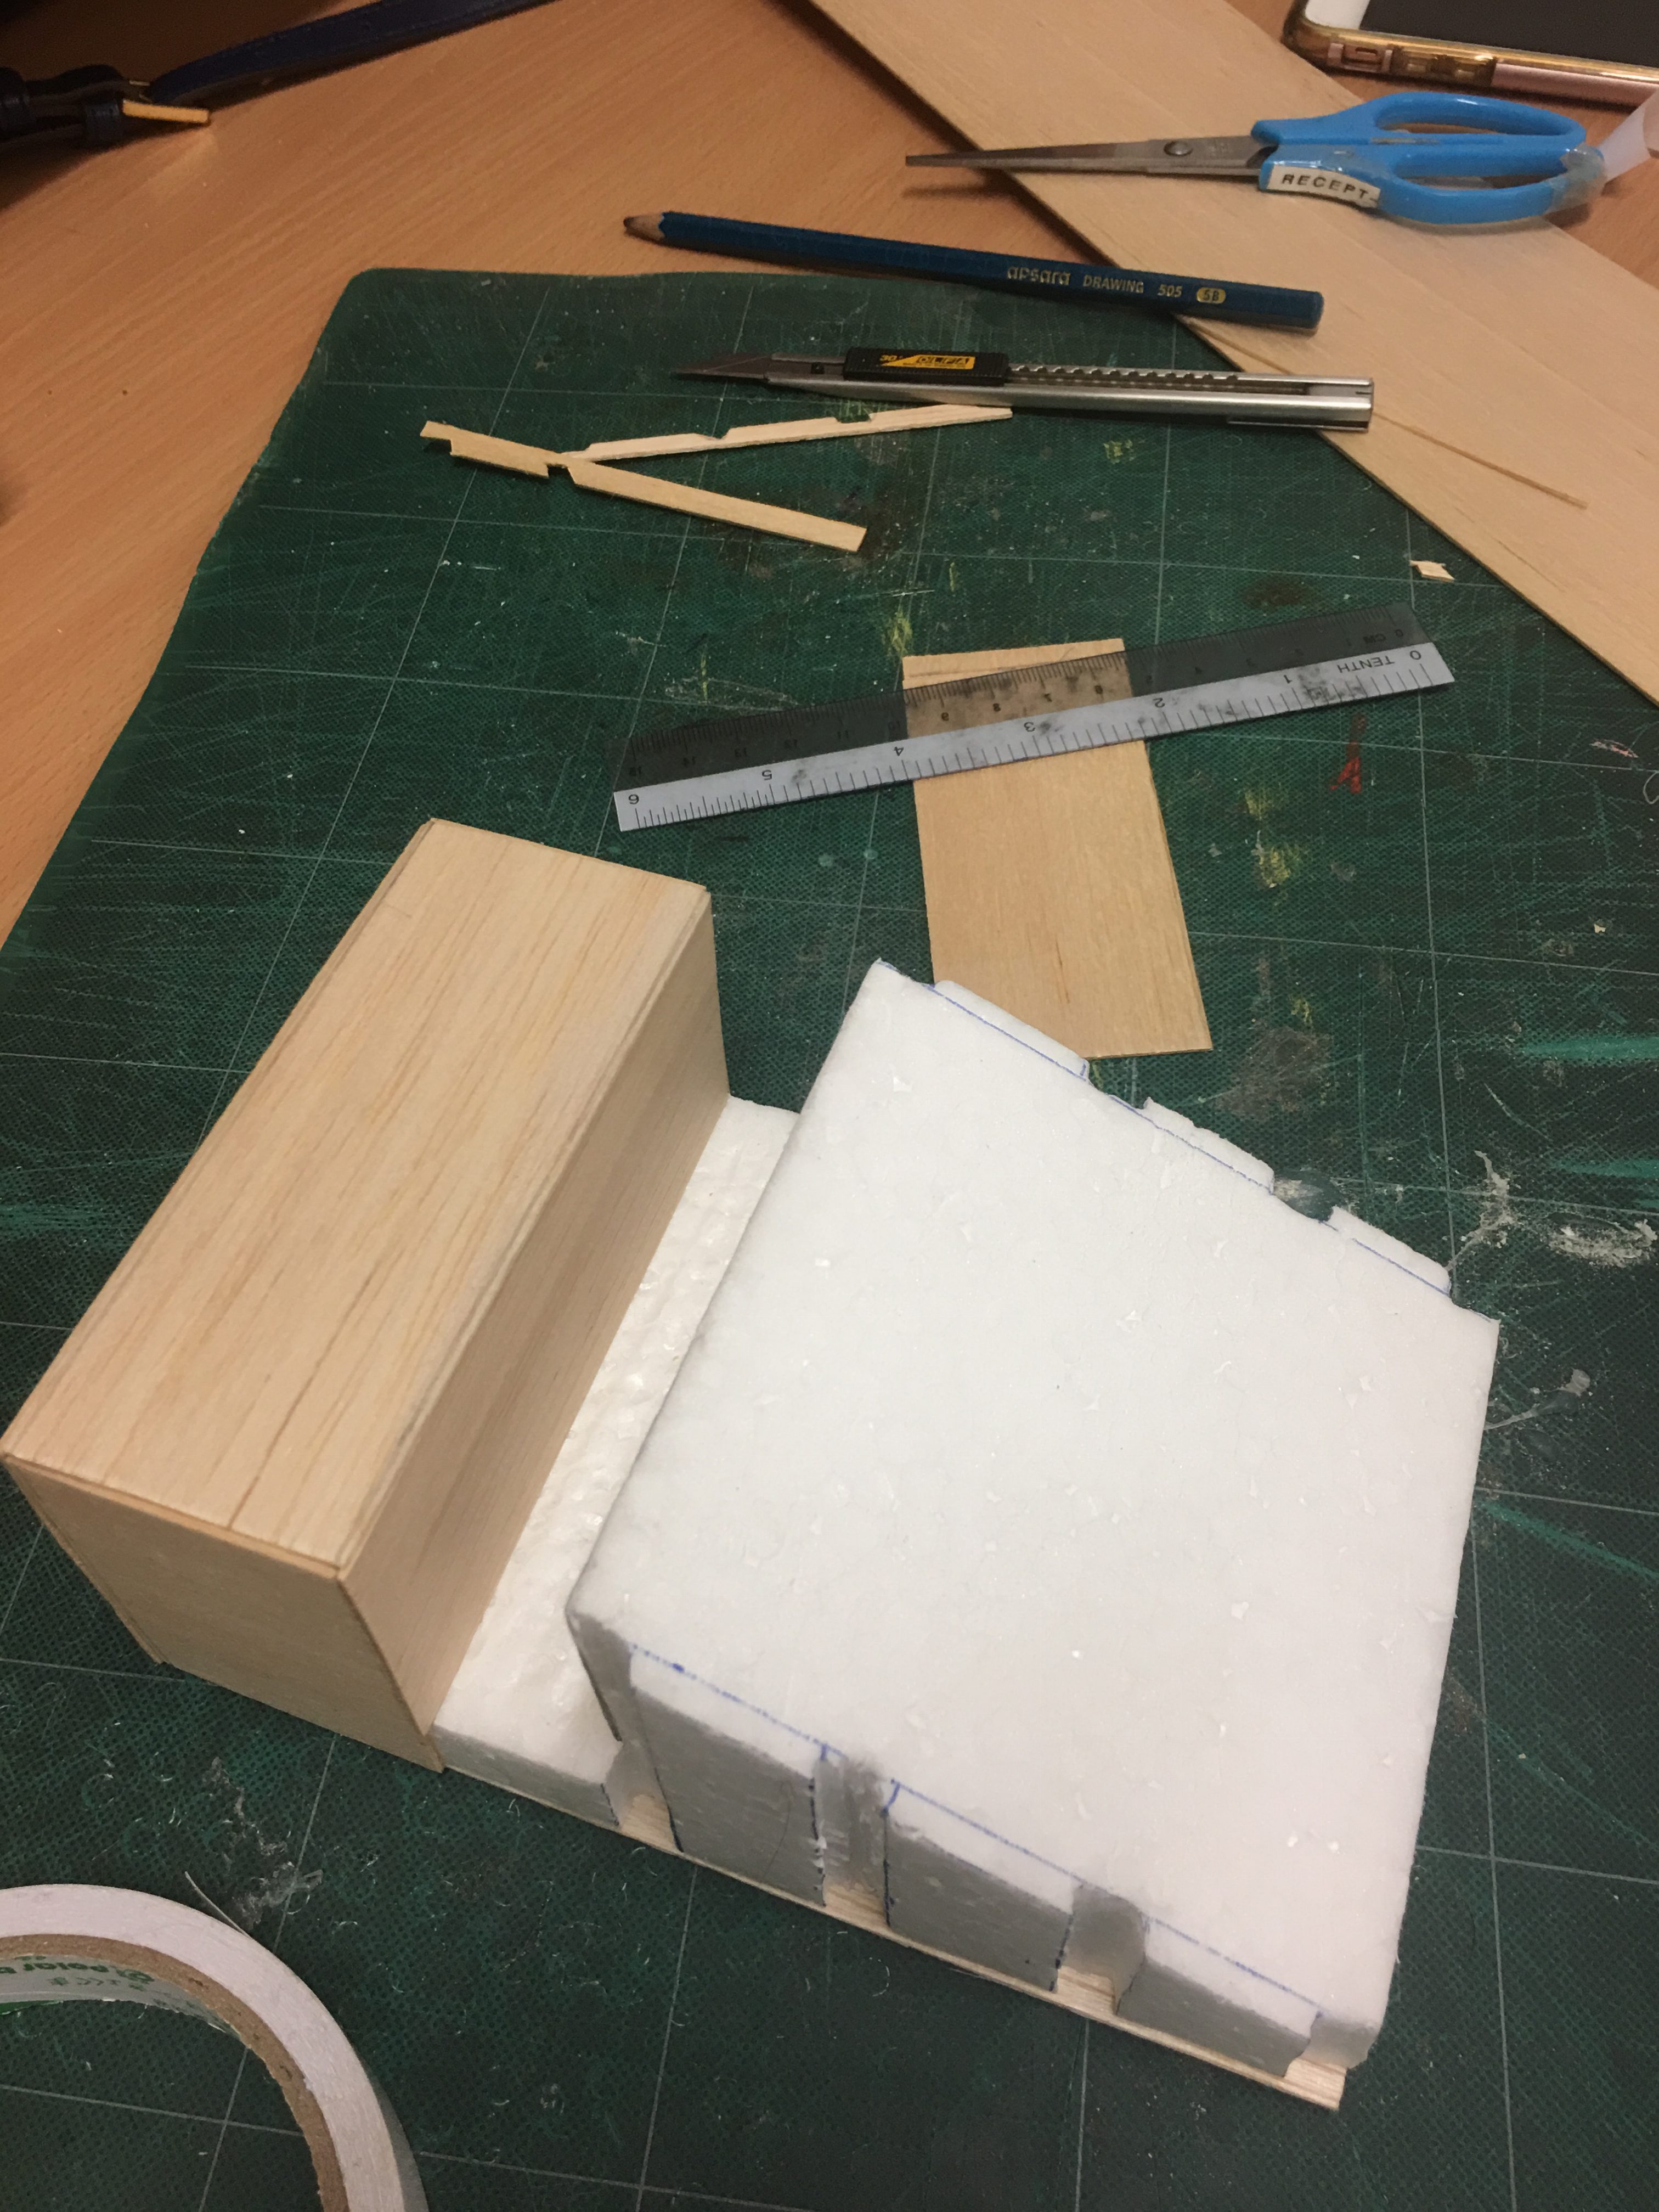
I first cut the shapes using a template for both sides, and sanded it down with sandpaper blocks. I was really happy with how clean I managed to get right angle cuts, and took extra care with the sandpaper to make sure the surface was completely smooth. I made two of these bases, with one spare, because I still wanted to see whether longer or shorter beams would be better, and didn’t want to accidentally dent the foam when working with it.
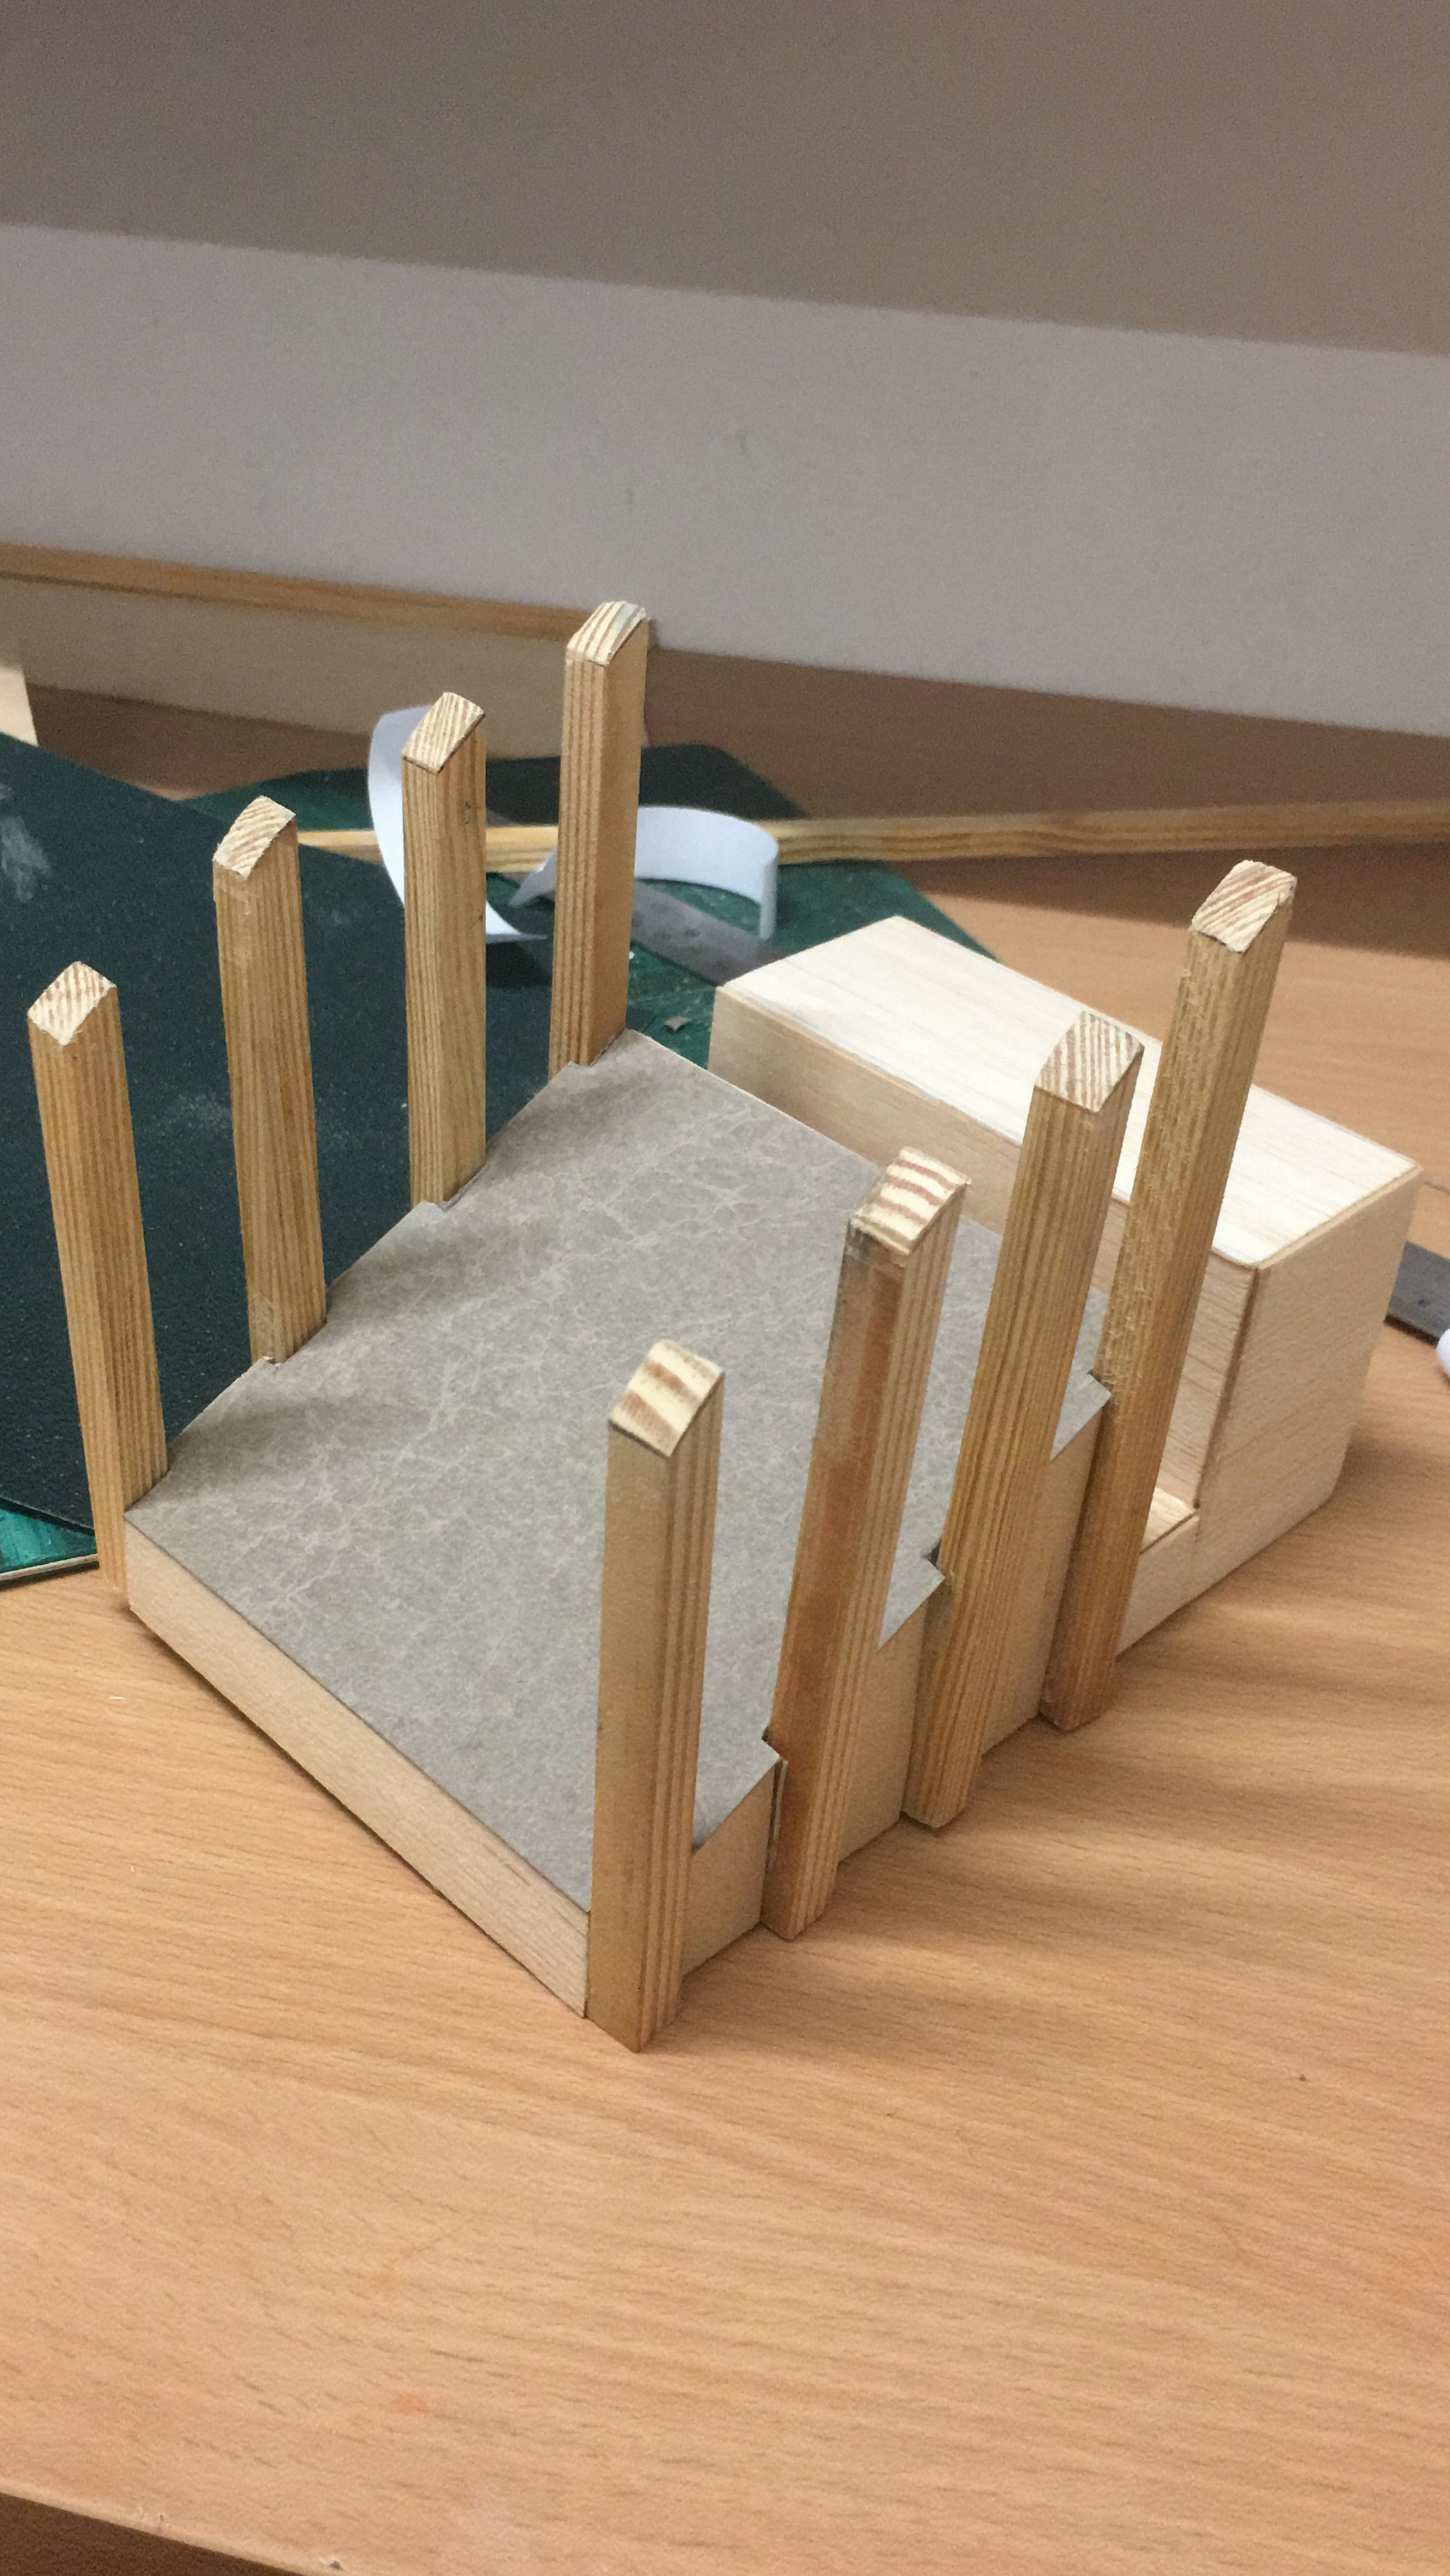
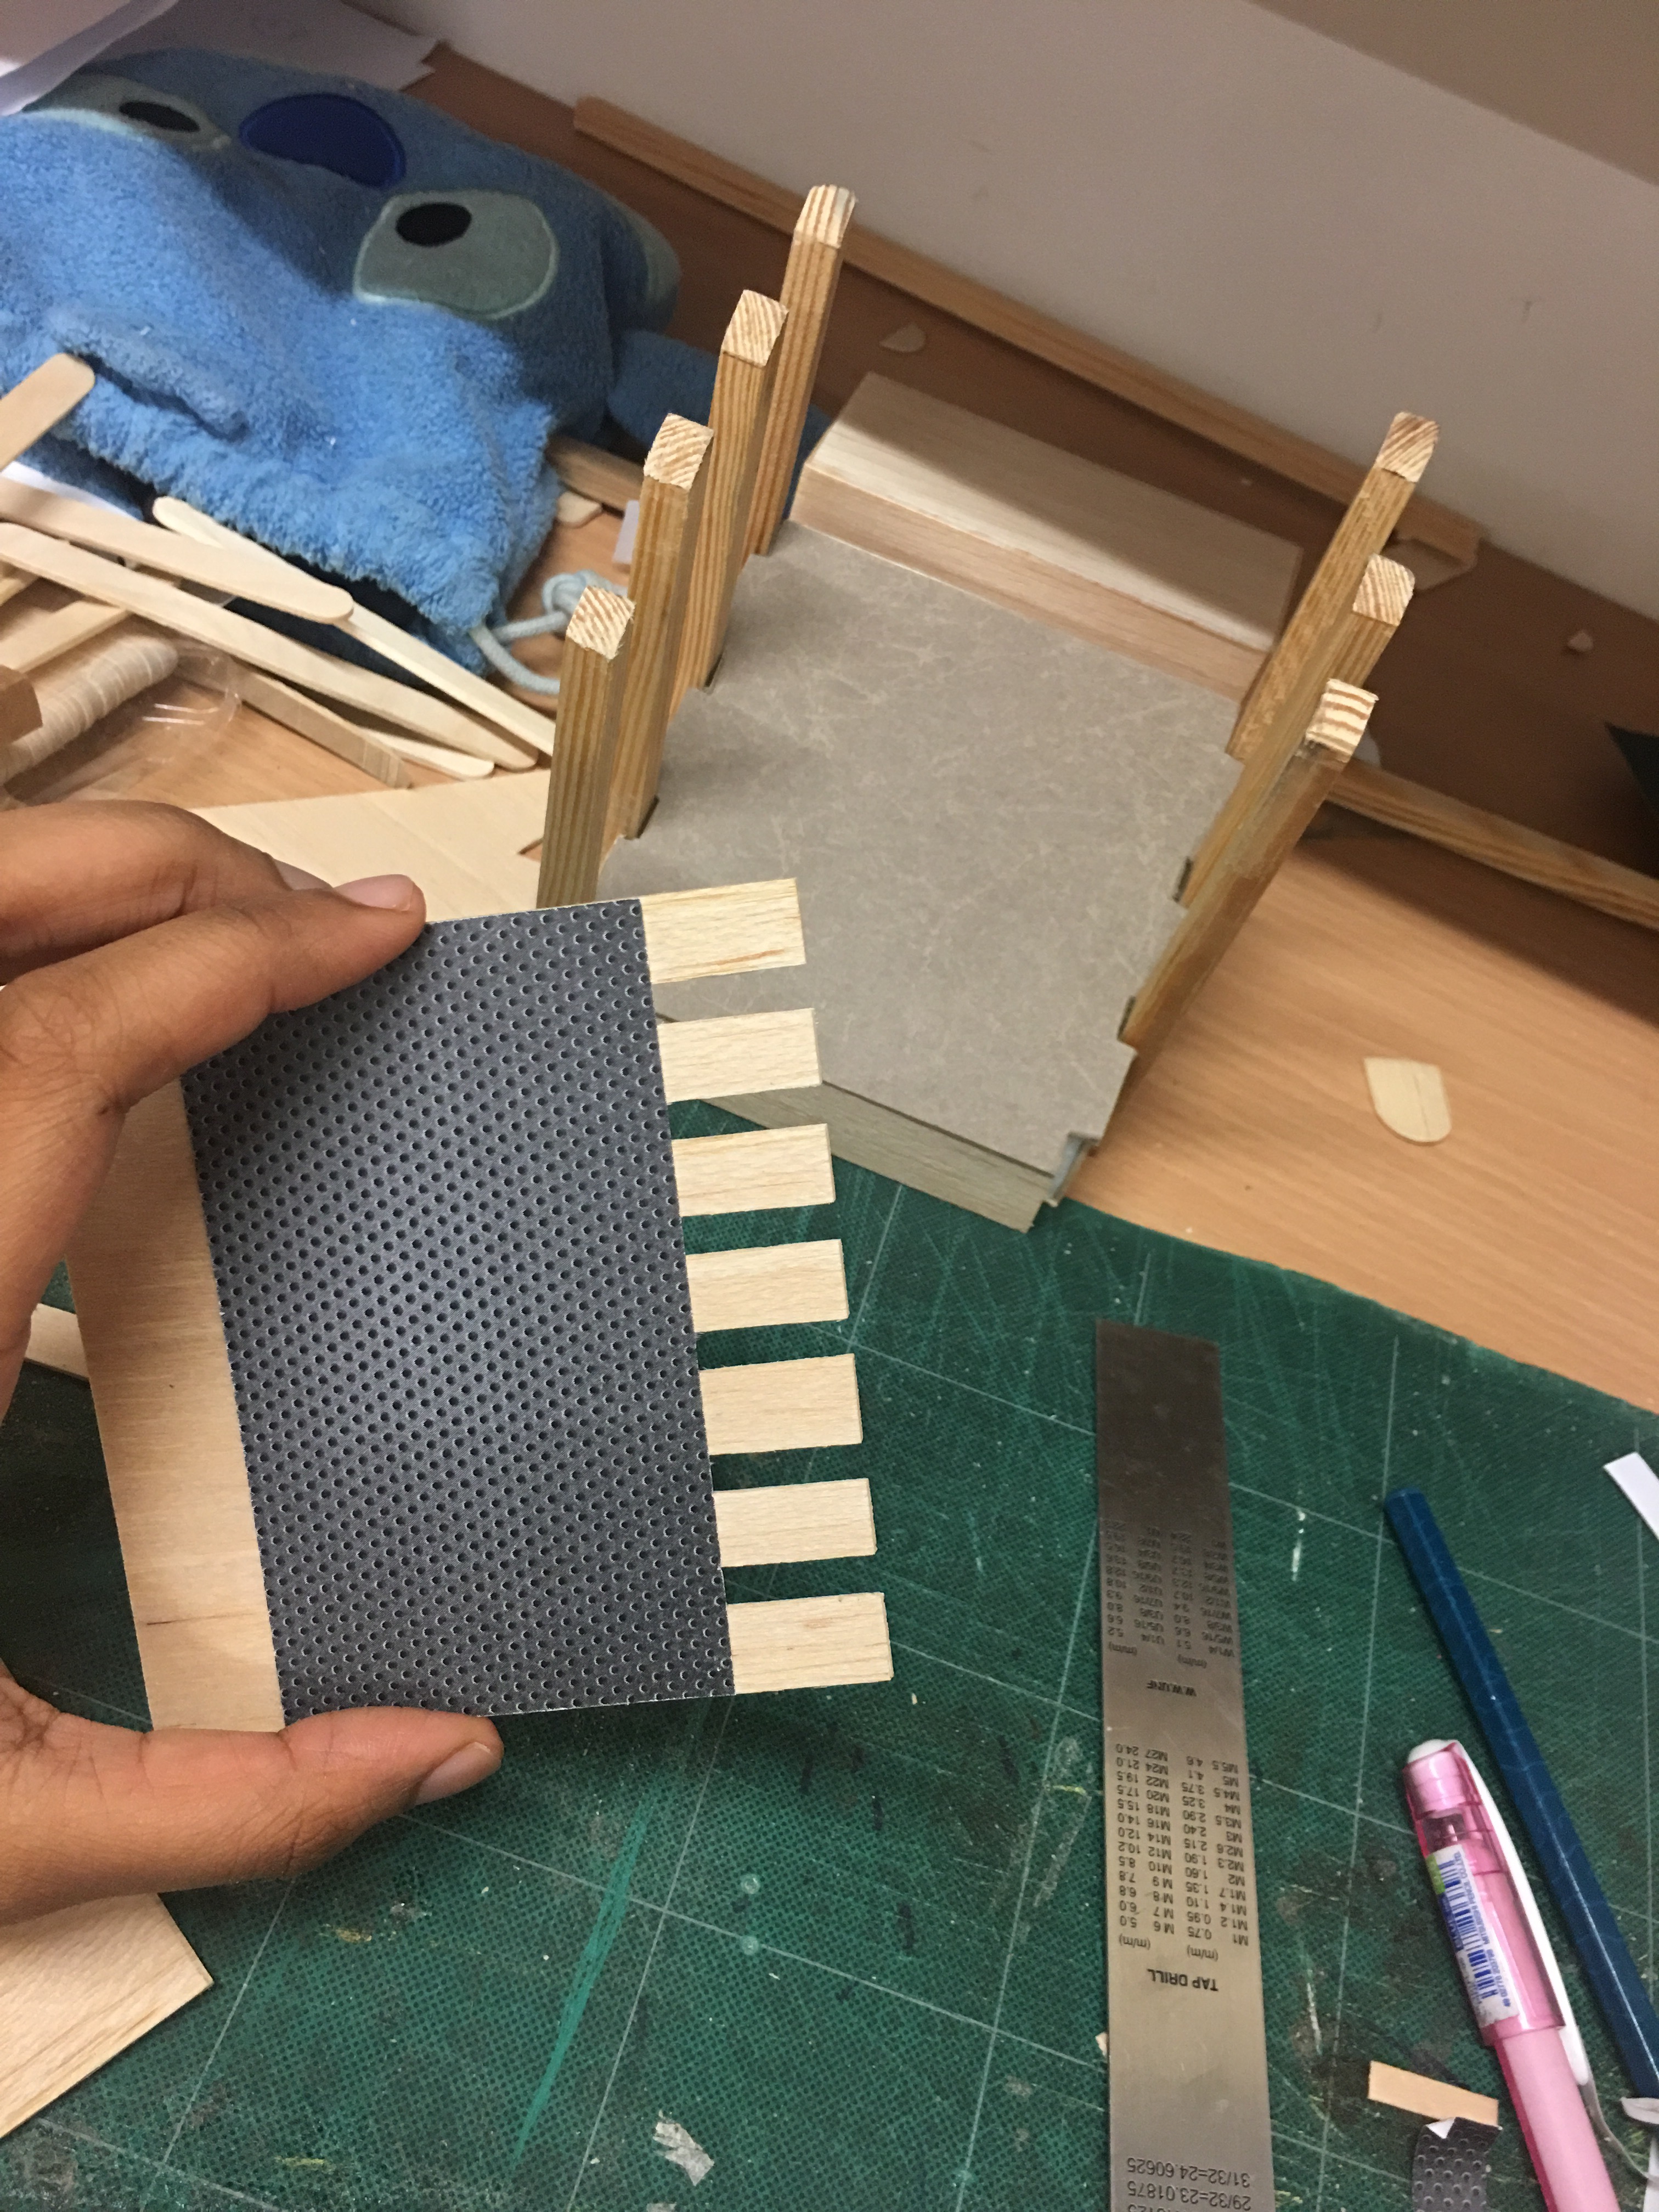
I then decided to experiment with the lengths of the beams. I decided to go with the longer beams in the end because they just looked better. The picture on the left below has the longer beams, while the one on the right has the shorter beams.


The longer beams with the rejected shorter beams.
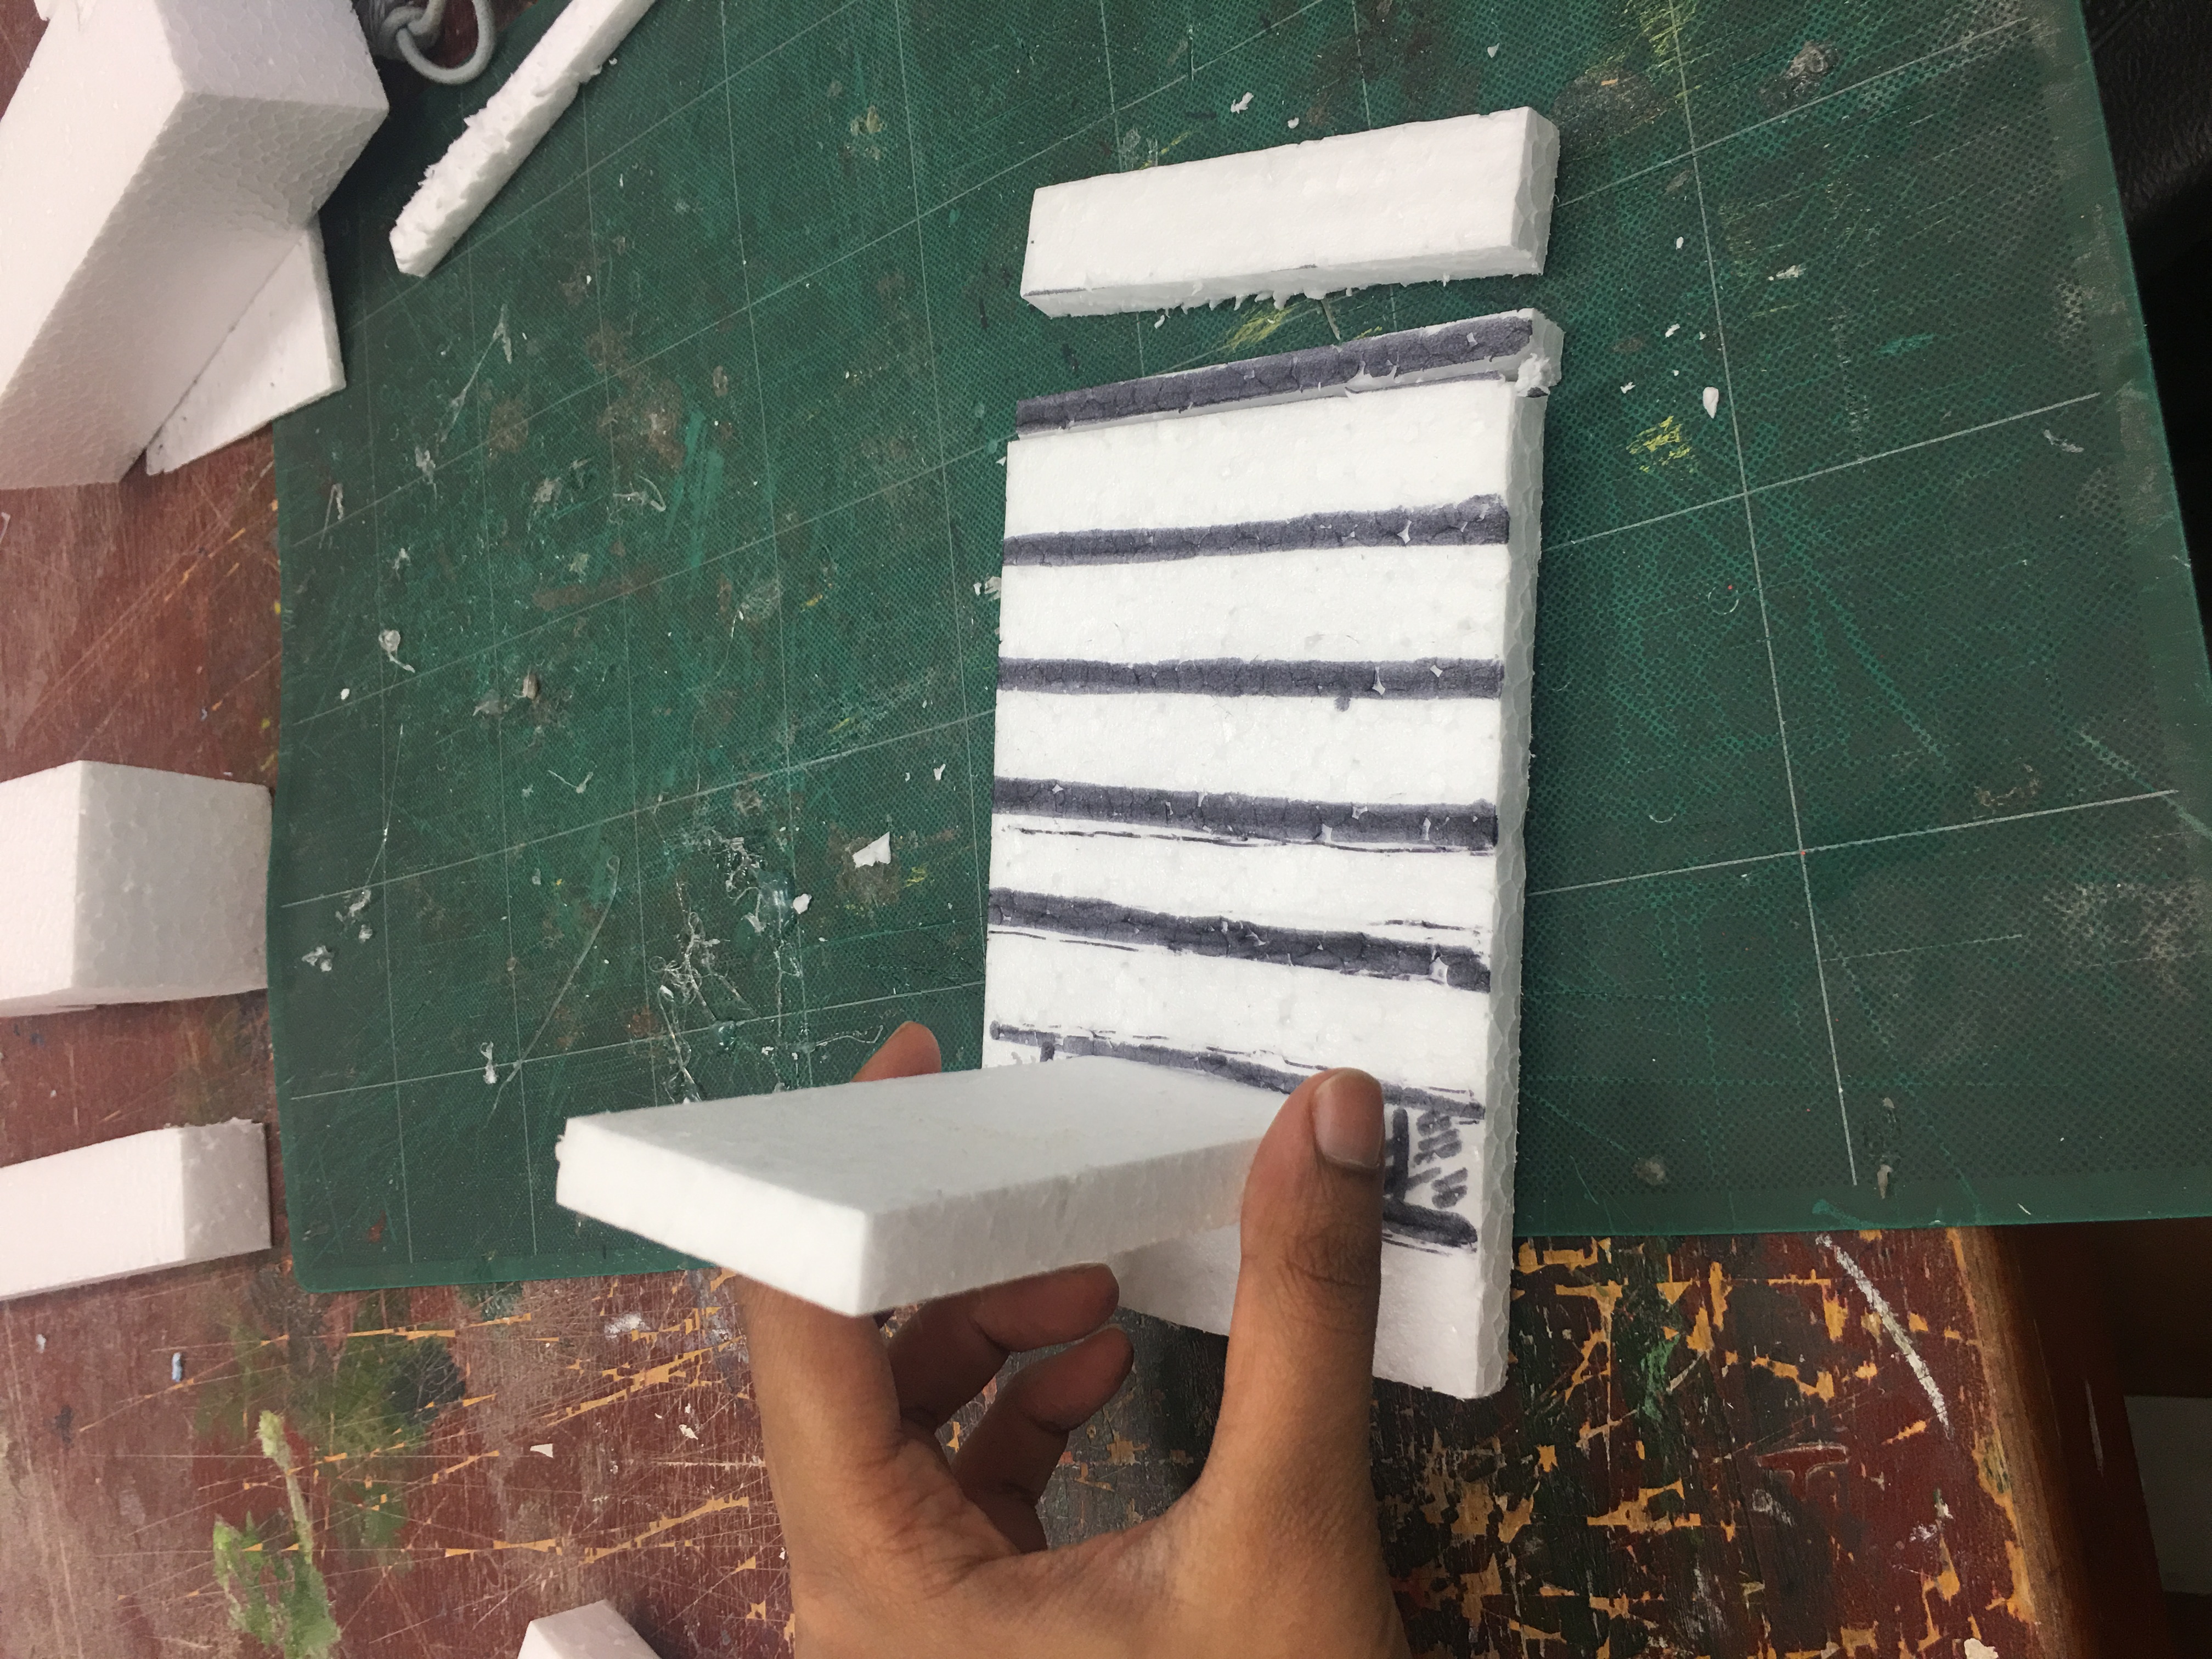
Then, I measured the distance of the beams apart from one another, adjusted some measurements, and got to marking the actual foam model base with it.
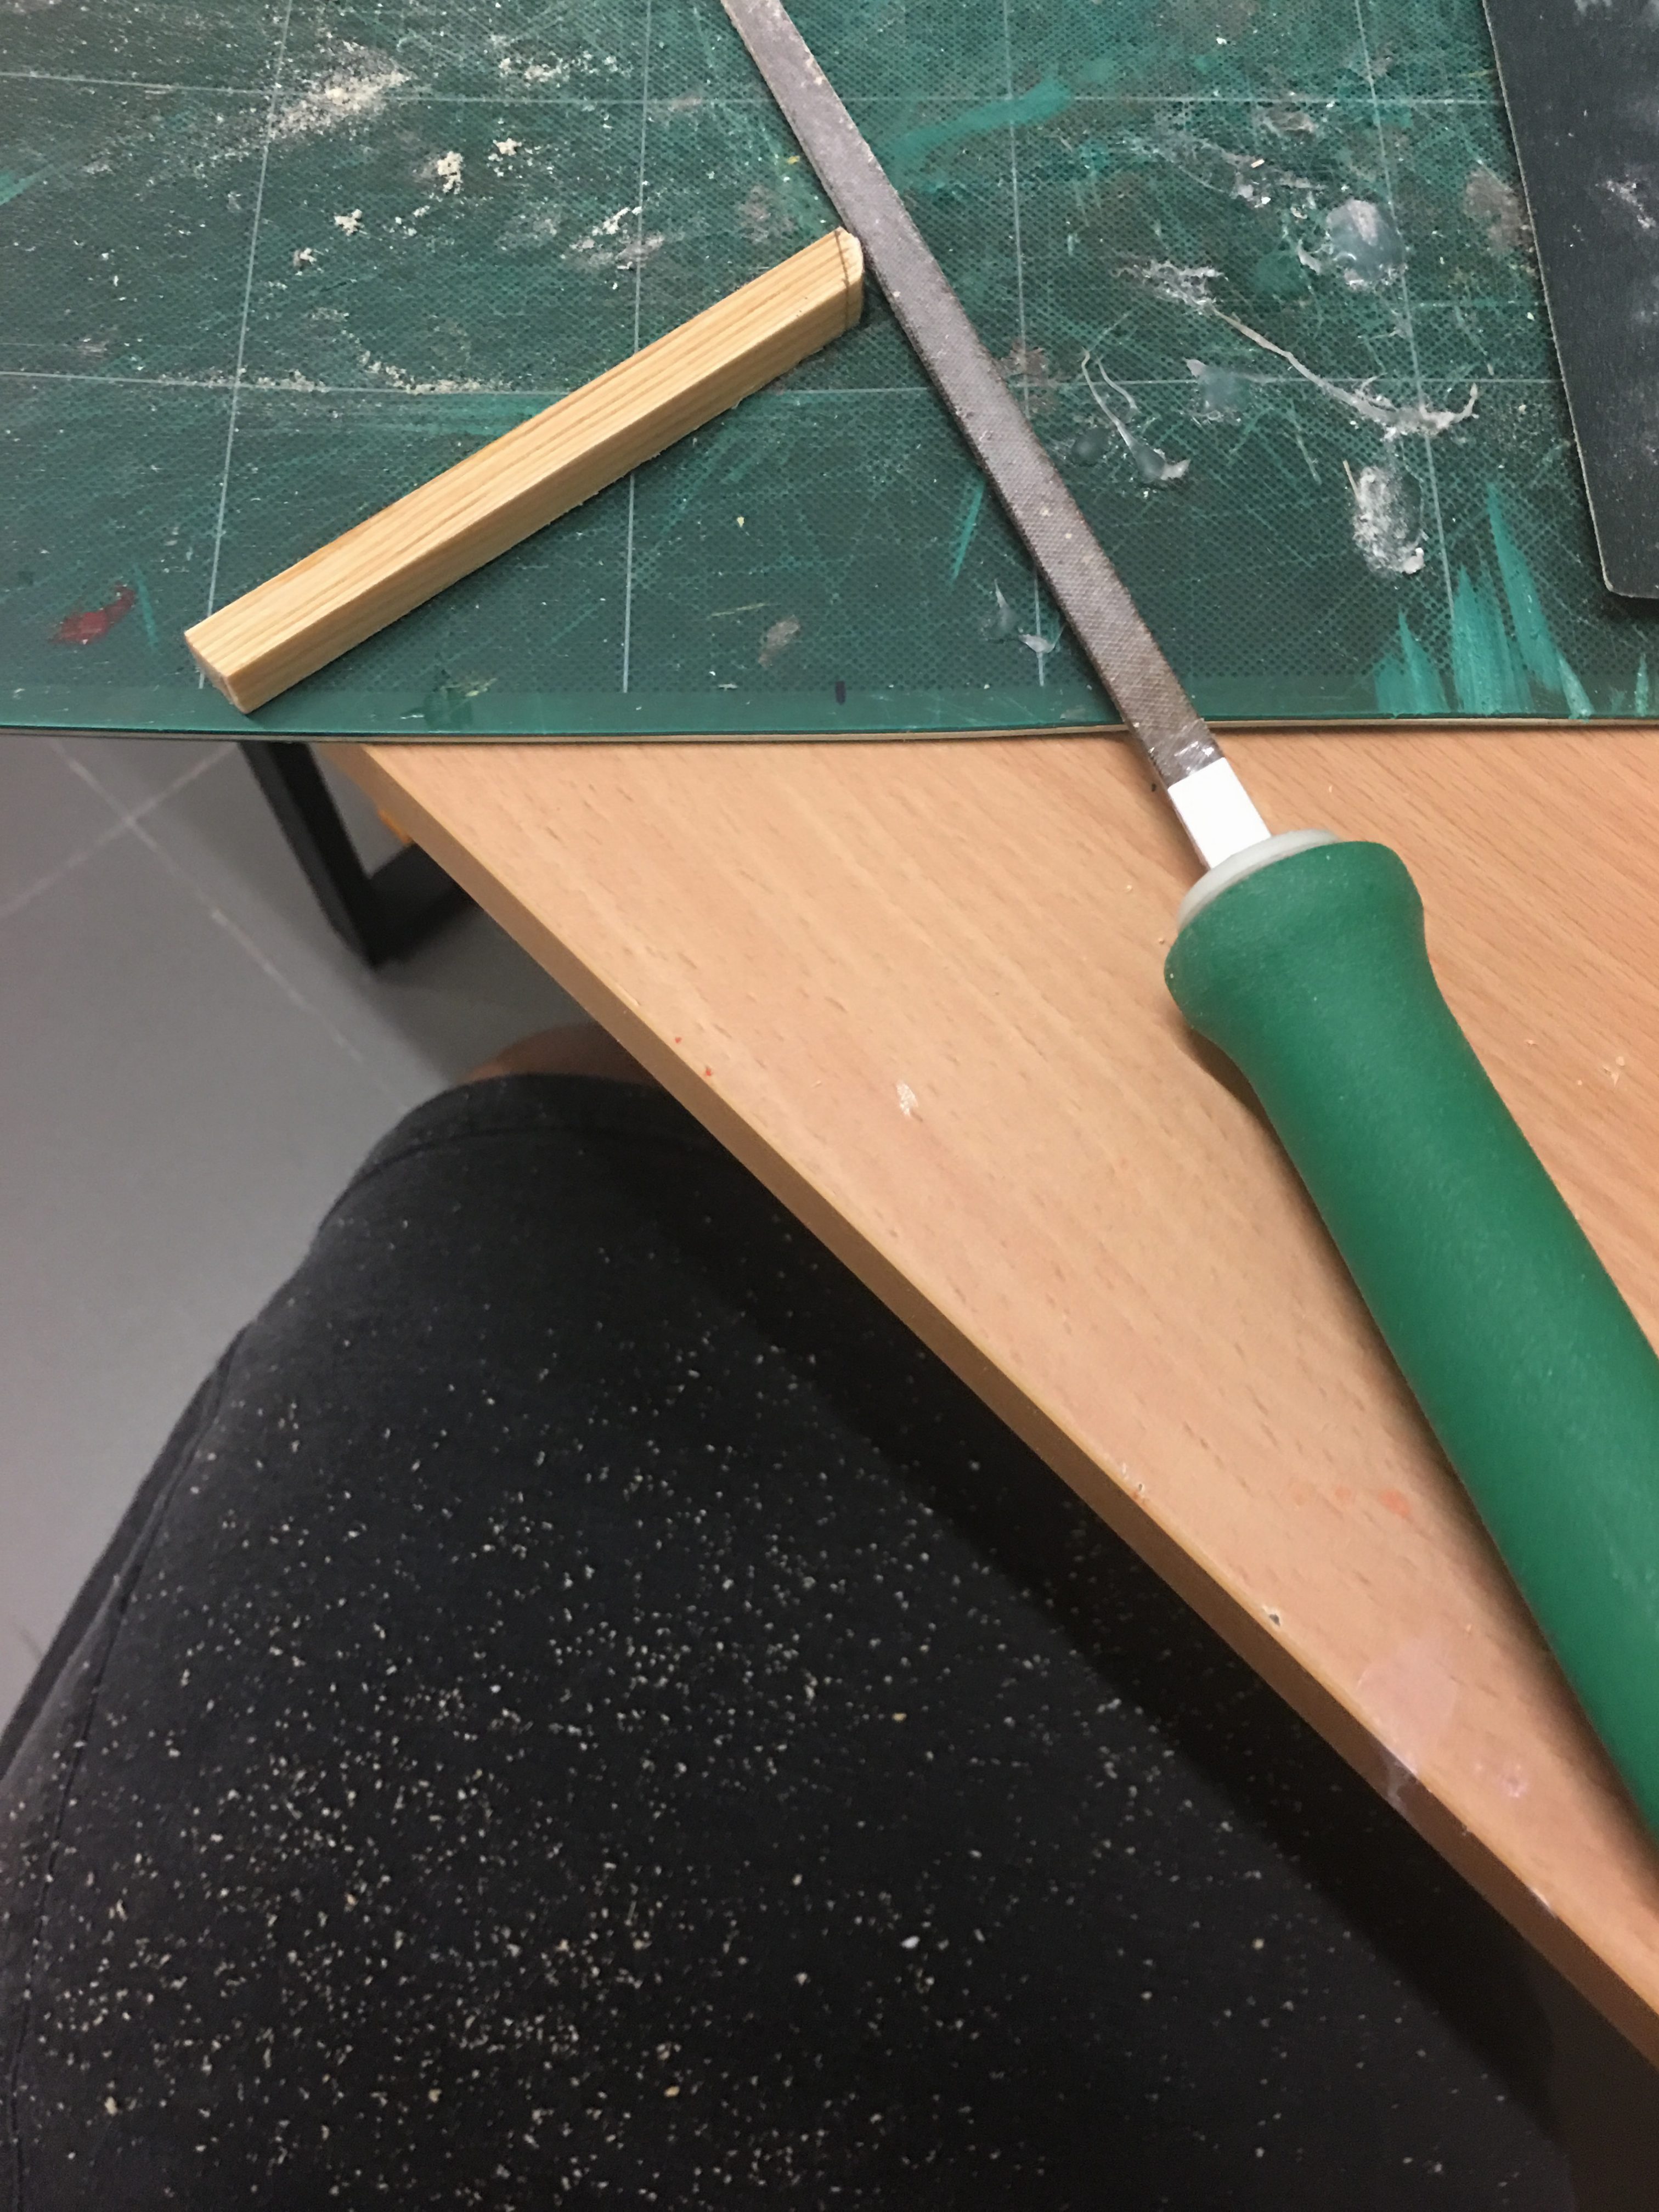
After that, there was a lot of filing down and cutting. I also found out during the review that I wasn’t actually supposed to use the yellow-handled tool for wood, it’s for foam (oops).
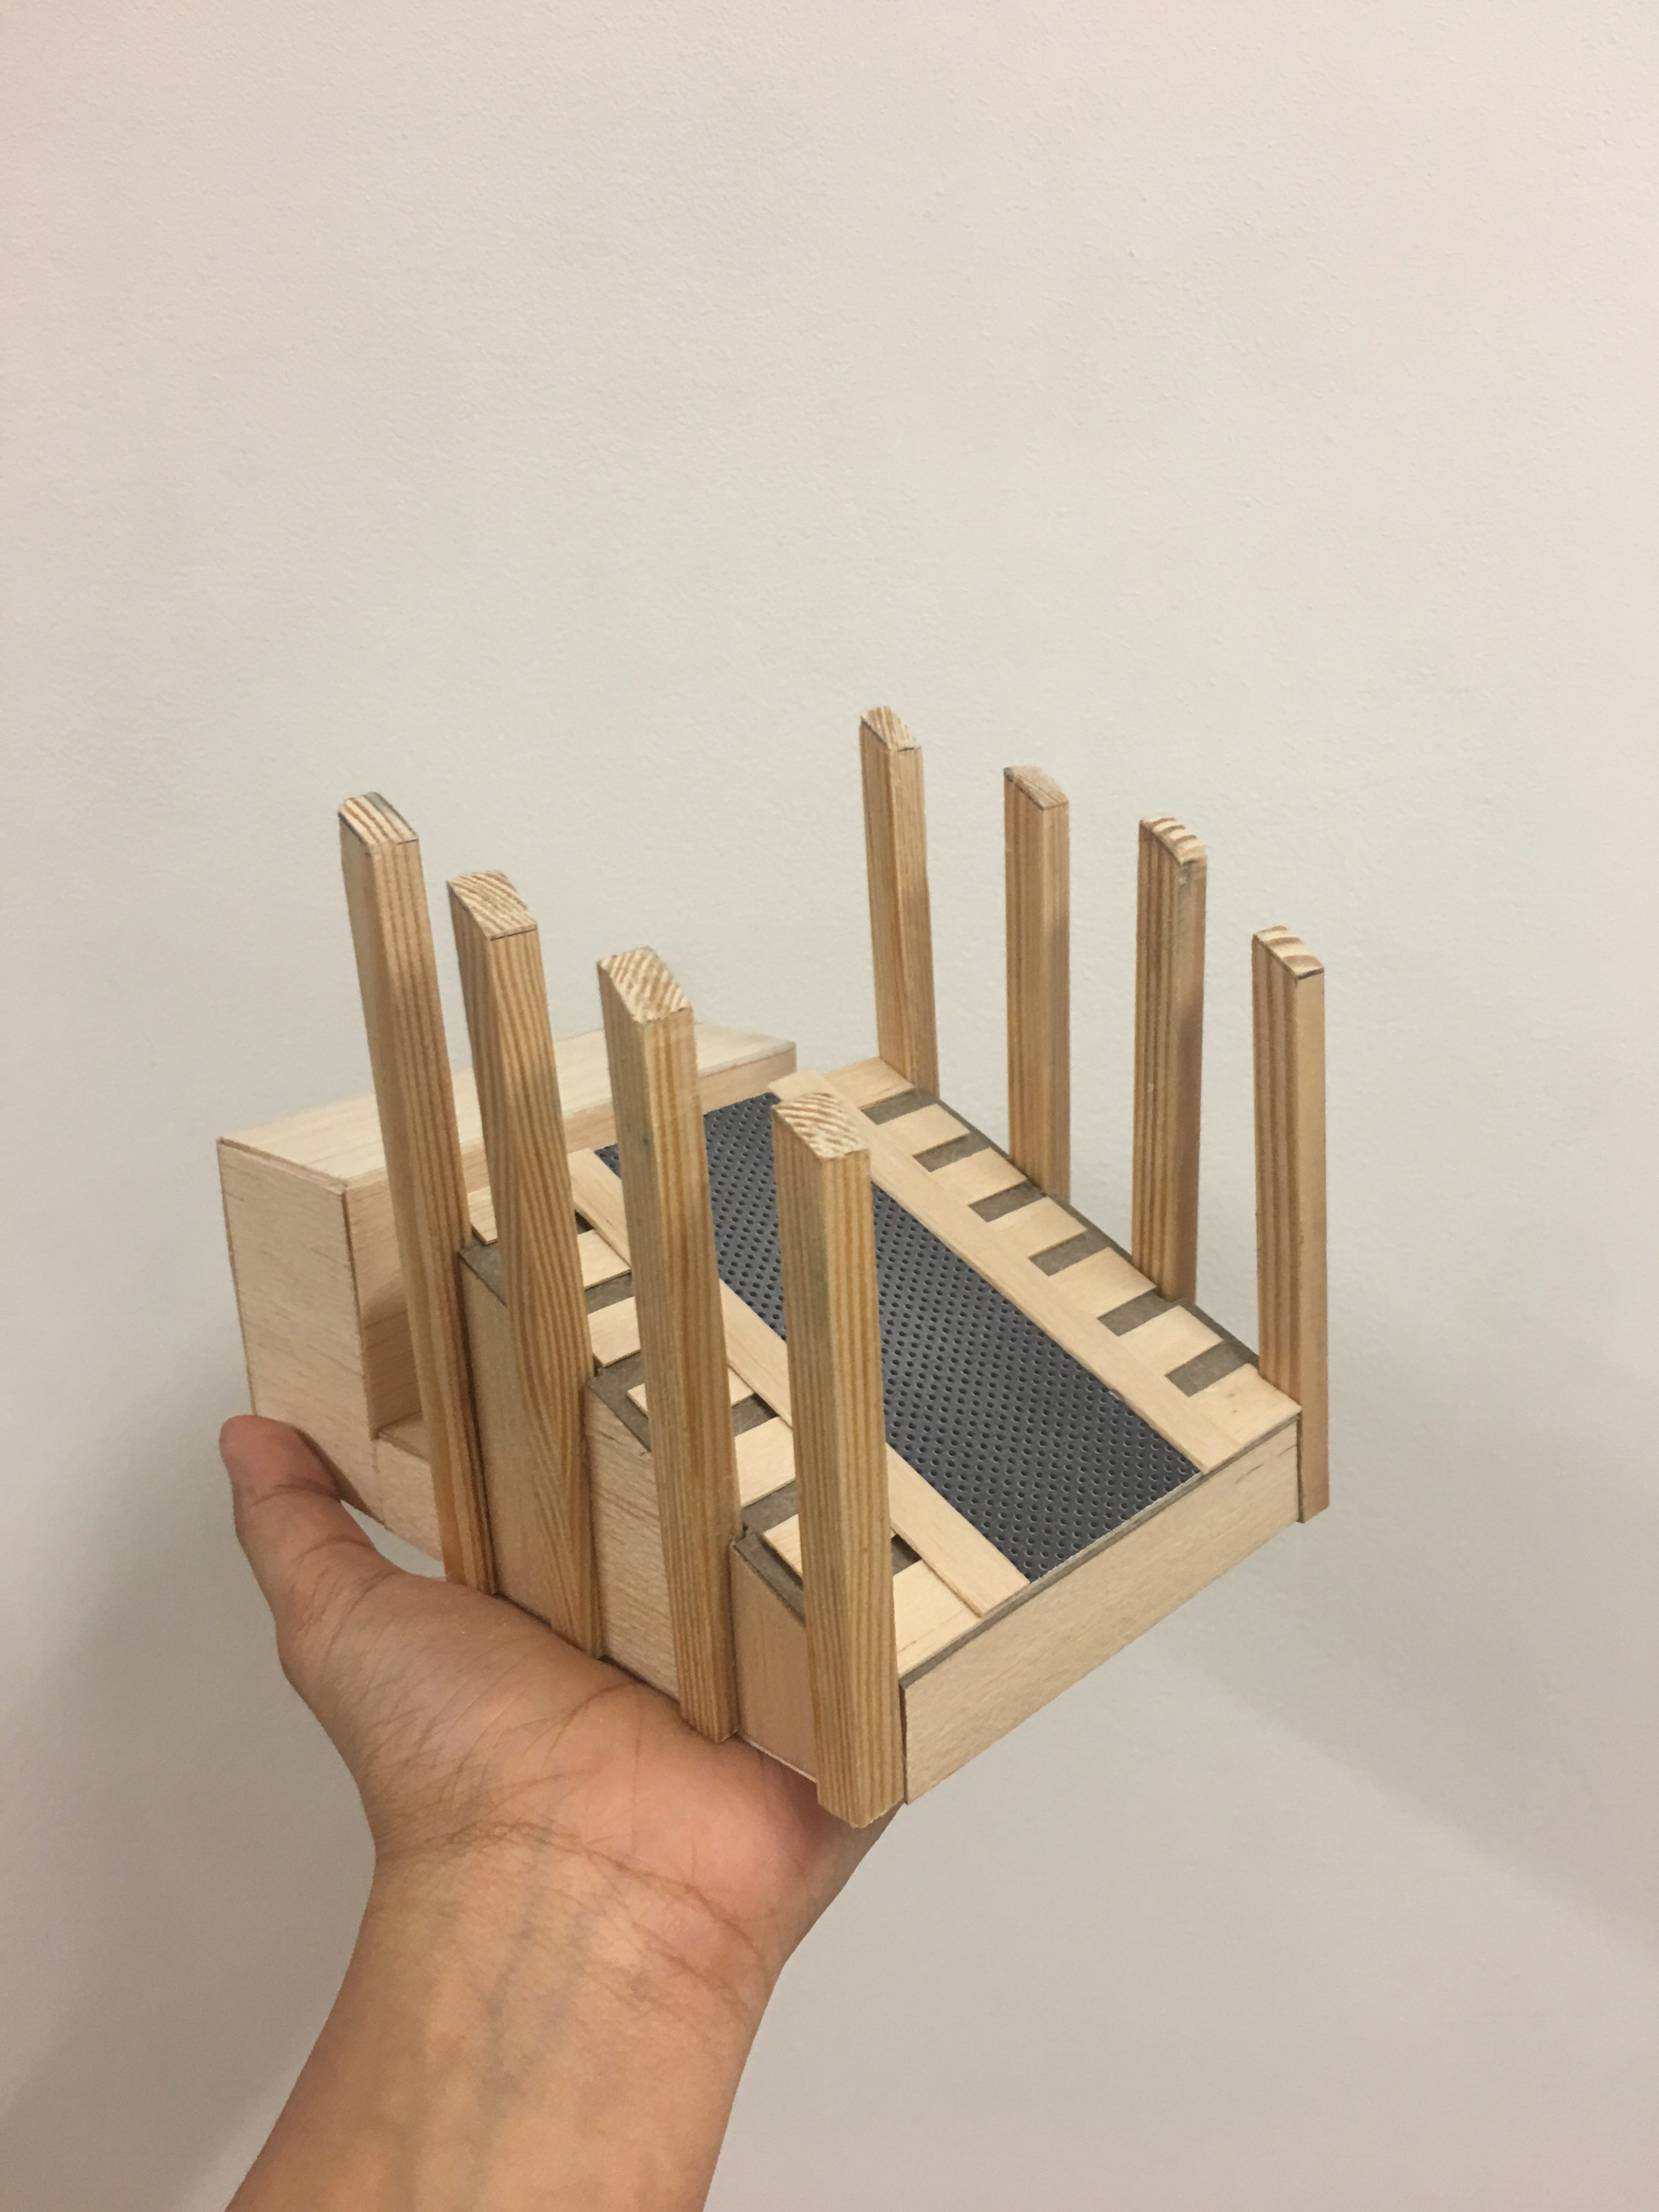
After I had pasted all the wood down, I had to decide on the width of the planks using ice-cream sticks of different widths. Purely by aesthetic, I decided to go with an in-between of the thick and thin ice cream sticks as neither were fully satisfactory to me. I also decided to make the spacing between them larger.

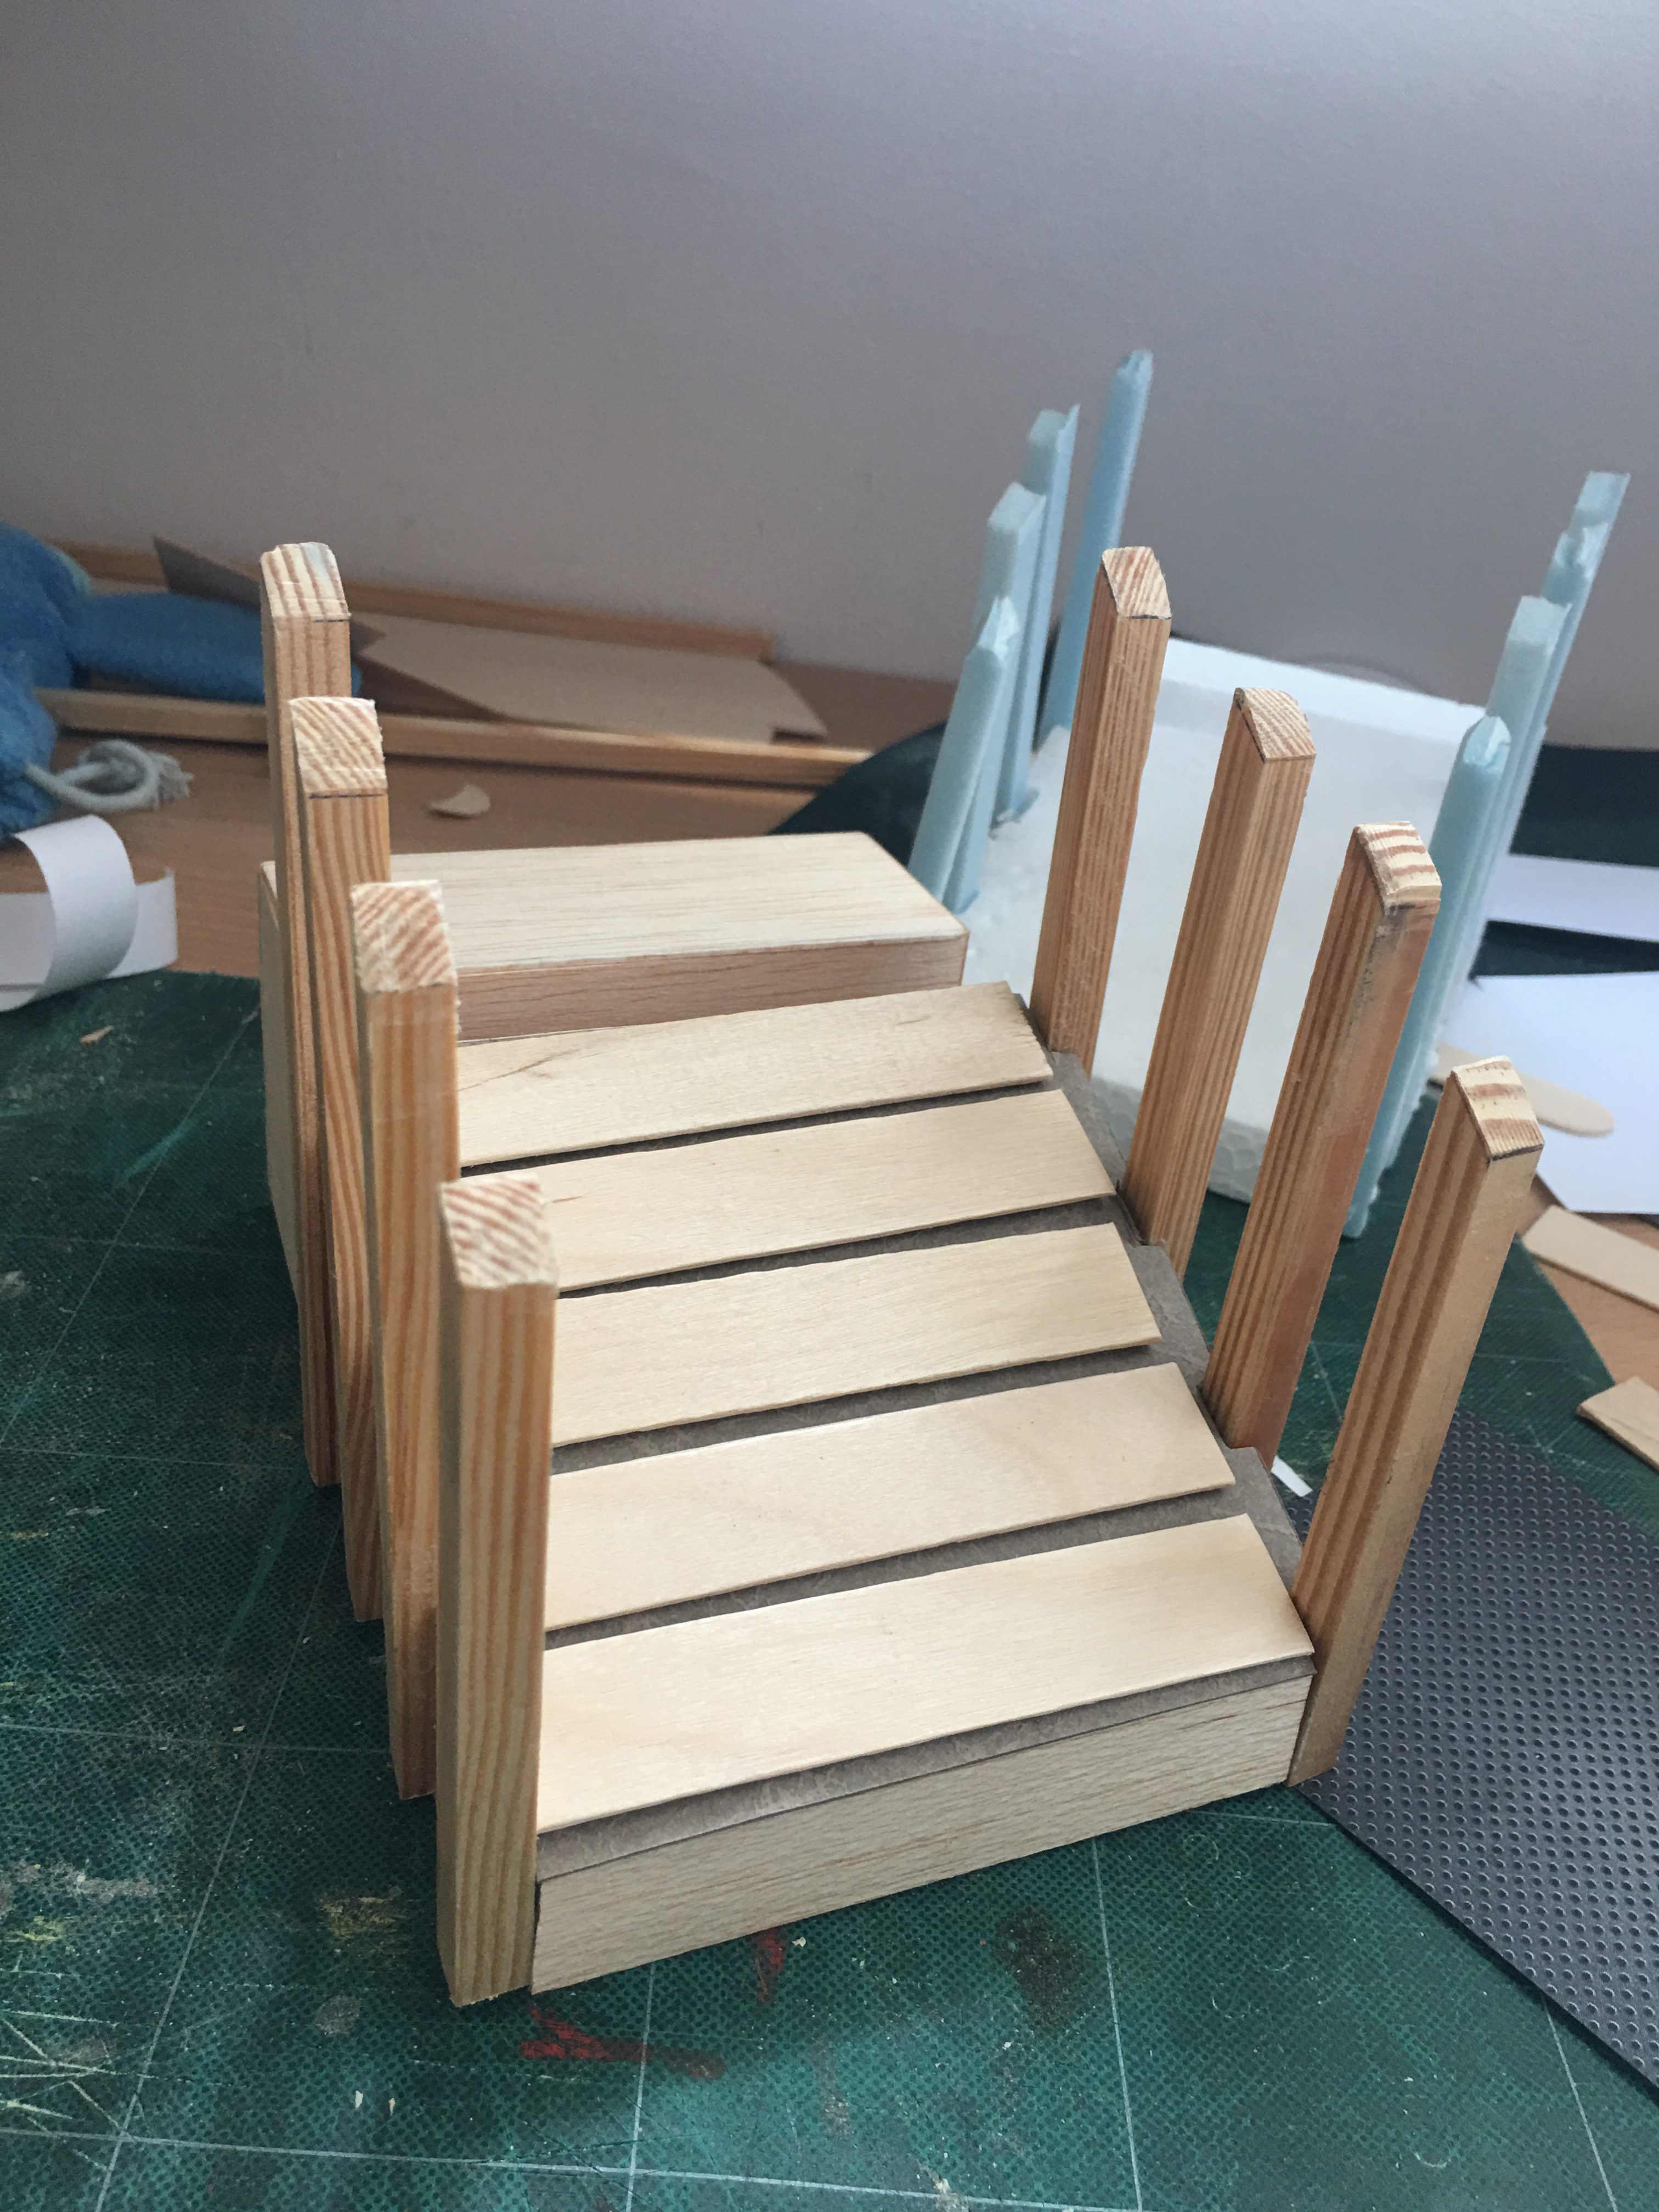
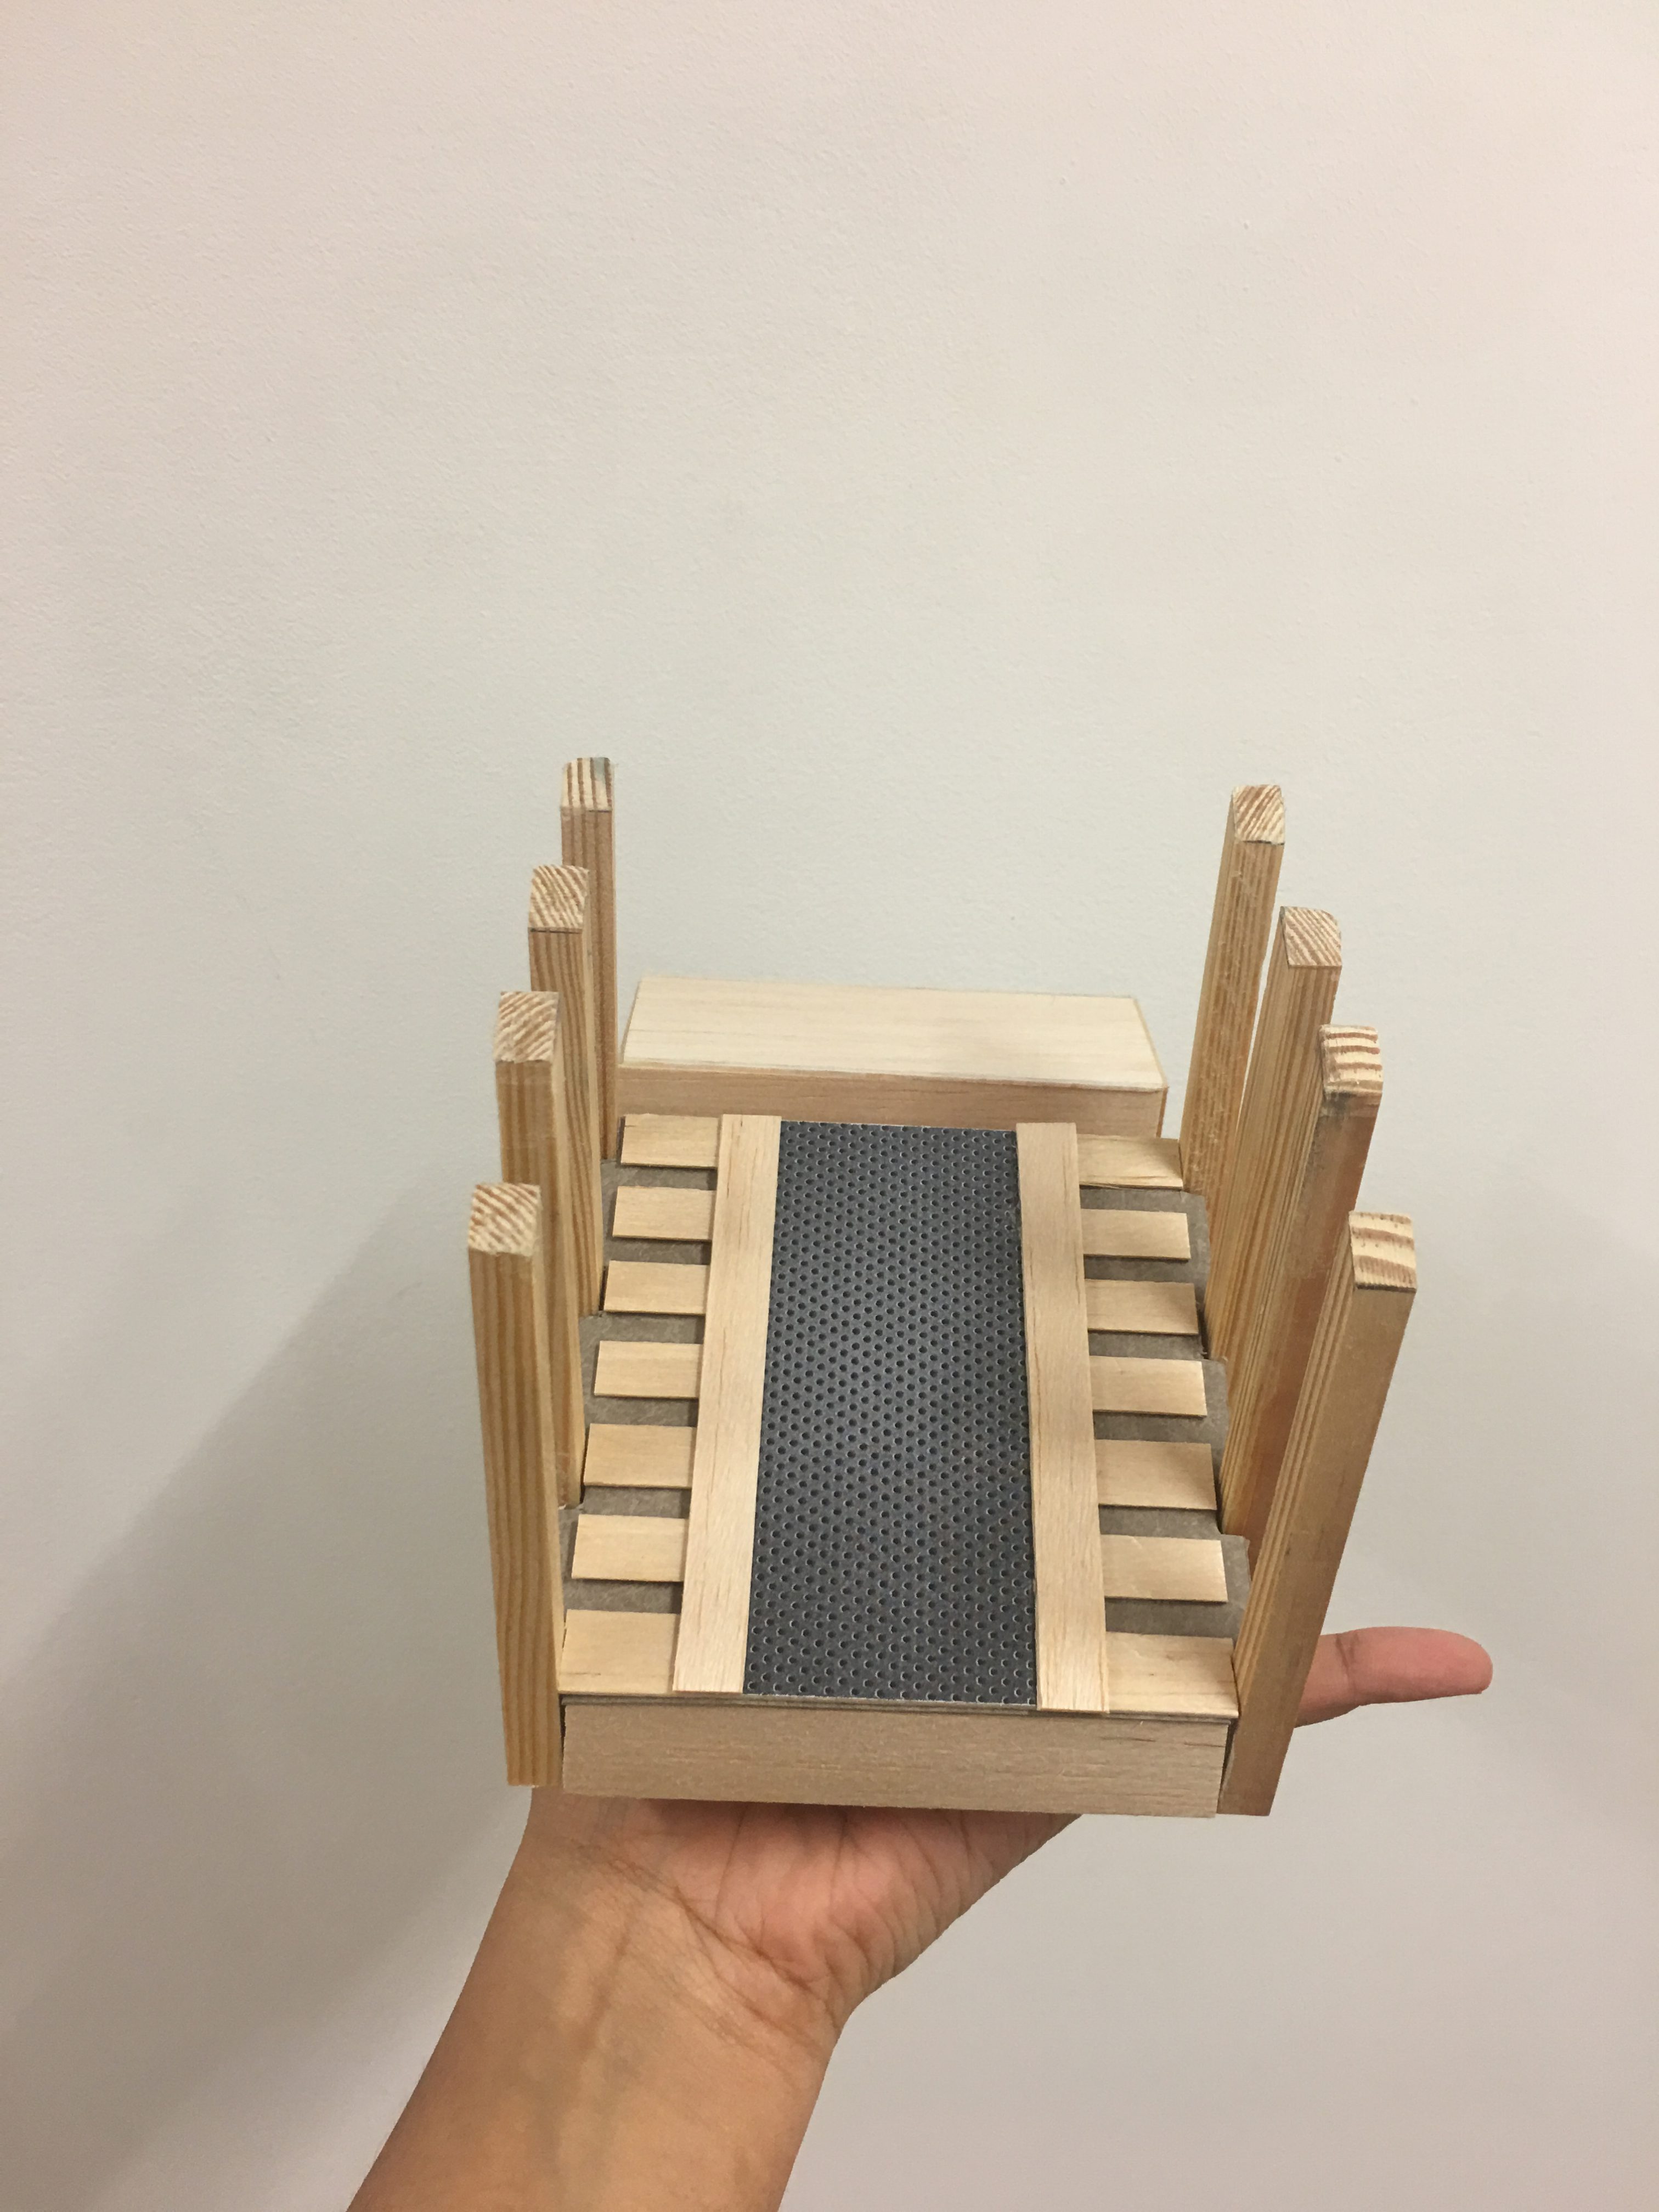
Finally, I decided to let the speakers go down the middle like a ramp.

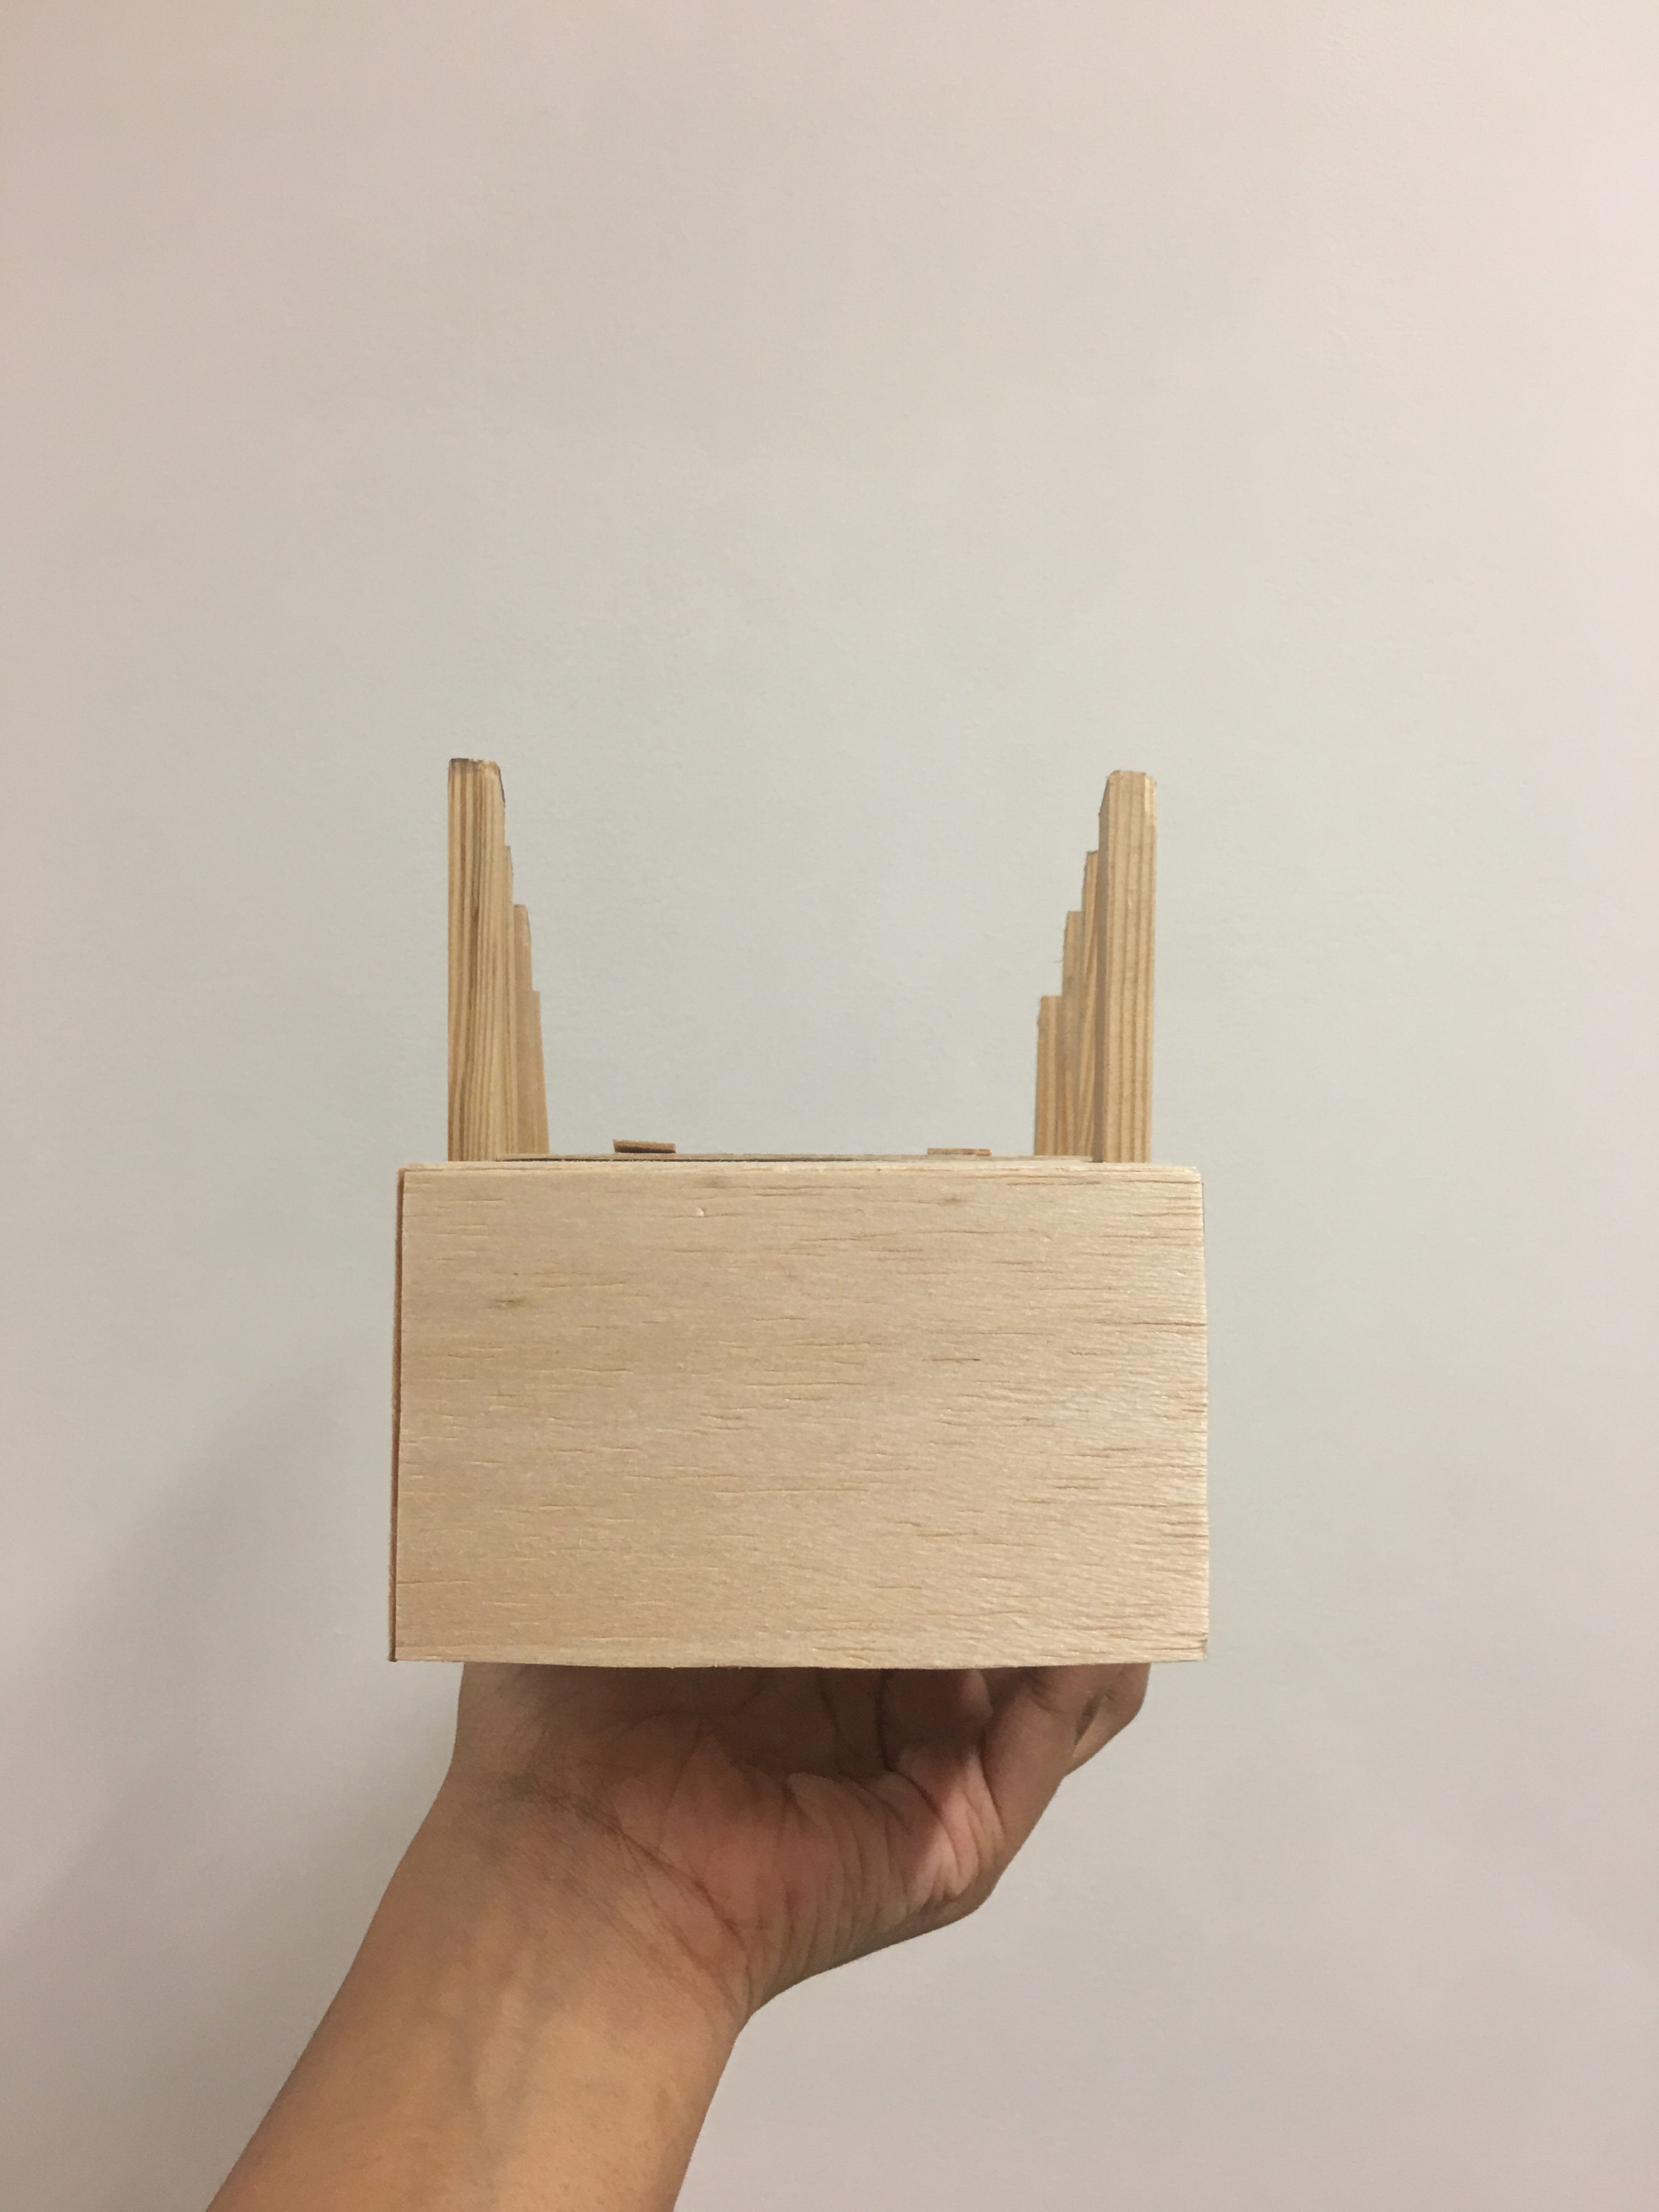
Here’s the final model!
During the review, Ms Pari mentioned that I could have had the speakers go in between the planks so that the planks can maintain their integrity, and I agree! I did a mock-up of that to visualize how that could look like.

Overall, I learned a lot about working with foam and wood, and how to sand effectively and well. I’m glad I got to work on my ideation and model-making skills ٩(◕‿◕。)۶

I started with by doing mind maps with associations to the words in the prompt. Then, I came up with more ideas through emotive keyword association and unrelated object association, which are two out of the four methods we learned previously in Week 3. I also made some small icon-like sketches just based off things I like, like animals and mushrooms. Eventually, I decided on going with a mobile phone dock based off an actual boat dock, drawing a parallel to how charging your phone (energizing it) and letting it rest is akin to how boats make a pit stop at docks.
My ideation pages can be found here: Ideation
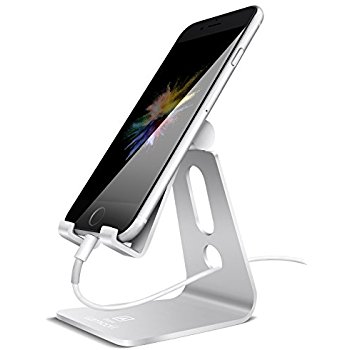
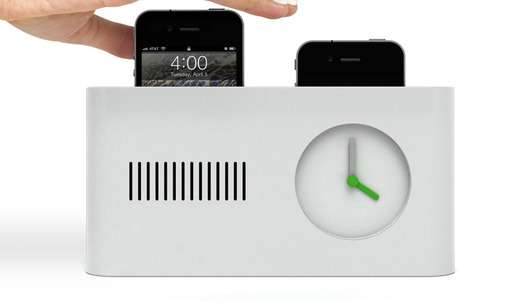
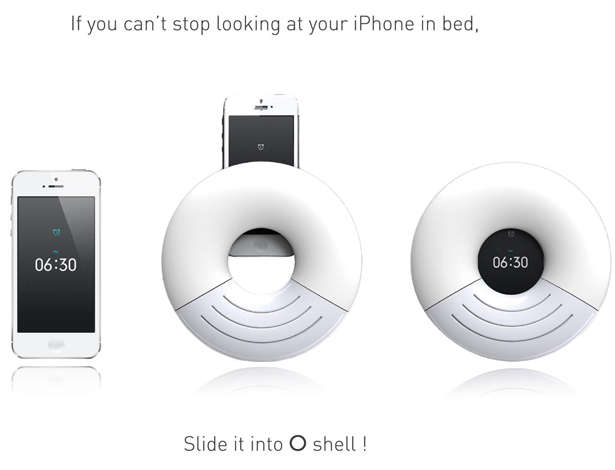
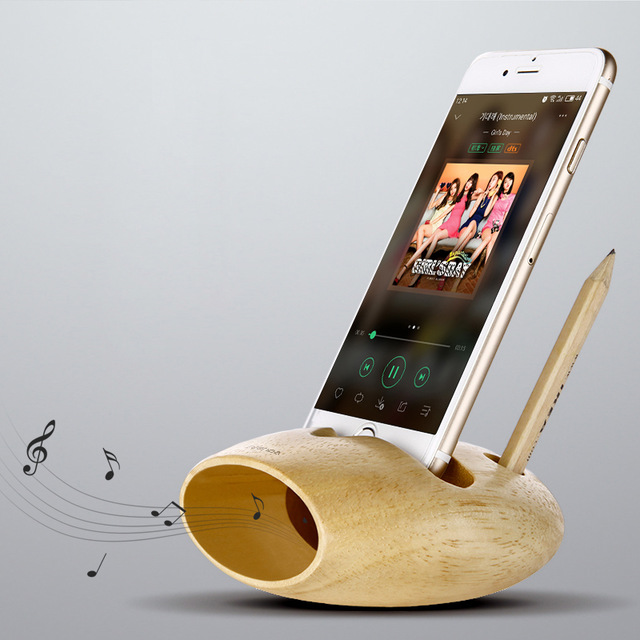
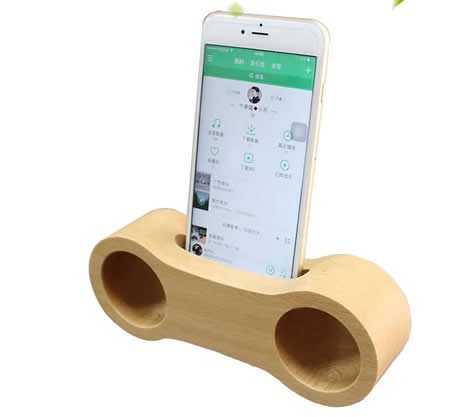
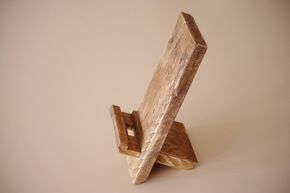
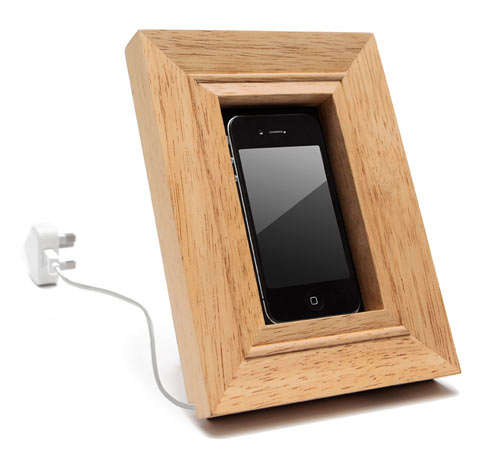
These are some interesting mobile phone docks I found beforehand. I really liked how sleek the first five phone docks here are, and I tried to emulate some of that in my ideation with emotive keyword association. I also really liked how warm the wood feels in the last four mobile docks, and wanted to use wood for my final piece.


After the ideation, I tried to decide between the bed-like dock (for your phone to rest while you lay in bed and rest too, as most people charge their phones when they go to sleep), and the boat-like dock. I eventually went with the boat-dock idea because I realized that it had the same rest-for-your-phone connotation like the bed-dock too, on top of the the terrible pun (and also because I’m a sucker for bad puns).
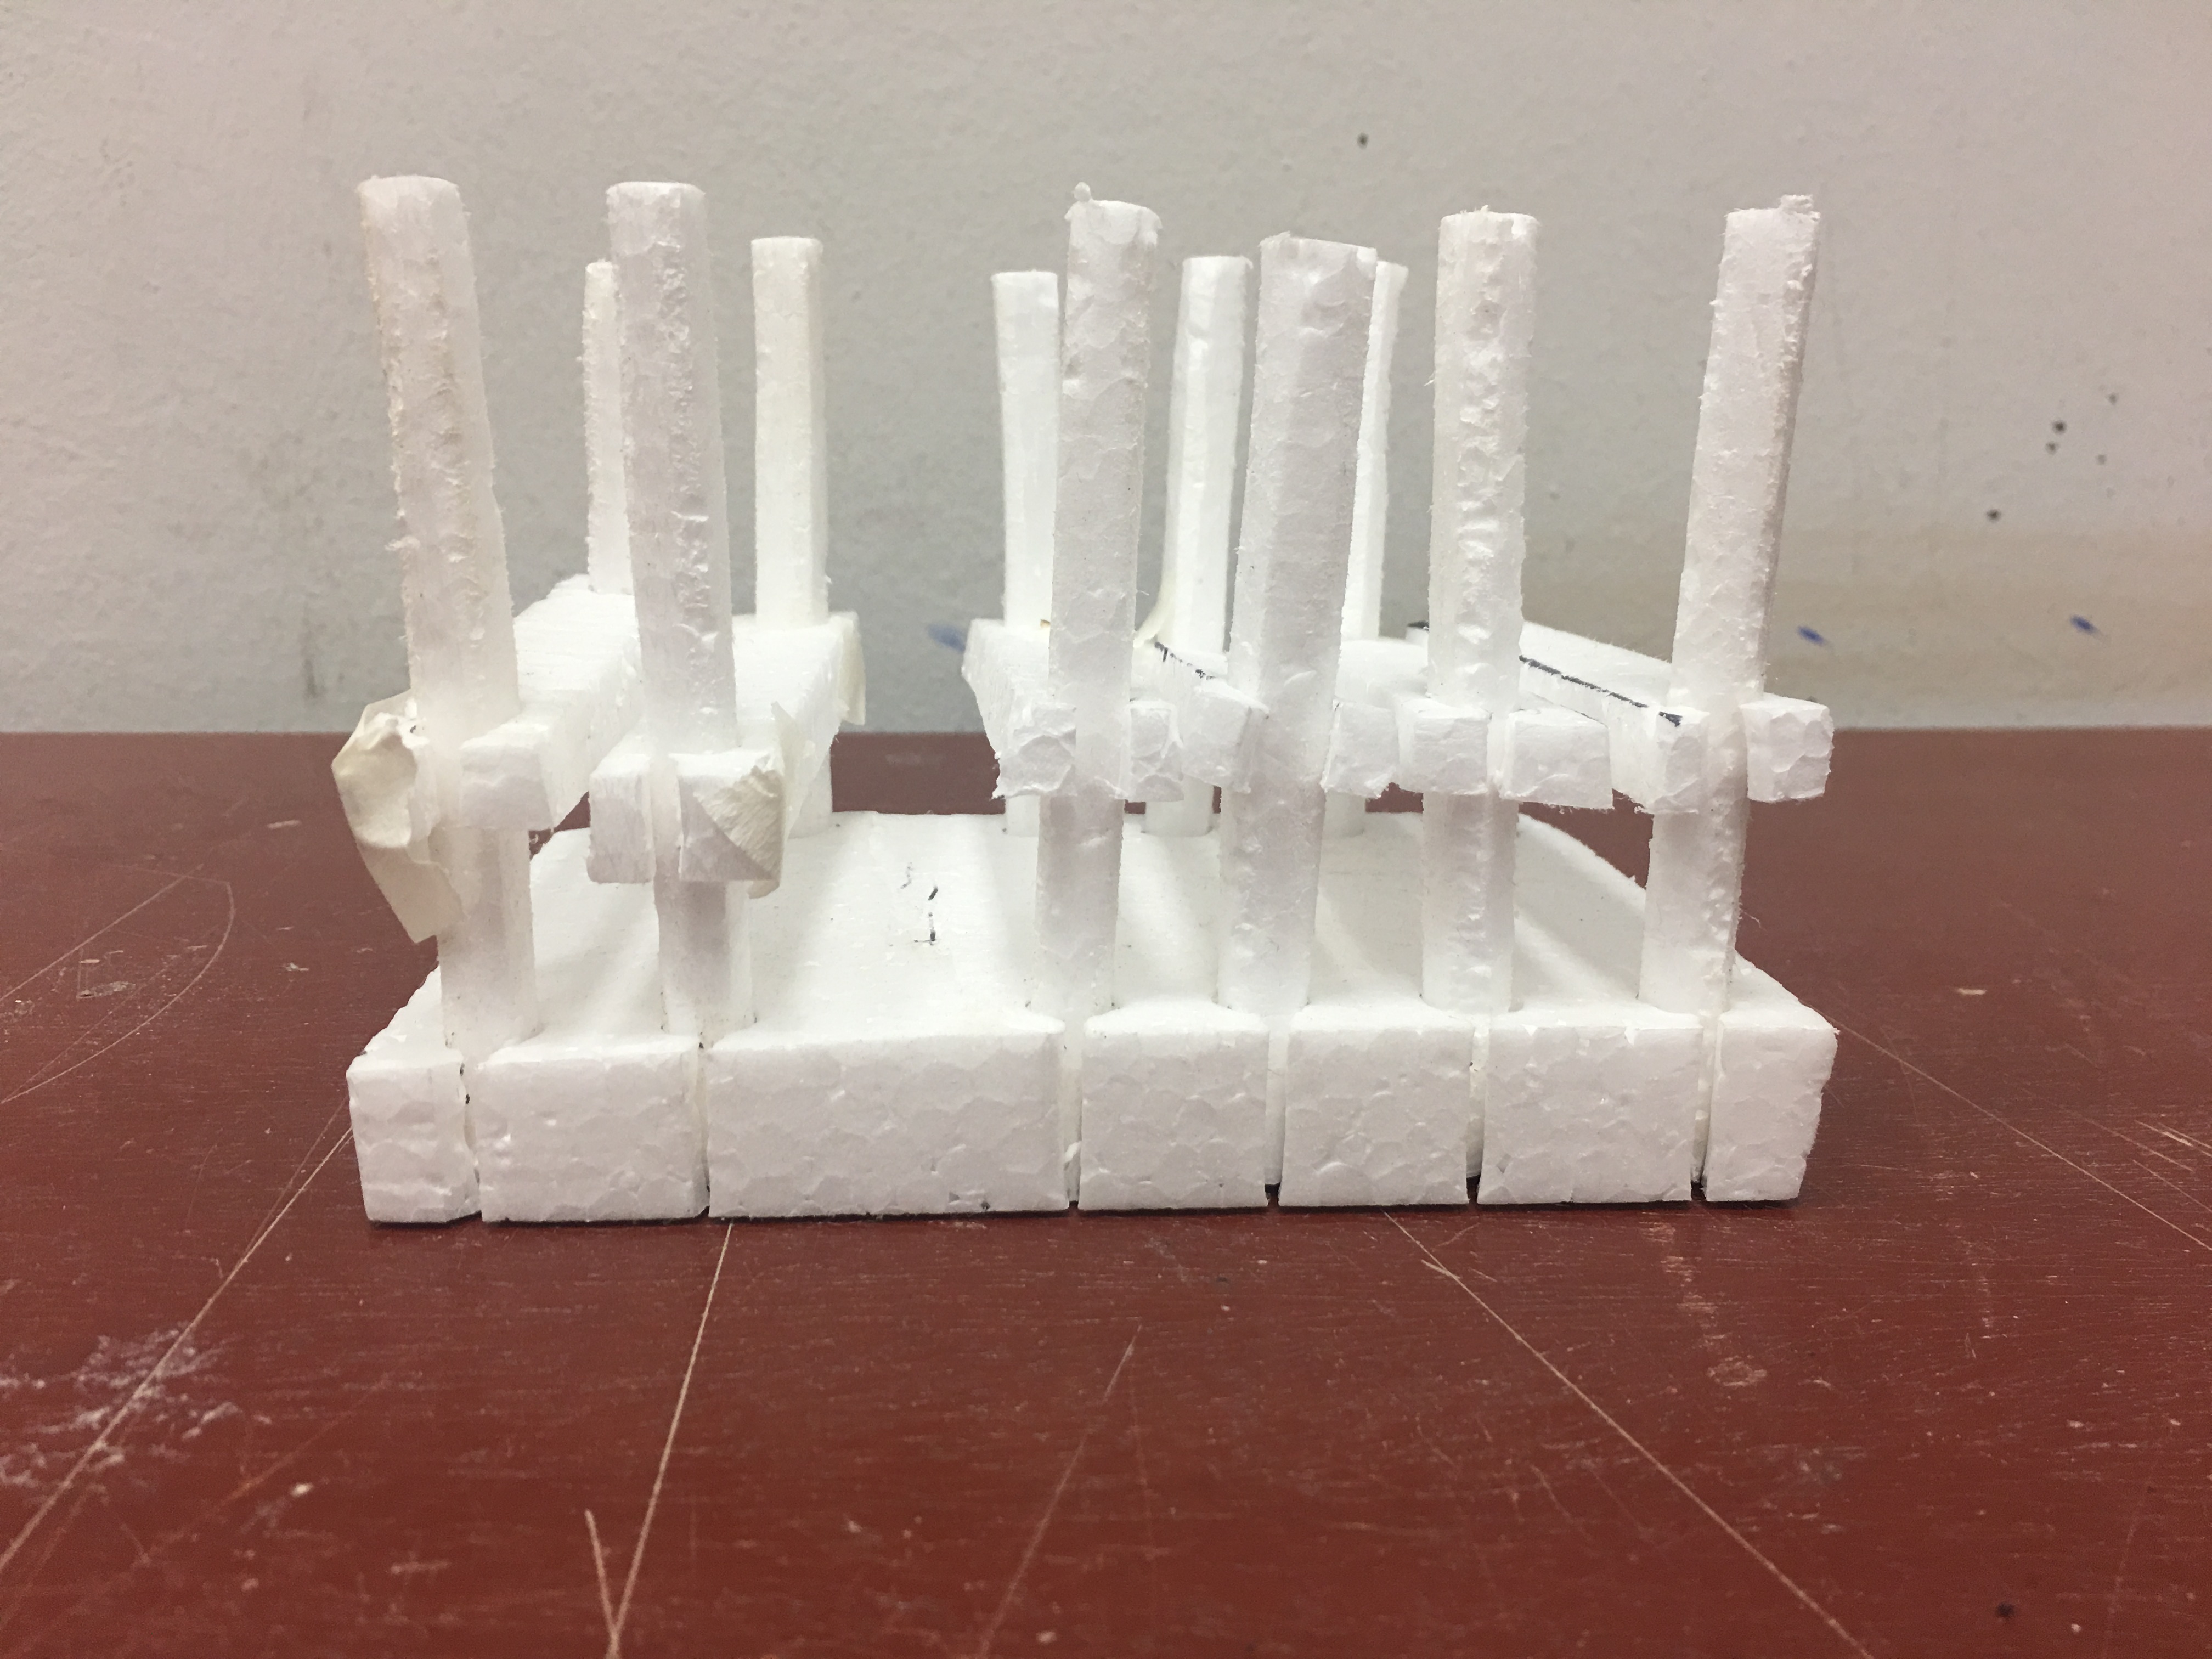
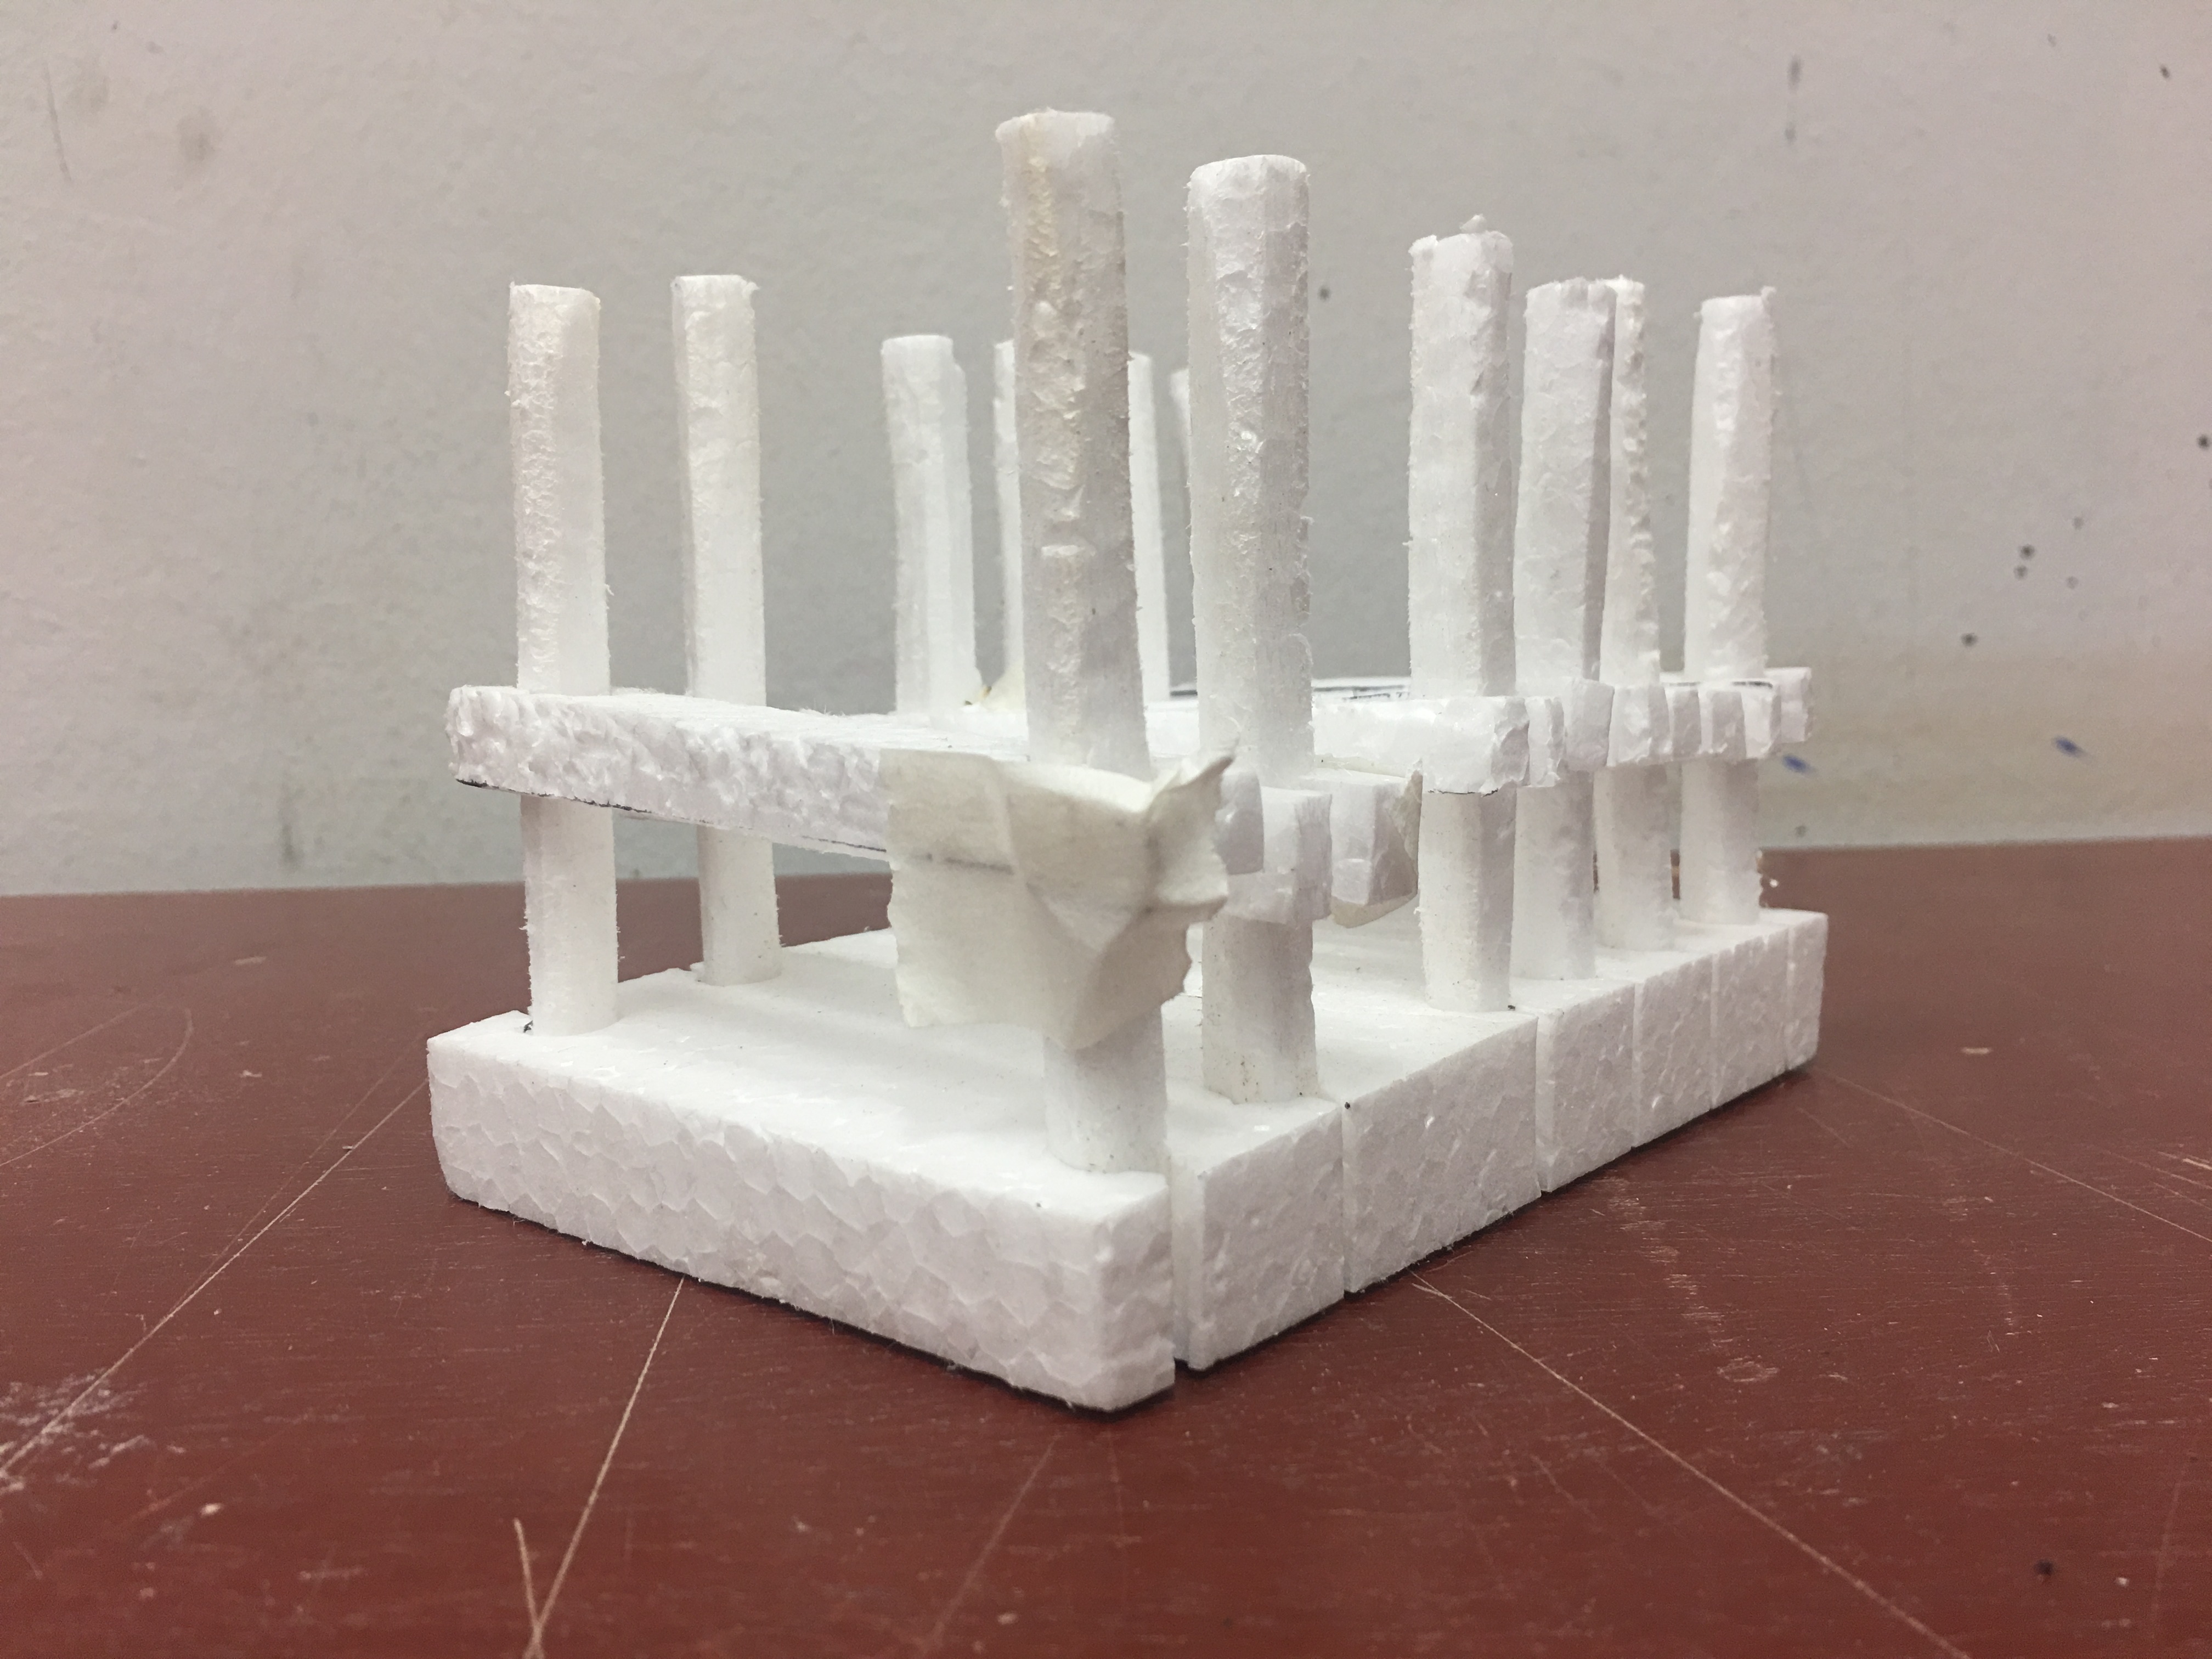
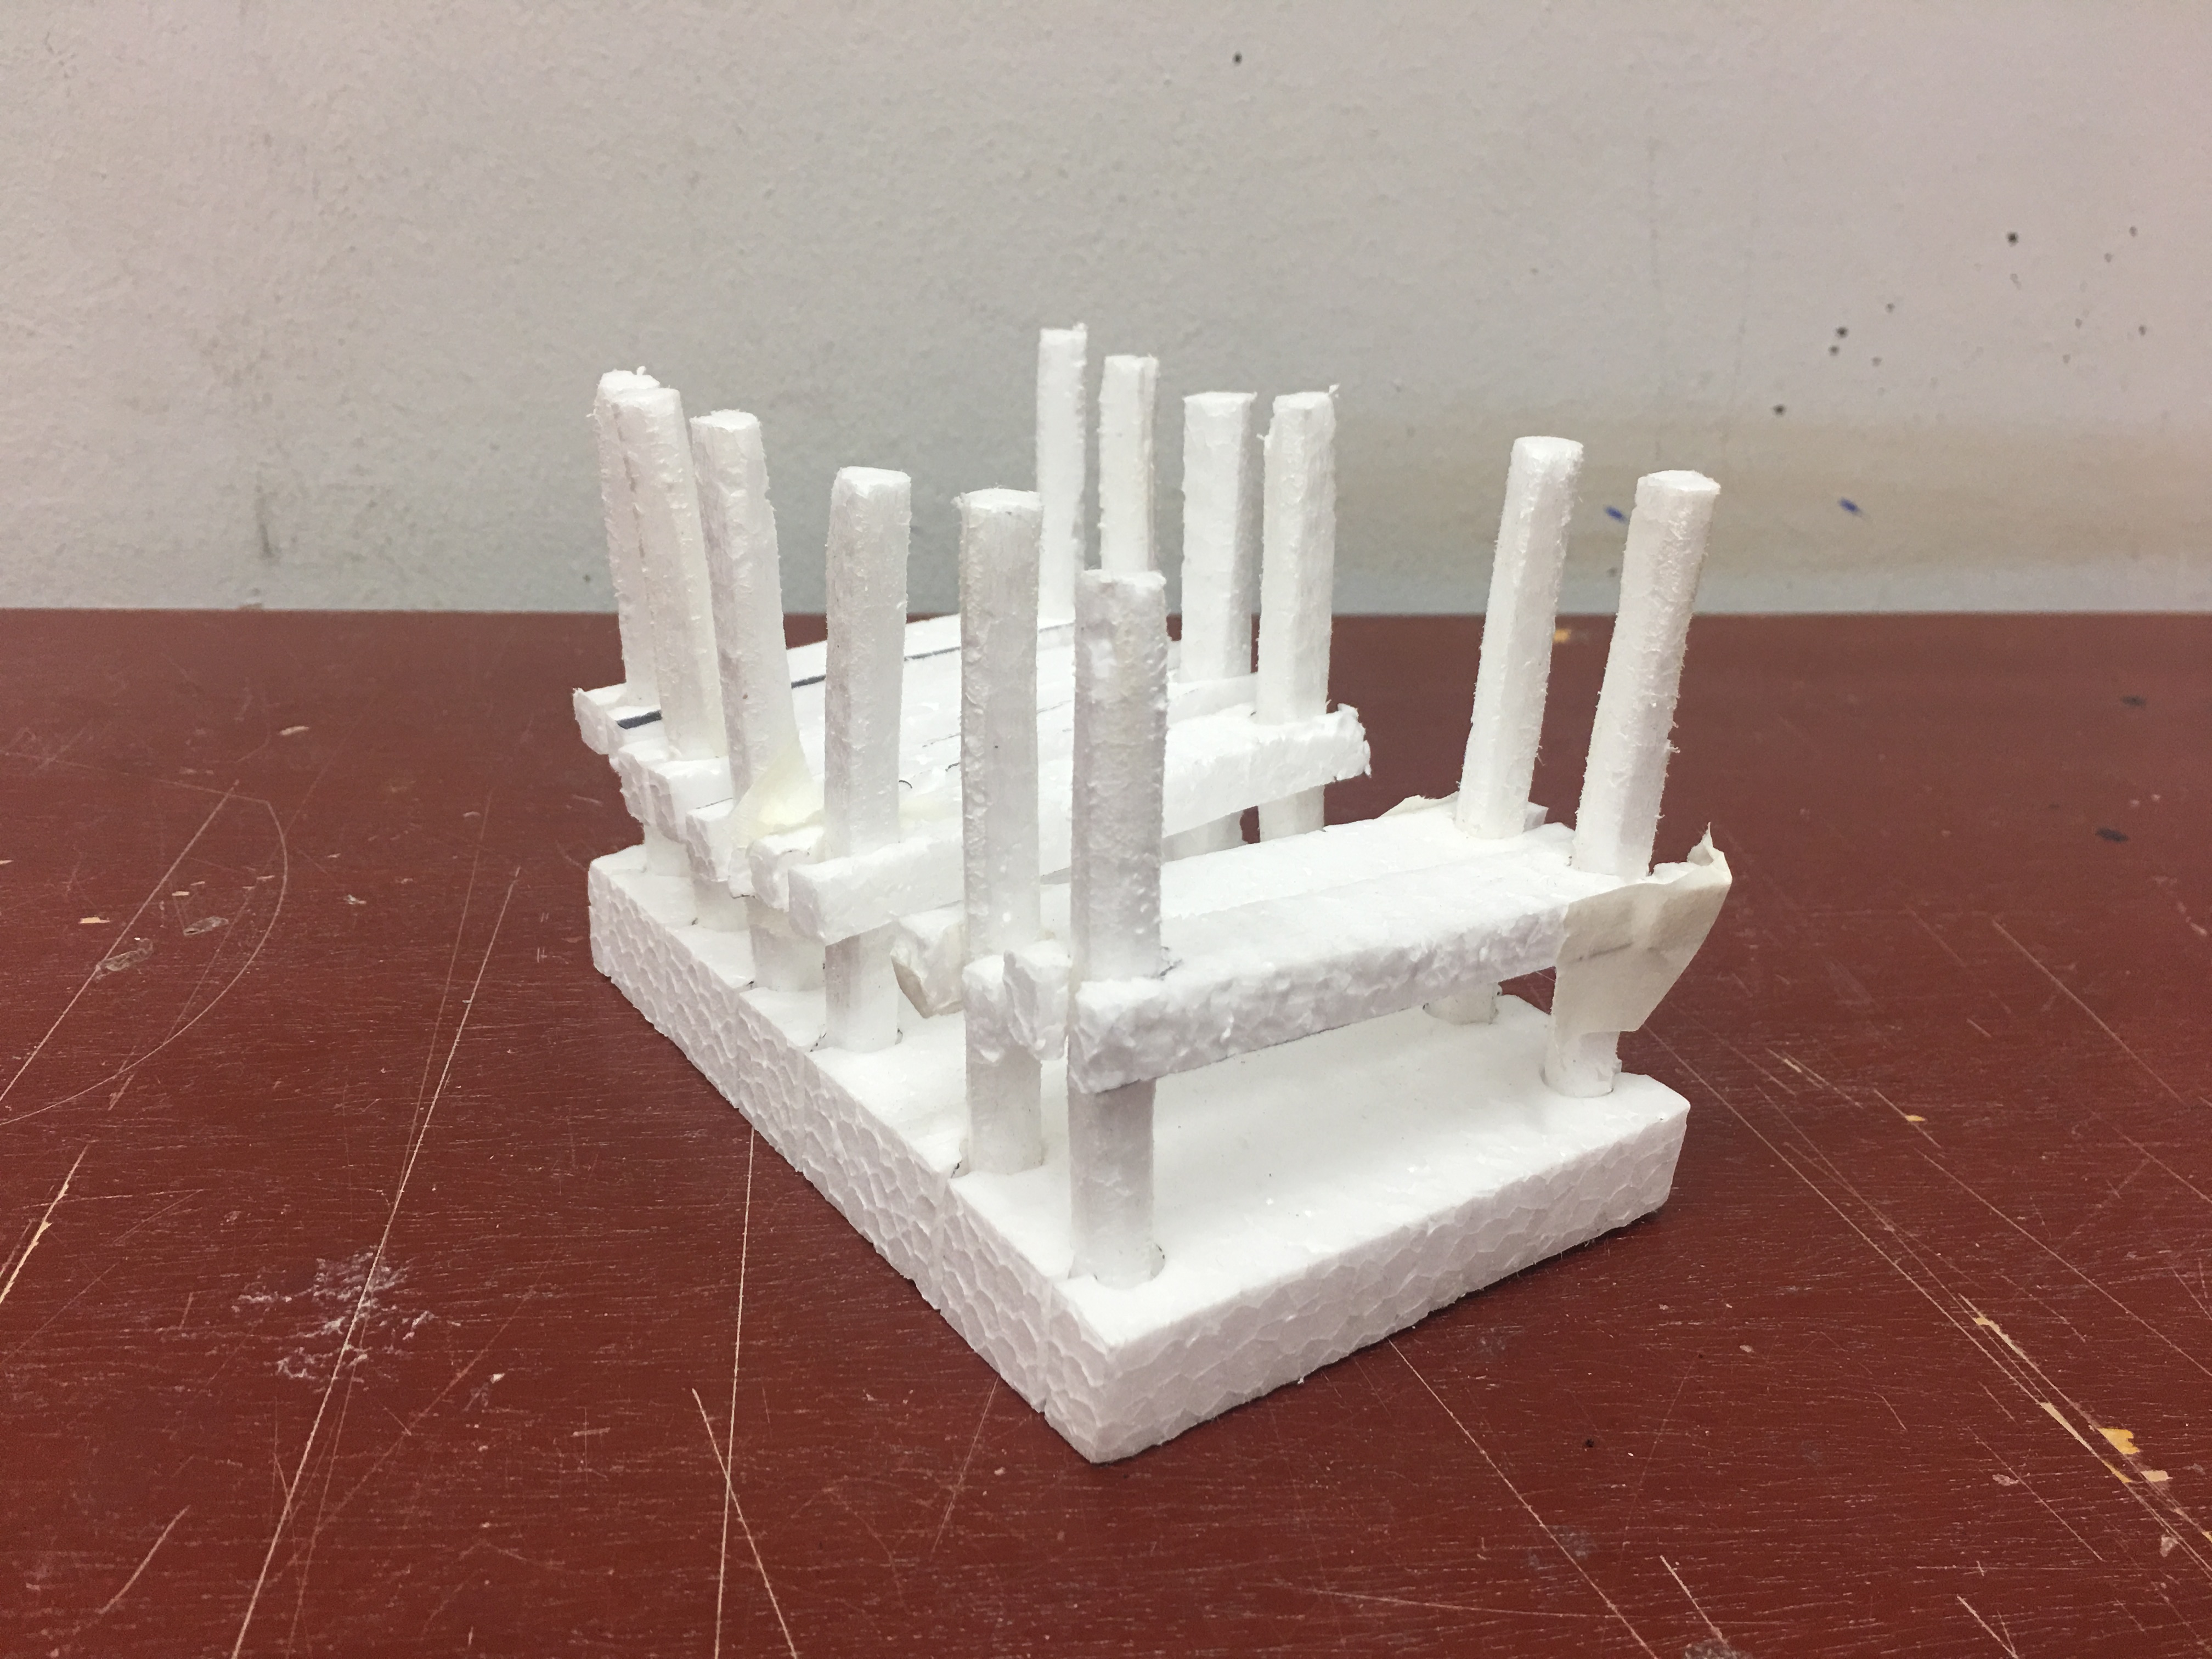
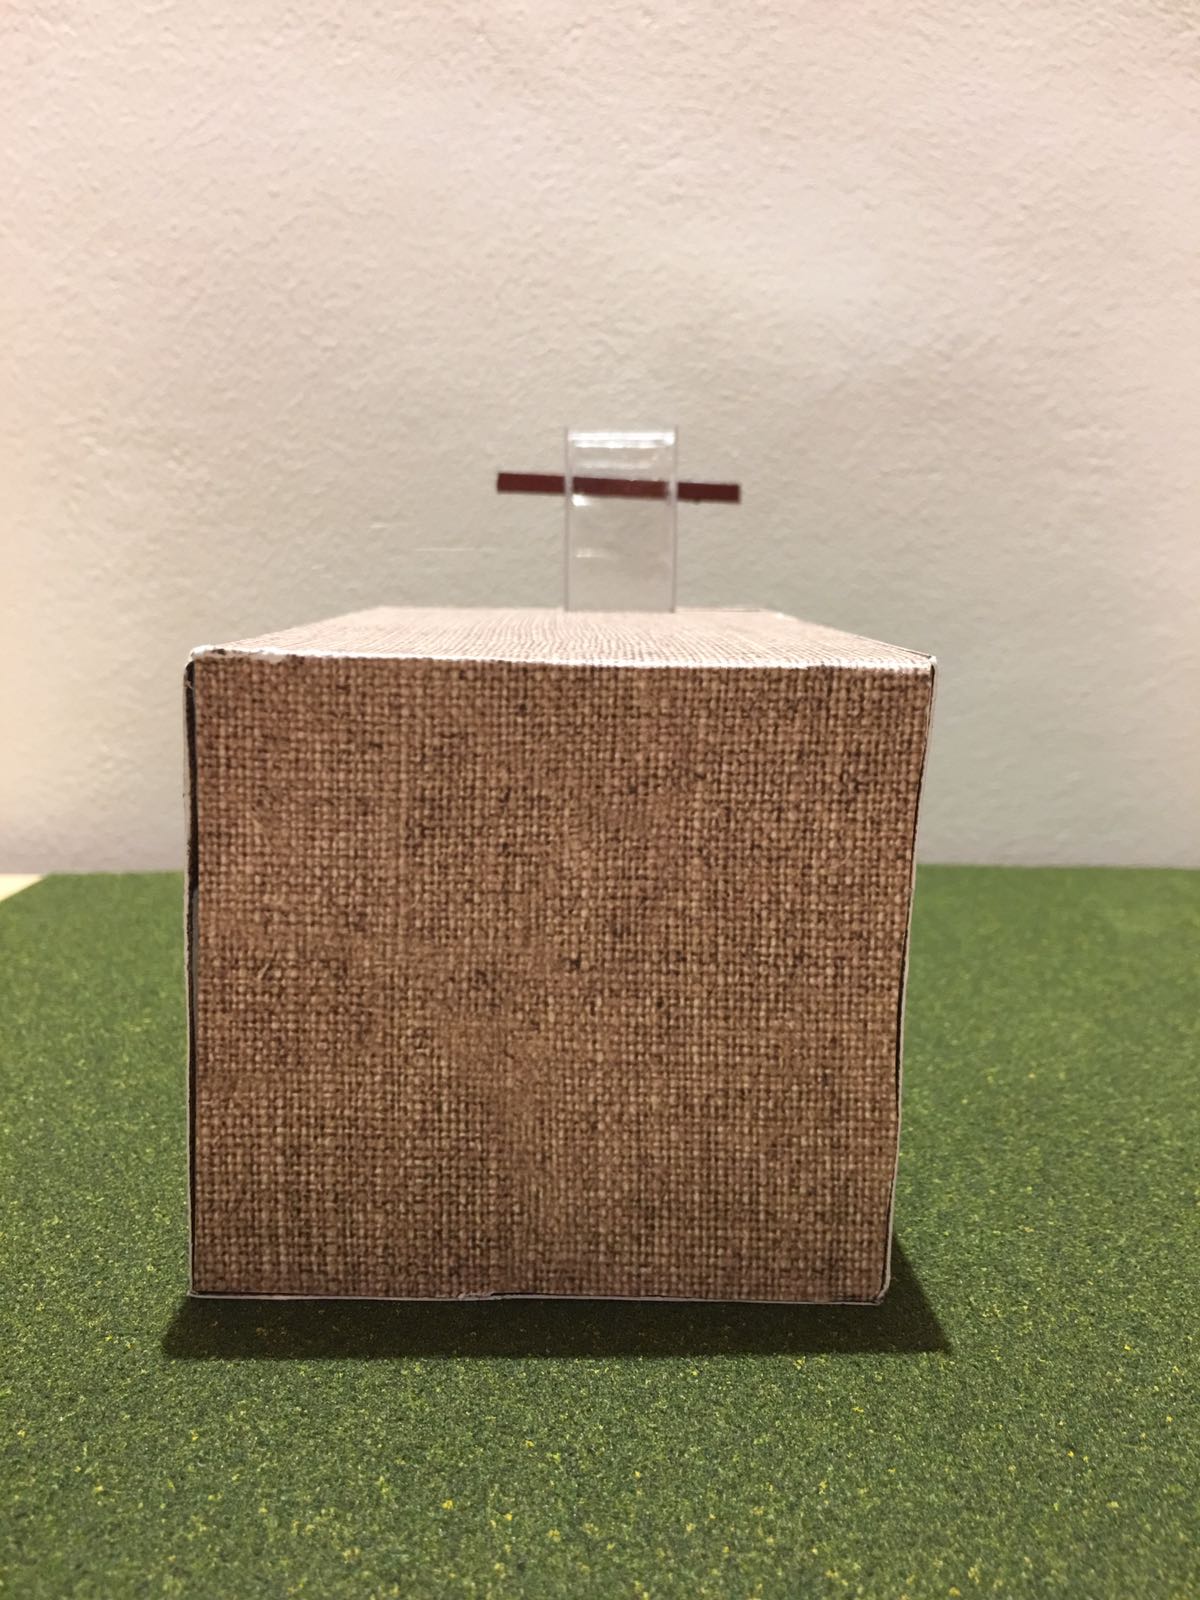
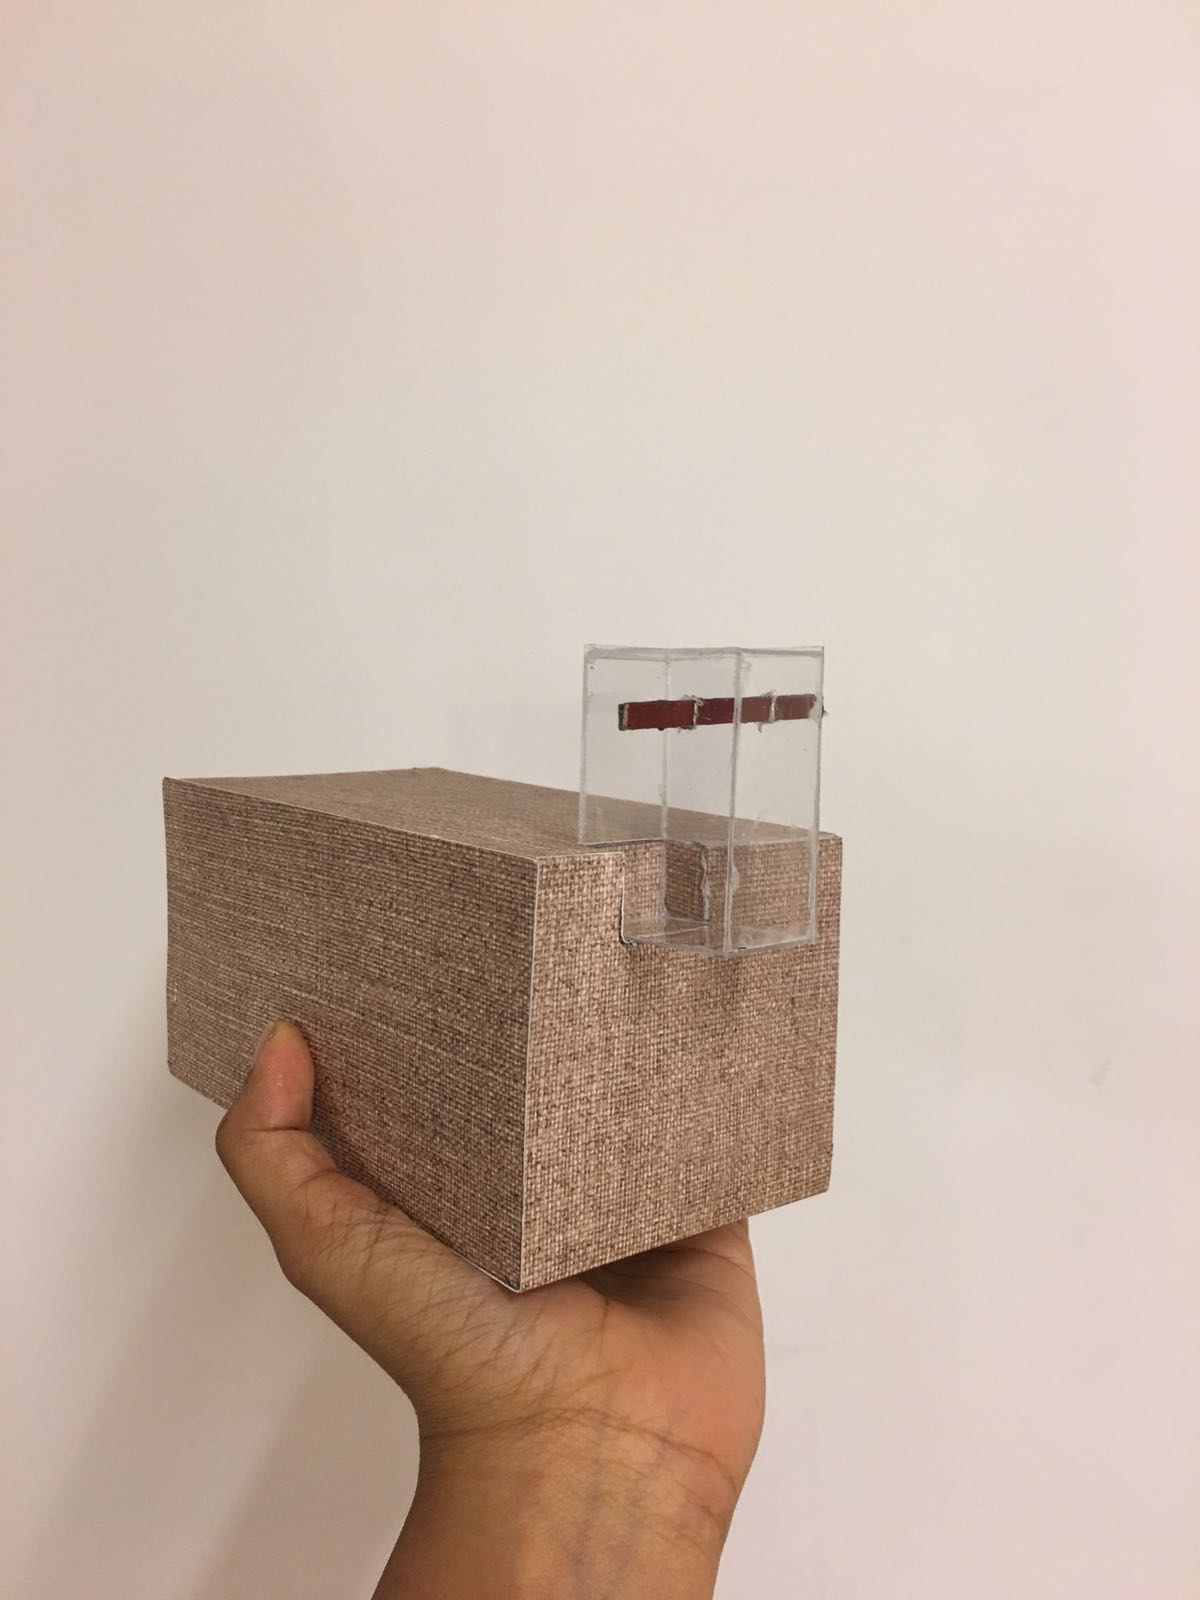
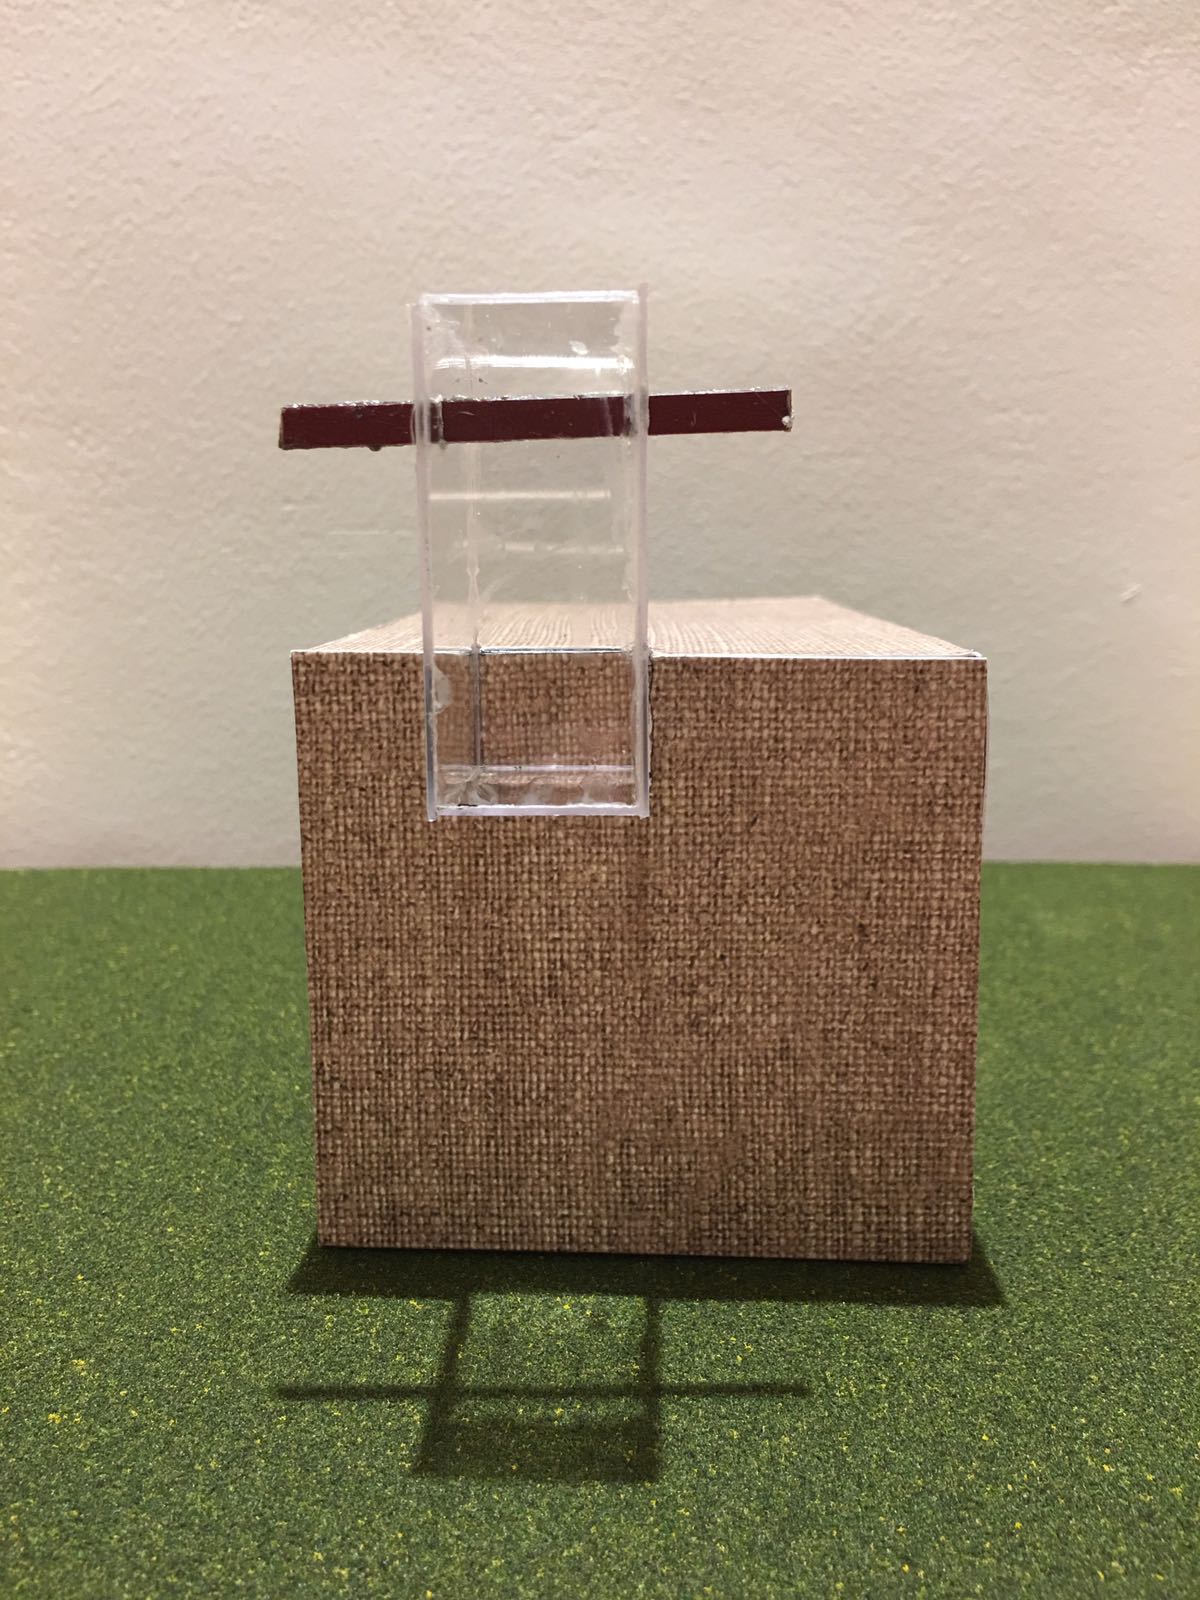
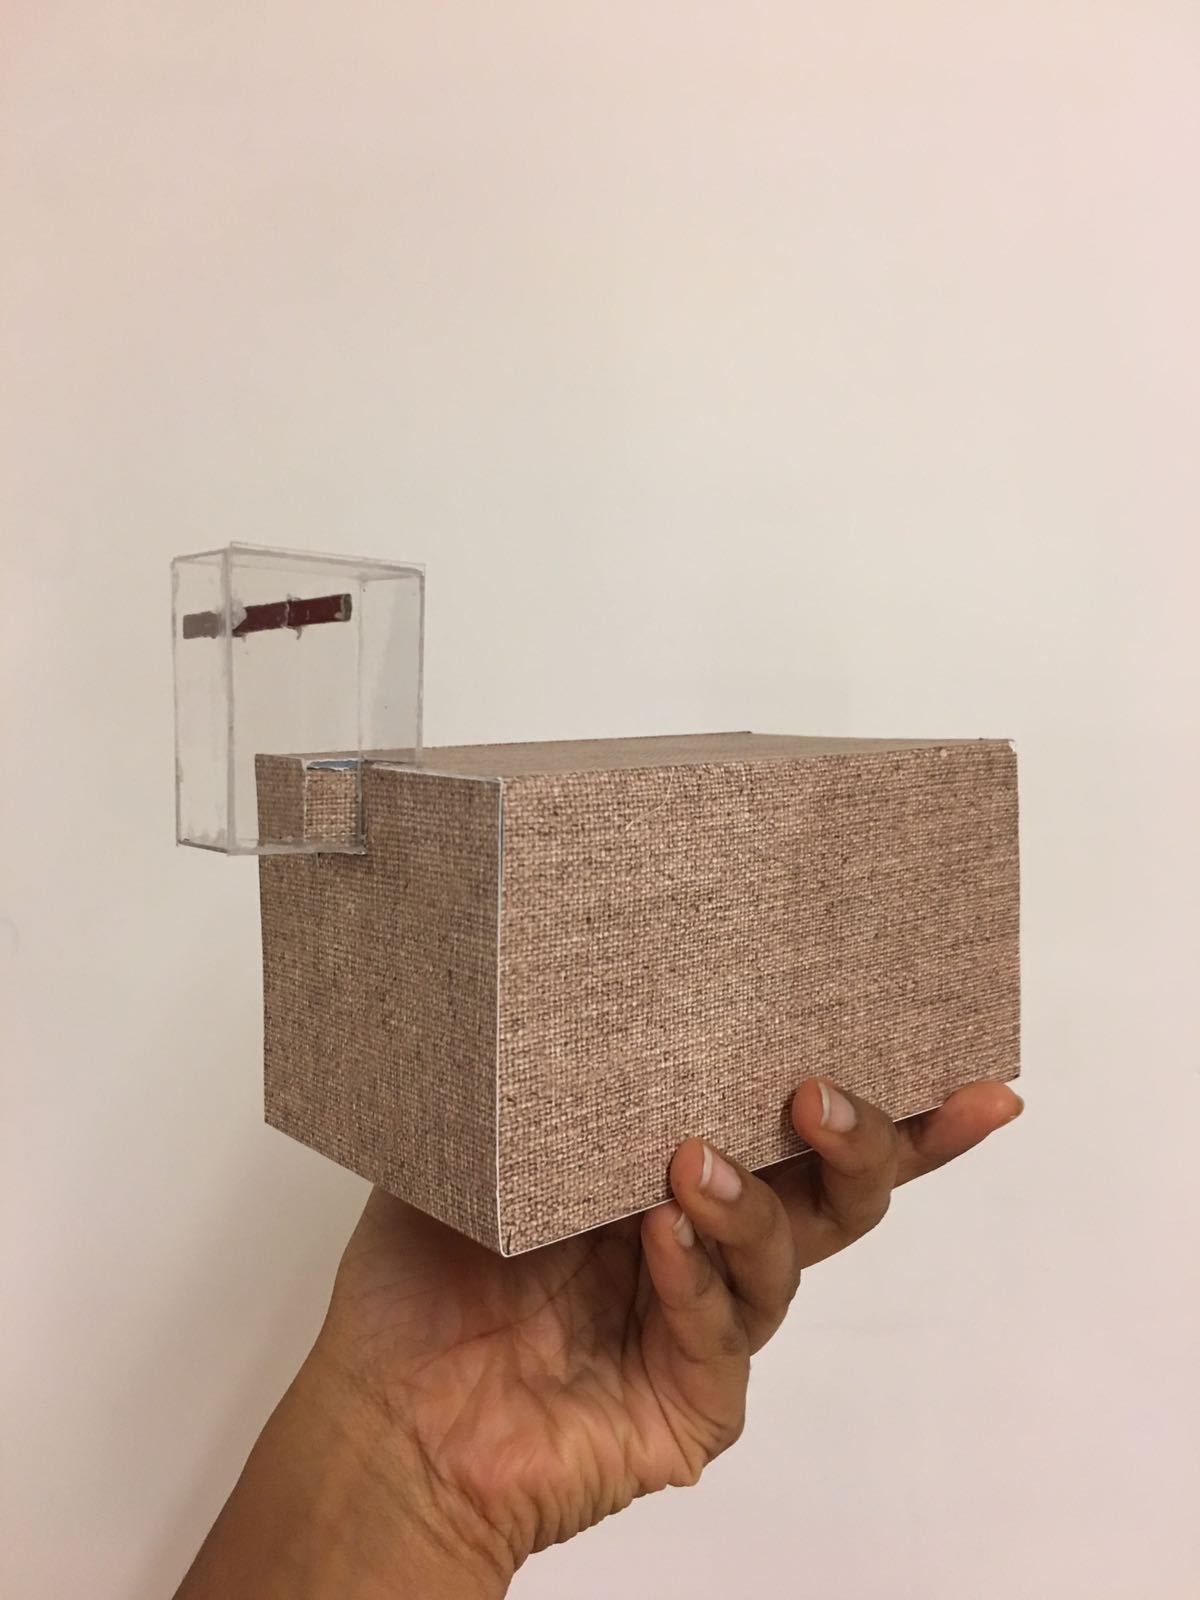
On to making my first model!
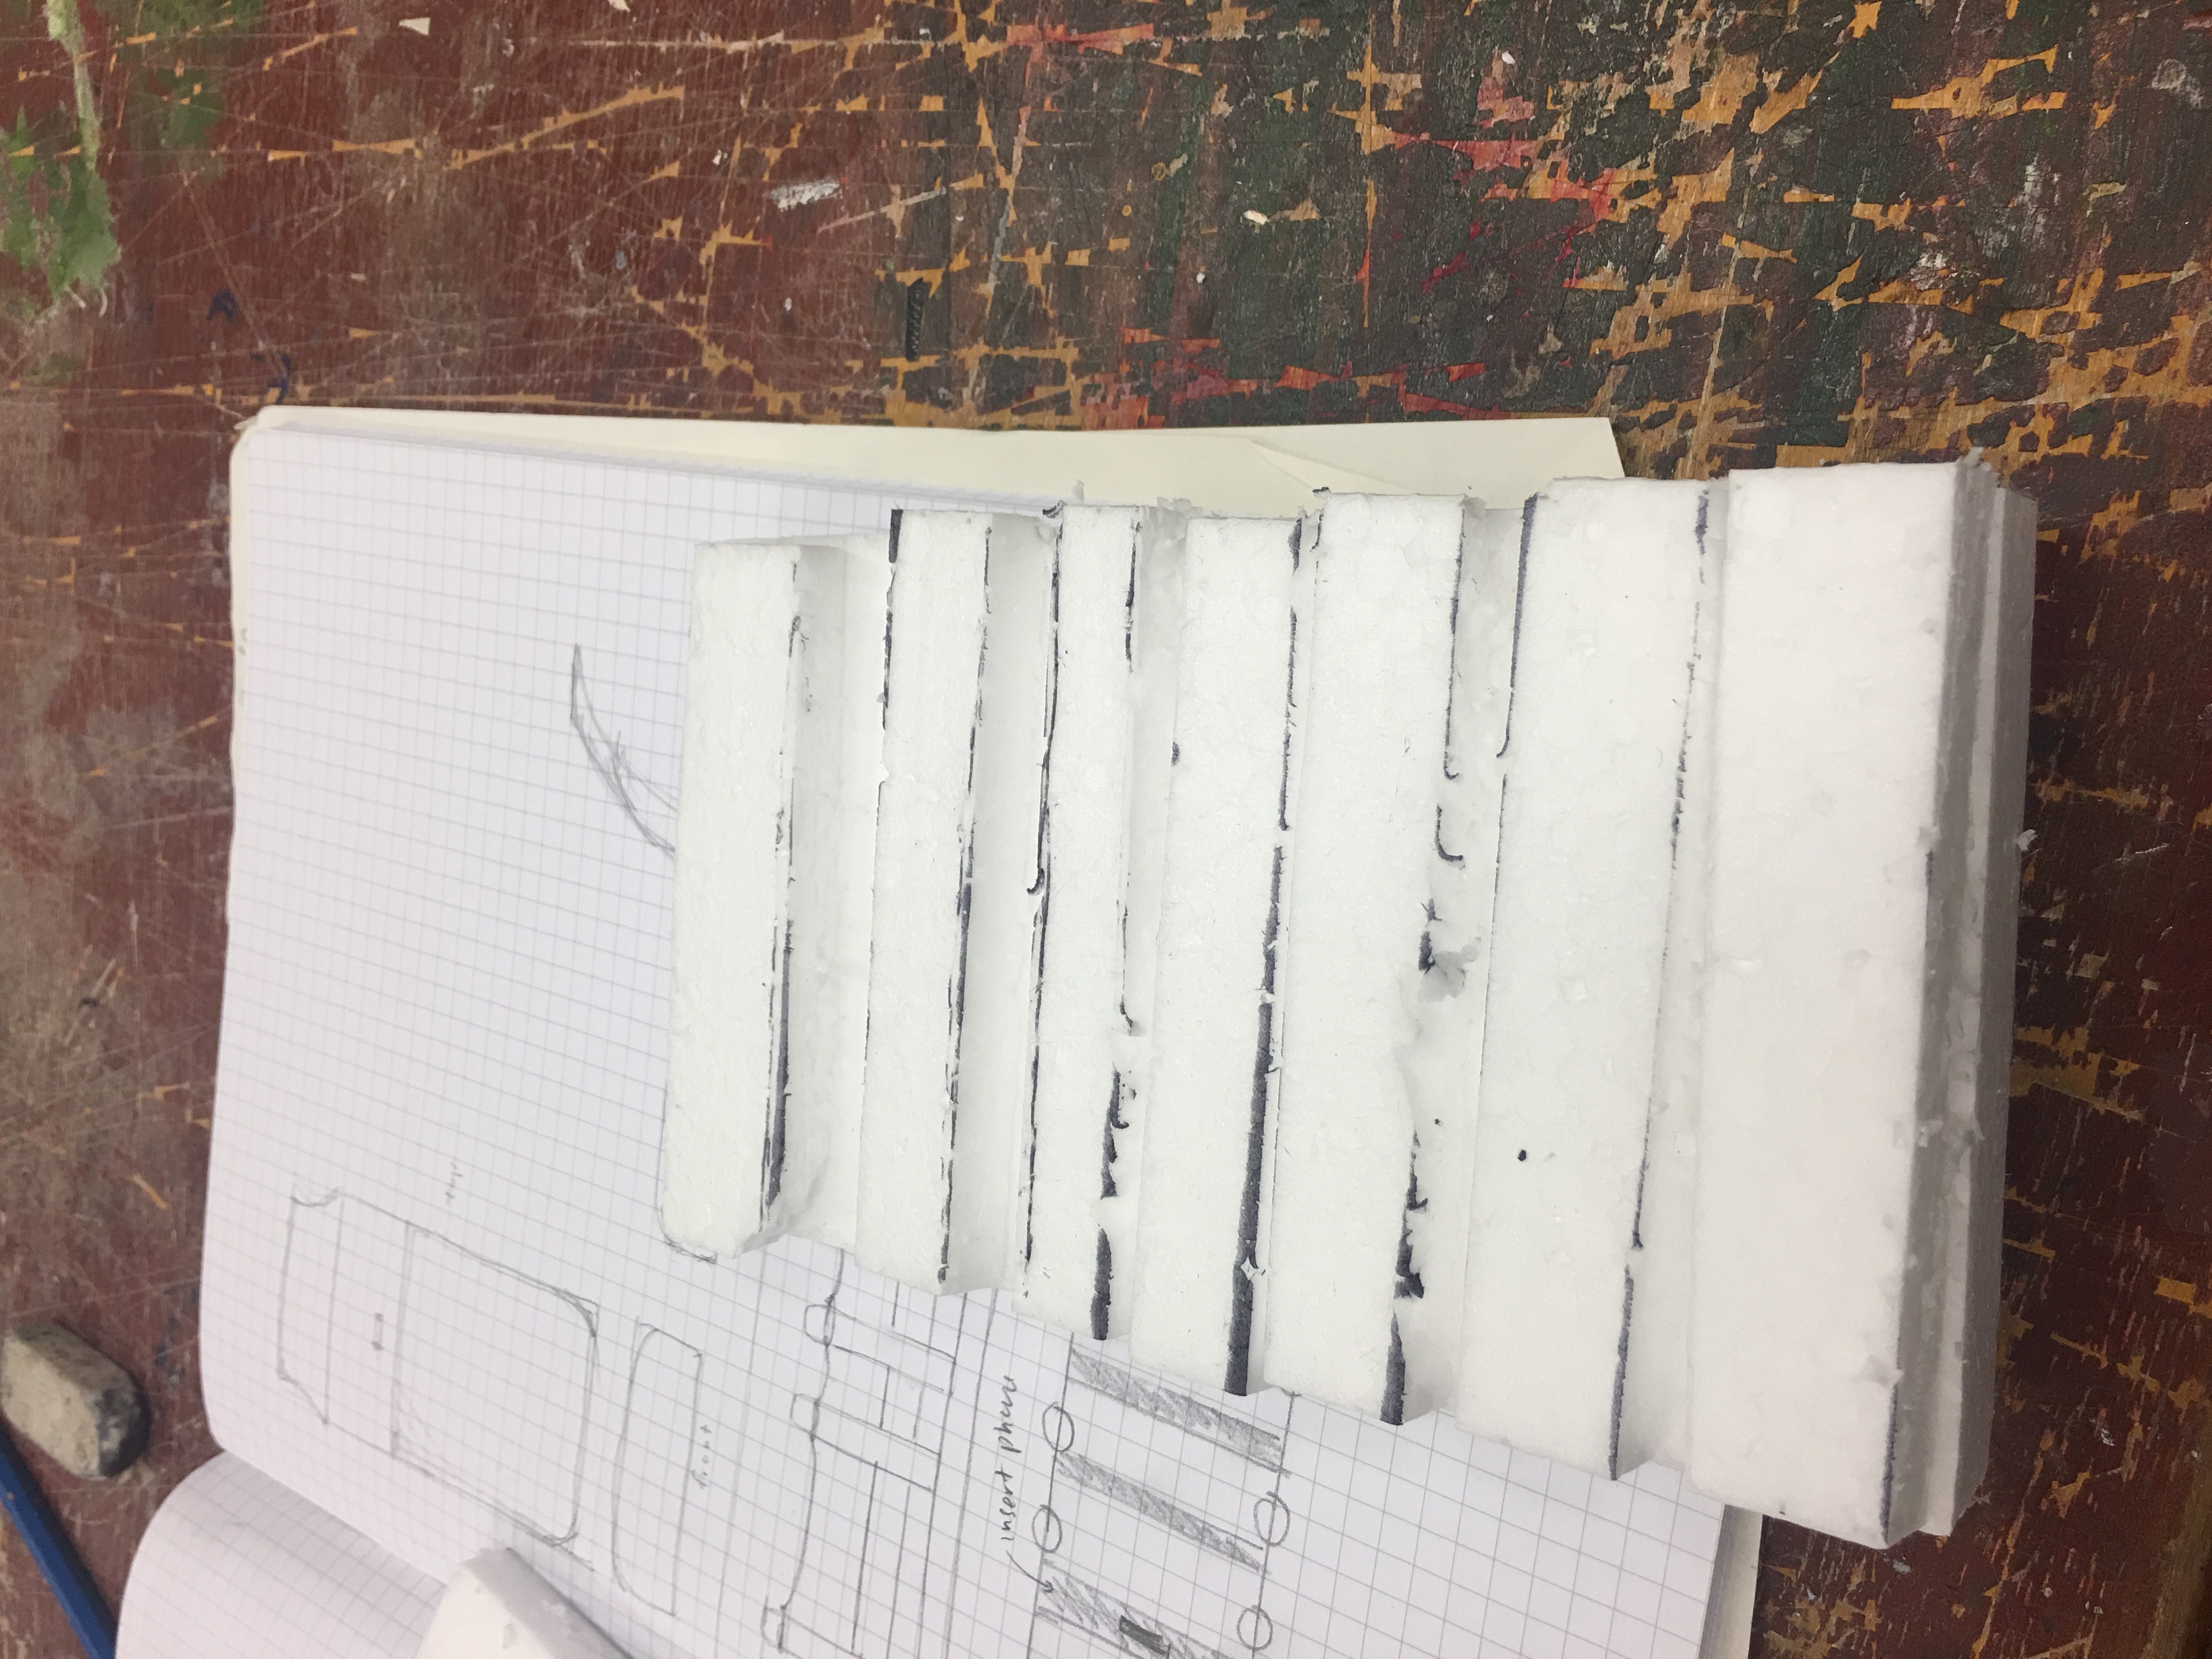 I first cut out the “planks”, and then the beams, I sanded the beams down to misshapen cylinders, too – I didn’t make them very well but I figured that I did not need to strive for complete perfection as this was just a “first draft”. The photos that are thumbnail sized have a smaller phone foam block for a relative size comparison to an actual phone.


Here’s my pdf for the accessory project Zhenyu and I worked on together!: https://www.flipsnack.com/balast/mnemosyne-2.html
I had so much fun doing this project, especially the little photoshoot at the end of it. Thanks to Zhenyu for being such a great partner, and Cheryl for her valuable feedback! If you can’t view the pdf, you can download it here. Thanks for looking! (っ˘ω˘ς )
Here’s my planar exercise and scent model!: https://www.flipsnack.com/balast/mnemosyne-part-1.html
I took really long doing the revisions and making the pdf look nice so that it’s easier on Cheryl’s (really overworked and tired) eyes.
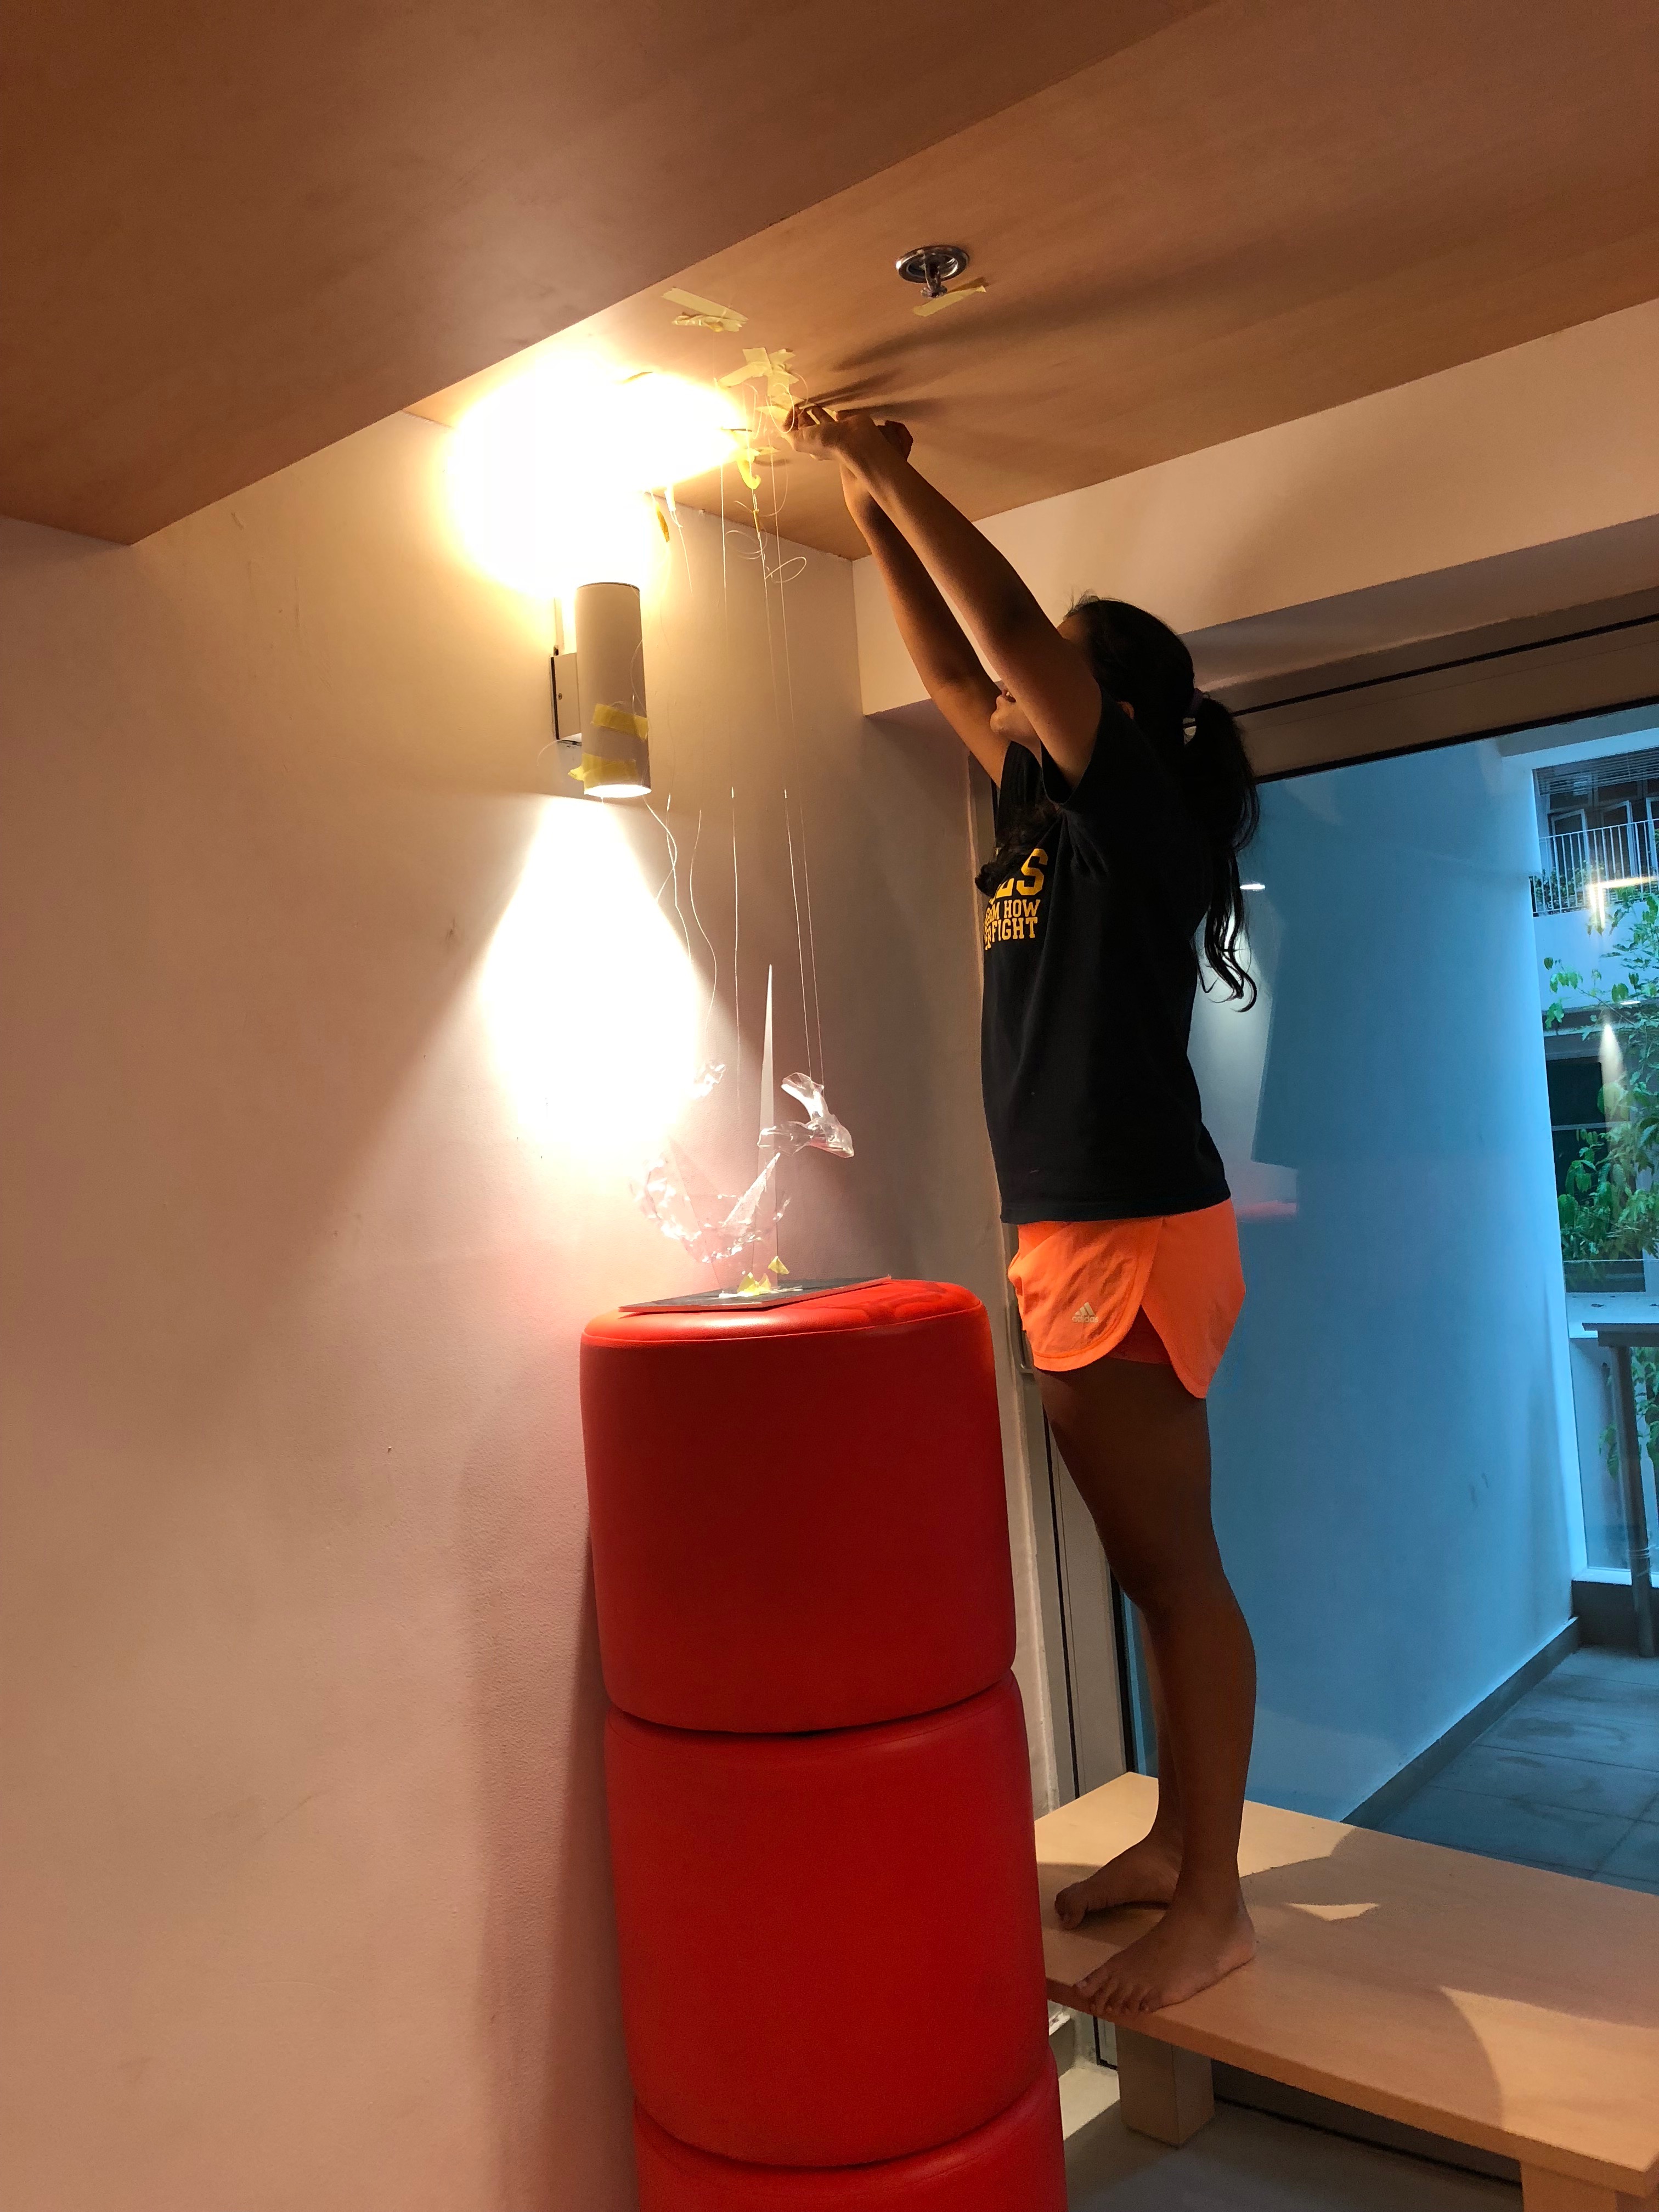
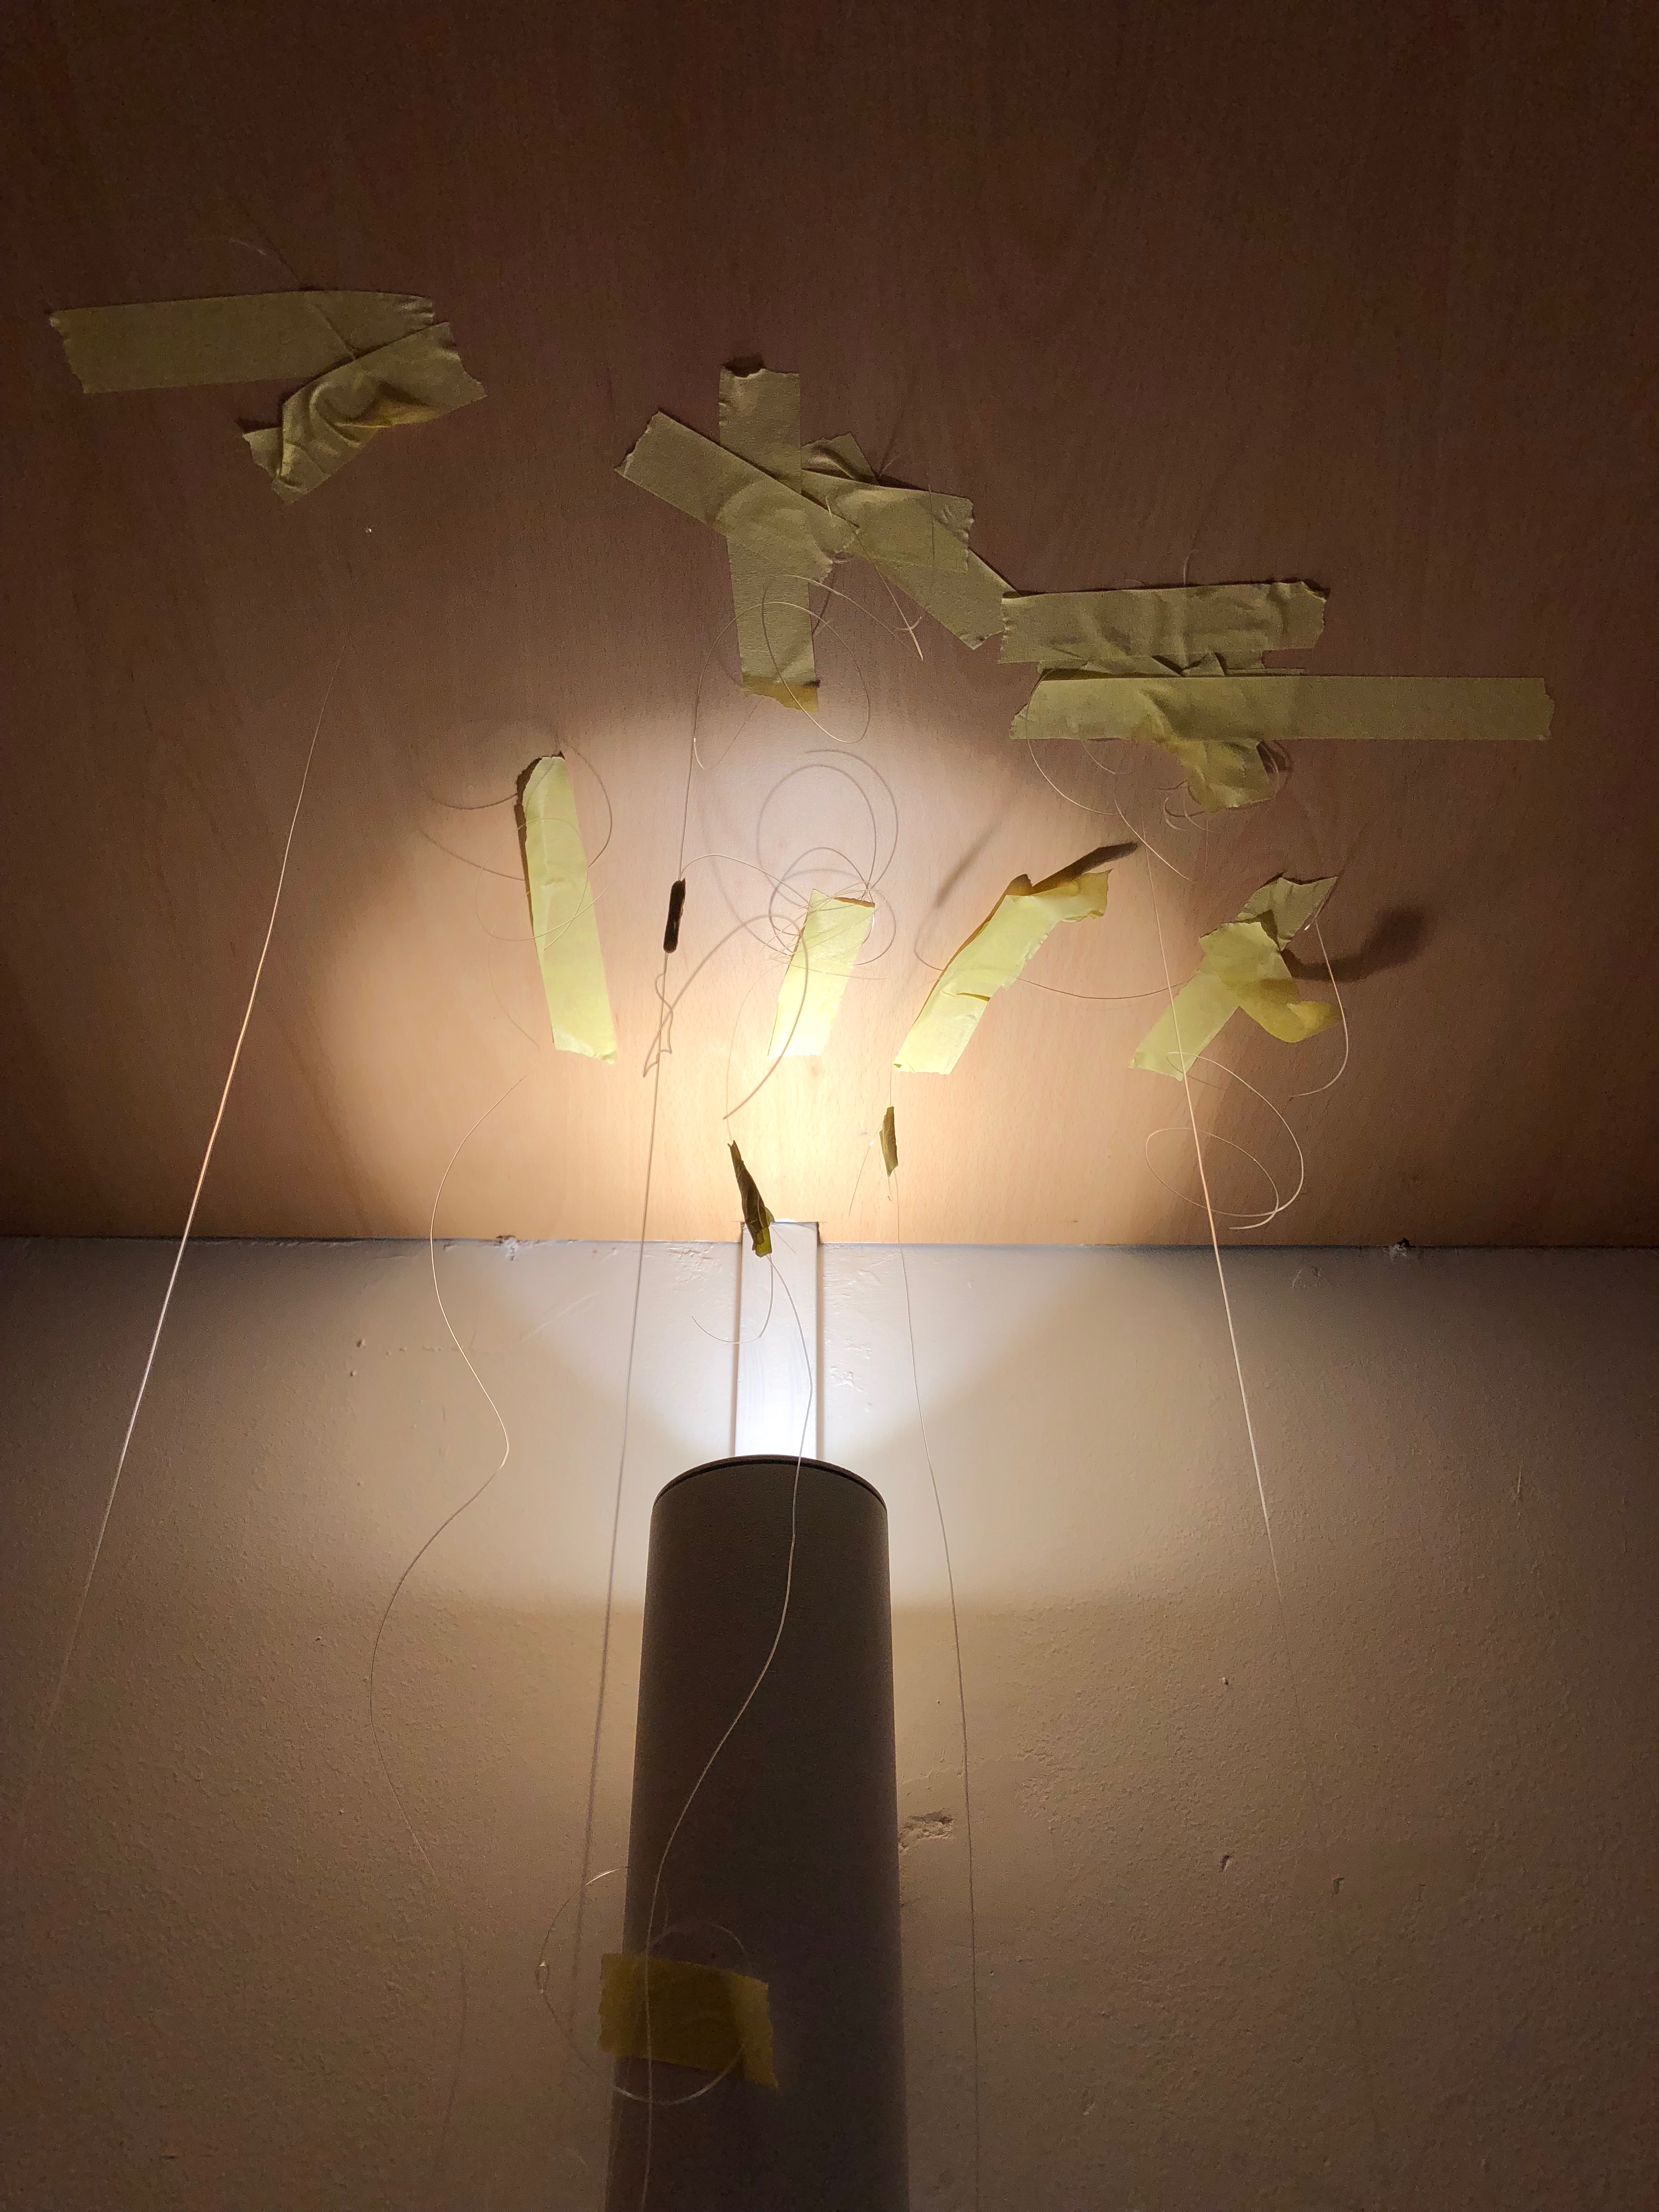
If you’re wondering how the set up for the scent model photoshoot looks like, I set it up in my hall’s lounge room like so! If the flipbook doesn’t work, you can also download the pdf here. Thanks for reading (≖ᴗ≖✿)


The mood box follows the sound analysis of the piece, with the SO pieces placed in between the D pieces like in the actual sound piece. There are also 4 wave like D pieces to imitate the 4 ‘tings’ of the dominant sound, and 2 SO pieces like in the sound analysis.


Close ups of SD piece:

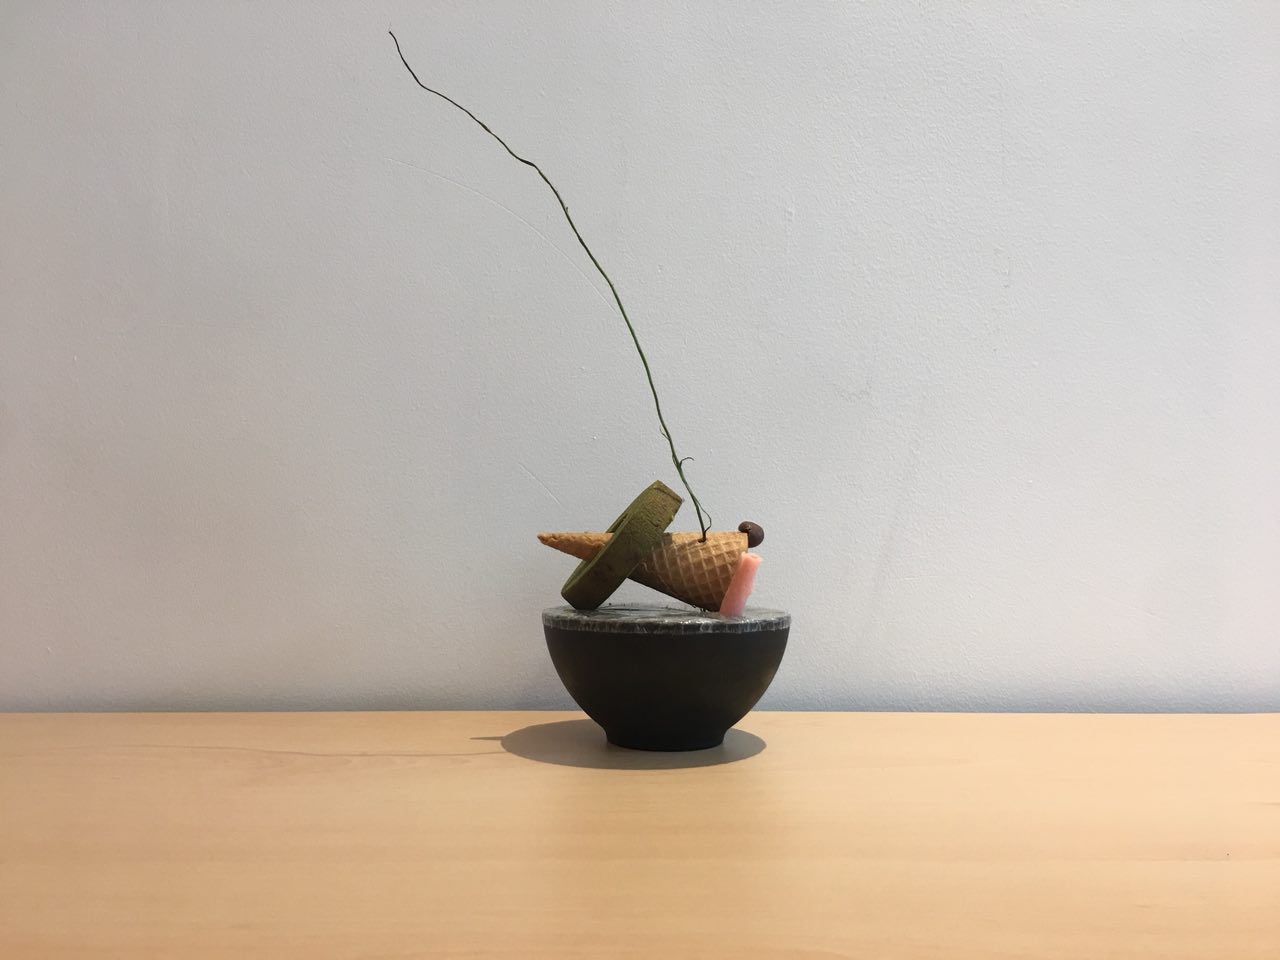
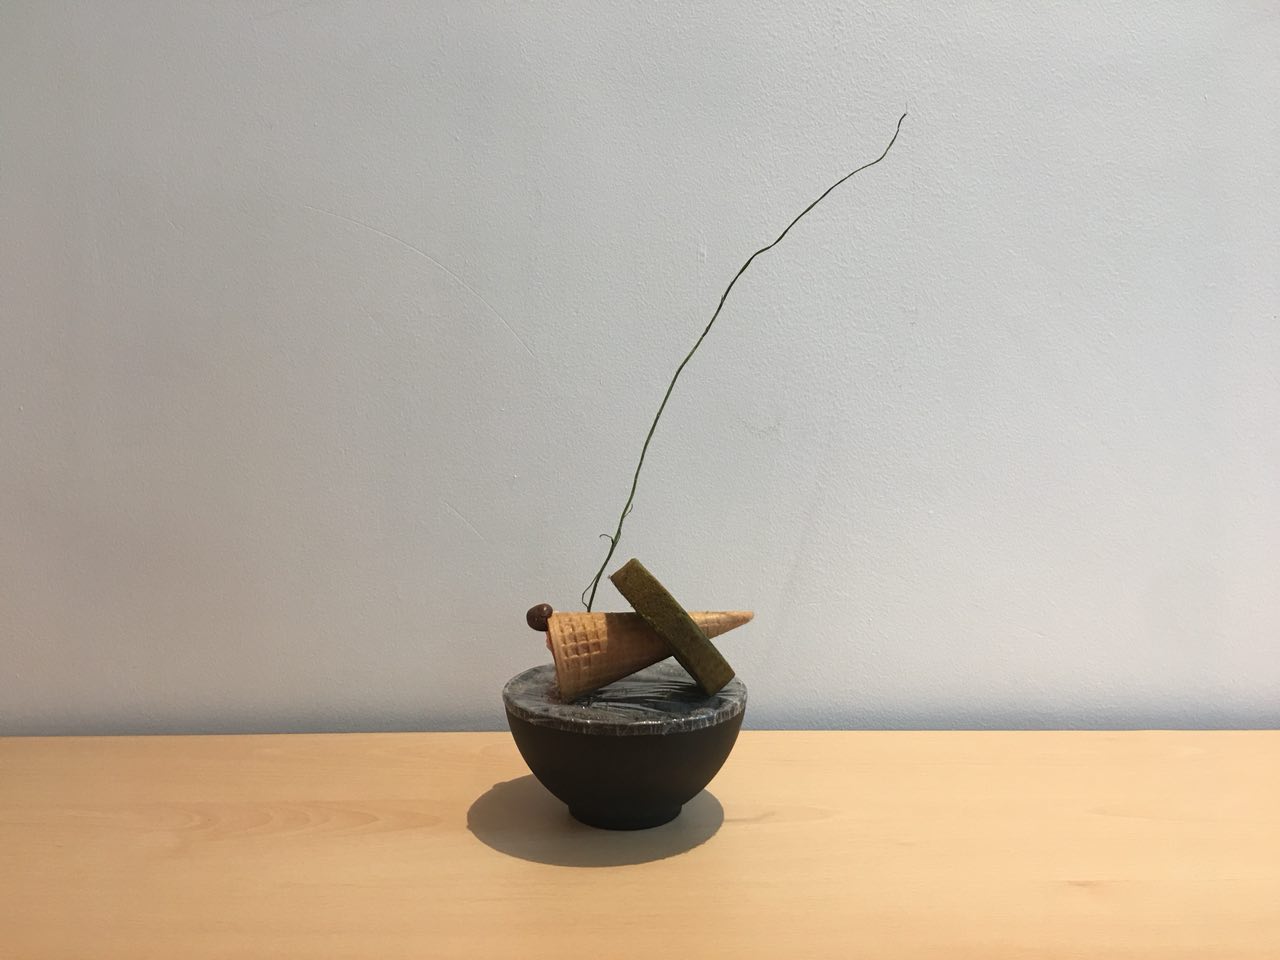
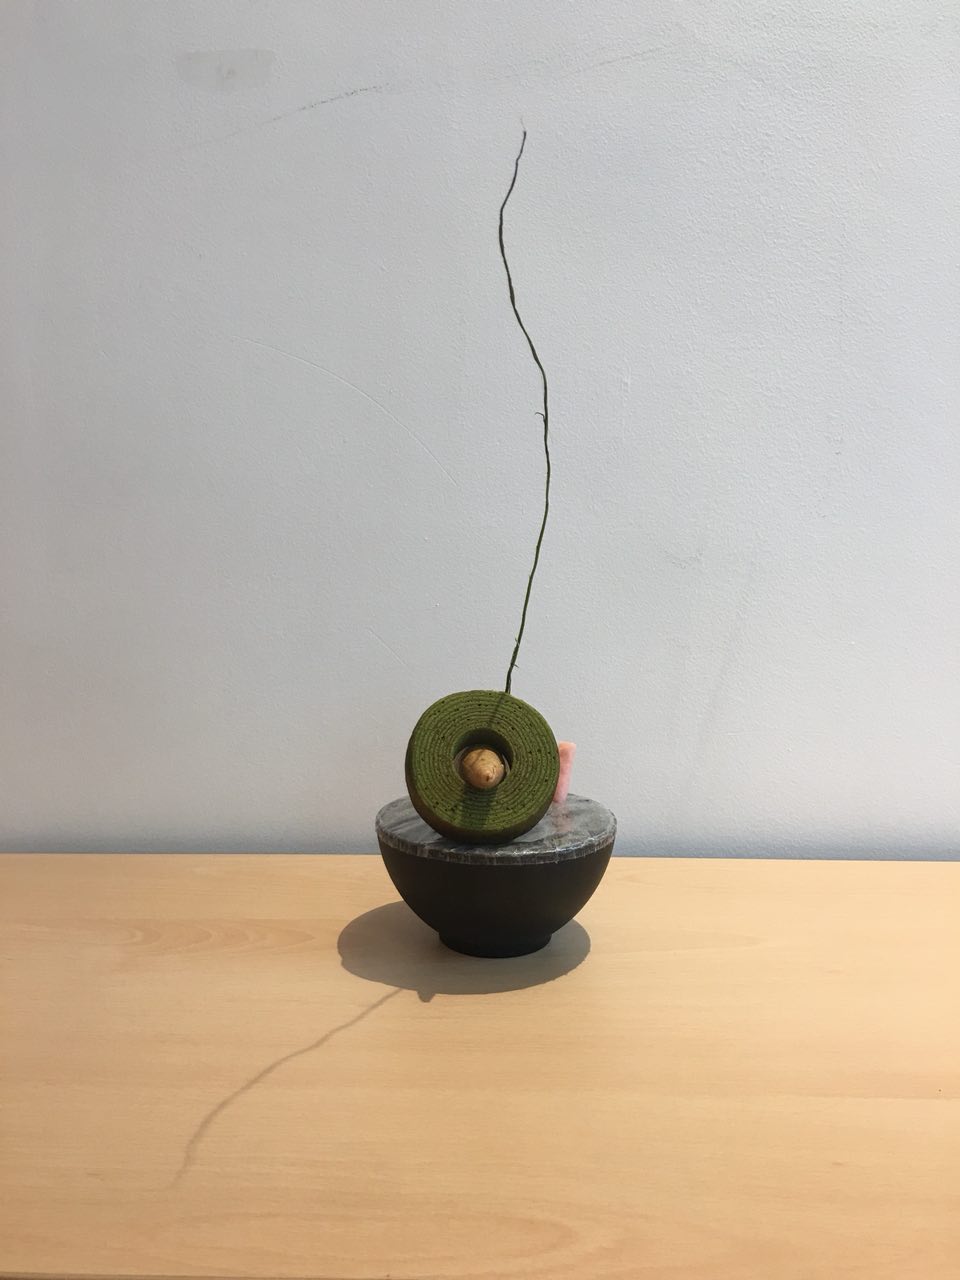
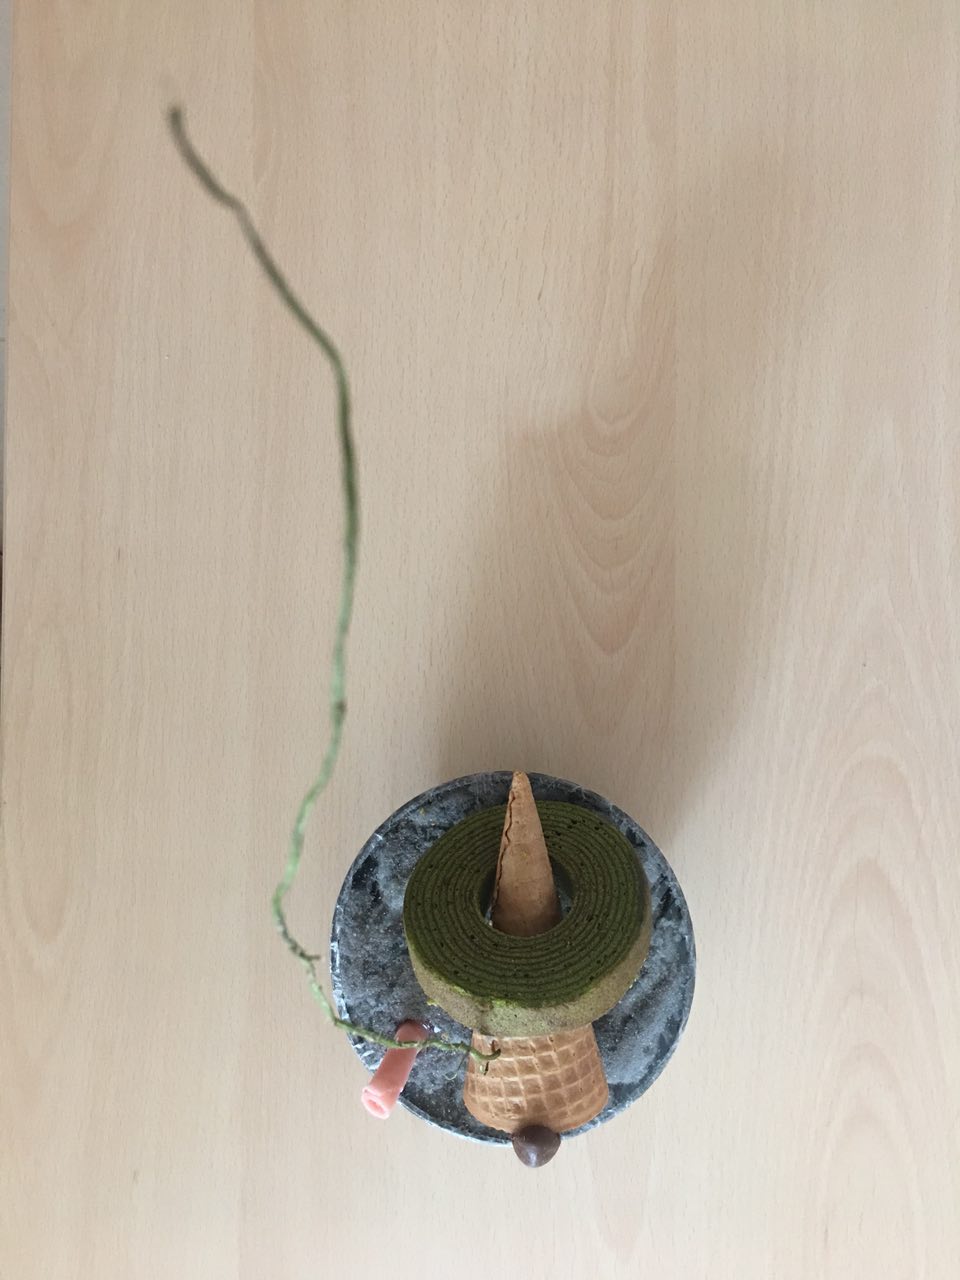
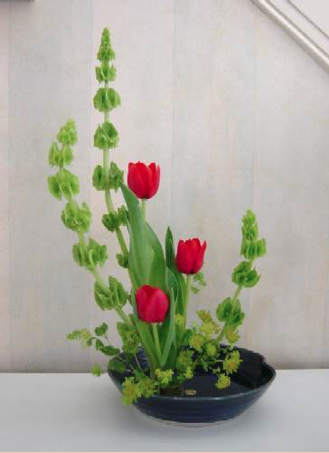
Spring sculpture 1:


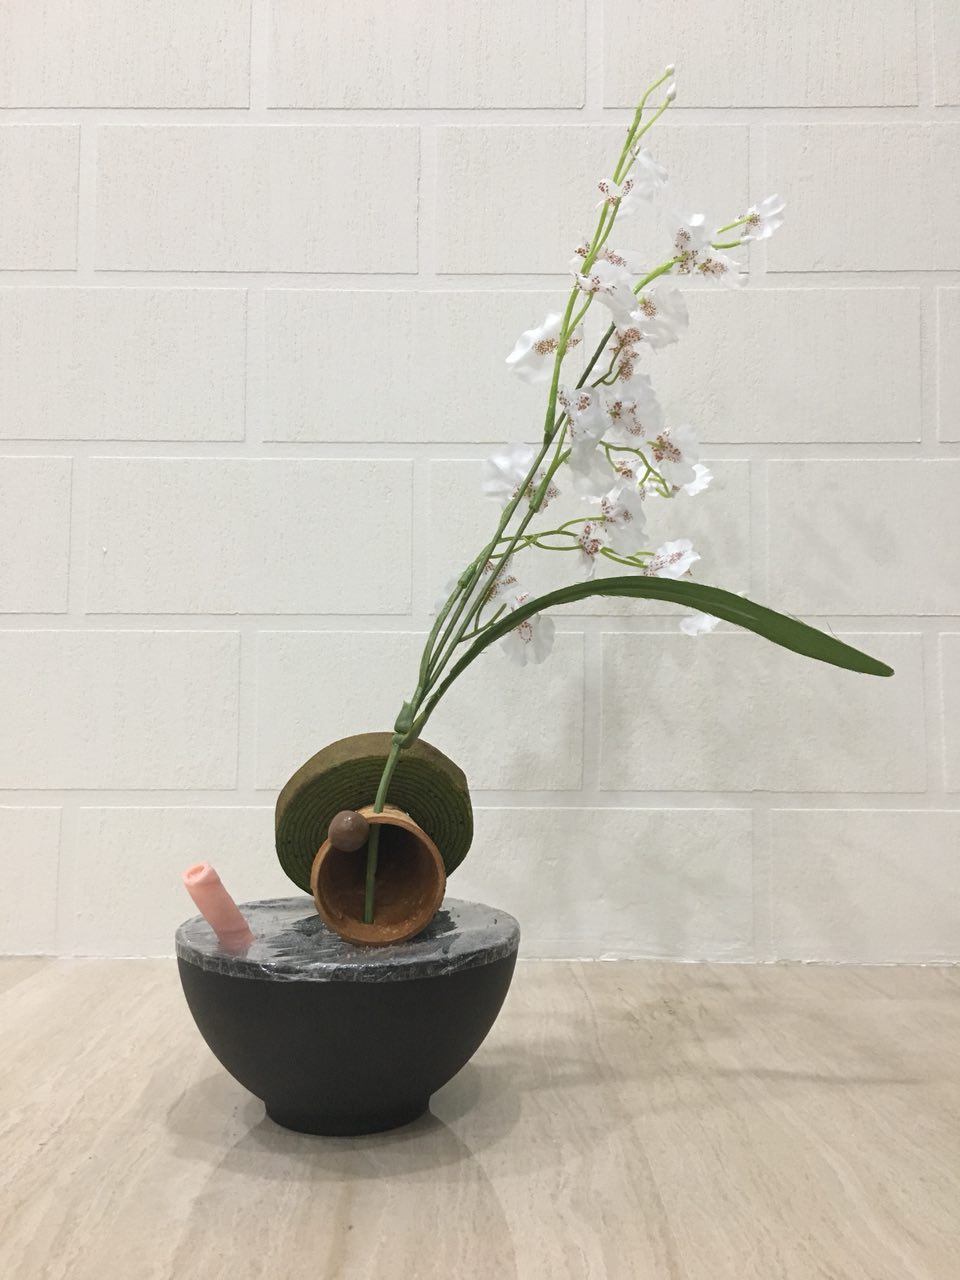
D: Orchid branch // SDs: Ice cream cone and matcha ring cake // SOs: Pink wafer cone and Hershey’s chocolate ball
Techniques used:
Critique in class:
Spring sculpture 1: Revised edition
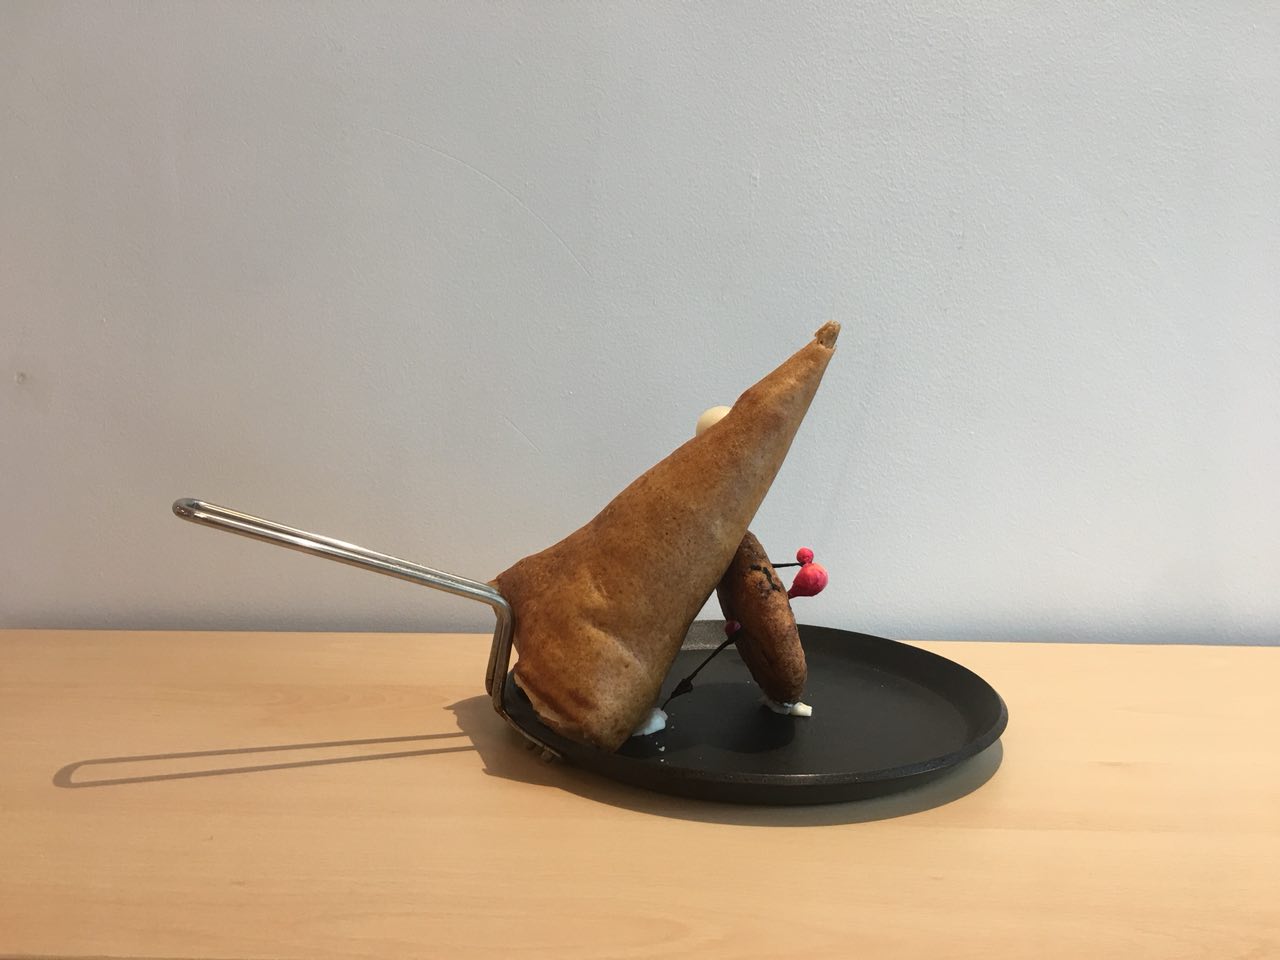
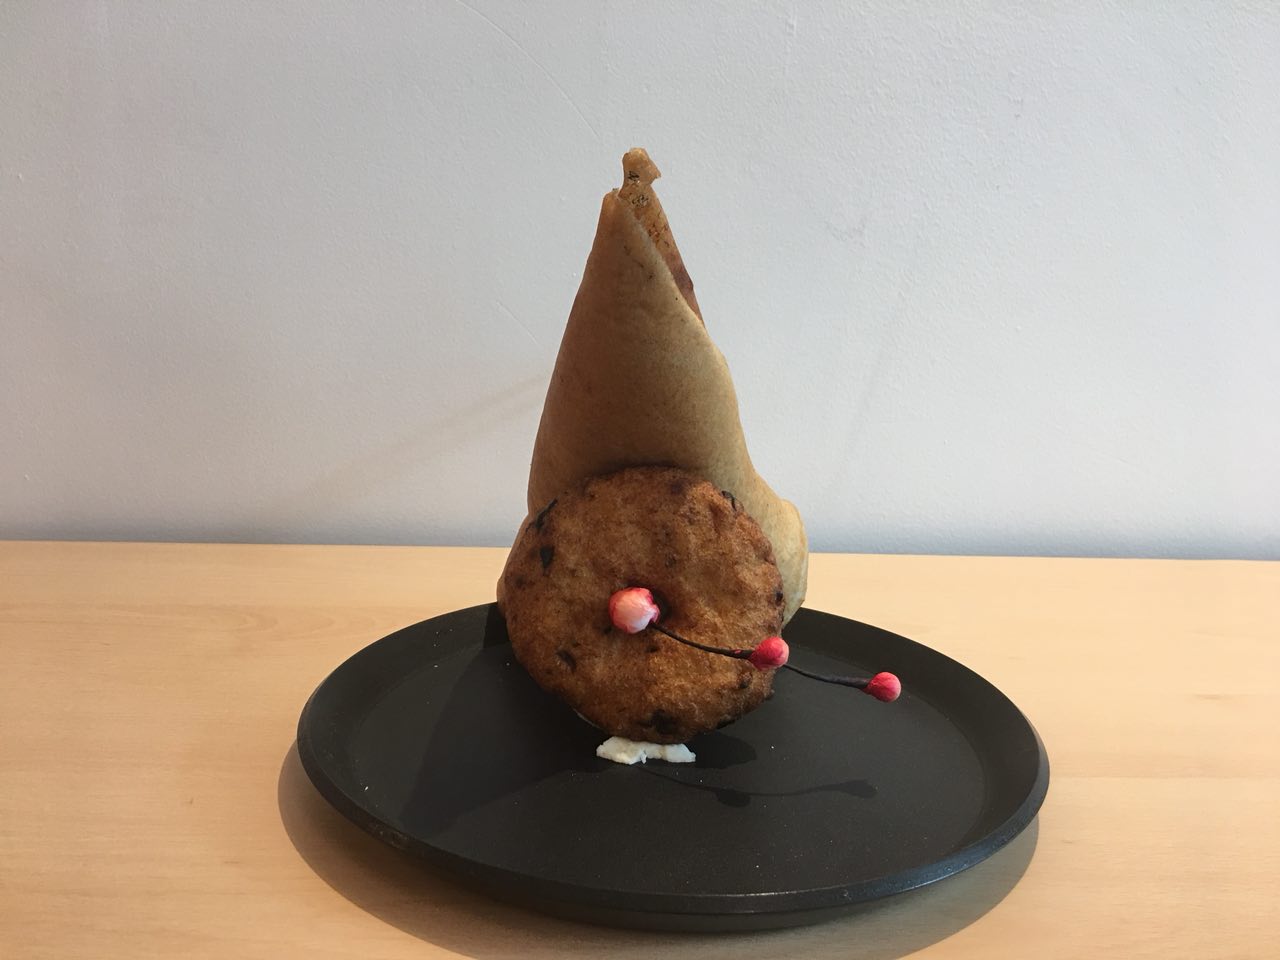
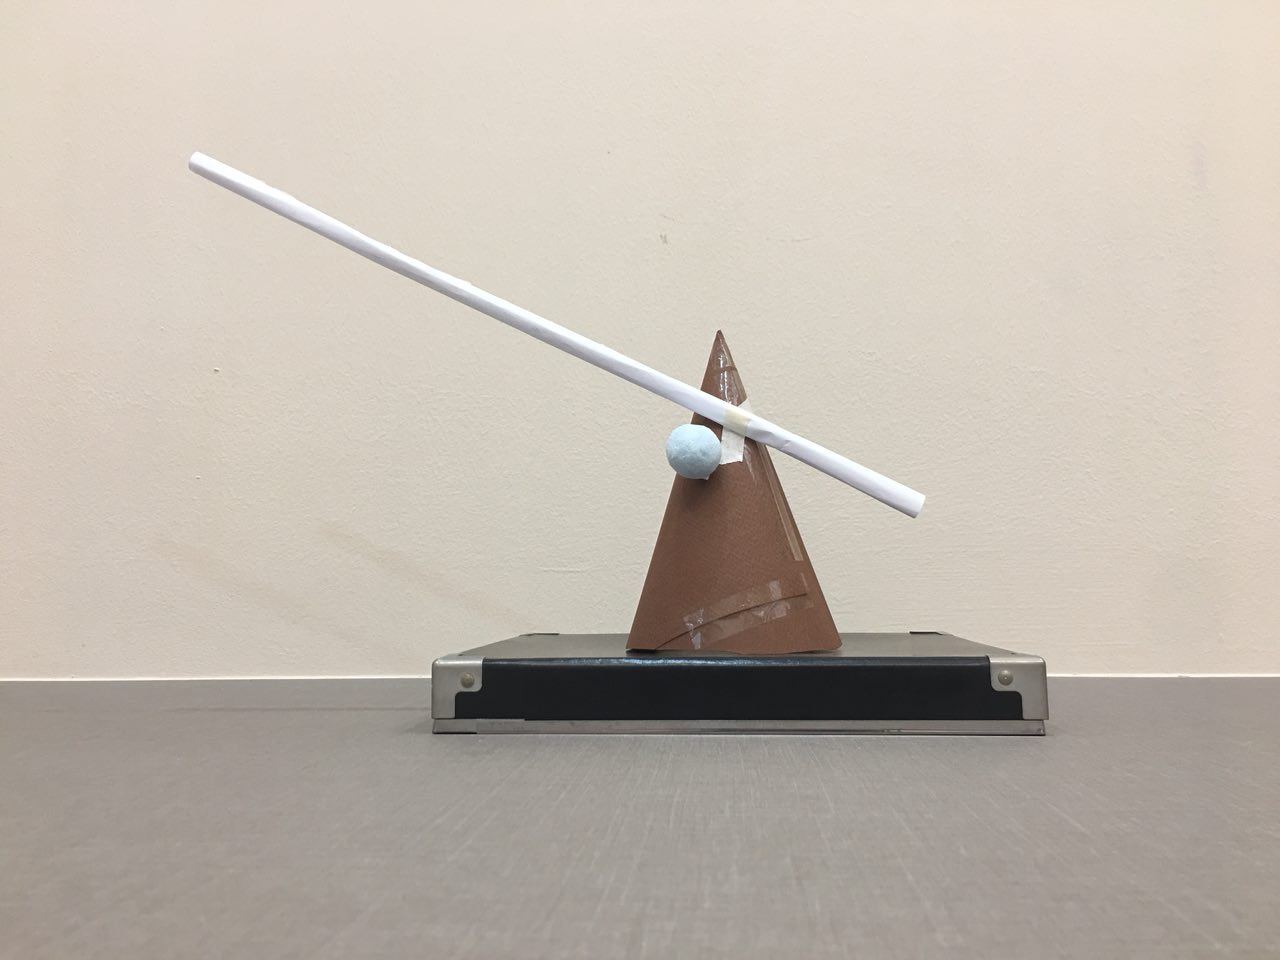
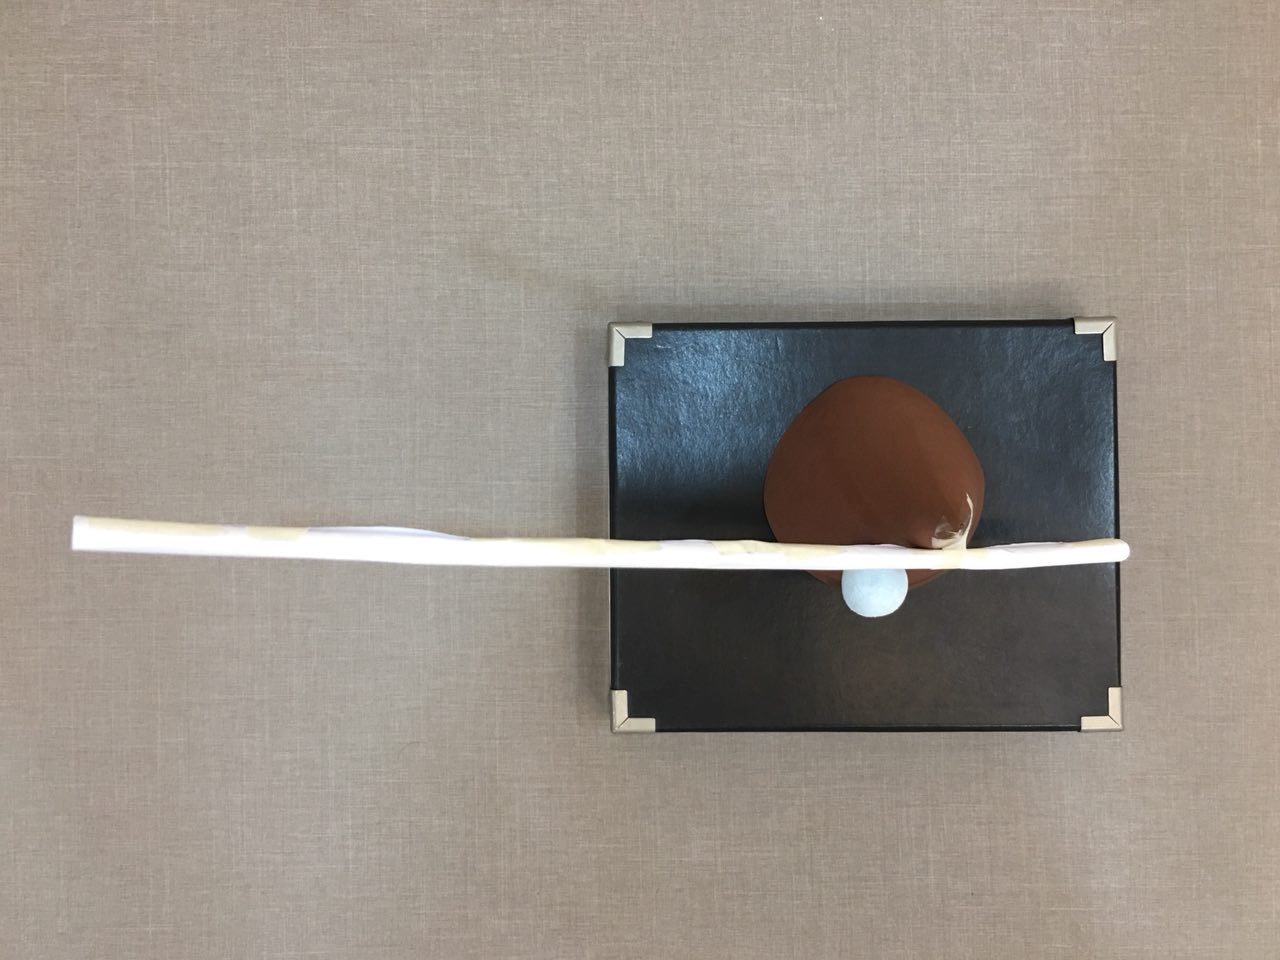
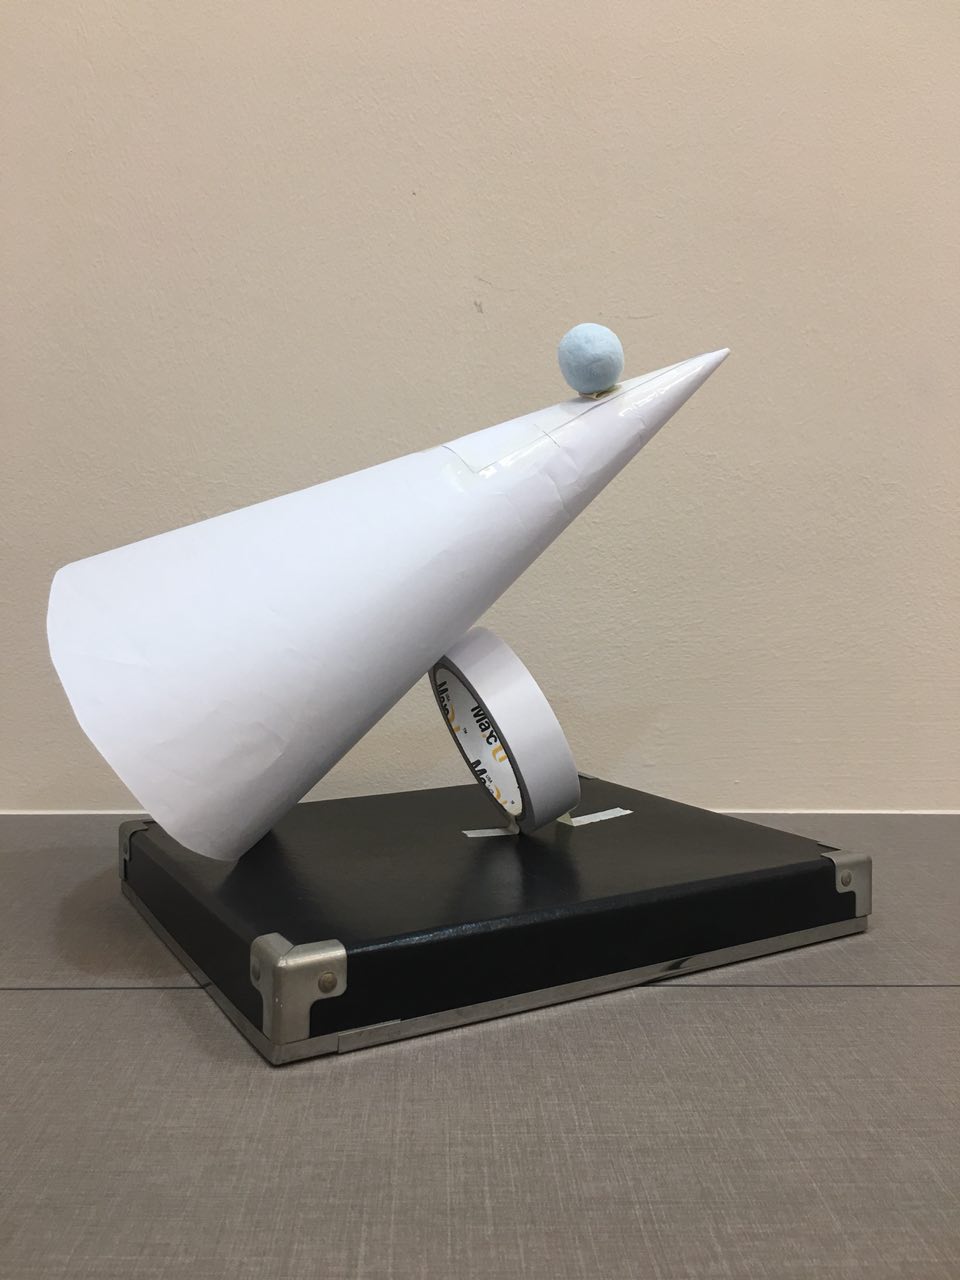
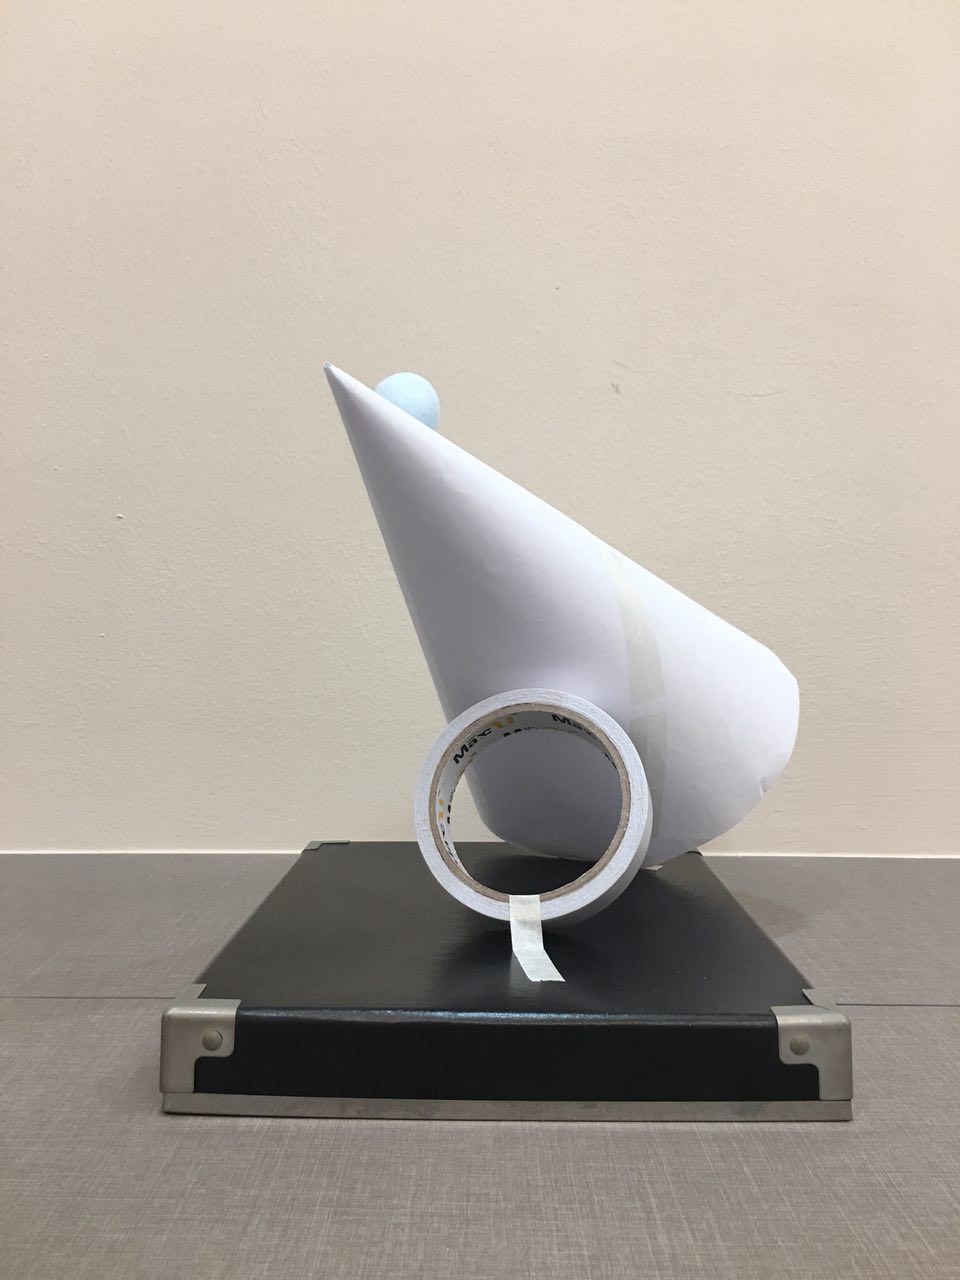
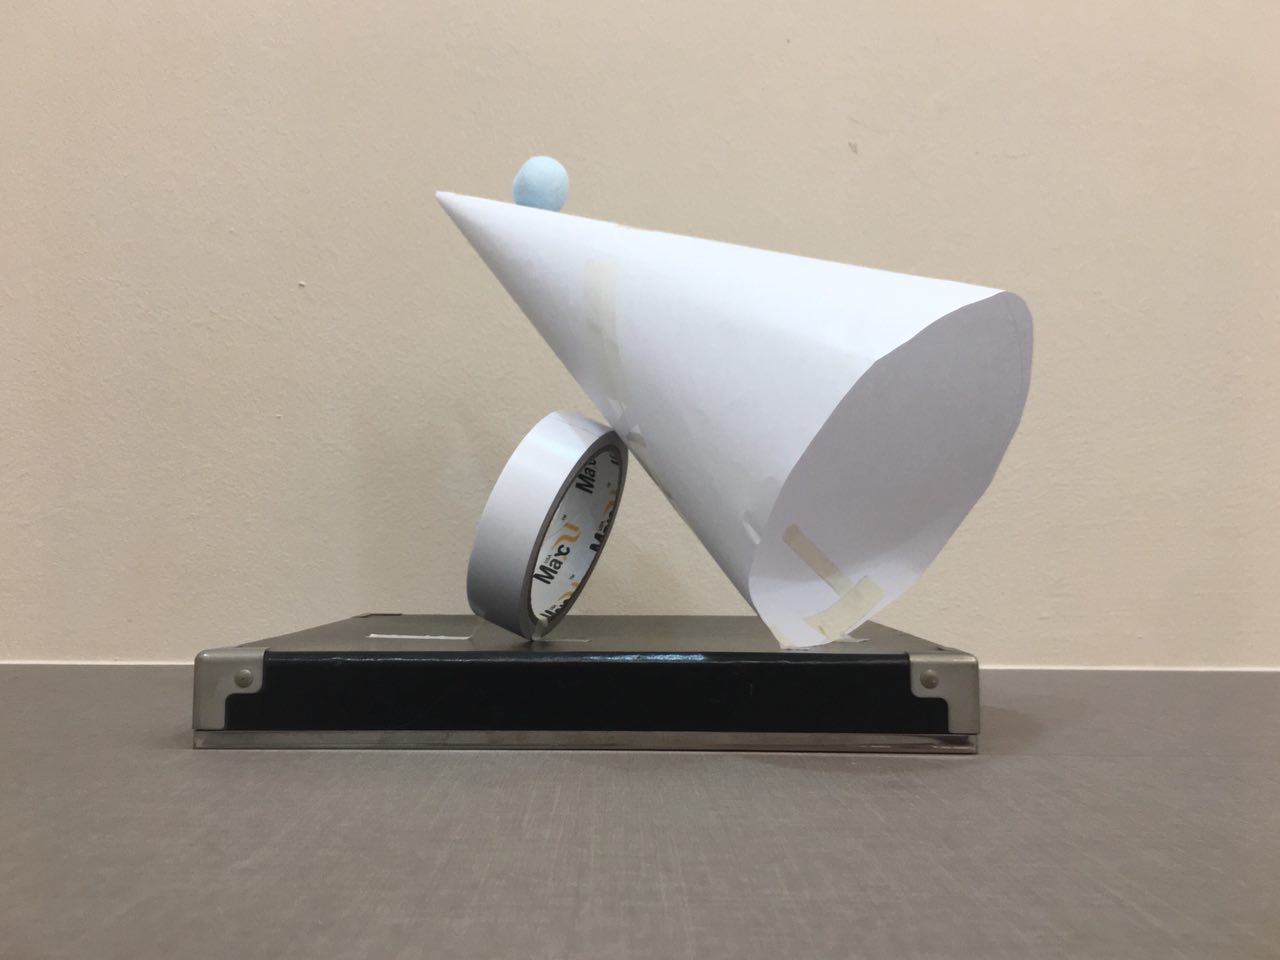
Next, we have spring sculpture 2, made of Indian food! I meant to have the saucepan as the base to be indicative of the tools that was used to make the dominant. Furthermore, the handle was vital to having the dominant cone be able to balance at the 30 degree angle.
Spring sculpture 2:
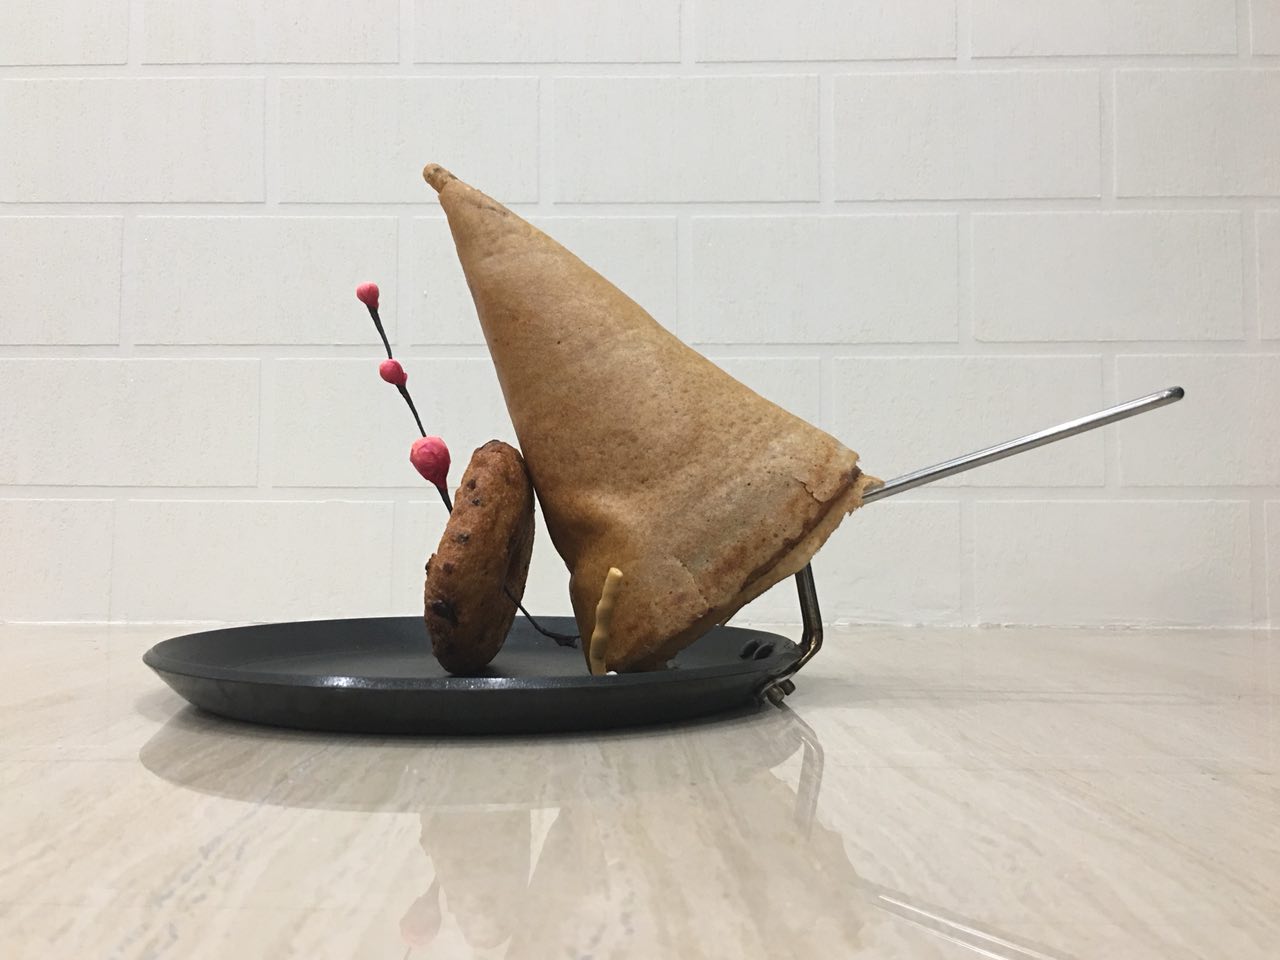
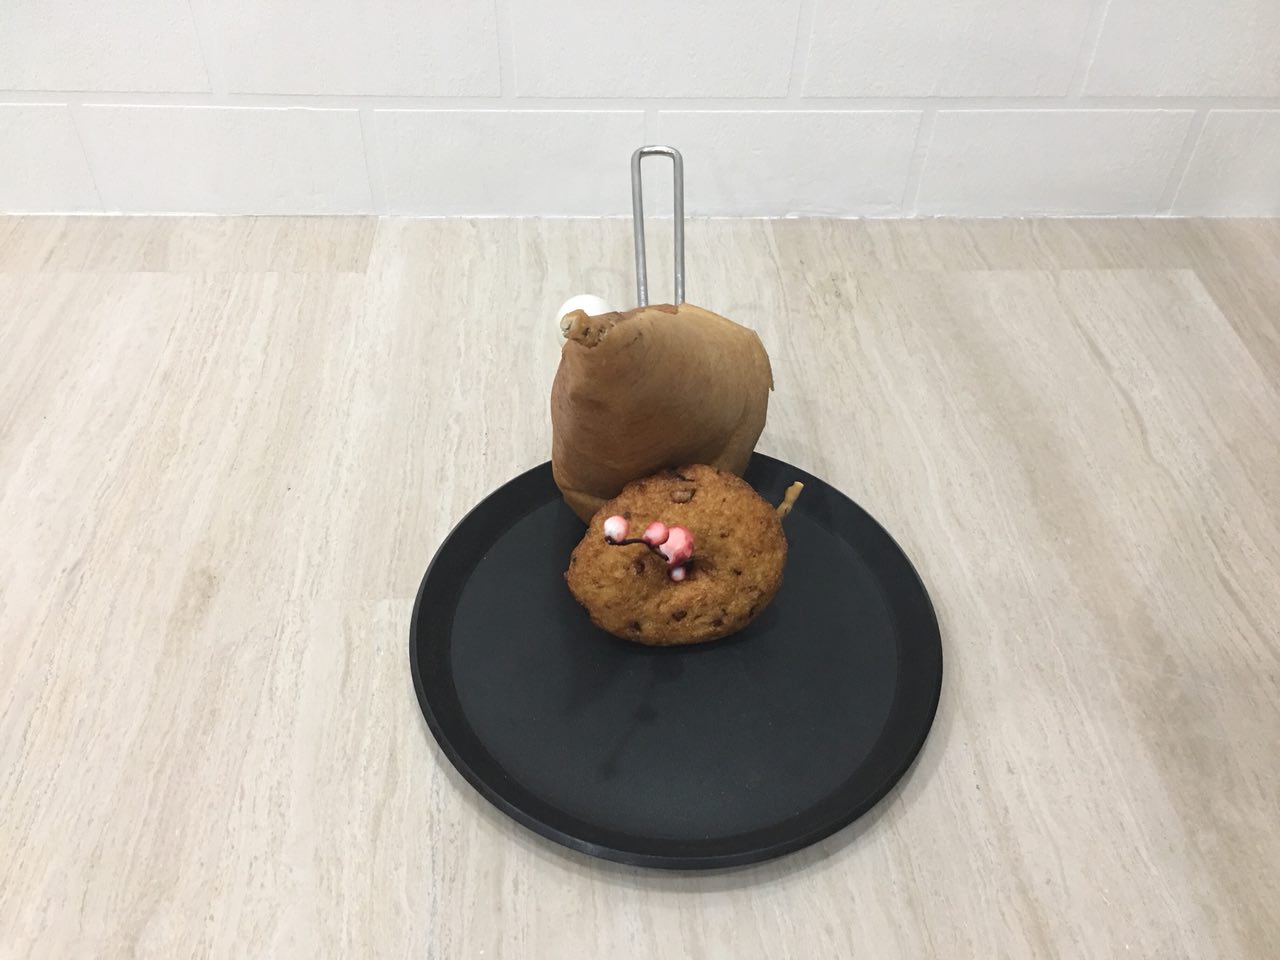
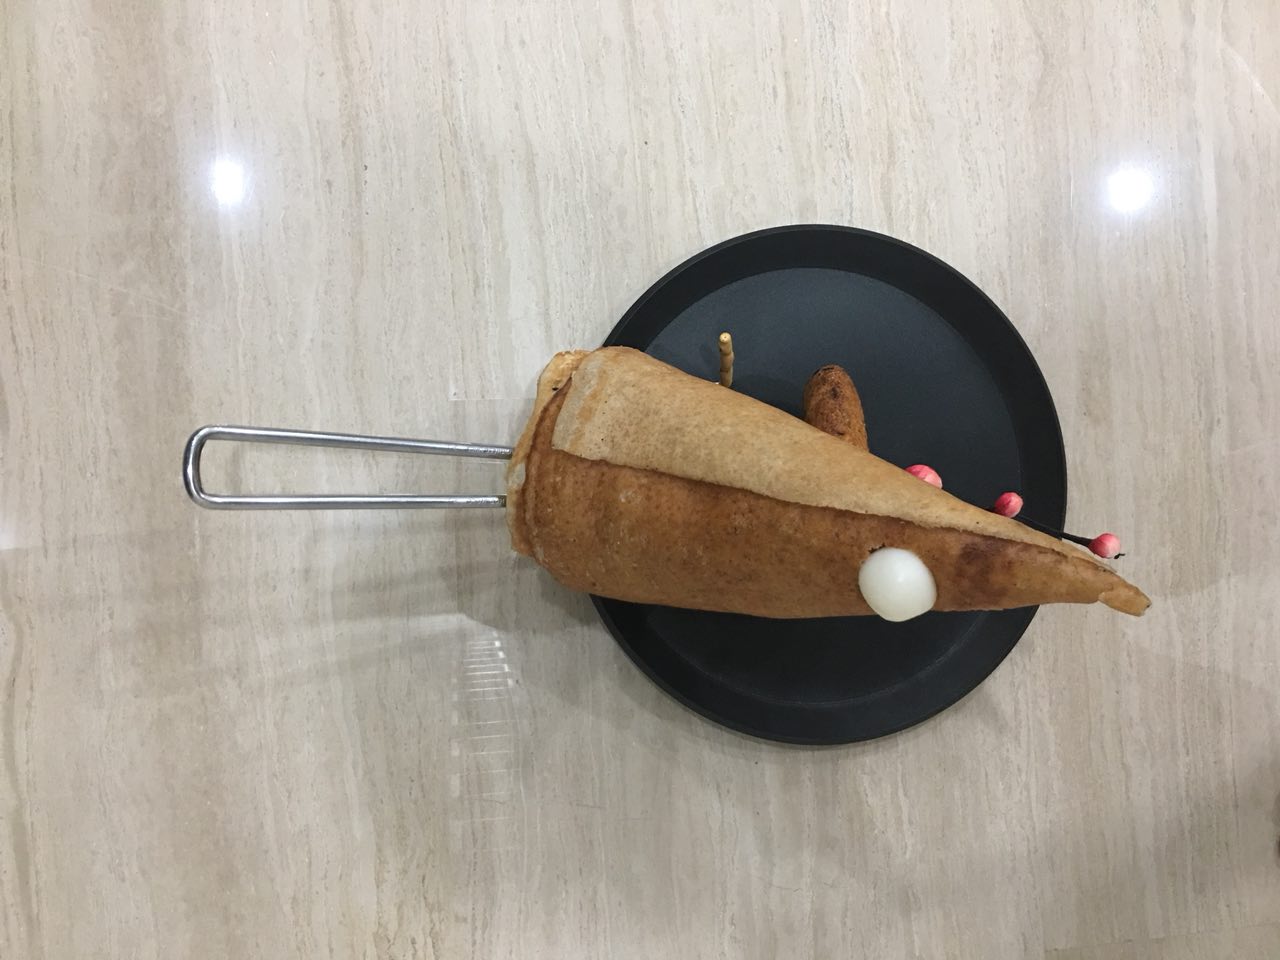

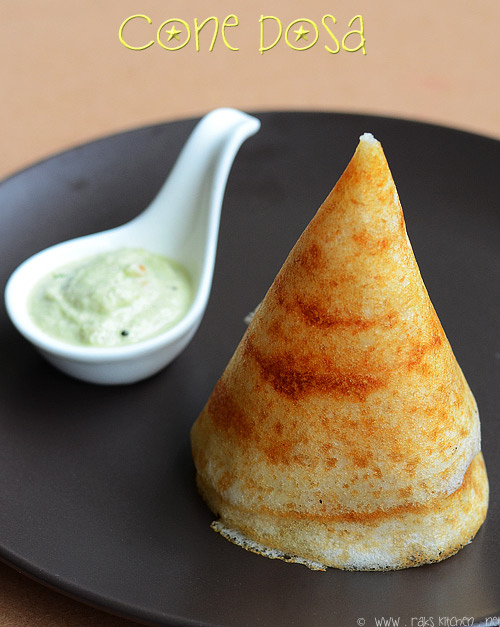
D: Cone dosai // SD: Cylindrical vadai and branch passing through cylindrical vadai // SOs: Spherical kozhukattai and indian biscuit
Techniques used:
Critique:
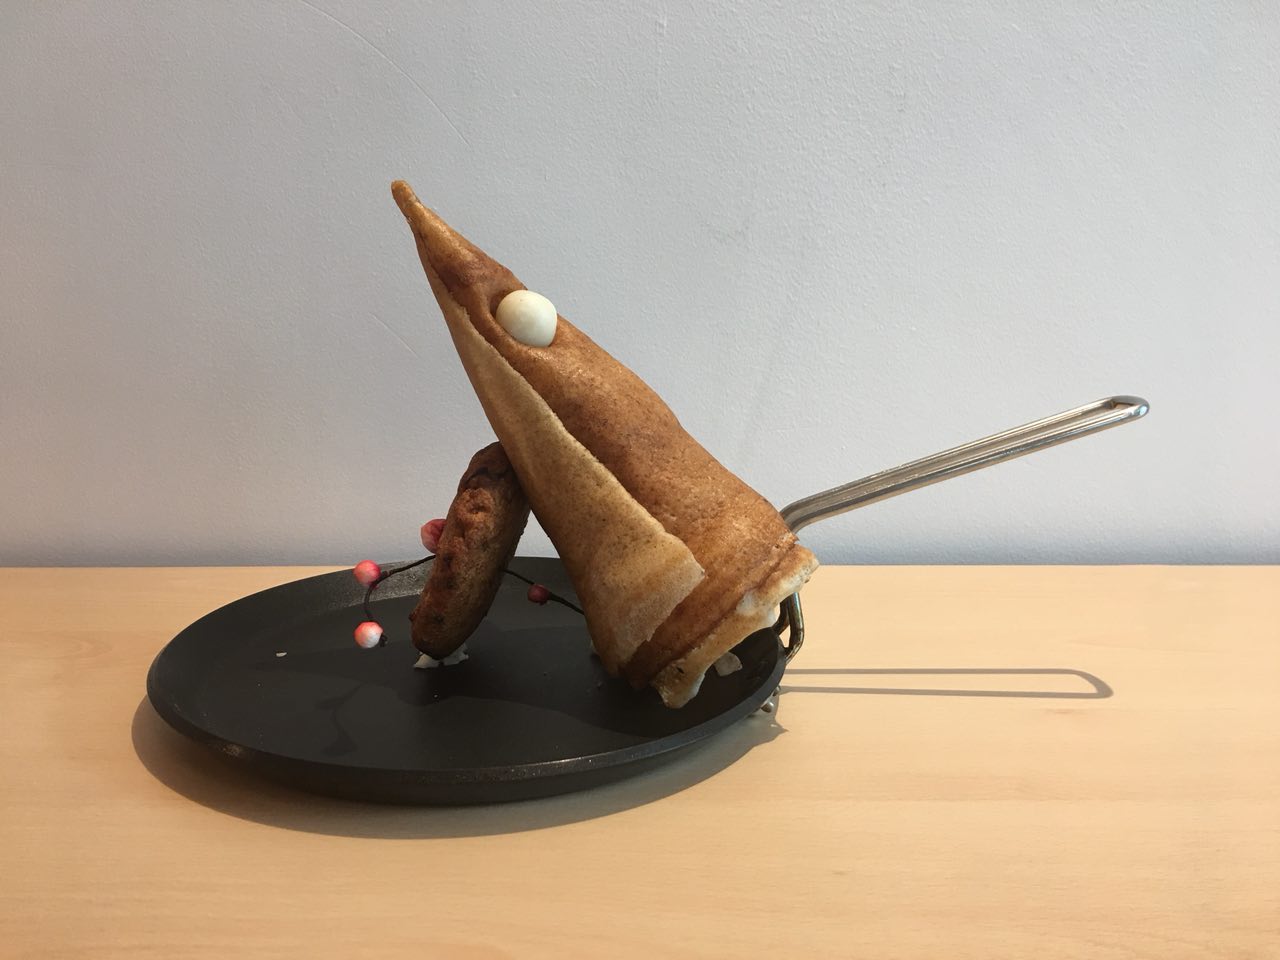
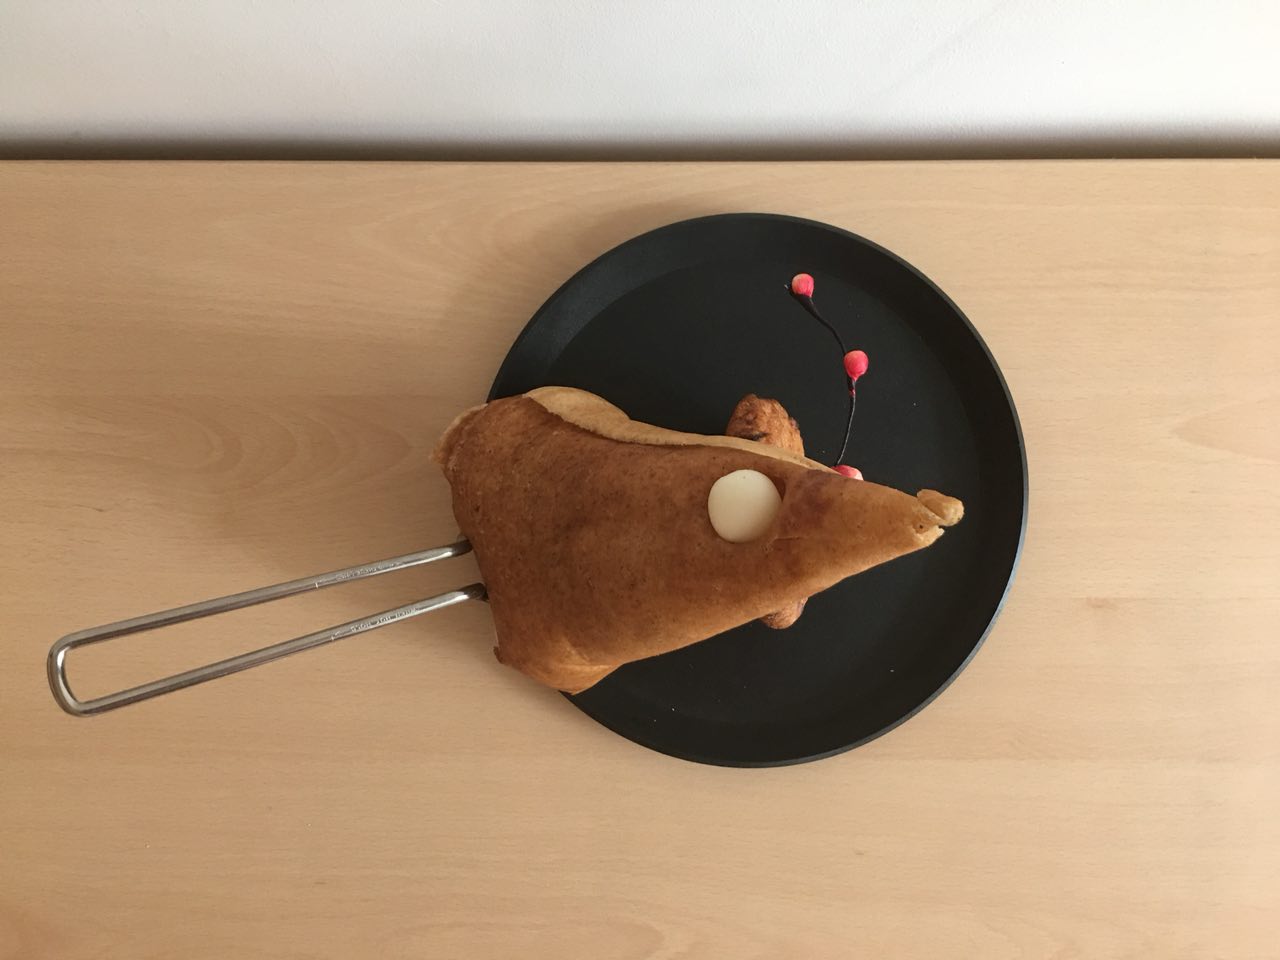
Spring sculpture 2: Revised edition
Reflection
At first, I was scared about the project brief mentioning that none of the axises could be parallel or perpendicular to the horizontal ground. However, I learned a lot about counterbalance from this challenge and how to get shapes that weren’t as easy to balance as rectilinear forms to stay in the place where I wanted them to be (っ˘ω˘ς )
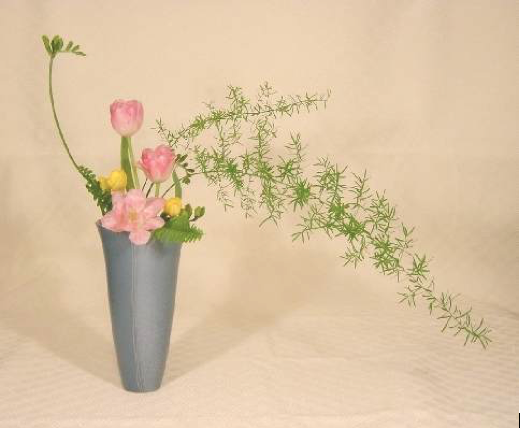
I really enjoyed learning about the art of Ikebana and using those principles in my own sculptures. I felt like I explored a lot of new territory with having the branches at specific angles, and enjoyed the visual effect it created as well.
I also learned to truly look at the whole sculpture, from the learning experience with the Indian food sculpture’s base handle being significant in the overall composition as well. Regardless of whether I had meant for the pan’s handle to be part of the 5 D, SD and SO elements, I realized that intention doesn’t really hold up to visual qualities, and learned to tweak the composition such that it could then be included upon this realization.
Lastly, I really felt like a cook after making all the Indian food, and it was even more fun to play with it to make my sculpture. I hope the smell of it didn’t make anyone too hungry in the morning (*≧ω≦*)

The theme I got was… spring! (o˘◡˘o)

I was super happy when I found out I was getting this season because I love spring and all that it symbolizes. I made a mindmap to work out the nuances in the season, and to set a direction for my final models.

The scene I was particularly inspired by for my color palette were these scenes from Bambi, like I have mentioned in my mindmap.
In my mindmap, I thought about what spring meant to me – renewal and rebirth. But in order to make the sculptures personal to me, I thought about when I feel renewed when I eat food: in the morning, when I start my day with Indian food, and desserts at night when I’m rushing assignments. I further broke desserts down into 3 main categories: cake, ice cream and chocolate. This was the point in time when I decided to make two sculptures to represent both of these ideas.
Next, I had to decide on which Indian foods and desserts to use, and how to make some of them.
Some preliminary research on Indian food:

(From left to right)
Photo 1: Dosai (Cone) – Pan fried pancake made from rice and black gram
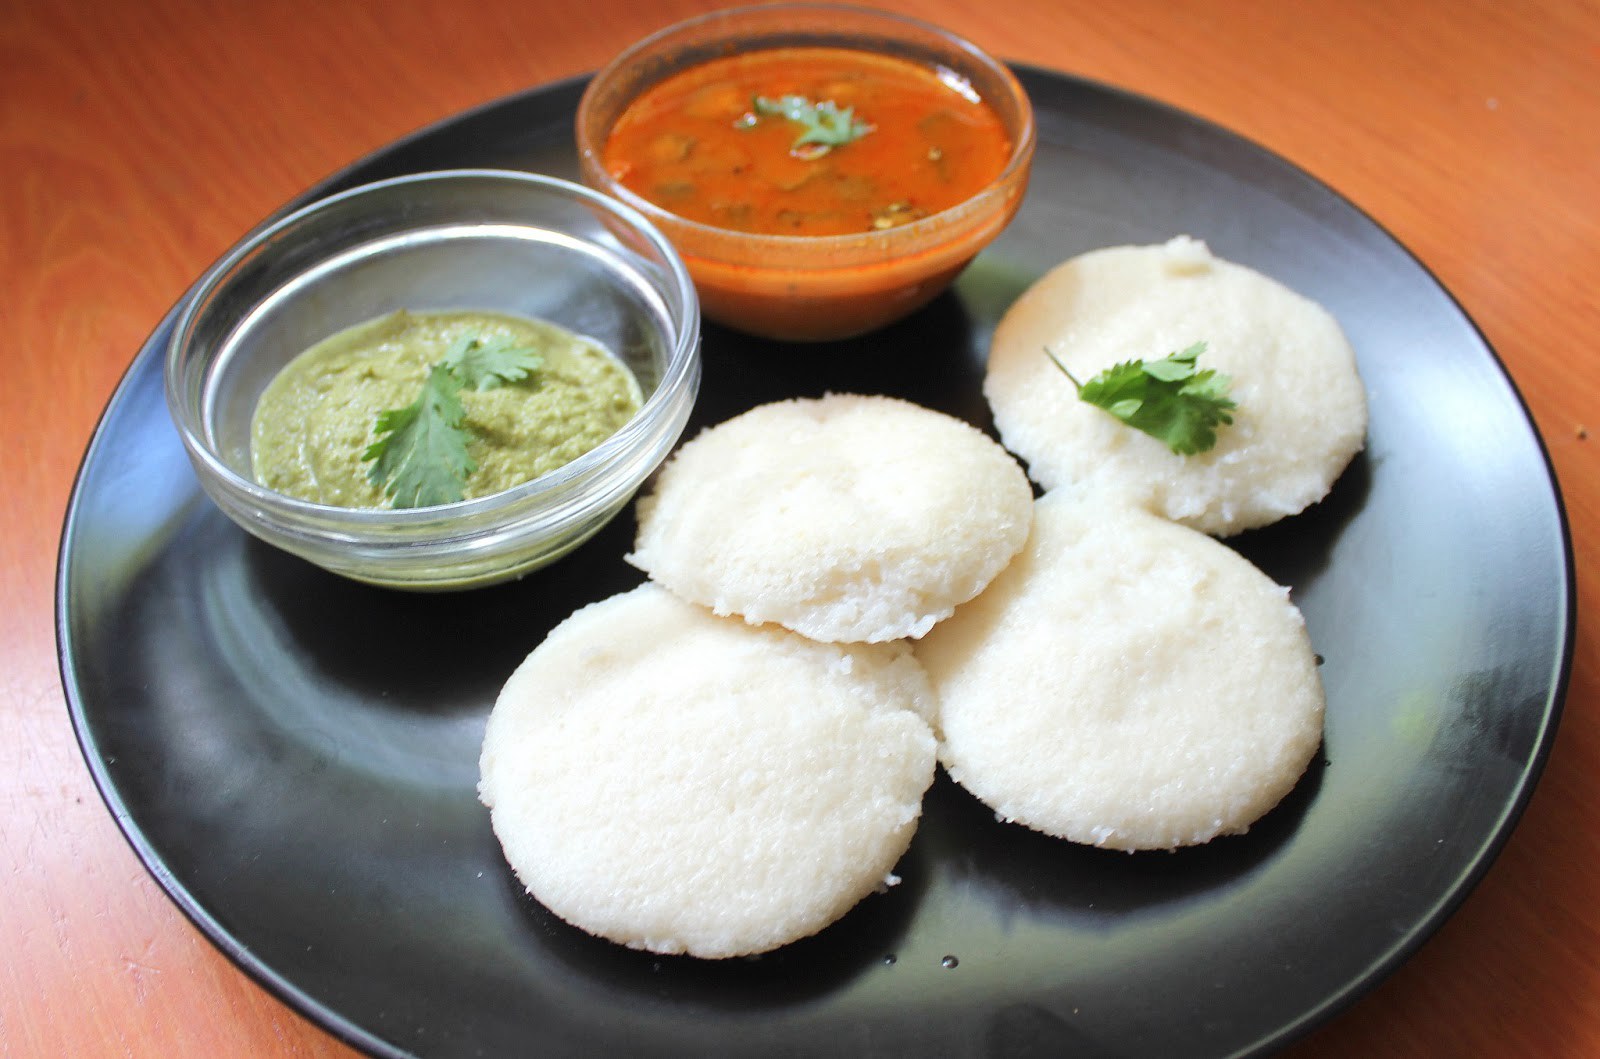
Photo 2: Idly (Cylinder) – Steamed cake made from black lentils and rice
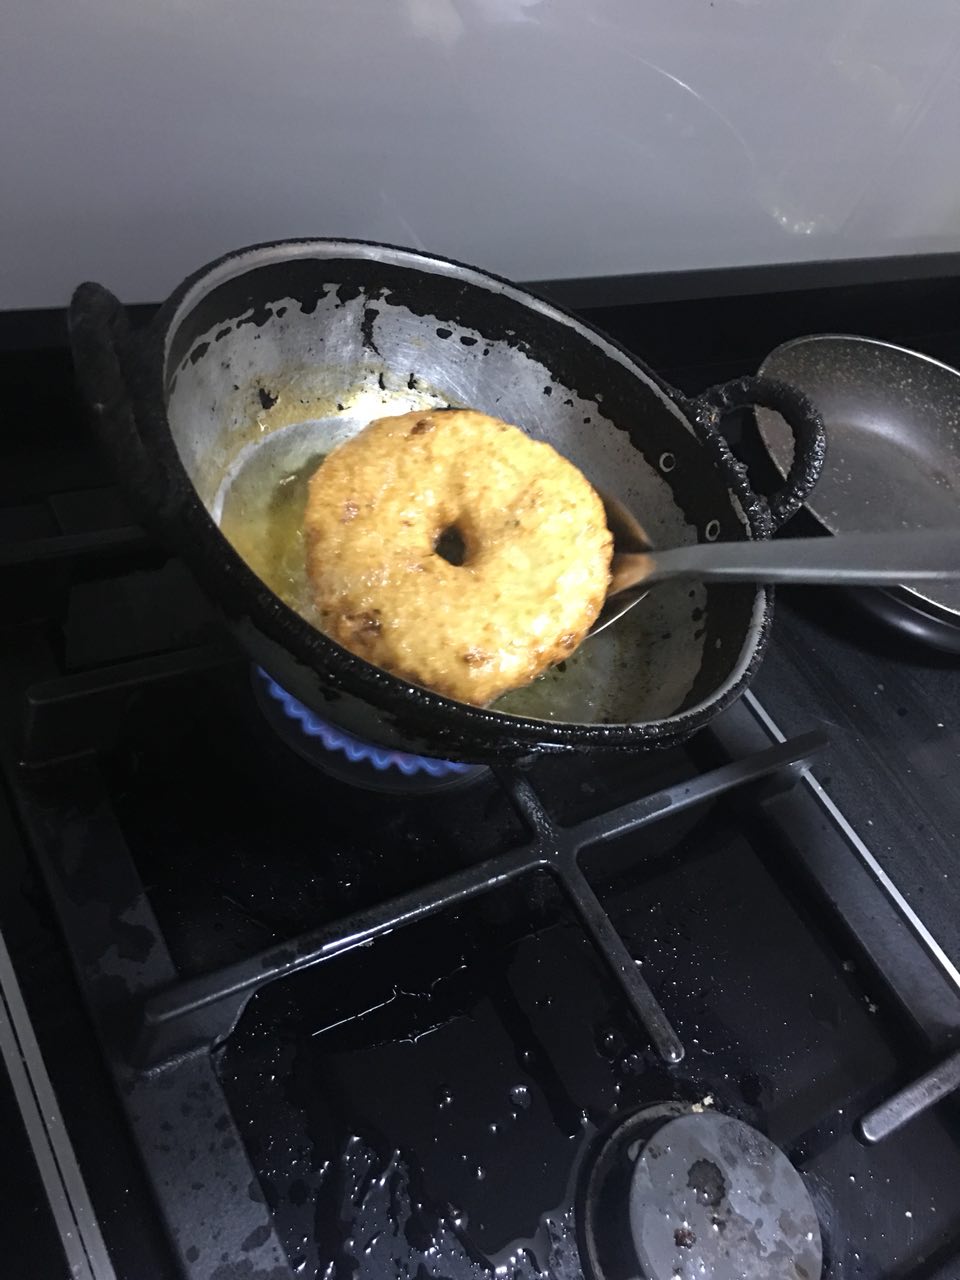
Photo 3: Vadai (Cylinder) – Deep fried doughnuts made from lentils, curry leaves, onions, chillis
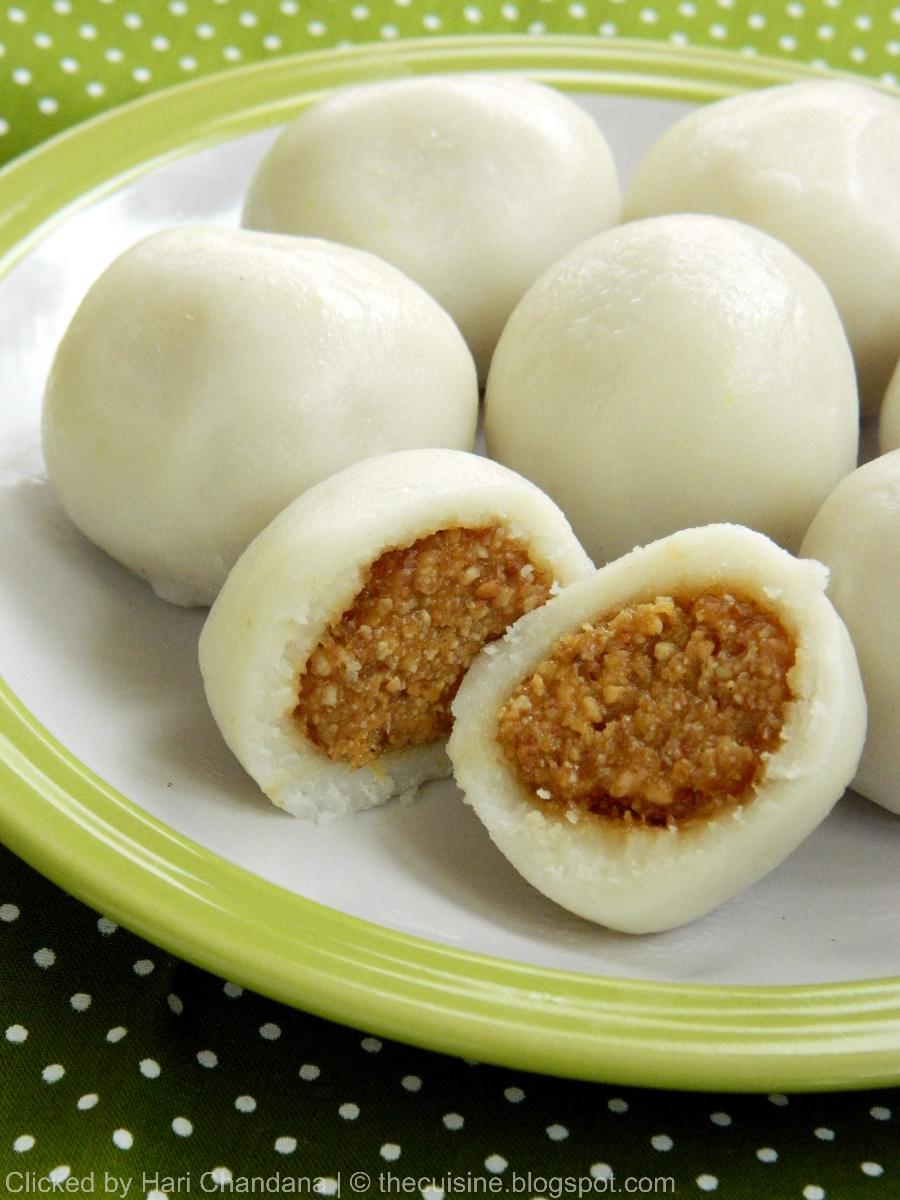
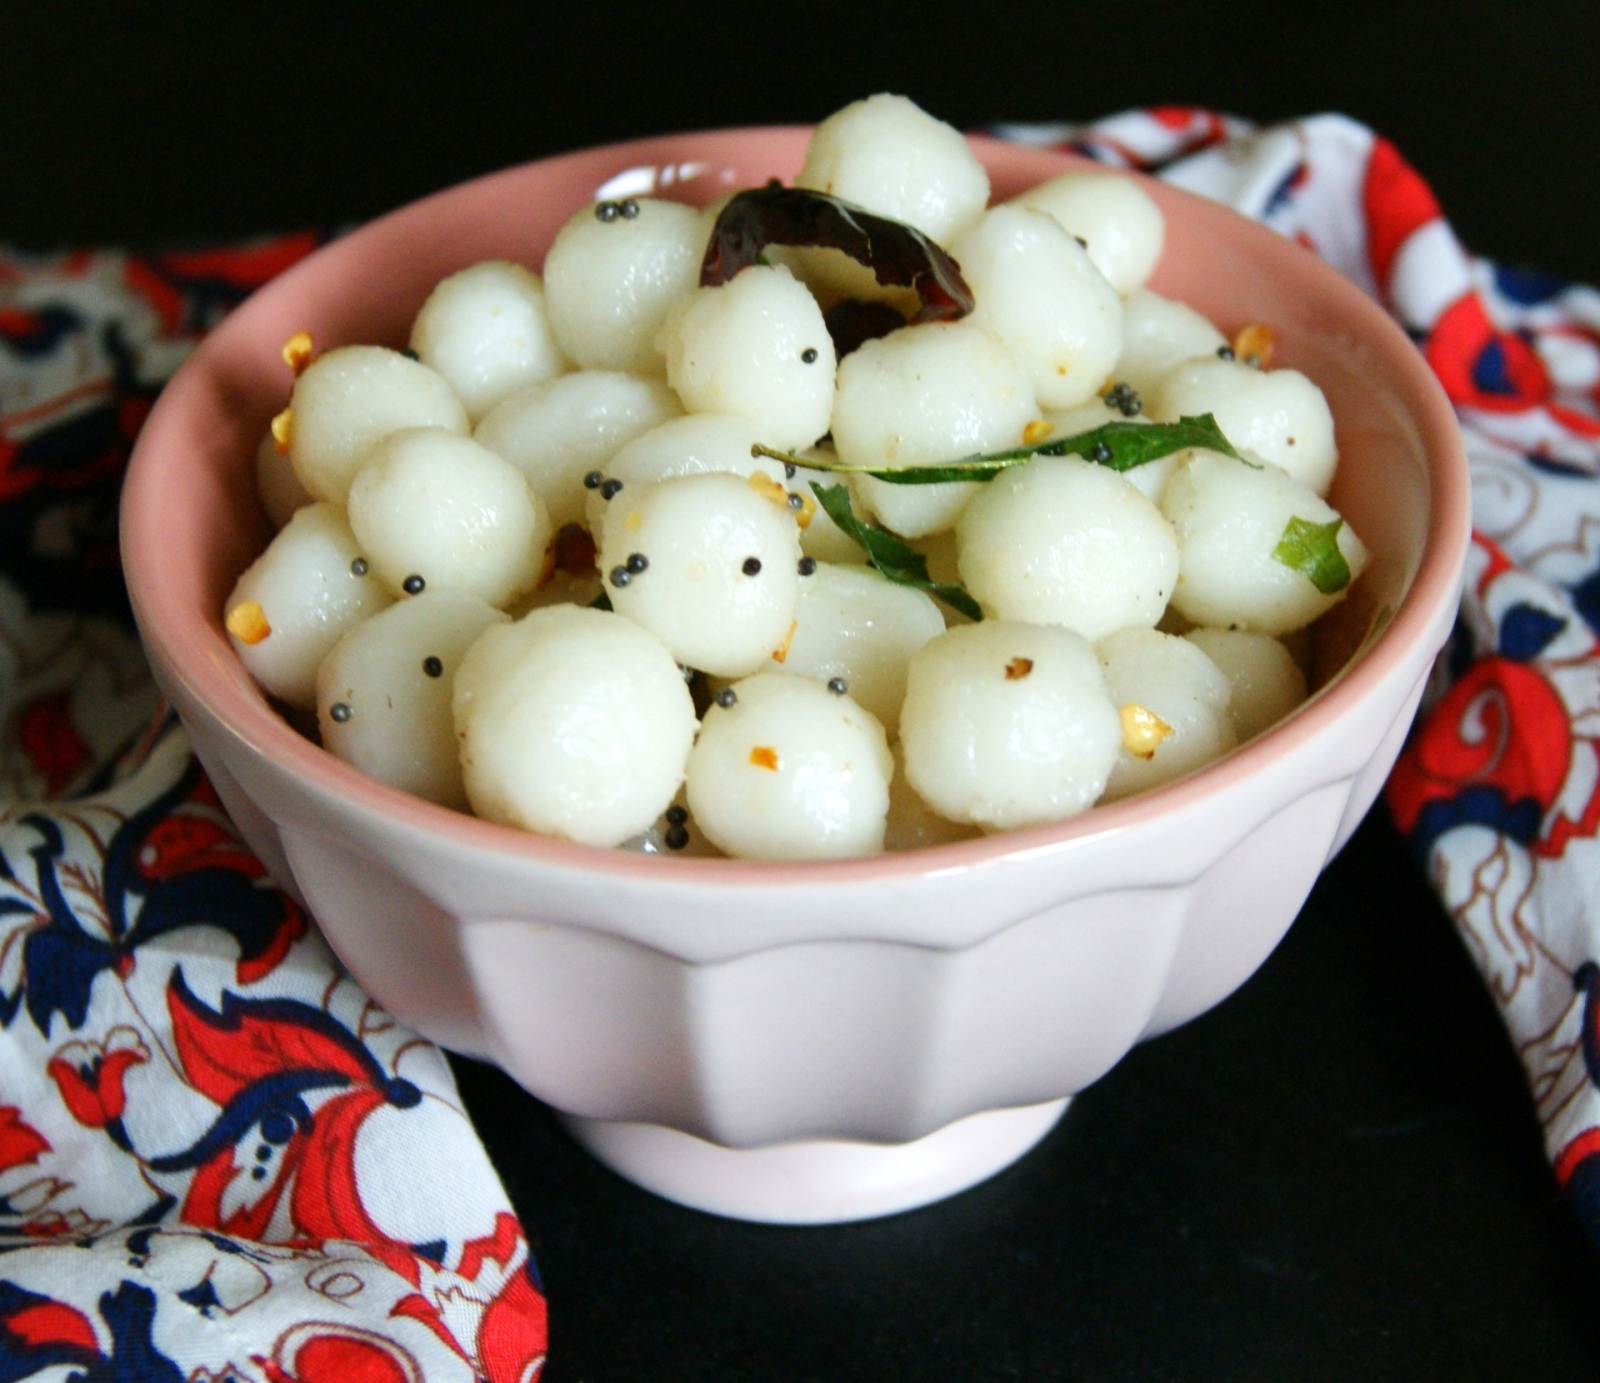
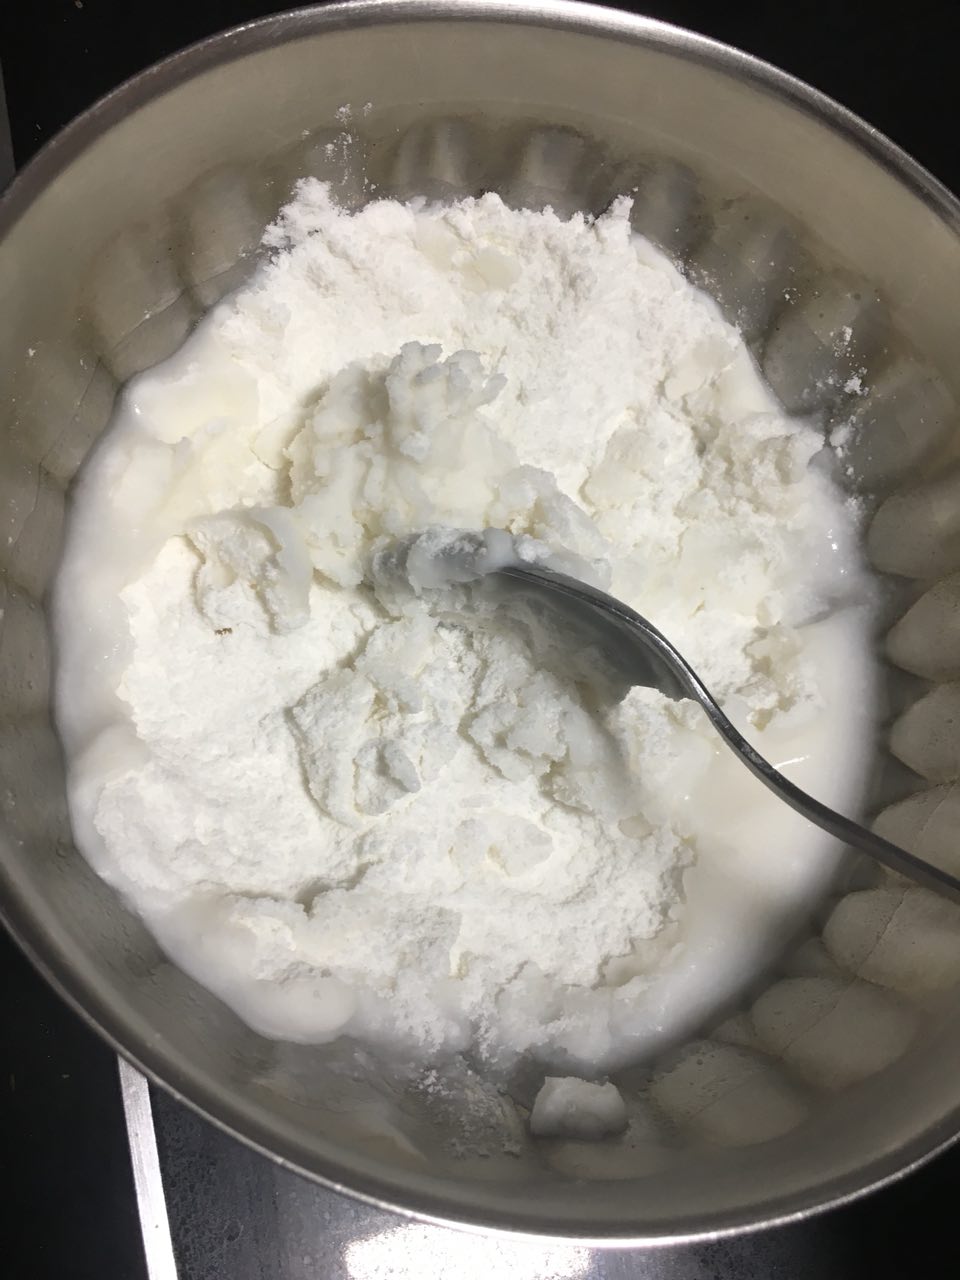
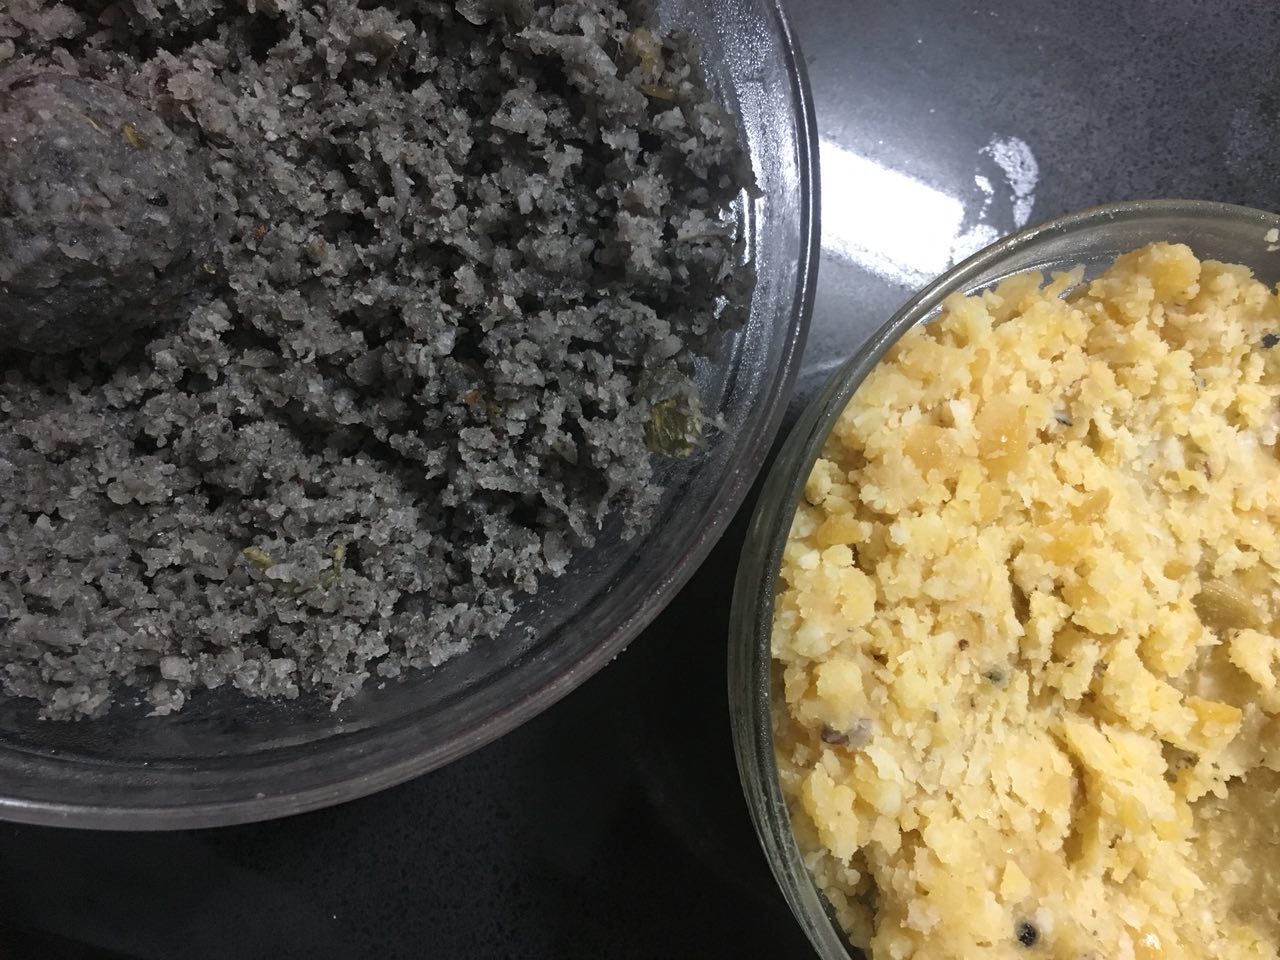
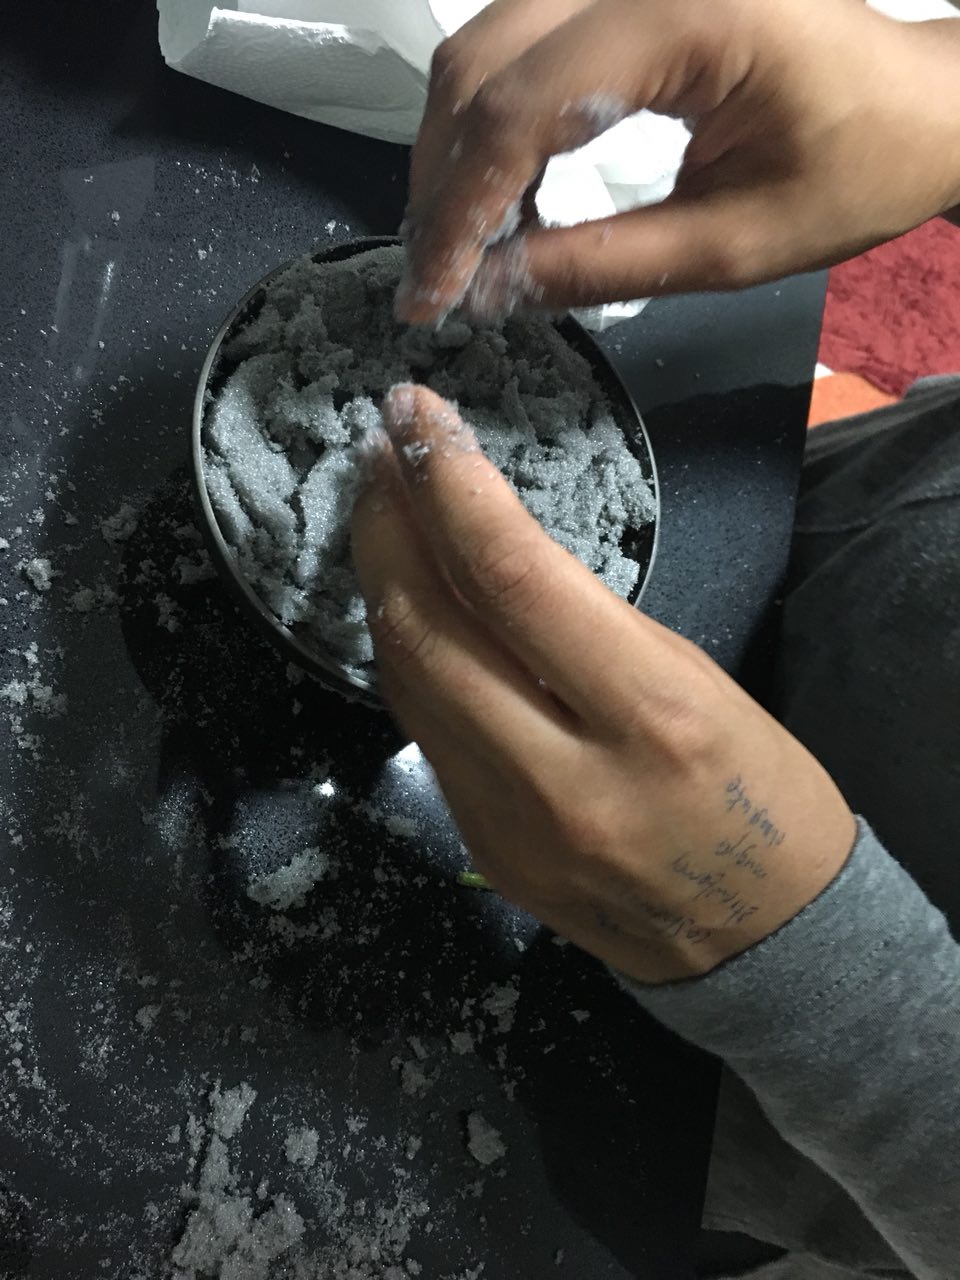
Photo 4 & 5: Kozhukattai (Sphere) – Steamed dumpling made from rice flour, with a filling of grated coconut and jaggery
Choice between Idly and Vadai: as I had already decided firmly on the Kozhukattai SO being white in color to reflect the purity and rebirth of spring, I felt that Vadai would be a better choice in terms of the color scheme, so that both the SD and SO would not be the same color.
Furthermore, I’d like the three items to reflect the three ways Indian food is cooked: 1) steamed (SO; kozhukattai), 2) pan-fried (D; dosai) 3) deep fried (SD; vadai).
Here are some process shots of me making the food; photos 1 shows me making the dosai cone, photos 2 to 6 show the process of me making the kozhukattai sphere (required the most steps and work) and photo 7 shows me frying the vadai cylinder. It was challenging making three different Indian dishes, but I’m super happy I managed to do it and make them really look like those shapes too.


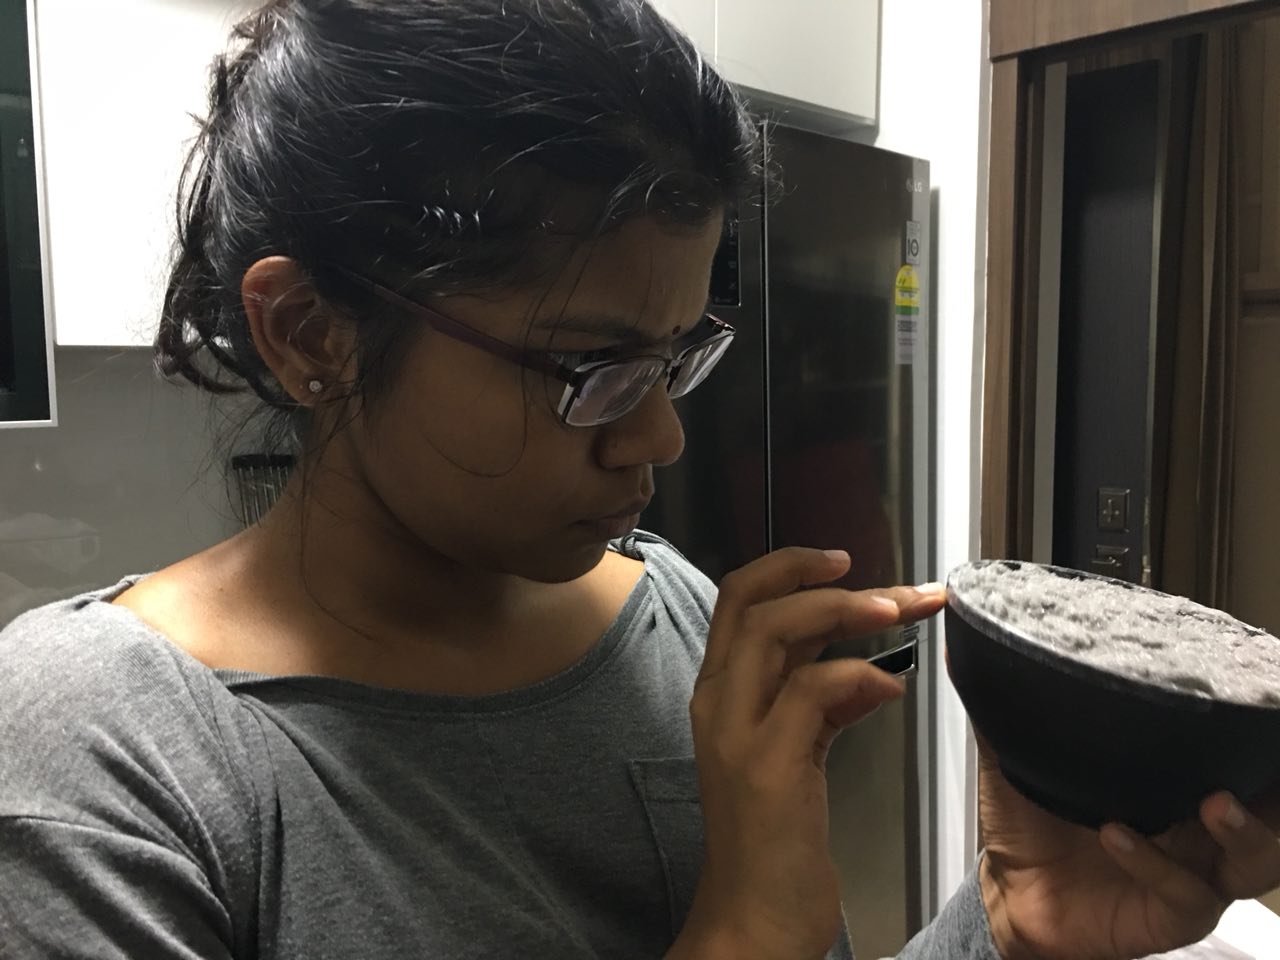
For my second sculpture, I wanted to incorporate all three of my favorite types of desserts – namely, cake, chocolate and ice cream, as written in my mindmap. They truly make me feel anew at 3 am in the morning when I’m finishing an assignment. I picked an ice cream cone to represent ice cream – actual ice cream wouldn’t have been a very viable material to use – a matcha ring cake from Chateraise to represent cake, and a Hershey’s chocolate ball to represent chocolate. Since we had to have 2 SOs and 2 SDs, I added an extra SO in form of a wafer.

In order for my dominant branch to be able to stand, it needed a solid base to be stuck into. Hence, I got the foam used for flower arranging and pressed it into my base container. Then, I covered the edges with double sided tape and stuck cling wrap over so that the foam bits would not fly around and get messy, and interfere with the food.
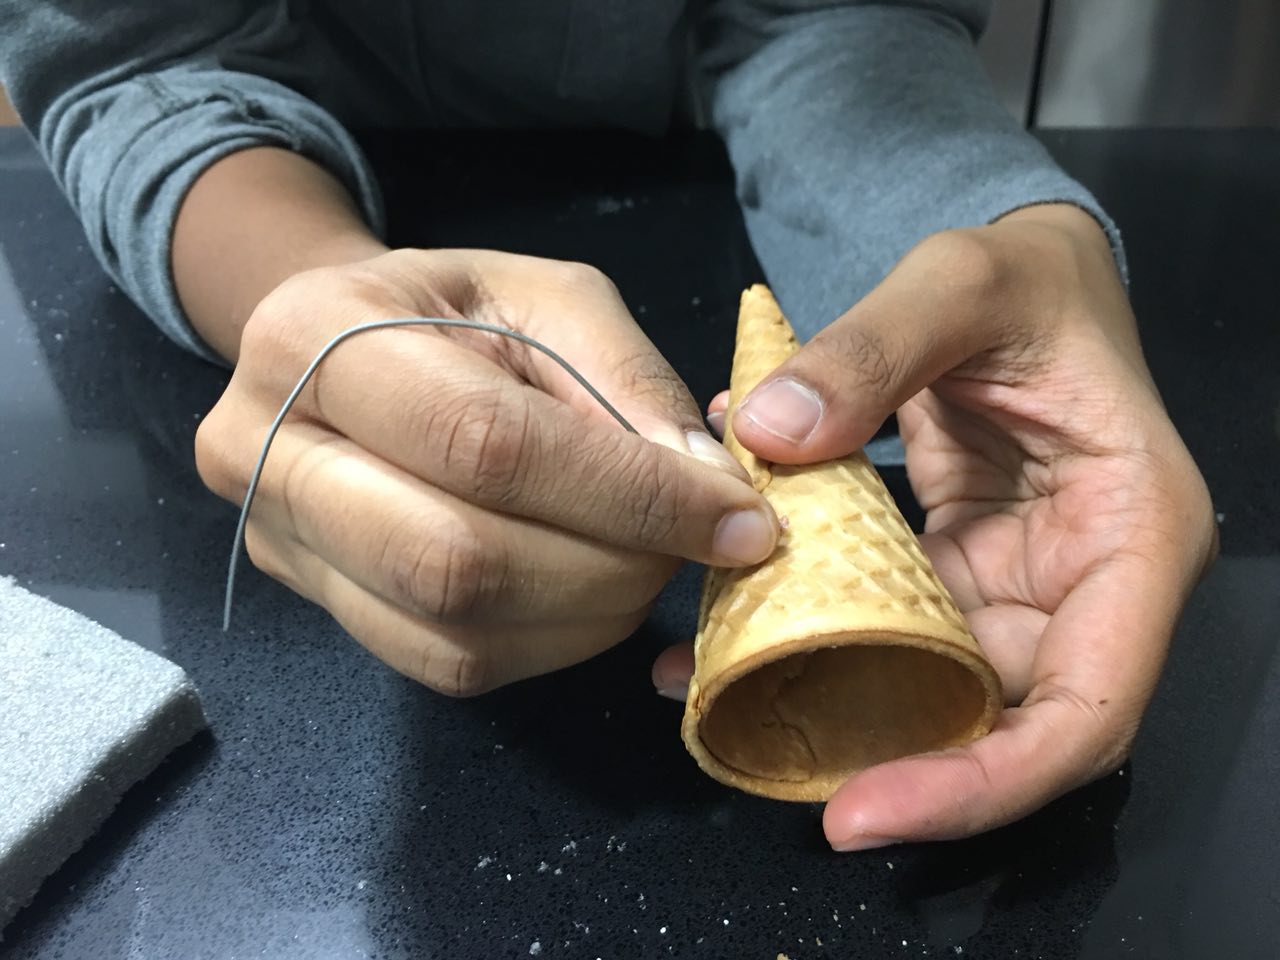
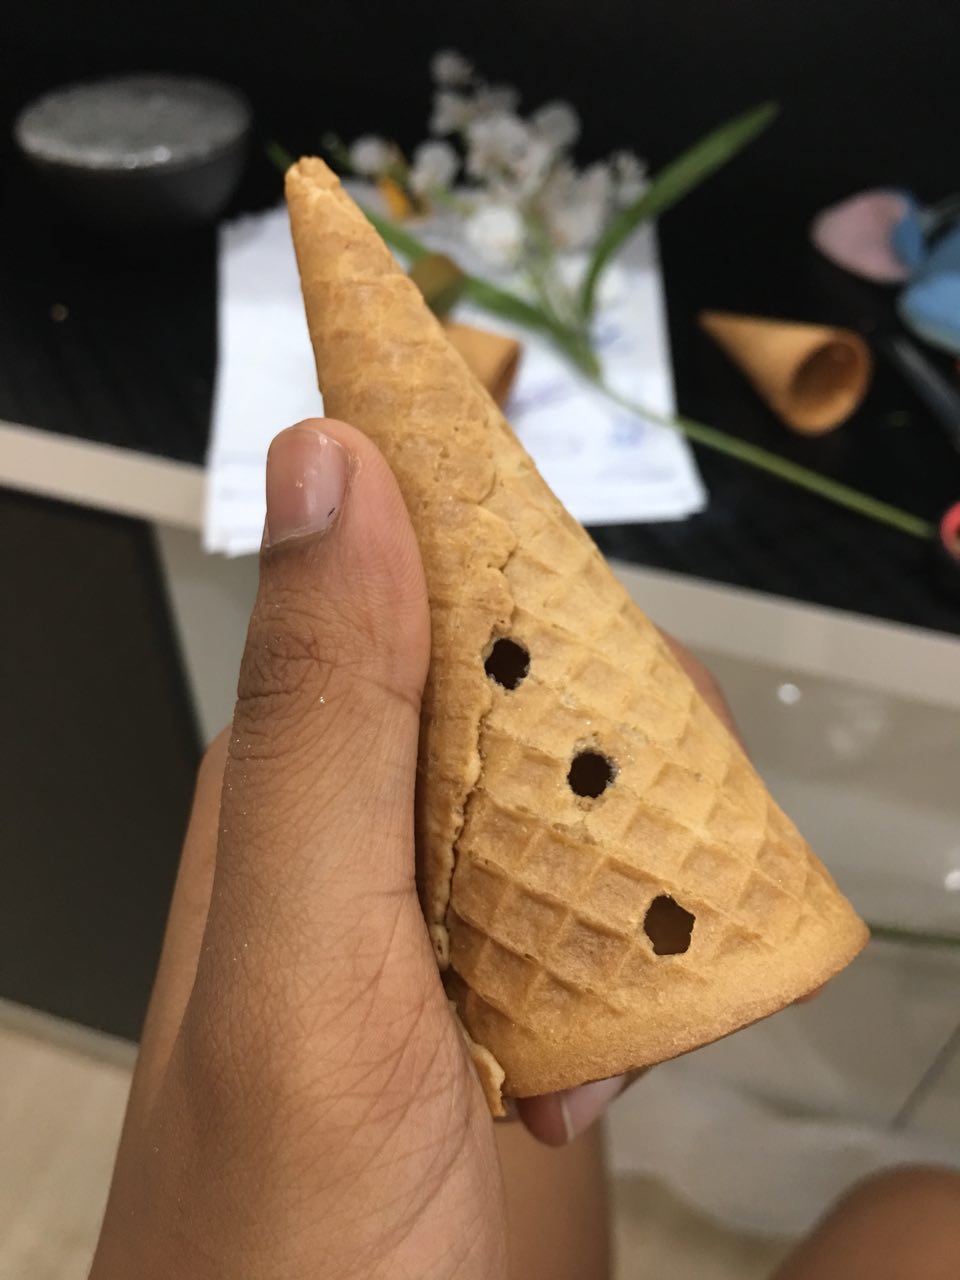
I had some problems initially with poking a neat hole through the wafer cone so that the dominant branch could be inserted, but I managed to figure it out by using a very sturdy piece of wire to pierce through. I also had some problems with the positioning of the holes so that the cone would balance at the 30 degree angle, so I tried piercing holes in different areas in order to find the right one, pictured in the second photo.
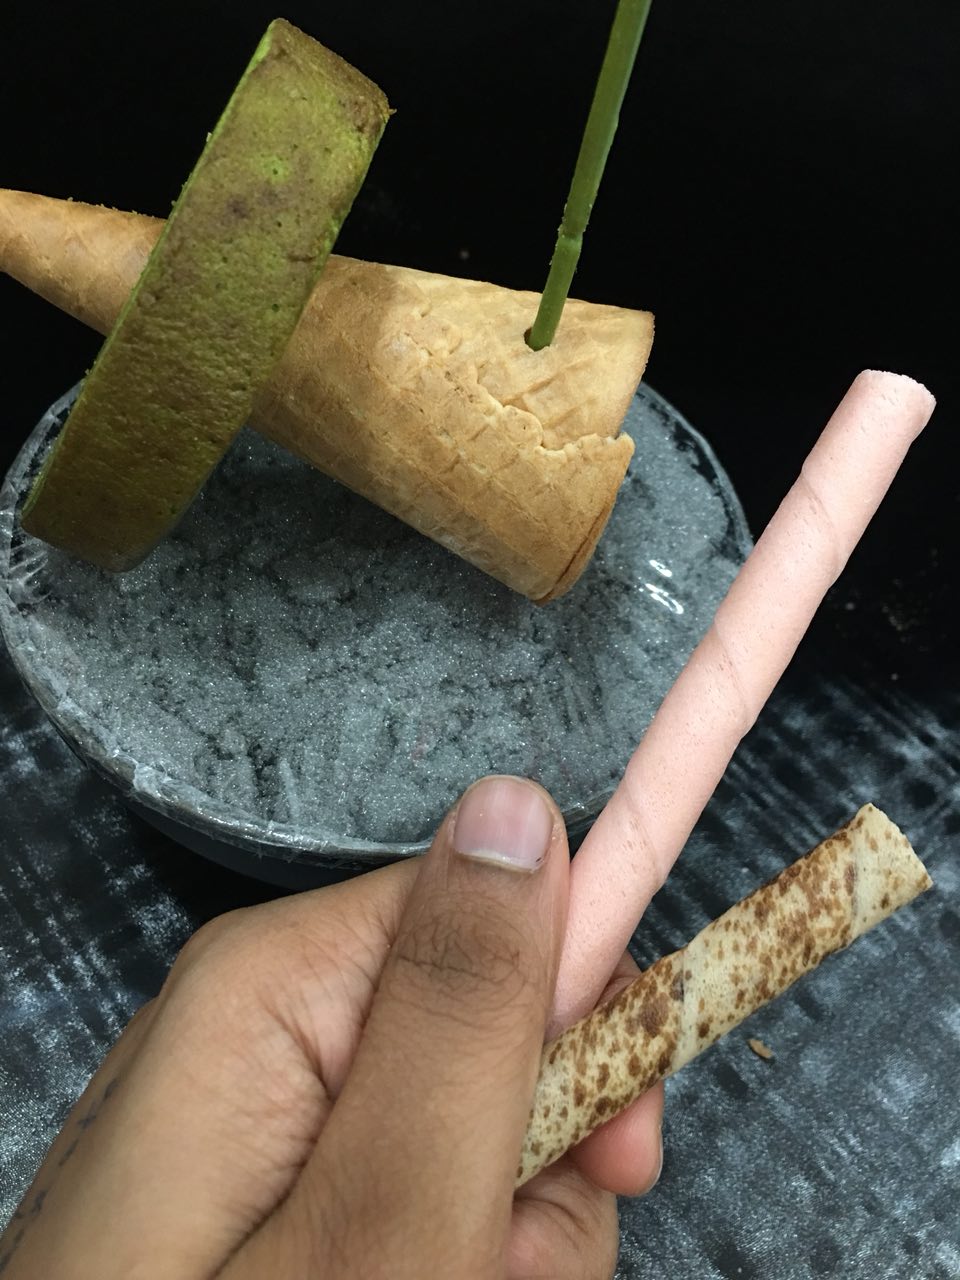
I had two types of wafers I could have used: the cappuccino one or the strawberry one. Even though the cappuccino wafer color’s were more harmonious with the color scheme of the sculpture, I felt that the pink of the strawberry was very in tune with the happy, light nature of spring. Furthermore, the color made it stand out as an SO.

When we first got this brief, I had no idea what an ikebana was. I’m happy to say that is no longer the case – in fact, I’d say I’ve gotten a pretty good idea what an ikebana is, because of the research I’ve done on three main types – summarized below for your reading pleasure ٩(◕‿◕。)۶
Types of Ikebana
1) Moribana
Characteristics of vase
Features
Specifics
There are three sub-styles of Moribana, determined by the angle of the Shin:
| Chokutai (upright) | Shatai (slanting) | Suitai (cascading) |
 |
 |
 |
2) Rikka

Characteristics of vase
Specifics
3) Shoka
![]()
Characteristics of vase
Specifics
2D Sketch Models and Analysis
Initial Sketches
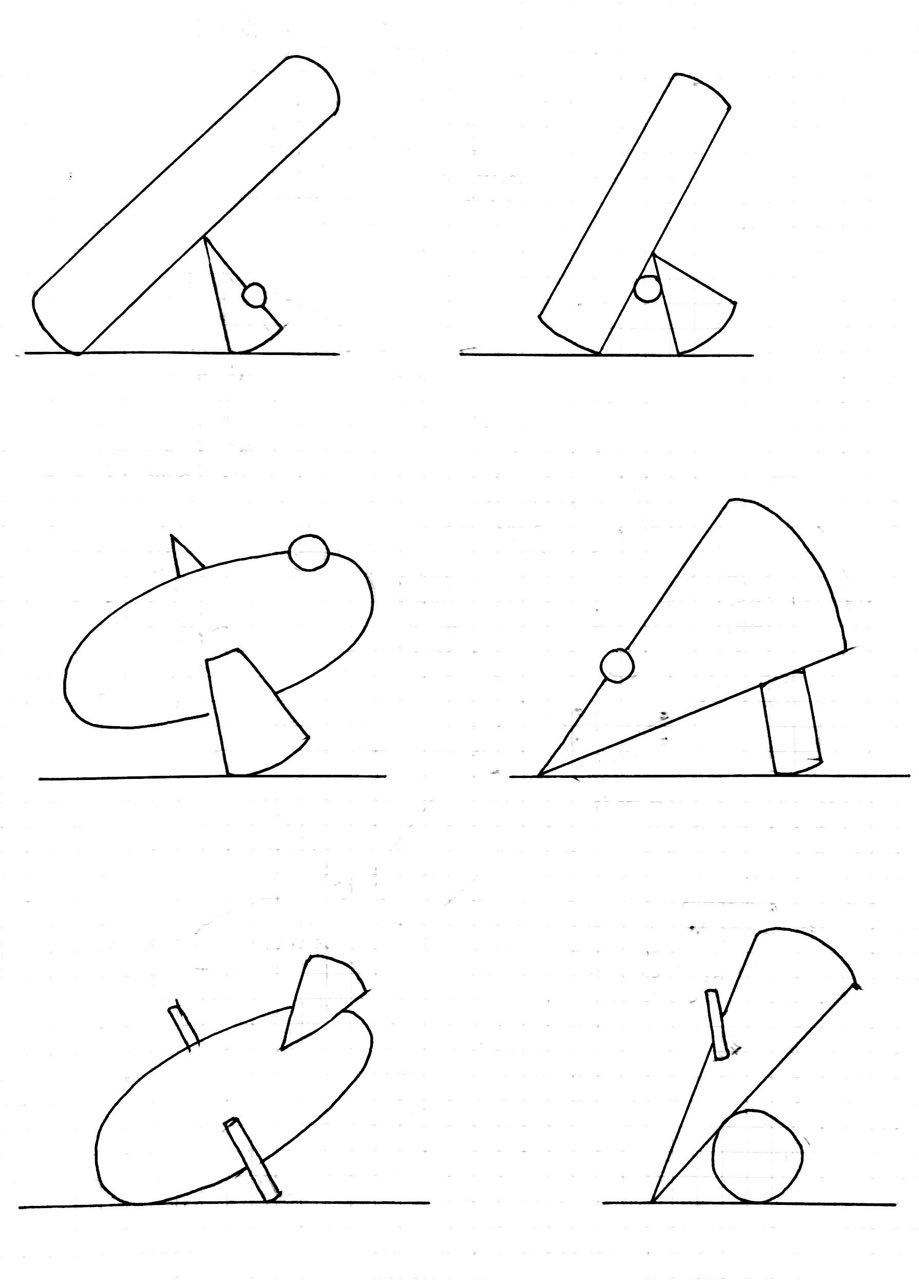
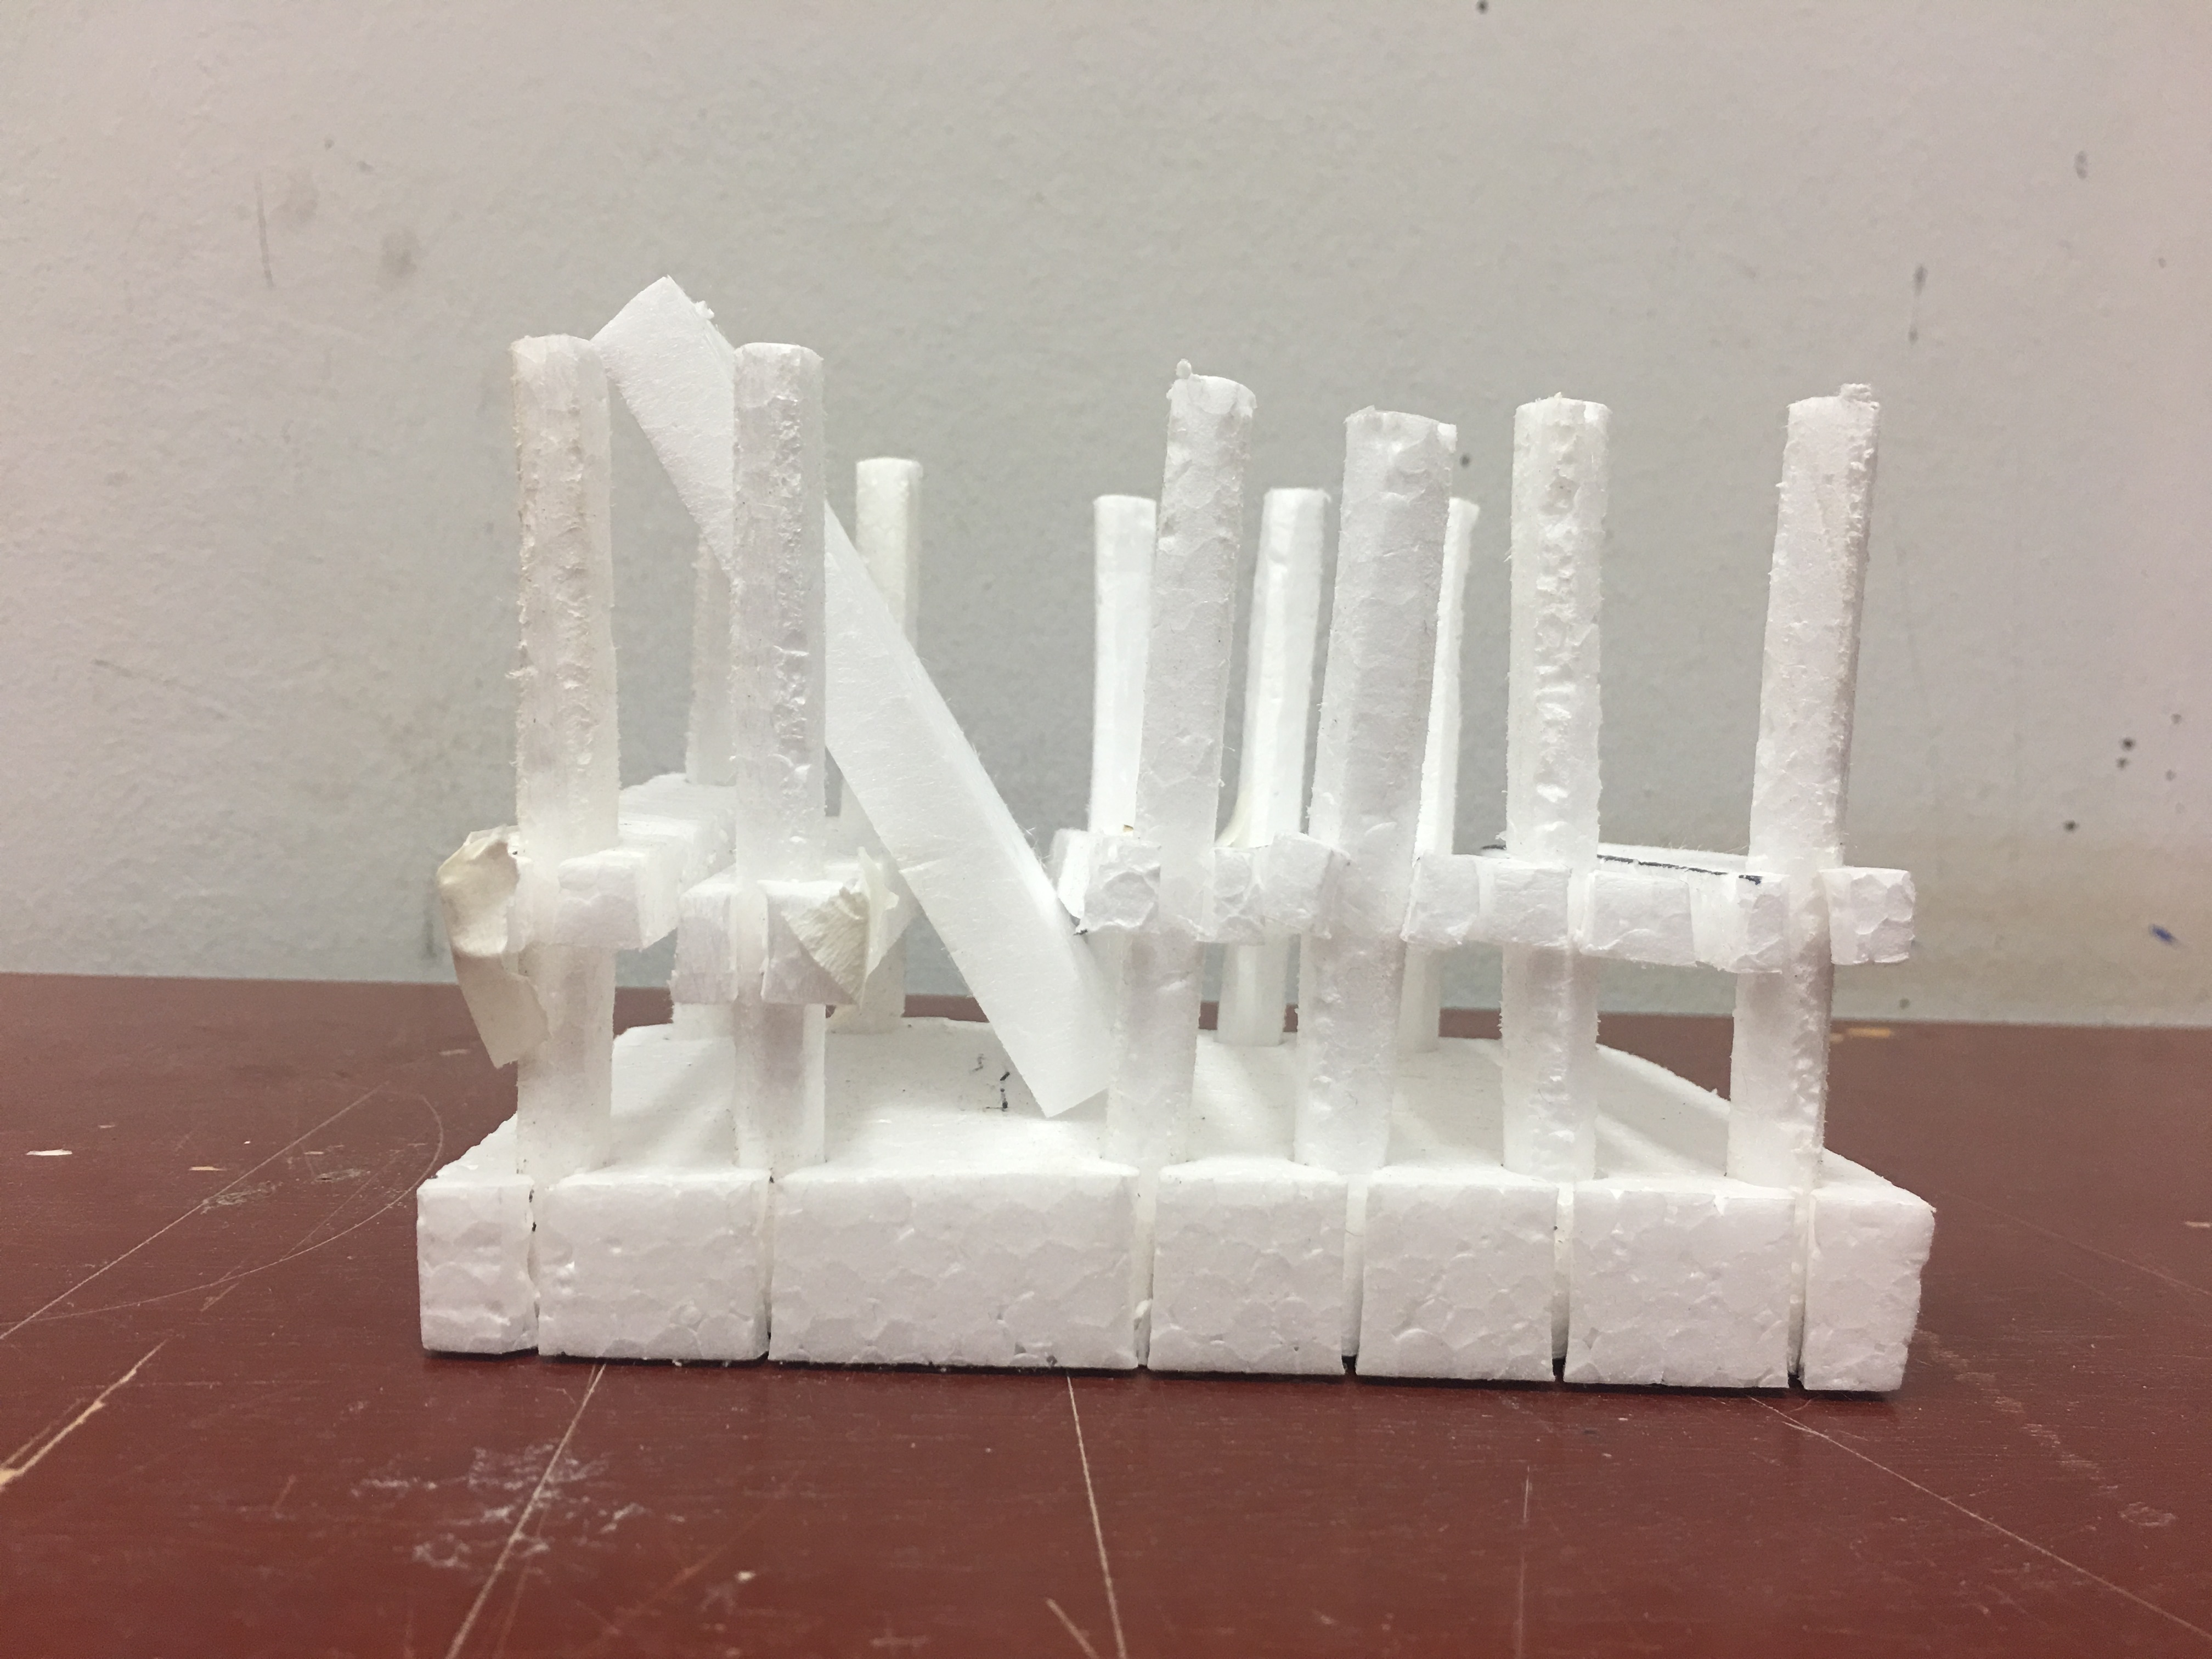
I sketched out some ideas where the cylindrical form, spherical form and conical form were the dominants, and how they changed the feel of the sculpture. I decided to focus more on the conical and cylindrical forms as dominants as I felt they added a strong axis to the composition, compared to a sphere which is pretty static to me, and also for which the principal axis could be unclear.
Sketch Model 1 – First version

I immediately realized the problem with this model – the subdominant cone’s axis was perpendicular to the horizontal ground. I hence revised this model to the actual first sketch model I will be analyzing below.
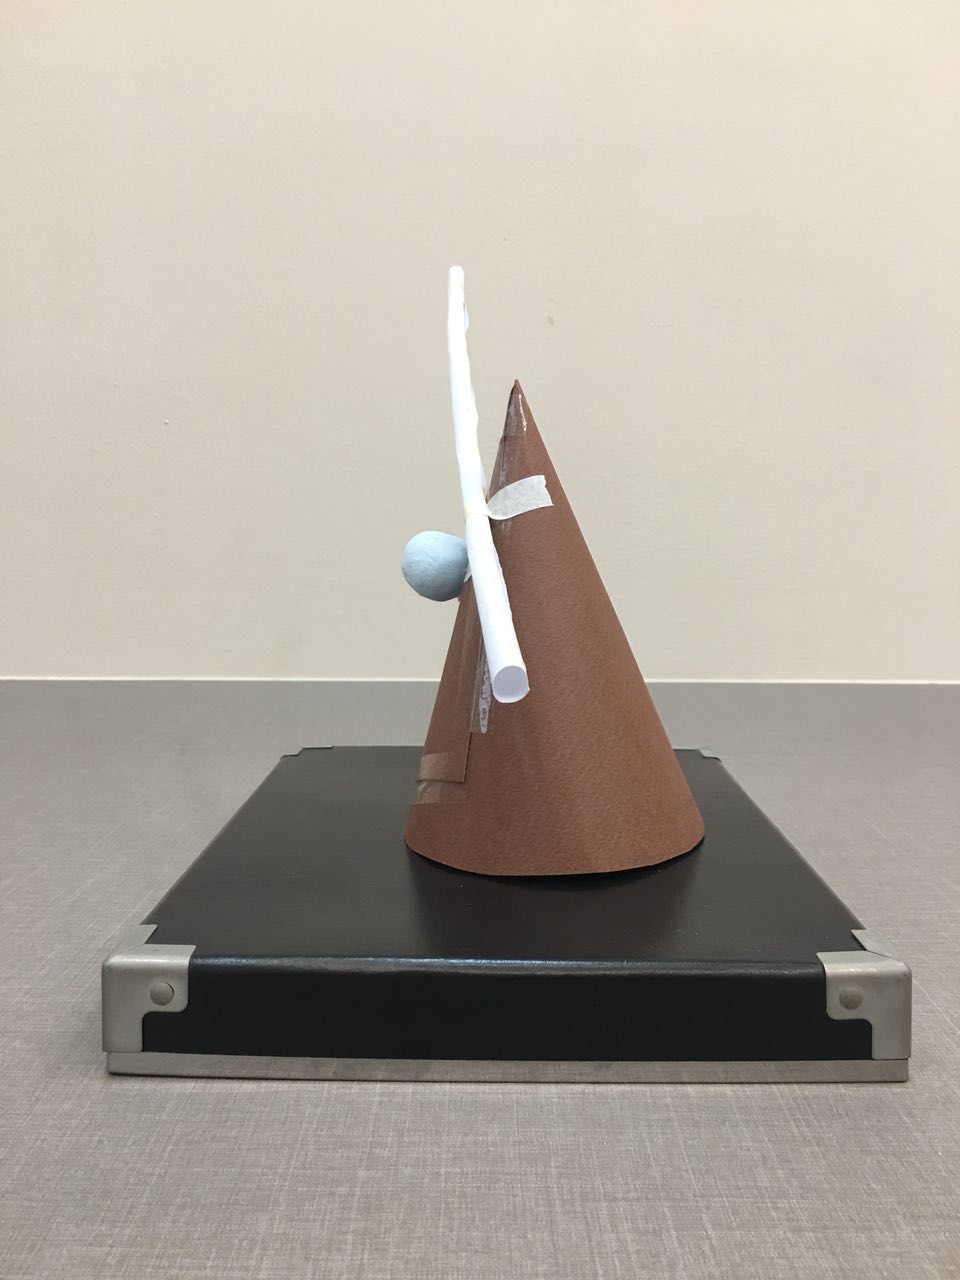
Sketch Model 1 – Revised version

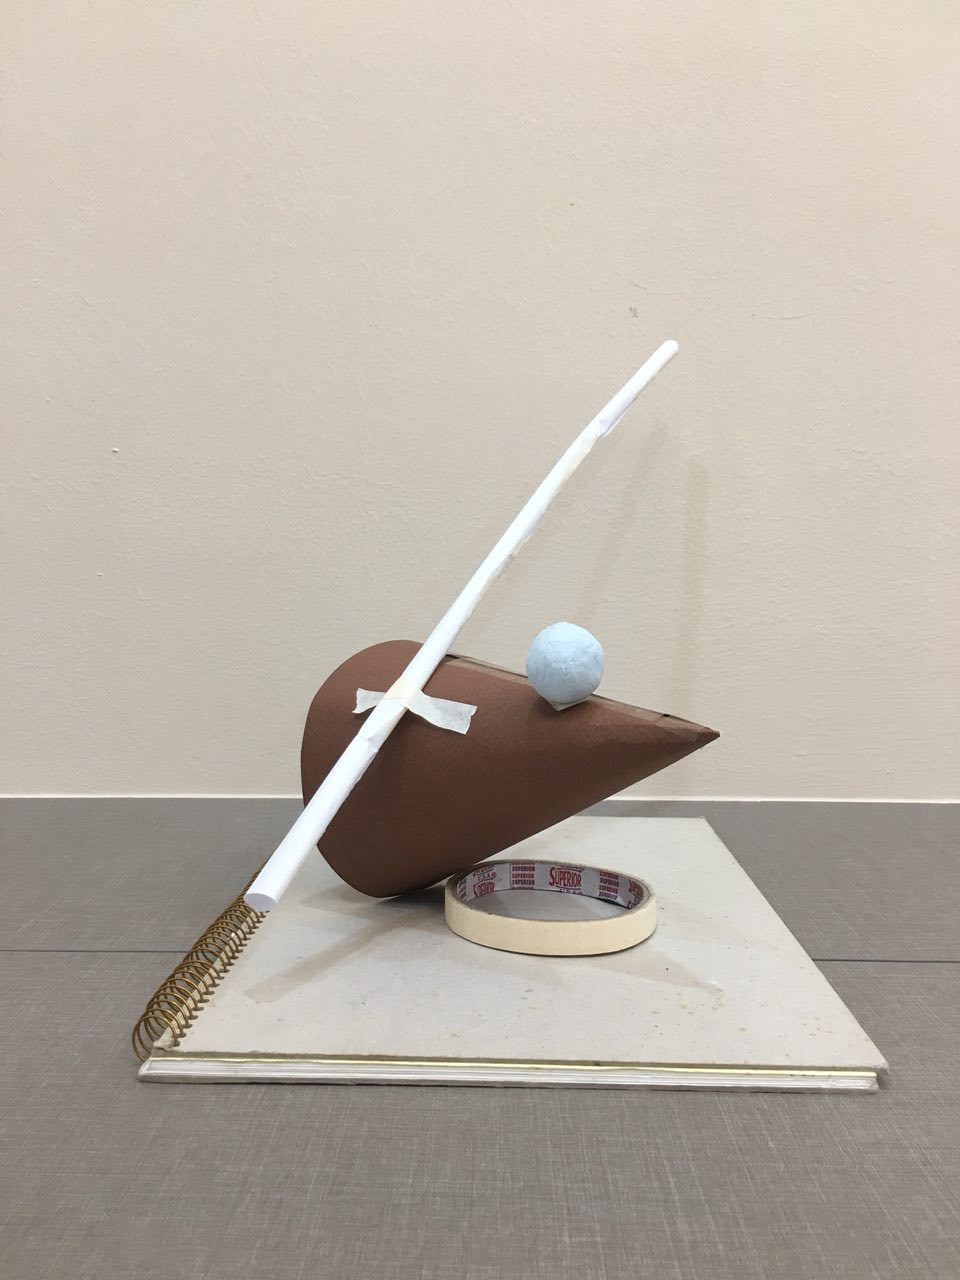

I had to use a masking tape roll solely so that the subdominant cone could lift off the ground – it will hence not be drawn in the 2D sketch analysis as I will find a way to get the cone to lift off the ground in the actual final model.
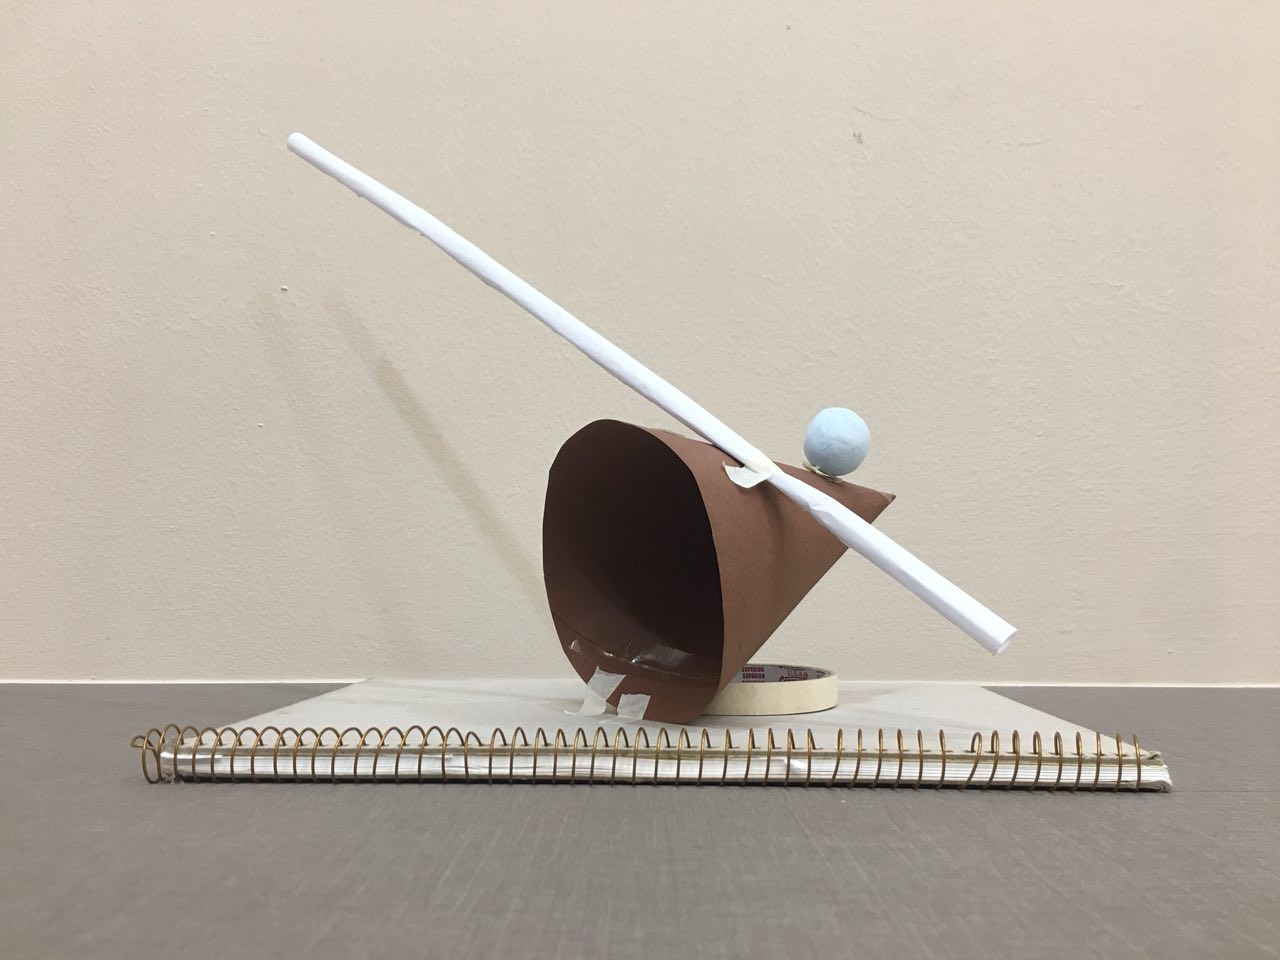
Sketch model 2

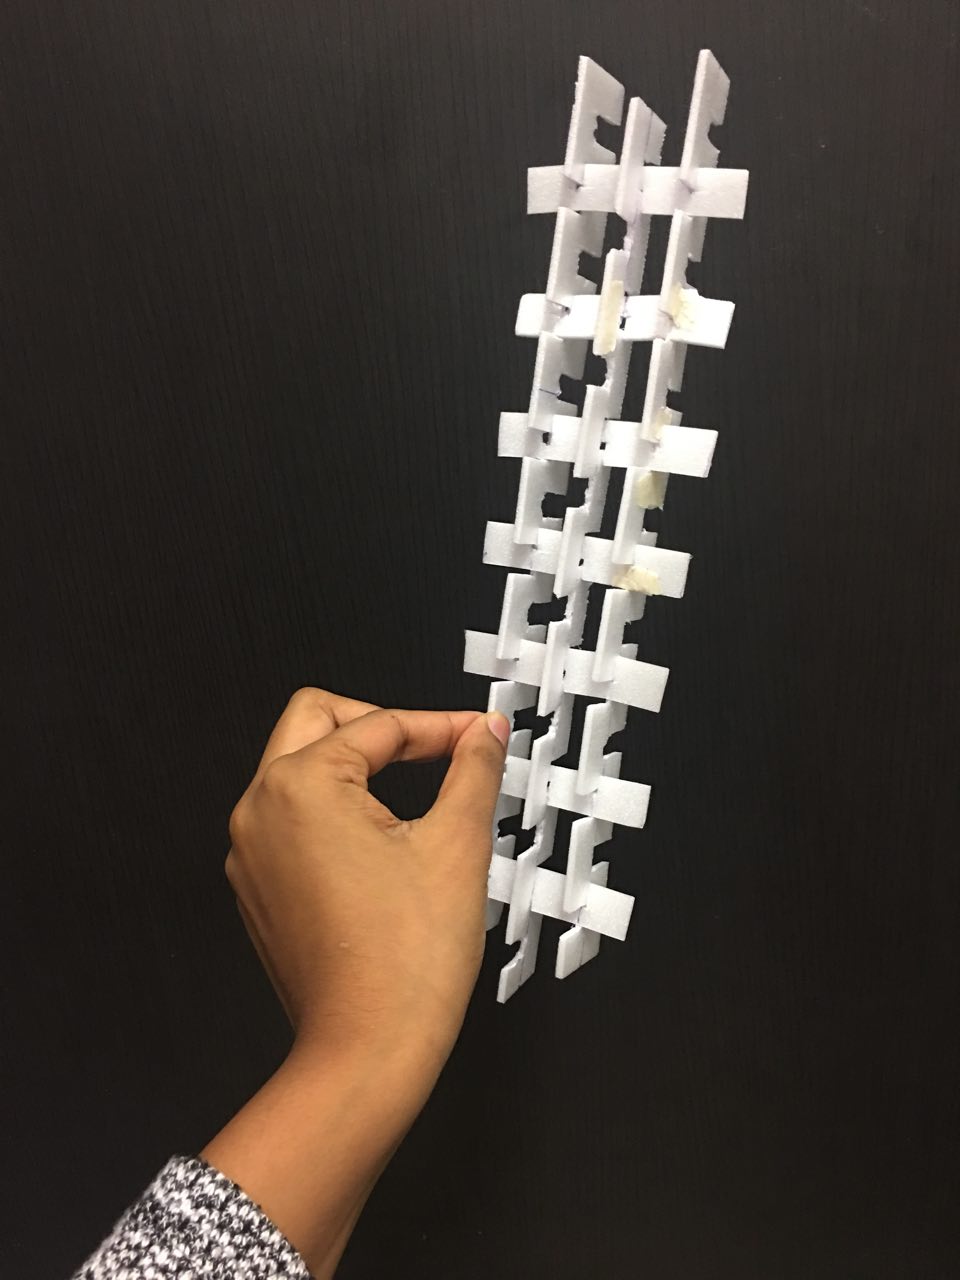
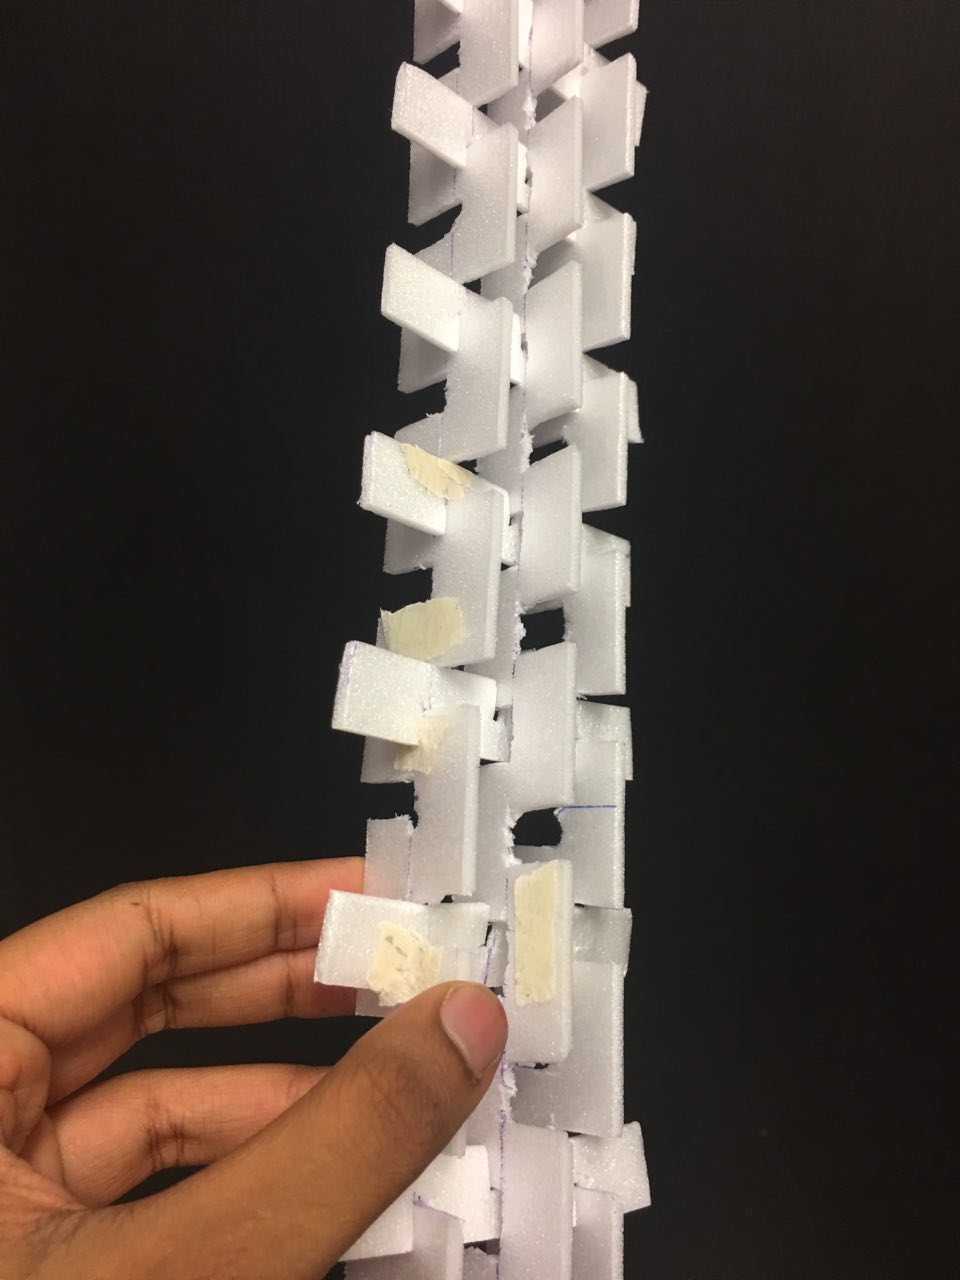
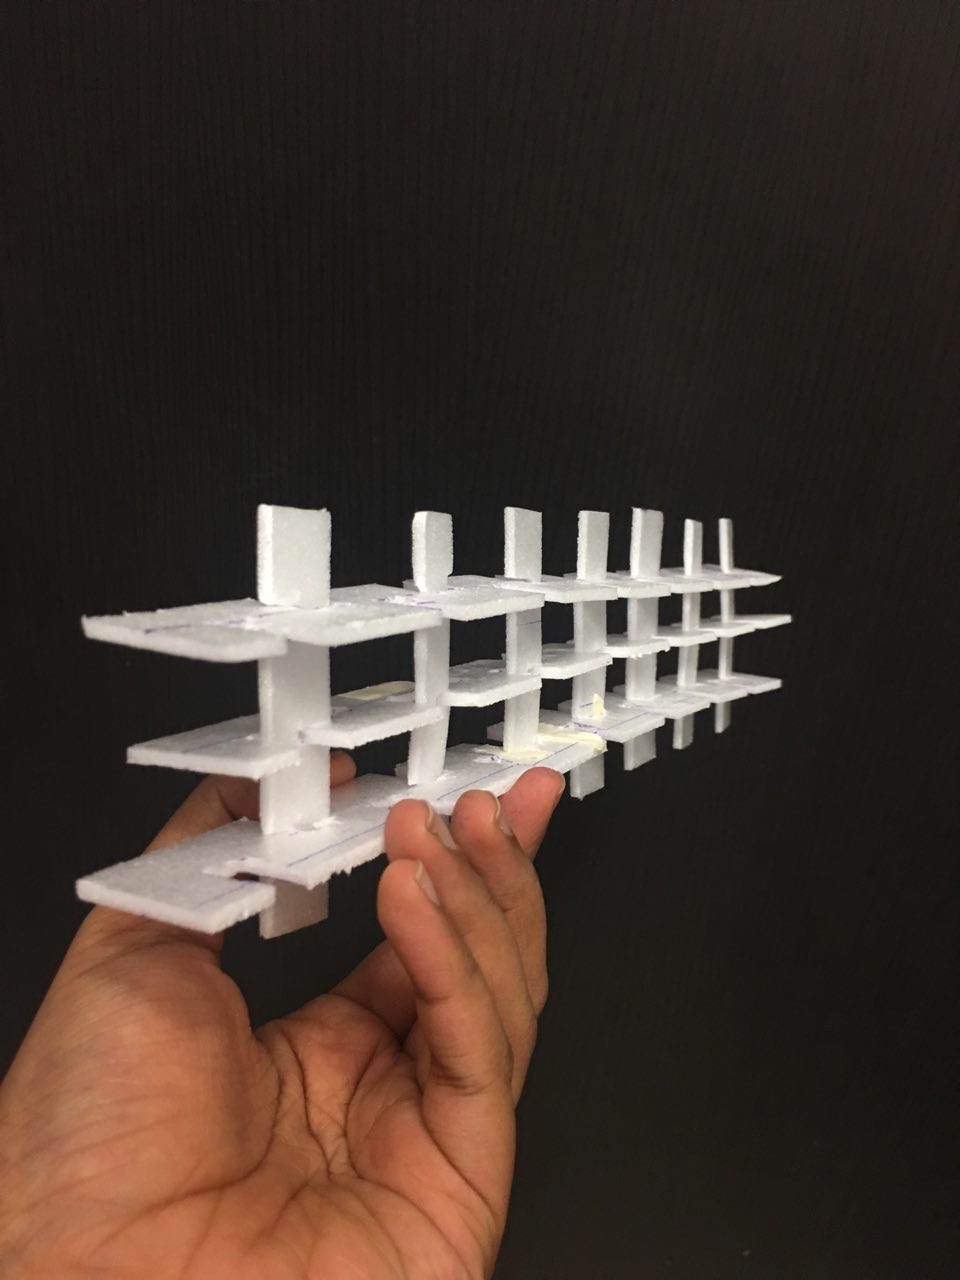
I really liked the idea of having a hollow cylindrical form as I like the “double void” it creates at the bottom of the composition. I thought of some ways to improve this, such as wedging the SO into the D so as to incorporate what we had learned in our first lesson.
Specifics of Moribana and Rikka Ikebana that were used in making sketch models respectively:

Link to 2D Sketch Analysis: Gaia 2D Sketch Analysis

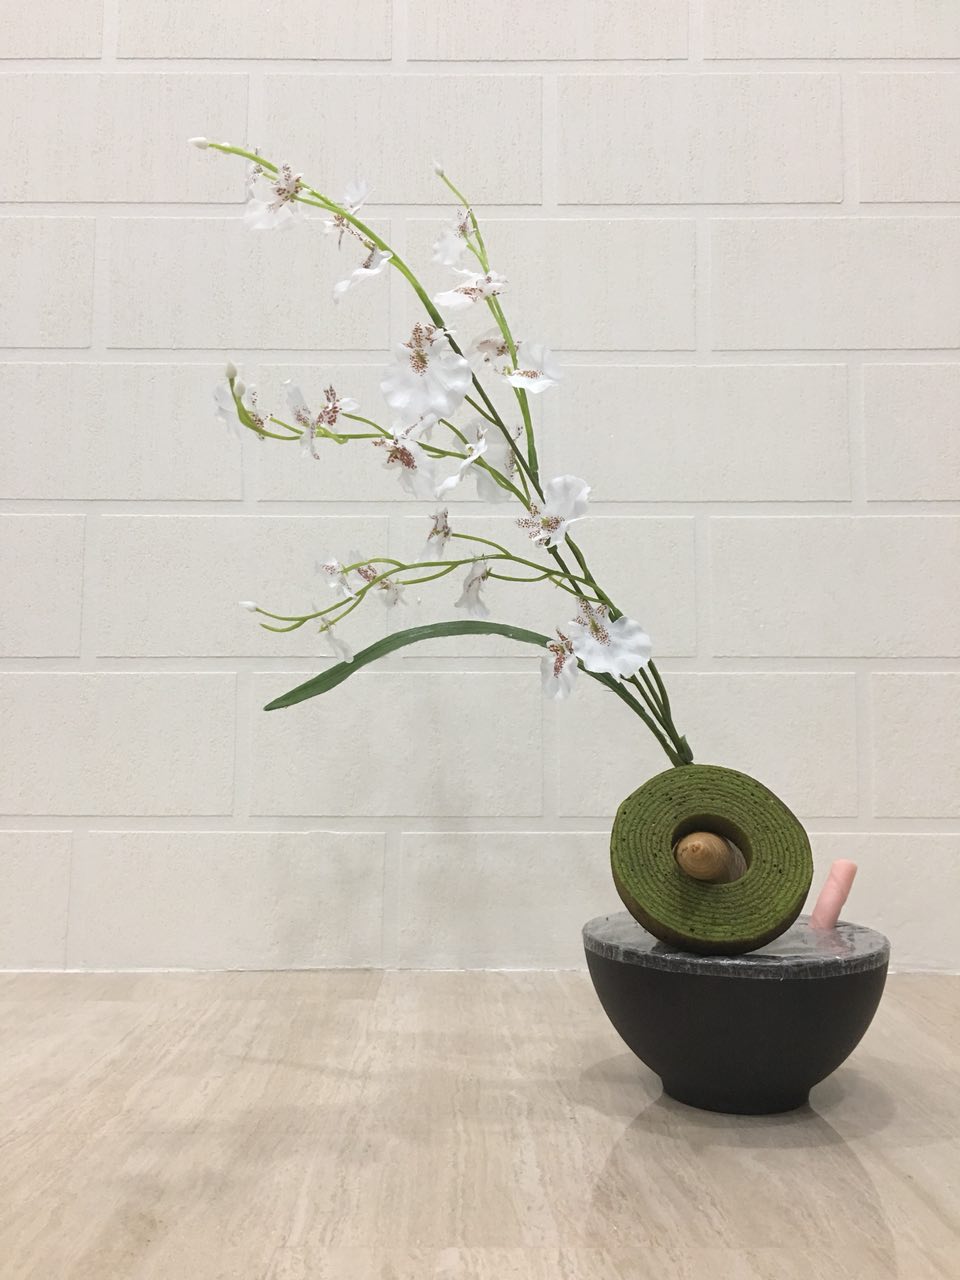
iiThe final models 。゚( ゚^∀^゚)゚。ii
I loved both of my final models a lot, so I decided to make them both.
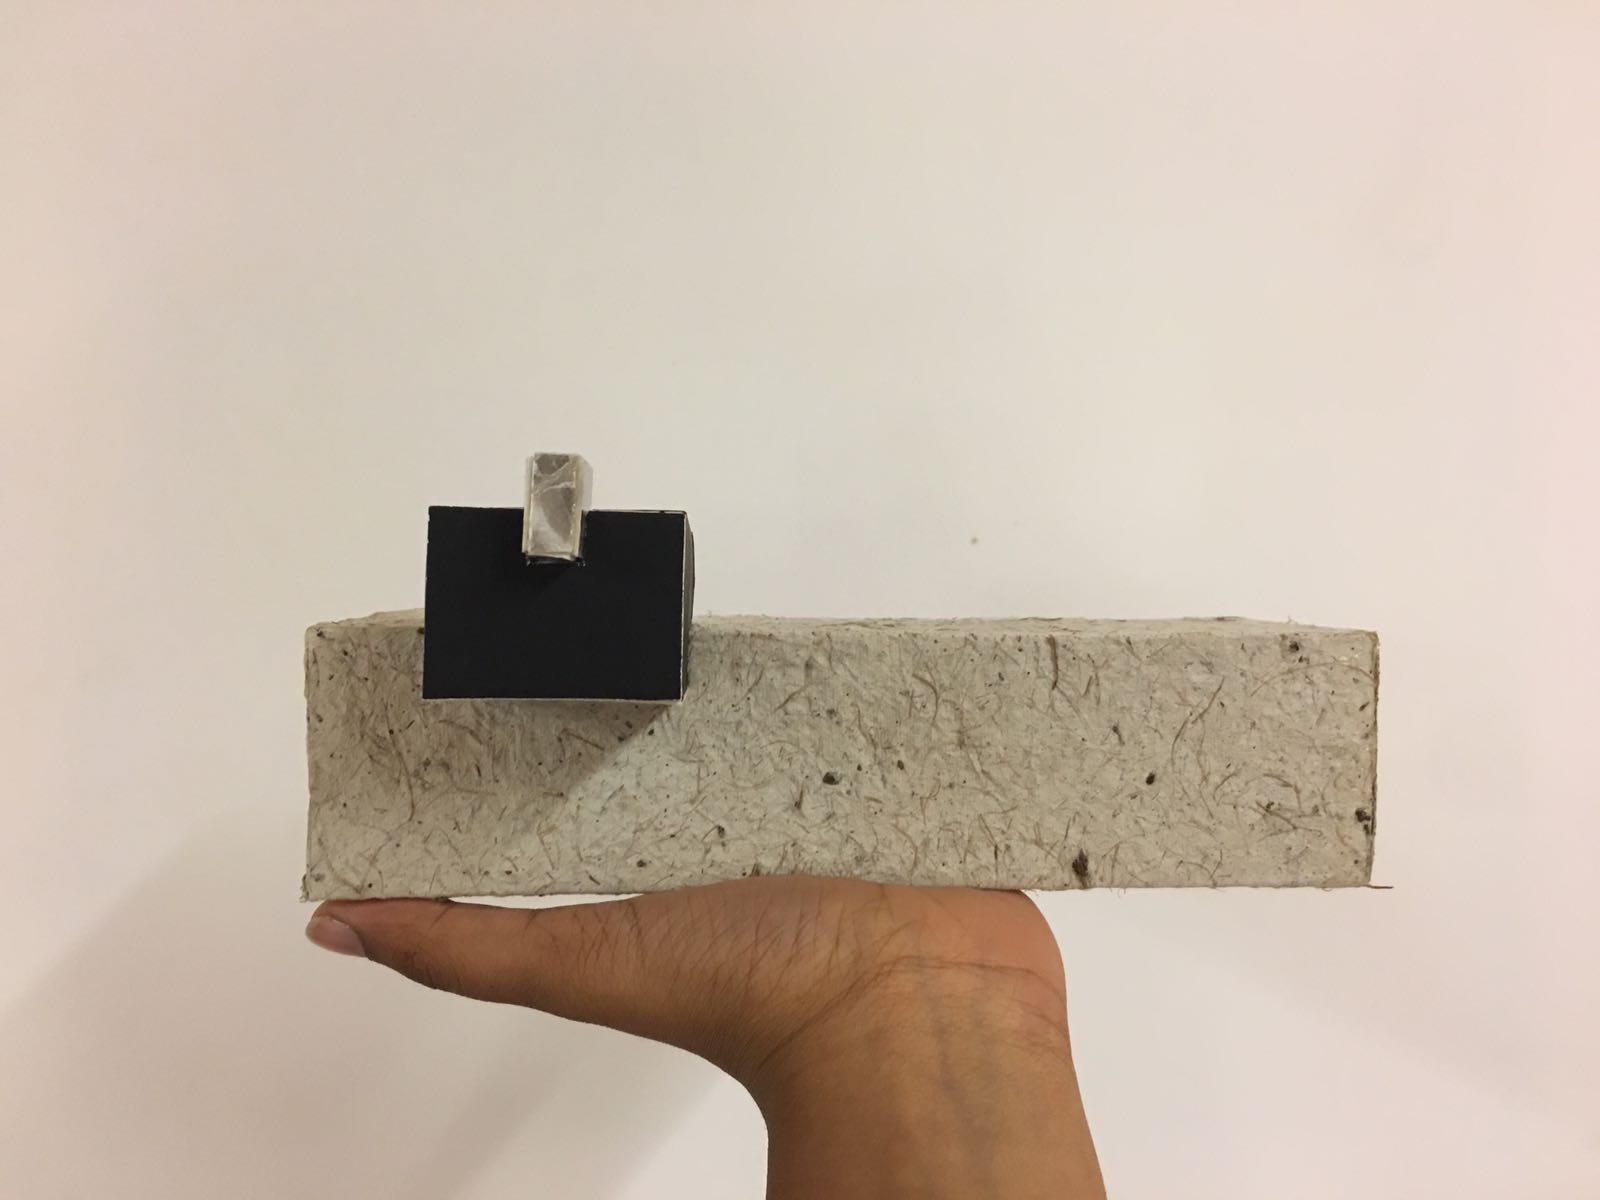
iiModel 1: Made using foam, paper and marble sampleii

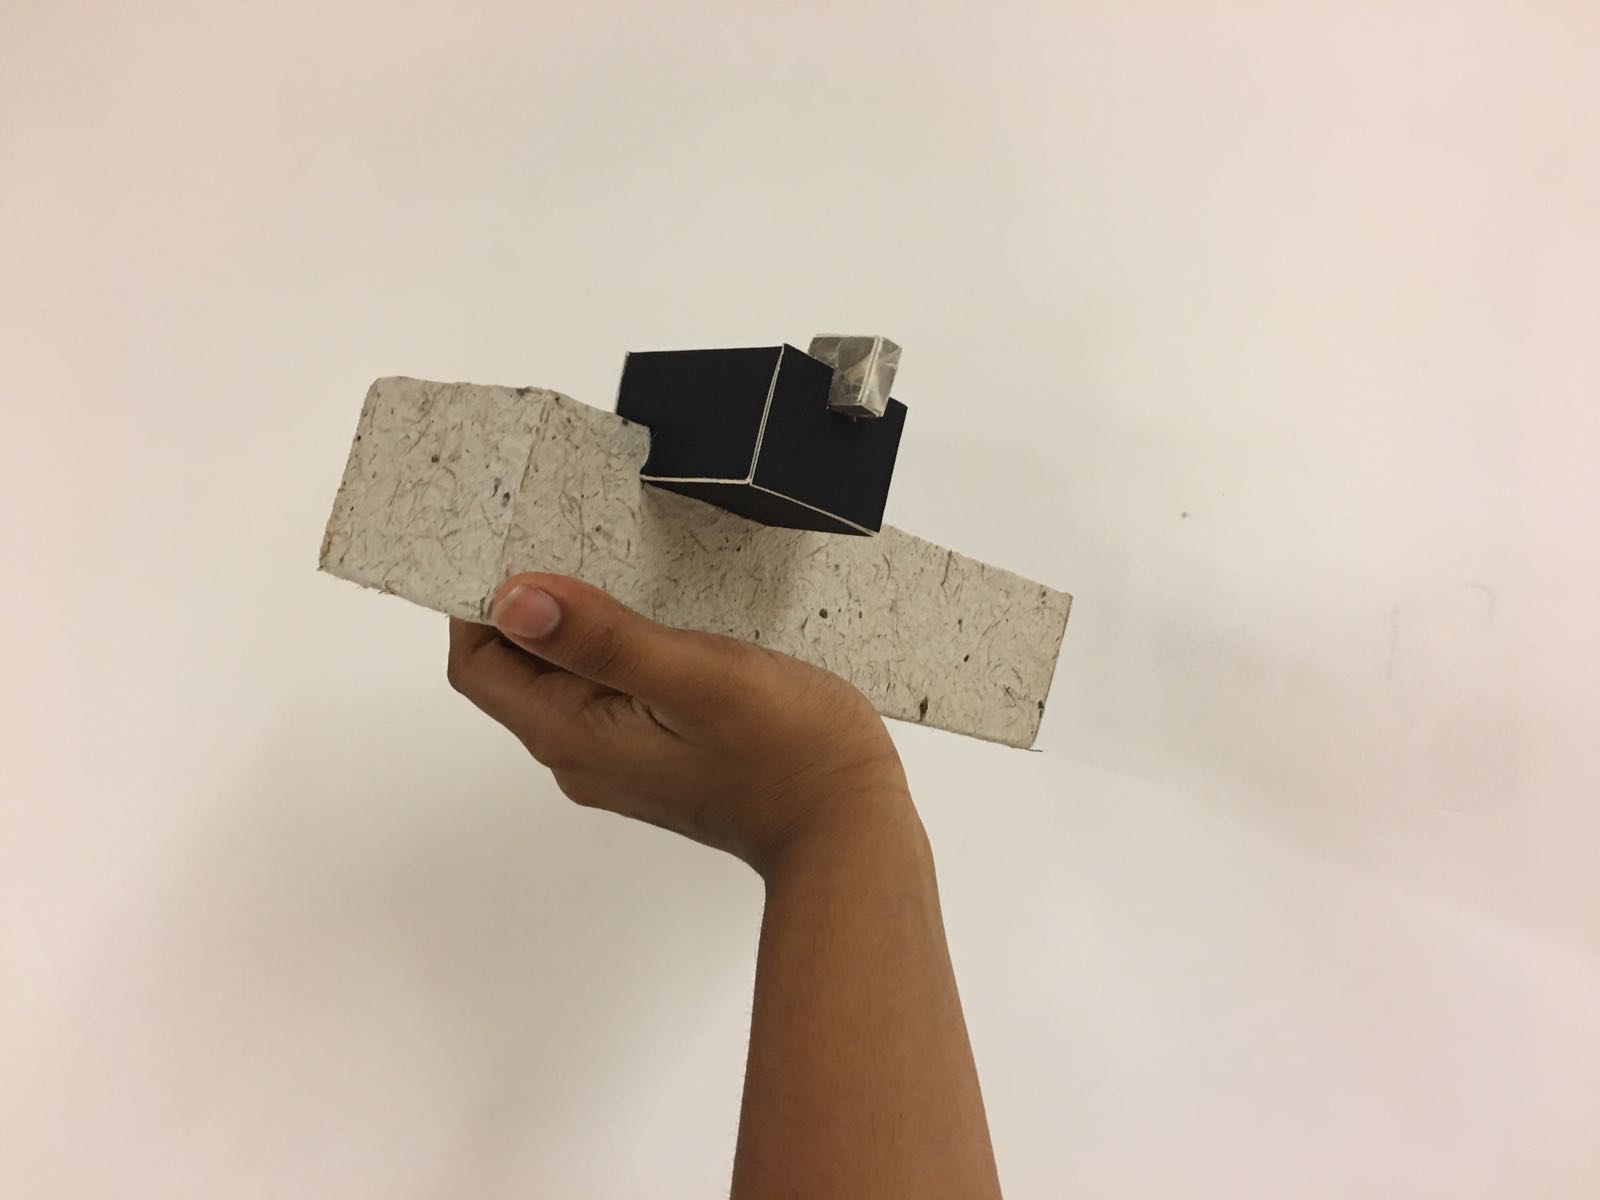

(Large application) Signifies a rock climbing wall, where the course gets increasingly difficult – textured and relatively easier to grip at first, the course gets smoother and harder to climb up as the climber progresses – how would he grip onto marble? I’d call this The Killer Rock Climbing Wall.
iiModel 1: Other applicationsii
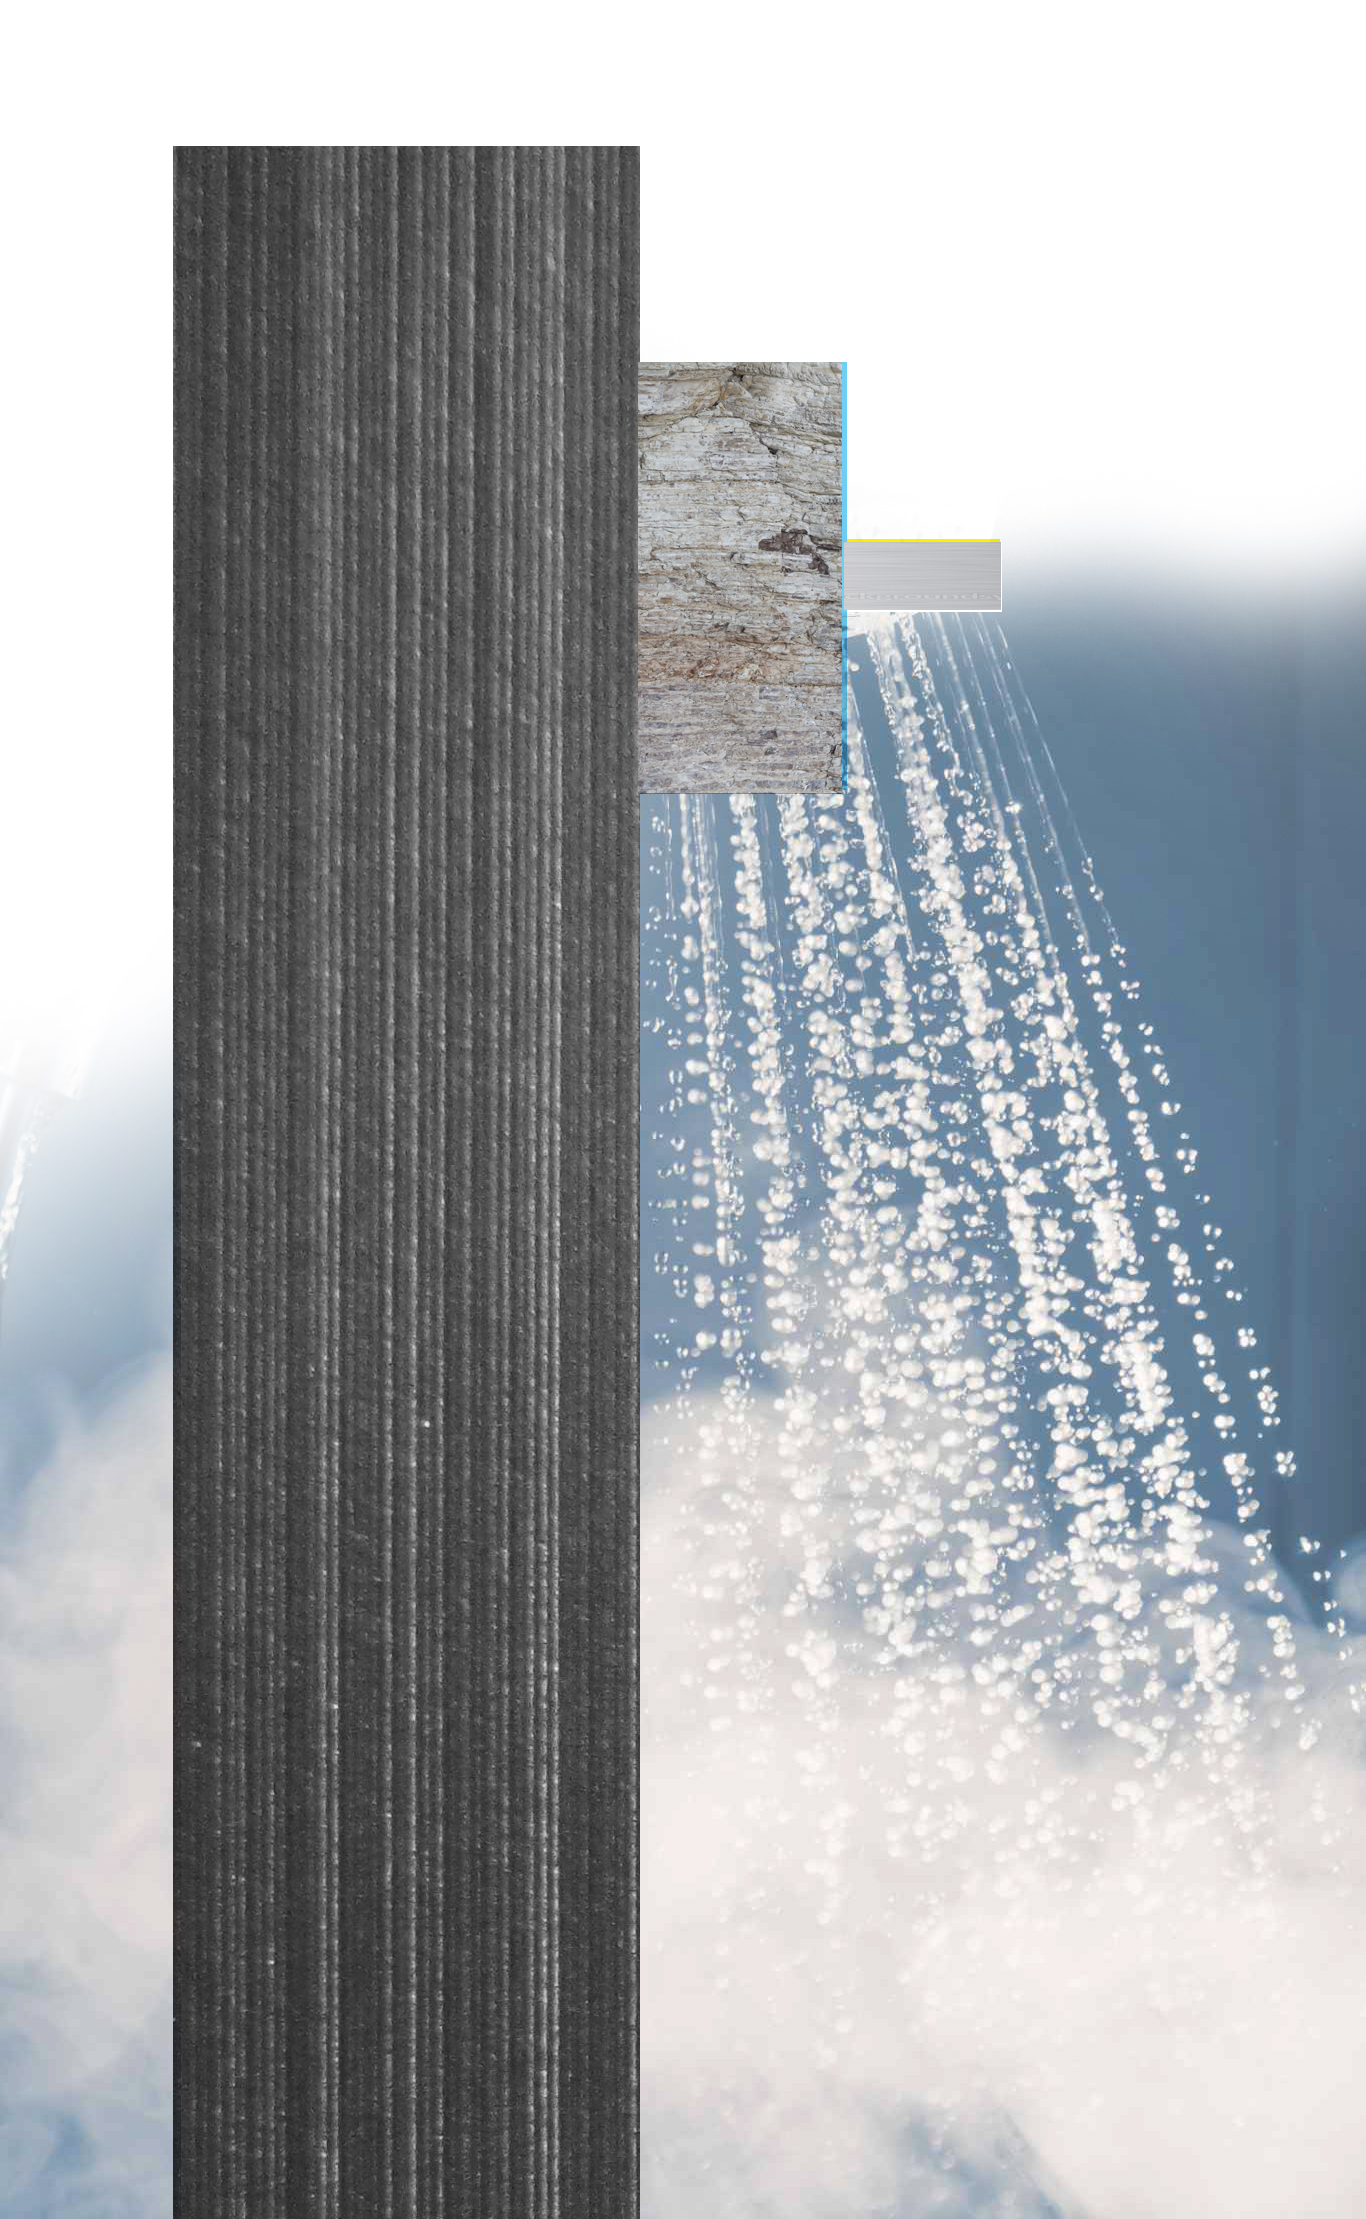
(Small application)
A minimalist showerhead, made of aluminium, stone, and ceramic, inspired by the work of Kazuyo Sejima.
The Kazuyo Sejima works I was inspired by for the showerhead:
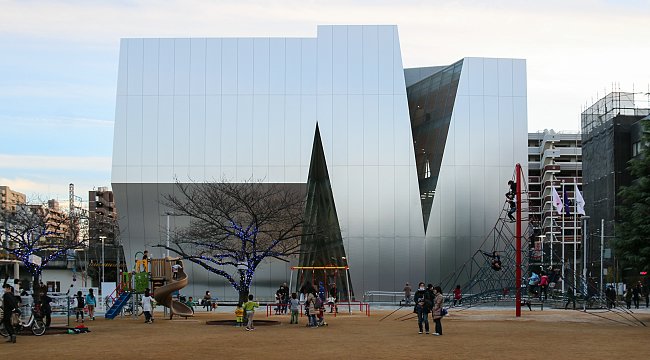

I really enjoy her simplicity and the clearness of concept that can be seen in her work. I aimed to emulate the subtly reflective surface of the Sumida Hokusai museum with the aluminium, and was inspired to include stone after viewing her house in Samaya.
iiModel 2, made of foam, paper, acrylic, leather sampleii

(Small application #1) It’s supposed to be a goat rocking hair for children, with the paper with a fabric texture being inviting and comfortable to sit on, acrylic adding visual interest, and the leather SO being the handlebars for the child to grip on to as leather has very tactile quality.
iiModel 2: Other applicationsii

(Small application #2) A minimalist swing, made of steel, acrylic and marble. I feel that people go on swings to relax, and the minimalist aesthetic would help with that.
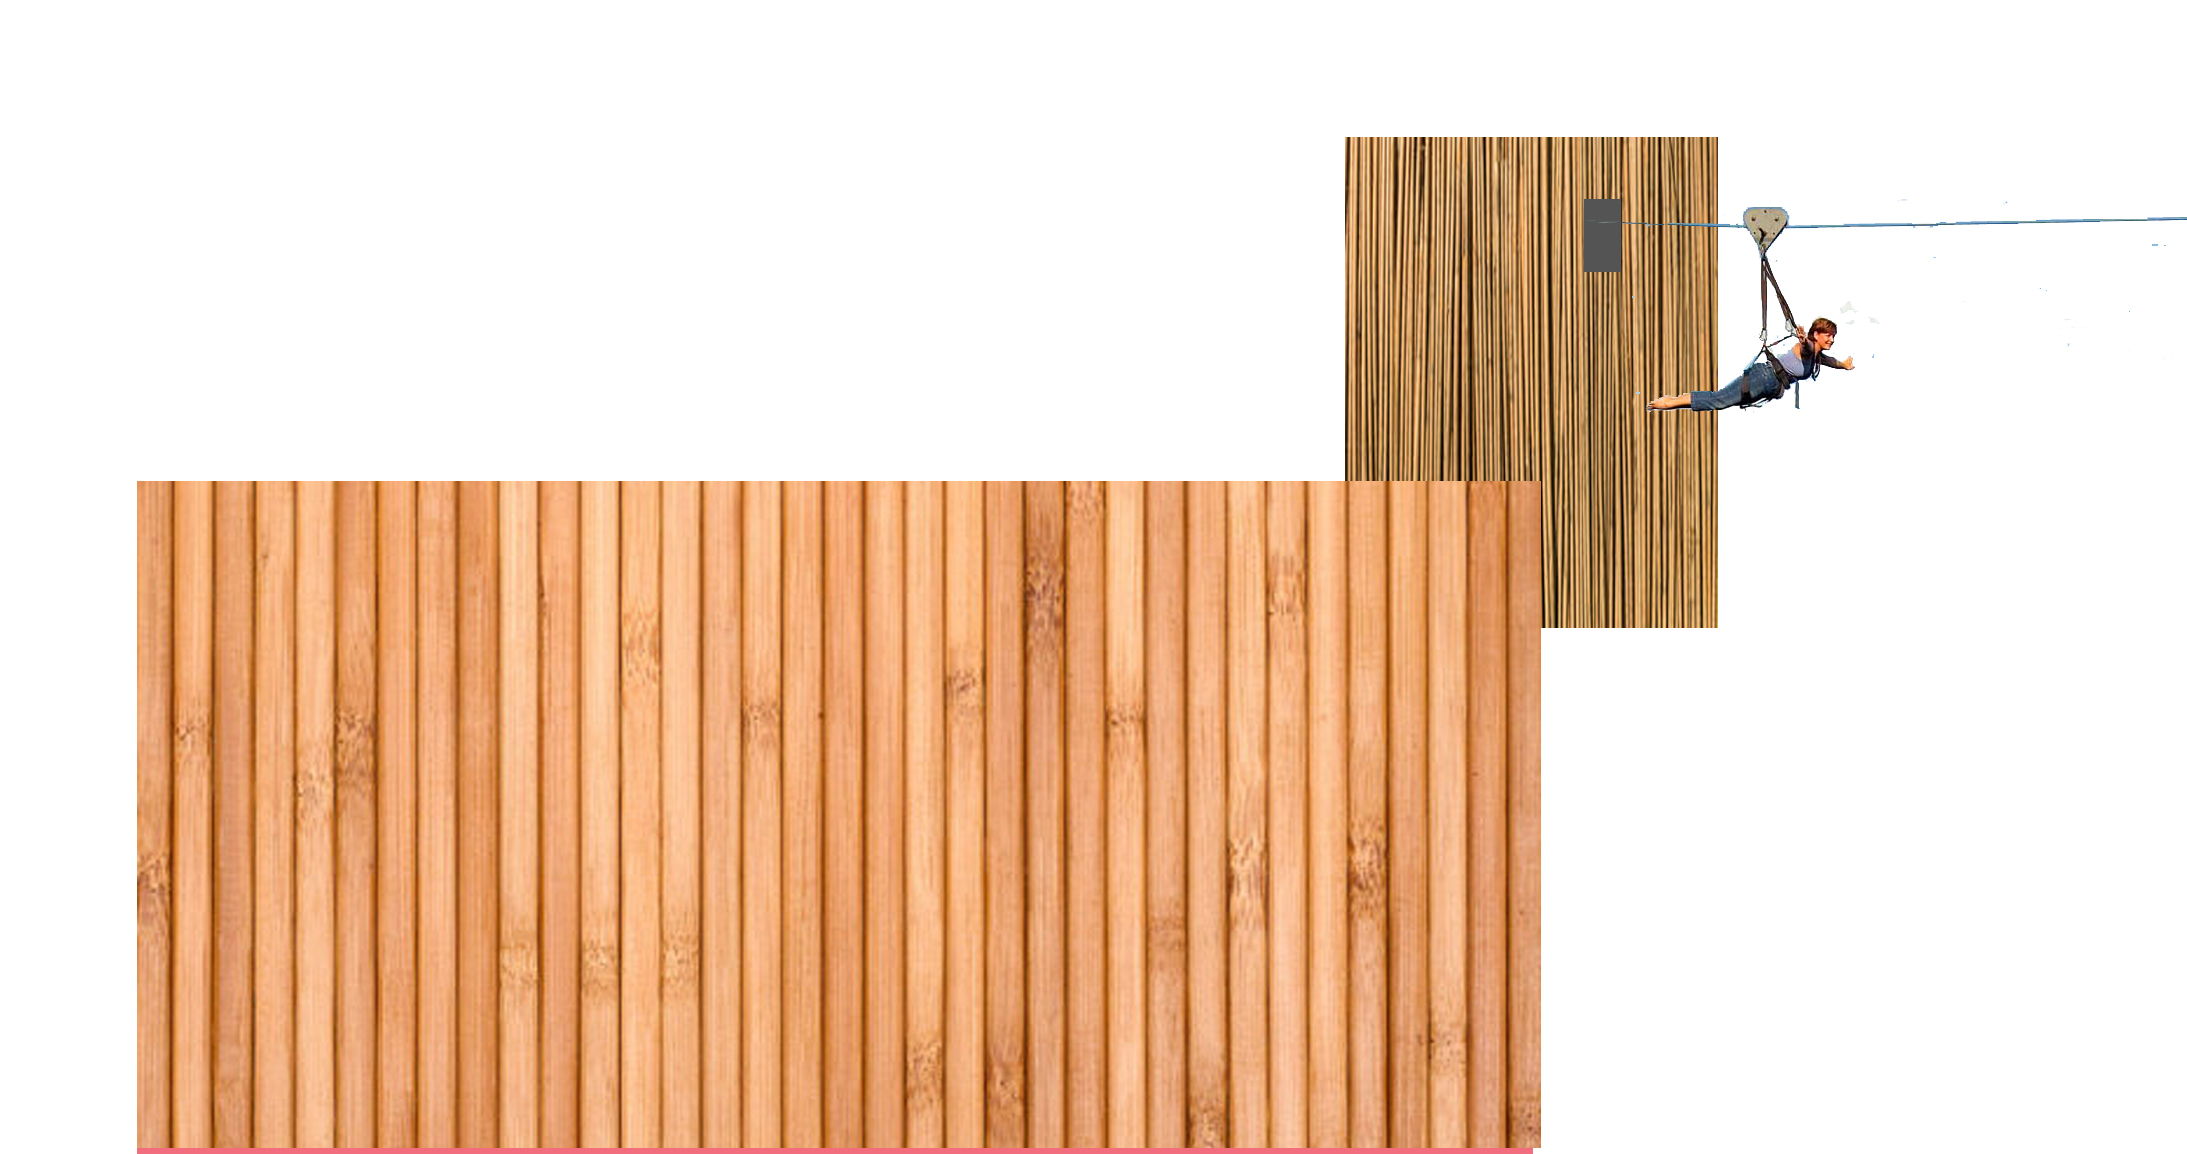
(Large application) A building to zipline from, made of wood! I was inspired by Kengo Kuma, who uses wood in his buildings. I thought that this building where you could do the flying fox from could be housed in a forest, and hence the wood that it is made of could help it look harmonious with the environment.
The Kengo Kuma works I was inspired by:
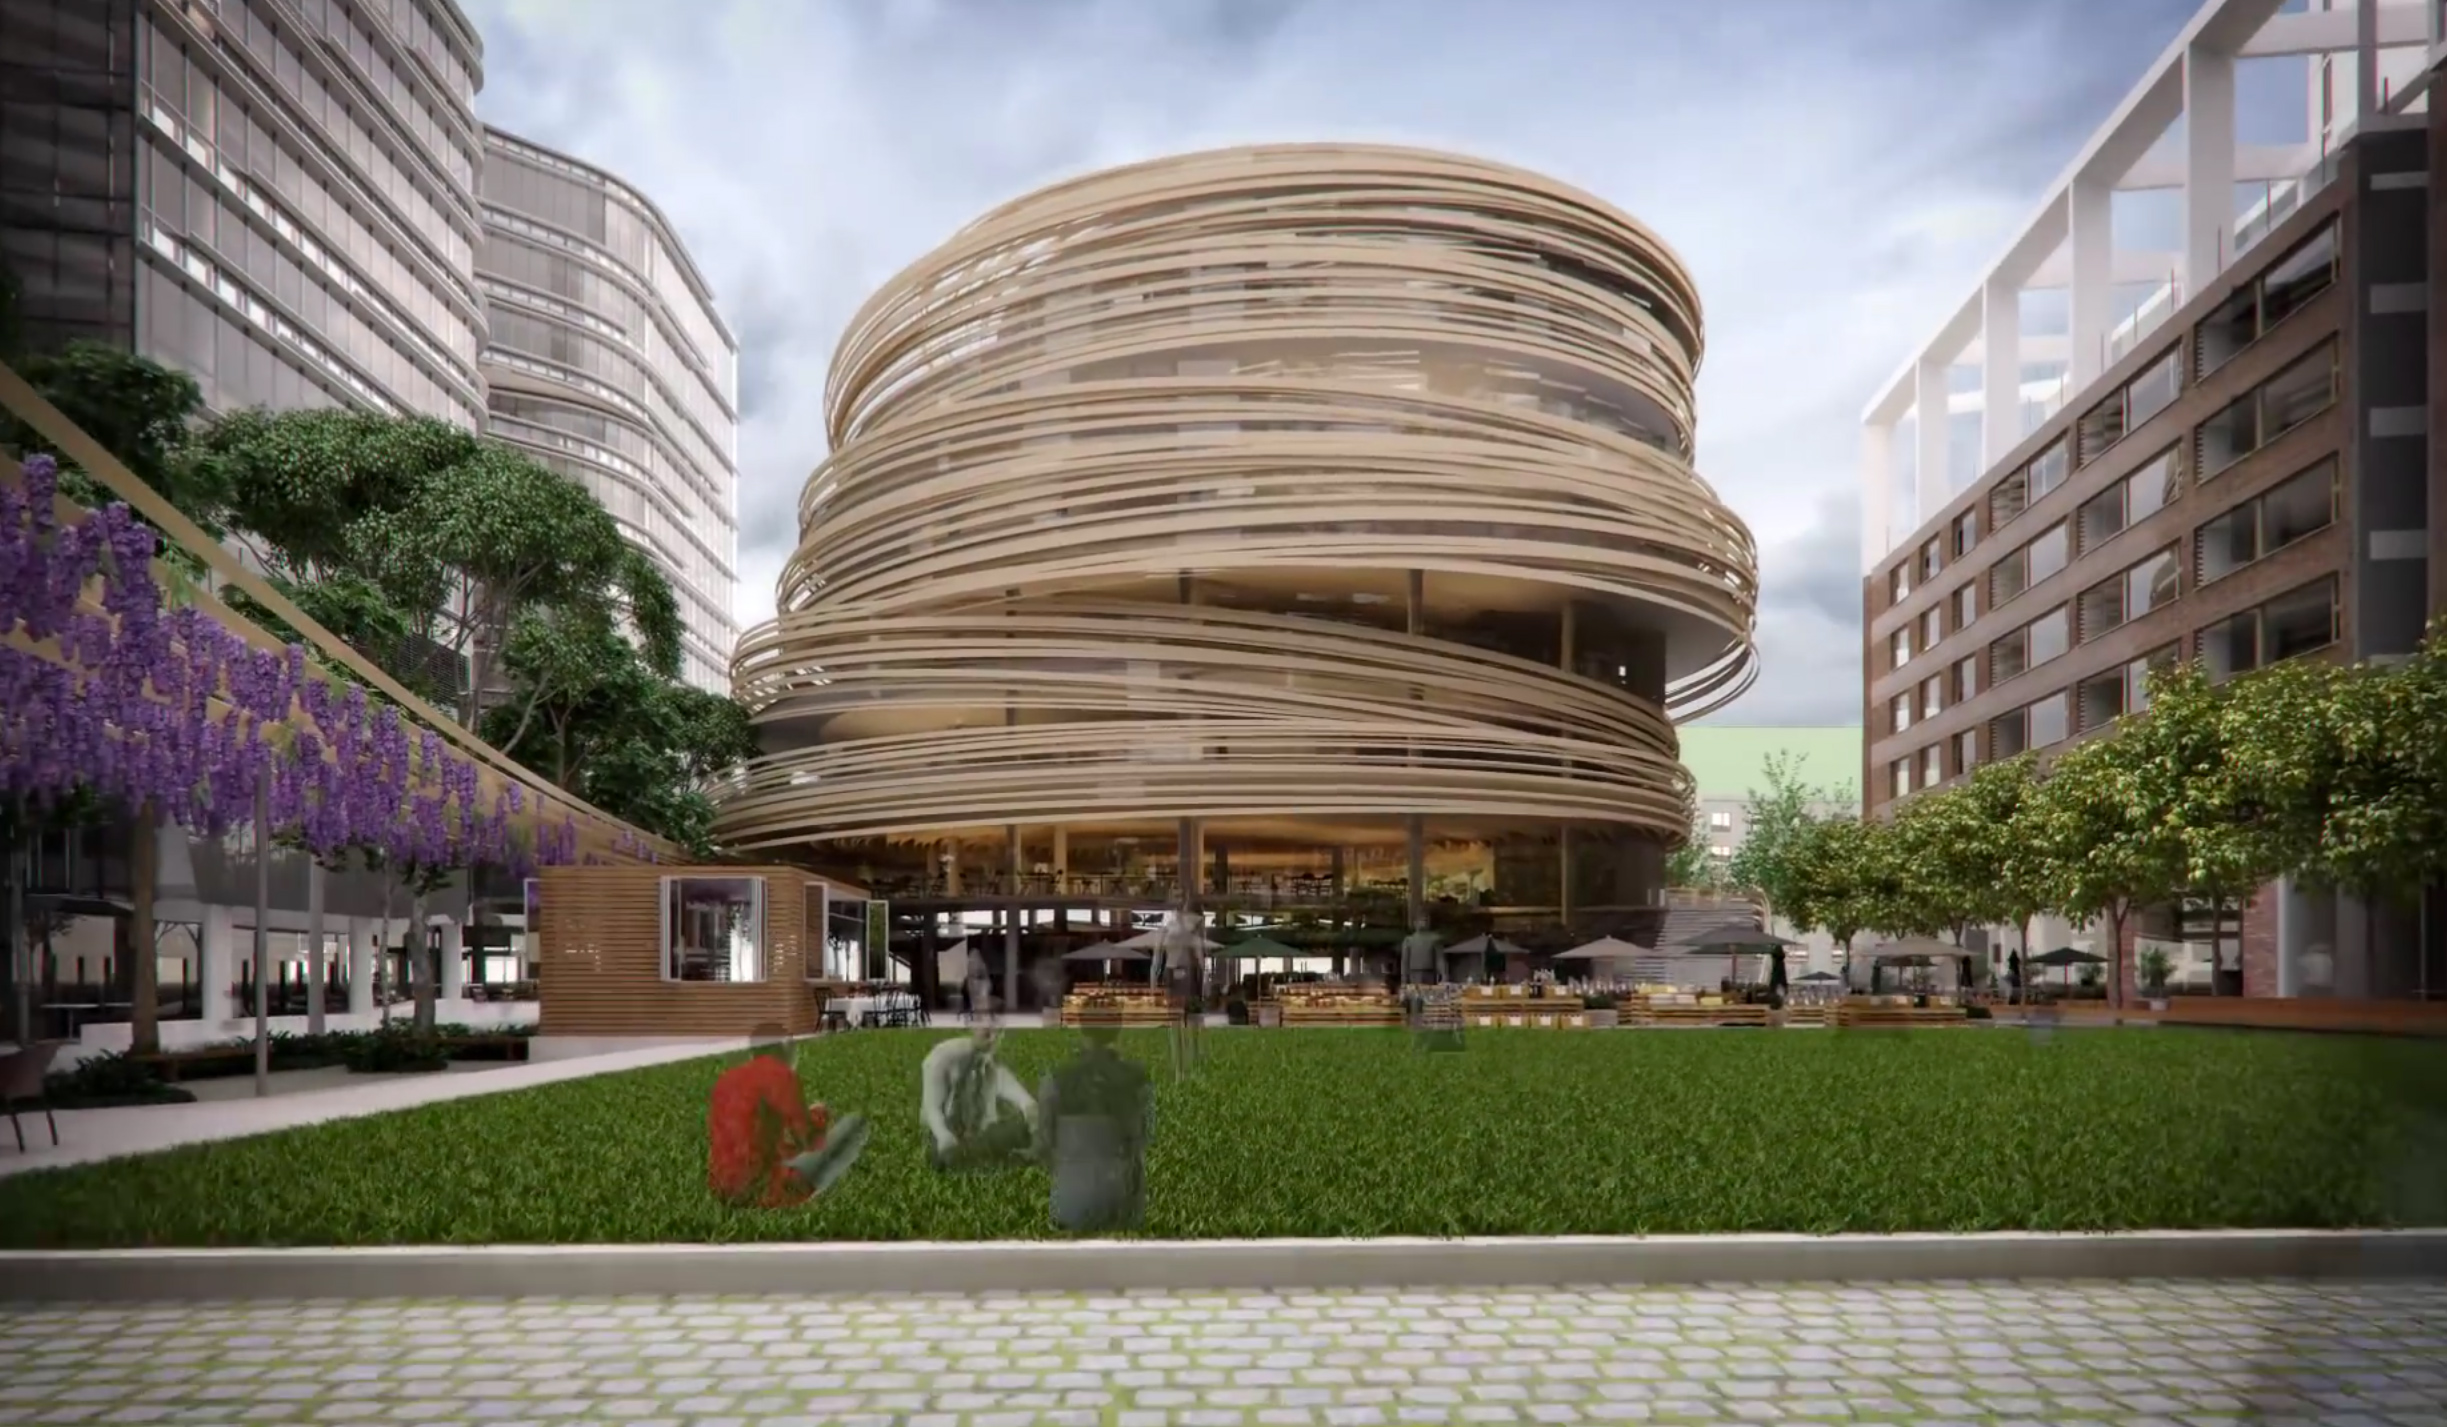
The Darling Exchange looks unified with the greenery surrounding it, even with the more industrial buildings around it, with its use of wood. I really like how even with its unusual form, it retains an organic quality with the its choice of material – I tried to emulate this unity with the environment with the usage of wood for my large application, the zipline.
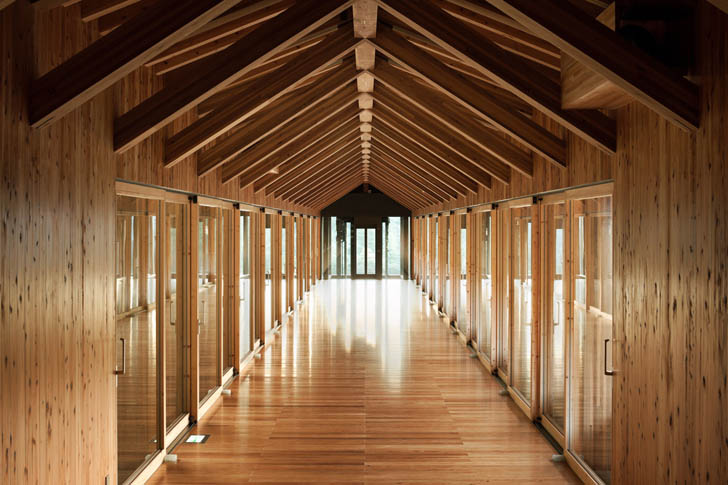
I love the Kengo Kuma Wooden Bridge Museum for again, the use of wood. I think it’s very comforting and homely, and could reassure someone trying to zipline off a significant height. I think it’s more appropriate then, say, steel or something more “cold” for such a scary thing to do for most people. I think the wood would make them feel more at ease.
iiReflectionii
I’m pretty pleased with how my models turned out – especially model 1 for the clean edges. I learnt a lot about materials – I learned how to work with foam, for a start, and found that textured paper – more specifically the one I used for the dominant of the first model – is a lot harder to get not to fray than it looks.
I learnt the most about the constant process of revision. The 2D sketch analyses were hard to do at first – simplifying is harder than complicating – but I learnt a lot about proportion and balance from the whole journey. Thank you for coming along on it with me *:.。.o(≧▽≦)o.。.:*