Category Archives: Foundation 3D 1 – G6 (2017)

[3D] Mnemosyne’s scent: Group

Here’s my pdf for the accessory project Zhenyu and I worked on together!: https://www.flipsnack.com/balast/mnemosyne-2.html

I had so much fun doing this project, especially the little photoshoot at the end of it. Thanks to Zhenyu for being such a great partner, and Cheryl for her valuable feedback! If you can’t view the pdf, you can download it here. Thanks for looking! (っ˘ω˘ς )


[3D] Mnemosyne’s scent: Individual

Here’s my planar exercise and scent model!: https://www.flipsnack.com/balast/mnemosyne-part-1.html

I took really long doing the revisions and making the pdf look nice so that it’s easier on Cheryl’s (really overworked and tired) eyes.

If you’re wondering how the set up for the scent model photoshoot looks like, I set it up in my hall’s lounge room like so! If the flipbook doesn’t work, you can also download the pdf here. Thanks for reading (≖ᴗ≖✿)


[3D] Gaia’s Ikebana III: Final models, critique and revisions

Spring sculpture 1:

D: Orchid branch // SDs: Ice cream cone and matcha ring cake // SOs: Pink wafer cone and Hershey’s chocolate ball

Techniques used:

  • Piercing (of Dominant orchid branch through cone) and Wedging (of Hershey’s chocolate ball to cone)
  • Voids between SDs and the horizontal
  • Triangular composition of 2 SDs and SO from the top view, like in the actual Moribana Ikebana arrangement
  • Rule of thirds in length of SD to D (elaborated on on 2D sketch analysis in previous post)
  • Follows 30 degree, 45 degree rules of dominant and subdominant like in actual Moribana Ikebana arrangement
  • Length of dominant follows relative proportion to base container advised for actual Moribana Ikebana arrangement

Critique in class:

  • The dominant branch is too overly ornamented with orchid flowers, and also has an element of artificiality due to the fact that it is plastic
  • Cheryl suggested that I try finding a different branch, so I did. Here is the revised model!

Spring sculpture 1: Revised edition


Next, we have spring sculpture 2, made of Indian food! I meant to have the saucepan as the base to be indicative of the tools that was used to make the dominant. Furthermore, the handle was vital to having the dominant cone be able to balance at the 30 degree angle.

Spring sculpture 2:

D: Cone dosai // SD: Cylindrical vadai and branch passing through cylindrical vadai // SOs: Spherical kozhukattai and indian biscuit

Techniques used:

  • Wedging (of Kozhukattai SO to dominant cone dosai) and Piercing (of SO branch through SD vadai)
  • Void between dominant dosai and SD vadai
  • Follows 30 degree, 45 degree rules of dominant and subdominant like in actual Moribana Ikebana arrangement
  • Length of SD is half of length of dominant
  • Rule of thirds followed in wedging of 1/3 of kozhukattai SO into dominant cone dosai

Critique:

  • The class mentioned that the composition seems very linear. I do agree, and it actually became that way because I could not get the cylindrical vadai SD to balance against the dominant dosai any other way as the dominant dosai was very heavy. In my sketch model, it was not such a linear model and actually followed the Rikka Ikebana arrangement. In hindsight, I could’ve made the batter for the cone dosai in such a way that the pancake was not so dense and heavy, hence letting the SD be balanced against it in the same orientation that I had meant it to be in my sketch model.
  • The handle created some confusion between the SDs and Ds. I had not meant it to be part of the composition, but on hindsight, I realized that the handle was in fact very prominent.
  • Cheryl tweaked the SO branch that passed through the vadai such that it went down rather than up, and it looked a lot better. I also removed the standalone biscuit so as to include the handle as part of the 5 D, SD, SO elements. Here’s the sculpture below after that revision, thank you for making my sculpture look a lot better, Cheryl! (๑˃ᴗ˂)

Spring sculpture 2: Revised edition

Reflection

At first, I was scared about the project brief mentioning that none of the axises could be parallel or perpendicular to the horizontal ground. However, I learned a lot about counterbalance from this challenge and how to get shapes that weren’t as easy to balance as rectilinear forms to stay in the place where I wanted them to be (っ˘ω˘ς )

I really enjoyed learning about the art of Ikebana and using those principles in my own sculptures. I felt like I explored a lot of new territory with having the branches at specific angles, and enjoyed the visual effect it created as well.

I also learned to truly look at the whole sculpture, from the learning experience with the Indian food sculpture’s base handle being significant in the overall composition as well. Regardless of whether I had meant for the pan’s handle to be part of the 5 D, SD and SO elements, I realized that intention doesn’t really hold up to visual qualities, and learned to tweak the composition such that it could then be included upon this realization.

Lastly, I really felt like a cook after making all the Indian food, and it was even more fun to play with it to make my sculpture. I hope the smell of it didn’t make anyone too hungry in the morning (*≧ω≦*)

[3D] Gaia’s Ikebana II: The Making

The theme I got was… spring! (o˘◡˘o)

I was super happy when I found out I was getting this season because I love spring and all that it symbolizes. I made a mindmap to work out the nuances in the season, and to set a direction for my final models.


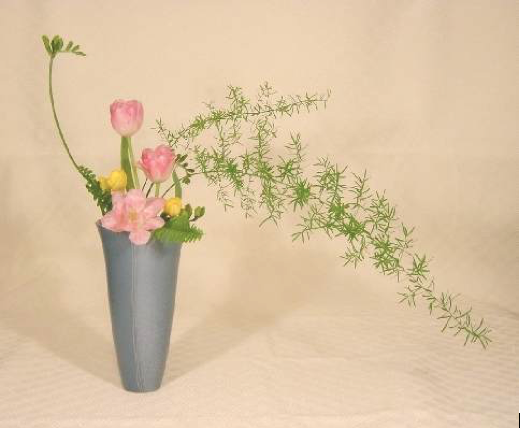
The scene I was particularly inspired by for my color palette were these scenes from Bambi, like I have mentioned in my mindmap.


In my mindmap, I thought about what spring meant to me – renewal and rebirth. But in order to make the sculptures personal to me, I thought about when I feel renewed when I eat food: in the morning, when I start my day with Indian food, and desserts at night when I’m rushing assignments. I further broke desserts down into 3 main categories: cake, ice cream and chocolate. This was the point in time when I decided to make two sculptures to represent both of these ideas.

Next, I had to decide on which Indian foods and desserts to use, and how to make some of them.

Some preliminary research on Indian food:

(From left to right)

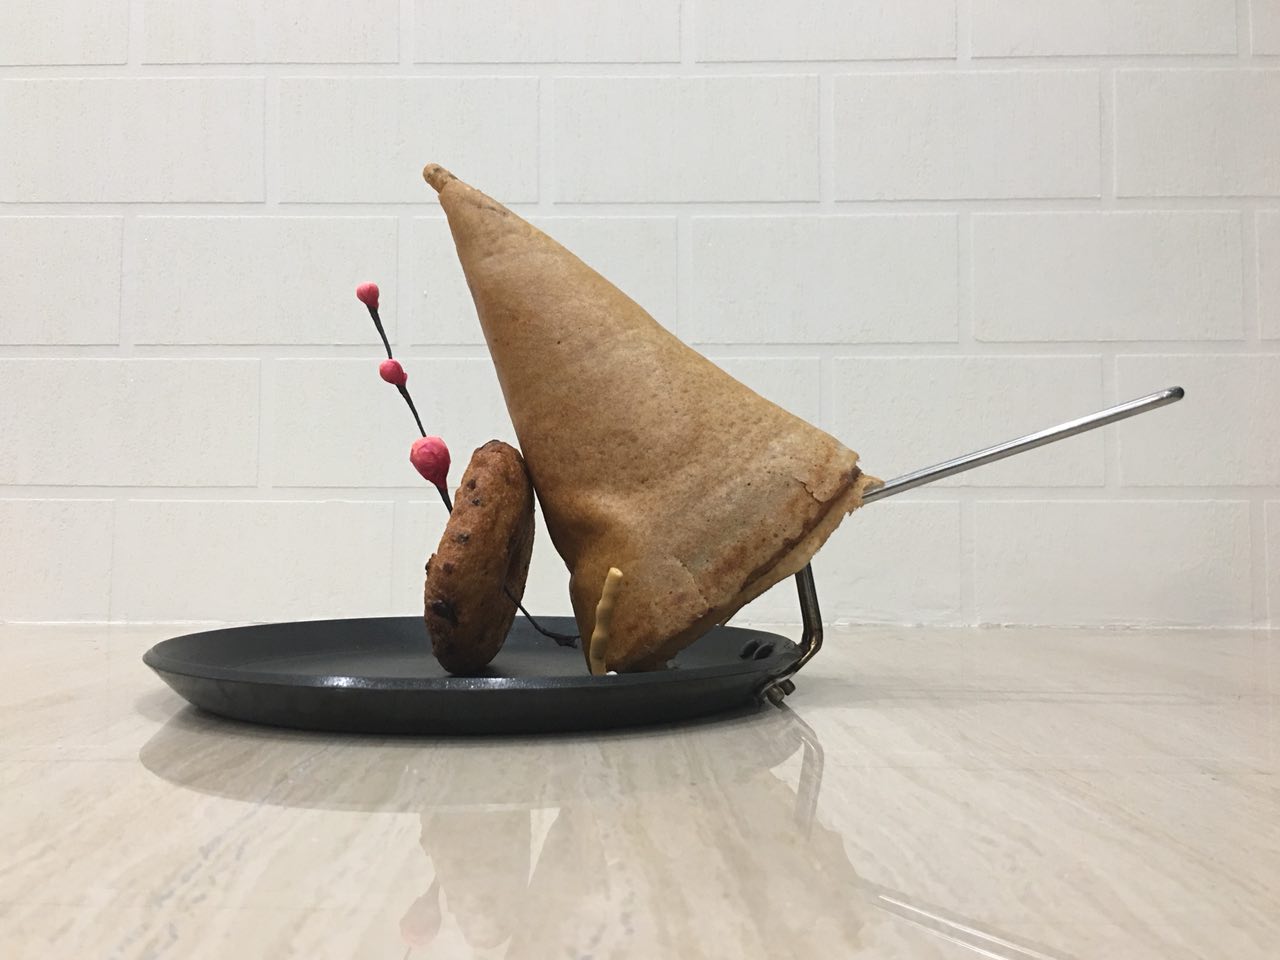
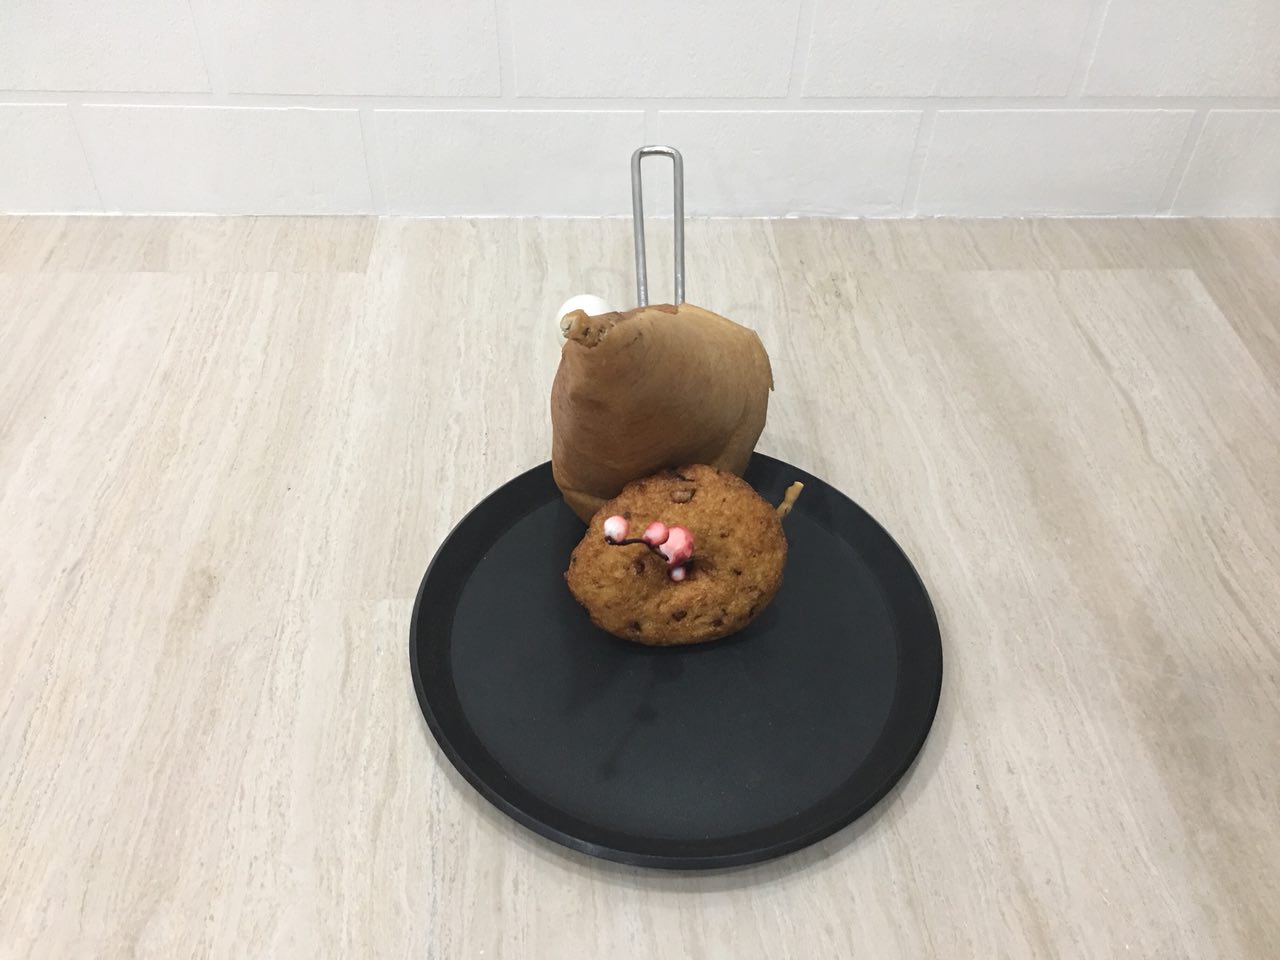
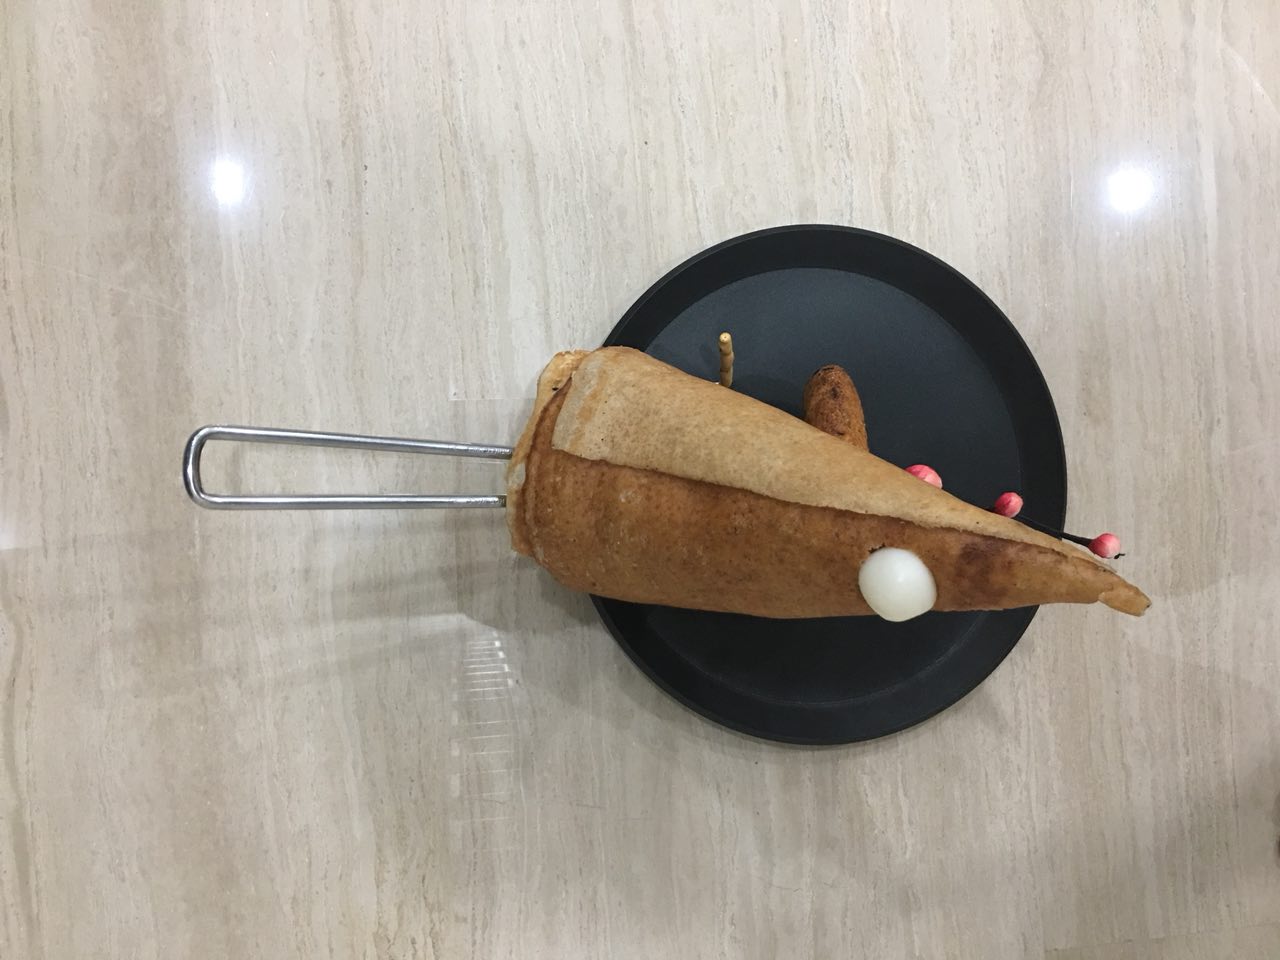
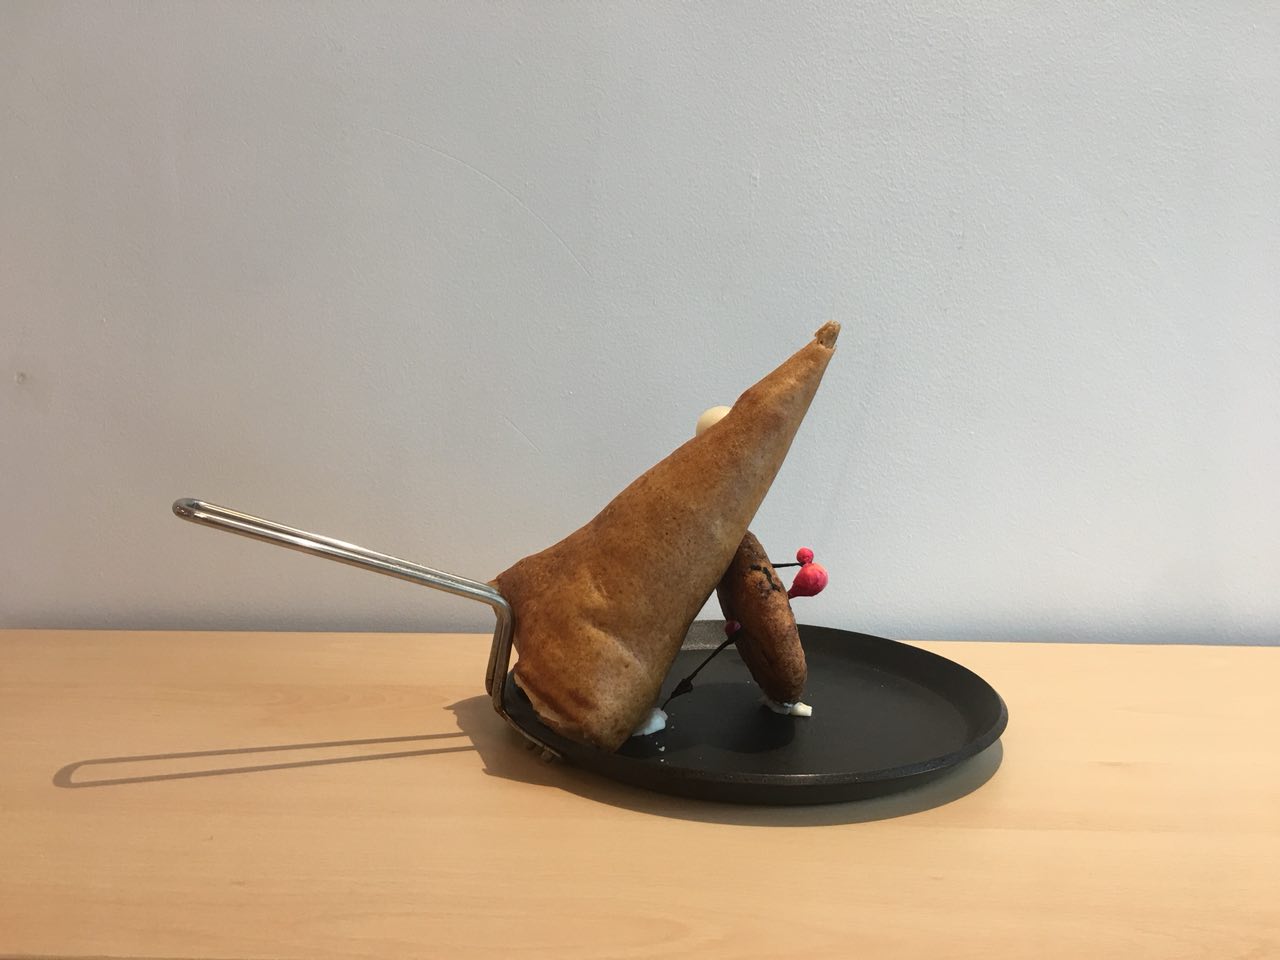
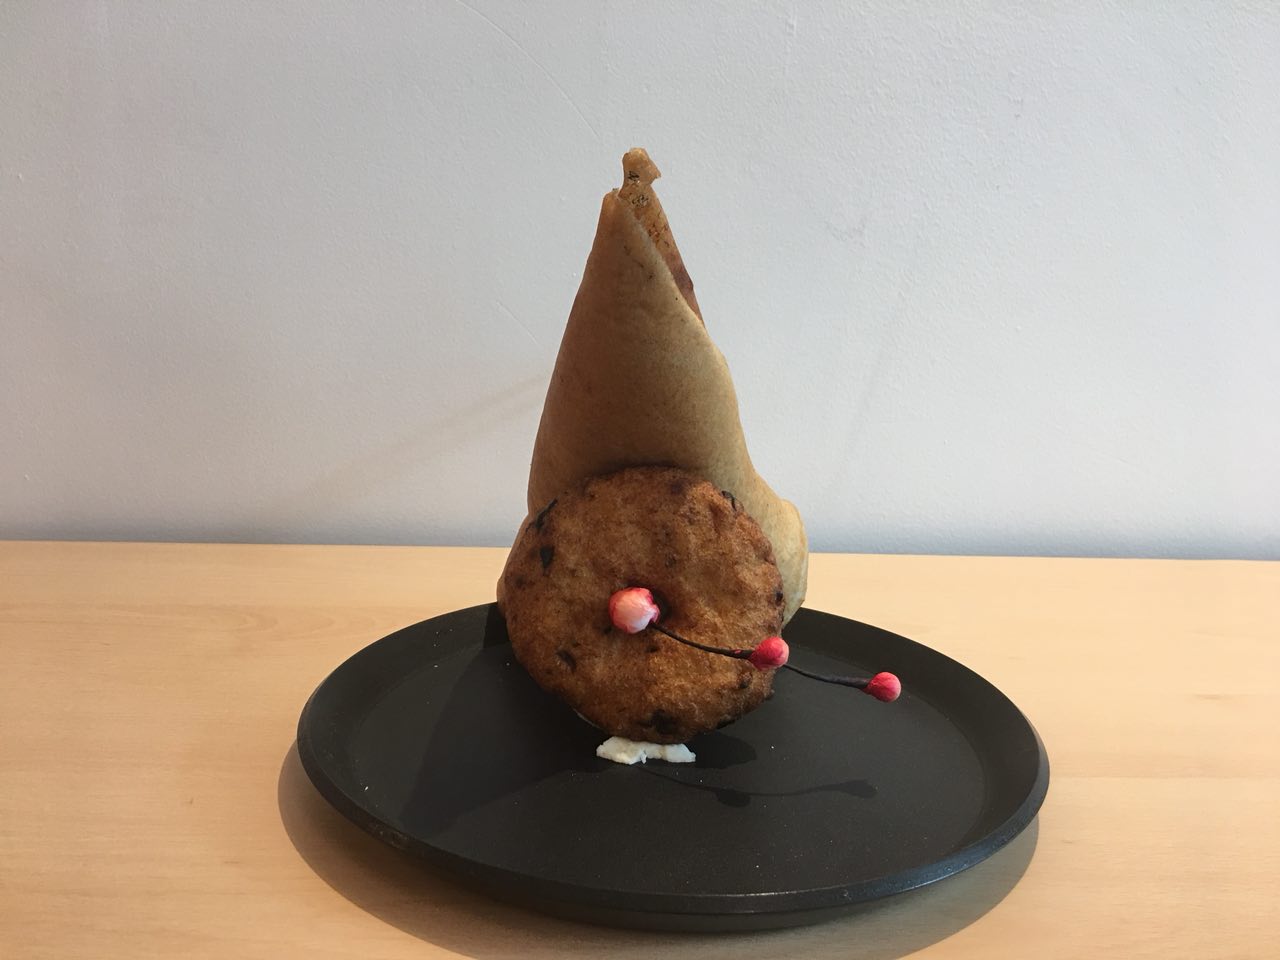
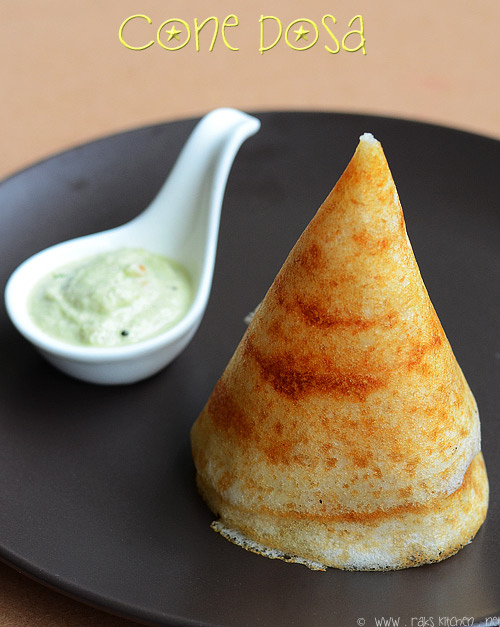
Photo 1: Dosai (Cone) – Pan fried pancake made from rice and black gram

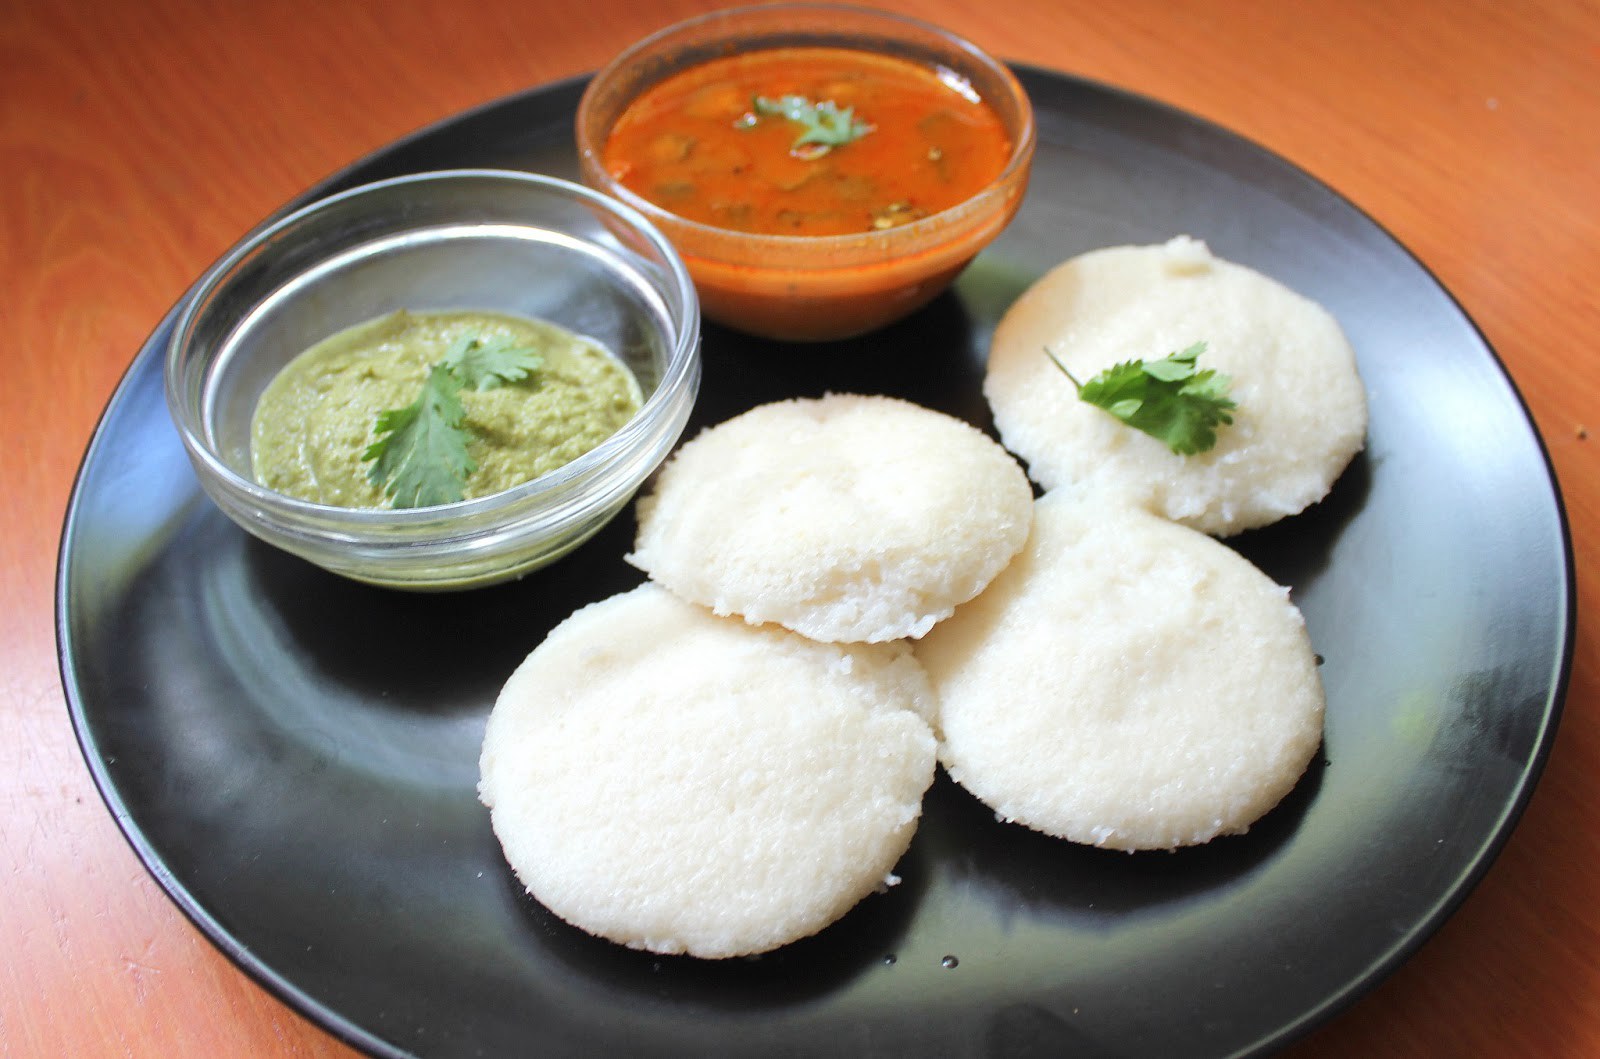
Photo 2: Idly (Cylinder) – Steamed cake made from black lentils and rice

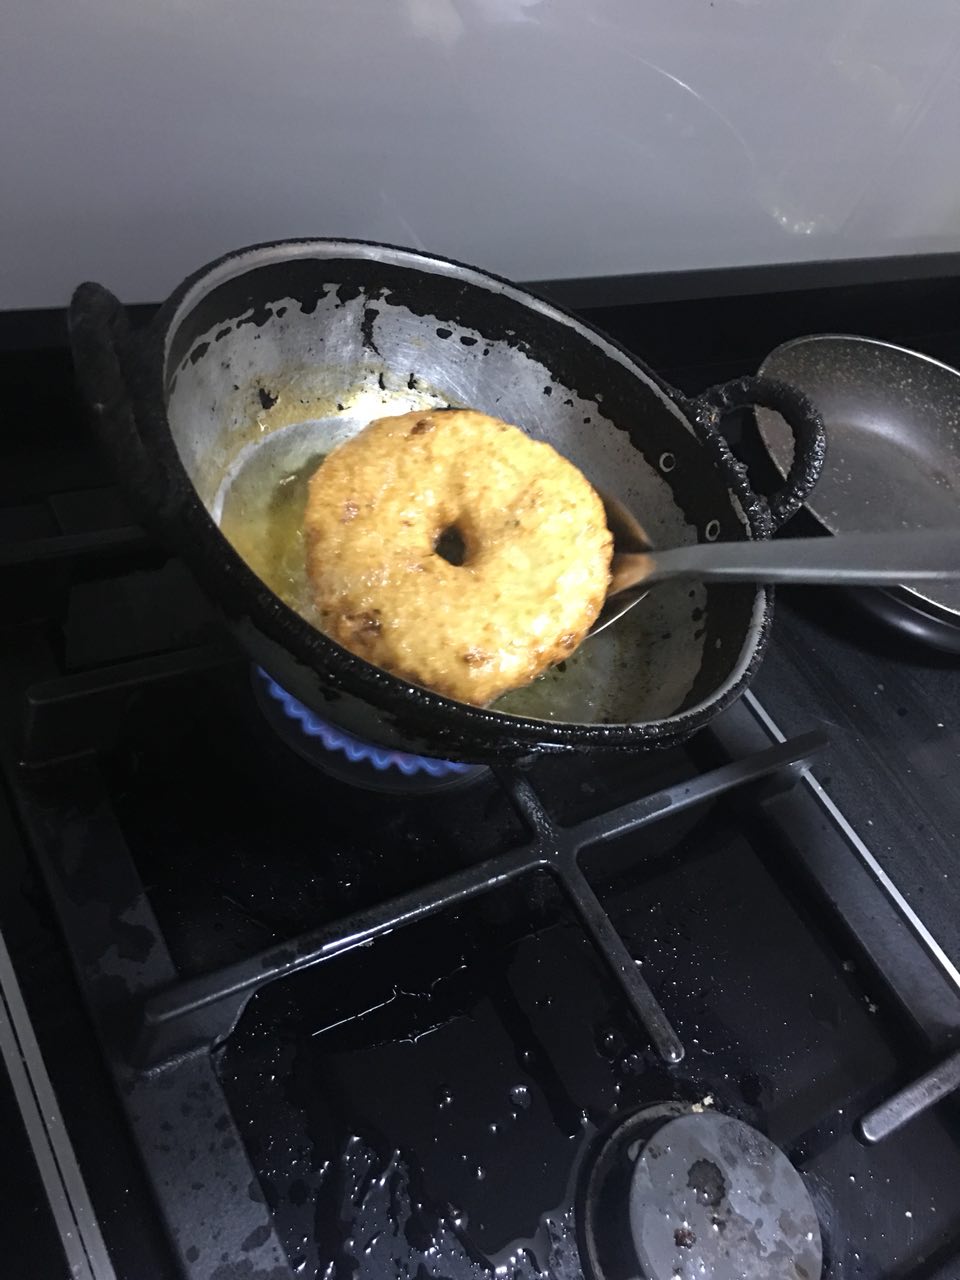
Photo 3: Vadai (Cylinder) – Deep fried doughnuts made from lentils, curry leaves, onions, chillis

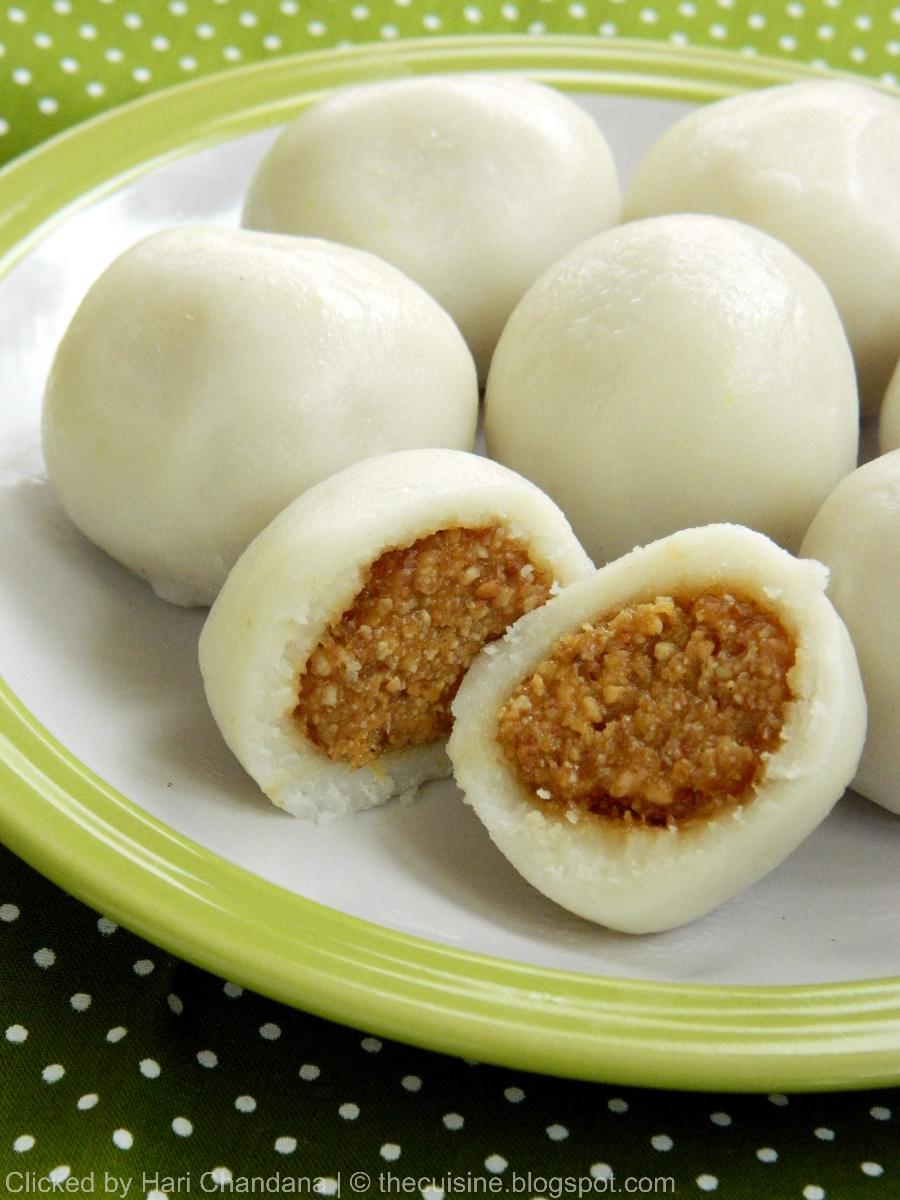
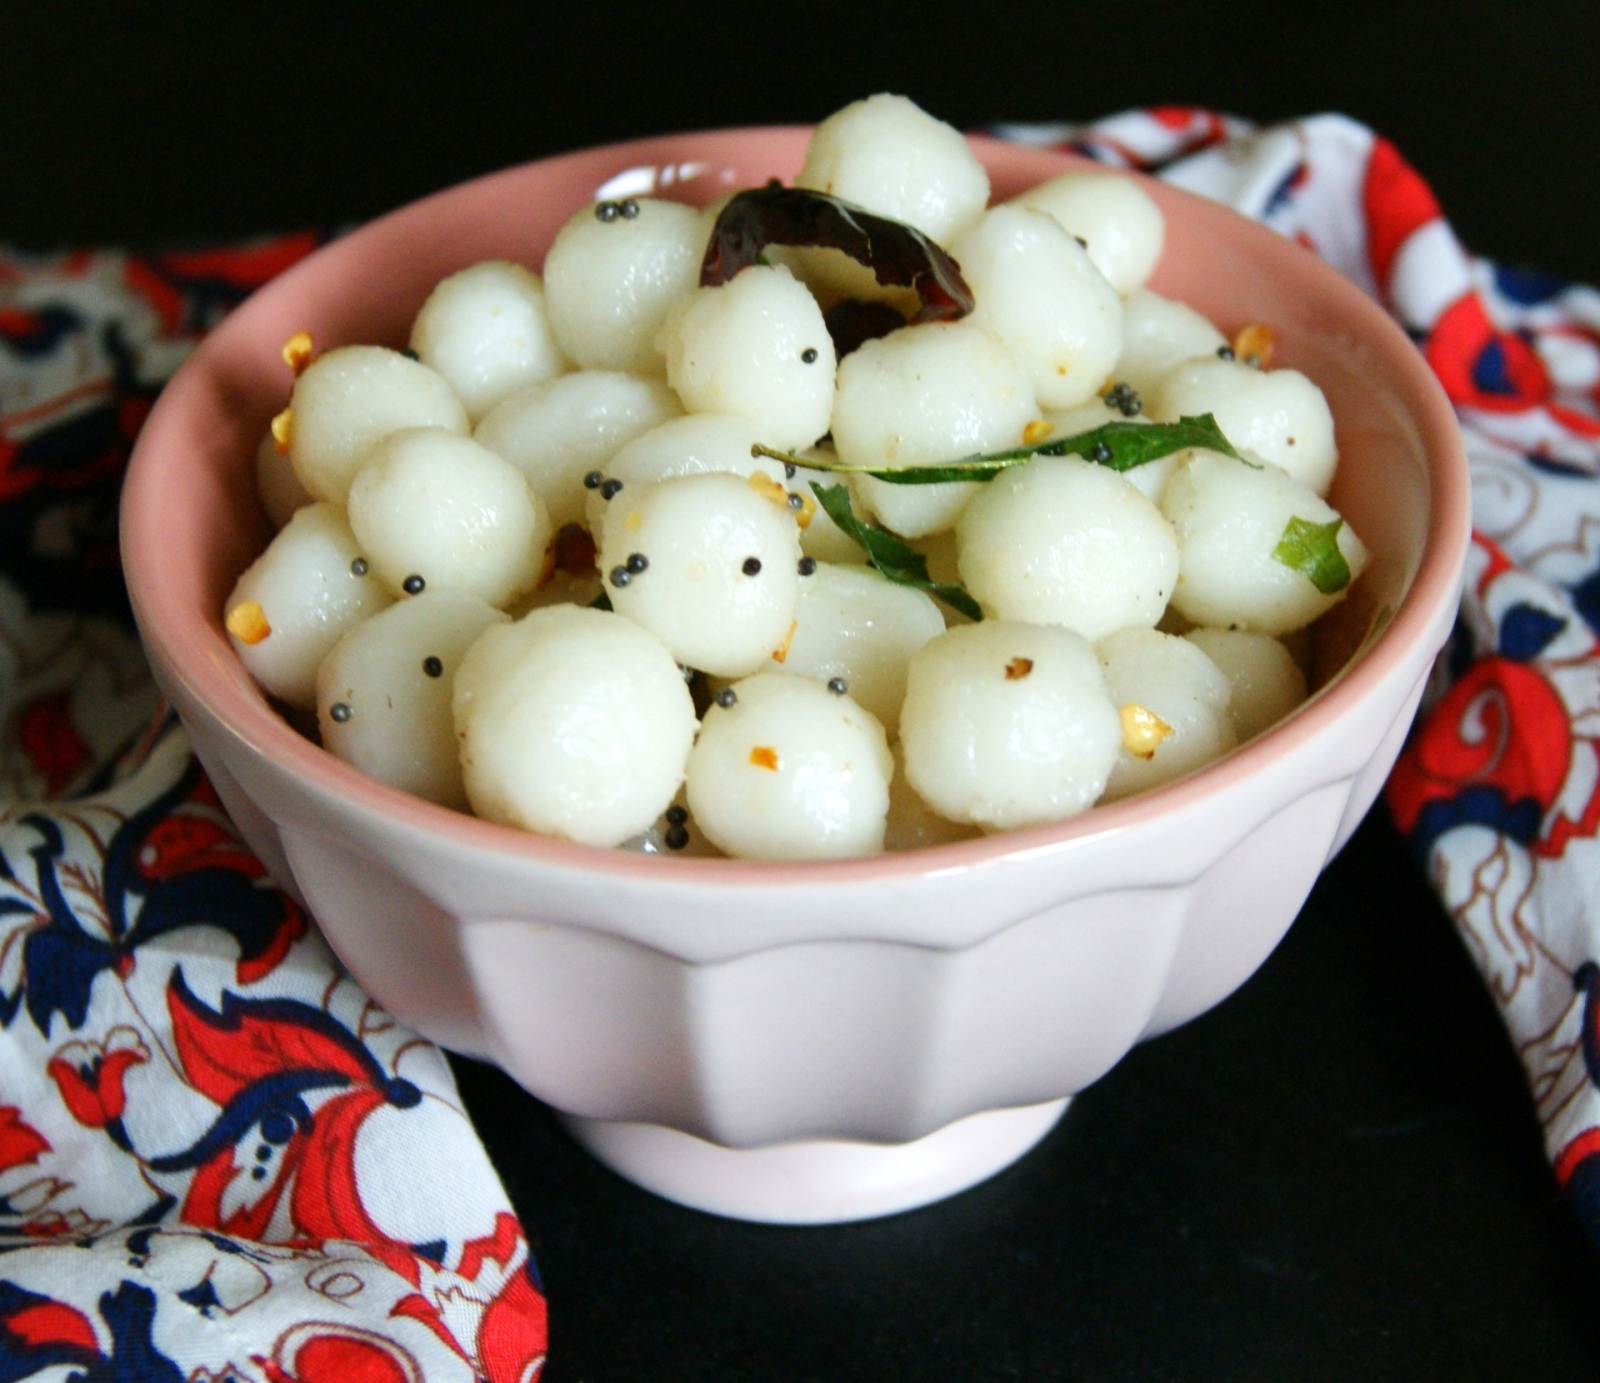
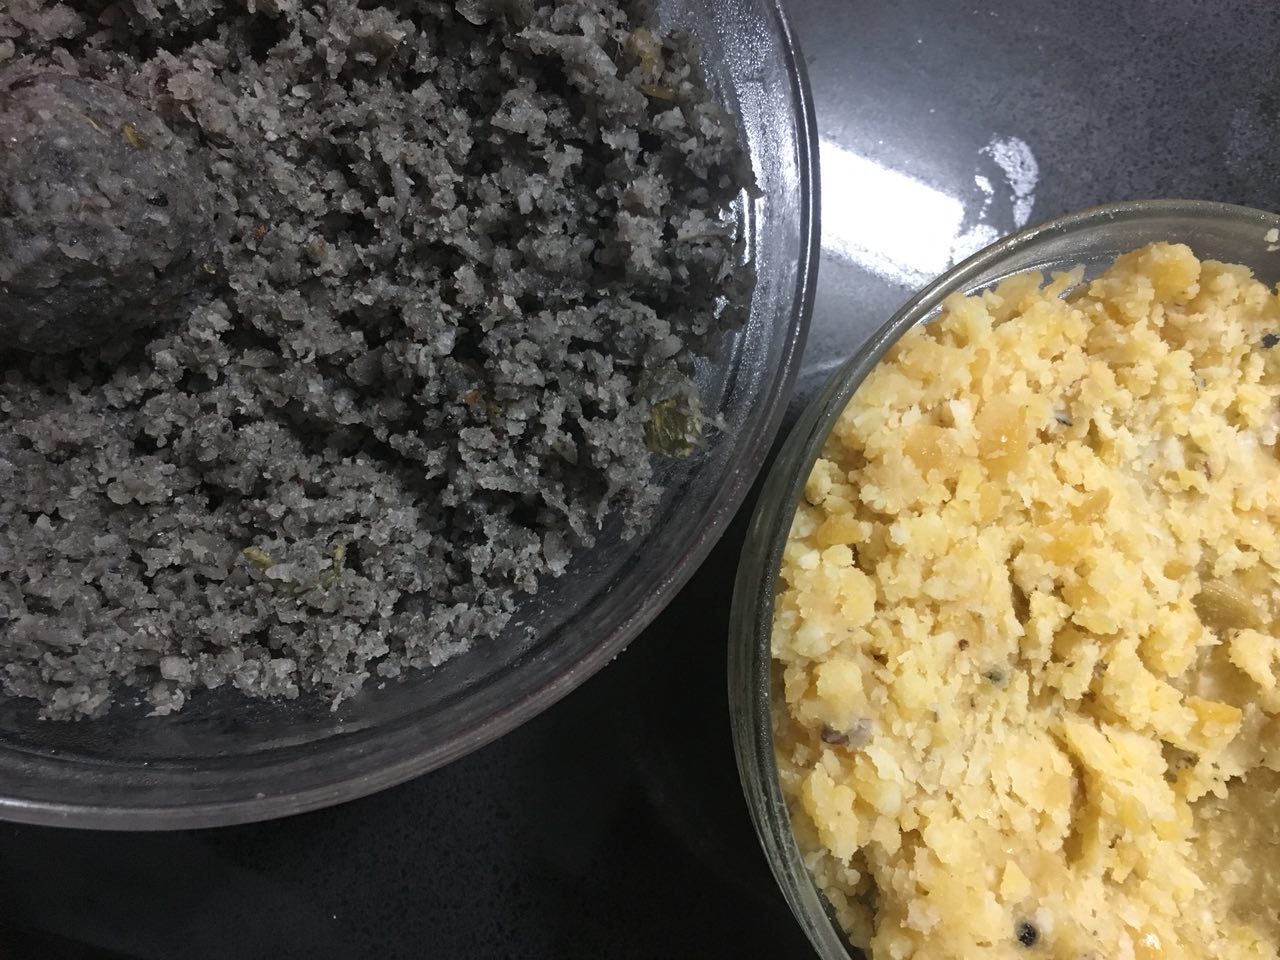
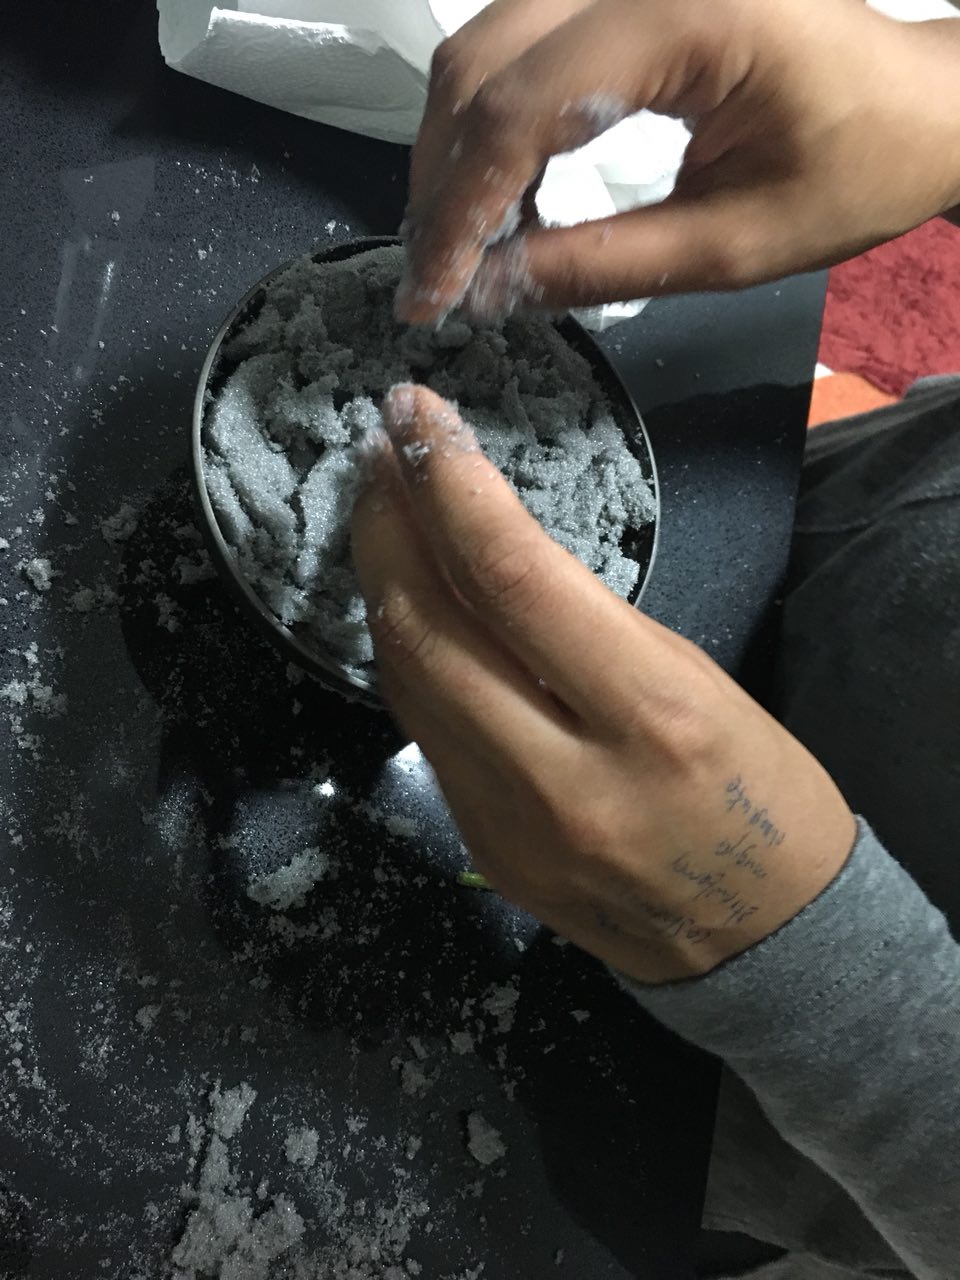
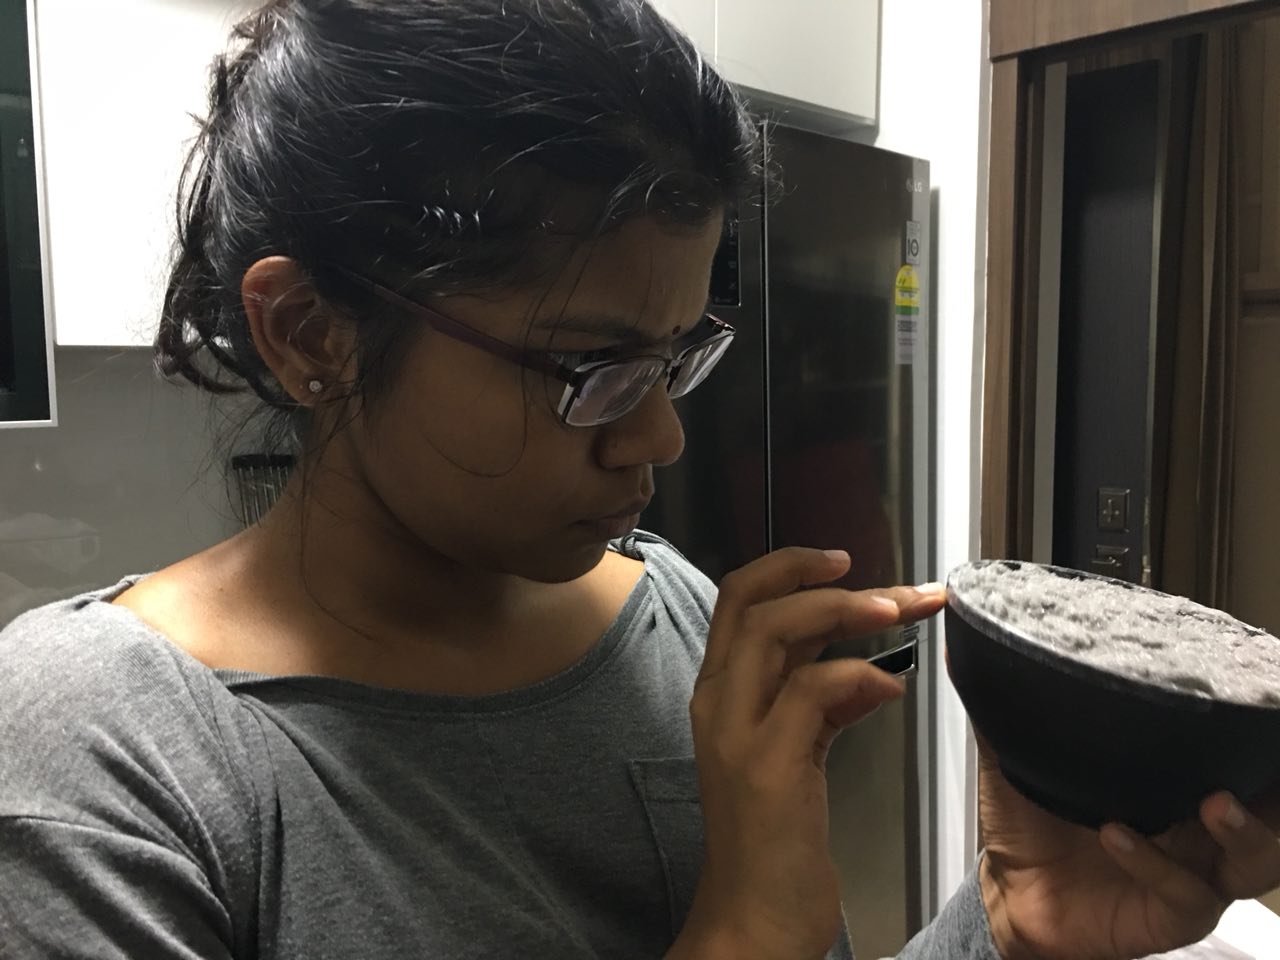
Photo 4 & 5: Kozhukattai (Sphere) – Steamed dumpling made from rice flour, with a filling of grated coconut and jaggery

Choice between Idly and Vadai: as I had already decided firmly on the Kozhukattai SO being white in color to reflect the purity and rebirth of spring, I felt that Vadai would be a better choice in terms of the color scheme, so that both the SD and SO would not be the same color.

Furthermore, I’d like the three items to reflect the three ways Indian food is cooked: 1) steamed (SO; kozhukattai), 2) pan-fried (D; dosai) 3) deep fried (SD; vadai).

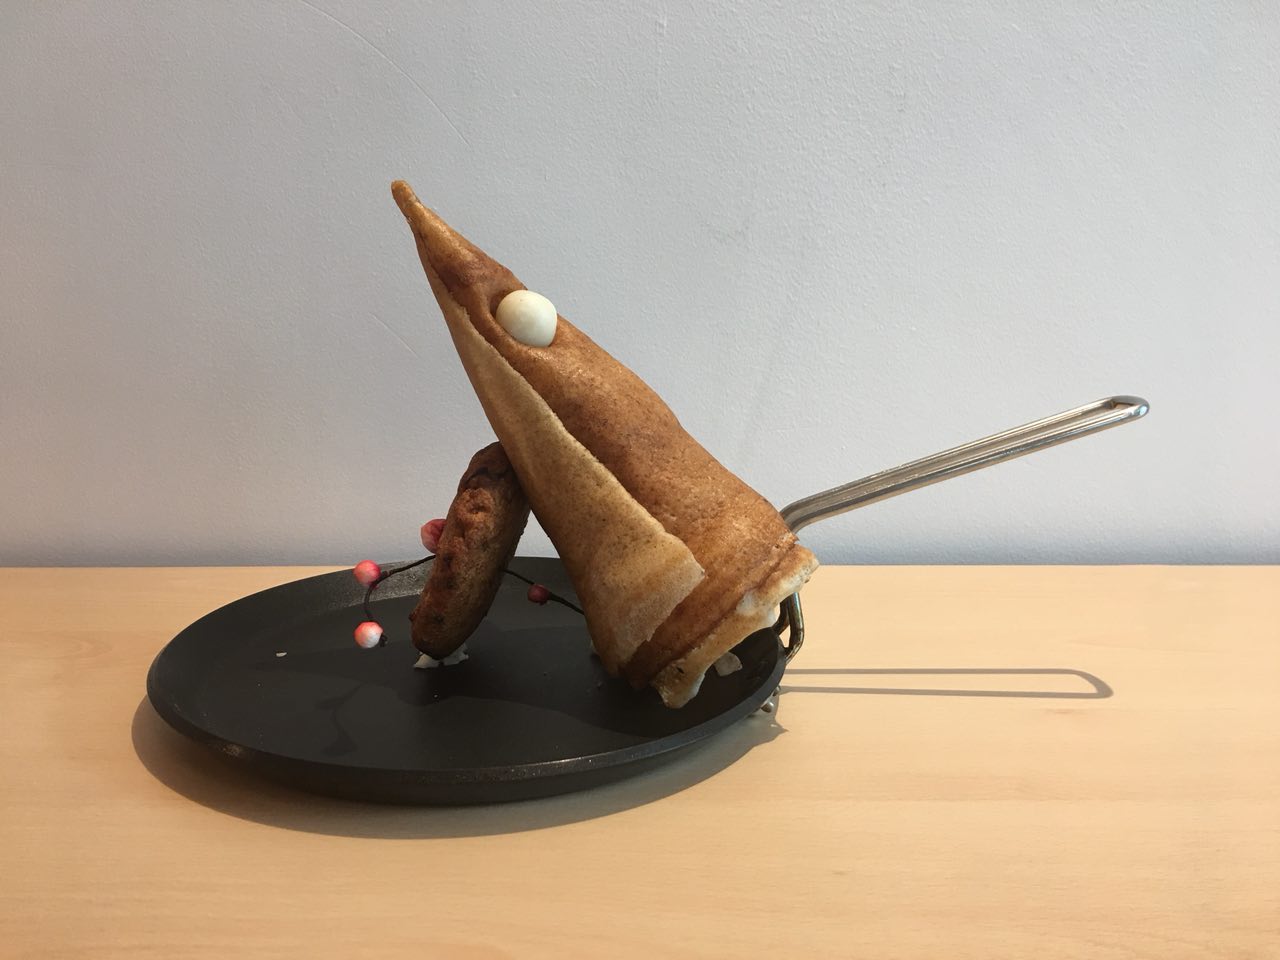
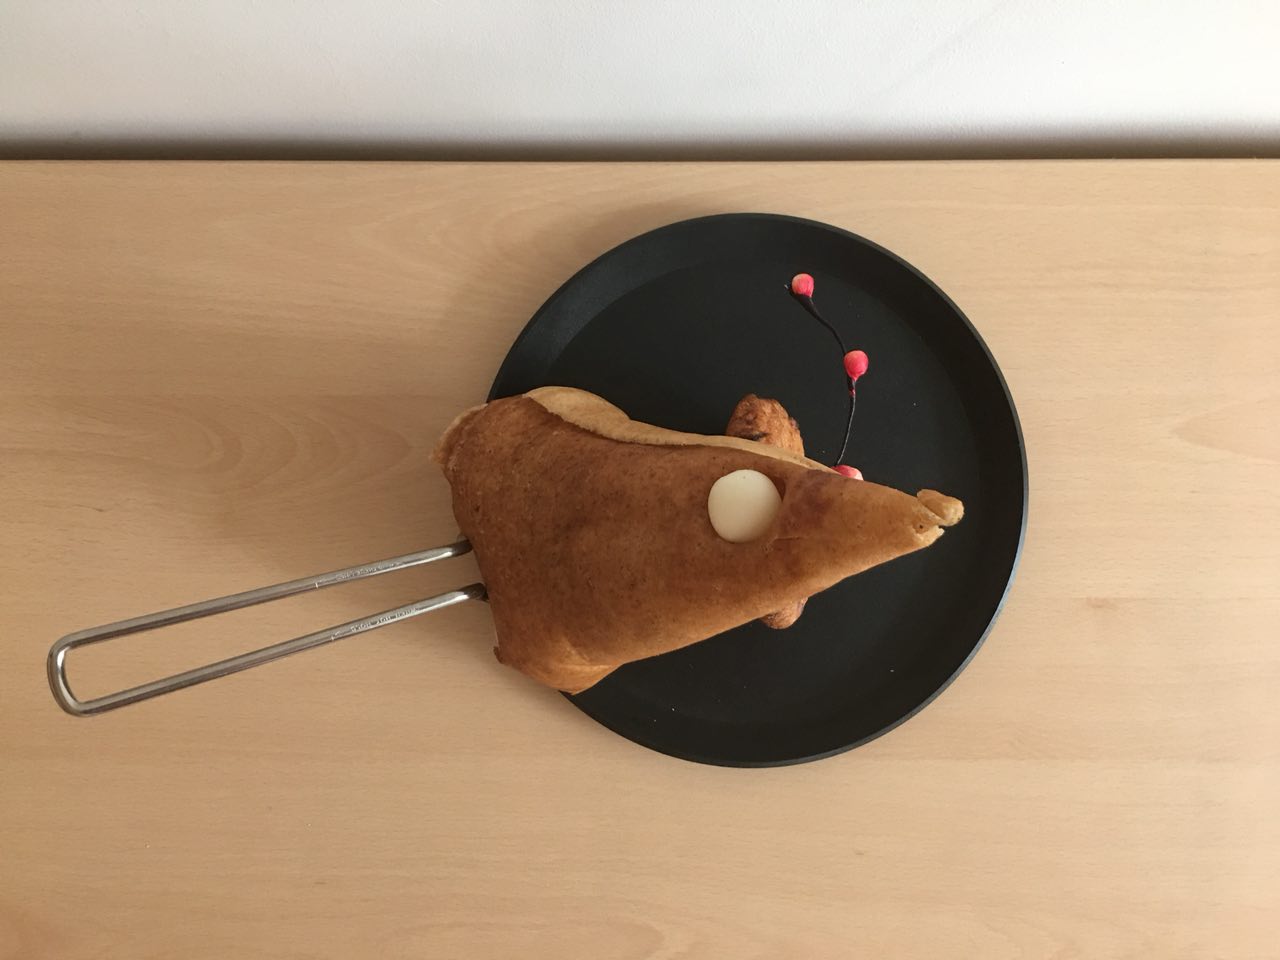
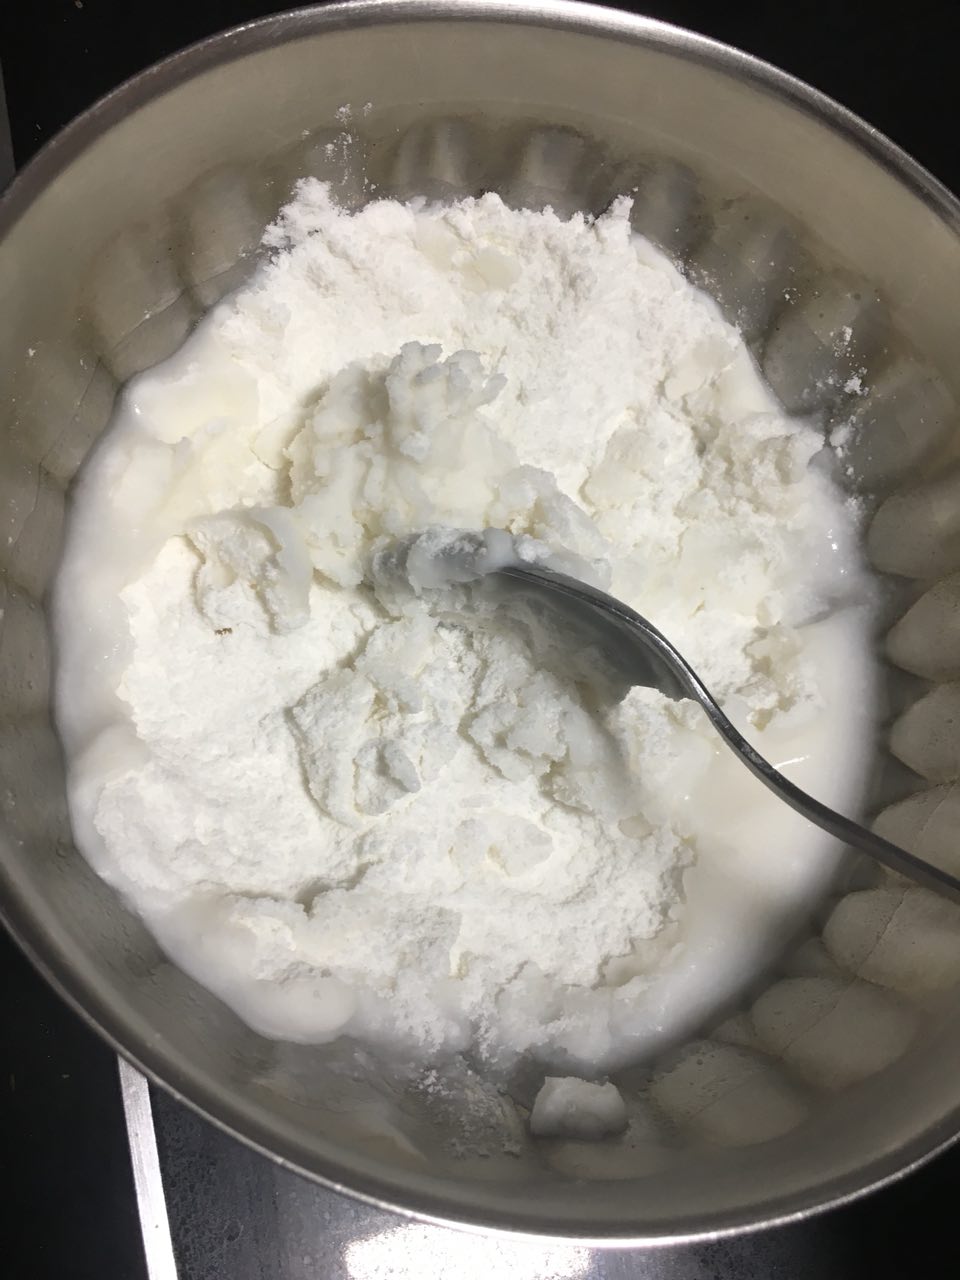
Here are some process shots of me making the food; photos 1 shows me making the dosai cone, photos 2 to 6 show the process of me making the kozhukattai sphere (required the most steps and work) and photo 7 shows me frying the vadai cylinder. It was challenging making three different Indian dishes, but I’m super happy I managed to do it and make them really look like those shapes too.


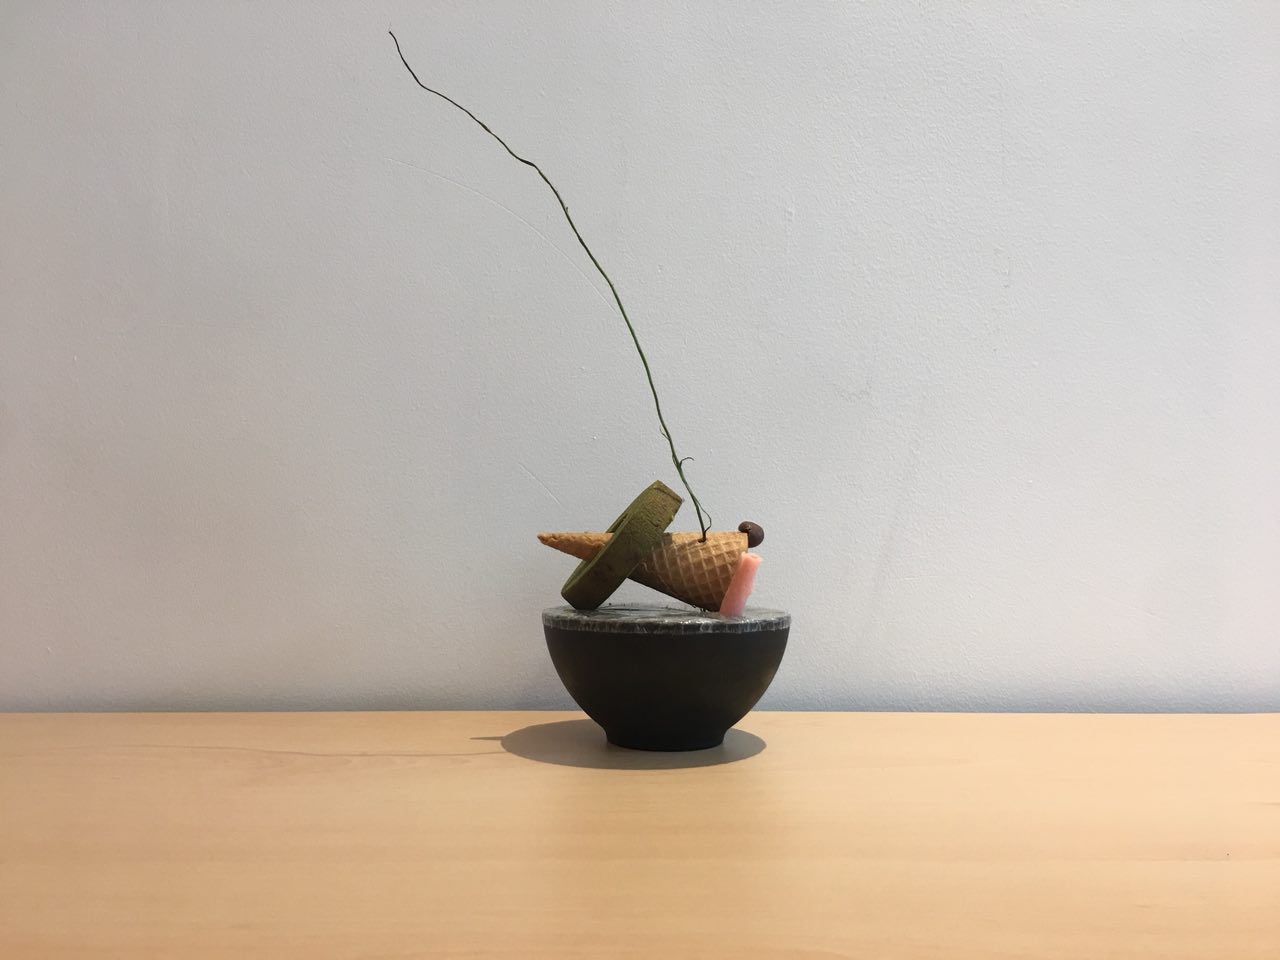
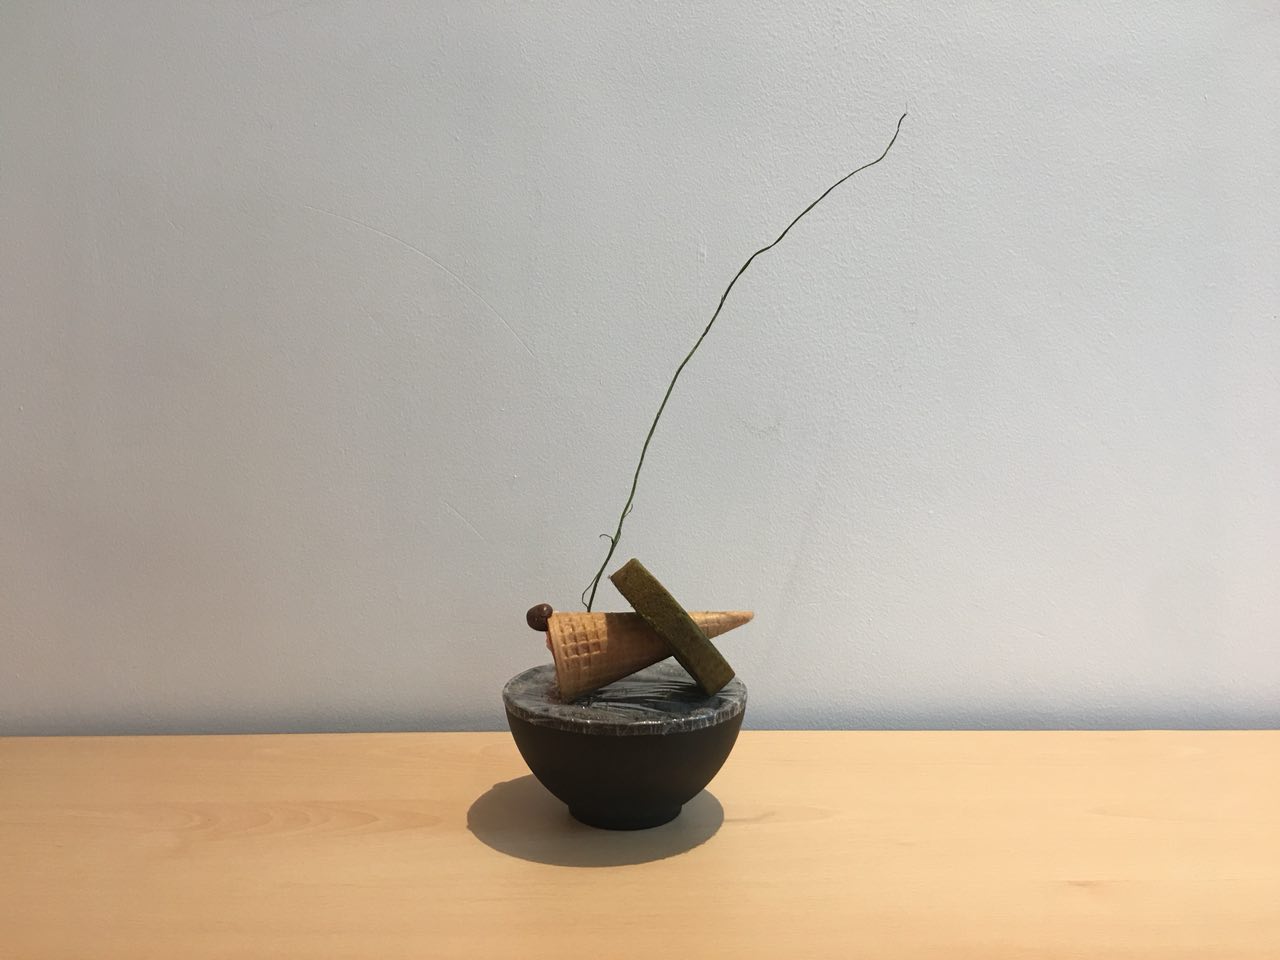
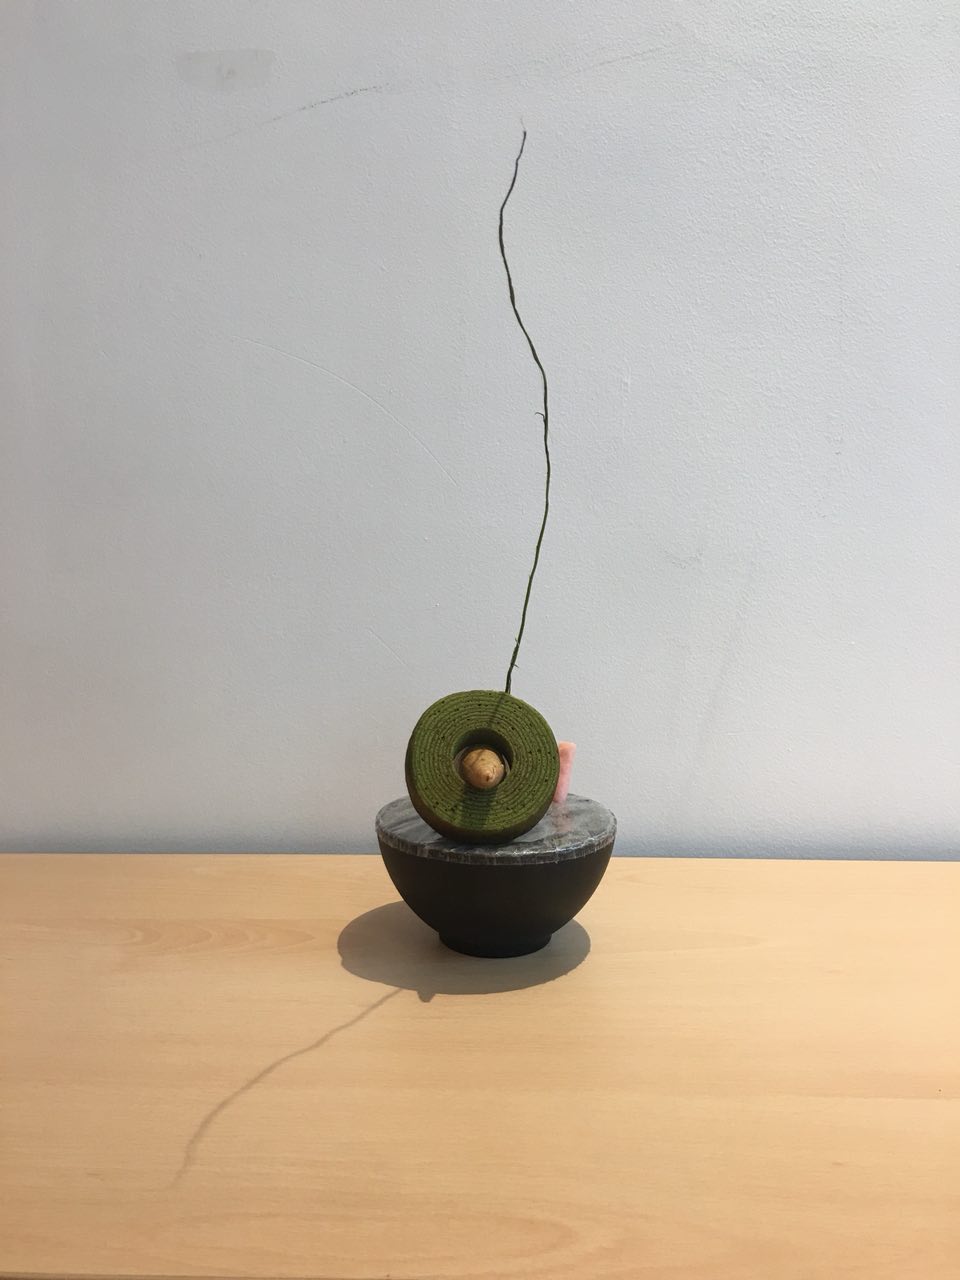
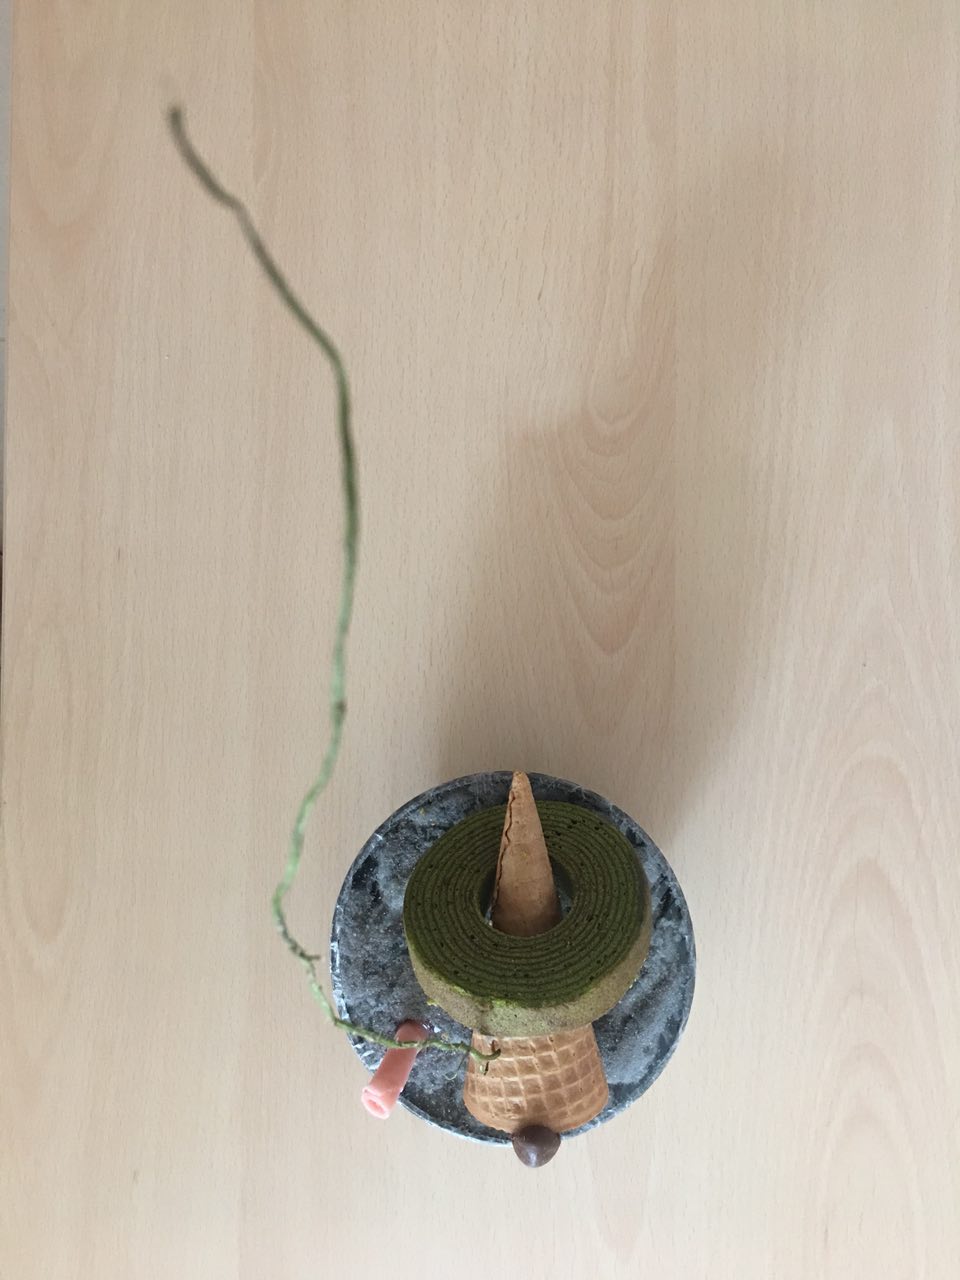
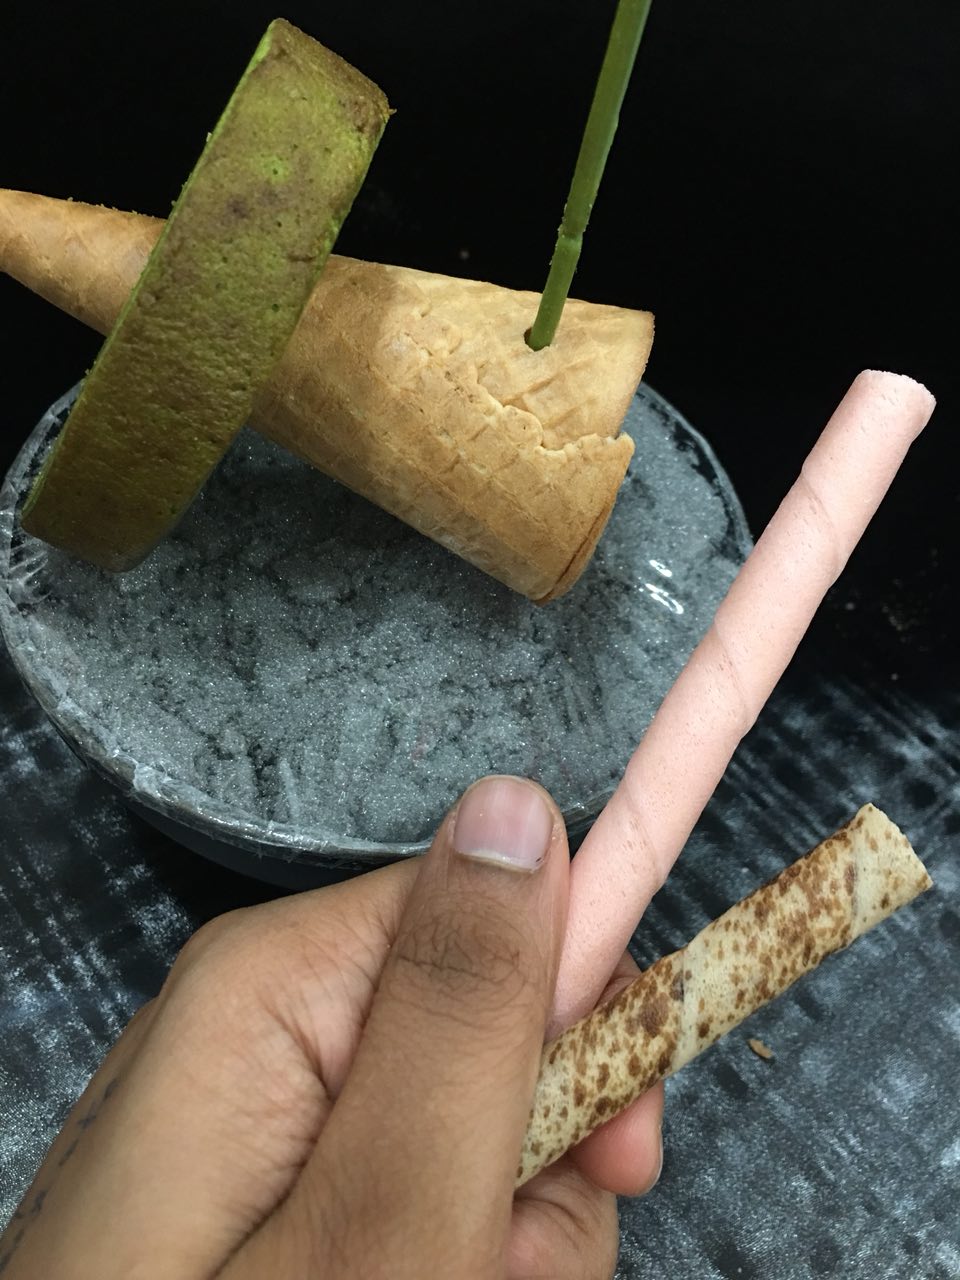
For my second sculpture, I wanted to incorporate all three of my favorite types of desserts – namely, cake, chocolate and ice cream, as written in my mindmap. They truly make me feel anew at 3 am in the morning when I’m finishing an assignment. I picked an ice cream cone to represent ice cream – actual ice cream wouldn’t have been a very viable material to use – a matcha ring cake from Chateraise to represent cake, and a Hershey’s chocolate ball to represent chocolate. Since we had to have 2 SOs and 2 SDs, I added an extra SO in form of a wafer.


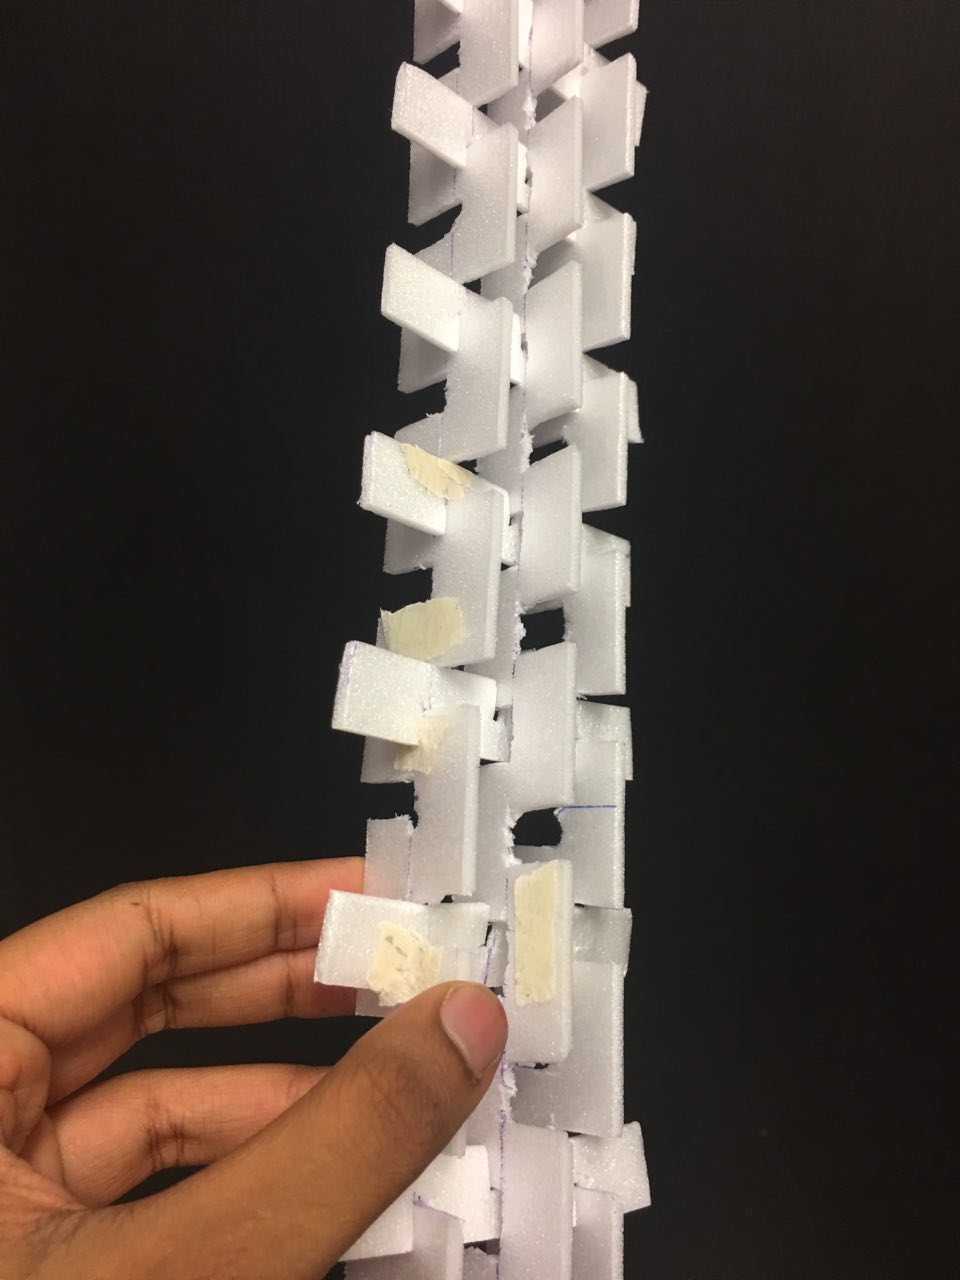
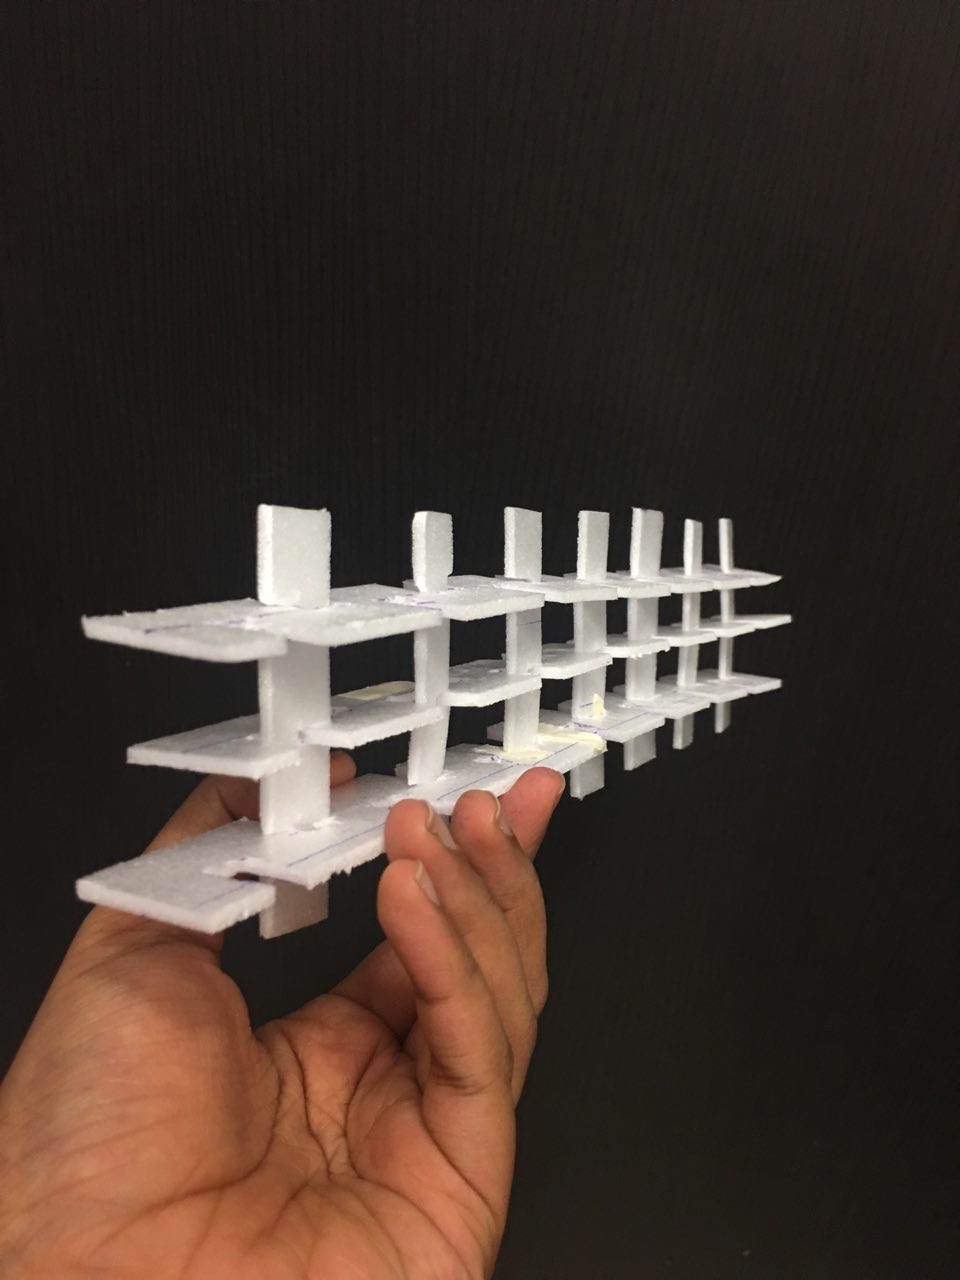
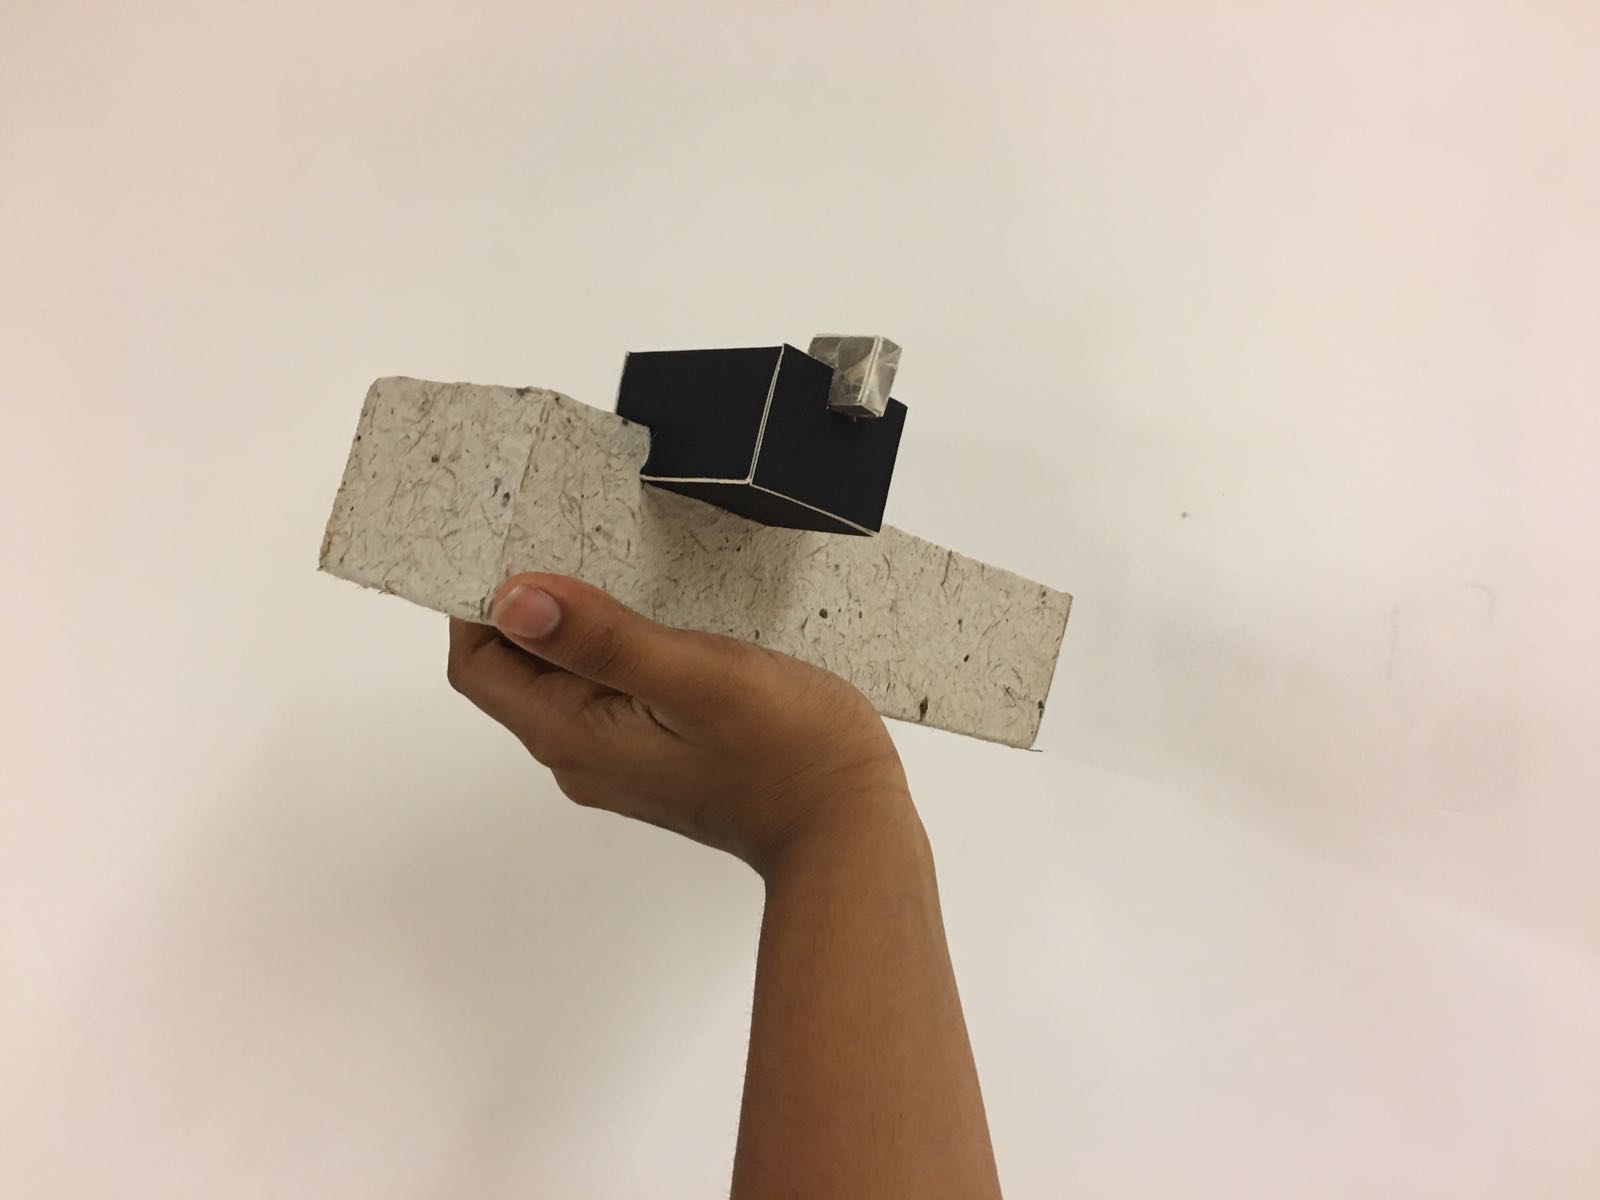
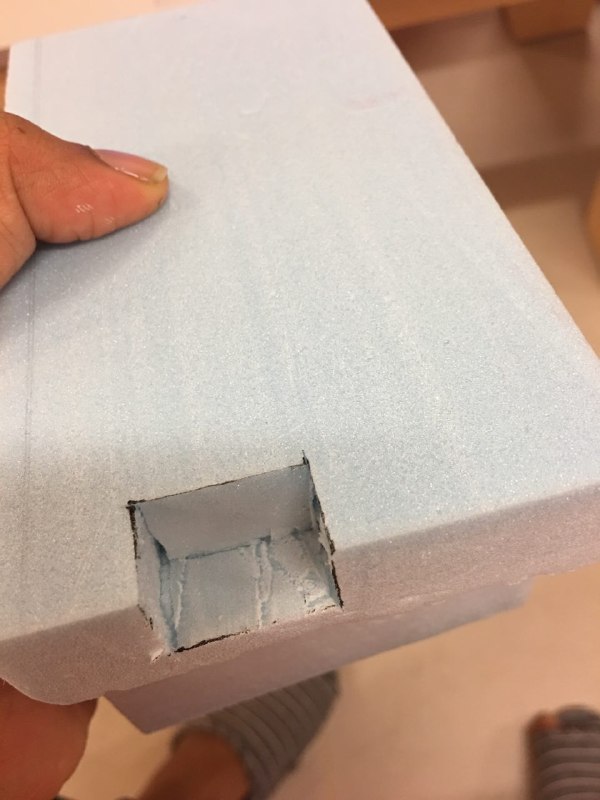
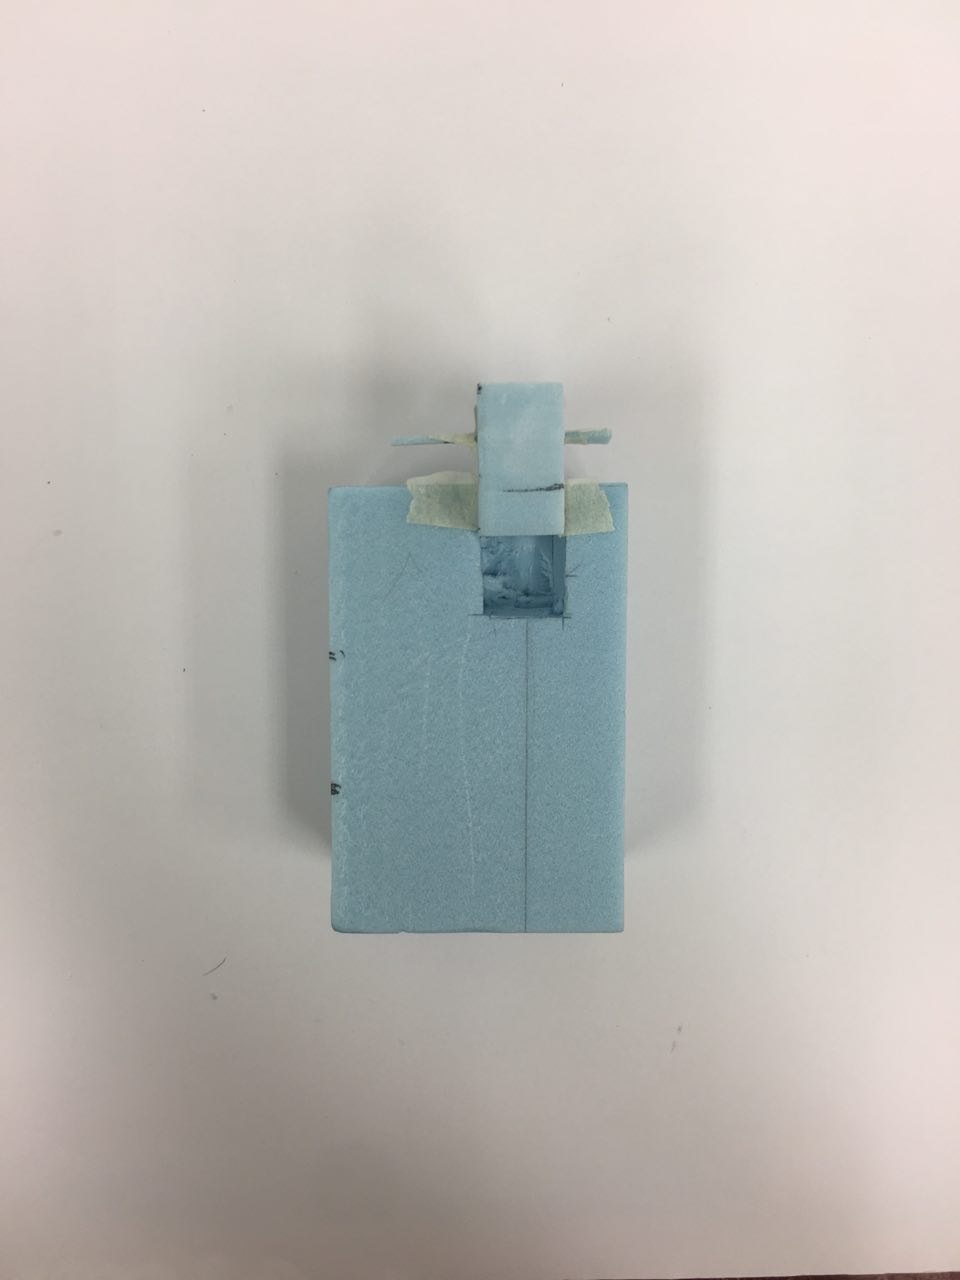
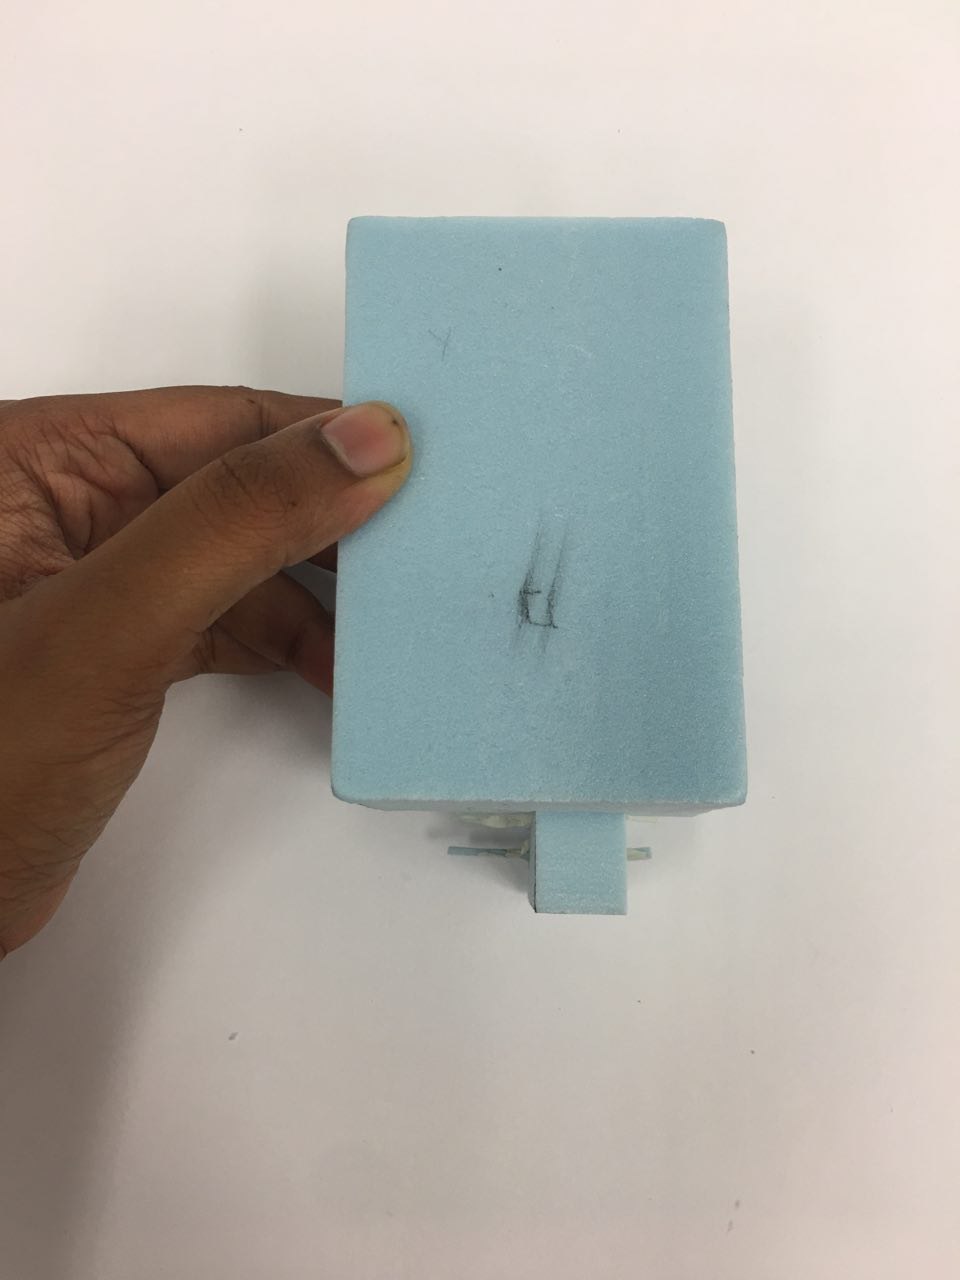
In order for my dominant branch to be able to stand, it needed a solid base to be stuck into. Hence, I got the foam used for flower arranging and pressed it into my base container. Then, I covered  the edges with double sided tape and stuck cling wrap over so that the foam bits would not fly around and get messy, and interfere with the food.

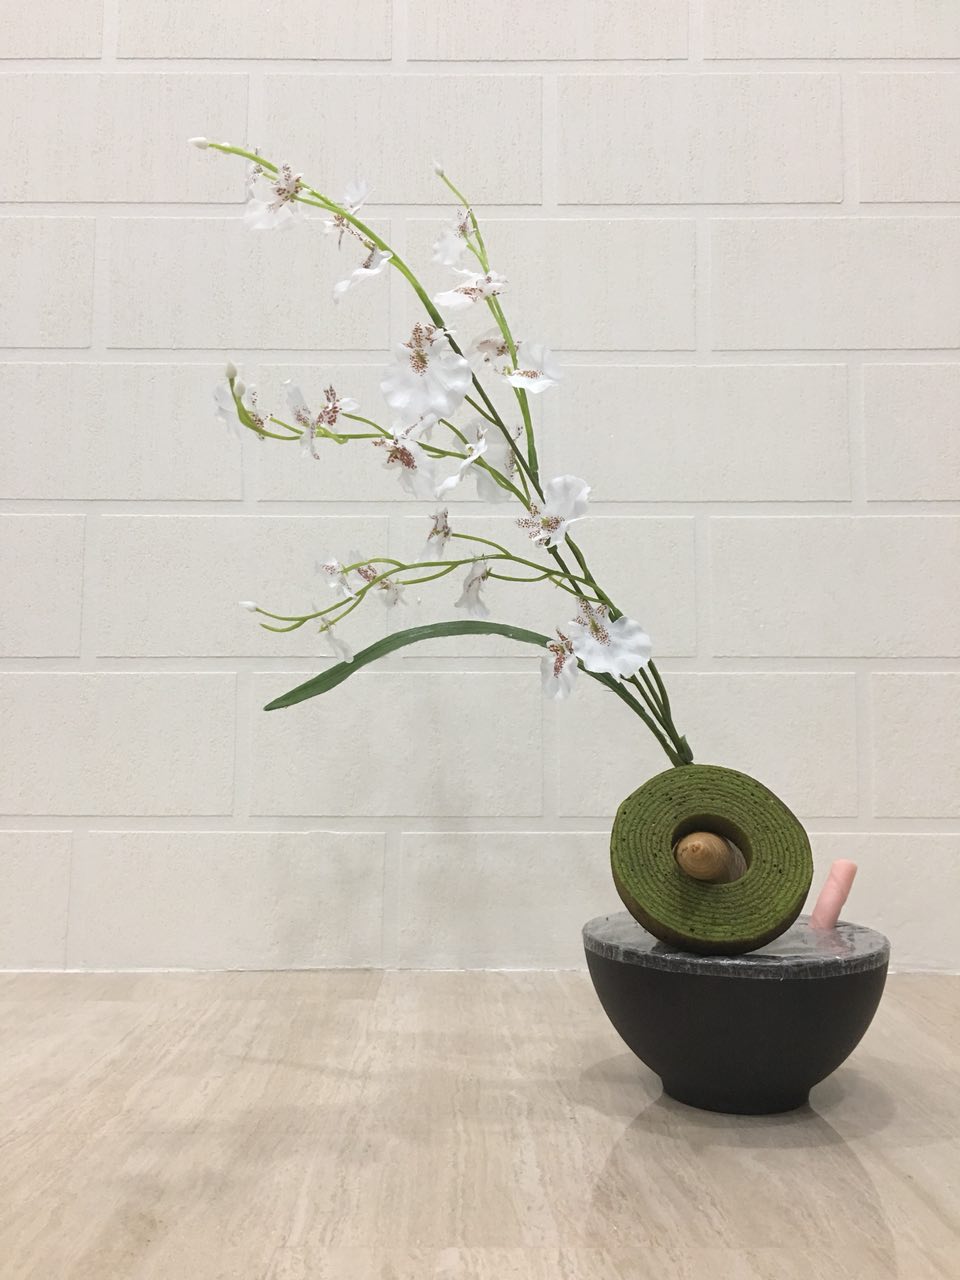
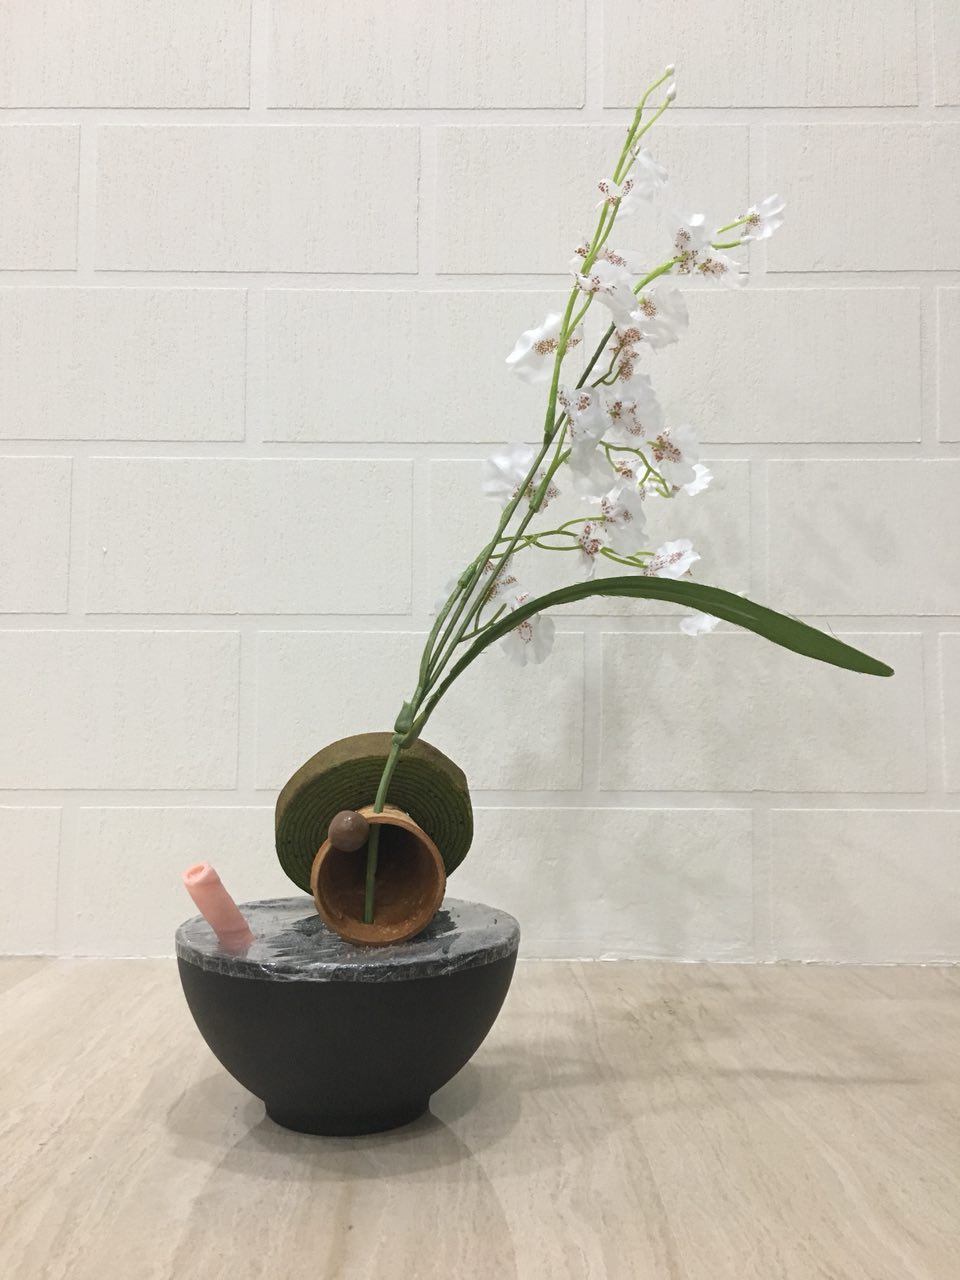
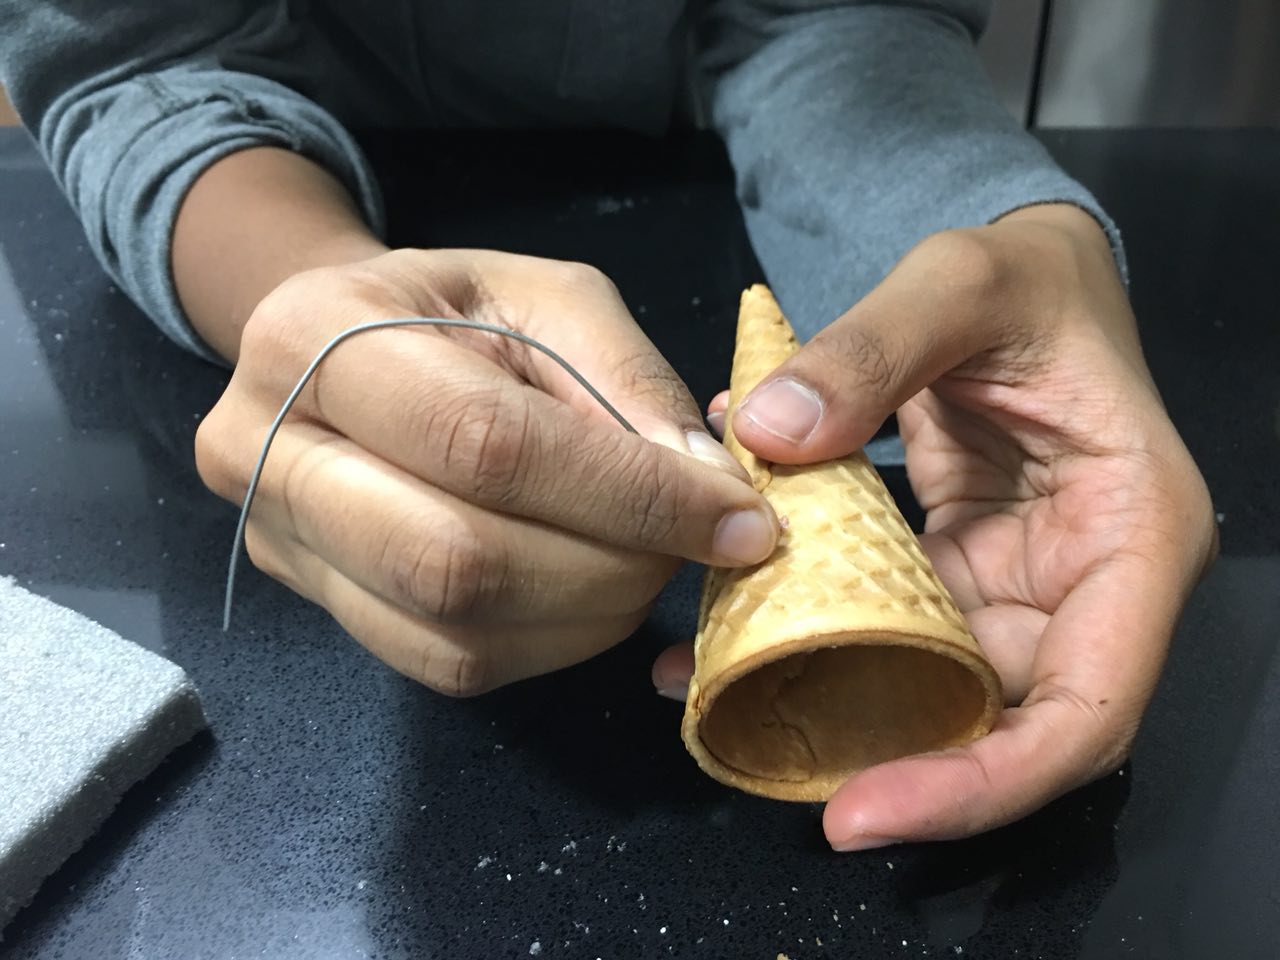
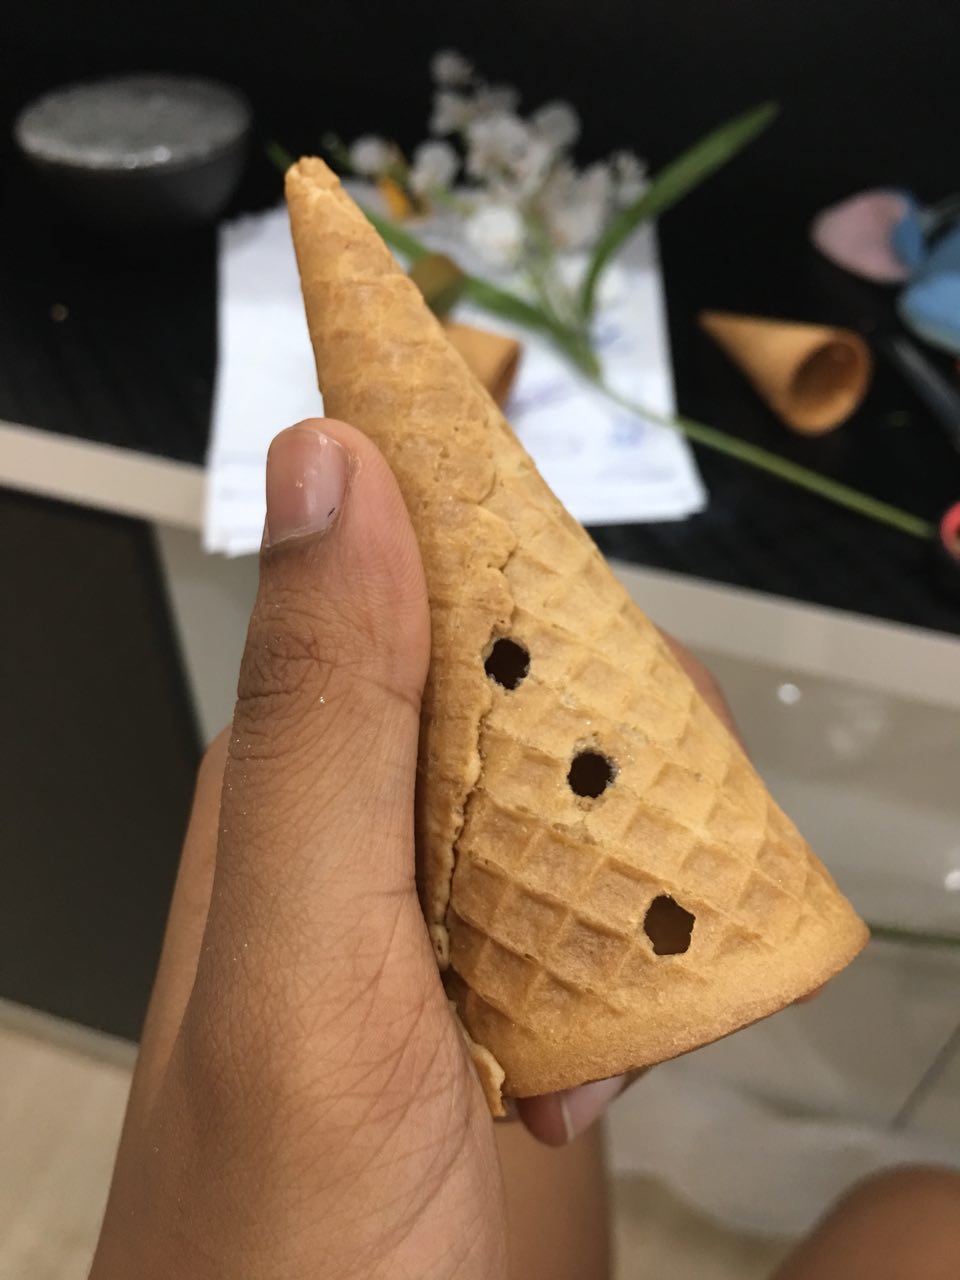
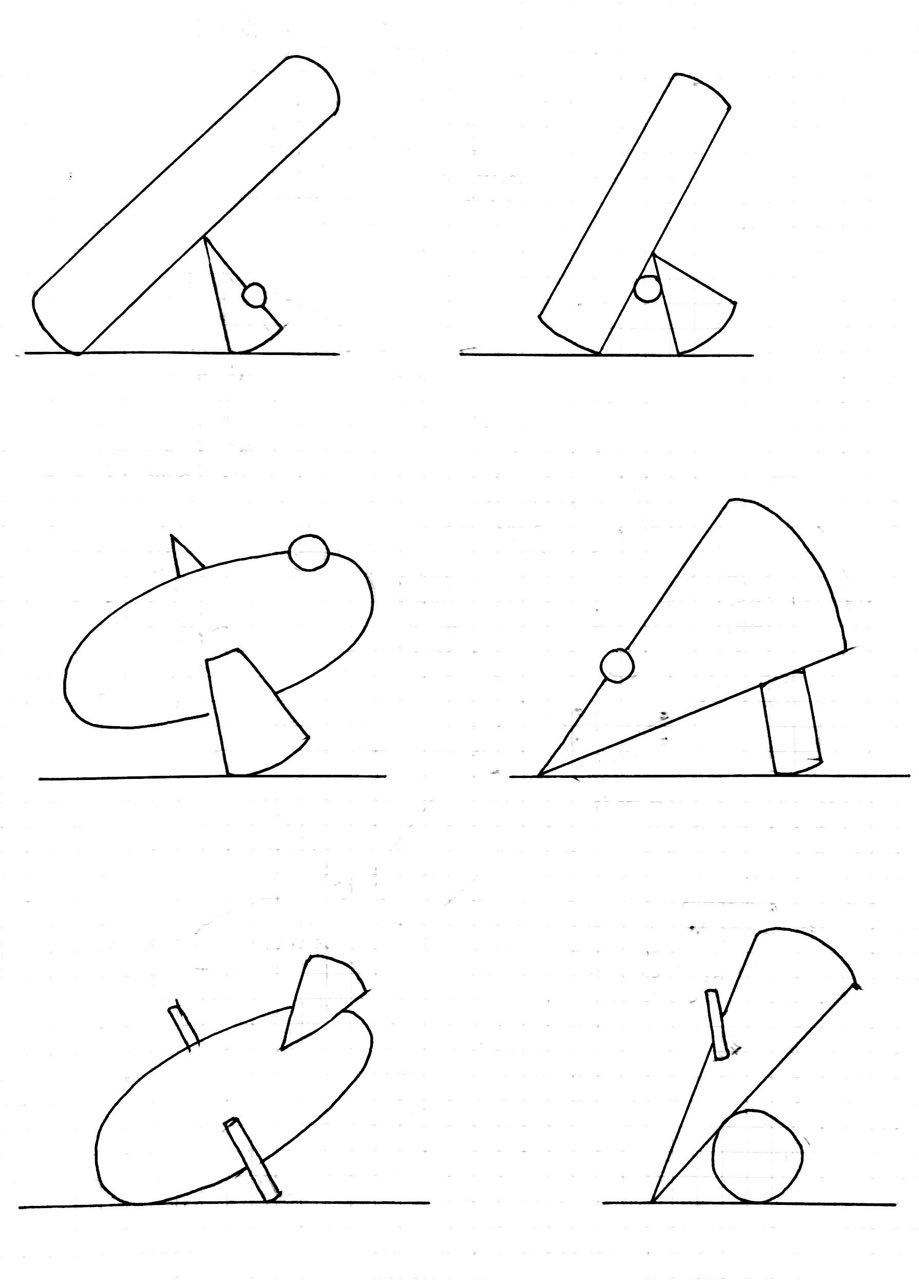
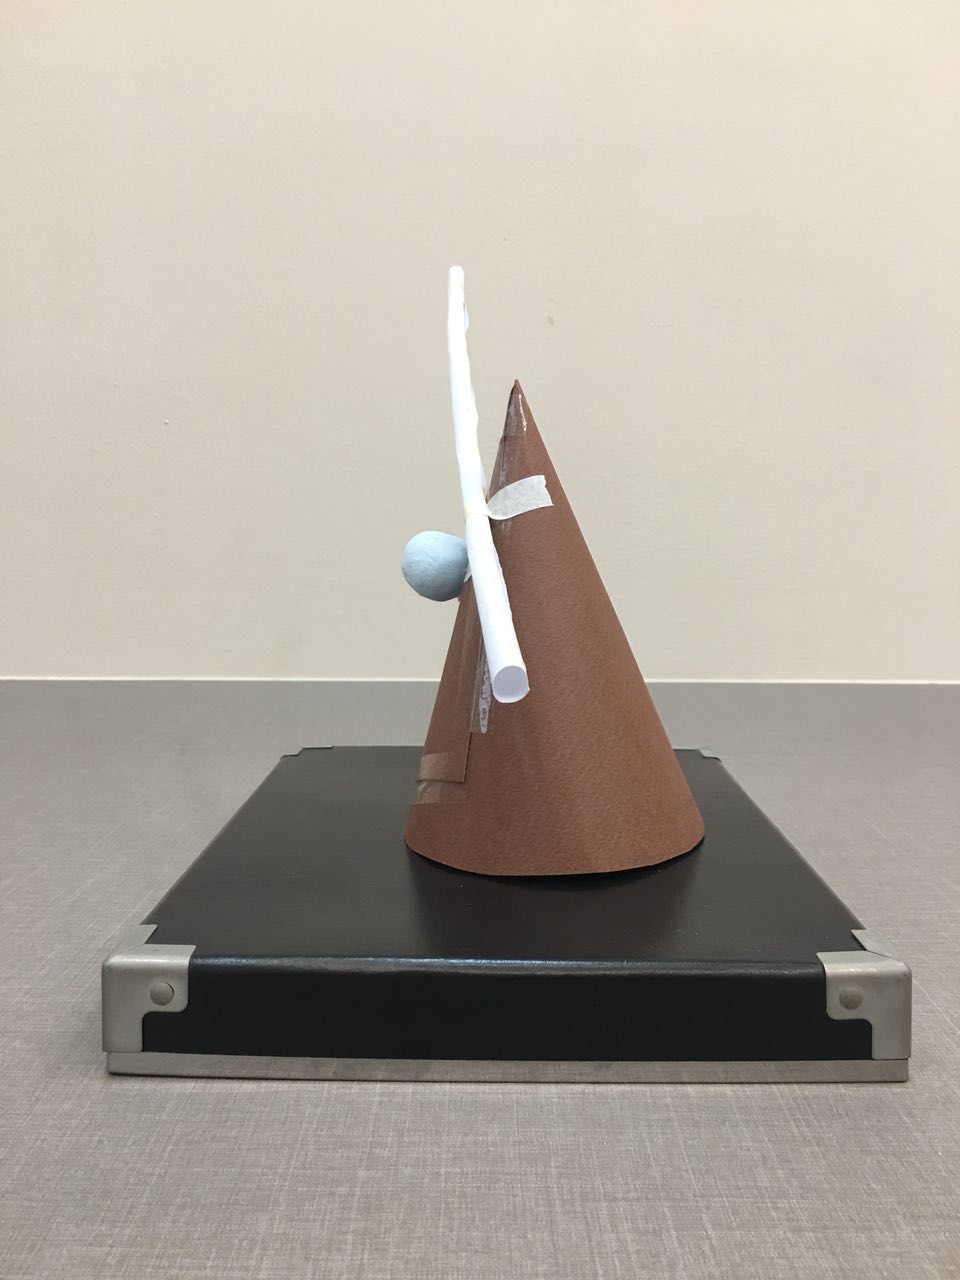
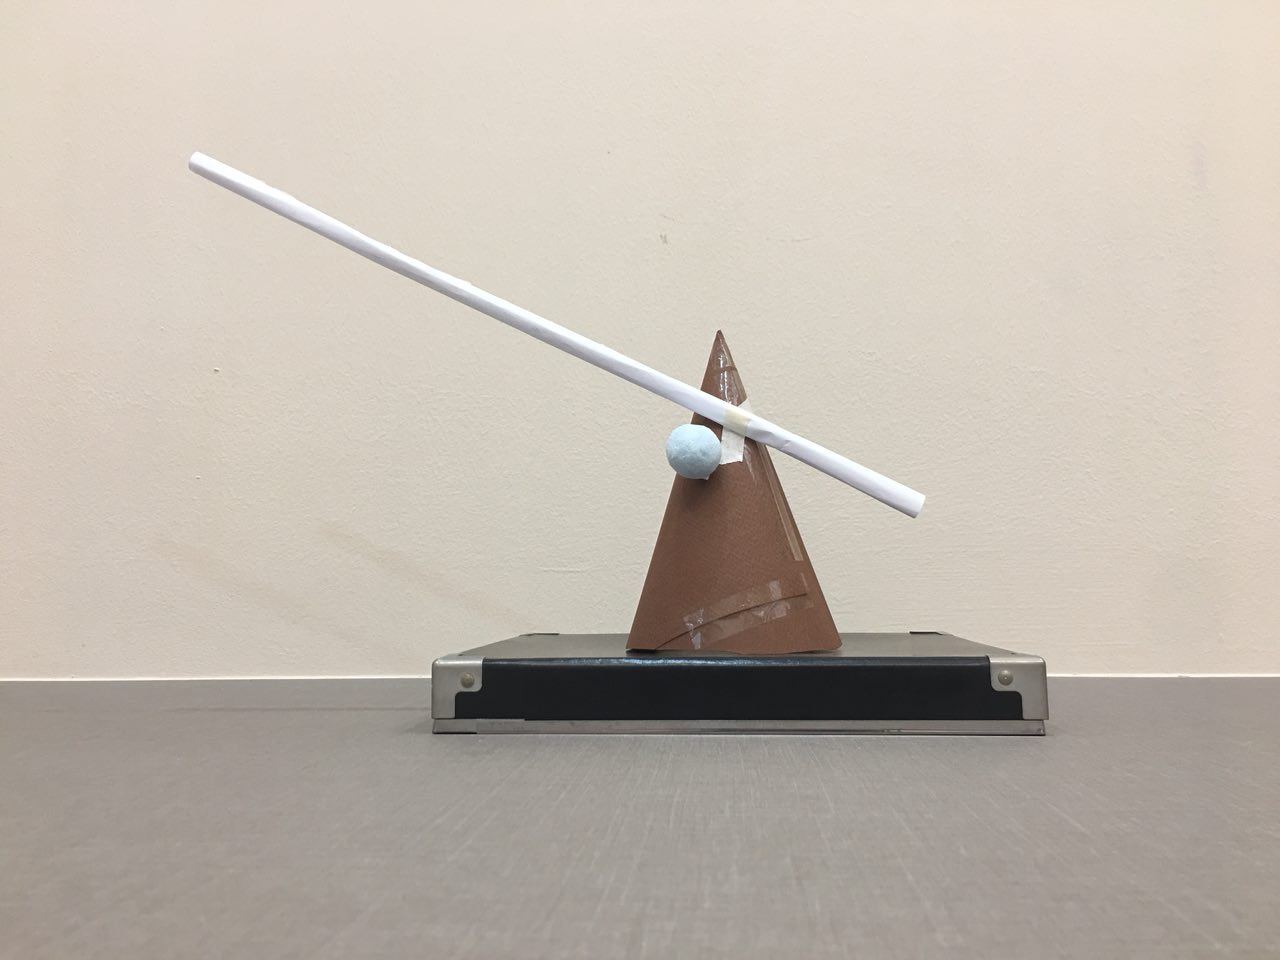
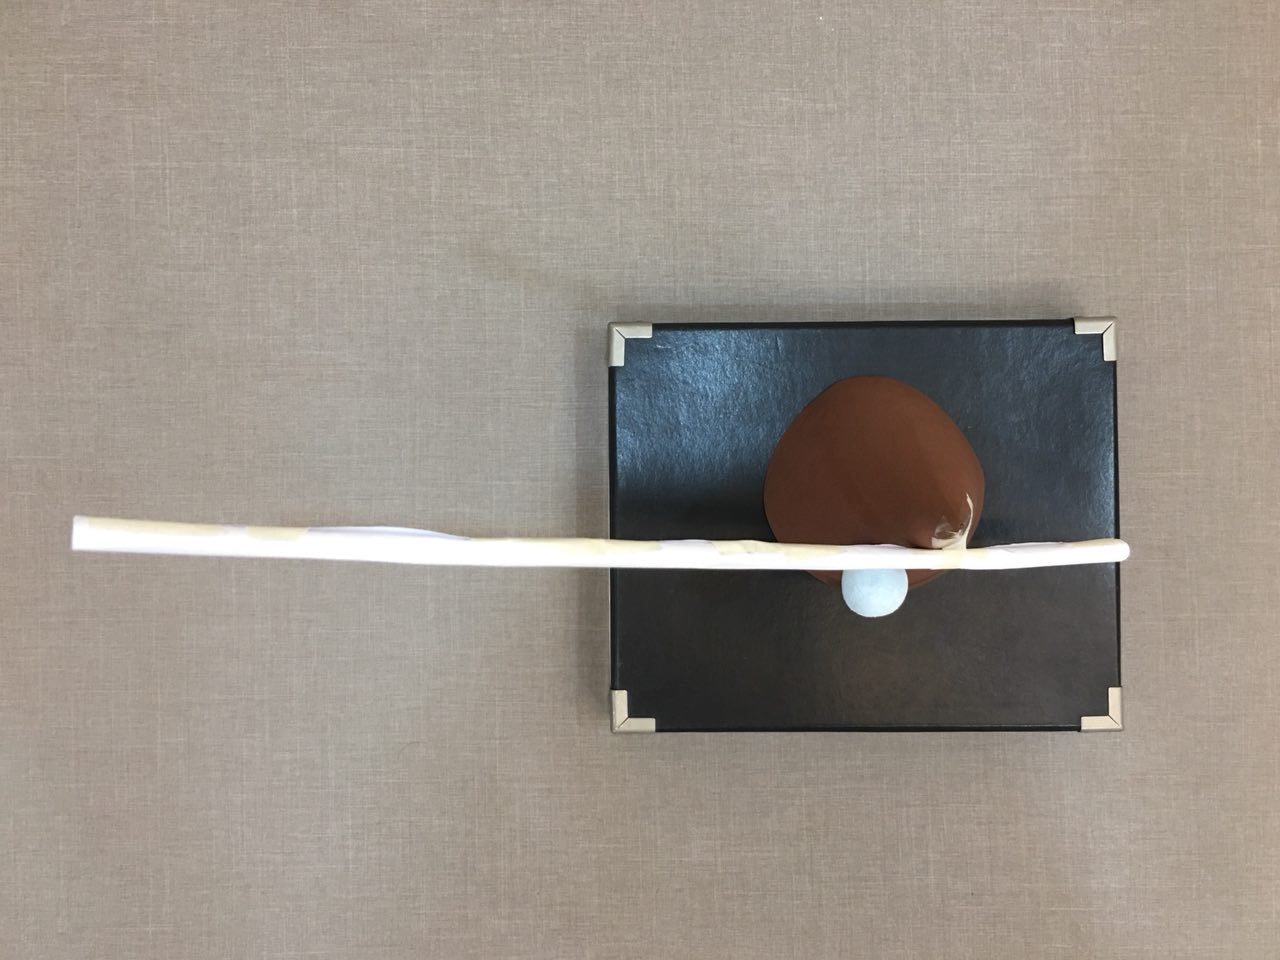
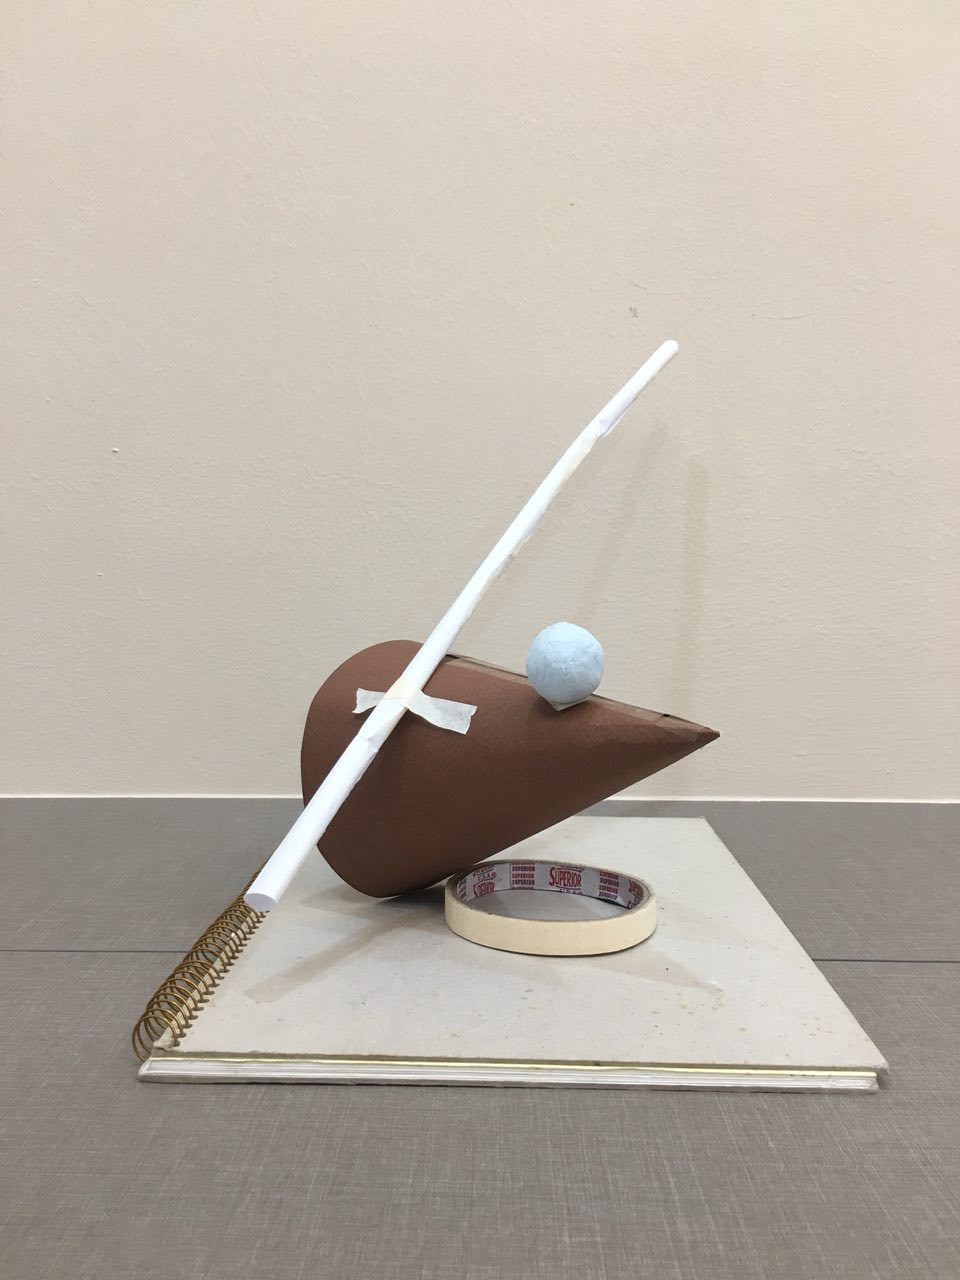
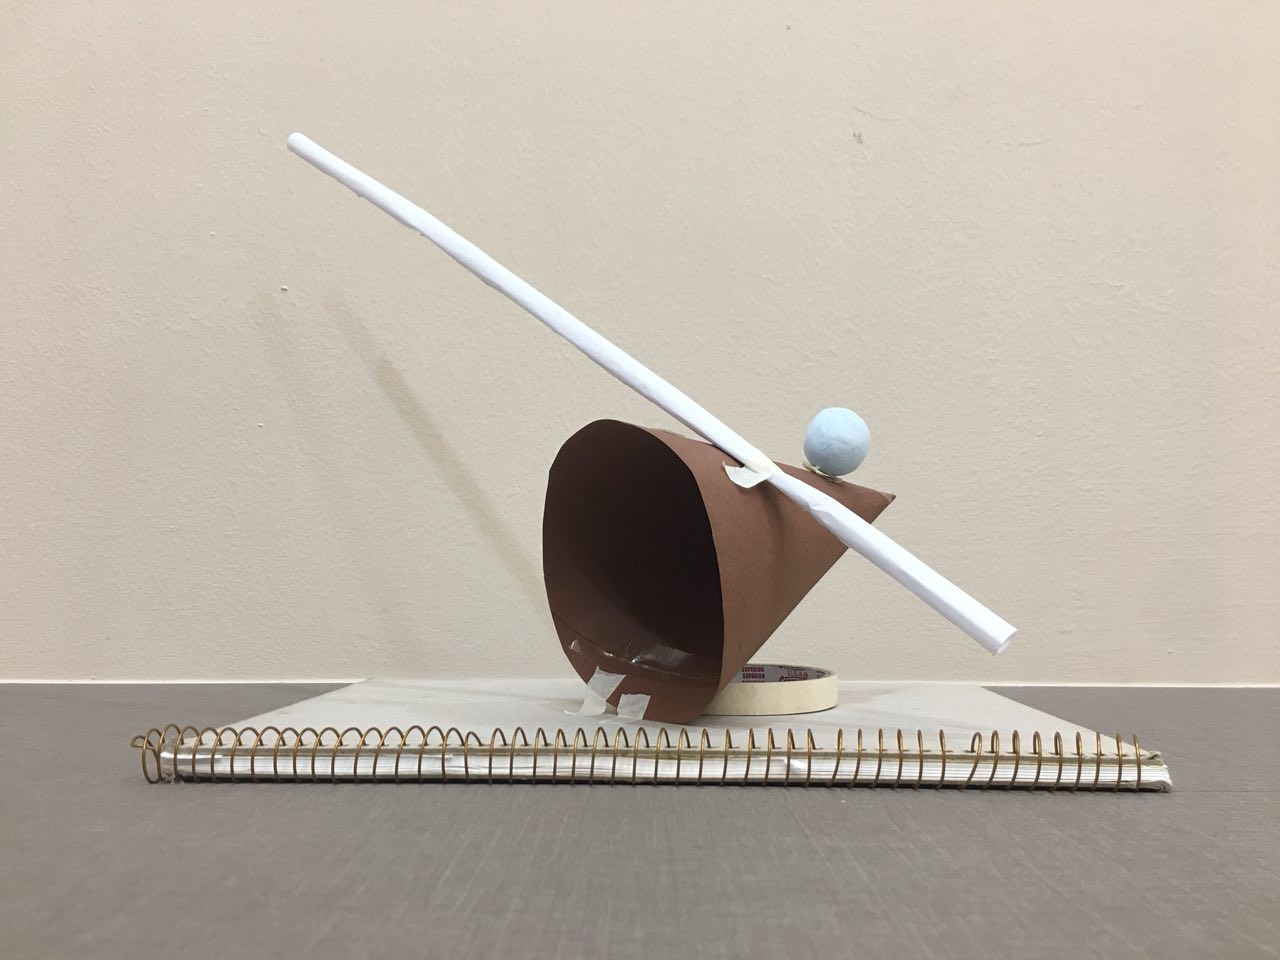
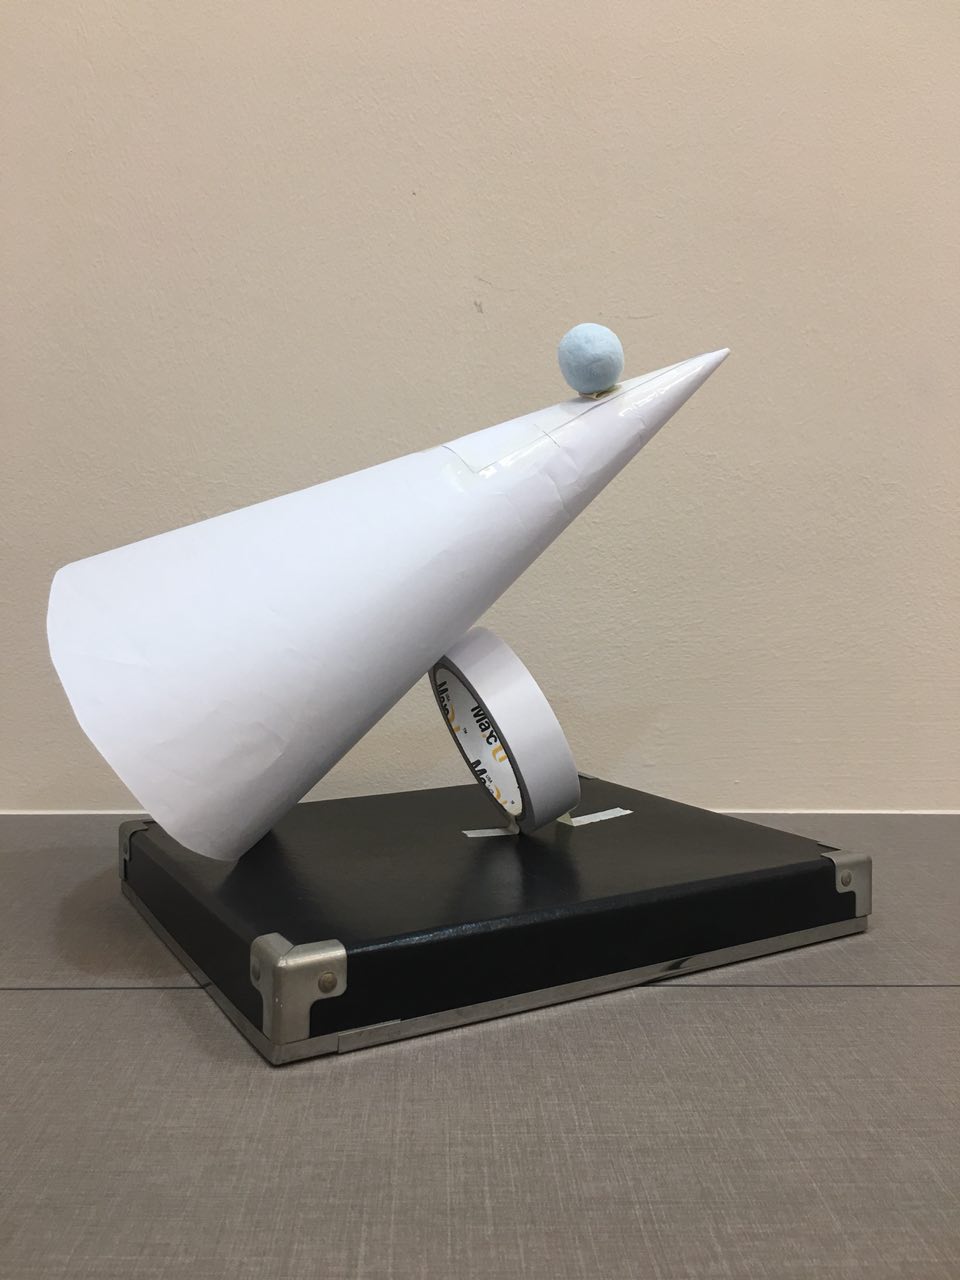
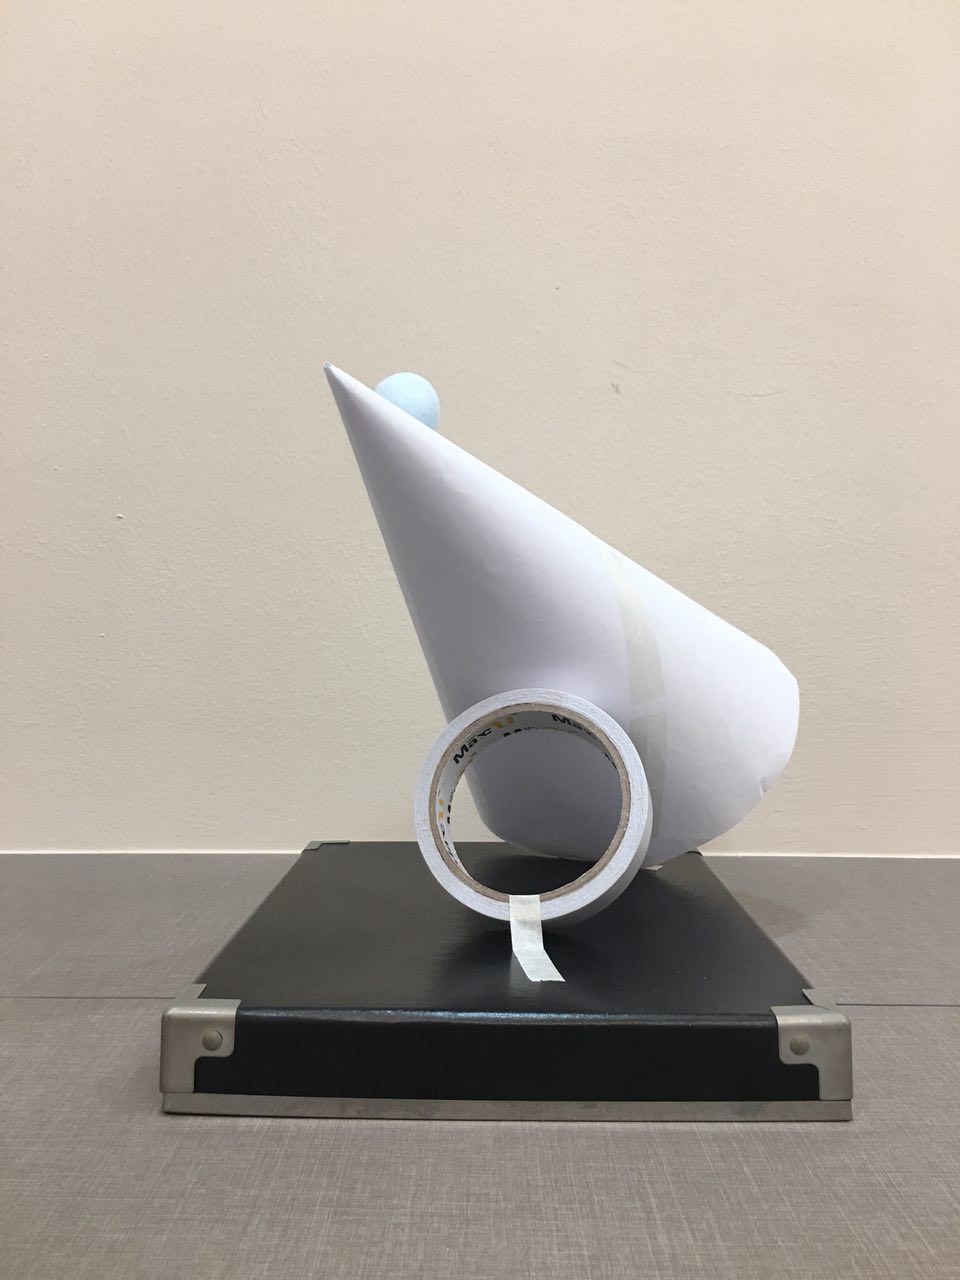
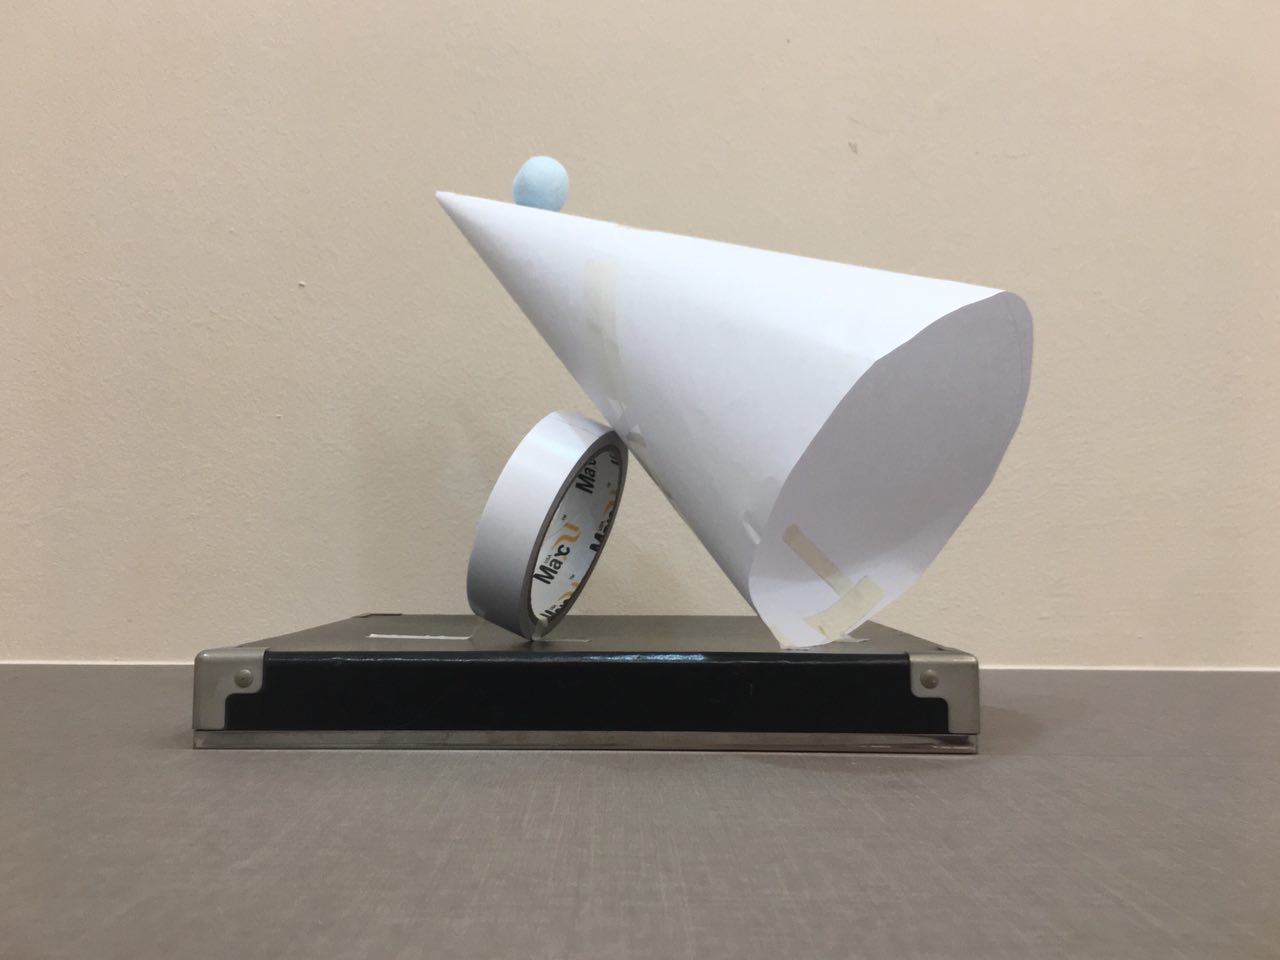
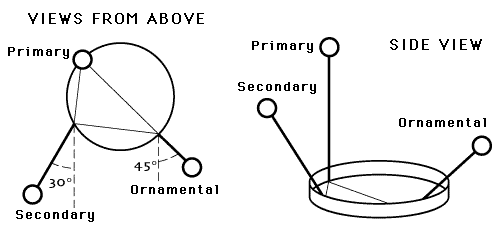
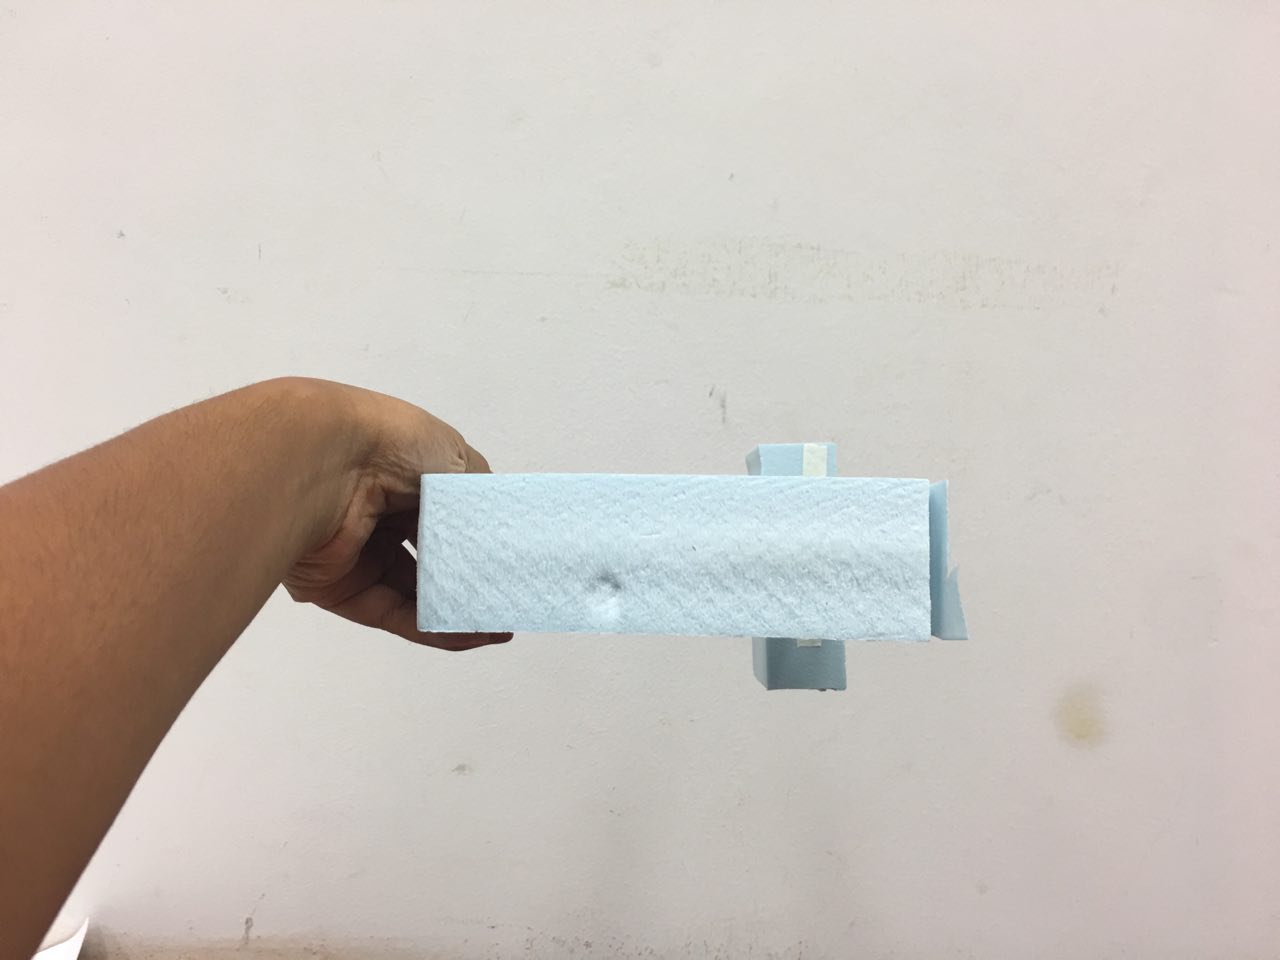
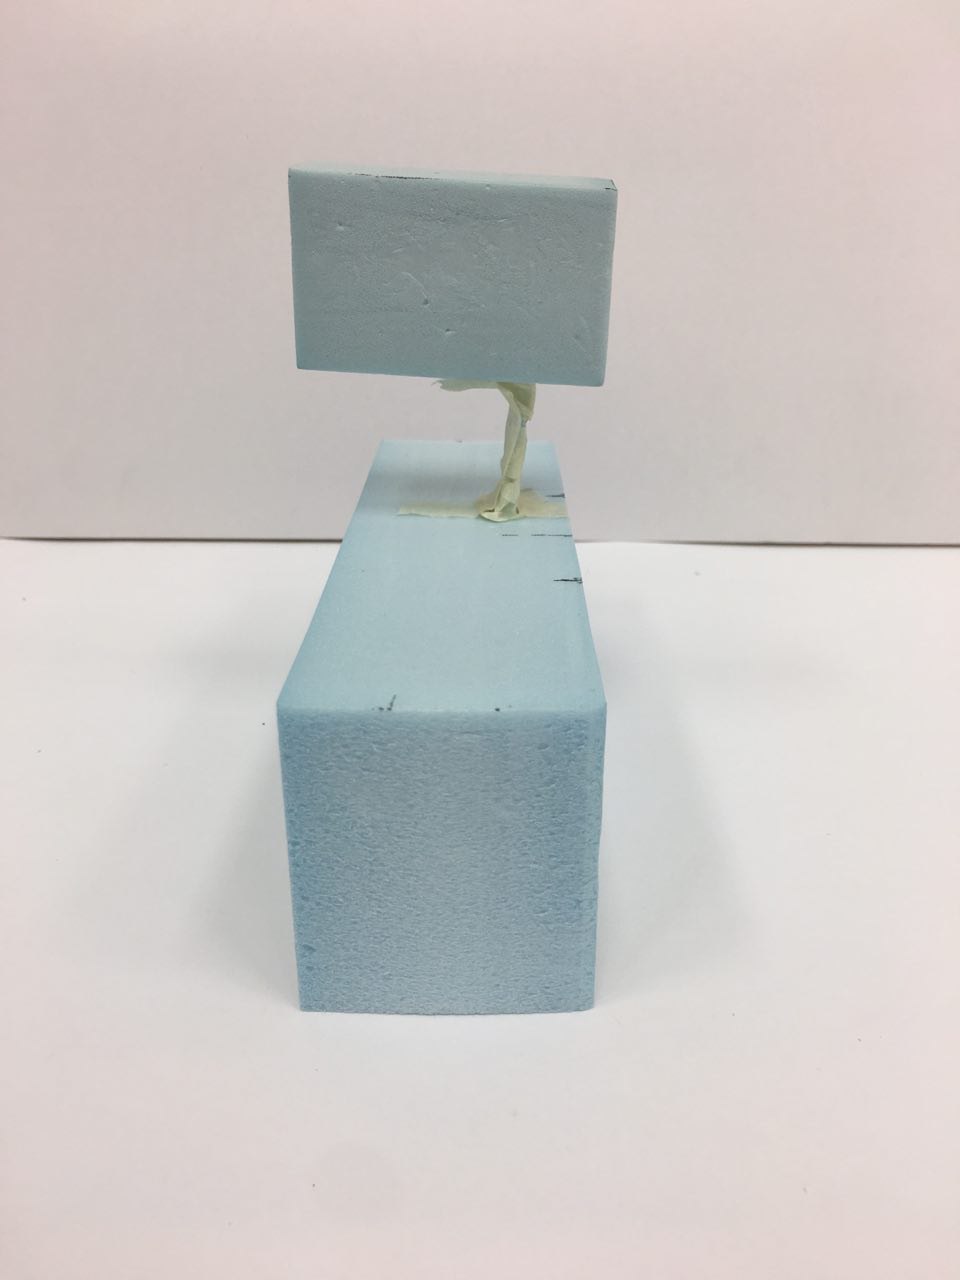
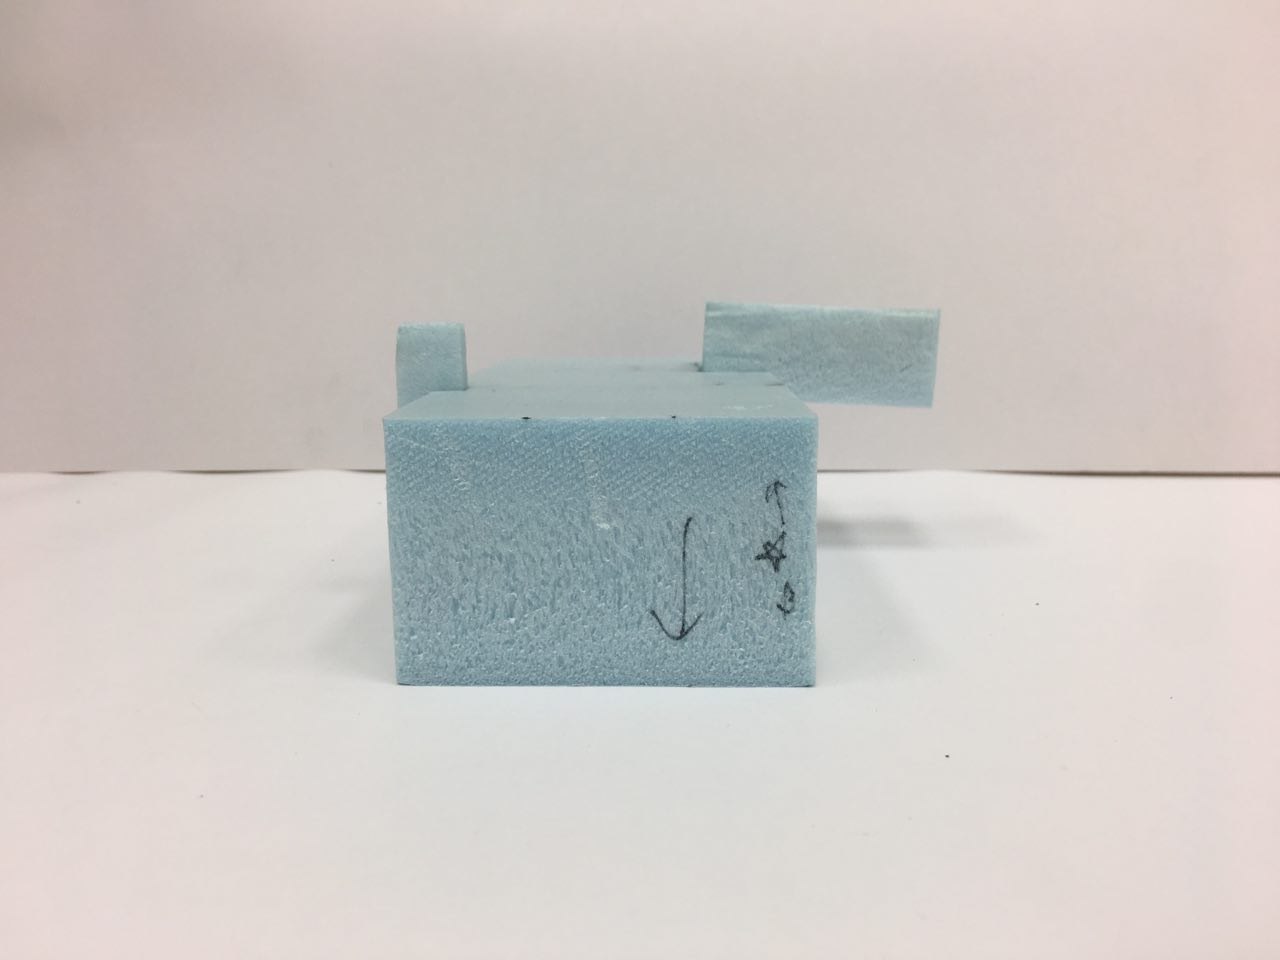
I had some problems initially with poking a neat hole through the wafer cone so that the dominant branch could be inserted, but I managed to figure it out by using a very sturdy piece of wire to pierce through. I also had some problems with the positioning of the holes so that the cone would balance at the 30 degree angle, so I tried piercing holes in different areas in order to find the right one, pictured in the second photo.


I had two types of wafers I could have used: the cappuccino one or the strawberry one. Even though the cappuccino wafer color’s were more harmonious with the color scheme of the sculpture, I felt that the pink of the strawberry was very in tune with the happy, light nature of spring. Furthermore, the color made it stand out as an SO.

[3D] Gaia’s Ikebana I: Research and Sketch Models

When we first got this brief, I had no idea what an ikebana was. I’m happy to say that is no longer the case – in fact, I’d say I’ve gotten a pretty good idea what an ikebana is, because of the research I’ve done on three main types – summarized below for your reading pleasure ٩(◕‿◕。)۶

Types of Ikebana

1) Moribana

Characteristics of vase

  • Shallow
  • Wide mouthed

Features

  • Broad expanse of natural-looking shapes
  • Exudes a feeling of stability and gravity

Specifics

  • Three Yakueda (stems), called Shin (primary stem), Soe (secondary stem) and Tai (ornamental stem)
  • Shin is about as long as the diameter and depth of the container combined
  • Soe is around two-thirds of the Shin
  • Tai about half the length of the Shin

There are three sub-styles of Moribana, determined by the angle of the Shin:

Chokutai (upright) Shatai (slanting) Suitai (cascading)
                        

2) Rikka

Characteristics of vase

  • Cylindrical
  • Often tall
  • Has a narrow mouth

Specifics

  • Also composed of three main branches, Shin, Soe and Tai
  • Shin’s height is usually one and a half of the height of the vase plus the width of the vase
  • Soe’s height is about two-thirds to three-quarters of the Shin
  • Tai’s height is about one-third to half of the height of the Shin


3) Shoka

Characteristics of vase

  • More than just a container – it represents the source of life
  • Vase will generally be symmetrical and open at the top

Specifics

  • Expresses the feeling of life, growing energy and the natural beauty of the materials
  • Distinguishing characteristics are brightness and sharpness
  • Shin is two to three times the height of the vase
  • Soe is about two-thirds the height of the Shin
  • Tai is about one-third the height of Shin


2D Sketch Models and Analysis

Initial Sketches

I sketched out some ideas where the cylindrical form, spherical form and conical form were the dominants, and how they changed the feel of the sculpture. I decided to focus more on the conical and cylindrical forms as dominants as I felt they added a strong axis to the composition, compared to a sphere which is pretty static to me, and also for which the principal axis could be unclear.


Sketch Model 1 – First version

I immediately realized the problem with this model – the subdominant cone’s axis was perpendicular to the horizontal ground. I hence revised this model to the actual first sketch model I will be analyzing below.

Sketch Model 1 – Revised version

I had to use a masking tape roll solely so that the subdominant cone could lift off the ground – it will hence not be drawn in the 2D sketch analysis as I will find a way to get the cone to lift off the ground in the actual final model.

Sketch model 2


I really liked the idea of having a hollow cylindrical form as I like the “double void” it creates at the bottom of the composition. I thought of some ways to improve this, such as wedging the SO into the D so as to incorporate what we had learned in our first lesson.

Specifics of Moribana and Rikka Ikebana that were used in making sketch models respectively:

Link to 2D Sketch Analysis: Gaia 2D Sketch Analysis

[3D] Pandora’s Box Part 4: Final and Applications

iiThe final models  。゚( ゚^∀^゚)゚。ii

I loved both of my final models a lot, so I decided to make them both.

iiModel 1: Made using foam, paper and marble sampleii

(Large application) Signifies a rock climbing wall, where the course gets increasingly difficult – textured and relatively easier to grip at first, the course gets smoother and harder to climb up as the climber progresses – how would he grip onto marble? I’d call this The Killer Rock Climbing Wall.

iiModel 1: Other applicationsii

(Small application)

A minimalist showerhead, made of aluminium, stone, and ceramic, inspired by the work of Kazuyo Sejima.


The Kazuyo Sejima works I was inspired by for the showerhead:

I really enjoy her simplicity and the clearness of concept that can be seen in her work. I aimed to emulate the subtly reflective surface of the Sumida Hokusai museum with the aluminium, and was inspired to include stone after viewing her house in Samaya.

iiModel 2, made of foam, paper, acrylic, leather sampleii

(Small application #1) It’s supposed to be a goat rocking hair for children, with the paper with a fabric texture being inviting and comfortable to sit on, acrylic adding visual interest, and the leather SO being the handlebars for the child to grip on to as leather has very tactile quality.

iiModel 2: Other applicationsii


(Small application #2) A minimalist swing, made of steel, acrylic and marble. I feel that people go on swings to relax, and the minimalist aesthetic would help with that.


(Large application) A building to zipline from, made of wood! I was inspired by Kengo Kuma, who uses wood in his buildings. I thought that this building where you could do the flying fox from could be housed in a forest, and hence the wood that it is made of could help it look harmonious with the environment.


The Kengo Kuma works I was inspired by:

The Darling Exchange looks unified with the greenery surrounding it, even with the more industrial buildings around it, with its use of wood. I really like how even with its unusual form, it retains an organic quality with the its choice of material – I tried to emulate this unity with the environment with the usage of wood for my large application, the zipline.


I love the Kengo Kuma Wooden Bridge Museum for again, the use of wood. I think it’s very comforting and homely, and could reassure someone trying to zipline off a significant height. I think it’s more appropriate then, say, steel or something more “cold” for such a scary thing to do for most people. I think the wood would make them feel more at ease.


iiReflectionii

I’m pretty pleased with how my models turned out – especially model 1 for the clean edges. I learnt a lot about materials – I learned how to work with foam, for a start, and found that textured paper – more specifically the one I used for the dominant of the first model – is a lot harder to get not to fray than it looks.

I learnt the most about the constant process of revision. The 2D sketch analyses were hard to do at first – simplifying is harder than complicating – but I learnt a lot about proportion and balance from the whole journey. Thank you for coming along on it with me *:.。.o(≧▽≦)o.。.:*


[3D] Pandora’s Box Part 3: The Technicalities

  The technical side of things 

With our class presenting our sketch models to one another, one word I heard a lot was “same”. To avoid this sameness in my model, I did pretty laborious technical drawings where I measured every side and adjusted ratios to reflect good proportion.

I also needed to know exactly where I would need to cut my blocks such that I could wedge the SD and SO in. And so I made another technical drawing, with the accuracy down to 0.05cm.

These gave me a great peace of mind – knowing I wasn’t just roughly estimating a third or a half. It also helped me to visualize the sculpture as a whole, and made me more comfortable with 2D sketches of 3D models.

Behind the scenes


Here’s me pasting some textured paper on a foam block on zen mode, and some satisfyingly crisp edges.

[3D] Pandora’s Box Part 2: Foam models

llCardboard to Foamll

As the cardboard boxes were really big and hard to work with physically (I couldn’t hold them up to see the proportions of the boxes relative to each other), I decided to make the necessary revisions in foam.

  Sketch Model 4ll

  Sketch Model 2 Version 2ll

  Final Model 1ll

  Final Model 2ll

 The story of how I got to this final outcome can be found here: Process Part 2  

[3D] Pandora’s Box Part 1: Cardboard models

  Sketch models and masking tape ヽ(・∀・)ノ  

For our first lesson, I worked with the cardboard boxes.


I found it pretty therapeutic, being able to use that much masking tape at one go. I felt like the world’s most proficient tape-tearer at the end of the lesson.


Anyway, I ended up creating three preliminary models with my assortment of cereal boxes, contact lens boxes, and milk carton boxes scavenged from the supermarket near my hall.

  The Task   

I also got my word – XYZ-Axis. Honestly, I was super stuck on where to start (っ˘̩╭╮˘̩)っ I told myself to keep calm and work through the word, though.

The first thing that popped into my head, was maths – more specifically, vectors, a topic I had to do in Junior College. The XYZ-Axis, to me, are very stable: they help me place points on a plane and understand what a vector looks like. They are always reliable when you start doing a vectors question.

  My approach  

Even though the task required us only to have the D, SD and SO be clear from 4 out of 6 angles, I thought about how the axises don’t change no matter what, no matter how u could rotate a model (or how you do a vectors question), and decided to take it as a personal challenge to have my D, SD and SO be clear from all of the 6 views – like the XYZ-Axis: constant and never changing.

  Initial investigation and 2D sketch models: Process Part 1