
End-of-Sem Project Proposal:
STRÄNG
(Time-Space Warp Simulation)
STRÄNG is a wordplay on Doctor Strange’s name (who bends space and time) which means ‘string’ in Swedish and is also coincidentally related to the string theory about how our reality is shaped.
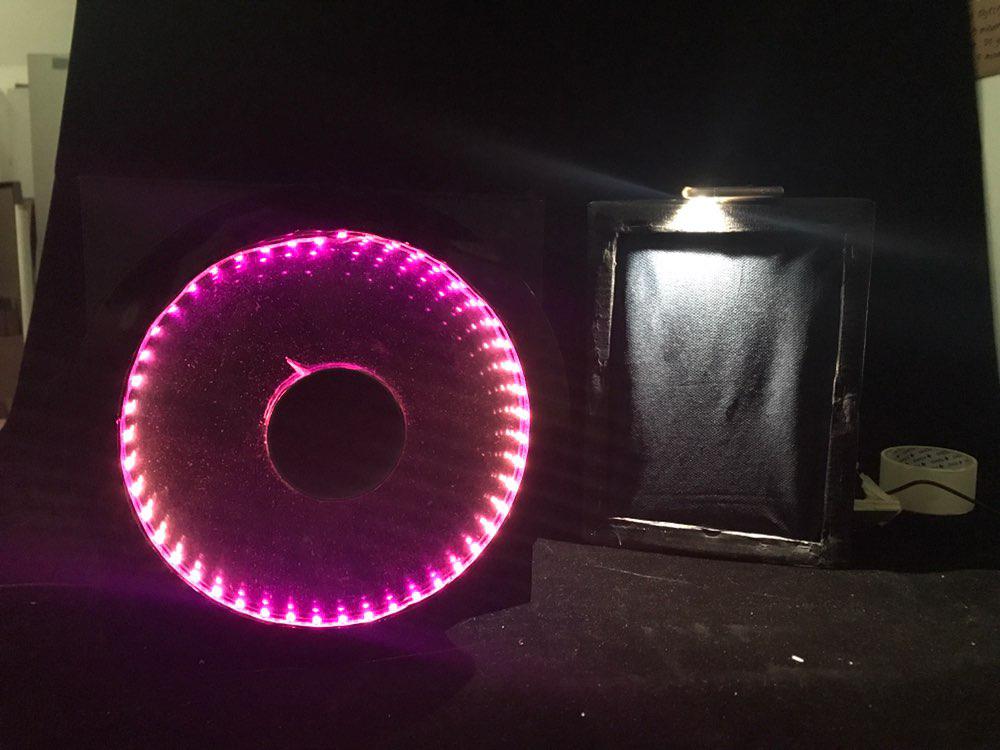
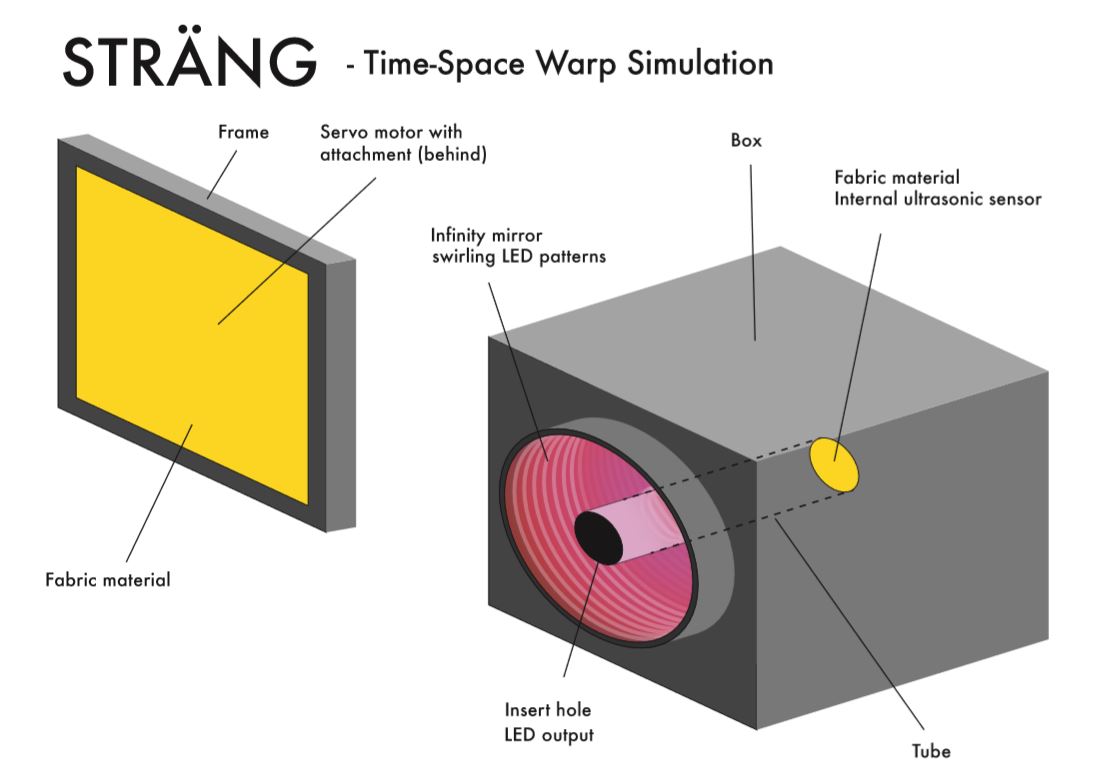
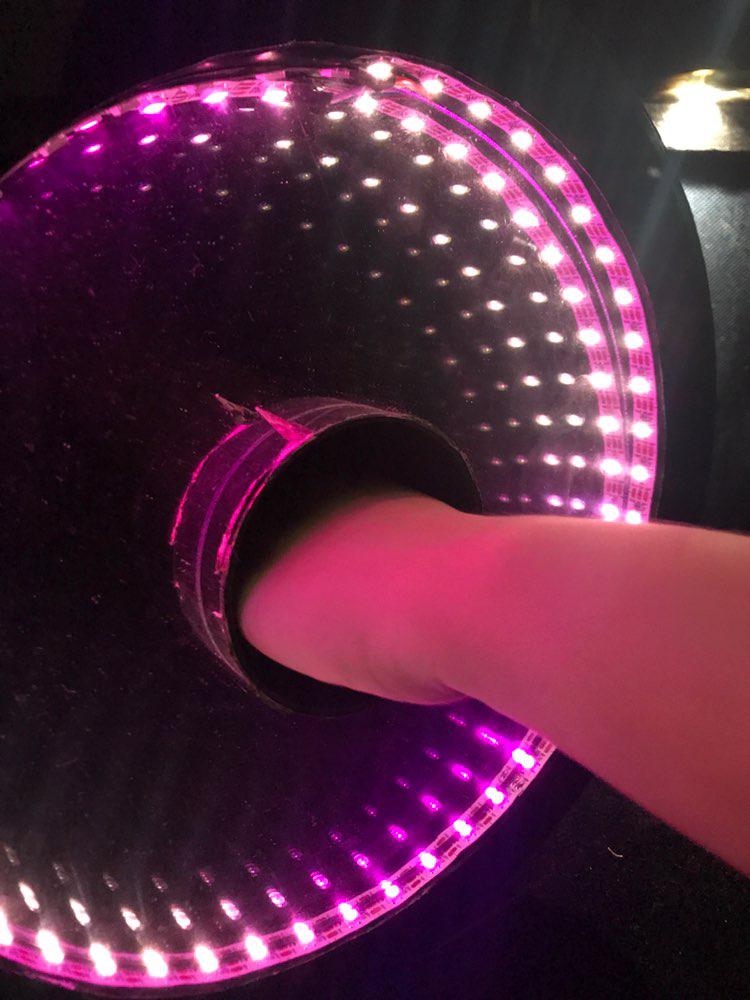
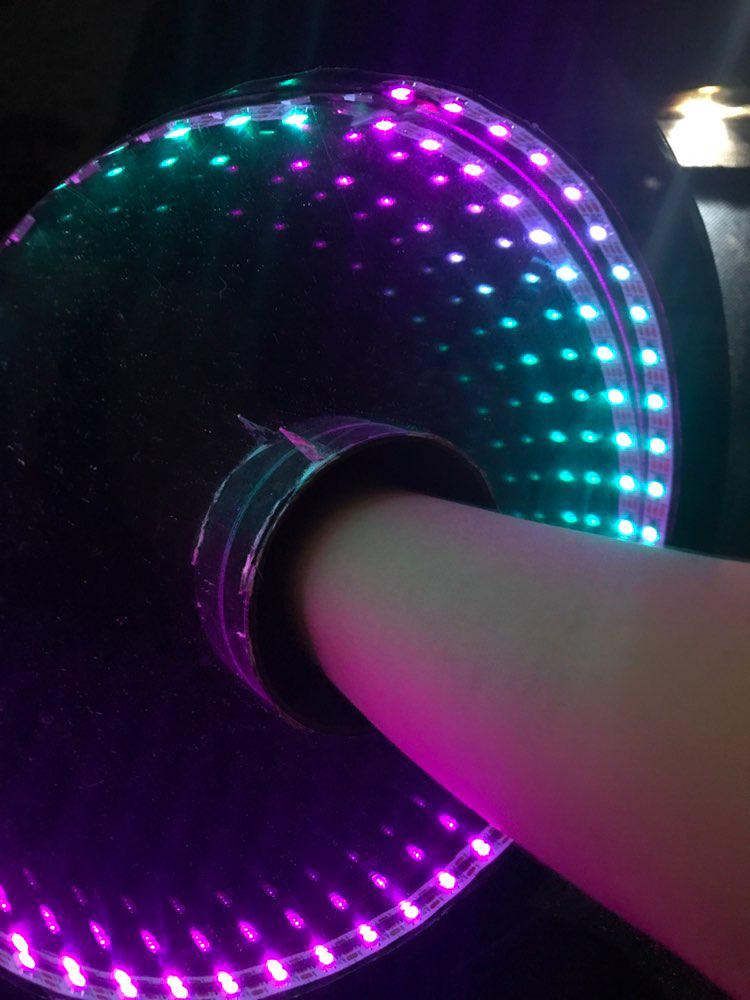
A superpower simulation that mimics the bending of space and time. There will be a clock mimicked by a running LED strip with RGB bulbs. There will be a one way mirror layer in front of the LED to create an infinity mirror illusion. The mirror will have a circular hole cut in the middle so that people can move their hands inside, and be able to touch a sheet of felt material. The RGB lights will change from blue to red across the rainbow spectrum when they do so (will add sound if time permits), and the running lights will start running at a slower speed.
Aside from that, there will be a servo motor behind a larger sheet of the same felt material away from the mirror that responds to the action by moving the sheet, thus creating the illusion that the participant’s hands are moving the sheet without actually touching the sheet. Whenever the motor moves, the LED lights around the frame of the material sheet will light up as well. In this sense, participants can feel like they are bending both time and space.
Things needed:
- LED strip
- Wood material for the box (probably will be spray-painted)
- (Elastic) Felt material
- Frame to hold felt material
- Servo-motor (have to fix something on it)
- Diffuser frame (borrow from film store)
- Ultra-sonic sensors/touch sensors.
- Speakers (If time permits)
Stuff to code for:
- Code for LED running strip (colours and speed)
- Servo motor.
- Response between touch sensor in the box and the servo motor on the other side
In the end, we had 2 main codes and used 2 Arduino circuit boards. One was for linking the LEDs and ultrasonic sensor while the other was for linking the flex sensor and servo motors. We shared a lot of the coding workload so it’s hard to be definitive but if we really had to, it would be something like:
Bryan – LEDs
Brendan – Ultrasonic sensors
Me – Servo motors
Challenges faced in the form of advice for future programming students:
#1 Do not go shopping at Sim Lim Tower on a Sunday.
#2 Go to Continental Electronics Pte Ltd #B1-23/24/25 to get WS2811 LED strips which are programmable by Arduino. Those lights are pricey though, 1m for $18 but do it for the project!
#3 If you do not take IM 1 and are deprived of your free Arduino kit, do get wires. Lots of them. Get the male to female connectors too.
#4 Nope, you can’t laser cut glass. Only acrylic mirrors from Artfriend (one costs $26)!
#5 Example codes and libraries are your best friends! We tried coding the running light pattern by ourselves one evening for around 3 hours but still couldn’t figure it out but then I found an example code and it solved like 80% of our problems. Just trust open-source culture.
#6 Yes we have flex sensors that can be borrowed from the film store. If you get the one soldered down you need male to female connectors.
#7 Loose wires were a huge problem for us, we had yet to try hot glue but it’s worth the try! Getting longer wires would probably have helped!
#8 The fabric of the black flag borrowed from the film store is way too tough. We just used Bryan’s old shirt. (We really wanted to use a stretchy material like Spandex initially but that’s too expensive)
Future Developments:
This installation may be small (because we’re on a low budget) but imagine being in a room with a massive infinity mirror where you can change its lighting using gestures! When you raise your hand in, motors move the other side of the room! T r i p p y
On the day of presentation we didn’t include music, but when we set it up the day after in its proper orientation and played music, it really gave the installation the atmosphere it needed!! Really important element for immersion.
Also do give a proper preface to your viewers about your installation! A well-conveyed context isn’t only fluff!!! It gives the installation more meaning and affects the way the participant views the artwork!
It is probably worth the try to place the ultrasonic sensor behind the thin piece of fabric and propped up by some piece of foam instead of placing it directly at the end of the tube since it was easily accessible by the participants and they could have just pulled it out.
P.S.: I just named a picture of the LEDs “strang” + “led” but I realised it literally spells “strangled” oh god
PICS OR IT DIDN’T HAPPEN:
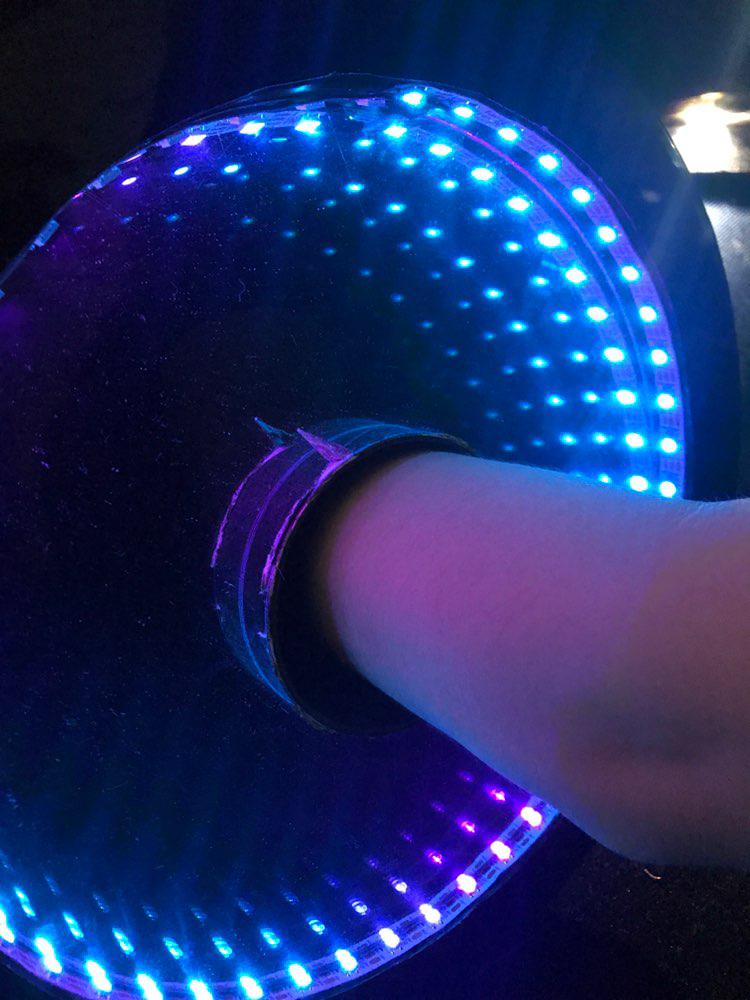
Here is a video of a demonstration done by our participant Jacob in the video below!
As the participant’s hand reaches the end of the tube to touch the cloth material at the end of it, they can push even further to bend the flex sensor. This changes the resistance read by the sensor and thus triggers the 3 servo motors coded for in the same program.