Exhibit Layout and How Moss And Grow Lights Fit in (FYP18)

Overview
Updates for the week would be focused mostly on material testing and more technical aspects of planning.


Exhibit Layout
The grad show layout has been finalised! I would be painting the space entirely with the colour Pantone 5395 C (or similar, depending on the colours the contractors provide), with the exception of projection surfaces. I picked this slightly dark navy colour that I thought would be able to complement the purple which the grow light would give off.

I have also “choped” 3 pedestals of different sizing each, one at H (1m for all) x W x L 40 x 40cm (to place previous prototype), another 40 x 80 (for final prototype), and lastly, one with 40 x 100 (to place supporting posters and documentations if any).

More details could be found here: FYP Diagram(BW).


Grow Lights, and What to Do with Them
I have finally received my grow lights, way faster than I had expected! However, despite me buying the smaller bulbs, there were many unexpected outcomes which would mar the final aesthetics of the project.

Catalogue of grow lights which I bought (I bought 2)

Some aspects which I did not realise include:

1. Light splashes around the entire machine, and even outside of the moss planters

Surely, this can be mitigated against, through either implementing a lampshade like hood on the bulb itself, or raising the sides of the moss planters (not ideal, as aesthetically it would look bad and incur more difficulties in raising the entire moss bed), but this would simply mean more effort expended into correcting these issues, and risk disrupting the already working machinery/aesthetics

2. Grow light makes… the moss look bad

Ever since the presentation, I had re-transferred the moss back to the plastic trays as it makes it easier to grow the moss (in terms of watering, or letting it sun out). Since then, the moss has not advanced much in terms of growth, but there has been an increase in sprouting amongst the moss.

As evident above, the purple from the grow light has overpowered the initial green of the moss. With green, the symbol of freshness, youth and growth eradicated, an eerie feeling takes over the model. I am on the fence about this new enforced aesthetics – on one hand, it strongly pushes forth the idea of the creepy science laboratory theme, and also adds some colour to the otherwise dark space exhibit, but with the green and symbols of freshness lost, I feel that I would need to adjust the exhibit aesthetics slightly.

3. Rotating Grow Lights?
Initially, I wanted each grow light to also be in continuous rotating motion, and each grow light was to follow each tray in rotation. However, knowing now that the light splashes around out of the tray planter, the intended effect of seeing each grow light rotate around (as though each was the sun rotating around a planet) would not be as strong as I thought.

I could try to add on the lampshade to minimise the lighting, but I am wary of its construction. For instance, I have not tested the lighting for long hours, and am not sure of the volume of heat it would release (which might potentially, set fire to my lampshade or kill my moss).

Another consideration would be that for the grow light to rotate, their connecting wires would also have to rotate. This is troublesome for the machinery layout planning, Currently, the grow light comes together with a clip and bendable stem, which would be extremely helpful in positioning it onto the model. As such, I am considering eliminating the rotation of the grow light, despite it being a much more powerful element.

What I have in mind to continue working on

To deal with these, I plan to:
1. Make a lampshade
2. Make my moss machine LARGER (for it to ‘capture’ more of the light spillage)
3. amend the construction of the moss model, as a larger model would require better supportive frame


Farming the Moss
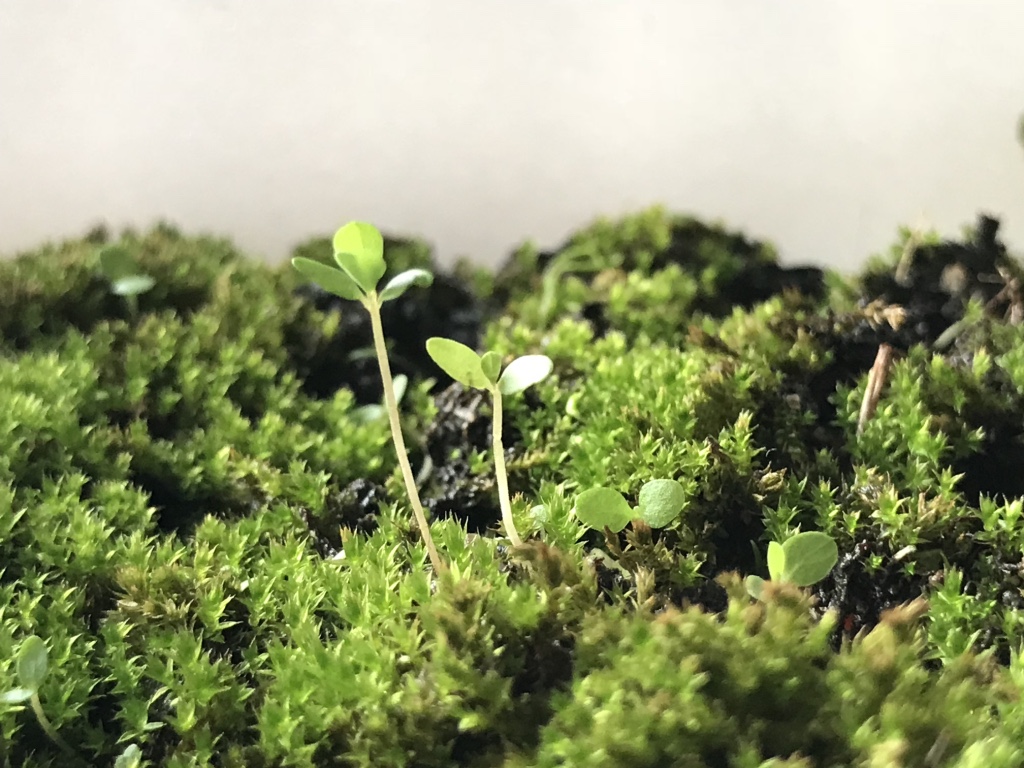
Close up of Moss bed

Moss growth has been good! Clearly, a few patches have died out but I attribute that to fungal infection (which luckily did not spread much to the surrounding mosses).

Left: Dead moss patch, but lively sproutlings

In fact, I noticed that the seedlings amongst the moss has had MORE responsive growth than the moss itself (even growing in the direction of the sunlight), and for a start/for statistics for my posters, I have started calculating the number of seedlings sprouted.

Data for my corresponding posters would be recorded and taken from the moss itself. Some examples of data which would be recording include the specific number and type of seedlings which sprouted in my moss bed. A sample is shown below:

Sample: Data Information Recorded for Posters
Close up: spot the 2 different species of seedlings sprouting

In this instance (referencing the previous 2 pictures), the data I tried to record was the number of single bladed (somewhat like a grass blade) sproutlings and normal 2 or 4 leaved seedlings. I would be continuing to collect similar data, and start working on my corresponding posters as soon as possible. Also, I would try as much as I can to include real data into my posters as I want them to lend some semblance of reality into my entire project, even though the theme was somewhat parodic.


Video Installation and How It Looks Like
Initially, I wanted my video portion of the installation to be more of a split screen format. However, through consultation with prof Randall, I realised that doing it in real time would not be possible with my envisioned 9 screens – which probably meant affixing 9 different working cameras onto the machine itself – due to technical limitations (computer data might mix up the video signals if too many cameras were to be attached to it).

Above would be my initial idea for the projection. However, with this unforeseen circumstance, I might alter it to simply 2 camera input signals, and simply play around with the available effects.


What’s real, and what’s not?

Through my consultation with prof Randall, I realised that I have not truly addressed this particular point within my project. For now, I am aiming at making it as real as possible, but at the same time, I want it to be slightlllyyyyy ridiculous in the sense that scientifically examining the theme of continuity is all but a fruitless attempt as the answer was simply absent in the first place (which ties back to the name of my project, of it being a continual study on the theme of continuity). Also, the “study” of the theme would be borderline parodic, of through the concrete examination of the topic, I attempt to make it “real”?

It seems as of now that this point is still slightly wonky, and I will continue polishing it, but as of now, this is what I have in mind.


Conclusion and Moving On!
After a week’s of deliberation of the final machine’s sizing, I have decided to just work on a similar model of the same size and will start rebuilding the model over the next week. At the same time, I will be starting on creating a series of posters and other exhibit decorative materials.

Meanwhile, for the projection, I would aim to affix the final projection scheme by the end of the next week, and hopefully, create a portion of it.

On Continuity, Time, and Everything Else (FYP18)

Some Reflections on my project
It’s 2018; cue a quick recap on 2017’s highlights: I played about with different materials, tested out several light effects on bubbles, and did a couple of projection tryouts. However, ideation wise, I was admittedly was pretty much stuck, despite my set topic on grief/loss. It was tough to translate the ideas into an actual artwork, and I hit a roadblock before slowly, but surely, losing interest in the topic.

Come December 2017, where I took time off fyp, and expanded my perspectives through chatting with people of different backgrounds. I realised one very prominent theme, of continuity. Be it a person stuck in memories of the past, or someone stuck in ennui, time will continue passing and you will be forced to move on. Personally, it also tied in with my belief that only through hard work from yourself is the only way to get yourself out of this stuck situation. That as a person, one will continually have to push yourself, to continue moving.

In other words,

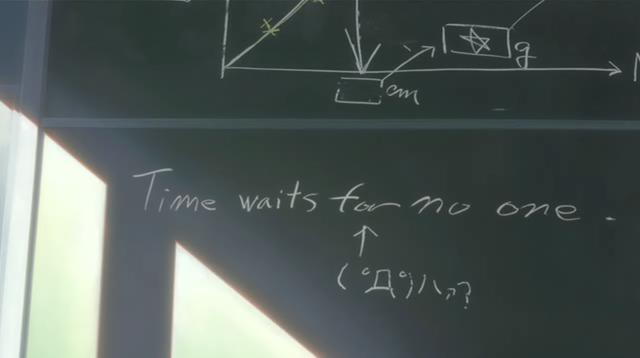
Screen capture from the movie [The Girl who Leapt Through Time]
Interestingly, I thought that even though we as humans are continuously moving, we do not internalise the present situation of the ‘being’, of the time that it currently passing by us. For the lack of a better word, I’d call this the ‘continuity of presence’ – somewhat similar to the continuity of time, I wish to emphasise on and focus more on ‘presence’. In which, one of the focal mediums by which this presence can be translated would be through time, and these will be the focused topics in my fyp project.

More on the continuity project

Mindmap of said topic

In part, it becomes a development from my previous topic of accepting loss – it’s moving on, and acknowledging the larger presence of the flow of time, or rather, the continuity of time in the larger sphere of things.

In particular, I wished to express this topic, and visualise into an seen experience.

I highlighted several factors of which were the most important for the given topic, and which I will clearly insert into my project.

Continuity of presence operates clearly on 3 different aspects:

  1. Imagined
  2. Independent
  3. Changing

Why imagined?
The flow of time remains a philosophical debate , where as creatures of the world, we come up with our own imagined concept of time to internalise the continuity we experience. It is arguably just an illusion, as our way of understanding this abstraction with our limited perception. According the article, the flow of time is such an conceptual entity that it is understood through the transition between the past, present, and future, whom we mark as individualised points.

Therefore, I’d like to push for the argument that this continuity of presence is an imagined concept.

Why independent?
It is independent of external events, and it can only go forth one way in a fixed trajectory. It goes forward in its own speed, at a rate of 1 second per second.

Why changing?
Say hi to the clique saying: change is the only constant in life.

With continuity, there is progression. Therefore, no matter how minimal, there will definitely be changes that are evident. Movement, or changes, can be shown through continual, evident changes or through highlighting the differences between the previous and present state of matter.

I end this section by the dictionary definition of continuous –

“Marked by uninterrupted extension in space, time or sequence”

These subthemes are what I aim to introduce into my project.


Artist References

Regarding the artist references, I looked at various artists who utilised light as a medium.

Why light? I felt that light (strobe, projection, led bulbs, led strips, neon lights) could be an interesting medium to build upon. Partially, this was because light has a fleeting ‘lightness’, which I thought was similar to the lightness as perceived by the inadequacy of words, speech or objects to quantify the continuity of time.

Olafur Eliasson’s Timeless Garden

According to Eliasson, he saw his works as vessels for experiencing reality, “creating new perceptions of the world” (https://www.modernamuseet.se/stockholm/en/exhibitions/olafur-eliasson/). At the same time, he proposes a dual-self awareness – of what we see, and also of ourselves in the midst of seeing.

It is a matter of becoming aware of what we see, but also of being aware of ourselves in the act of seeing. Or, as the artist puts it, “seeing yourself seeing”, of acknowledging our presence and our participation.

I find it particularly interesting that Eliasson’s approach was not through showing the continuous flow of water, but rather by utilising intelligently the strobe lights, he was able to show that there was changes, albeit frame by frame. By proving the opposite/outcome of change, he shows continuity within the flow of the bigger space.

Teamlab’s Black Wave

Though the teamlab’s concept behind this artwork was not focused on the continuity of time, but rather on generating a force of nature based on hard science and coding, I really liked how this artwork brought about a sense of calm and really allowed visitors to connect with nature, and possibly, reengage unknowingly with the passage of time, and presence of the man made waves.

Joao Costas’ and the wind was like the regret for what is no more

As an outcome of my previous artwork research, I decided to delve slightly deeper into how can one translate ideas into physical installations. One of which was Costas’ wind installations, where he altered the space, drawing attention to wind, and changing it into a sense (sound) which we could experience more knowingly.

Leo villareal’s Cylinder

On Villareal’s biography page, it reveals his inner thoughts and concepts behind his installations. Particularly, I liked how his works explored the physical and dimension of time, both in terms of spatial and temporal resolution. In fact, one might argue that his works and art collective team Nonotak operated on similar principles – the common usage of simple forms and lights to create a more complex structure.

Tokujin Yoshioka’s Lexus

Using optical fibres, Yoshioka created this mirage which I really liked based on my personal preference. As I had done a previous installation using strings, I found this particularly captivating and considered once whether to continue enriching my past string installation into something as large and monumental as Yoshioka’s work.

Ryoji Ikeda’s Test Pattern [100m Version]

Flow: as seen through black and white linear imagery, Ikeda renders data into images.


Perhaps, what I should consider is what aspect of time, space, or continuity which I want to alter into the visual scene?

(Failed) Fog Juice and more | #FYP

(Backdated post to 20 Oct ’17)

Overview: Creating new Set-ups
This was a week of toggling with equipment, with the intention of coming up with the final installation setup. I decided to just go back and focus on projection on bubbles. To do this, fog is required, to make the bubble opaque enough for projection to shine on it.

Thus, I tried to make my own fog as buying a fog machine would be much more costly. It was a failure.


Experiment I (out of 2):
Part 1

This experiment’s step by step tutorial was taken from here.

Experiment set-up

In brief, the experiment required,
1. Creation of fog juice (mixture of distilled water + glycerin)
2. Other materials: aluminium tray, heat source (candle), bottle ‘cover’
3. Place fog juice onto aluminium tray, and bottle cover over
4. Heat it up, fog should be evaporate from aluminium tray

As seen from the video, the resultant fog was near negligible – and in fact, this was the best videos I managed to get. Despite upping the glycerin amount in the fog juice, there were still no fog produced.

The experiment was a certified failure – how now? I would like to scrape the idea of utilising projection onto bubbles directly, and cut out the need for fog bubbles.


Experiment I
Part 2

Rough sketch of experimental set-up
Entire set-up (without heat source supposedly under the aluminium tray)

My original intention was just to combine bubble blowing by the user, and create a singular platform for one single bubble to stay on. This bubble ought to be a fog bubble, with fog blown into it.

After creating the fog bubble, projection light would beam images on it and create the effect I required.

Needless to say, this was a situation where the ideal was way better than the physical. The water from the tray kept dripping down the straw onto the fog juice tray, bubble-blowing was an arduous and unhygienic process, and the entire structure as a whole just was not appealing and stable.

Thus, I did entirely scrape this idea as it just was not working, and did not see how it could further develop.


Experiment III (final)

Set-up

I thought of creating a tinier installation, and contain just one bubble for now as it might be easier to work with. Thus, I decided upon a boxed installation – partly because I started becoming interested in peephole art installations – and also because it was much easier to control the environment within a small, contained space.

The intention was for the user to blow and create one bubble at a time, which float inside the box. An external camera will capture the facial expression of the person blowing the bubble, and project that static image onto the bubble. The bubble was meant to gently float down towards the ground, as I would be placing liquid into the box to greatly reduce the speed the bubble floats down. The user will proceed to look at the bubble through the peephole on the right of the box, as I envisioned that it would greatly magnify the bubble’s size in the eye of the user, and have it easier to contain within a smaller box. The person thus becomes the bubble, and he fitnesses his own death through the bubble.

At the same time, as the bubble floats down and vibrates/moves, a recorder will record the movement and sync it to a sound, which would vibrate according to the bubble’s movement.

Thus, I tried making a box structure to first test out the size.

Set-up: Constructed paper box, blowing tube, plastic sheet at bottom

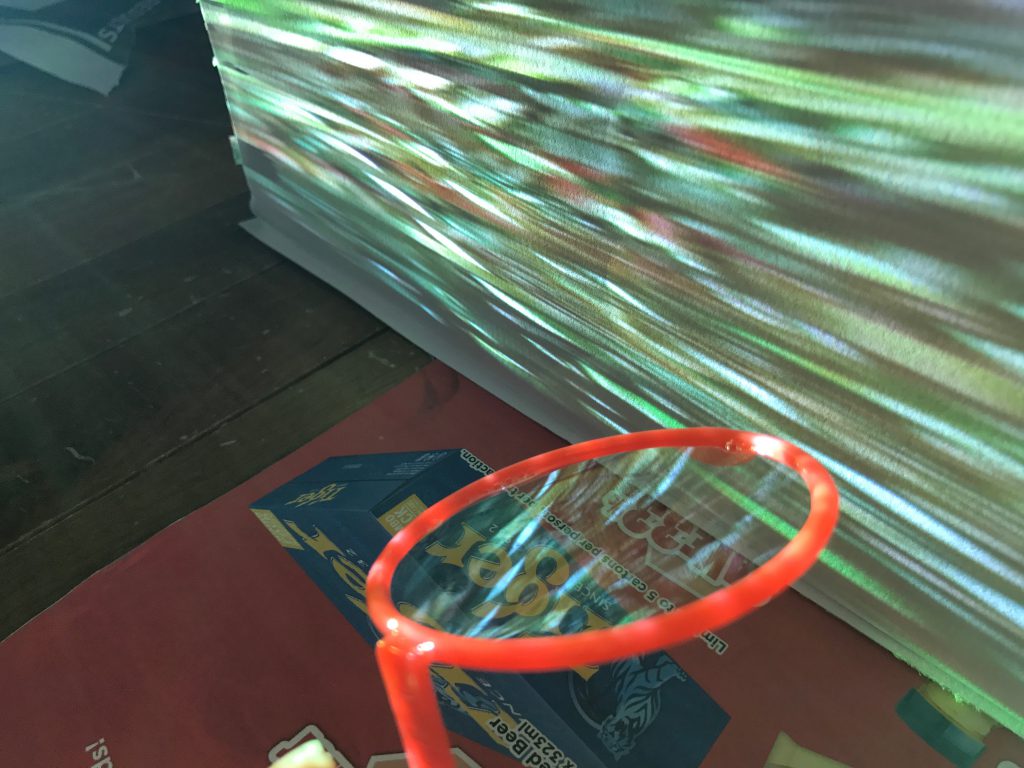
As the programming for the facial recognition, and sounds were not finished yet, I just decided to cast a simple video projection pattern onto the box, and test out the effects on the bubbles.

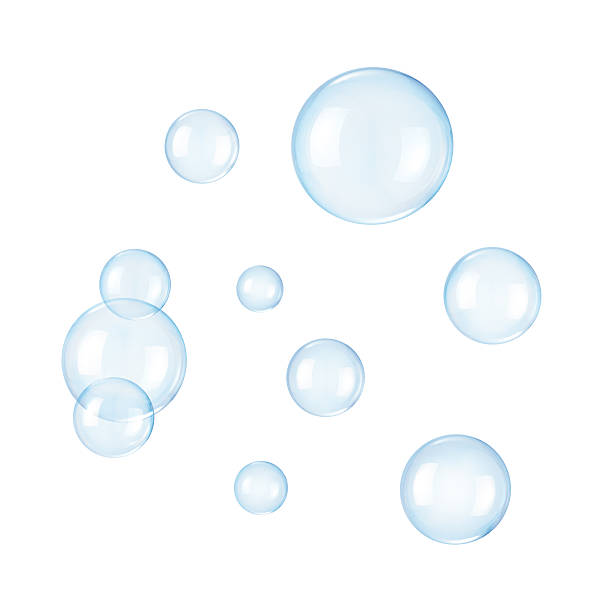
Also, though I intended the bubbles to be like these (see below),

Small bubbles singular form
Singular large bubble

due to the set-up structure, I could at most manage a large bubble or two, like this (see above).


However, I realised that the quantity of light given out by the projector wayyyy overpowered the bubble, and reflected itself at the back of the box. Also, the bubble was exceedingly fragile, and with the small size of the box (and hence short height), there was not enough space for the bubble to poetically flow down as I had wanted it to. The reflection on the bubble, needless to say, was an extremely poorer version out of the many reflections I obtained from my previous experiments.

I received several feedback, that perhaps the peephole was way too small and insignificant to push through the intricacies of the bubble projection, and I could perhaps use a different camera to capture the reflection and re-project it on a larger screen. This way, it would make it easier to look at the projection, and allow a larger group of people to look at it.

Another feedback I got was of hygiene – having visitors to blow through the same tube was unclean, and I did consider providing disposable plastic ‘mouth-guards’ or disposable plastic blowing tubes. However, it was way easier to just alter the bubble blowing structure and make do without this problem.

This idea, though it sounded good theoretically and I was genuinely interested in furthering it, had to be largely tweaked for it to work.


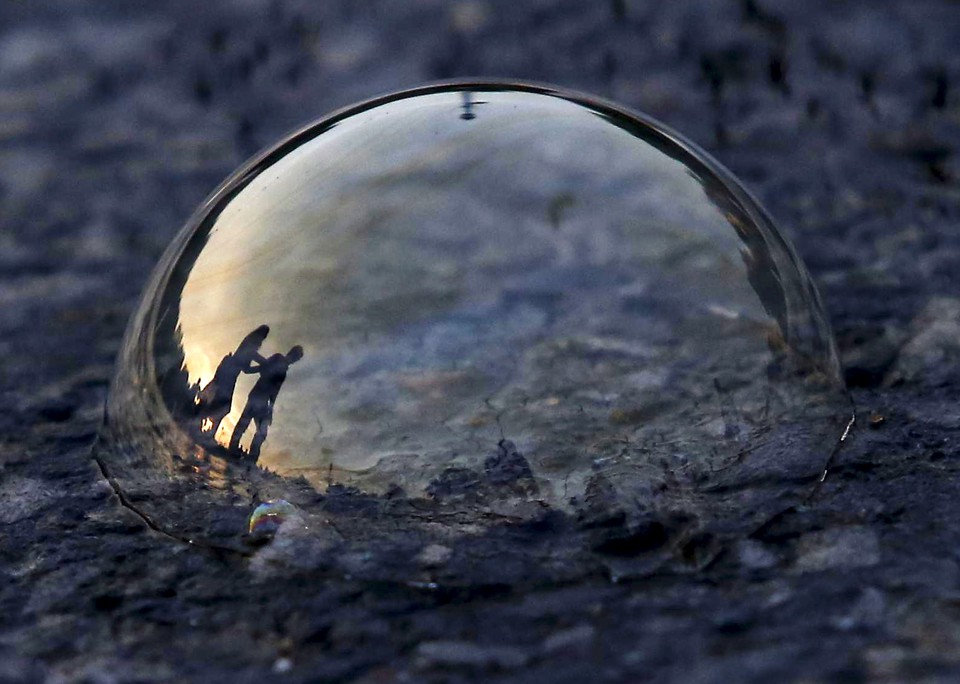
After these experiments, Prof and I found out that the bubble could be used instead as a reflective surface. As seen in the below images, the reflection off the bubbles created a surreal, living image.

Thus, in my future outcomes, I will be utilising this reflection of the bubble as, 1. it’s much easier to manipulate, and that 2. I love the effect.