Project Update
The structure and overall outcome of the project is gradually getting finalised over this week, as I settle and roughly confirm how the set-up will be like: a reflective bubble surface, together with a 2D screen projection. Of course, this is only much simpler and truncated version of what my project – but I would have to first test the settings to see if it works.
The In-store Bubble Machine
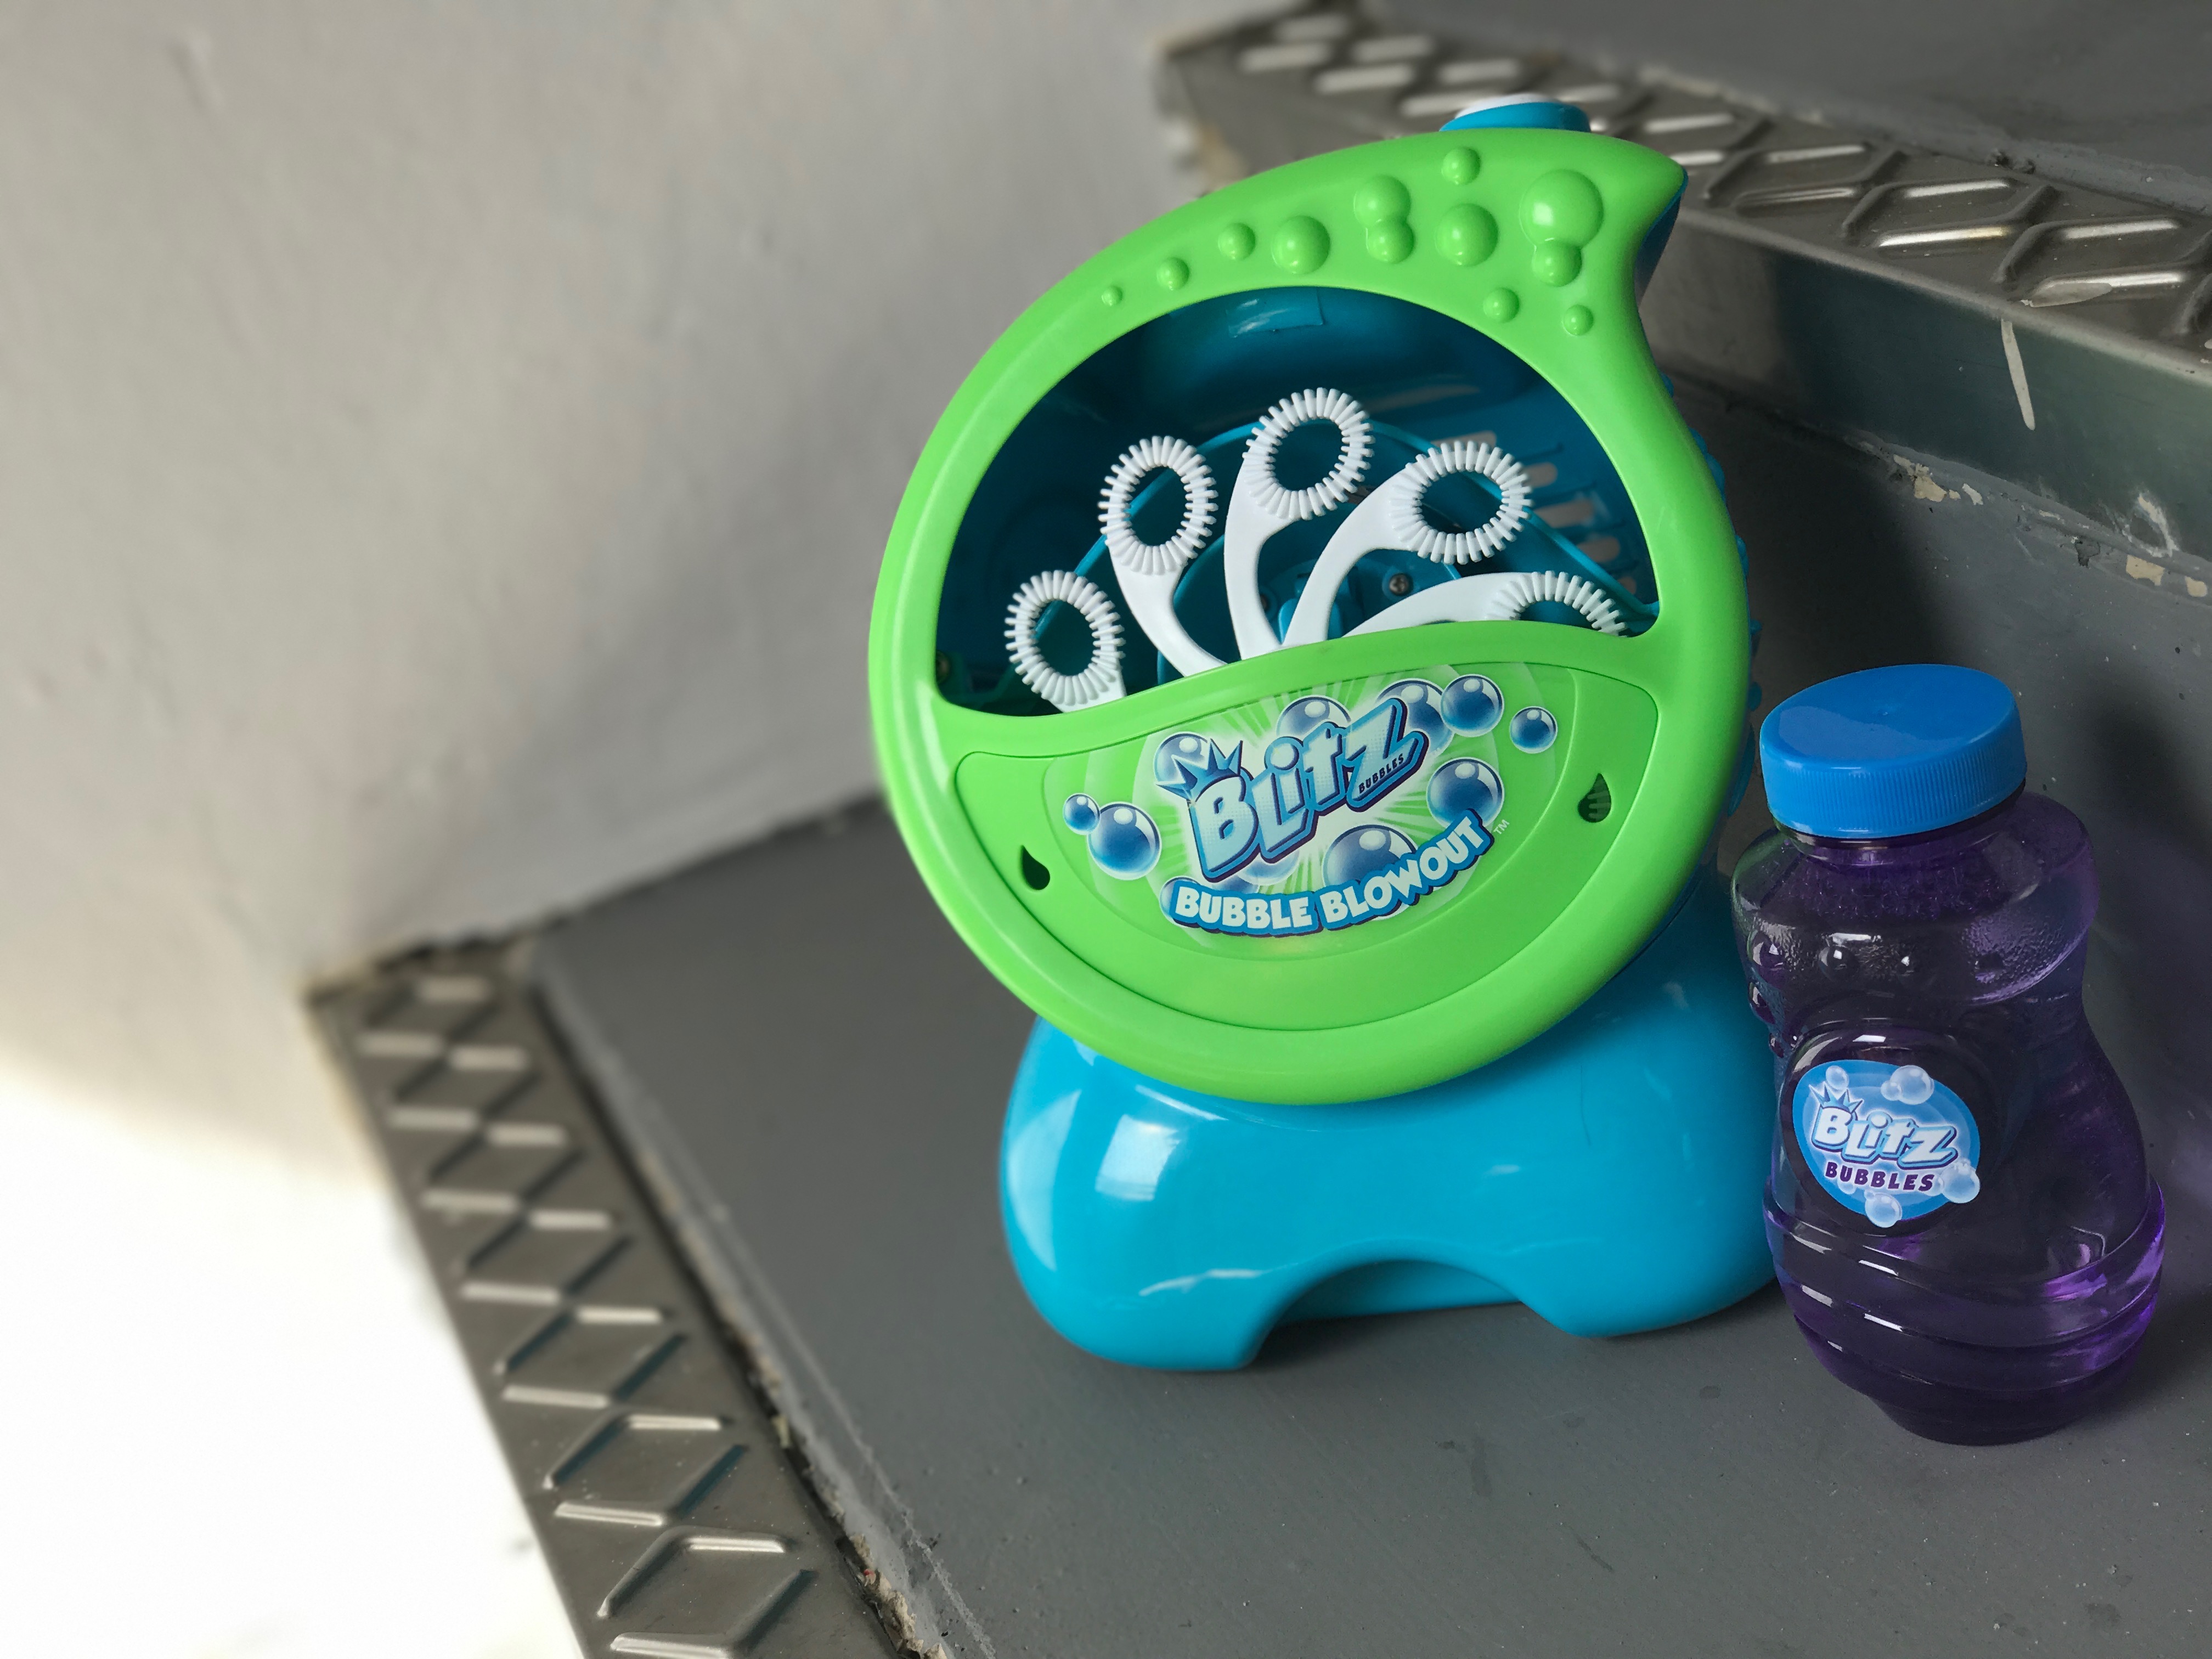
I finally caved in and bought a bubble machine to investigate the structure of it! Which ended up being how I envisioned it to be. However, with the machine now, I was able to personalise the size of my bubbles, although, by using the machine’s old structure, the blowing speed of the machine was fixed and I was forced to make bubbles at a quick and fixed pace.
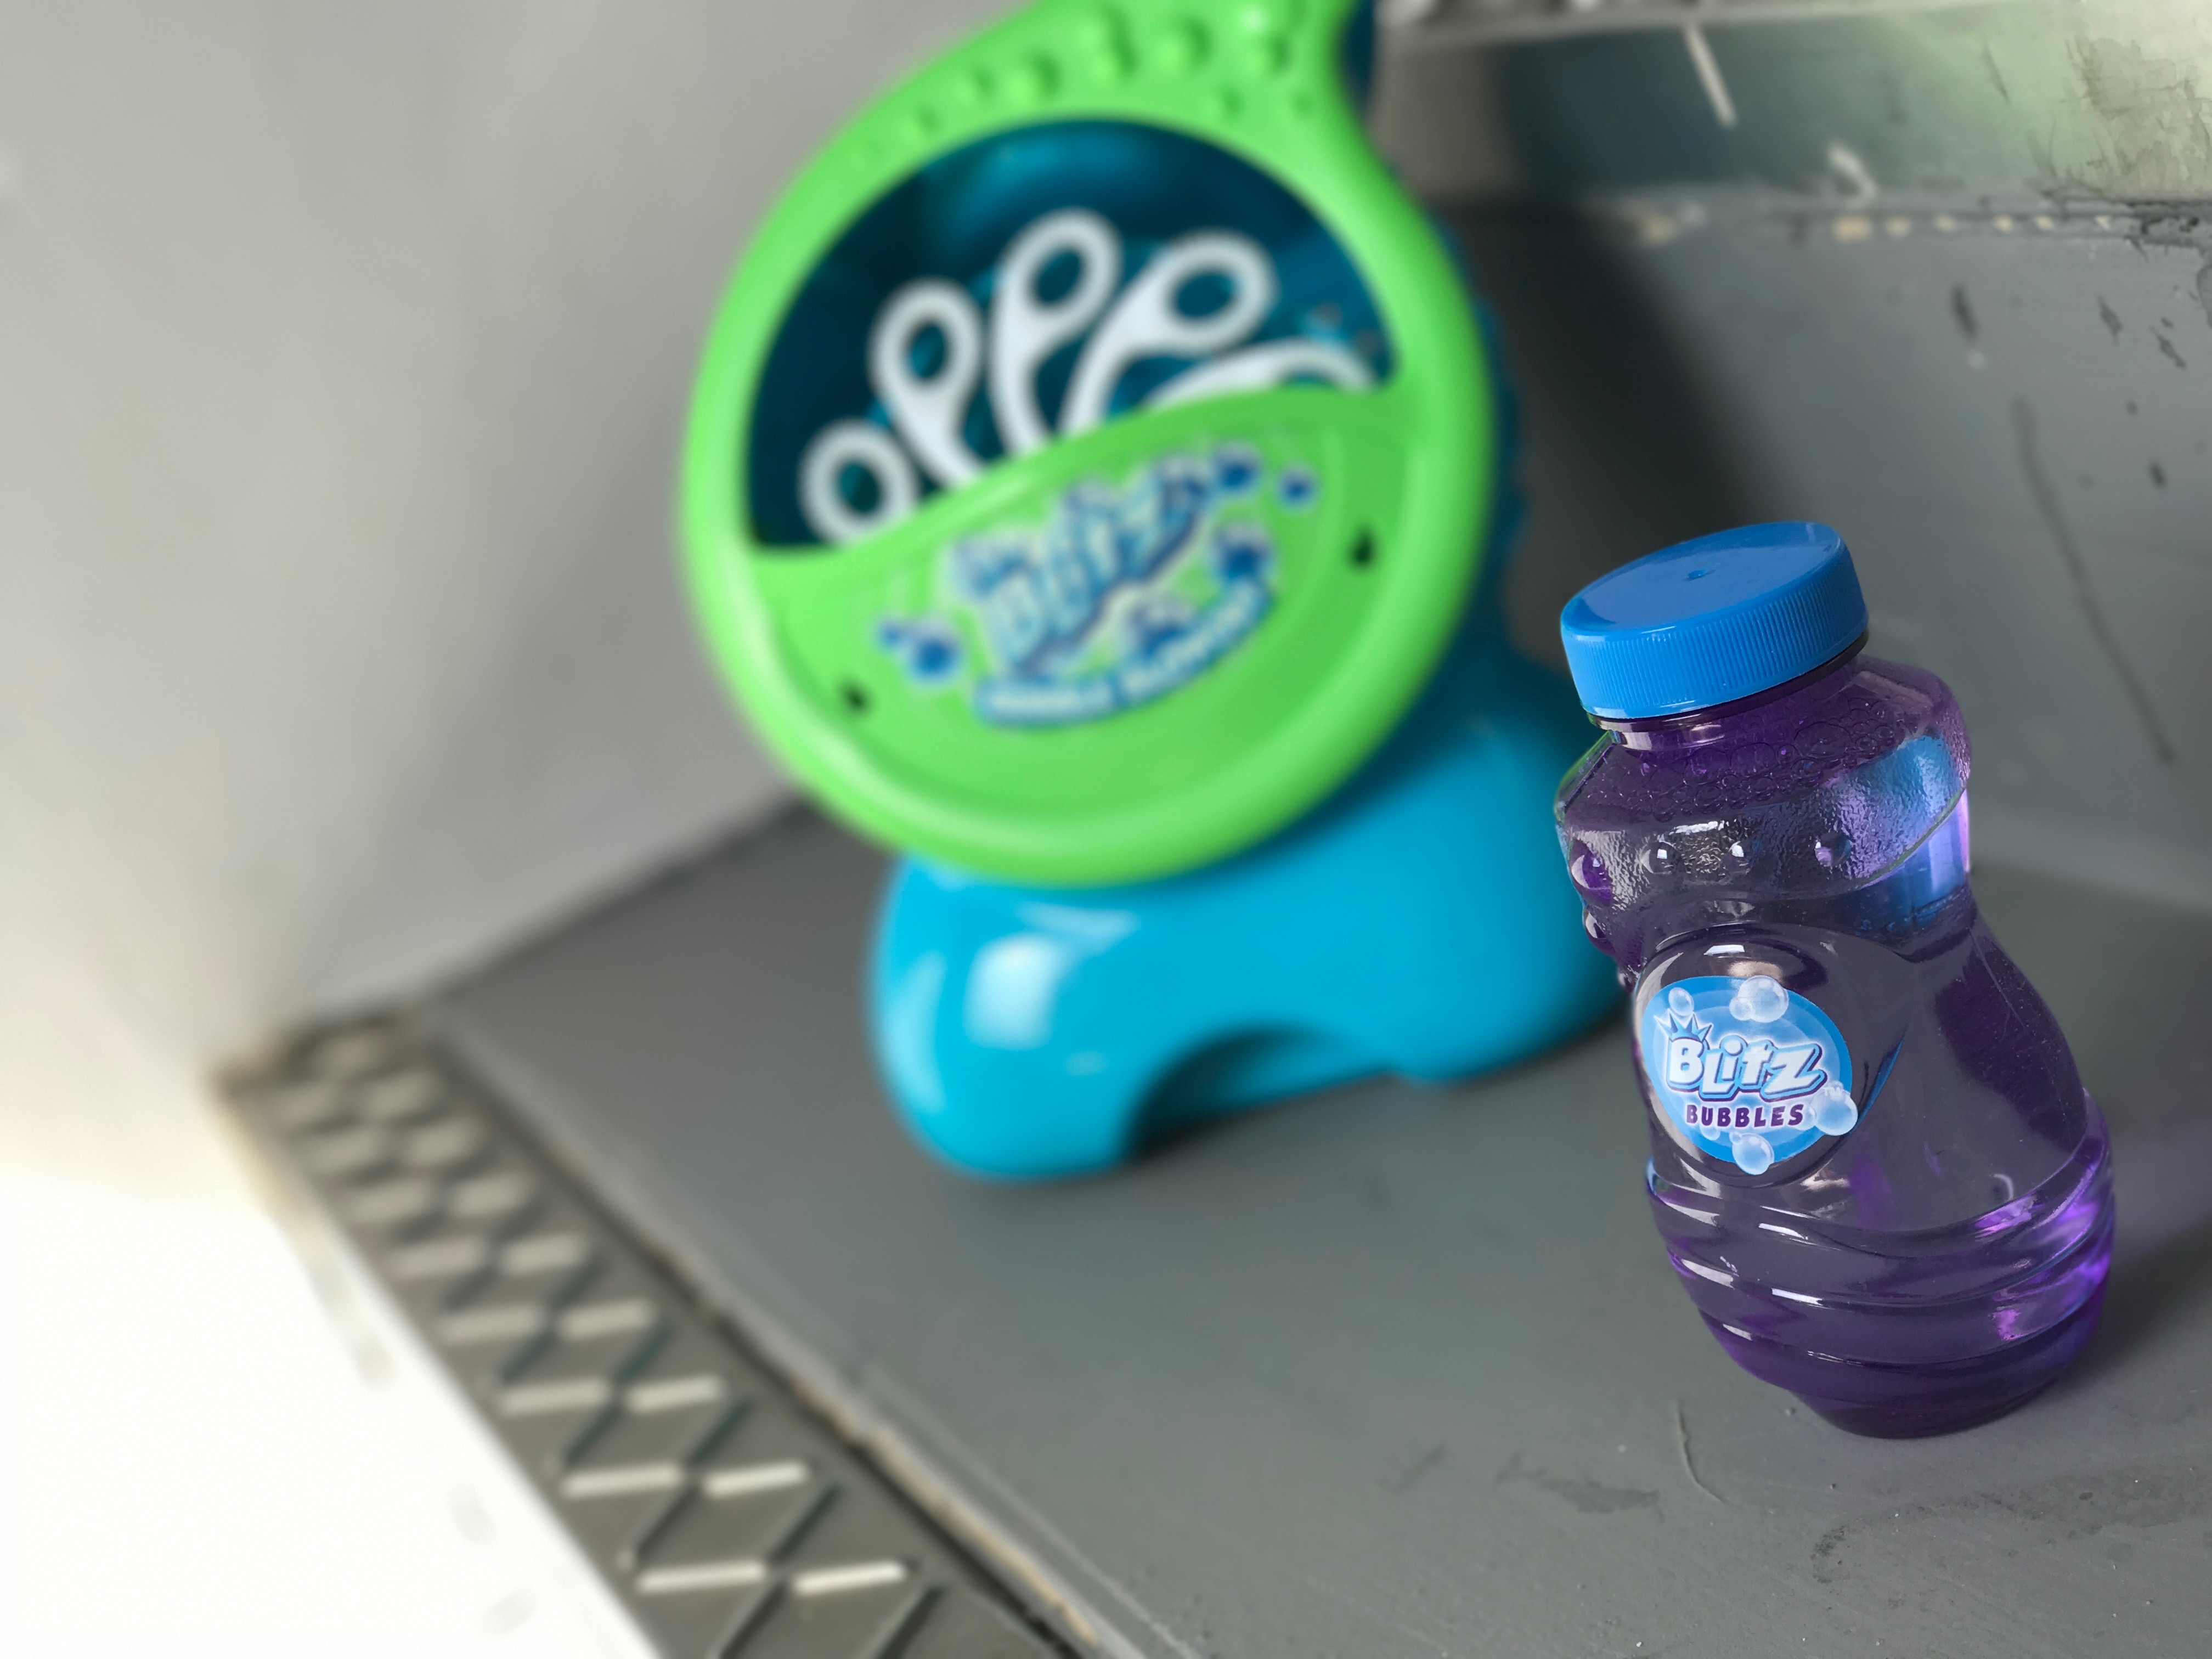
Blitz Bubble Blower
with accompanying bubble solution
Bubble Machine
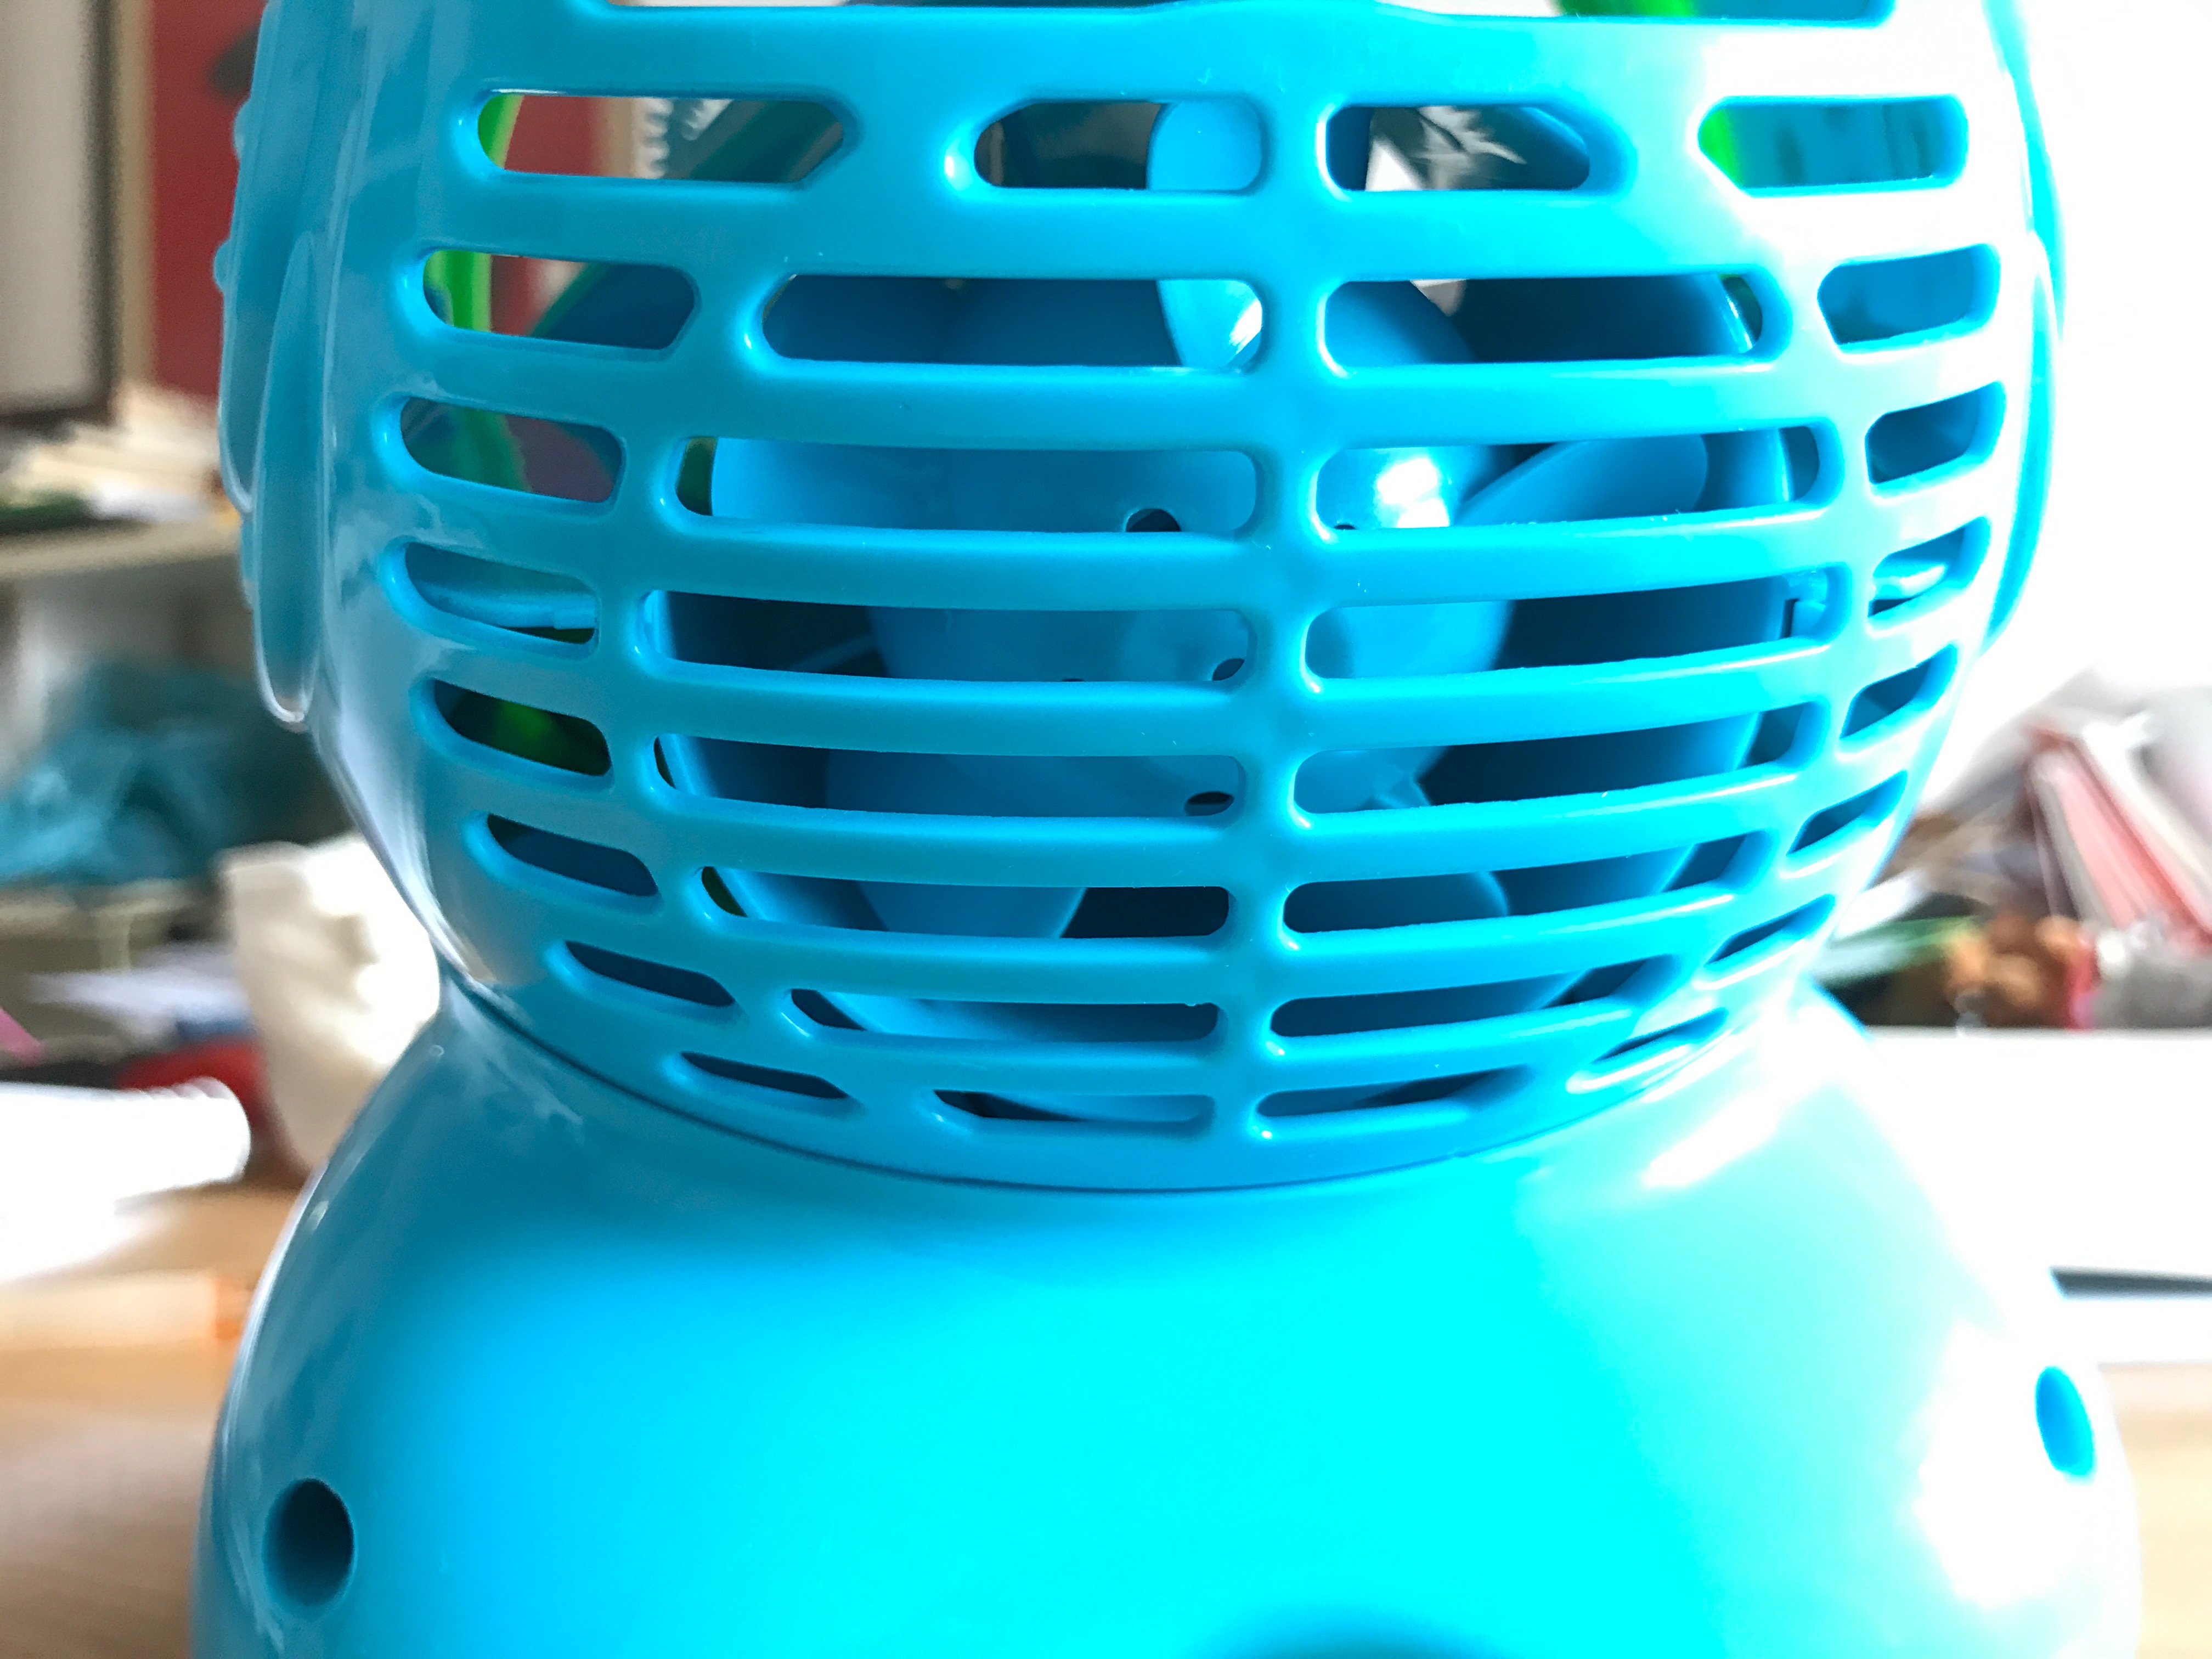
Back of machine
Fan at the back
Fan at the back
The machine was a powerful one which could produce numerous bubbles at high speed, as seen in the video below. The iridescent bubbles were the outcome of a better bubble solution, which came together with the machine as an add-on.
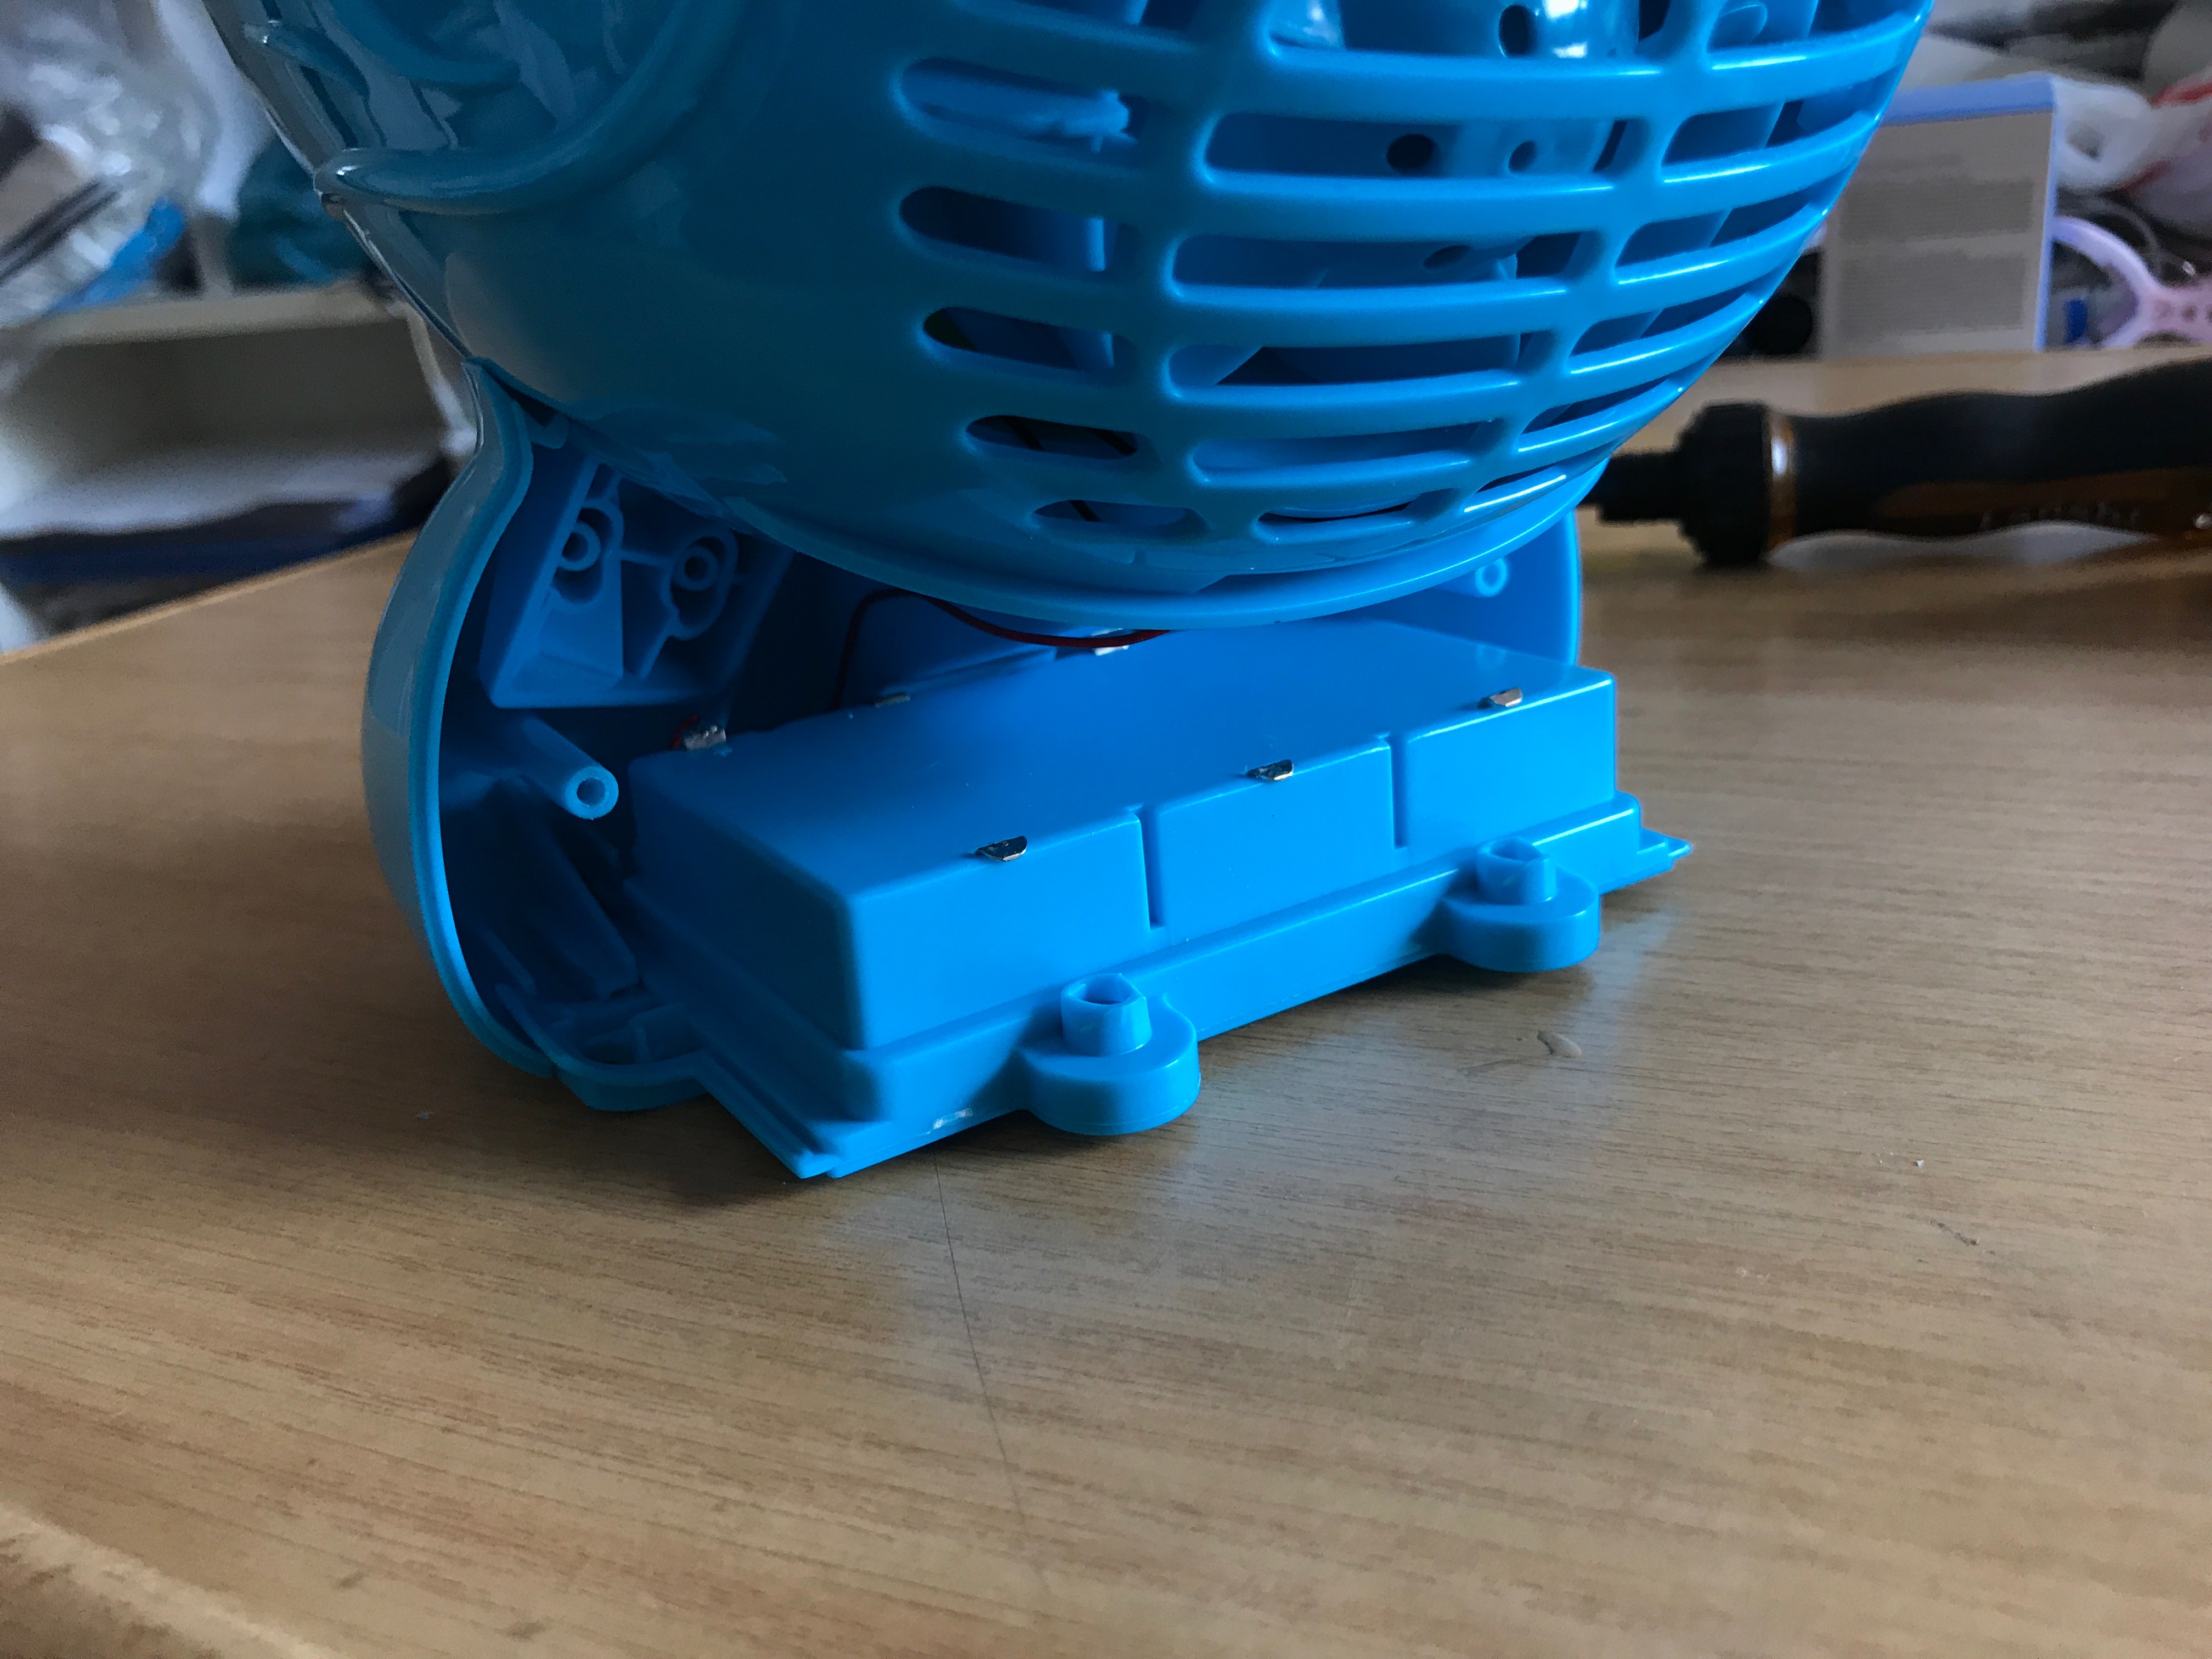
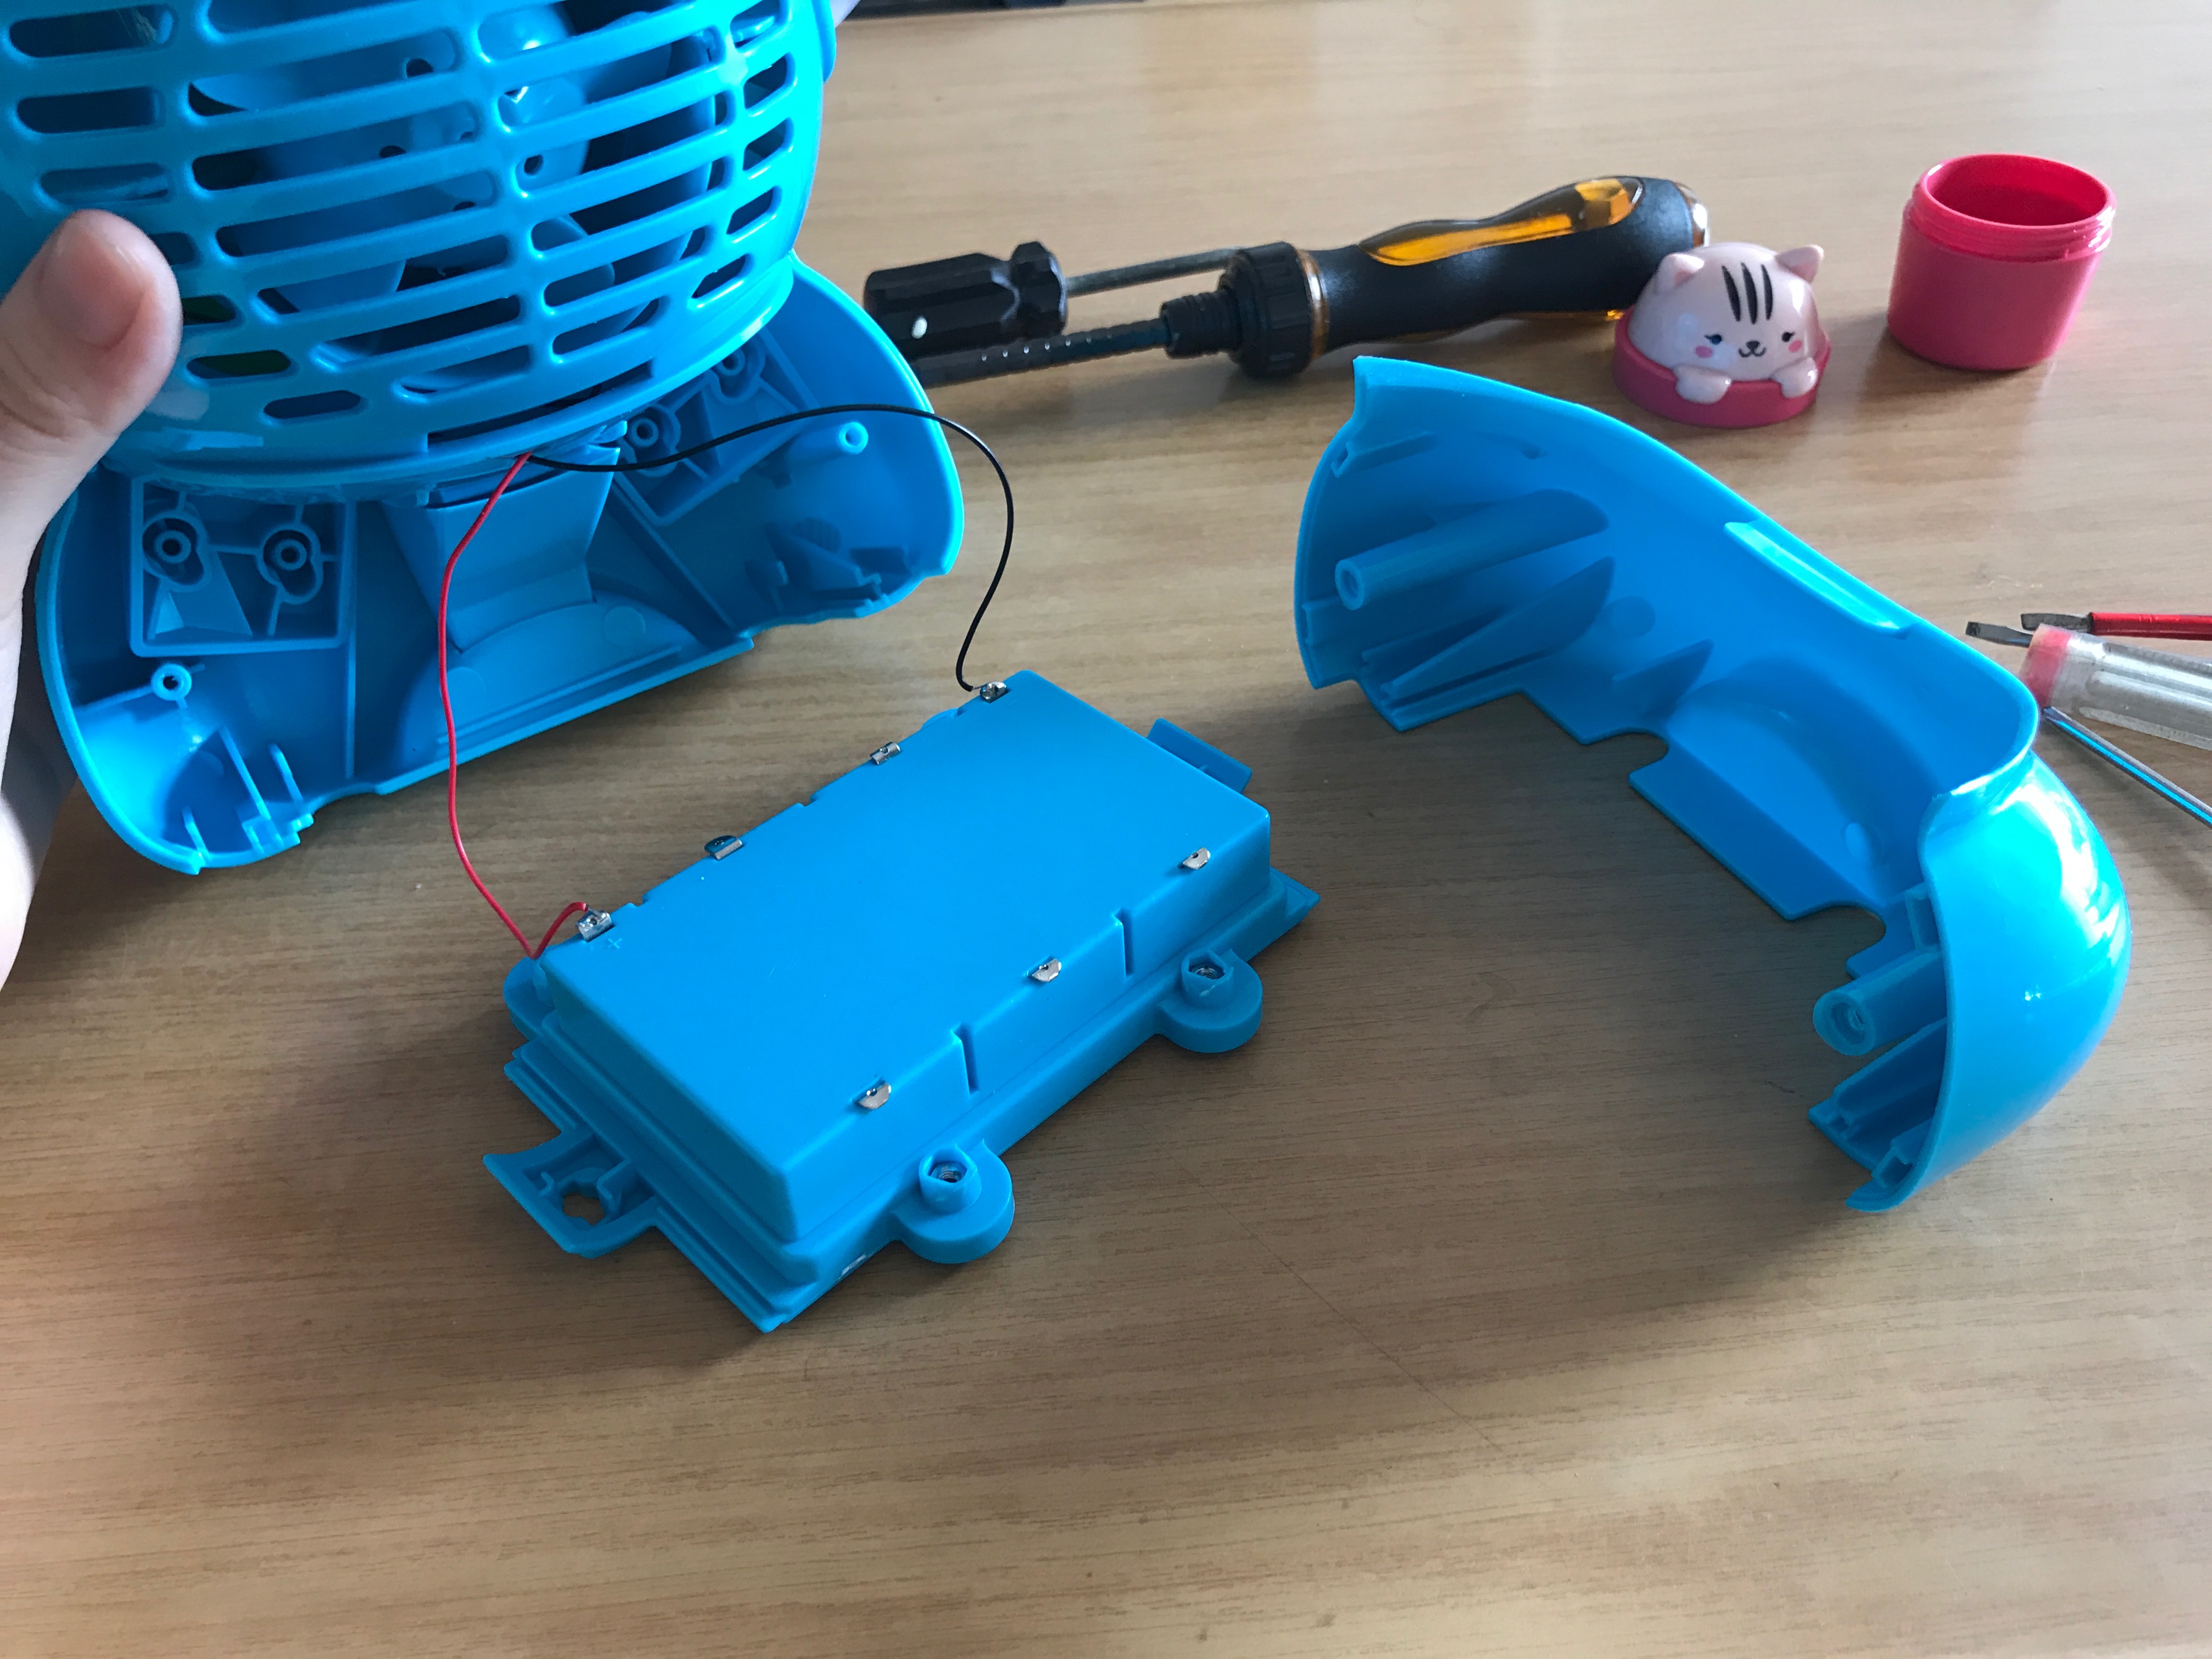
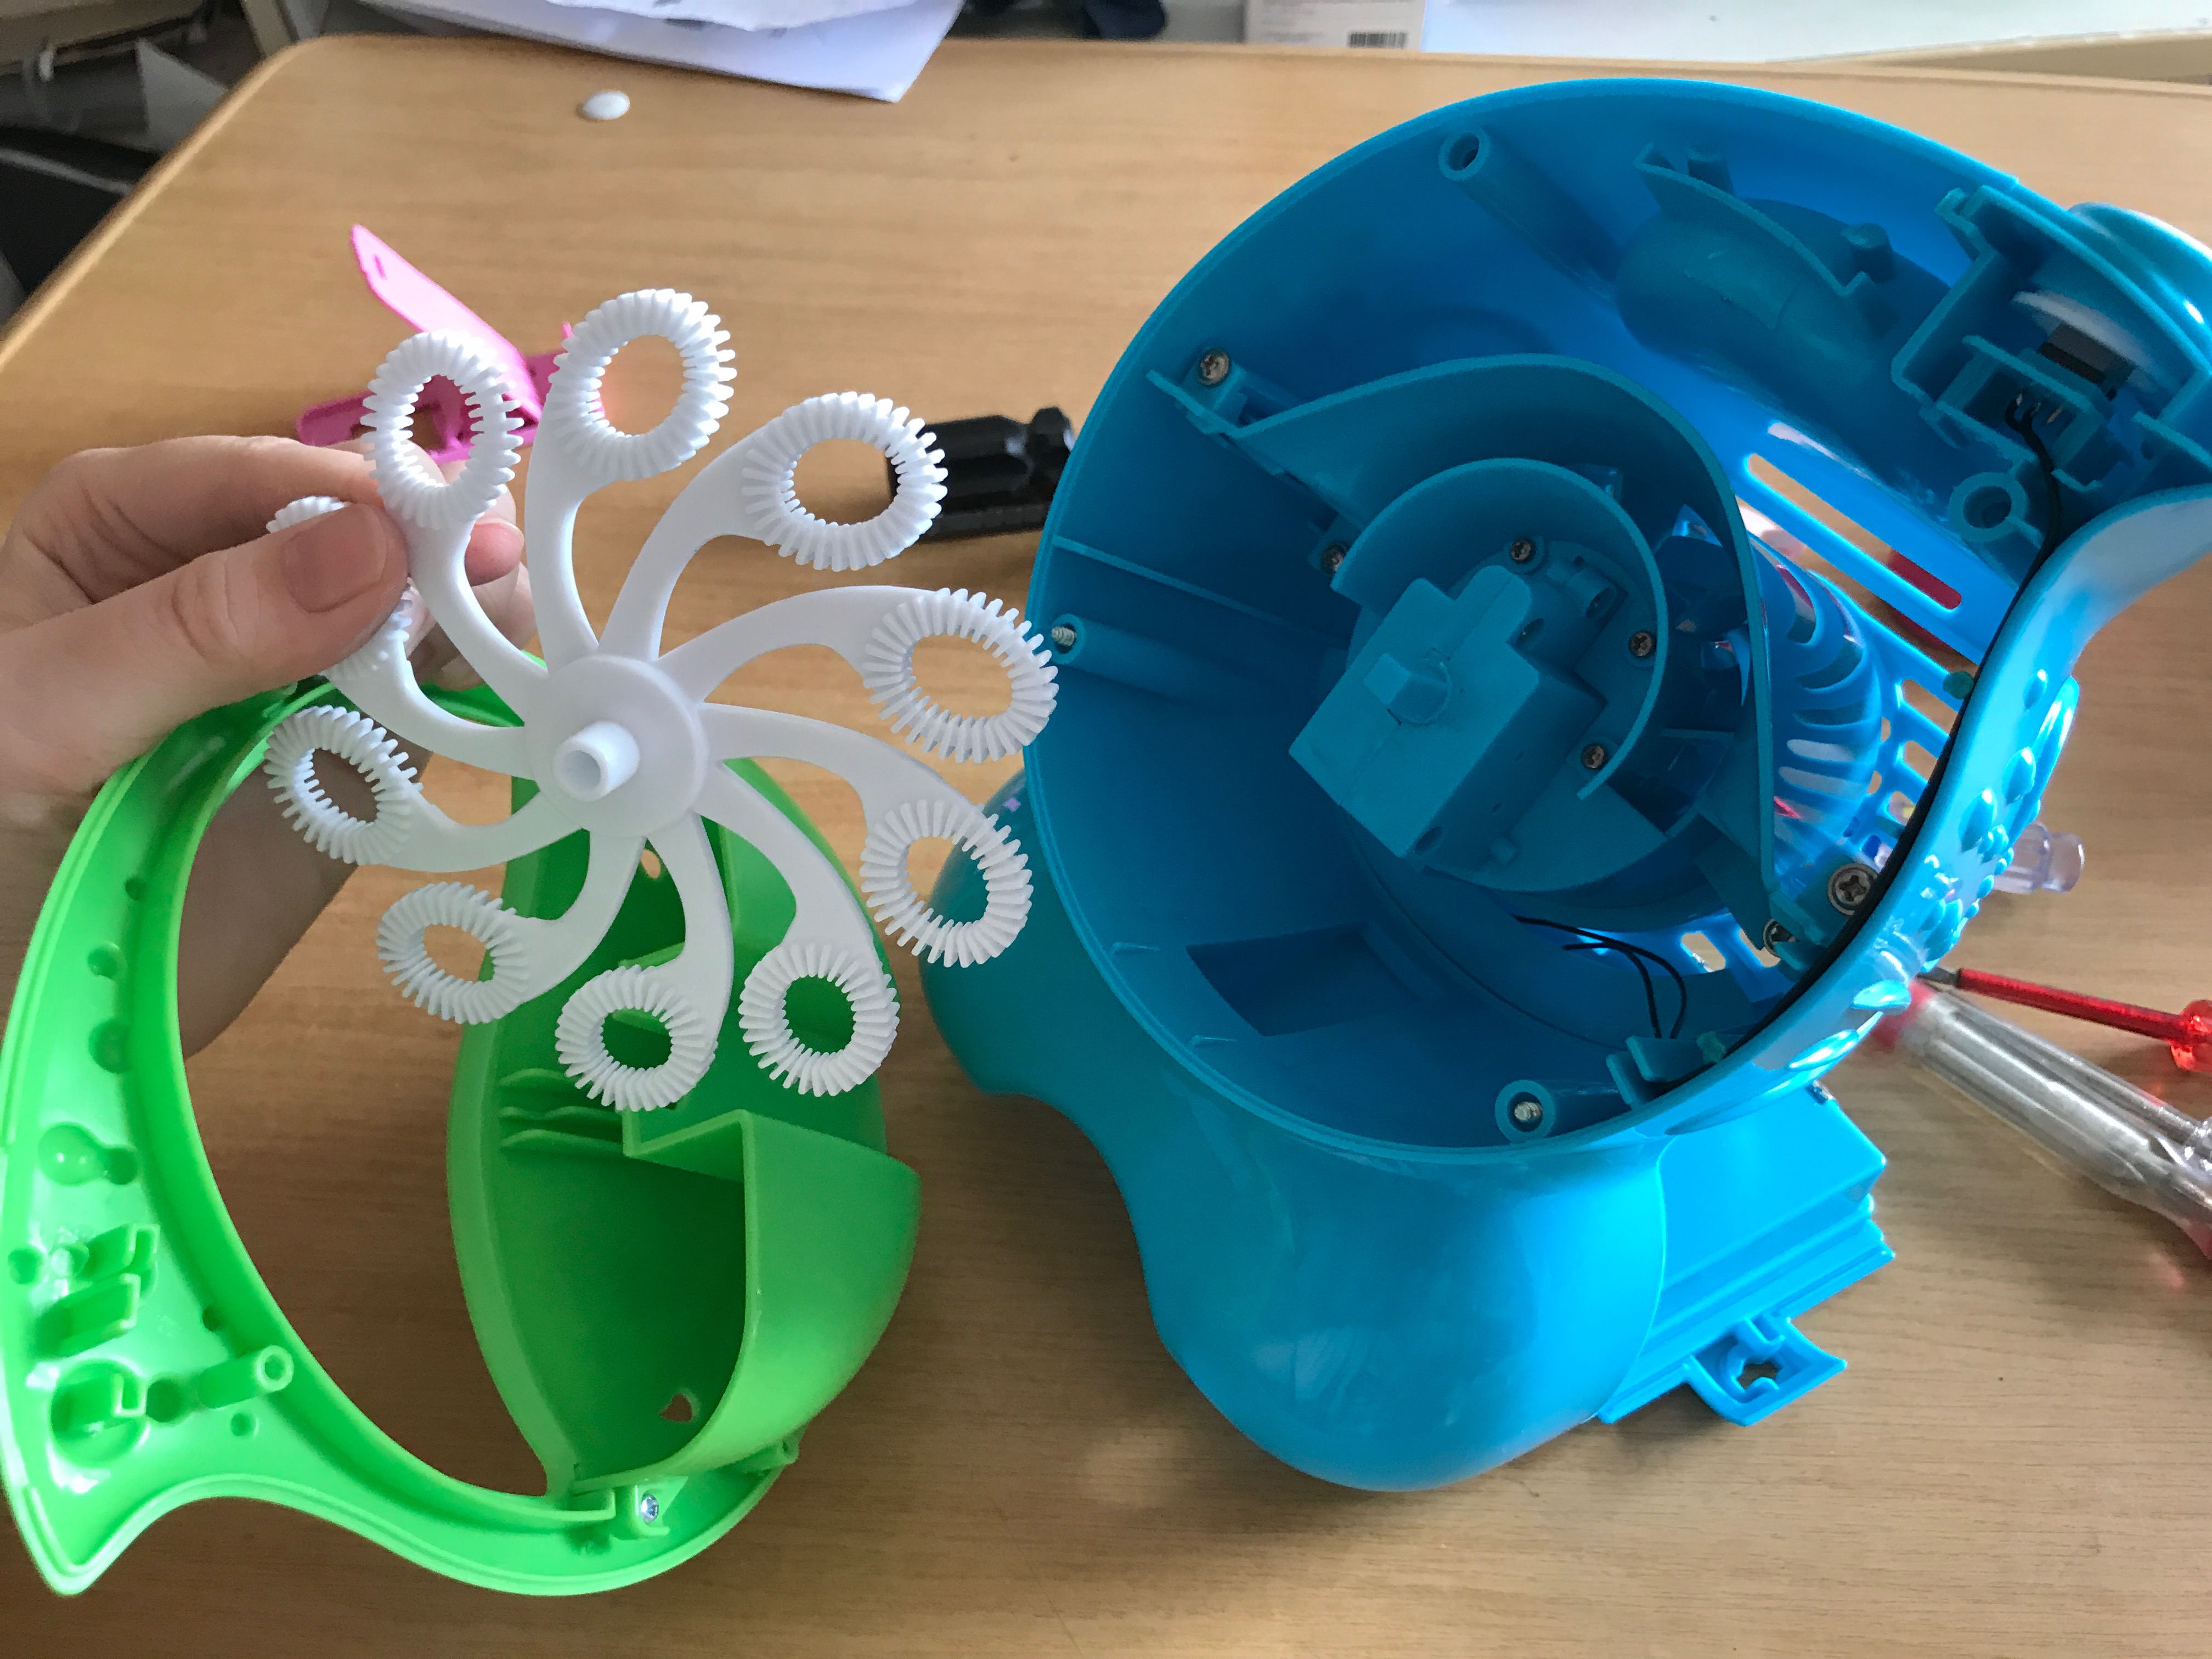
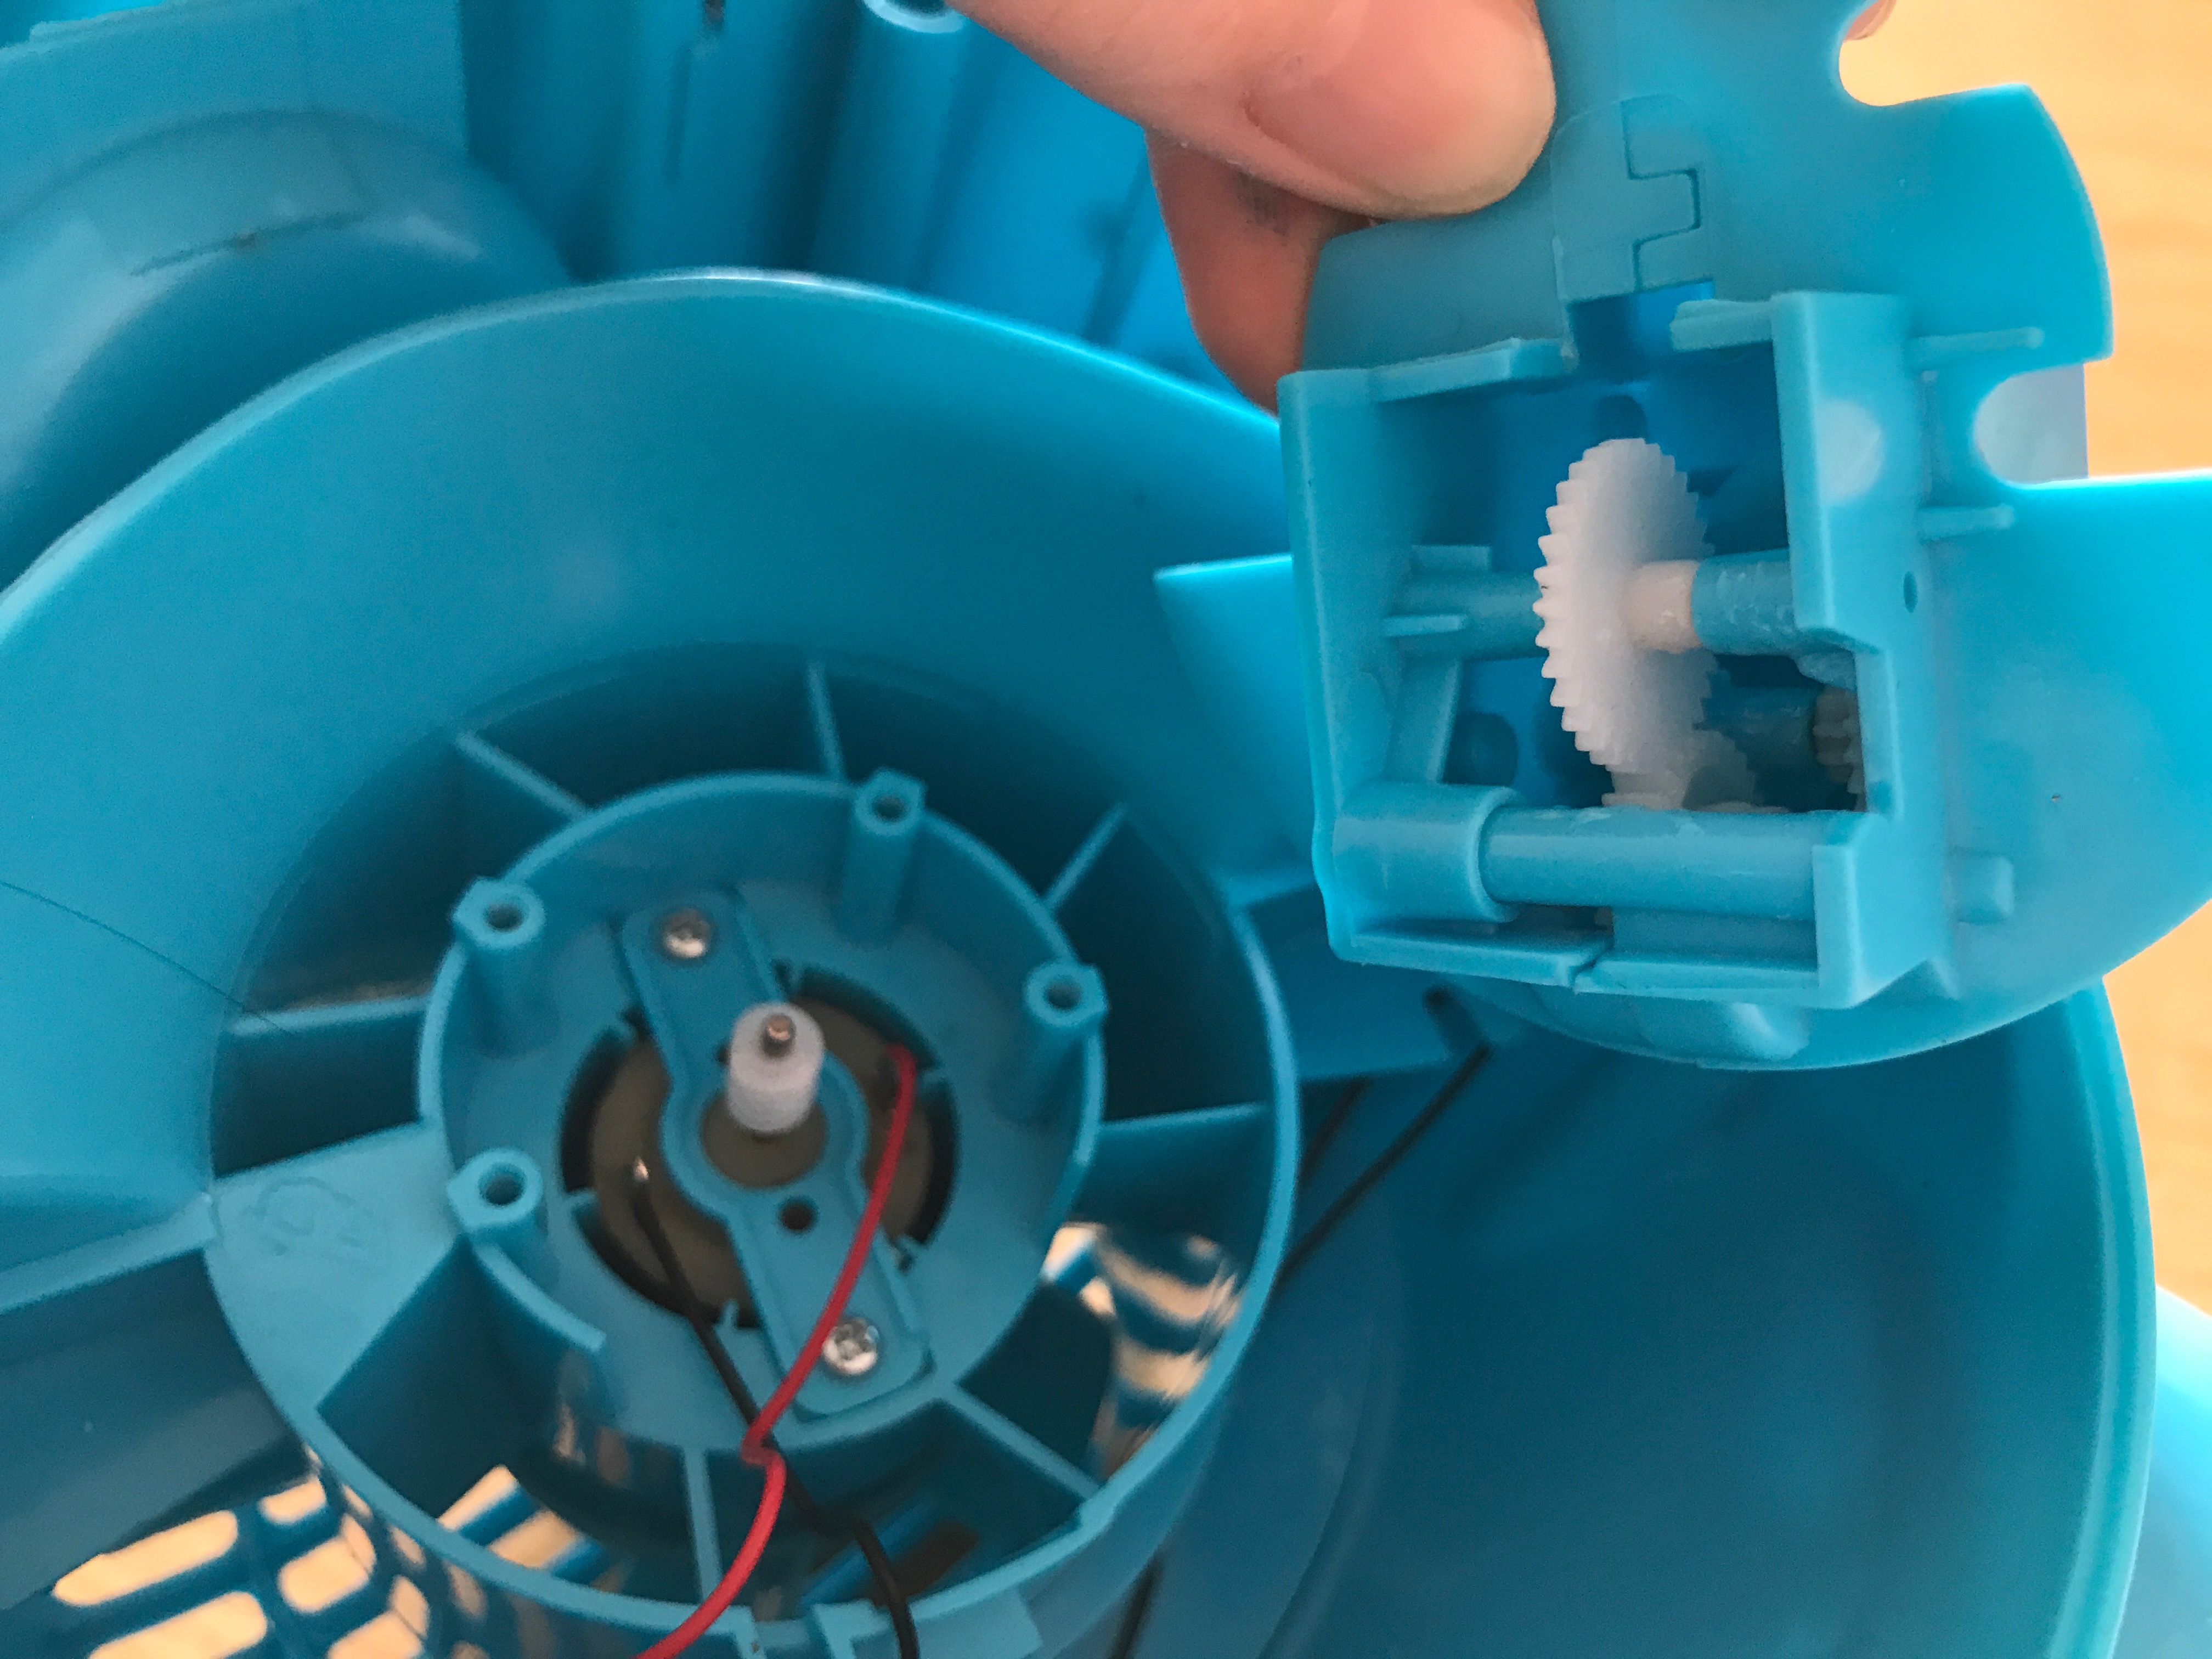
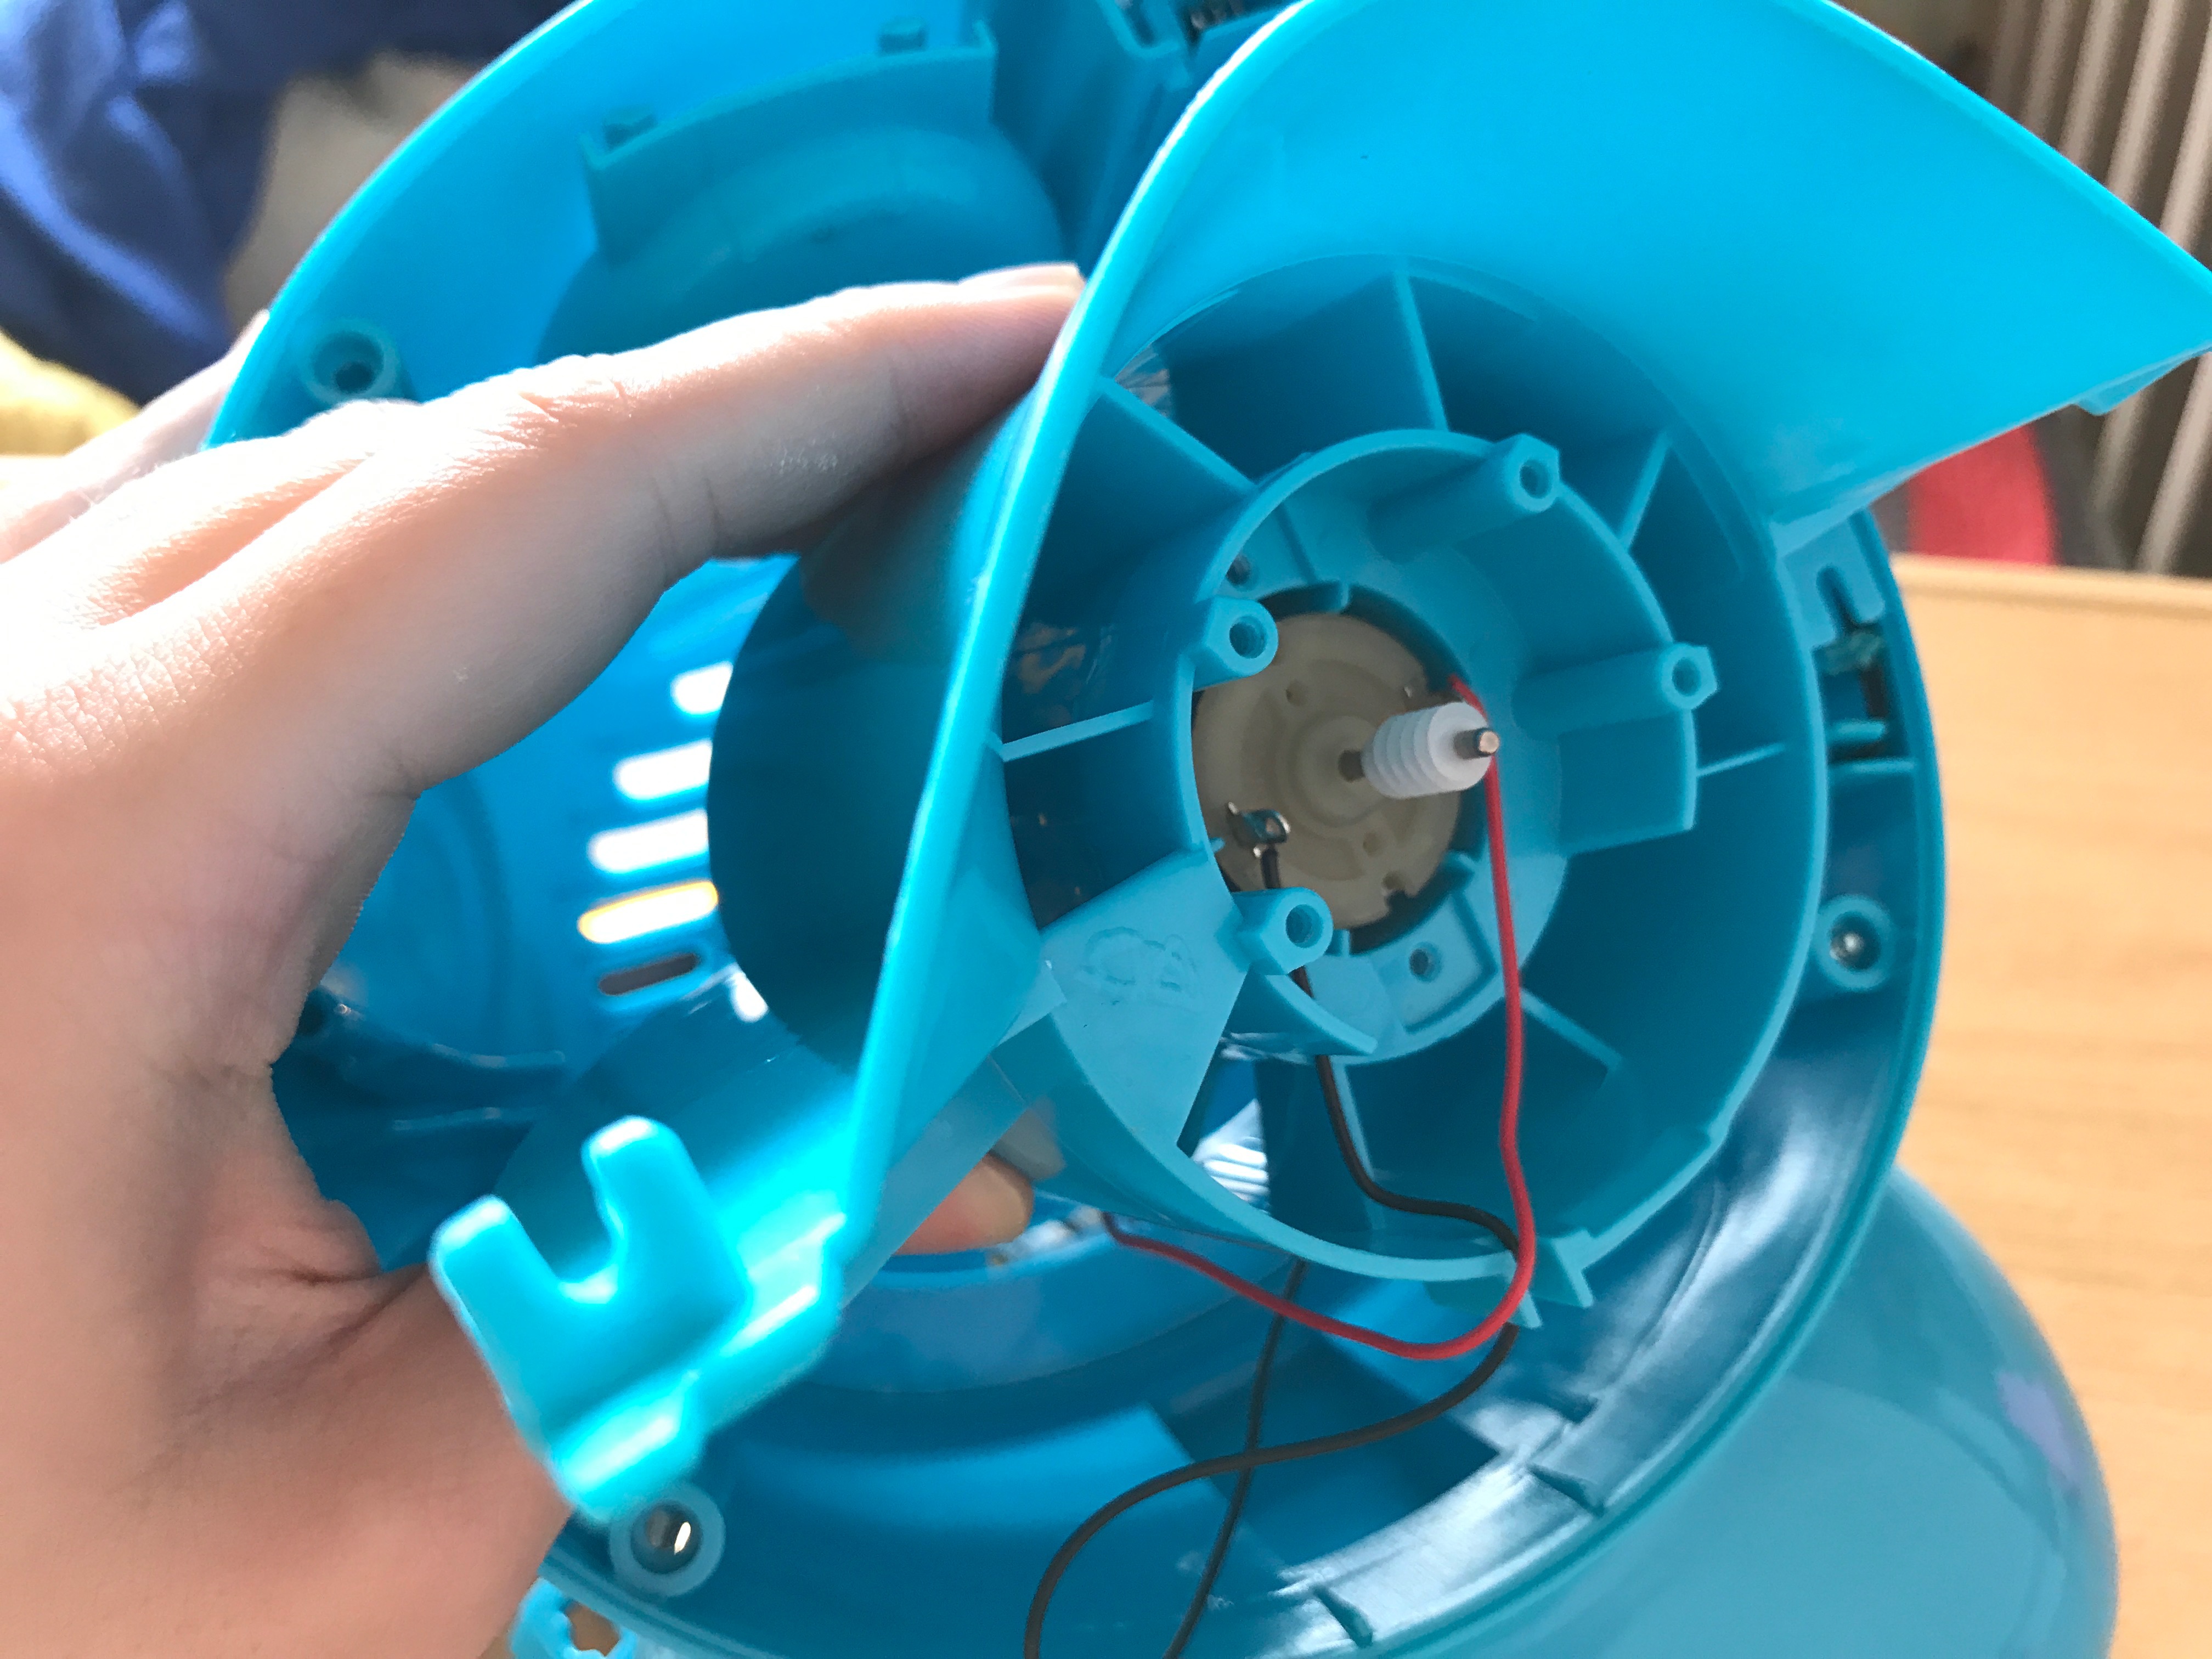
I proceeded to next dismantle the machine to see how the gears work. As I thought, it worked as how I suspected it to be: a fan and gears mechanism to rotate the bubble wand – together, there was continual rotation and movement to produce the bubbles. The bubble wand was continually rotated, being dipped in and out of the bubble solution. The fan at the back of the machine then blew the bubbles out manually.
Dismantling the bottom
Battery cartilege with external shell
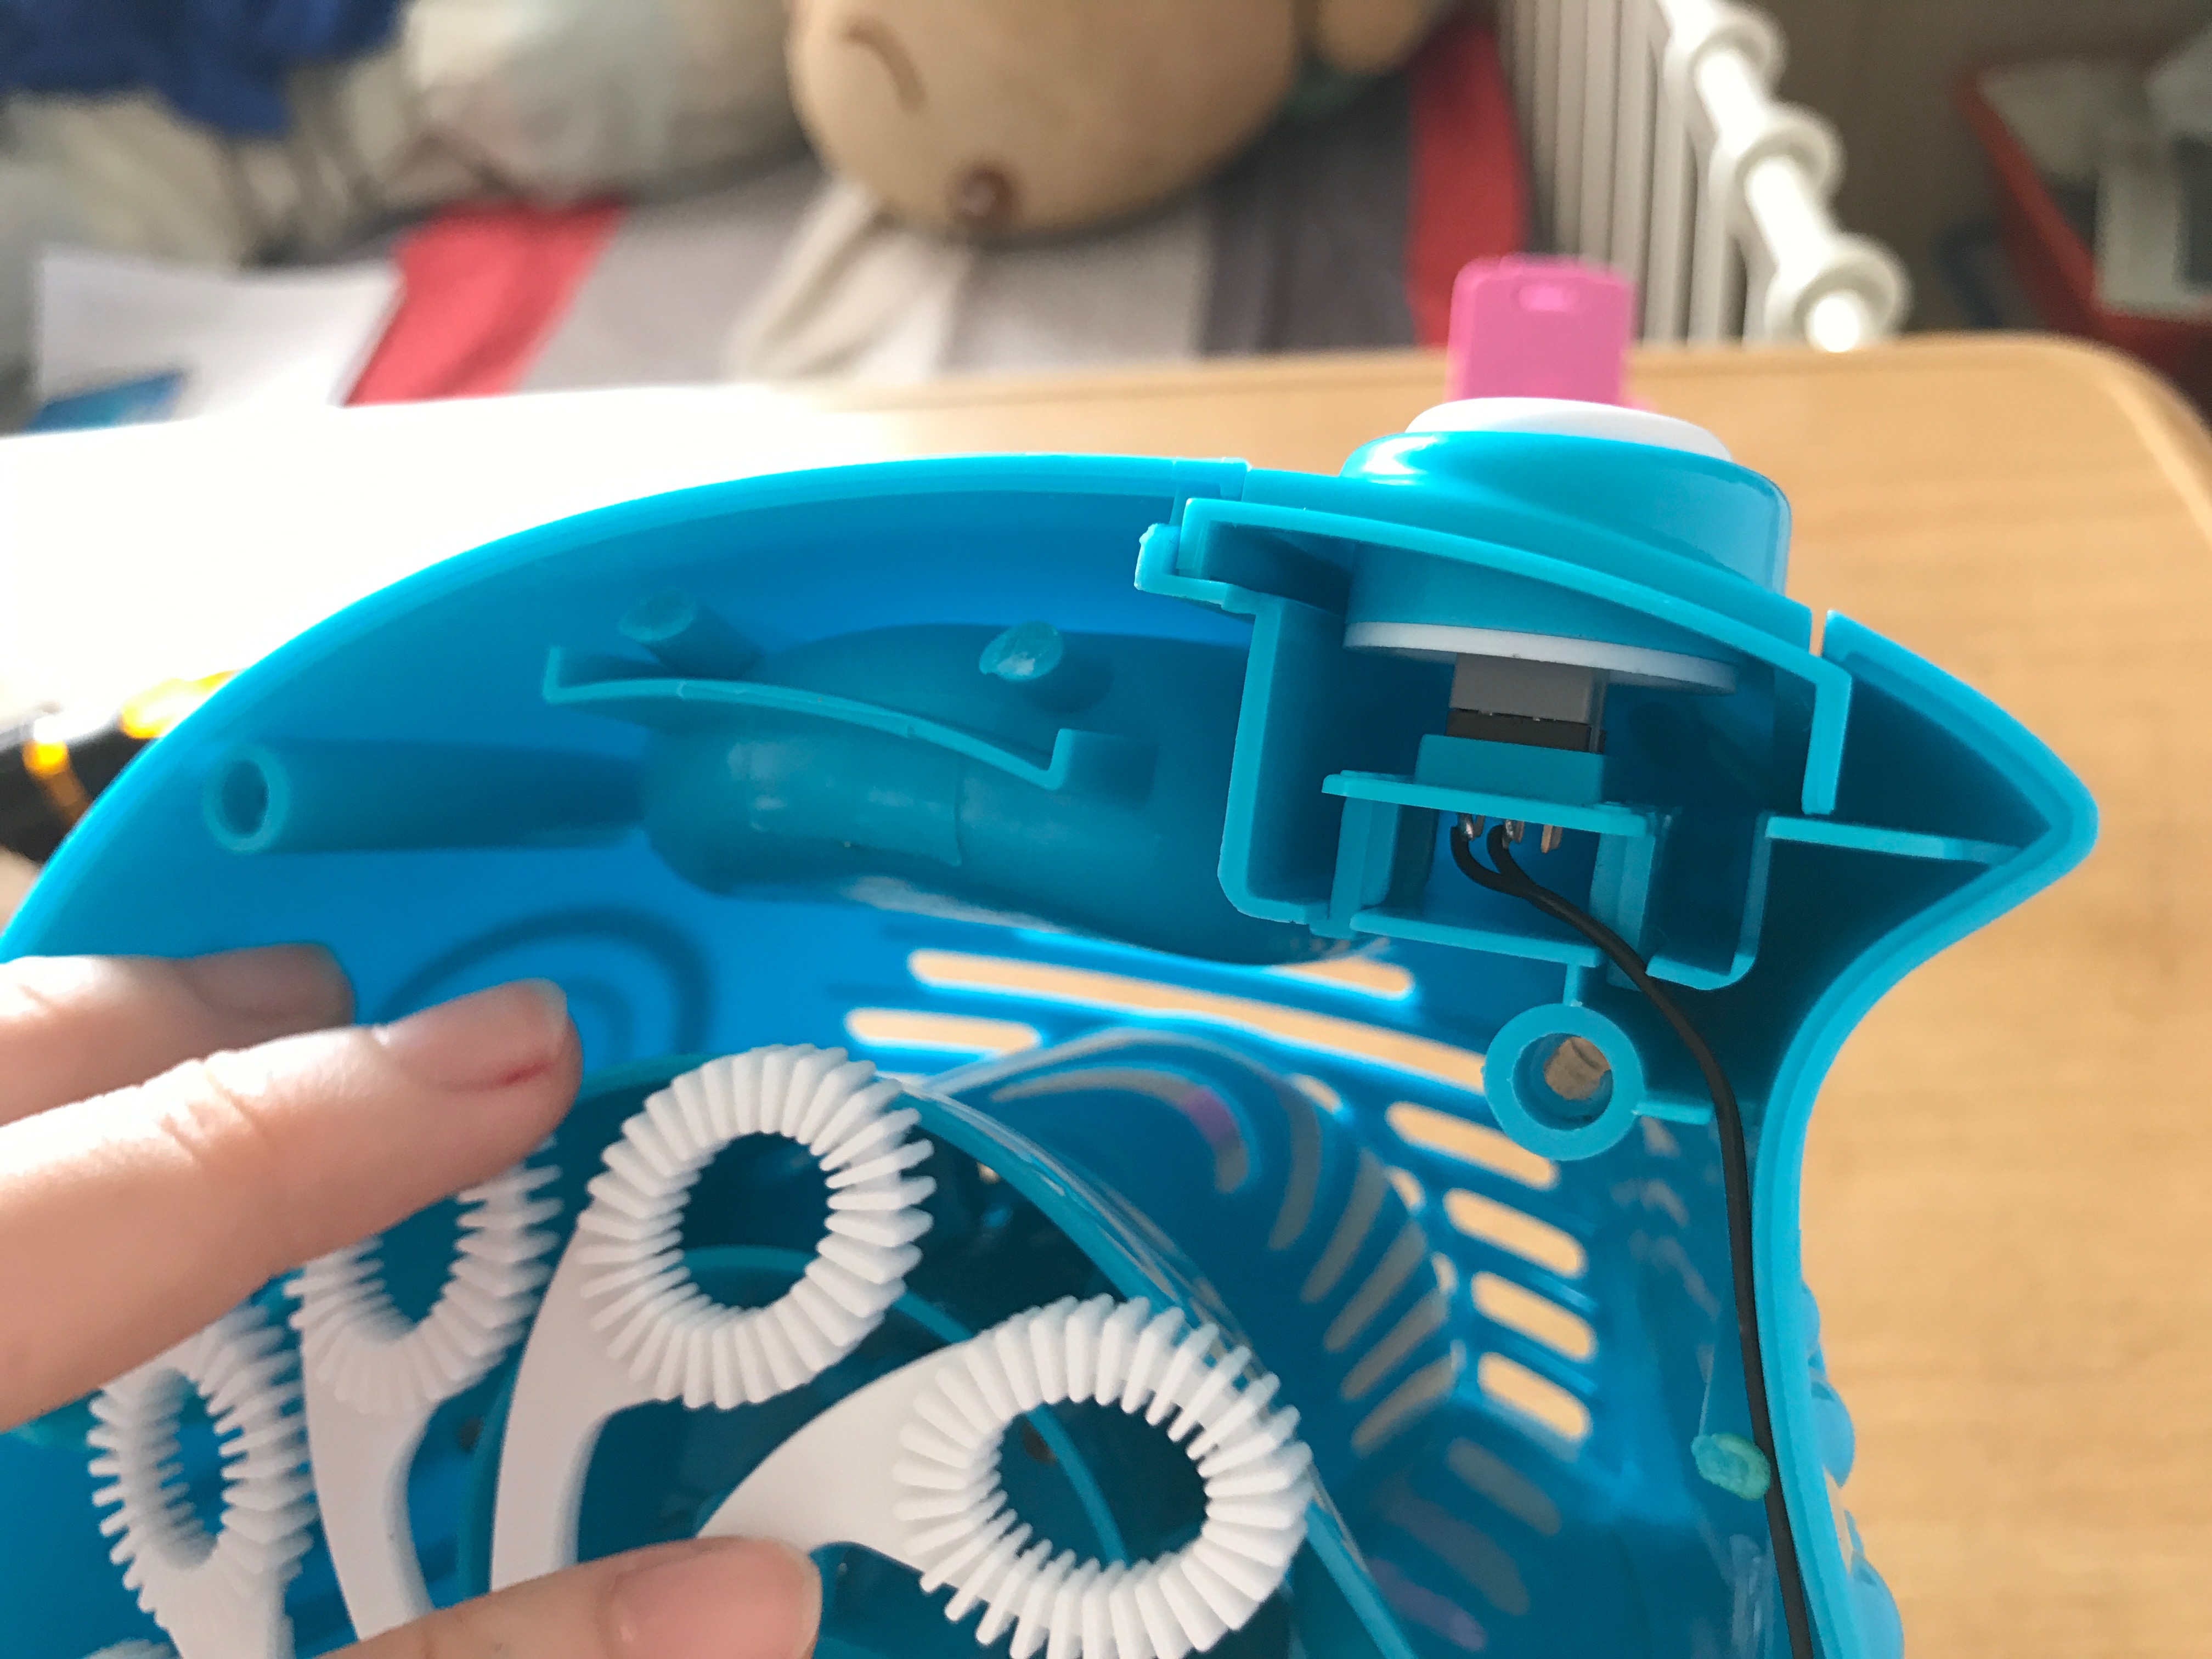
Bubble dish basin, bubble wand with gear
Button at top right
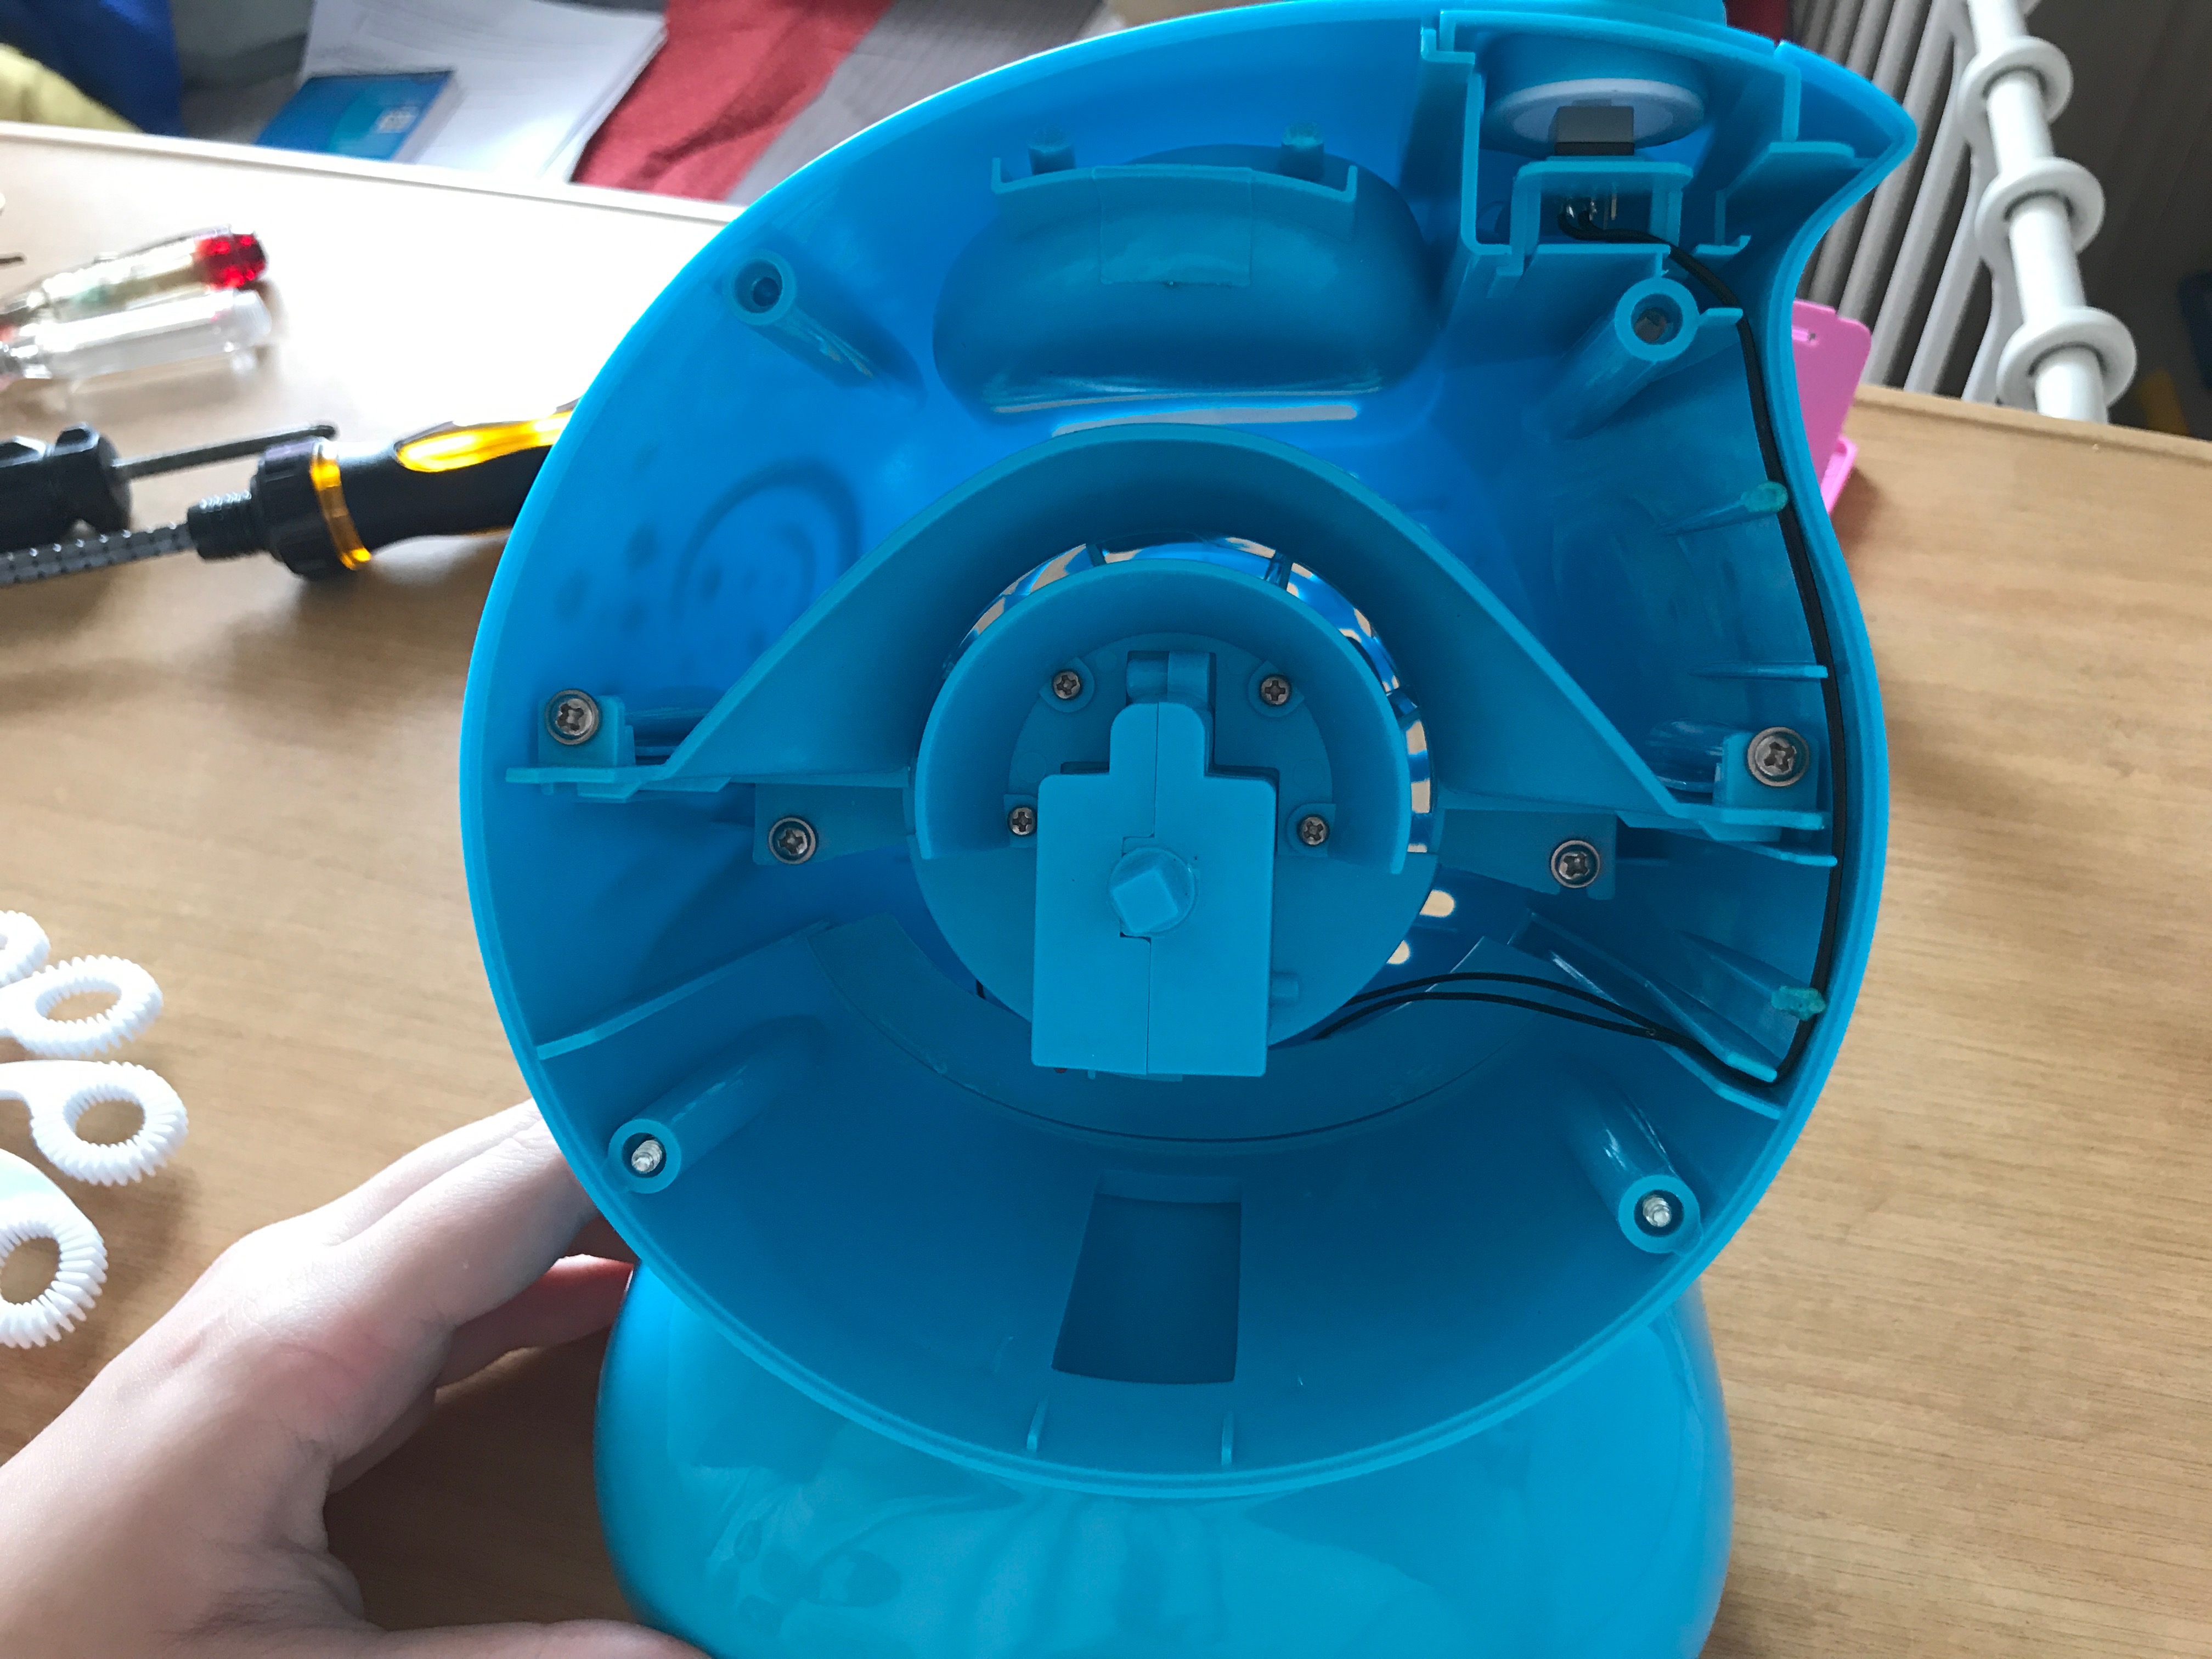
Circular gear system (outside)
Circular gear system (inside) with fan rotation gear
Fan with wires attached
Therefore as previously mentioned, I switched up and created my own bubble wand as I wanted a larger bubble surface area so as to do my projections on.
Bubble machine with self made wand
…which worked! I initially made a larger one but unfortunately I did not have a larger soap dish bowl and had to cut back in size.
Machines and Reflections in a Single Set-up
Setup
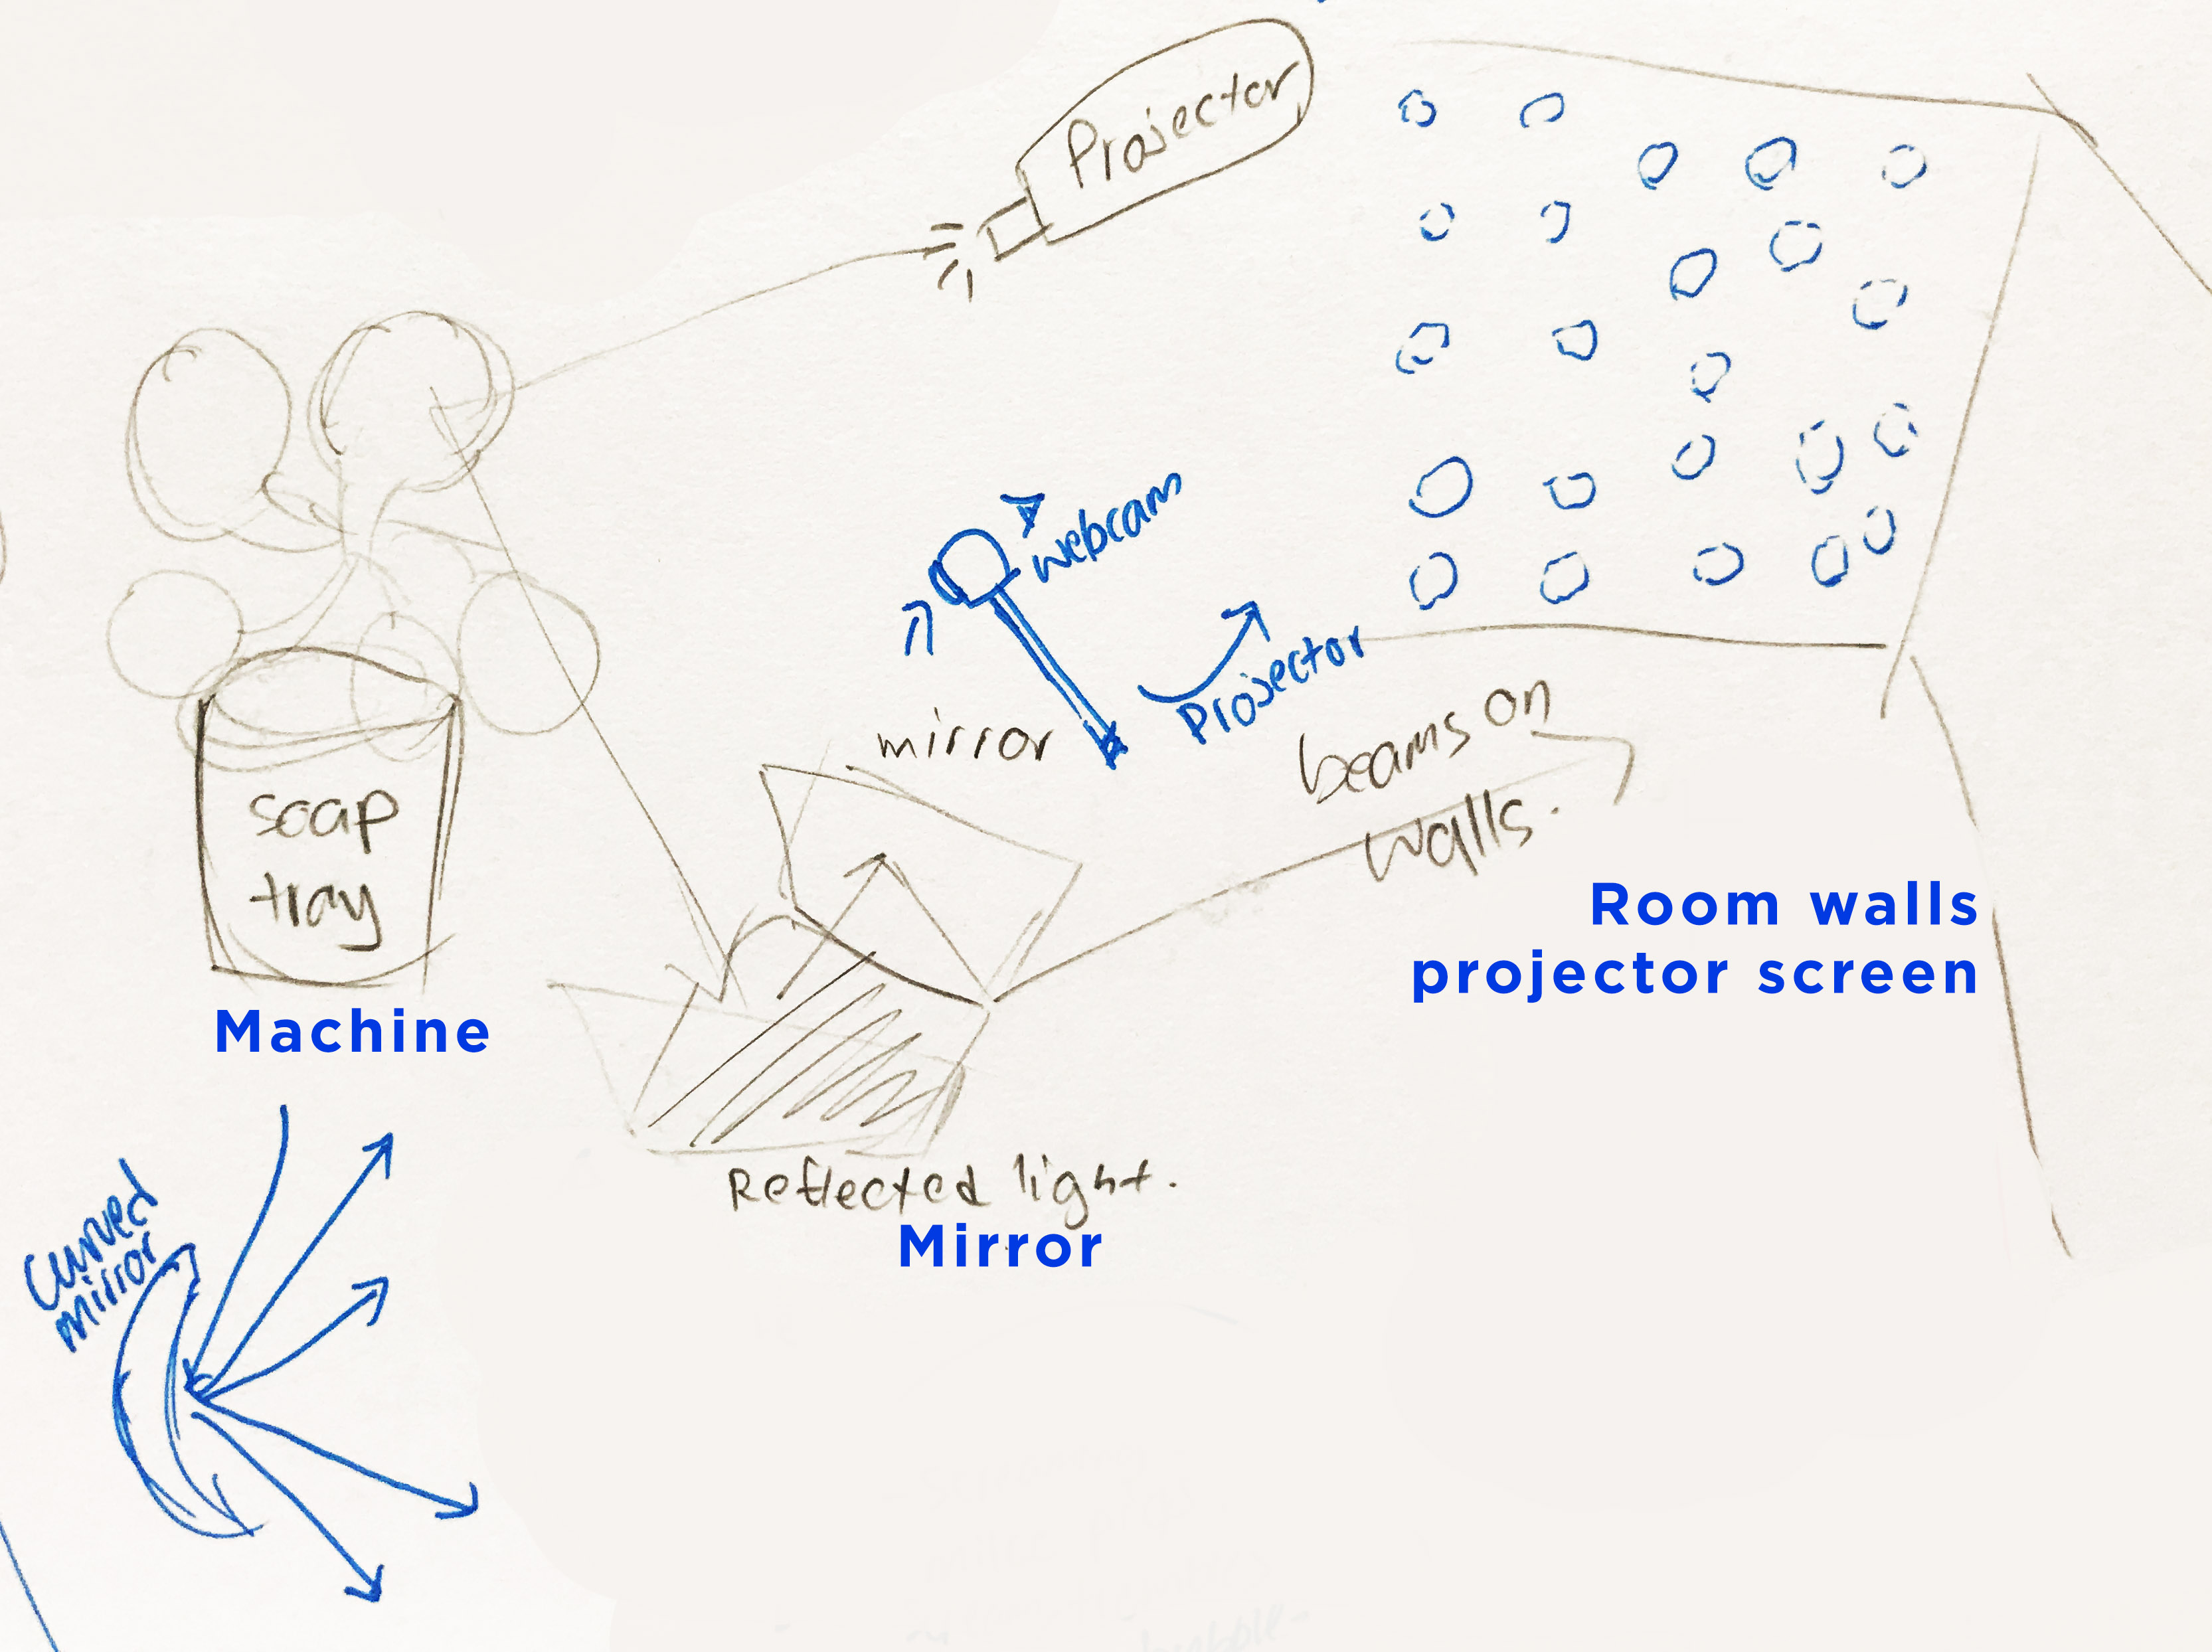
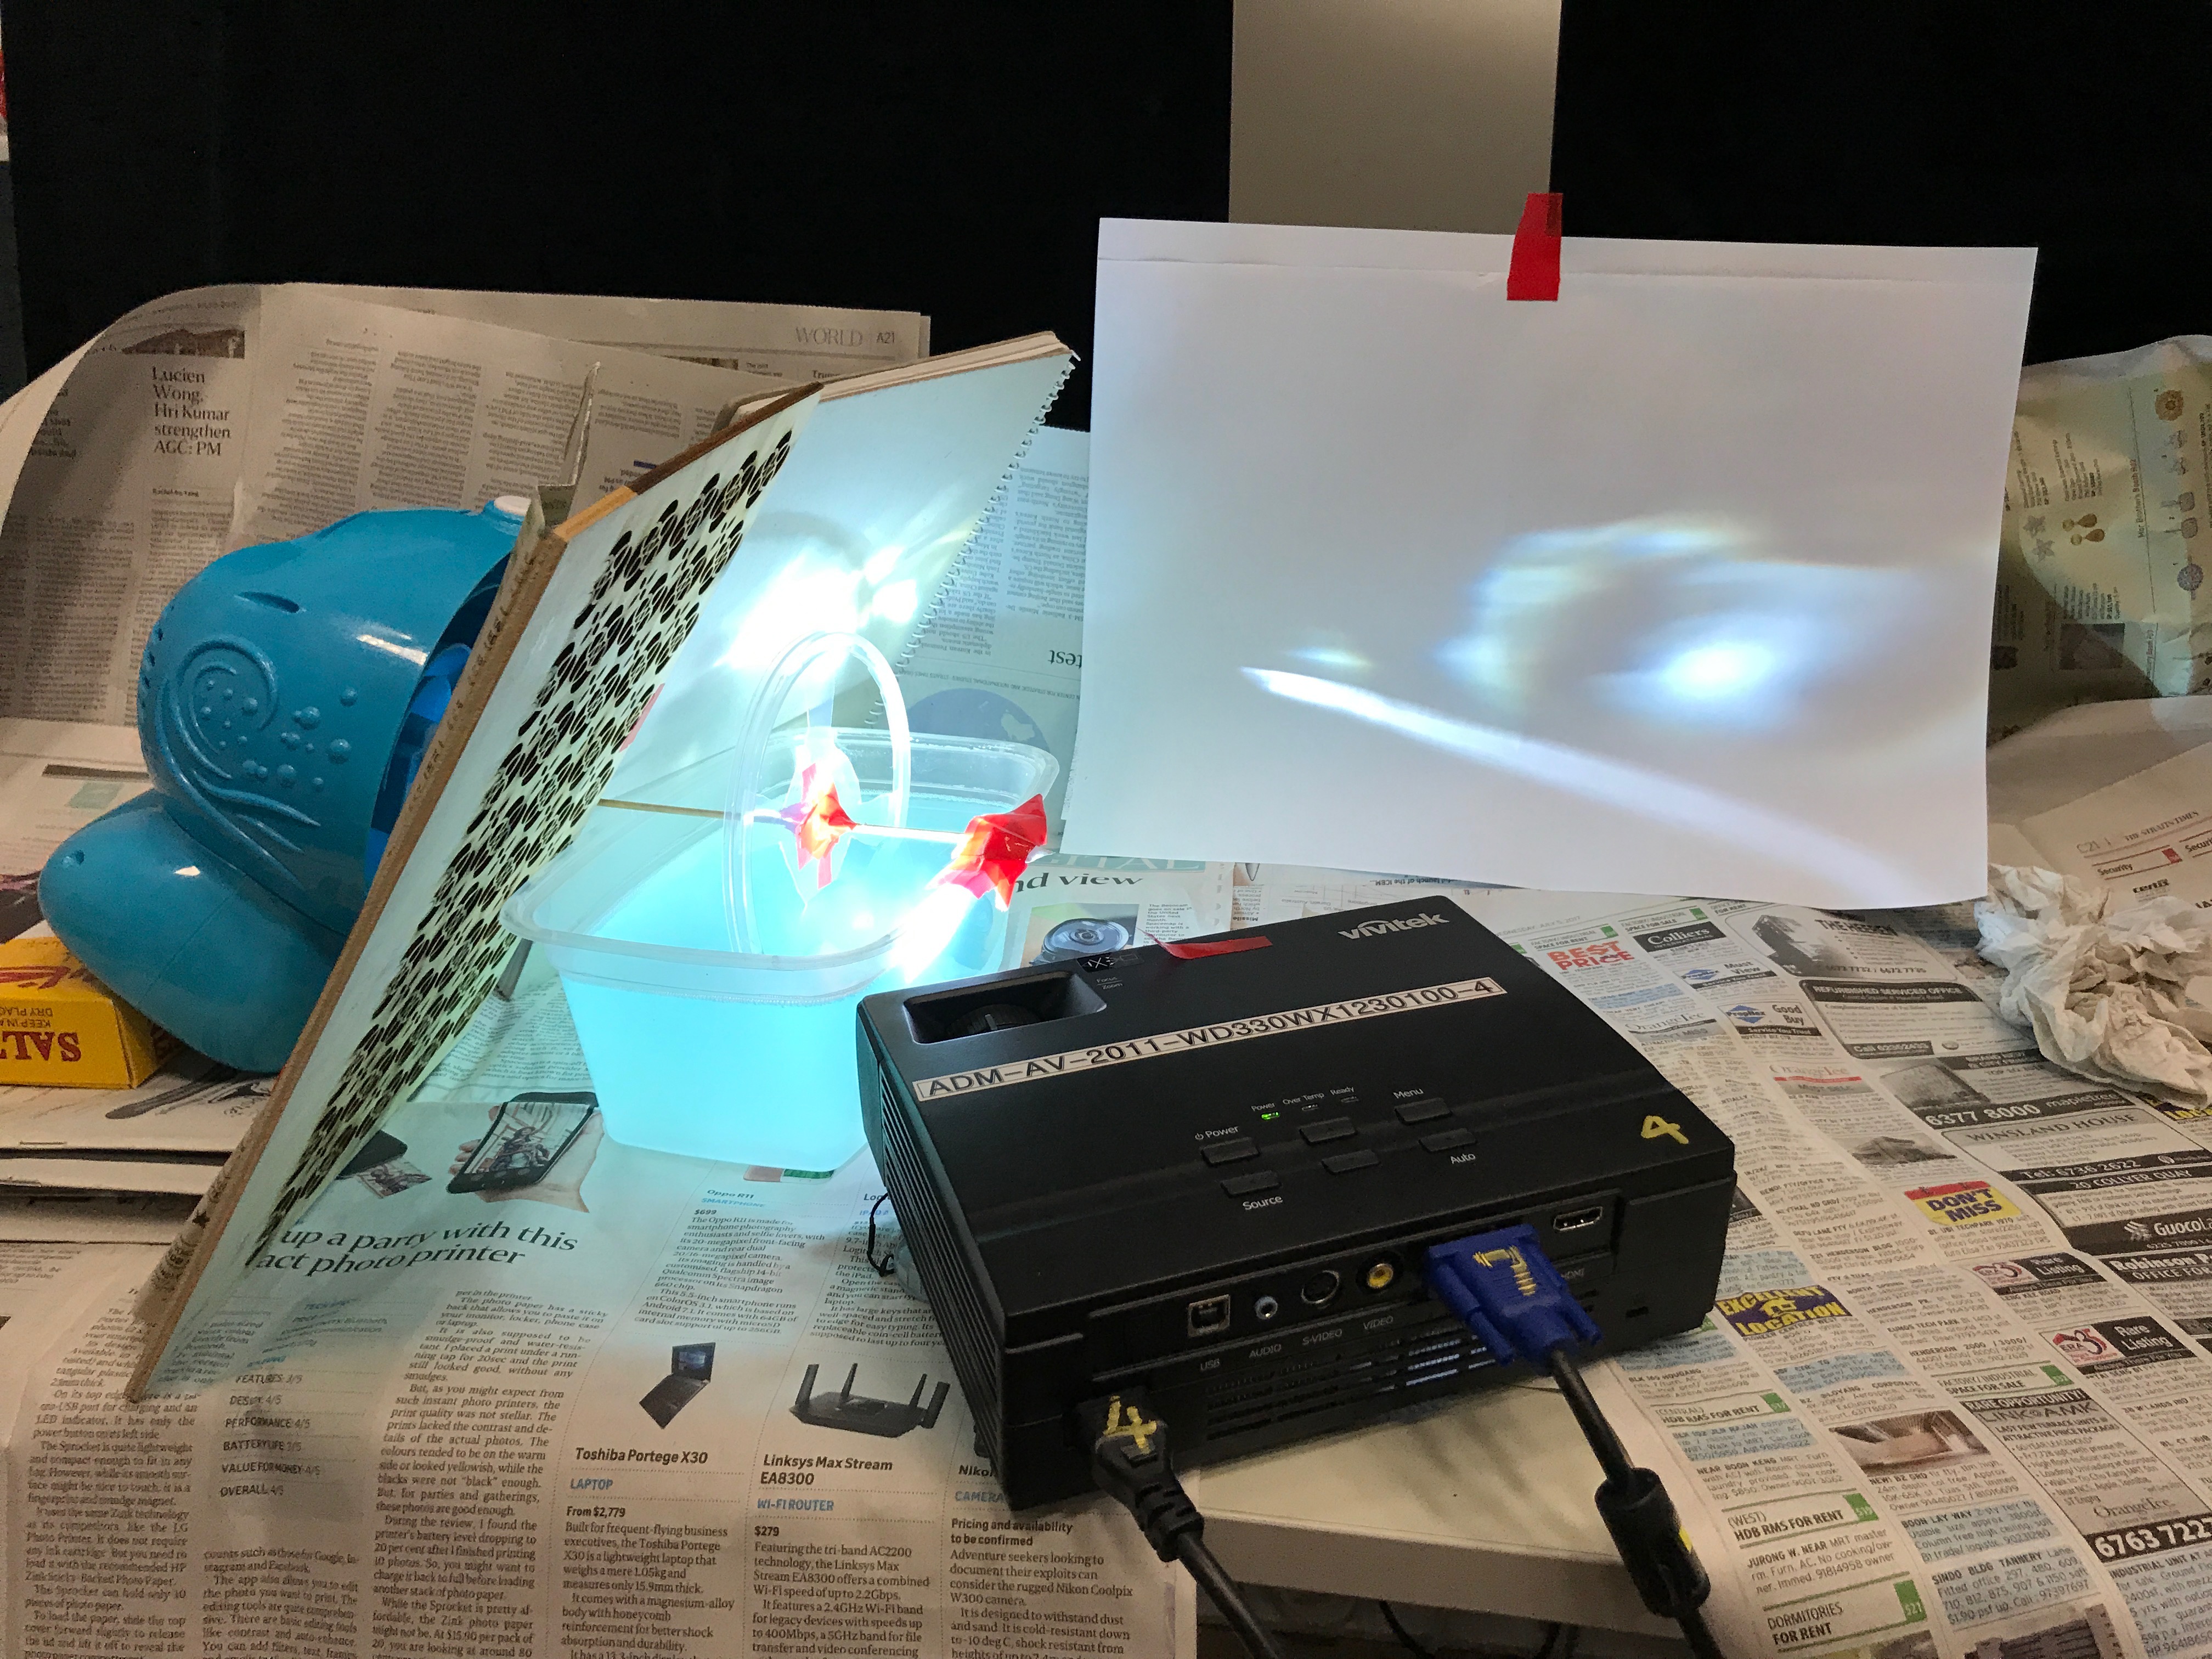
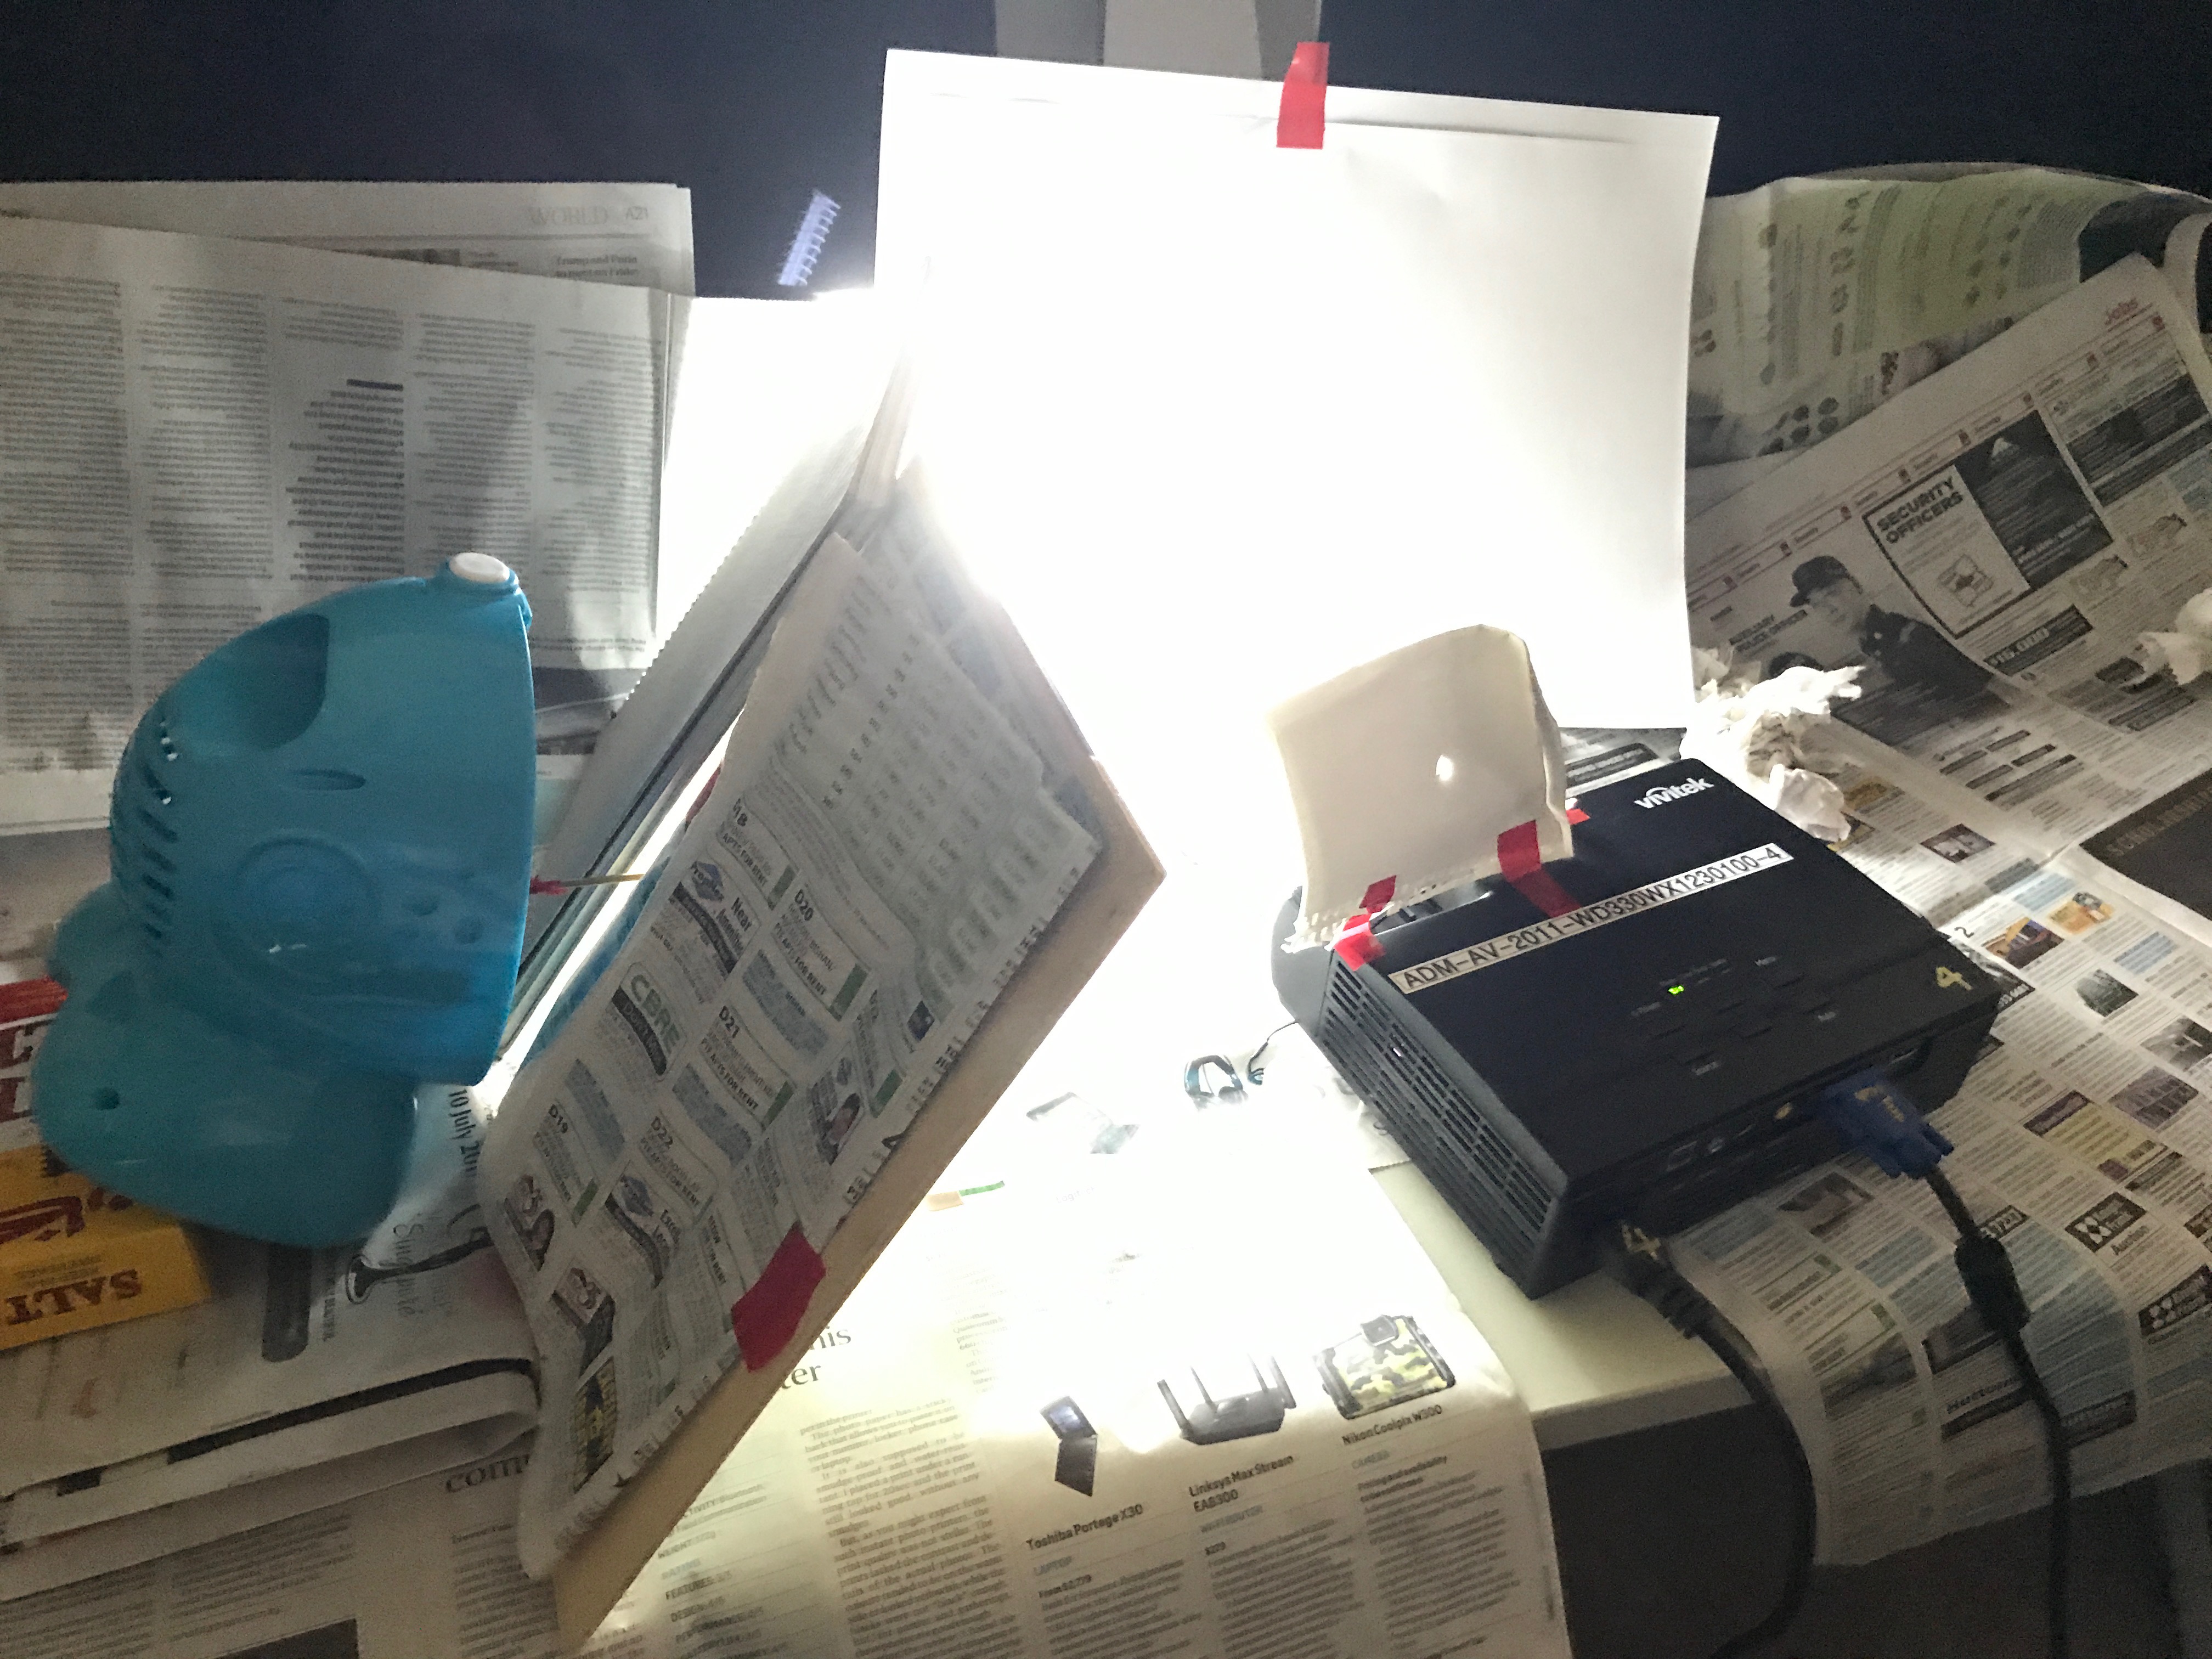
Initially, with my setup, I did want to try the above setup – the machine would generate bubbles, which would be projected upon and gain a reflected light surface, which bounces off the bubbles and would be reflected using mirrors into a projector screen/room wall/surface.
However, I admit that though it’s really doable, my setup was less than ideal.
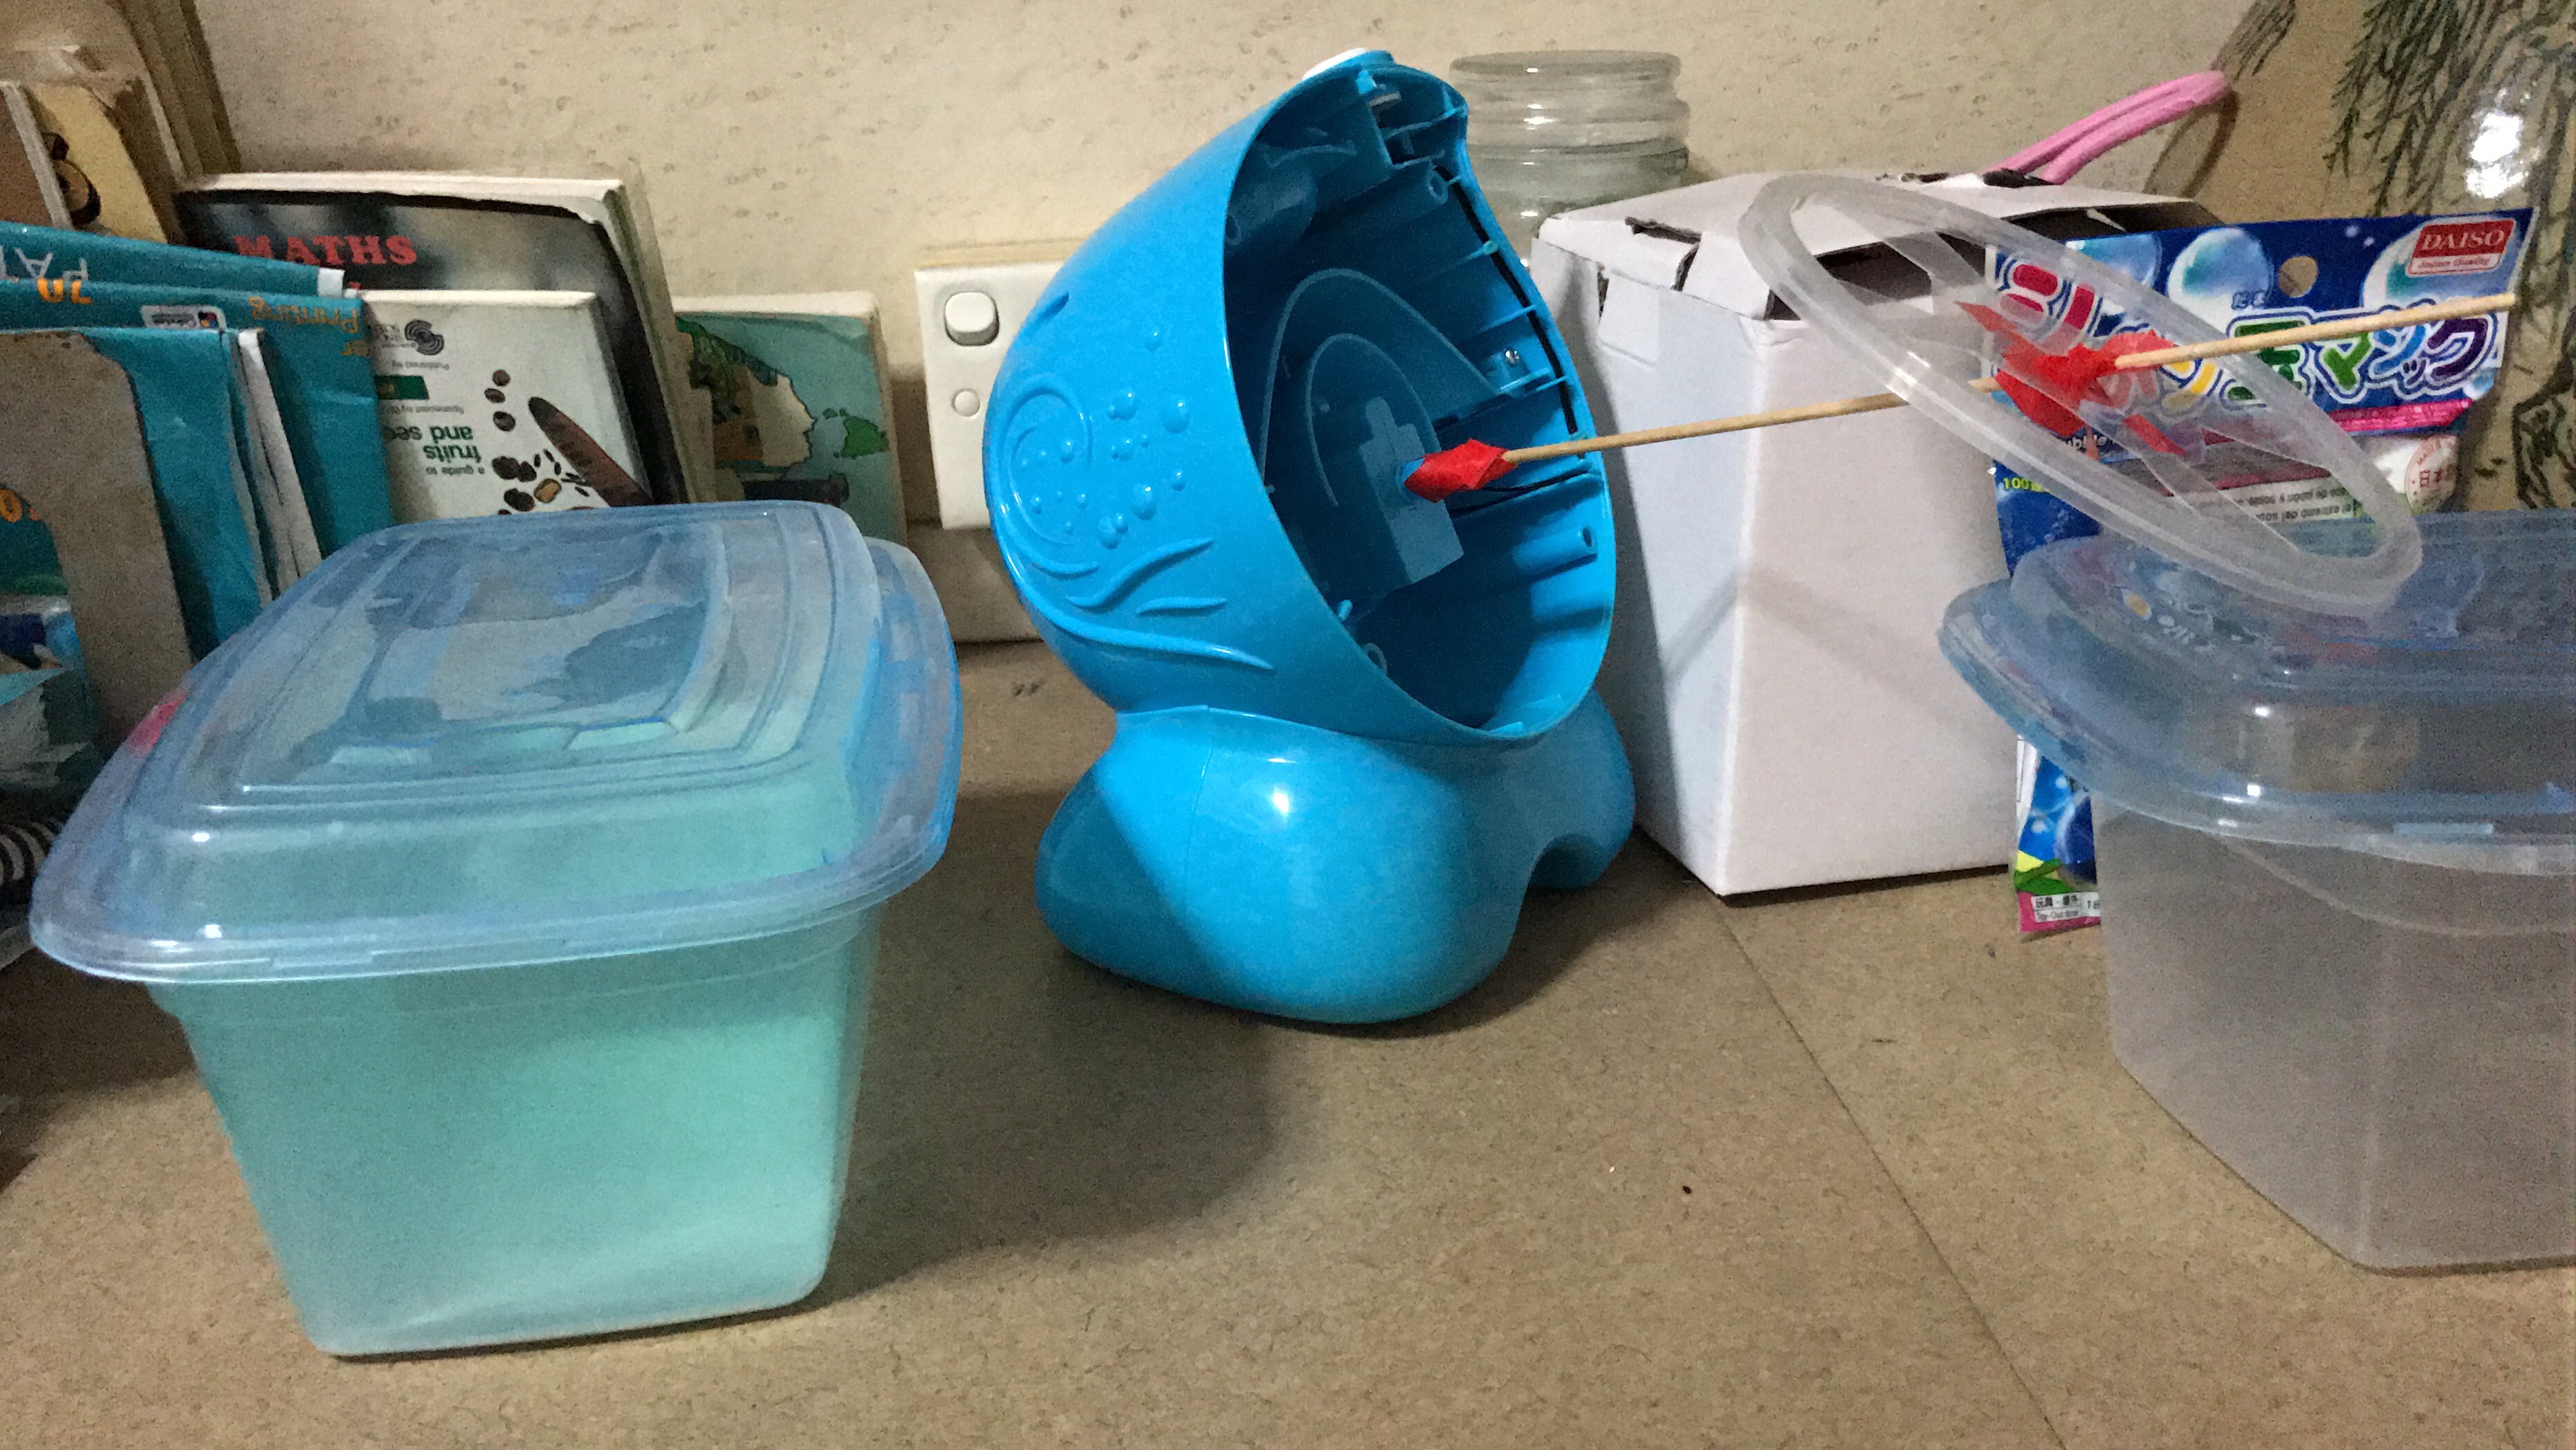
Entire Setup: machine, wand, soap solution
Setup
Setup
Machine
Just to clarify, the boards in front of the bubble machine are placed intentionally to block the fan of the machine so that the bubble would remain ‘more static’ and allow for better reflective surface.
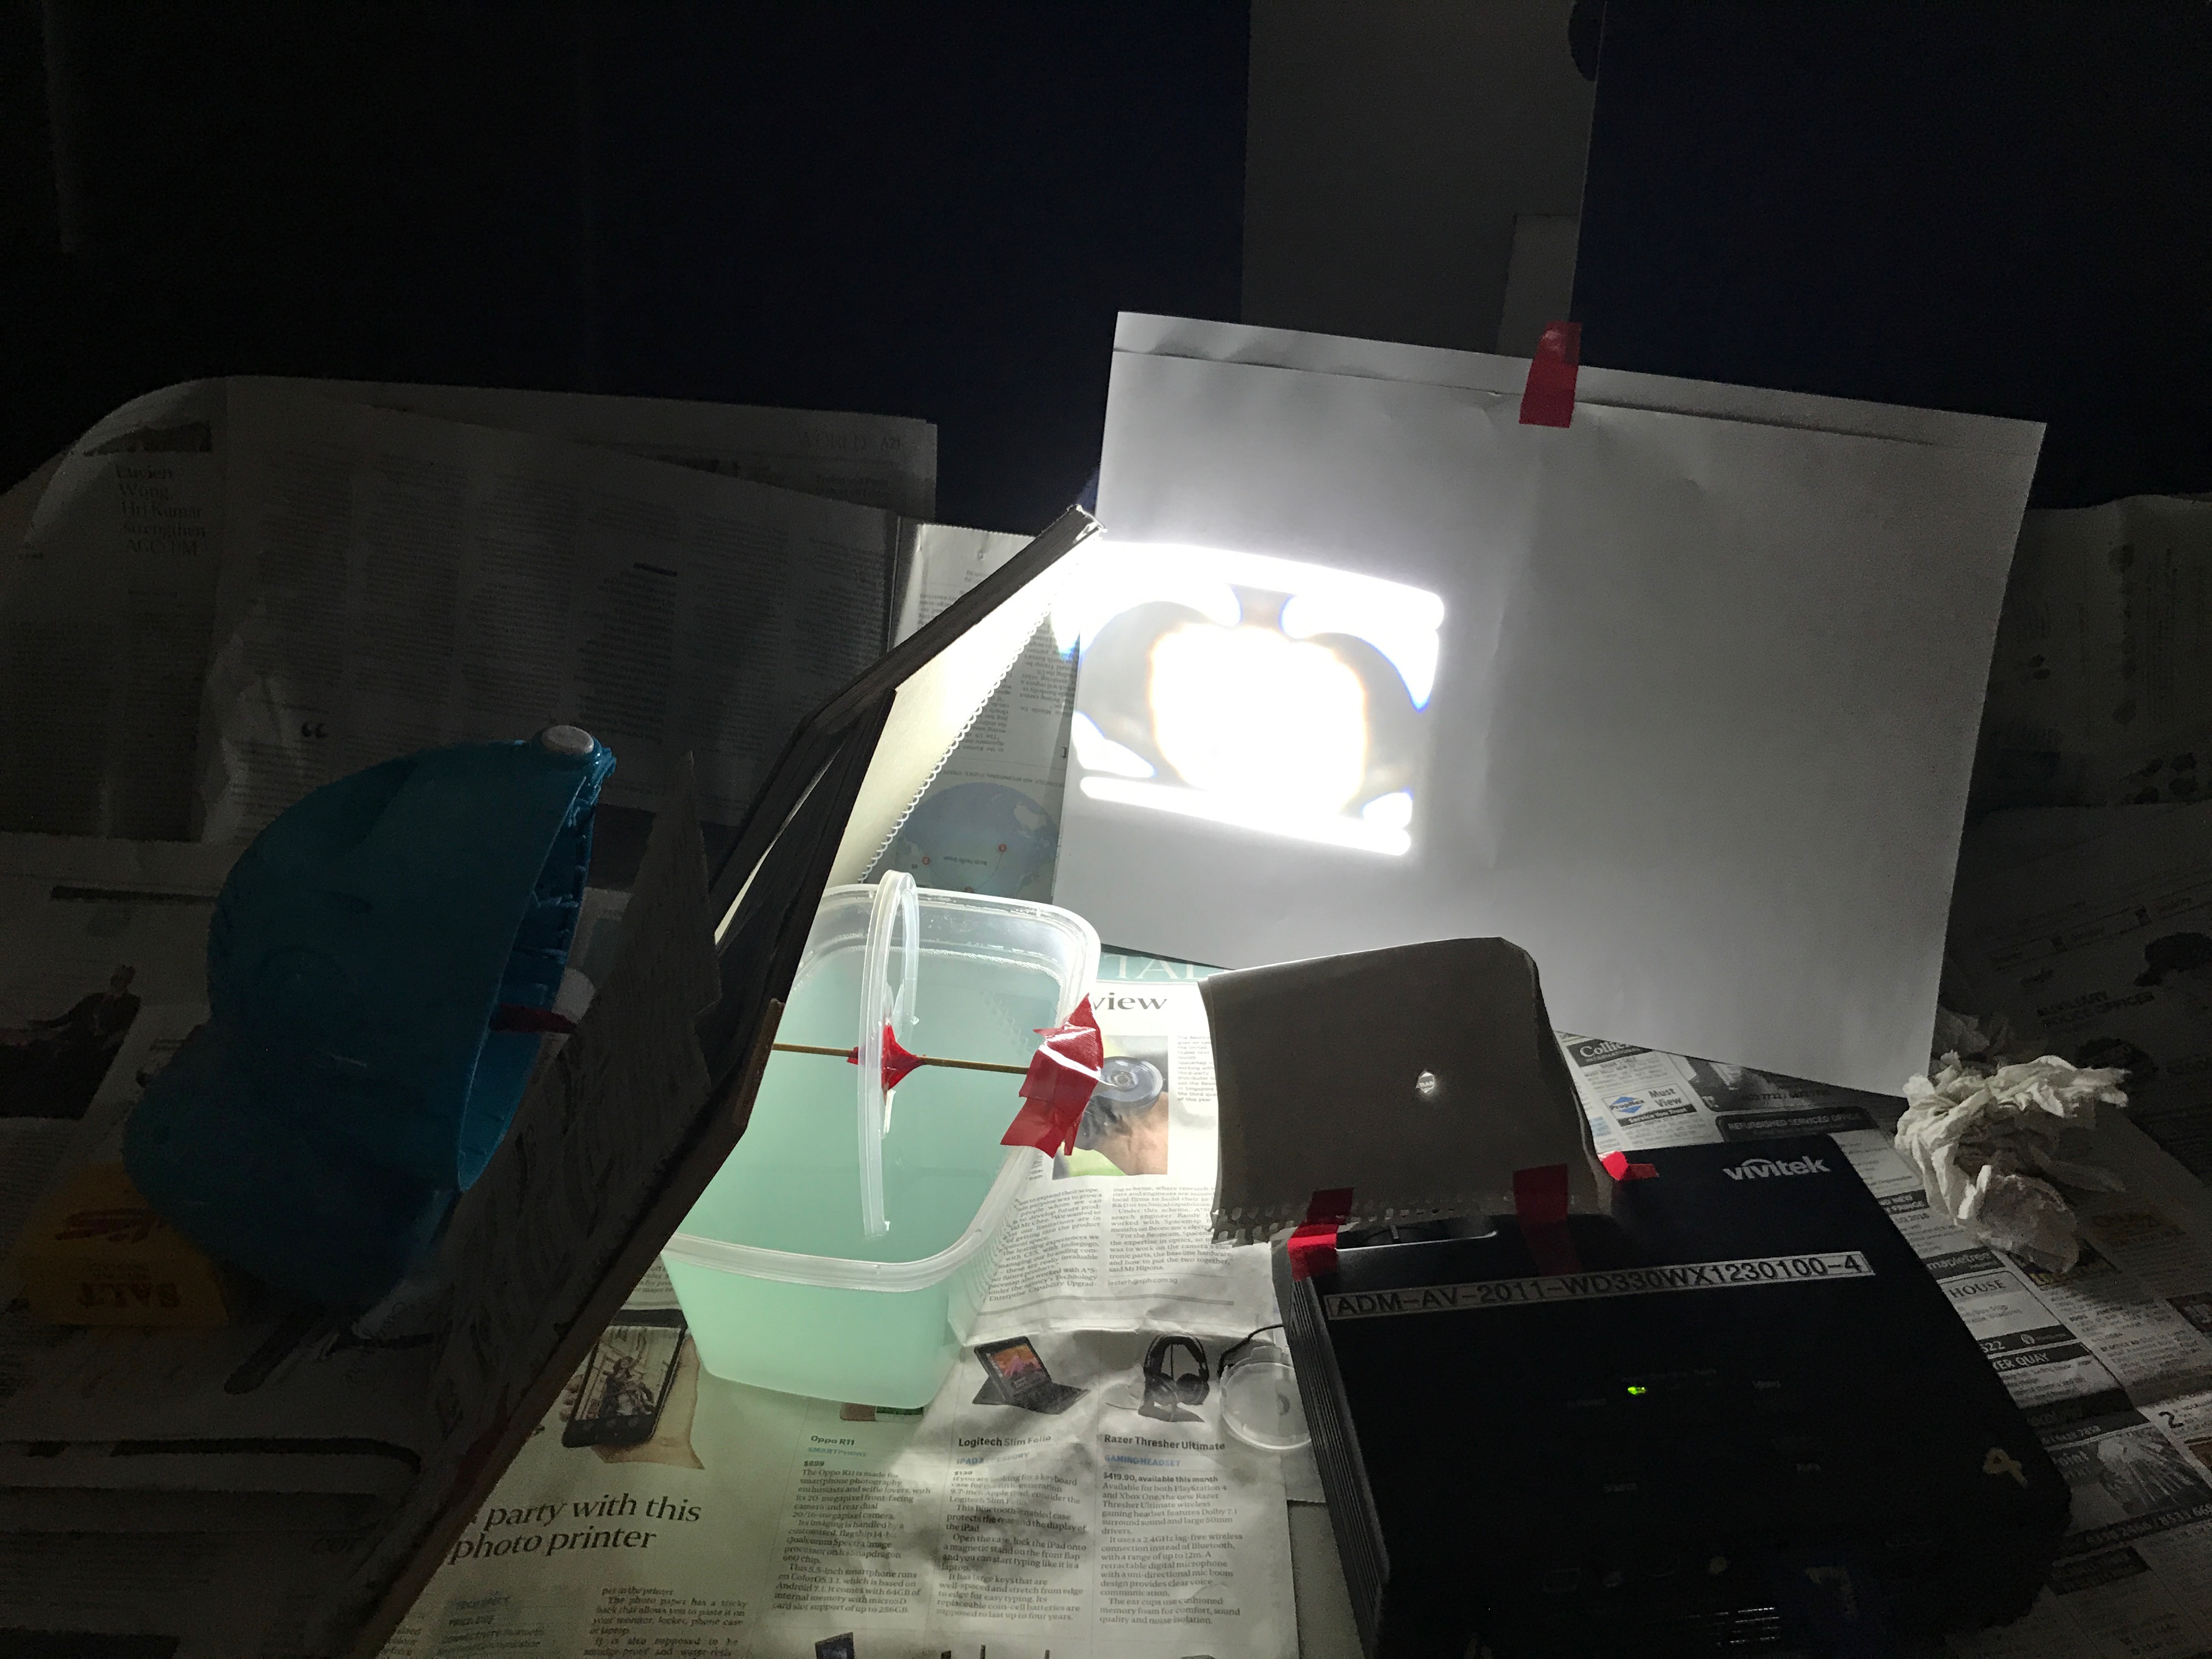
Projected image from projector: manipulated gif of bun
Projected image from projector: manipulated gif of bun
Projected image from projector: manipulated gif of bun
Source Image of Projection
Source Image of Projection
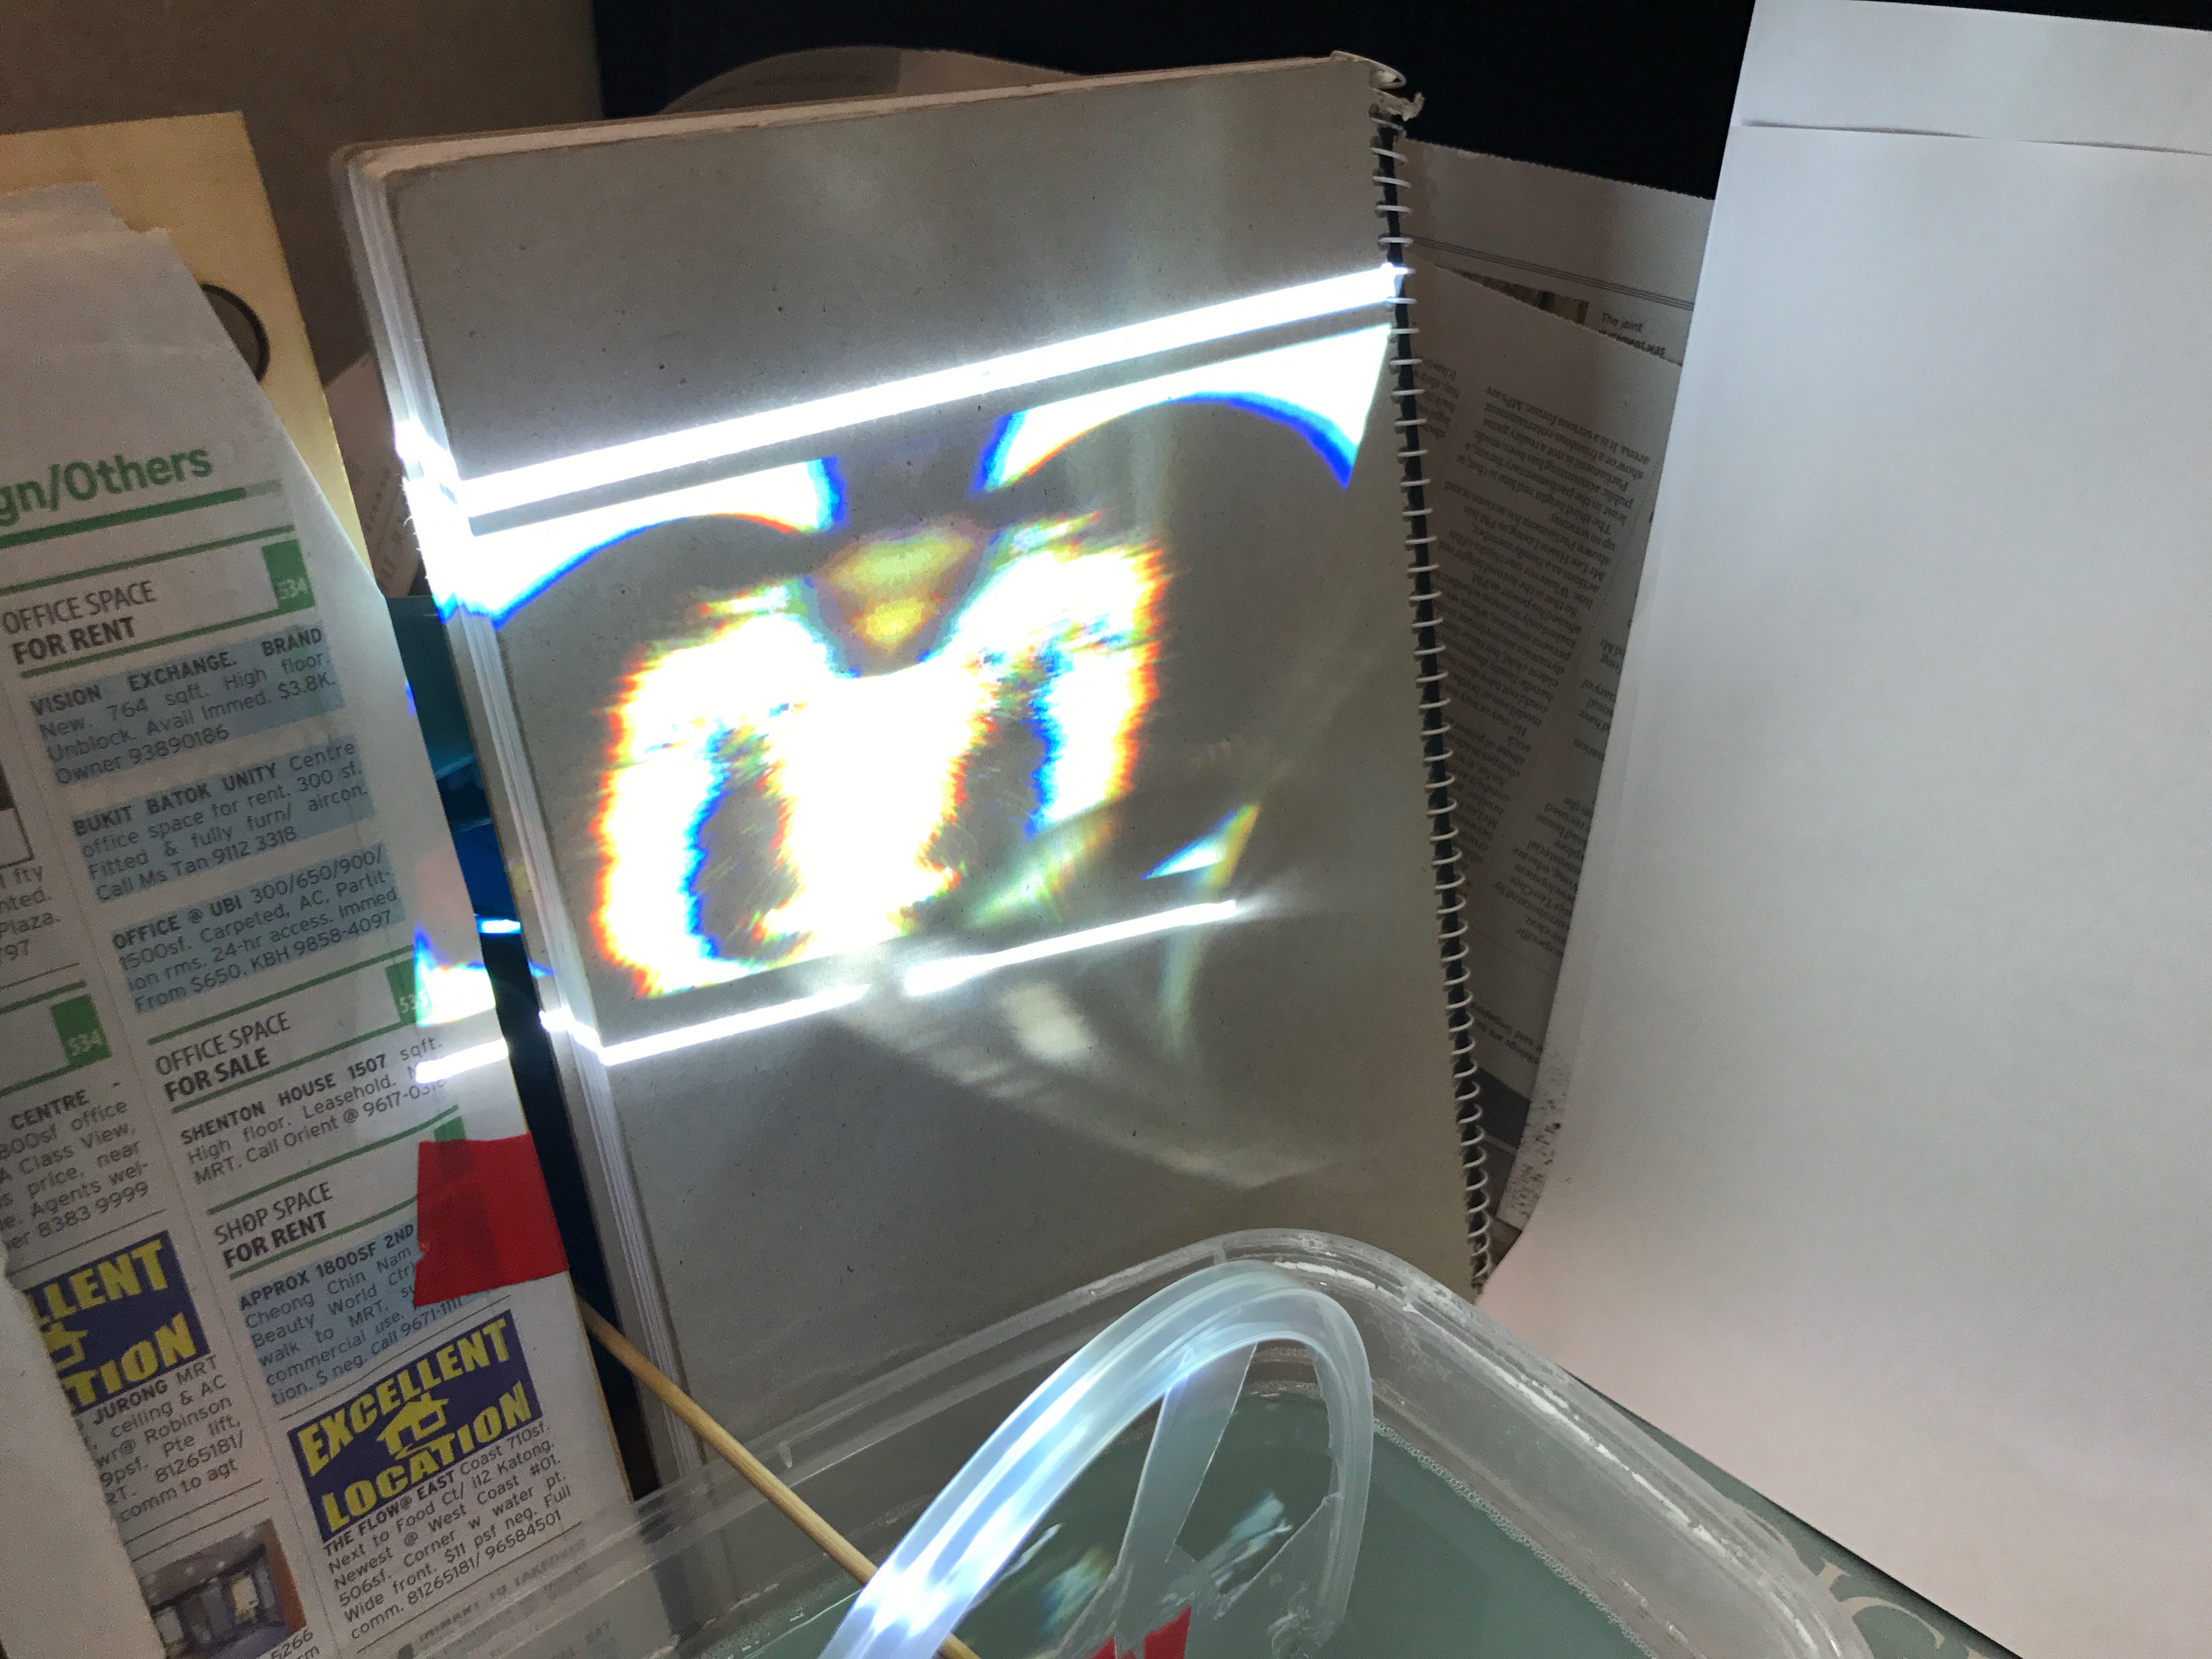
Reflection outcome
Reflection outcome
Reflection outcome
Only after doing video documentation did I realise that the reflective image.. was moving too much against what I had envisioned, and I thought that I had leeway to play with the bubble’s movement and use it as a compelling material for my project. In addition, I envisioned my reflection to be able to see more of the source image… no that did not happen.
Setup (revised)
Nevertheless, after discussion with prof Randall, perhaps I would move onwards to using the reflective image as source material and use digital manipulation to further the concept.
Sounds
I am currently working on the sounds on the side, and will combine it with the visual footage for the final outcome. It is still a work in progress! If possible, I would like the sounds to match the visual footage (eg. one beat = visual footage changes accordingly).
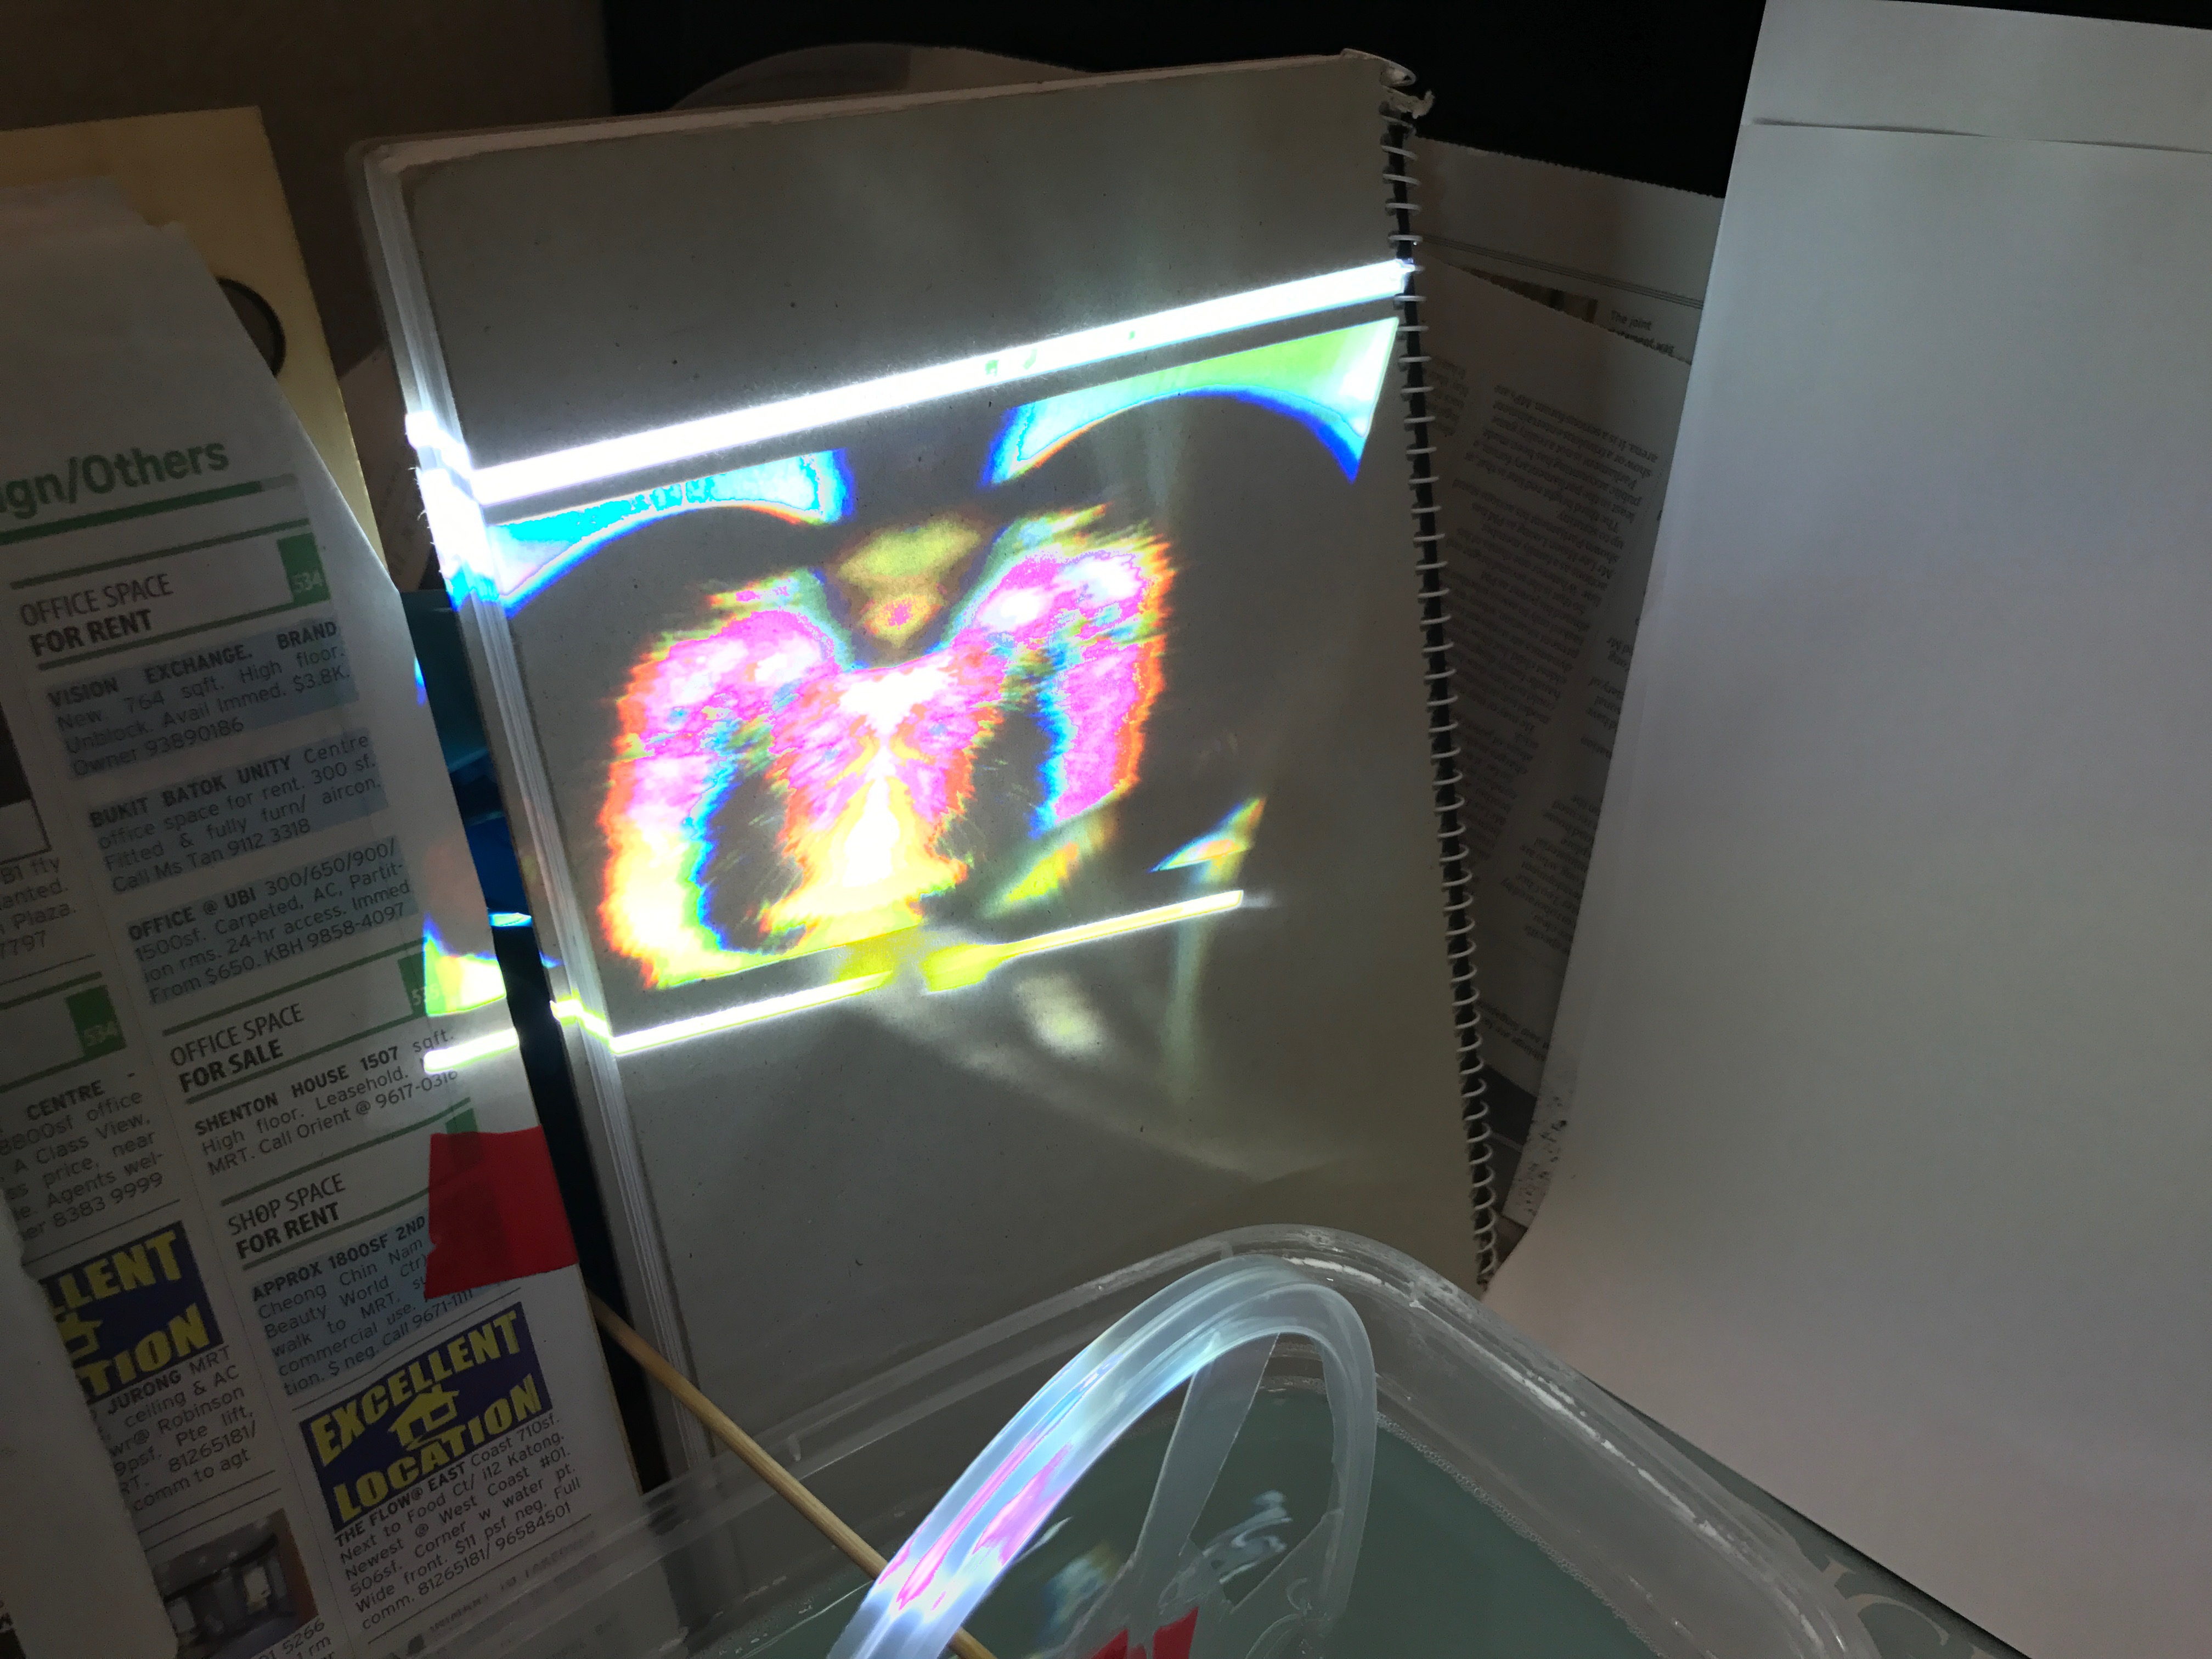
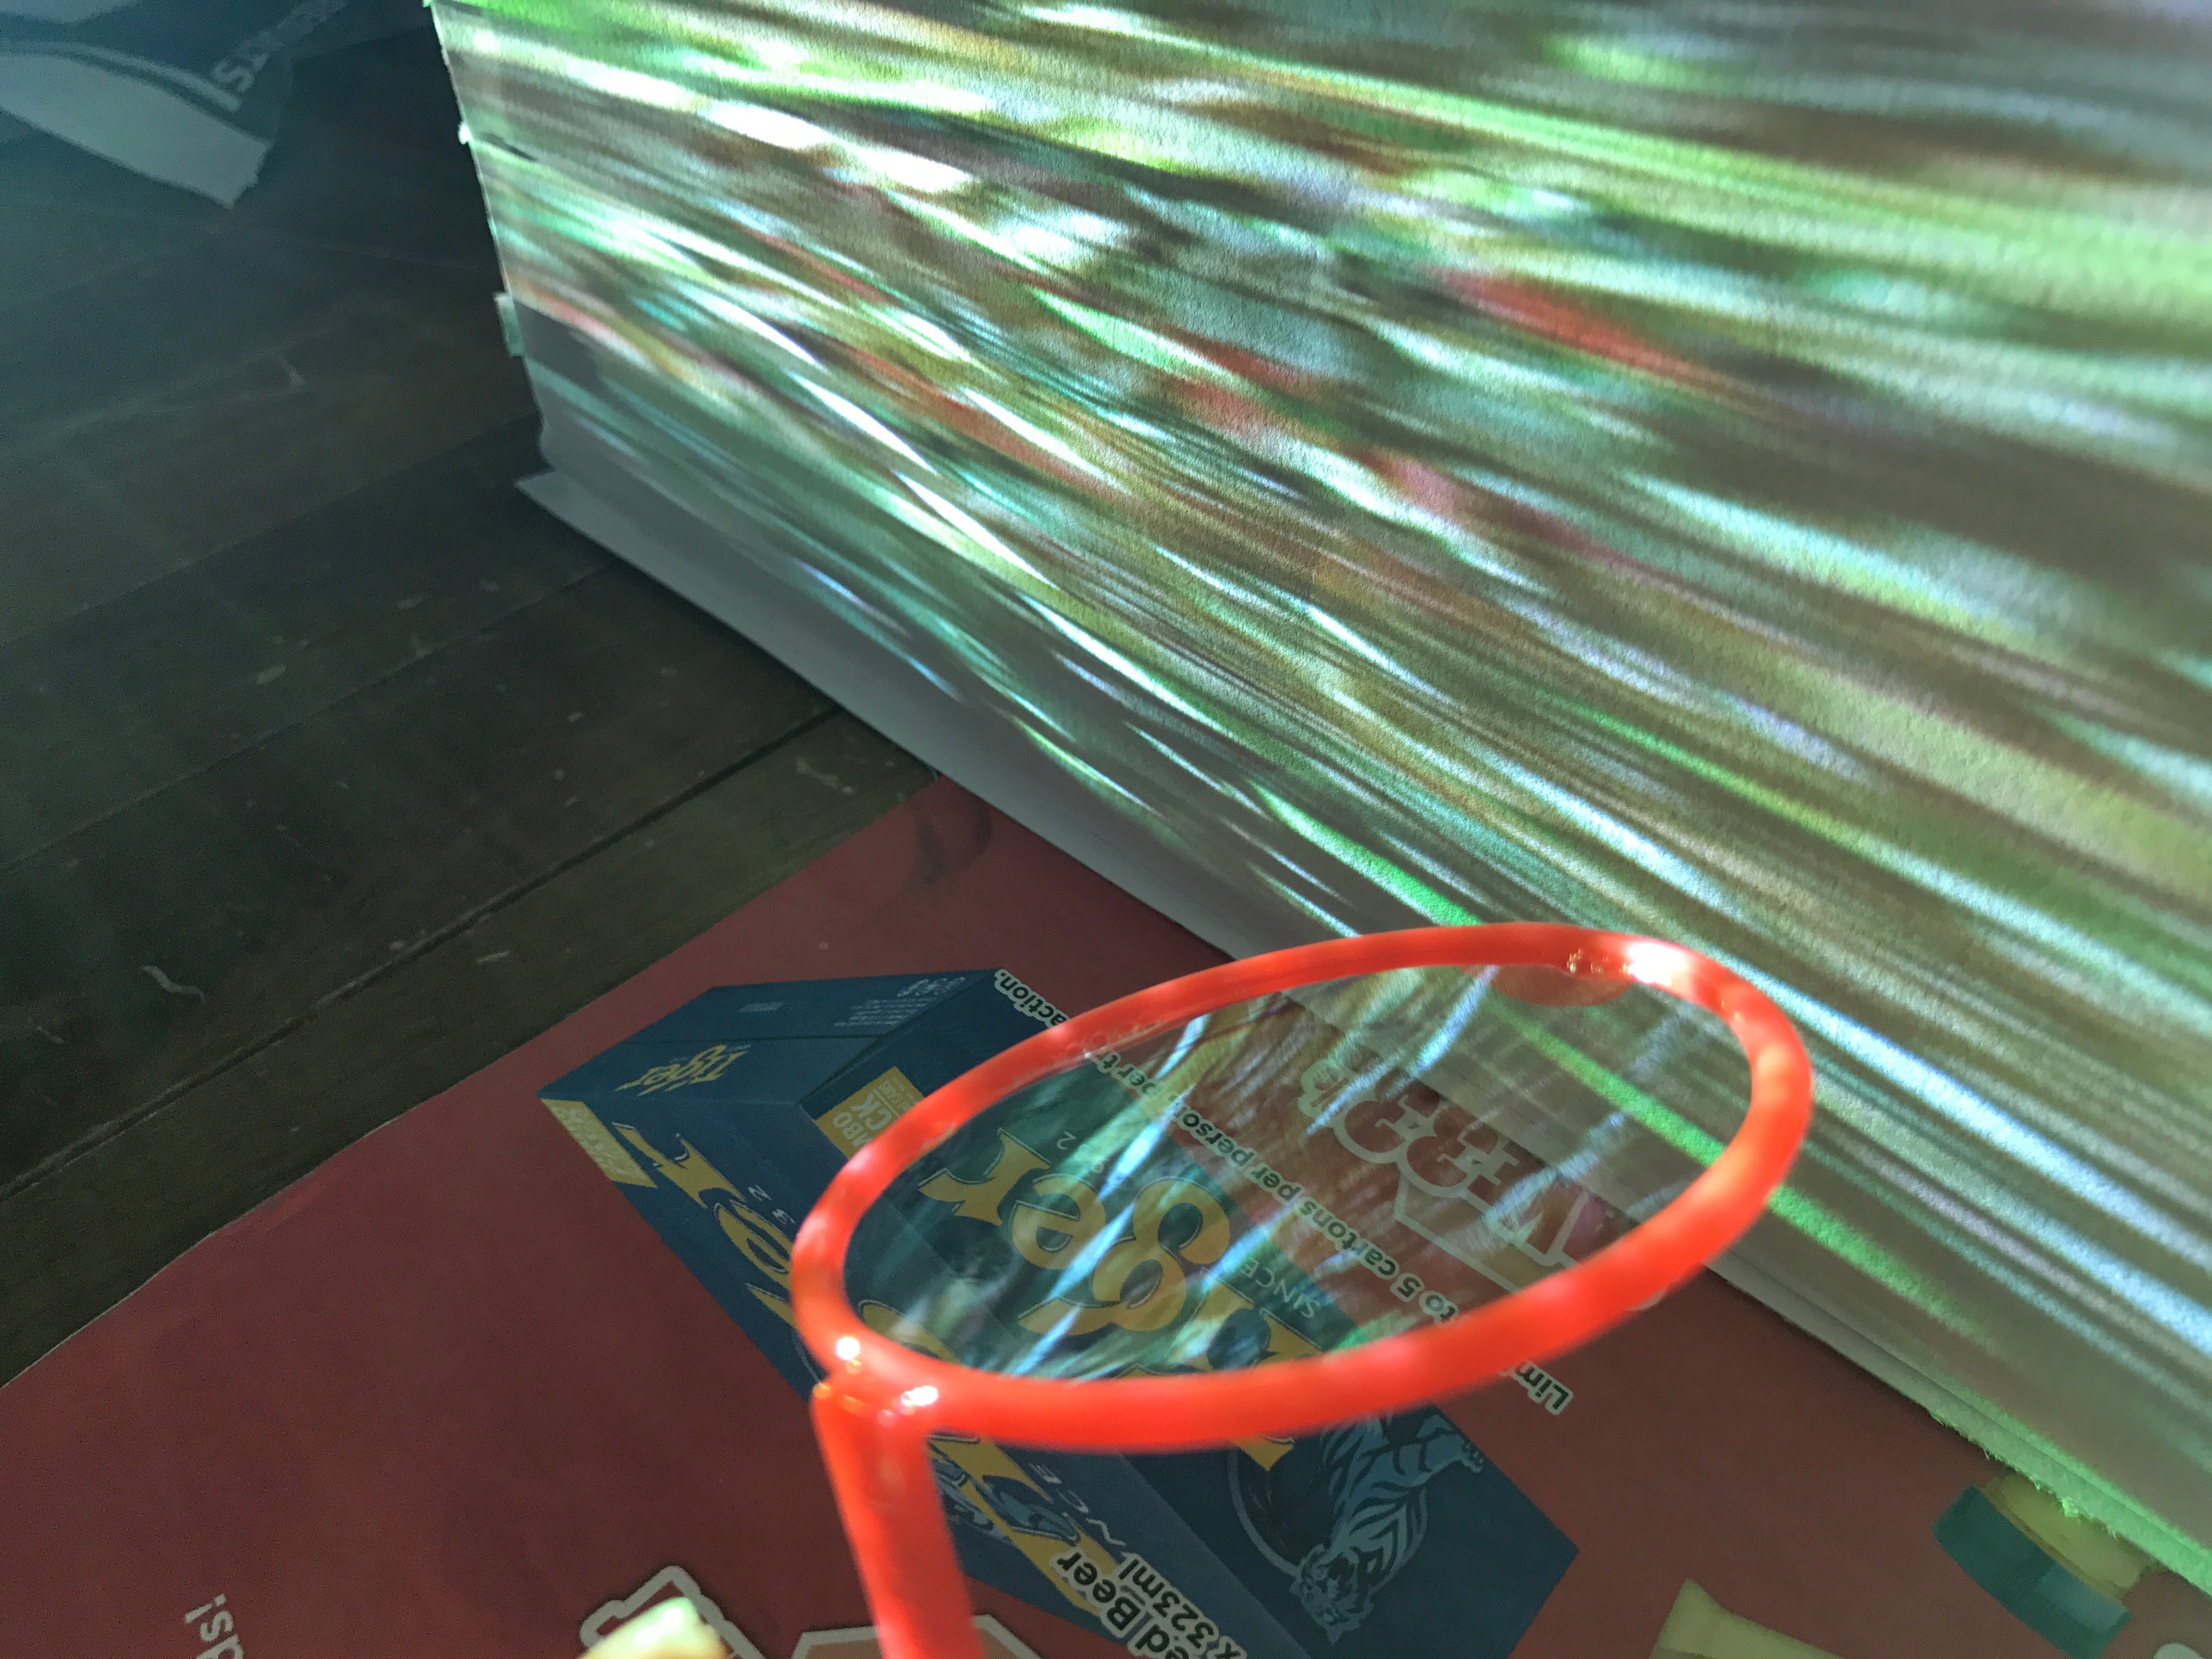
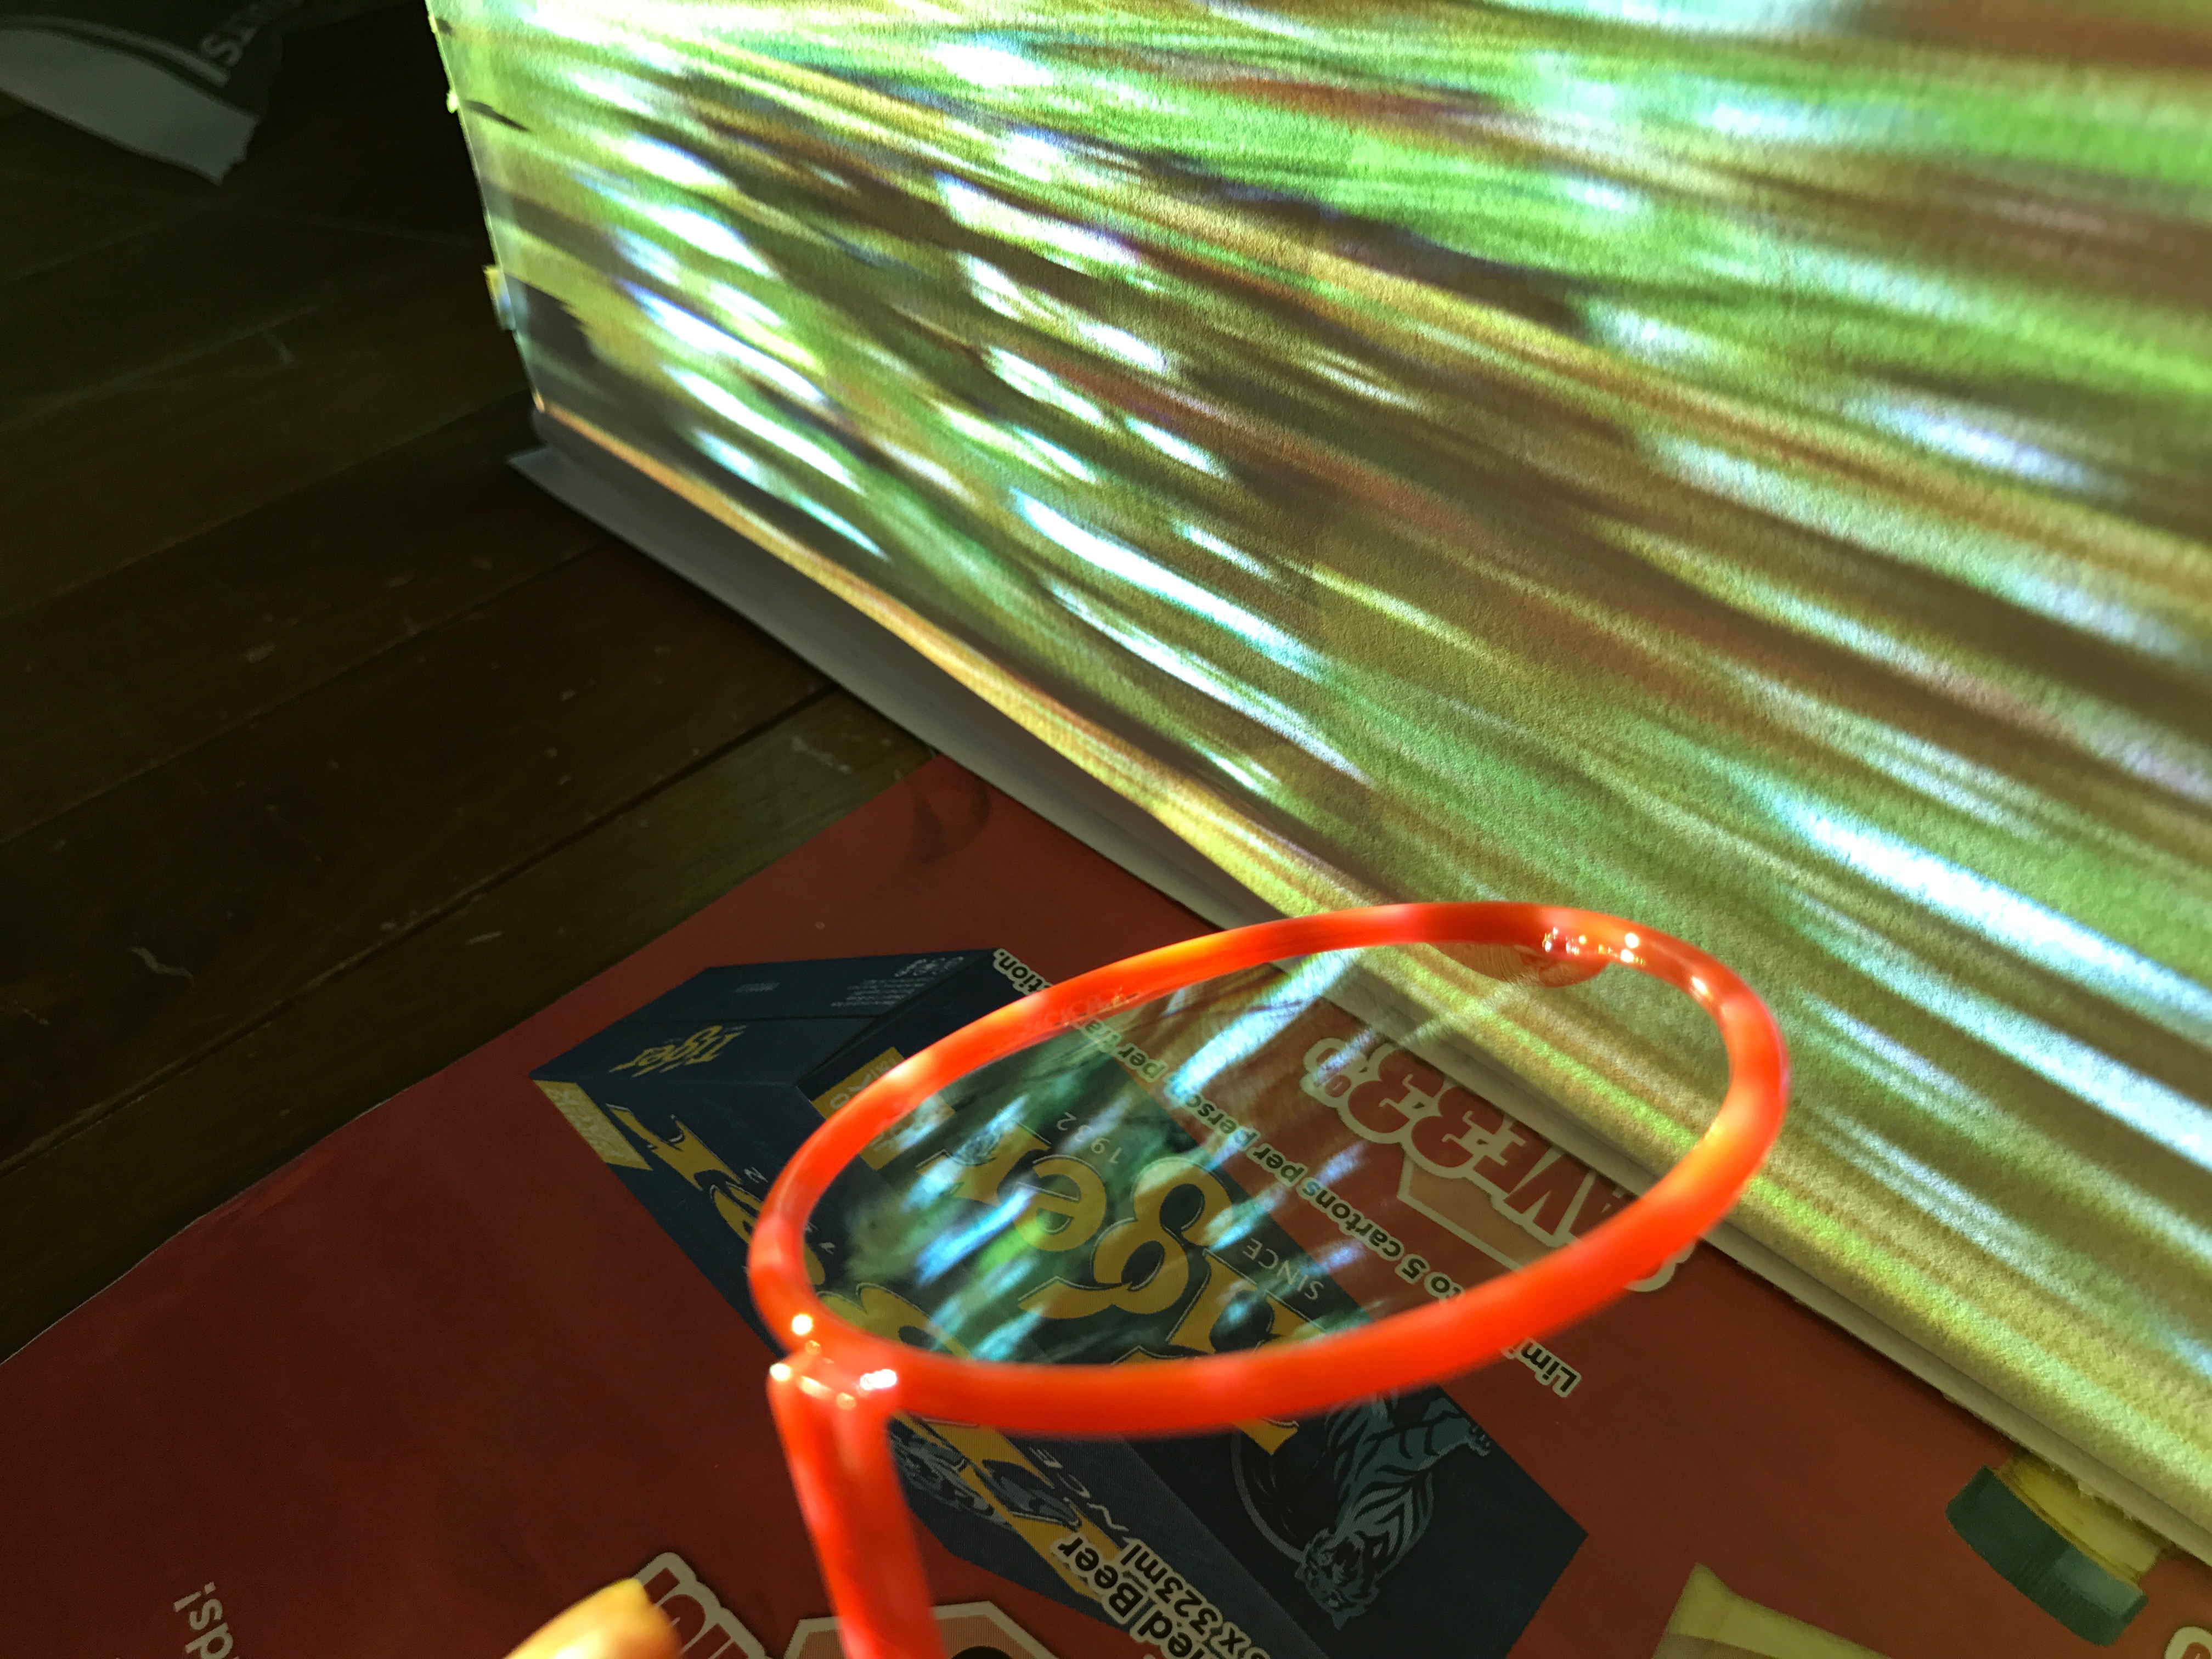
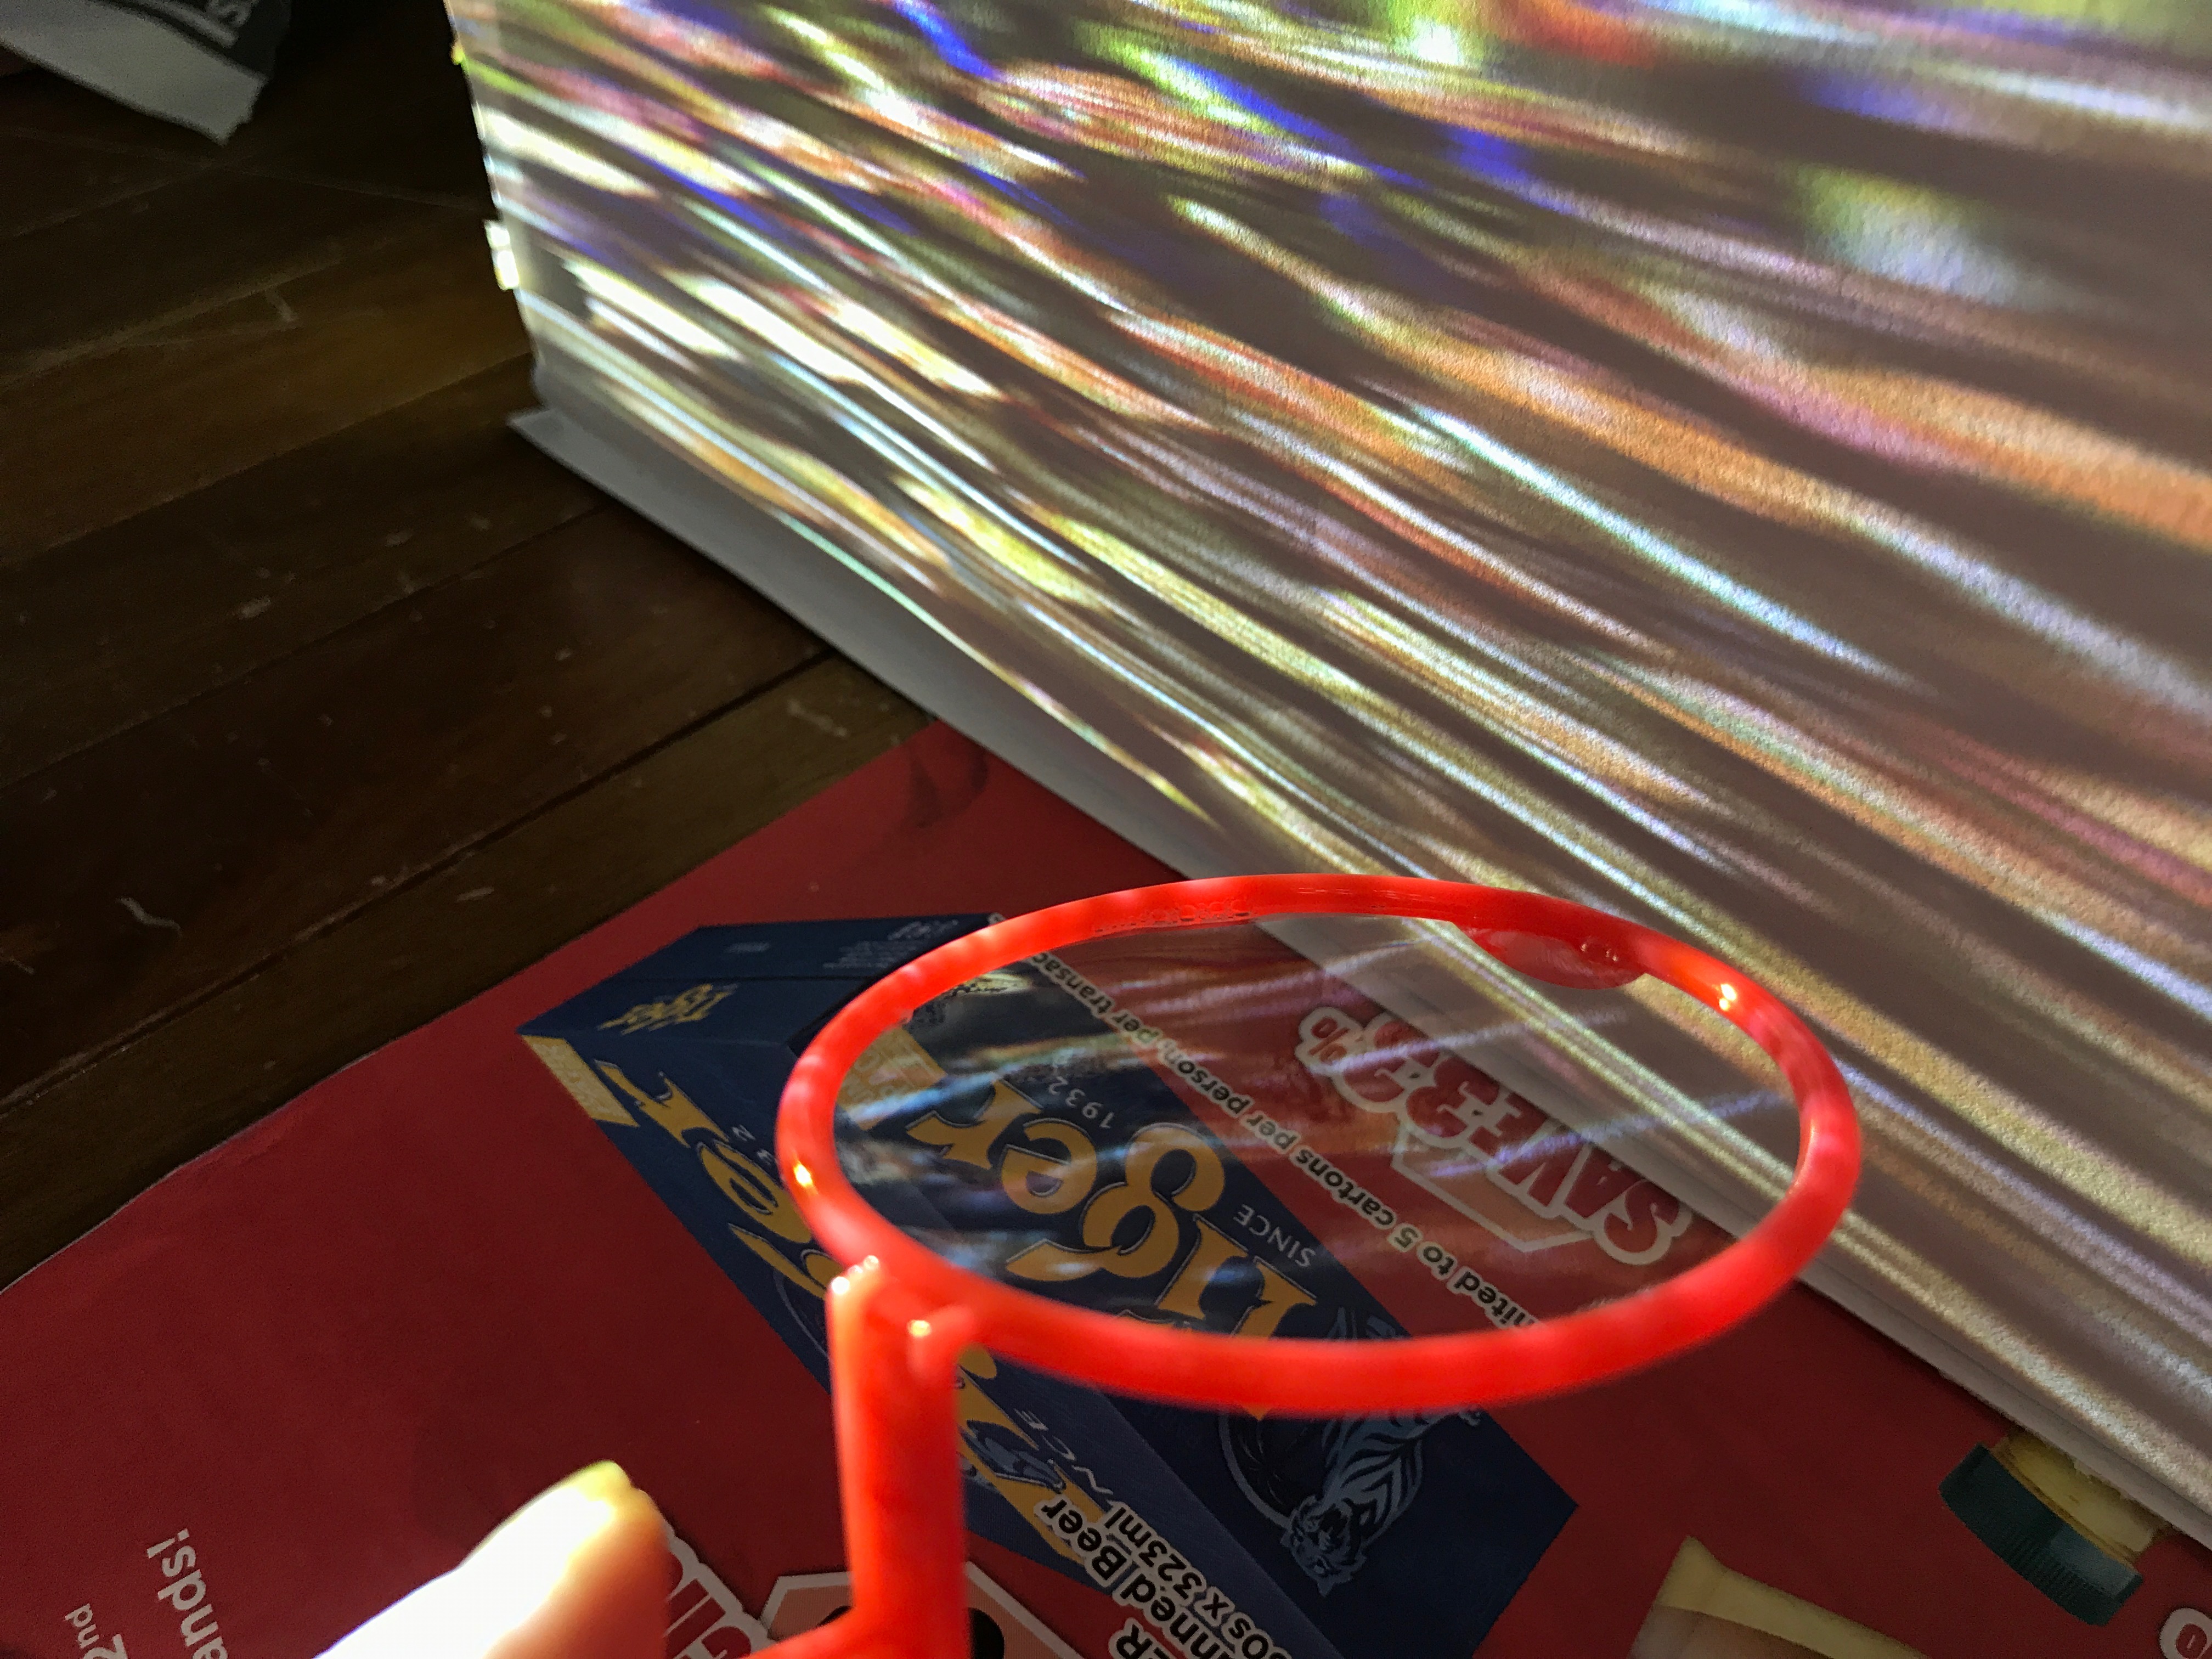
Sooo… I was considering how to move on. I constantly toyed with the idea of making projected bubbles, very much like this – but soon hit a revelation: while yes its perfect, that the outcome really embodies what I truly want, I would like to investigate another more appealing aspect of the bubble medium: reflections.
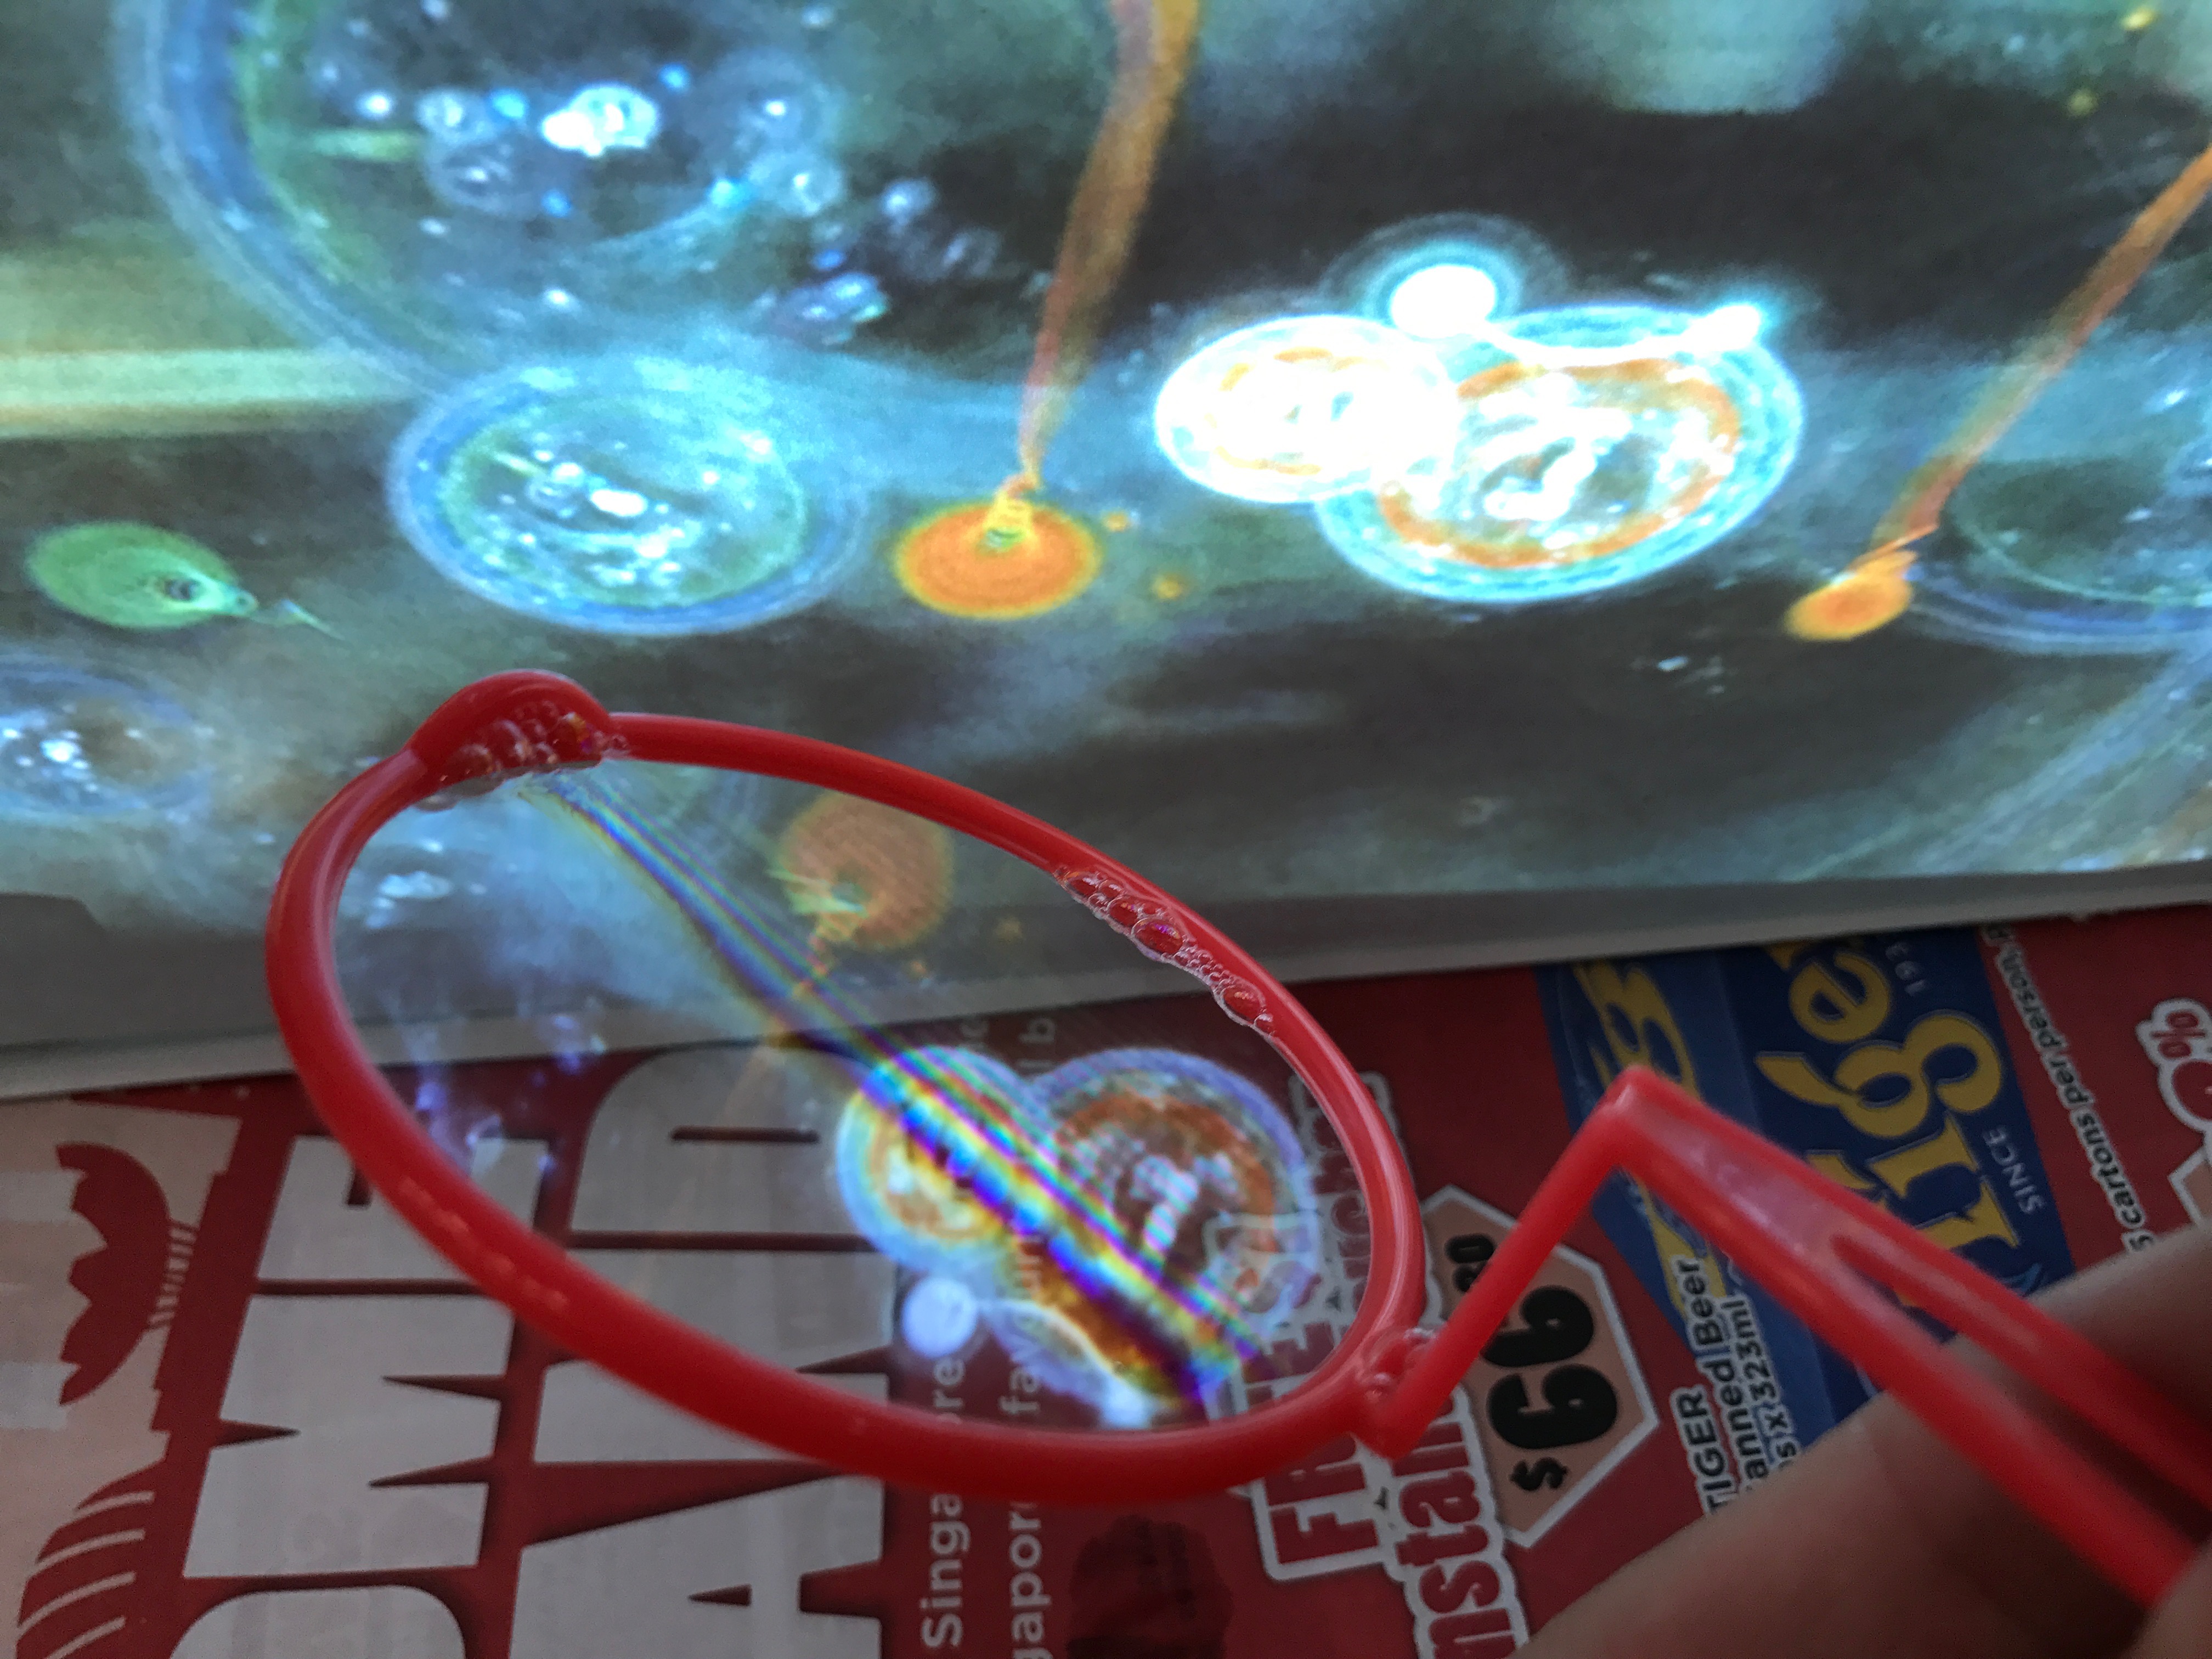
From the start of my experimentation stage till now, I have been fascinated with bubble’s reflections; the multi-coloured hues swirling in circles, glistening and changing colours at whim: it was utterly beautiful. The week before, Prof Randall actually showed that the reflective surface could actually be used as a projection surface, though, in a different way as seen in the video itself.
The bubble surface: swirls of soap and water
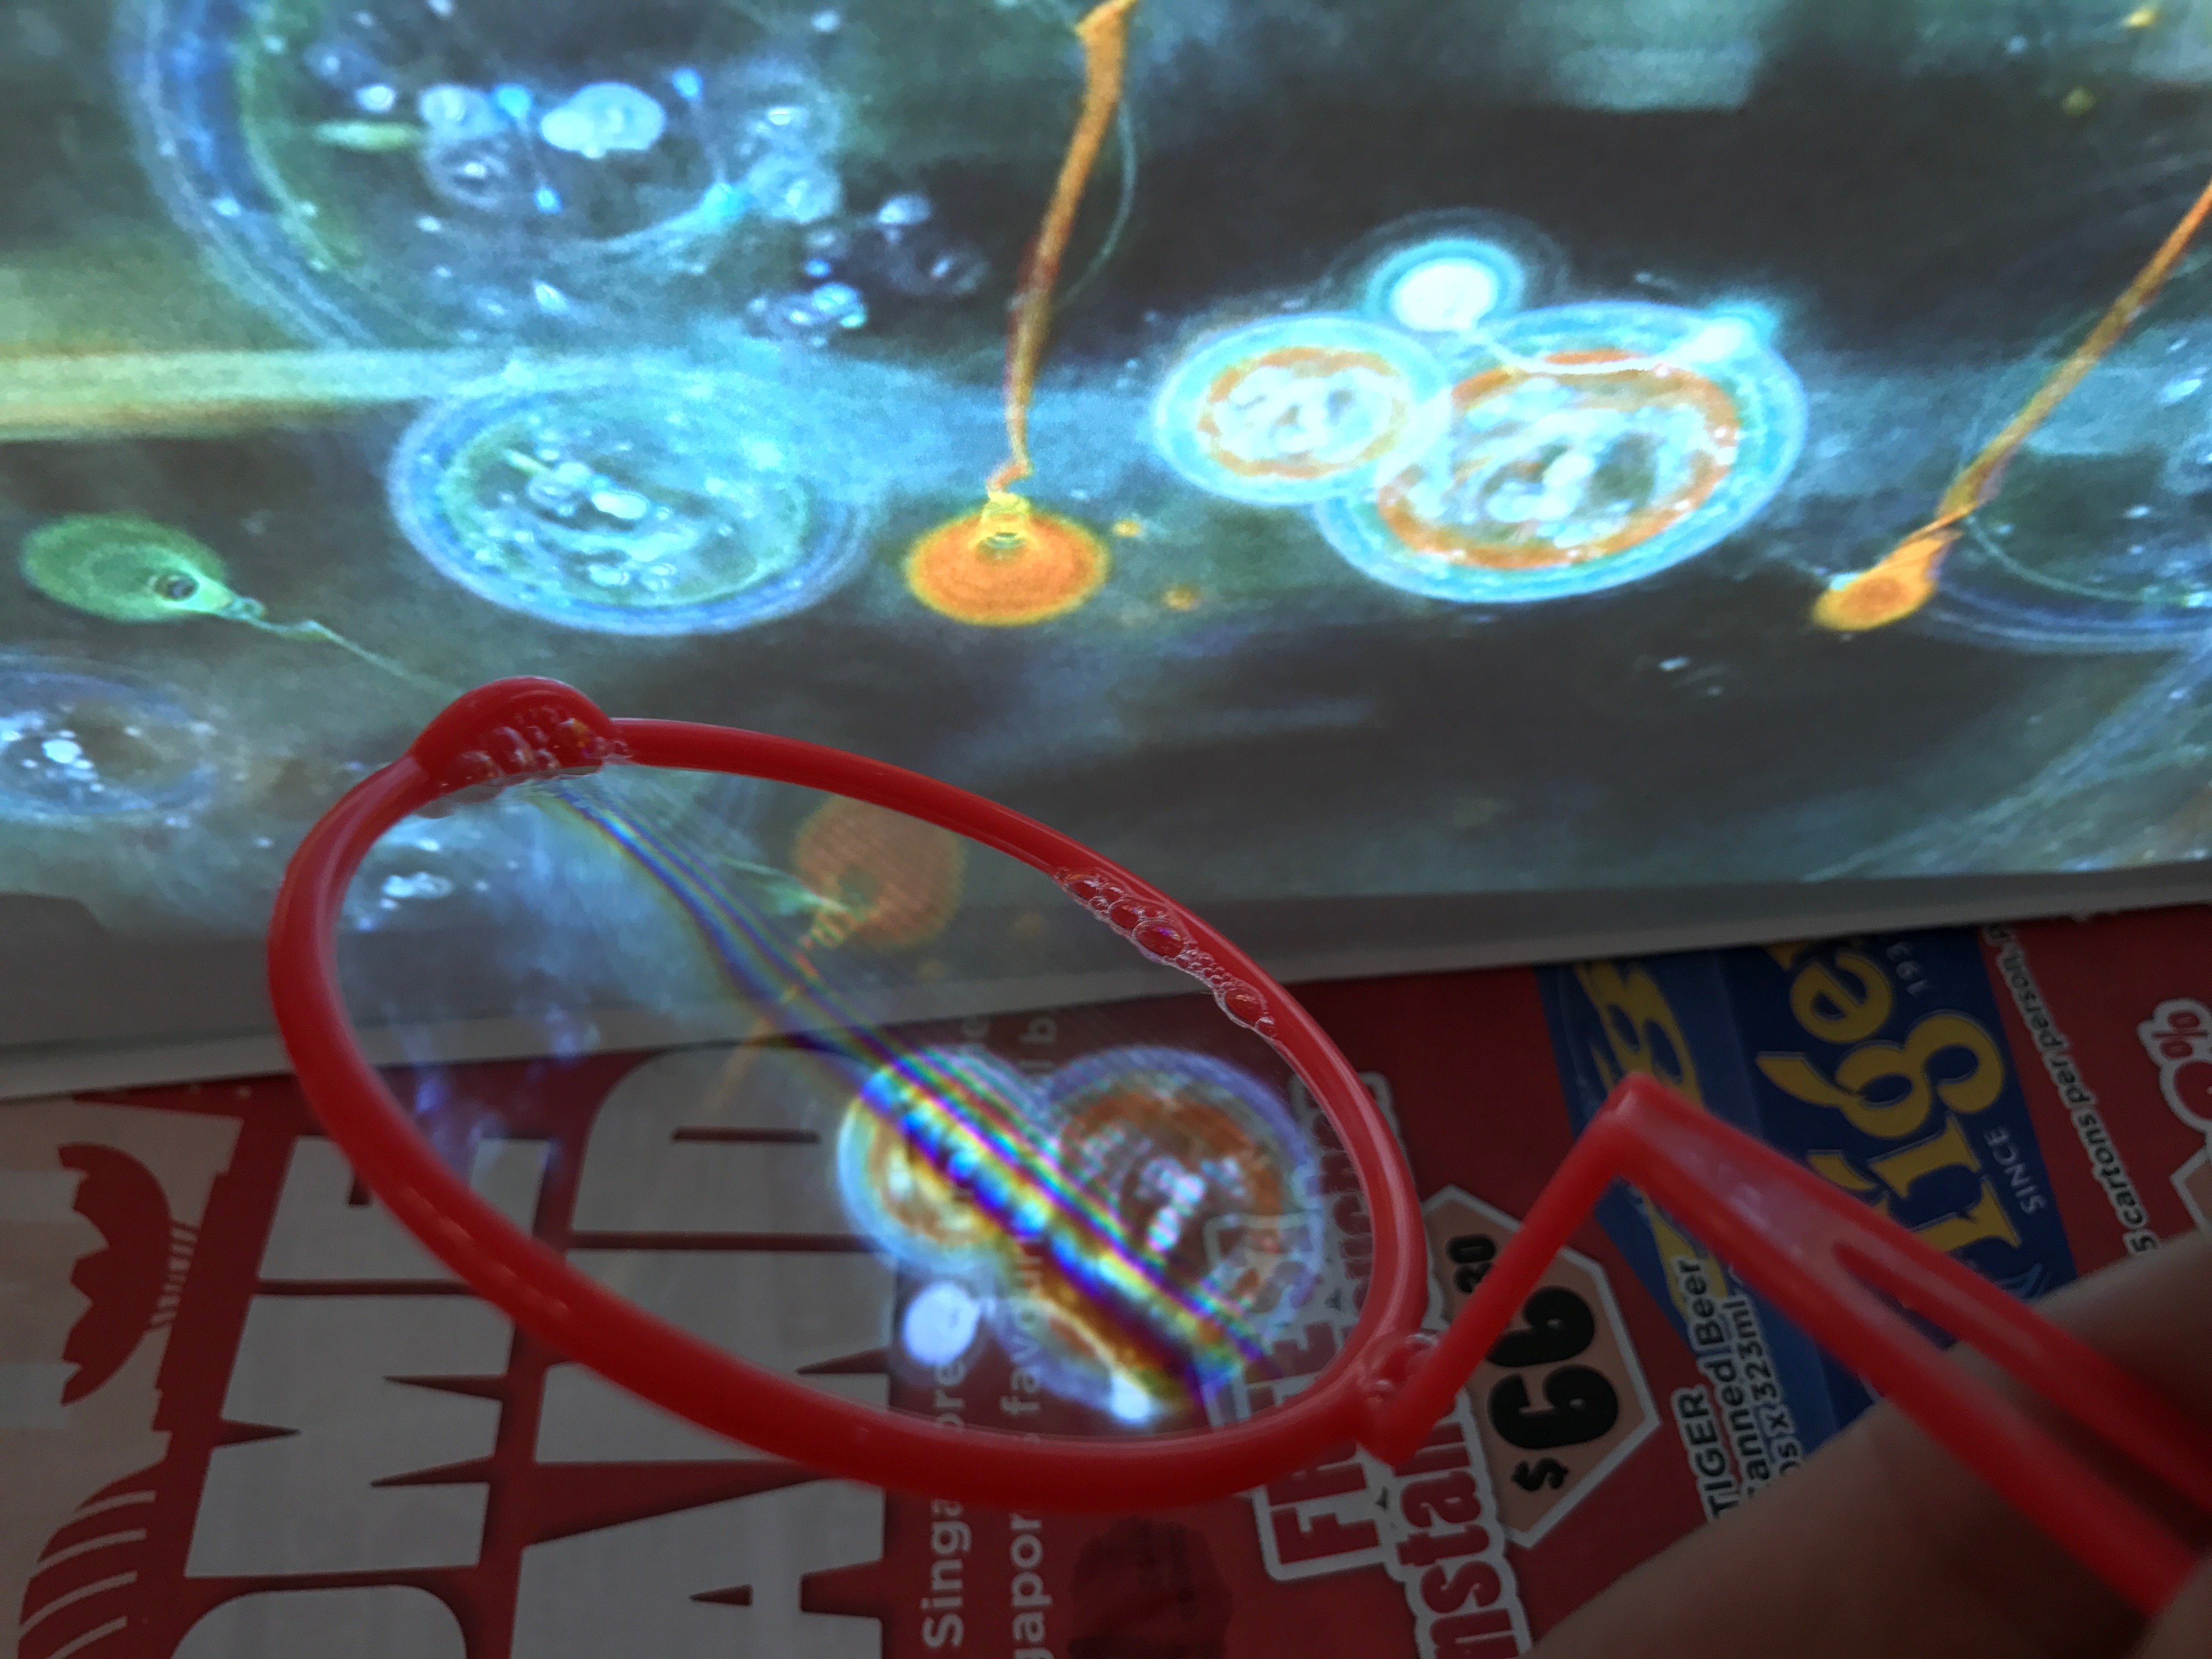
Reflected projection ON bubble surface
Reflected projection ON bubble surface
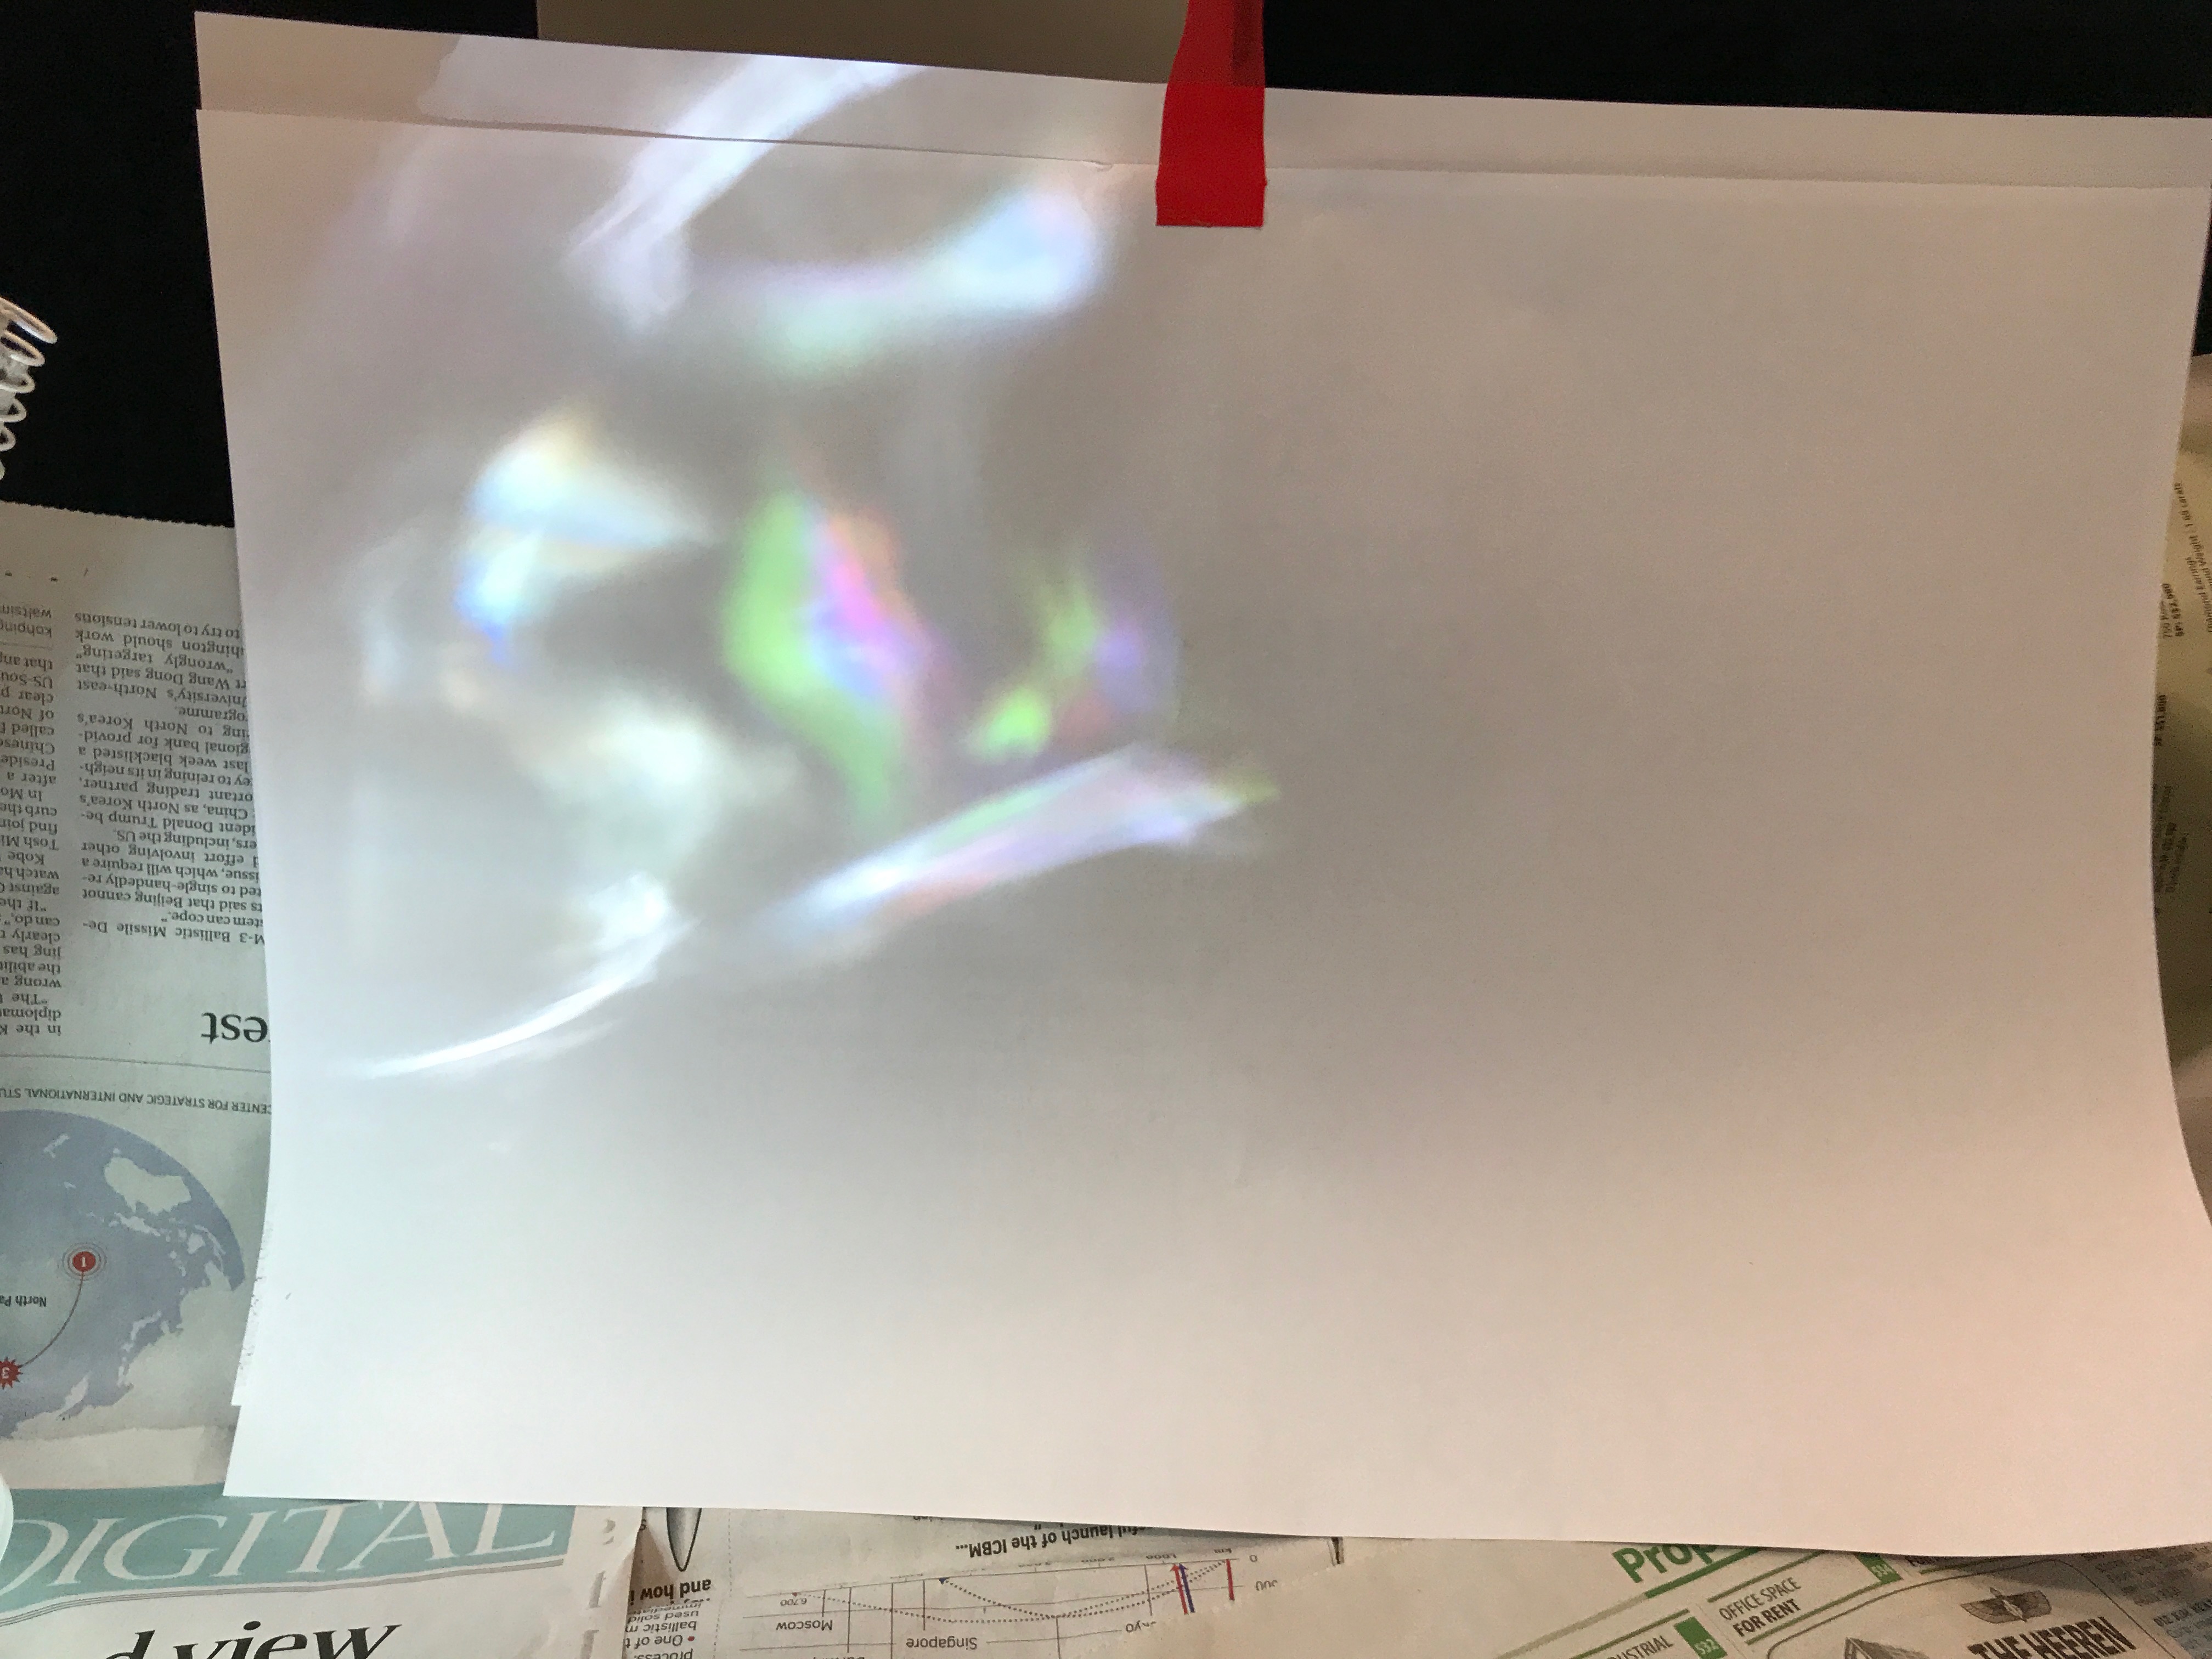
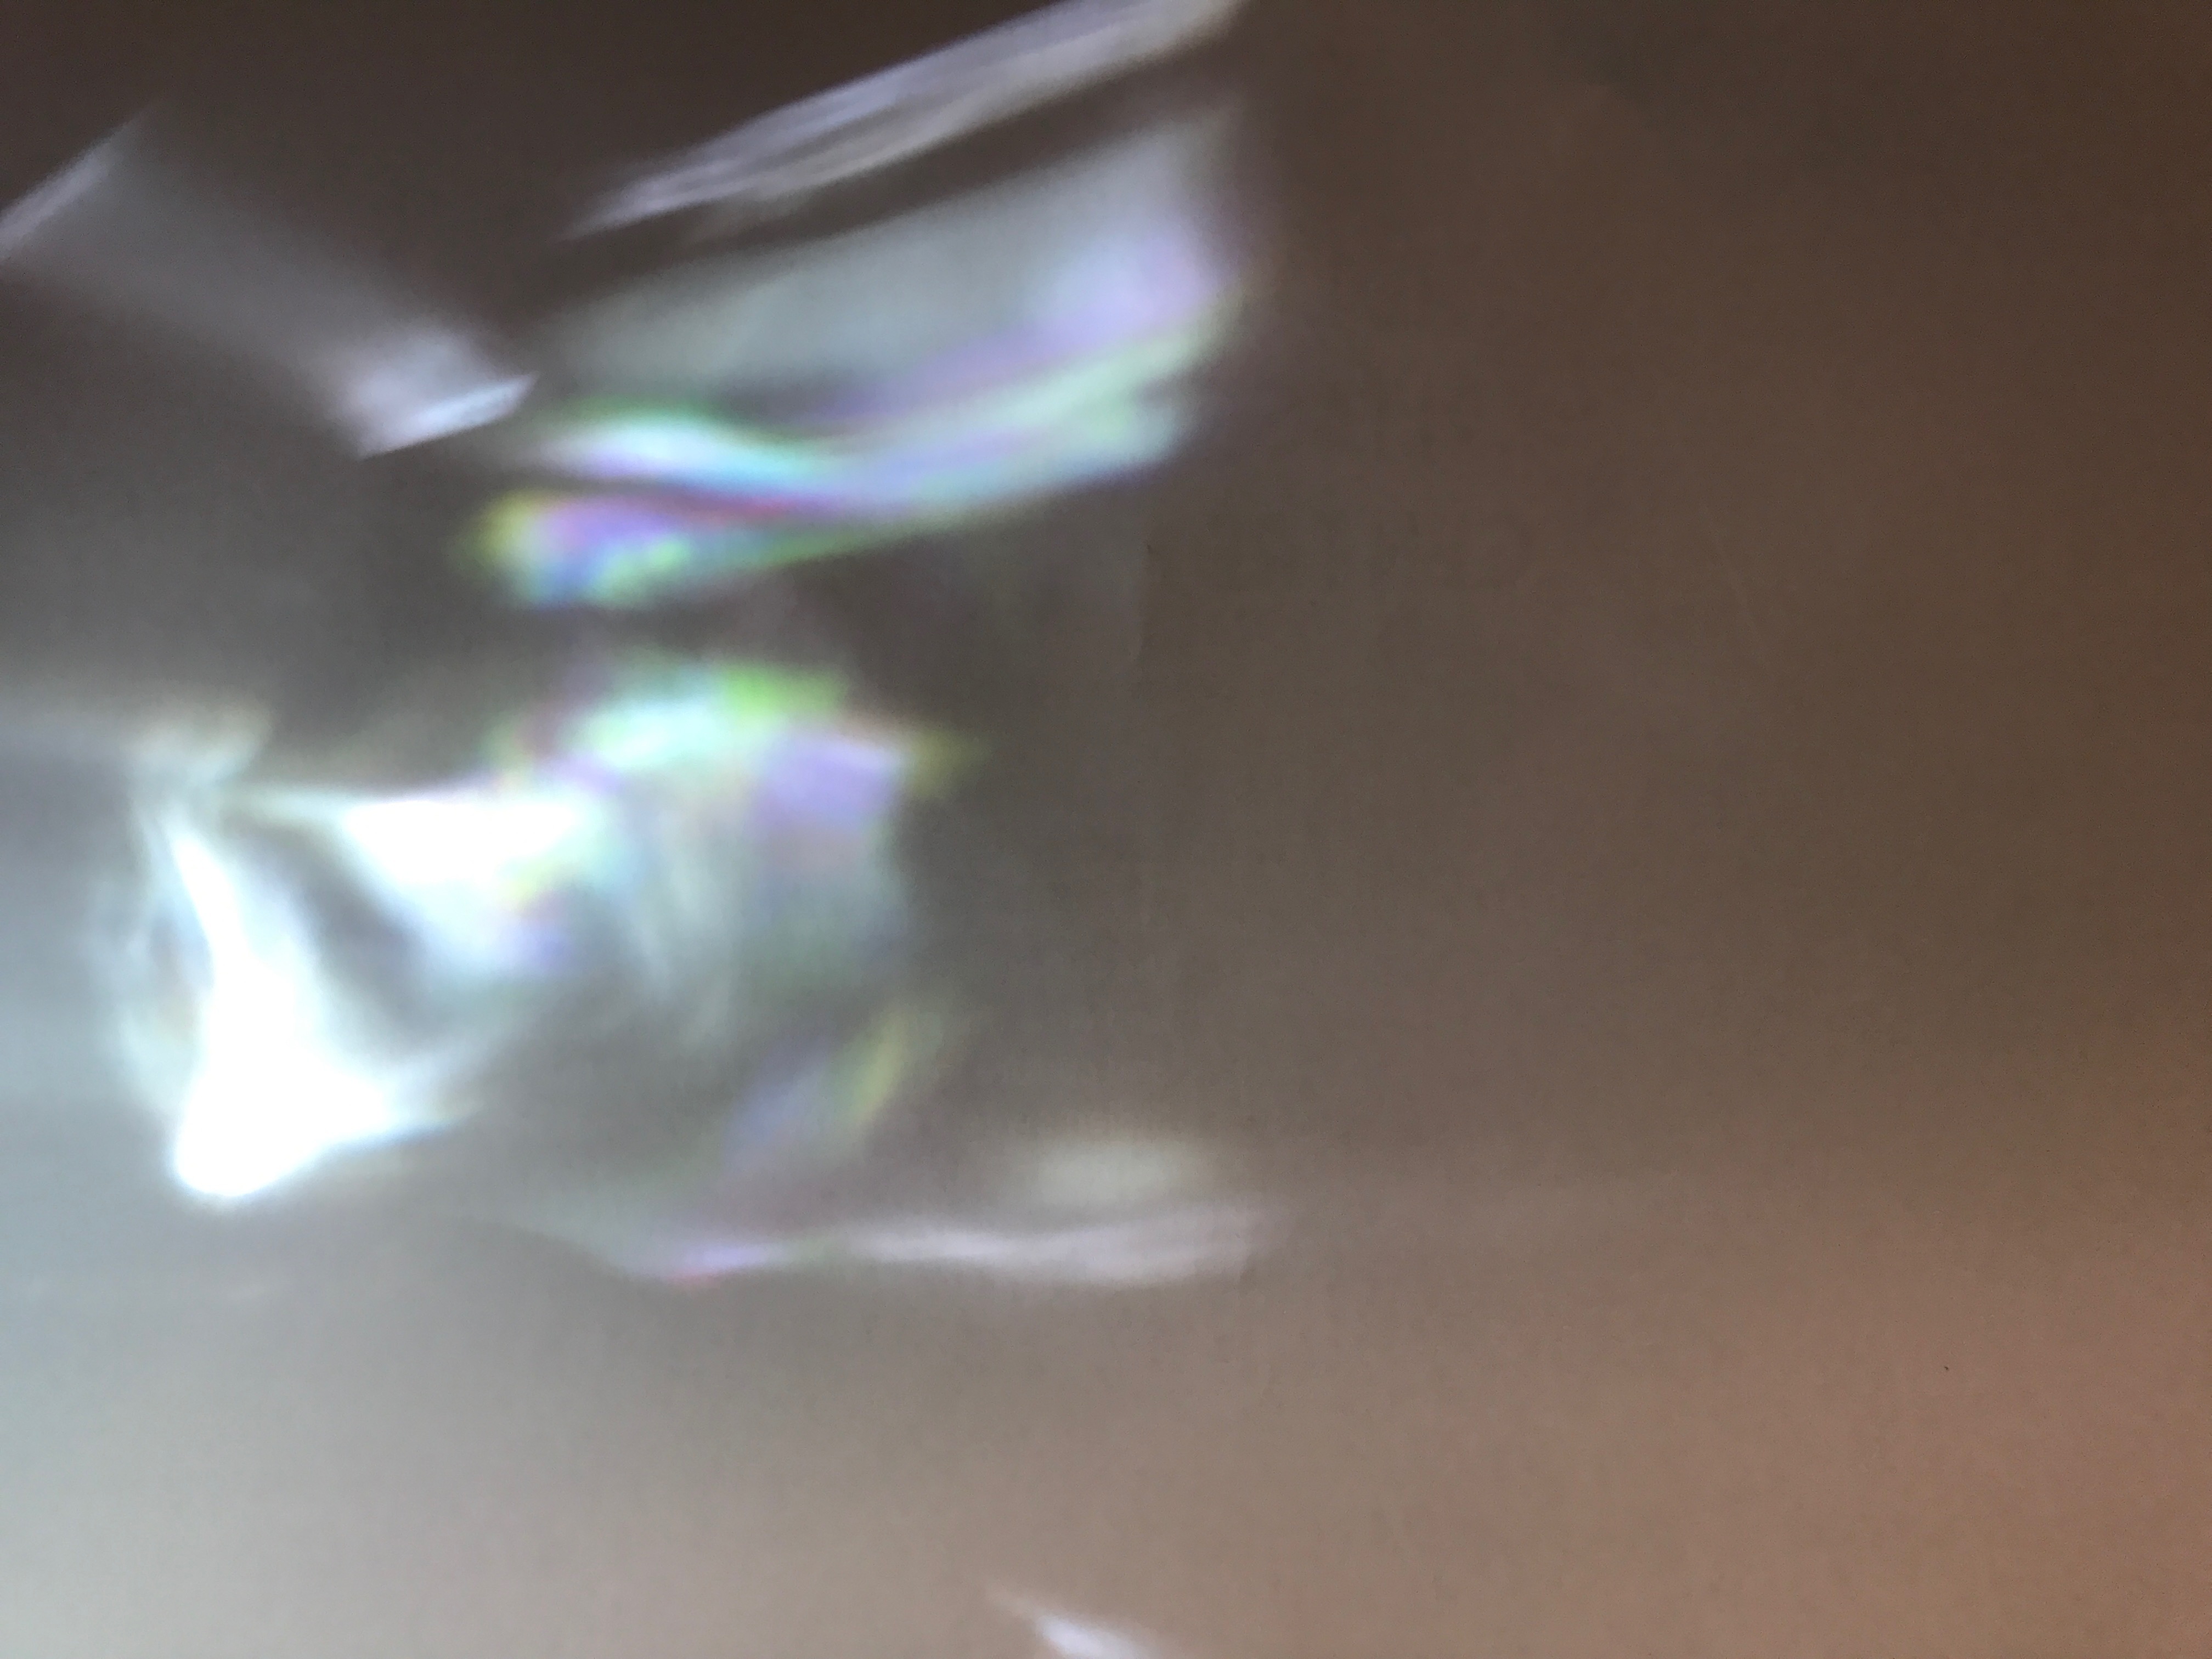
Reflected light FROM bubble surface
Reflected light FROM bubble surface
Prof Randall highlighted that viewing the reflection on the bubble itself might be hard, and that I could utilise another projector to enlarge the initial projected surface (such that the final look can be seen on say, a projector screen). To this, I felt pretty unsure about as I did not want my final installation to look 2D (aka like watching a television show), and that the interaction did feel slightly disconnected from the outcome.
I knew what I wanted, I wanted the reflected image to be tangible. Something you could actually see it in 3D rather than a flat surface. Perhaps, one could see it via the physical object which creates the final outcome, or the may the outcome be more ‘real’ (for the lack of a better word).
What I do want though, is for the bubble surface to no longer be a sphere, but a ‘wall’ of bubble. This would allow for a greater area of projection and logistically speaking, makes it way easier to control than a spherical bubble which bursts more easily.
Thus, I went to do a quick search of the different kinds of bubble ways, and stumbled upon a few interesting ones:
Ontario Science Centre, Bubbles making up a Face
This photo of Ontario Science Centre is courtesy of TripAdvisor
Kentucky Science Centre
This photo of Kentucky Science Center is courtesy of TripAdvisor
The medium of bubbles is an interesting one, it has both a scientific basis, and can even be used as a part of a performance, as seen by bubble artist Fan Yang.
Envisioned Installation
I did mention that I wanted a wall of bubbles, but for now, I am going to start by making little round wands, tied by strings to the ceiling and lowered down at chest-level . The rationale behind this height was for visitors to be able to actually blow and play about with the bubbles. In the future, I would like to change the opening shape of the bubble wand but for now I will stick with this to experiment first.
Bubble wand
As you can see, there’s a tray of soapy water. It is intended so for the user to be able to lower the entire assortment of wands into the soapy water by the use of a manual hand lever/pulley system. I want to be able to automate this system with time to come, but would need to consider how so, and the duration/trigger to lower the entire wand set.
I would like a projector to beam light onto the wands, and highlighting the bubbly reflection surface. Hopefully, there would also be reflections of the bubbles onto the surroundings, which would also vary based on the vibration of the bubbles.
As for the sounds, I wish for the sounds to be edited real-time – hopefully, the bubbles’ vibration speed/actions can be translated into sounds for the installation itself.
This would suffice for now, as I attempt to create my prototype on it (to be continued in the next post).
Overview: Creating new Set-ups
This was a week of toggling with equipment, with the intention of coming up with the final installation setup. I decided to just go back and focus on projection on bubbles. To do this, fog is required, to make the bubble opaque enough for projection to shine on it.
Thus, I tried to make my own fog as buying a fog machine would be much more costly. It was a failure.
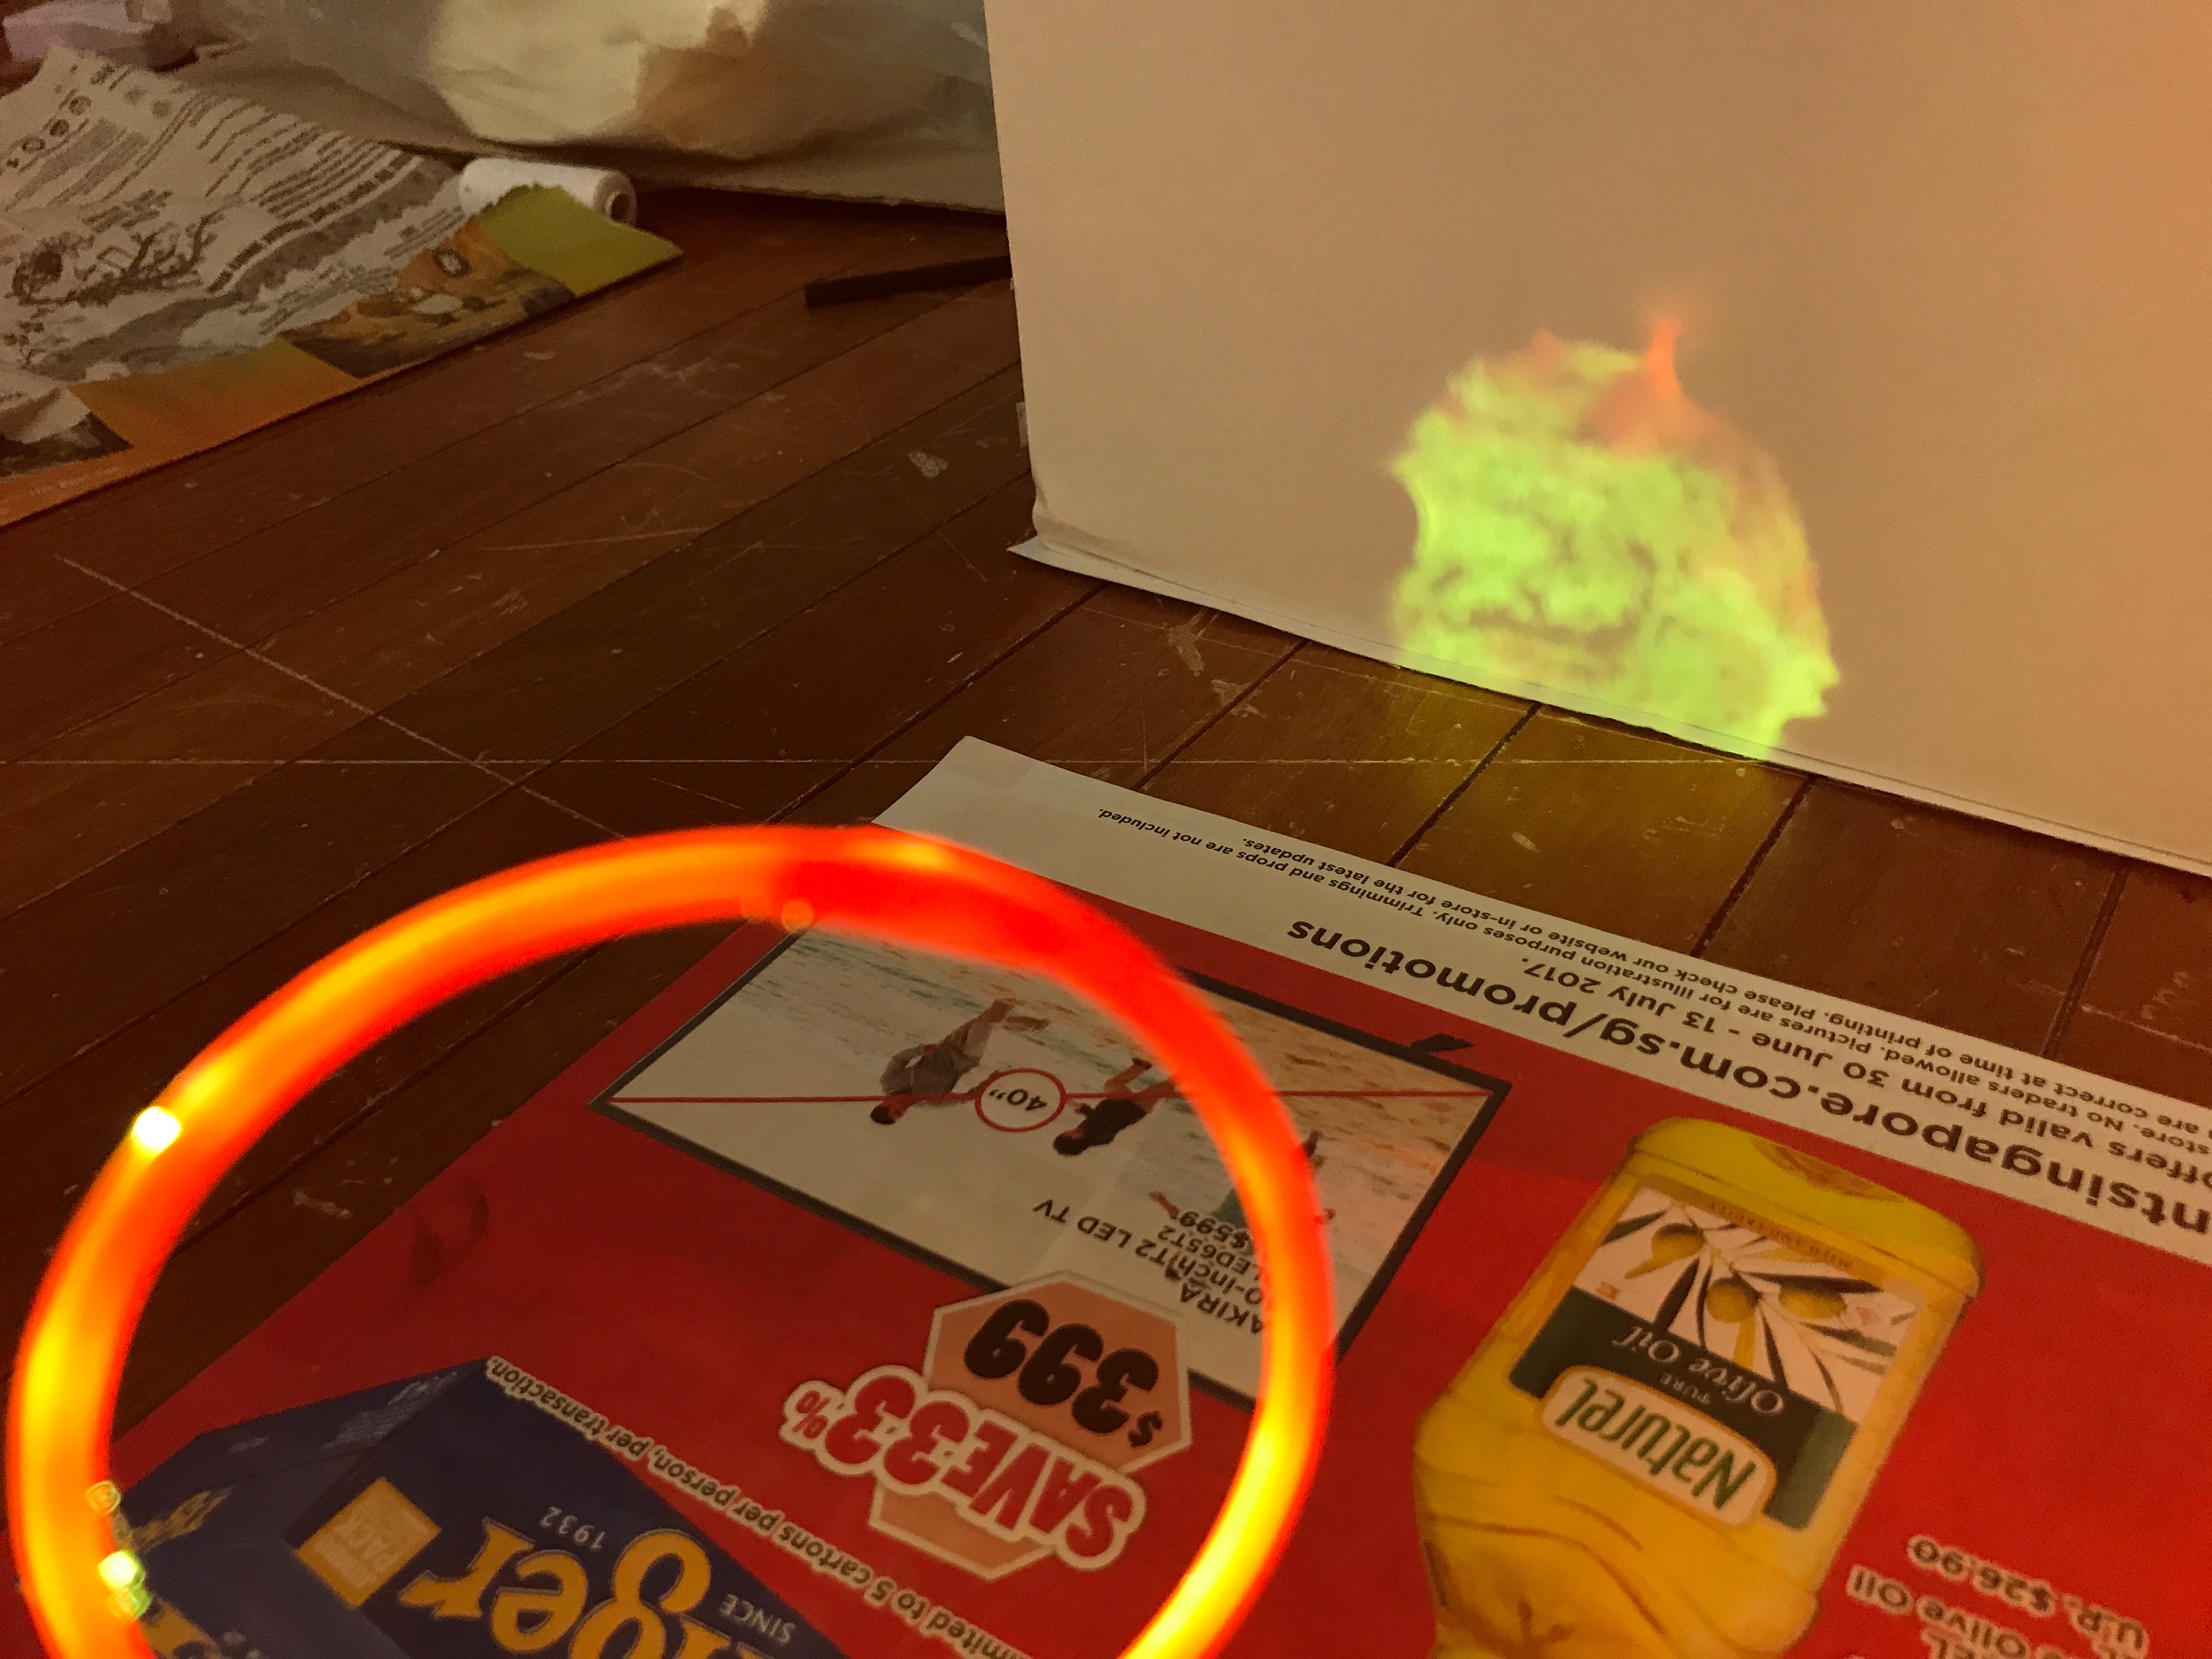
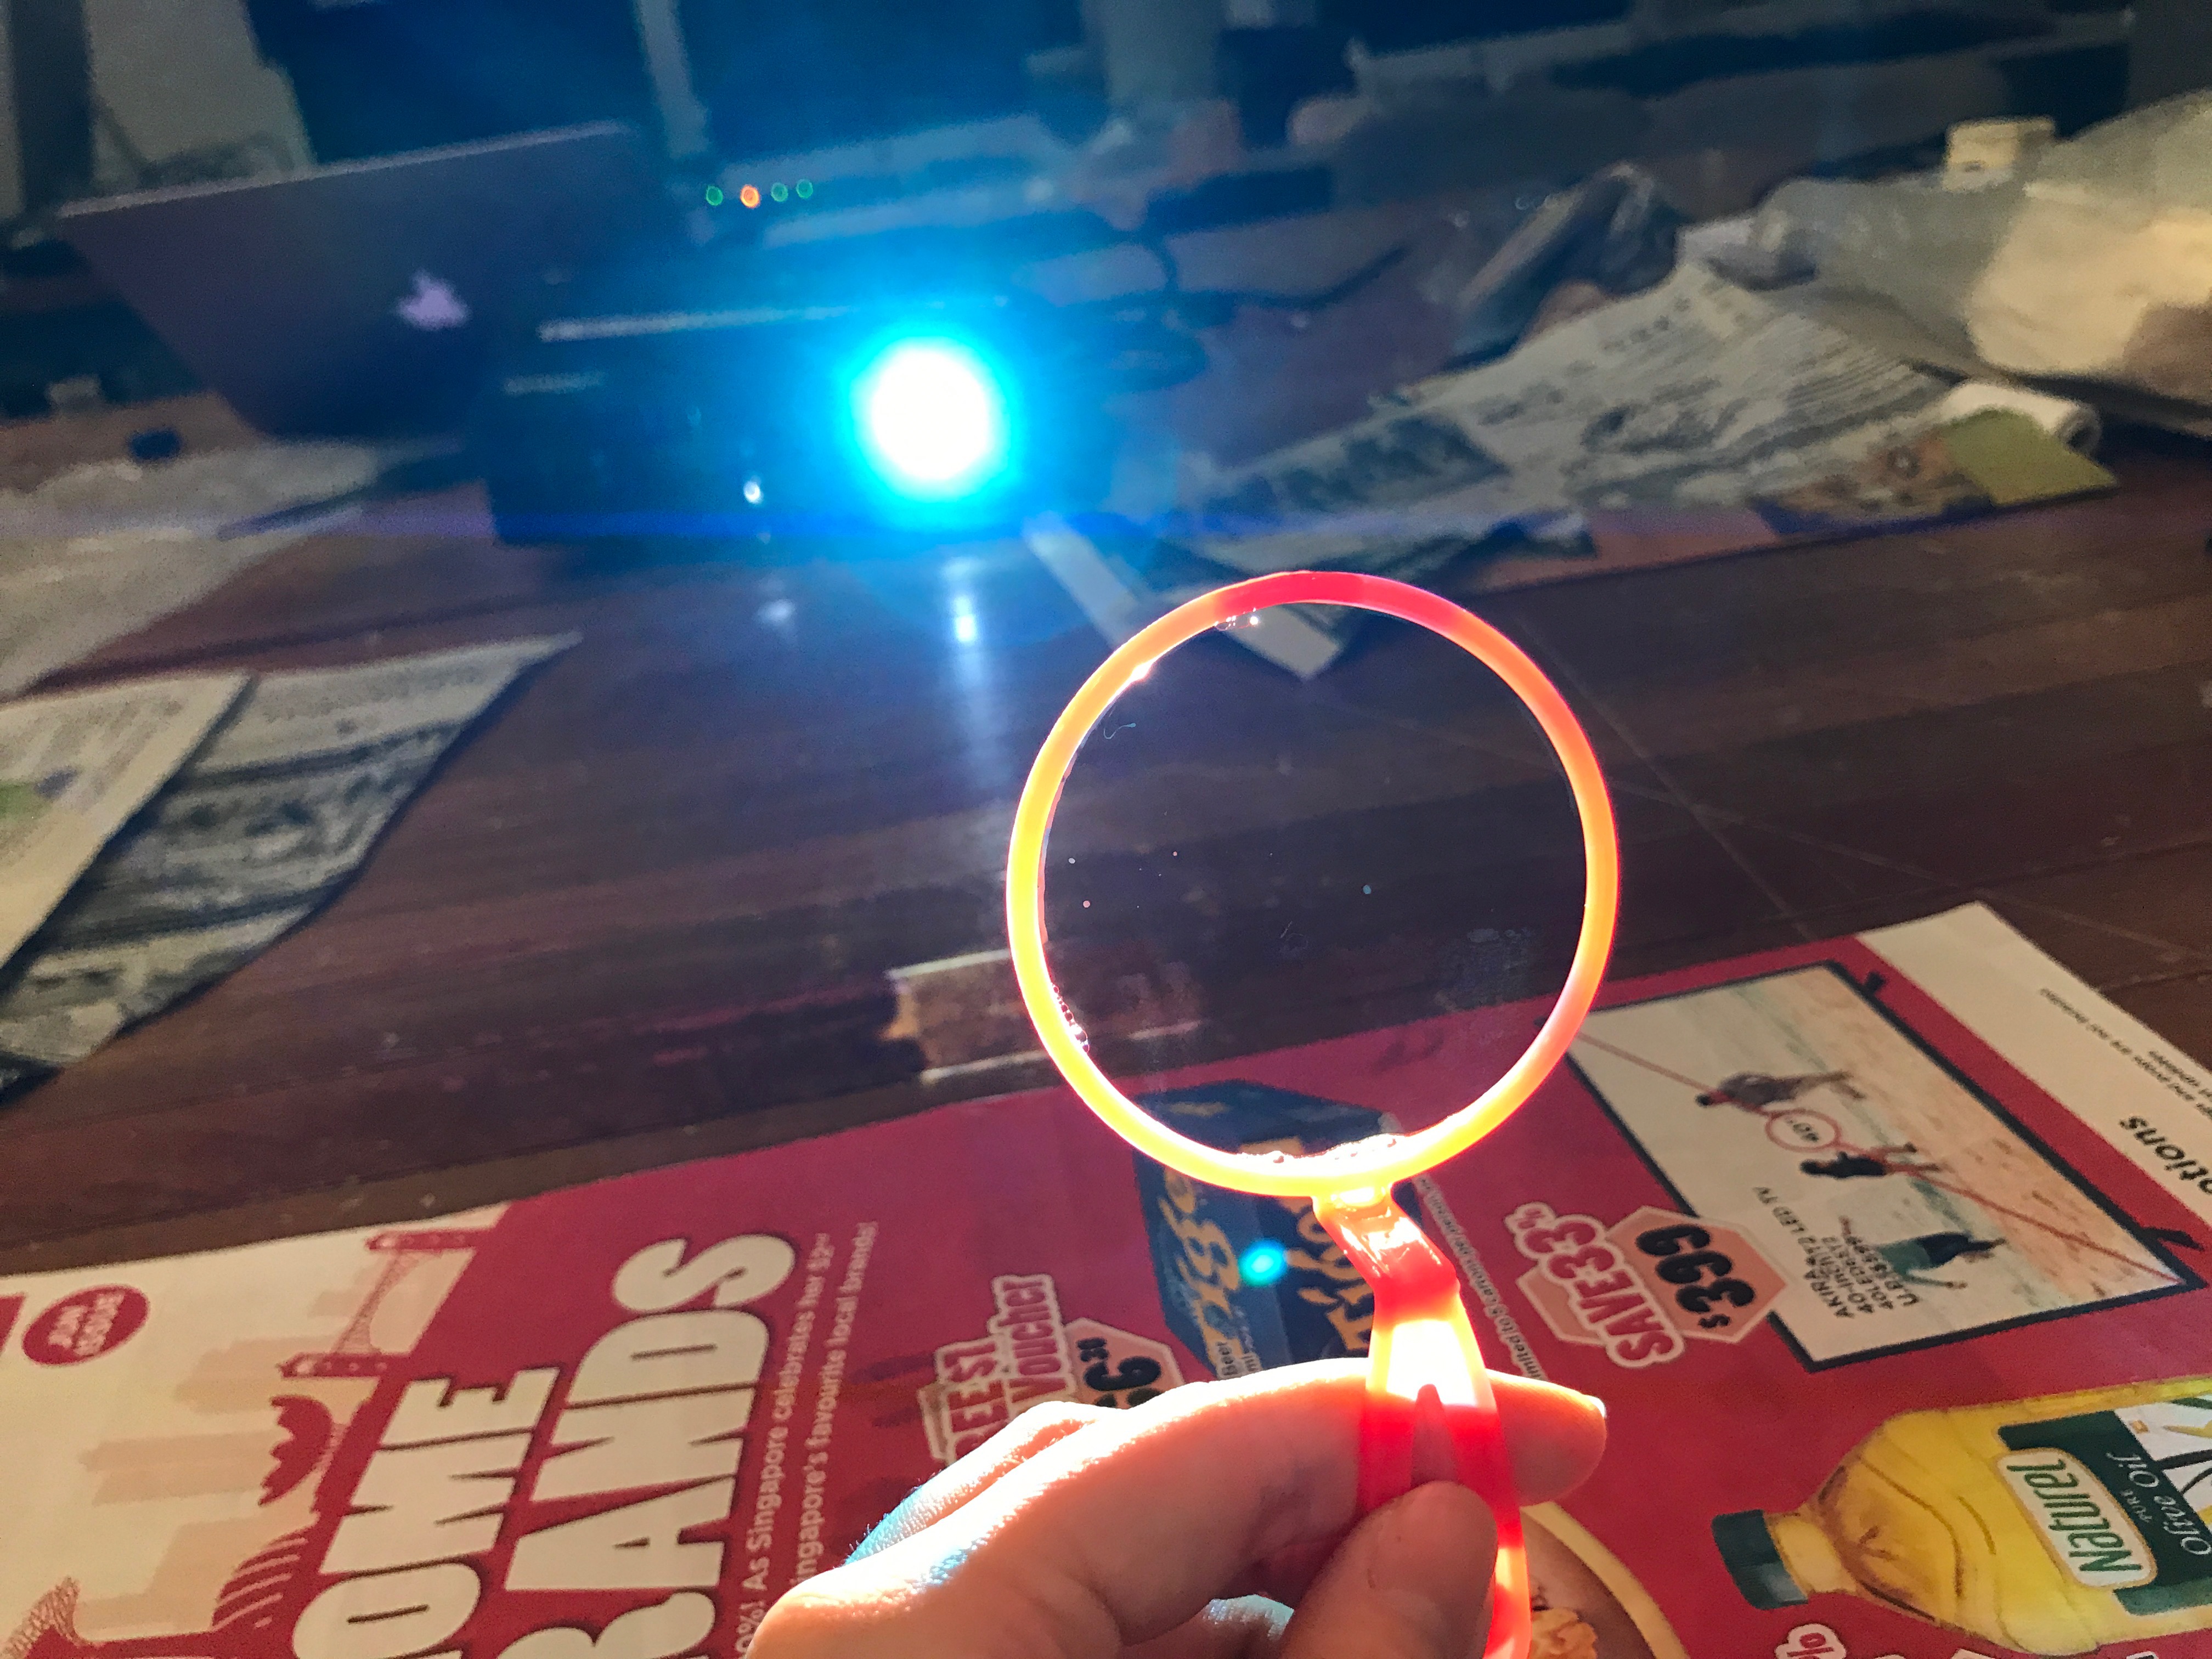
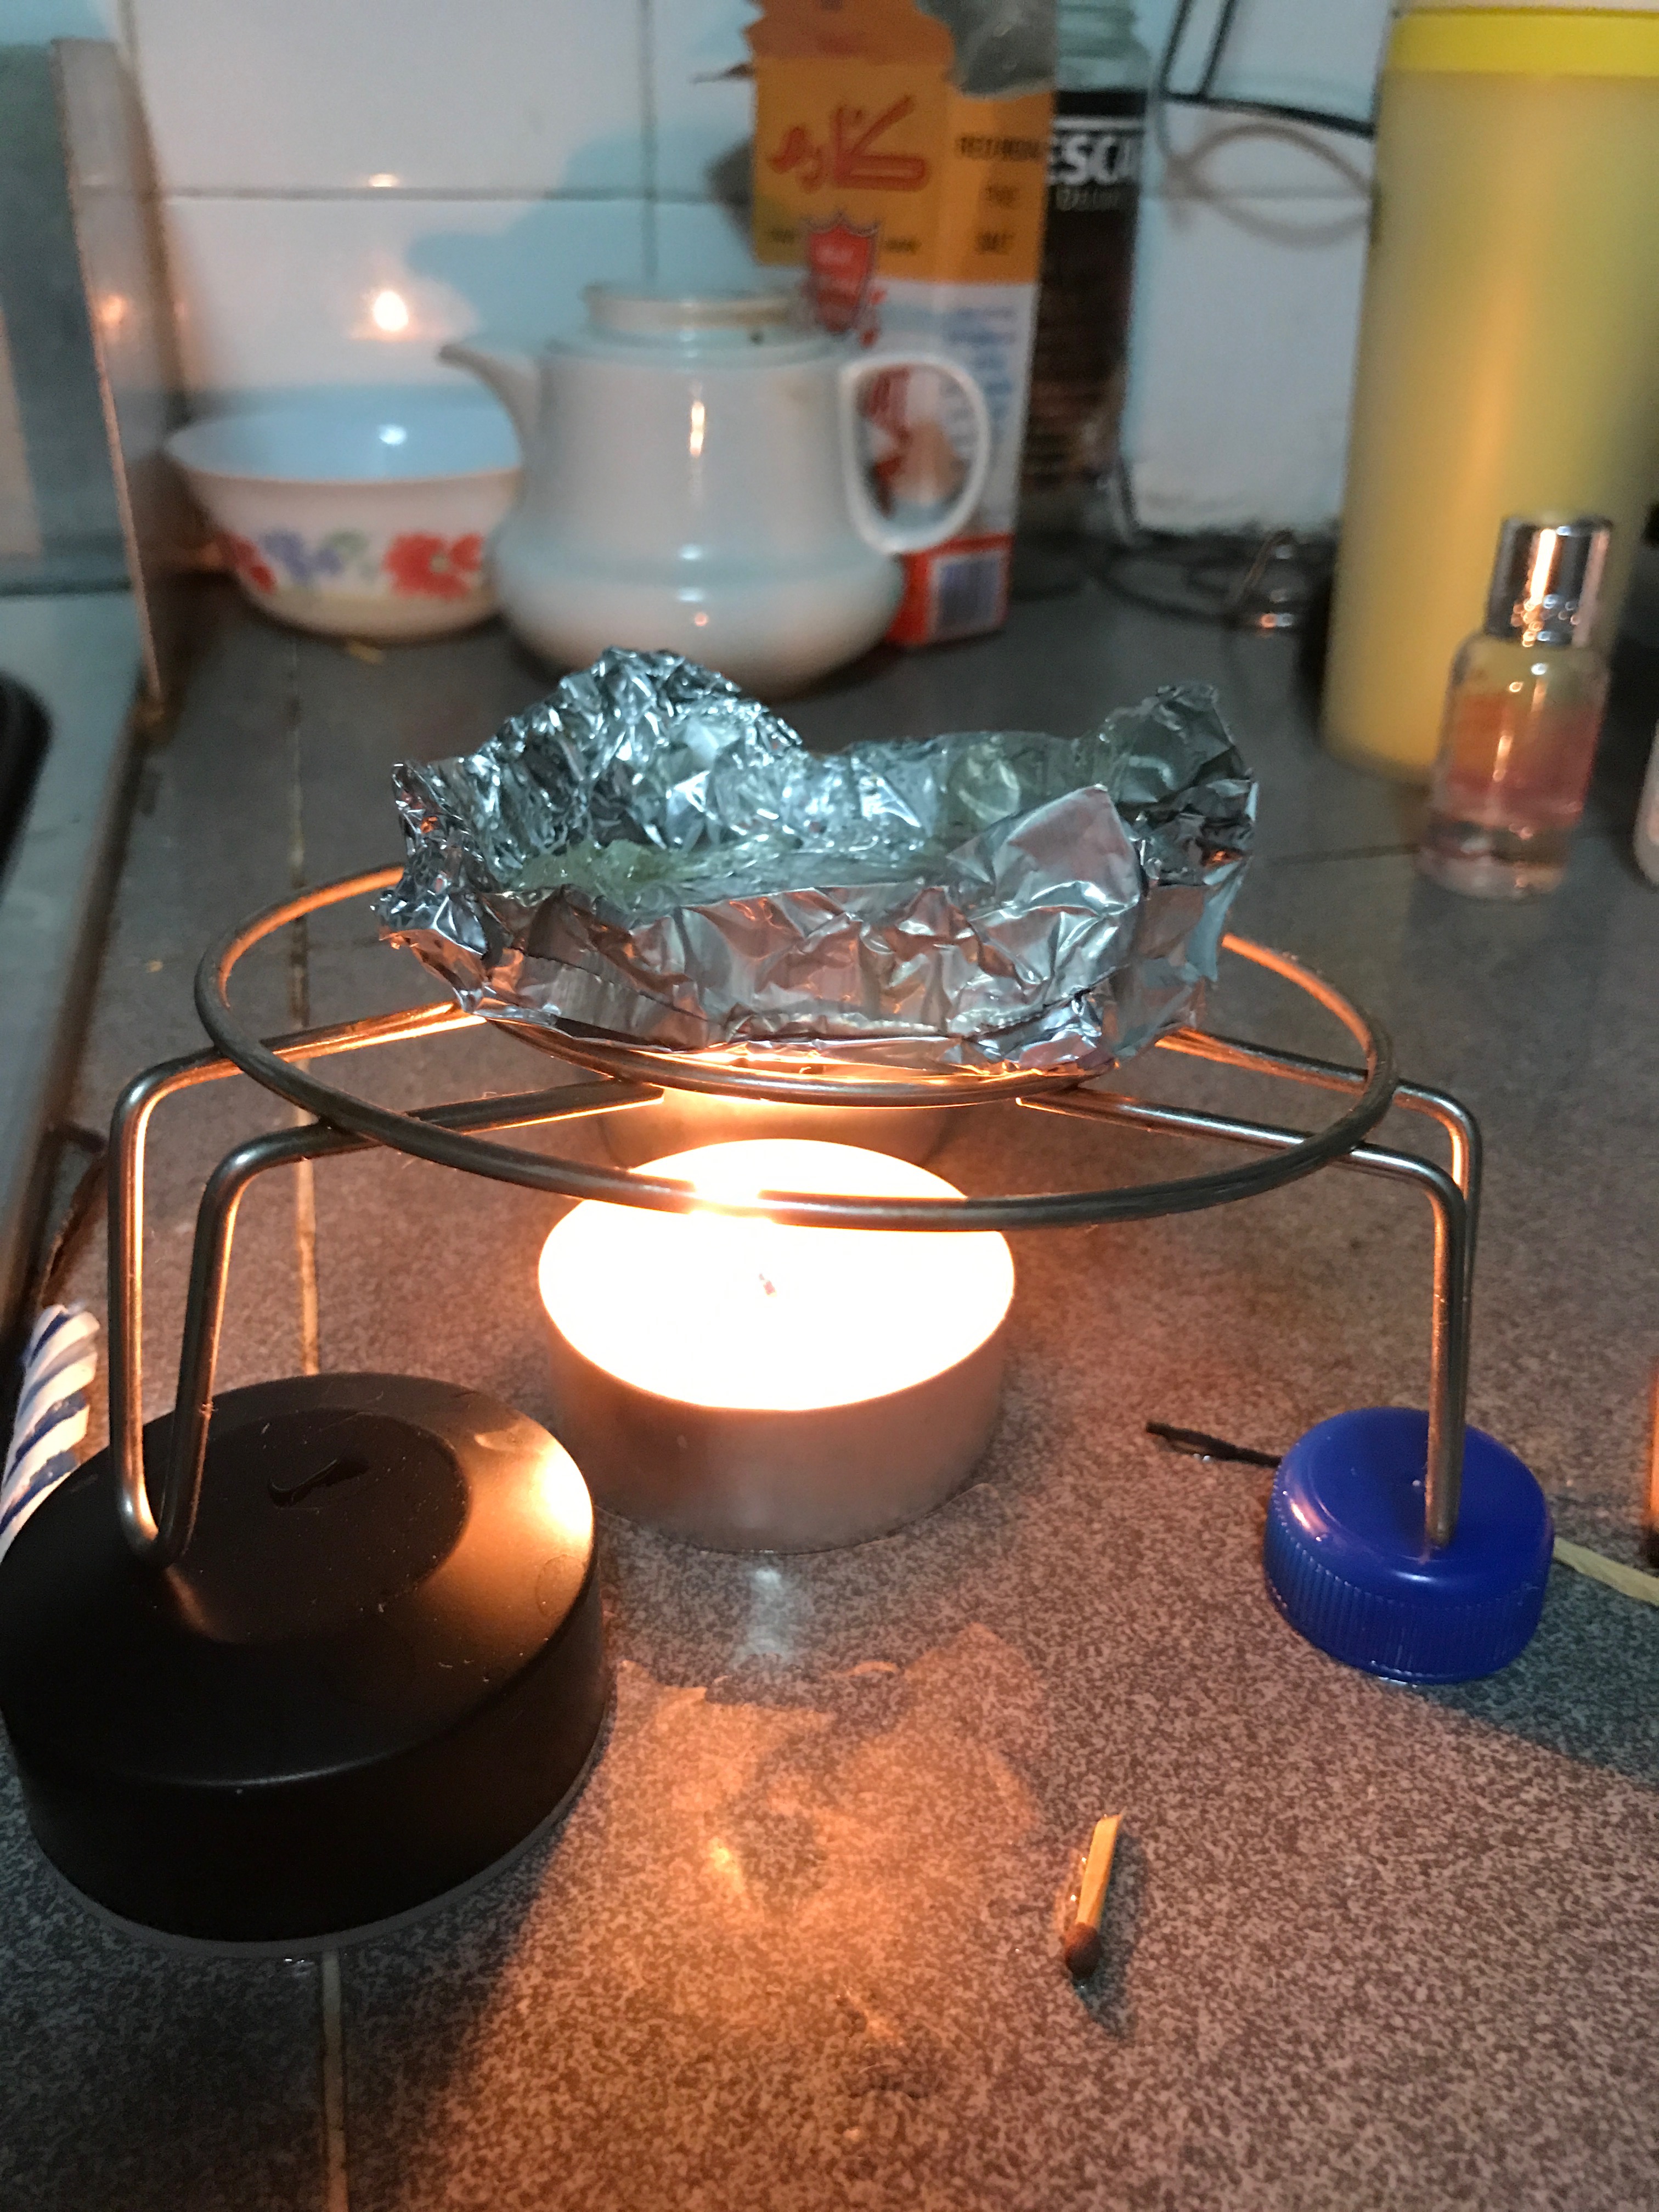
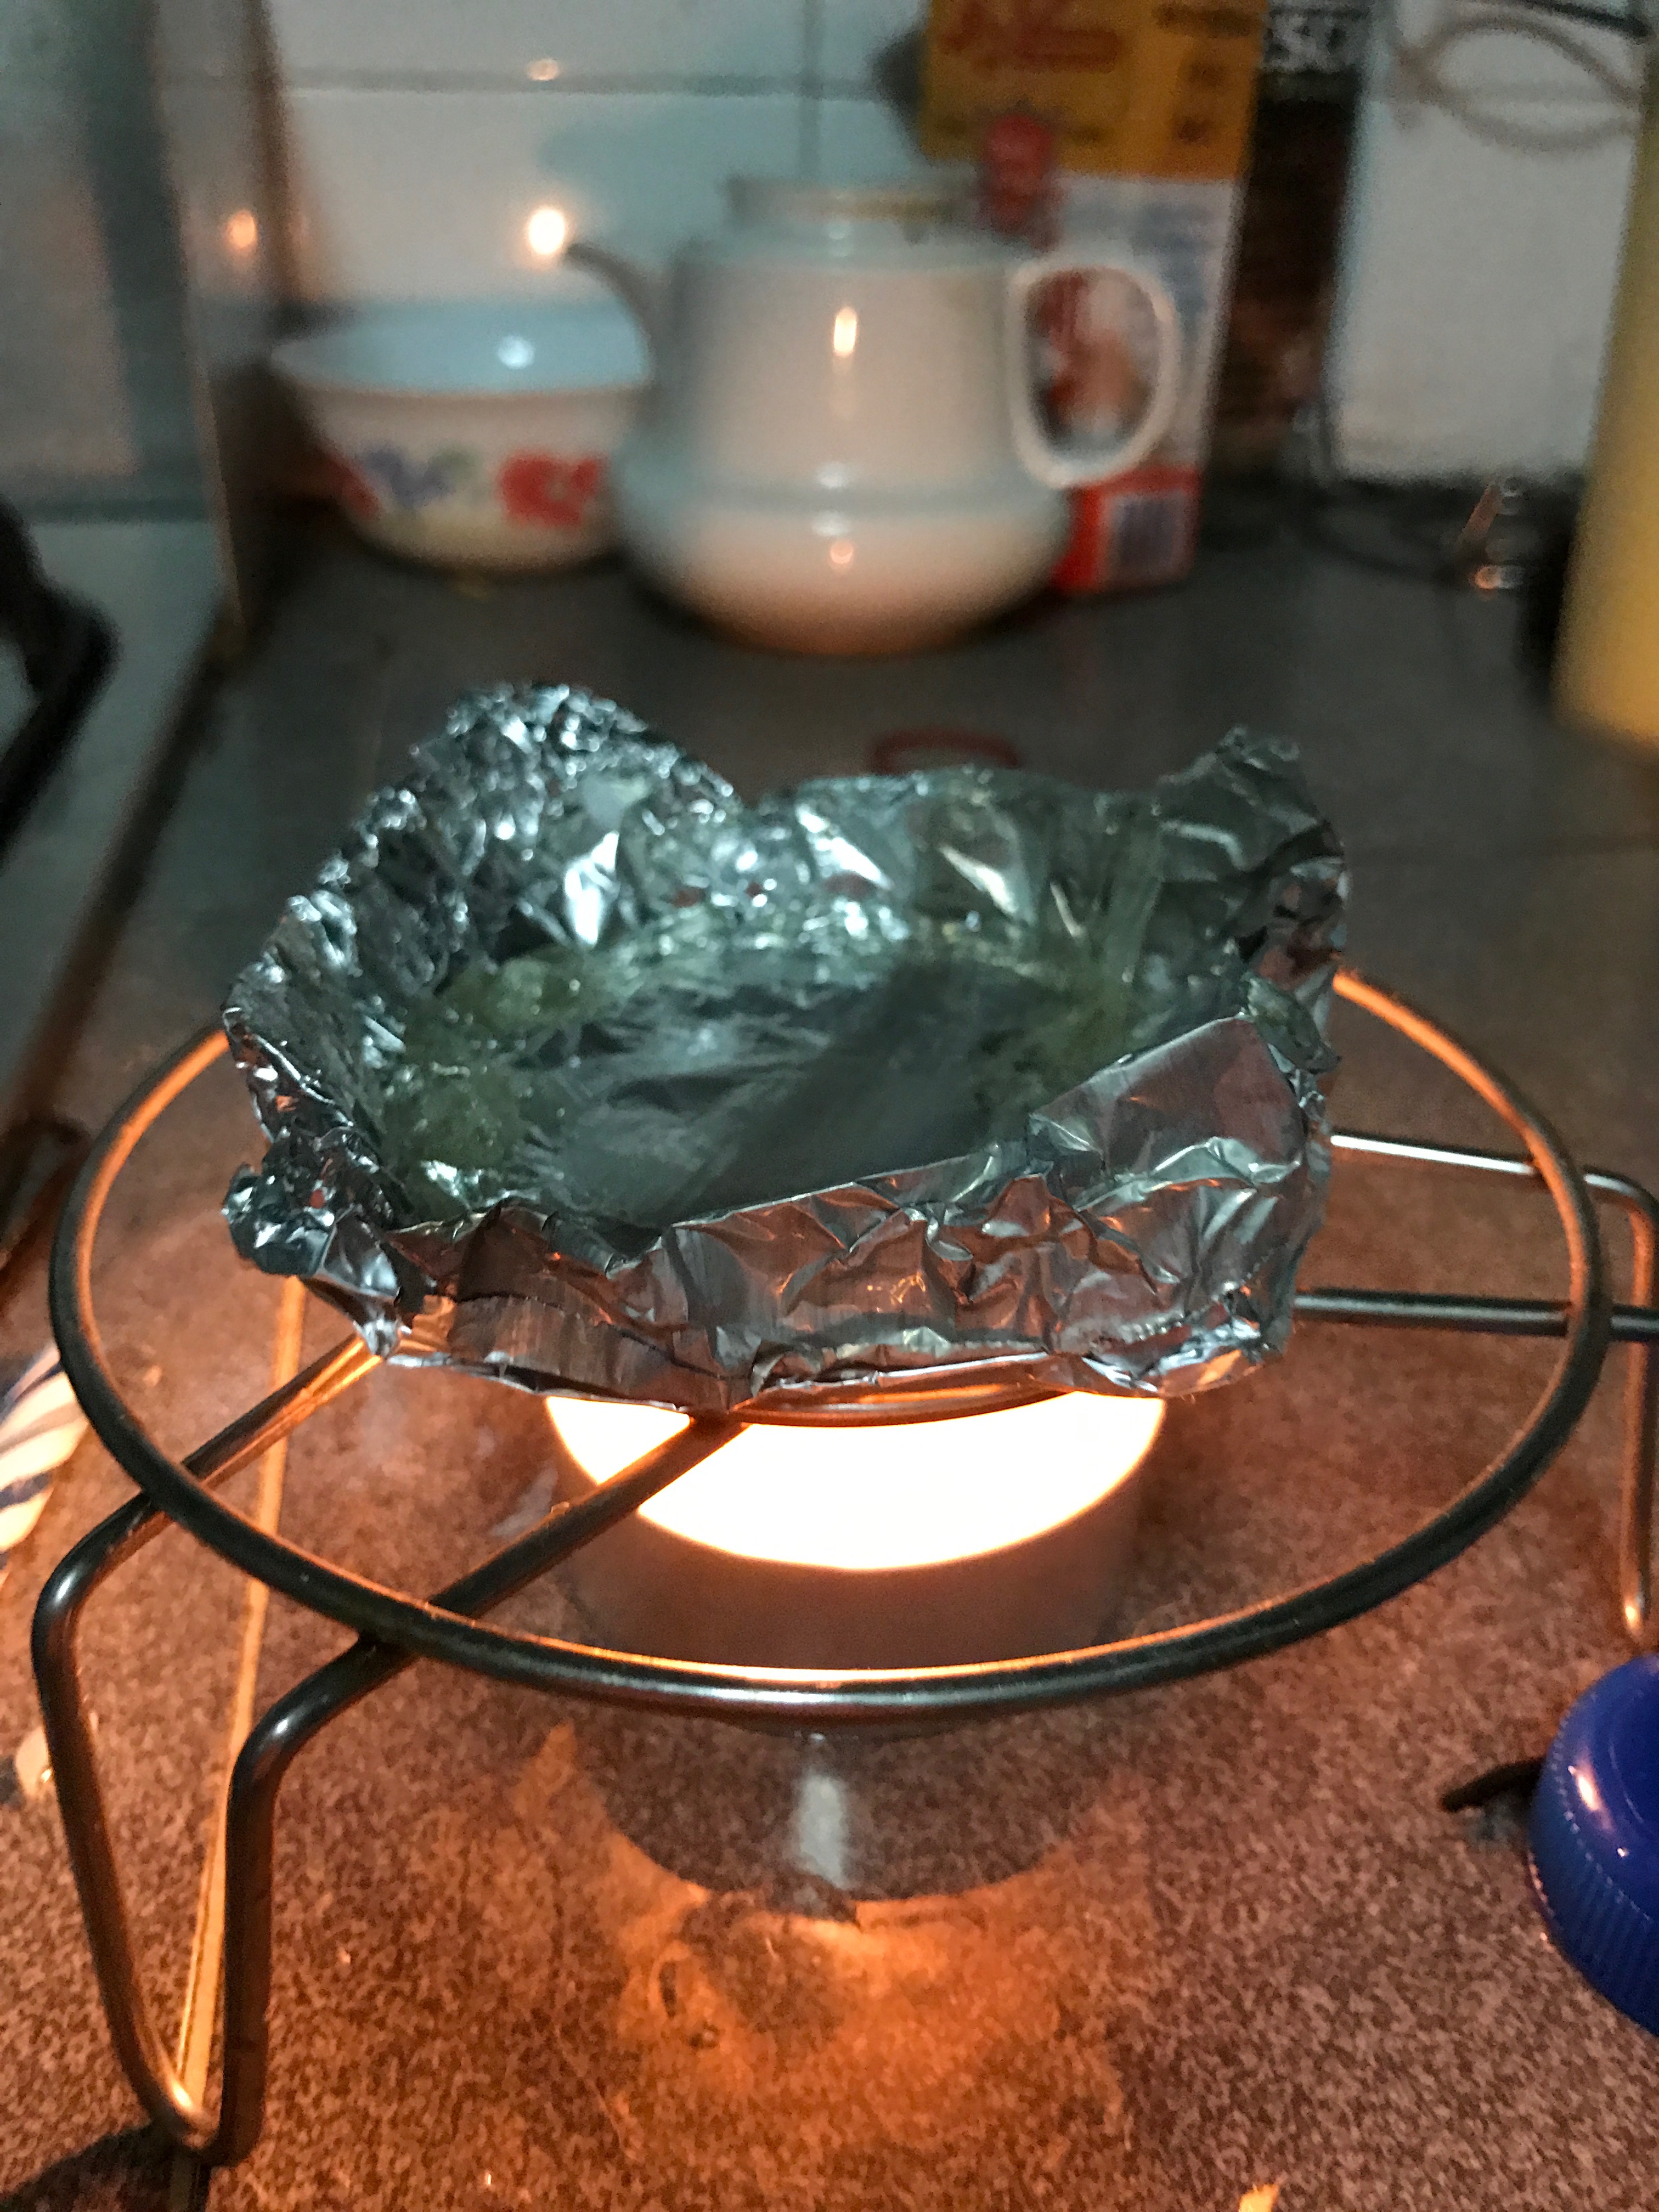
Experiment I (out of 2): Part 1
This experiment’s step by step tutorial was taken from here.
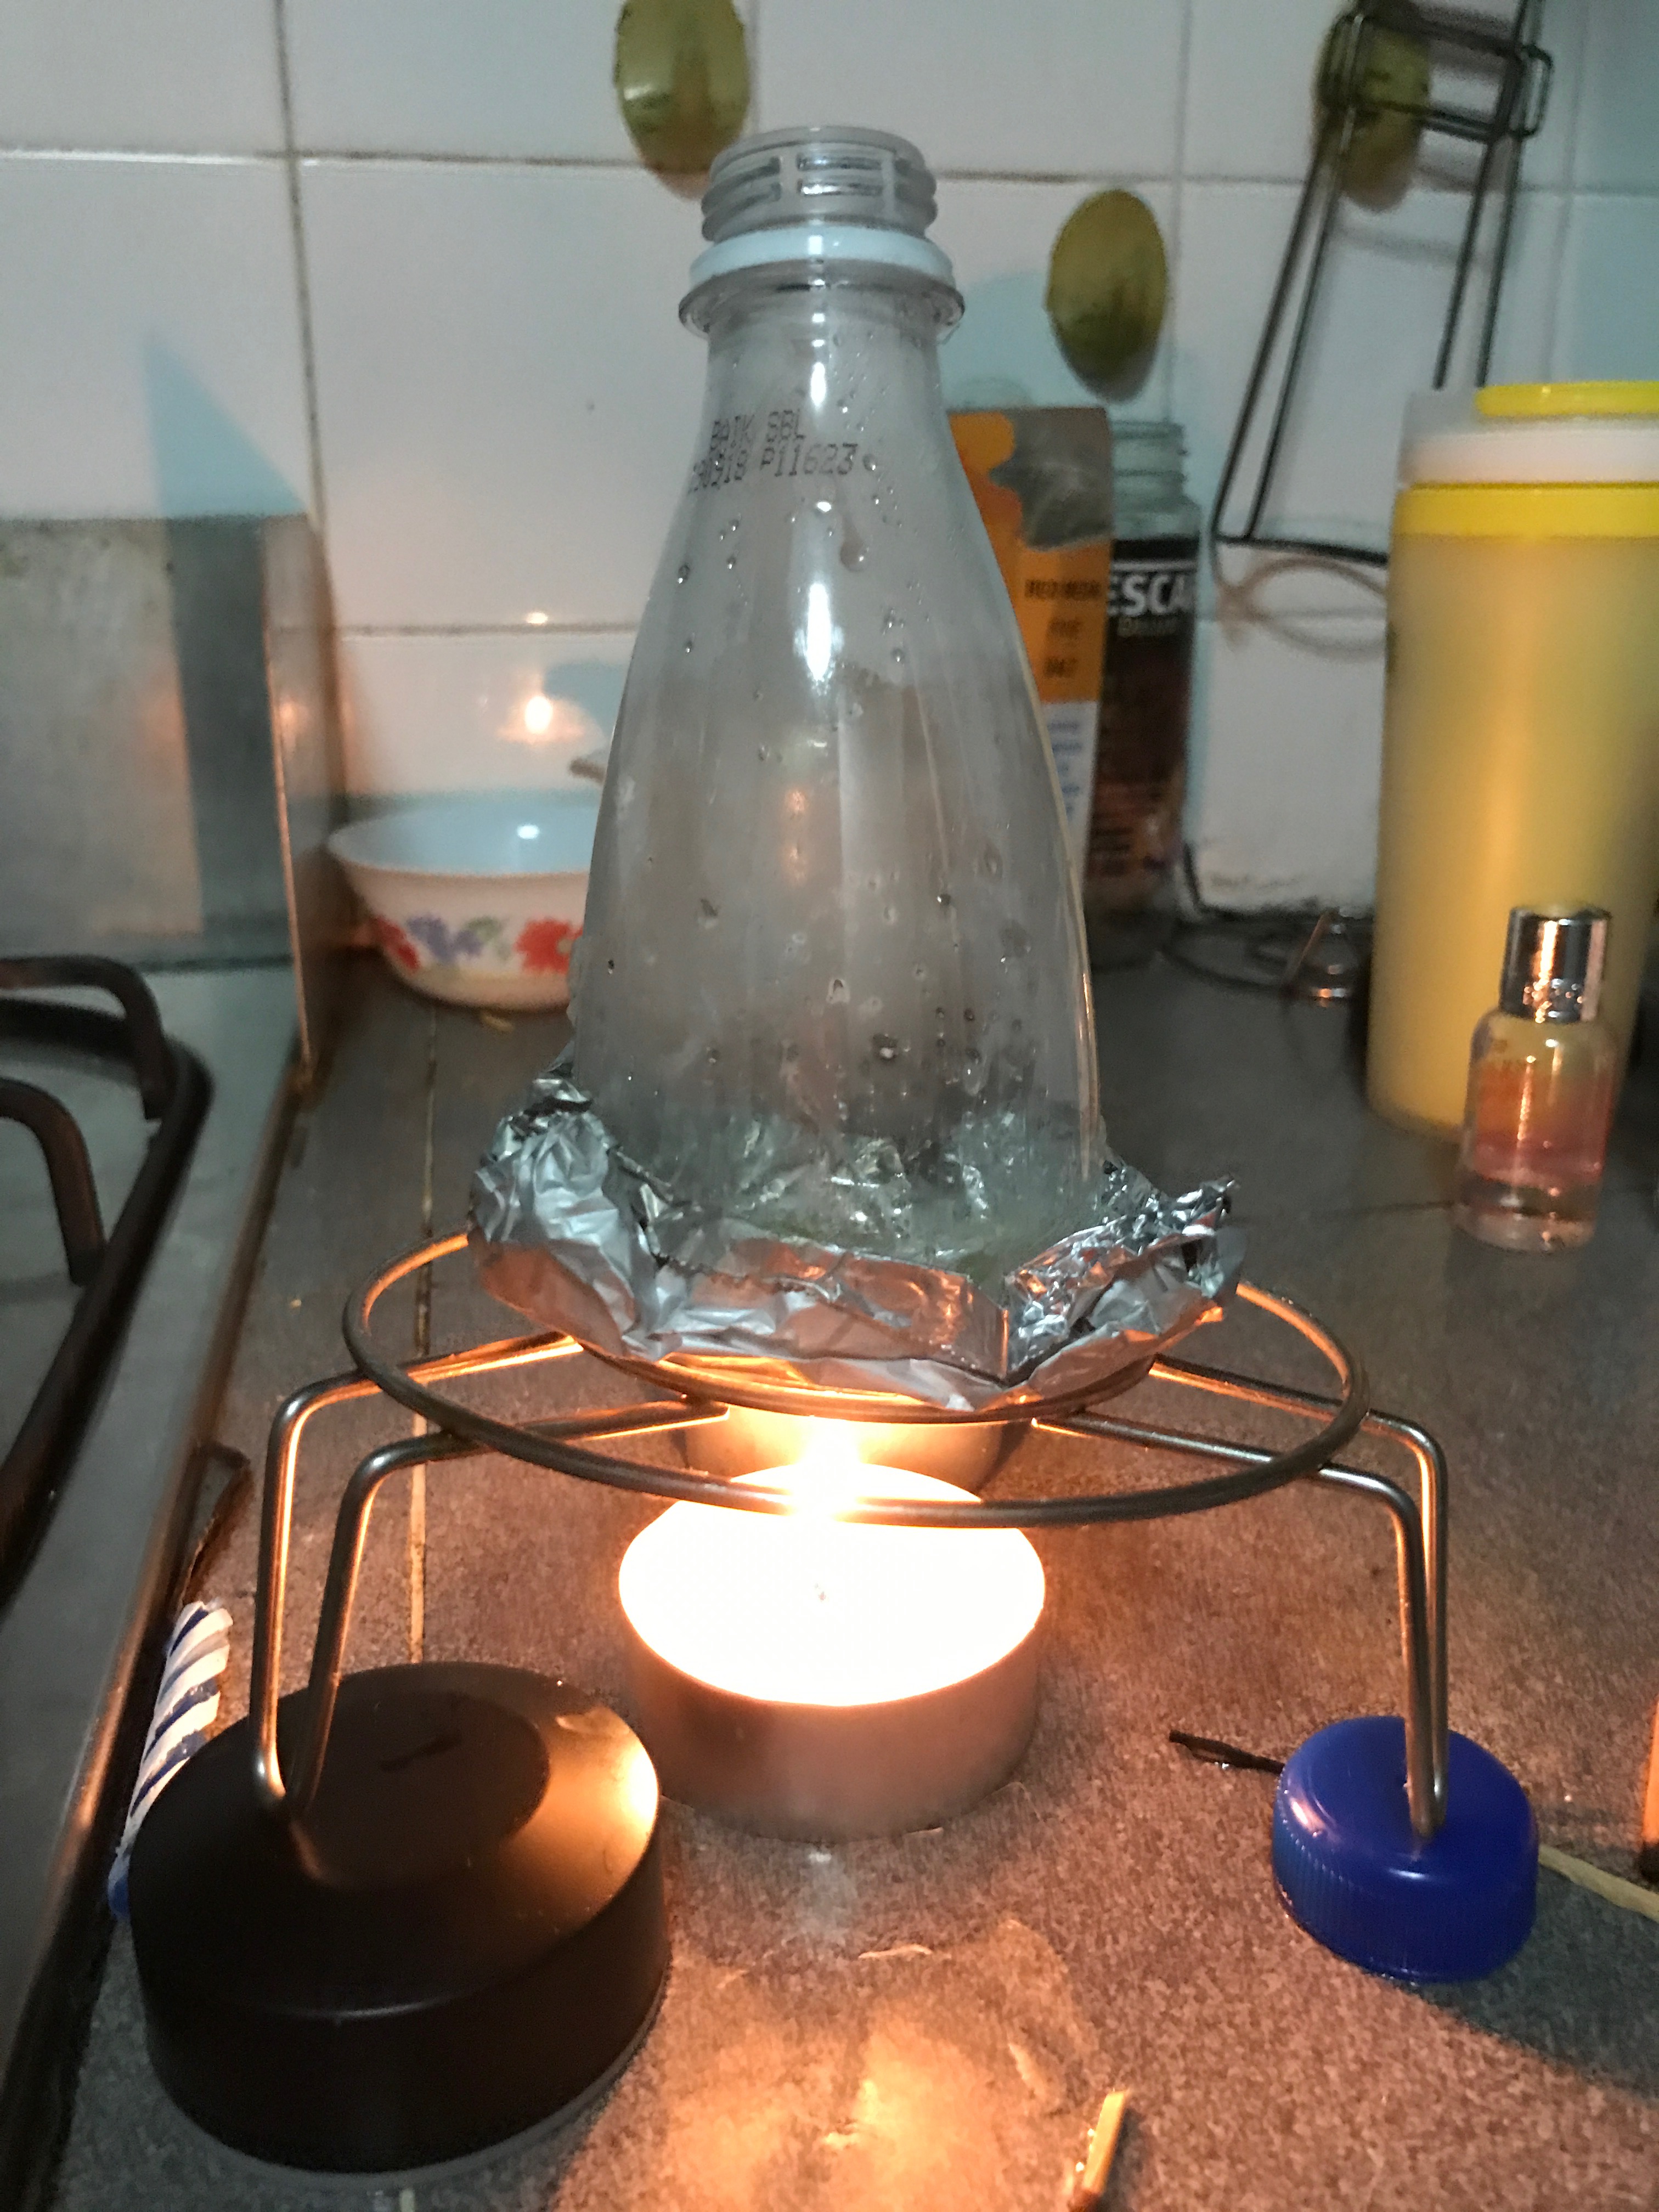
Experiment set-up
In brief, the experiment required,
1. Creation of fog juice (mixture of distilled water + glycerin)
2. Other materials: aluminium tray, heat source (candle), bottle ‘cover’
3. Place fog juice onto aluminium tray, and bottle cover over
4. Heat it up, fog should be evaporate from aluminium tray
As seen from the video, the resultant fog was near negligible – and in fact, this was the best videos I managed to get. Despite upping the glycerin amount in the fog juice, there were still no fog produced.
The experiment was a certified failure – how now? I would like to scrape the idea of utilising projection onto bubbles directly, and cut out the need for fog bubbles.
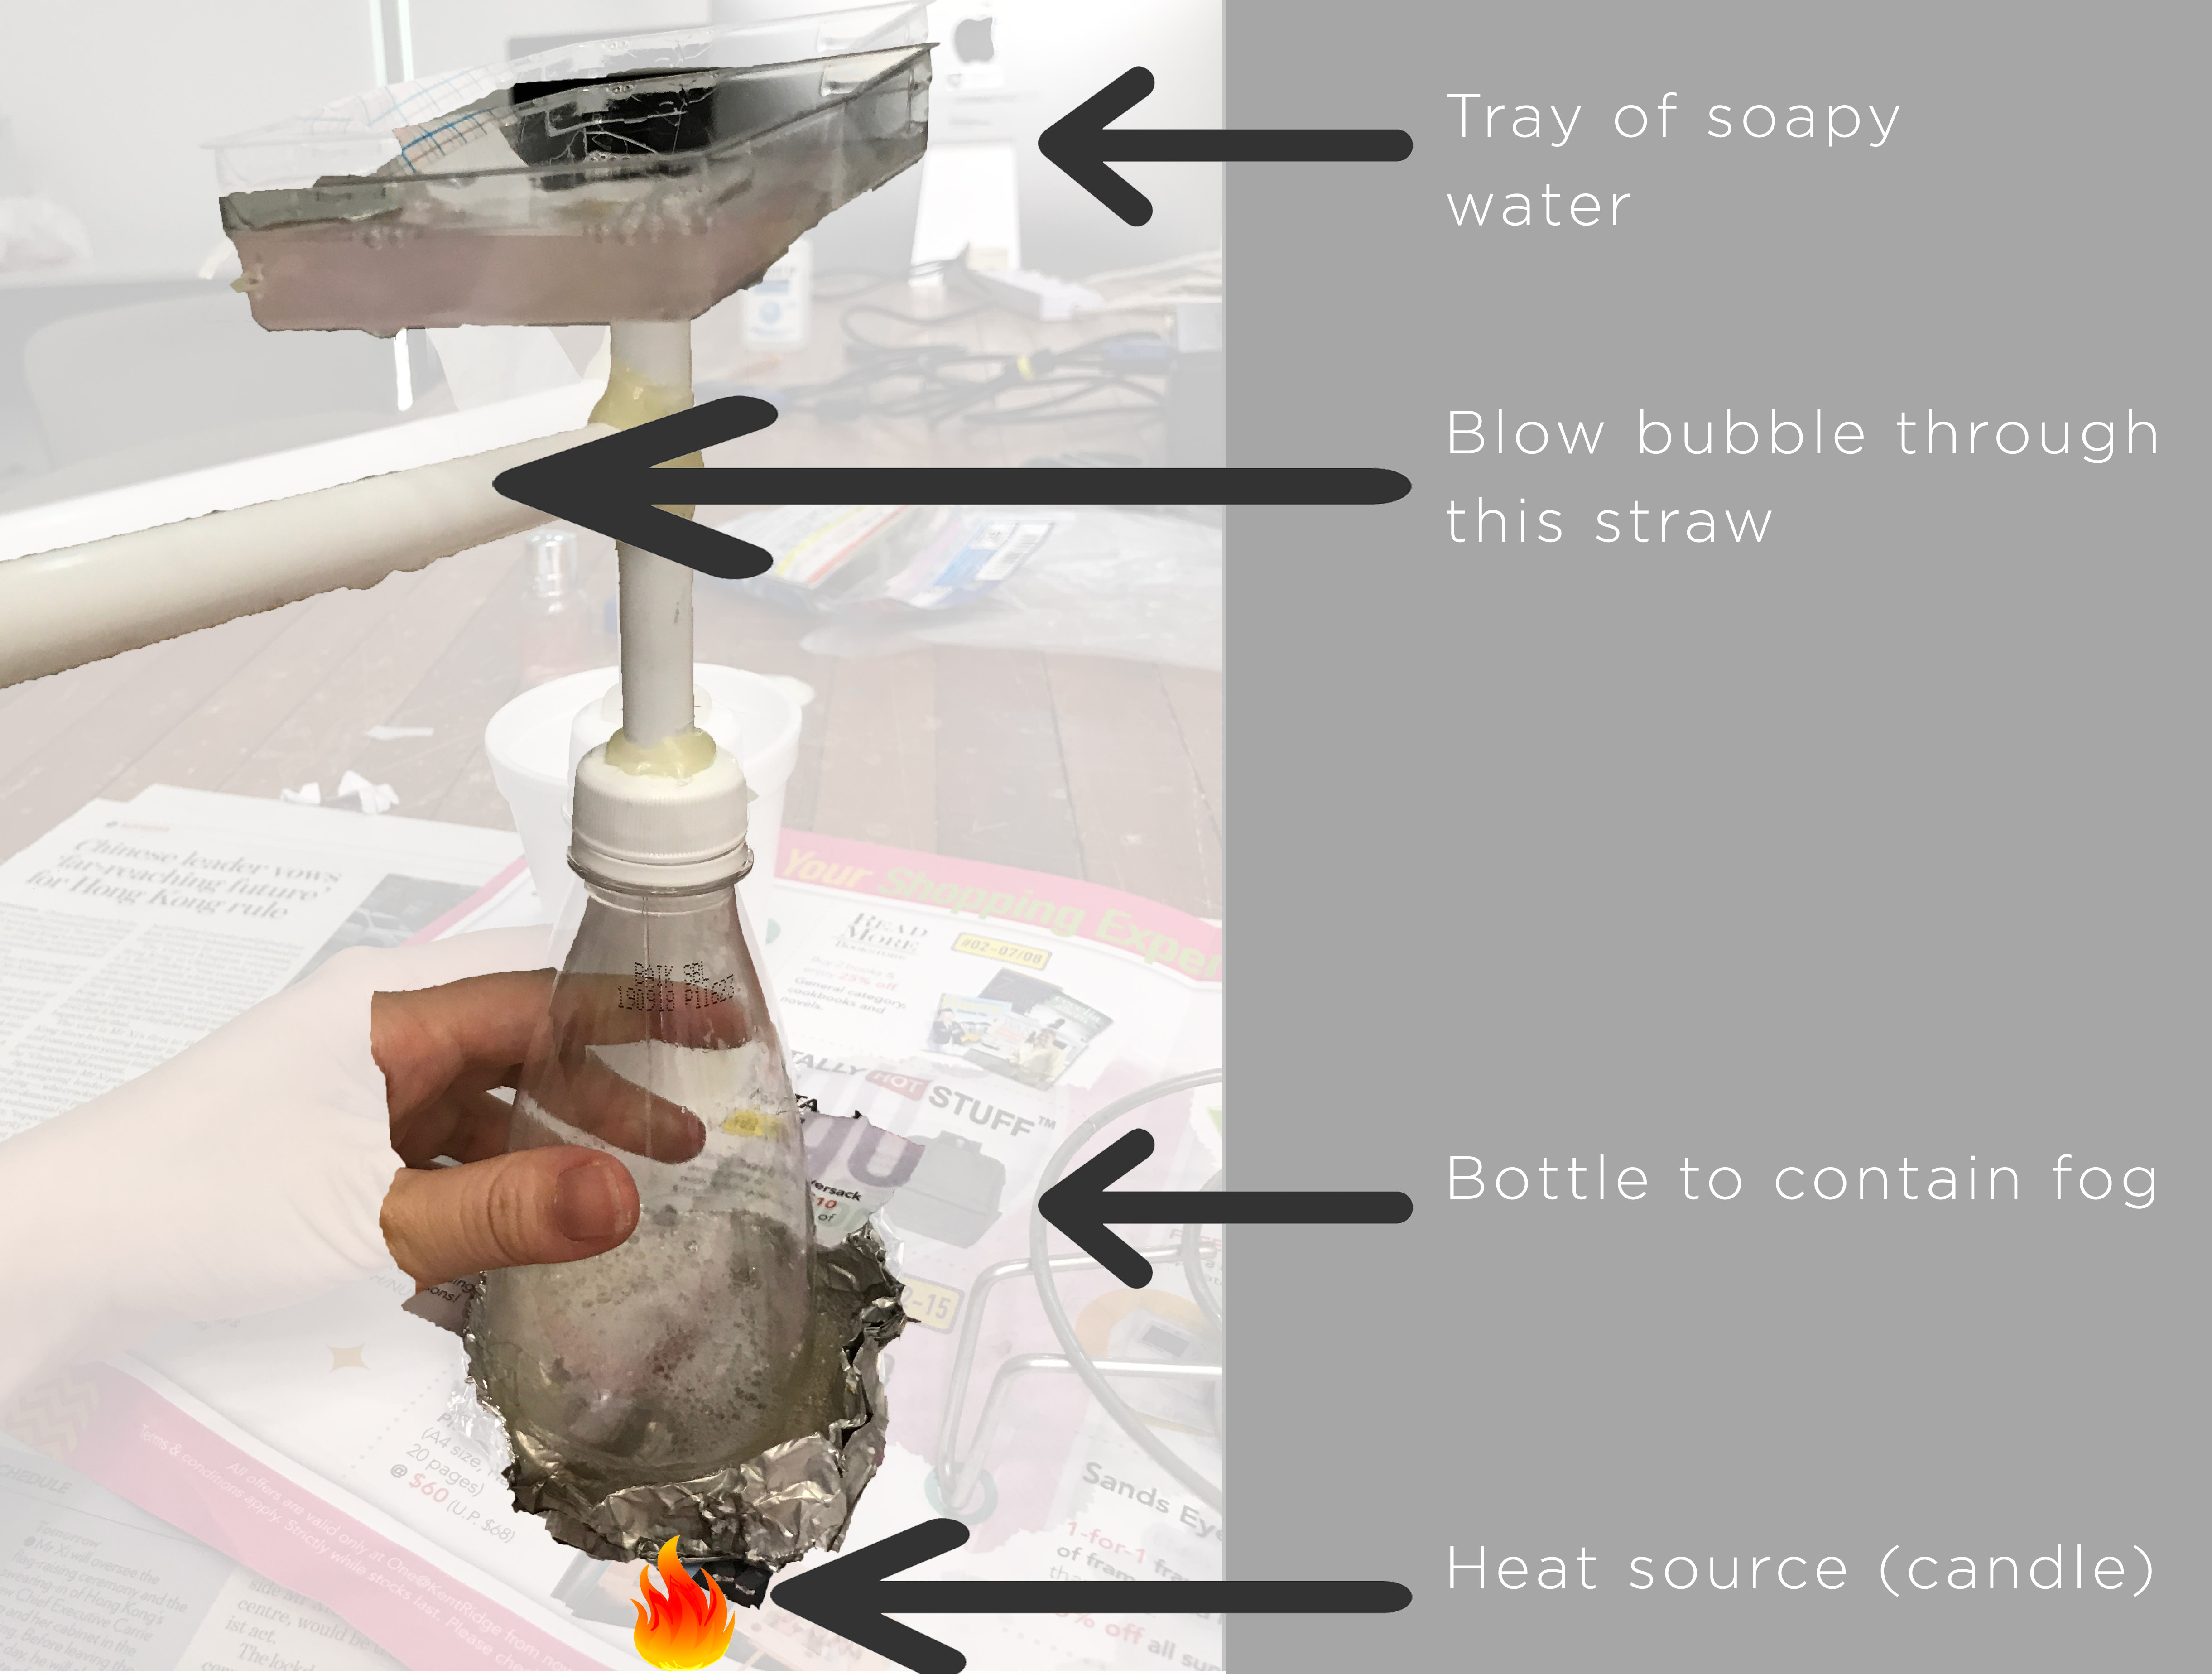
Experiment I Part 2
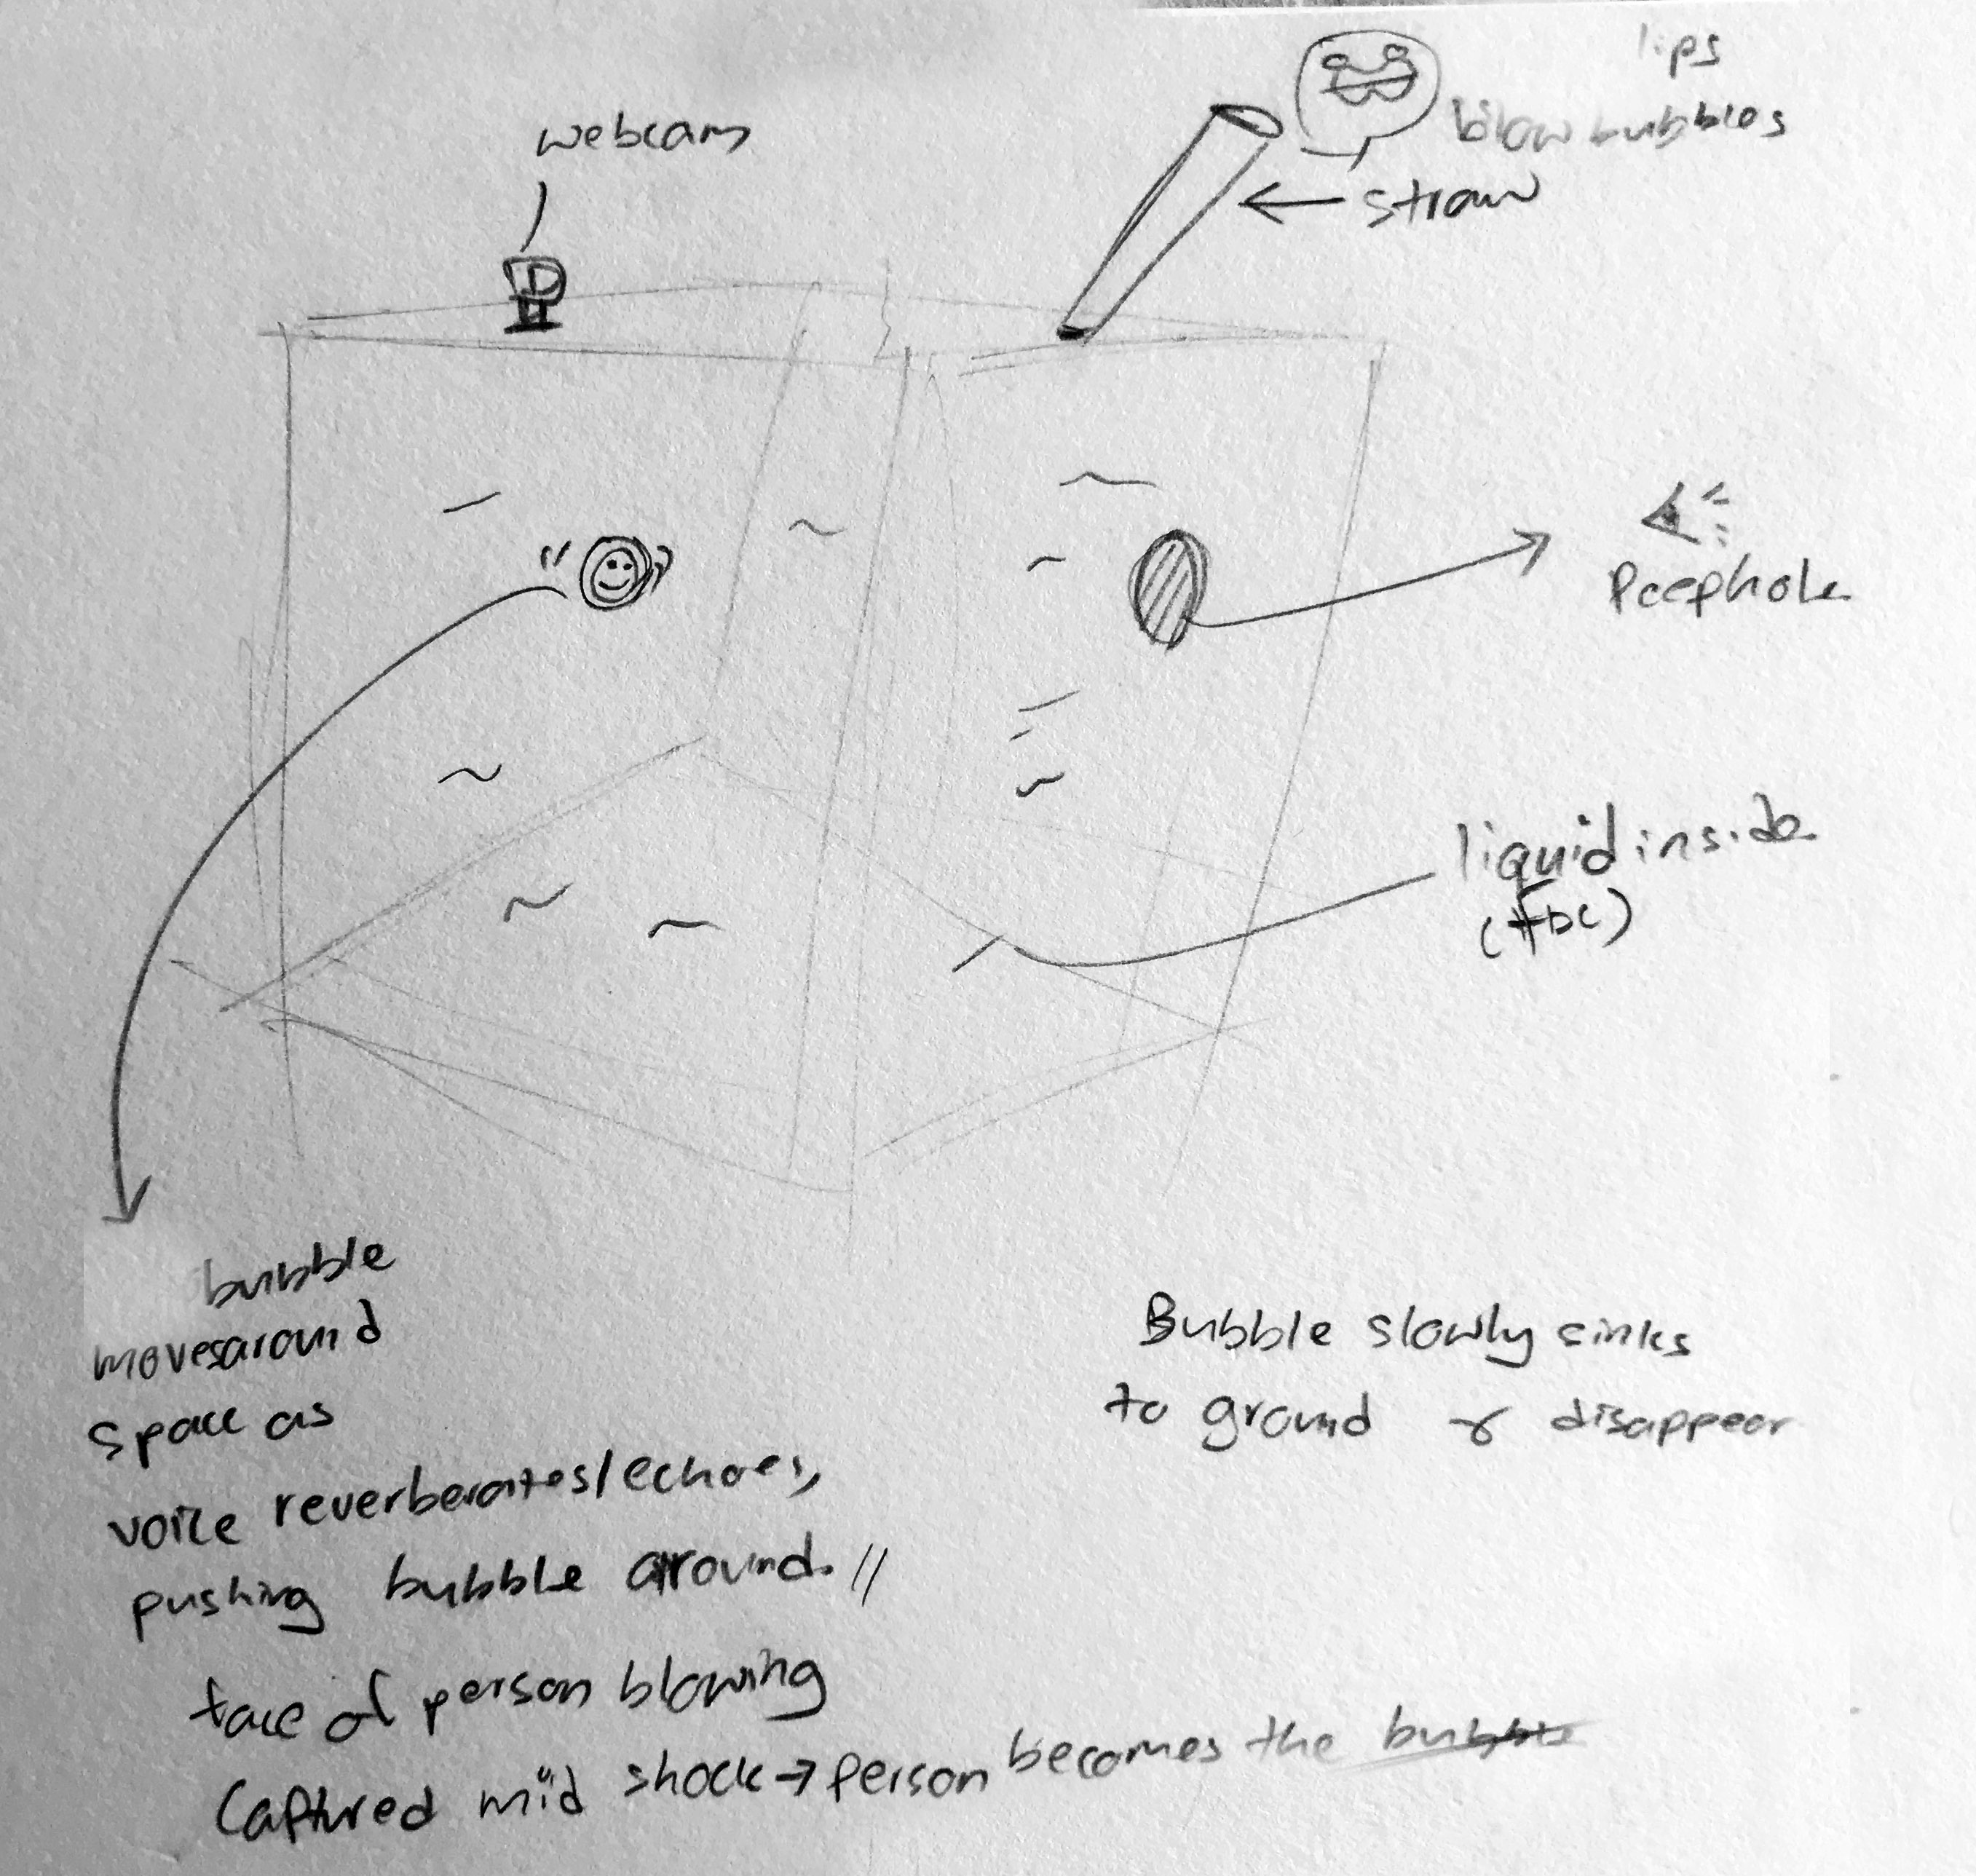
Rough sketch of experimental set-upEntire set-up (without heat source supposedly under the aluminium tray)
My original intention was just to combine bubble blowing by the user, and create a singular platform for one single bubble to stay on. This bubble ought to be a fog bubble, with fog blown into it.
After creating the fog bubble, projection light would beam images on it and create the effect I required.
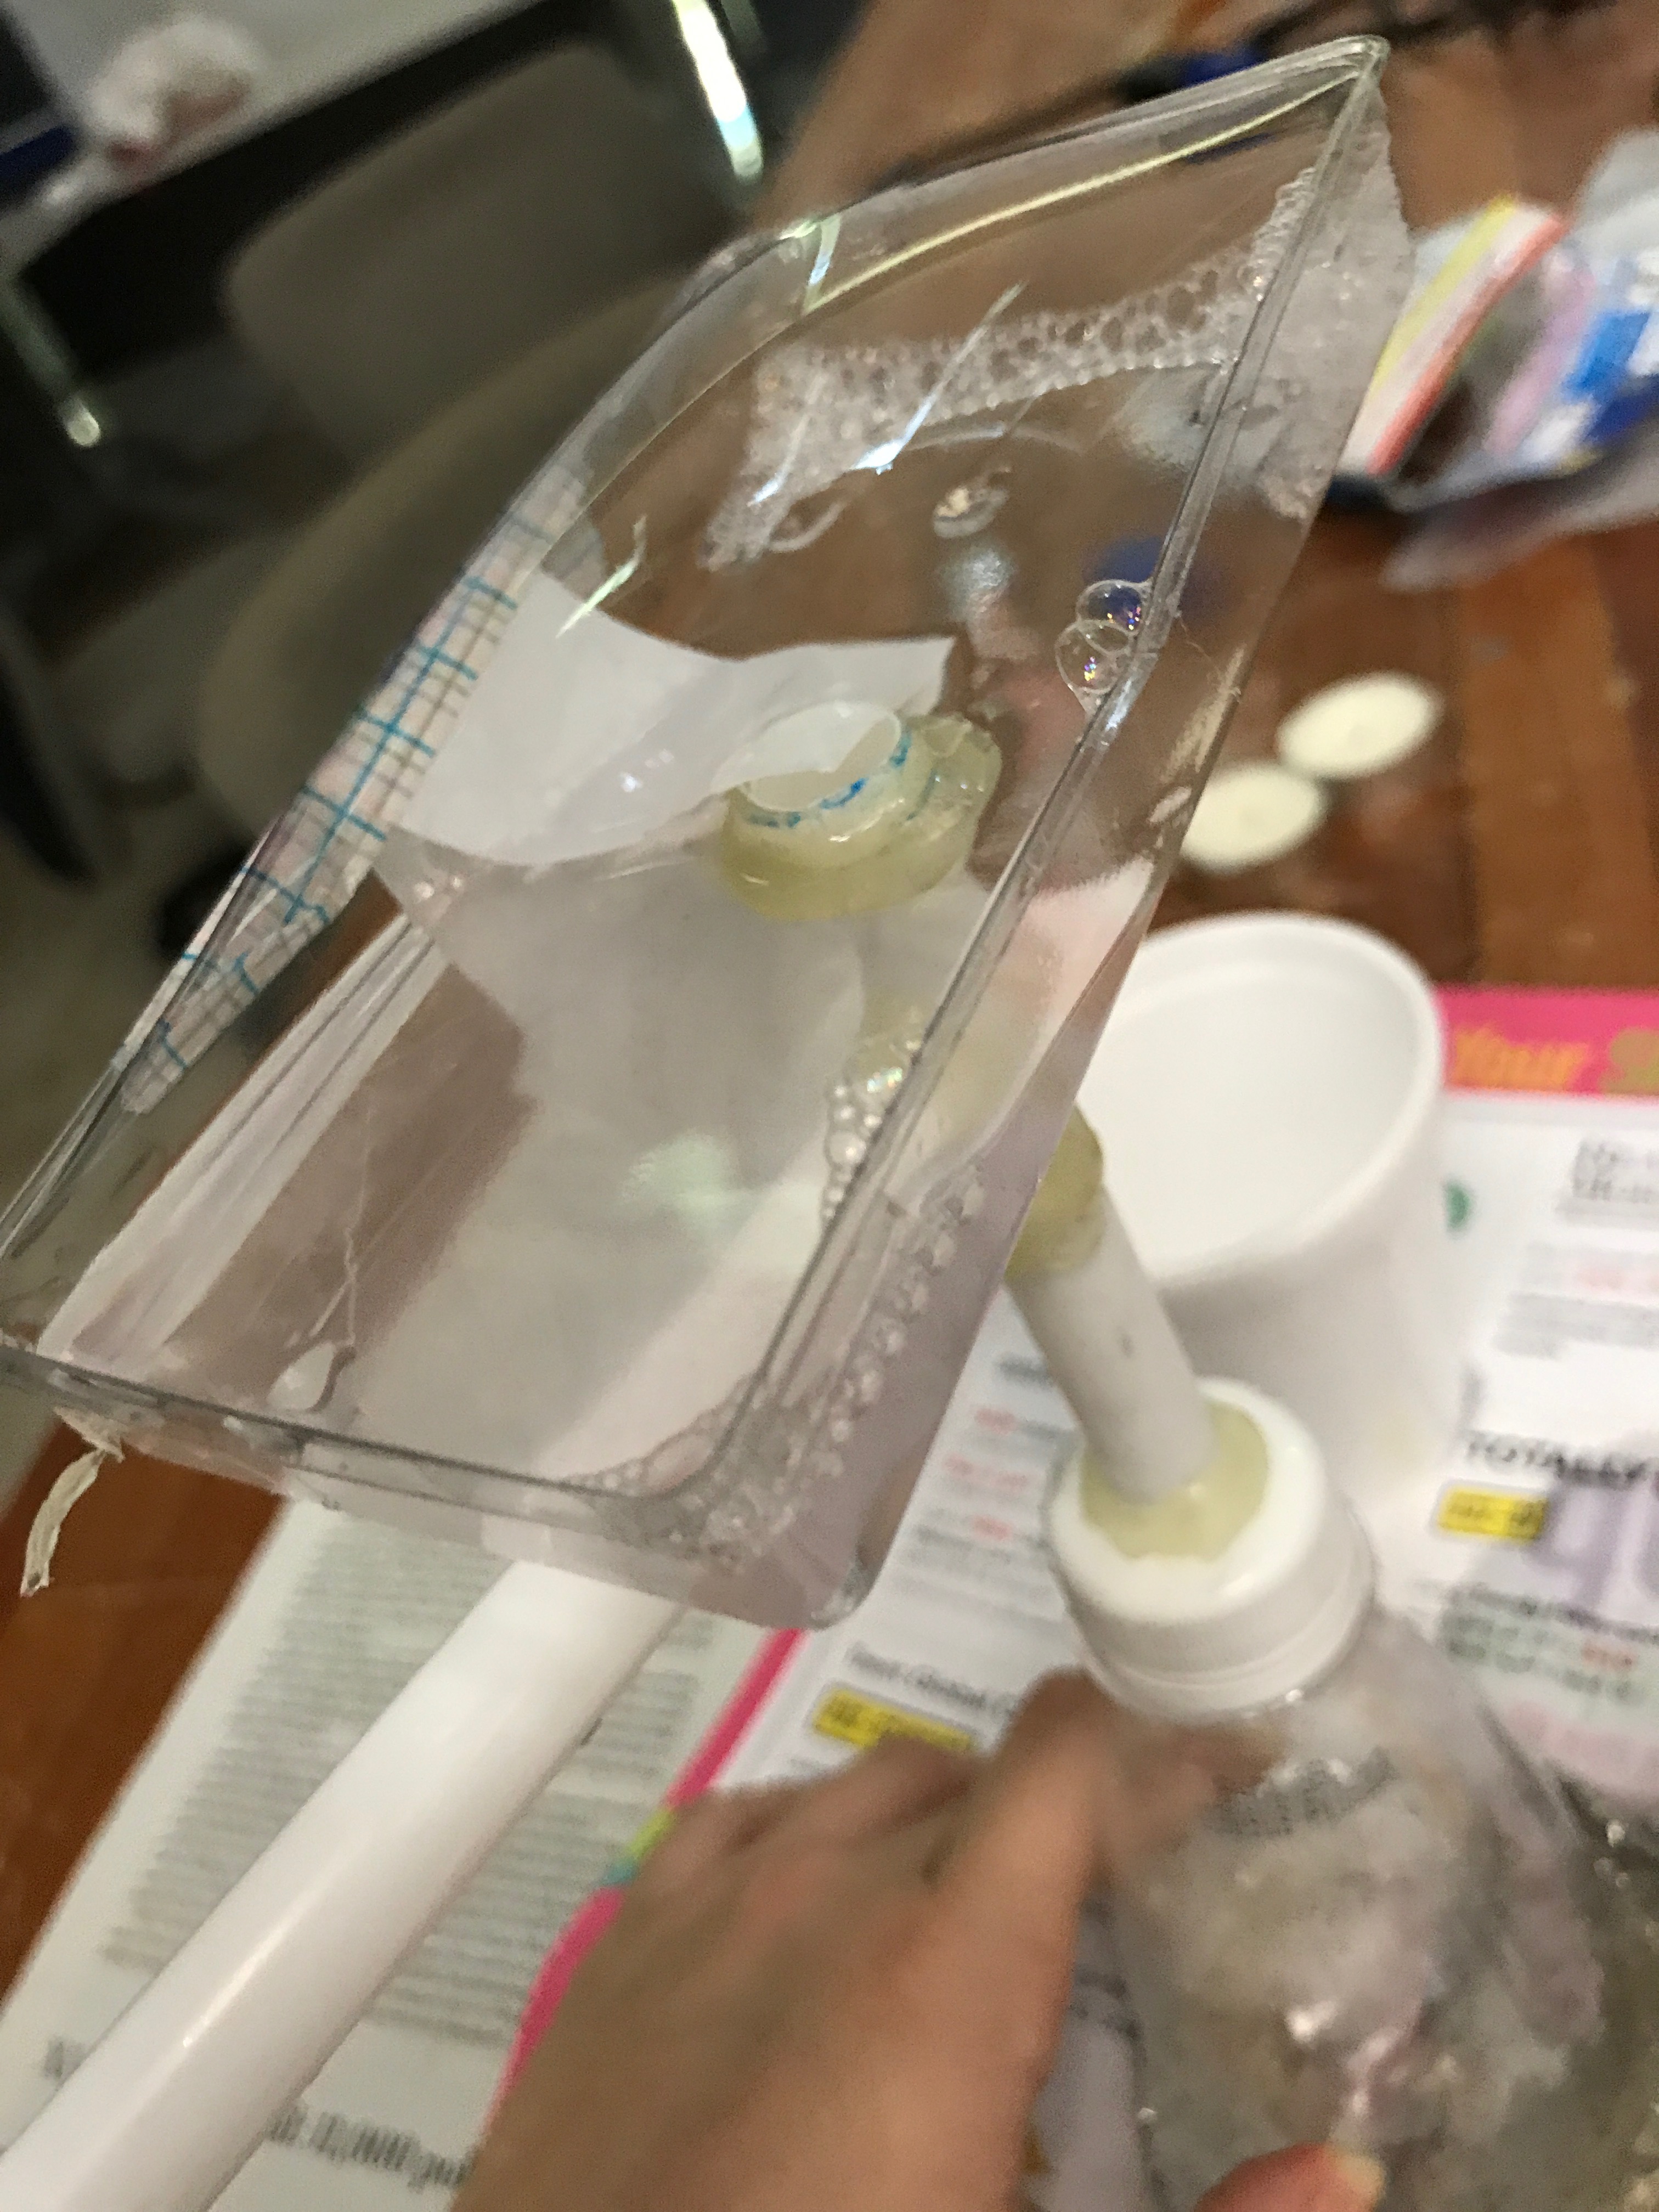
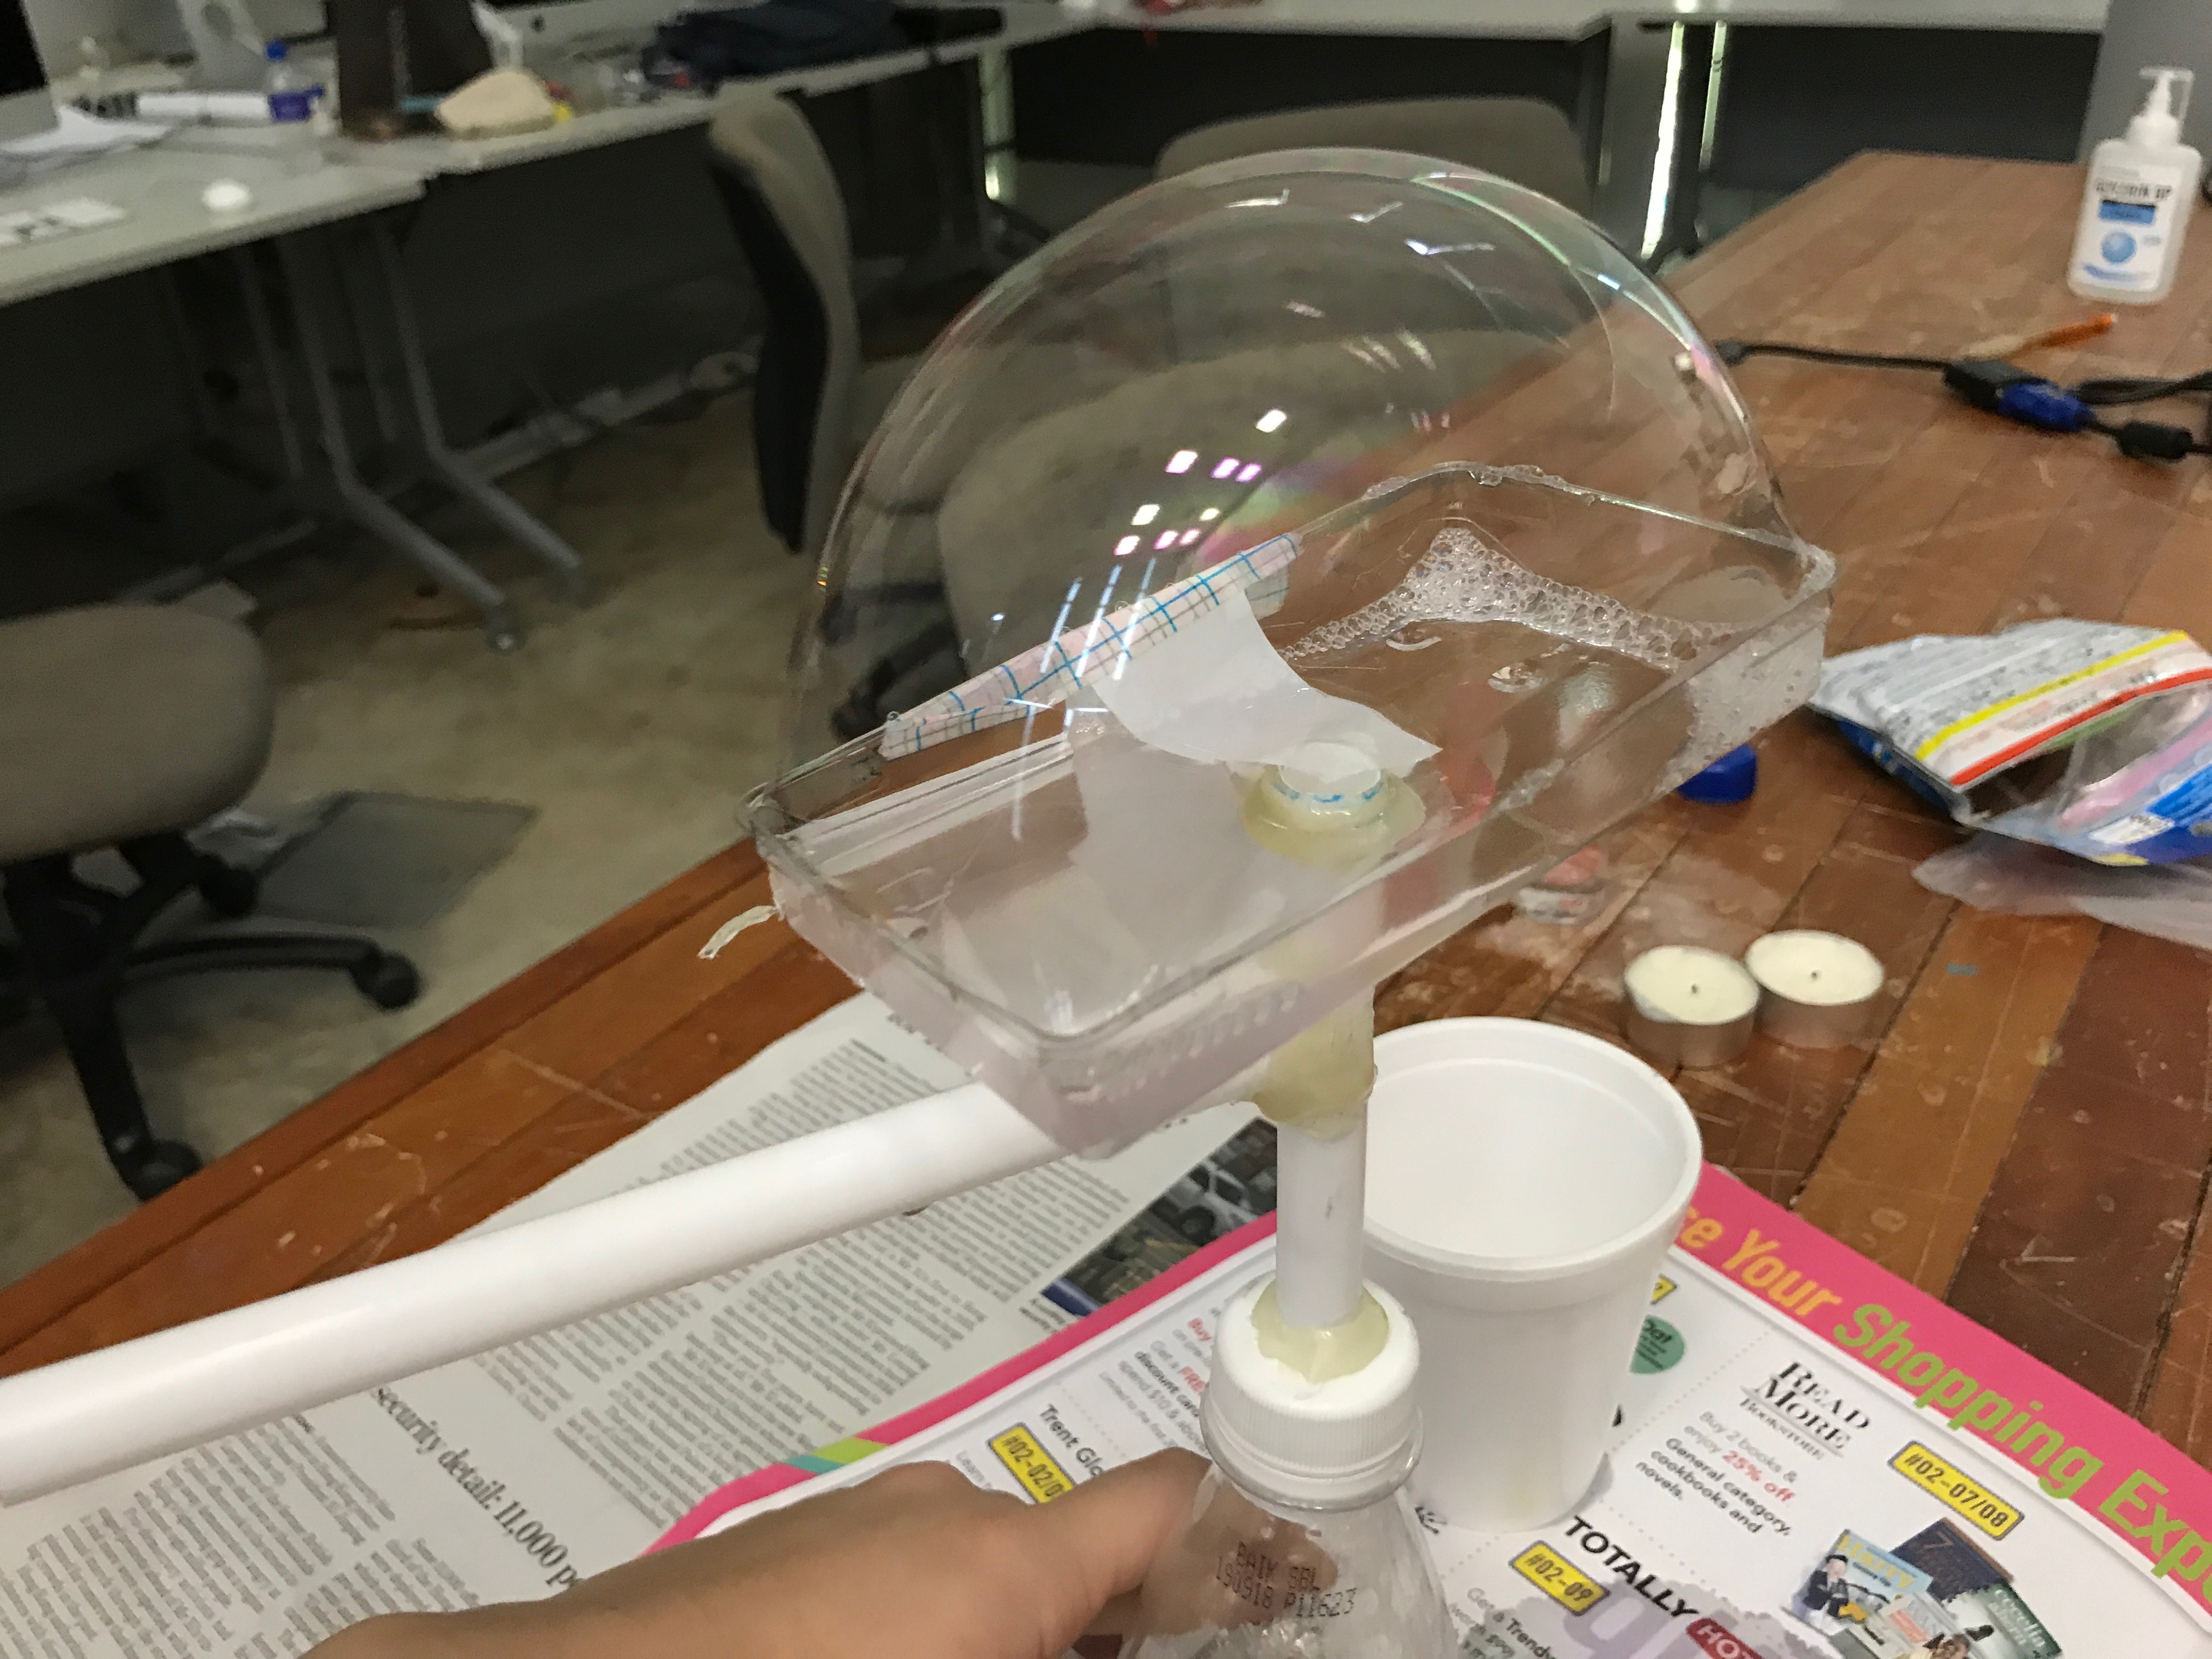
Tray of soapy water, tiny plastic stopper to stem flow of water when not in use
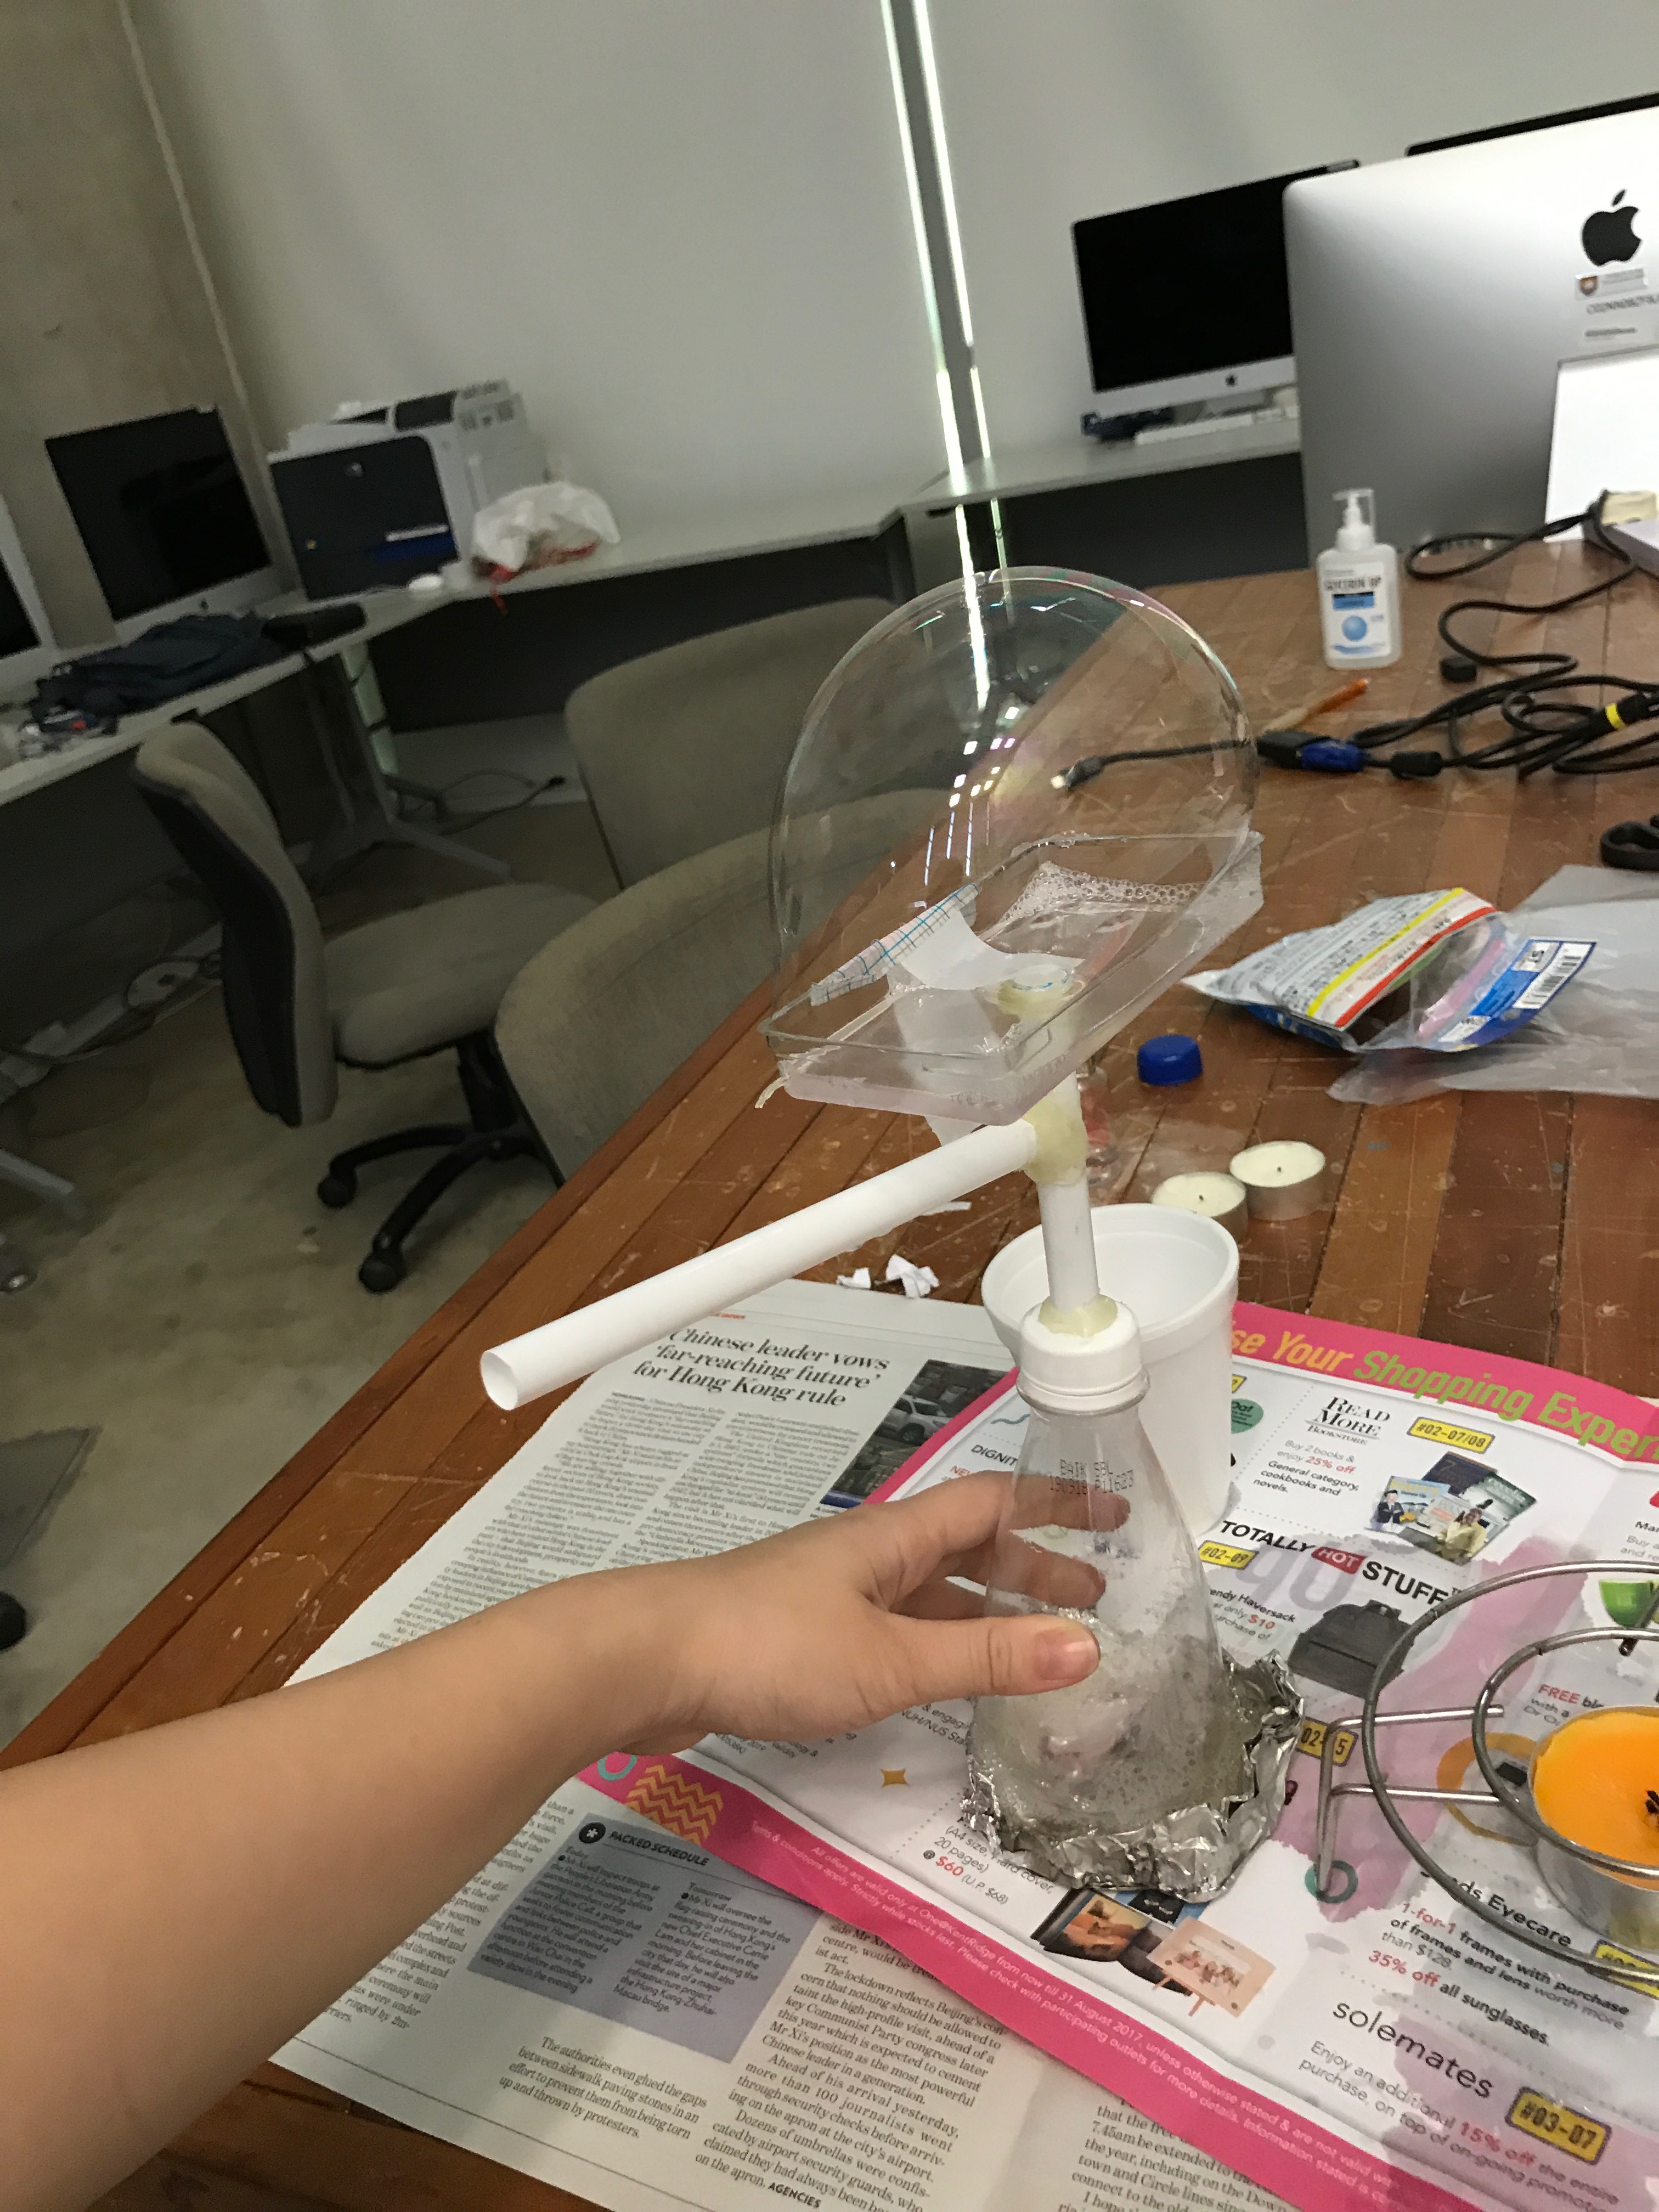
Bubble (taking on the shape of the container)
Entire set-up (without heat source supposedly under the aluminium tray)
Needless to say, this was a situation where the ideal was way better than the physical. The water from the tray kept dripping down the straw onto the fog juice tray, bubble-blowing was an arduous and unhygienic process, and the entire structure as a whole just was not appealing and stable.
Thus, I did entirely scrape this idea as it just was not working, and did not see how it could further develop.
Experiment III (final)
Set-up
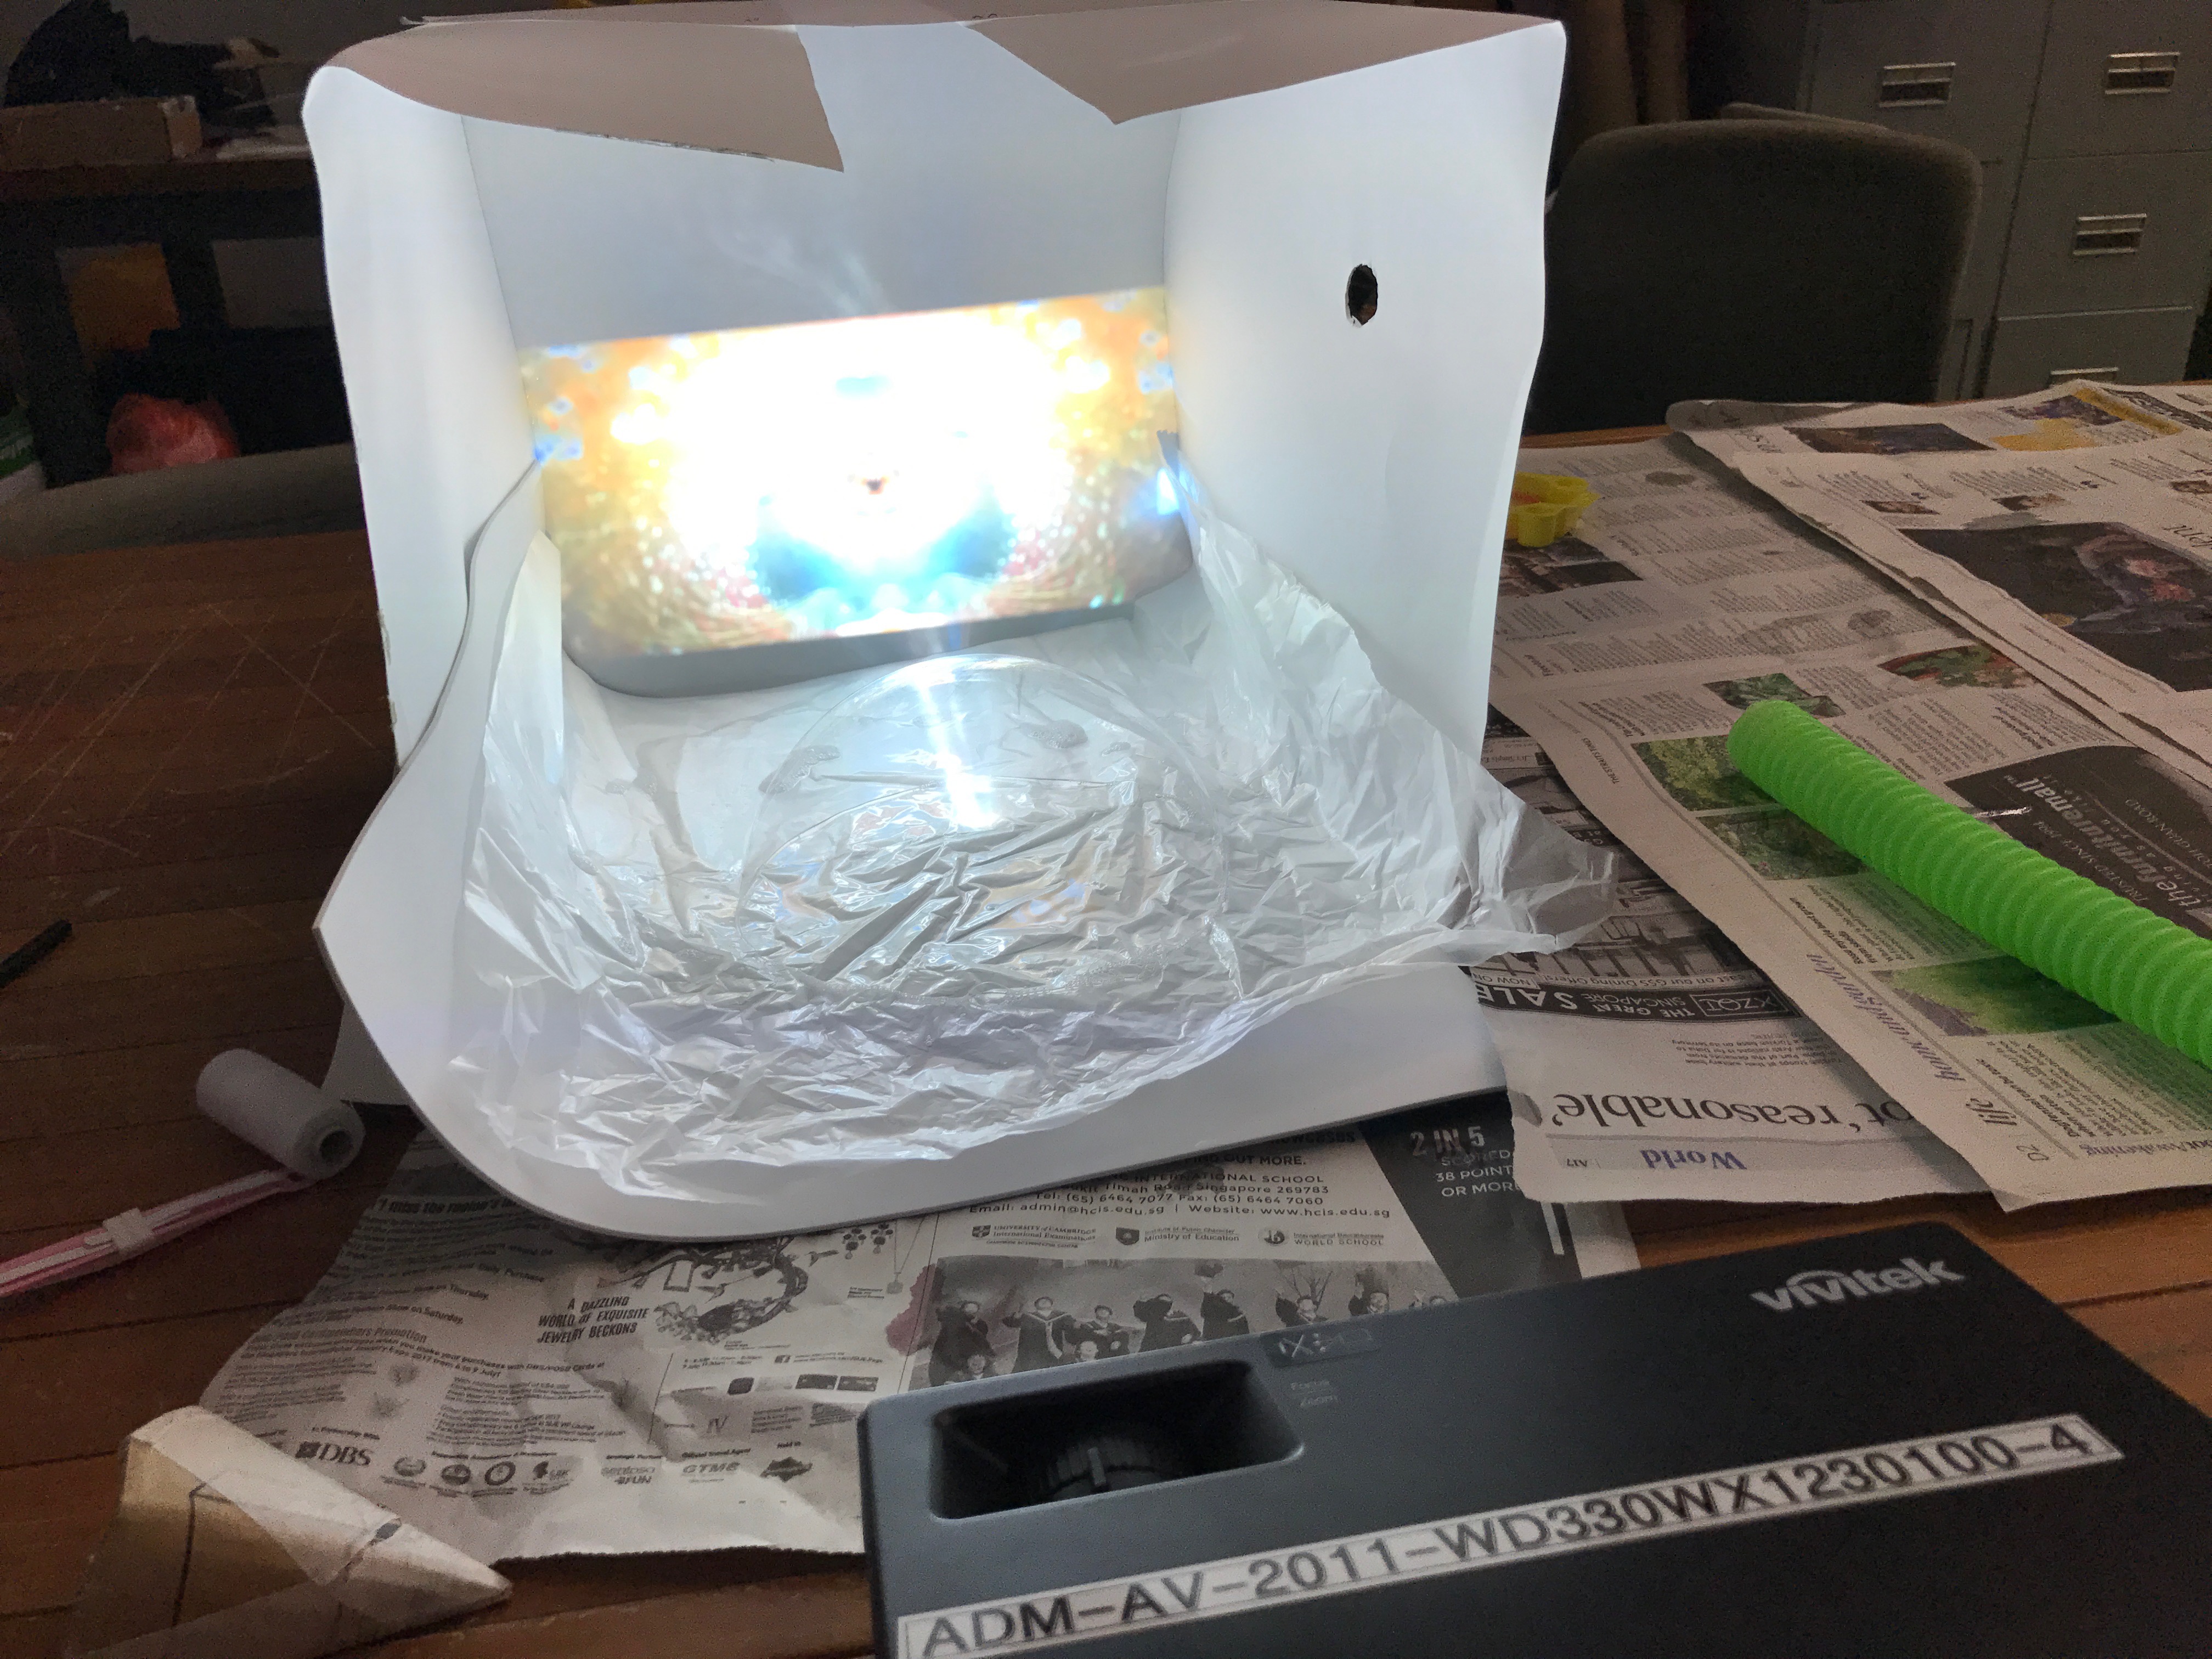
I thought of creating a tinier installation, and contain just one bubble for now as it might be easier to work with. Thus, I decided upon a boxed installation – partly because I started becoming interested in peephole art installations – and also because it was much easier to control the environment within a small, contained space.
The intention was for the user to blow and create one bubble at a time, which float inside the box. An external camera will capture the facial expression of the person blowing the bubble, and project that static image onto the bubble. The bubble was meant to gently float down towards the ground, as I would be placing liquid into the box to greatly reduce the speed the bubble floats down. The user will proceed to look at the bubble through the peephole on the right of the box, as I envisioned that it would greatly magnify the bubble’s size in the eye of the user, and have it easier to contain within a smaller box. The person thus becomes the bubble, and he fitnesses his own death through the bubble.
At the same time, as the bubble floats down and vibrates/moves, a recorder will record the movement and sync it to a sound, which would vibrate according to the bubble’s movement.
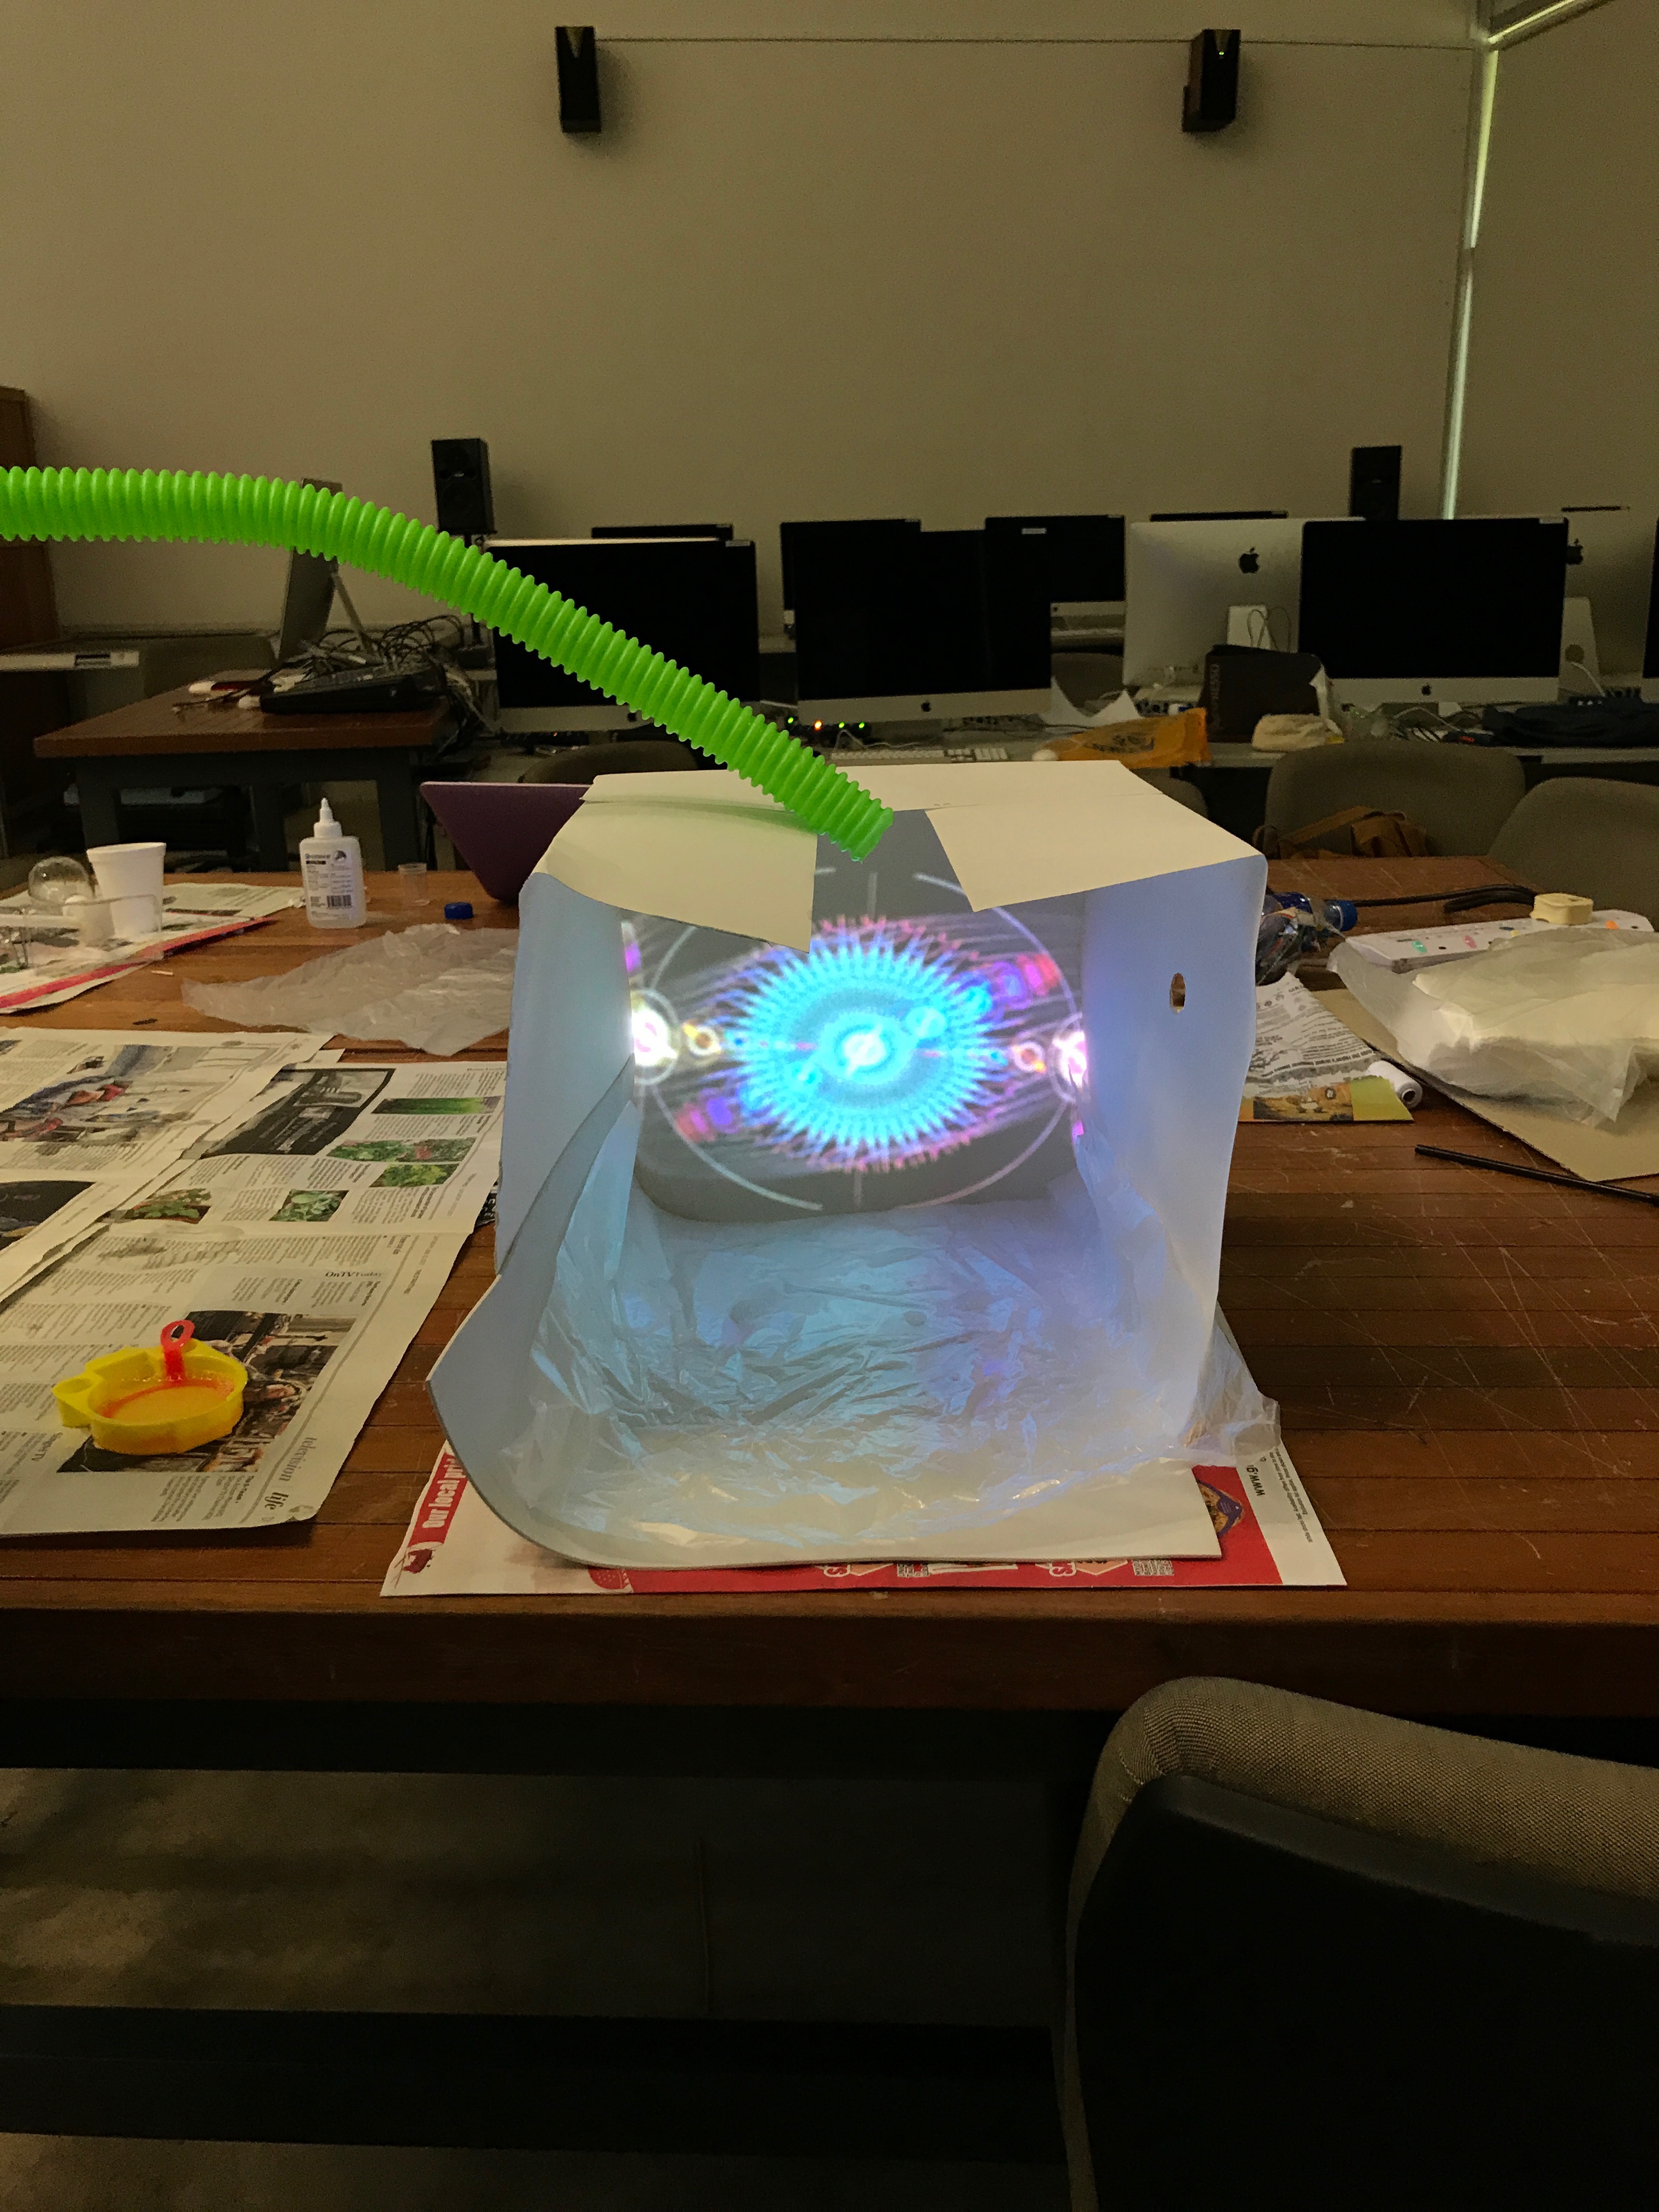
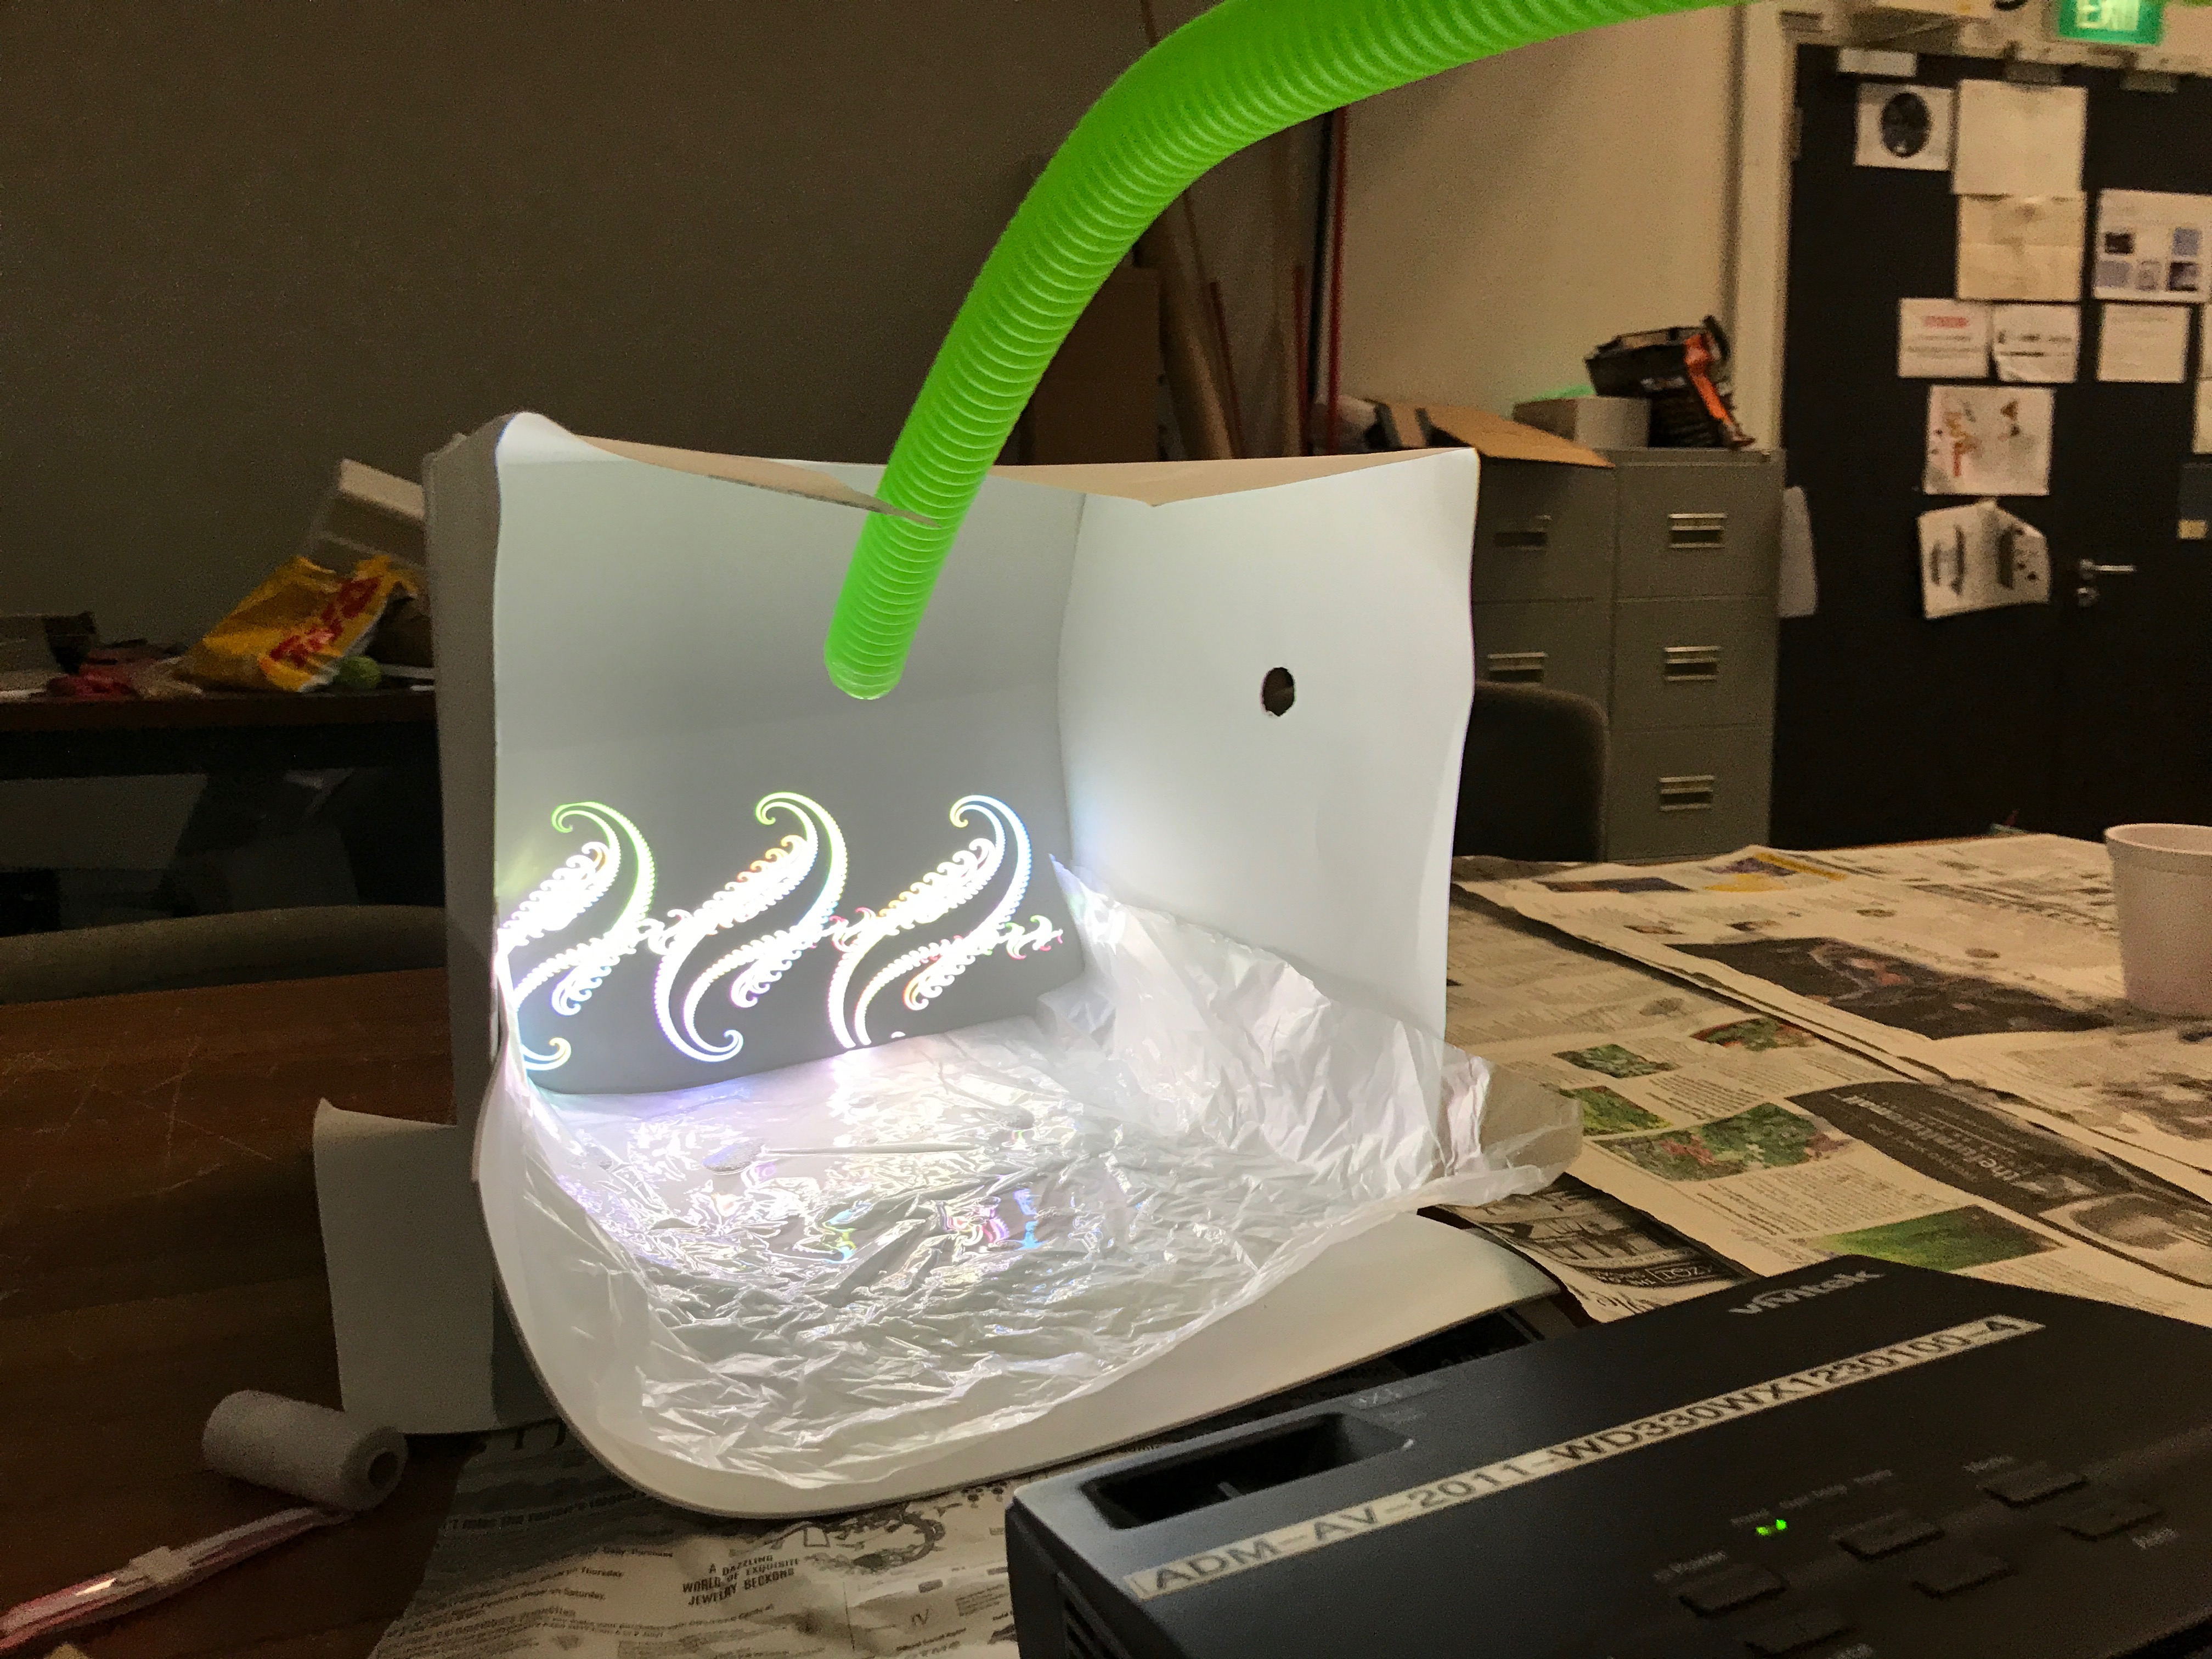
Thus, I tried making a box structure to first test out the size.
Set-up: Constructed paper box, blowing tube, plastic sheet at bottom
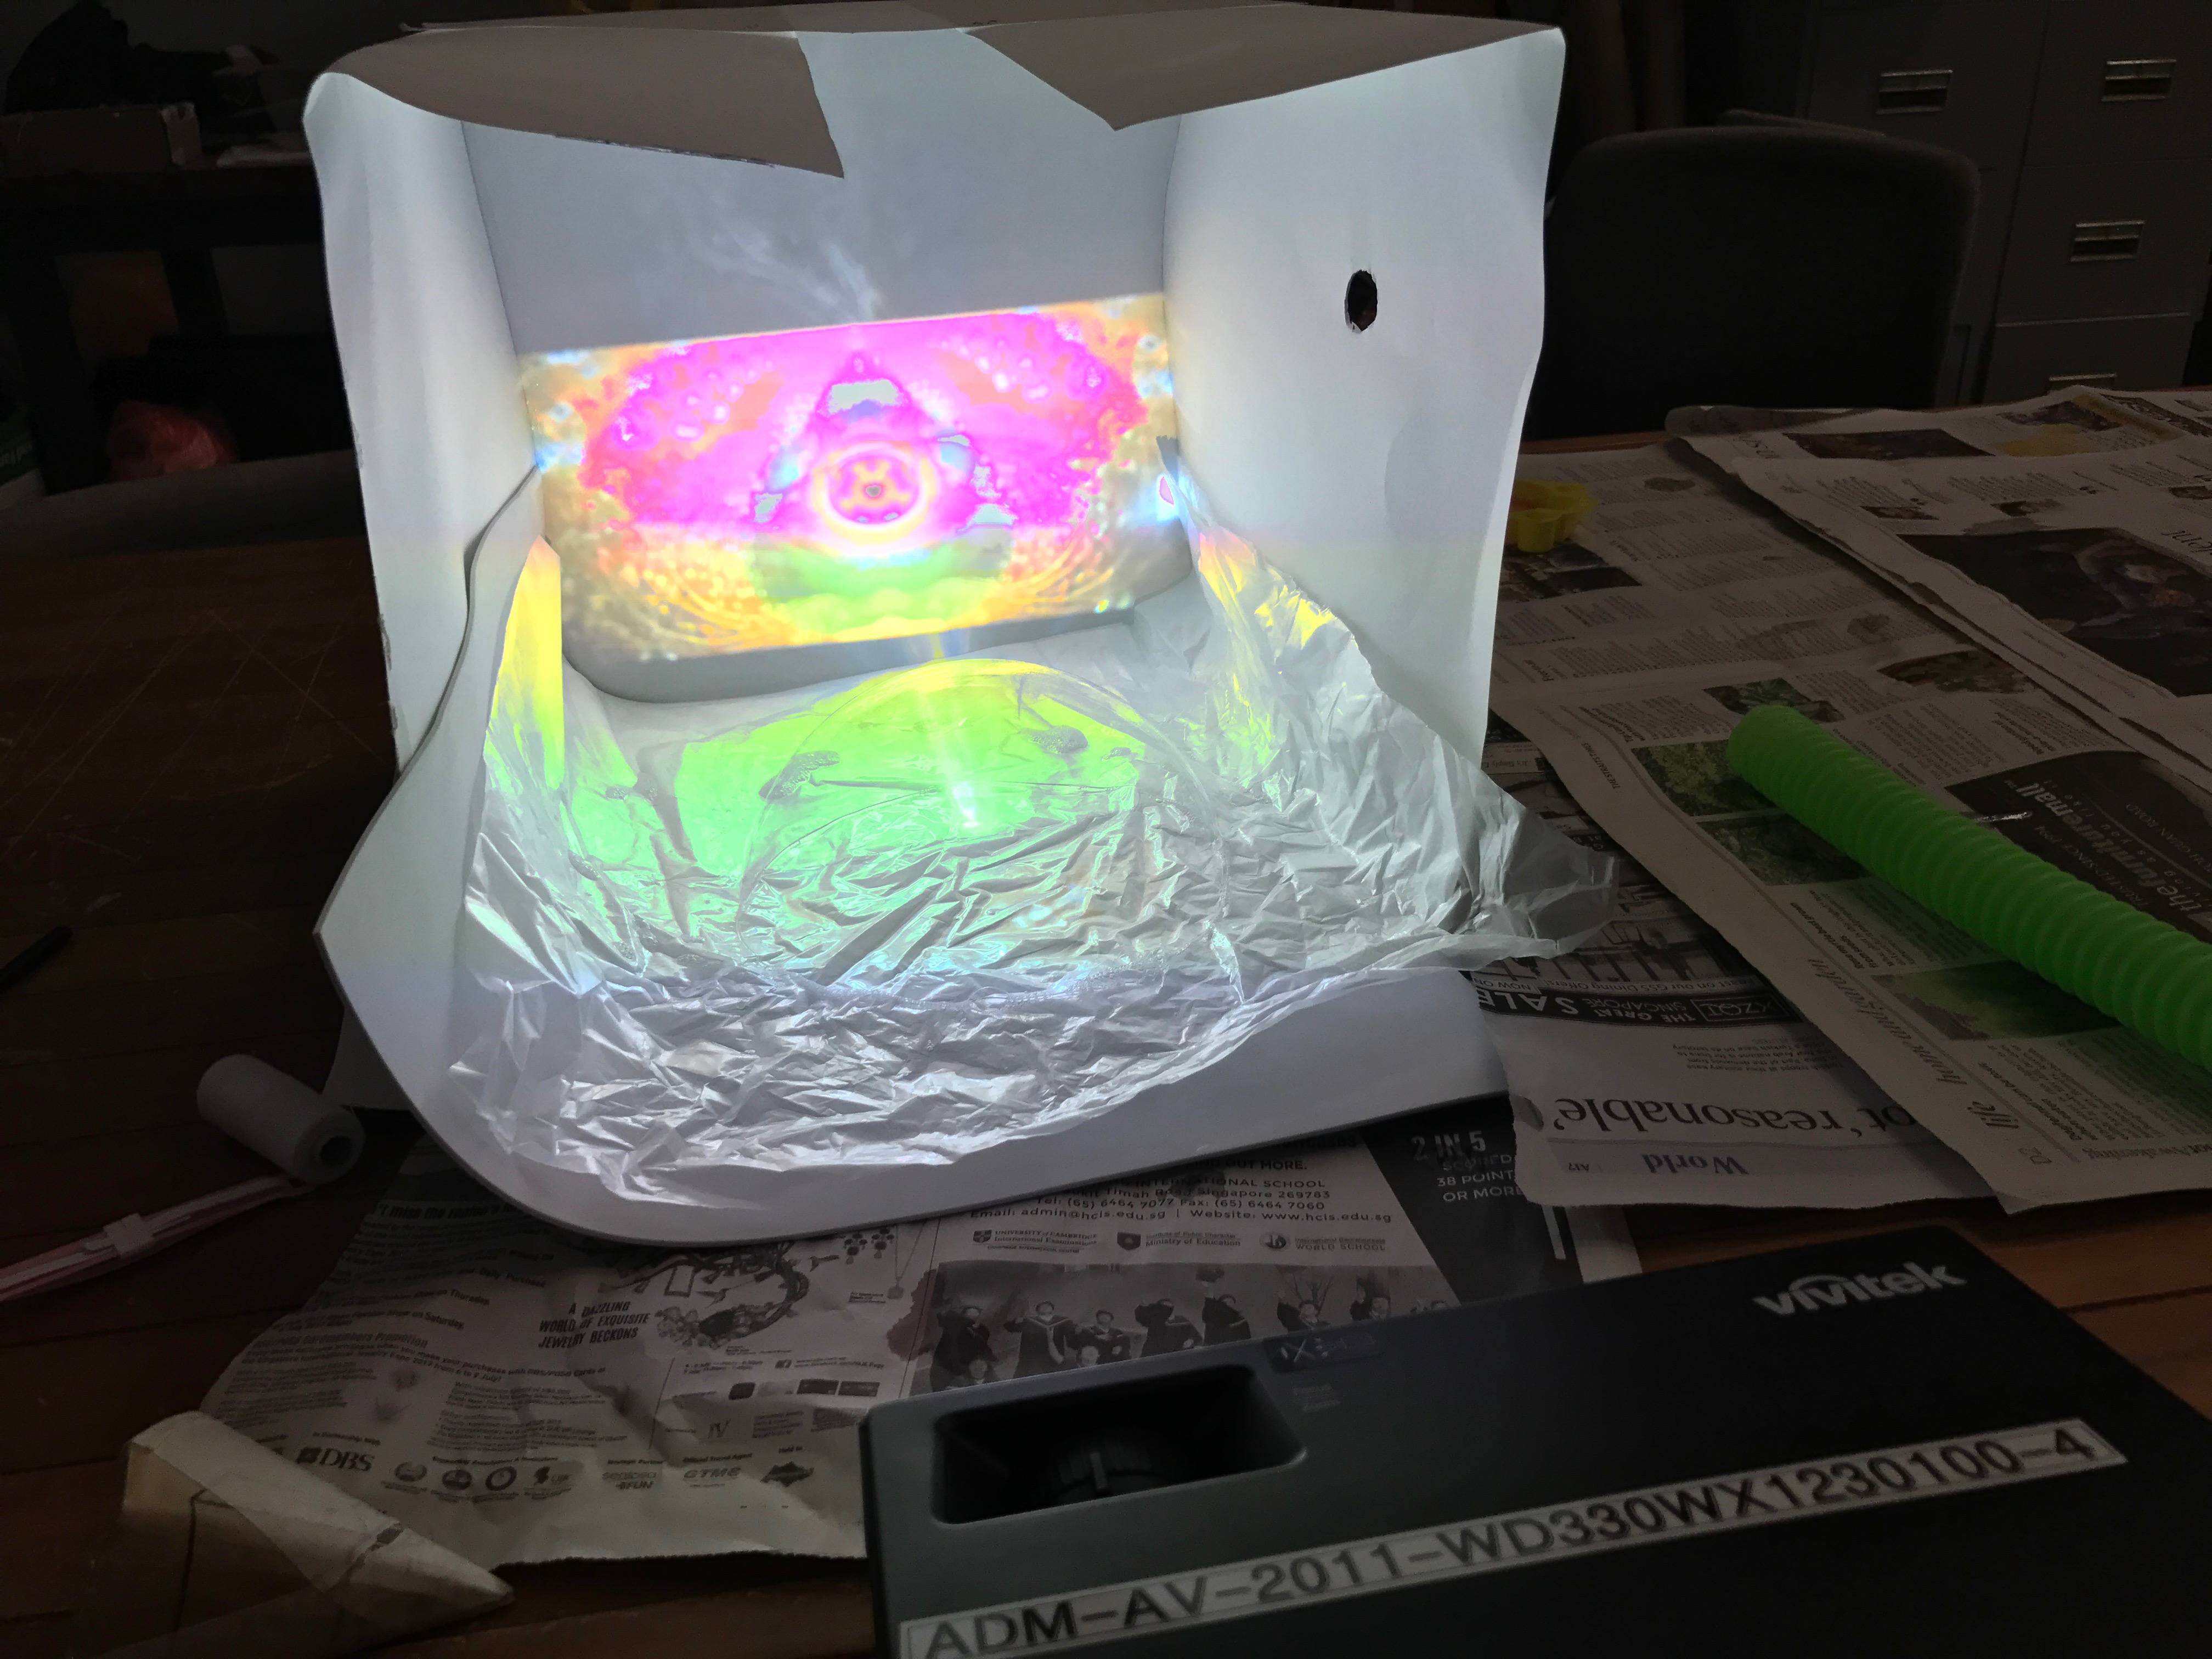
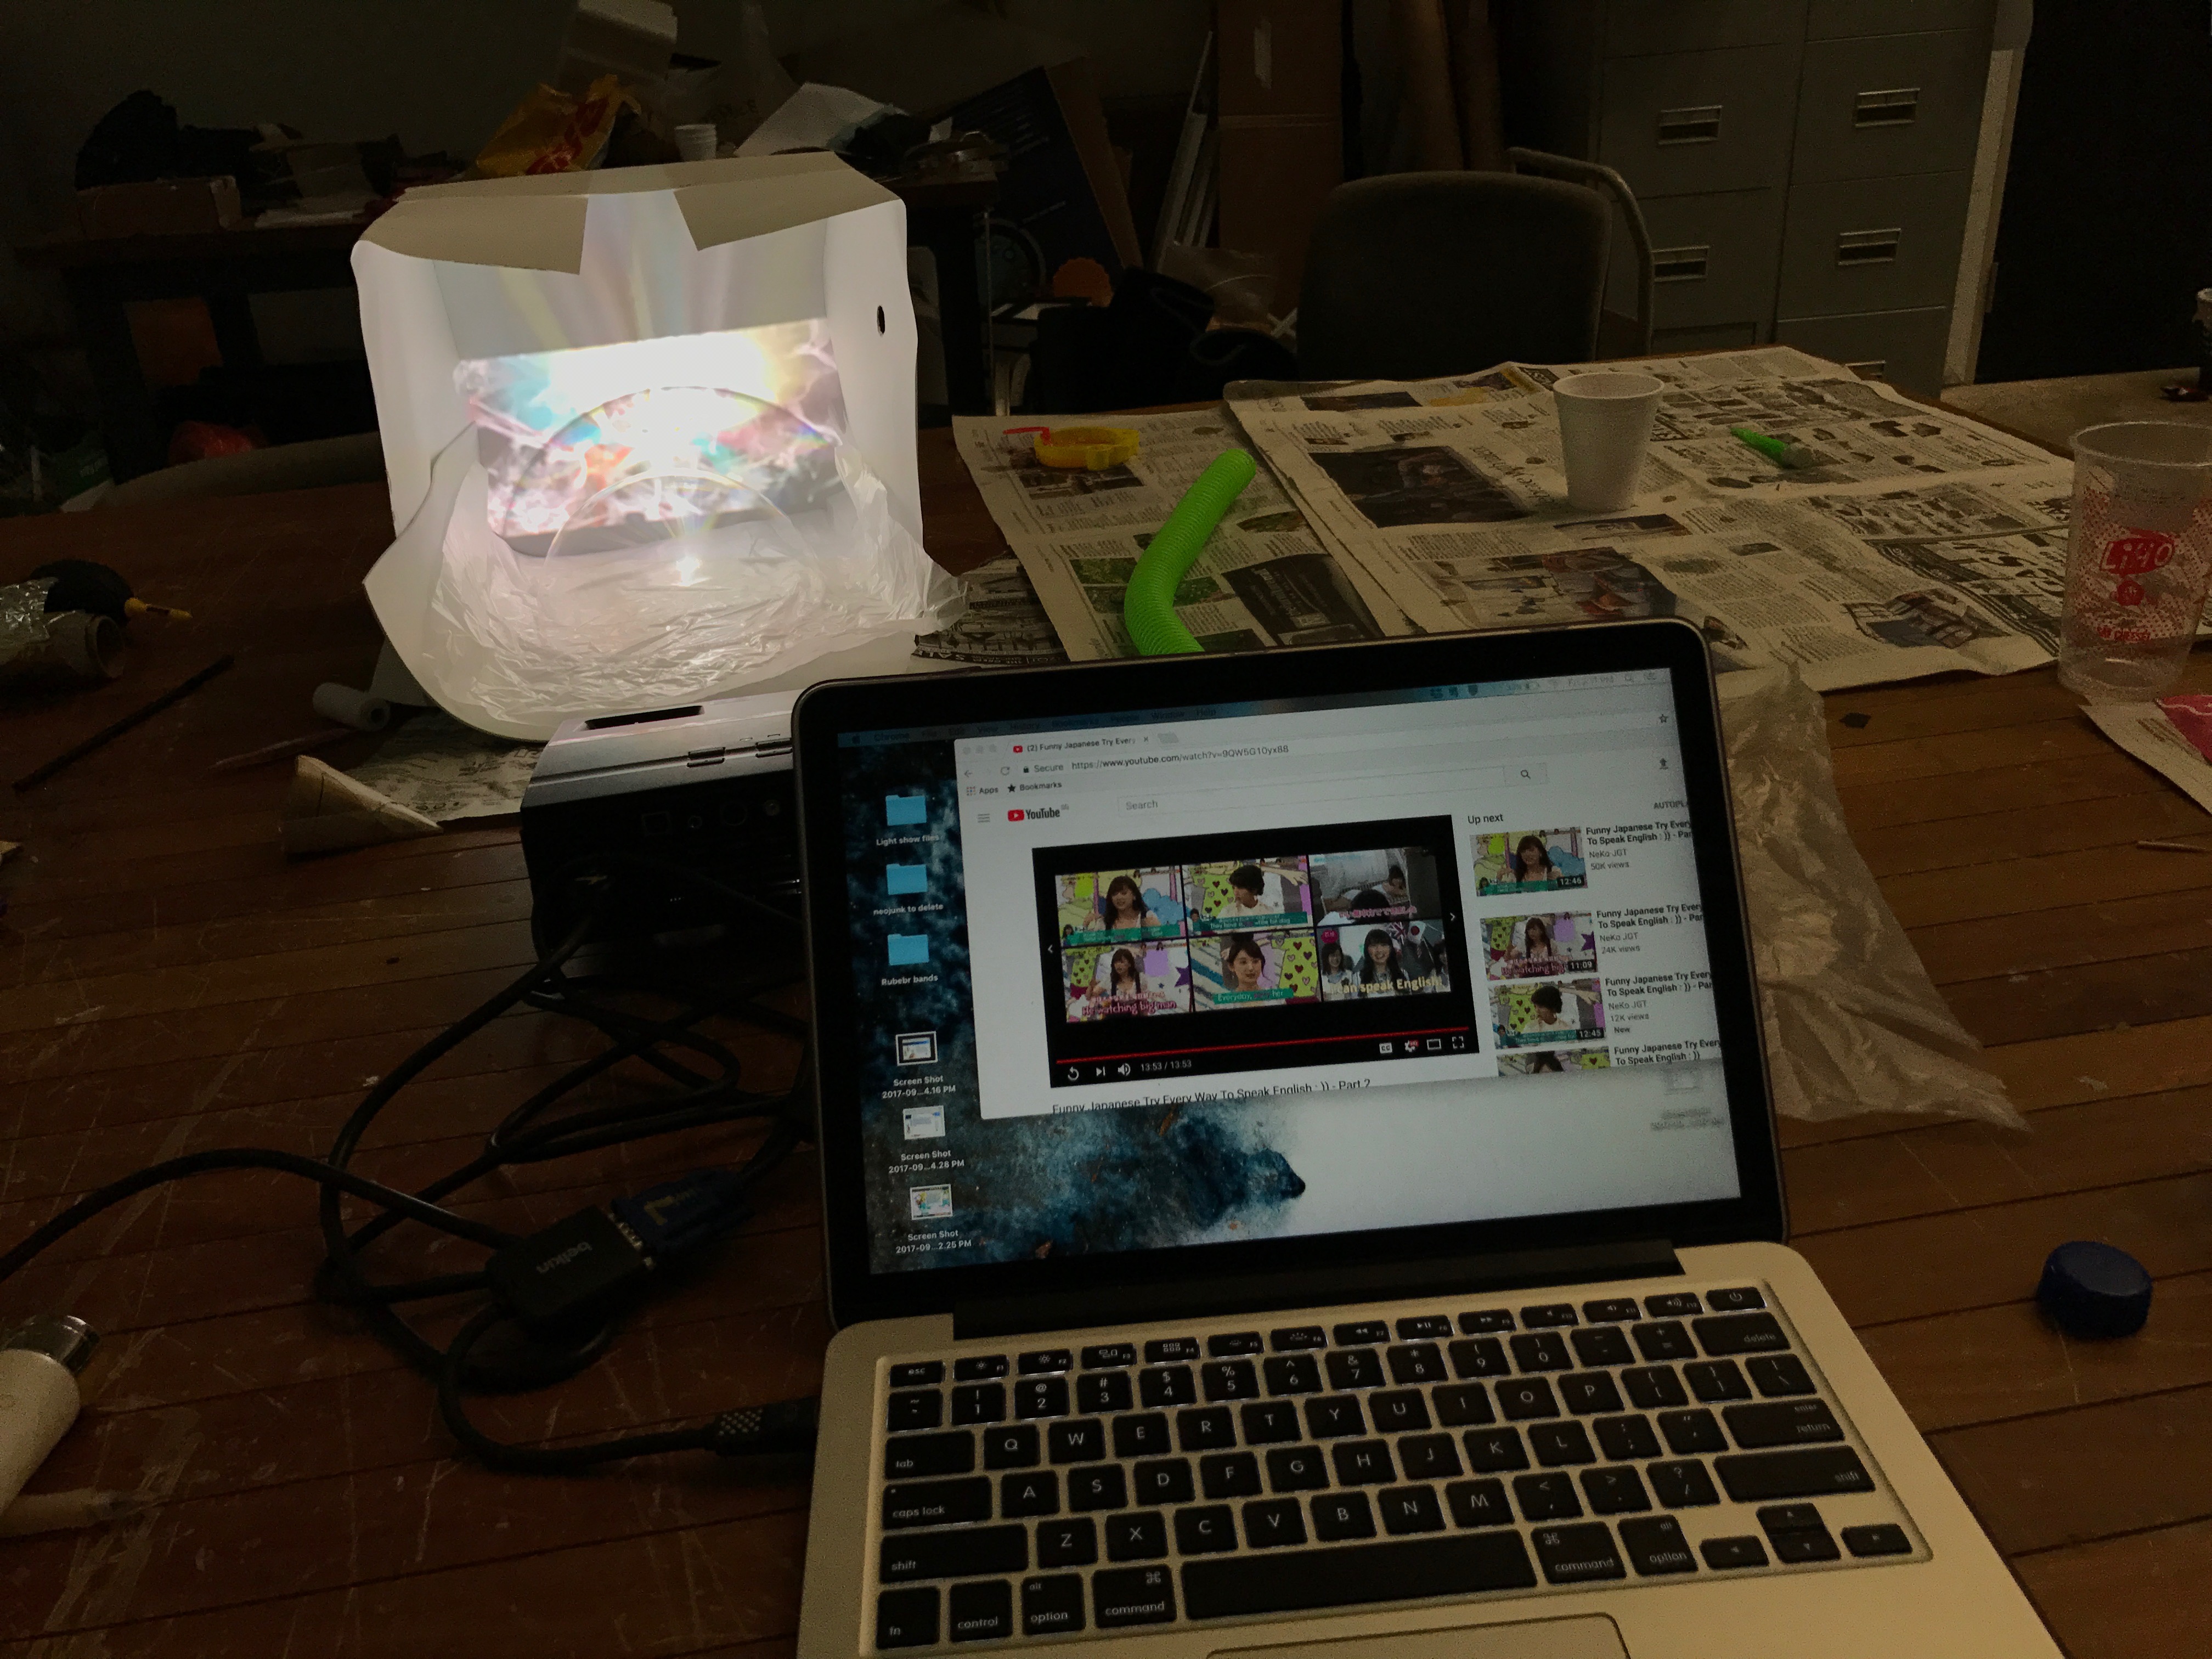
As the programming for the facial recognition, and sounds were not finished yet, I just decided to cast a simple video projection pattern onto the box, and test out the effects on the bubbles.
Also, though I intended the bubbles to be like these (see below),
Small bubbles singular formSingular large bubble
due to the set-up structure, I could at most manage a large bubble or two, like this (see above).
Set-up (side view)
Tiny hole on right of box – peephole for visitors to look at bubble
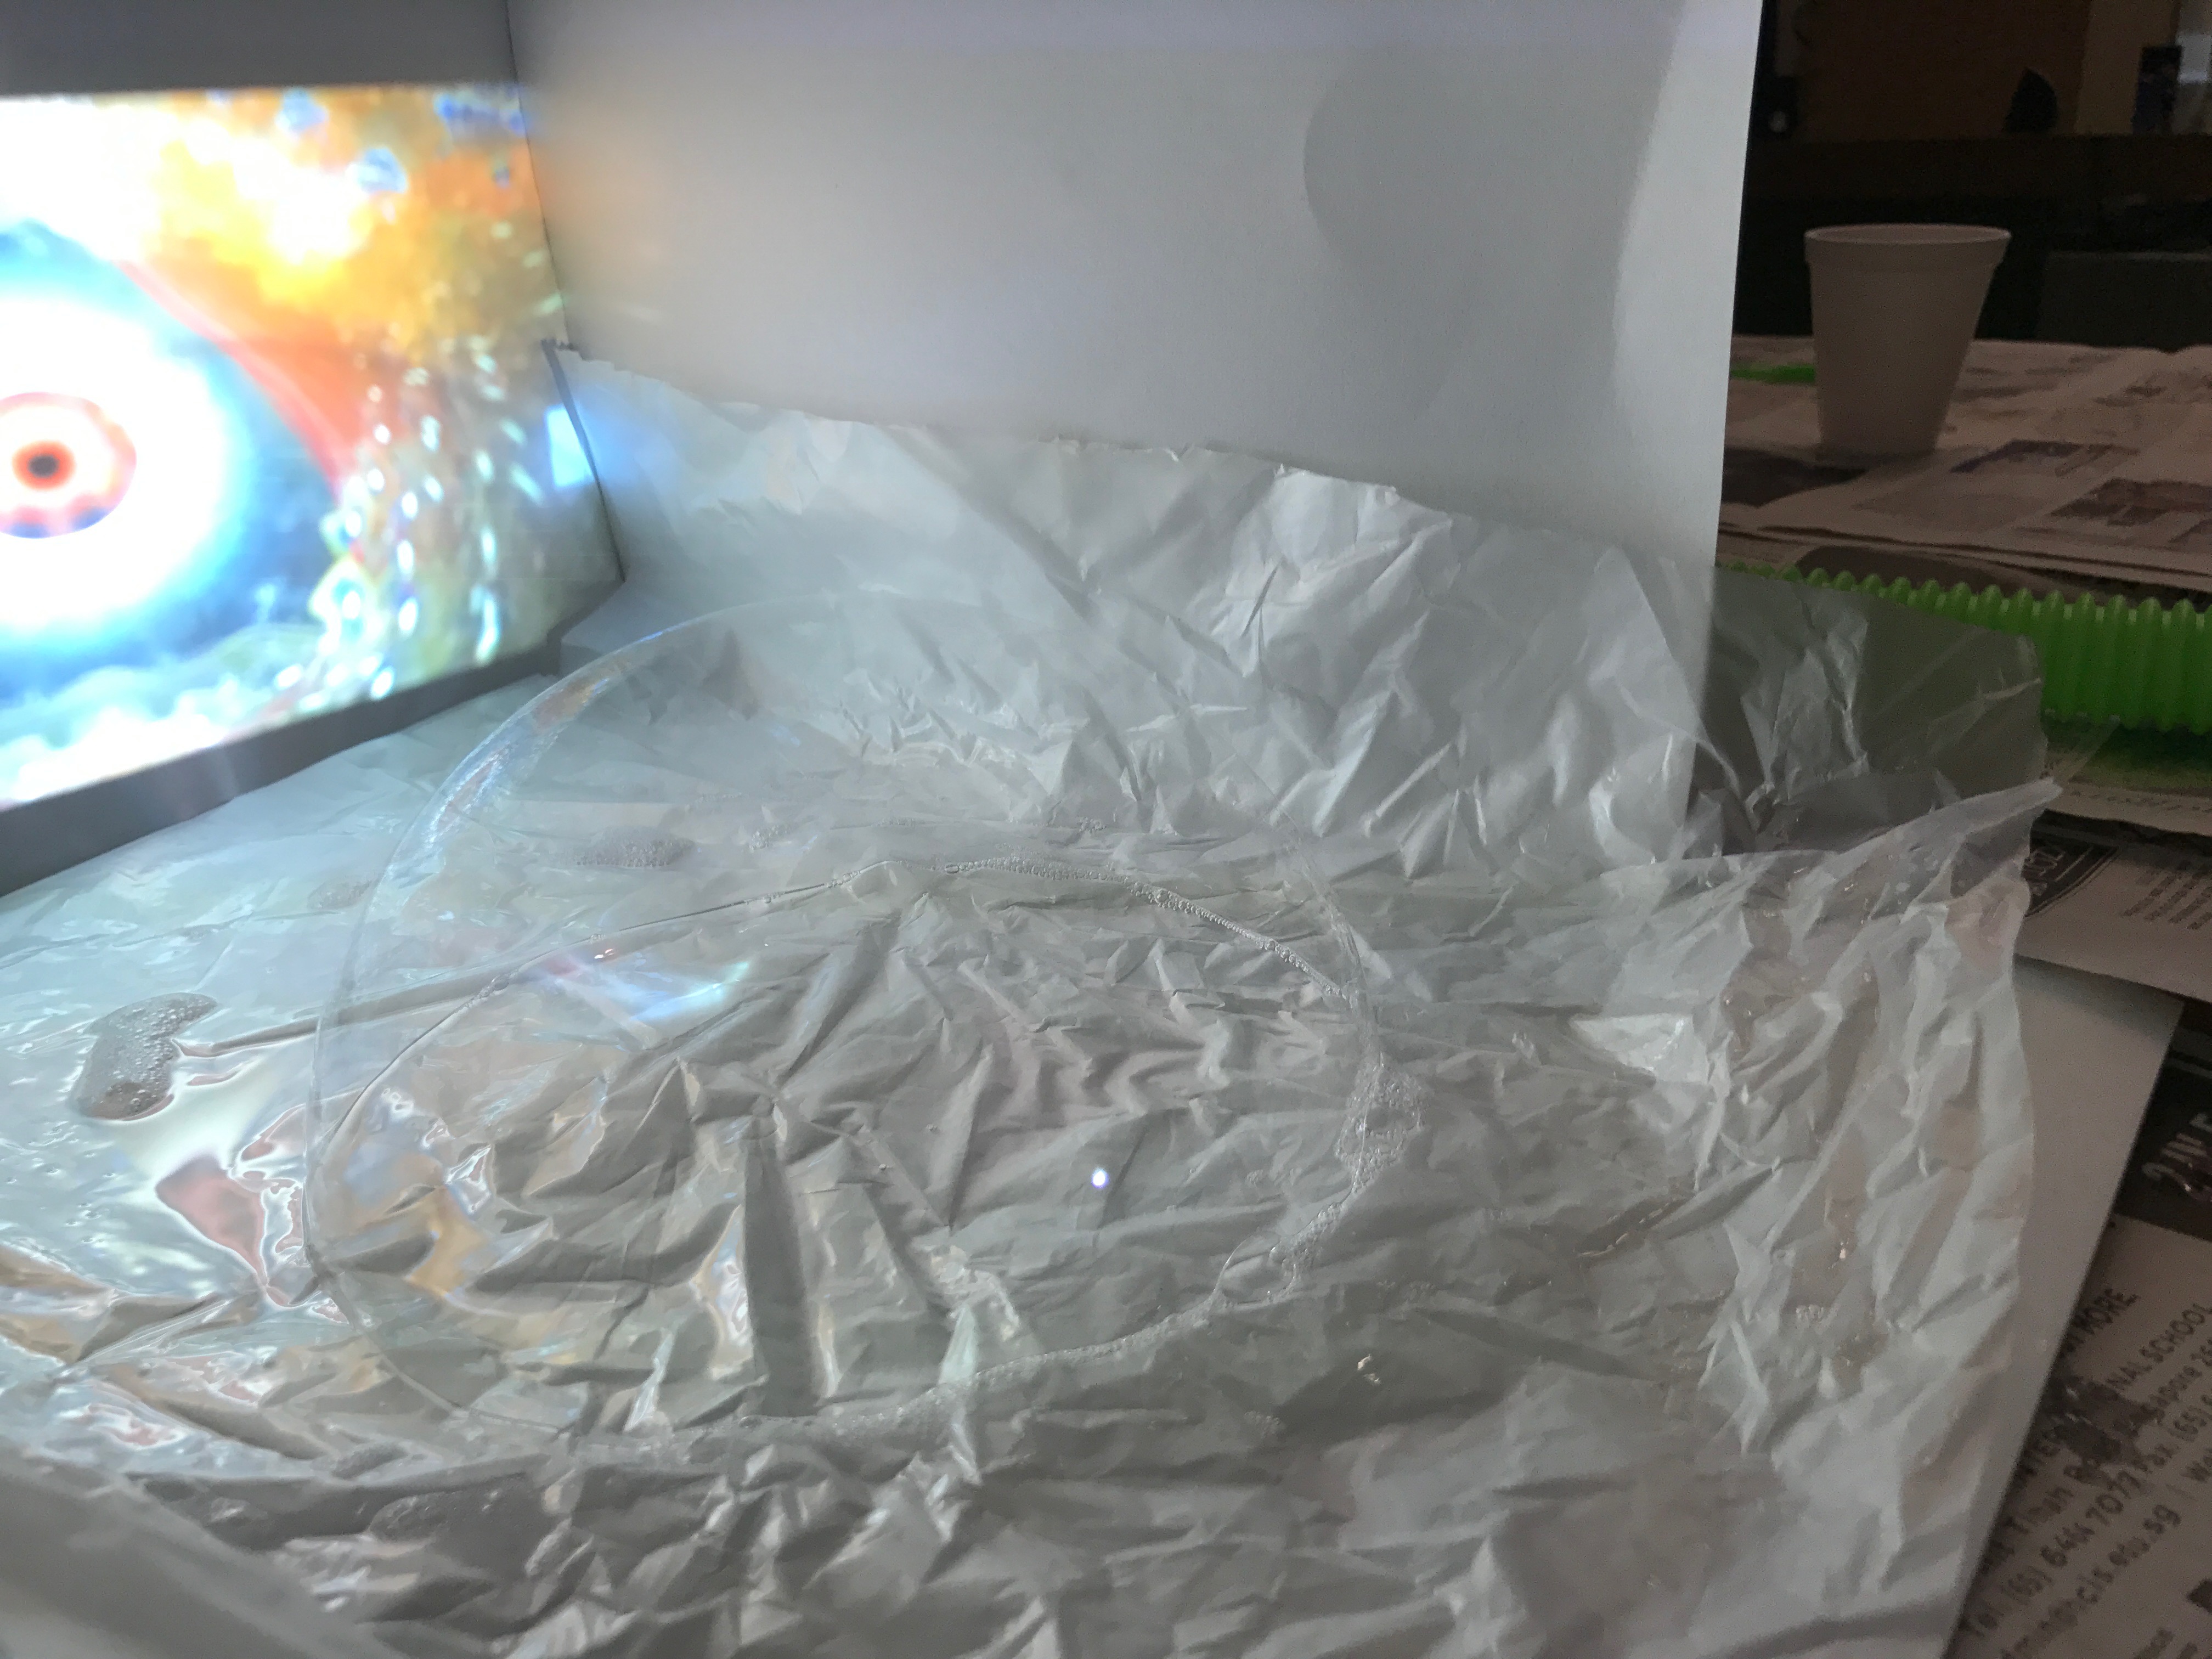
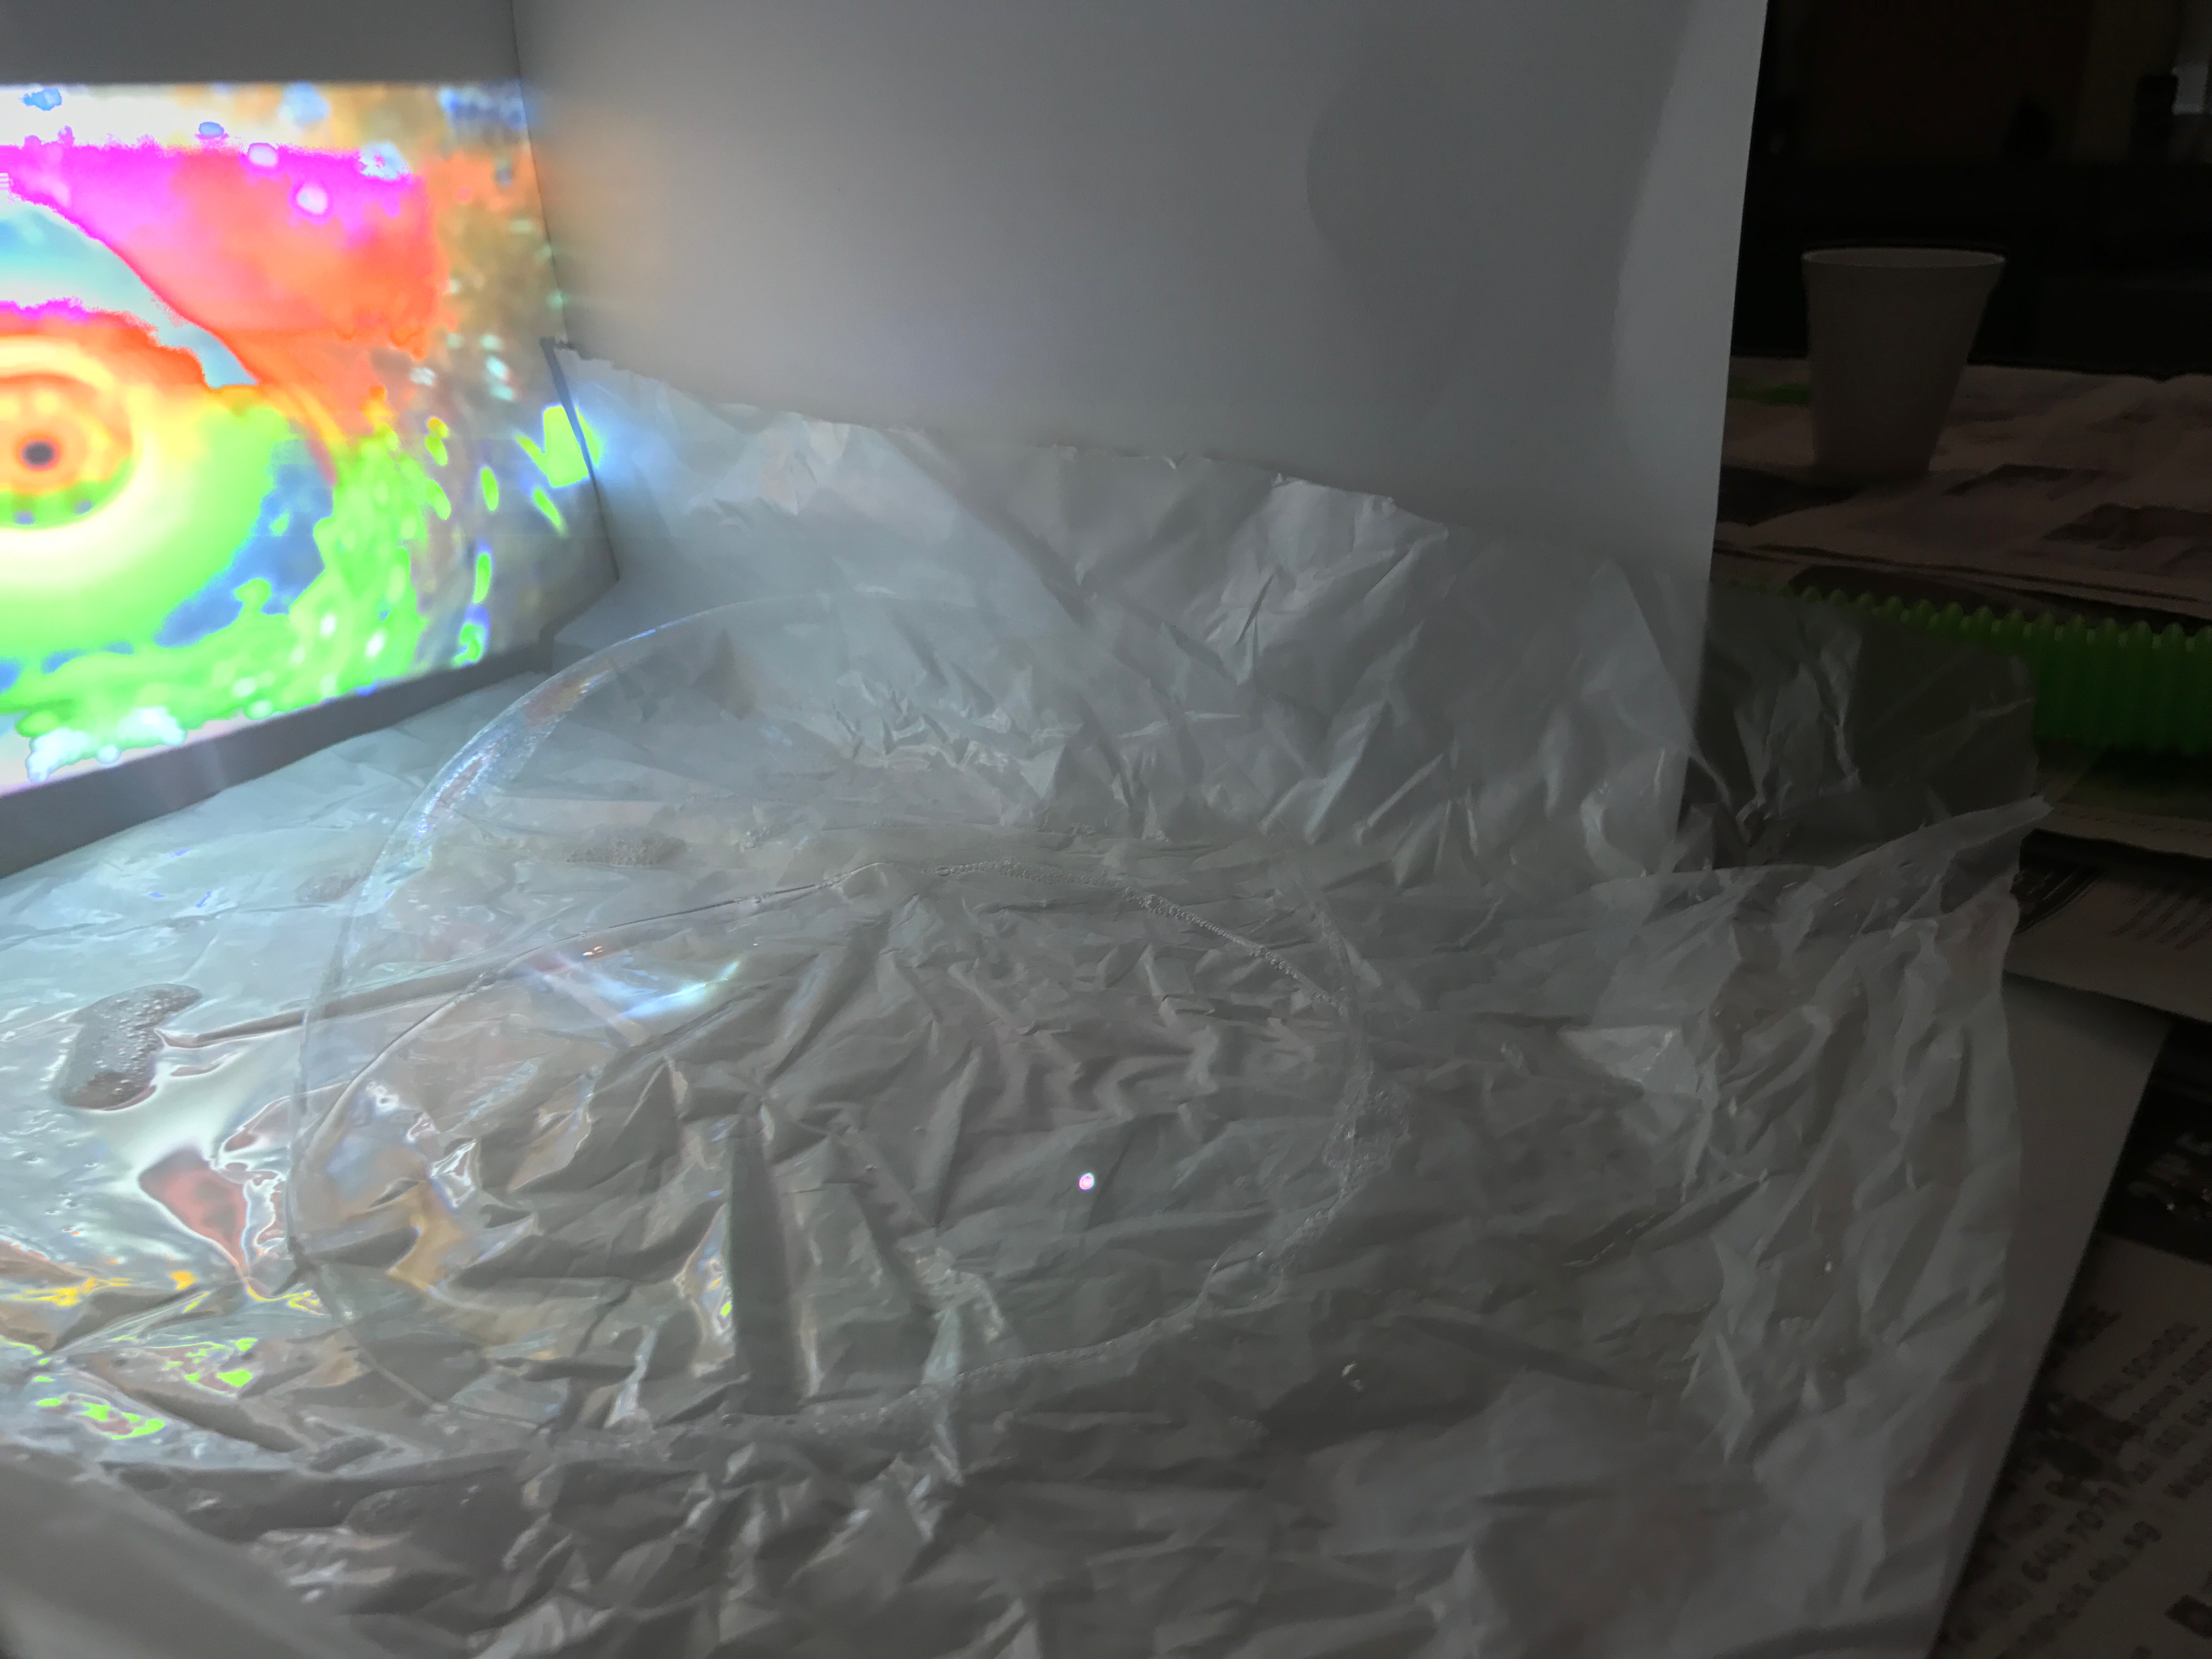
Close-up with bubble
Close-up with bubble
Slight reflection onto large bubble adhered to floor
Slight reflection onto large bubble adhered to floor
Experiment set-up: projector, laptop, box
Experiment set-up: projector, laptop, box
However, I realised that the quantity of light given out by the projector wayyyy overpowered the bubble, and reflected itself at the back of the box. Also, the bubble was exceedingly fragile, and with the small size of the box (and hence short height), there was not enough space for the bubble to poetically flow down as I had wanted it to. The reflection on the bubble, needless to say, was an extremely poorer version out of the many reflections I obtained from my previous experiments.
I received several feedback, that perhaps the peephole was way too small and insignificant to push through the intricacies of the bubble projection, and I could perhaps use a different camera to capture the reflection and re-project it on a larger screen. This way, it would make it easier to look at the projection, and allow a larger group of people to look at it.
Another feedback I got was of hygiene – having visitors to blow through the same tube was unclean, and I did consider providing disposable plastic ‘mouth-guards’ or disposable plastic blowing tubes. However, it was way easier to just alter the bubble blowing structure and make do without this problem.
This idea, though it sounded good theoretically and I was genuinely interested in furthering it, had to be largely tweaked for it to work.
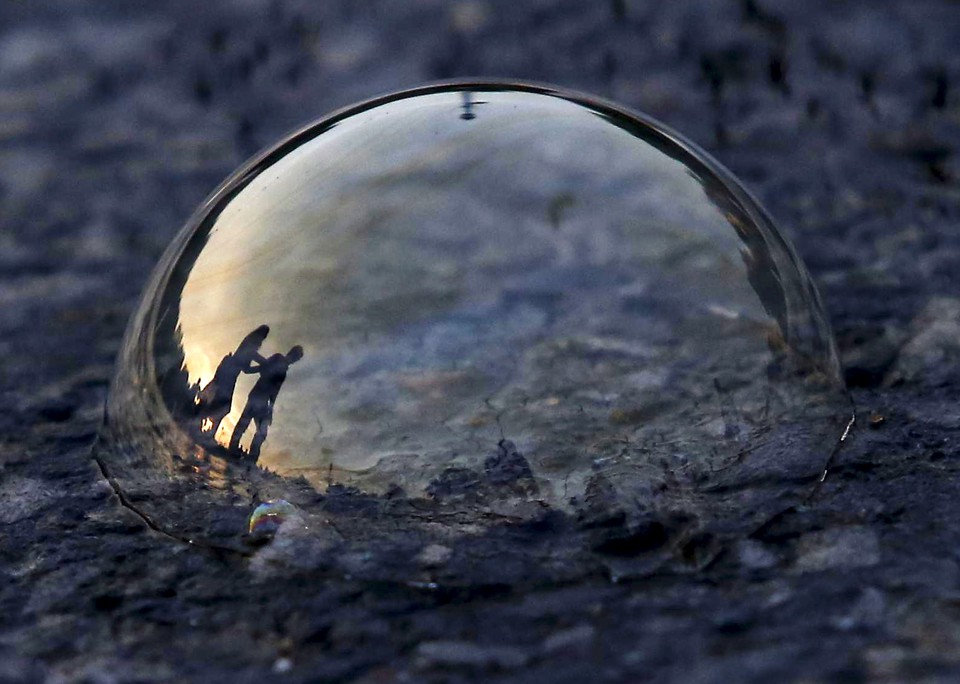
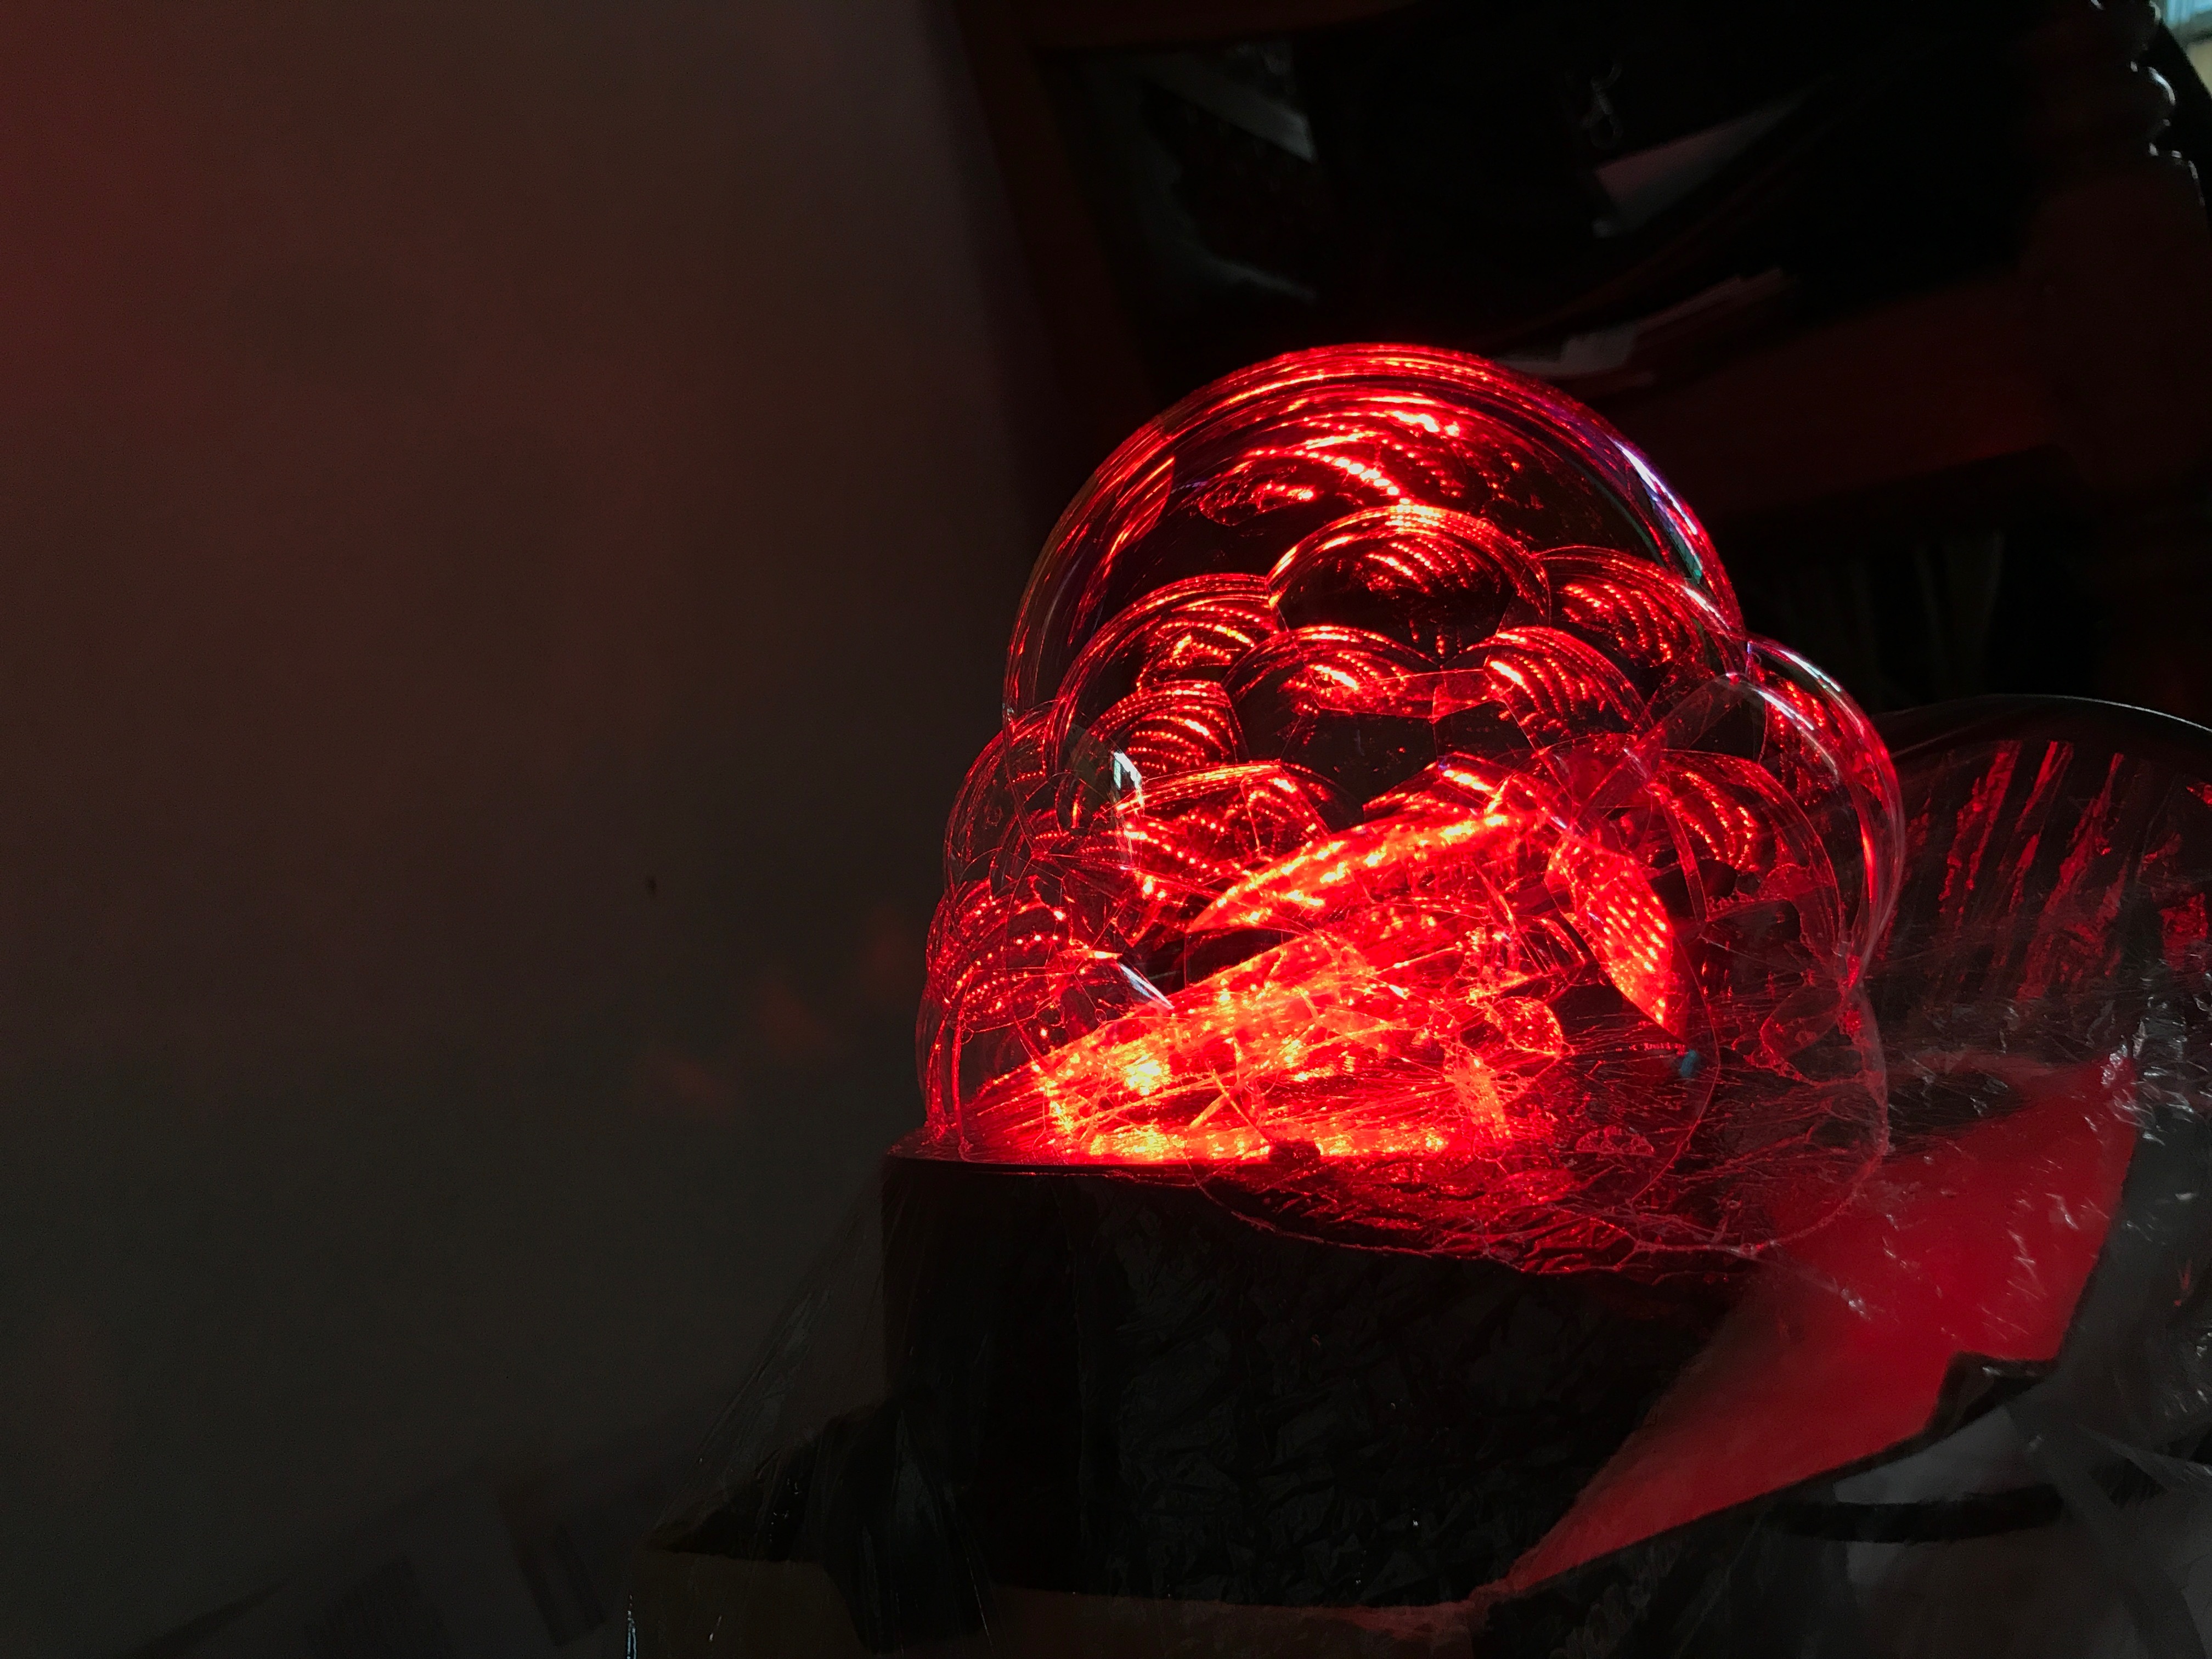
After these experiments, Prof and I found out that the bubble could be used instead as a reflective surface. As seen in the below images, the reflection off the bubbles created a surreal, living image.
Foreground: Reflection on bubble; Background: reflection off bubble
Background: reflection off bubble
Reflection on bubble surface
Reflection on bubble surface
Reflection on bubble surface
Reflection on bubble surface
Thus, in my future outcomes, I will be utilising this reflection of the bubble as, 1. it’s much easier to manipulate, and that 2. I love the effect.
After doing my research, I decided to start small – making just a single bubble. However, I want the singular bubble to pulsate, as though it’s a living organism. When it later bursts, I wish for the feeling of loss to be more pronounced – by initially thinking of it as a living being, one would feel pity, a sense of loss, and sadness (hopefully), as per what they would feel should a real living being dies.
Honestly speaking, when I start thinking of the idea of a singular bubble, the image of the atomic bomb on Hiroshima during WWII comes immediately into mind (hope this isn’t offensive/it isn’t meant to be offensive):
Hiroshima Peace Museum
Partly due to the fact that it has indeed caused many deaths and destruction, but this symbolic model was very arresting – the bright red contrasting with the vast city landscape.
I did consider putting placing a huge singular bubble into a small room, where people would have to squeeze past it to get to the other side – it seems fun, but there were considerations that they might accidentally touch and make the bubble bursting, making it not-so-practical after a while. At the same time, the bubble will pulsate like a pumping heart, giving it life-like qualities.
Thus, remembering Prof Randall’s words to ‘crawl first before I run’, I decided to start small and create a small bubble before I envision it in the whole space. That being said, small seems okay to start with – in my previous research the artwork The Long Now by Varena Friedrich, she too starts small – yet the product was very effective.
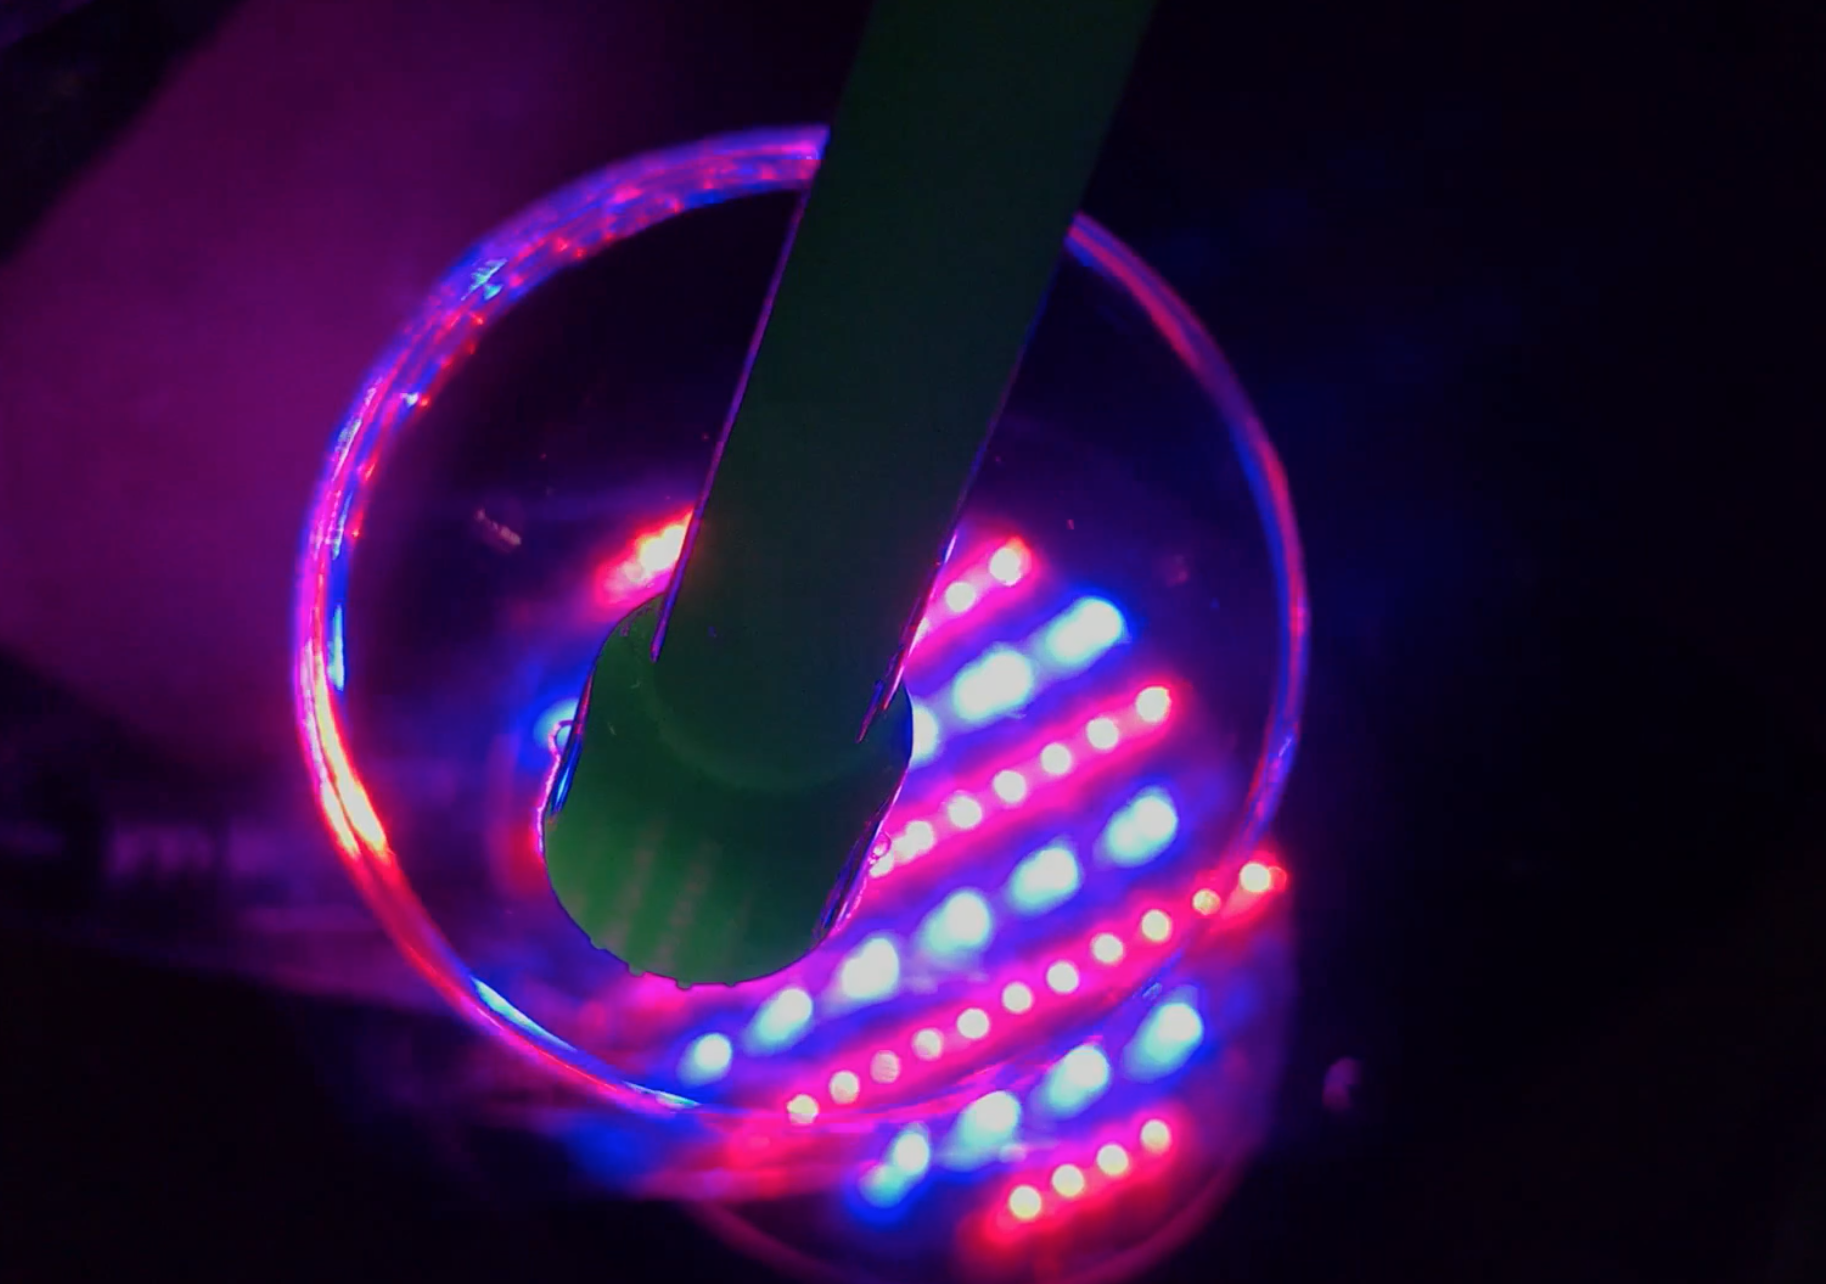
Before I thought of this idea, I did a few experiments with DMX lighting. I did want to try using projection on the bubbles, but decided to postpone it as I haven’t had the fog ready to intensify the projecting (but am loaning the projector again today to test it out this weekend).
DMX Chauvet Lighting and Bubbles
Setup: Chauvet Light pointing up
Switched on
Bubbles directly sitting on top of light projection
I first wanted to beam the light sideways, but the leftover light shone onto the background wall which was very distracting. In addition, there was too much surrounding light from the chauvet lights – thus it was hard to pick out the lighting of the bubbles itself. So, I pointed the chauvet light upwards instead (and risked the cables getting wet but shower caps are always a lifesafer)
I also did experiment with the flickering lights, as seen below. From my tests, a slow strobe could dramatise the effect of the bubbles, but it really was not what I envisioned for the experiment.
Caution! Strobe lighting in the below video!
(Please mute the above video while watching it; sounds of the video does not correspond with the visuals – I’ll explain why later in the post)
Here, there are two different ways of strobing: fast, and slow. I played with different light colours (purple, white, blue) to test out the effects, and particularly liked the purple colour out of all 3 colours.
One thing to note that while it was resplendently pretty, lighting was a considerable issue – the surroundings had to be STARK black else the surrounding light will wash out the lights of the bubble. Another issue was that the medium simply is hard to capture with the camera – the shimmer of the bubbles, how airy it was, and the glint and floaty-ness that it had. This is truly an experience that one has to feel first hand.
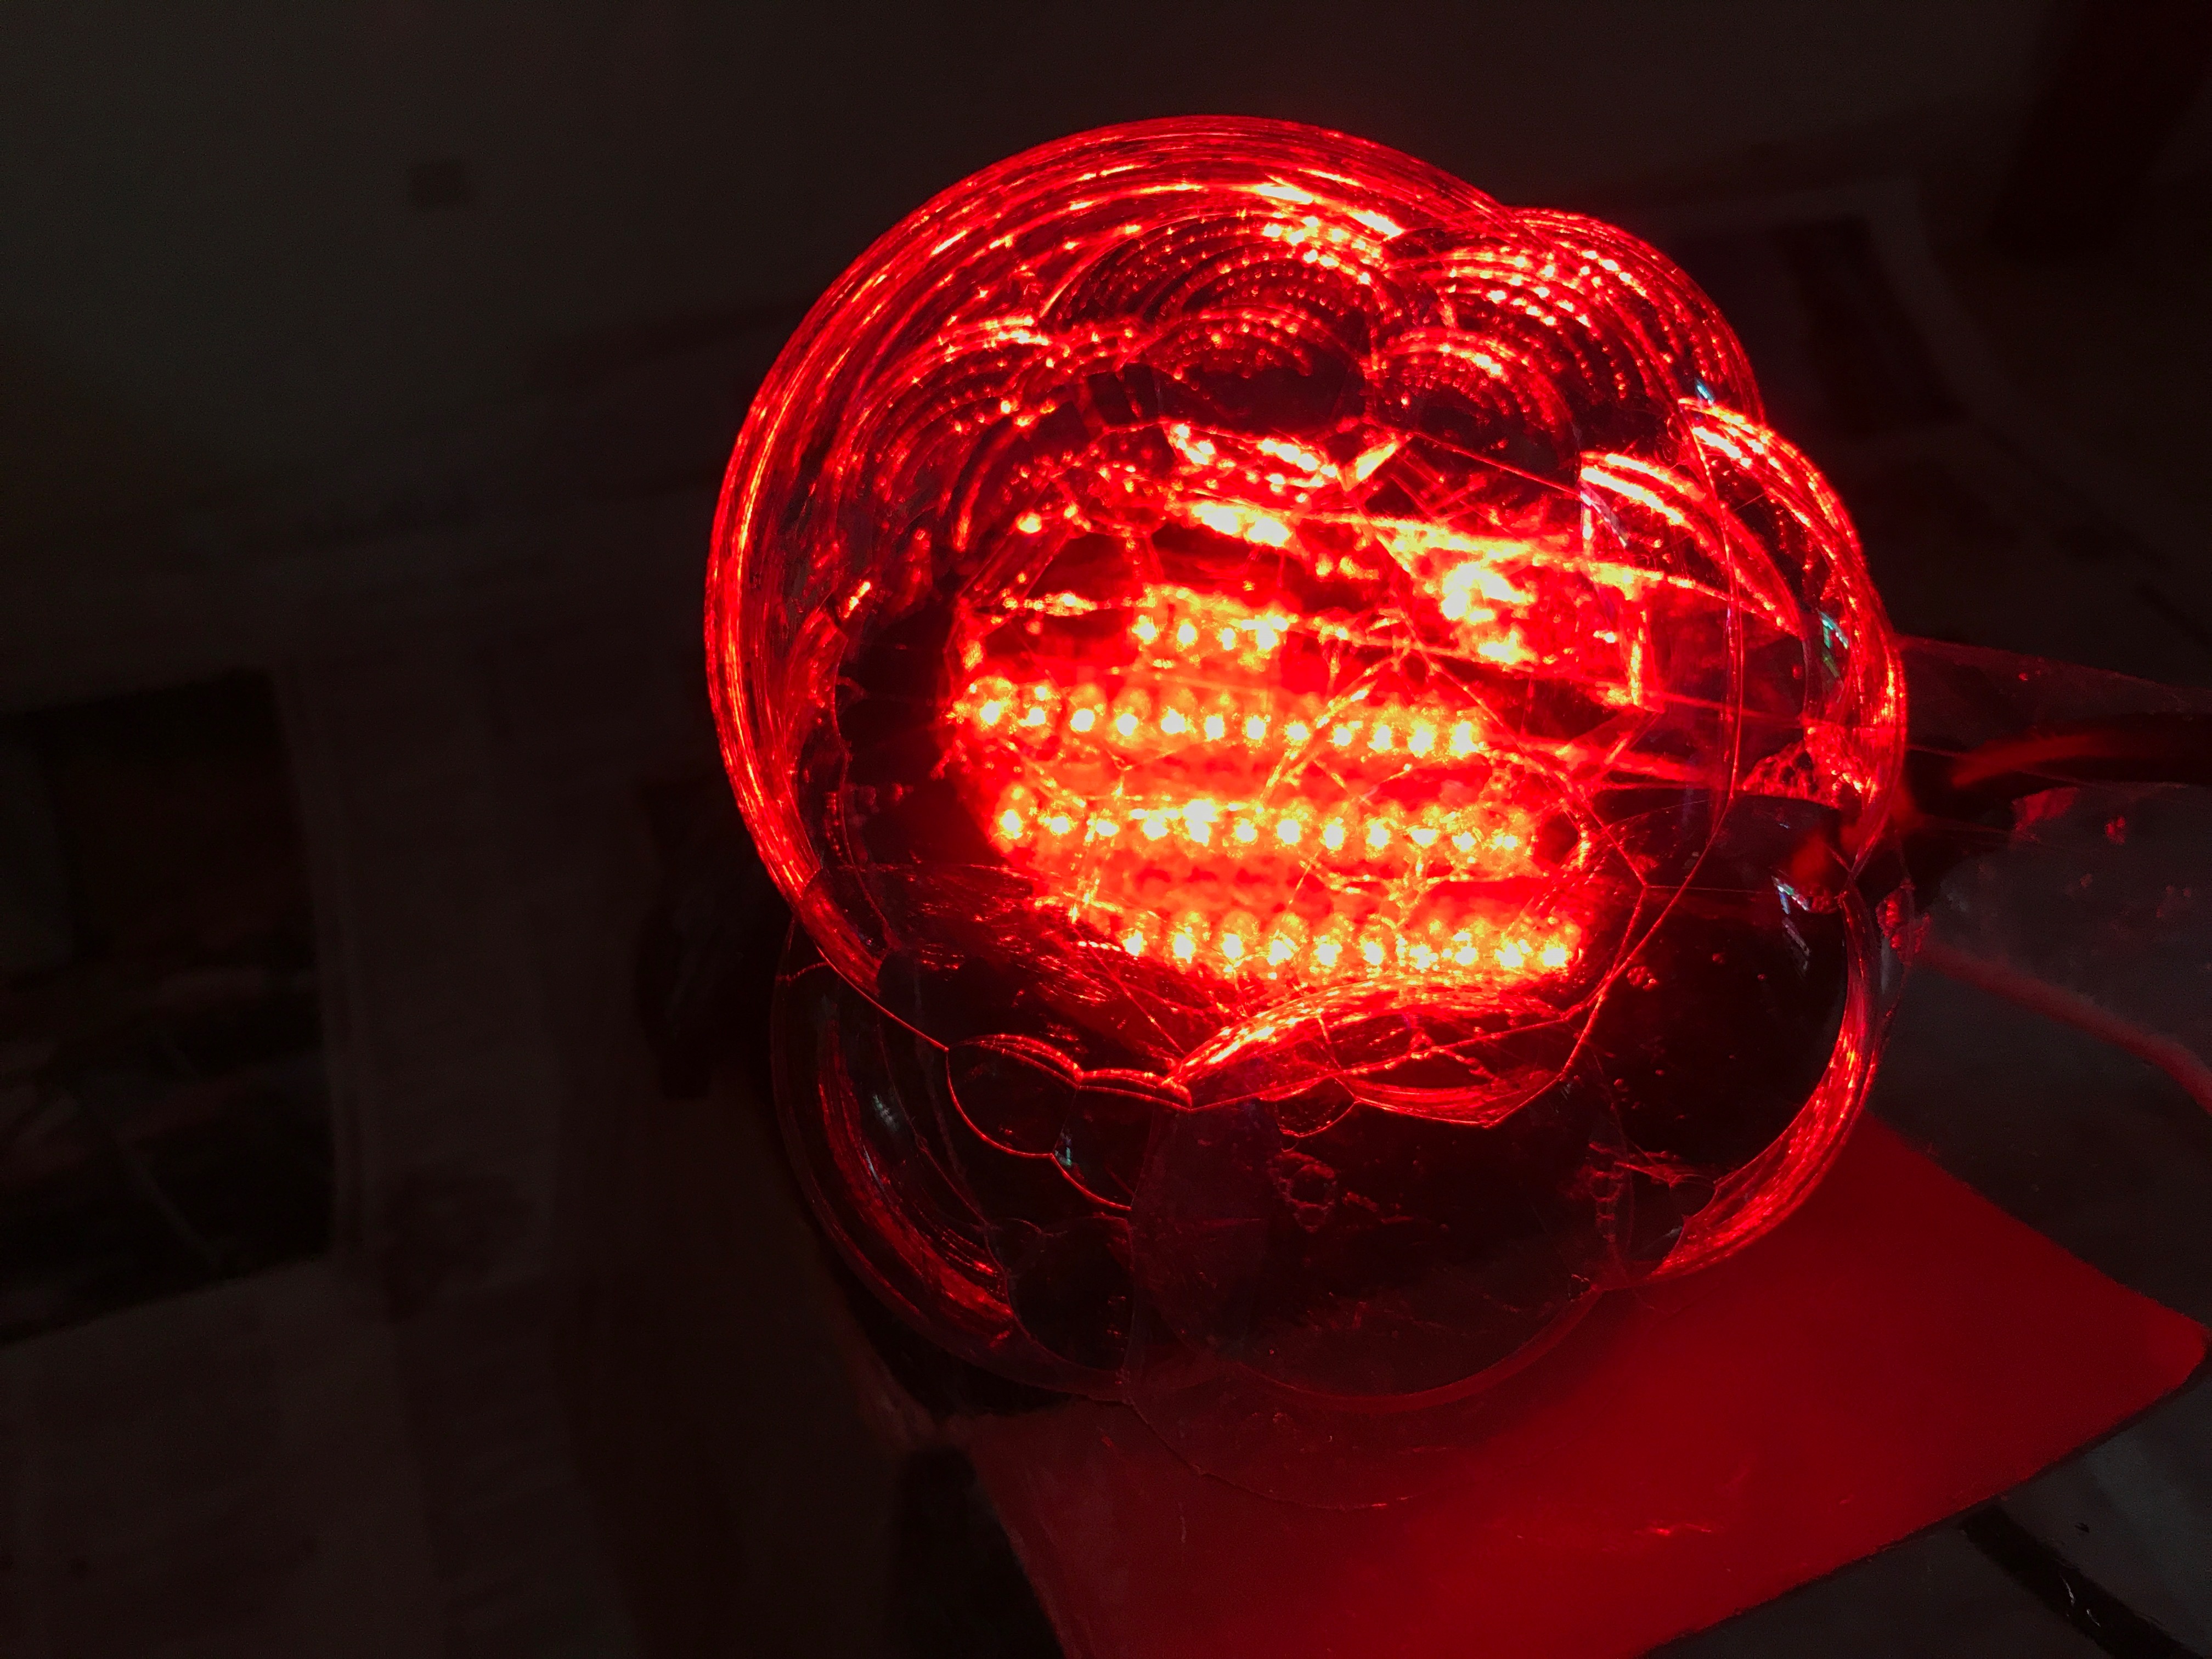
In this experiment, a pure red lighting was chosen as I envisioned that the strong lighting would translate into visually powerful bubbles exuding a single colour.
To add on to my previous point, only by directly placing the bubbles at the top of the light itself could really bring out the reflective quality of the bubbles. However, this would mean that the bubble has to be either suspended over the light, or that it would have to sit on a flat surface right above the light – whereby the spherical shape of the bubble would no longer be possible.
I did love the reflections of the bubble, particularly here:
Reflection on singular bubble
However, it was very hard to be able to angle one’s sight successfully to view this reflection, and that the structure of the chauvet lights dictate it that each individual RGB colour is seen, rather than the blend of R, G or B to achieve a new colour. This is especially so in the case of the bubbles were the light has to be very close to the bubble and has no affording distance to blend together. I suppose that this limitation could be overcome by directly wrapping the coloured cellophone paper over the light, hence it will not be an important consideration as of now.
I tried using many small bubbles, and one singular bubble to play with the lights. I concluded that while the small bubbles really gave off an airy feel, I would rather use larger singular bubbles as I could more properly play with the bubble medium. It would also be easier to control, and individualise my project rather than the conventional bubble explosion scene.
Sounds of.. Making Bubbles?
I recorded the sound of bubbling and edited it via Audacity. I will show a few samples.
(Please un-mute the video while watching it)
The edited sounds are included in the video, and there are 3 tracks in total.
Inside a dark room, bubbles filled with fog slowly drift ground-wards. Projected on it are flickering image which are a symbol for dreams which as quickly built as they are destroyed.
How Artwork was created:
1. Bubbles are created: smoke is blown through a tube moistened with soapy water
2. Camera tracking: soap bubbles illuminated with infrared light, filmed with an IR camera
Program vvvv recognised position, size and movement of bubbles 3. Projection: Images projected at calculated positions
The creators were investigating light as a design element, and saw the artwork to symbolise the relationship between dreams and wishes.
Personal Opinion:
The absolute brilliance of their artwork was of how the fragility of the bubbles was highlighted, and transformed with the addition of the projected light. Their artwork becomes a key learning reference for the technicalities of projection – the bubble medium itself is way too thin to be a suitable projection surface; there needs to be a ‘film’ of slightly opaqueness for the light to fall on. Particularly, when the bubble burst, the artwork was arrestingly beautiful – the bubble’s destruction was purposefully amplified and it faded away.
Their artwork also reminds me of the multiple possibilities of using equipment, such as IR light within a dark room to assist with position mapping.
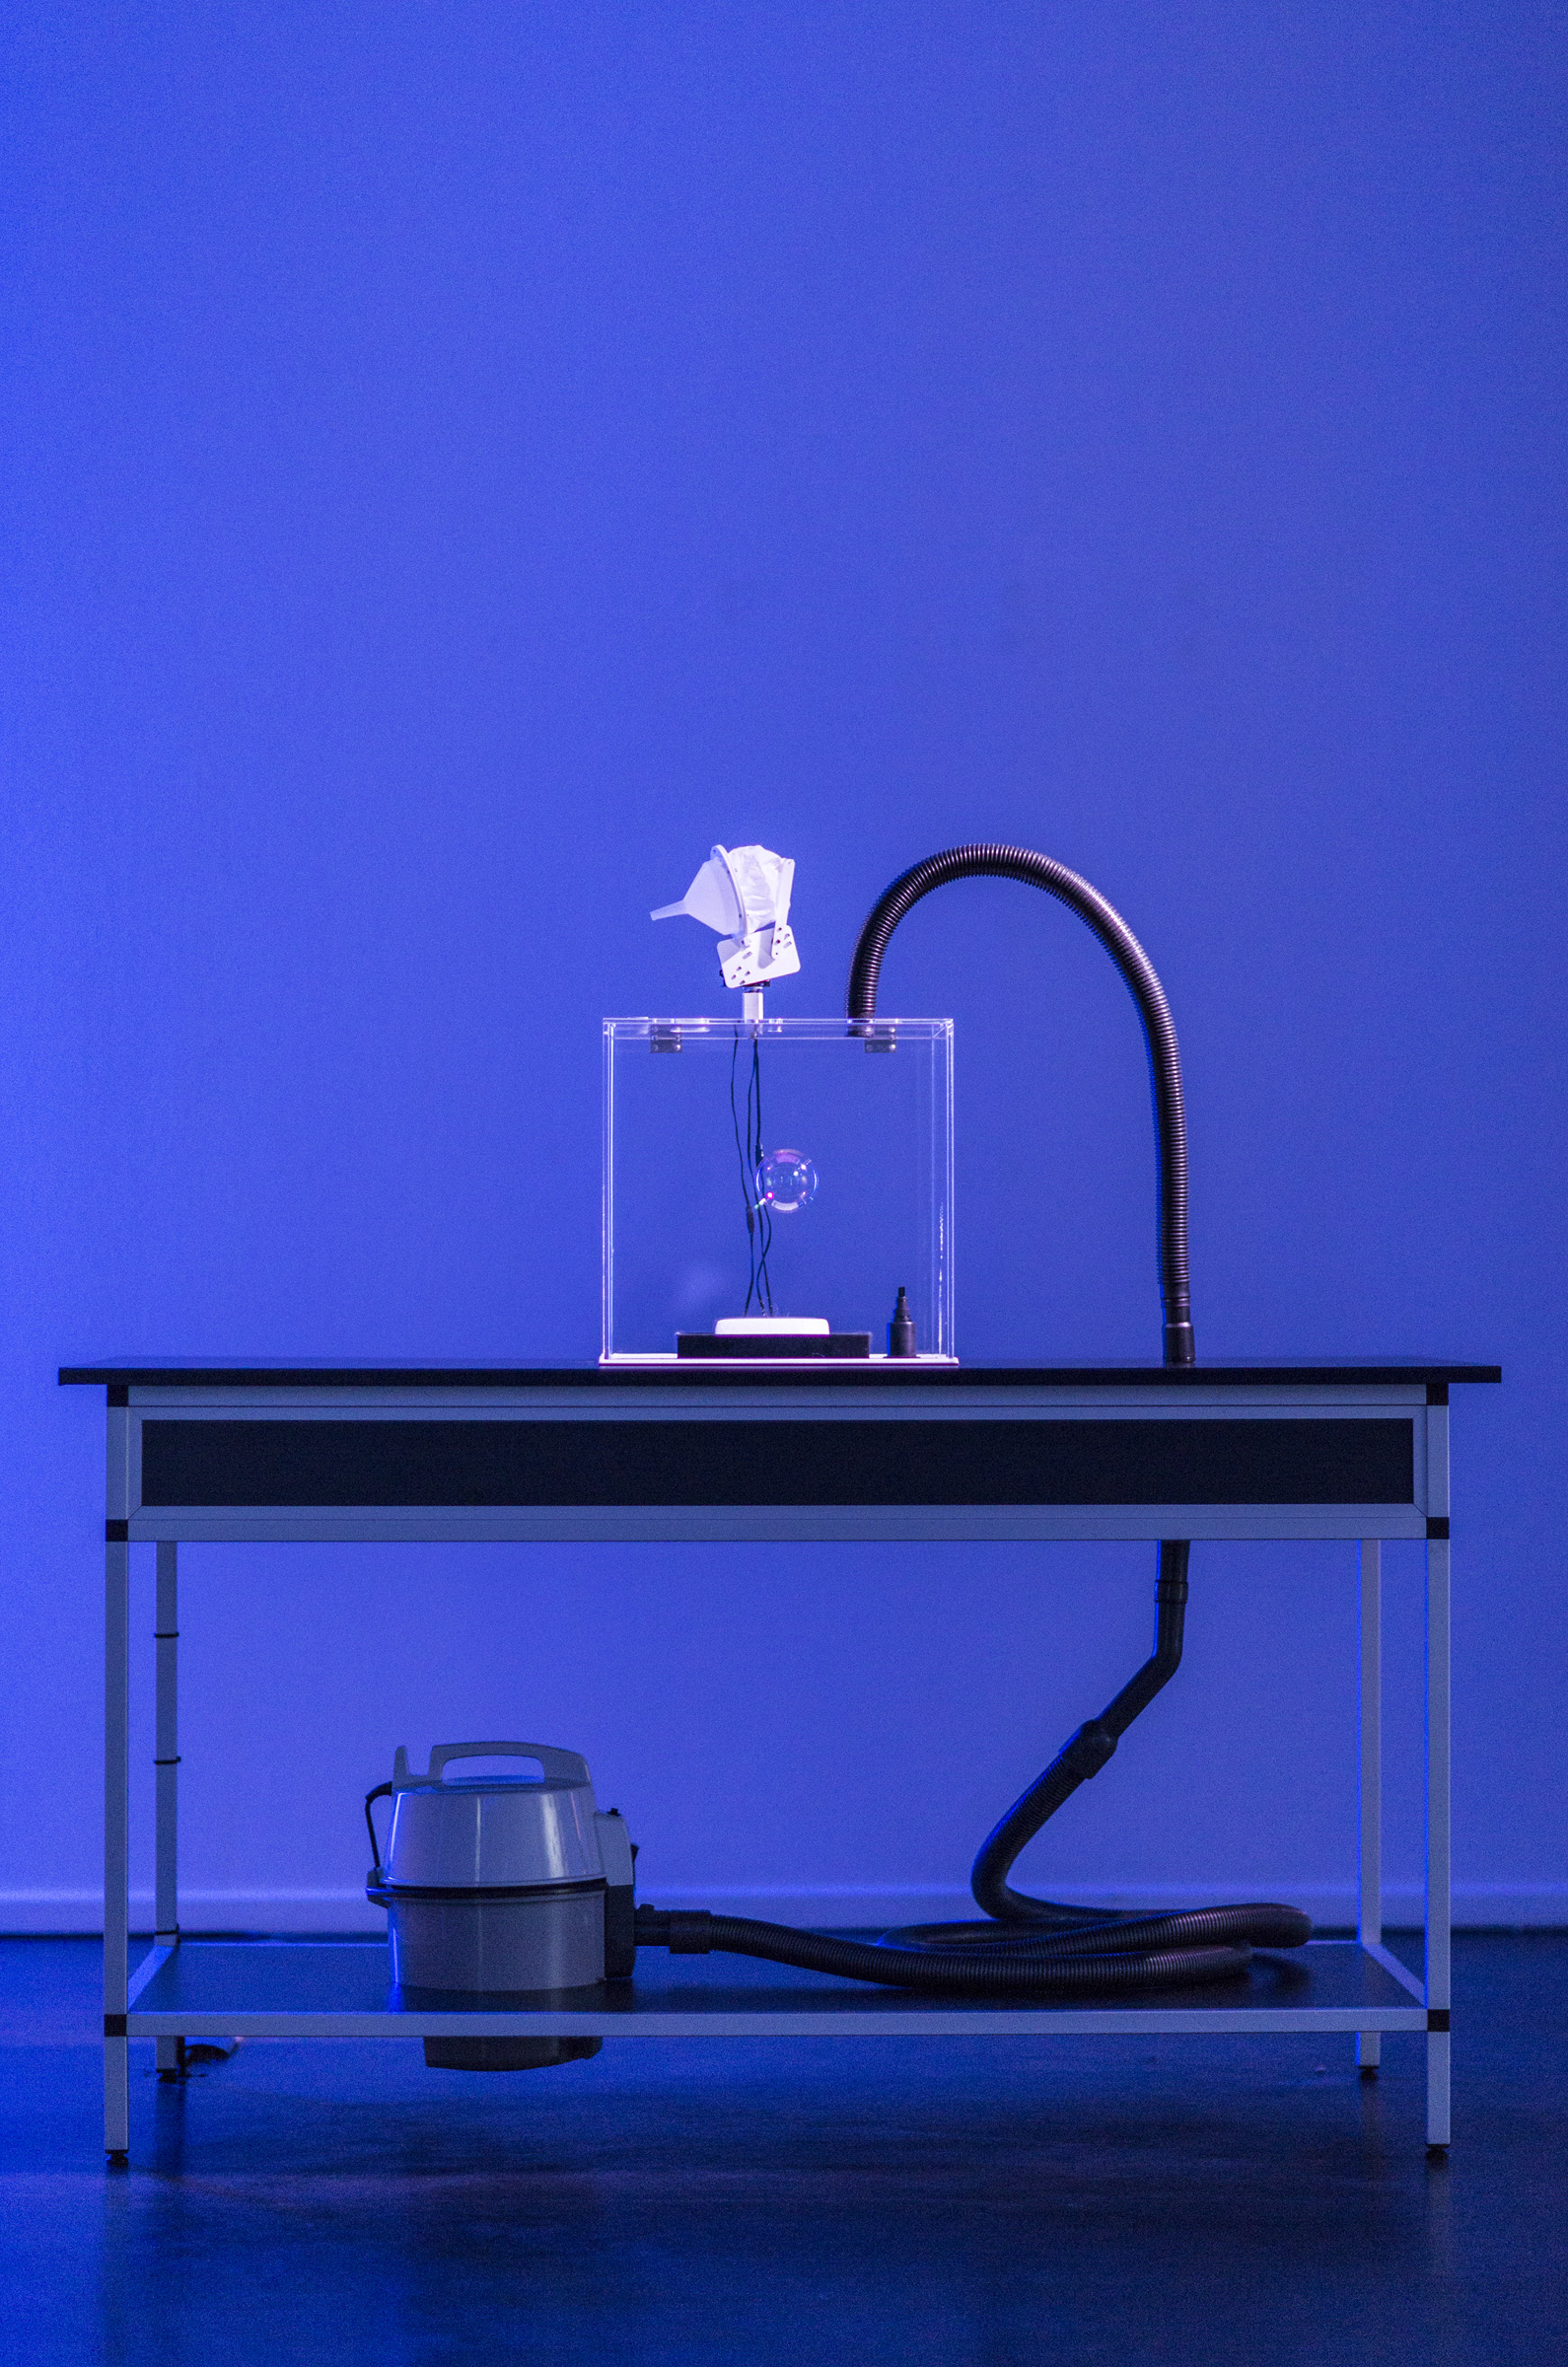
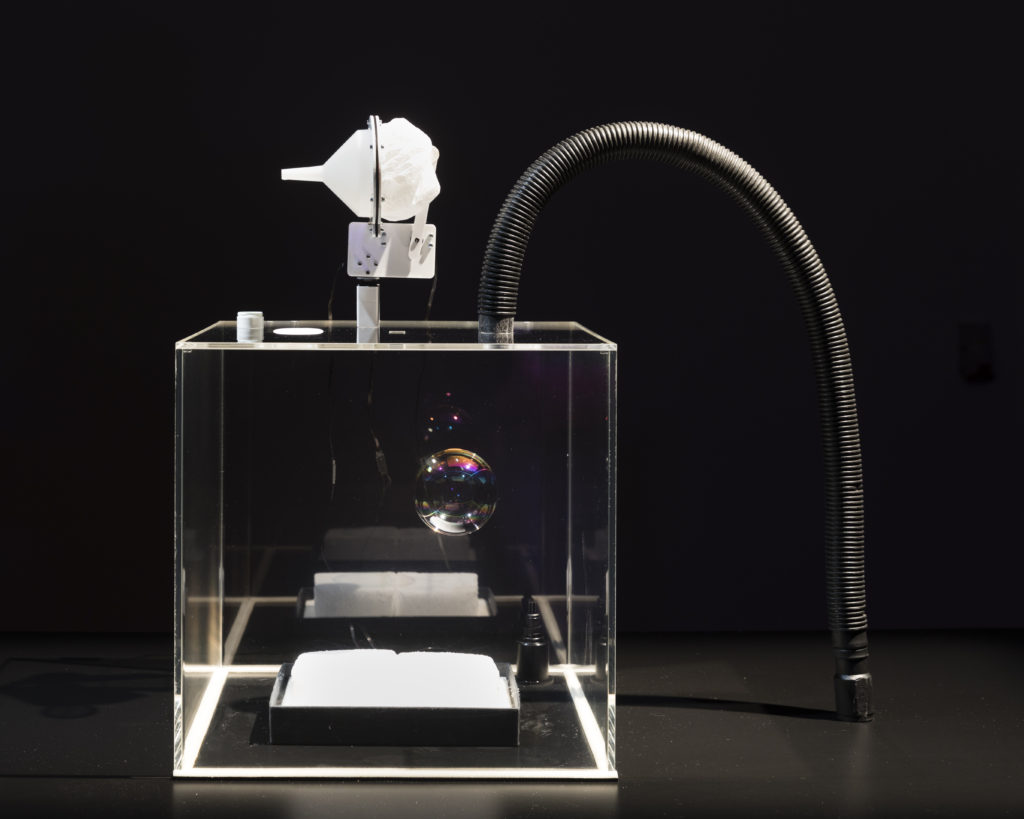
The mechanical arm squeezes a bubble out, and the predetermined settings in the container attempts to keep the bubble alive for as long as possible. Friedrich mentions that the artwork was her scientific and technological take on the vanitas symbols (momento mori?), where the project looks like a scientific project where the bubbles exist between the states of death and existentialism.
How Artwork was created:
Close up of squeezer pump
Set-up (excluding setting control pump)
I could not exactly find much information on this, but I assume that Friedrich used a pump manually lubricated with soapy water (the lack of a container for soapy water is obvious). A robotic arm manually squeezes the bubble out. However, Friedrich mentioned that the physical quality of the bubbles had to be altered to increase durability. As for the controlled environment, I suspect it’s to do with temperature, humidity (where colder environment and increased humidity dries the bubble out slower, hence it lasts longer) and wind conditions, to set the bubble at the exact spot where conditions are the most optimal before it slowly floats off route.
Personal Opinion:
I thought this was simply brilliant, and it opened my eyes to the possibility of using only one bubble for the whole experiment vs repeatedly many. At the same time, this project remains very simple and elements are stripped down to the bare minimum – instead of continuously adding in different technologies, perhaps I could focus on the skeleton first? I think this would be very useful to me right now when I have not much ideas on how to create my own project.
Muench | Furukawa Interaktive Installation mit Echtzeit Video-Tracking System Realisiert am ZKM Karlsruhe, 2000
Muench | Furukawa Interaktive Installation mit Echtzeit Video-Tracking System Realisiert am ZKM Karlsruhe, 2000
Muench | Furukawa Interaktive Installation mit Echtzeit Video-Tracking System Realisiert am ZKM Karlsruhe, 2000
Muench | Furukawa Interaktive Installation mit Echtzeit Video-Tracking System Realisiert am ZKM Karlsruhe, 2000
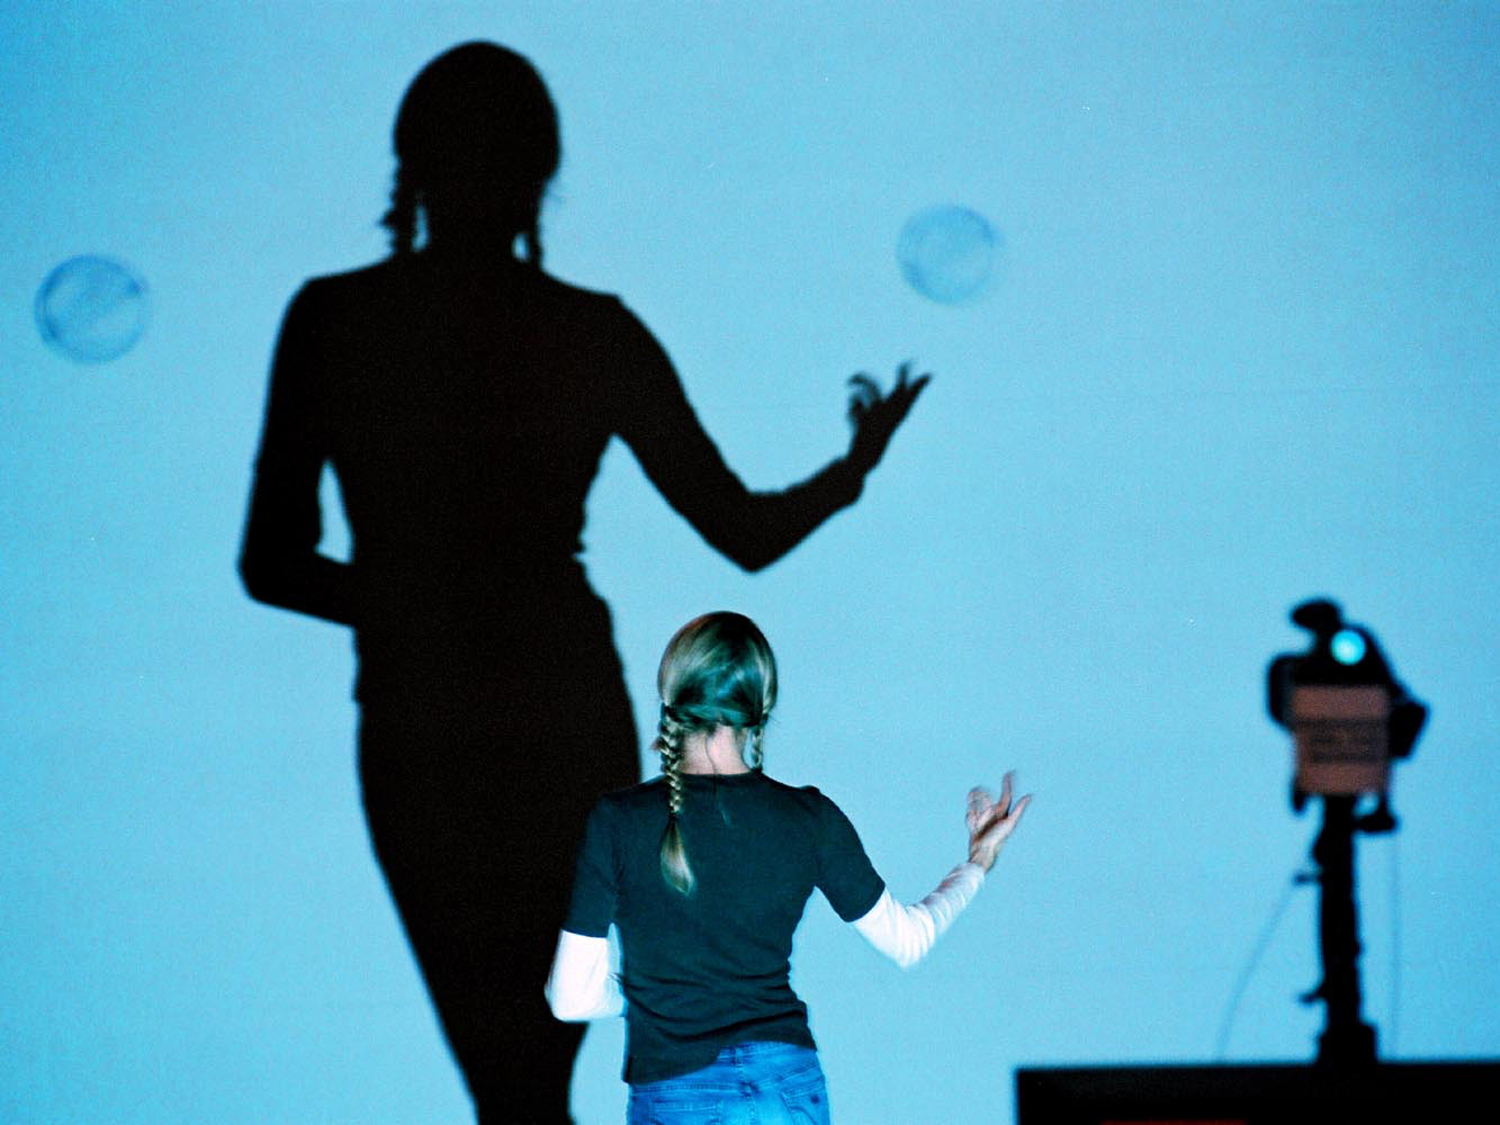
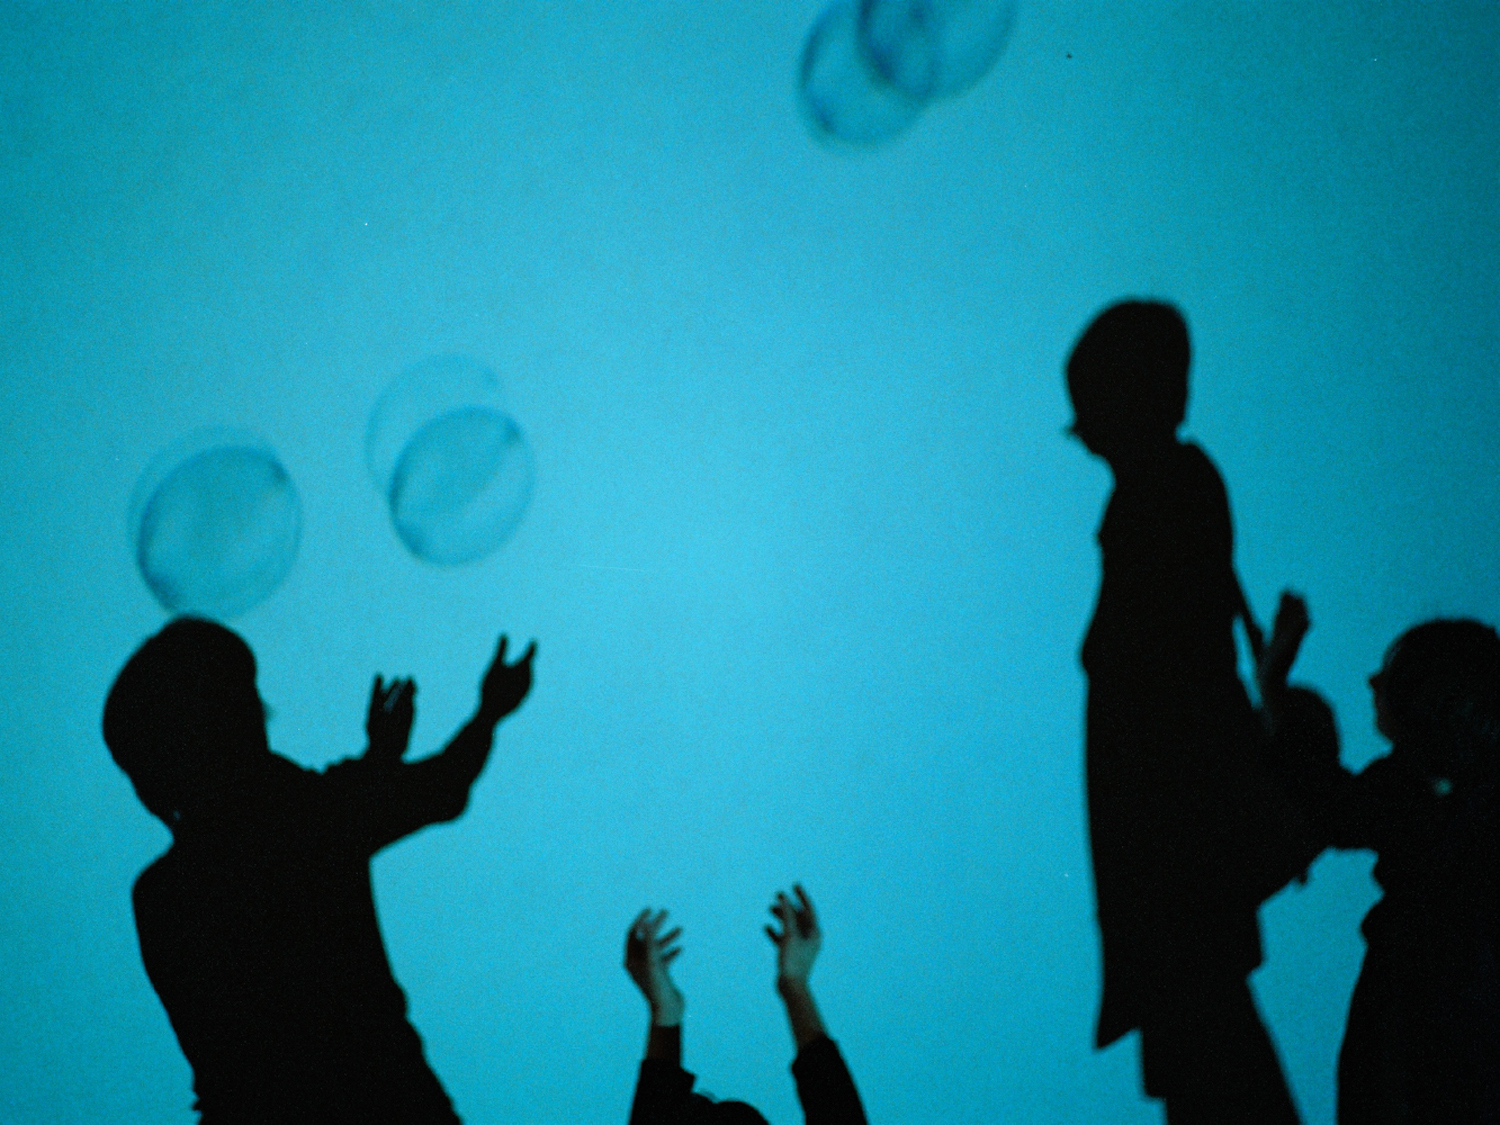
Interacting with virtual bubbles using your shadows. Your shadow, reflected on the screen, can move/hit the bubbles, and a corresponding sound will be played. This project attempts to imbue the body – an object usually left out of artworks – into the project as a means of interaction. The combined surface of shadows, projected bubbles and the screen itself closes the distance and spatial relationship between the three discreet objects.
How Artwork was created:
1. Bubbles on screen were created using a simulation algorithm, each bubble was paired with a script object which defined its behaviour according to gravitation, acceleration and air circulation
2. Bubbles’ drifting movements were synced to a midi-synthesizer for sound
3. Shadow’s position was captured if it hit above a certain threshold, and if present, triggers a routine whereby the bubbles bounce back
2. User tracking interface was implemented
Personal Opinion:
Indeed, this could be another method of using bubbles and in fact I did think briefly about this idea. However, I felt that the outcome was way too technology-based/impersonal for my liking. It was nice however, to know that such options are available.
Huge black horns bellow out compressed air, which collides with soapy water to create big sound bubbles. The concept was to transform sound into three dimensional space with its presence. As the shape of the bubbles are constantly changing, it is also a reflection of how space is repeatedly getting redefined. Visitors are encouraged to place their bodies relative to the bubbles’ position.
How Artwork was created:
1. Need for horn to blow compressed air
2. Fluid circulation required
3. Horns were 3-D designed Horns’ pitch were also affected by material, due considerations had to be given
Personal Opinion:
I like this artwork, the idea of transforming sound into the physical bubble was evident in the outcome. Since I am considering to input sound into my artwork, are there other ways to go about doing it? Ie. sound affecting the physical bubble
A quick and (very) summarised update on what I’ve been up for the week – bubble experimentation!
Bubble Characteristics Types of Bubbles Singular, clump, foam
Bubble Movements Burst, fuse, repel
Creating Bubbles
Based on my experiments, the outcome of the bubble type will depend on the shape of the wand and can be altered as such.
For a large singular bubble, use a wand with a big single opening. For little bubbles to appear at one go, use a wand with many small openings.
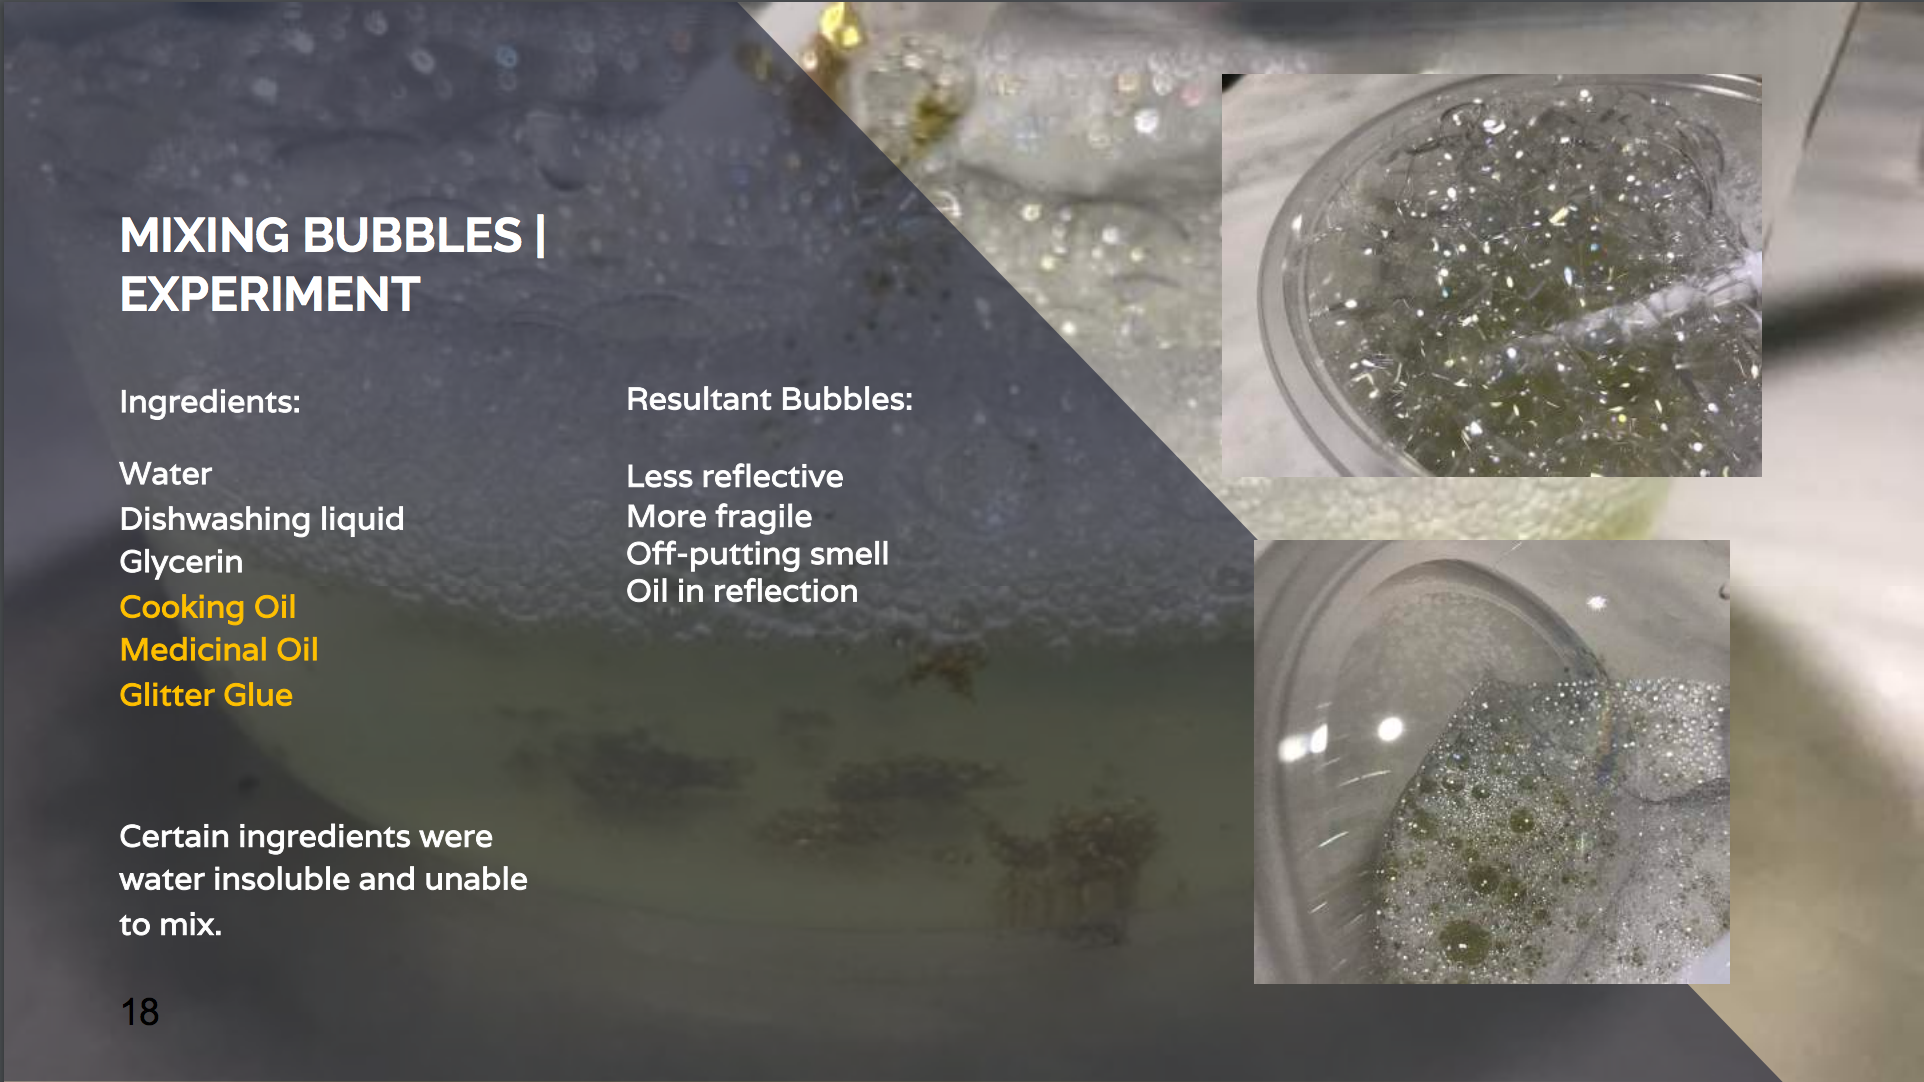
Bubble Experiment #1 Altering Materials
Material List for bubble exp 1
It should be noted that certain materials such as the glitter was hard to mix into the soapy mixture. For future references, only water soluble substances should be used.
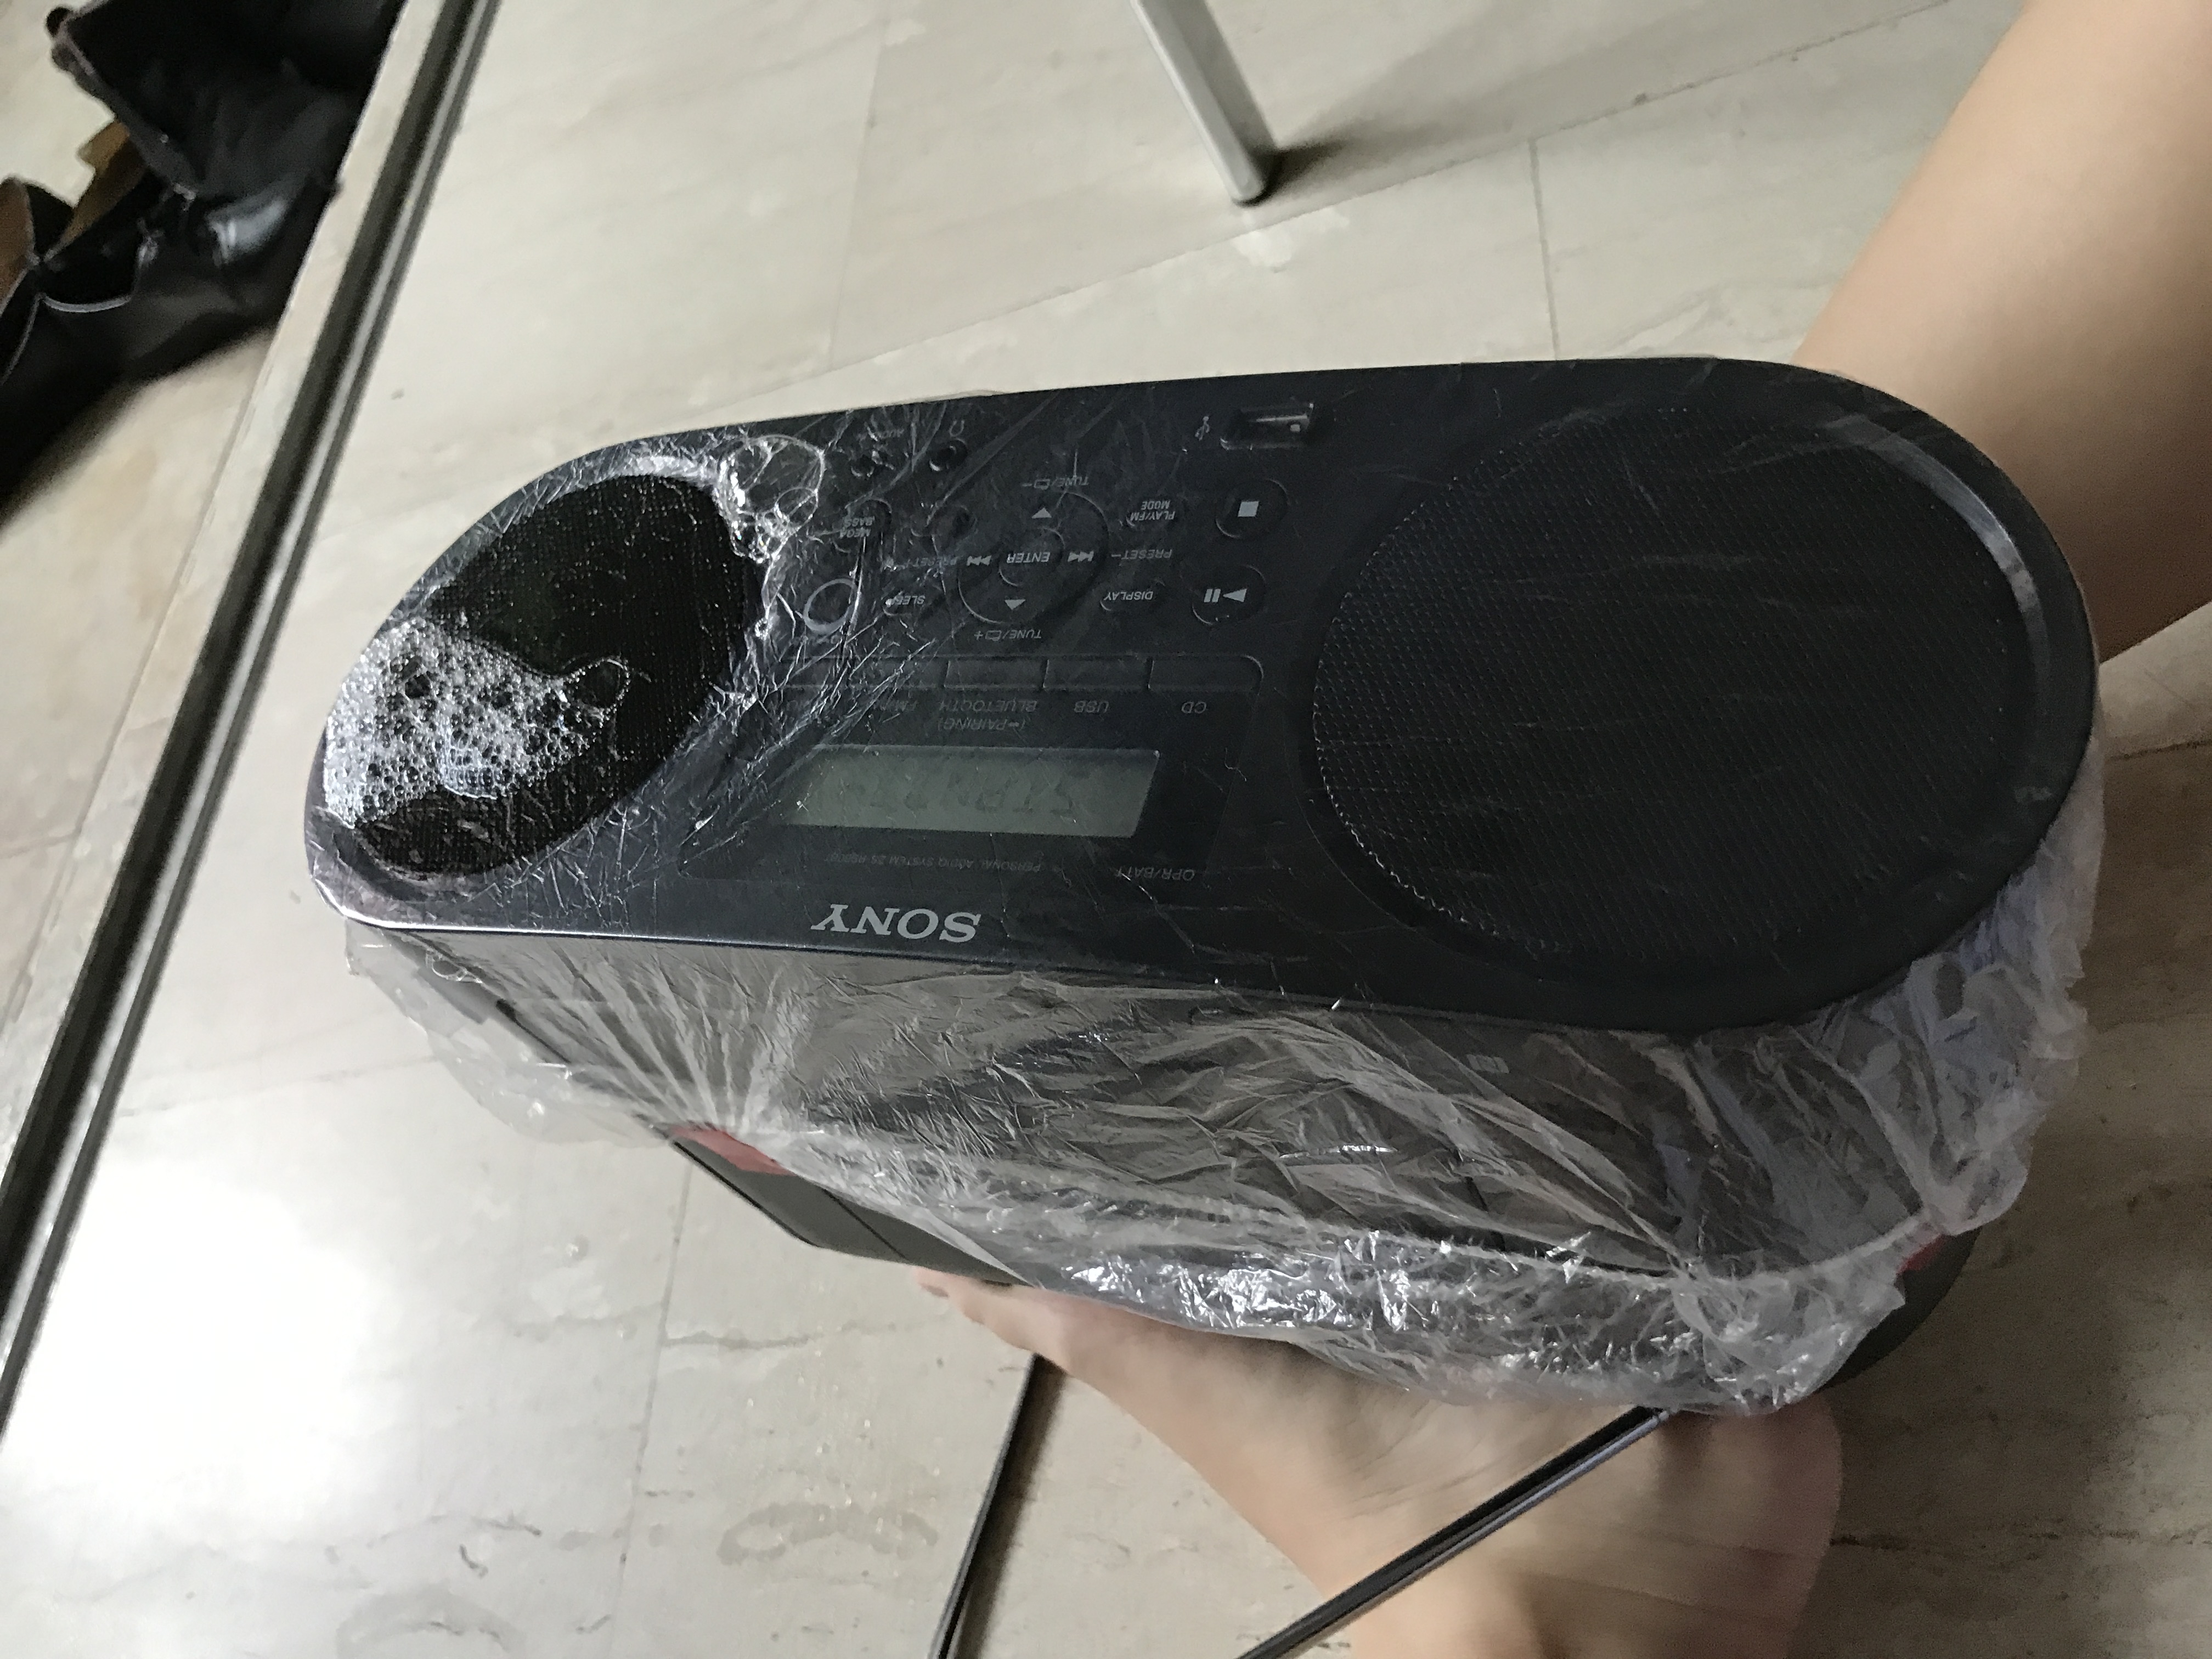
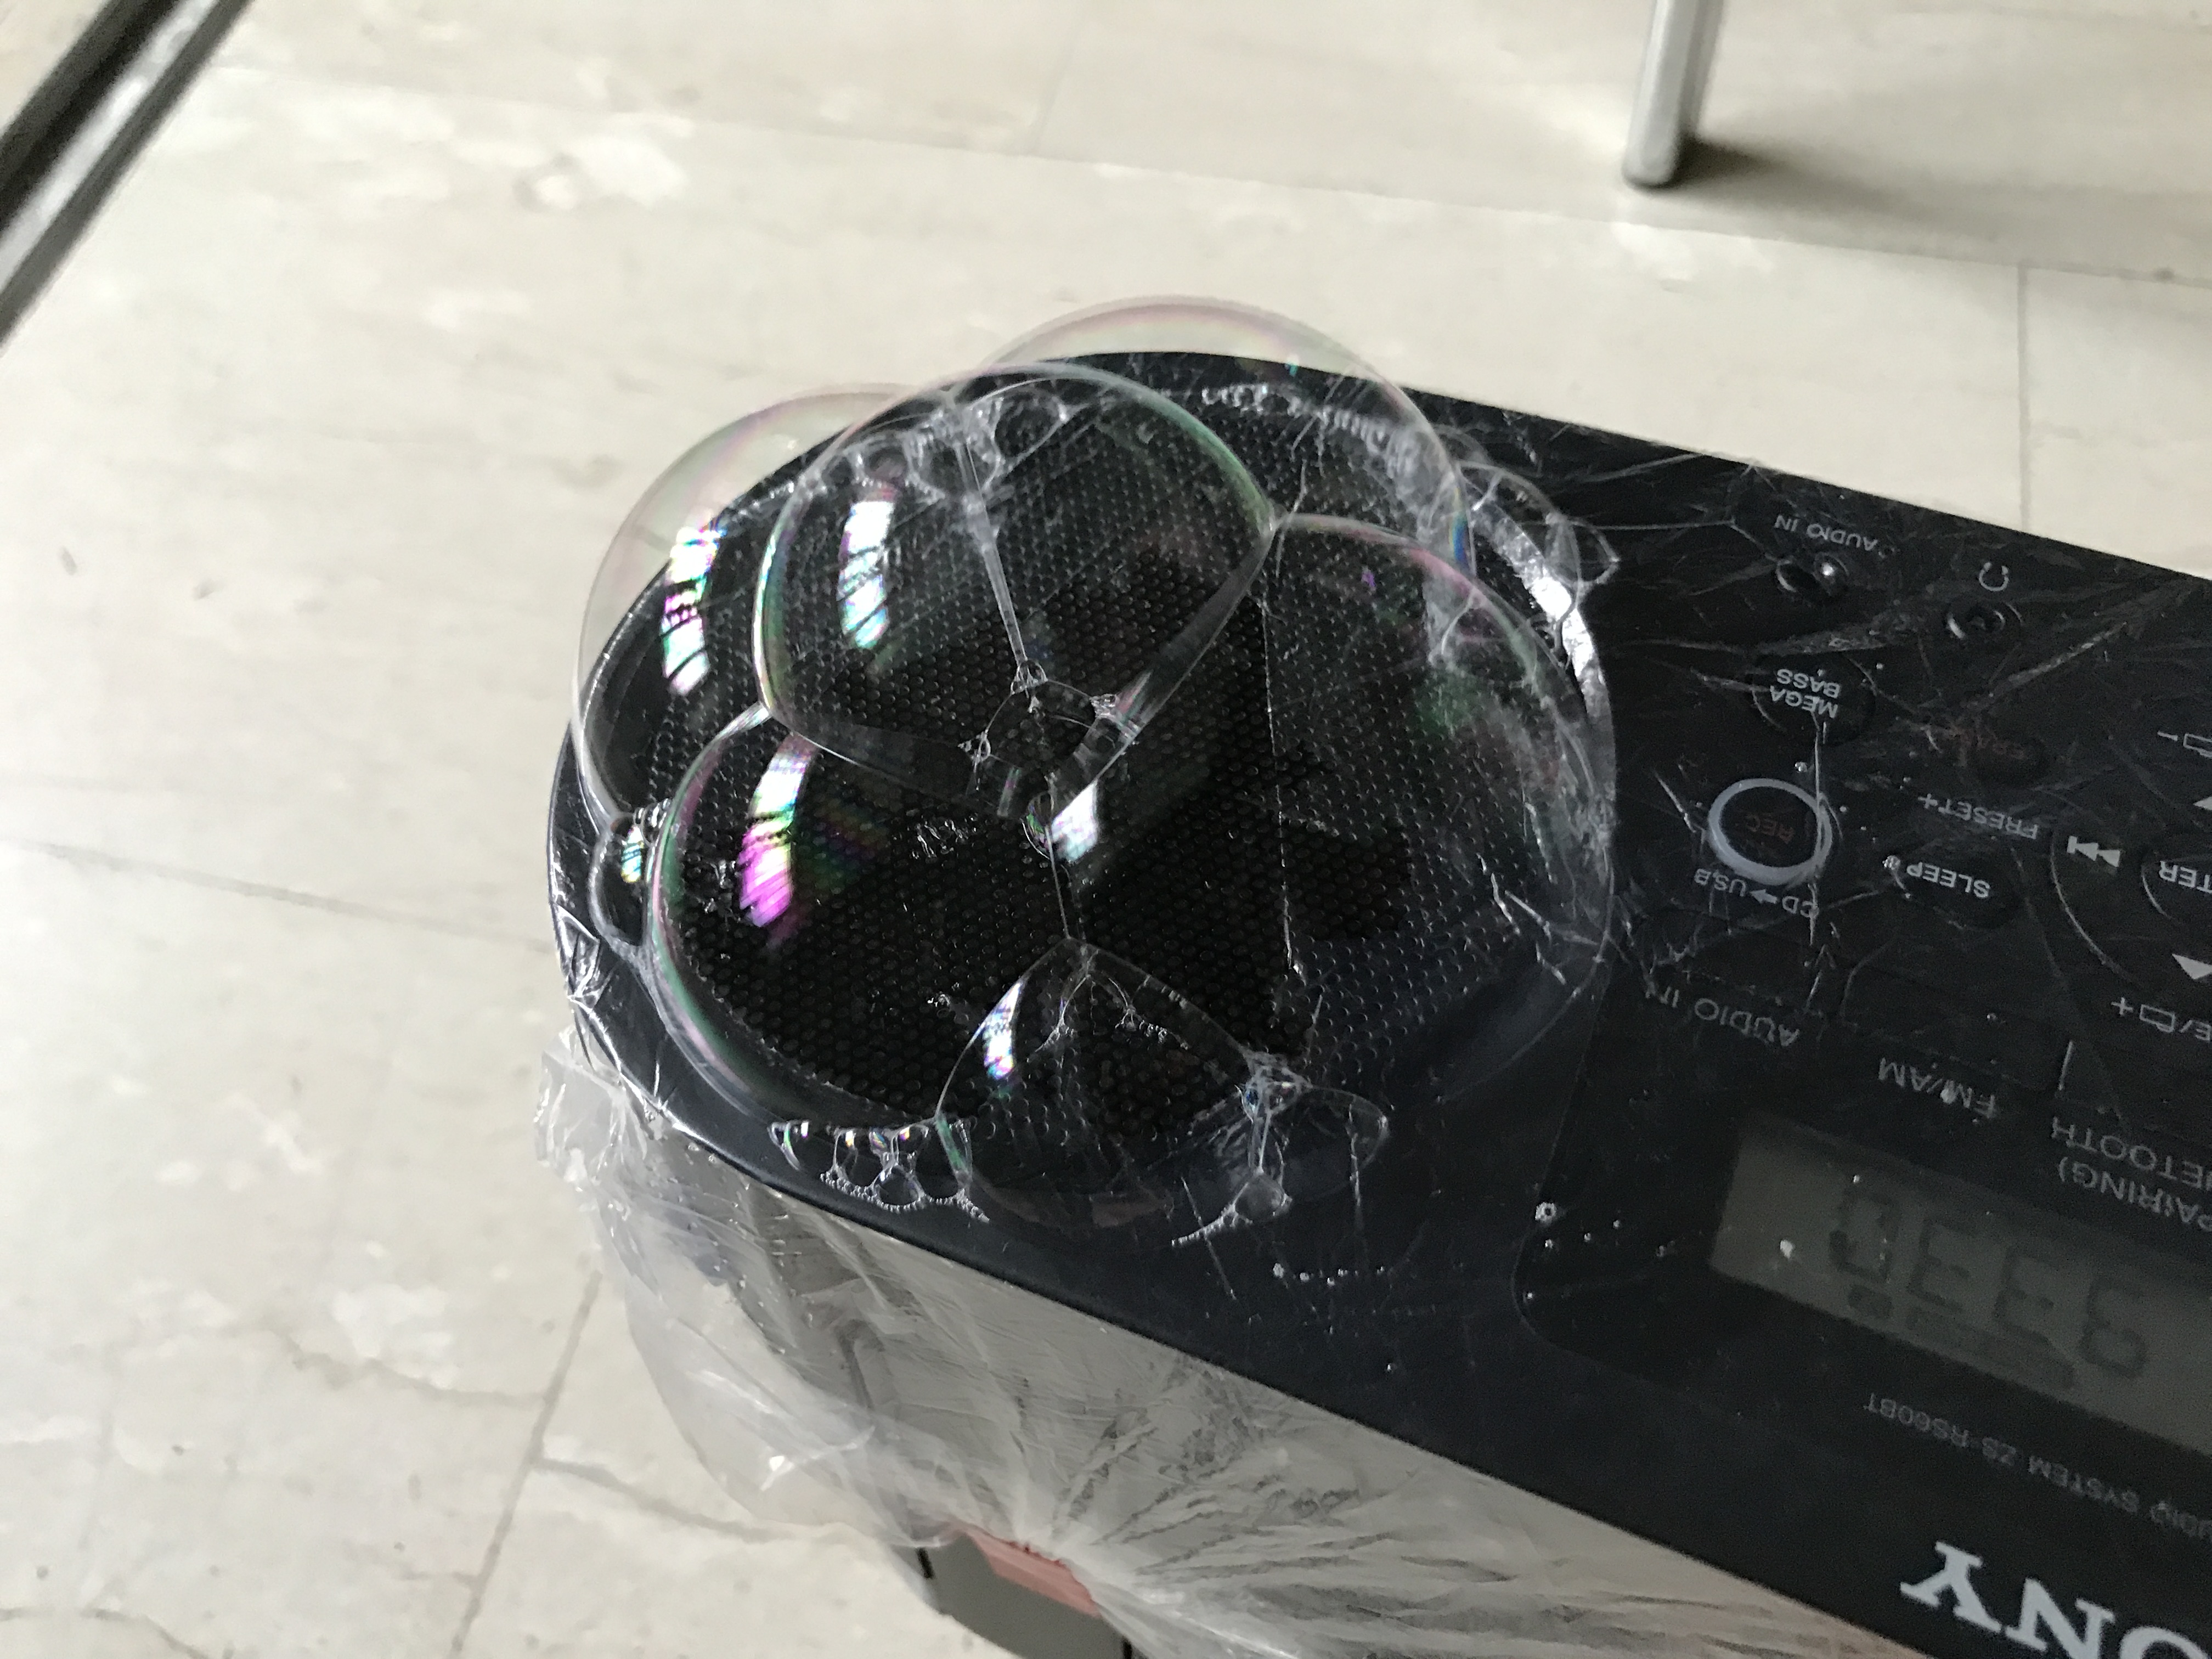
Bubble Experiment #2 Inputting Sound
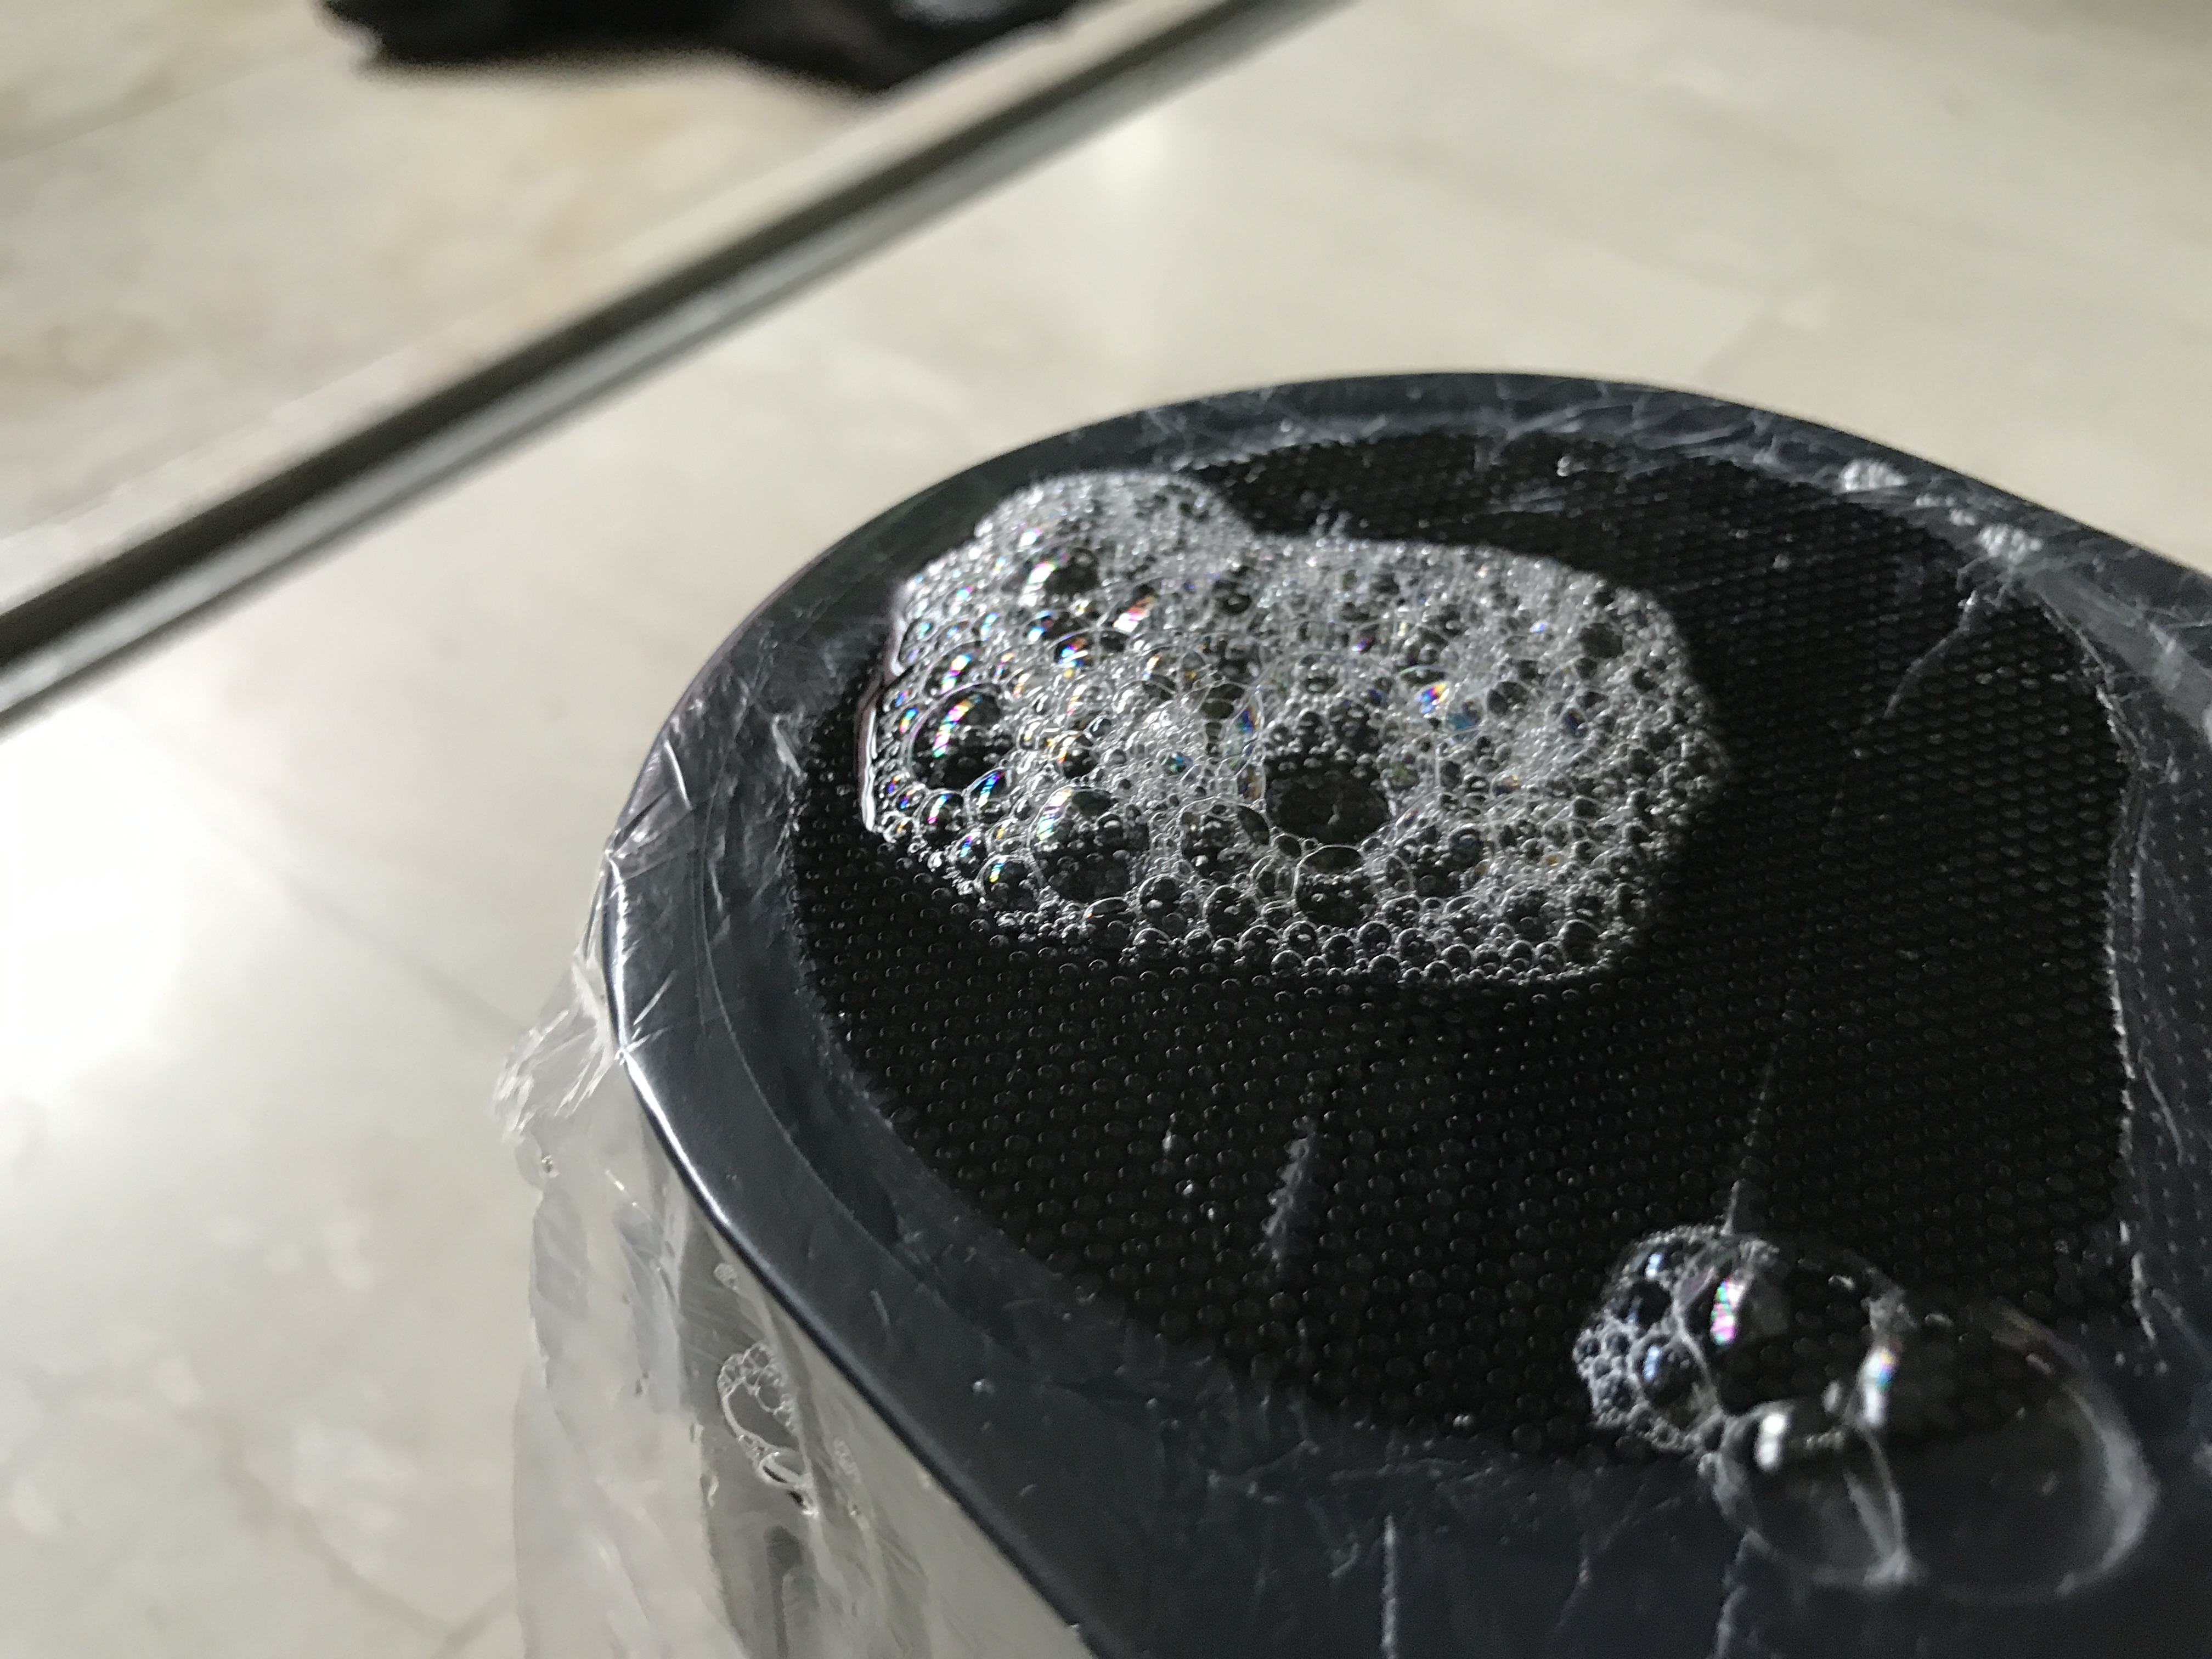
The radio was wrapped with a shower cap
Clump of bubbles tryout
Singularly large bubble tryout
Foam tryout
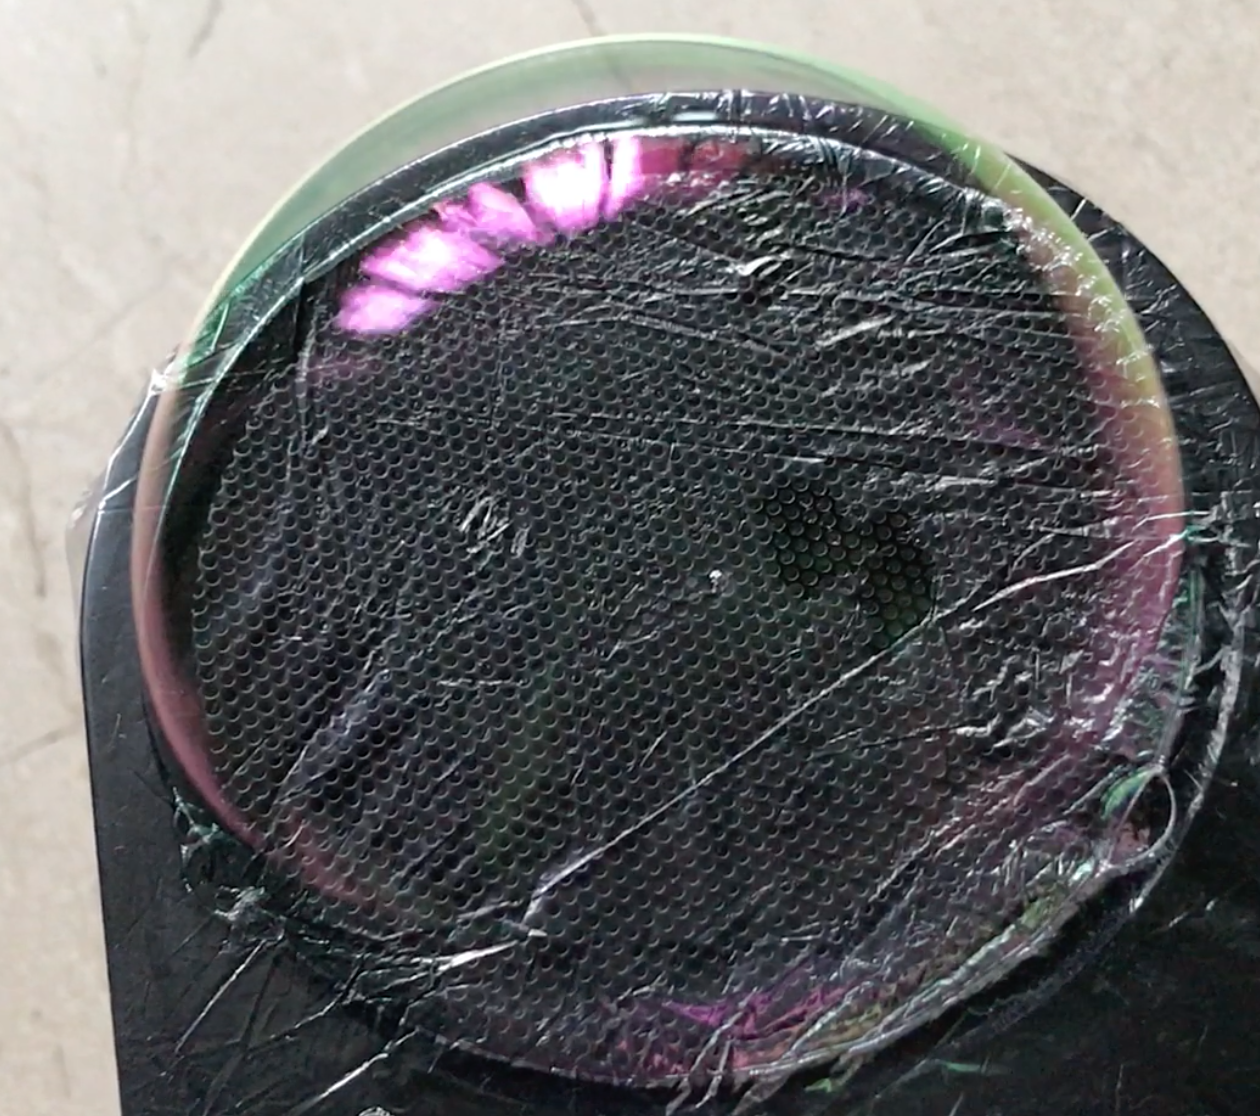
Singularly large bubbles reflection and tryout
Outcomes:
Singularly large bubble – rainbow reflection was more ‘solid’, and changes in sound beats more obvious in bubble
Clustered bubble – similar outcome to singularly large bubble, but movement/swaying of bubble more negligible
Foam bubble – most obvious outcome in terms of movement (as foam is smaller and lighter to move), water droplets dance around resplendently
My friends recommended that I try bass music instead for more effective ‘bubble dancing’. Perhaps I should try that.
Recapping last week’s episode, I have to combine all the distinct elements into one set installation – as till now I still can’t envision the final outcome. Basically, I tried to combine performance actions with the visuals background in OBS to build up a mockup. But I wonder if blatant combination would be really what I want? The best thing to do is to just work on it and figure how it goes on the side.
Sounds
Understand that sounds are very important, but I am still sourcing for appropriate sounds and have recorded a few but have not started editing them. But at the same time, I am wondering if sounds are really needed in this installation which I am considering of using the physical objects to generate on-site sound rather than a prerecording.
Nawa actualised one of the sketches I had in mind, particularly in my foam tryout last week. However, his premise for the installation slightly deferred from mine – through this installation, Nawa investigates the cycle of birth and destruction, whereas mine focuses only on destruction.
Small bubbles (cells) continue to form on the surface of a gently lapsing liquid. They accumulate to form an autonomous structure comprised of foam. Each bubble cannot escape the cycle of birth and destruction, which is not unlike the way our cells operate as they metabolize and circulate. Source: dezeen.com
Madrid, Cloud-Gates Bubble Machine Museo Nacional Centro de Arte Reina Sofia, 2013Cloud Canyons No. 3: An Ensemble of Bubble Machines (Auto Creative Sculptures) 1961, remade 2004
kinetic, evolving forms
Locally, Medalla’s Cloud Canyons No. 24 installed at National Gallery Singapore requires maintanence in the form of topping up the detergent and water before restarting the installation every five days.Sulaiman’s team had to find a brand of detergent that is odourless, water-based and which emits low levels of volatile organic compounds so as not to affect other artworks. Six different brands were tested – each for a week at a time.
Bouquet Final, Michel Blazy Foam as an installation
Housed in a Cistercian monastery in Paris that dates back to the 13th century, the unpredictable, free-forming foam “sculptures” drape softly and frothily over unyielding metal scaffolding.
Resembling huge swaths of cotton candy, the fluffy, wet mass of foam is meant to symbolize the fragility of life.