We have finally come to our project of the semester!! Initially I had a hard time coming up with an idea for my project but I knew I wanted to do an extension of our project 3 – type as pattern. I thought that slapping a pattern on a notebook would be too cliche and overdone so I thought of all the possibilities of when I could use type as pattern.
Moodboard

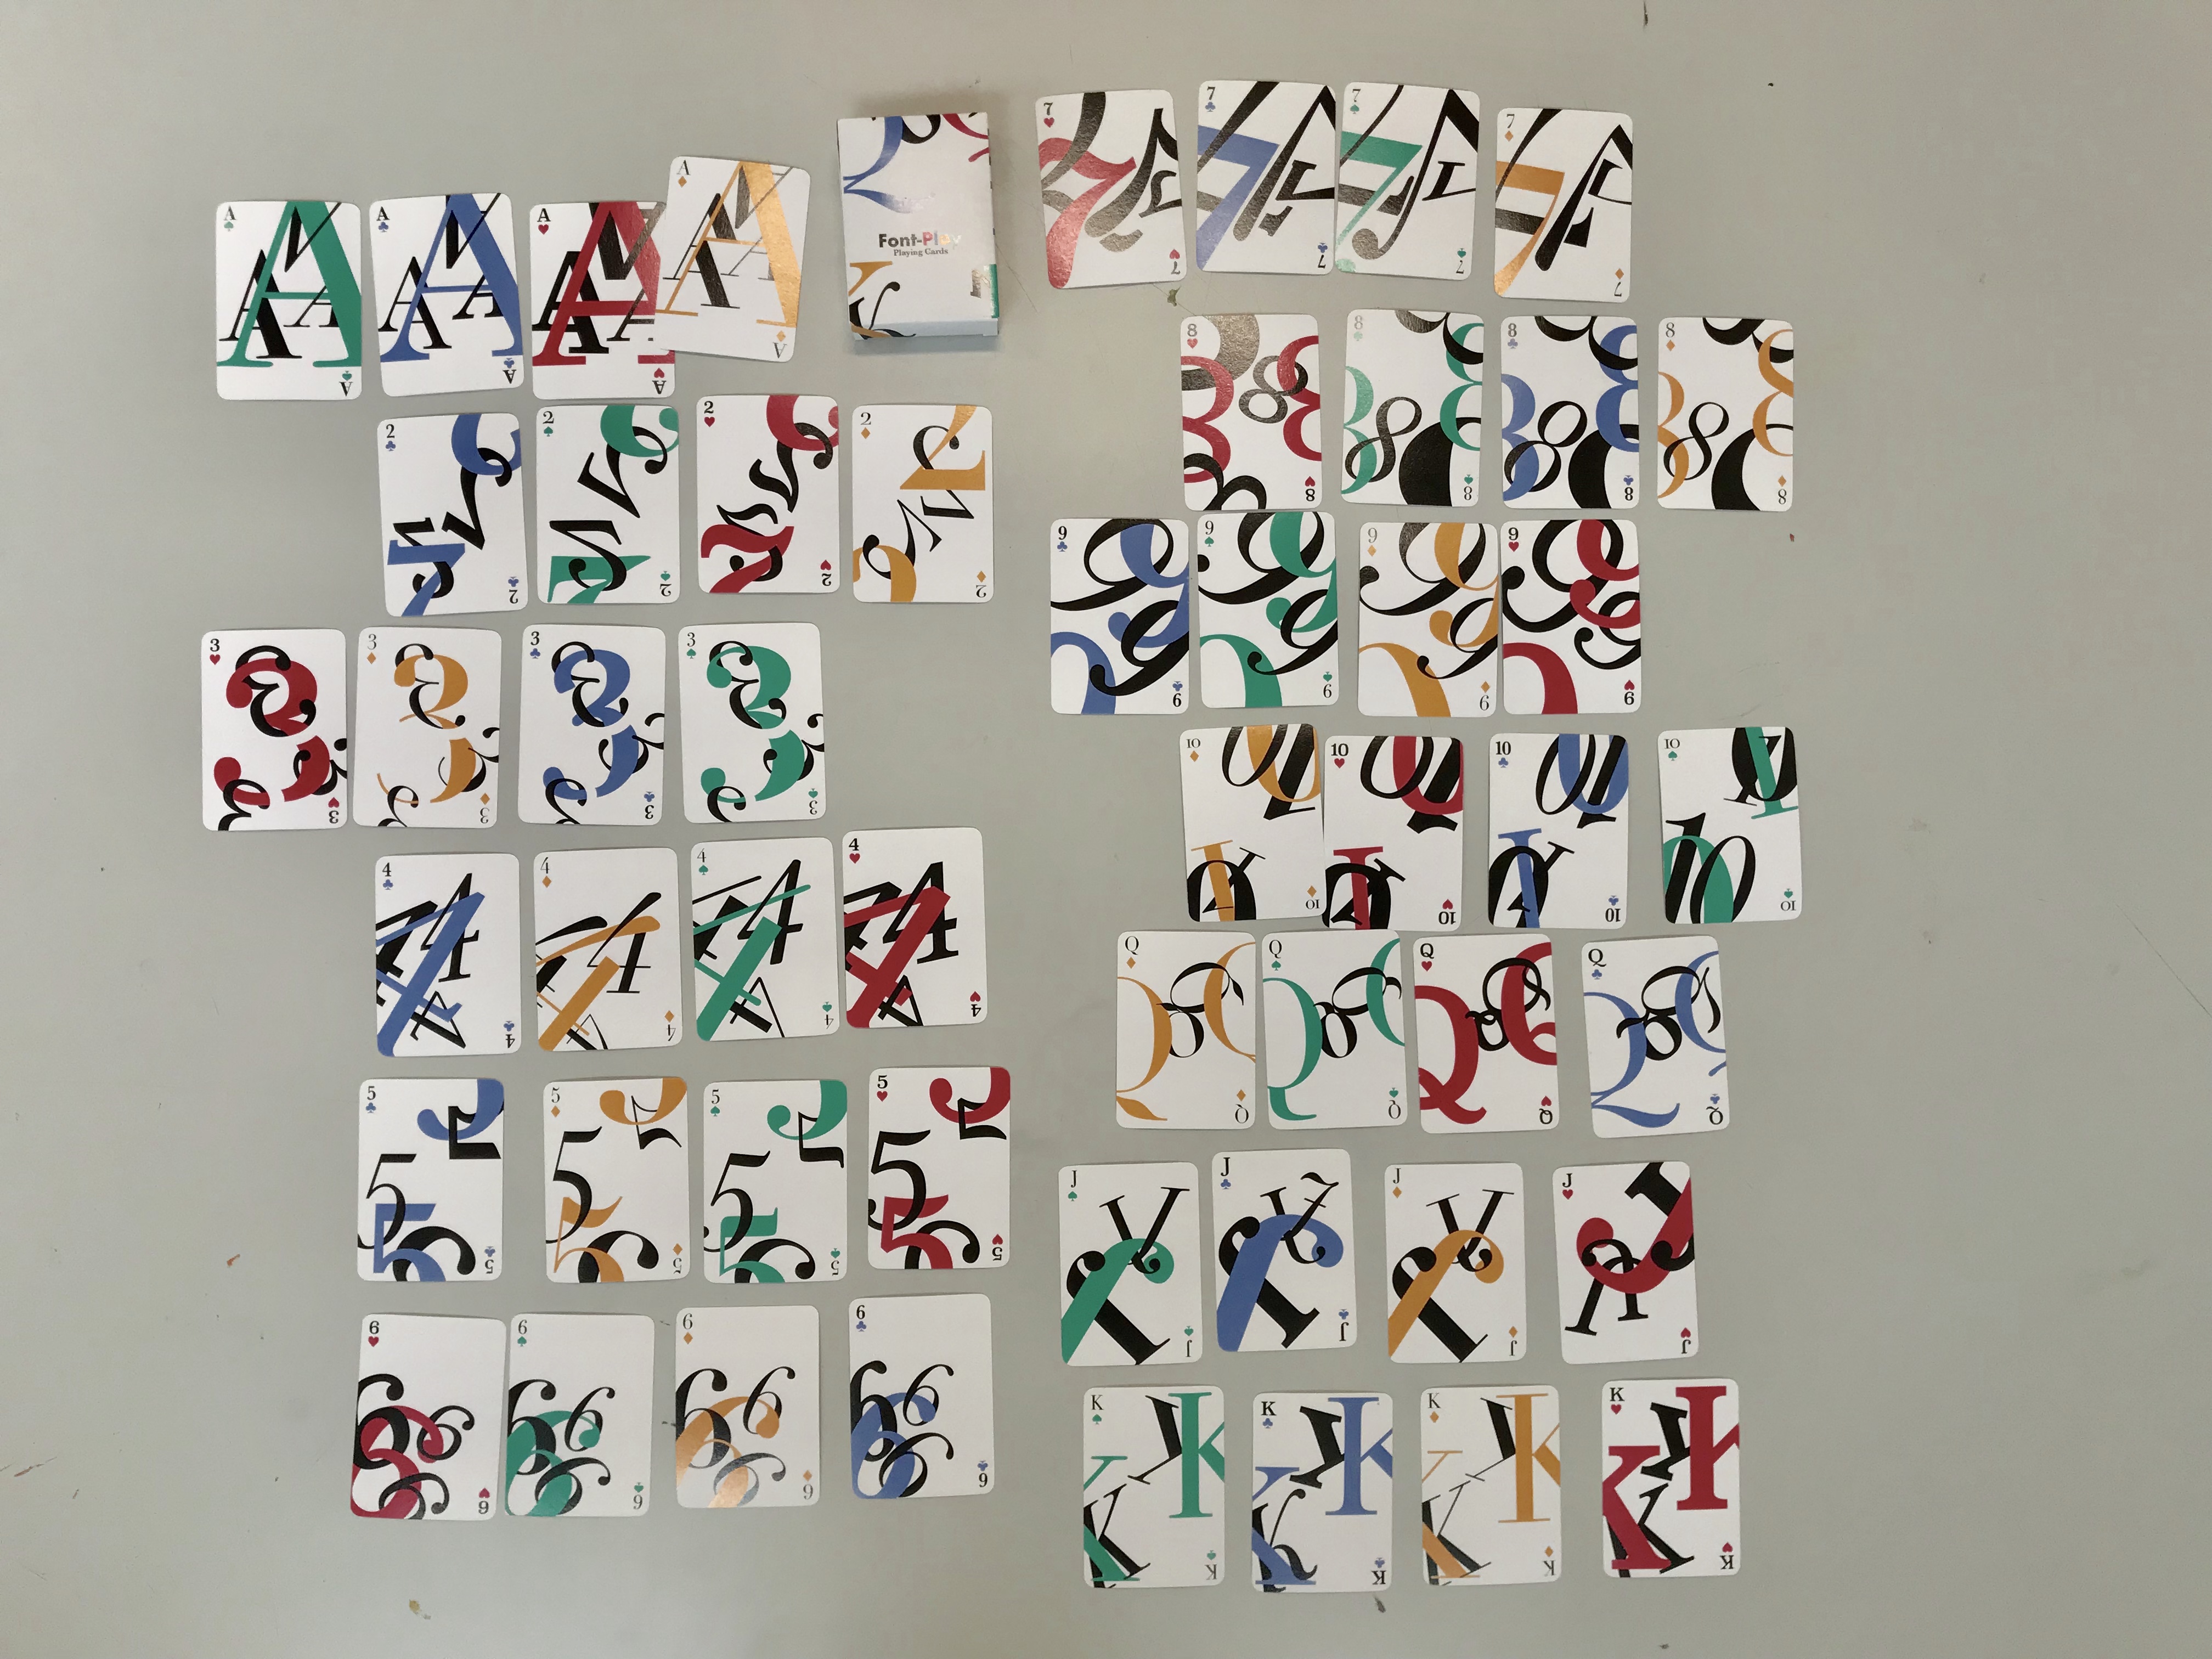
I came across a bunch of typographic card designs online which inspired me to make my own. I wanted to incorporate 4 different typefaces and a different colour to differentiate the 4 suits.
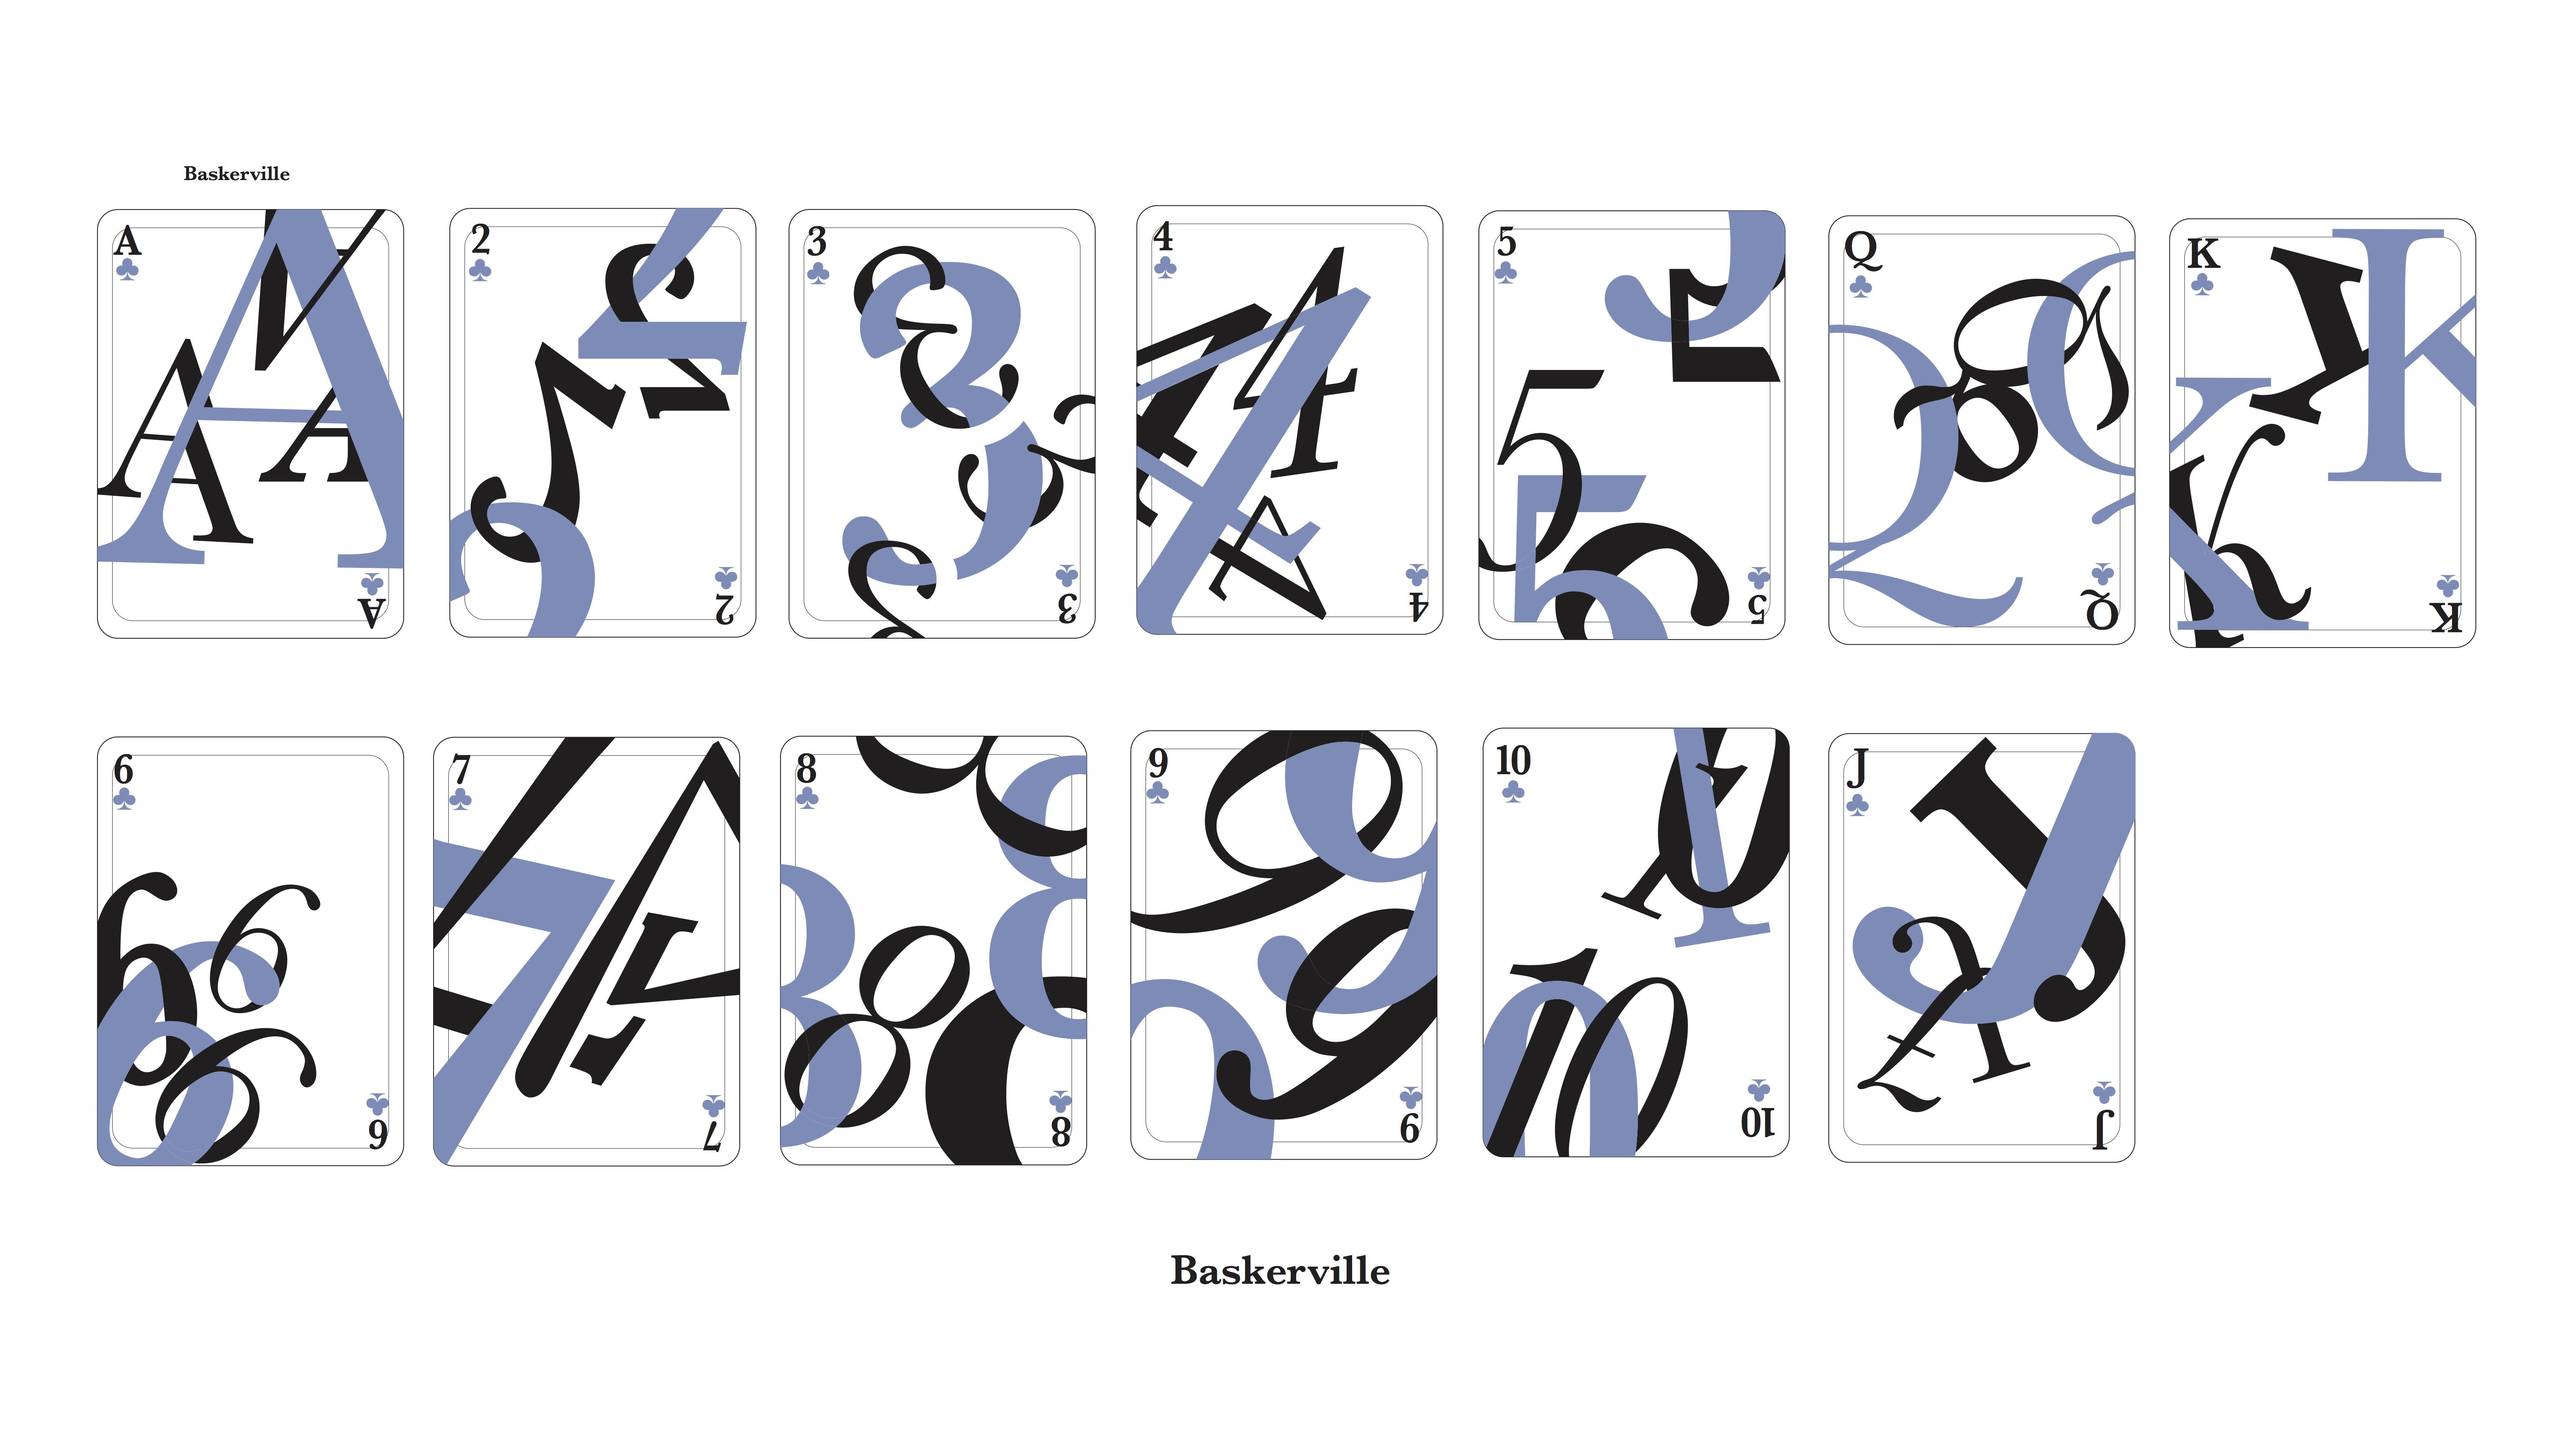
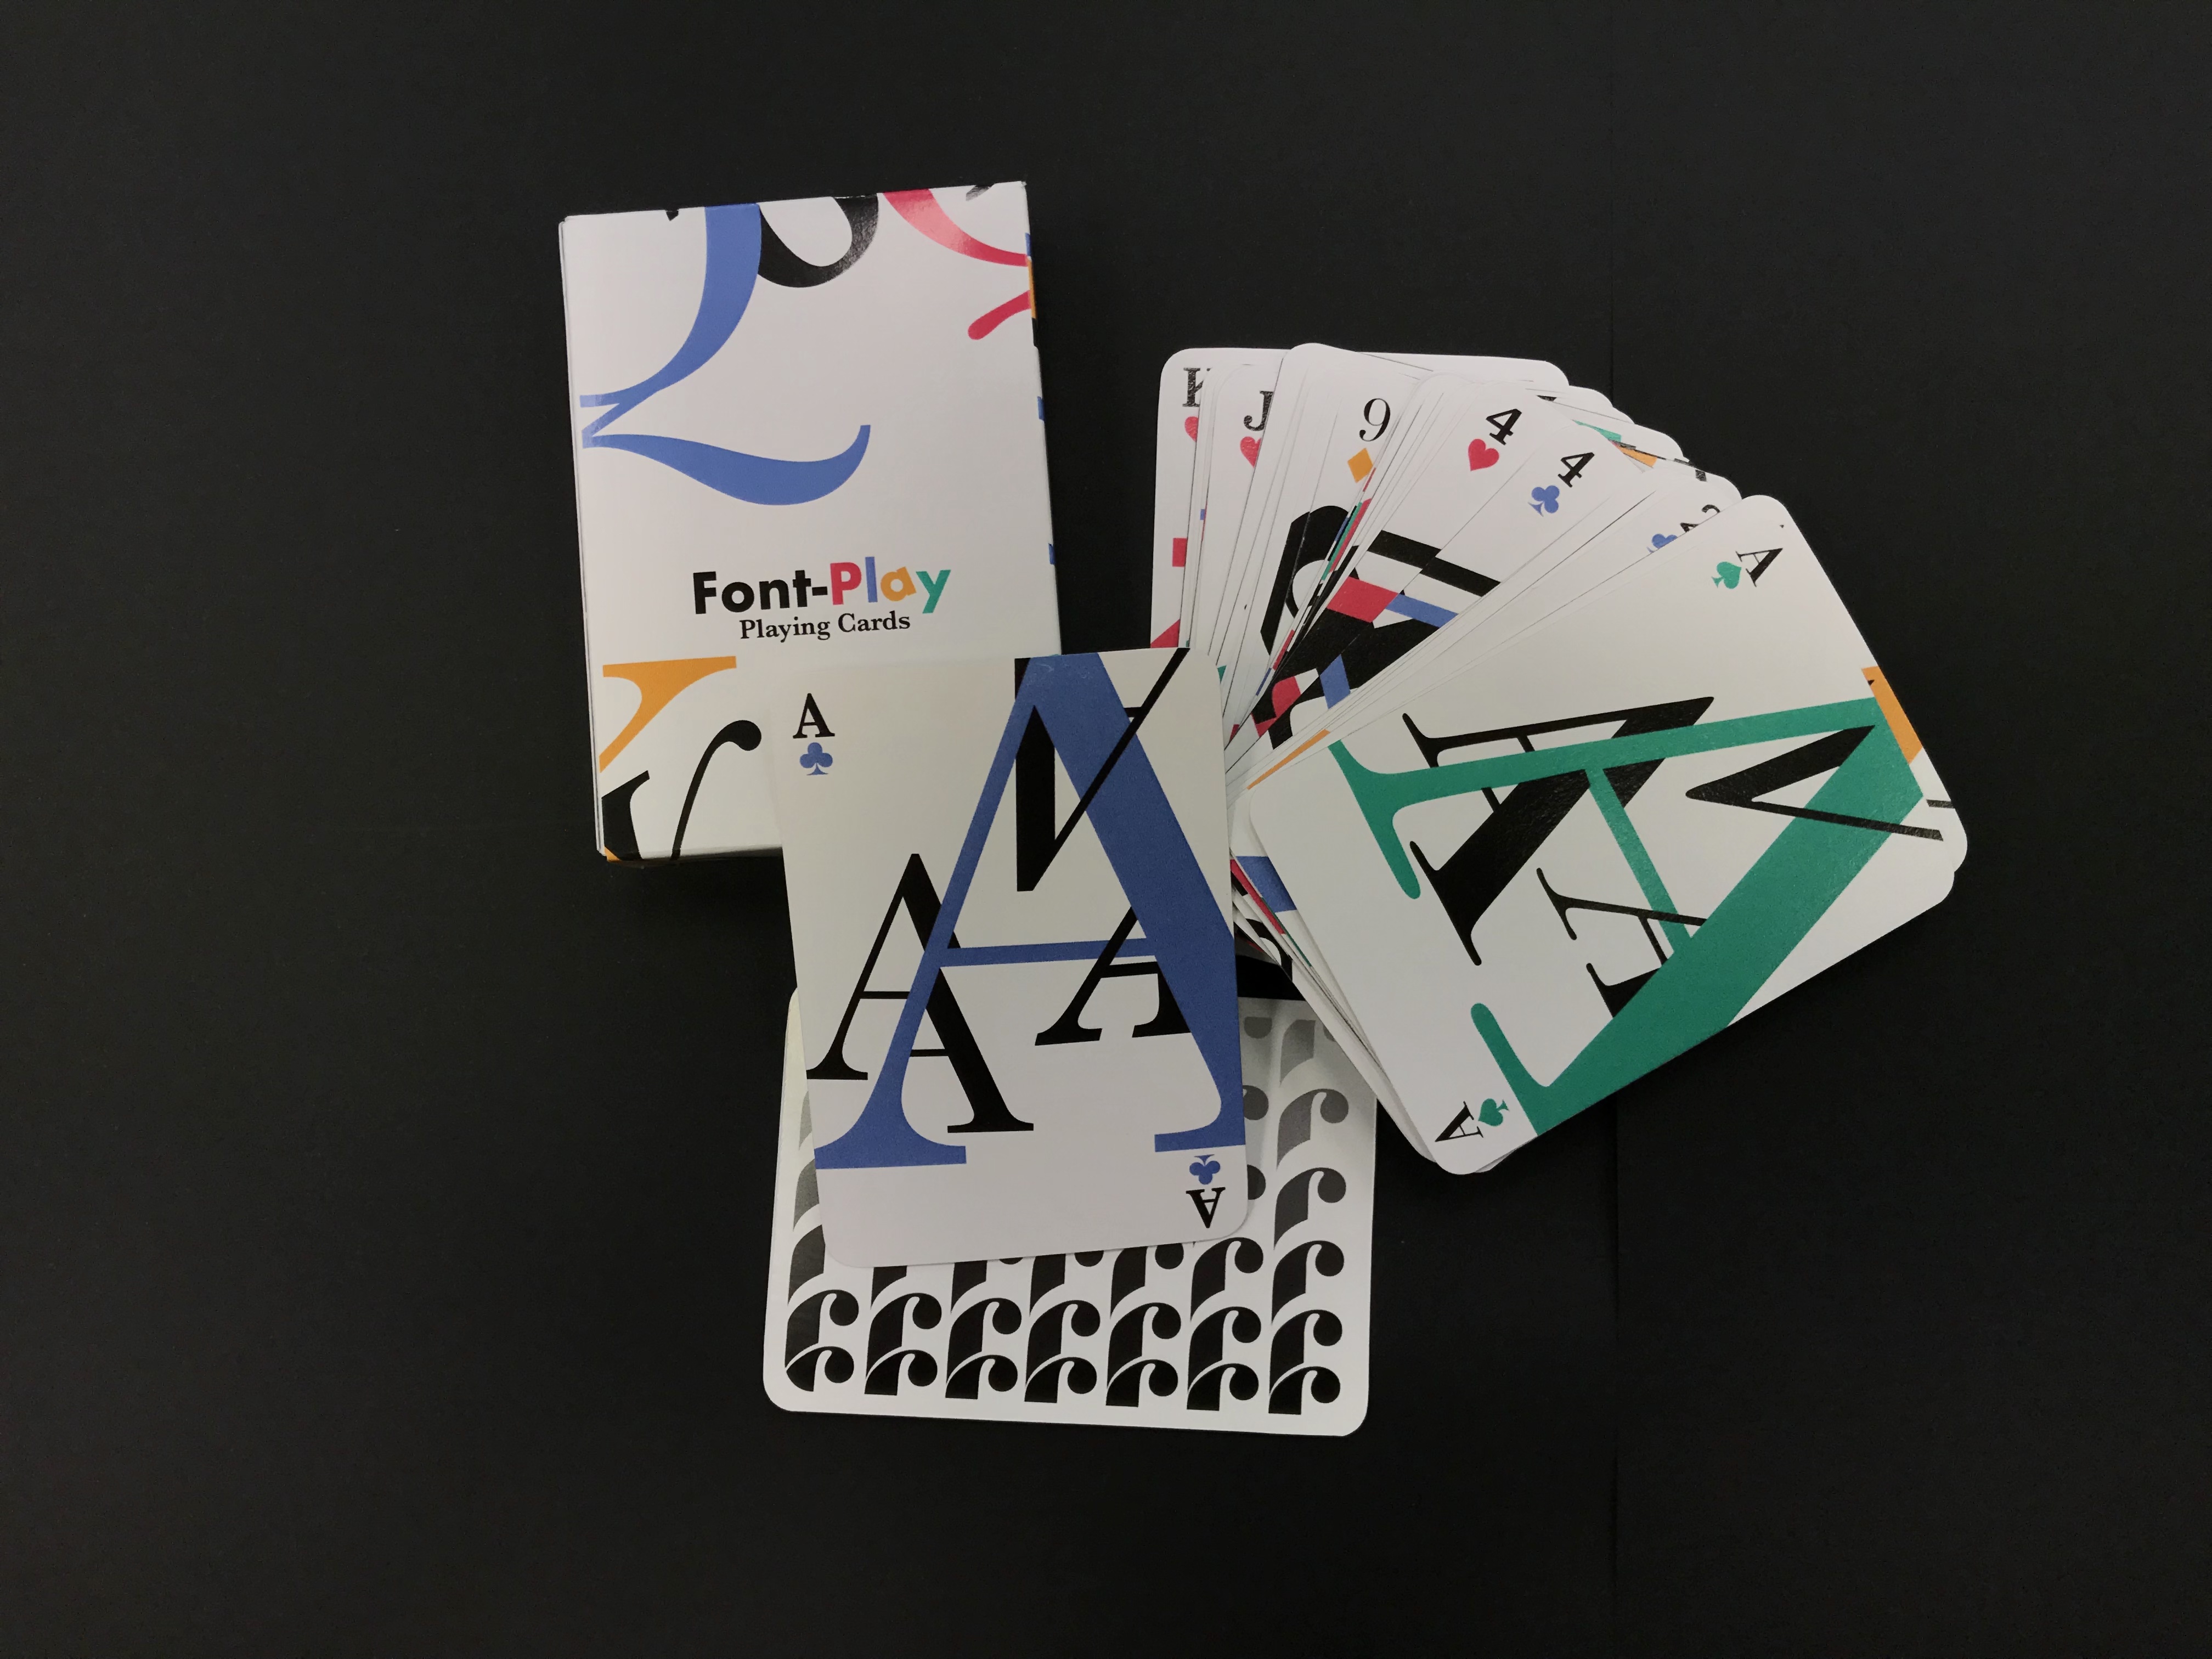
- Clubs – Baskerville – blue
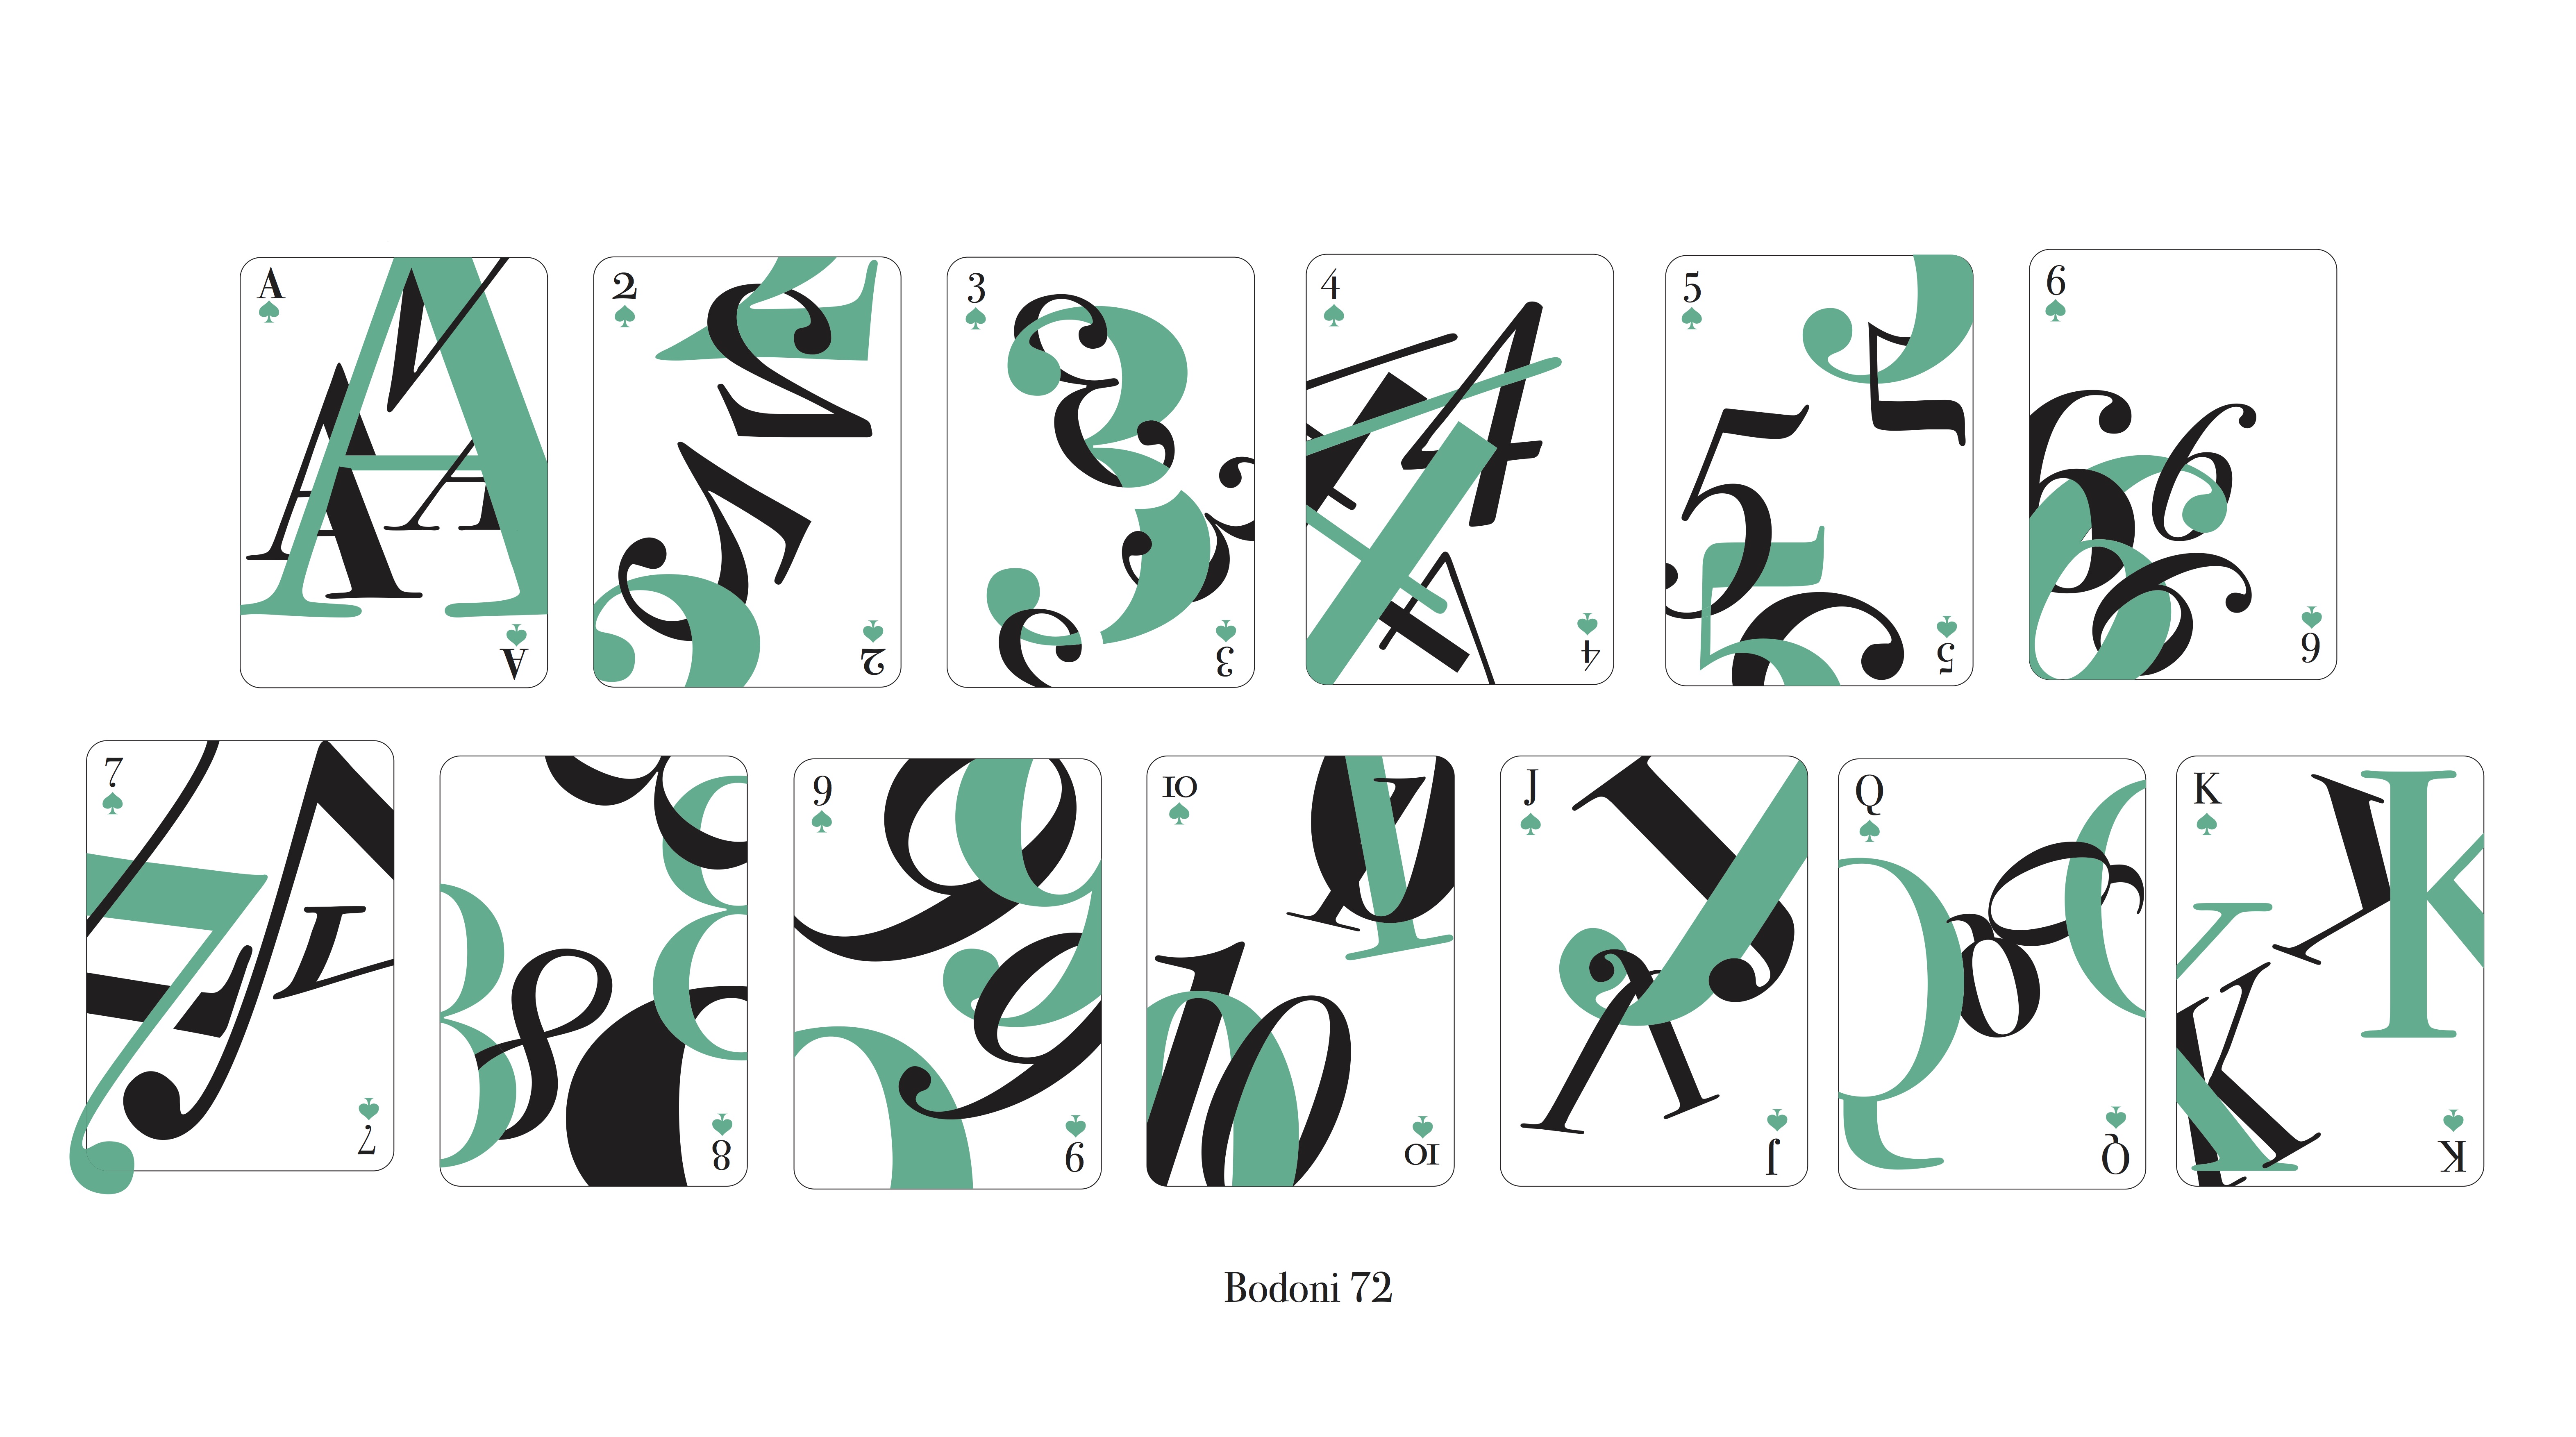
- Spade – Bodoni – green
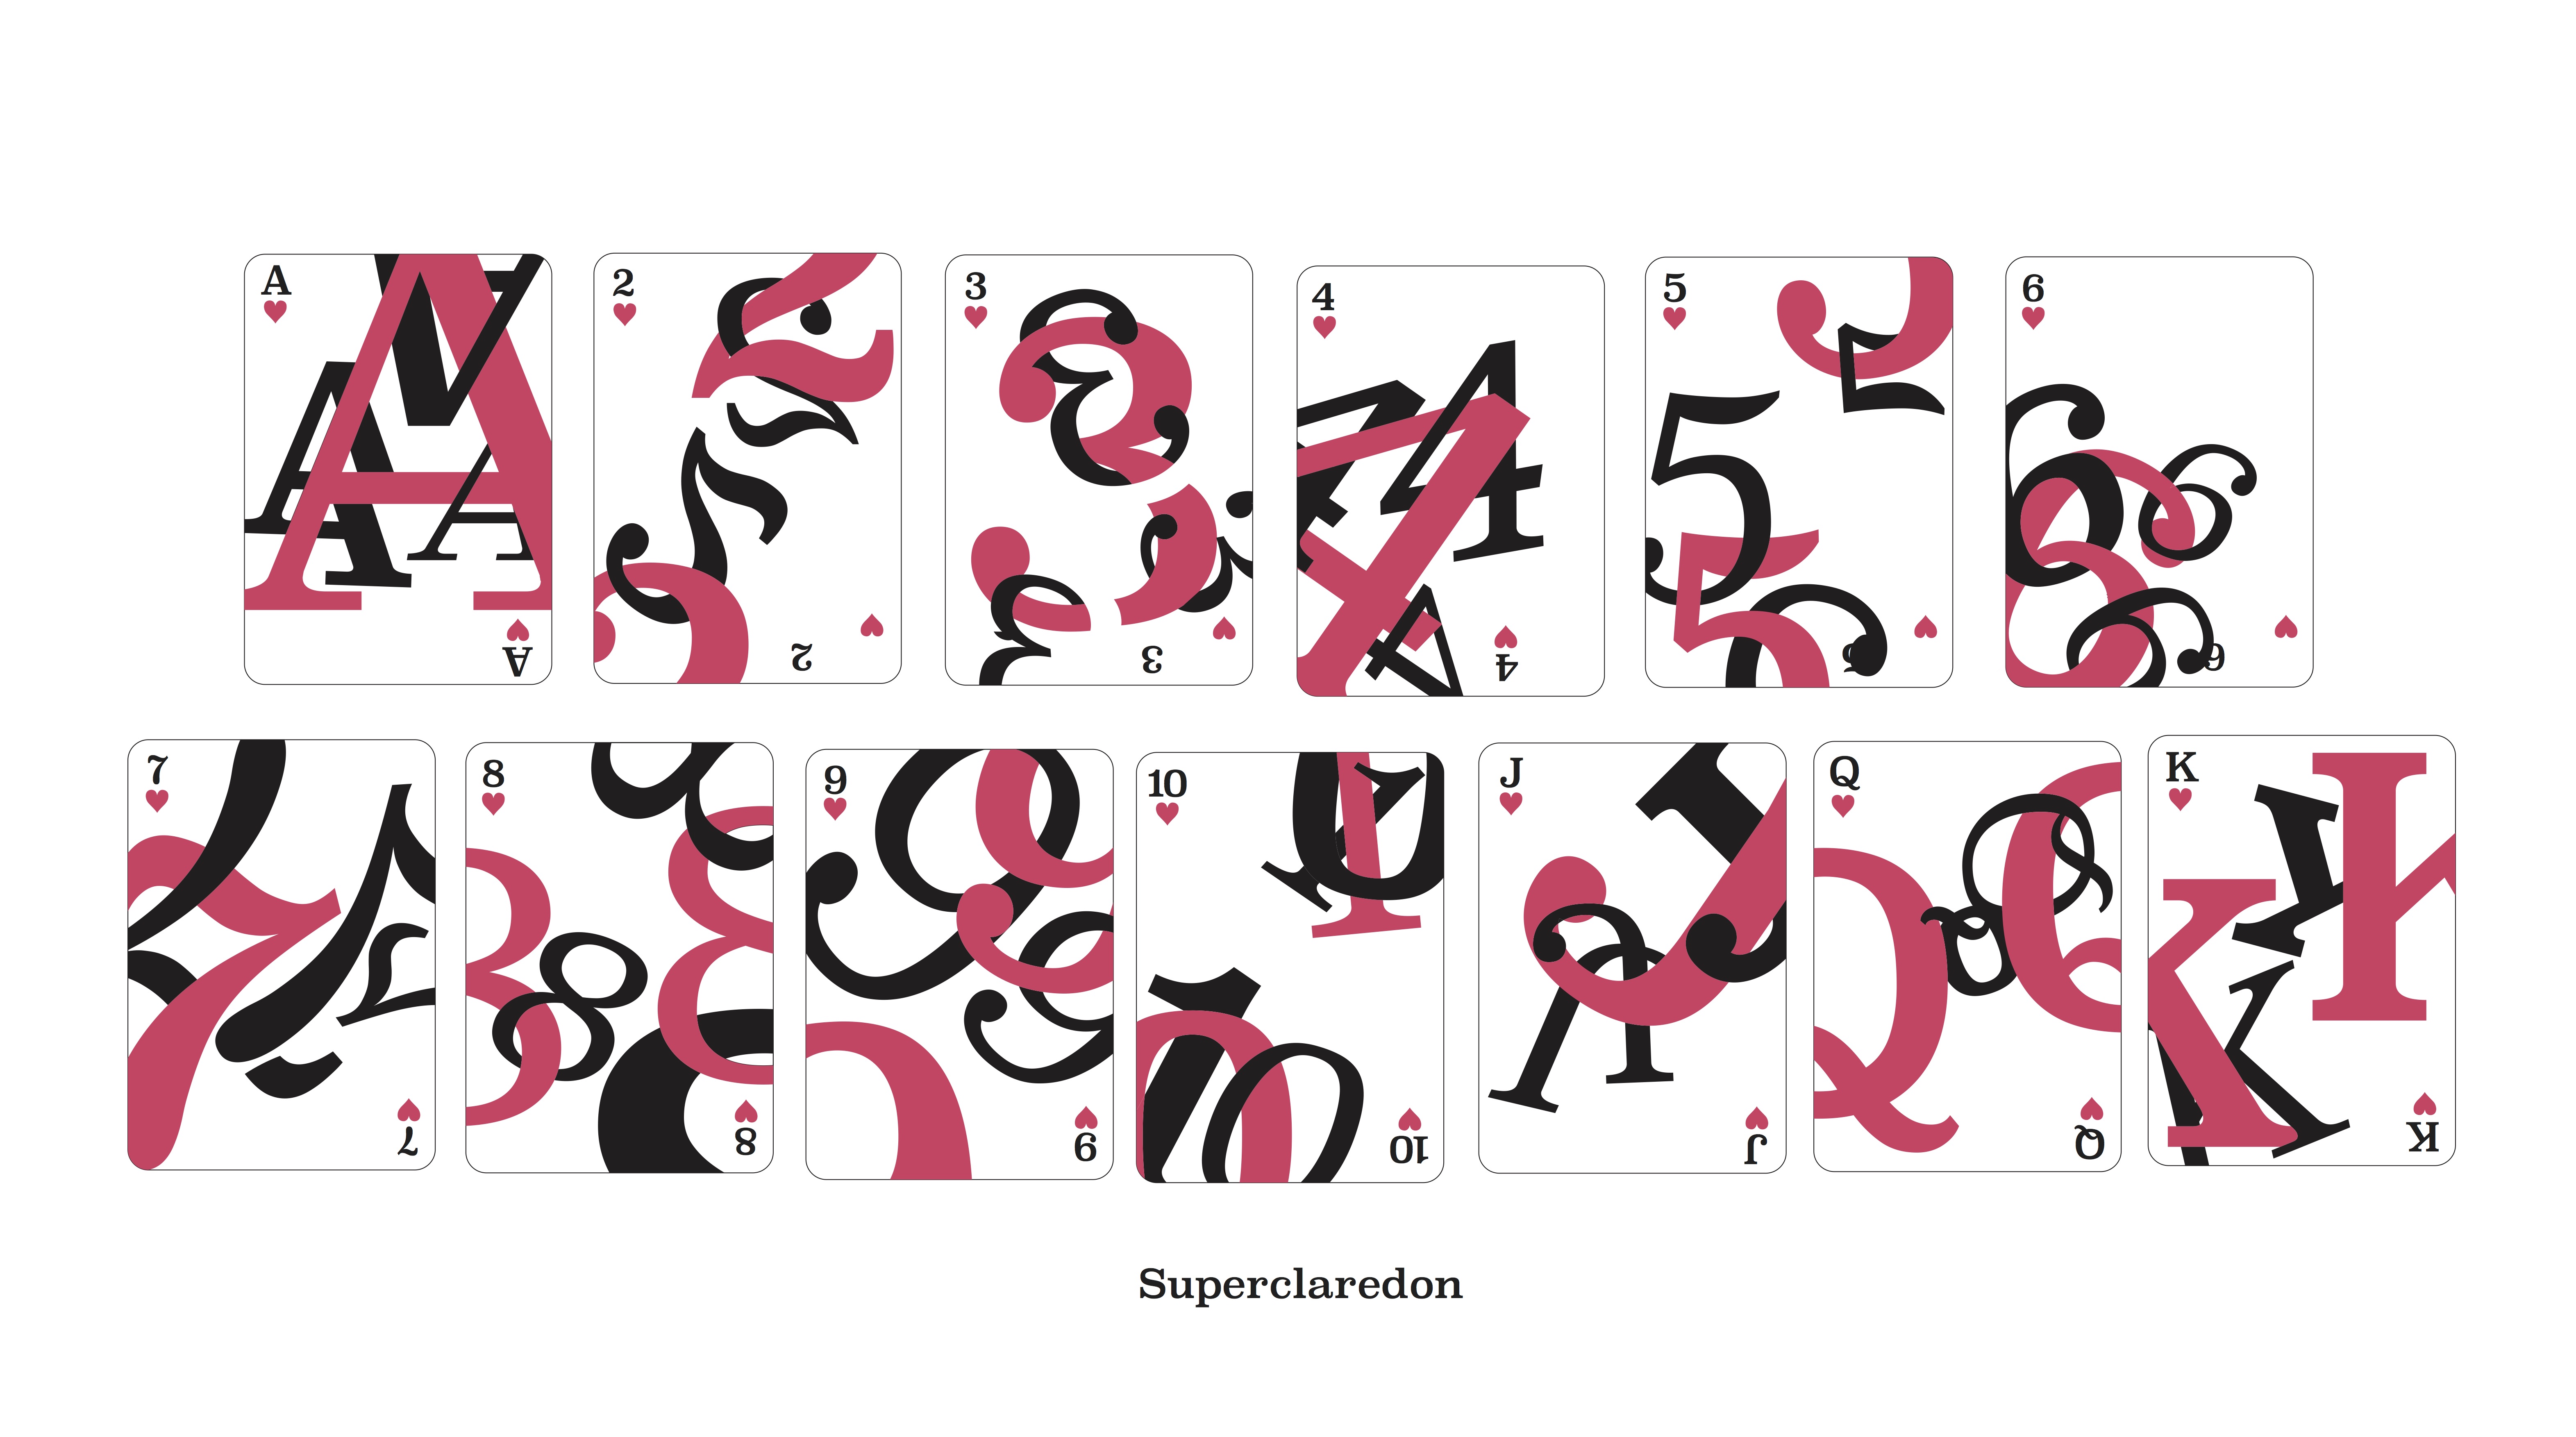
- Hearts – Superclaredon – red
- Diamond – Didot – yellow
Design Exploration

These were a few of the design explorations that I did. Initially, I wanted to make a unique design for each alphabet / number with different styles, playing with repetition, scale, gradient, density, opacity etc. However, after my first consultation, Shirley mentioned that everything ended up looking disconnected as there were multiple styles in a single set of suits and and it was better to stick to a single style throughout. Also, for the design such as the “K”, the “pattern” aspect of the design was lost as I was just cutting up the K into fragments. In the end, I decided to just go with the style of the “A”, sticking to interlacing and slicing up the font. There was also the issue of whether I should use letters or numbers for the 2-10 but in the end, I decided to just stick to numbers to avoid making it too complicated for the user to read the cards.
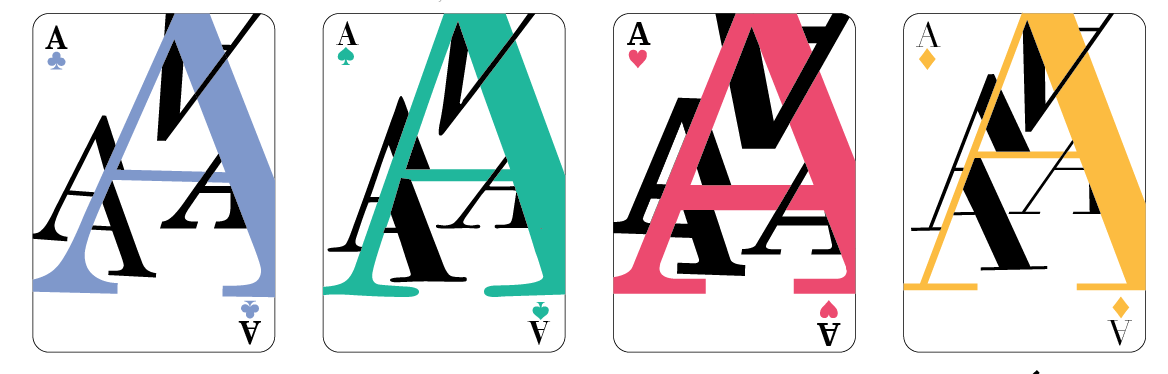
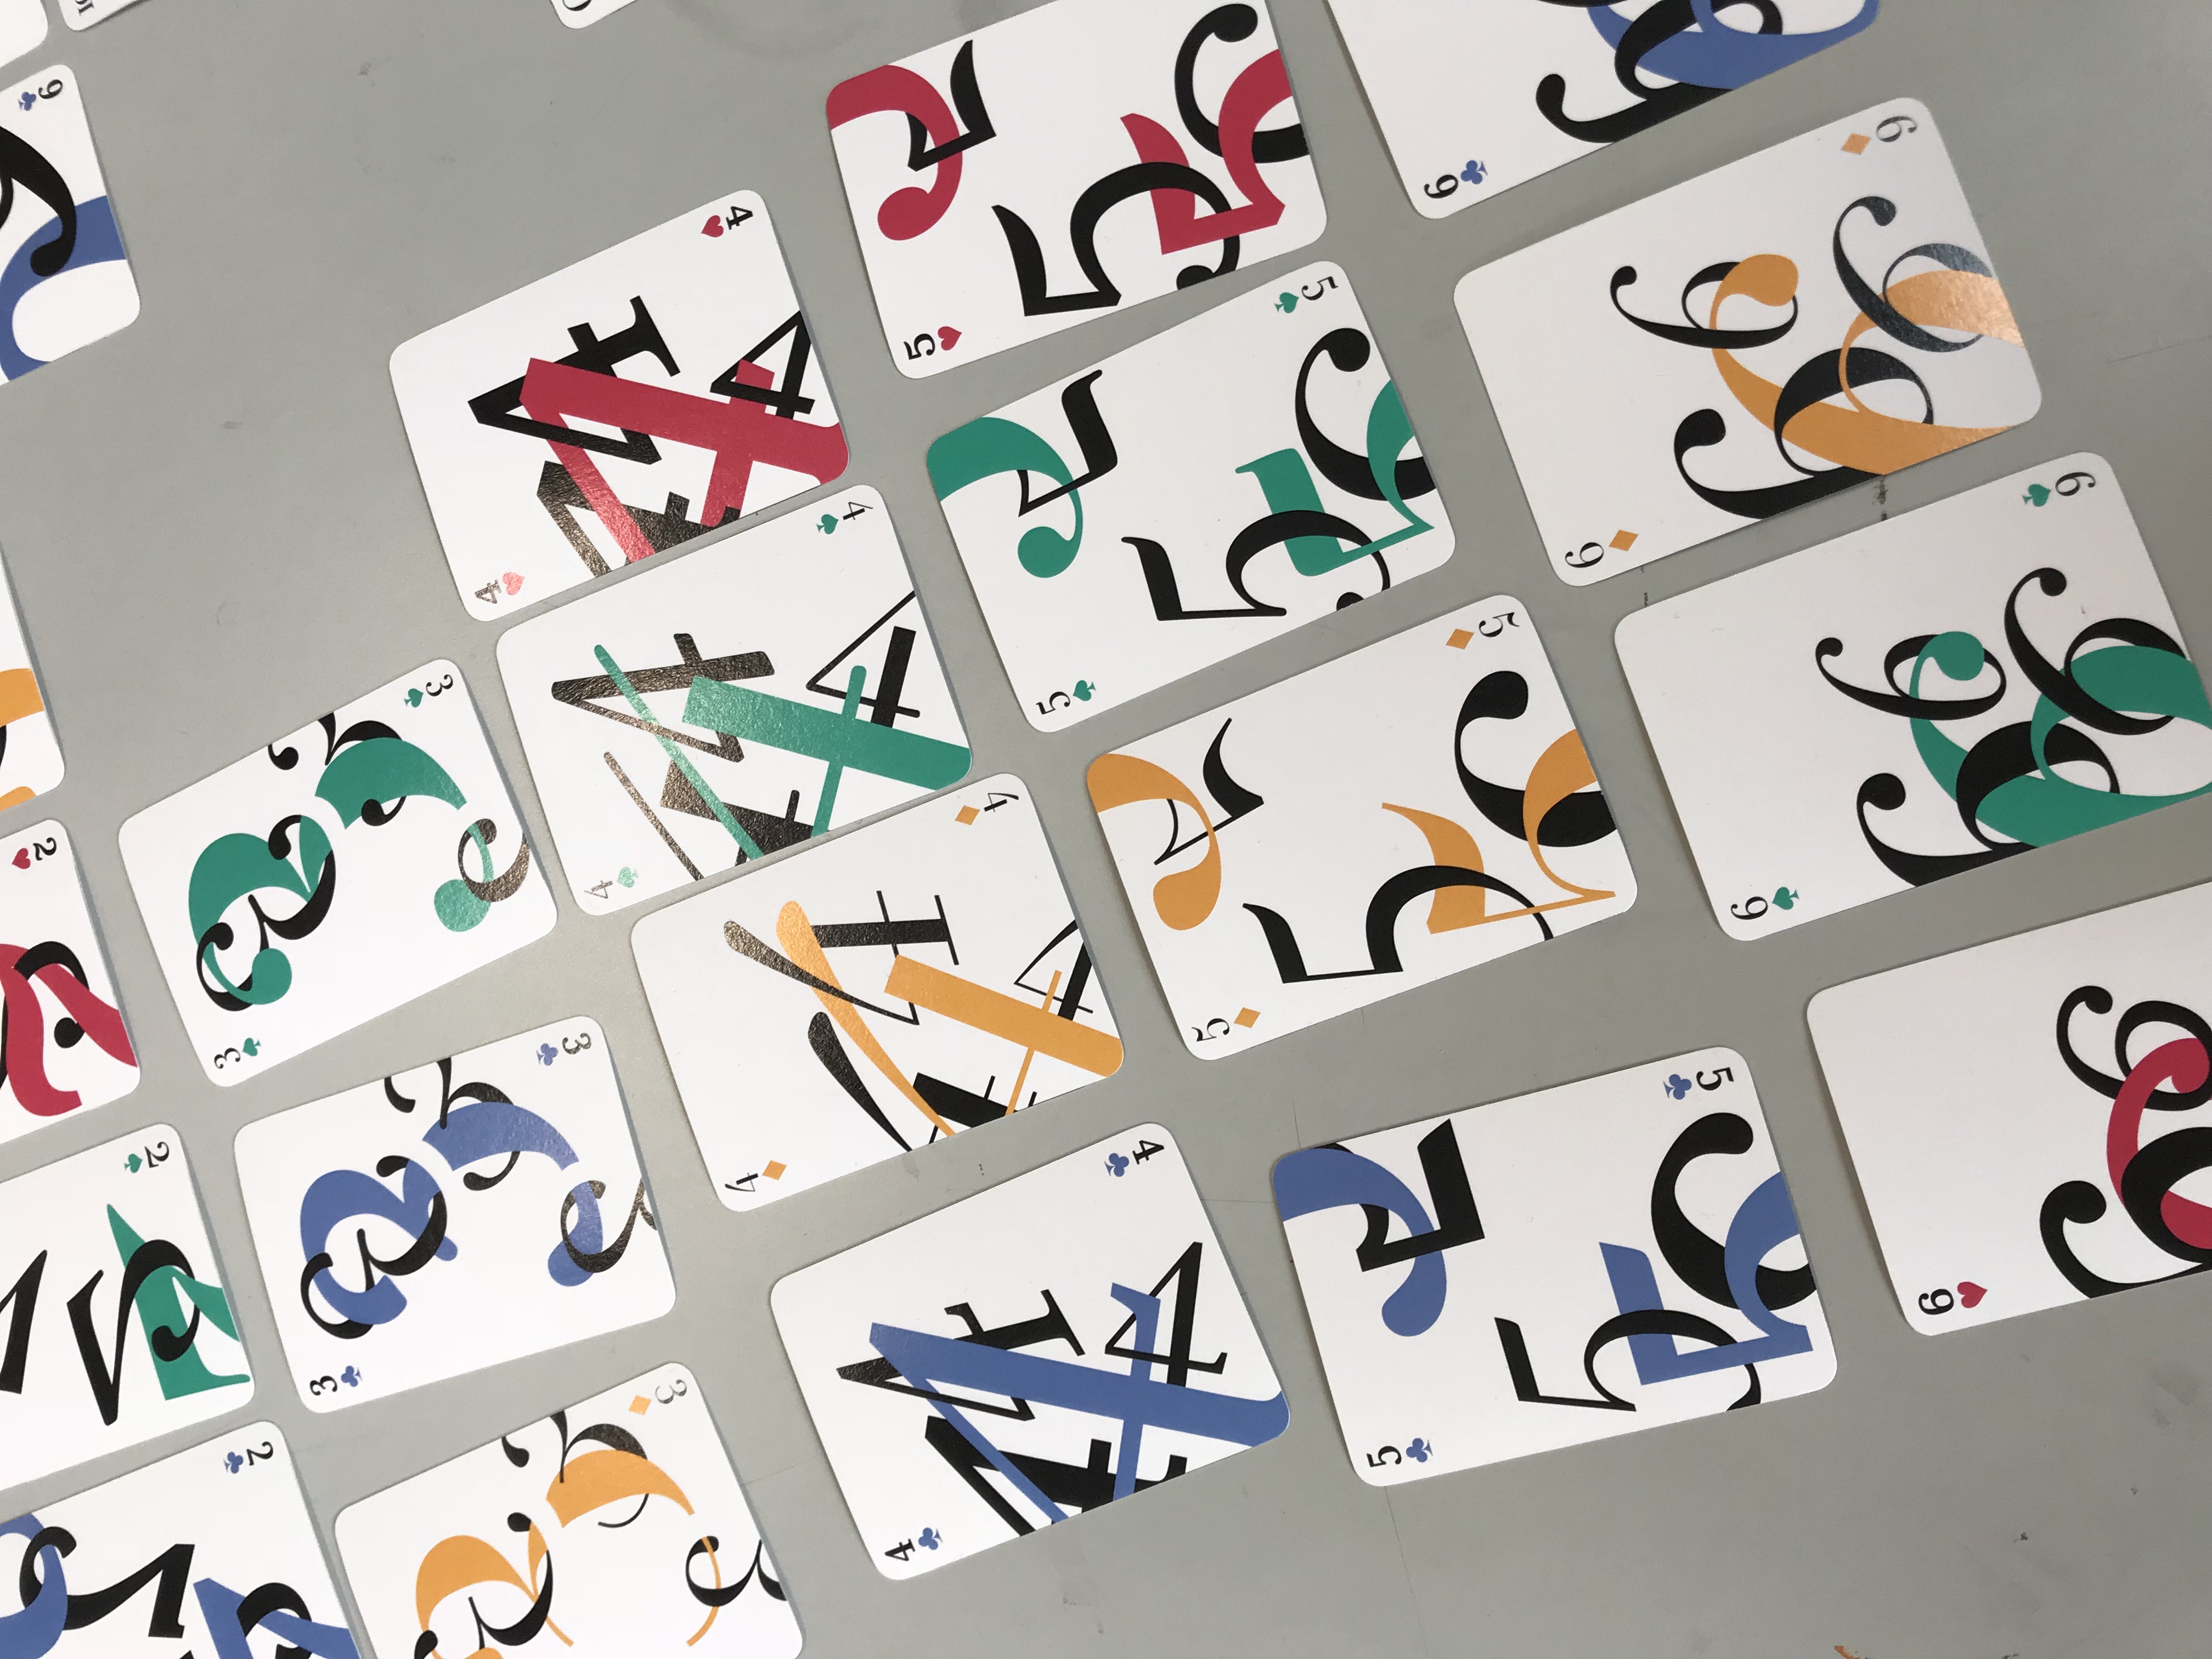
I wanted to keep the design consistent throughout all the “A”s but I found it a little hard given that each typeface has different anatomies and it was not possible for everything to follow a fix template. For instance, the difference in the height of the crossbar would mean that I have to alight it higher or lower according to the different types. As shown above, Bodoni has a lower crossbar, hence, it is cut off when interlaced with another “A”. It was also hard to interlace certain alphabets with certain typefaces being narrower or wider.

Design Backing
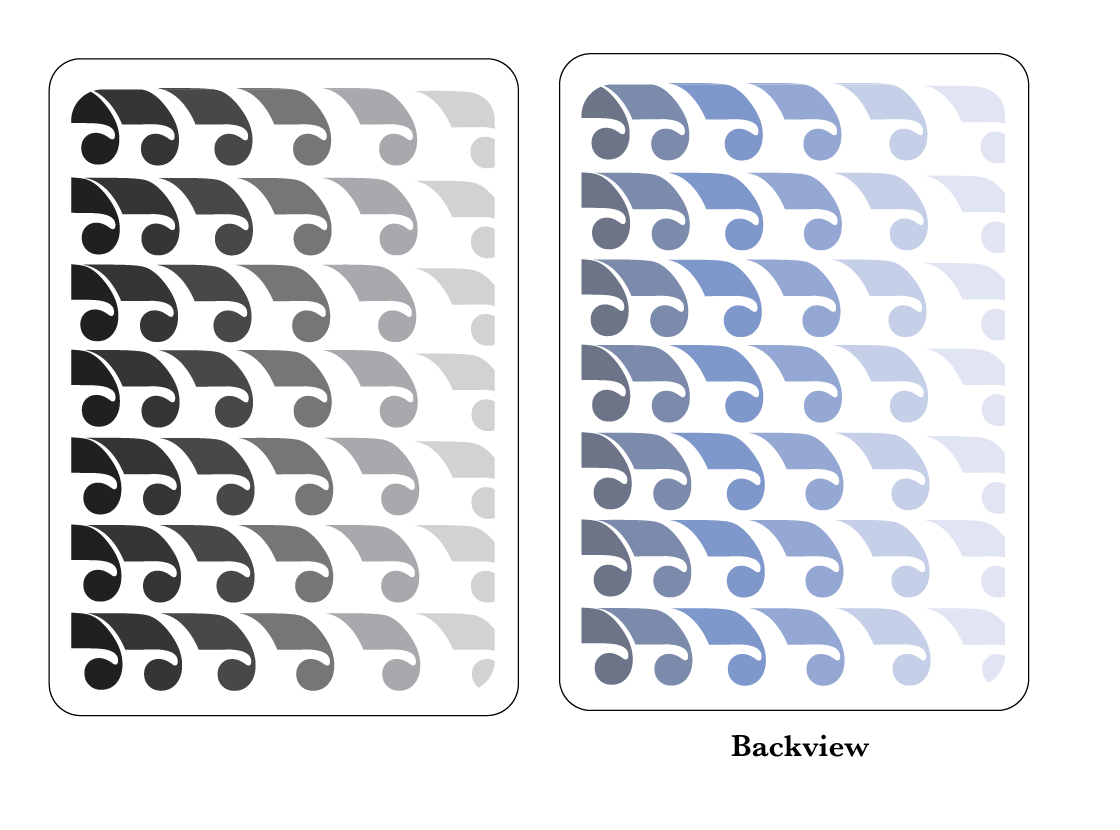
As for the backing of my cards, I used my pattern design from project 3 but I had a hard time deciding on the colours. In the end I decided to stick to monochrome as using multiple colours wouldn’t make any senses given that the colour would give away the identity of the suits when playing. And sticking to blue would not match the other colours used on the front.
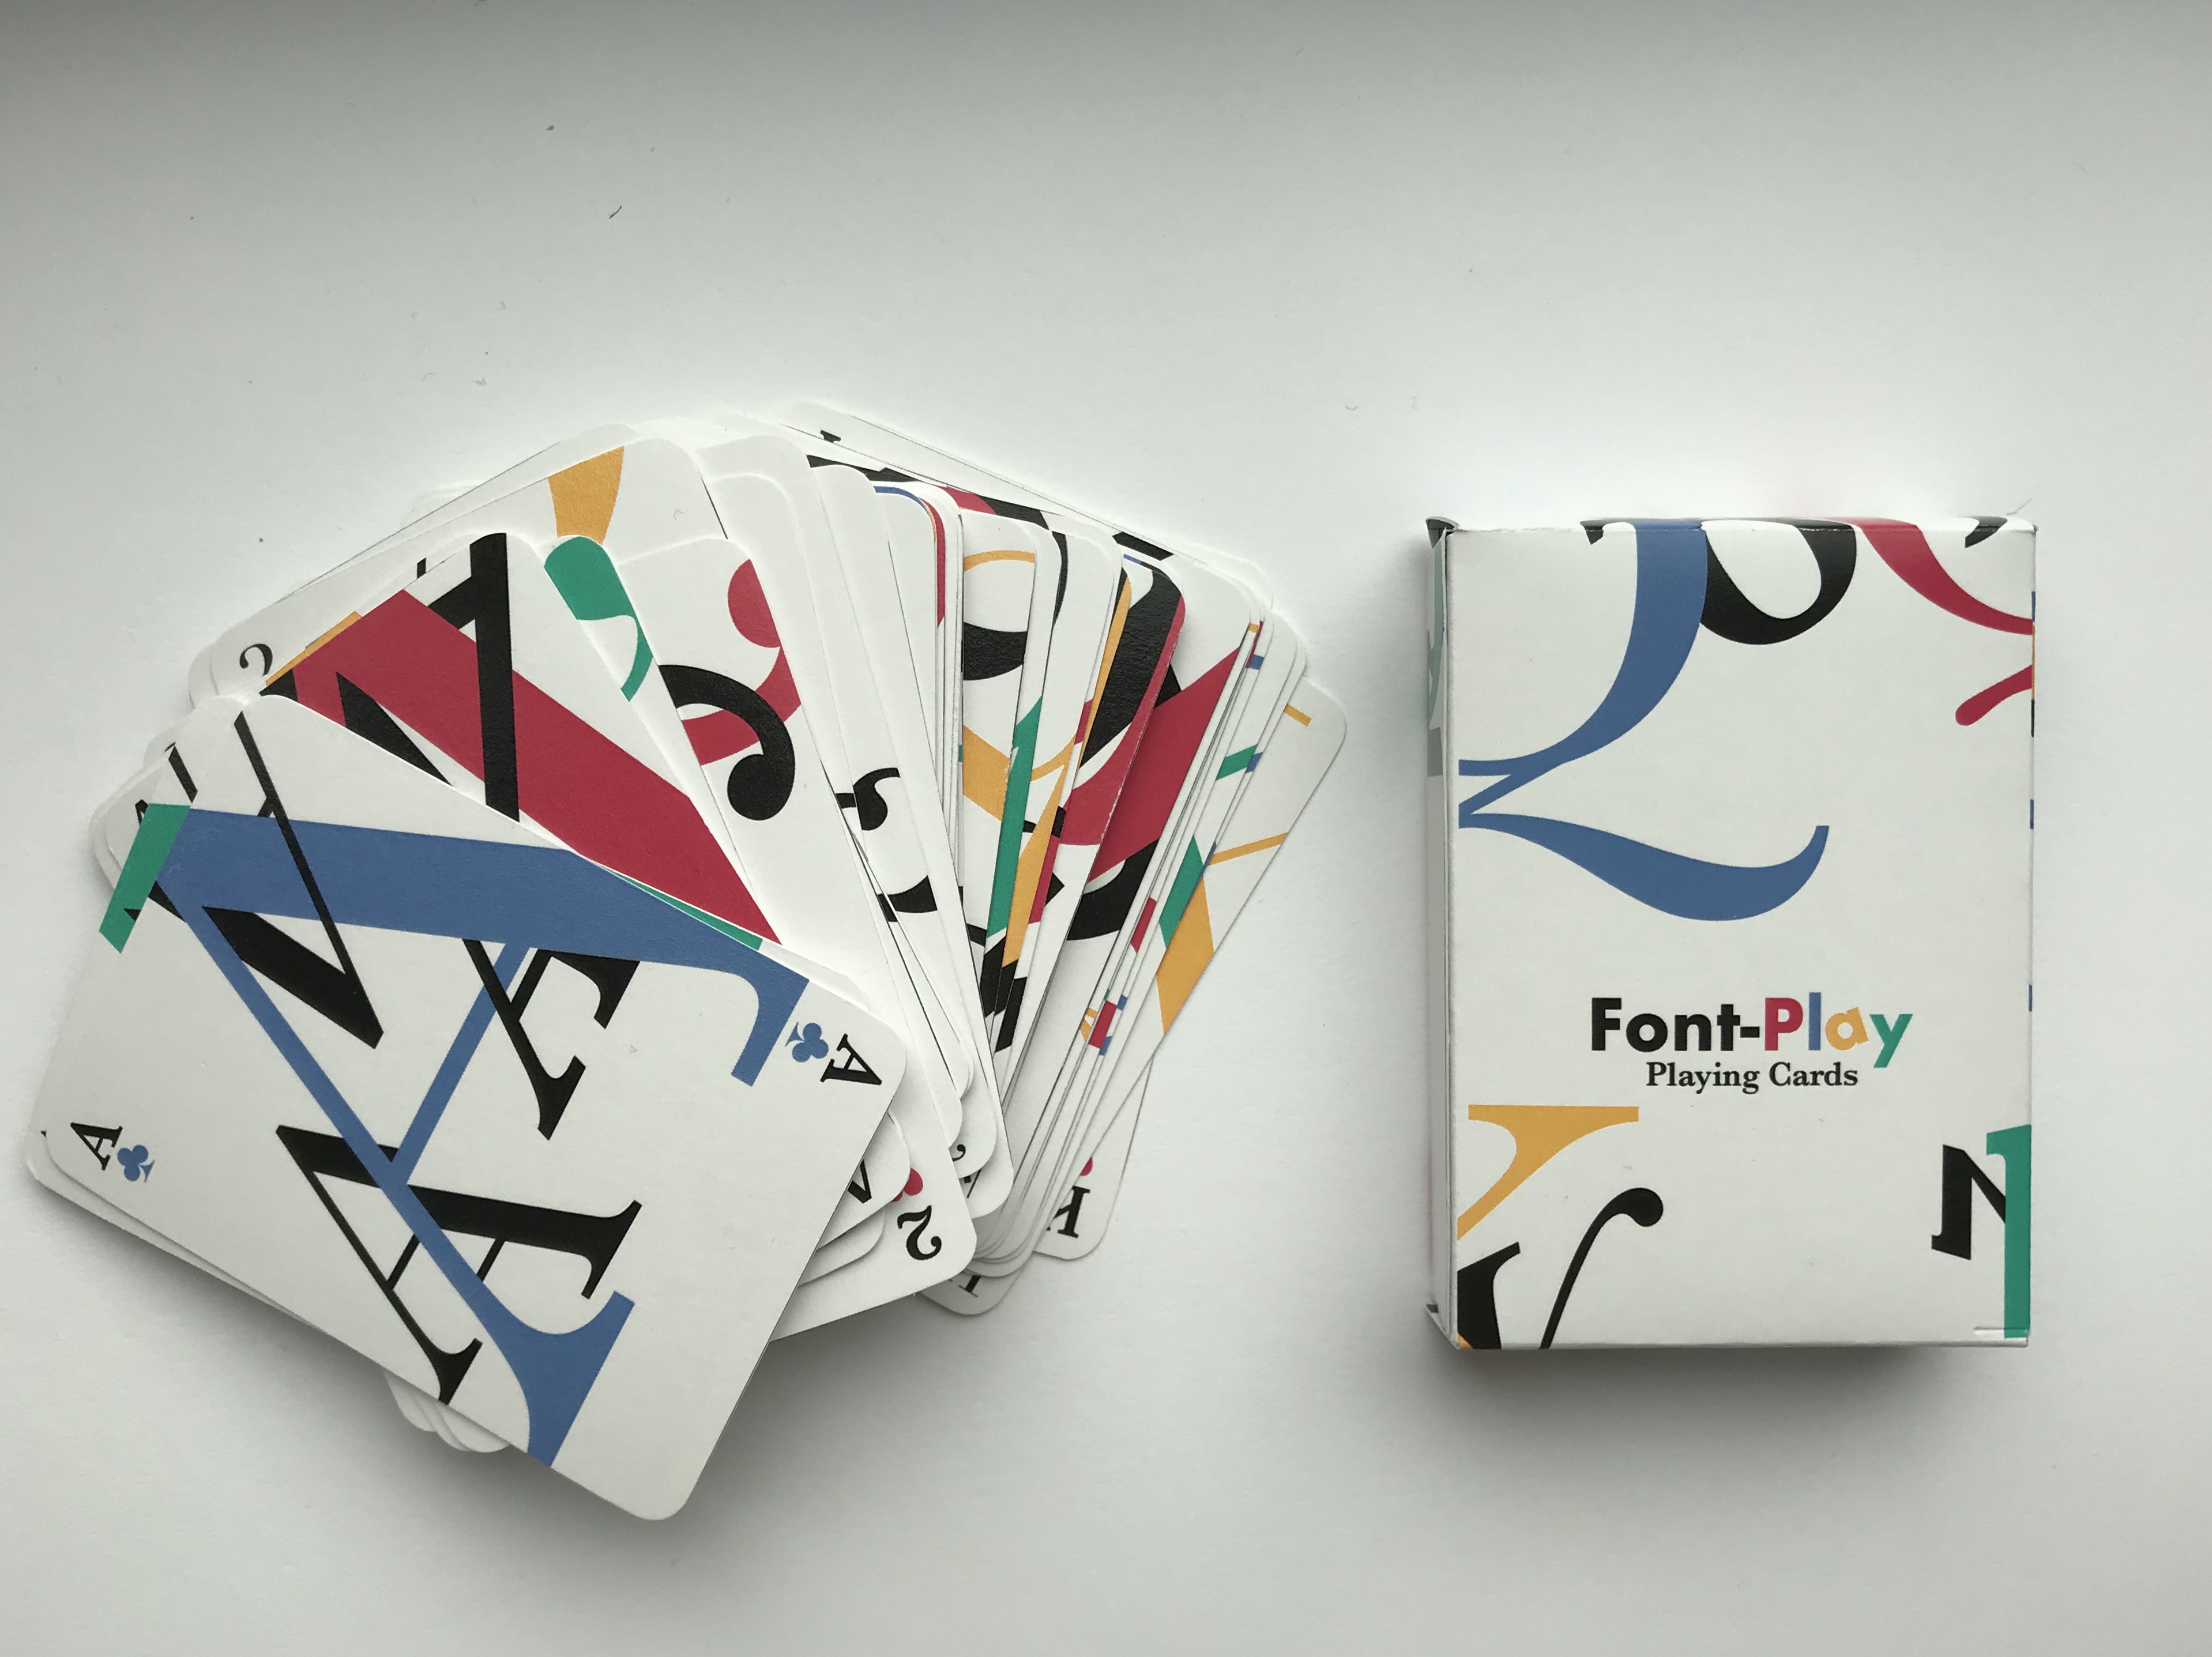
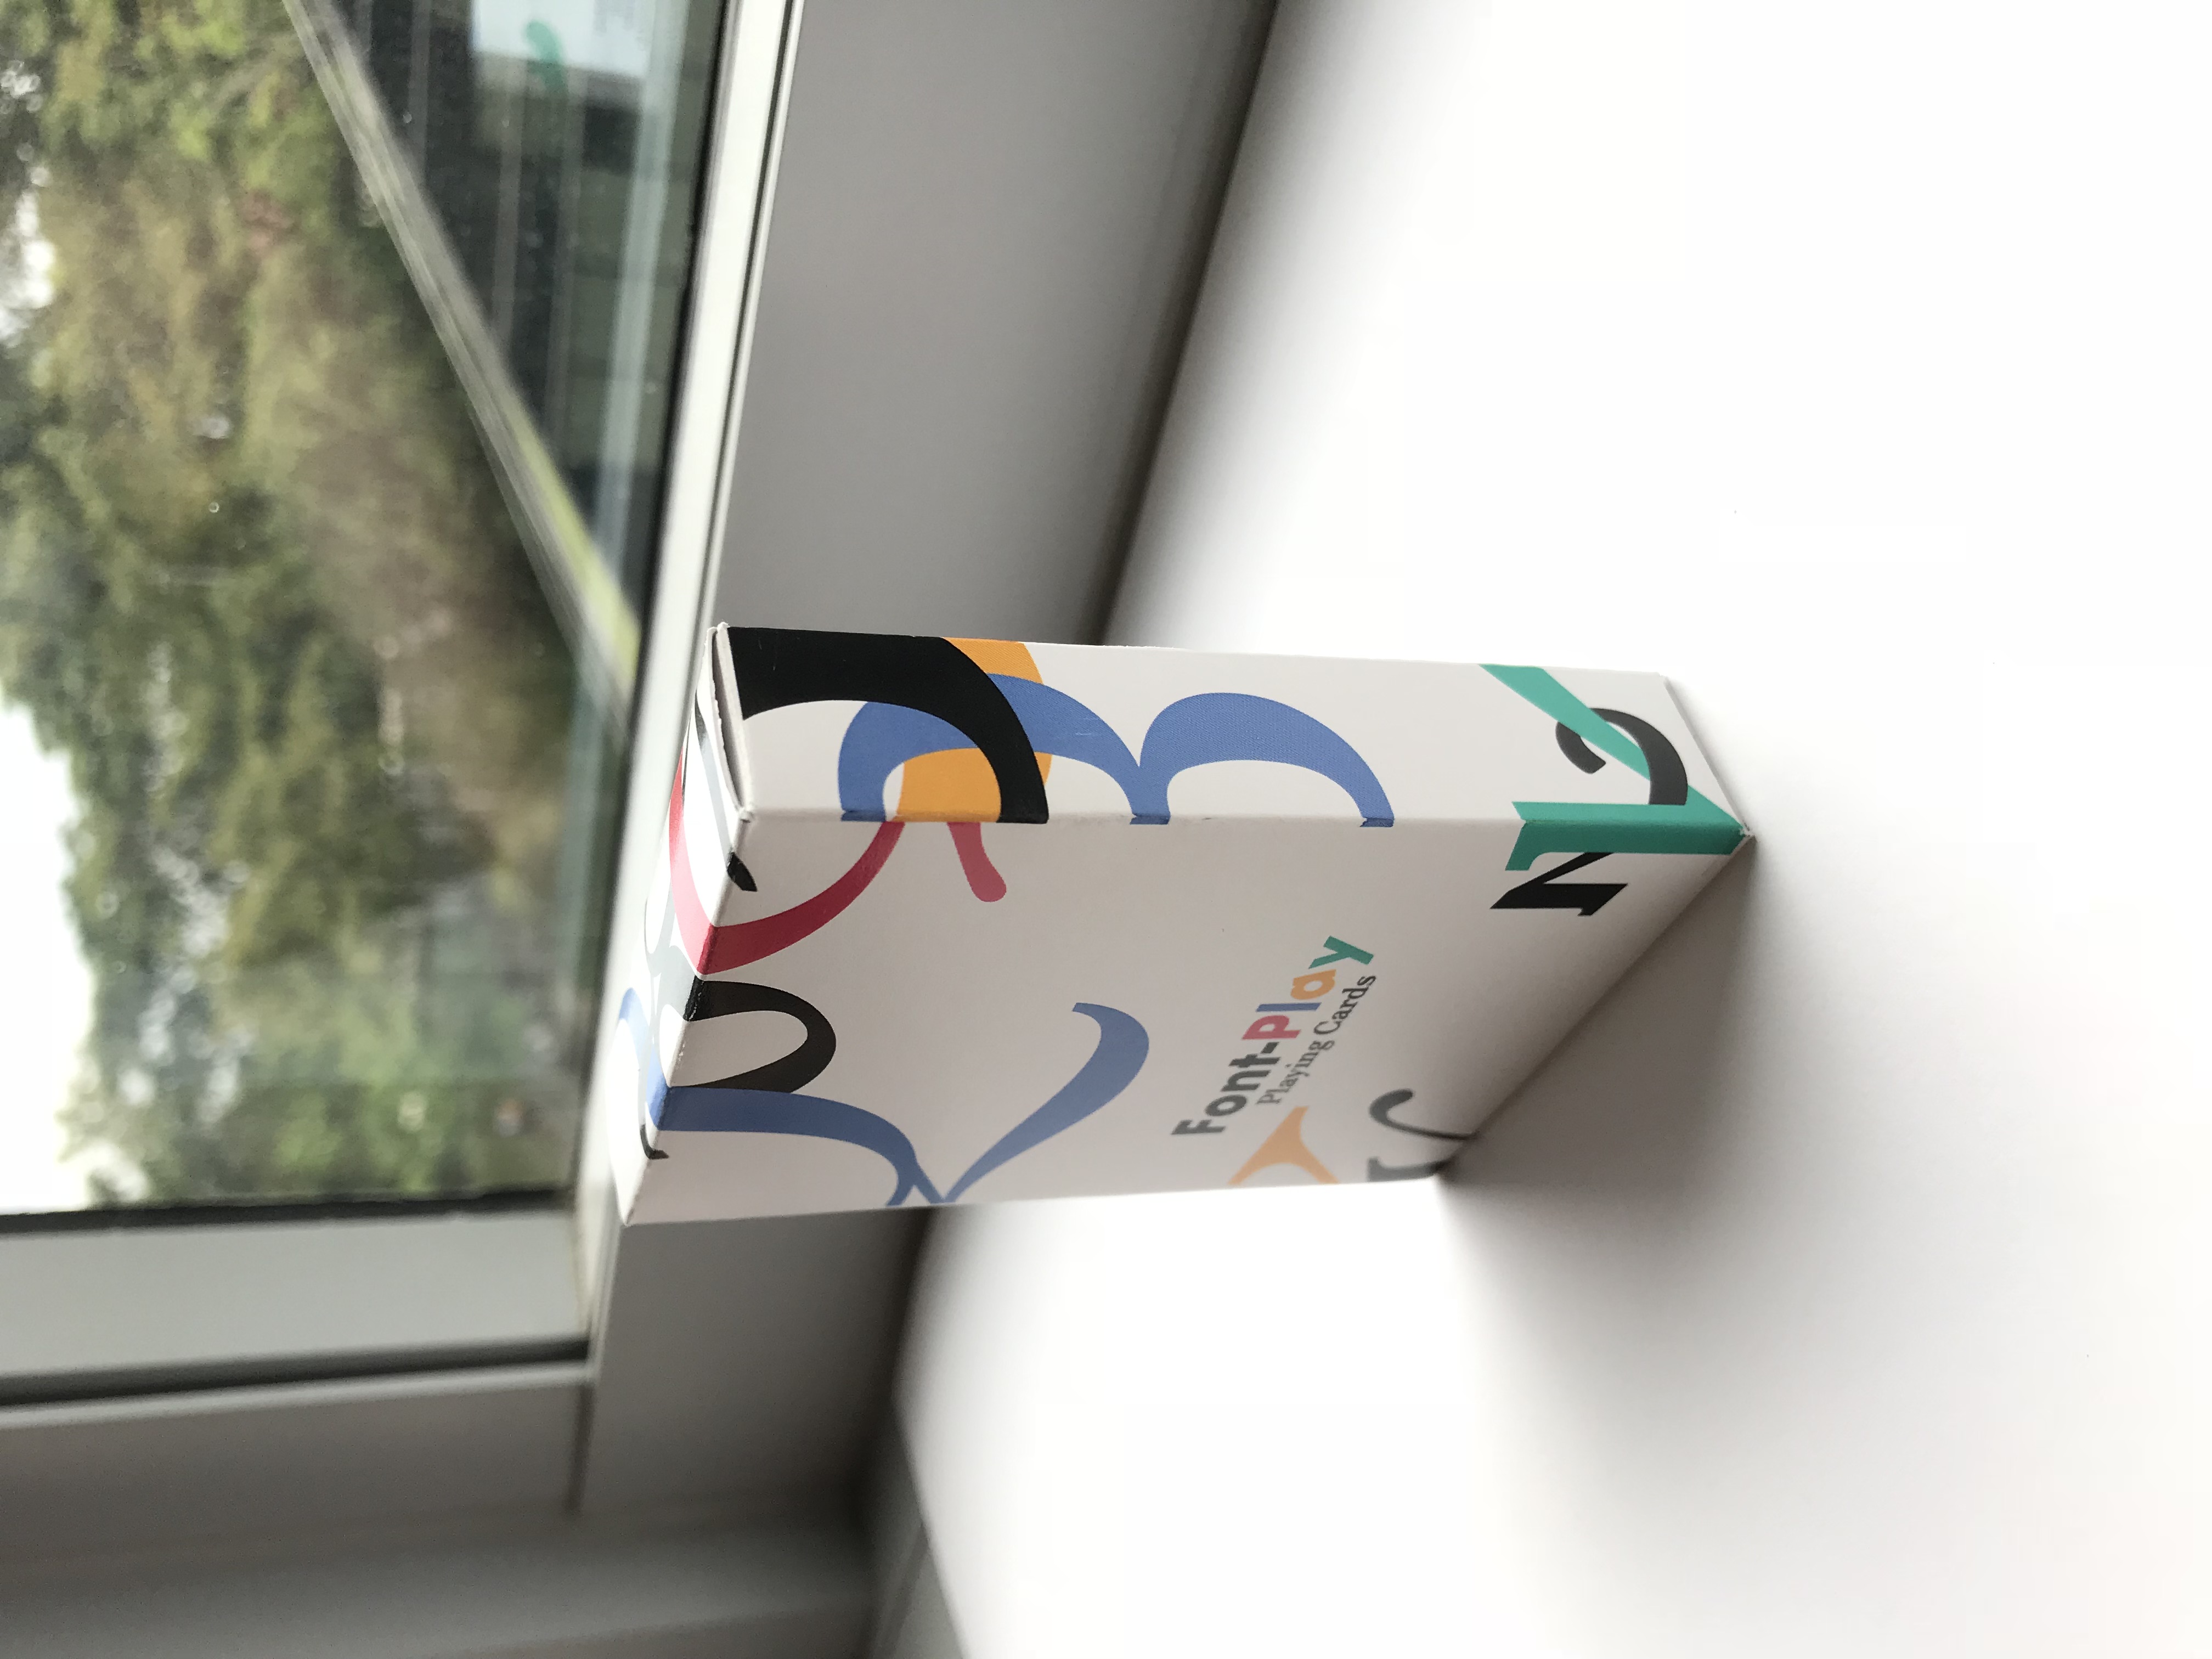
Design packaging


I used elements of the different fonts on the box itself. The name font play is a dual meaning title. It means playing with the physical cards itself and playing with the typography at the same time.
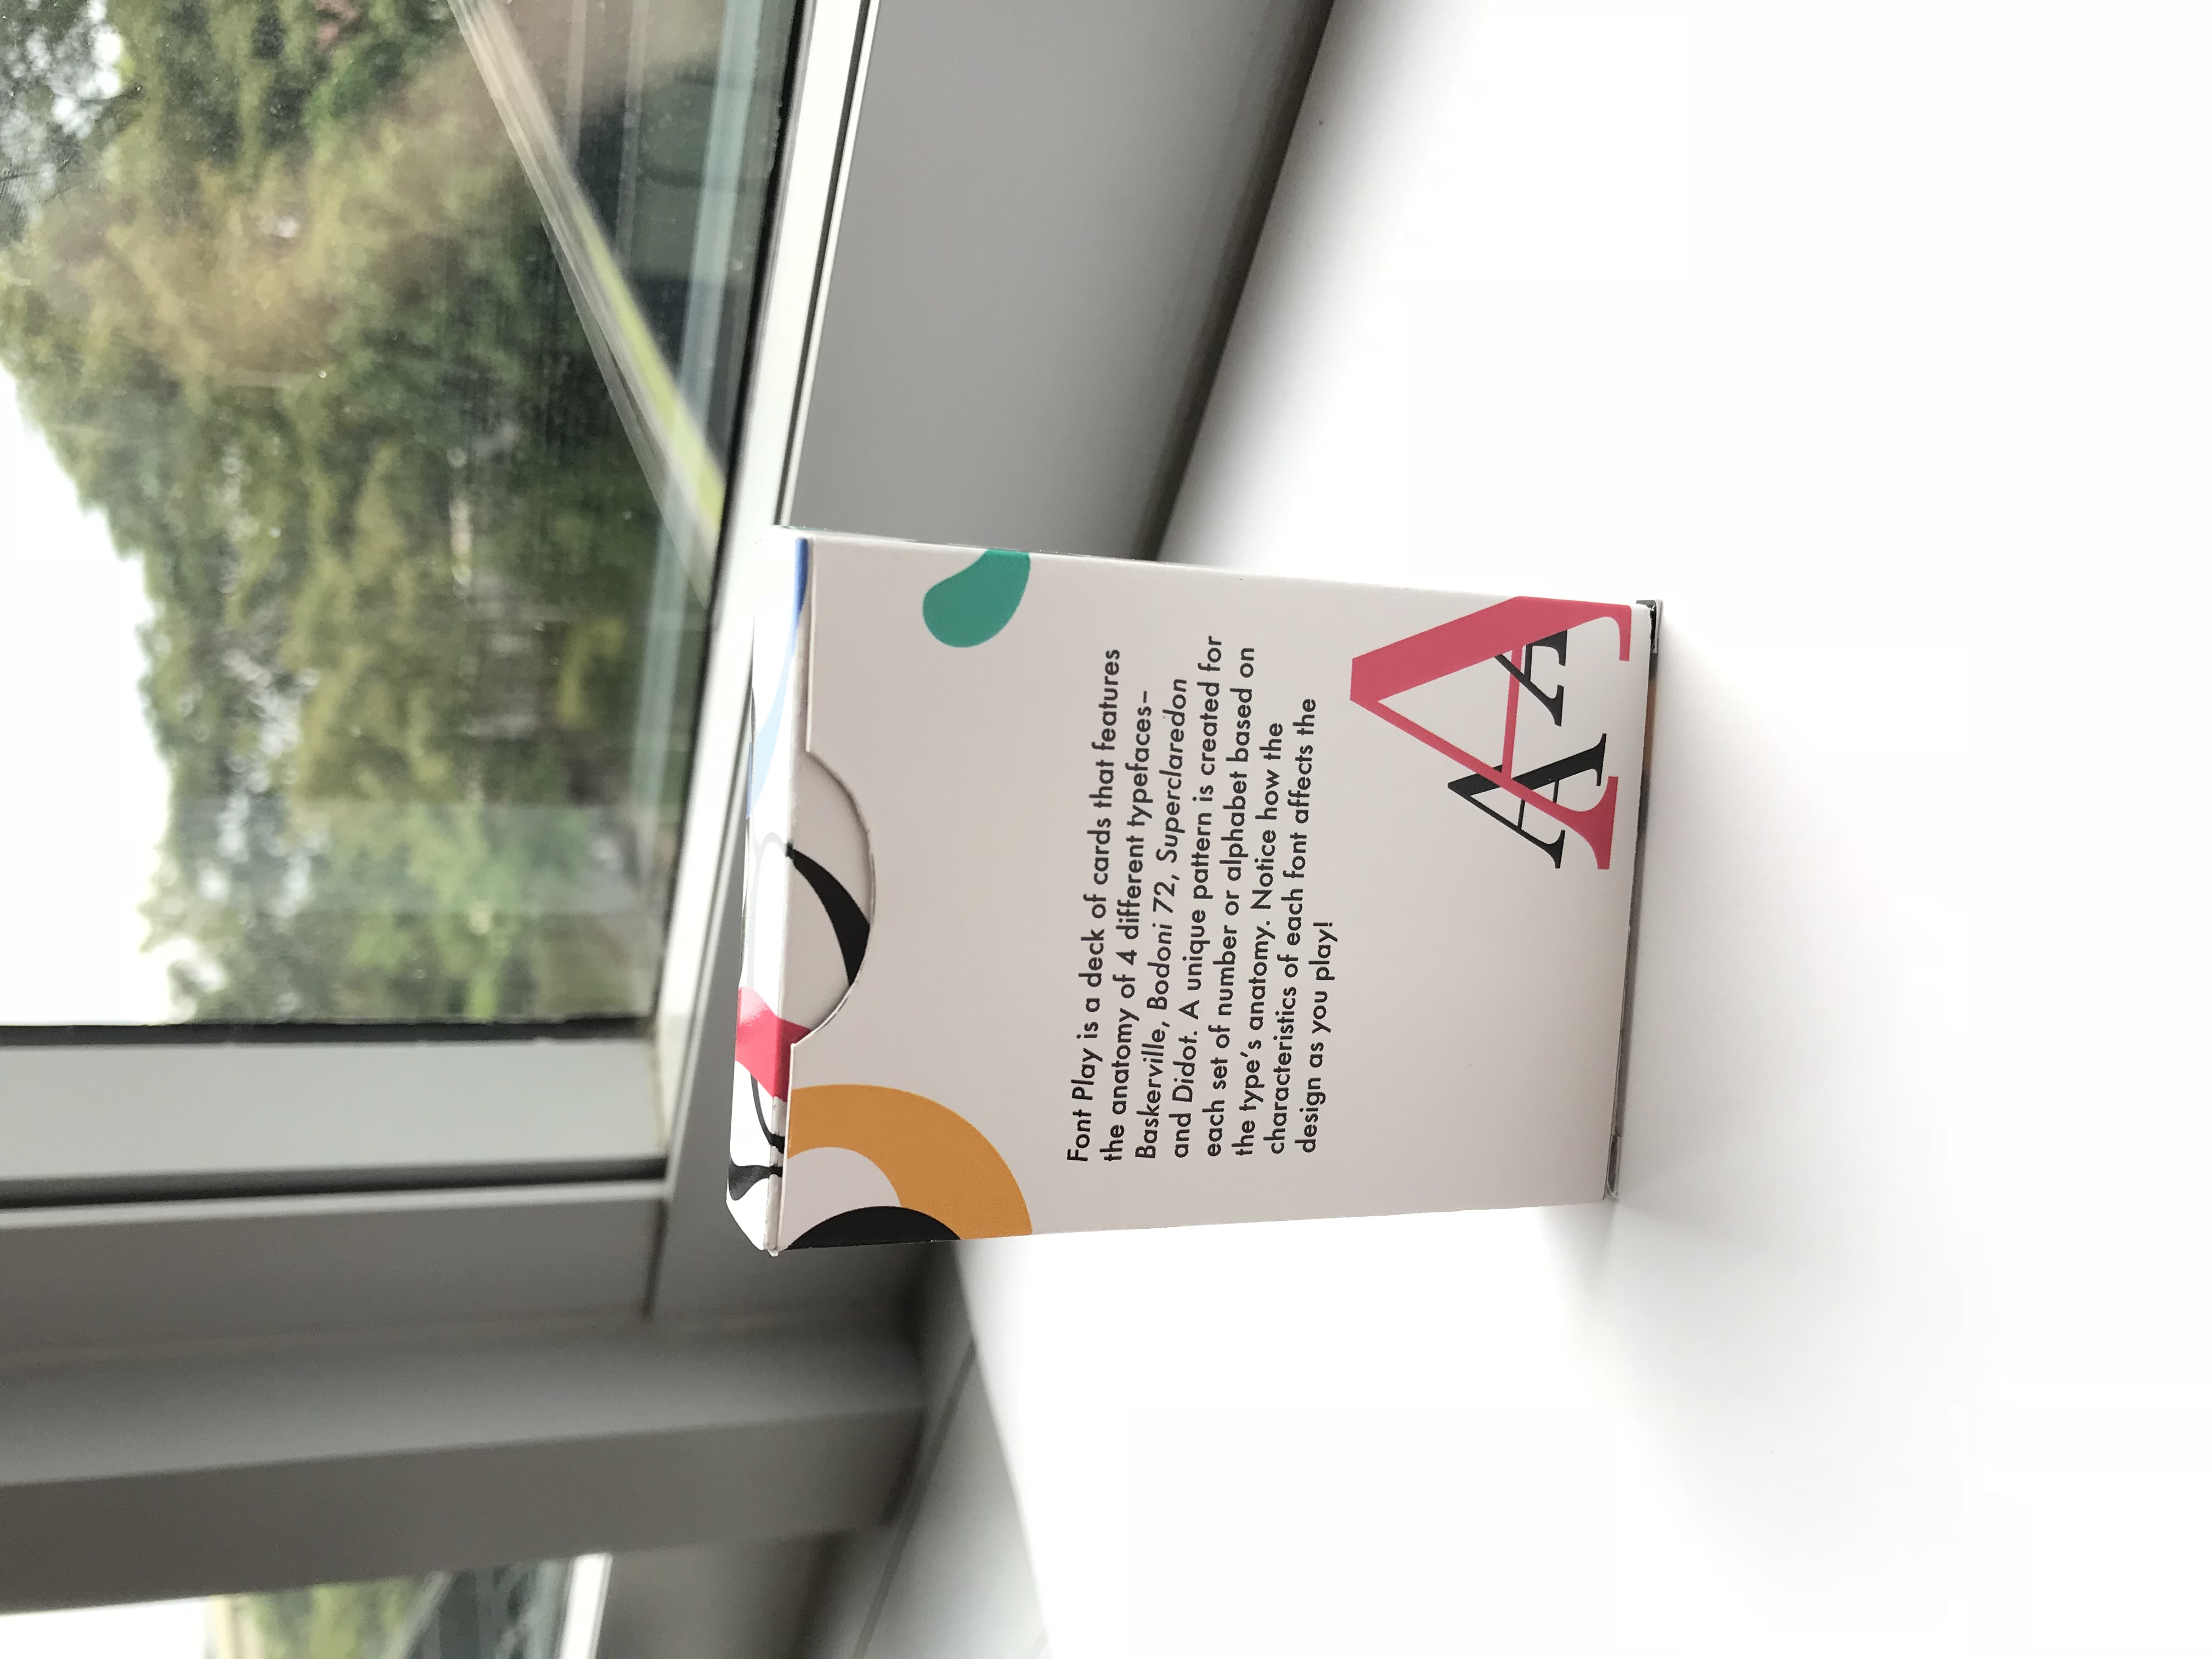
Font Play is a deck of cards that features the anatomy of 4 different typefaces– Baskerville, Bodoni 72, Superclaredon and Didot. A unique pattern is created for each set of number or alphabet based on the type’s anatomy. Notice how the characteristics of each font affects the design as you play!
The whole concept behind Font Play is to get users to compare how anatomy of the different typefaces affects the patterns created and to spot the differences behind each unique design.
Coming up with the dimensions of the box was a bit of a challenge for me as I based the measurements off a generic poker card box template. However, the paper quality and thickness would be differ from the original poker card and I was afraid of whether my cards would fit.
End product

Reflections
Overall, I was pretty satisfied with the results. Despite the tedious process of designing 52 cards, I really enjoyed myself and it was pretty fun exploring the anatomies of the different typefaces. Had I more time, I would probably explore more compositions and maybe include a “fun fact” sheet for each typeface used to tie the designs together better. Cheers to the end of project 4 to conclude this semester 🙂