Gaia Ikebana – Autumn ( Part 2)

It is getting colder and darker; leaves are falling from the trees. There is a chill in the air overnight, frost on the ground in the morning, mist and fog in the air. Dry, dead leaves crunch beneath your feet and clouds appear when you breathe out. There is still a lingering warmth but always a constant reminder of the cold to come.

This is a quote I found describing Autumn and I believe it’s a good overview description of my final food model.
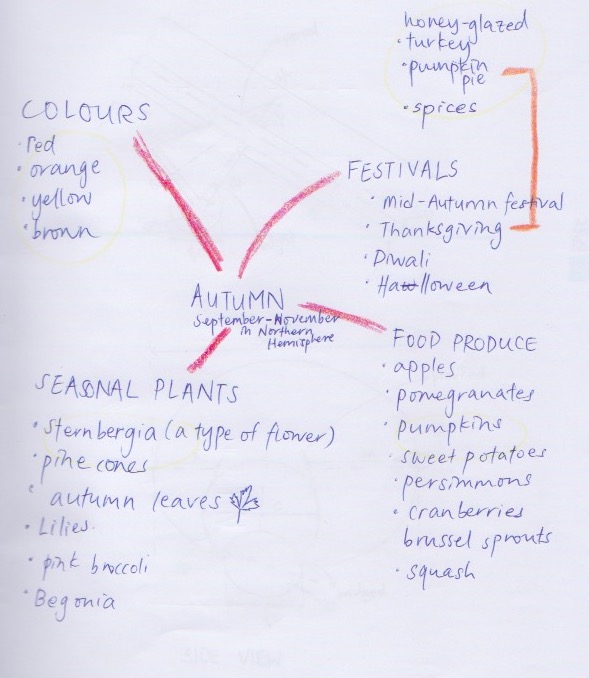
RESEARCH FOR AUTUMN

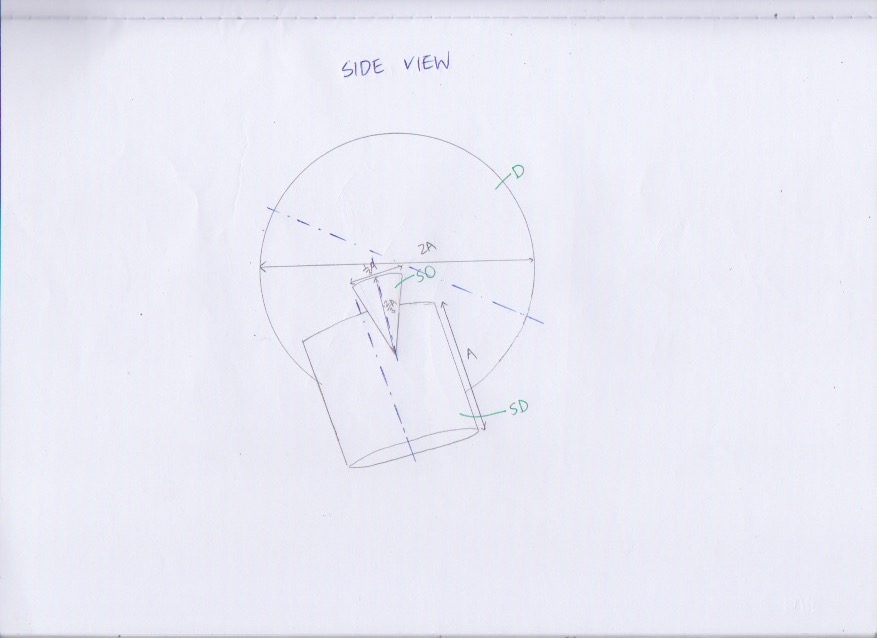
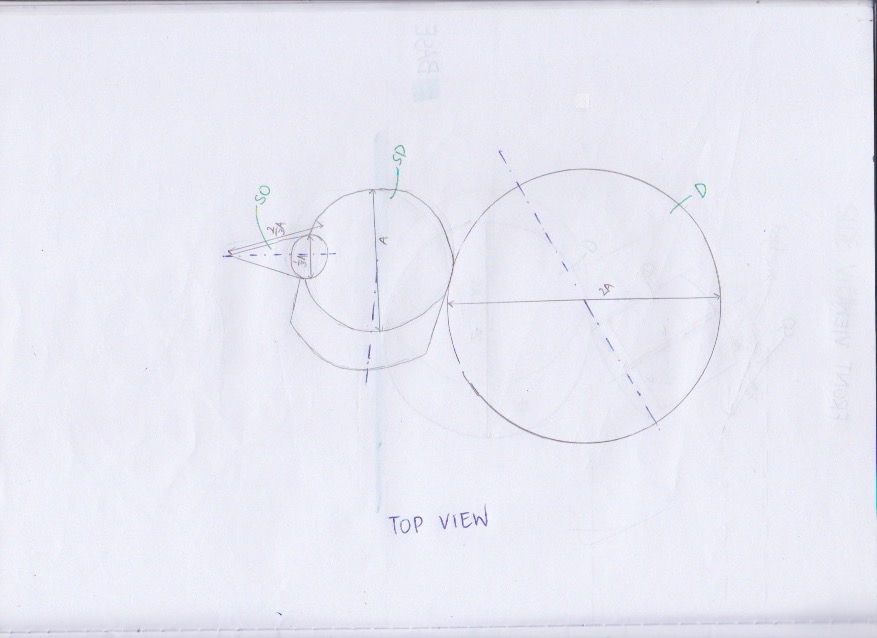
For my final food model, I chose to work with the theme of thanksgiving because I felt like with this theme I could bring in the taste aspects of savoury and sweet. This contrast in taste would be able to enhance the different properties between the D, SD and SO.

RESEARCH FOR THANKSGIVING

Thanksgiving began as a day to give thanks for the blessing of the harvest and of the preceding year.

According to https://www.foodnetwork.com/thanksgiving/thanksgiving-menus/classic-thanksgiving-menu, some of the few traditional dishes for thanksgiving:

  1. Squash soup
  2. Turkey w stuffing
  3. Pumpkin pie

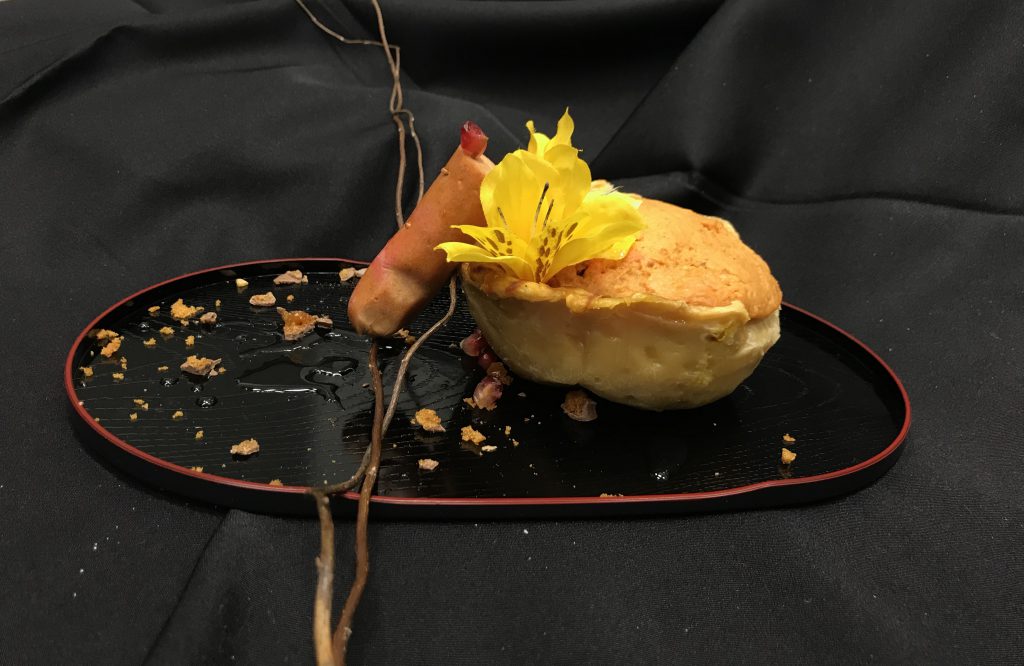
I decided to incorporate Pumpkin Pie (Traditional thanksgiving dessert), Chocolate Fire replica (‘lingering warmth’ from the Quote, BUT this failed and hence I changed out for Turkey from the concept of Traditional thanksgiving dishes *will be explained further), Pomegranates (Seasonal Fruit produce) and Sternbergia (Seasonal Flower) into my food composition.

MAKING THE ACTUAL FOOD

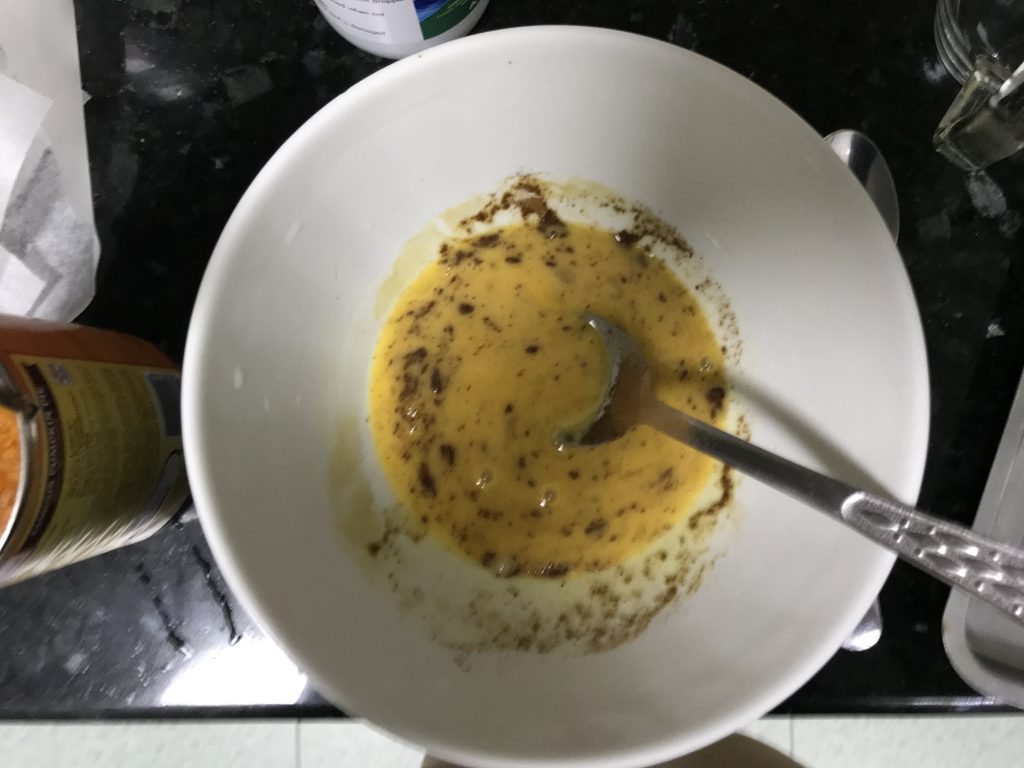
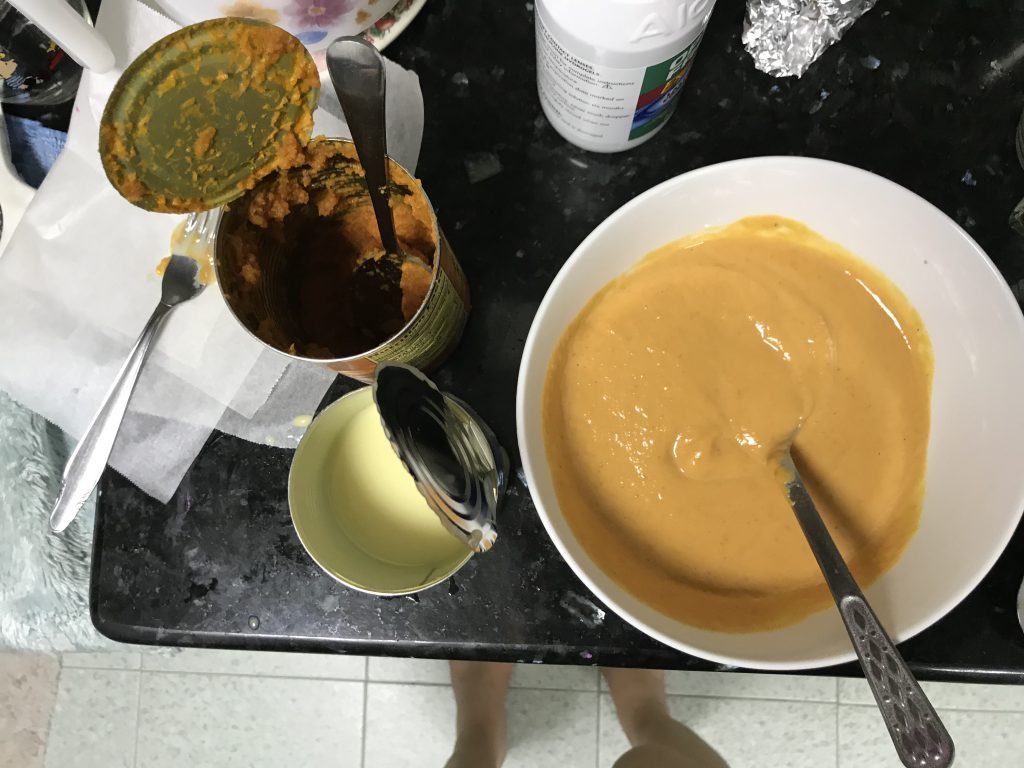
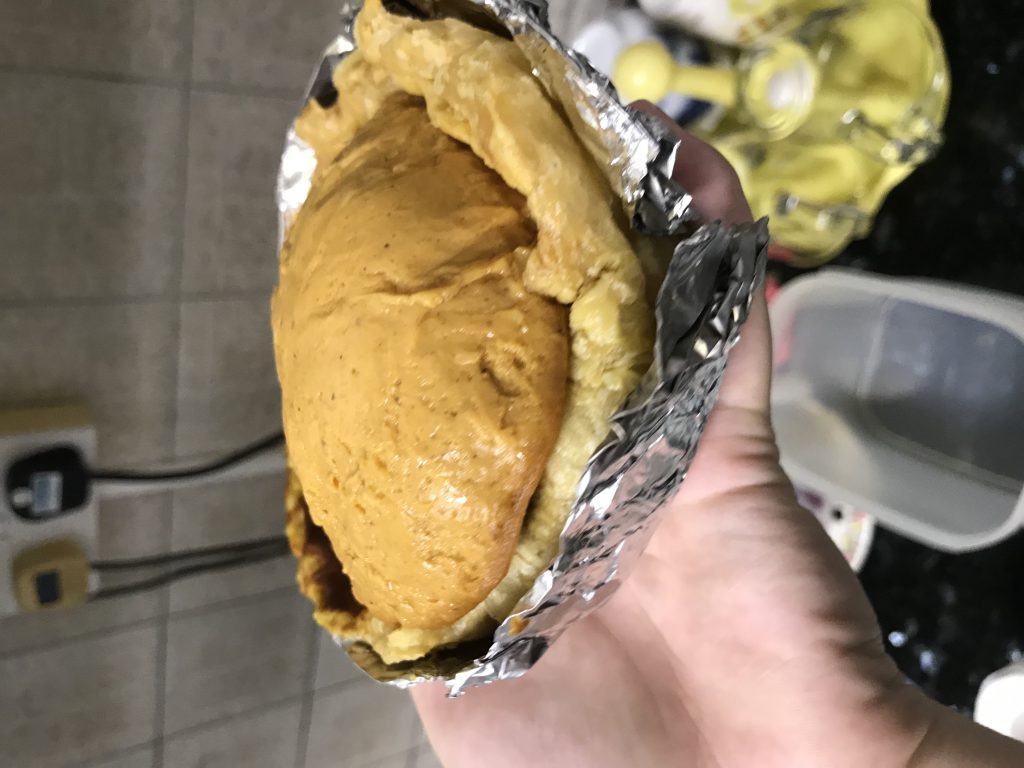
Making the pumpkin pie:
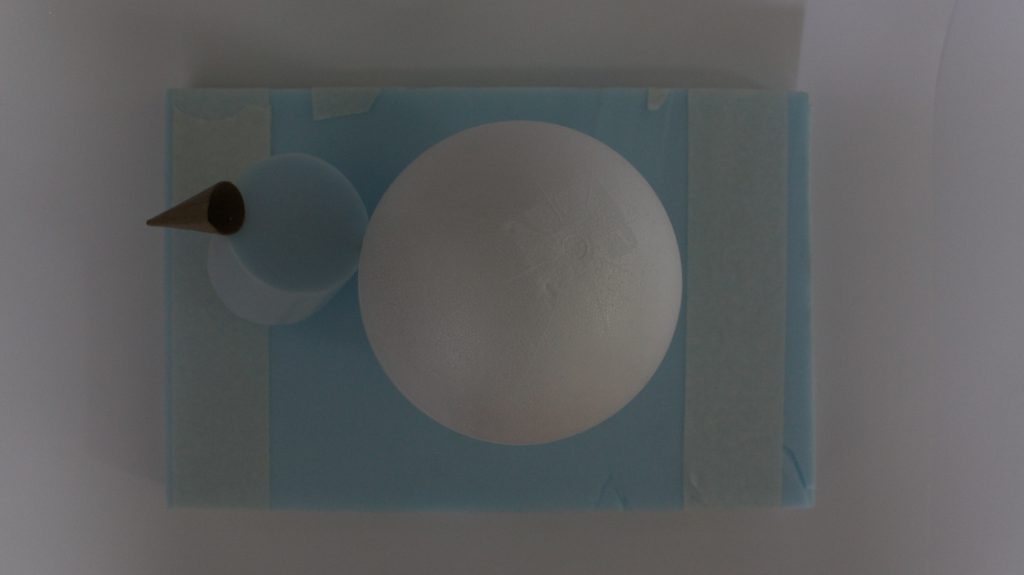
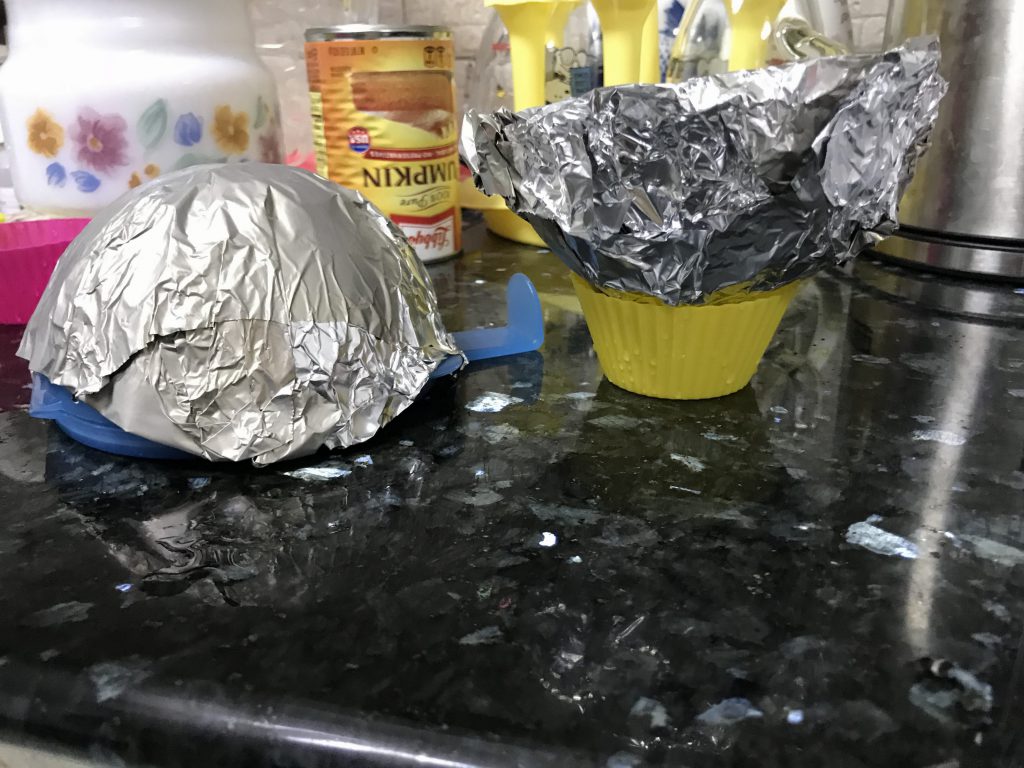
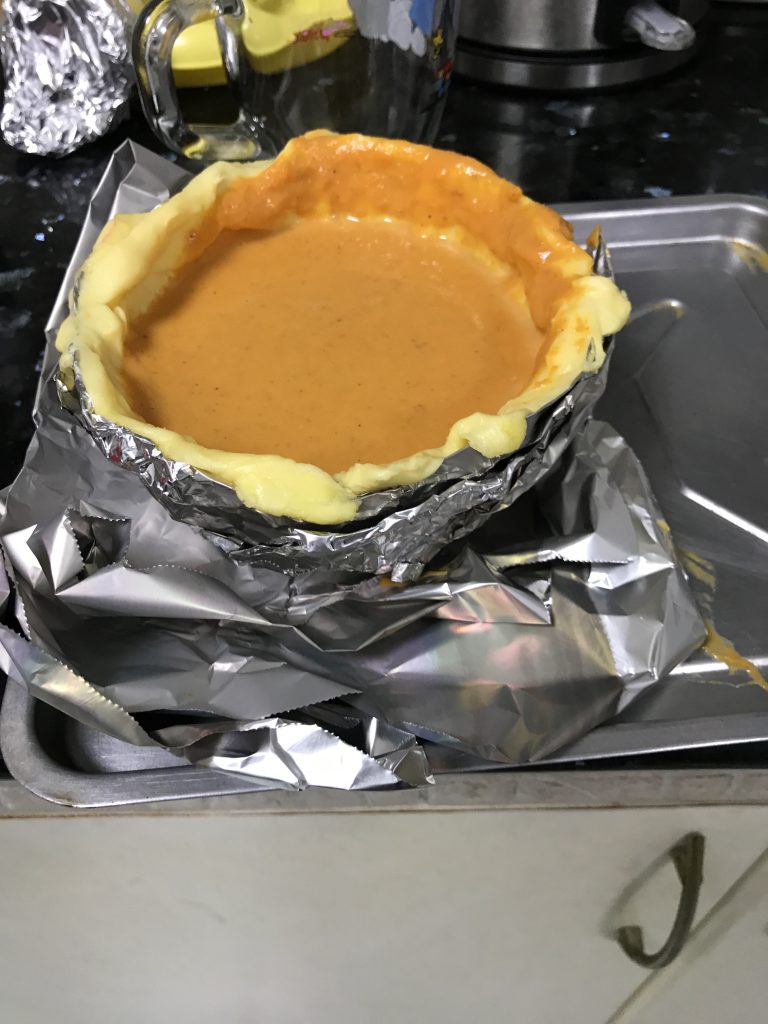
1. Make the hemisphere mould using a hemisphere Tupperware and aluminium foil
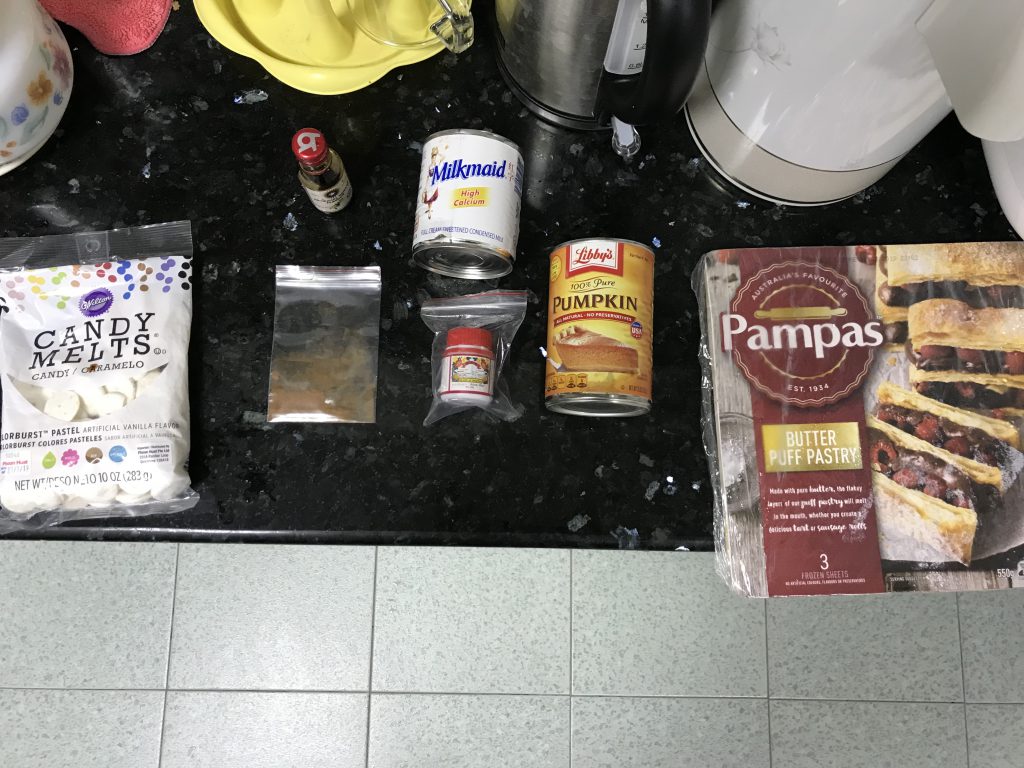
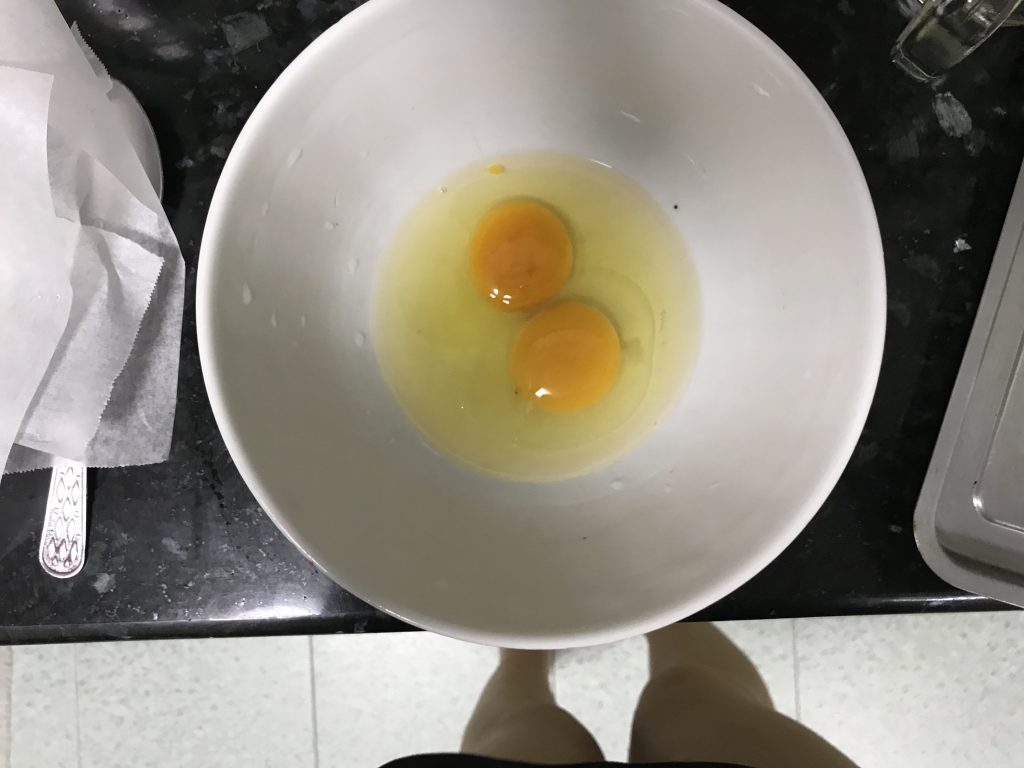
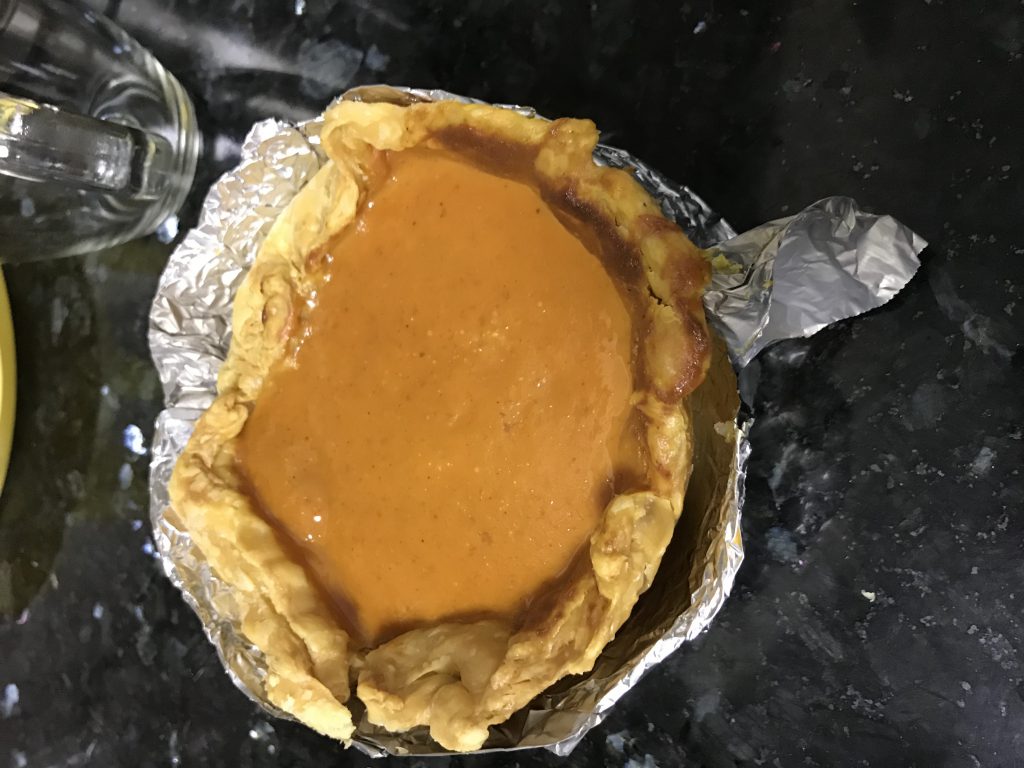
  1. Make the actual pie

How it turned out!

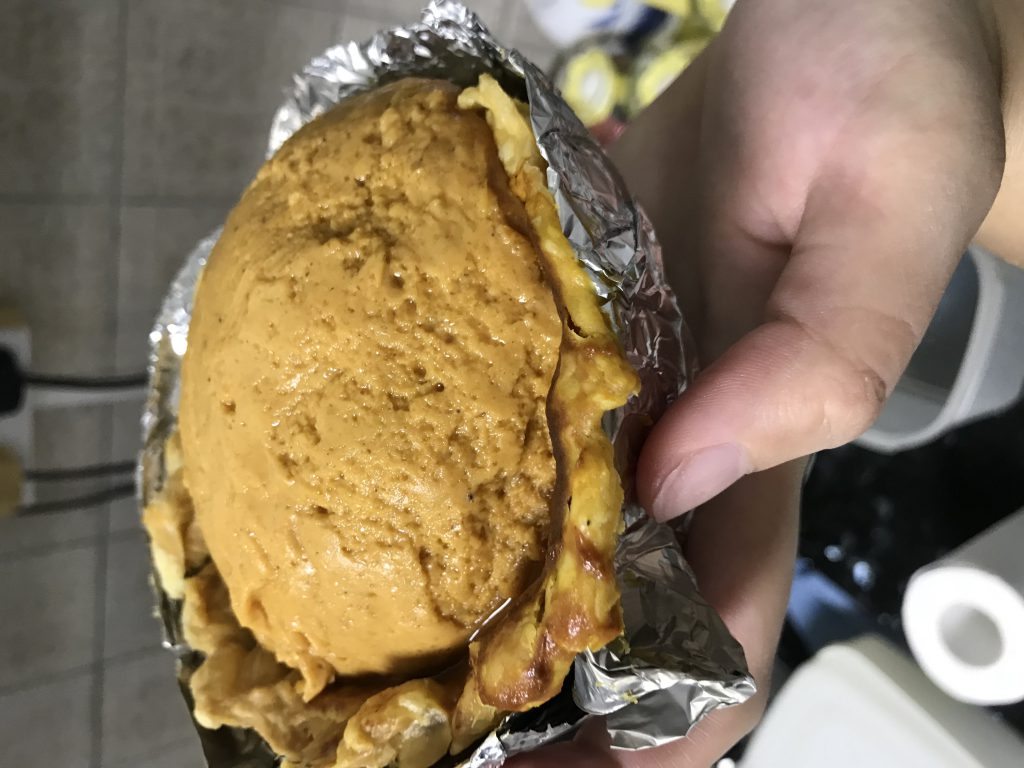
Made another half of just the filling without the crust to make a sphere pie

Next, make the chocolate fire by following this youtube video (https://www.youtube.com/watch?v=k0XcA9yi6uQ).

It was supposed to look like: 
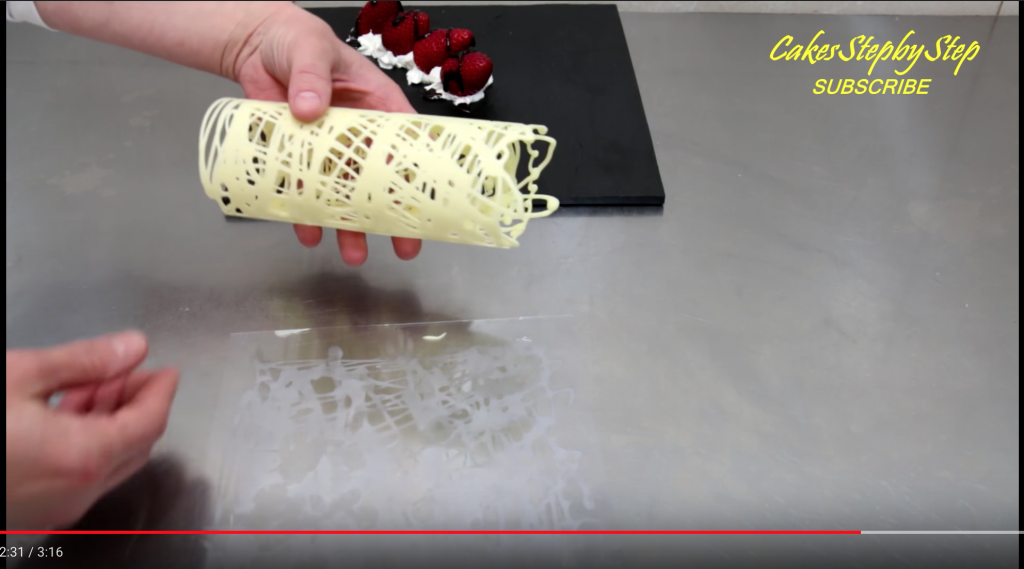
expect that it’s red.

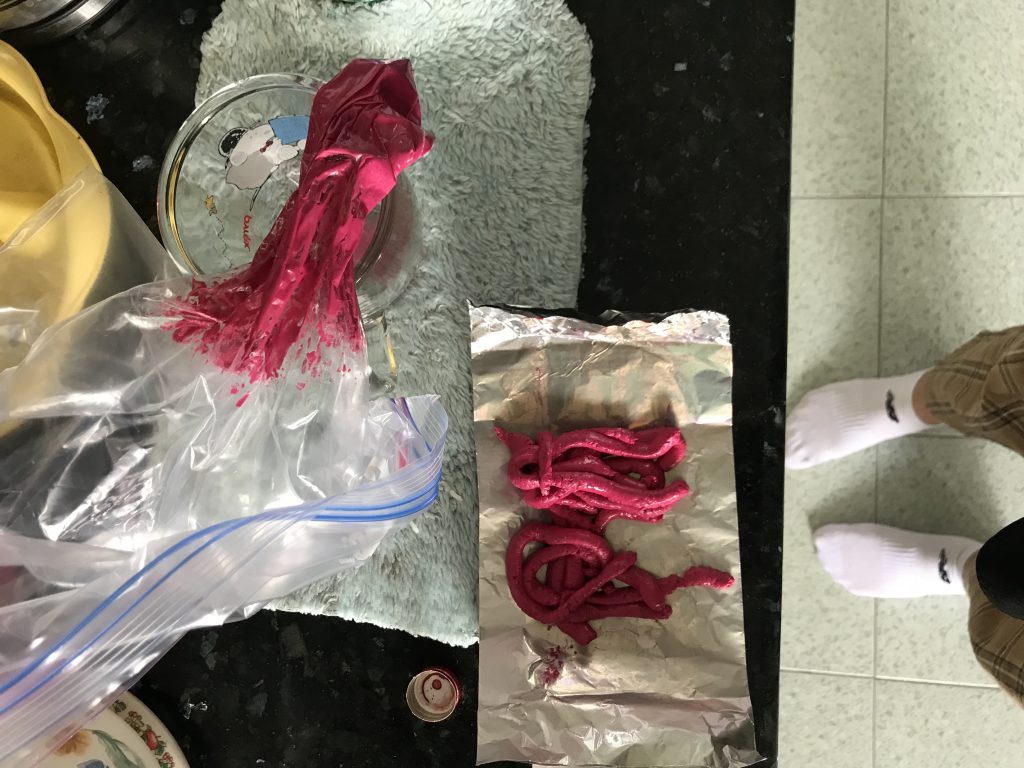
But, everything that could go wrong at this step went wrong.

  1. I could never get the red I intended.

On first try,

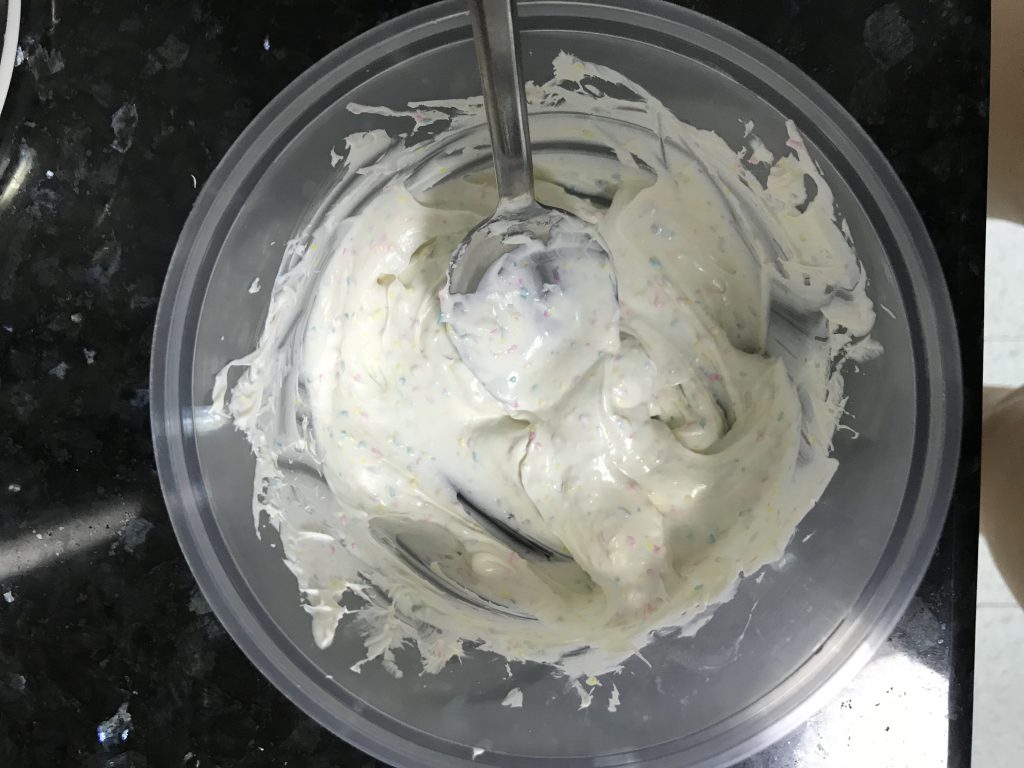
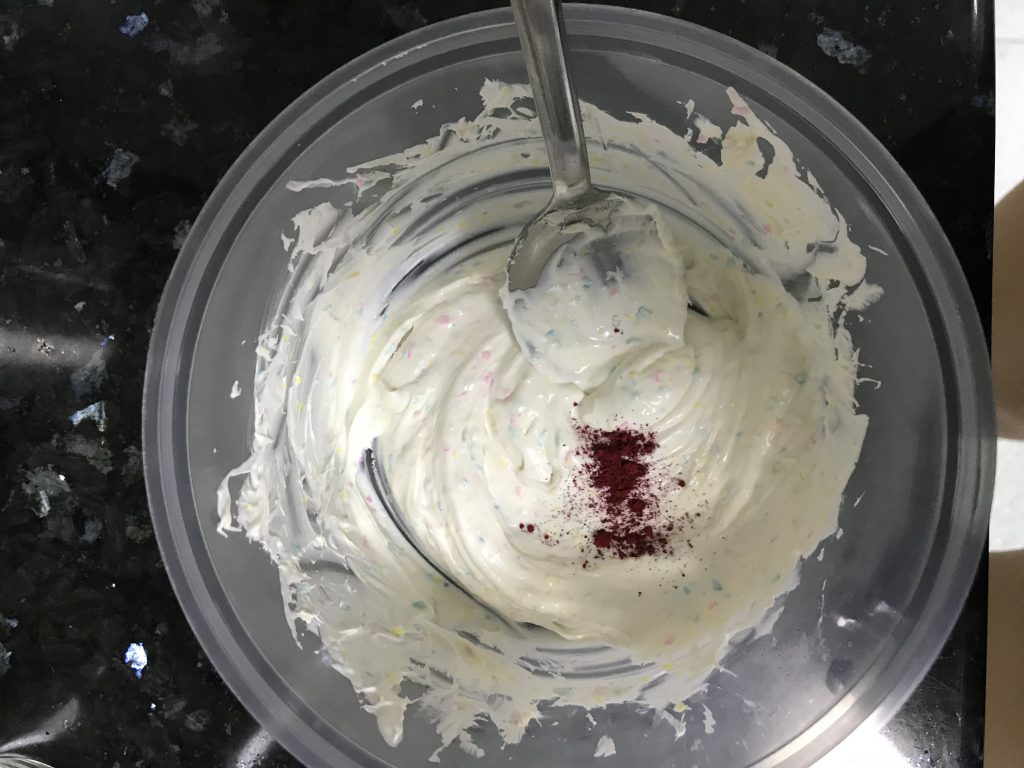
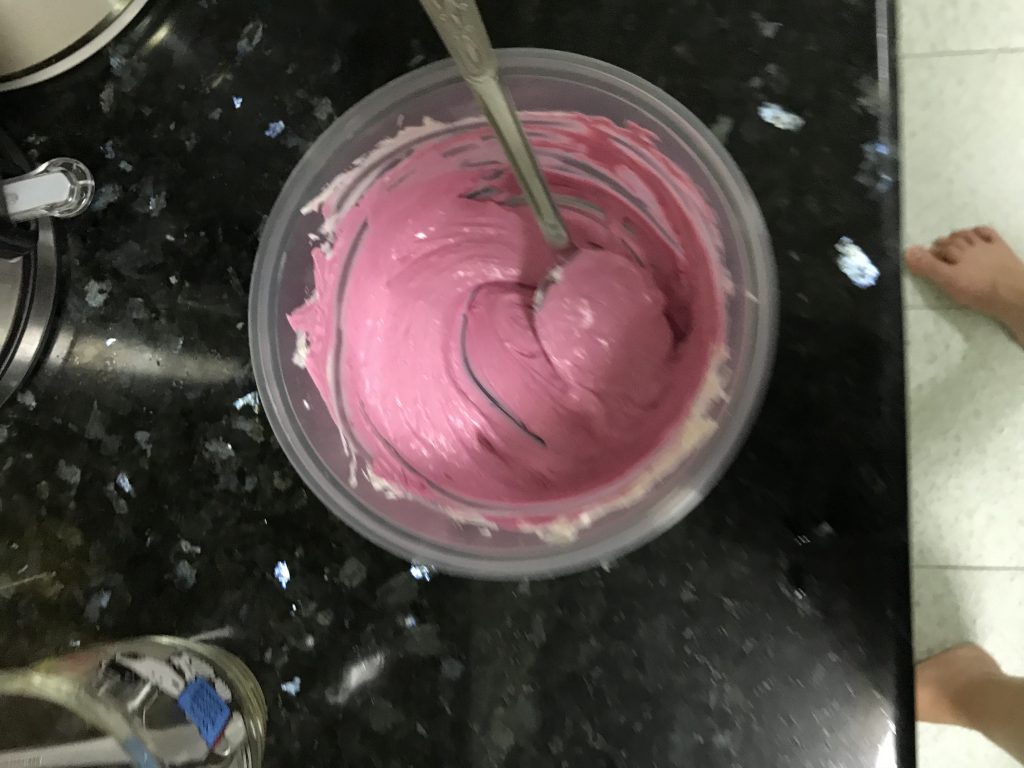
It came out a shade too light. So, I tried again with another food colouring.

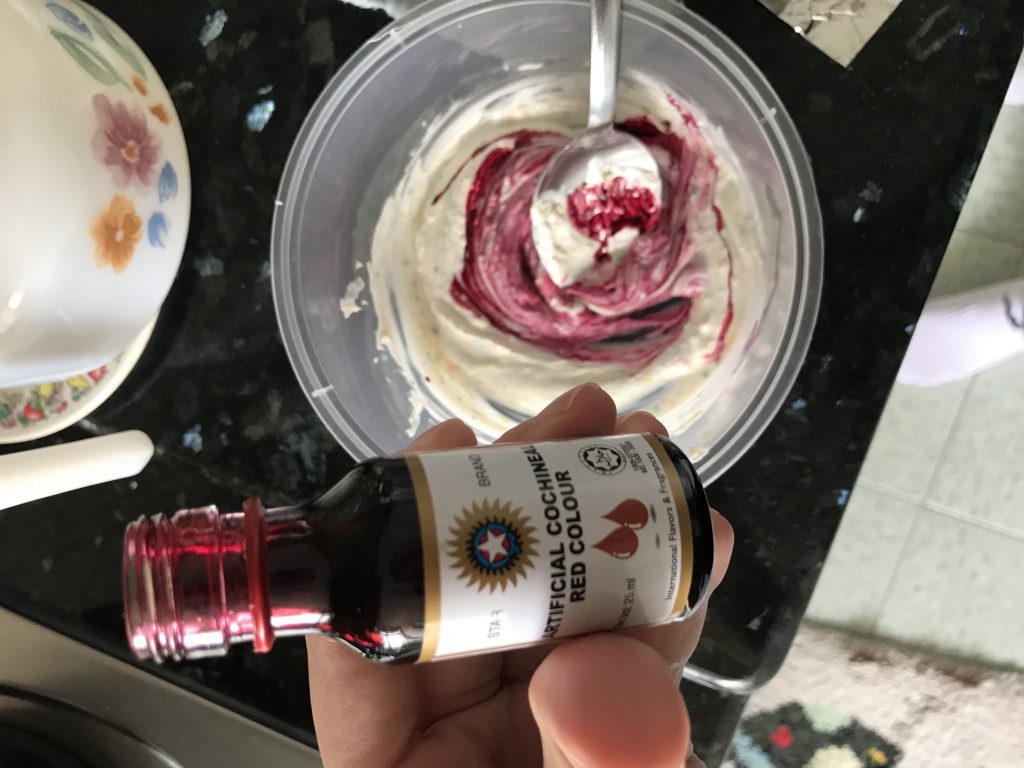
Now, it’s a darker shade of pink but still not the pink I wanted.

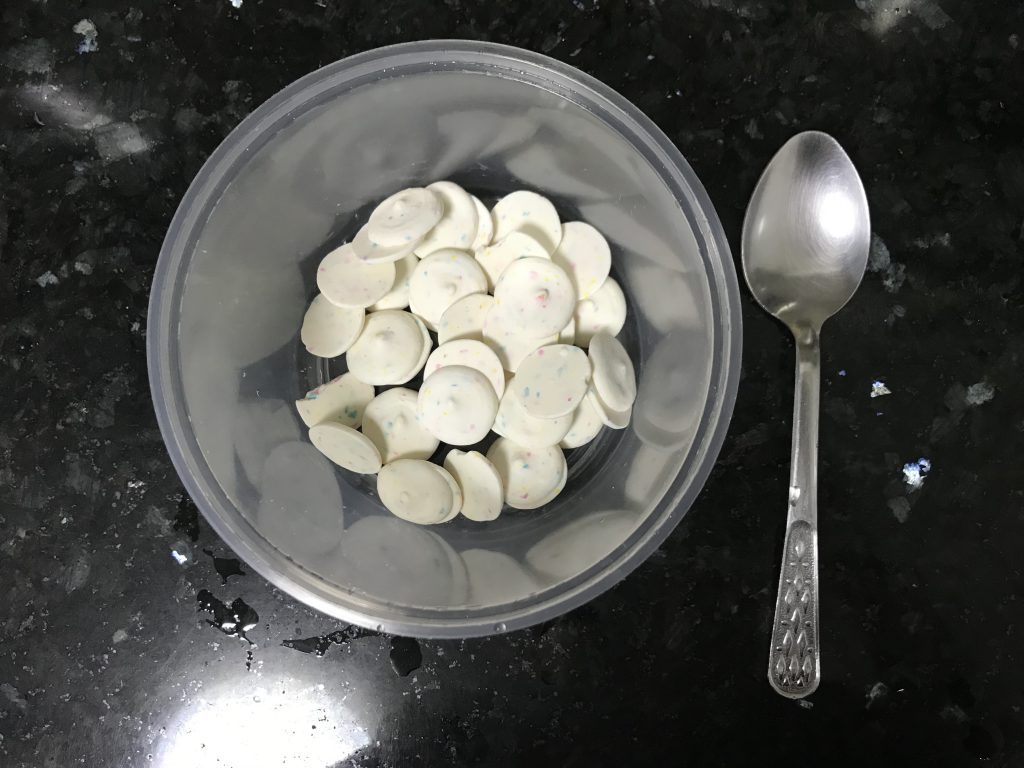
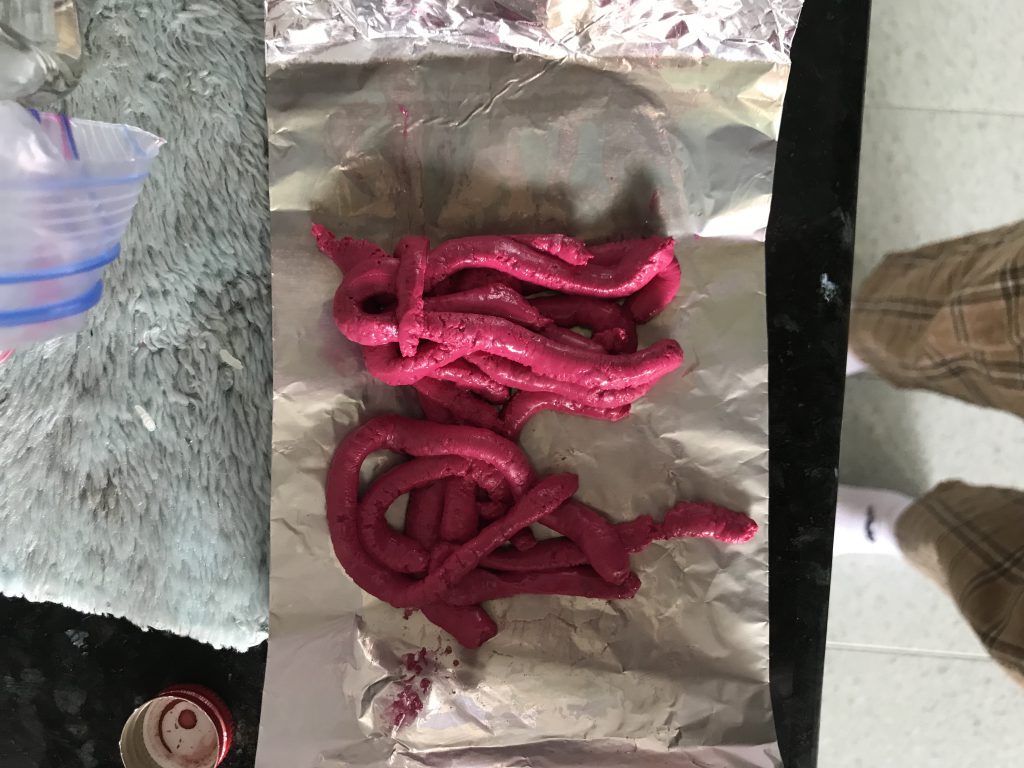
2. I could not get the chocolate thin enough to form the fire shape.

On the first try, it was too bulky, back-firing on what I intended.

On the second try, the chocolate foil couldn’t even be rolled up.

At this point, I gave up and evaluated what I could do so I decided to replace the initial chocolate fire idea with turkey sausages instead.

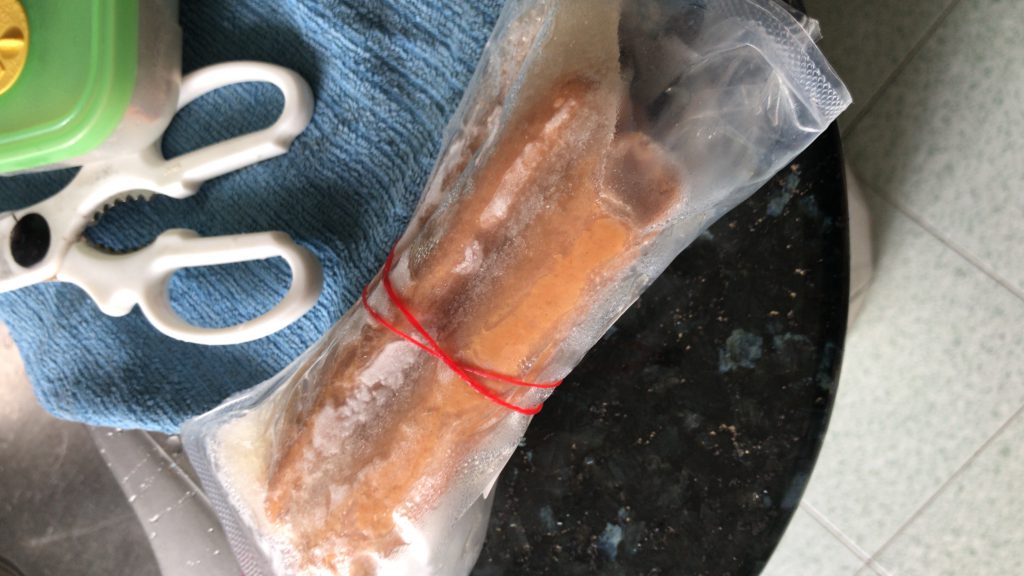
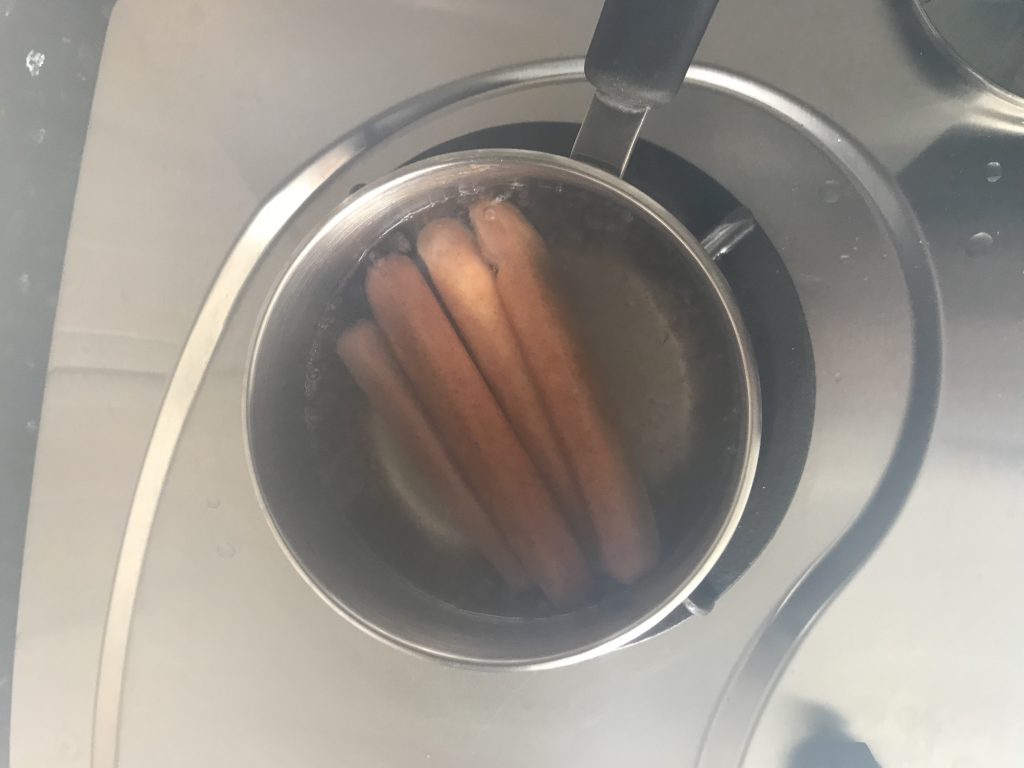
It was held together with toothpicks.

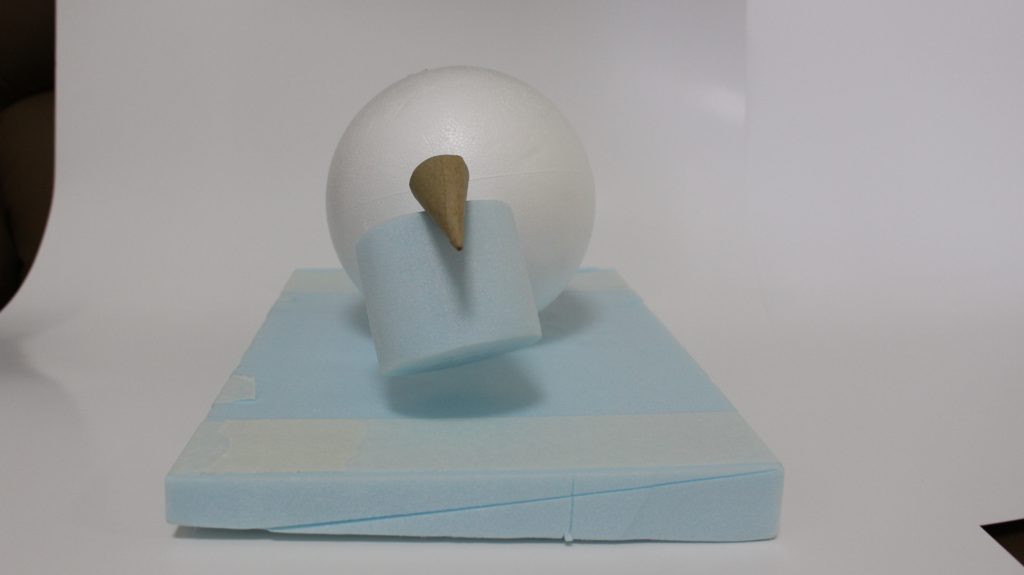
I made the cone out of honey comb chocolate to signify honey-glaze turkey.
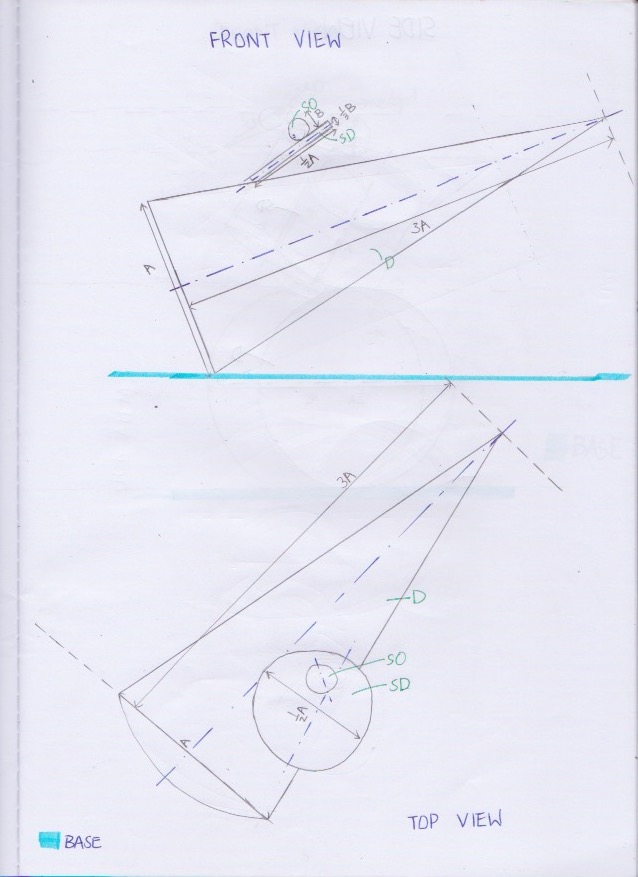
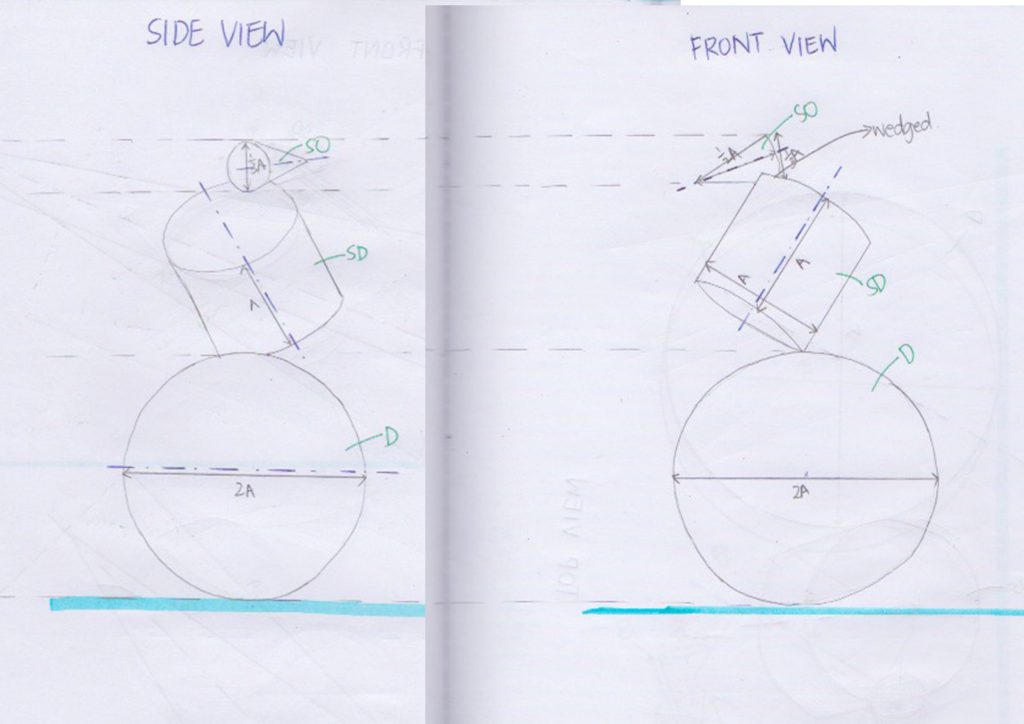
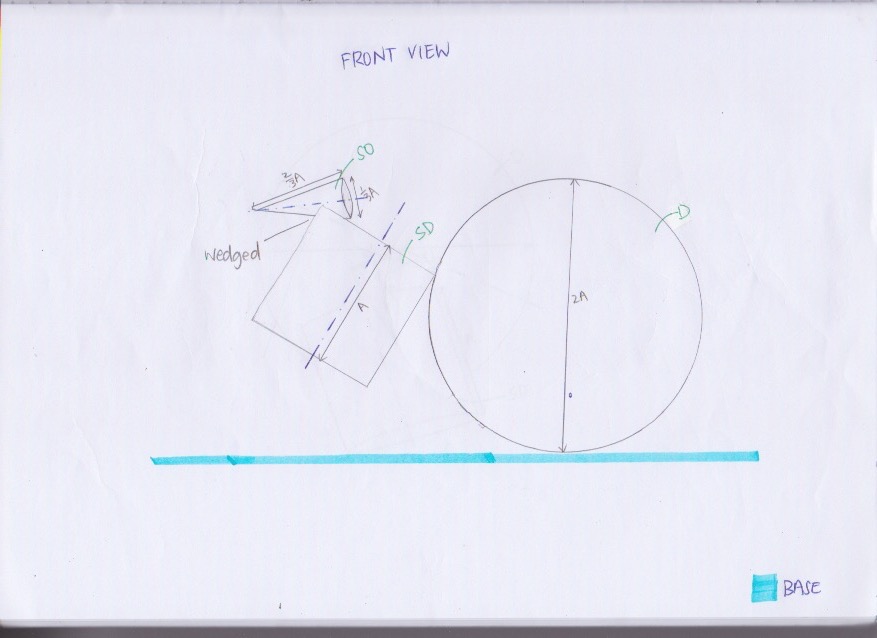
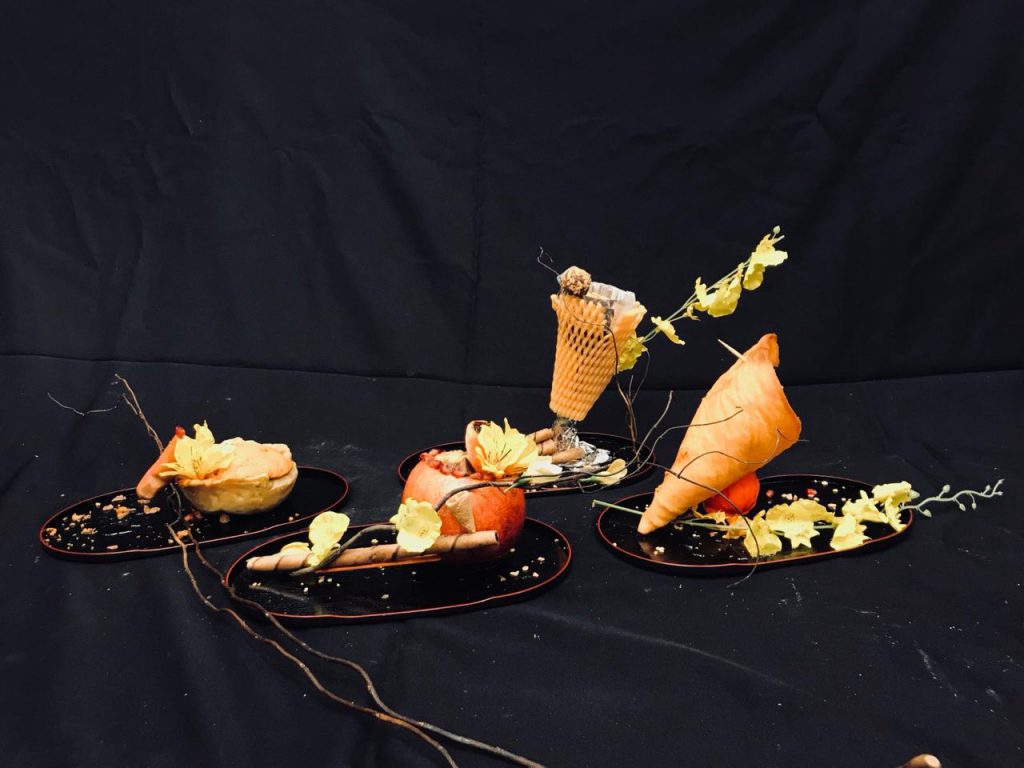
Food composition:

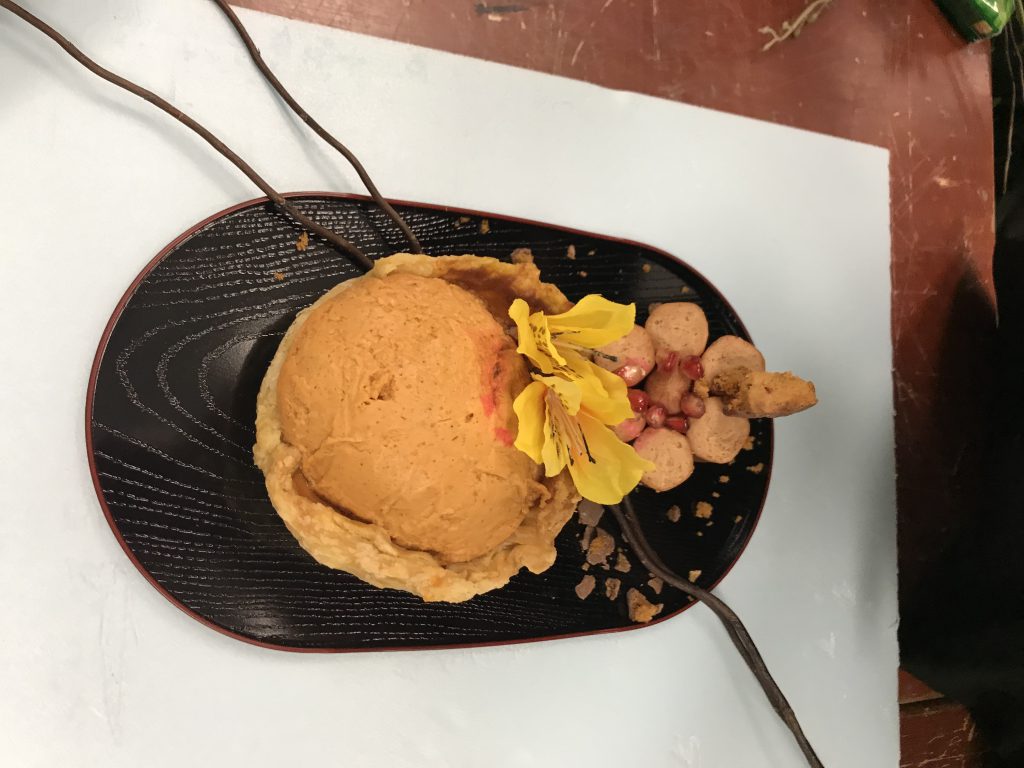
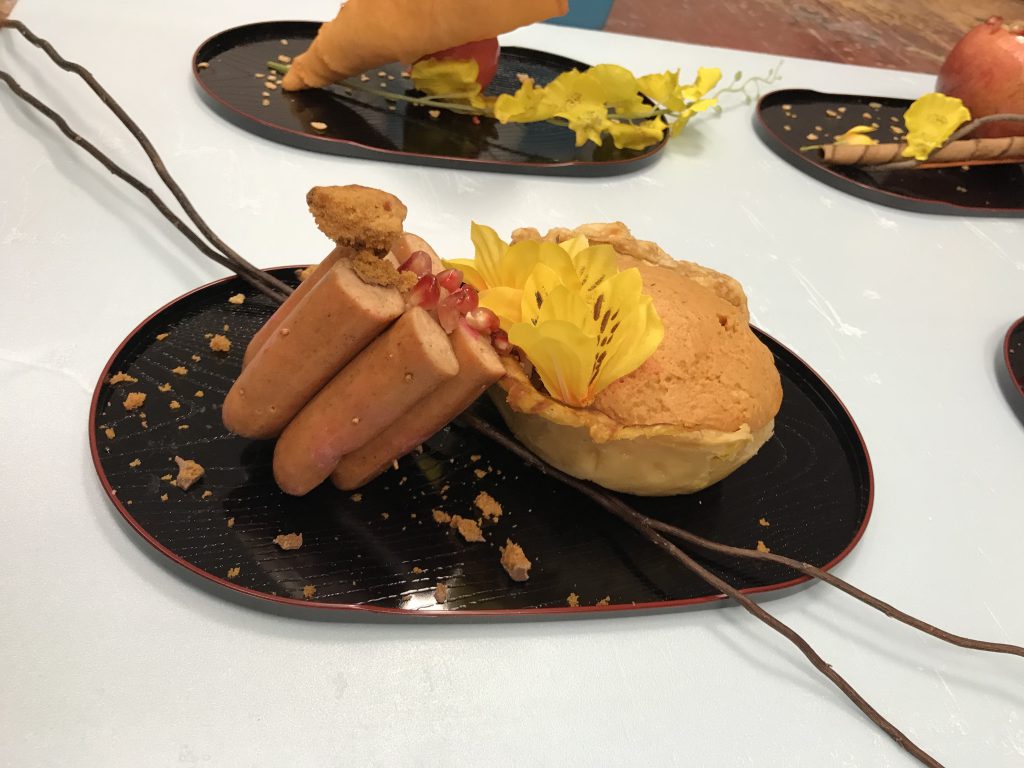
However, after consulting with Cheryl, she made a valid point that the sausages is stealing the show from the pumpkin pie because of its bulkiness. and how similar they were in length. So I made a reduction to the number of sausages and also the cone.

I am happy I made the change to this composition because

  1. The ambiguous D, SD, SO is now resolved. THIS even included the taste aspect whereby now the D is sweet, the SD is savoury but not overshadowing the D because it is just 1 and the light fruity taste from the pomegranate makes whole taste composition interesting.
  2. The red pomegranate didn’t get lost in composition even though it was small due to its colour.
  3. In general, it looks more cleaner and general more aesthetically pleasing.
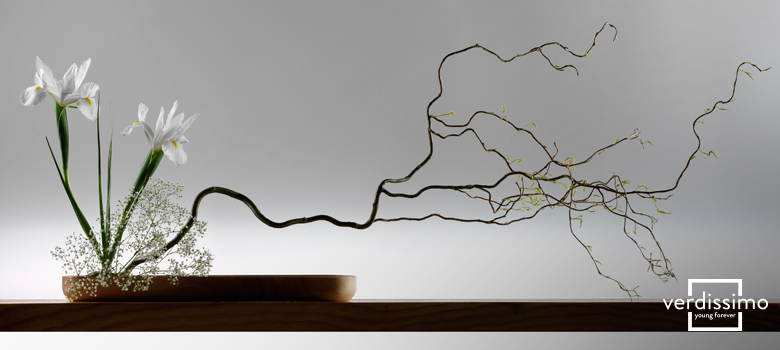
TWIG

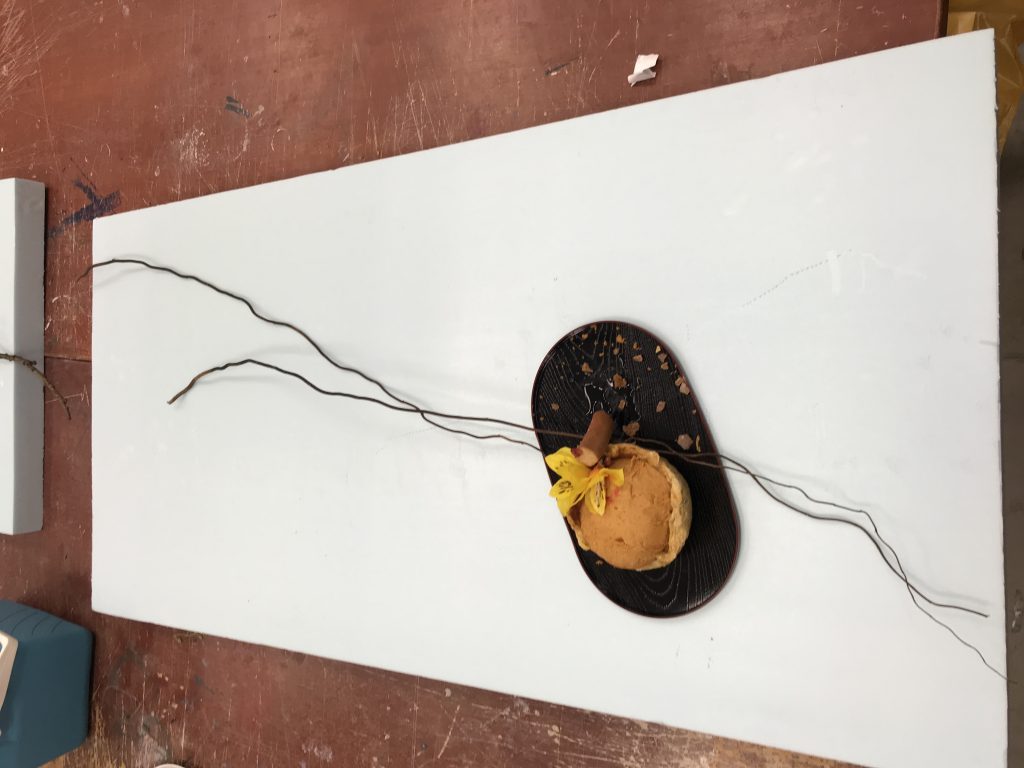
This was the twig I used. It was a relatively long twig placed in the ratio of 1:2 in relation to the dish.

This was because

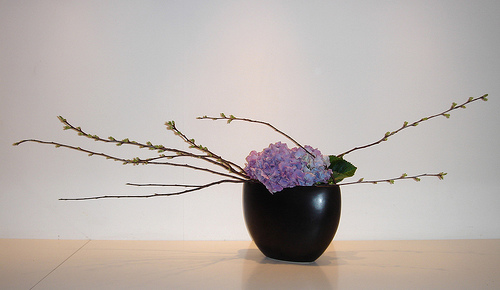
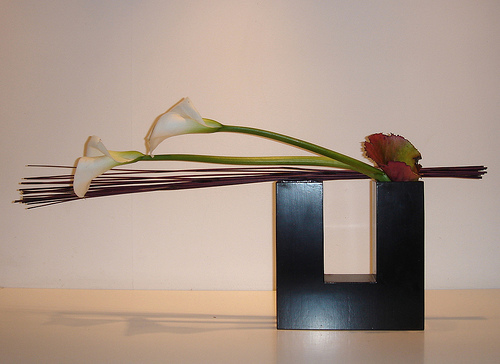
RESEARCH FOR IKEBANA

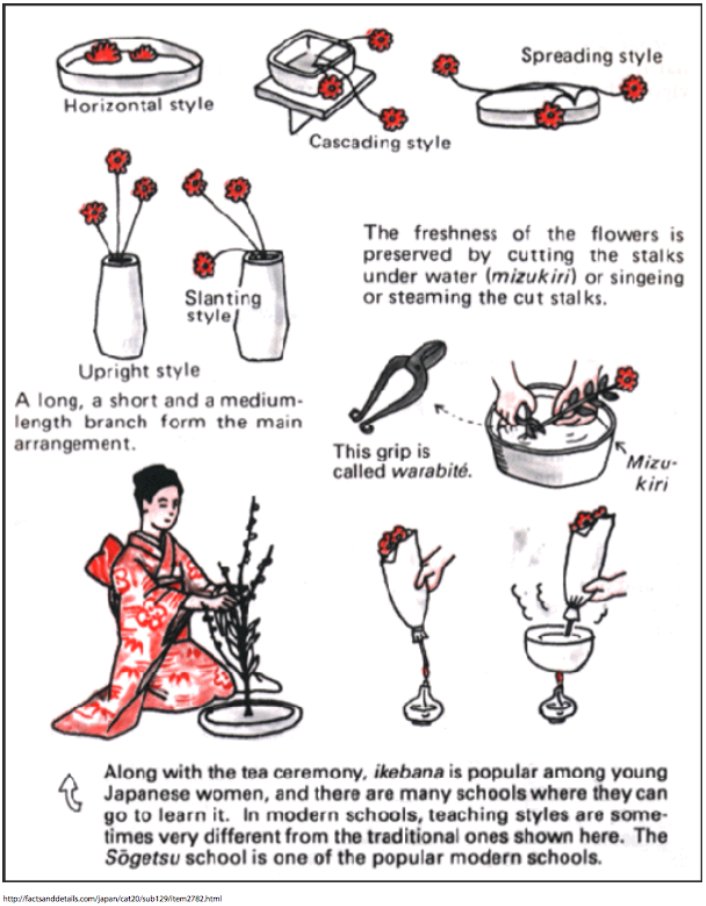
I wanted to bring out the rather horizontal layout of my composition but tweak it to make it more interesting by putting it at an angle to the dish. Not going to lie, I am also very inspired by Cheryl’s long twig example haha. I also referenced a few other arrangements.

PLATING/PRESENTATION

With reference back to the quote, we decided to present ours with an orange warmth light as well as a light hearted background music to bring out the Autumn atmosphere as described. As for plating we also have crumbs to represent dried fallen leaves and honey to represent the warmth autumn twinkle.

Here’s a photo representation of Autumn babies:

Here’s a video of Autumn babies:

https://drive.google.com/file/d/1w7GeOCHkDZHZ0jEsws-Oqb37Zqsjg_g4/view?usp=sharing 

Hope you enjoy this documentation! Thank you for reading 🙂

Gaia Ikebana – Autumn (Part 1)

The word I chosen is Autumn.

Here are my primary 3D sketch models.

Cylinder: D

Cone: SD

Sphere: SO

  • The sphere is standing independent.
  • The cone is dependent on the sphere.
  • The cylinder is precarious to the cone.

Pros:

  1. Overall, balanced

Cons:

  1. Too symmetrical for a Ikebana composition
  2. The use of both methods: piercing and wedging may eventually fail when moving onto the food portion
  3. Sphere is already an SO yet it is still overshadowed by the Cylinder

Cone: D

Cylinder: SD

Sphere: SO

  • The cone is precarious in relation to the base
  • The cylinder is also precarious in relation to the cone
  • The sphere is dependent on the cylinder

Pros:

  1.  Relatively interesting composition
  2.  All components can be seen at all angles

Cons:

  1.  Overall, imbalanced
  2.  May become a problem when dealing with food
  3.  Lack of an independent element

Sphere: D

Cylinder: SD

Cone: SO

  • The Sphere is independent to the base
  • The Cylinder is precarious in relation to the Sphere
  • The Cone is dependent on the Cylinder (since wedged)

Pros:

  1. Overall, balanced
  2. All elements can be seen at all angles

Cons:

  1. Too symmetrical for a Ikebana composition
  2. Long structure may become a problem when dealing with food

I personally wished to revise Model 3 because out of all 3, I felt that it had the most potential to be changed considering it’s cons can be rectified without the compromise of the pros.

Model 3 Revised


Sphere: D

Cylinder: SD

Cone: SO

  • The Sphere is independent to the base
  • The Cylinder is precarious in relation to the Sphere
  • The Cone is dependent on the Cylinder (since wedged)

This is my final composition which I hoped to adopt to my food model.

Look out for Part 2 to see what happened!


Project 2: The Subverted Object

The object that I picked out was an ice cube.

As for Component 1, I wanted to bring out what I felt was unique about ice.

For the first photo, I thought that something really interesting about ice is that even as a solid it is able to float in water which is a liquid.

Hence, I chose a patterned cup to emphasise the refraction that happens when there’s a tension that happens as the ice floats in the water.

For the second photo, I wanted to captured how ice interacted with fabric. Upon long contact with fabric, ice melts and freezes the fabric with it causing the fabric to stick to the ice.

Hence, you see here that even though lifted, the fabric doesn’t drop.

The last photo is taken to depict how brittle ice is. Upon dropping it, it will break apart.

Hence, you see the literal broken pieces of the ice.

Moving onto Component 2, as I was researching I came across a surrealist photographer Ben Zank and I was very inspired by him.

His works often only features 1 person who never has his face full-fledged shown and 1 subverted object. It’s a very minimalist vibe, very clean.

Hence, I tried to adopt that style and if there’s anything at the back, its solely to help with the composition, to help to draw the viewer’s attention to the subverted object.  

So as I was thinking only how to subvert the object, I remember a question that Serena asked during our brainstorming session, which part of the body does the object come into touch with? Typically, ice comes to contact with us on the lips when we are having a drink.

Hence, this factor of what the ice comes into contact with was what I decided to change in component 2.

In this first photo, I have made the ice into the beads of jewellery and this is because I wanted to emphasise how the ice cube has now come into contact with the neck.

In this next photo, the ice has been modified into a phone. As for phones it’s often in contact with our ears and hands, which here brings out how the ice is now in contact with these 2 parts of the body.

As for the last subversion, I wanted to go extreme and play with the scale which is why I decided to have the ice in contact with the entire body and have turned it into a bed.

This leads me to Component 3.

I have added 2 sentences (linguistic messages) to the last photo of Component 2 and turned it into an advertisement for King Koil, which is a mattress company, and is targeted at new customers.

I have added 2 sentences.

The first line “Without King Koil” acts as a relay as it expands on the idea that your current mattress is just like how ice is hard and cold because your previous mattress was not from King Koil.

The second line “Visit us at one of our outlets today to find out more about our mattresses!” acts as an anchorage because it’s a call-to-action, an emphasis on King Koil better mattress.

In conclusion, this linguistic messages would help shape the context of the photo.

Thank you for taking the time to read! 🙂

Brainstorming Ideas – Ice Cube

The object I picked out was Ice Cube.

The research process:

This is a quick sketch on how I would have removed, replaced or redefined certain properties of the ice cube:

This is a quick sketch on how I would have associated an ice cube with the given verbs.

Pandora Box- Complementary (Part 2)

FINAL MODEL

MATERIALS USED


The final materials were chosen because I wanted to bring out the different textures and elements there were in different kinds of fabric. The way they were pieced together would complement one another to fix one cohesive piece.

The faux leather used on D would bring out it tough-ness and how bulky it is.

The denim used on SD would give it enough characteristic to bring out its existence but not enough to steal the show.

The sequins used on SO is to grab attention so that it would not be lost in the bulky D. It’s almost illustrates the ‘bling’ ‘the finishing touch’  that Cheryl describes of a SO.

APPLICATION

Front View

Billboard (L Application)

Side View

Guitar paddle board (S Application)

Top View

Surfboard holder (M Application)

REFLECTION

The project has taught me to the concept of distinguishing D,SD and SO. Even though I still don’t have the sharpest eye for it, I am still going to hone the skill of integrating it into my future designs because I do see how it acts as the fundamental breakdown of an object.

Pandora box- Complementary (Part 1)

DEFINITION OF COMPLEMENTARY

According to Dictionary.com, it is to combine in such a way as to enhance or emphasise the qualities of each other or another.

INITIAL PHASE

At first, there were 3 3D Sketch models.

Model 1 was created down the line of symmetry into to act as the base of comparison between 3 boxes. This helped to bring out the differences in the width of the boxes. However, Model 1 had too many similar lengths.

Hence, SO had to be scaled down and SD had to be shortened.

In order to make it interesting, I have attempted to pierce the SO through the D (still at the line of symmetry).

Model 2 was created with the intention to play with moments. To do so, I had 2/3 of the SD hanging out and having the SO act as an anchor that the 1/3 mark. One concern was that L could have been to similar to H.

Hence, I decided to double the length of H in order to greatly distinct it apart form the rest and also to give it its own characteristics of ‘Bulky-ness’.

I also decide to wedge SO and then move SD in front in order to move away from the boxes being flushed to 1 side.

Model 3 was built around the idea of having the length 2 boxes(SD and SO) to match and line up the length of 1 box(D). However, even though it might have brought out the characteristic that D was large however, SD and SO lost its touch and was outshined. It was also noted that the boxes tend to flush to one face.

Hence, since this concept is not the best to bring out the word ‘Complementary’, this model was eliminated at this stage.

PHASE 2

Revisited model 1 and made the changes. However I decided to drop this model at this stage because SO and SD still stands at an ambiguous stage whereby both of which still looks pretty similar. Piercing SO into the box also played a factor in the ambiguity. Hence, despite the rectification, I believe that model 2 would have more potential than model 1.

Personally believe that Model 2 had a more distinct difference in SO,SD and D. I decided that the orientation on SD could have been changed in order to help with its distinction in the front view. I have also decided to move SO to the left slightly to give it a more interesting structure where SO is jutting out. Some adjustments still needs to be done such as shaving SD by half and adding more foam to the SO in order to make sure that the lengths don’t match.

Keep a look out for the next post on how the final model 2 will look like as well as its applications!

Project 1: Curating Self

WOULD YOU CALL IT REBELLION?

I was born into a Buddhist family. My family is really religious and since young, God and spirituality has fascinated me a lot.

Component 3 #1

The many Gods at home are presented with many details signifying how majestic it was to younger me. The blue tint is to represent the amazement I had towards the concept of Gods.

As i got older, Buddhism became a practice that felt very much like a routine and I never really knew the significance behind what i was practicing.

 Component 3 #2

The alters almost seem to have blended into the house. This was brought out with seemingly almost having nothing in the focal point. The brown tint is to represent how I was starting to grow numb towards the religion. 

When I was in secondary school, things started to change. Long story short- I knew I was going to be a religious convert.

However, when you are placed in a family that is super religious, it just wasn’t going to be easy. I wanted to reflect this through Component 2.

The item I chose was a lighted up Buddhist red candle because it represented the light of wisdom illuminating the darkness of ignorance which points down to the enlightenment of Buddha and the core essence of buddhism.

In Component 2, there is a gradient red tint over the photos because it is meant to signal movement and hence the passage of time- time it took to get my parents to let me practice my faith.

Component 2 #1

The crop was to bring focus to the wax on my hand and the action of breaking the candle. The wax on my hand represented that even if I was going to get burnt and hurt, I would still fight, represented by the breaking of the “Buddhism practice”, for what I believed in.

Component 2 #2

Throughout this period, I felt like my parent’s faith was placed more important than mine hence the candle takes the middle position and I was ditched to the side. This shot was taken top down to paint myself as a victim- victim to the harsh and brutal words of my parents. Further emphasised with the kneeling position.
But I wasn’t just going to succumb to it- hence the eyes is staring straight into the camera to present the fight I still had in me.


Component 2 #3

With this going on, a really small part of me (hence the size relative to the A4) knew I had to try to honour and love my parents at this time. This was shown through the approaching kiss towards the candle. I have purposely cropped away the face because I wanted to signal the unwillingness I faced and how I didn’t want to face reality.

As time progresses, I’m so glad to b able to say that things are improving
and I’m able to practice my faith at home back.

 Component 3 #3

This is depicted with me back-facing the alter and in a surrender position (hand raised, kneeled down, hand placed over heart) towards my own God. It is green tinted to show that I might have my own freedom now but I’m still growing in my element.

Now, I’m trying to teach my parents that
I’m a sinner

 Component 1 #1

This position is to get the viewers to make their own meaning of sin- potentially it could represent lust yet it could also represent a shot of distress. I have cropped out my eyes because I am not proud of this side of me either. It is black tinted to signal that there is bad sides of me.

But I pray, repent and learn from my mistakes represented by the multiple me(s). Now, after a gruelling process (seen through my emotions), I am made clean by God’s grace, hence the white tint representing purity.

 Component 1 #2

Proud to say I am now the King’s daughter.

 Component 1 #3

The blanket shows the relief I feel. Shaping it to look like a throne and the purple tint hints royalty.

Summary

The process of me fighting to stand up what I believe in has allowed the old me to change (Component 2 growing smaller) and the new and better me to blossom (Component 1 growing big). Lastly, I am now changed. (Hence, the orientation on the last photo has changed.)

Thank you for reading. I have really enjoyed this project and it has properly allowed me to reflect on this phase of my life. Story aside, I have also managed to pick up many technical aspects as well. Once again, really grateful!

2D Sketch Analysis of Interesting Object

Meet Charlie. Clearly he loves purple (dominant). As for grey- not so much (dominant). He’s been labelled TOYO (sub-ordinate) but its 2018, he isn’t just going to accept it. On first look, you will notice he’s really curvy. He is really great. A really great Sharpener.