Robotic – Final Project Prototype Part 4 – Unlimited Revisions.

There is only testing and remodeling, testing and remodeling after i went to simlim to look for a battery 2 weeks ago.

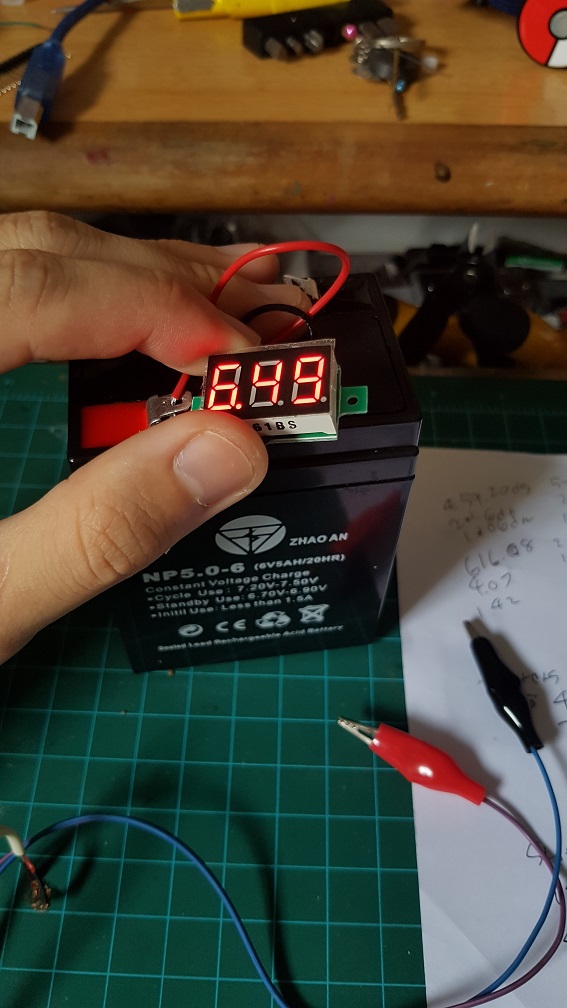
After that, the battery could also power no more than 3 servo at once so I purchases some AC-DC 6V 10A converter online and had been waiting for its arrival since then.

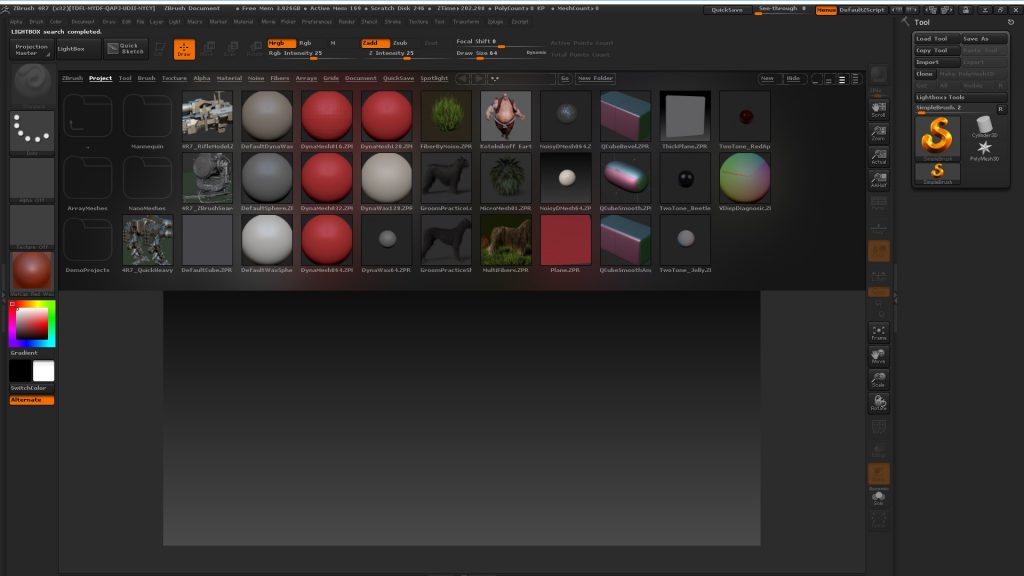
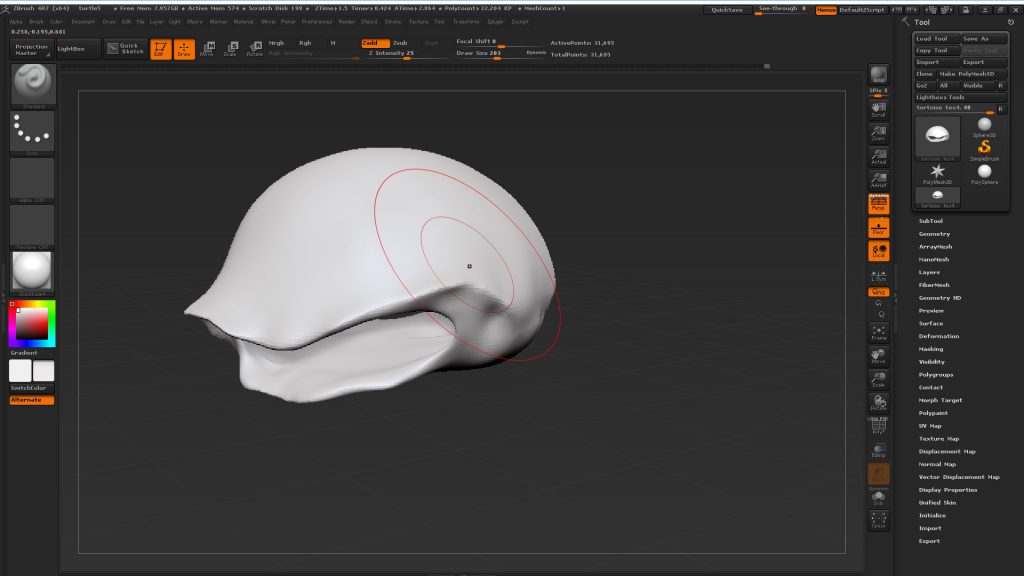
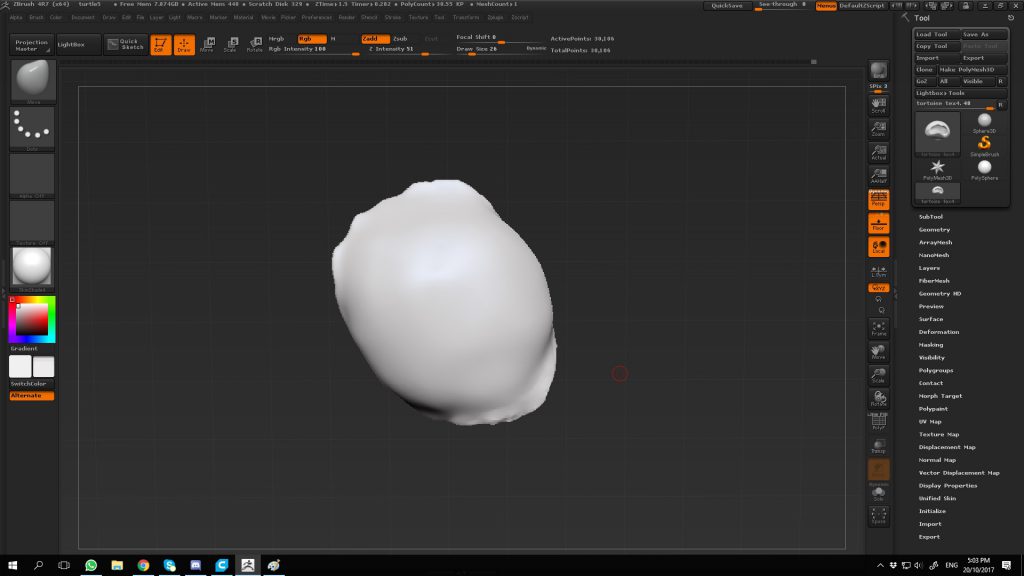
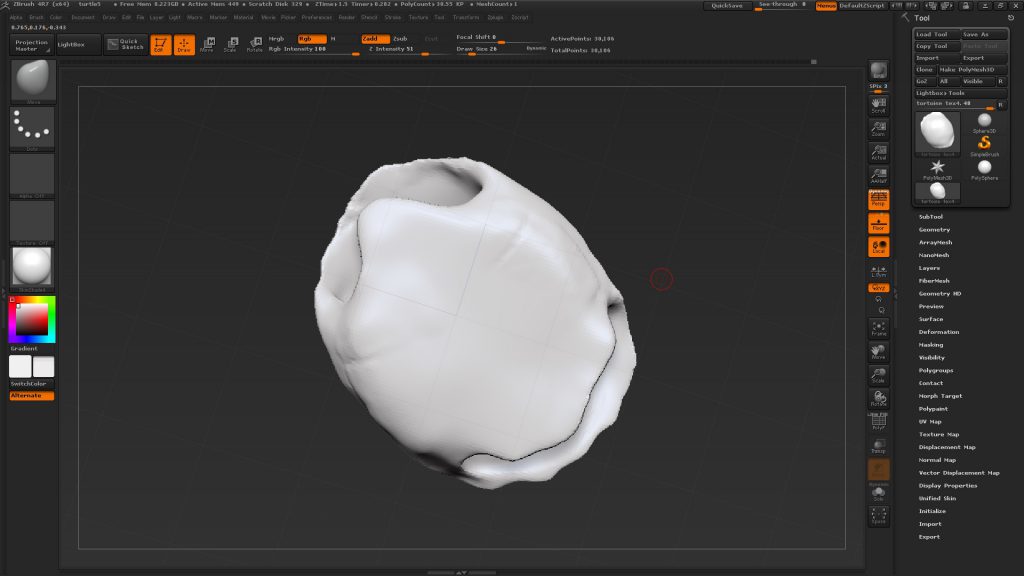
meanwhile waiting, all I did was re-model almost everything again and again…. and I also downloaded ZBrush- a 3d sculpting software and learnt it just for me to sculpt the turtle appearance since i have to learn it sooner or later and luckily I tried it now so I know that there are actually a lot of problems in my current structure when place in the shell I modeled afterwards.

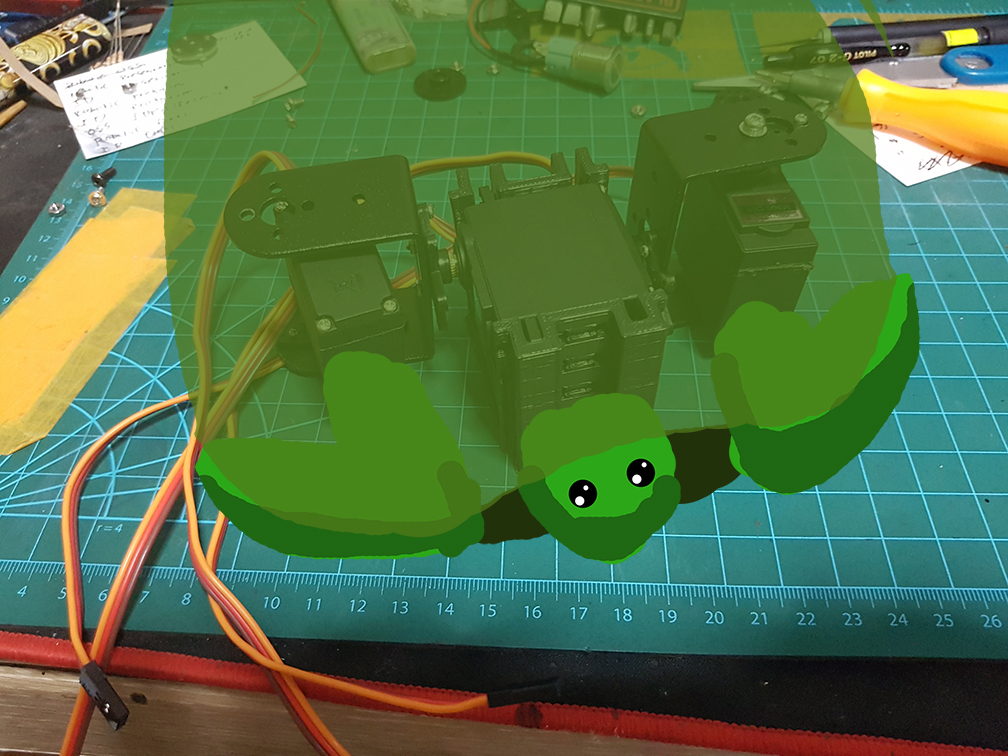
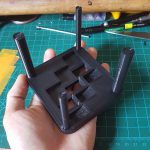
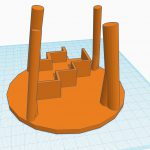
After last post, I’ve built a bigger base mount for the turtle.

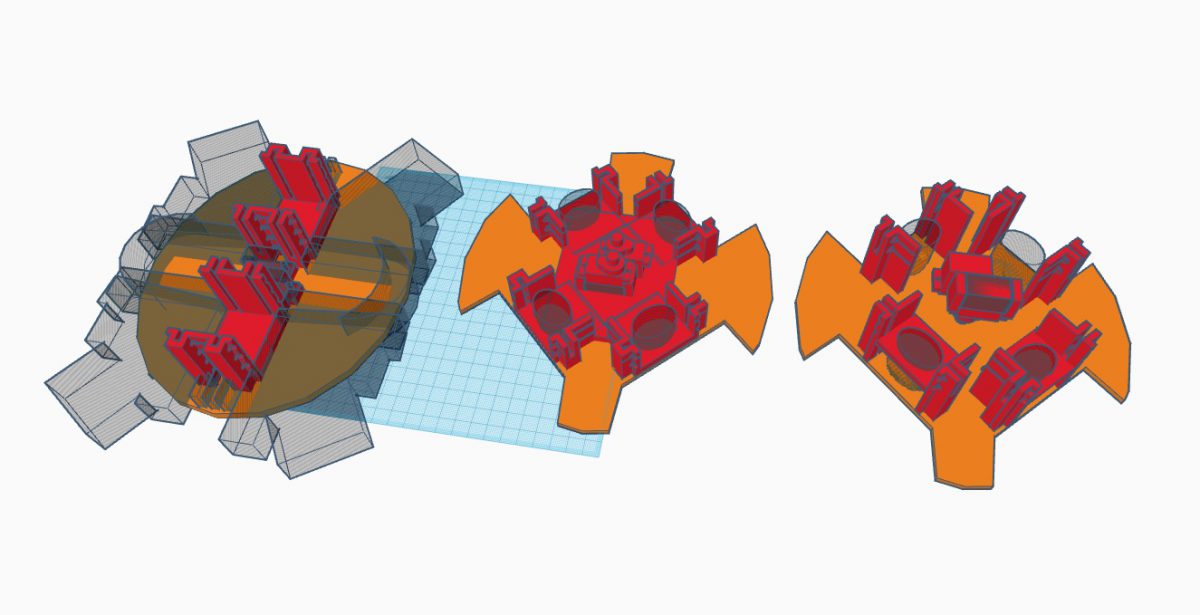
This was originally the rough full size for the turtle base, Version1, Version 2 with 2 arm motor attached, and Version 3 with no Arm motor attached.

And I downloaded Zbrush and started to learn how to sculpt something in it and MANNNNN IT IS HARRDDDDD

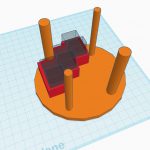
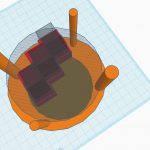
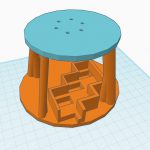
And then I printed it out in smaller scale to see how it feels.

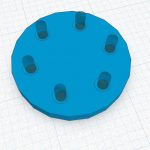
And to check which layout should work.


and since after I did more research on turtle, I realize that the bone structure of the turtle wasn’t straight and so I tilted the motors to give it an angular tilt for it to move more like a turtle.

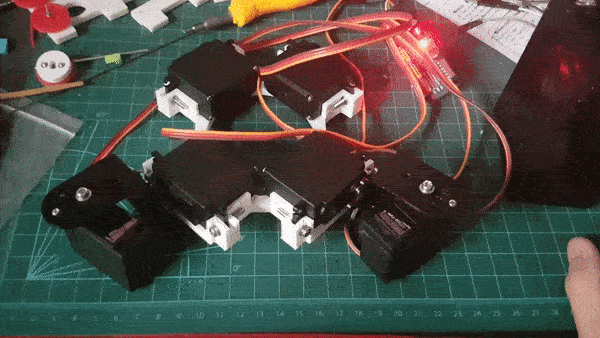
then I tested the structure of this configurations.

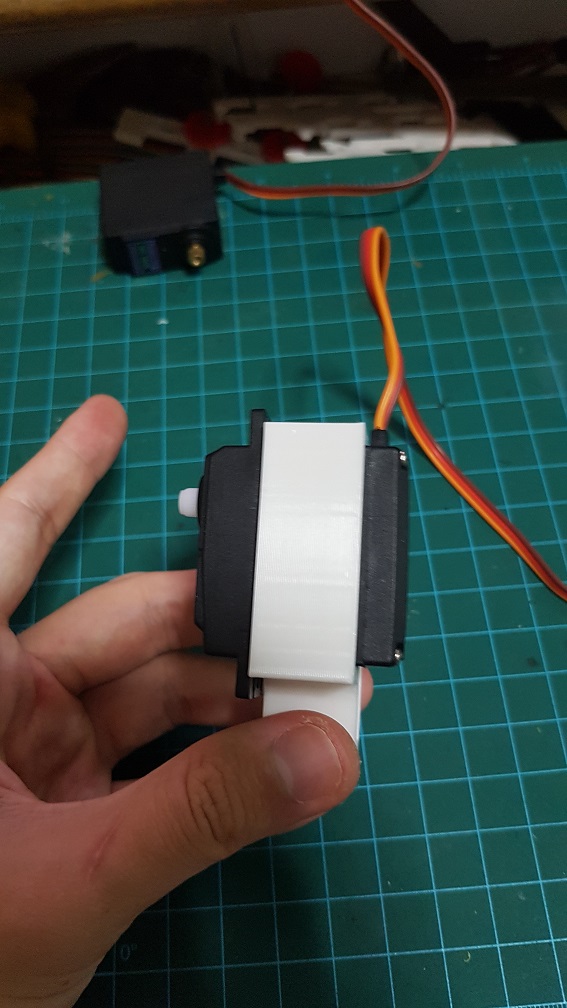
I also modeled a arm motor connector and found out that this is WAAAYYY to long for it to work properly, and another problem is that there is still not enough tilt, so I changed from a 45 degree tilt to a 22.5 degree tilt.

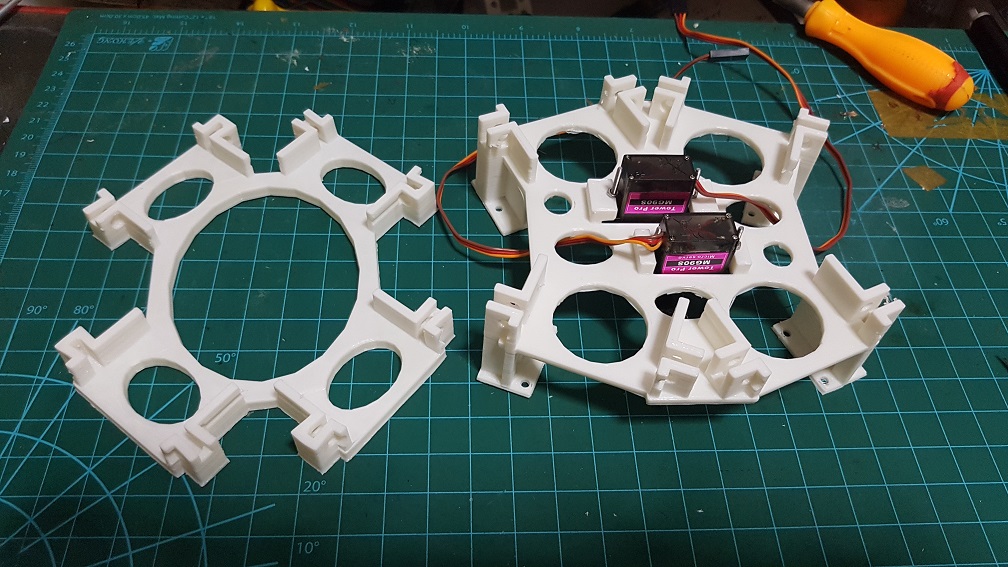
This is the Version 4 and Version 5 of the motor mount, I’ve decide to make it higher so to be able to turn the arm in the correct direction, I’ve also tried to add the middle servo which will control the turtle head retraction and head/tail turning.

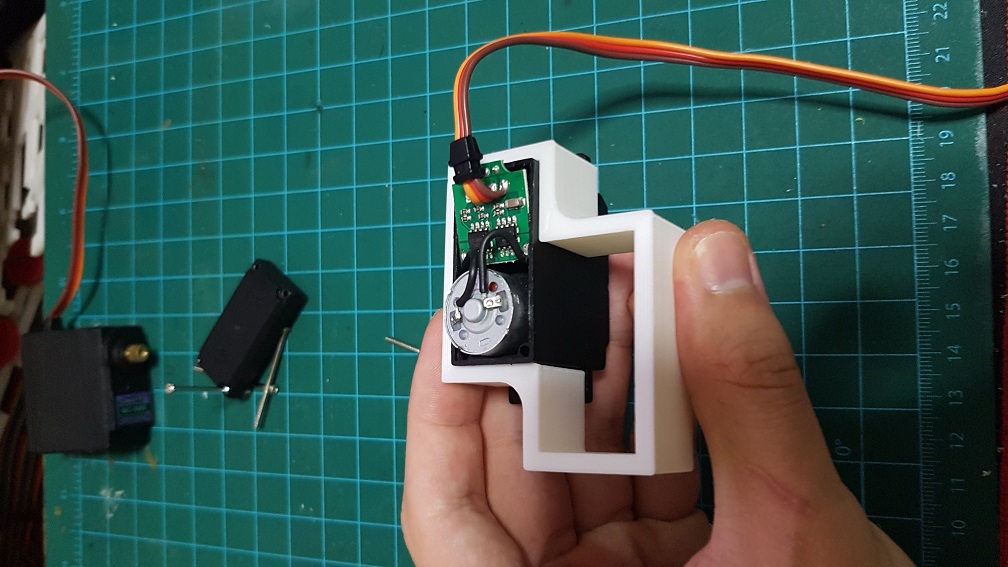
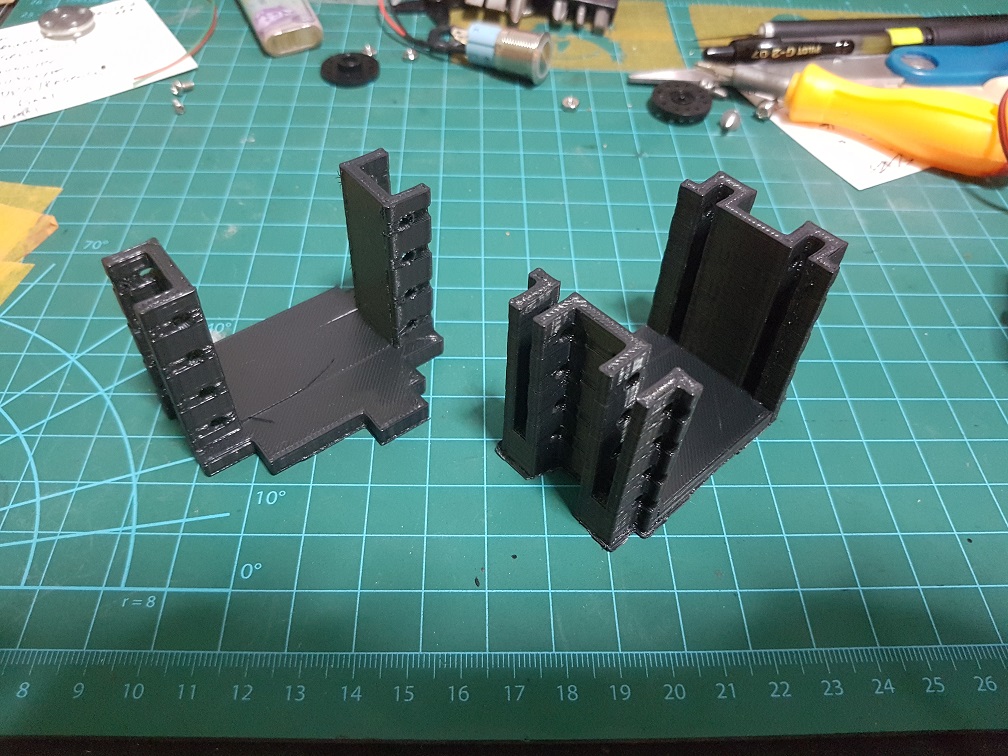
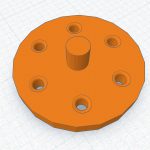
This is with Version 5 base and version 2 Motor connector which are much shorter.

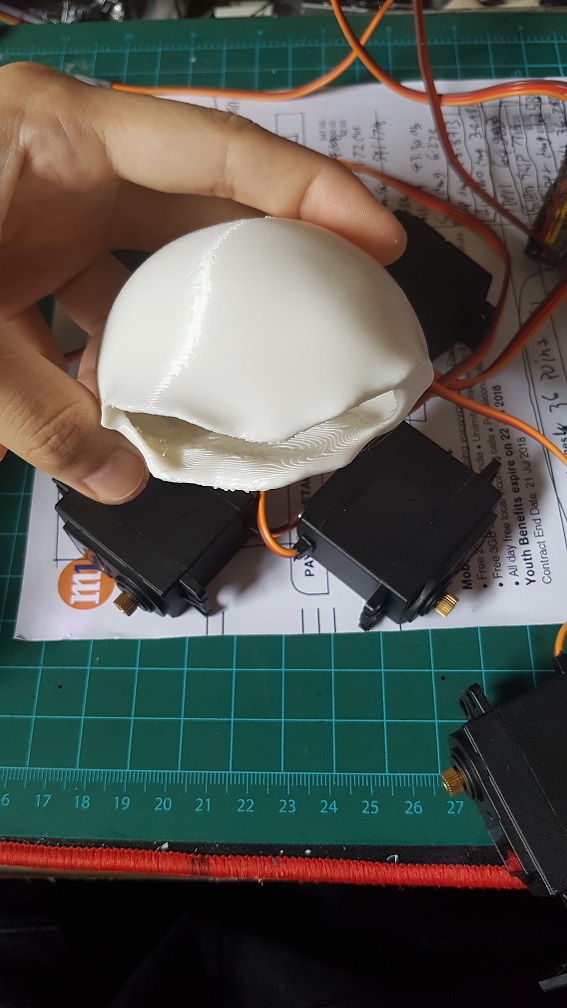
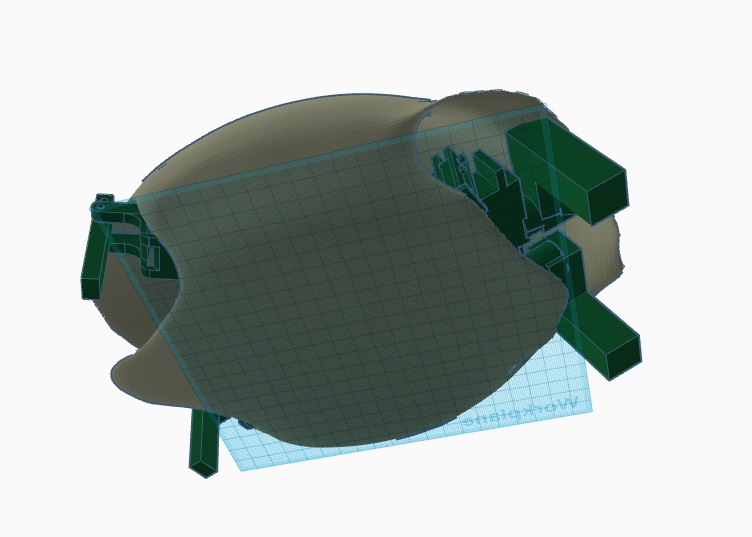
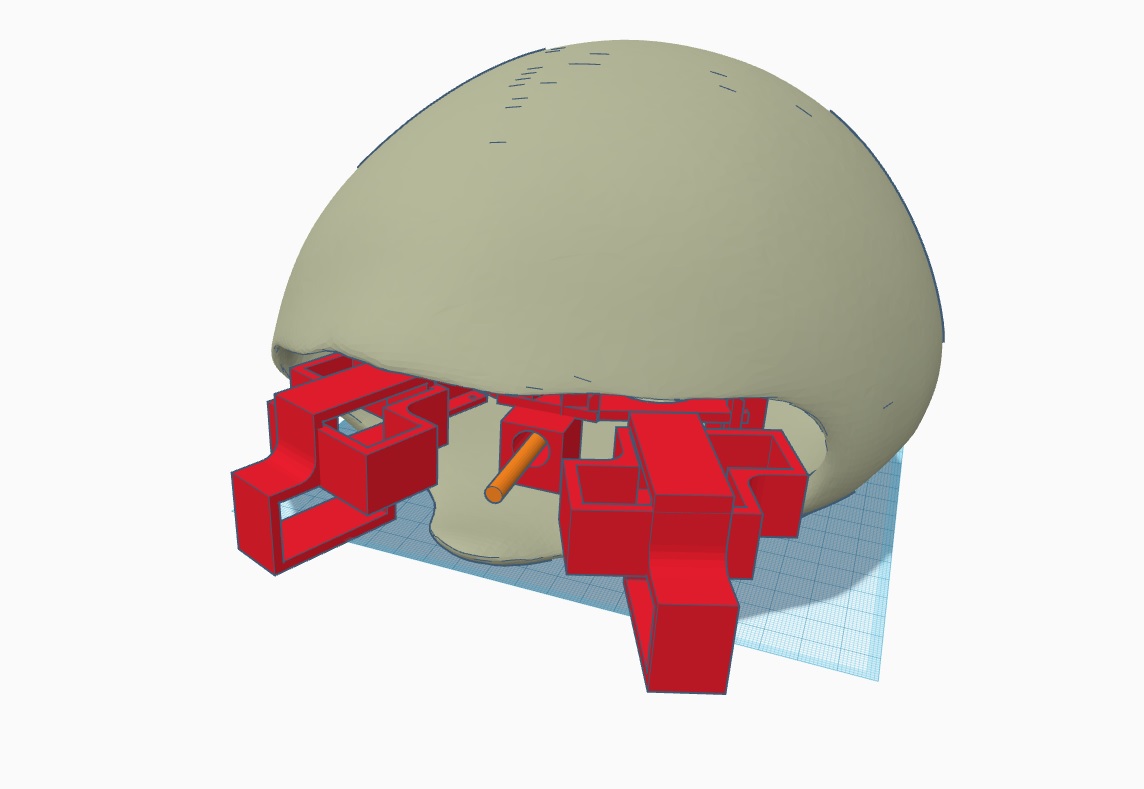
Next, I further edit the turtle shell and upscale it to see how it fits into my system, however i found many problems here like it doesnt fit well. Since I can make adjustments to the layout, I decided to use another method to do the leg mechanism.

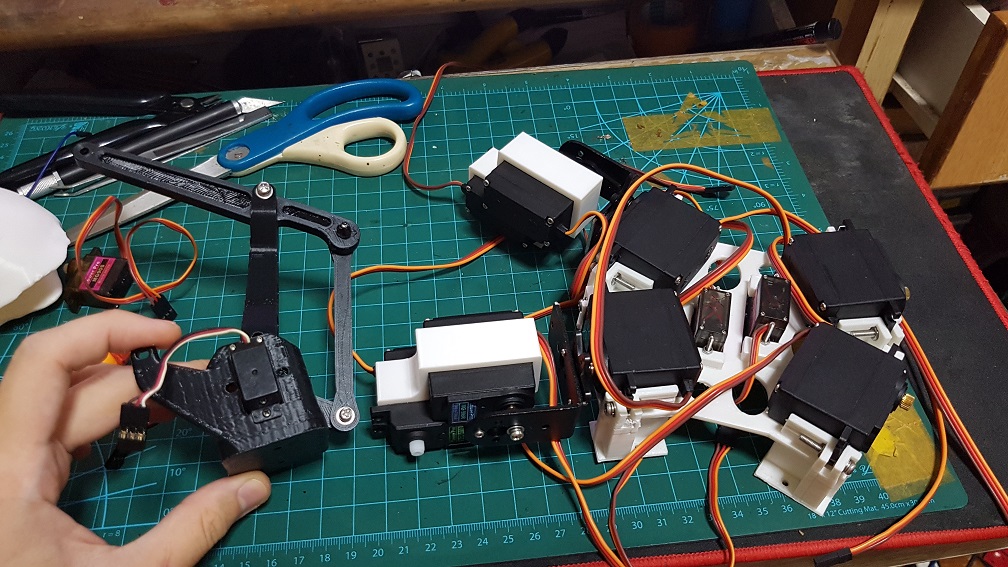
By combining this lever system straight into the leg.

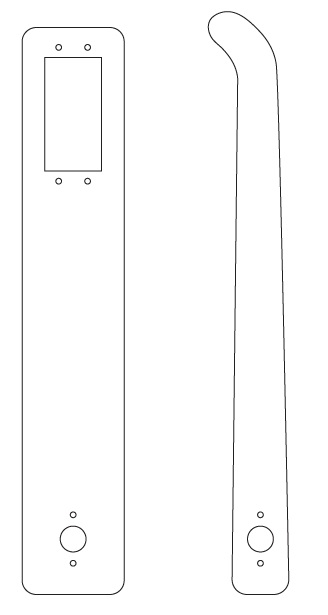
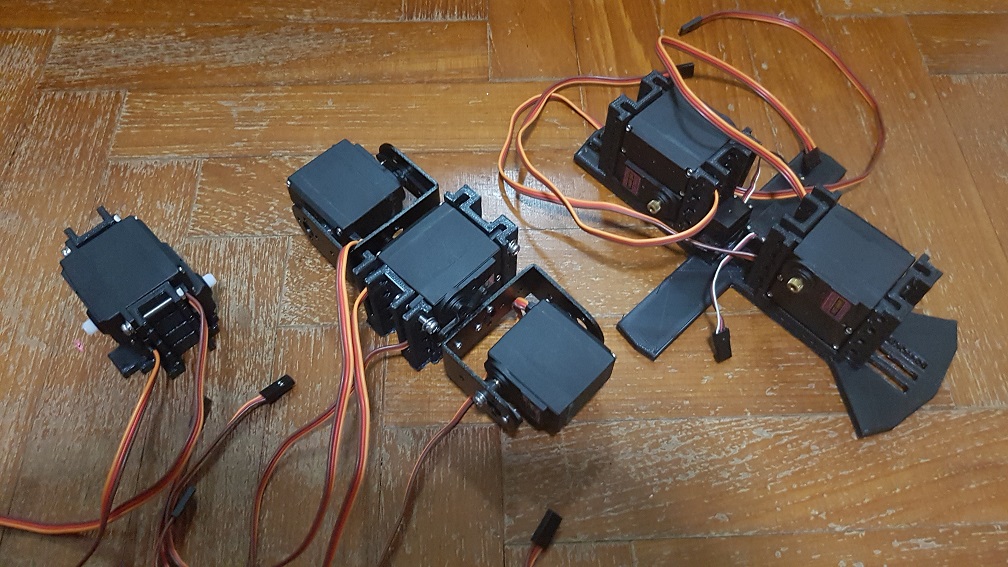
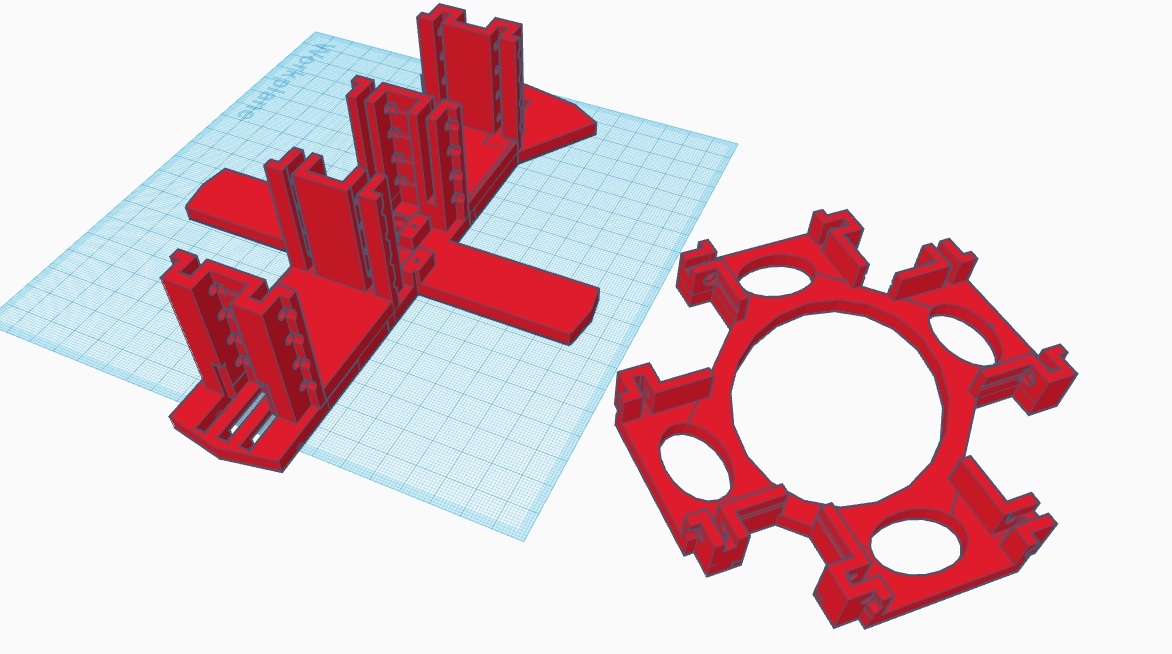
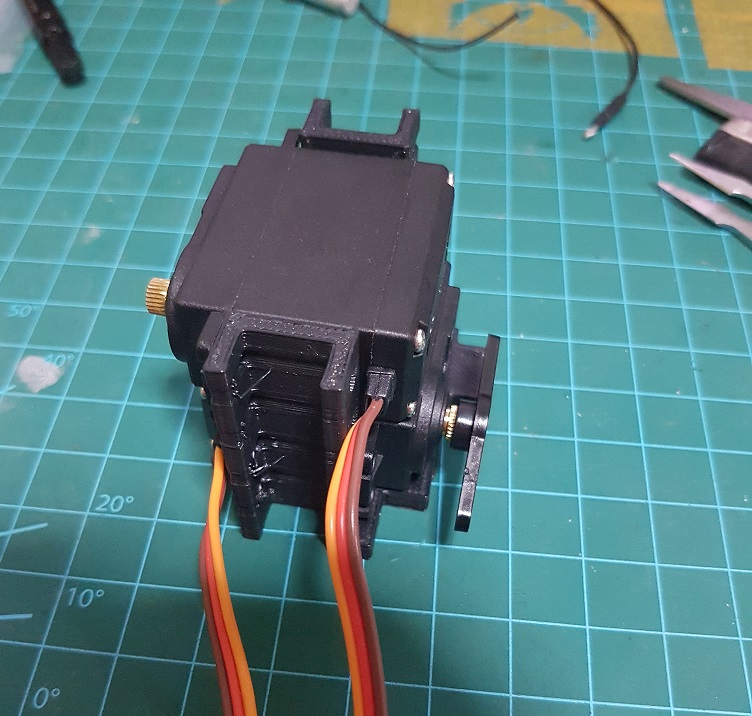
The 4 generation of motor connector.

This should be the mechanism I will use for the leg, I hope it works.

for now, I have to test them out again.

ROBOTICS COMPONENTS!! CHEAP CHEAP! COME COME!

First, you will need an EZbuy account, it will be really worth it. Best part, they have collection point from Canteen 2 in NTU!!

Buying from Taobao /EZbuy won’t guarantee the quality, occasionally  will you receive item that doesn’t work but they are CONFIRM 3X to 10X cheaper than Simlim Tower.

Waiting time is anywhere from 5days to 3 week (5 days only if you are really lucky that the seller send your order out the same day and it finished inspection the next day in EZbuy warehouse PLUS you used Express shipping which is $2.99 per 500 gram) if you are REALLY UNLUCKY that the seller gone MIA after you purchase, good luck, but that shouldn’t happen with the link I gave as I bought from them and all is good.


Tutorial here for those who don’t know how EZ buy works,

PCA9685 Motor Driver  <—– CLICK HERE


MG945, MG946R, MG995, MG996R(Get the 996R, I think its the best out of the 4 from some forum I read, but not very sure.) waterproof servo and 30kg servo, I dont’t know how well they work. <—– CLICK HERE

SG5010 Servo They are 180 Degree by default & they are similar to the one above, but with plastic gears which made it lighter and cheaper but don’t last long<—– CLICK HERE 


SG90S, Much Stronger version of the small servo in the Arduino kit & this 1 have all metal gears, but WAY WEAKER than the 2 above <—– CLICK HERE

Arduino Uno Clone. working good with more pins available for soldering  <—– CLICK HERE

ESP32, runs Arduino code and with built-in WIFI and BLUETOOTH  <—– CLICK HERE

Wemos D1, work exactly like Arduino Uno, but with Built-in WIFI <—– CLICK HERE

Lots of plastic gears, metal rods, rubber band belt drive <—– CLICK HERE


Have fun shopping!!

Robotic – Final Project Prototype Part 3 – Understanding the Motors and Power Supply.

For weeks, I’d been thinking that my code was wrong hence I cant move more than 2 motor at the same time or it will corrupt the system….

And in the end, it wasnt my code, as I was using PCA9685 which is a servo driver which I bought online and thought that I could control 16 motors at the same time, Yes, it could and the code can work.. the problem is the power supply. NEVER HAVE A SERVO DRIVER’S MOTOR POWER SUPPLY POWERED STRAIGHT FROM THE ARDUINO!

I finally found out today that was the main reason, when the motor drains too much of the Arduino’s power, it will brownout, causing erratic behaviors in the motors which was my main problem up till now, so instead of limiting myself to code up to two motors to move at the same time, I could potentially move all 16 motors just by finding another power supply.


15:15- 16:10


My Brownout will occur when I run 4 servo at the same time, so 3 servo running simultaneously is the maximum for my current power supply, There are ways which I could solve this problem.

  1. Using a battery which could supply 6V power at 10A or more, after my research, battery are rarely rated at 6V and 10A is just too much for a battery, even if they do, it will drain the battery out really fast unless I am using a HUGE car battery on 12V and step down the supply using a Voltage Regulator.
  2. Using Multiple battery at 5 V or 6V and parallel them to increase their current, since this will be the most expensive out of all option, the only way possible to get this done is to series 4xAA battery and parallel multiple group of 4xAA to create a powerbank, the downside of this will be the voltage drop overtime due to lesser power in the battery.
  3. Using a power adapter with the 5V or 6V at 10A, and this will probably be more feasible due to the availability of 10A power adapter in the market, or I could use a 12V 10A power adapter along with a Voltage Regulator and step down it to 6V. I think this will be relatively doable because it will have a stable supply and I do not have to worry about recharging my battery, moreover, I might be able to supply power to my Arduino at the same time too.
In conclusion

I will try to find suitable power adapter along with voltage regulator, if this still don’t work as well as i thought it would work, I probably can use a capacitor to increase the current rating(I am still not sure how does this work, but I’ll figure out)

Robotic – Final Project Prototype Part 2 – Compacting Mechanical Systems.

After the Study model of the last part, where I stopped at the lever system and realize that it is not as strong as it should be, my improved method is to use 2 servo to do the same action, After a long time trying, I found out that the overall height of the servo will still be as high and as big as a standard MG 966R servo motor, and the MG966R will provide significantly higher torque than 2x SG90 at roughly the same height.

So my new solution to this is to use the heavier and stronger MG966R as the feet motor. Since they are relative big, I need a system to fully utilize the height and the movement of motors to make it as compact as possible. Since the center of the turtle shell is usually the tallest part, it make sense to stack the first rotating joint (the shoulder) above each other to greatly reduce the total size of the turtle by making it slightly taller.

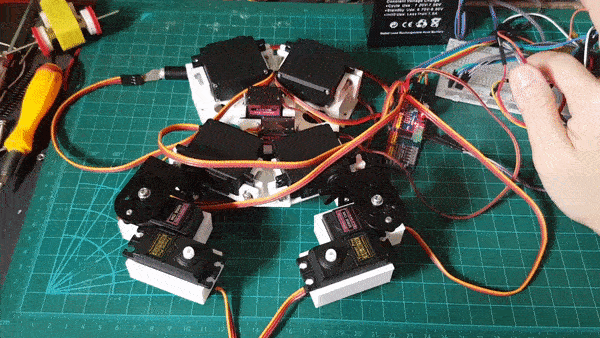
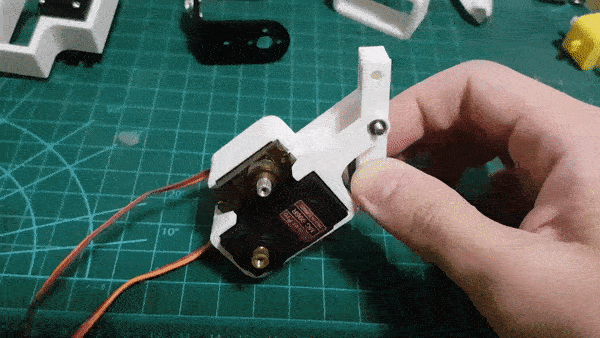
Prototype of stacking the Shoulder motors, I’ve realized that the left motor should be at the bottom and right motor should be at the top as one will spin clock wise and other will spin counter clockwise to make it the same height when their pivot are not centralized.


Improved prototype of the system which reduces the shakiness of the Shoulder Motor(which is important as Shoulder is the first joint, if this vibrates, it will be amplified become very obvious in the feet.)

Un-centralized joint of the Shoulder Motor to Arm connector will result in centralized and same height of both left and right arm when in horizontal(walking) and vertical(back in shell) even when the shoulder motor are stacked(different height). Look at the green dot which is where the center of arm motor going to be.


after countless of testing to get the perfect balance of height in horizontal and vertical, this system should be able to progress into what I will use in the final, there are still improvements to be made in the base height of the Shoulder Motor as when the Arm spins, it will still touch the ground.

for now, it probably can walk and hide like this..

Next up is to further refine this system and find the suitable system for the Elbow joint.


Robotics – Biologically Inspired Robots: Research part 1

What is Biological Inspired robots? First lets break the words into pieces.
Biology – The natural science of studying Life and Living Organism.
Robots – A machine capable of carrying out a complex series of actions automatically.
we could see that the Robotic studies has a lot to learn from the Biological side as most of the nature elements are refined through the years and it should be one of the most efficient way of doing things.

There are 2 methods from nature where robotic could potentially learn from which are

  • Imitating mechanisms found in nature (velcro)
  • Studying organizational principles from the social behavior of organisms(Swarming)

Imitating mechanisms found in nature

Bionics/Bio-mimicry(biomimetics)

In robotics, bionics and biomimetics are used to apply the way animals move to the design of robots. Bionic Kangaroo  by Festo was based on the movements and physiology of kangaroos and one of the most well known Bio-mimicry of a bird was by Flying Machine by Leonardo Da VinciImage result for leonardo flying machine

There are many different variation of the bionics which replaces missing human limbs and they try to make it as close as the real ones, by producing a joint at where a joint should be, and although it might take awhile to get used to it, the technology is getting better over time and we are starting to go past the “Replacement of missing limbs” to “Enhancing human parts” since some of the Bionics worked better than our current limbs. *360 rotation of all joint? count me in.

This really inspired my projects in the turtle idea the spot is also an quad-pedal robot and I really love how it moves, maybe I could incorporate the idea of it into the turtle.

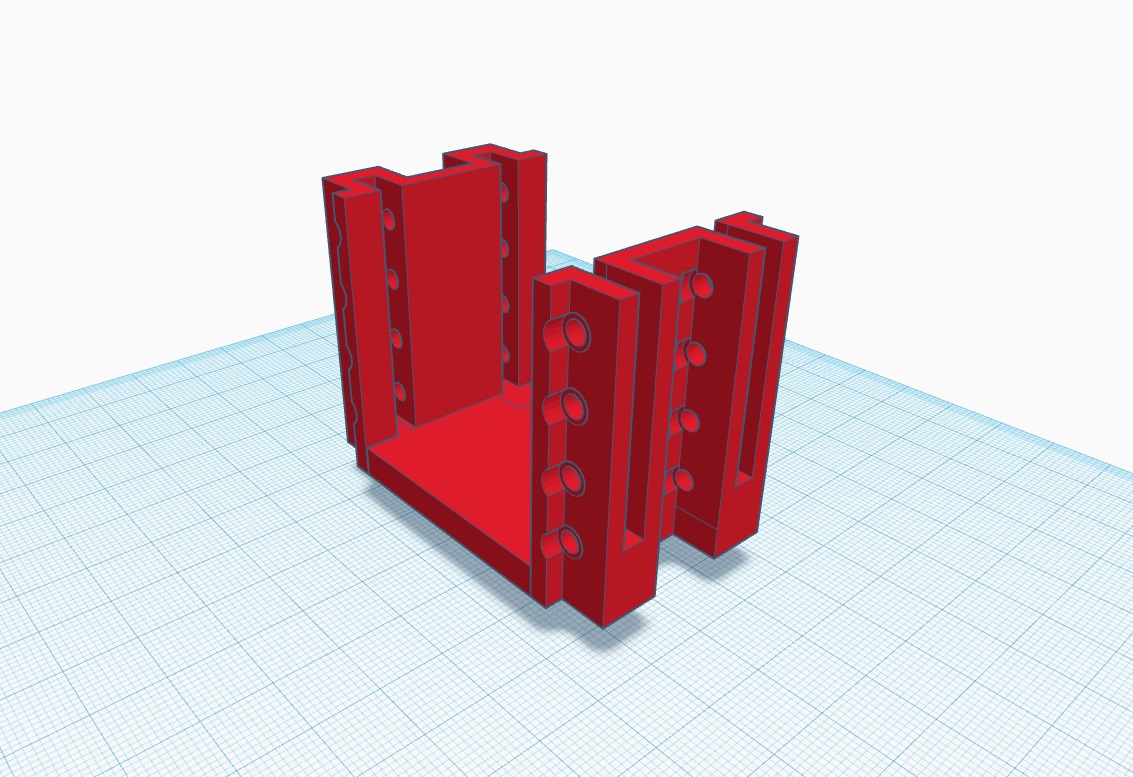
Notice how it move 1 foot at a time when turning and how it walks.


Studying organizational principles from the social behaviour of organisms

From the behaviors of ants, one ant may not be much and does not do much, with simple rules given to each type of ants, a society of ants will be able to do so much more and is really efficient. Hence on the idea of collective artificial intelligence in swarming in ants, fishes or birds, we could see the potential by using swarming in robotics by using local rules and global behaviors could allow us to scale the robotic ability into a scale unimaginable to us. 10 swarming robots could work, but 10 thousands swarming can do so much more, each individual robots just have to know where its immediate neighbors are.

The studying of insects like ants could really benefit the field of science and robotics.

This remind me of something that is in Big Heroes 6

Inspiration from this?
ANTS.
DEFINITELY ANTS.

I’ll end this part of research here and if I have anything more to add, I will add them in another part afterwards.


Robotic – Final Project Ideas, Researches and Prototypes.

A Continuation from the previous Idea and Research, Part 1 where I wanted to do an Animatronic Turtle.

The Difference between a Turtle and a Tortoise is that all Tortoises are turtle and not all turtles are tortoise. Generally, Tortoise live on land and turtle lives in water most of the time, with exceptions which I’ll not go into. However in my Project, I’ve decided to use “Turtle” as I simply prefer the sound of Turtle more than Tortoise.

First thing.

How do Turtle/Tortoise walk?

Tortoise are cute! and the way they walk naturally are quite robotic =D

the “Hand” are much longer and the “feet” are much shorter in comparison. This is how a Tortoise retract its head, by bending its “neck” inwards. maybe I could emulate this.


29:43 – 30:20 where they talk about the locomotion of the tortoises

I could use a lever system to move the front and back legs so that I could use smaller motor and all 3 motor placed in the shell so the overall weight of the feet will be greatly reduced to allow me to use smaller/weaker motors.

From my research I’ve done and found this EEZYbotARM on Thingiverse which I could use it to study the mechanics I could potentially use in the feet of the Turtle.

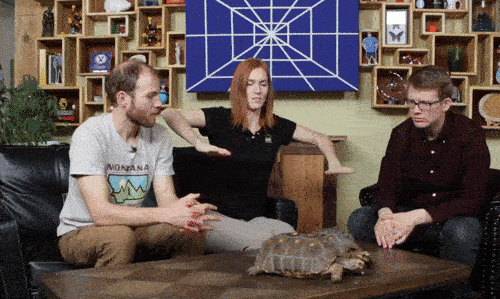
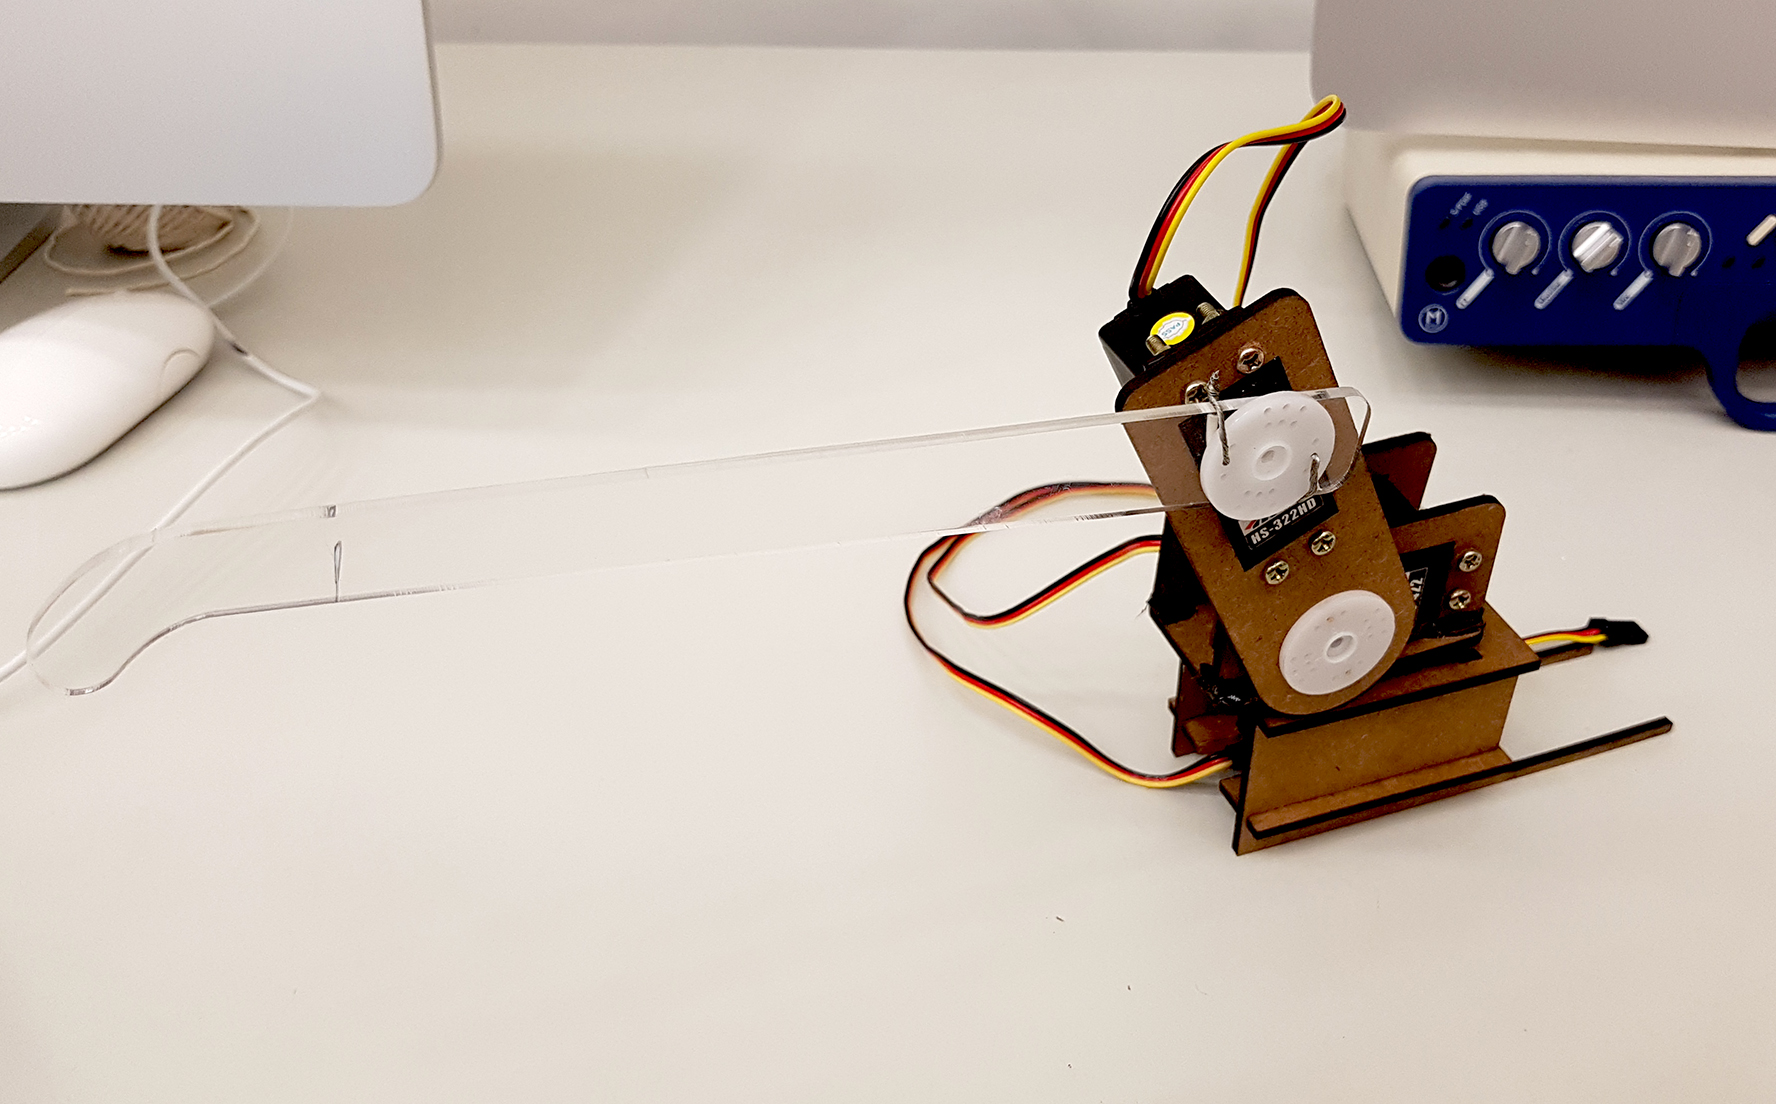
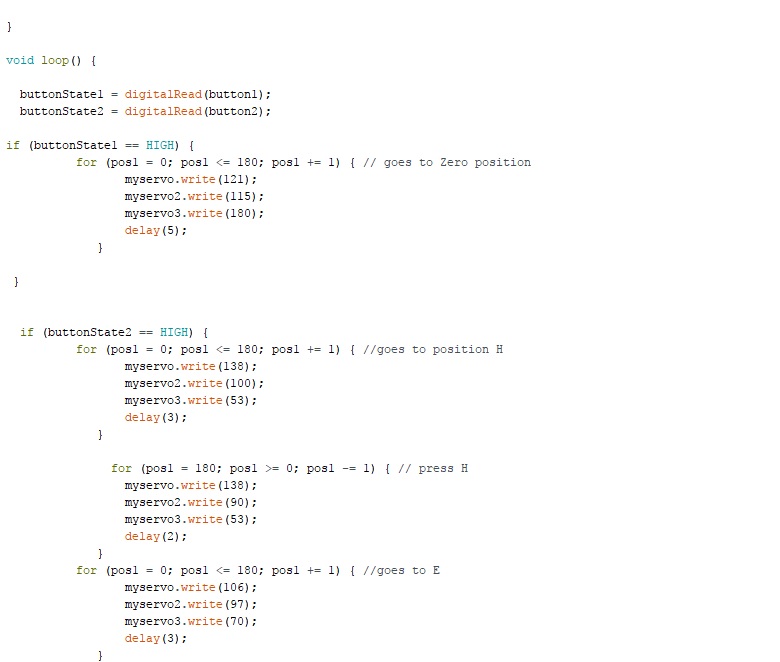
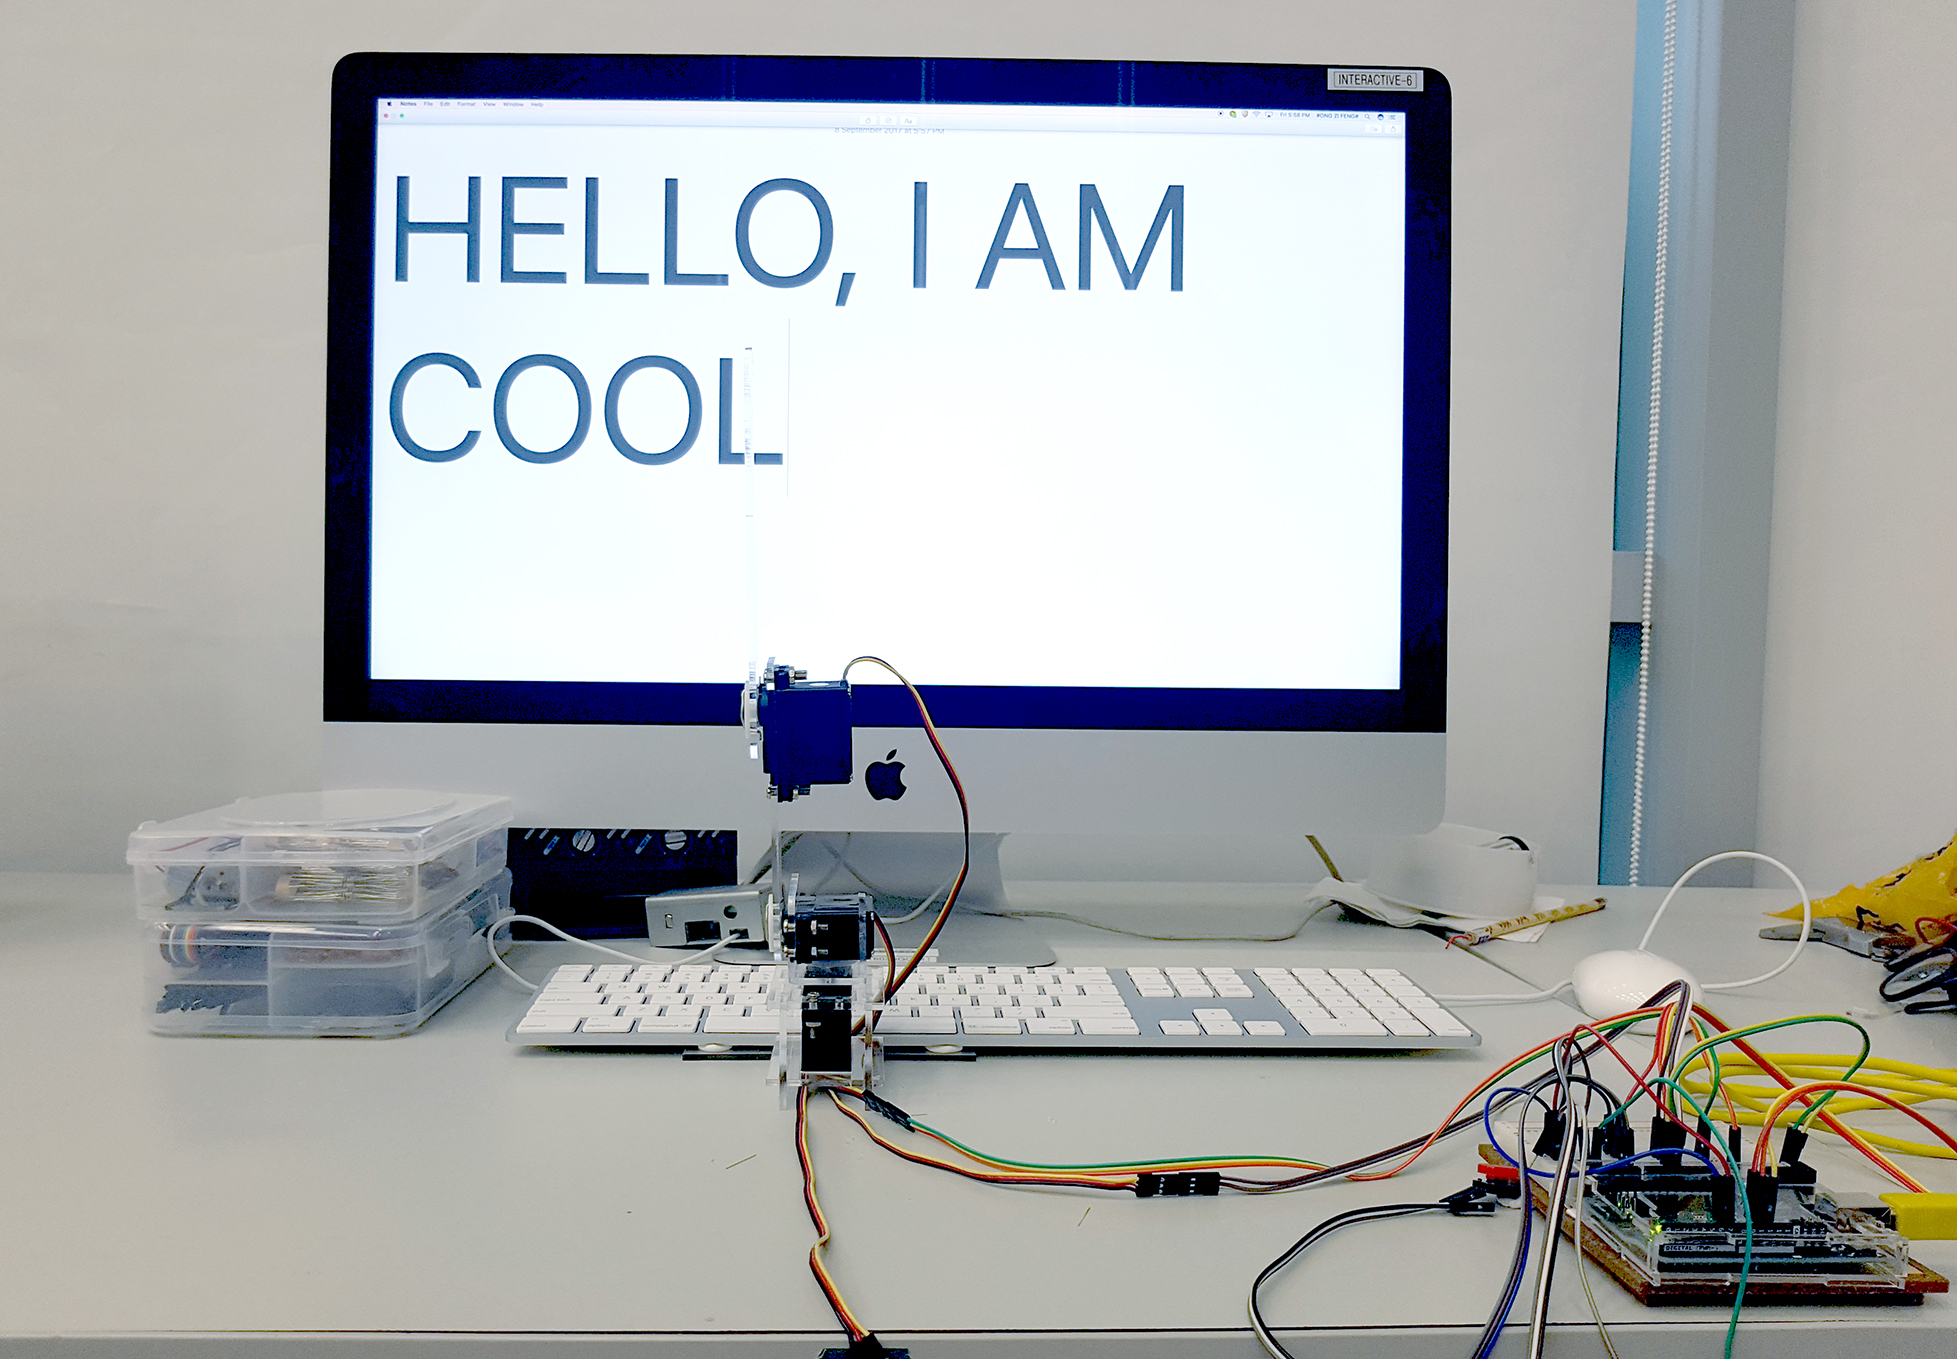
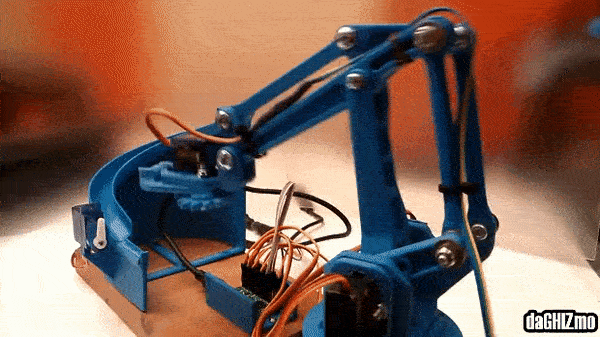
The two motor is at the base of the mechanical arm(Typebot), in comparison to our typebot, 
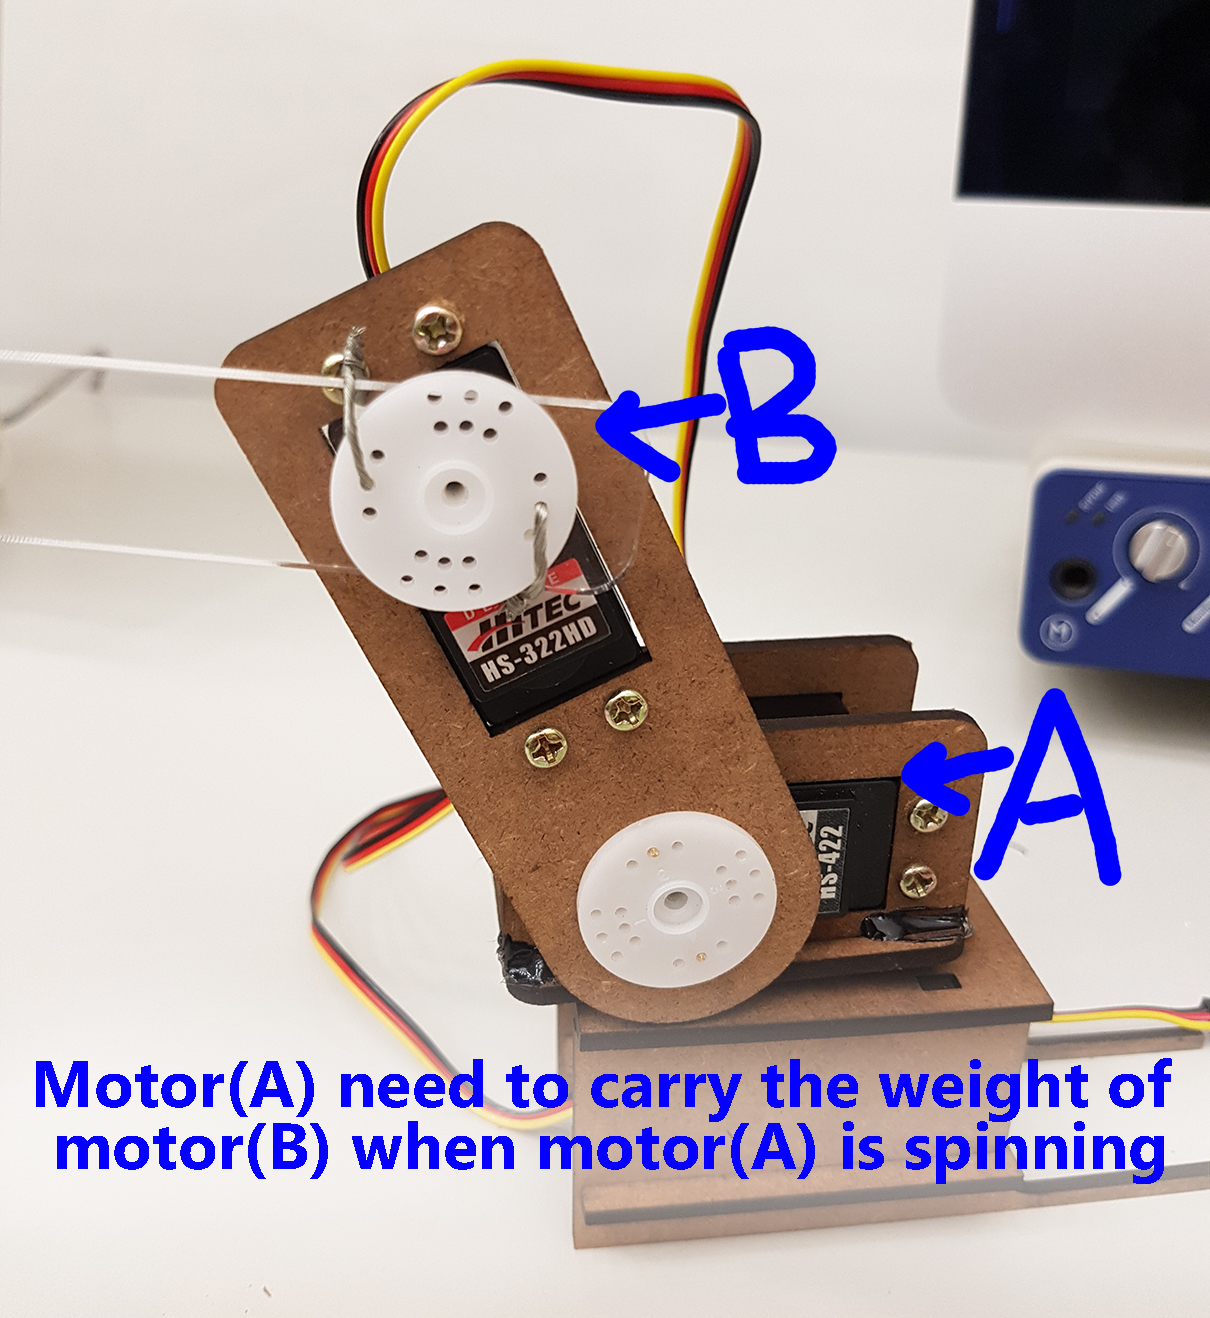
This Typebot system is less efficient unless the torque of the motor far exceed the weight of the system and only a when there is a short (A) to (B) distance(longer fulcrum, more torque needed to turn it)

So to understand how fully it works and if there are any restrictions to this lever system, the best way is to having a study model to study how I could incorporate it into my Turtle. I also purchased a few servo few weeks ago and they also arrived so I used them in the study model.

The movement is really smooth and the movement coverage is definitely good enough for my turtle, However this system could barely carry its own weight as the base is relatively heavy, this Lever system could work great as a Type bot kind of project because doesn’t need to carry the base of the robotic arm, in my opinion, this probably wont work in my Turtle since each leg will still carry its motor weight because they are all in the shell, so having Motor(A) not carrying Motor(B) is of less importance since Motor(A) and Motor(B) will ultimately carry the weight of (A)+(B)+the mount+components+the shell in the end.

In Conclusion

I’ll need to find a more efficient system or use a bigger motor to do the work of lifting everything in the shell along with the motors and still able to cover the movements. Now my main concern will be

Weight of motor VS its Torque
Size of Motor (slightly bigger motor will result in MUCH BIGGER TURTLE which I’ll try to avoid as I wanted a COMPACT turtle, not a monster.)
Movements of motor especially within the shell.


Robotics – HUMAN+ Reflection and critics

Human+ was an eye-opener for me in the sense that the robotics we have now is still in the developing stage and we are still years apart from artificially intelligence robots like we saw in the movies.

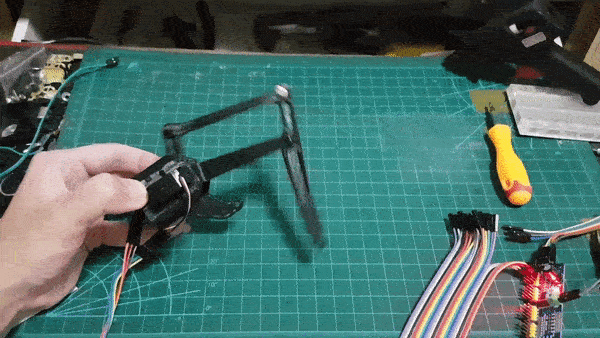
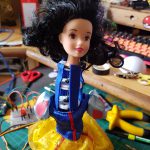
Chris Trying to interact with Nadine.

The Robotic piece which caught my attention was Nadine and I saw the previous group of strangers whom had some interaction with Nadine, she was not reacting to my speech, but she seem to be able to “look” and wave at me when I was sitting down. That’s why I am sure that the camera and most of her movements are working well. Nadine is a robot made in NTU which is trilingual and knew English, French and German and I am impressed with it.

or maybe its my horrible English. Also to clarify, I am really amazed when I sat in front of Nadine and she “look” at me and I felt intrigued so I do not see the project Nadine as a failure at all even if it does not register what I said, Nadine is awesome and the quality is superb and since people are in the developing of AI globally, I see Nadine as a stepping stone to push for more advance and intelligent developer to get over the technological hurdle to make her to act exactly like a real human.Photo credit to Isaac Chu

The hardest animatronics to replicate is human as we grew up looking at peoples all the time and, we are so good in observing facial expression and how a normal should normally look and act, an abnormality in the expression will make them unnatural but Nadine was really well made and had almost past the uncanny valley which if she sits on the chair, with eye closed, she will look exactly like a human being when not moving.

I think few years later, we will be able to interact with robots so advanced that we will have a hard time distinguishing a robot from a real person.This humanoid robot is eerily lifelike

Robotics – Final Project Ideas Generations & Researches 1

For the final project for robotics, I decided that I want to do a solo project as to explore and learn more about the robotic aspect.

Categories that I am interested in:

Animatronics:

The use of Robotic Device to emulate human or animals, or to bring lifelike characteristic  to inanimate object-

It integrates:
Anatomy
Robots
Mechatronics
Puppetry (research to be done: Karakuri Puppets)

Usually powered by:
Pneumatics
Hydralics
Electrical
Mechanical

And controlled by:
Computer
Human (teleoperation like remote)

And further research must be done on:
Structure – Frame/Skeleton(Material, Skin)
Components – Types of motors and usage

Automaton

They are self-operating machine or mechanism that automatically follow a predetermined sequences of operations, for me, they are more like the 3D – Dumb, Dull and Dangerous of robotics that does job that would reduce manpower.

The main aspect I think of Automaton is the ability of repeat-ability as they are supposed to do the same sequence over and over again so the zeroing of every cycle is of an importance here.

Areas to explore here:
3D
Healthcare
Unmanned Vehicles
Architecture
Medical
Entertainments

Stepper motor VS Servo Motor

Stepper Motor:
– Easier to control (1Pulse = 1 step)
– Higher Torque at low speed
– Relatively cheaper
– Accelerate too fast will result in skil step
– Higher vibration

Servo Motor:
– Generally High speed and High torque for given size
– Ability to maintain torque at high speed
– More efficient
– Does not vibrate much in comparison to Stepper Motor
– Generally more expensive
– Only limited types of servos

Overall:
Stepper motor is good for low acceleration and high torque applications  and Servo motor is good for higher speed and higher torque applications.

My thoughts:
I could use 2 smaller servo to move a lever which is not capable by using only 1 servo instead of using a bigger servo (like 2x SG90D at 6V vs 1x HS322HD at 5V, but theres a limit to this)

I am more inclined to Animatronics as it seems much more interesting for me, after some research about Animatronics, Hexapods and Octopods are really common among the field of robotics due to the stability (6/2 = 3, and 3 feet on the ground will be stable) but then I am really interested in Quadruped which has 4 feet and an quadruped animal which I really like was the turtle/tortoise as they are interesting, generally does not move too fast and naturally have a shell, which seems logical to use a turtle as a base as their nature suits what I am looking for and it will be easier to hide all the components. So for now, I really want to give a Robotic Turtle some thoughts.


Robotics – Class Assignment 2 : Come On Barbie. (SuHwee and ZiFeng)

Our Initial idea was to have a head to bang onto the wall/table just because it will be sadistic and funny to watch. So our basic idea was to use strings and wires with plates for the head to move in any direction like to swivel around as it adds to the eccentric aspect of our idea. We did lots of trial and error as we were not sure what could work or not. First, we 3D modeled the servo mount which will pull the strings.

Meanwhile, we also went to look around in carousell for heads which could fit into our project nicely and is near for us to purchase them so we asked countless of dolls/plushie sellers on carousell

Then we realized that a square base we did previously was relatively inefficient as the part of the servo that spins was not centralize within the mount so we re-designed the 3D model.

After which, we did experiments with the plate for the “Neck” of the doll.


One spring in the middle was too flimsy until we added strings

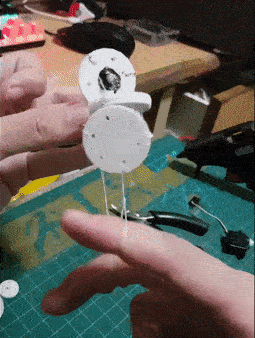
emulation of 3 motors and movements, We were impressed.

And we fixed everything together and tied it with fishing lines.

With the setup above, the doll head was relatively heavy when attached to it,so it does not come back to the standing position so we modified the system with some blue felt to strengthen the system by a bit.

and then after some coding……

Typebot : Lim Su Hwee & Ong Zi Feng

This was a great project for us to learn about how to program a servo to move, basically for this project, we had some failure as but the end result works far better than what we expected. Our first laser cut was was too long and we re-cut them together with the rest of the parts.

And then came our Ver1 Typebot that is almost made from MDF with the finger that we knew it was too long(the marking was the length we needed)

the base of the rotation serco were too big and “wrist” were too short so we couldn’t get it to revolve 180 degree due to the size error and we went into making the Version 2.

This was made into our final Typebot as the length were just nice to press the nearest(Spacebar) and the furthest button (Escape), which was what we needed as we wanted to make the Typebot to possibly type all the letters.

The base of the Typebot was sticky tacked to the base of the keyboard to fix make sure that it will not shift around from the time I calibrate each letter in the Arduino IDE to the completion of this project.

Basically our Arduino code consist of 2 “if” function which are triggered by 2 button. Button 1 will reset all the servo to the original position as we found out that when uploading the code to Arduino, servo 2 will goes all the way to 180, so to prevent it from pushing all our parts to breakage, we will reset the position before uploading so the maximum it will move is to only touch the table hence all our parts will be safe.

Button 2 will activate the code and help me in getting the values for each motor by allowing be to repeat the movement just by clicking the Button2. For the Typebot to press one letter, there will be 6 values for a smooth movement from a letter to the next – 3 values for Servo1,2,3 to travel to the position above the letter without dragging over other keys and 3 values for Servo1,2,3 to press the letter.

The rest will be just trail and error to get the values for all those letters.