A game where you judge each other’s moral and ethical decisions.
Story
In the year 3221, planet Earth has become inhospitable due to overpopulation. The human population exceeds the carrying capacity of the Earth. In order to decrease the population and save the Earth, a new law governs that the dictator has to choose a group of people to cull.
Gameplay
A dictator is chosen from the four players.
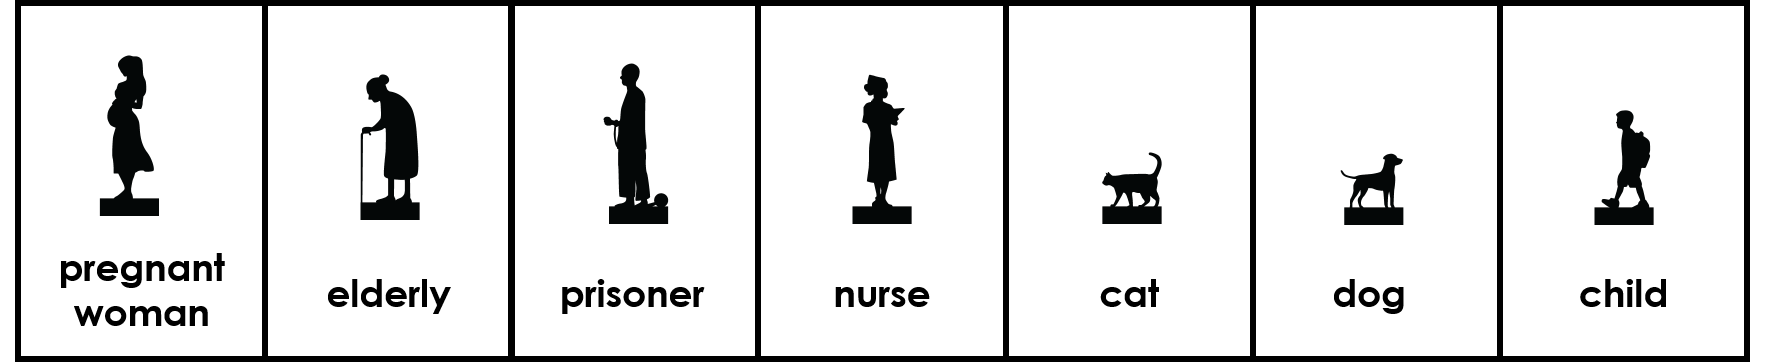
The counters are placed onto the tiles.
Players have to decide which they think the dictator has chosen to kill.
Earn a point if you choose the same as the dictator.
An app that sends a signal to your loved ones through
a wearable device to transmit a love message.
Concept
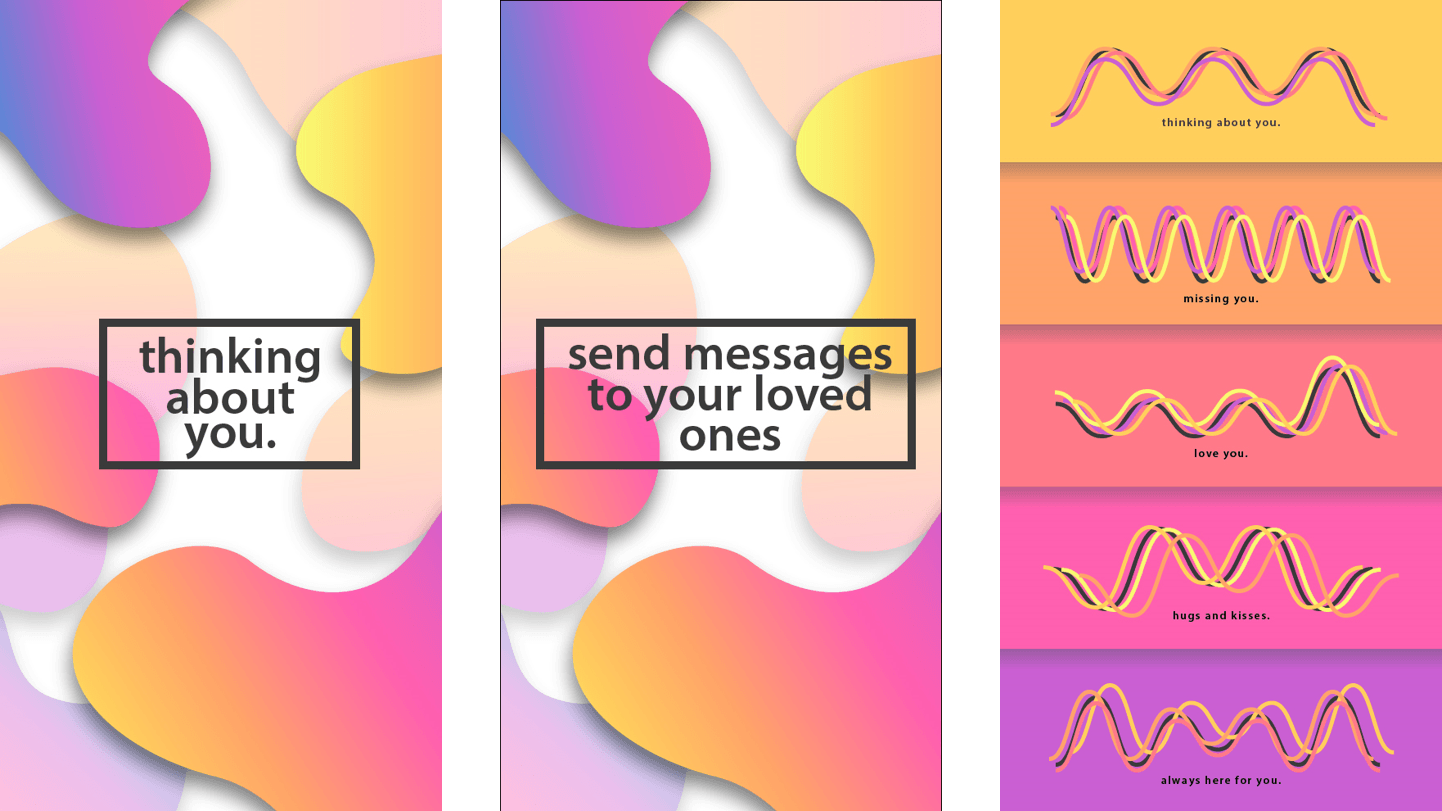
For the final product, I imagine the wearable device to be remotely connected to an app, so another party can select from a list of messages they would like to send, and this message will be sent to their loved ones (wearing the device) through vibrations.
Due to the limited time (also lack of knowledge about creating an app), for the prototype, I replicated the interface of the app on Processing instead.
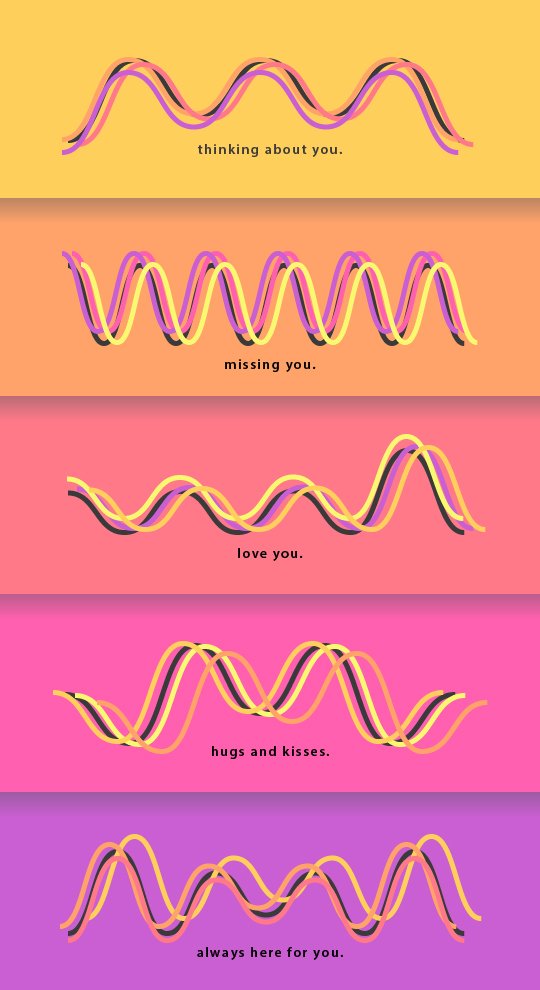
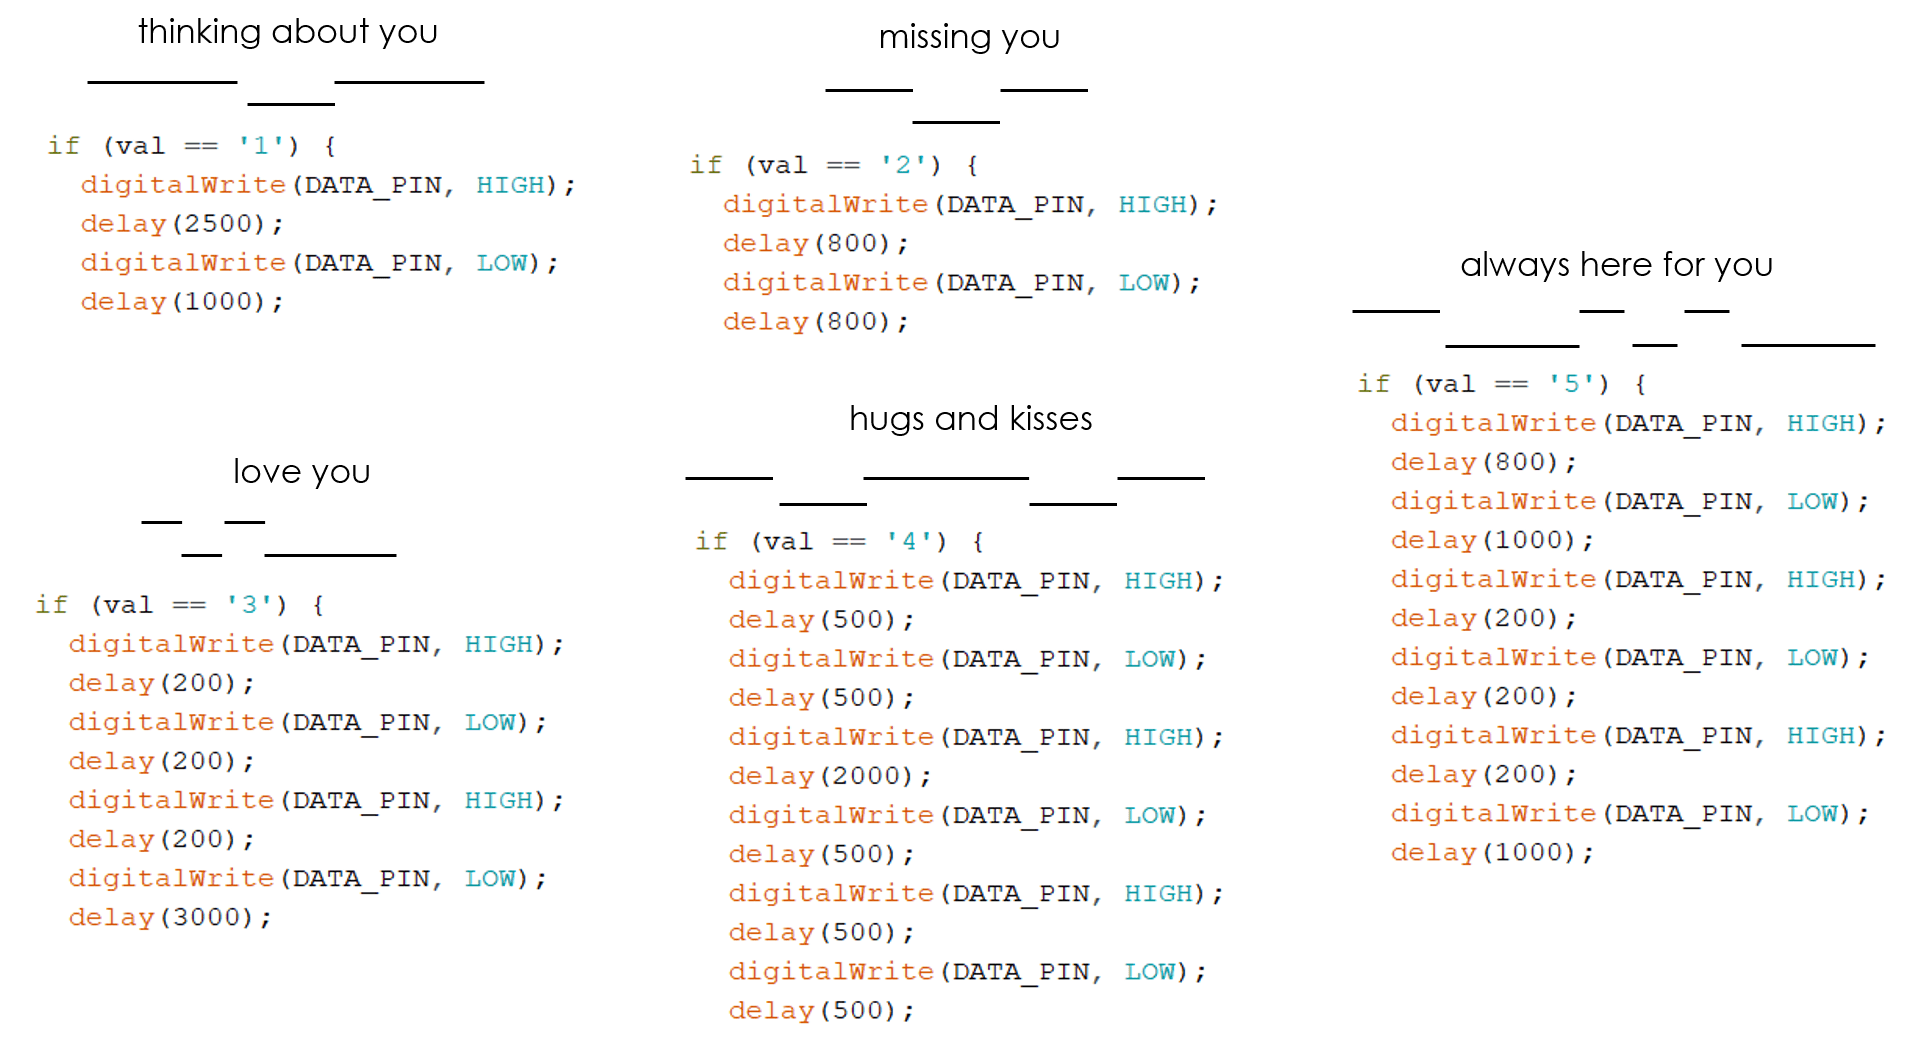
The idea is to create another love language in the form of vibrations. Each love message is translated into a unique vibration.
app interface
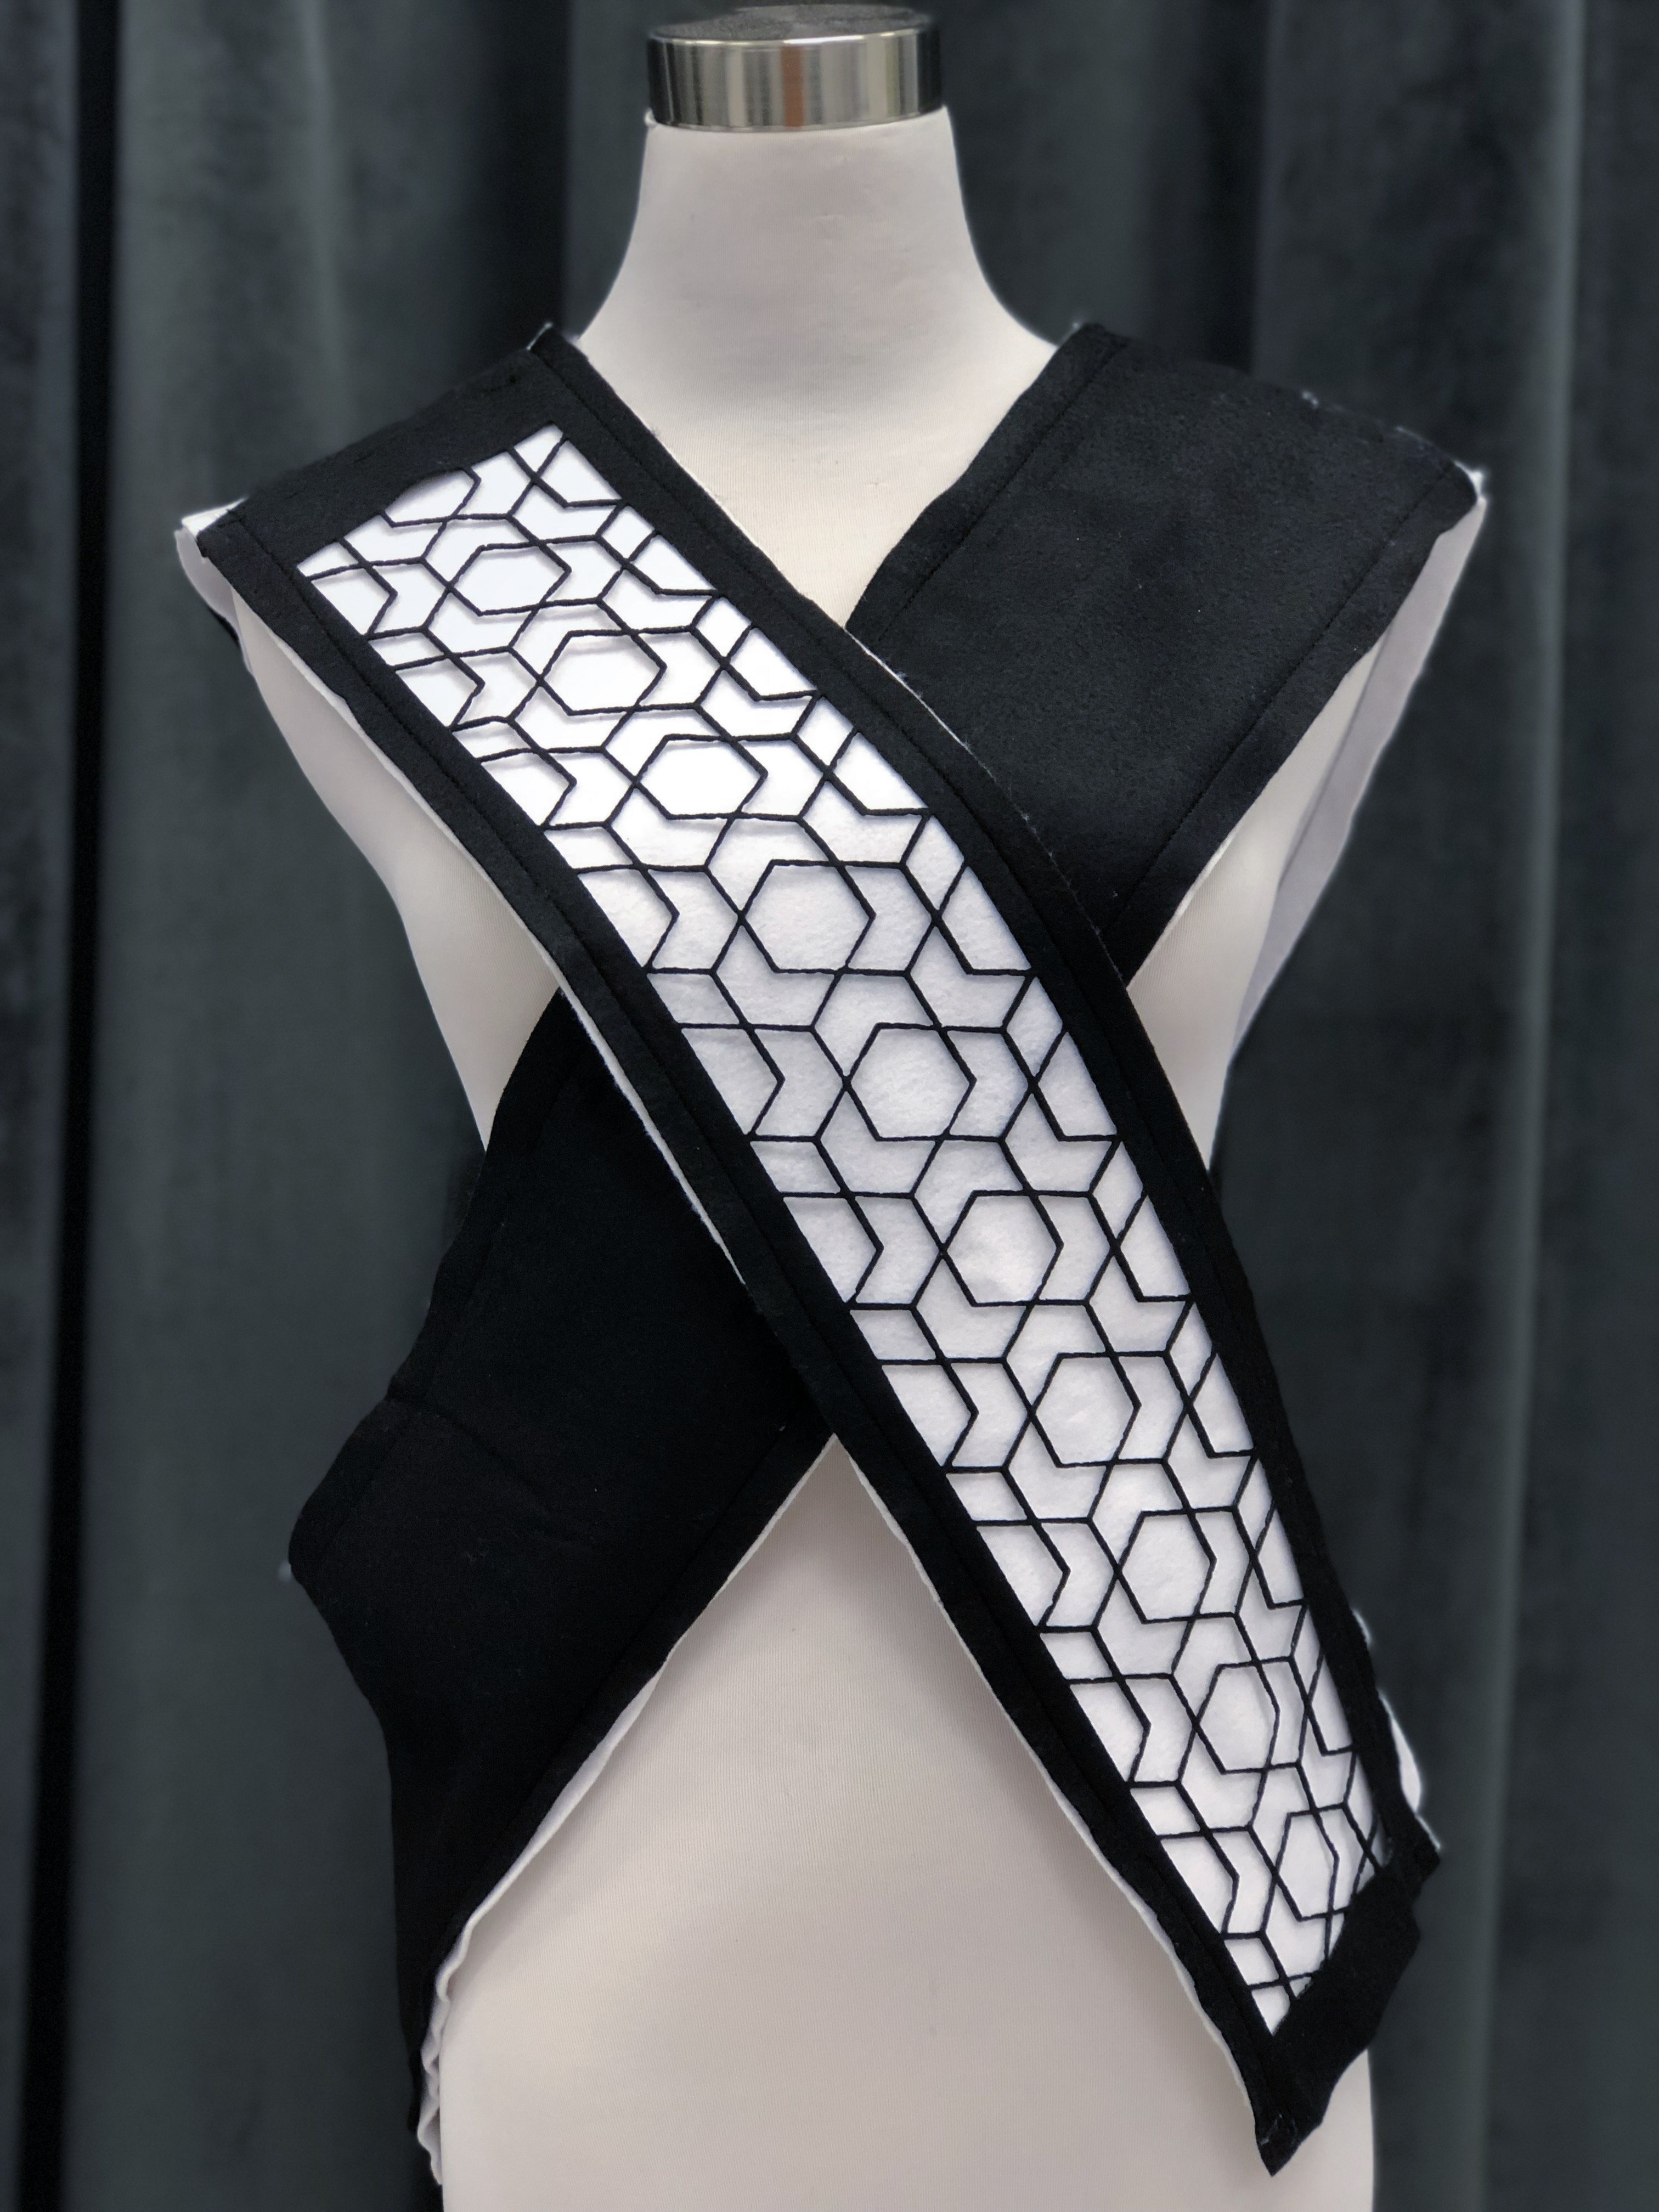
wearable device
Because the idea has to do with love, I thought it would be good to send the message to our heart. Thus, the vibration module is strategically located on the left side of the upper chest.
With my new knowledge of laser cutting, I thought why not laser cut some patterns onto my design. Furthermore, I wanted to add some texture and aesthetics to my design. (I chose this pattern cause it has geometric heart shapes in it)
Creating different vibrations for different messages
Connecting the Arduino to Processing
Creating the app visuals
Laser cutting the felt
Sewing
Installing the hardware onto the wearable
Refining code
thoughts
By far, one of my favourite projects. It was super fun learning how to sew and laser cut. Of course, I still have a lot to learn, but this is a great start.
I felt that my craftsmanship for this project did improve compared to the last project. However, there is still room for improvement. The cutting of the felt wasn’t as clean as I wanted it to be. Sewing not that perfect either. Also, I didn’t think through the clasping at the base of the vest properly, hence it looks a little awkward at the bottom.
Thankfully, the coding side of this project was rather simple, since the vibration motor module works just like a bulb with only 2 states, high and low. The only issue I encountered was figuring out how to make the vibration stop after a couple of rounds which I eventually fixed by creating another mode comprising of just the low state.
A device that sends a signal to their loved ones to tell them that they are thinking of them.
For the final product, I imagine it to be connected to an app, so someone can select from a list of messages they would like to send, and this message will be translated and sent to their loved ones through vibrations that they can feel. For example:
____ Thinking about you
__.__ Missing you
.__. Love you
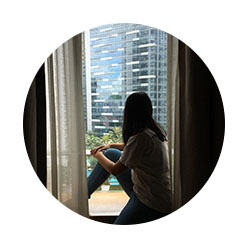
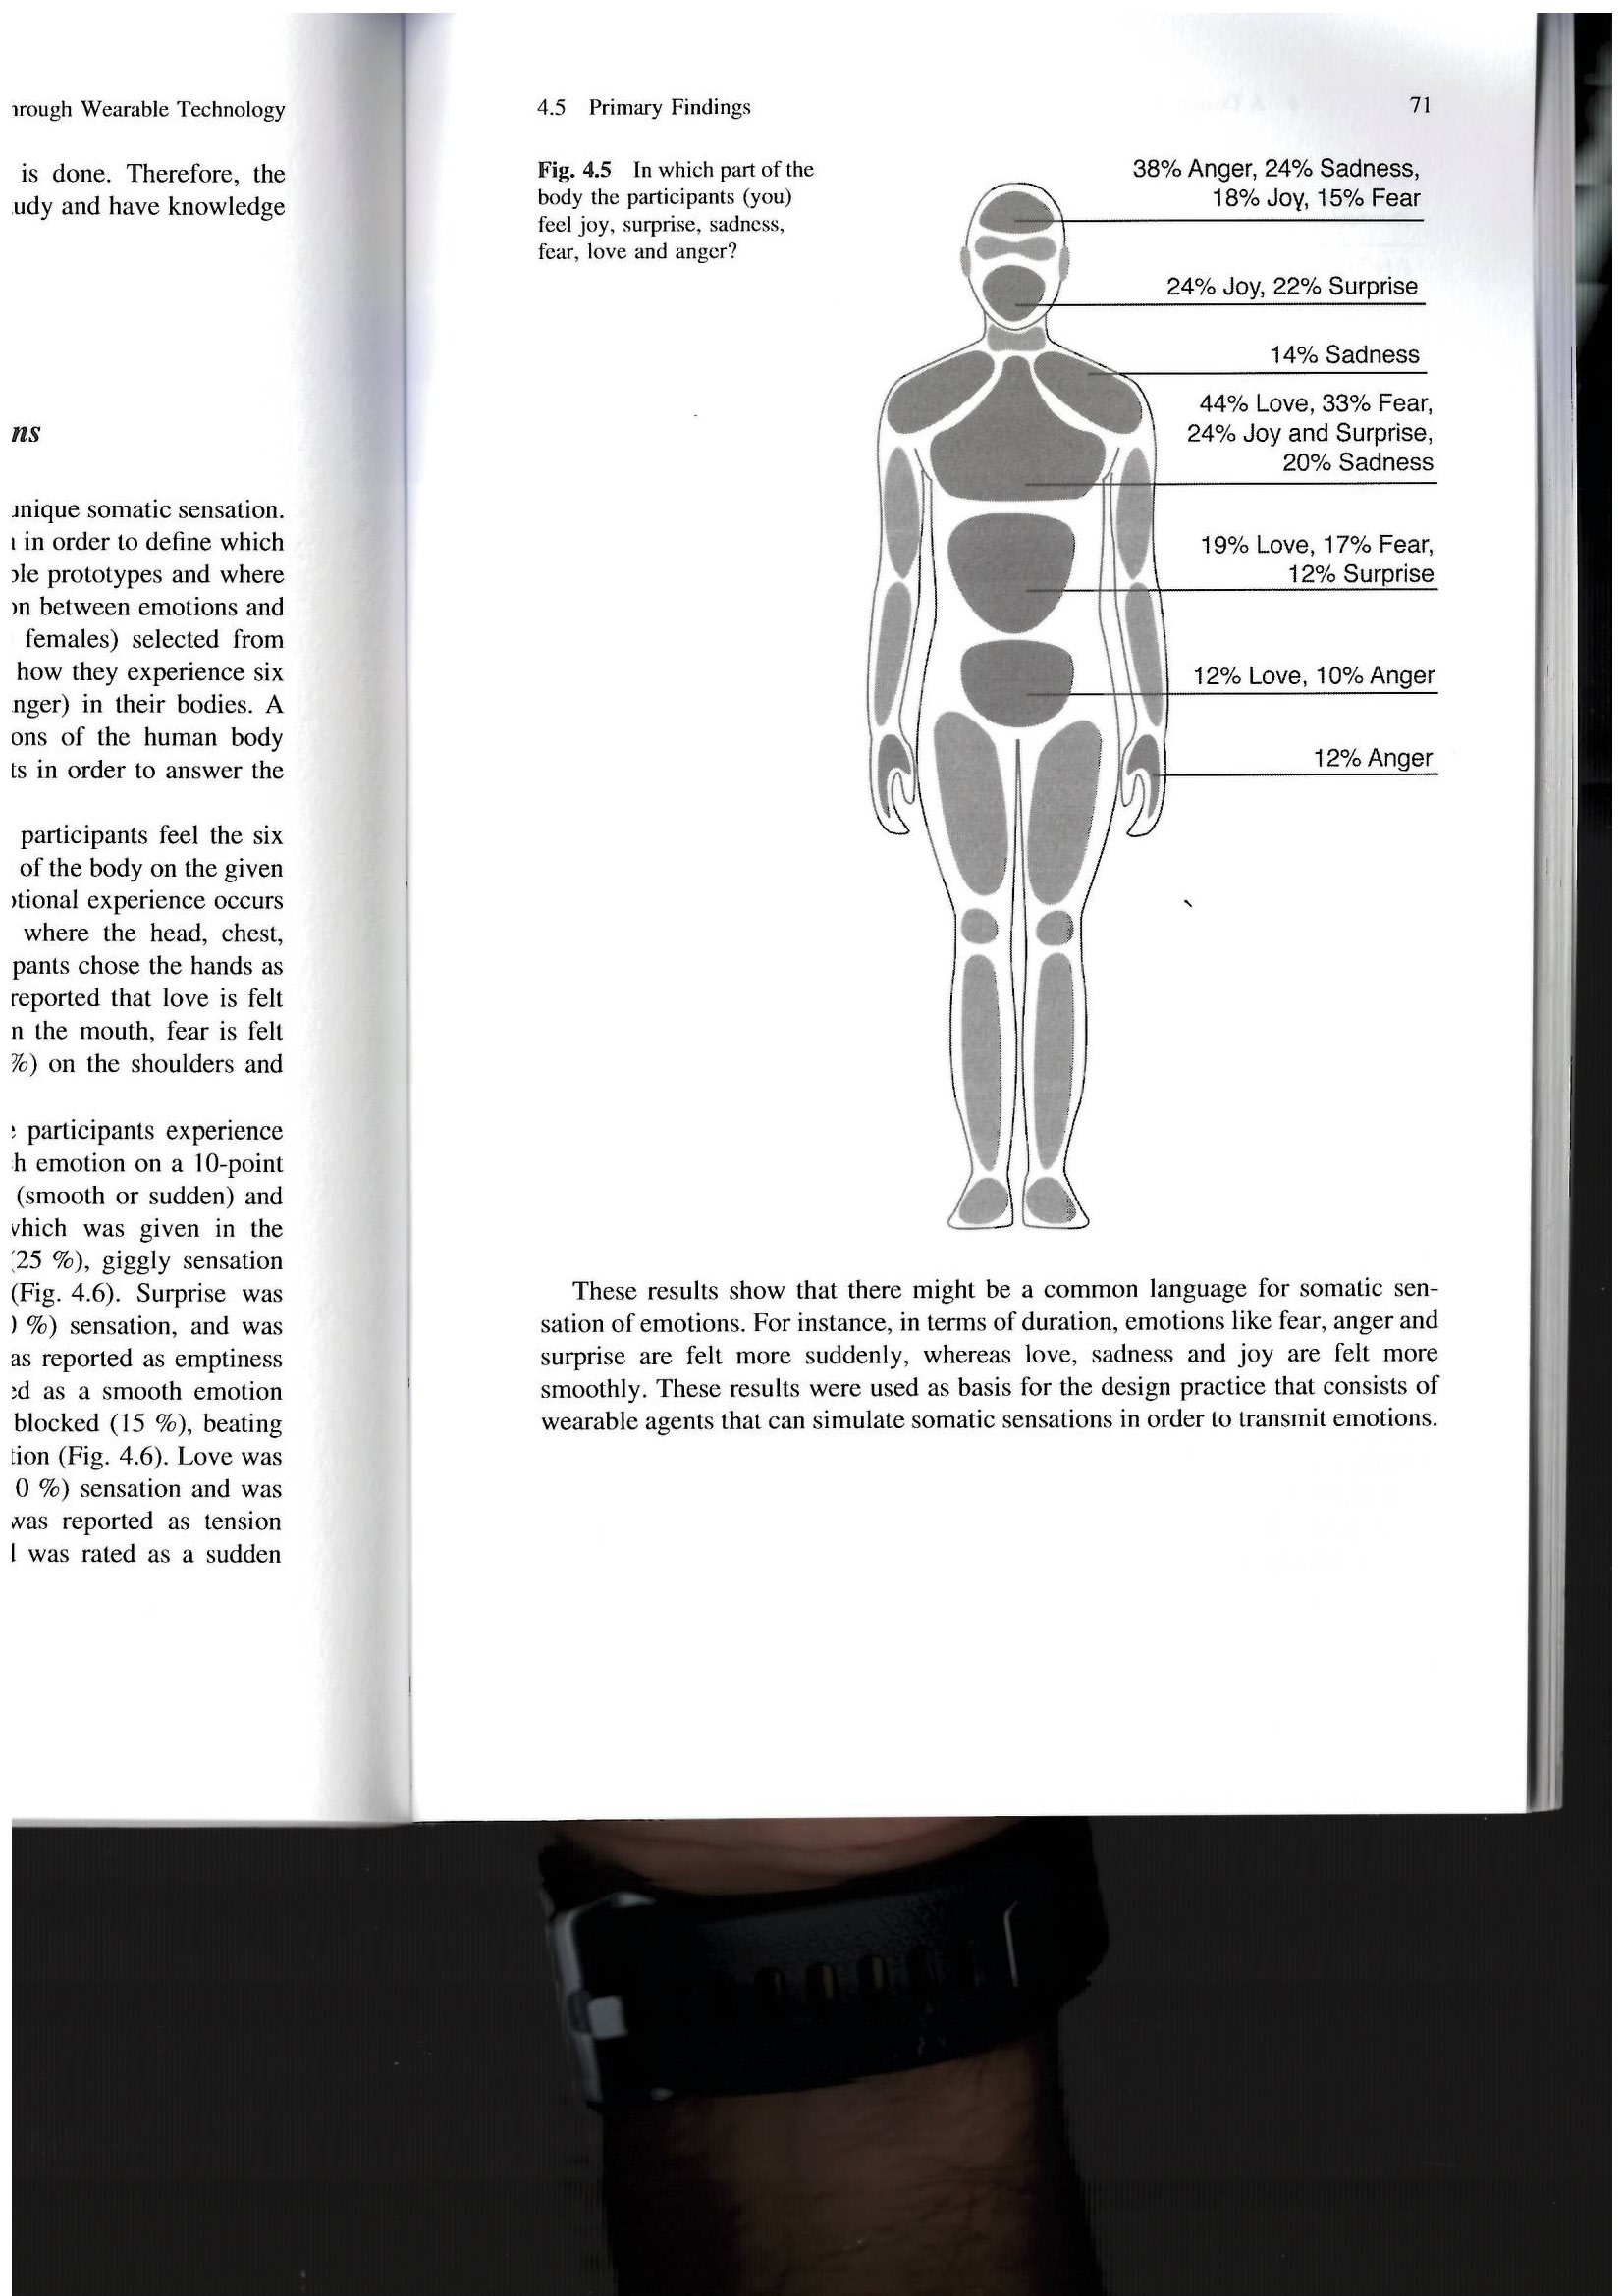
Because it is to do with love, I thought it would be good for it to be close to the heart. Hence, the wearable should cover the chest area which is in line with where the body feels love the most, according to the diagram below.
Due to time constraint, I won’t be able to produce an actual app with that technology but instead, I intend to create the visuals of the app on Processing and participants can select the message they would like to send through that visuals.
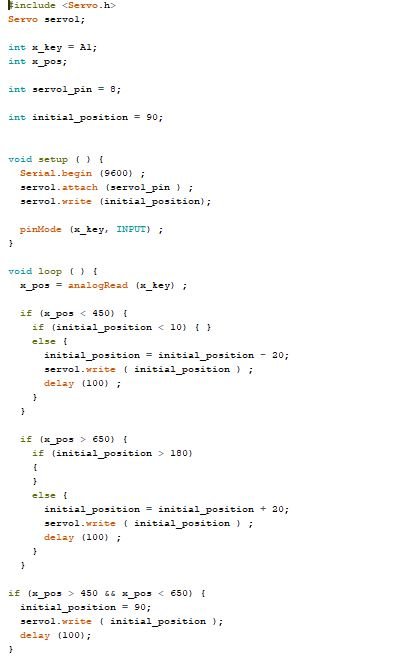
Since I only needed to use the x-axis of the joystick, I eliminated the y-axis and also adjusted the code to ensure that it only moves when the joystick is pushed to either left or right.
Code and circuitry for RFID and LED Strip
The difficult but fun part of coding this was making the LED strip coloured differently based on each card. Using PaletteKnife, I made use of the presets created by artists.
I didn’t want the colours to be static, thus I adjusted the code to include movement in the LED light which wasn’t working at first. However, I realised that the delay of the RFID was affecting the LED lights, thus adjustments were made there.
Crafting
Unfortunately, I’m pretty weak at crafting, hence I spent a lot of time struggling to form the shape and aesthetic of the artwork. Furthermore, I wanted to make sure that all the wires were compact together and hidden. This is to also ensure that the wires don’t get tangled while turning.
In all honesty, I was pretty disappointed by the final look of the sculpture. Nonetheless, I have learned the importance of proper planning of the structure of your artwork before execution. In future, I hope to create more clean crafts by planning properly and making use of proper measurements. Would definitely try using 3D printing or laser cutting.
I hope that as we progress to the next few projects, I’ll be able to improve on my craftsmanship and create more high-quality finishes.
Creating something that can be seamlessly assimilated into an exhibition as an added event experience. At the same time, making use of an existing object in an exhibition as the form of interaction. Hence, I derived the idea of incorporating event attendees’ name tags in trade exhibitions for this artwork.
A personalized viewing experience of an LED sculpture.
Offers a different experience for different event attendees, thus encouraging attendees to stick around to view the outcome of other attendees’ experience.
Using RFID technology, the nametags for event attendees are keycards with an RFID chip in it.
For example, in the case of an event for 5,000 attendees, for every 1000 attendees (randomly assigned), their RFID nametags will be programmed with a unique ID to produce a specific light sequence.
To create movement in the sculpture, attendees are able to turn the artwork using a joystick controller allowing them to view the sculpture from various angles.
Prototype
For the prototype, I created 3 light sequences for 3 unique nametags.
Thoughts
As mentioned in my process post, I just wished I had paid a little more attention to the aesthetic or visuals of the final product. I’ll definitely take that into consideration in future projects, and properly plan out the visuals before execution.
This was the first project where I had to code and do the circuitry on my own. To be honest, I was really scared that I wouldn’t be able to pull it off. However, I’m proud that the code and circuit (may not be perfect) works!