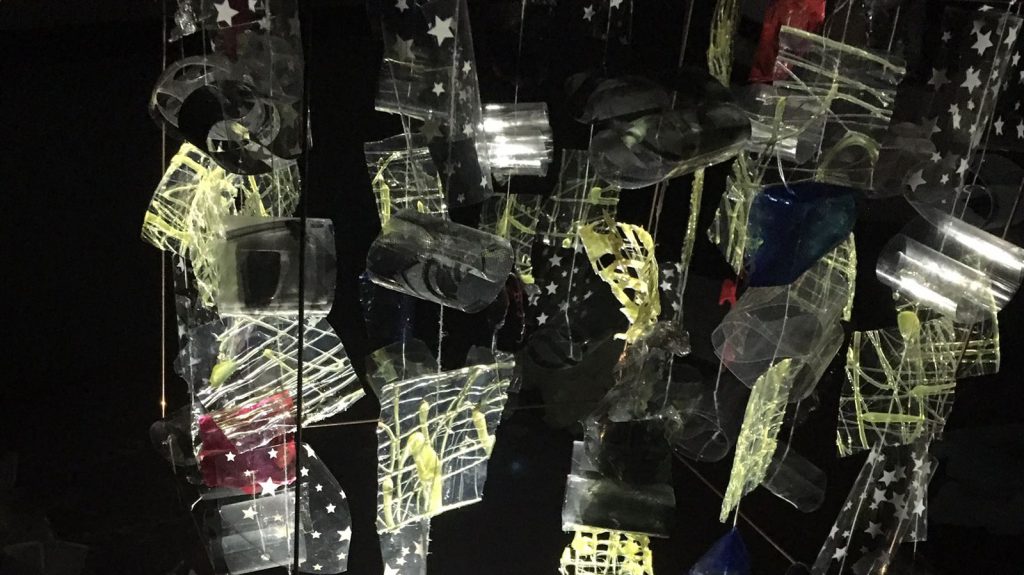
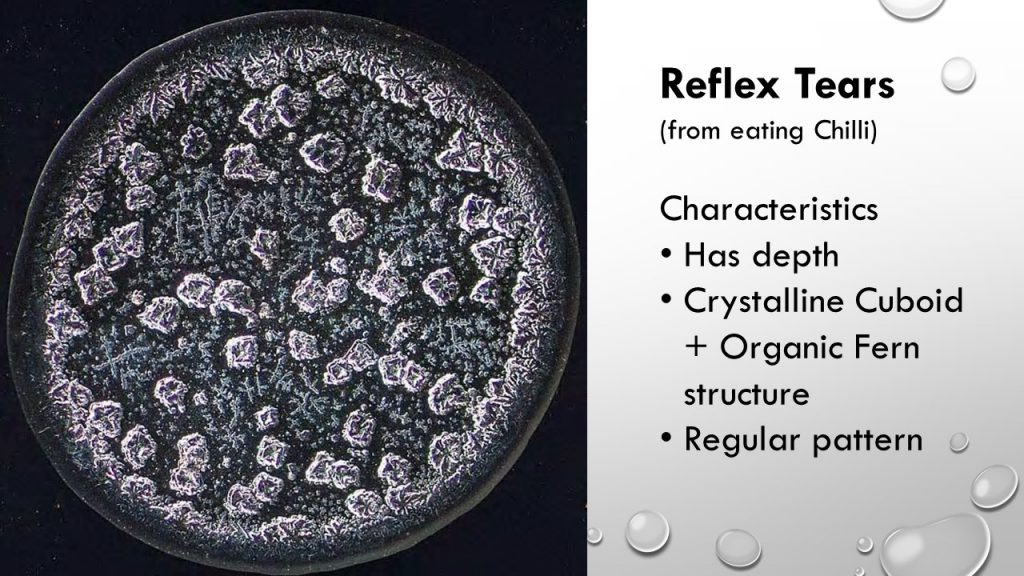
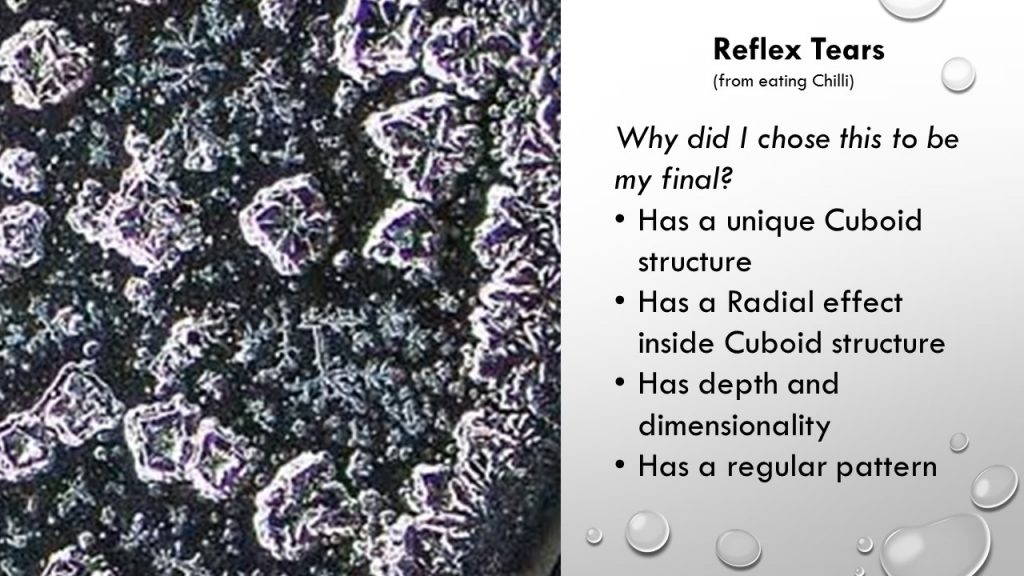
For this modular construction project, our group which consists of Queenie and I, created this lampshade cover (sort of).

20161116_123929fhdh


Amalgamation

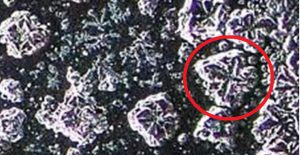
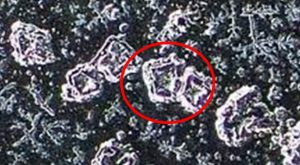
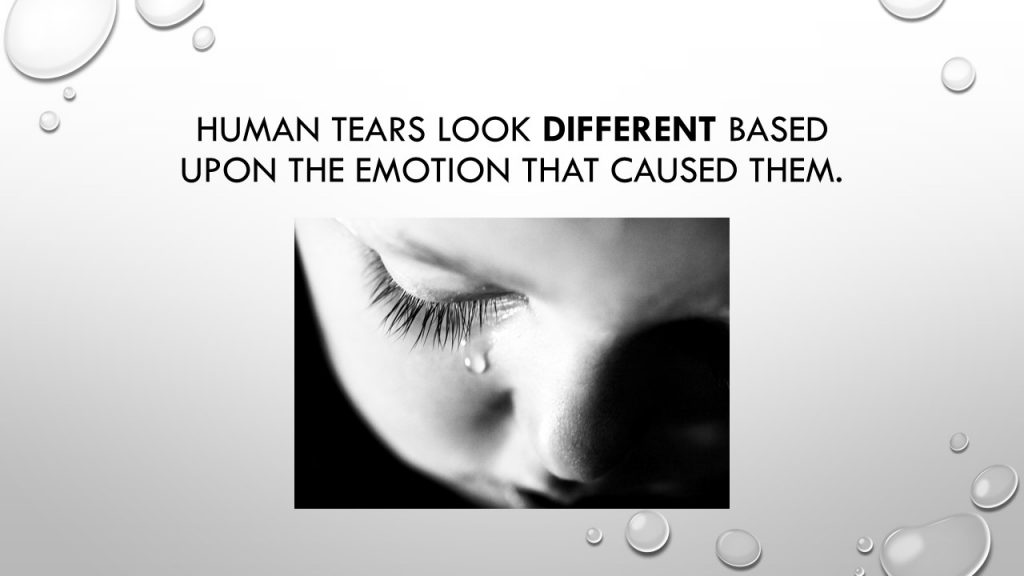
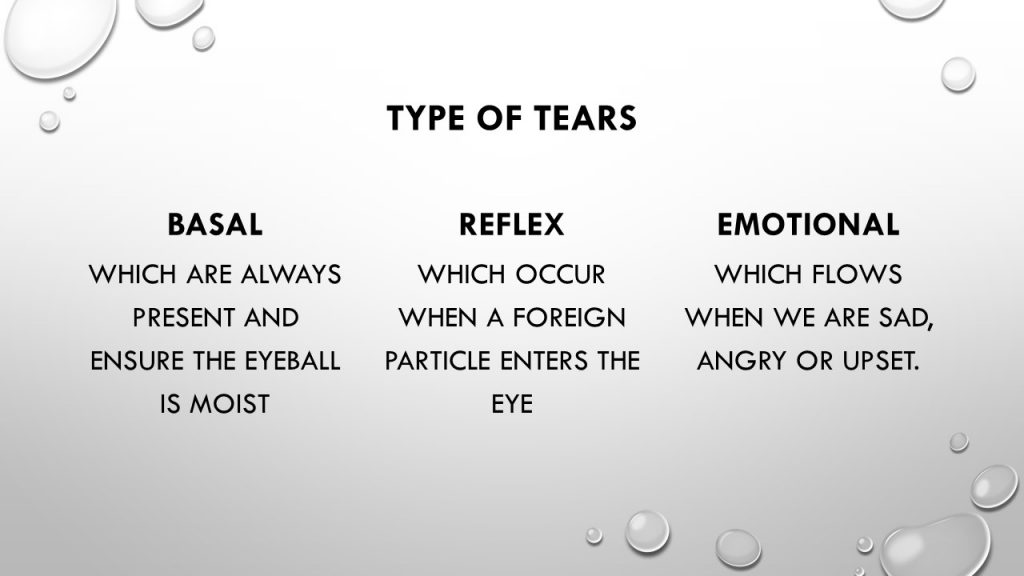
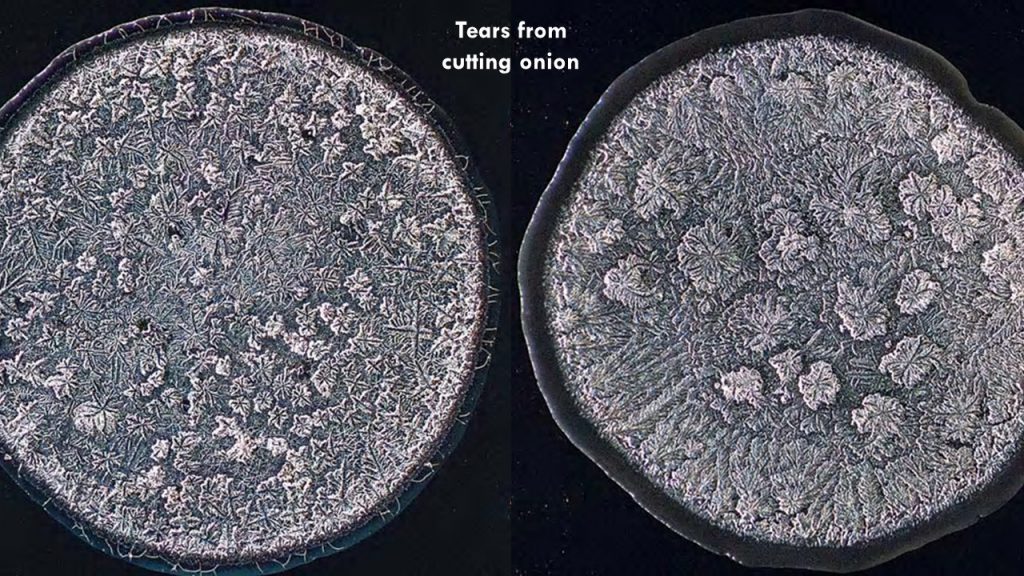
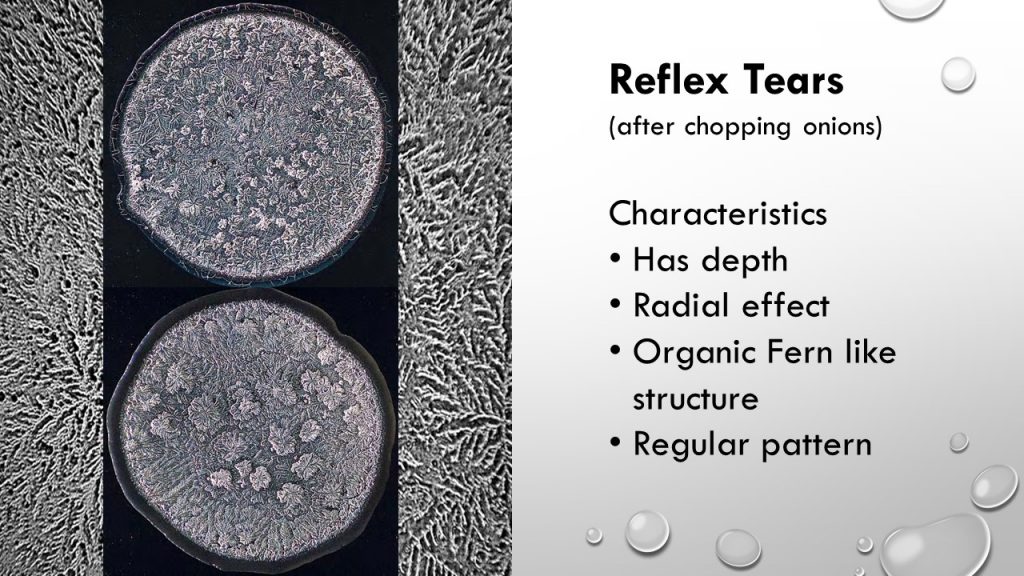
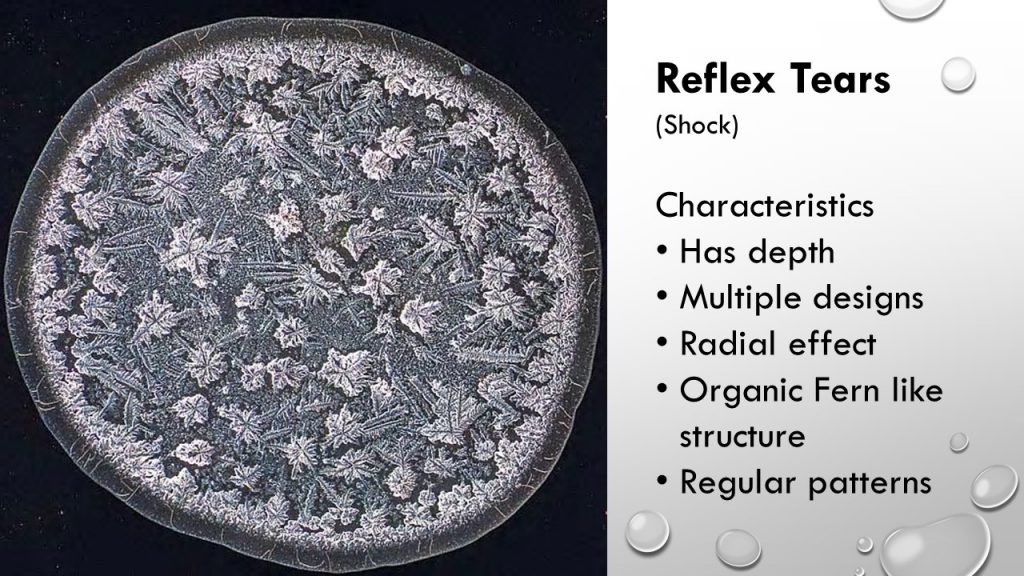
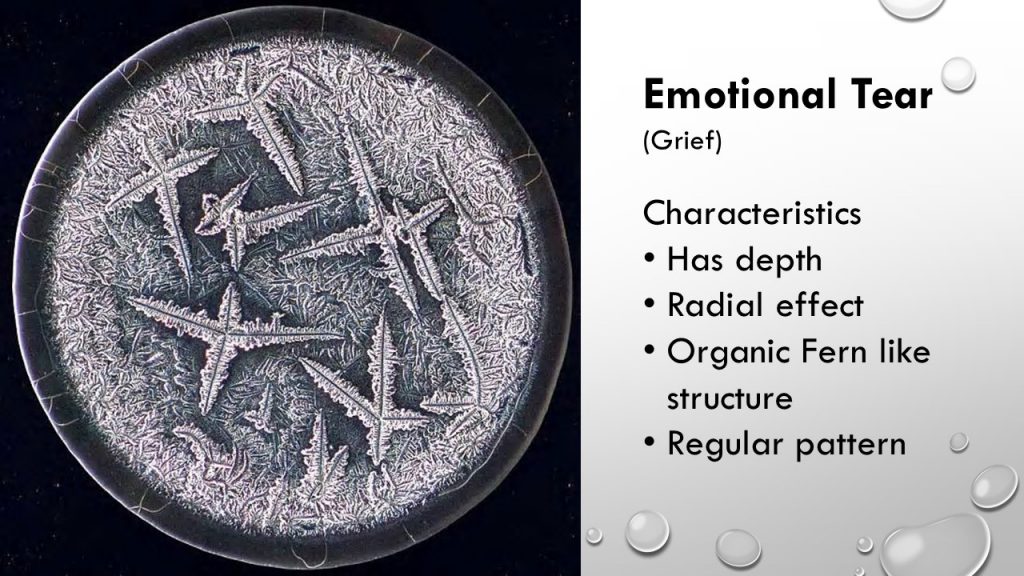
This modular construction is the amalgamation of our previous project on Morphogenic Construction. Queenie used the SEM of Leek and I used SEM of Dried Tears.

Queenie Ke’s

img_0651

We obtained her construction’s highlights which were …

  1. The Folds in the layer -> We incorporated that into our brainchild, by folding transparency paper.
  2. Use of dried layers of glue -> We incorporated that into ours by coloring the glue sheets with red and blue paint as well as calligraphy ink.

Mine (Seng Yi Ling)

20161019_094011

My previous construction’s highlights were…
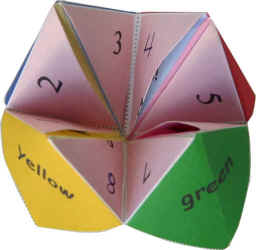
  1. The Wire frame
  2. Plastic to make the units -> Used transparency and plastic sheets with pattern to create shadows.
  3. Thread to hang units.

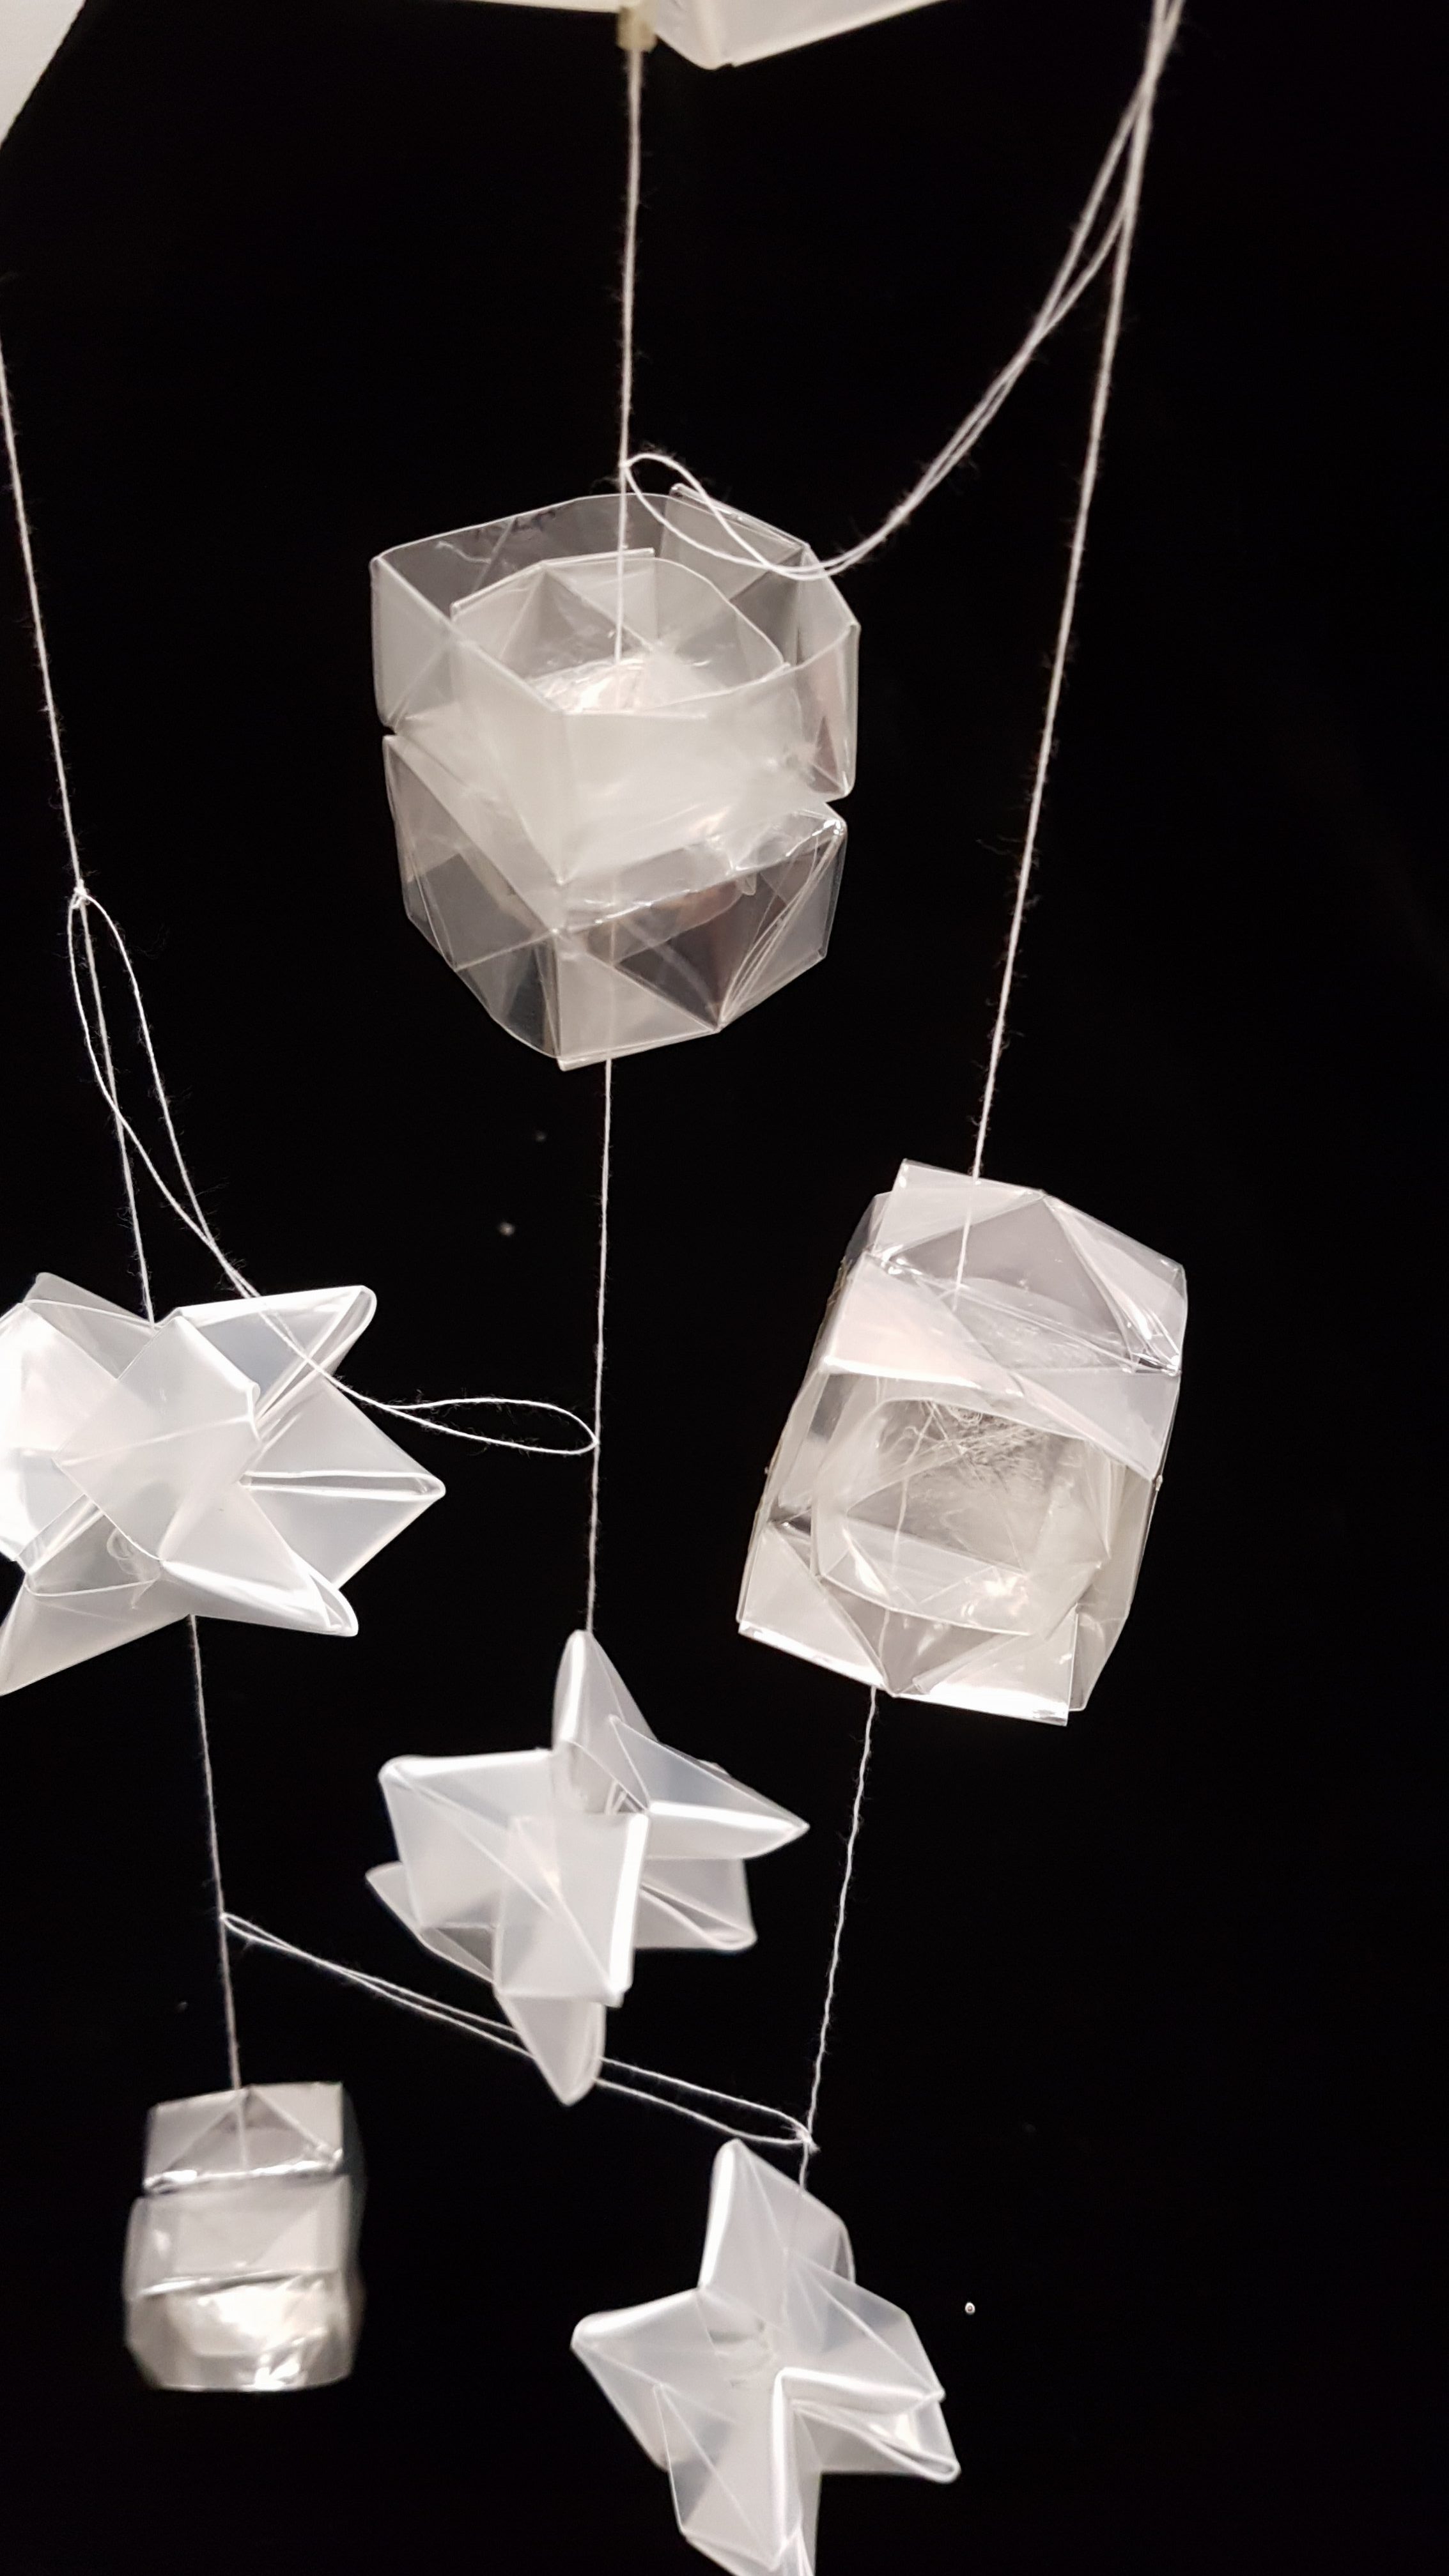
Aesthetic Cohesiveness

img-20161116-wa0026

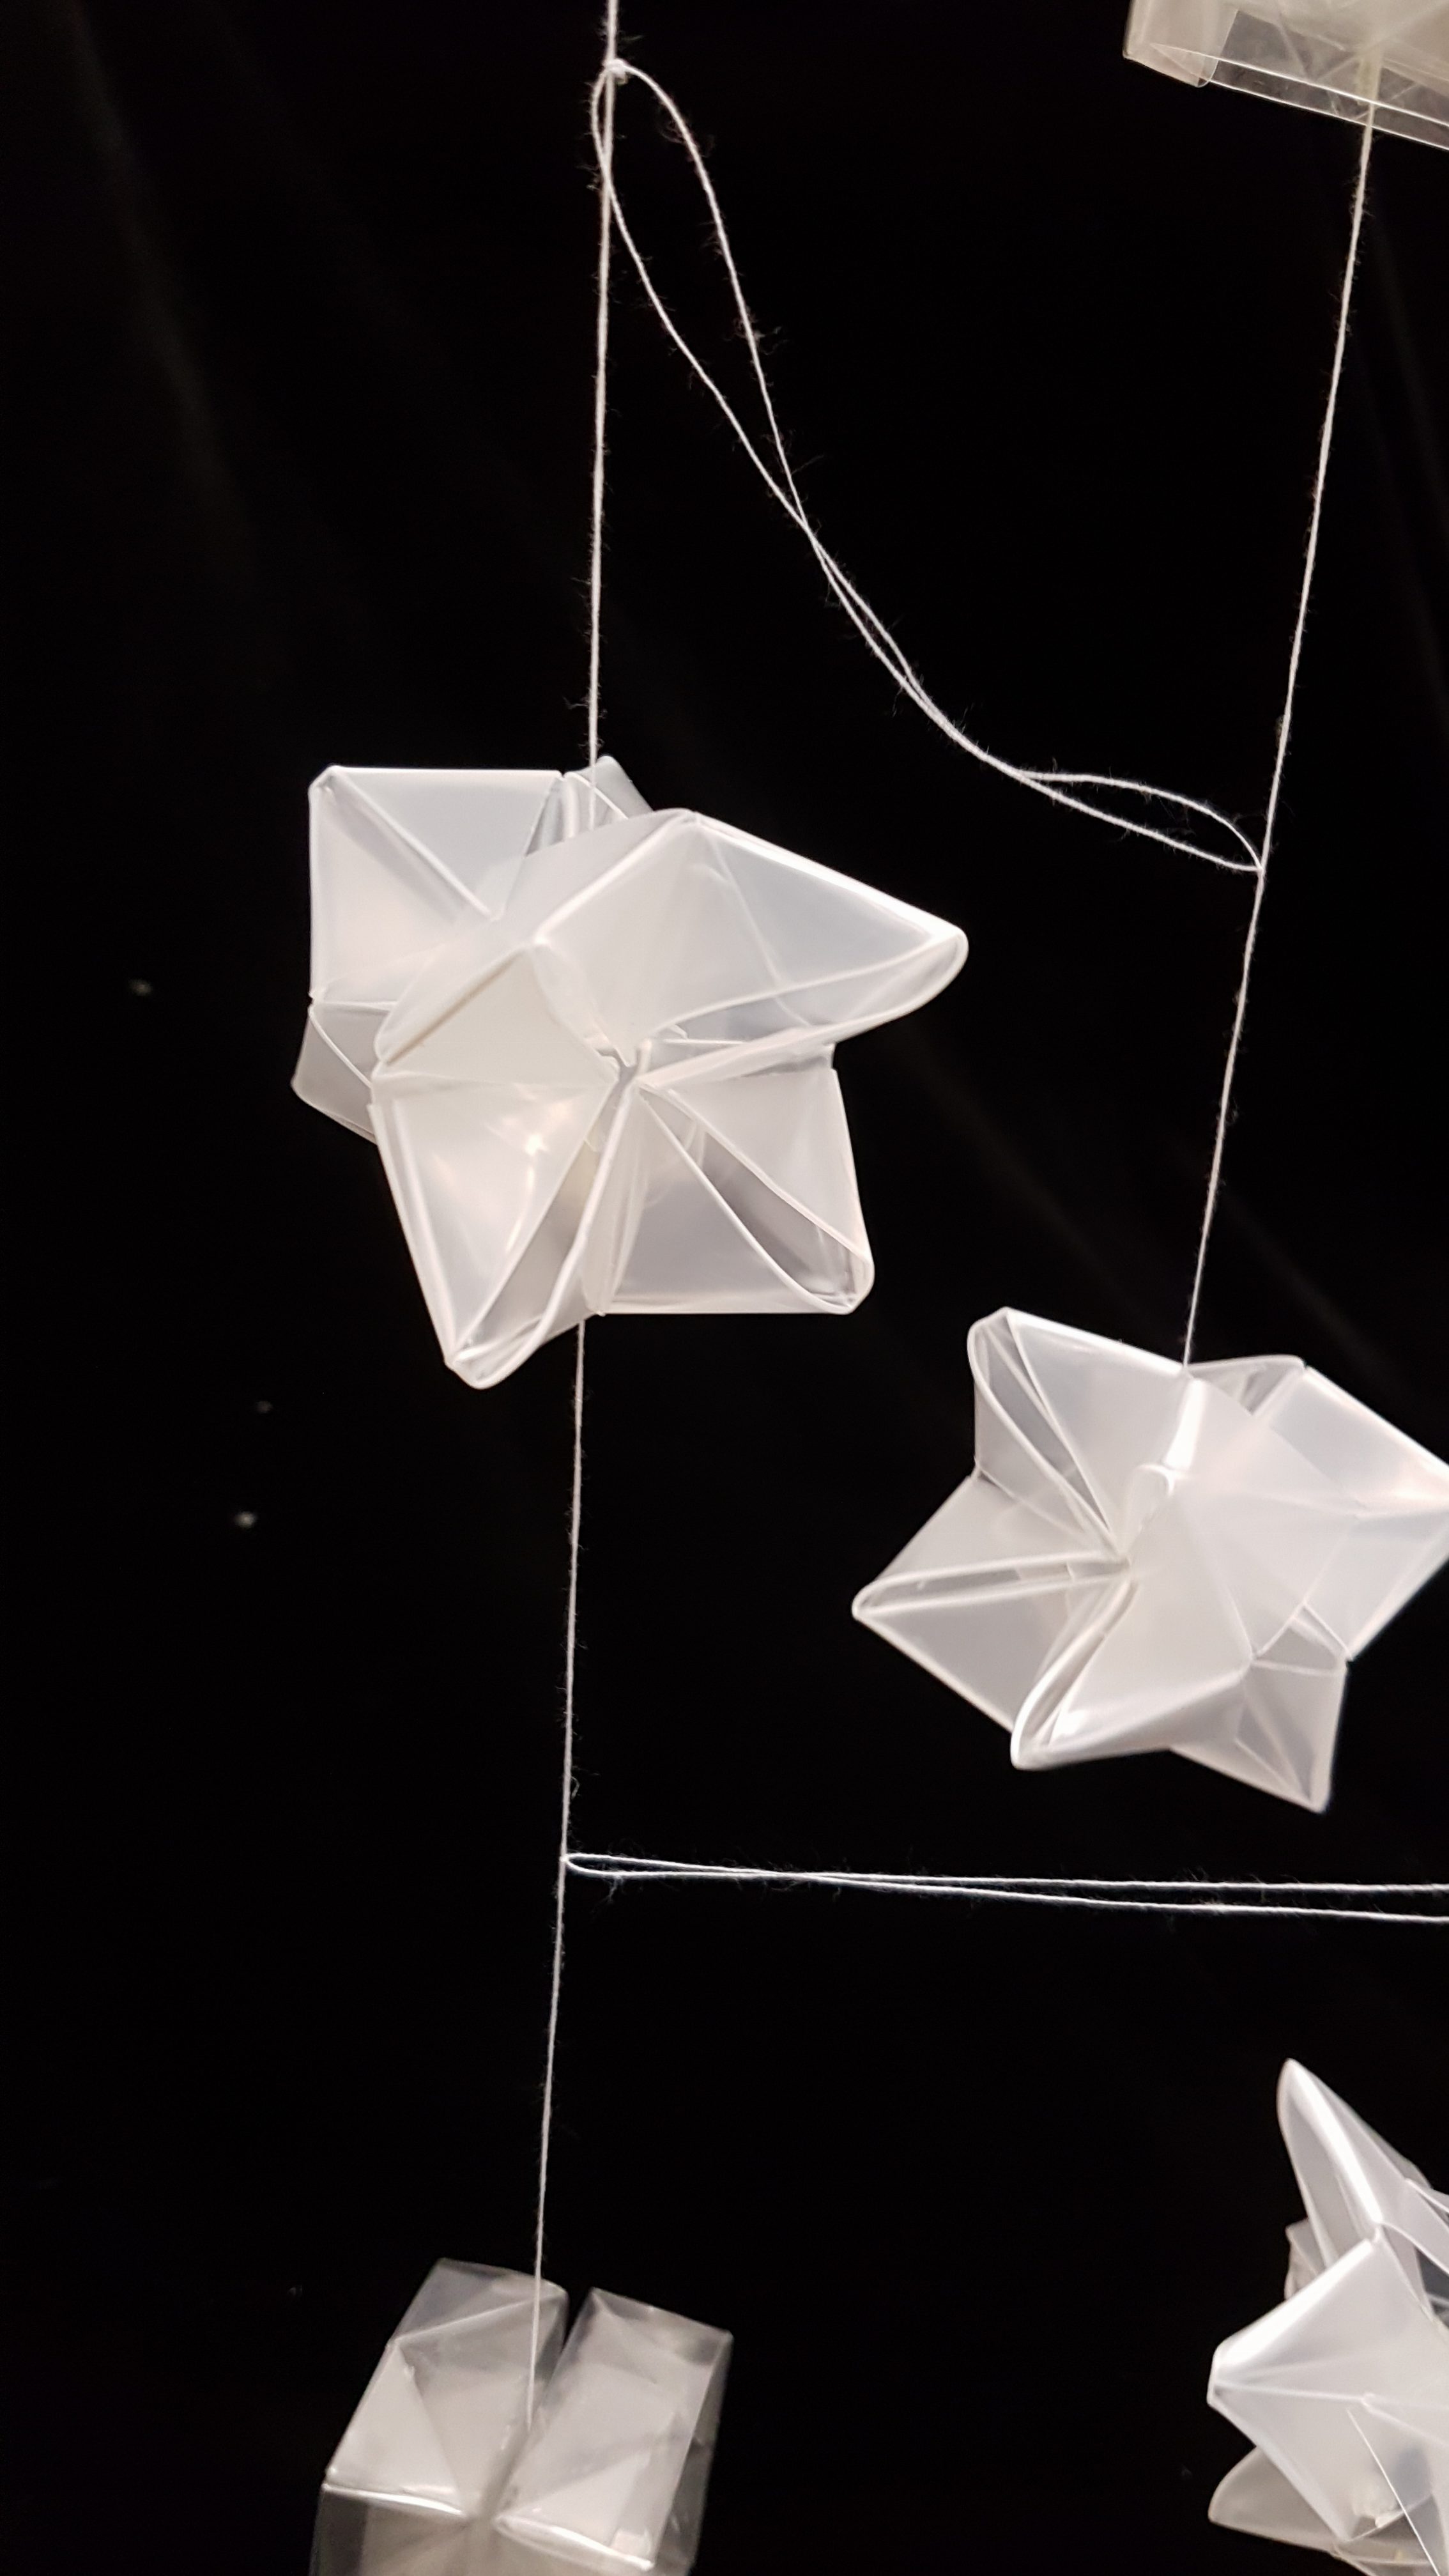
Units in each row are arranged in a uniform pattern.

Materials used for each unit are…

  • Glue from glue gun onto cling wrap
  • Star patterned plastic wrapping sheet
  • Red and Blue Watercolor paint on glue
  • Donated transparency paper from our classmates

Delight

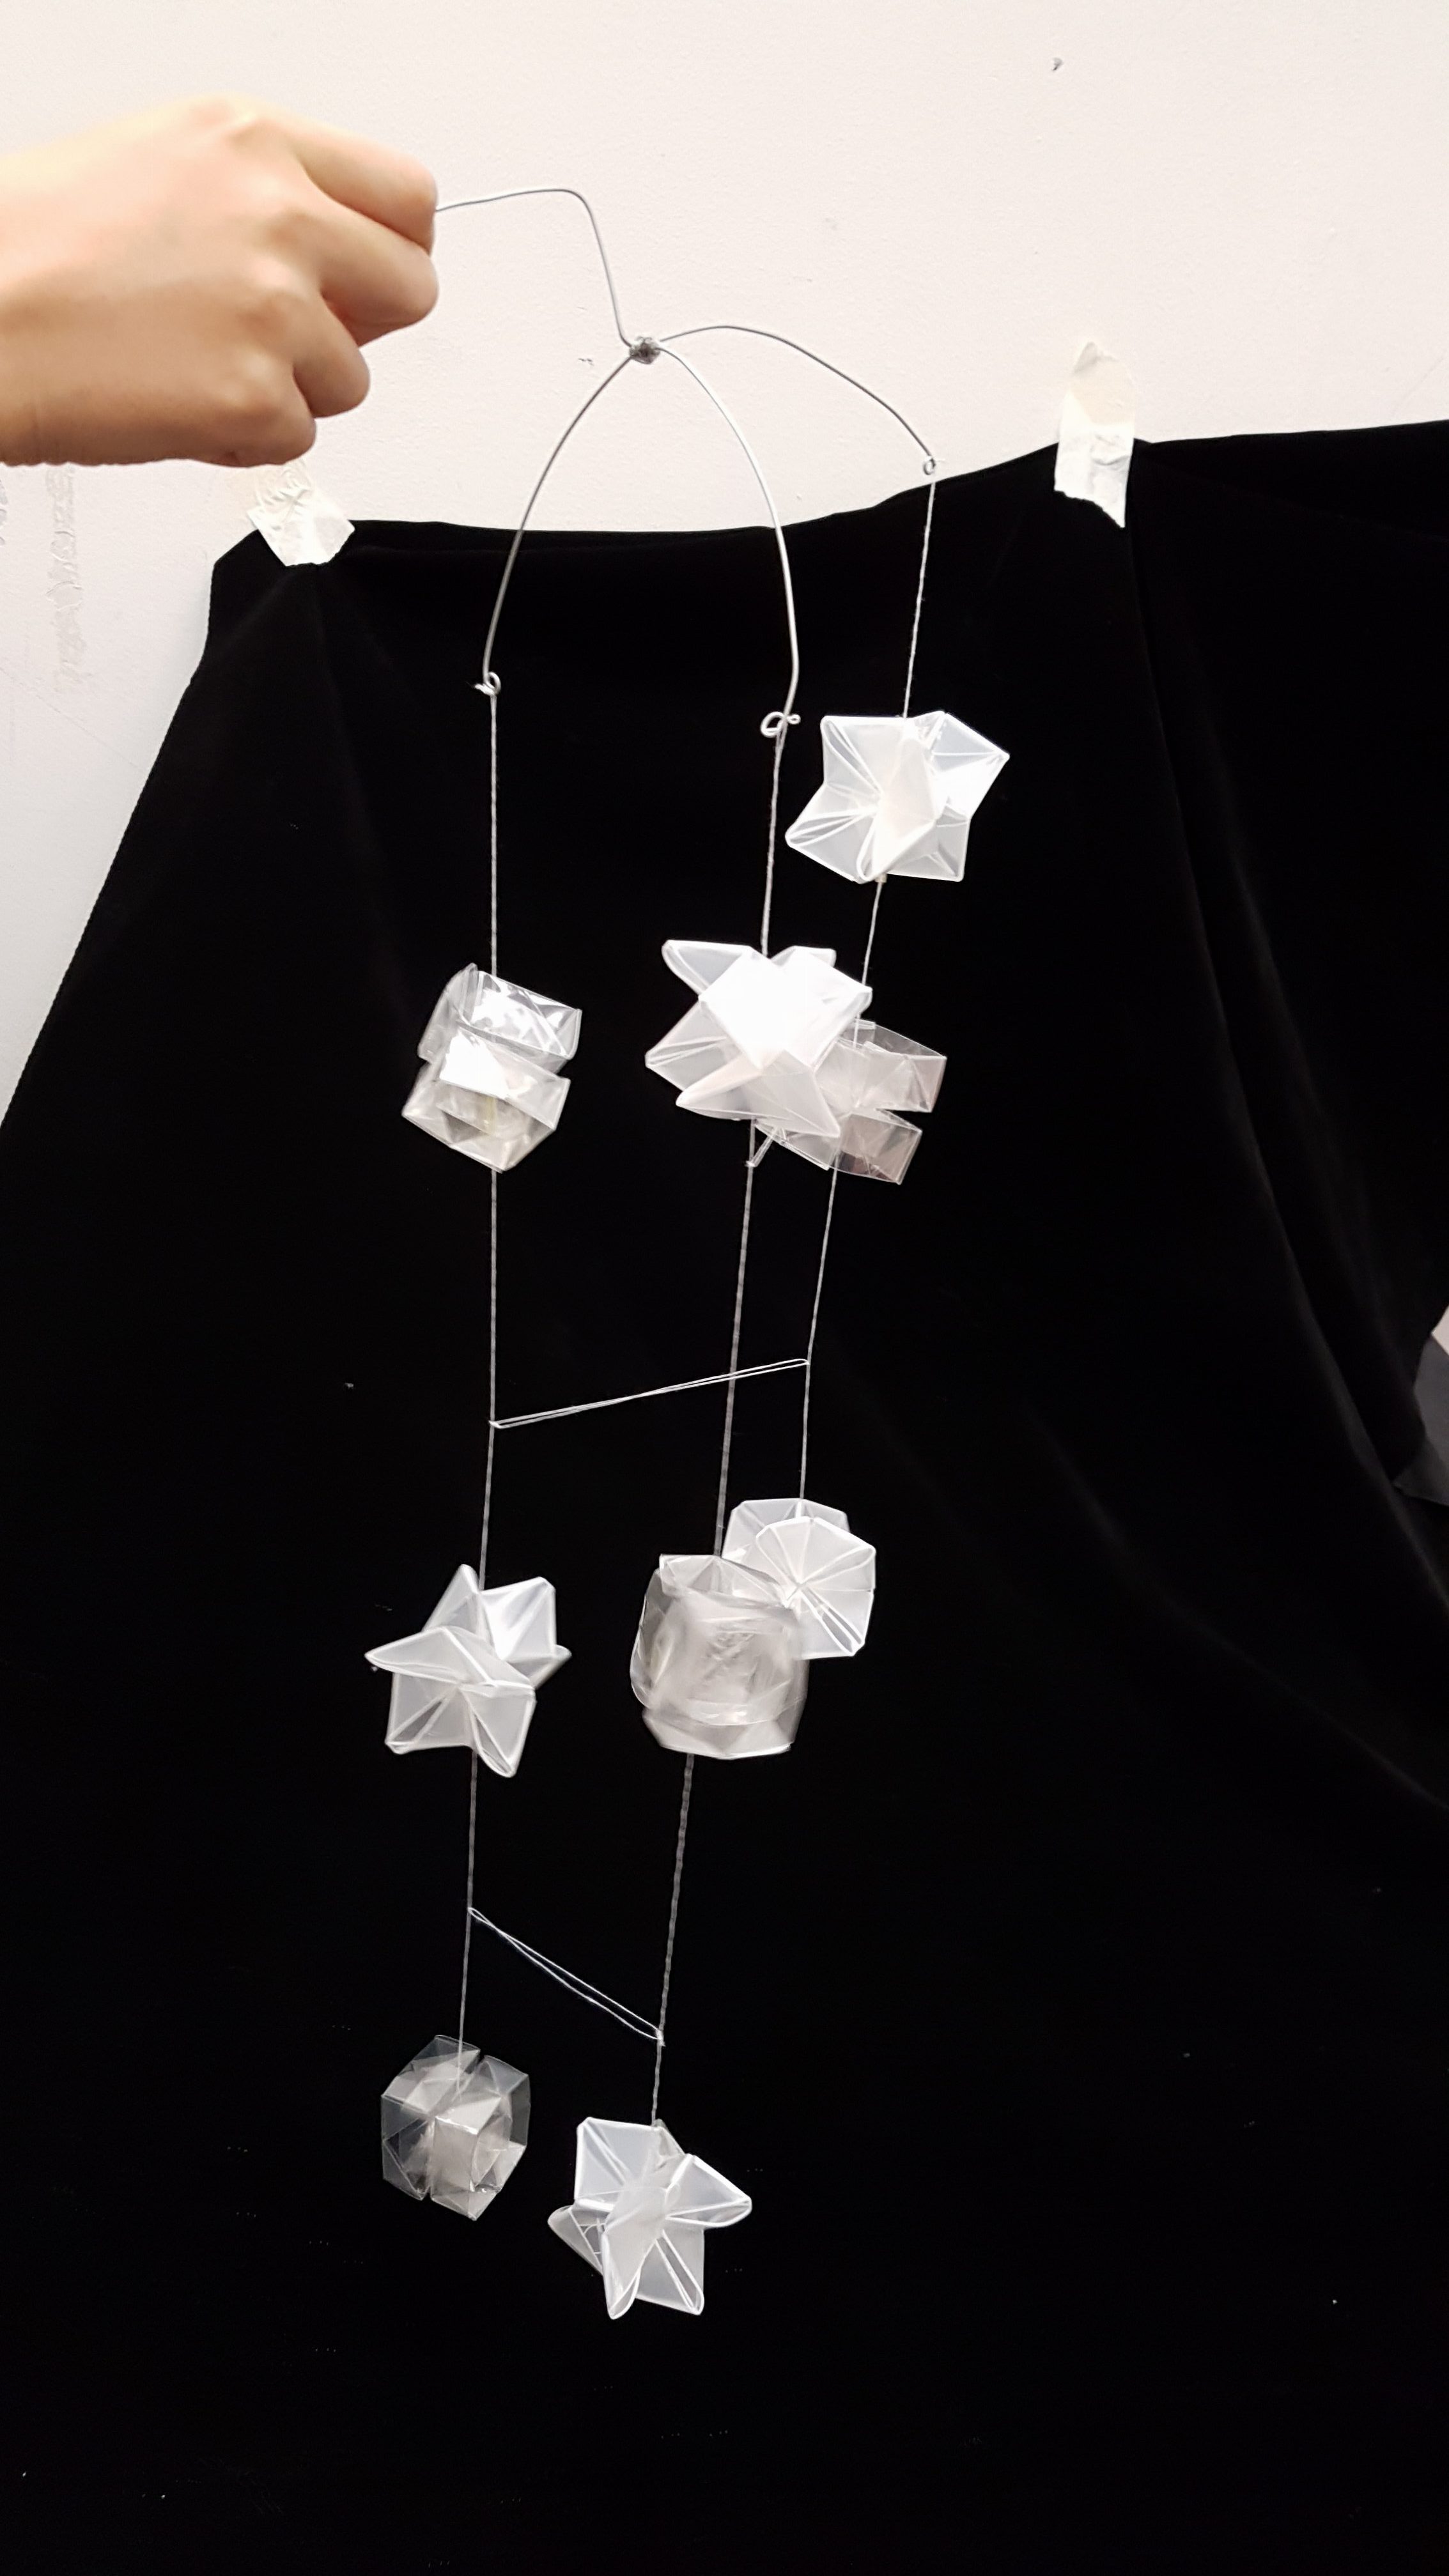
Colors, light and shadows are rather friendly. Rather interactive due to the mobility of each row. Each unit moves rather independently on it’s own in the air.


Light and Shadow

For this assignment, Queenie and I heavily focused on the light and shadow casted from our model, hence the physical exterior aesthetic aspect of our model is rather… ahem….

ANYWAYS.

This is a video of how the light and shadow look upon changing the position of the light source: front and back, left and right.

  • The panels closer to the light source appears larger, and overlaps with the shadow casted by the panel which is further away from the light source.
  • Transmission of light through the red, blue and black glue layers created colored translucent shadows.
  • Transparency folded up has a reflective surface. Hence, mobility of the transparency units when turning creates a refraction of lights.

img-20161116-wa0024

During presentation, our classmates were rather fazed –Queenie and I were rather surprised by the responses haha.– by the shadows casted on the ceiling and all around the room when we placed the light source (iPhone light) directly faced up on the table, in the center of the model. Yit Ling told me that she felt serene looking at our ‘constellation’ like shadows cool.


Some of the pictures in class of our work were taken by Dawin and they were really pretty so we used them! Thanks Dawin!

Constructive feedbacks we’ve received from Mr. Peter and our lovely classmates were that we could actually hang our lampshade cover instead of having it on legs; and that letting it have uneven legs to give mobility or allow it to rotate like a musical box would make the shadow even more interesting on the walls and ceilings. smile

20161116_155625

‘Family Portrait’ of Queenie and my lovechi..I mean. BRAINCHILD. 😀 THANK YOU QUEENIE FOR WORKING WITH ME ON THIS PROJECT <3

Assignment 3: Morphogenetic Construction

For assignment 3, we will explore the relationship of the unit and how unitary elements operate as cellular building blocks towards the growth of complex organic structures.

For our individual research and analysis, I have decided to go with the SEM of Tears where we did a PowerPoint presentation slide!

slide1 slide2 slide3 slide5 slide6 slide7 slide8 slide9 slide10 slide11 slide12And the video which failed to play during presentation entails the tear extraction process by the creator of these SEM and how the crystallization is formed:

https://www.youtube.com/watch?v=uvDNVE3_A5Y


Construction of Model

So my initial idea was to create the units using egg cartons, but Mr. Peter suggested a better readymade/material can be used to recreate the units as the egg cartons did not really look like the units.

So after much brainstorming, I have decided to use the plastic used to create the previous assignment to create my childhood ‘Fortune telling paper’ toy, as the top view resembled the top view of the unit.

mfortuner-teller

The X in the middle resembled the unit of the image I wanted to recreate

teardwes

20161019_093953

As the SEM of the reflex tears has different repetitive units, the second unit I have decided to go with using Transparency paper to create origami paper box to recreate this unit:

Origami box

Origami box

tears-asdfghjkjpg

By stacking a smaller box into a bigger box, I was able to create this structure.

20161019_094001

Using wires to create this frame, so that when I hang the units, the 3 Dimensionality is enhanced and they are more interactive and flowy. By adding strings across the strings, the units are more connected and flows rhythmically (like liquid), instead of giving an airy feeling.

20161019_094011

I was inspired by the baby toy to create the framework.baby-toys-for-0-12-months-hand-bed-crib-musical-hanging-rotate-bell-ring-rattle_jpg_350x350

Planes in 3D Space

I believe most of us were really perplexed when our class got this project for assignment 2 (At least I was VERY perplexed). I wondered how was it possible to create 3D space with just planes?

I did some preliminary research regarding artists who did installations with strings and observed how people used strings to create art online.

And after much exploration online, I did my first model for the assignment.

Inspiration: Waves of the Ocean

mark-a-johnson-crashing-waves

I was drawn by the crashing waves of the ocean when I first started sewing the paper because a certain amount of tension applied onto pulling the strings would cause the paper to bend.

Study Model

Top Side View

Top Side View

Side View

Side View

Side View

Side View

Top View

Top View

  • The study model has lesser strings and the negative spaces were more spread out.
  • I also attempted to create a whirling action in the center (Dark Purple plane) by continuously sewing the lines in a crisscross interlacing of strings manner to create a continuous pattern. Sadly it did not turn out well and the interlacing turned out rather messy and congested.

After consulting with Mr. Peter, I made final modifications to my work.

Final Submission

Top Side View

Top Side View

Frontal View

Frontal View

Side View

Side View

Angle of display where tension of strings are strongest.

Angle of display where tension of strings are strongest.

Video of Planes in all angle upon rotation: img_0857

(Hopefully the video can be opened >.<)

The plane on the extreme left (Light Purple plane) is less acute than the plane on the extreme right. This is to mimic the swirl and energy of the waves when it is riled up at the start.

And the plane on the extreme right (Light Blue plane) is more acute and more parallel to the plastic board to mimic the waves that has lesser energy and swirl.

For the plane in the middle section (Dark Purple), Mr. Peter suggested I lift the strings up by bringing the strings over the top, rather than interlacing them. This lifting effect in the center I realized, creates a sense of 3 Dimensionality space.

Difference between Model & Final?

  • More holes in Final were punched and less negative spaces between each line.
  • The planes are more stretched and are longer in the Final than the Model.
  • Change in choice of material from paper to plastic board.
  • No interlacing of lines in the middle, but strings are lifted when almost parallel to board.

Problems faced

  1. Tension of the strings loosens when the knot I tie in the end is not close enough to the hole.
  2. Tension of the string AND plastic loosens when left to display for a long time.
  3. Tension of the strings loosen on the planes I’ve completed when I do other planes.
  4. Over estimation of tension applied ruins the configuration of strings.