
YAY So we have finally completed our FINAL assignment for 2D Foundation WOOHOO~

So lets get on with this extremely long and detailed post~
ME
Representation of Me: Tofu + Baby Elephant

Instead of using photographs of myself to represent myself, I decided to use my spirit animal as a representation of myself: A baby elephant.
Why a BABY elephant?
Because I often wish that I didn’t have to grow up so fast, and like a kid I am rather gullible & childish.
Why a baby ELEPHANT?
Because an elephant is a gentle giant ( I am rather big), they never forget(I bear grudges), they are playful and friendly but not to be trifled with ( my emotions are easily riled).
I was also intrigued to explore Anthropomorphism as well. Hence, I wanted to use Tofu as my subject as well. The texture of my elephant I have decided to go with is different types of Tofu as my friend once told me that I am like Tofu, soft and fragile and I ought to toughen up to be like Tau Pok.

Hence, in each row, the toughness of each elephant in each square will show the progression of how I , from a fragile watery Tau Huay transform into a tougher Tau Pok. Vice Versa. 
Methodology
For the methodology for the representation of myself, I was very inspired by the cartoons I have watched in the past and recently.
Hence, I decided to carrying out my emotions and state into the form of hand-drawn elephant cartoon drawings, which then I scan my drawings into the computer, and then overlaying the texture of tofu over my drawings for the elephant’s skin on Photoshop.
This further emphasized on the meaning of my spirit animal is also soft and fragile like Tofu. Thus, giving a new definition to my spirit animal.
I decided to split the 4 rows into 2 where the first two will be on my concept of Dystopia and the other two will be my ideal concept of Utopia.

A constant method of carrying this project out is on Surrealism, as I was having lots of fun for project 2 and I would like to incorporate photo manipulation and montages again. 🙂
Compositions
1) Utopia 1:

Me: Me when I am stressed.
Setting: Lured by Temptation
Black used in the background and doodled TV to show the dull and mundane life I am in. Juxtaposed by the burst of white light behind the TV, it acts as a metaphorical representation of the TV being a portal to send me to another dimension ( color wheel ) where there is colour, vibrance and excitement. Outstretched hand (Korean drama actor Song Joong Ki’s hand) from the center of the colour wheel invites and lures me into his world. *fangirl snigger*
Outcome: Living vicariously through fiction.
My concept for this composition is a themepark because I love thrilling rides and I lose track of time there. Similarly, in the land of fiction, I lose track of time and reality when I watch TV dramas.
I used Square complementary Harmony color wheel in this composition where I used : Violet, Orange, Blue and Green. Violet/ purple gives off a dream like atmosphere, Blue is calming, orange gives a youthful and warm feeling and Green is refreshing.
For this row, I was rather inspired by an image I saw online once which I felt it was highly relatable.

Everyone is a genius. But if you judge a fish by its ability to climb a tree, it will live its whole life believing that it is stupid.
– Albert Einstein
2) Dystopia 1
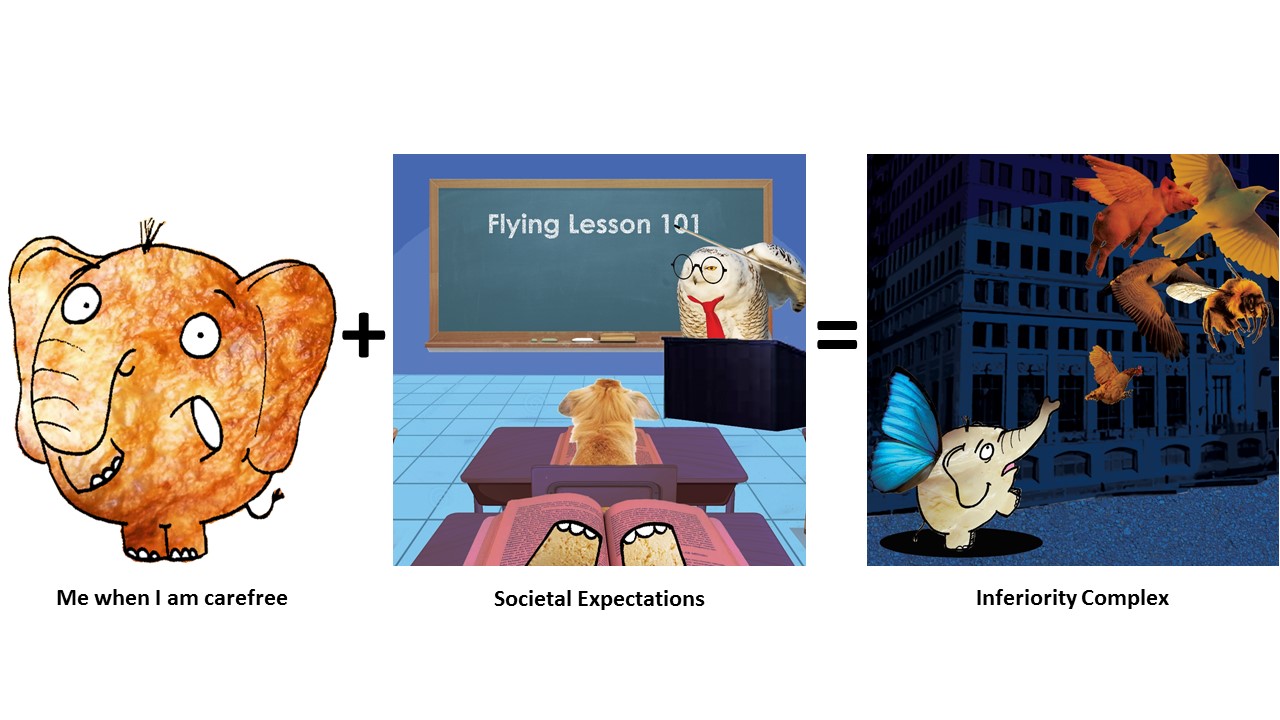
Me: Me when I am carefree
Setting: Societal Expectations.
I used cool colors for this composition that has similar tones. Scene takes place in a classroom setting in my perspective. Blackboard serves as the center of focus to create line of perspective, further emphasized by grids on the floor, which says, “Flying Lesson 101”.
This is to show that sometimes in society and education, we are often taught things that we don’t need or does not apply to us individually, or it simply is not cut out for us. And no matter how hard we push ourselves to learn, we remember the theory but we cannot apply it.
Outcome: Inferiority complex.
Outcome is a representation of Exam day.
I used monochrome harmony ( Blue) and split complementary ( Blue with Orange ) in this composition. I used blue as the background as I wanted to express the coldness and cruel side of society (building in the background), as well as inferiority I experienced when my peers do extremely well but I don’t. It is as though, when I am not doing well in certain subjects as compared to others, I am deemed as incompetent, inadequate and less intelligent by society…
The bright orange juxtaposed against the dark blue background is to show how much my peers shine through their abilities, where I am blended into the background, questioning my abilities. I attempted to create a diagonal implied line from the bottom left corner to the top right hand corner, to convey the instability I felt.
3) Utopia 2

Me: Me when I have Anxiety
Setting: My Safe Haven
My Safe Haven is depicted in an outdoor scenario where ELEPHANTS SHOULD BE ROAMING AND NOT LOCKED IN CAGES NOR ENCLOSURES *ahem* where there is plenty of room to roam. I used rain, as Elephants love the rain; I represented the sun with a fried egg (Because I like too eat eggs) and the vegetation at the bottom to be a Soya Bean field as Tofu is made from Soya Beans, and metaphorically, I am where I am born. Hence, my safe haven is places where I find most joy and comfort as a child.
I used a Analogous Warm Colors for this composition where Green, Red, Orange and Yellow are present.
Outcome: Recuperation.
In this composition, the Elephant is seen in the ground with a Soya Bean and a rice grain on it’s side. This is a representation of me talking my problems out with my loved ones, and in this scenario, the Soya Bean is a representation of my family and friends (What made me ‘Me’.) and Rice is also the basic element which makes my comfort food: Carbohydrates. My elephant’s texture is Tau Huay again as I wanted to show that in front of my loved ones, I am allowed to breakdown and show my weak and fragile side 🙂 The Farmer Boots, Watering Can and Sunlight are what will help me grow up as a Soya Bean to be a stronger and happier person…I mean tofu.
I used Analogous Warm Colors and Earth tones for this composition.
4)Dystopia 2

Me: Me when I am Happy
Setting: Whirlpool of negativity
I depicted this composition by a hand grabbing the Elephant and attempting to throw her in the black hole made by the black and white whirlpool.
My highs and lows are rather unpredictable. I get triggered by comments and actions really easily as I am hypersensitive- *sighs* I am a Scorpio…excuses – and in an instant I get so caught up in chains of thoughts or reasons, I enter my abyss of fear and swirling thoughts, which eventually lead me to a state of melancholy.
Used Monochrome Harmony for this composition.
Outcome: Abyss of fear and melancholy
In my state of fear and melancholy, I am consumed by my own thoughts, things people say and self-loathe. I’ll think about past events and I get really scared of my consuming thoughts which swirls around me like vultures waiting to feed on my corpse.
Flying eyeballs with mouth-Conscious of things people say and the way they look at me.
Lizards with Math equations on them – Constant reminder of greatest fear in Math. I hate lizards.
Frankenstein Snowman – Things people compare parts of my body to.
Used Monochrome Harmony and Split Complementary ( Yellow rays from Window)
The texture of my elephant from a tough Tao Pok to Tau Gua to a watery fragile Tao Huay is evident here.
Artist References
A lot of my inspirations come from the cartoons I binged watched as a kid and the cartoons I watch now with my younger cousin on cable TV as a form of bonding session!
Best thing about being an Art student is that I can get away with watching cartoons for research purpose MUAHAHA.
I pay quite a lot of attention to the details in the animations which I drew my inspirations from:
Fairly Odd Parents
I really liked how they used color of the background has similar tones and roughly from the same hue. And the main characters are usually much more saturated and has brighter hues to draw our attention to them. The juxtaposition of the one-hue background to the more vibrant and colorful main characters really gives the main characters that POP of color.
The AMAZING WORLD OF GUMBALL
&
PICKLE AND PEANUT


My inspiration for Anthropomorphism comes from these 2 cartoons.
I liked how in The Amazing World of Gumball, the character’s personality are related for the medium they are made from. For instance, Teri (the paper bear beside Tina the T-rex) is made out of paper, she is very fragile, and physically weak. It is revealed that if Teri stands in the light, you can see “inside of her.”
And in Pickle and Peanut , I like how the main characters are the only ones made from ‘Real Objects’ whereas the rests are drawings.
Problems Faced
Use of colors
The colors aspect was bugging me quite a bit. The placement of colors on certain areas of my compositions and the saturation, tone and the Hex color code made it hard for me to decide as there were so many colors to choose from. But then again I was intrigued by the types of color harmony I can use to further illustrate and emphasize on my intention and emotion in each composition.
Ideas
I was rather concerned regarding using Color Harmony as the main key point as my head was really congested with ideas on how to pull off the photo montages, methodology, ideology and which elephant to use for which setting etc.
Images
Finding the right high resolution images for my photo montages and photo manipulation was rather difficult. For instance, it was not easy to find a high resolution image for tofu. 🙁
Comments and Feedback
Lovely Classmates’:
 THANK YOU GUYS FOR THE LOVELY COMMENTS <3
Miss Joy’s ( I can’t remember word for word but I got the gist):
– Can tell that I tried to apply my Principles of design such as implied lines and use of perspective.
– Joy suggested that for my ‘Societal Expectation’ composition, doing a sketch of a bunny hopping off a cliff to show the act of learning to fly would be better as compared to writing the text ‘Flying Lesson 101’ as the texts are rather jarring when seen as a whole during presentation of my 12 compositions, as it was the only composition with text on it. 🙂
Have pretty mixed feelings when lesson ended today 🙁 I had lots of fun working on the assignments, and odd to say but critique day is my favorite part of the assignment XD, but I cant help but feel a tinge of sadness when in sem 2 our class may split up and we may not get Joy as our instructor again even if we try to grab our timetable slots on STARwarS… sigh. But regardless I am very glad to get to know my classmates more as individuals through 2D projects ;’) It is my utmost pleasure guys~ Thank you for the memories <3

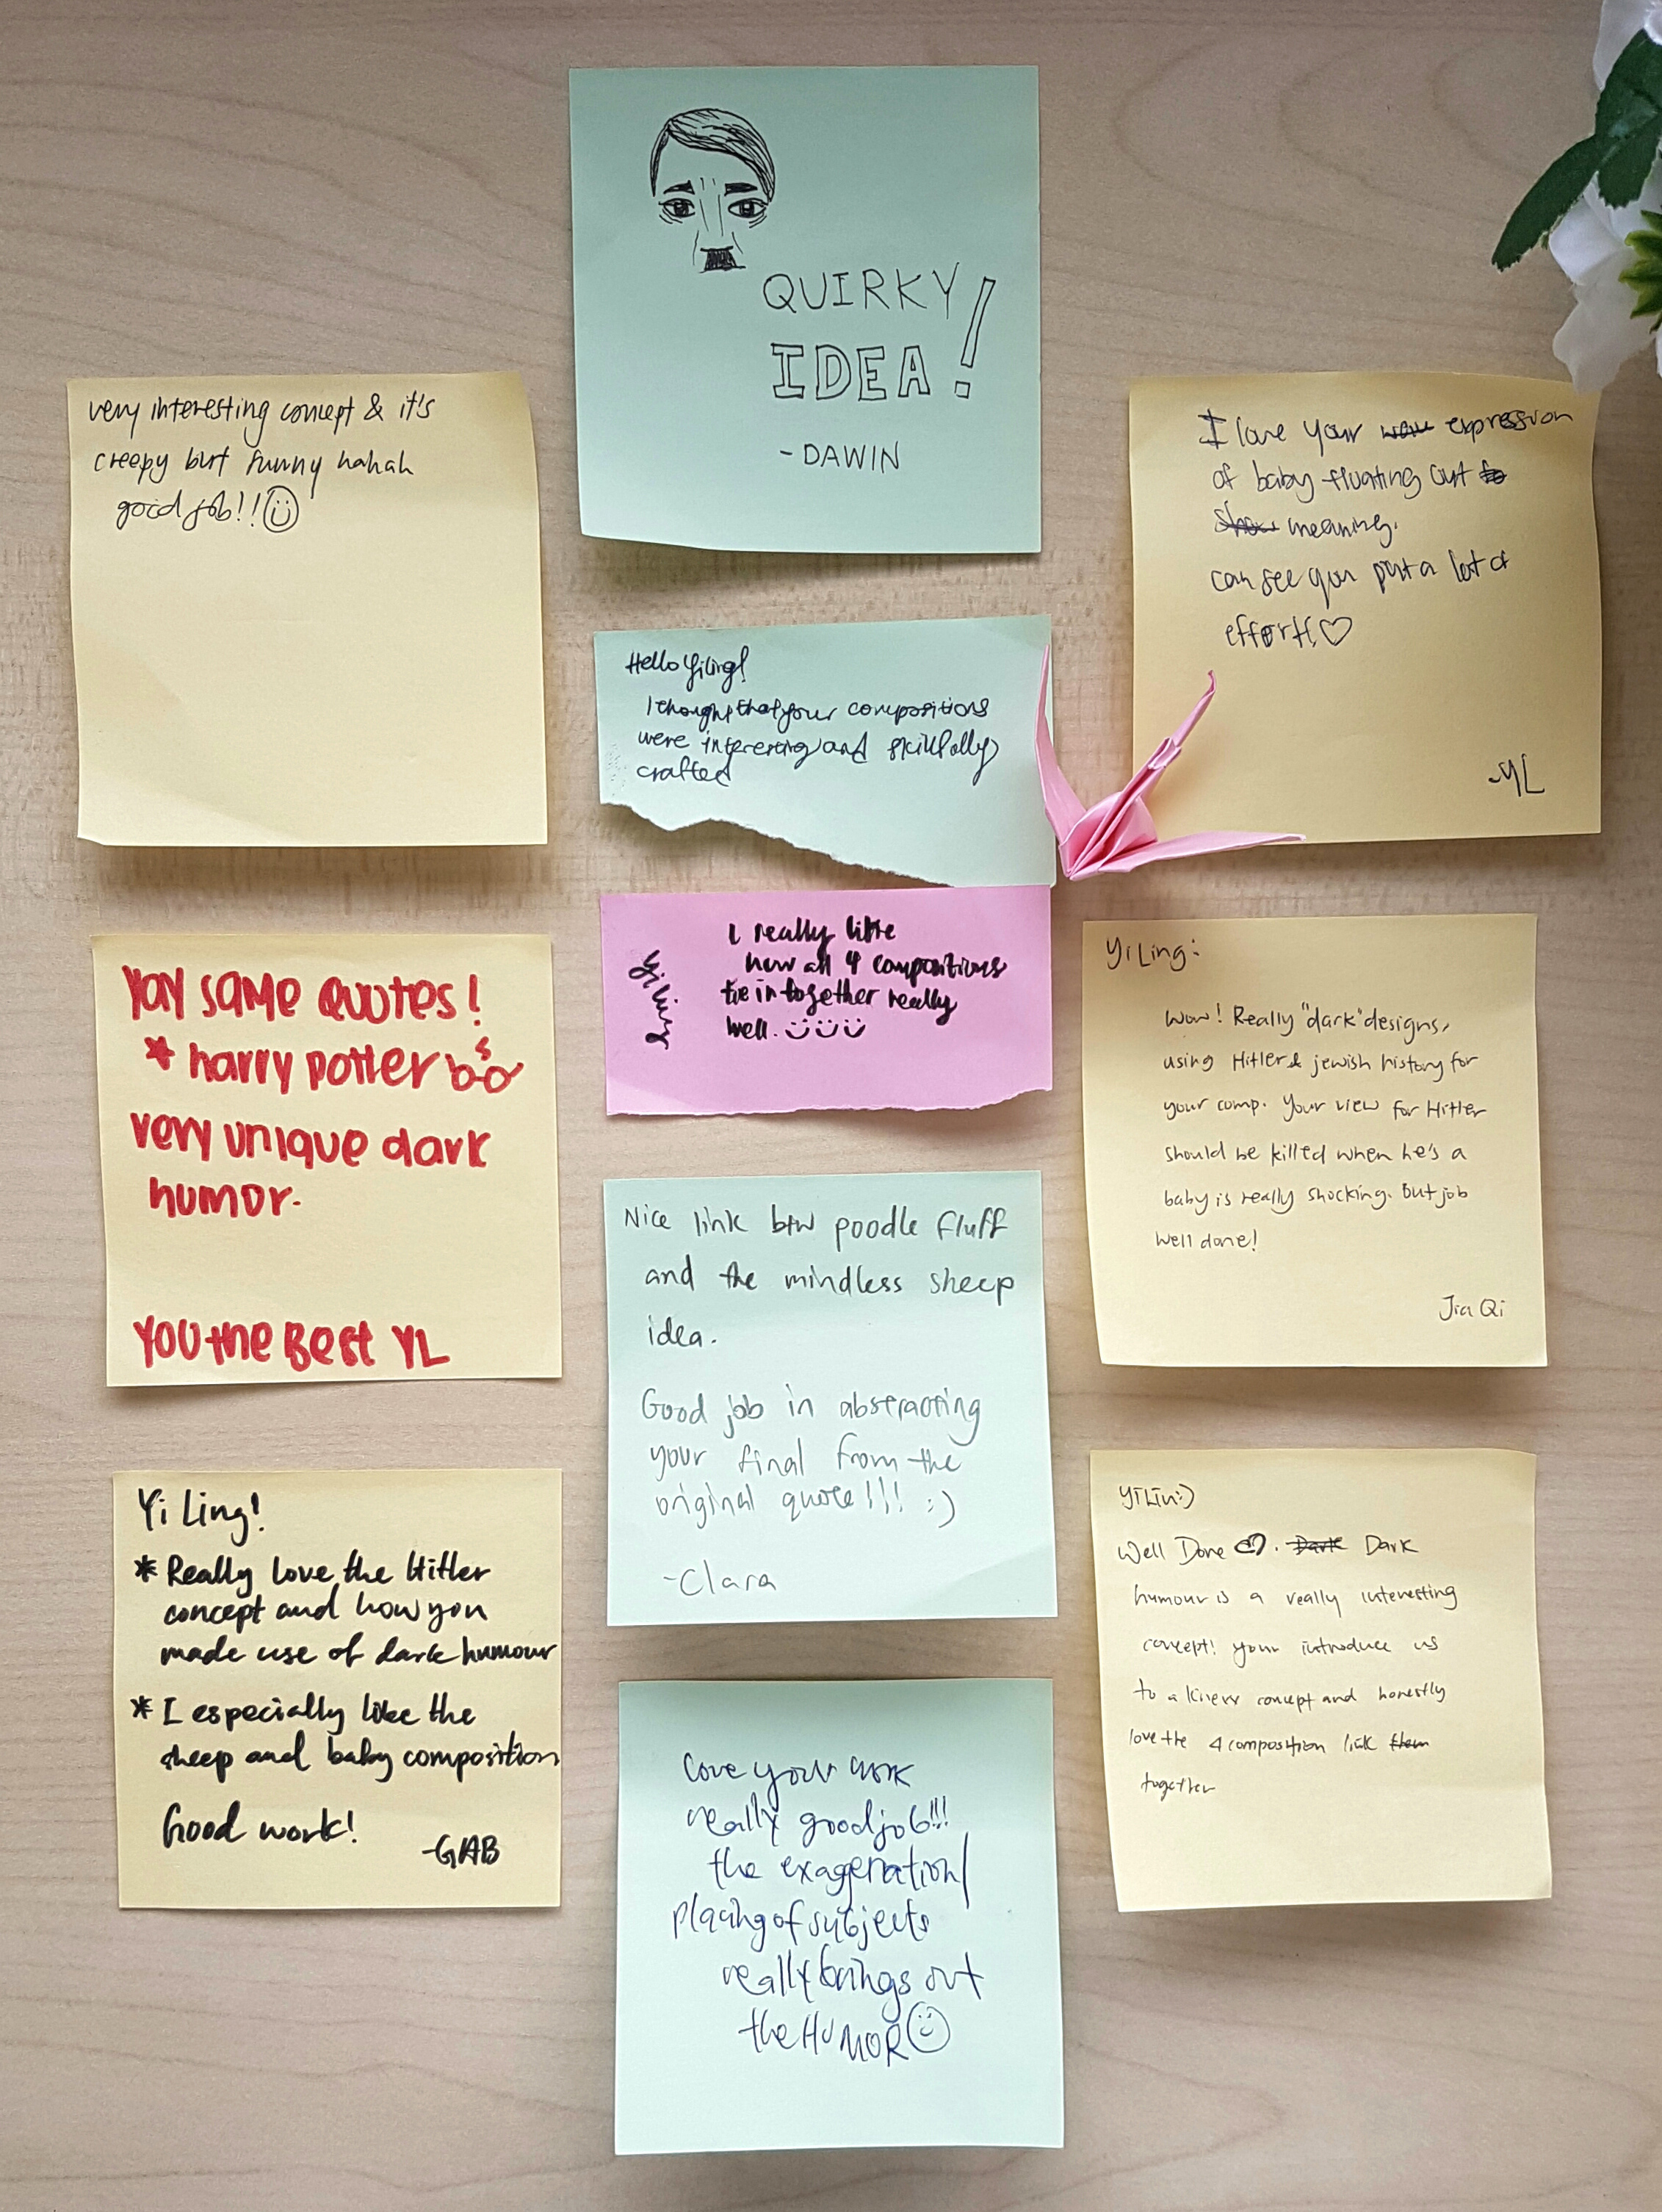
 To be honest, my favorite part for presentation day is getting the post-it notes from my classmates, and obtaining feedback. For some unknown reason it makes me feel very excited! ^0^
 <<<Original digital design after bitmap


 )
)


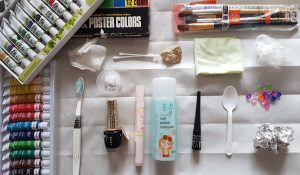
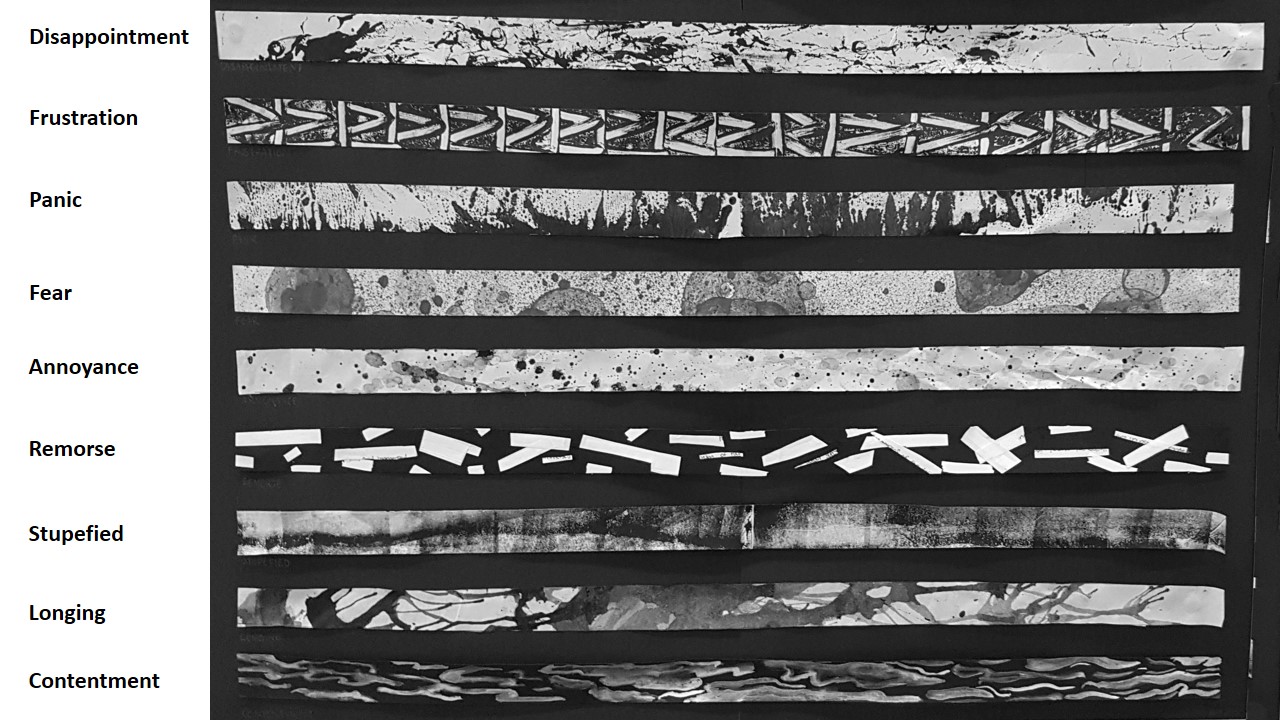
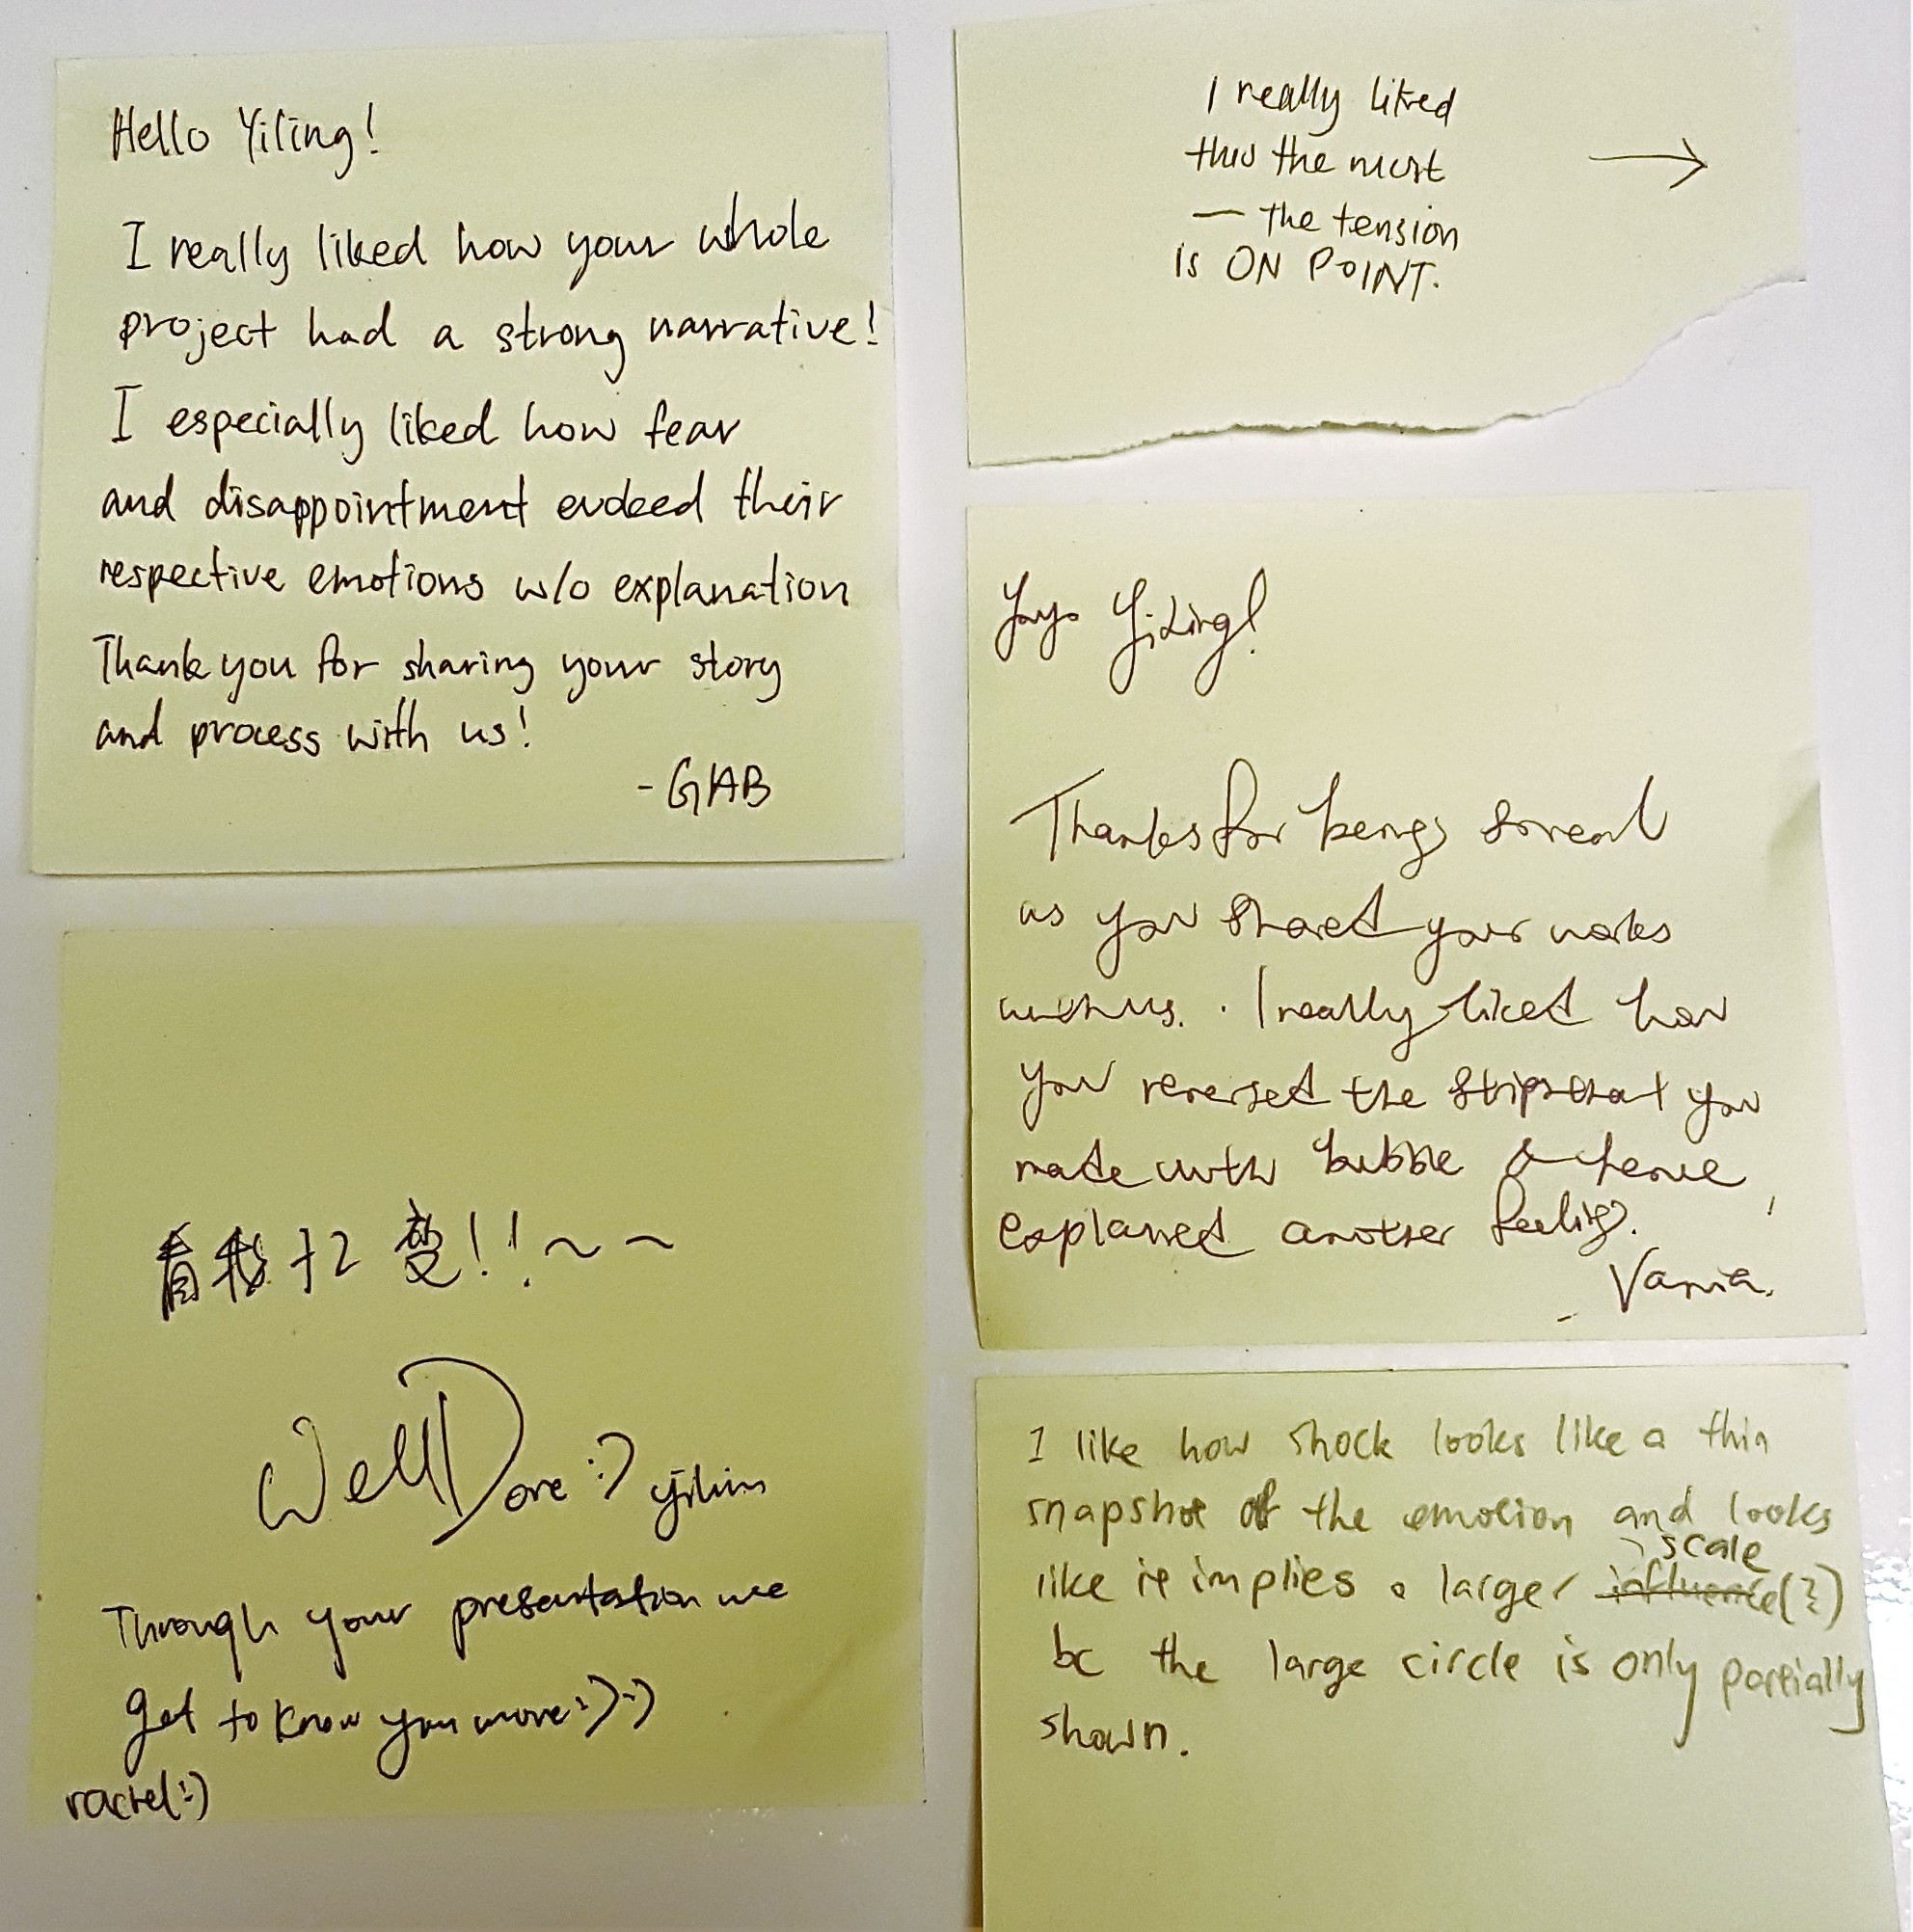

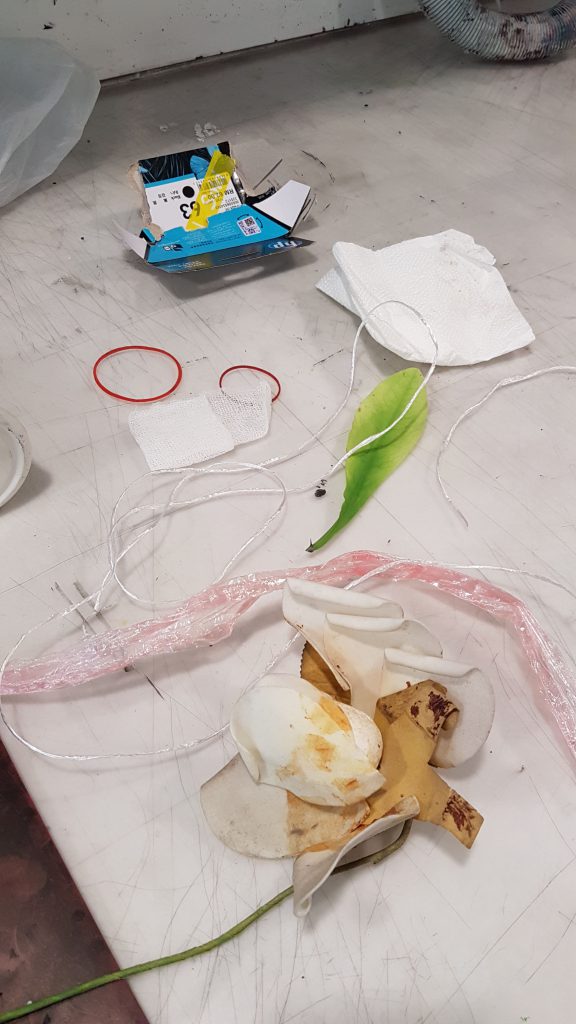
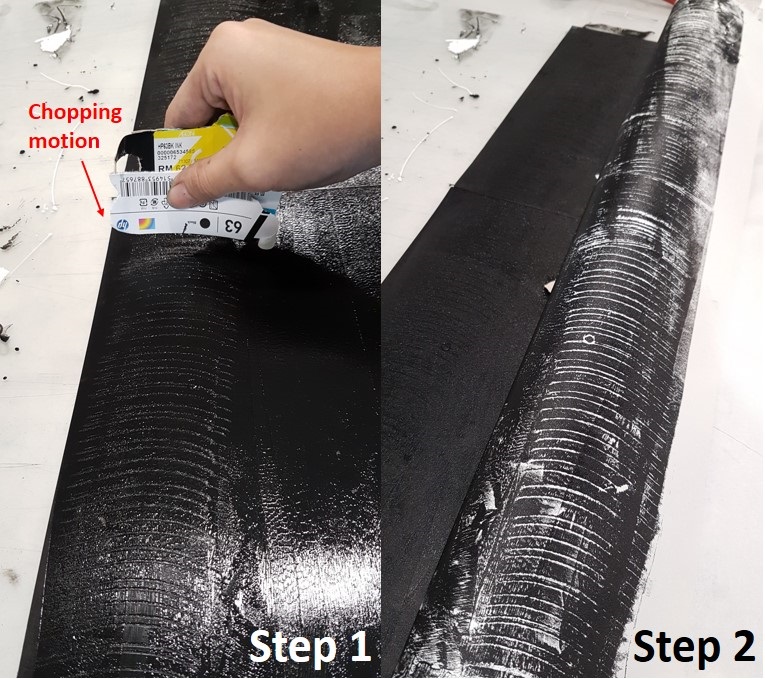
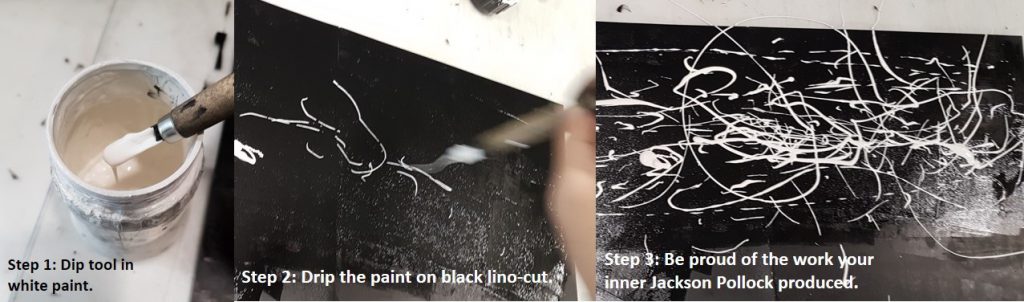
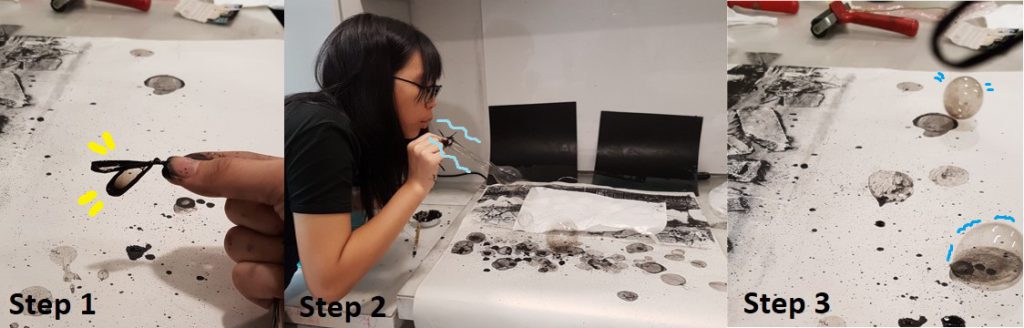
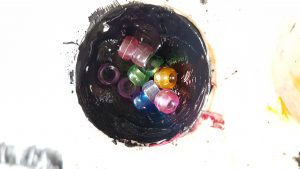
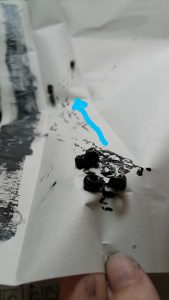
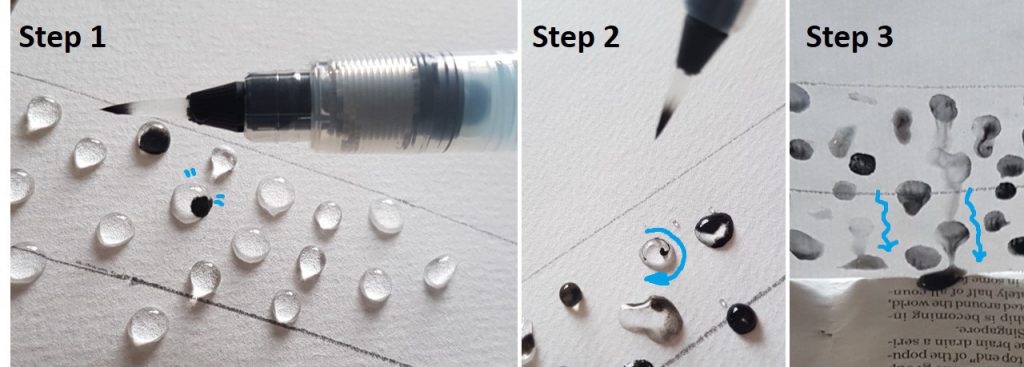
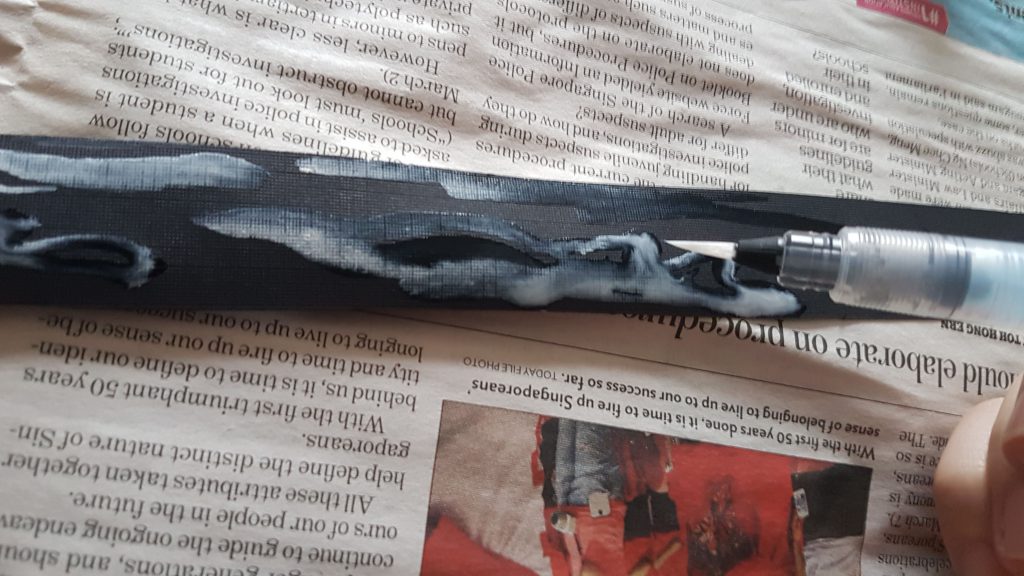
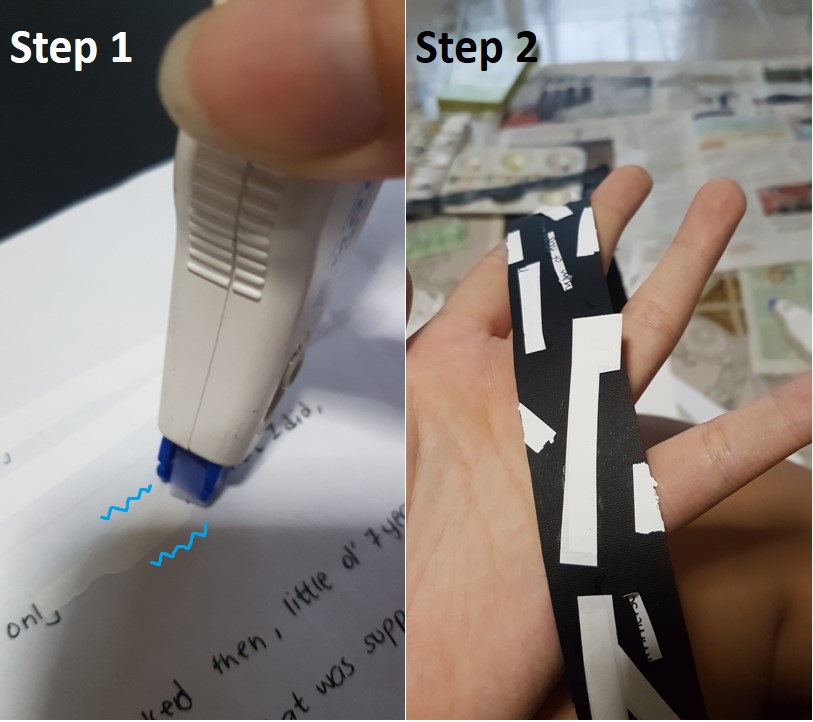
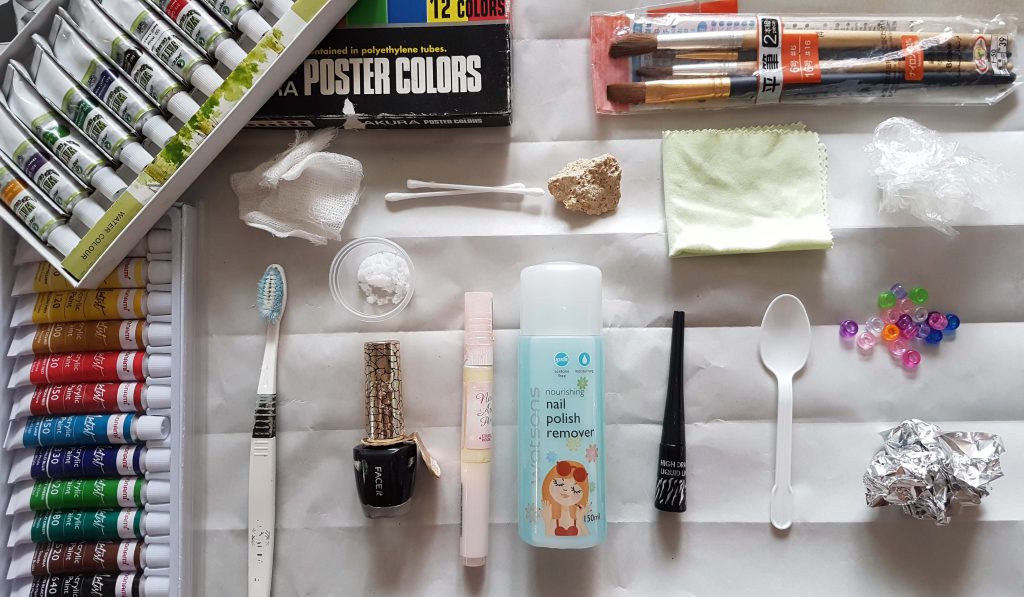 Image 1:
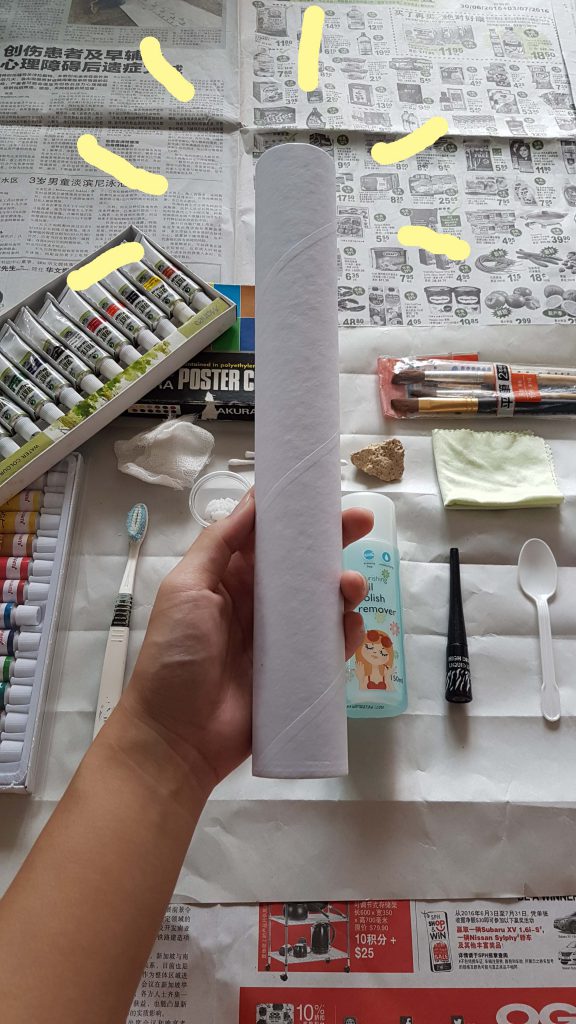 Image 2: Because I didn’t have a roller like the mono-printing post previously, I used a kitchen towel cardboard tube as a… low-budget roller. Hope that it works just as well.
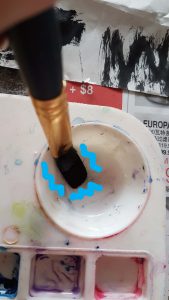 << Image 3: I tried mixing watercolor paint with nail polish remover and to my surprise and excitement, the 2 mediums are not completely miscible! Black paint coagulations were found at the bottom of the palette.
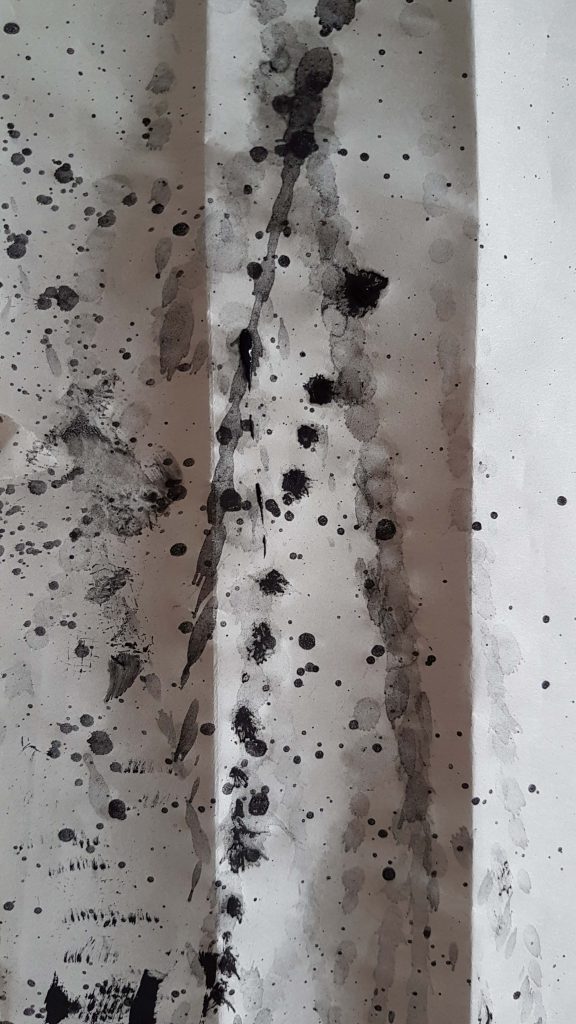 Image 4: After vigorously mixing the mediums in image 3, I swung my wet paintbrush onto the newsprint paper, creating far-ranged splatter patterns.
 Image 5: I cut open a tube of white nail varnish and poured it over the newsprint, and then adding a few drops of black nail varnish onto the white.
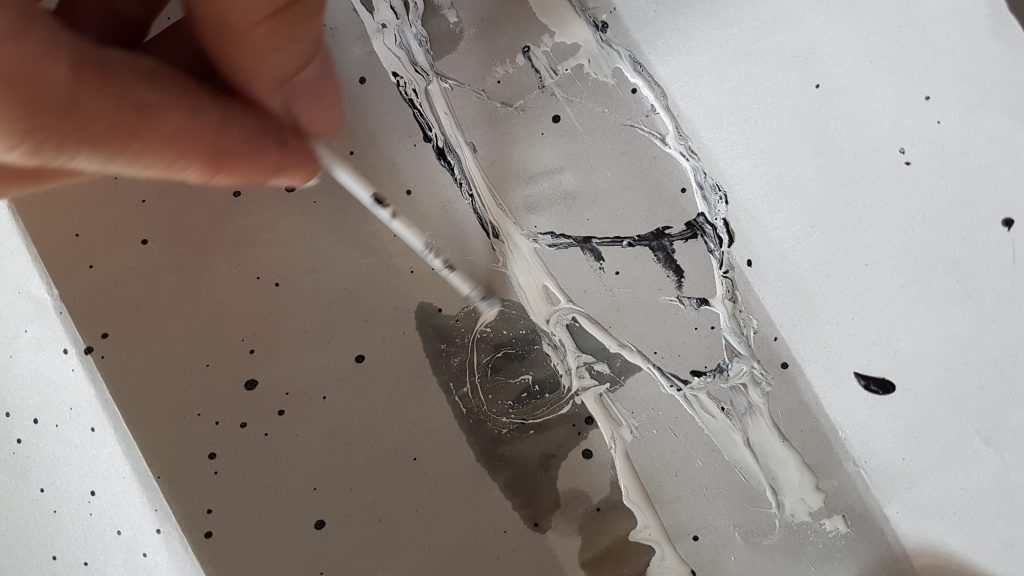 Image 6: I then used the plastic teaspoon to pour nail polish remover over the white nail varnish, and then using a Q-tip (with the cotton portion cut off) to swirl the mixture; creating another pattern that is a result of 2 immiscible mediums!
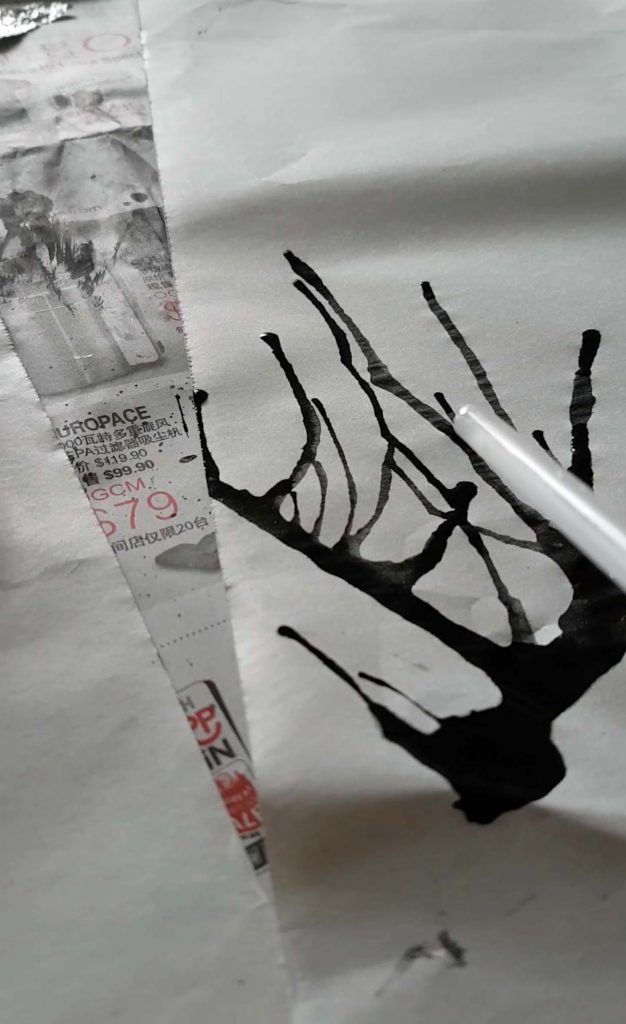 Image 7: Blowing air out from a straw onto an A2 newsprint with fluid black watercolor paint.
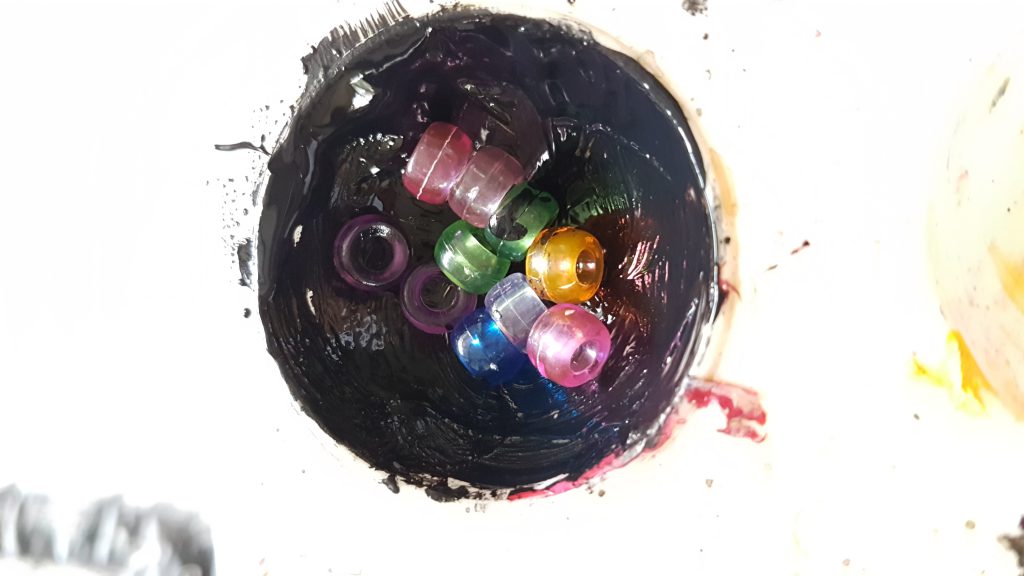 Image 8: I didn’t have marbles so I used beads and coated them in dense poster color paint.
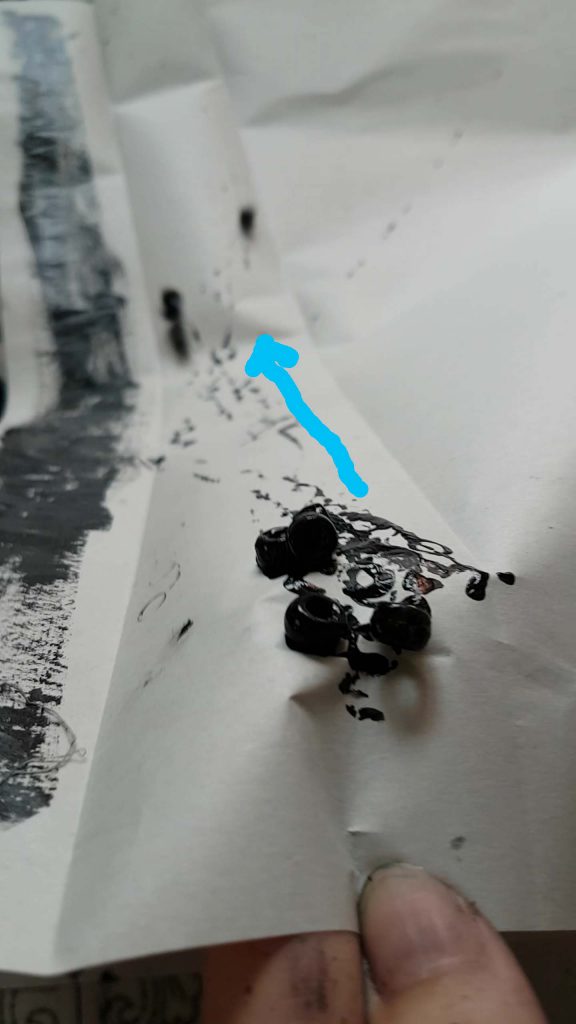 Image 9: I tilted the paper in an angle and allowed the beads to roll downwards, creating a linear rolling pattern that goes in different direction.
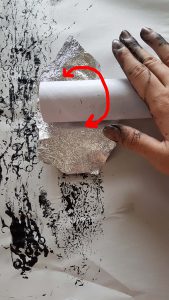
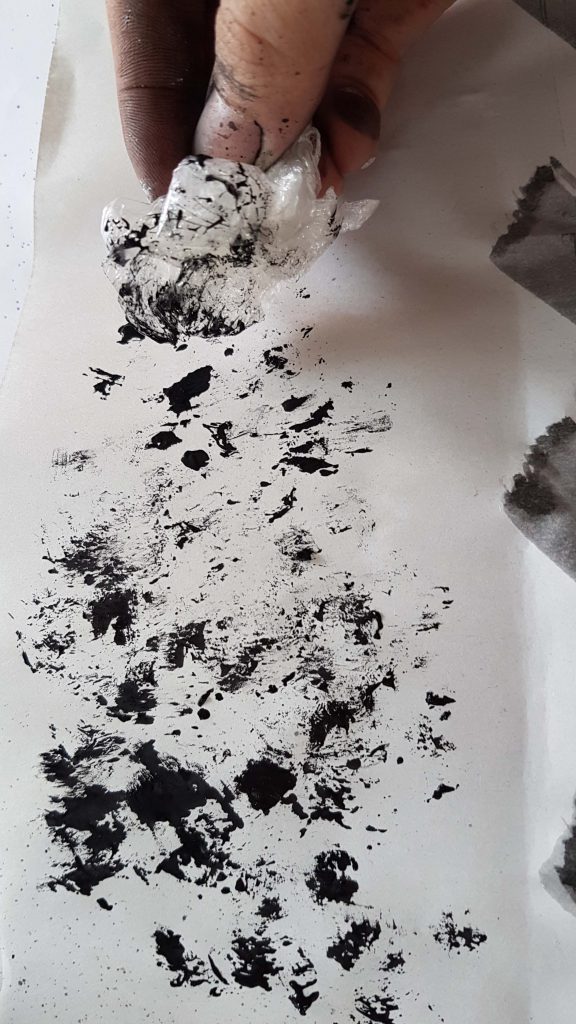 Image 12: I also used a scrunched up cling wrap dipped in paint to dab it all over my newsprint. Creating a blotchy and detailed patterns as the pain began to dry a little.
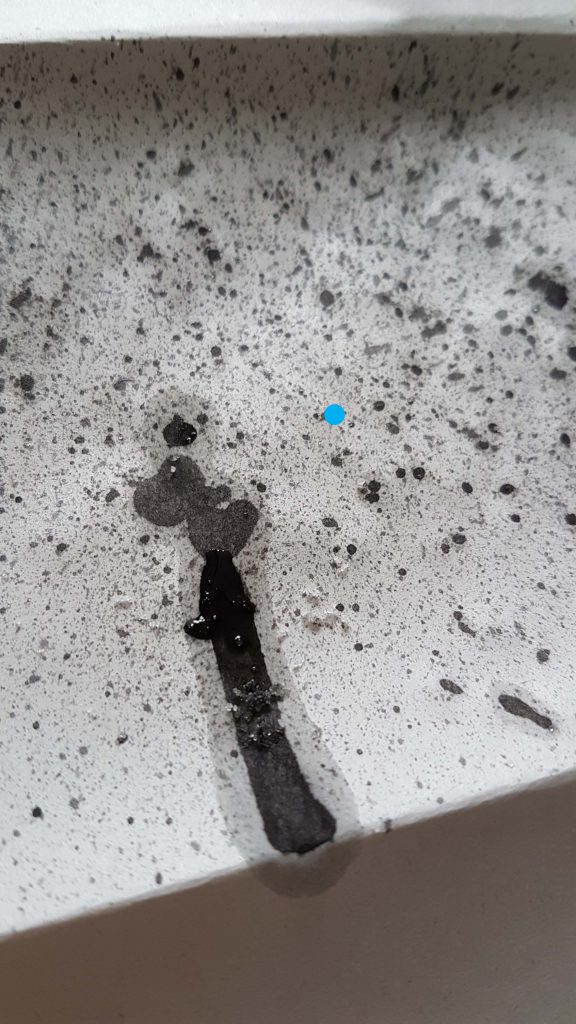 Image 13: Incorporating a tooth brush, I created tiny splattered patterns . The blotchy watercolor paint drip was created by accident. So I decided to add some salt crystals onto it, hoping to achieve a water color to gather the water pigments. But the experimentation has failed as the paper absorbed the water color more efficiently than the salt could.
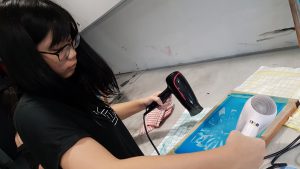
 Image 1: Spreading the mono-printing ink onto the lino-cut with the roller.
 Image 2: Placing my mark making objects onto the wet lino-cut from Image 1.
 Image 3: Placing a piece of A2 newsprint paper on the lino-cut from Image 2.
 Image 4: Covering my newsprint paper with a stack of A2 newsprint, which acts as a ‘Blanket’ to protect the roller machine from getting stained.
 Image 5: Begin turning the wheel which moves the platform below it, rolling the A2 newsprint over the lino-cut.
 Image 7: After gently removing the mark making tools, place another clean A2 Newsprint on top of the lino-cut and repeat the step in Image 6 to achieve a detailed print of the mark making tools!
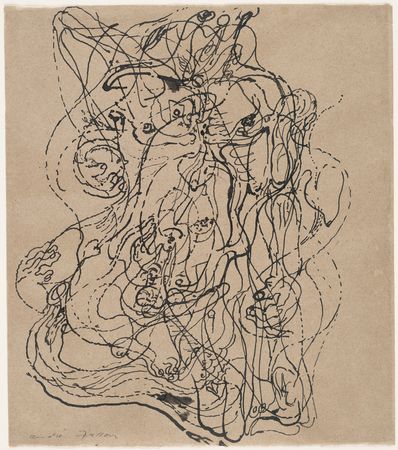


 Mark making can be loose and gestural, or structured and controlled. Zen-like doodles, expressive and emotive paint throwing techniques and simply rubbing a stick/ comb/ toilet brush (??) through some acrylic paint are just some of the many creative ways mark making can be done!
 Come on now brain, time for my creative juices to start flowing through my Factory of Creations~


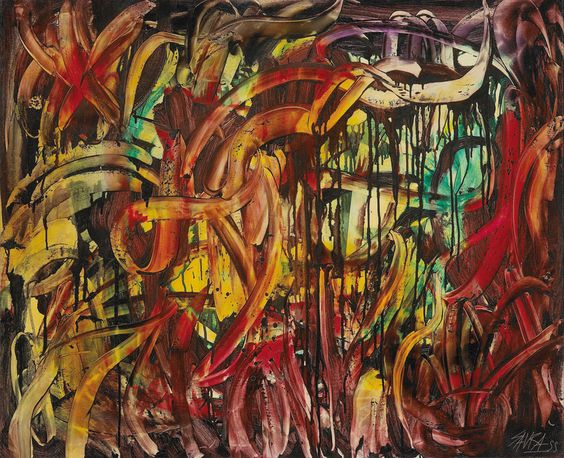
 Pollock also incorporates the use of different unconventional mediums. Instead of using the traditional paint brush, he would add depth to his images using knives, trowels, sticks and even his own foot prints as part of the artwork, as he works while standing IN his monumental artwork. In that it had a direct relation to the artist’s emotions, expression, and mood, and showcased their feeling behind the pieces they designed. Thus, achieving different patterns and forms in midst of his expressive mark making.