After that 15 min brain storming activity Ms Lisa had us try during class I felt was really useful, not only do i get to look around and have greater inspiration for ideas, i get to move around instead of sitting down!

From that walk, i generated this idea where i can do a fictional event like a Couch Potato Support group! A Couch Potato Party where we congratulating failure and have a very Tongue in Cheek approach to it! 😀

According to Cambridge dictionary, ‘Couch Potato’ describes a person who watches a lot of TV and does not have an active life.

The reason as to why I chose this topic is because I am pretty sure everyone of us has this ‘Couch Potato’ moments once… well… twice… OKAY FINE PERHAPS EVERYDAY OF OUR LIVES. AHEM. Okay and so I thought it’ll be fun to celebrate and encourage this unproductive behavior which is highly discouraged, by ENCOURAGING IT through this fictional event.

Instead of using literal metaphors of a couch and a potato, I thought of illustrating the characters for this project through exaggeration and relatability with the audiences.


Style & User Personas

One of the things that I struggled with this assignment was to convey the tone of voice.

My ‘Couch Potato Support Group’ kit is for lazy people who don’t want to get off the couch to CONTINUE being at their hibernative mode.

And to create a loud and packaging design for it to attract buyers seems to be a little contrasting with the theme… Hopefully it turns out well!

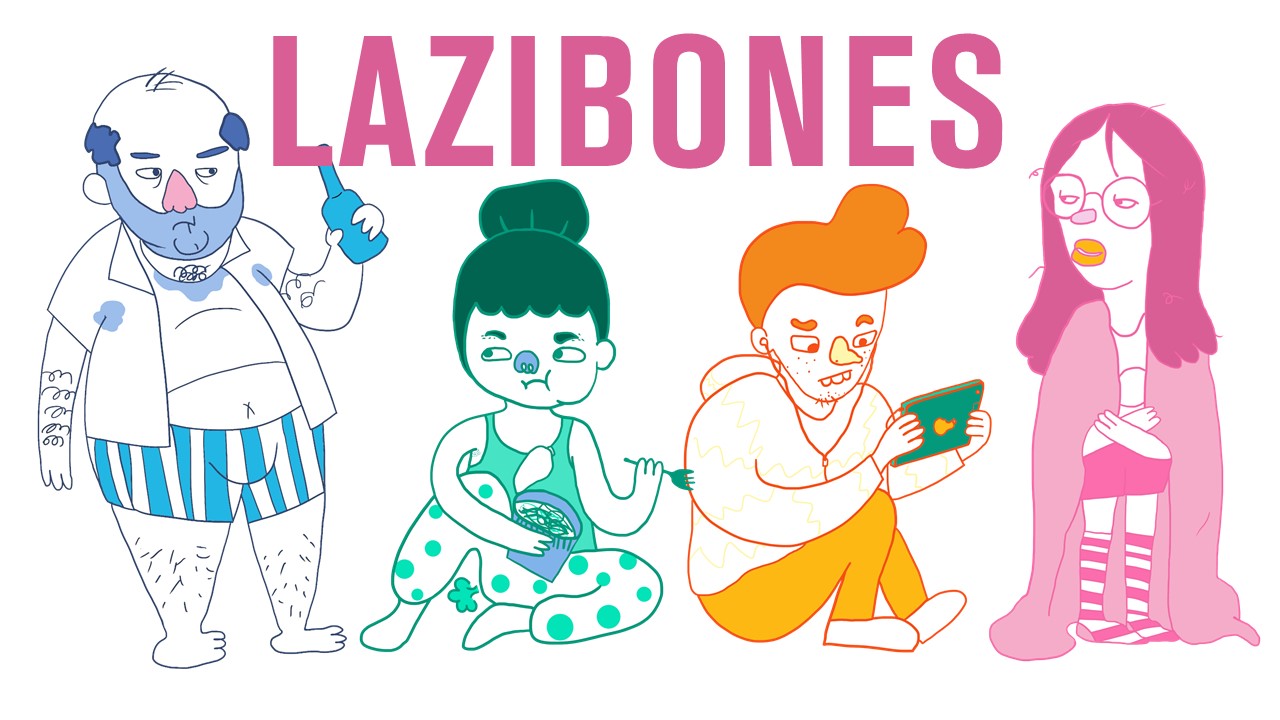
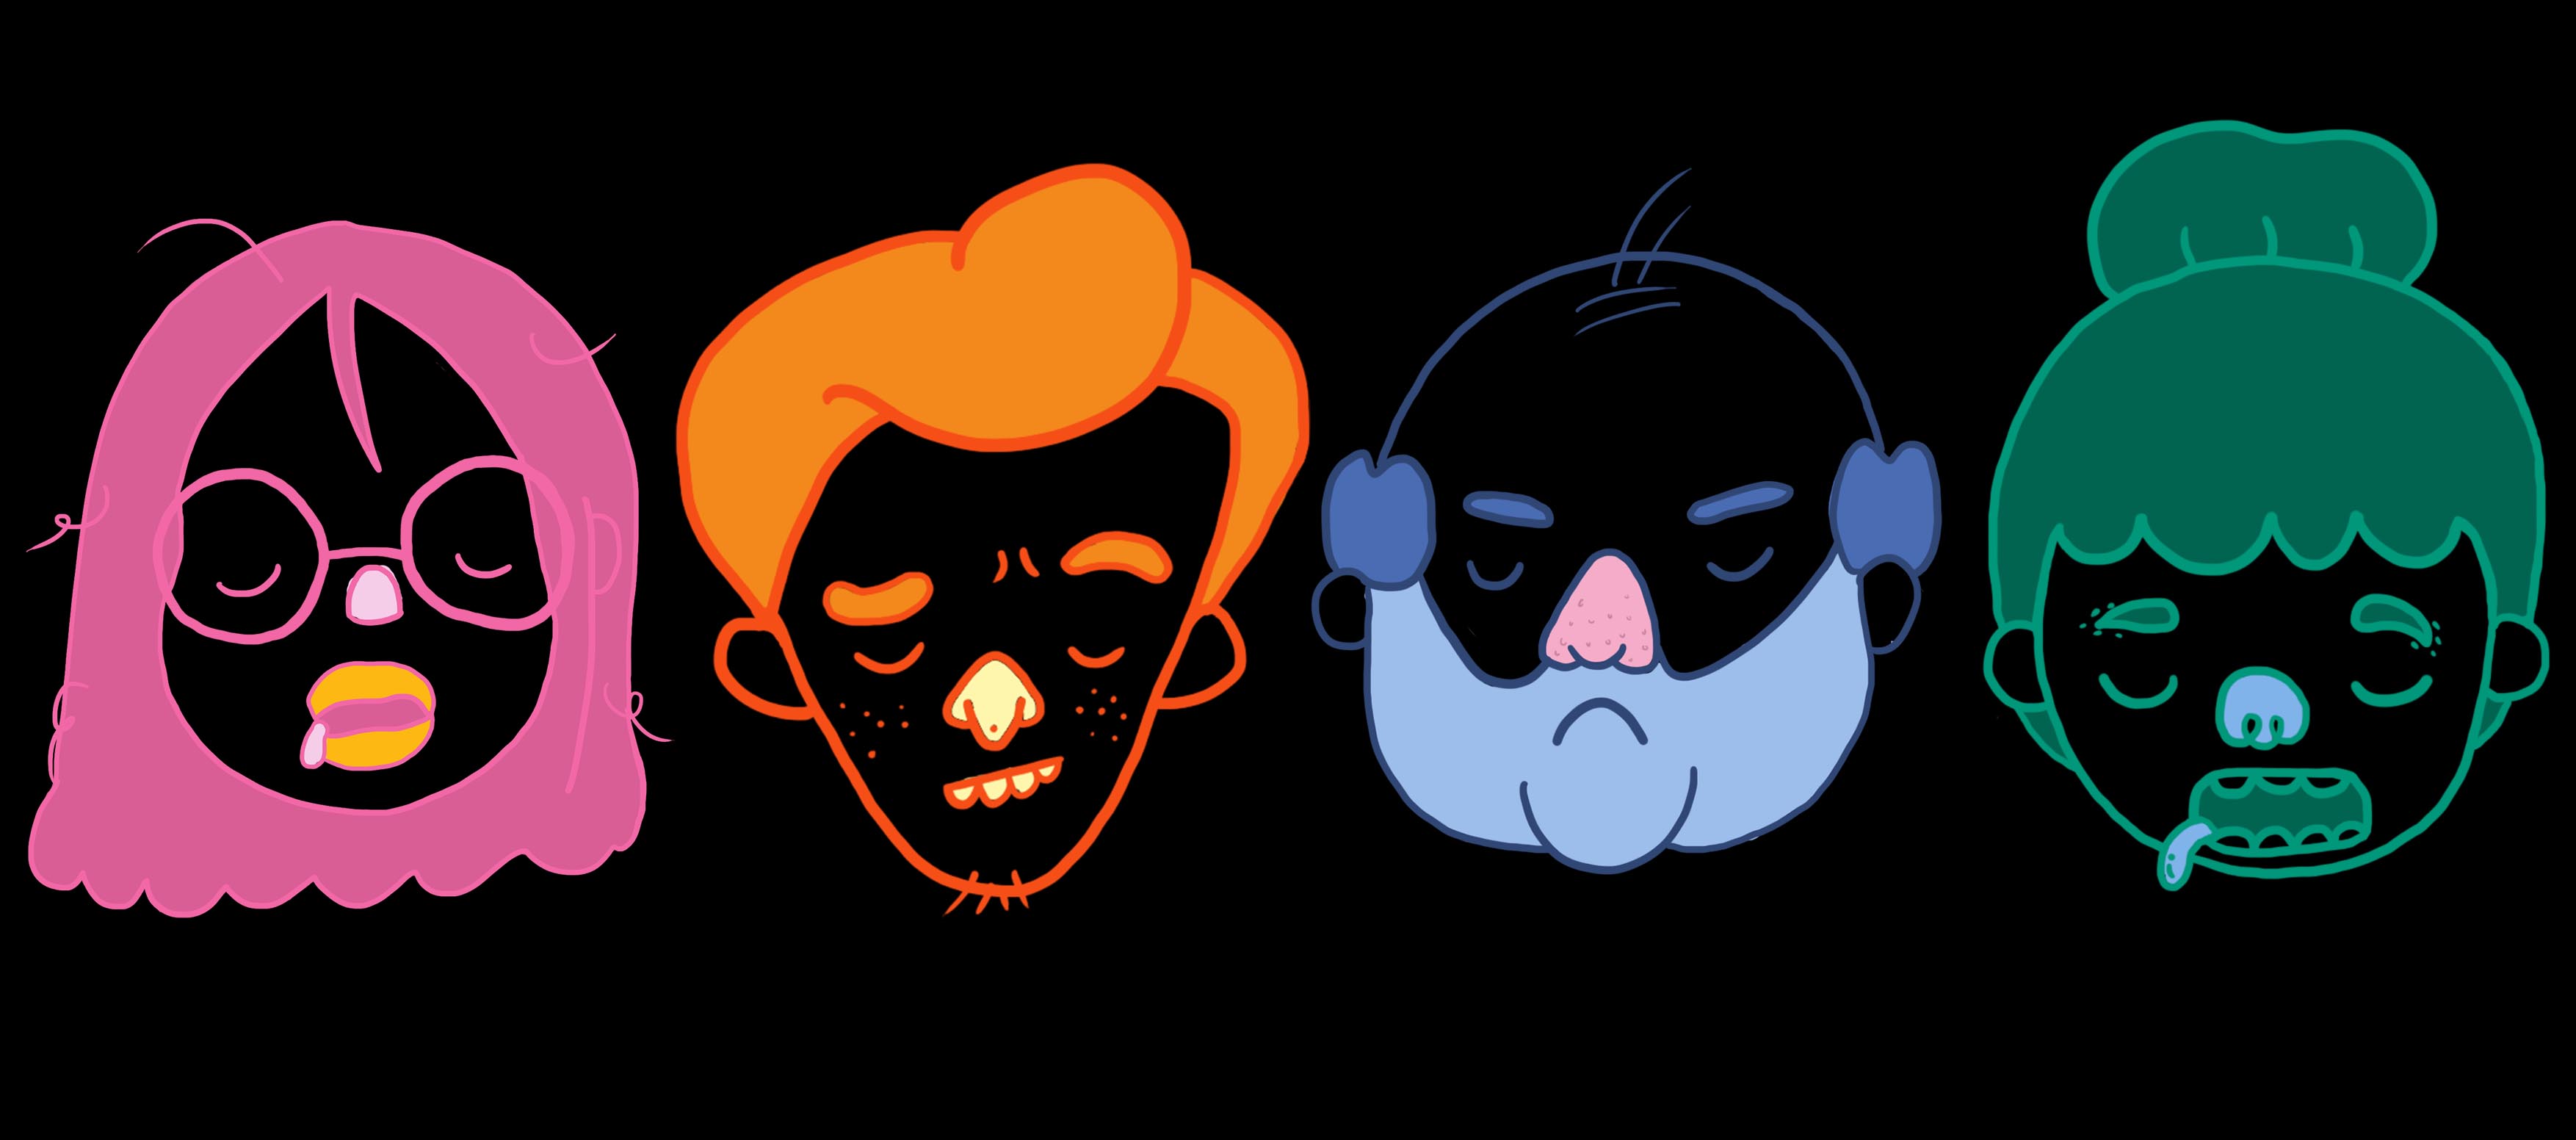
The idea I have is to illustrate 5 characters of varying age groups and gender who are representations of this couch-potato behaviour in everyone.

1st up, we have Bludger Bob

2nd , we have Shortcut Sarah

3rd, we have Loafer Laura

Lastly we have Deadbeat Danny.

The common traits that all of them have are that they are lazy and avoids doing any form of work.

The characters are also the user persona audiences as well.


Methodology

I tried to illustrate my characters using both Adobe Photoshop and Adobe Illustrator to compare first. Learning from my previous assignment 2 incident, I made a sudden switch from 3 weeks worth of Adobe Illustrator progress to work in Adobe Photoshop instead just days before the submission, mainly because working on Illustrator was not going very well for me and I was not willing to give up. Hence, I thought it’ll be a good lesson learnt to try out both software to see which would bring about more convenience and which would bring about the best form of illustration I wanted to achieve.

I sketched them out on paper first, and then I brought it to both software. Afterwards, I decreased the opacity of the image and used it as like a tracing paper for me to use my Wacom pen to draw over.

The first character I illustrated was Bludger Bob.

As you can see, the way it was illustrated varies a lot on both software.

Adobe Illustrator

(PROS)

I liked how clean the lines are and that I can transform the paths or toggle each vector points to my liking

I can resize the character without having to worry it will be pixelated or not.

(CONS)

Colouring was not easy as ‘Live Paint’ only worked for closed paths and using a brush tool to colour behind the lines resulted in very clean bulbous shapes that did not fit within the spaces I wanted to.

I did not have very good control over the outlines when I drew it out with a Wacom pen as they ‘round off’ to a certain shape I did not ask for. And the paths are not closed which I have to manually find the paths and close it. Which was much of an inconvenience.

I don’t like how Bludger Bob looks like here, he looks like a melted plastic blob..

Adobe Photoshop

(PROS)

It is easier to colour because there is more control over the paint bucket and brush.

Line work has more character.

Layers made it easier to try different kinds of colours

(CONS)

I cannot change the outline color once I fill in the colors via paint because they are all in 1 layer. Such that if I have to erased and make amendments to the outline after coloring it in, I cannot.

One of the issues I faced was that when I filled the colours in using bucket tool, there are spaces left uncoloured or that the lines has this white outline, which i resolved by painting it over in a separate layer below


Eventually I chose Photoshop to illustrate my characters and these are the 4 i have created.


  • These 4 are the main characters that i have illustrated based off the user persona i have created above!
  • Their colors are based off the mood board colors I have chosen as they seem bright and fun on packagings!
  • I varied the tone of each color for each character because it is easier to work on, and it gives the subject matter more character and personality.
  • Each character has a little bit of color from the following one so that each character is not that isolated, but cohesive with the rest as well. For instance, the orange on the Loafer Laura (Pink Girl) brings our attention to Deadbeat Danny (Orange boy) and so on 🙂

Packaging

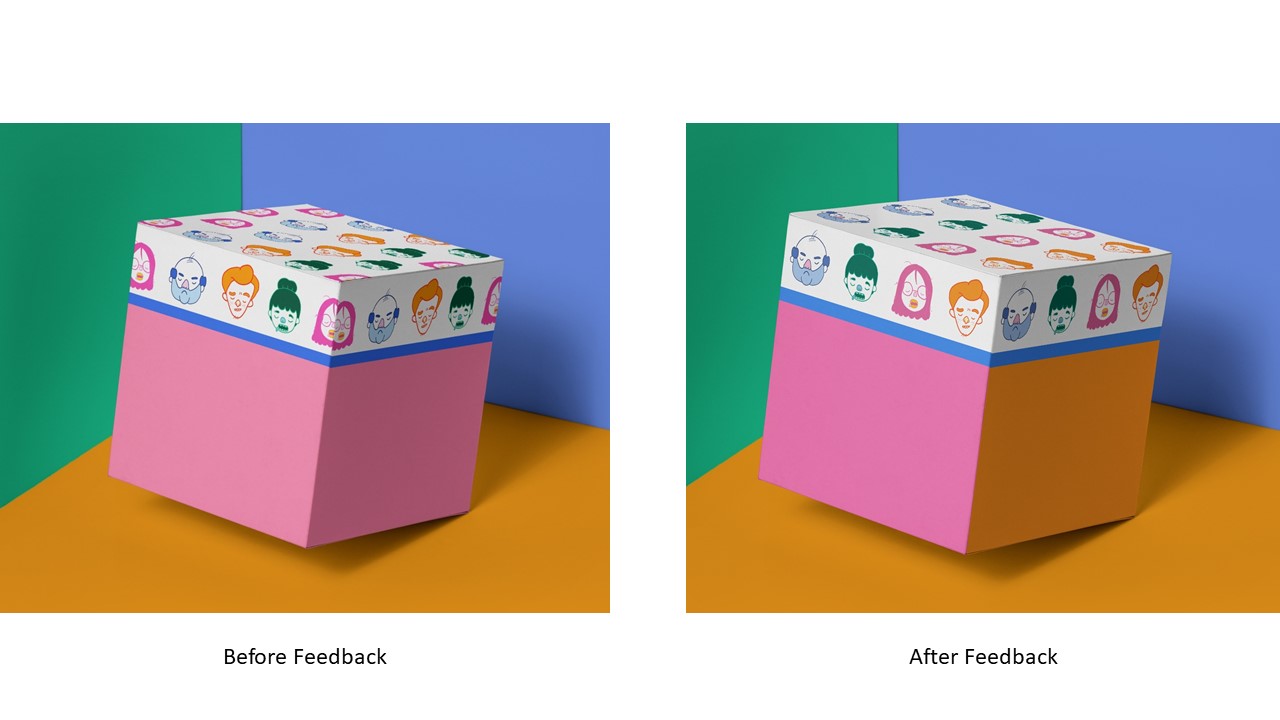
I did a mock up of the box kit design and a welcome card just to tie the whole Lazibones Kit together.

I came up with 4 different sleeping eye mask designs for Loafer Laura who loves to sleep.

The pieces with names are customizable to the customer’s request! Making it a very personalized gift for the ones who need to catch some shut-eye

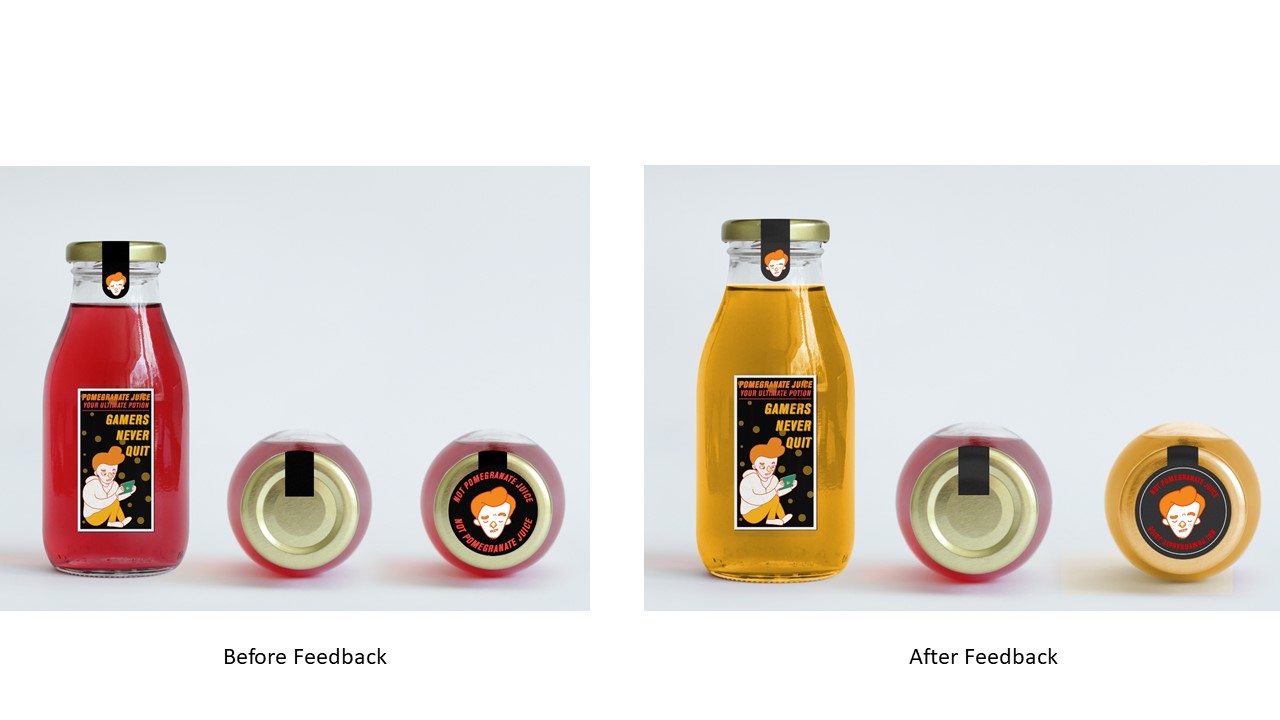
Idea for this drink comes from fictional characters in games where they take potions to regain their ‘health’.

Deadbeat Daniel who is addicted to games would regain his ‘health’ through this drink and conveniently pee back into this bottle when he is done because the game he is playing cannot end and the toilet is too far.

Oh and don’t forget to place the sticker on the lid to remind himself that his newly filled bottle is no longer pomegranate juice! 🙂

And for Bludger Bob who sits on his couch the moment he reaches home from work, fret not as he can wear these socks back home from work and to work the next day without changing!

These socks keep feet from sweating in Bob’s work shoes and keeps his feet warm at home while watching TV!

Socks are available in different designs as well in the case if Loafer Laura or Deadbeat Danny wants to wear them as well!


Critique Session + Feedback and Edits

After the feedback, it was suggested that I make amendments to the box design such that the characters’ face don’t get cut off at the edges, and change the colour on the sides of the box.

And also, for the drink and pee bottle for Deadbeat Daniel, it would have been more convincing to change the colour of the liquid to yellow to be more convincing. 😉

The middle drink is still left red to show that Pomegranate juice is still inside unlike the bottle on the right that is newly filled with pee.


I gave out some stickers I printed for fun and I was very touched to see that my classmates like them :’) It is one of the best feelings in the world when they paste it on their laptops and even their phone <3

Click the link below to the final post for this final assignment!

DV2002: Assessment #3 – Applied Illustration (FINAL + My Reflection)

Lets get on with the process of making the cover editorial illustration!


I drew out my designs on paper first and I tried using transparencies to create individual elements to play around with layers.

And then I scanned my designs in and tried to image trace it, however, because I used pencil, the lines were not very clear which resulted in unjointed lines.

I resulted to vectoring the area, and ‘clipping masked’ the designs I wanted to be in.

I set up the tonal values of the colour schemes to create depth for layering.

This is the progress I had when I vectored the designs, and I used the image on the extreme right for atmospheric perspective reference, and a constant reminder to my absent minded brain that “THE DARKER IT IS THE CLOSER IT IS TO THE FRONT”.

Miss Lisa introduced to me Johnny Duddle’s Gigantausaurus which uses the creation of atmospheric perspective with plants. *Inner voice “THE DARKER IT IS THE CLOSER IT IS TO THE FRONT”.

Johnny Duddle’s Gigantausaurus


UPDATE 23/3/2018

I am about to make a very big risk, and that is to restart this again.

Halfway through the illustration I feel that the progress is very forced and something is amiss.

The vectoring and masking of the patterns did not carry out a raw and crisp feel that I wanted, and using Adobe Illustrator made it harder for me to bring forth the aerial perspective that I wanted to achieve. Layering was very tedious on Adobe Illustrator.

Because looking my composition as a whole and after some analysis and feedback from more people, my illustrations did not make a lot of sense as the huge cathead waterfall was very domineering and evoked a more cat-centraled message than the ‘Empathy- self love’ message that I wanted to evoke.

Hence, I totally discarded my vector progress and outlines that were done in Adobe Illustrator, and restarted an updated design.

I am moving to Photoshop and drawing everything from scratch again. 🙂

This is a more up close view on the new designs I did on Photoshop, the layering done via Photoshop was so much easier than Adobe Illustrator. The art direction as closer to the reference image that I wanted to achieve and I am very pleased with it. 🙂

I replaced the initial cat head with the mountains to create more depth and a more tranquil environment for relaxation in the Terrarium, using the image on the right for reference.

After layering and drawing out the illustrations through my Wacom tablet, i ended up with this!

I decided to have the background to be purple and orange to create a sun-set mood and also to create more contrast against the paler and more earthy colors.

I  then clipping masked the shape of the terrarium onto the illustration.

Trying out different background colours for the varoom magazine for submission!

Magazine mock up look and feel

Magazine mock up look and feel

Magazine mock up look and feel


After presenting the work to the class on submission day, some feed backs were given and i made necessary amendments to the work!

  1. Glass reflection was suggested to be added onto the terrarium to create a more 3D look.
  2. Shadows for the ladder and changing the perspective more will give the ladder more depth
  3. Changing the background color of the magazine to blue will bring about a more relaxed and tranquil feeling.

I found the feedbacks given to be very useful and really aided in bringing out the best in my work! 🙂
Stay tuned for the final post to see the final submission piece for this assignment!

Click the link below to see the FINAL post for Task 2!

https://oss.adm.ntu.edu.sg/yseng001/dv2002-assessment-2-editorial-illustration-final/


This is the first post for DV2002: Illustration for Designers! I hope through this module, I will be able to be more expressive through my illustrations and adventurous in my learning journey! Lets go~


(22 January, Week 2)

We were given a class activity to draw our classmates and it was really fun! I drew my friend Rachel using continuous line drawing as we were given a short time, I figured this method was the fastest and more realistic form of illustration! 🙂

My drawing of my friend, Rachel Ng


(29 January, Week 3)

We also had some practice in class where we learnt how to critiqued effectively as a illustrator and a viewer. It was really interesting to know what we thought of each other’s randomly chosen images!

The image I randomly chose was this :And applying what was taught, this is my Visual Analysis on Image 7:

  • Lines are smooth and clean, as though created using vectors.
    The image is a front view of a bicycle and it is illustrated in its simplest form. The subject matter is vertically symmetrical.
    The negative and positive space is used to make the image of the subject matter. So much so it does not have definitive lines.
  • The color pallet is made from 3 colors: Yellow, White and Black. Yellow being the most striking color draws attention, black creates area of emphasis for this image, drawing attention to information that matters. And white creates a sense of breathing space.
  • Hierarchy of the image has a definitive order and creates visual movement for the eyes to follow based on the scale. The reader’s eyes move from the main subject figure (bike), the title, sub header and body text, and lastly the date.

BRIEF 4: PERSONAL CREATION

Brief 4 PERSONAL CREATION: Creating expressive typography
Summary The final component of the module allows you the freedom to expand on any of the assignments to date. Choose from one of the following briefs. Other ideas of creating your own briefs are also welcomed. All briefs below are flexible but please discuss with instructor for approval.

A. Visual analysis of type anatomy

Select an alphabet and analyse its anatomy in a visually exciting way with at least 20 different typefaces. Compile your visual analysis into a book form.

B. Exploring vernacular type

Expanding on your vernacular type assignment or creating a new idea scratch. Develop an extensive visual collection. This collection should include original imagery and also digital manipulations of the letterform. Compile your outcome into a book form or other tangible formats.

C. Organic type creation

Expanding on your organic type assignment or create a new idea from scratch. Develop an in-depth and innovative method of creating your own organic type. Compile your outcome into a tangible format.

D. Type as pattern

Design a range of patterns using typography and deliver them as creative tangible output. Keep in mind that this should not be a repetition of your assignment but to create an innovative way of looking at type as pattern.

E. Type as image

Using various letterforms, create a series of imagery. Conceptualize a theme to tie all your imagery together and present them in a tangible format. Keep in mind that this is not a repetition of your assignment but an opportunity to create innovative ways of creating images from typography.

F. Type as narrative

Select a poem or a song lyric and express them in black and white  using only type over a 32-44 pages book format.

G. Open brief

Think about which of the assignment you enjoyed most and how you can further expand on the making of it. Please discuss for approval.

Tips Employ typographical skills and knowledge gained over the last couple of weeks for the project. Be playful, have fun and justify your decisions!
What you
must deliver
for this assignment
  • You are free to decide on the final outcome of your creation but ideally no smaller than a dimension of 18cm by 18cm.
  • A process documentation link on OSS or PDF process
Grading criteria
  • Creativity of concept
  • Presence of typography appreciation (any form/method)
  • Depth of methodology
  • Aesthetics and craftsmanship
  • Due diligence of experimentation
Due date: Week 14

I am pretty keen to choose ‘E. Type as image’ as the choice of my expansion.


Documentation Journey for Assignment 4

16th October 2017 (Week 9/Week 14)
I would like to use alphabets of a particular typeface to make portraits of people. I was scrolling through my Pinterest feeds and saw many of these hand drawn portraits.

Looking at individual subject figures, my eyes tend to narrow their head, features into geometric shapes. That made me wonder if typefaces and letters can be used to make portraits.
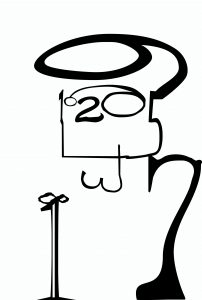
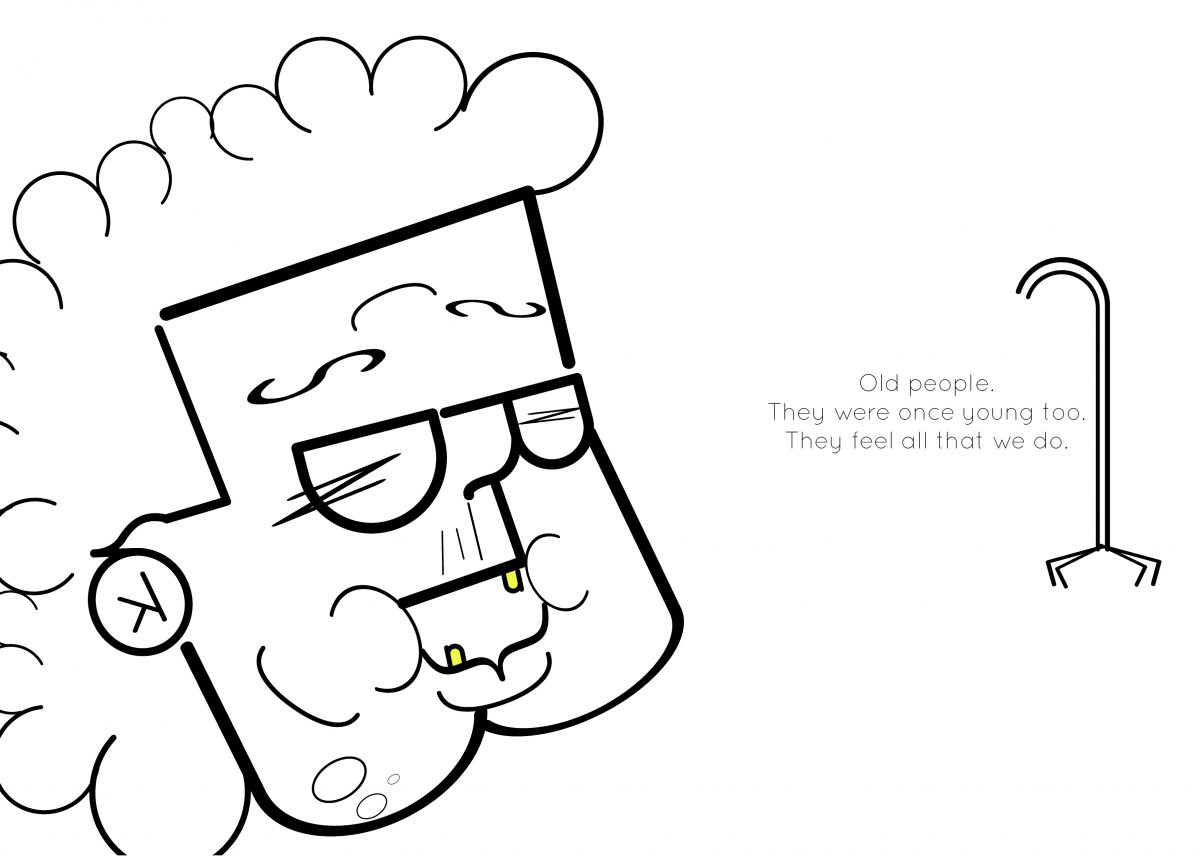
I did up a try-out to see if the idea was feasible. I used the numbers 1 to 10 to create an image of an old man; I manipulated the numbers by playing with the vectors to create certain features, for instance, the foot of 7 to be the foot of the old man, and the curve to be his back.

Hence, I gave my own handwriting a try to create characters and see how it goes. I had the idea to create emotions of Old People with the letters of the emotion. For instance, the word ‘Happy’ to create a happy elderly.
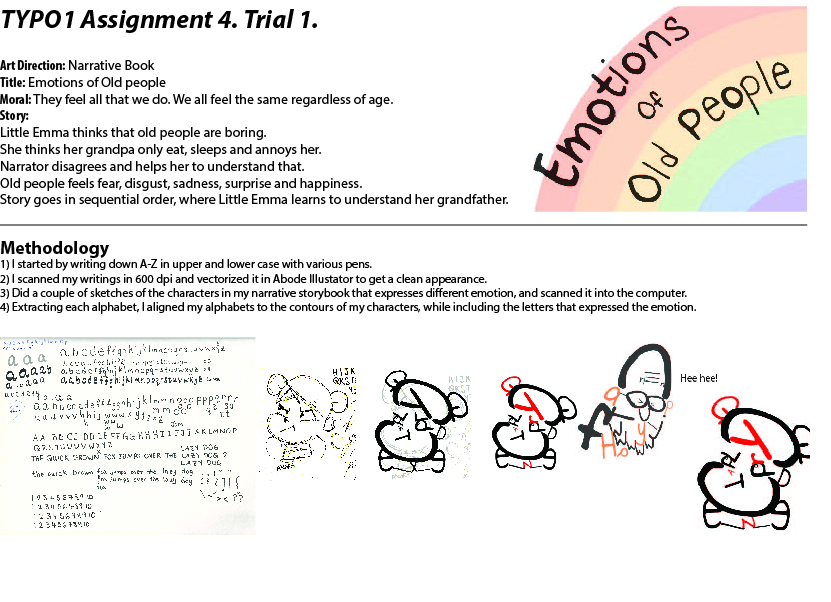
I shall pitch this idea and see how it goes! 🙂


23th October 2017 (Week 10/Week 14)

Pitched previous week’s idea during group consultation and received many feedbacks! One of the feedbacks given was to leave the narratives out as layout and choice of type for story would be more difficult to tackle alongside with my characters.

A lot of reconsideration had to be done and a different approach was suggested if I were to carry on with this idea. Hence, I decided to give this idea another go and think of a backup plan if Type as Image wouldn’t do.

I pitched my idea to Miss Angeline via email and she finds both ideas to be workable, and gave comments too! Yay! 🙂 But now I am in a dilemma because I want to go ahead with both ideas.

Hence, as of now, my plan is to fuse both ideas together. But I can’t seem to churn out a platform which both ideas can reside on… Perhaps a book about old people on Christmas day? :/ I’ll just go ahead with a few motifs and see it goes from there! 🙂


30th October 2017 (Week 11/Week 14)

So in the end I decided to push forth with my Old people’s emotion idea and I created many more other old people portraits that illustrates different emotions.

In addition, I thought that having it in total black and white may be too flat and boring. Hence I added a color to each portrait to give it some life, while not taking away the attention from using type as image.
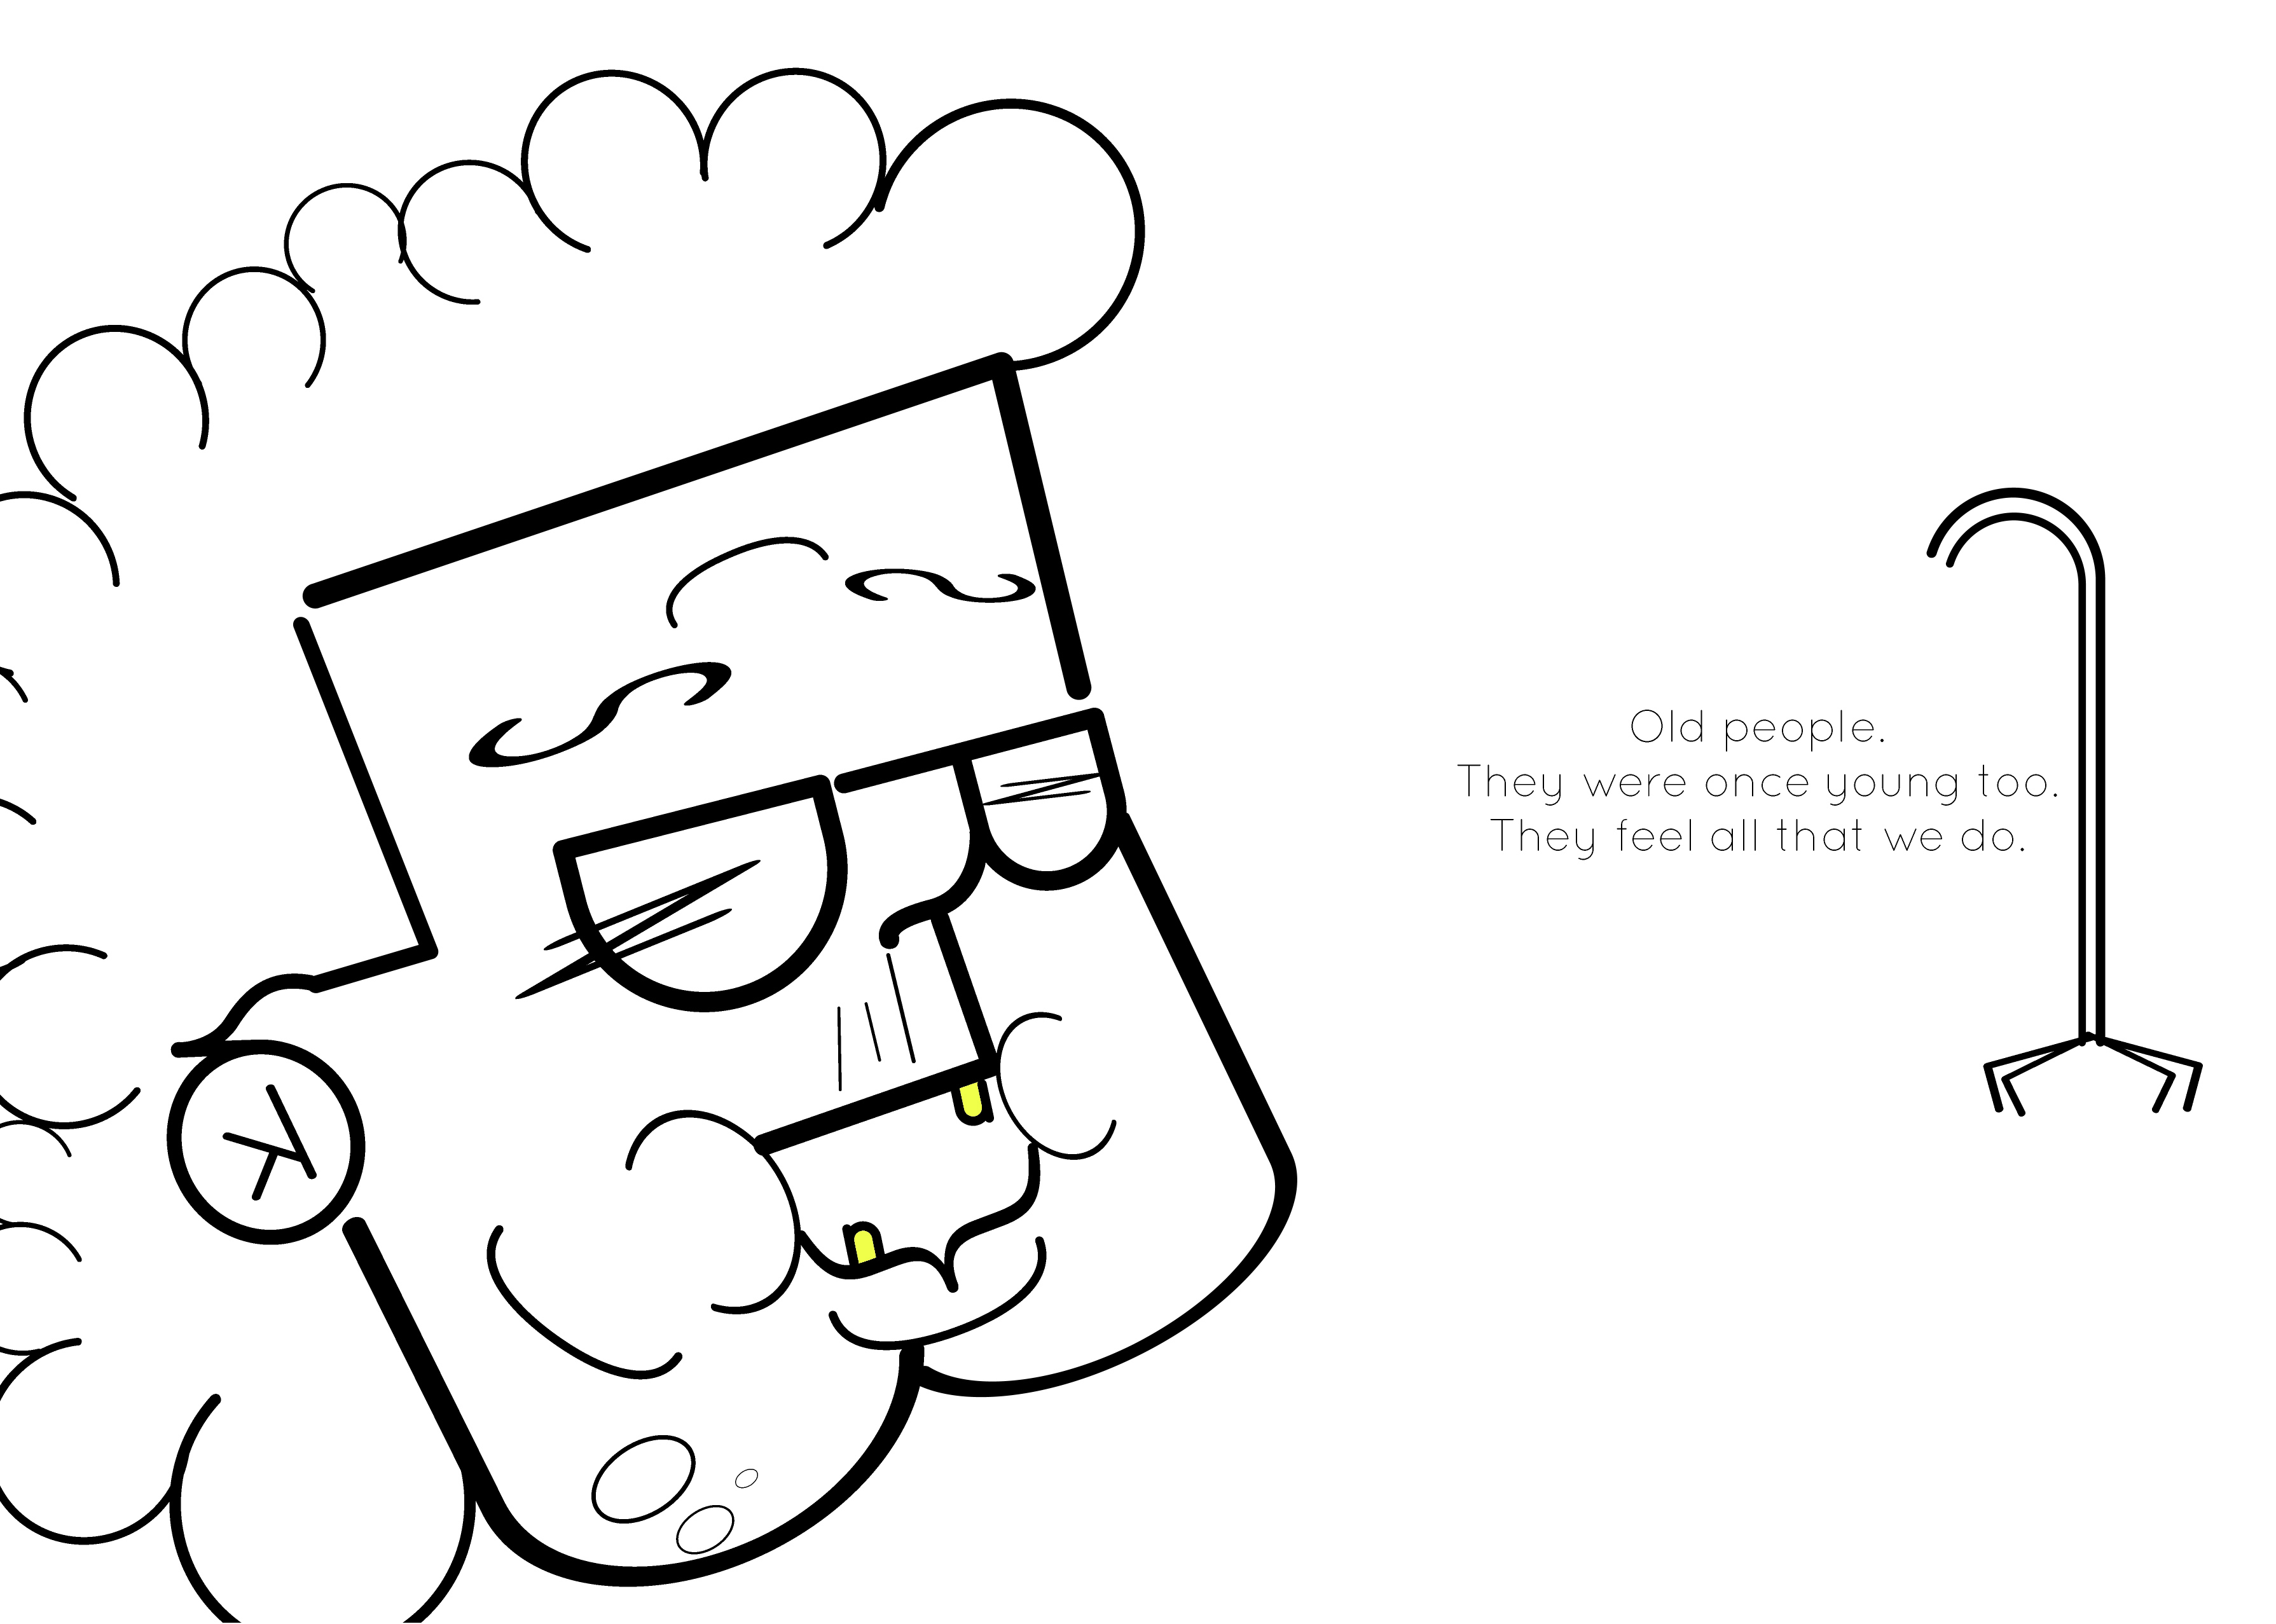
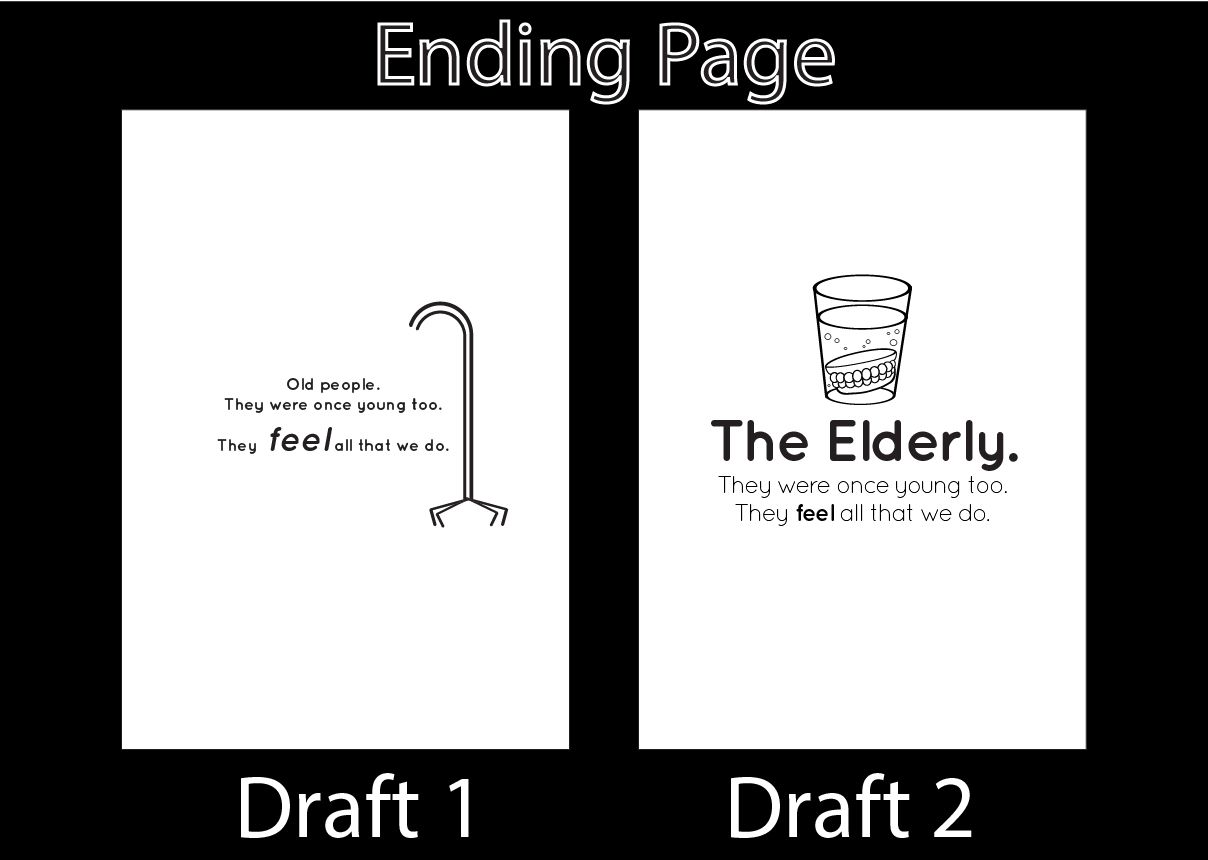
Emotion: Happy. The color Yellow is placed at her teeth. This is the ending page. Hence I wanted to end off the book with a message as written on the right.

I did a test print to show a prototype to Miss Angeline for consultation, and I already found lots of issues.

  1. Alignment of the pages on InDesign is rather complicated. Pages and Spreads ought to be odd an even numbers.
  2. Alignment of image. Margins. Gutter. etc.
  3. Alignment of different images on the same spread…yell

Oh well, at least I know about these issues BEFORE the actual printing day.

Upon consulting Miss Angeline with the prototype, these are the feedbacks and thoughts given to improve! 🙂

  • Likes the layout where there is space on one side.
  • Not so keen in seeing if can the emotion, but more keen in the typeface to create image.
  • Like how it flows to the next page.
  • Empty pages for? Can use blank space to write what letter you used? Or something fun the characters would say? Can use lesser words to prevent issues of long sentences type setting. Use something short. Or sound expression: ‘Huh? Hmm! Aiya… OI’. Start with the same typeface first just to play safe. Add colors and vary scale.
  • Type Setting. Centralized? Too big? Too small? Little space? Leading? Kerning? Margin? Next one is centralized or at the side?
  • Change size to A3. A4 is too small. Not 18×18.
  • Title page? Can keep things simple. Emotions with Type, Type with emotions.
  • Have 10 faces? 6 too little.
  • What kind of paper?
  • *How would you take it out of the book? Transfer it to a huge poster? Promoting for some Elder’s convention or event; type 1 class promotion etc. Choose 2 very good ones and transfer it to an A2 poster.

8th November 2017 (Week 12/Week 14)

So based on last week’s feedback, I made some changes and additional information to make the book more wholesome. I included more faces and additional texts with the portraits!

The texts used is the typeface, Quicksand. The texts are words or sounds I felt that the faces were expressing. Using the previous project’s brief on type as emotion, I manipulated the texts, and arranged it in a way that best expresses the emotion when reading.Feedbacks and Things to change:
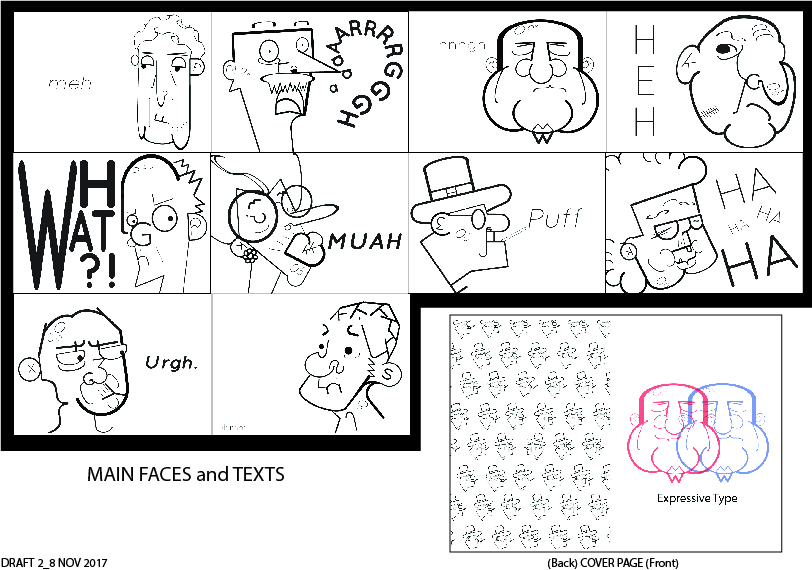
  • Back and front cover can be the faces back and front. Happy and Sad man.
  • Images are fine, but type needs working. Use the first angry man as a model template.
  • Some spaces can be filled, some can be not filled. ‘Meh’ can be more impactful. Bigger Type face, bolder, lighter etc.
  • See the texts first then see the expression. That is the effect you would want to achieve.
  • ‘Urgh’ can fill up the whole space.
  • Title is very boring. Emotions of the elderly etc. Layout is dependent on the
  • Repeating pattern doesn’t work.
  • Questioning of choices of type size, layout and category must be explained.

Hopefully I can print this mock up before next week’s consultation and that everything will run smoothly! 🙂


11th November 2017 (Week 12/Week 14)

I have finally experienced the pain and stress that my peers were always lamenting about regarding printing day…

For some reason, I have been troubleshooting the issue from InDesign for several hours and I cannot solve the issue when the program cannot save my document in PDF for Booklet. The pages are always a spread instead of the chopped pages.

Hence, these are the solutions I have come up with to counter these problems.

  1. Manually cut the pages so that the booklet form can be saddle stitched.
  2. Change the binding technique to those that don’t require folding of pages.

Types of binding to explore

Types of binding


Type of Book Binding I may look into with regards to the spreads

  • Perfect Bind (Still in booklet form but in 2 stacks)
  • Perfect bind (Pages don’t have to be split, Glue sides to spine)
  • Plastic Grip (Pages don’t have to be split, but double side printing. Bind with paper clip)
  • Hole Punch ( Pages don’t have to be split, need side border for hole . Use ring to bind)

Trying Solution 1: ***Note to future self: ALWAYS DO A MOCK UP WITH RECYCLED PAPER FIRST TO KNOW IF U GOT THE RIGHT NUMBER OF PAPER AND WHICH SIDE OF THE PAPER IS WHICH PAGE!!!
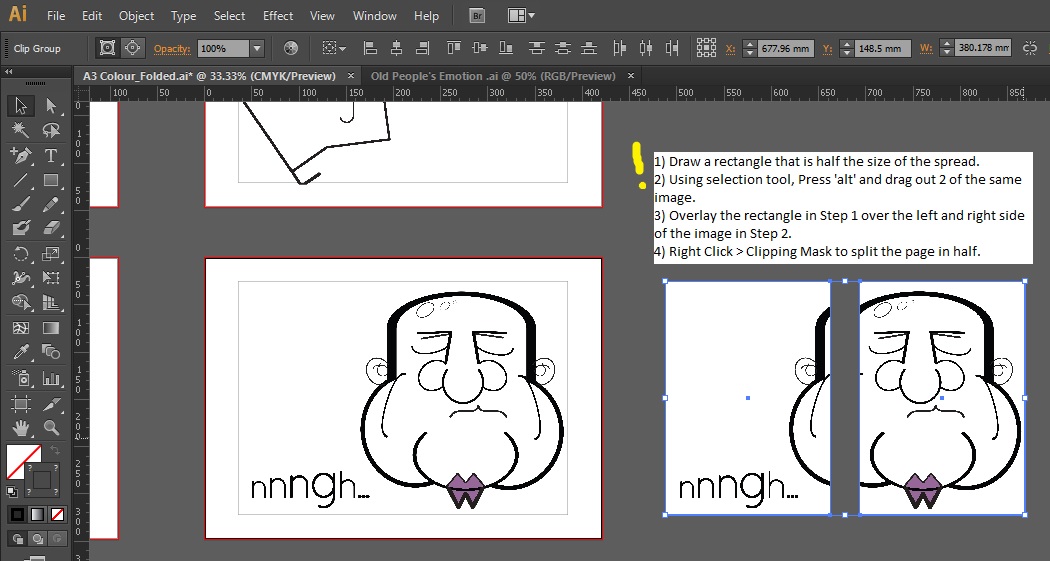
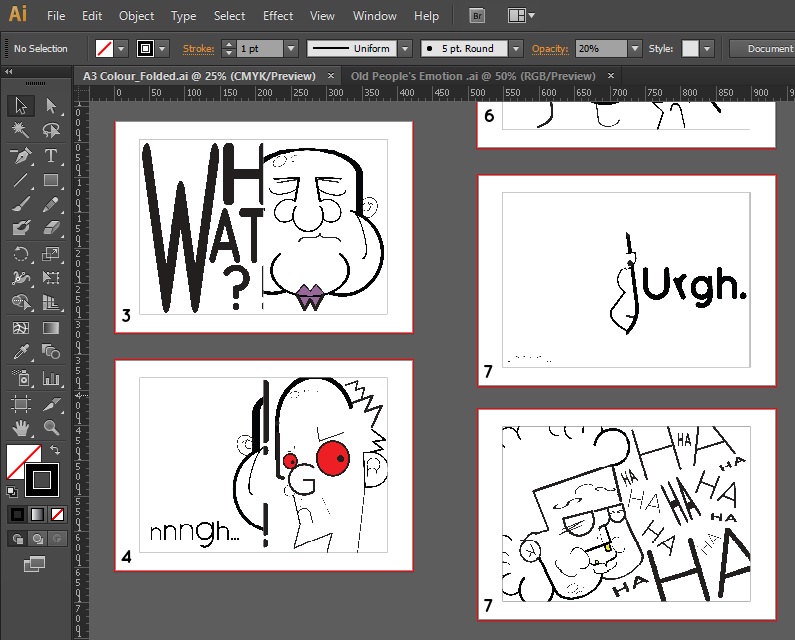
Start Piecing the half images together using the mockup as a guide, while labeling to make your life easier.

YAY I AM OFF TO PRINT THE MOCKUPS.


12th November 2017 (Week 12/Week 14)

So… I printed the mock up for the designs yesterday and of course, issues are bound to arise.
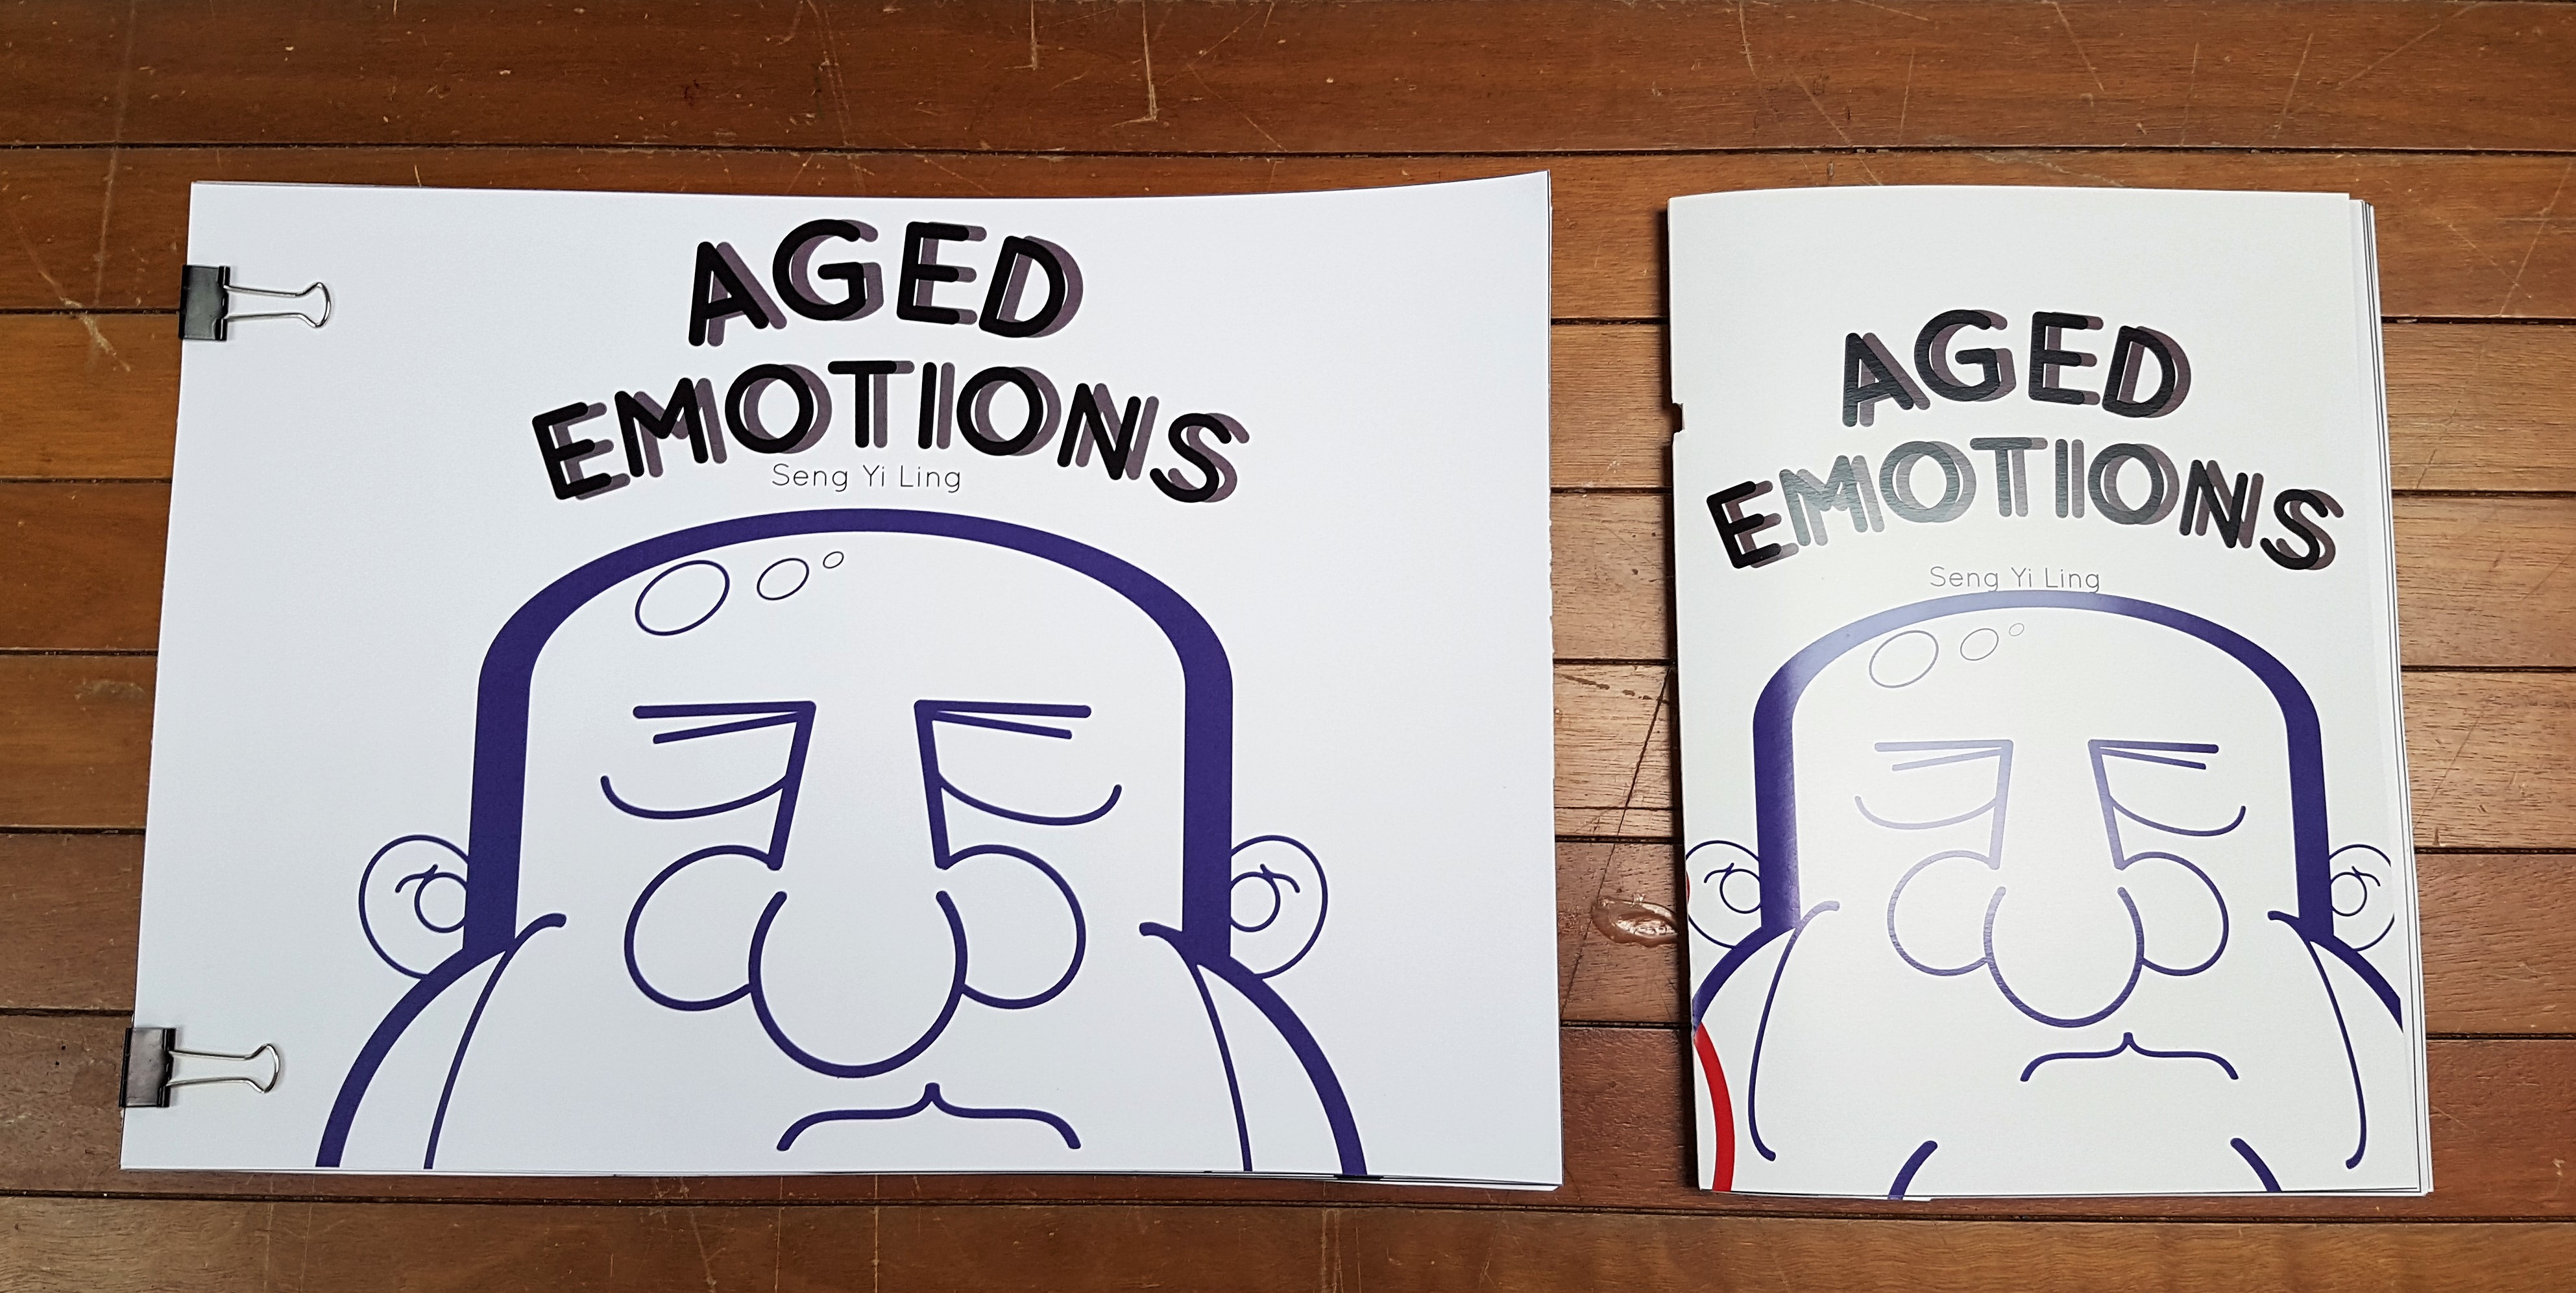
Paper choices: 300gsm (Gloss and Matte) and inside spreads are about 128gsm

I printed the format with the idea that I want to try saddle stitching stapling or the landscape form where I can use binder clips to hold it down.

The saddle stitch stapler mock up had several issues.

  1. The stapler punched a hole through the paper
  2. Alignment of each page is inaccurate. Even though scored at the center, paper thickness which cases certain pages to be obscured is prone.
  3. Stapled not directly at the center, hence some pages cannot be fully opened and flattened.
  4. When closed, the pages protrude. Cutting off the sides is a must, but cutting off important parts of the pages may happen.
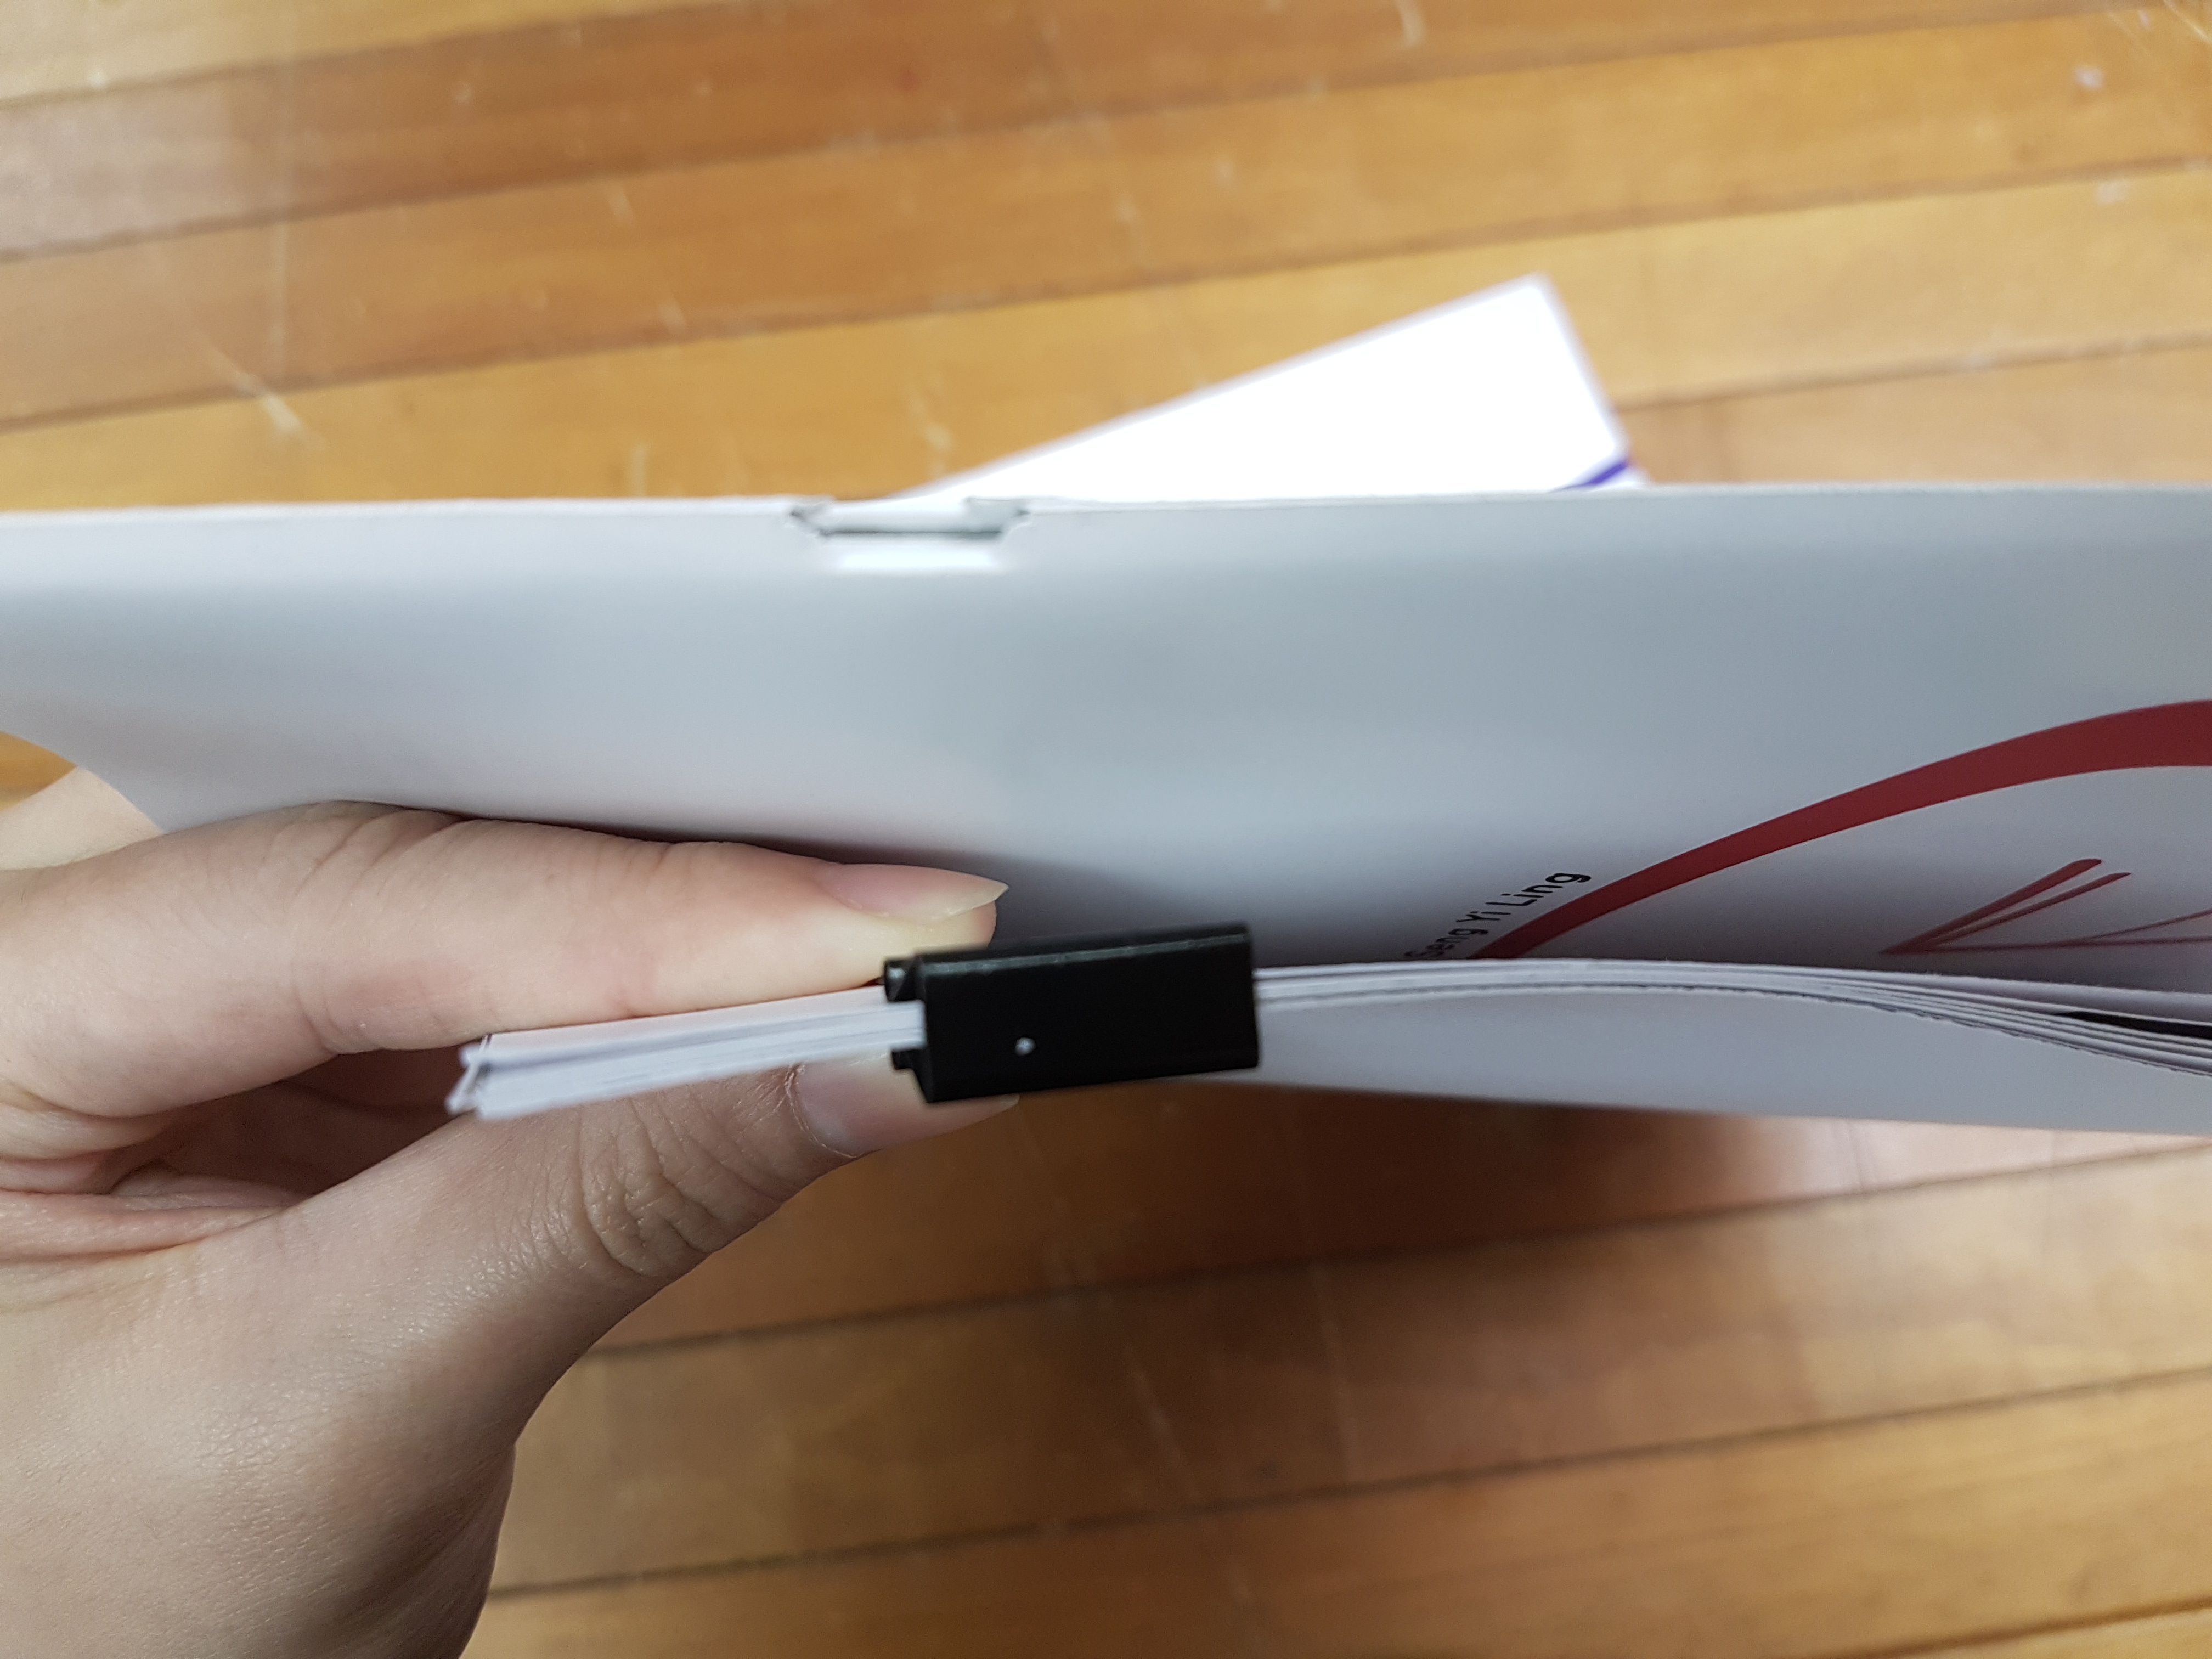
Stapled mockup punches a hole right through the paper after scoring 300 gsm paper.
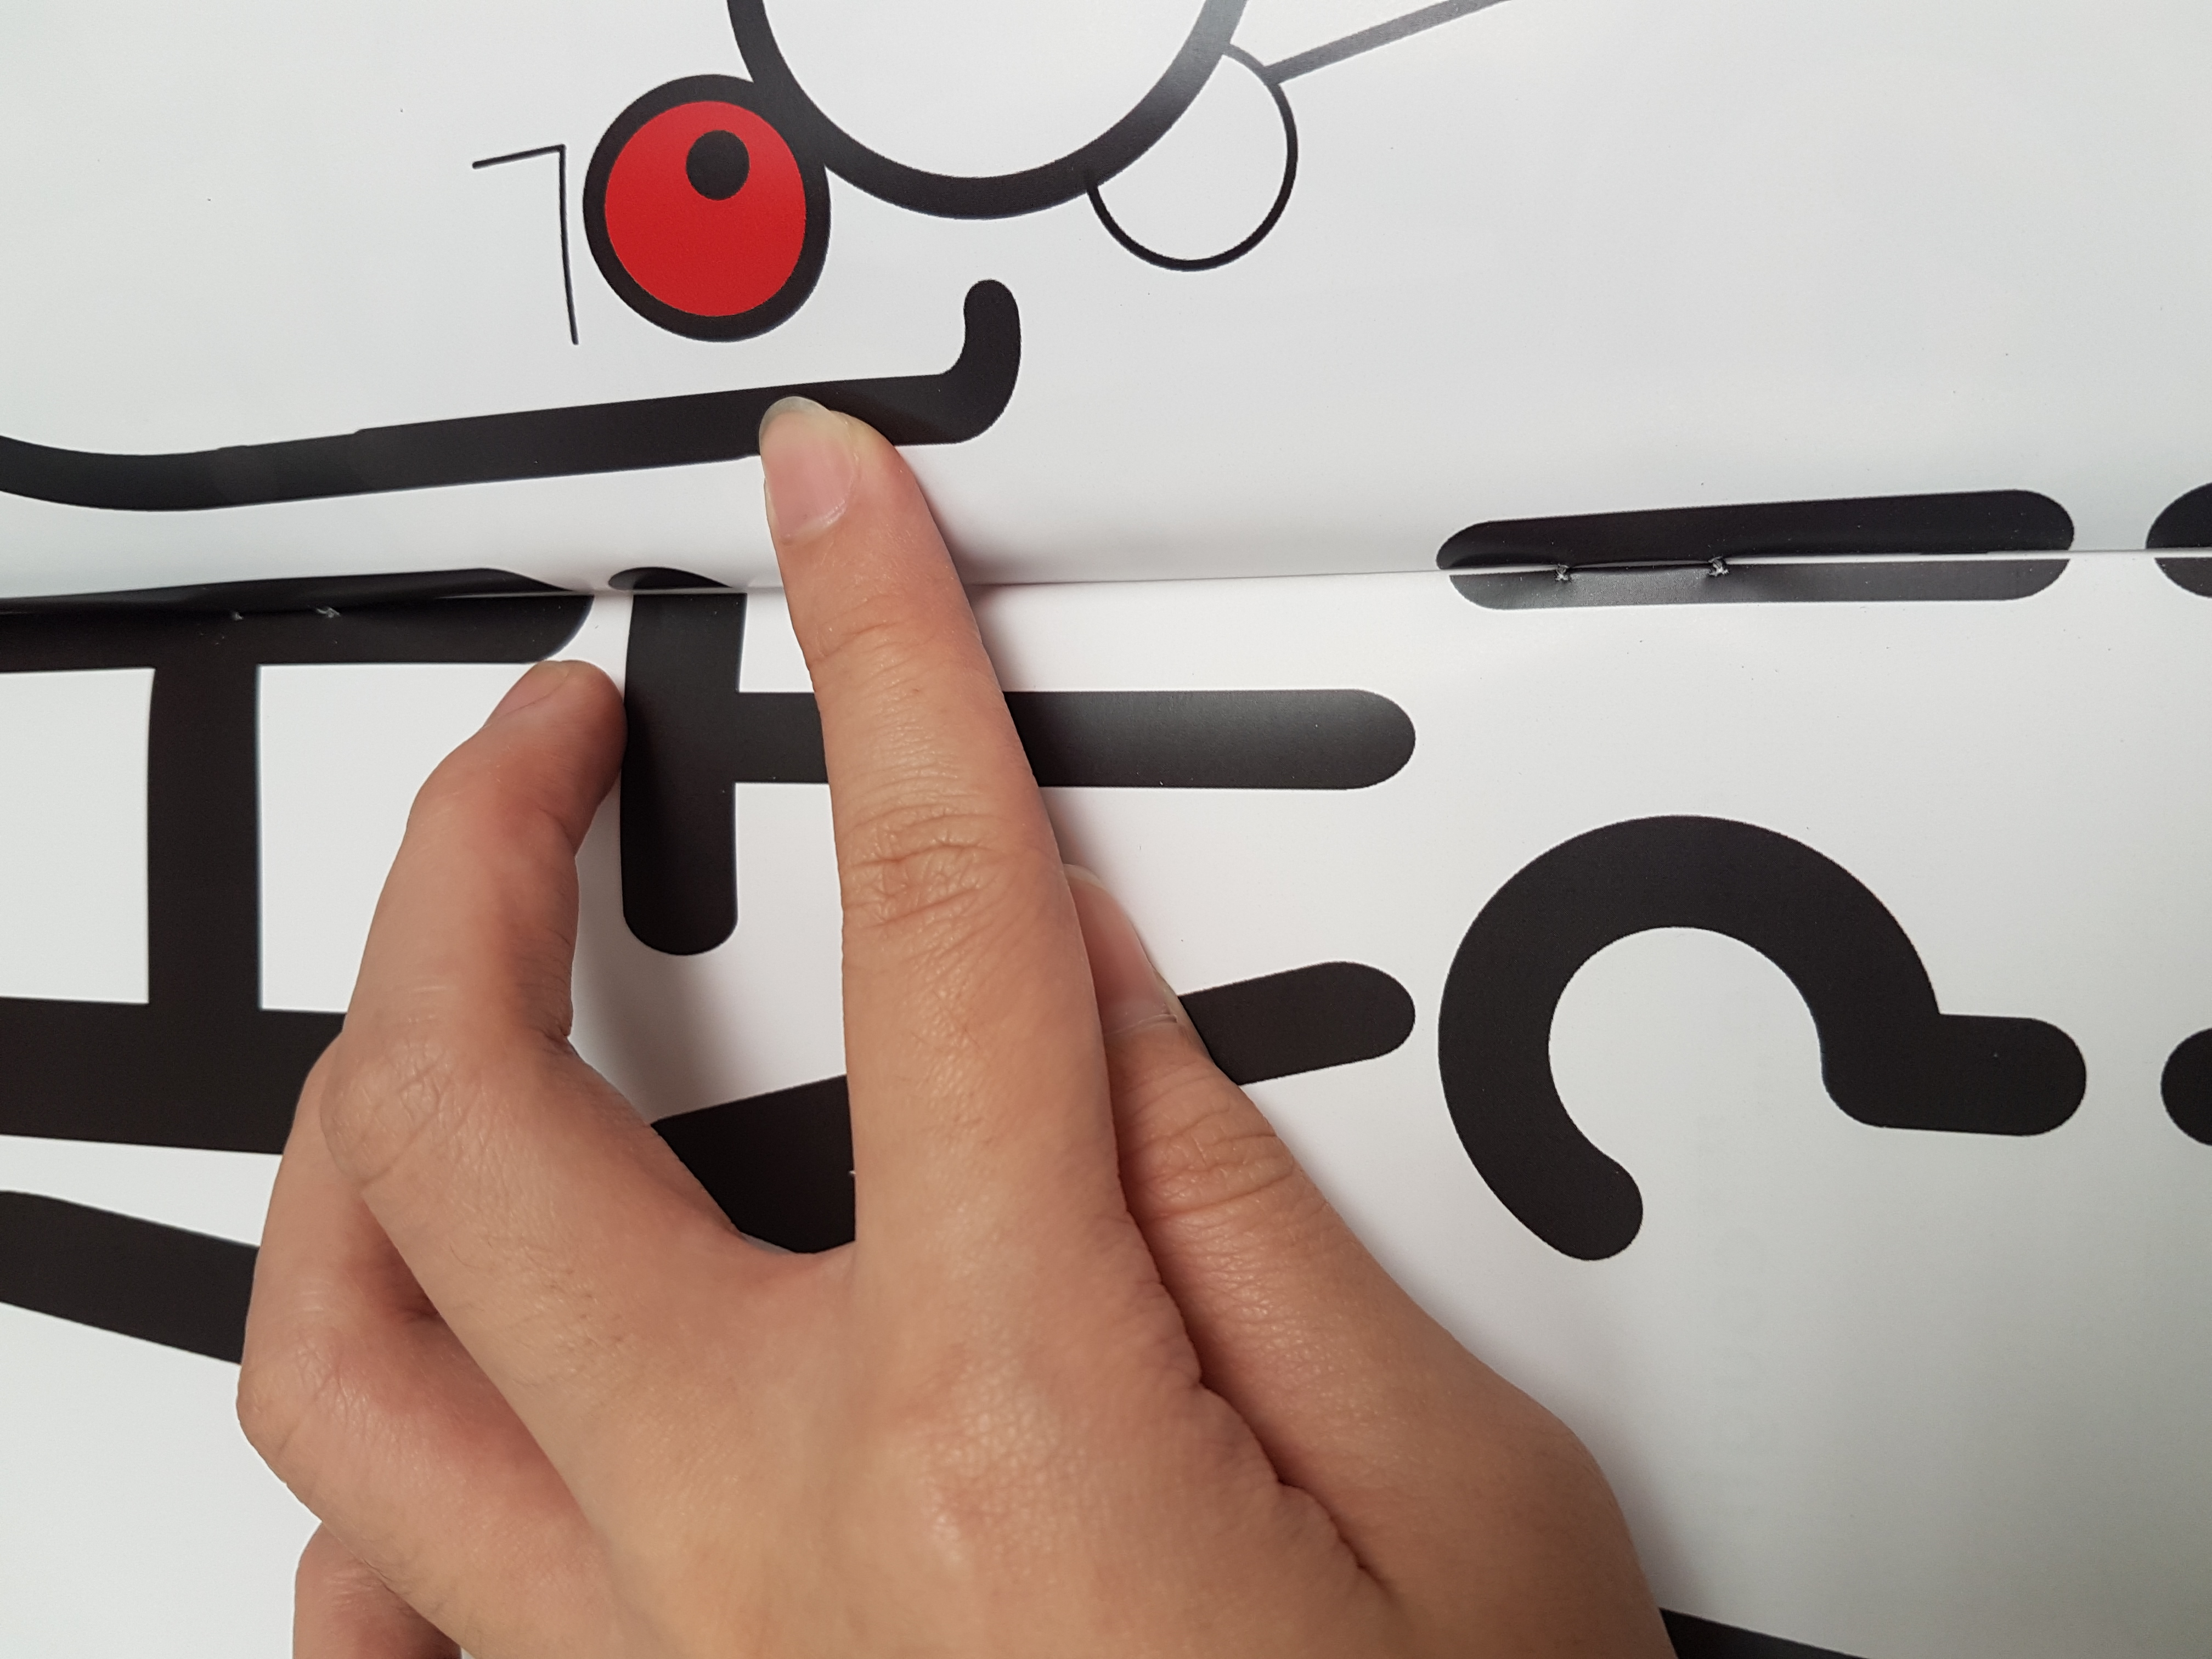
White lines in the middle due to misalignment, and stapled inaccurately does not allow the pages to open fully.
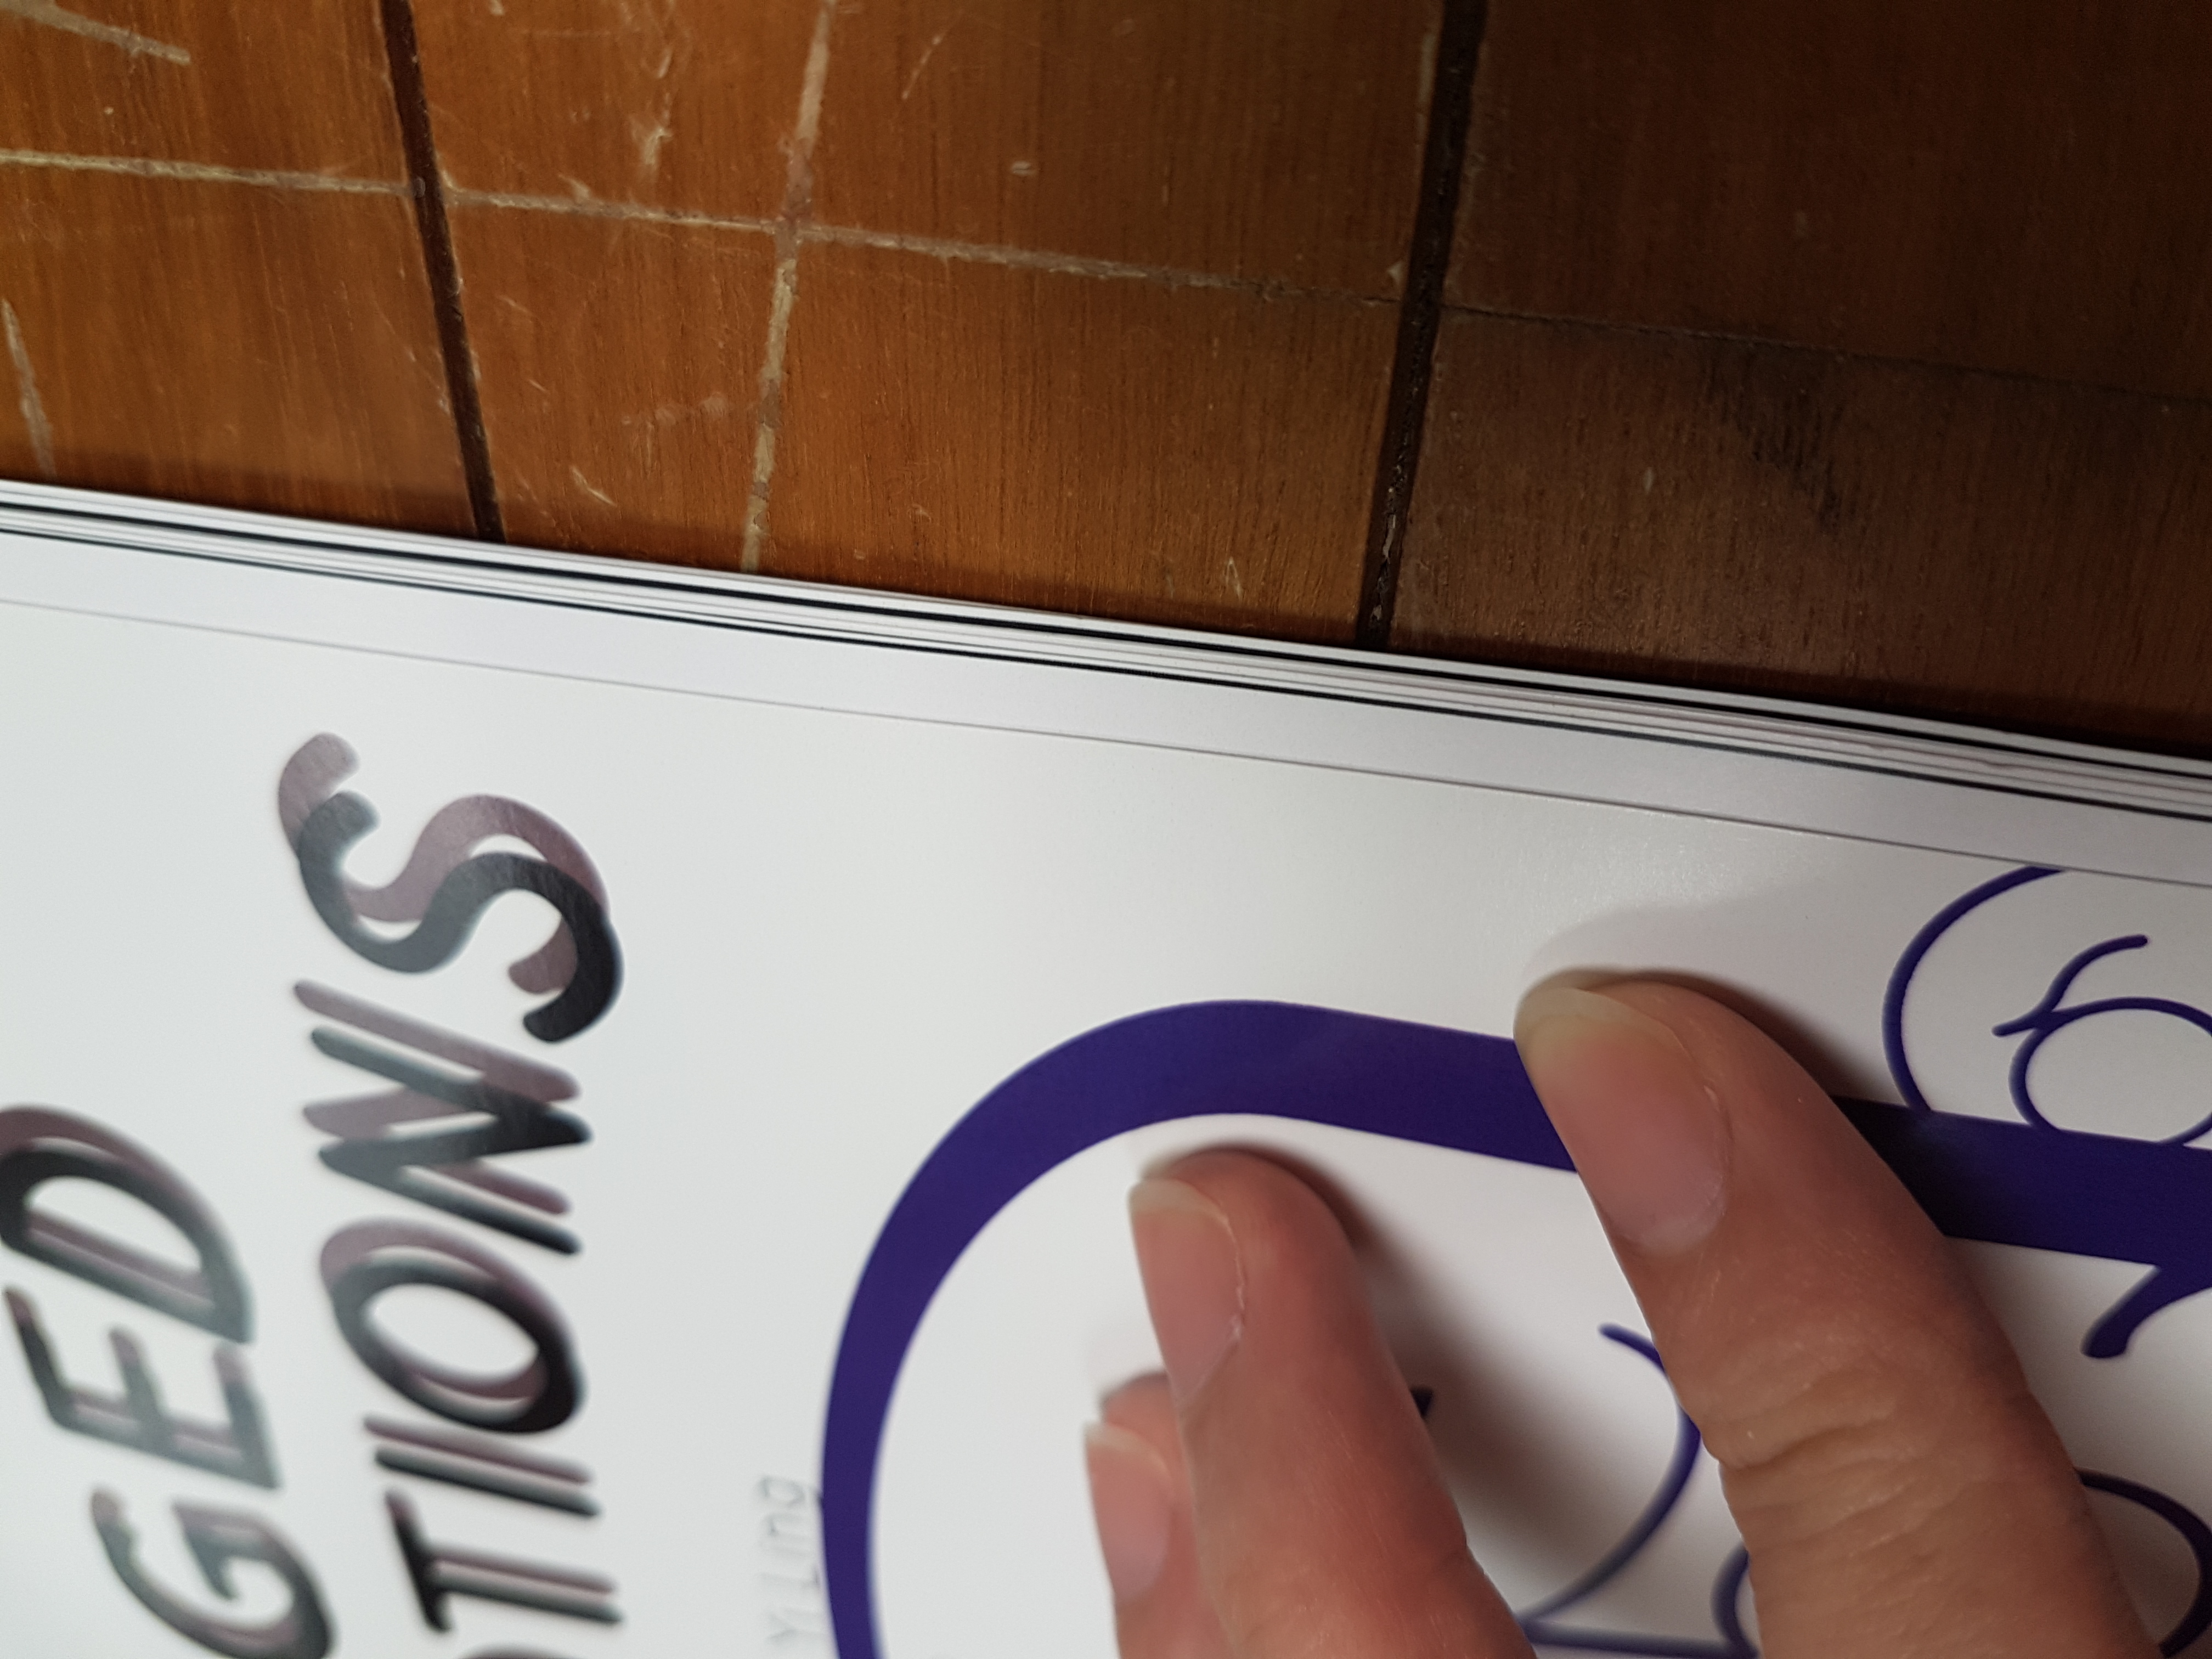
Pages protrude out from the side

POTENTIAL SOLUTIONS

  • Score the pages, making sure each side really is at the center, poke hole on scored areas and manually put the stapler inside. Fold the book in half and slice the sides. ( Remember to allow allowance space in designs as well incase cut off)
  • Do all the above, but instead of staple, saddle stitch by sewing with dental floss. It will be neater too.

13th November 2017 (Week 13/Week 14)

Individual Consultation day! EXACTLY ONE MORE WEEK TILL D-DAY.

After showing my mockups to Miss Angeline, there is actually A LOT of room for improvement for not just only the binding issues listed above.

Feedbacks given

  • Relook into the margin space for the texts. Pay attention to space between text and image.
  • Visual hierarchy for each spread is important. Where you want the audience to look at first? Text or face first?
  • Tracking, alignment has relation to each other.
  • There are different ways of emphasizing. Not just size. Color, Bold it etc.
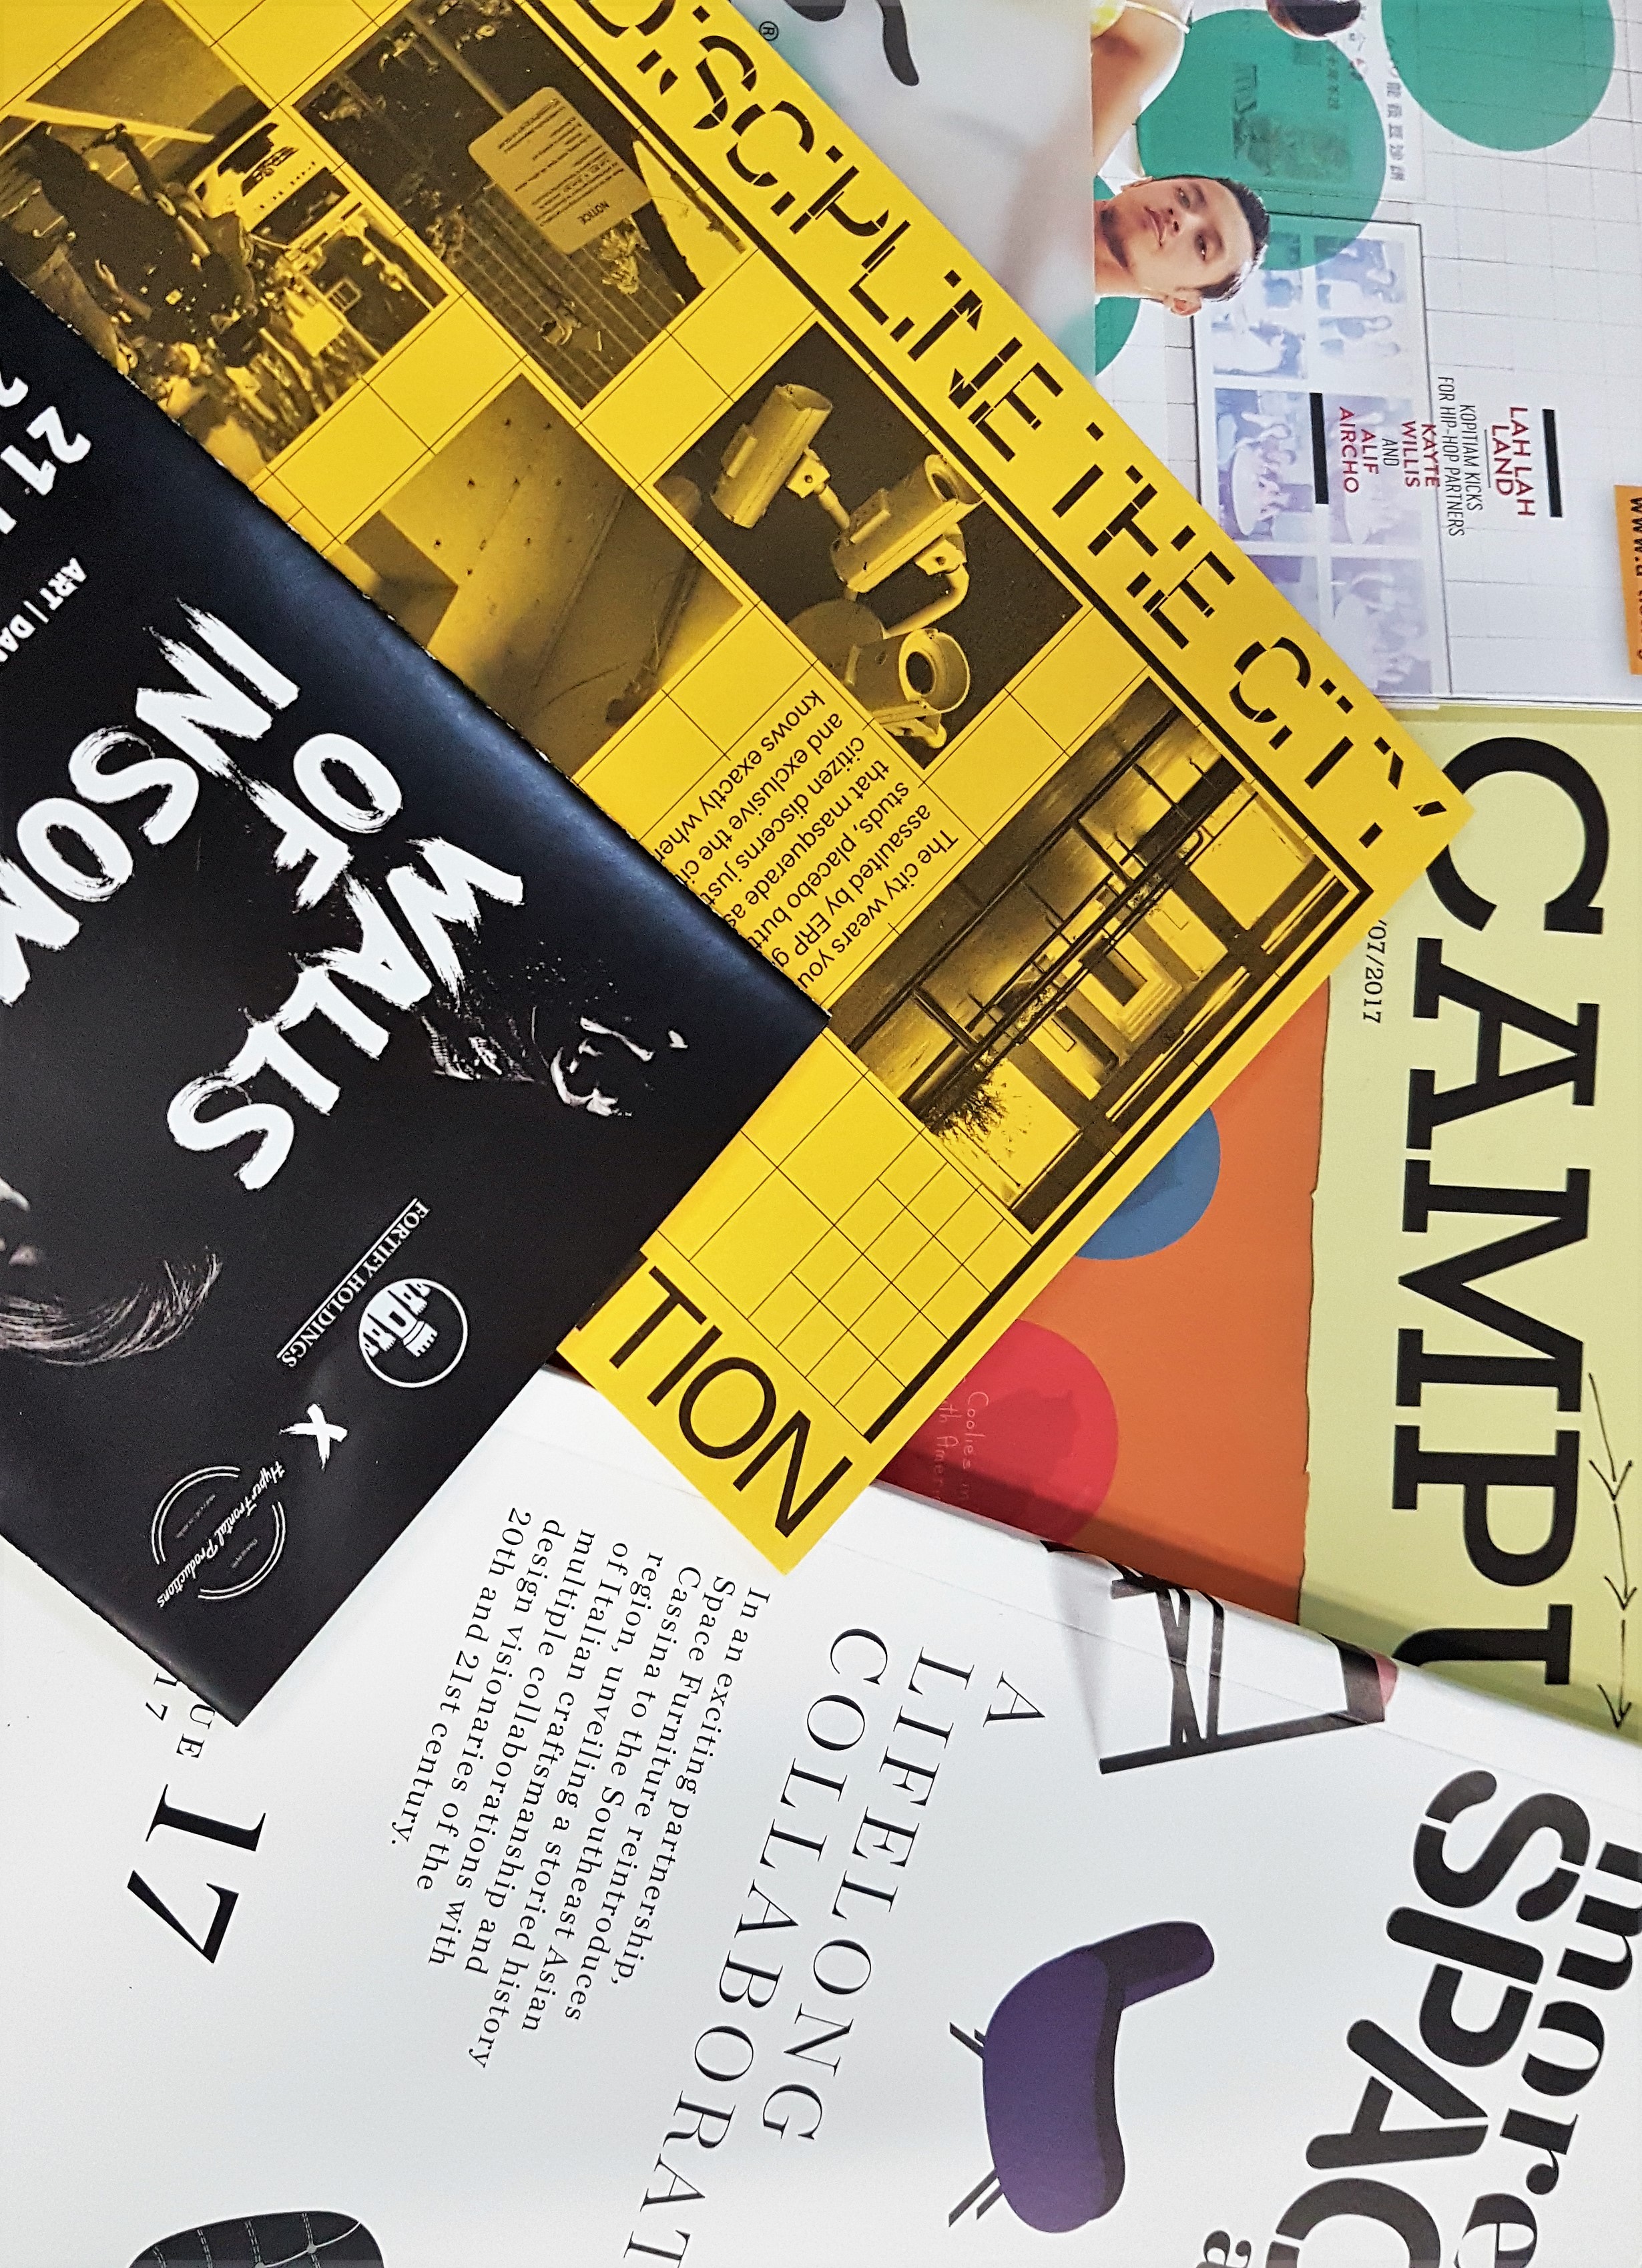
  • *PAPER. Take note of paper quality. Paper thickness and texture matters a lot to give the over all mood of your product.

I took a few magazines from school to examine the paper quality and overall feeling the magazines gaves off. Also observing the layout and placement of text and image.

16th November 2017 (Week 13/Week 14)

I reinstalled my InDesign because the Adobe Illustrator way of printing has a lot of human error. And yes, the reason I had issues with my alignment and spread issues was due to a bug in the software. I couldn’t save the document in PDF, and FINALLY after reinstalling it is working!! YAY.

I made amendments to the feedbacks given for the previous consultation and tried out several ways the texts can be presented in a neater manner.

I am pretty inclined to Row 2 for the first few pages, as the simulation of a conversation is represented by colors and positioning.
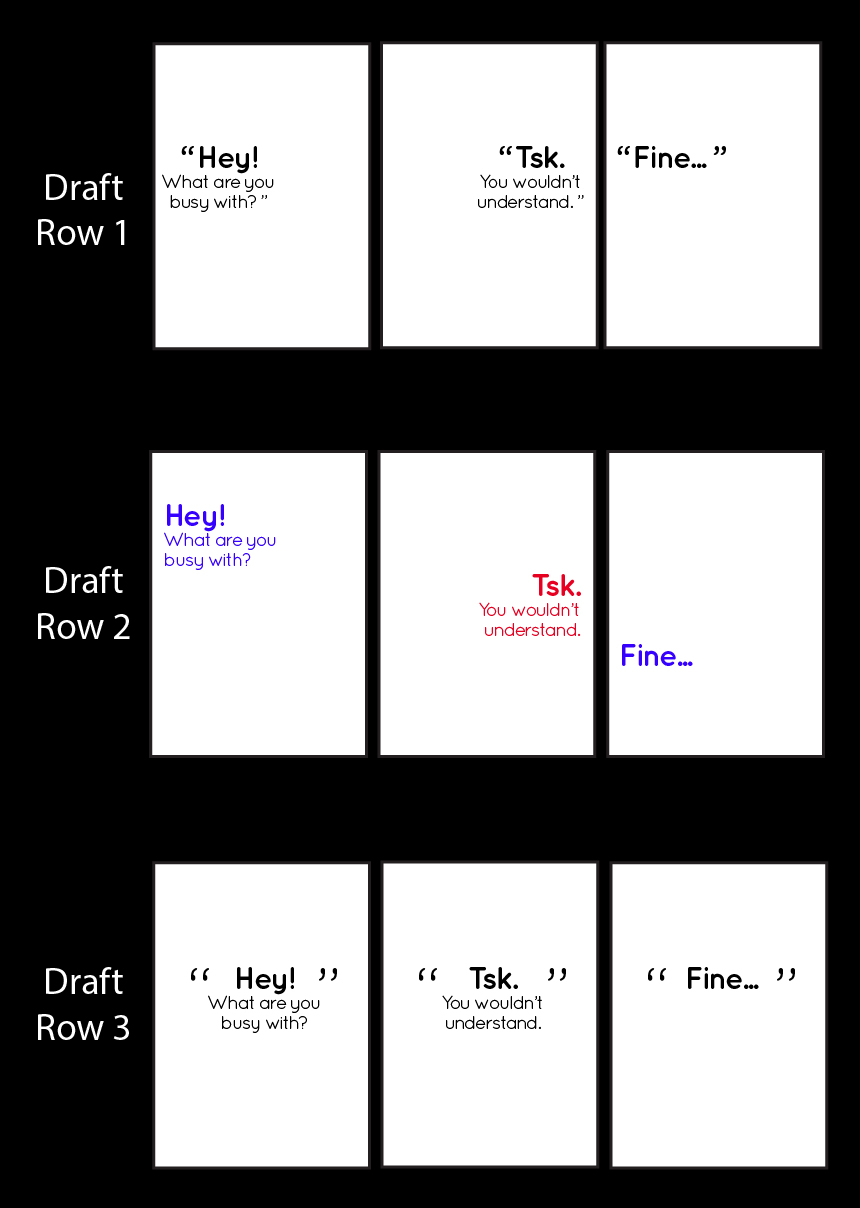
Changed the ending page too


17th November 2017 (Week 13/Week 14)

Given that my main deliverables (Aged Emotions Book) is just about complete, I moved on to produce extra deliverables given that I still had some time left before printing the FINAL product tomorrow!

I was rather stuck on how I can apply my characters on other items, so I went ahead with Miss Angeline’s suggestion to do up a poster for her TYPOGRAPHY 1 module.
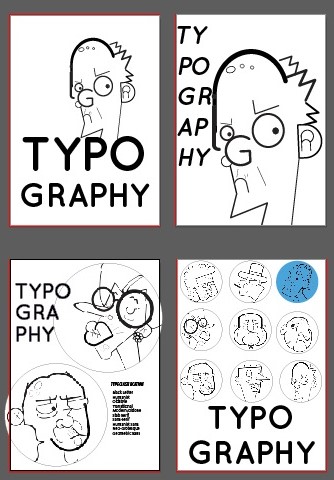
I tried out some layouts and compositions to see which works best!

And since the motif used for the poster are circular and colored, I think it may look good as stickers as well!

And with the final rounds of editing for the main and extra deliverables, I am ready to conquer printing day tomorrow!!cool


17th November 2017 (Week 13/Week 14)

PRINTING DAY!
So I went to the paper shop at North Bridge Road called ‘Fancy Paper’ to choose better quality papers for the printing, as the feedback given was to be more sensitive to paper type and weight.
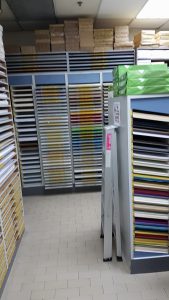
In the paper shop with a wide array of paper choices!

I wanted my book to express familiarity, and some sense of rootedness. The same feeling my grandparents evoked.

After choosing the papers I wanted, I went to Sunshine Plaza to print.

I was really worried that the printing would not be aligned as I would be  doing saddle stitch, and both the sides of the pages are necessary to be aligned so the pages would not overlap that drastically.
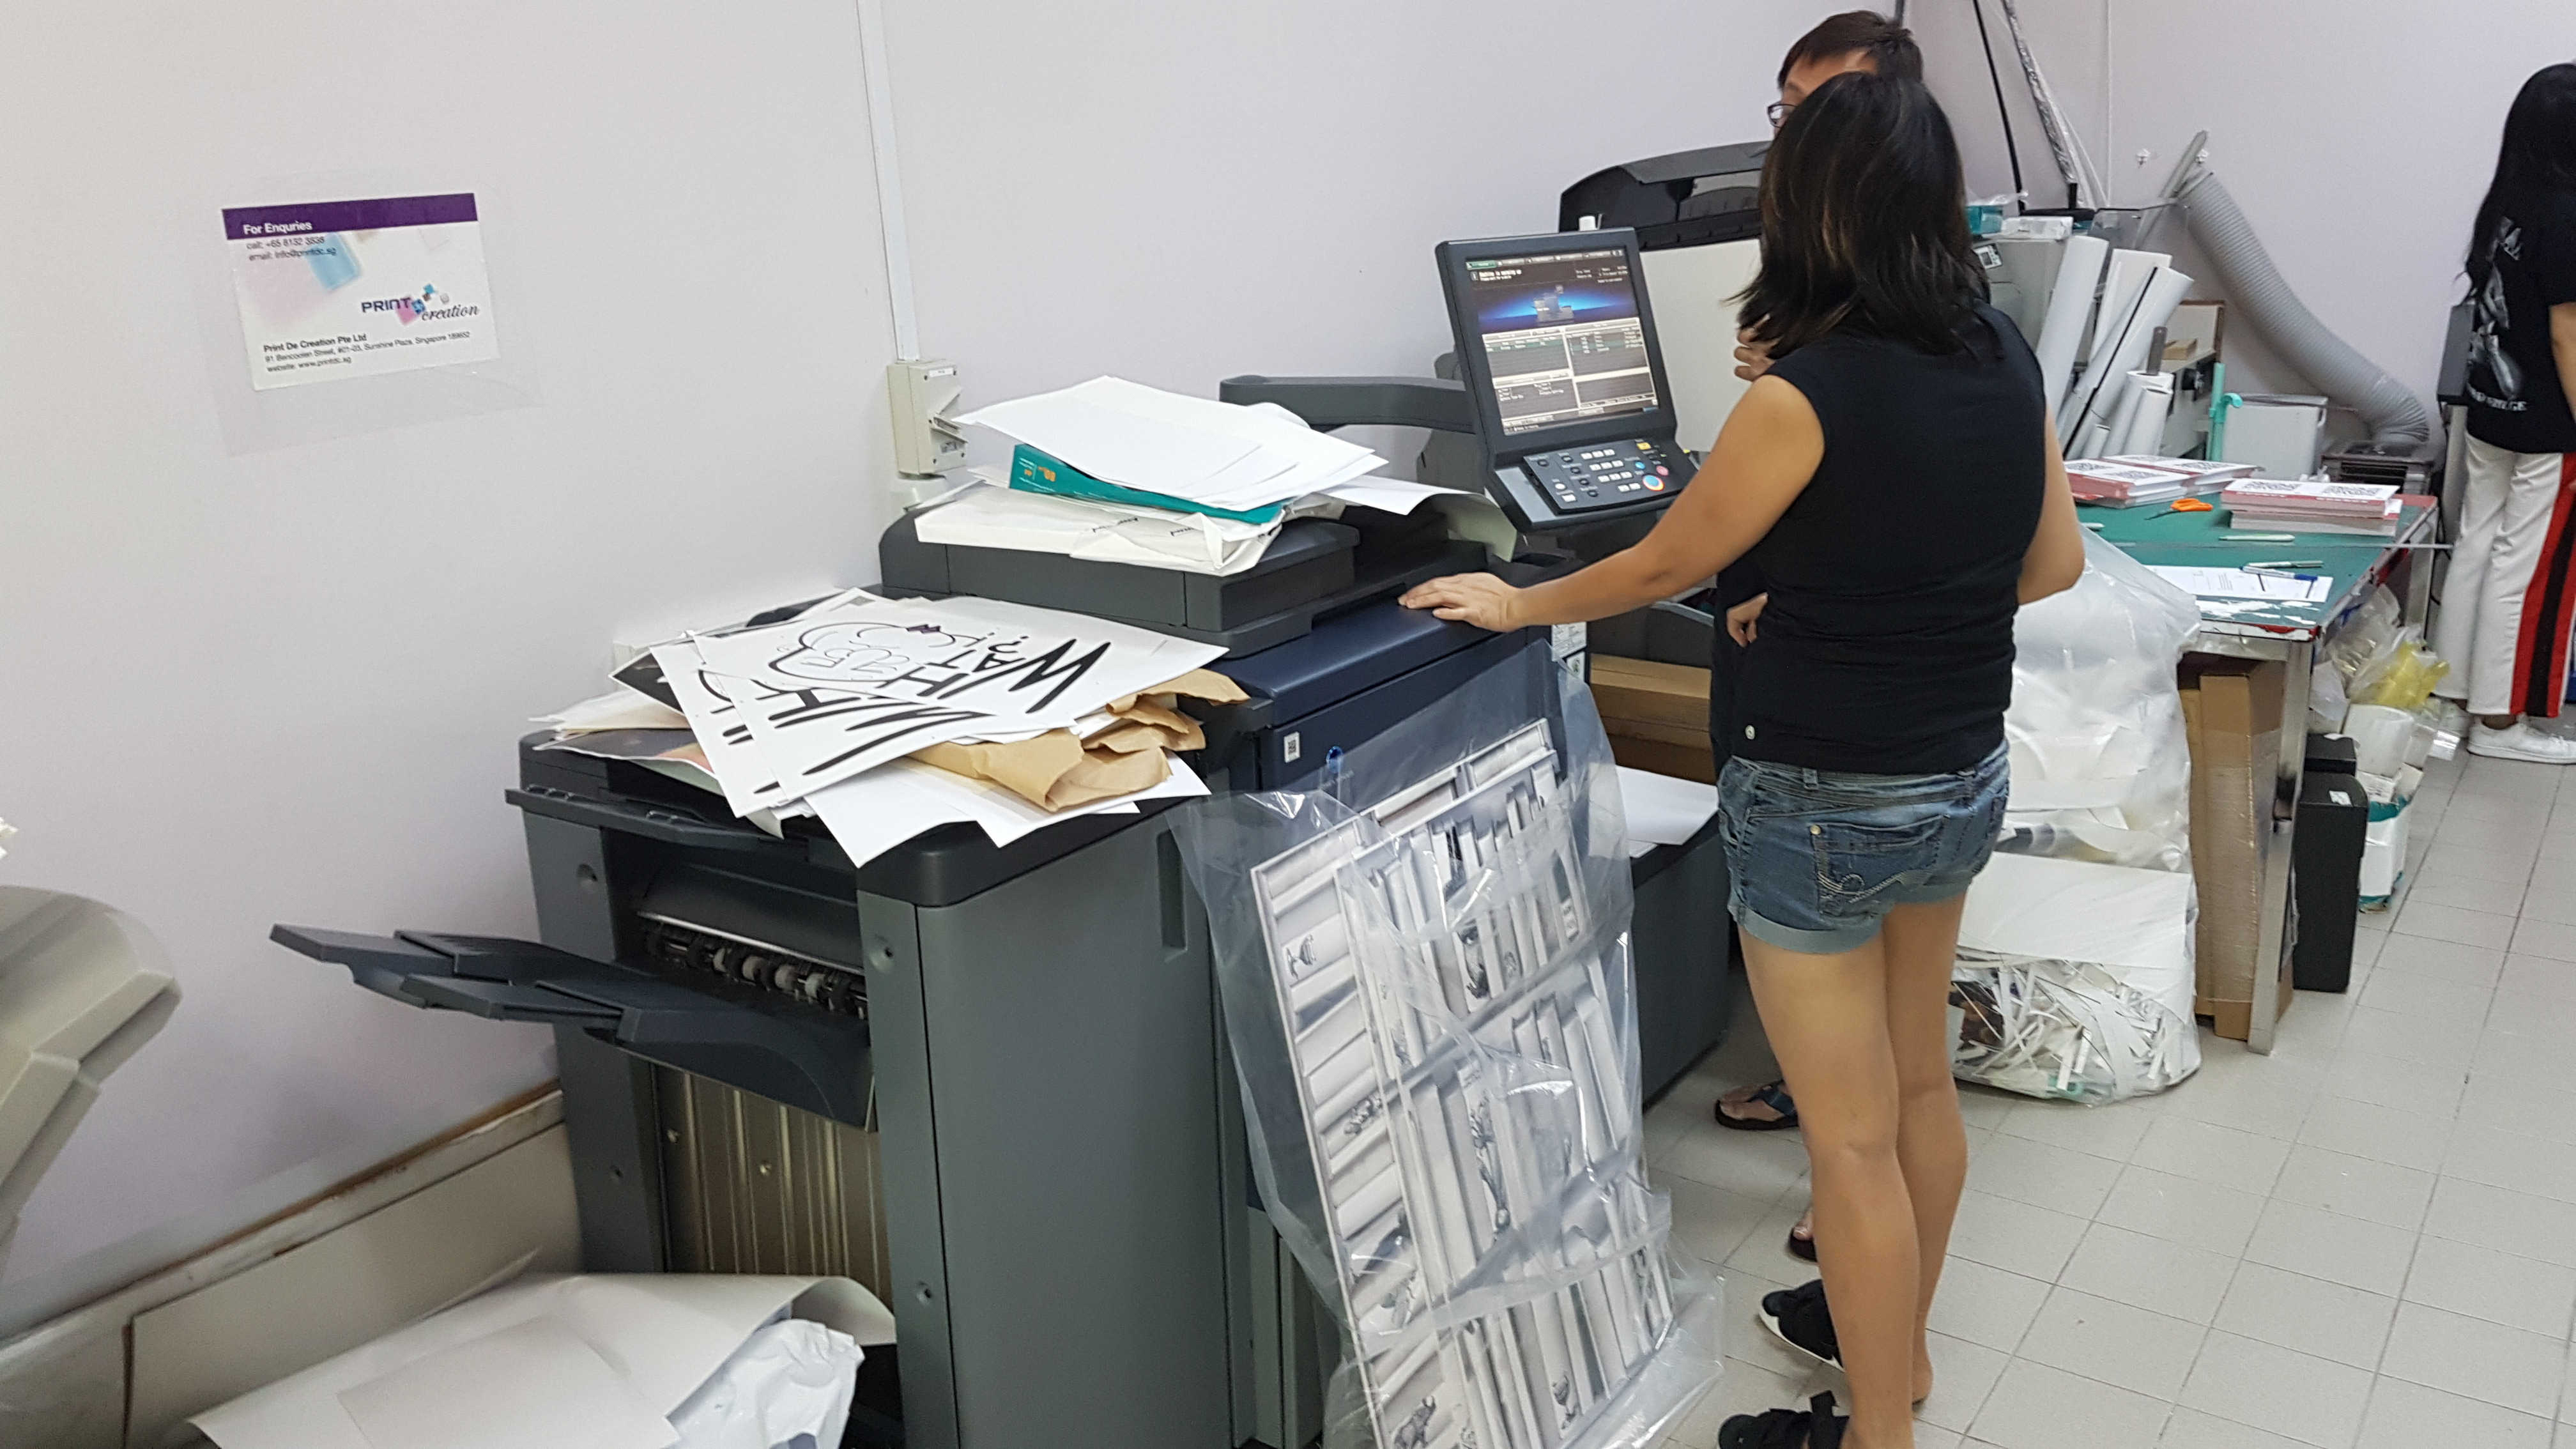
The printing shop lady was very helpful as I noticed that the alignment was off, and she recalibrated the machine for me. Look at all the test prints we did on the printer…

And thankfully, things turned out pretty well despite the multiple test prints by the re-calibrated machine. I took my prints home and started to do the saddle stitching.

The inner pages paper are A3 White Matte Paper, 160 GSM.
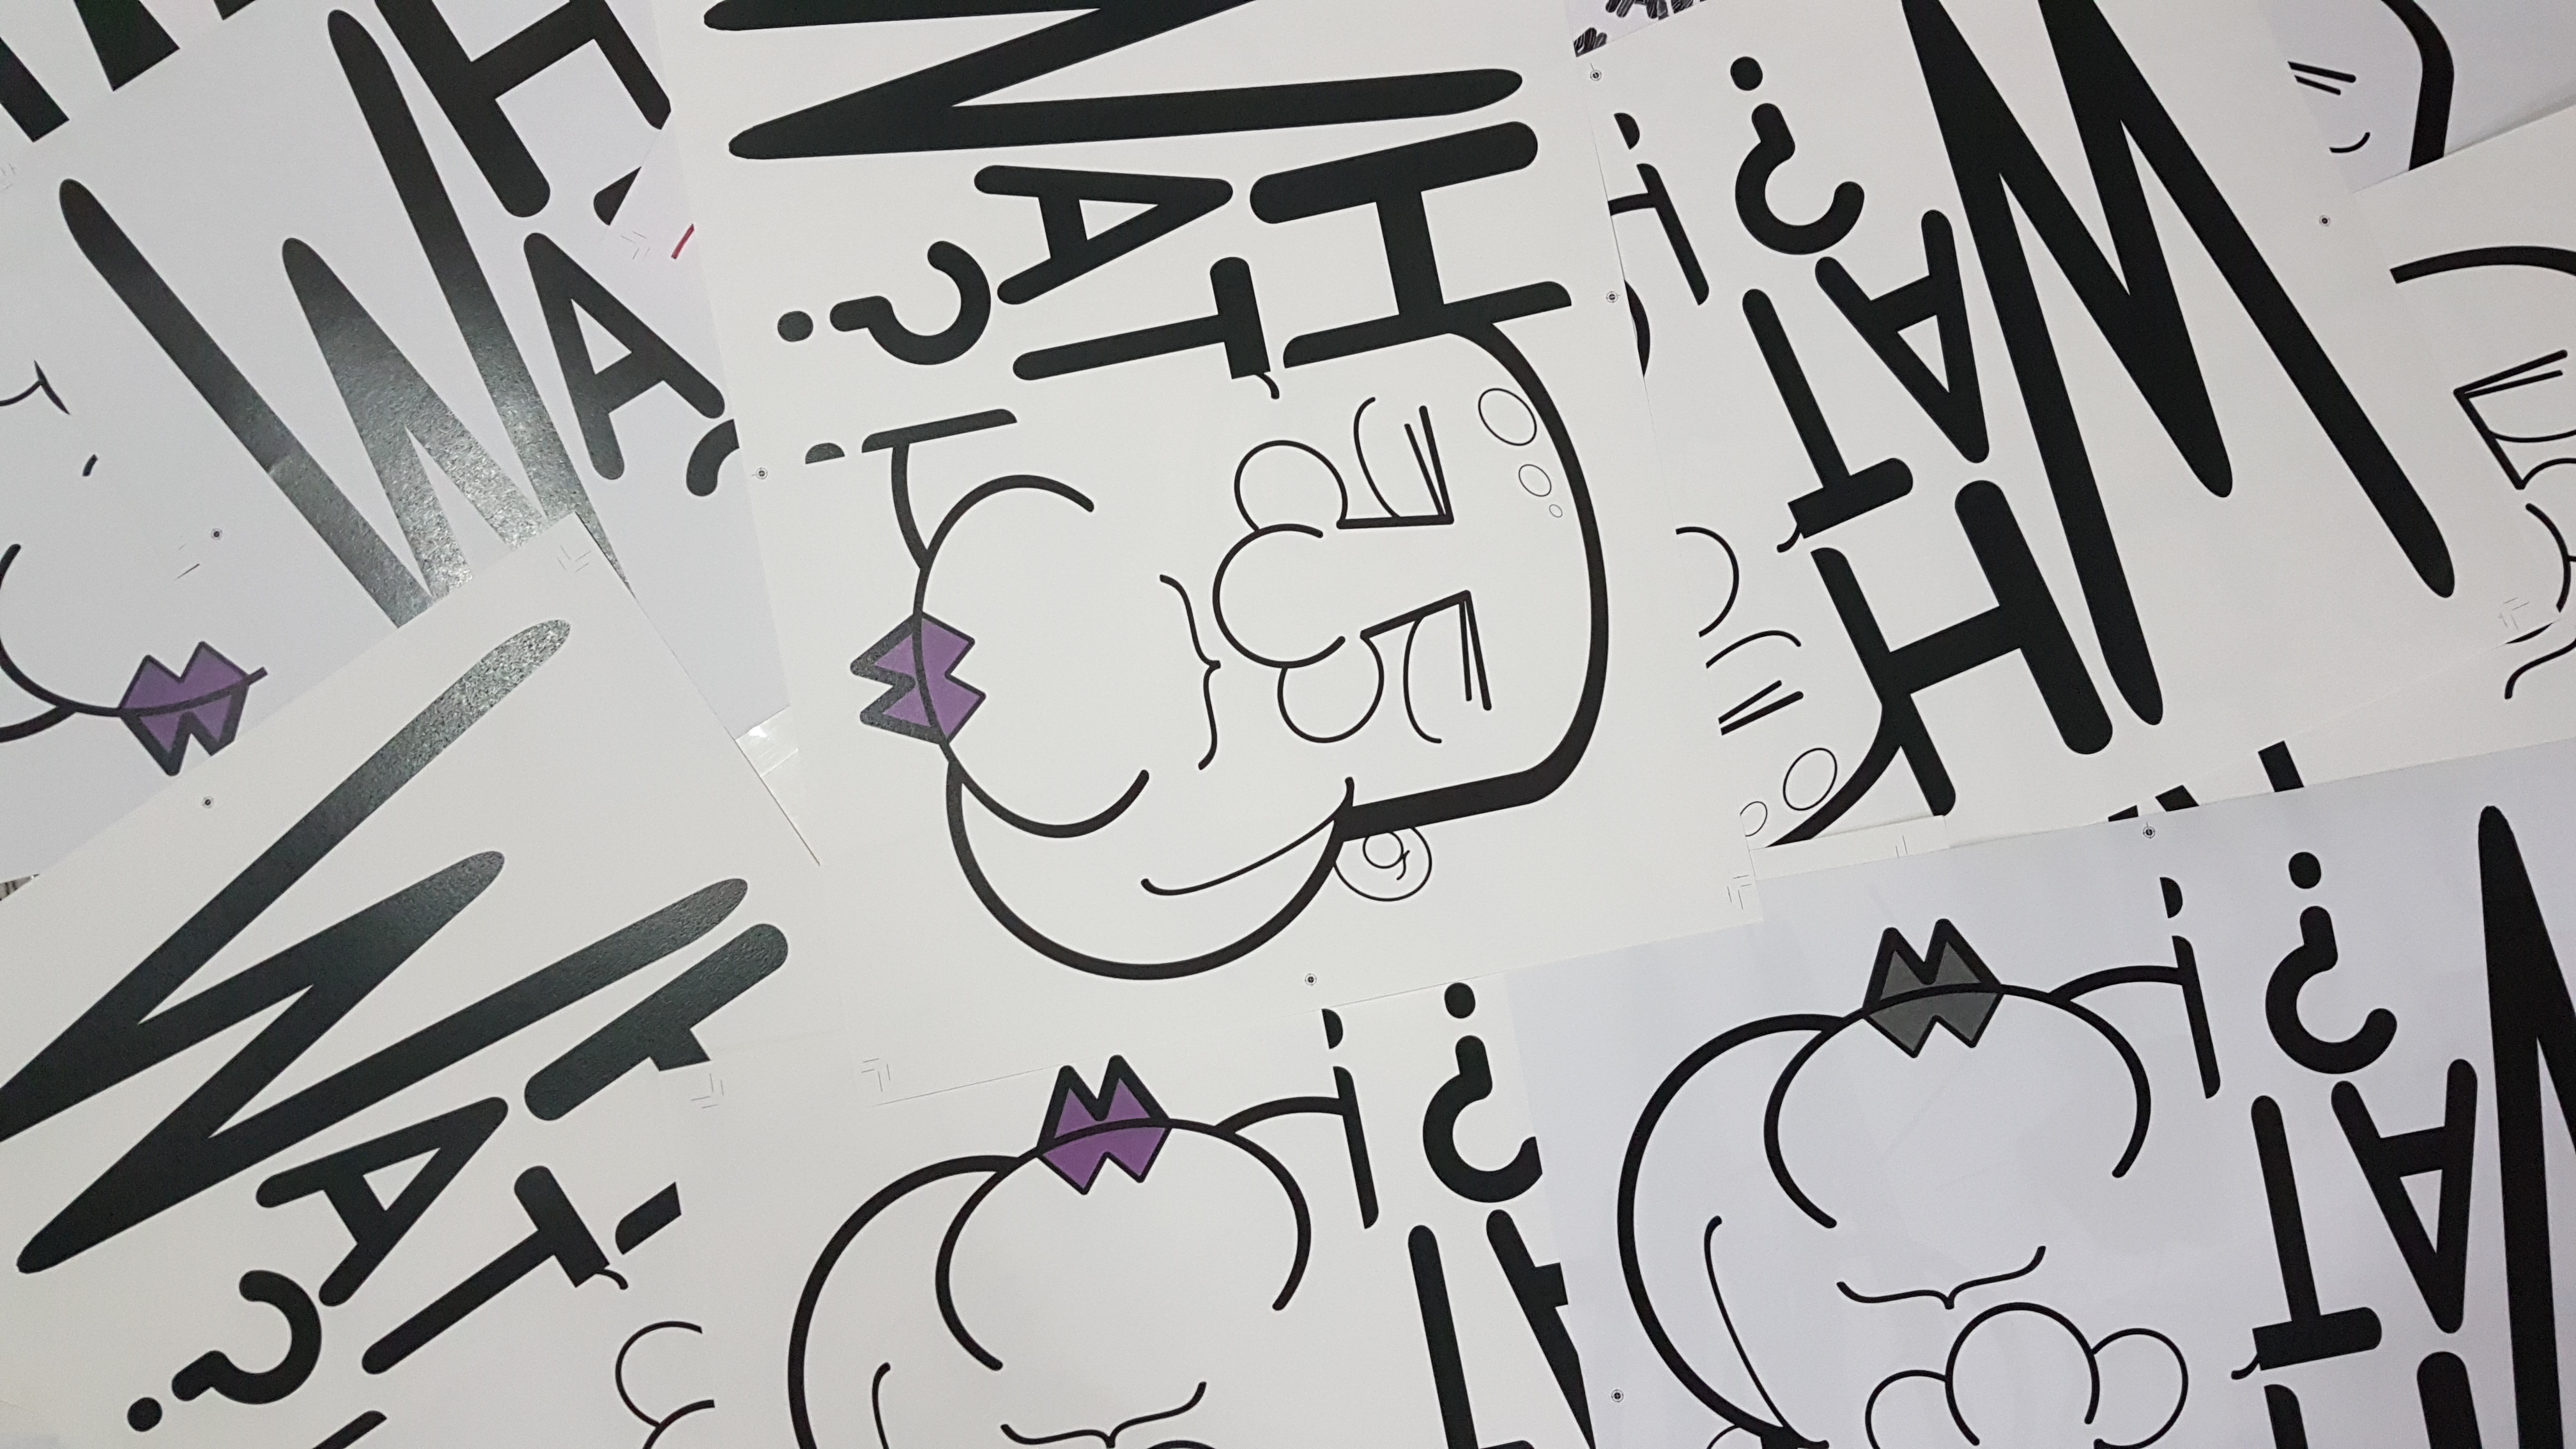
A. Lot. Of. Test. Prints.

At Fancy Paper, I chose a woody texture for the cover page of the book as I really liked the natural rooted quality evoked by the paper. But unfortunately, the paper texture made it hard for ink transfer and it. was. hideous.
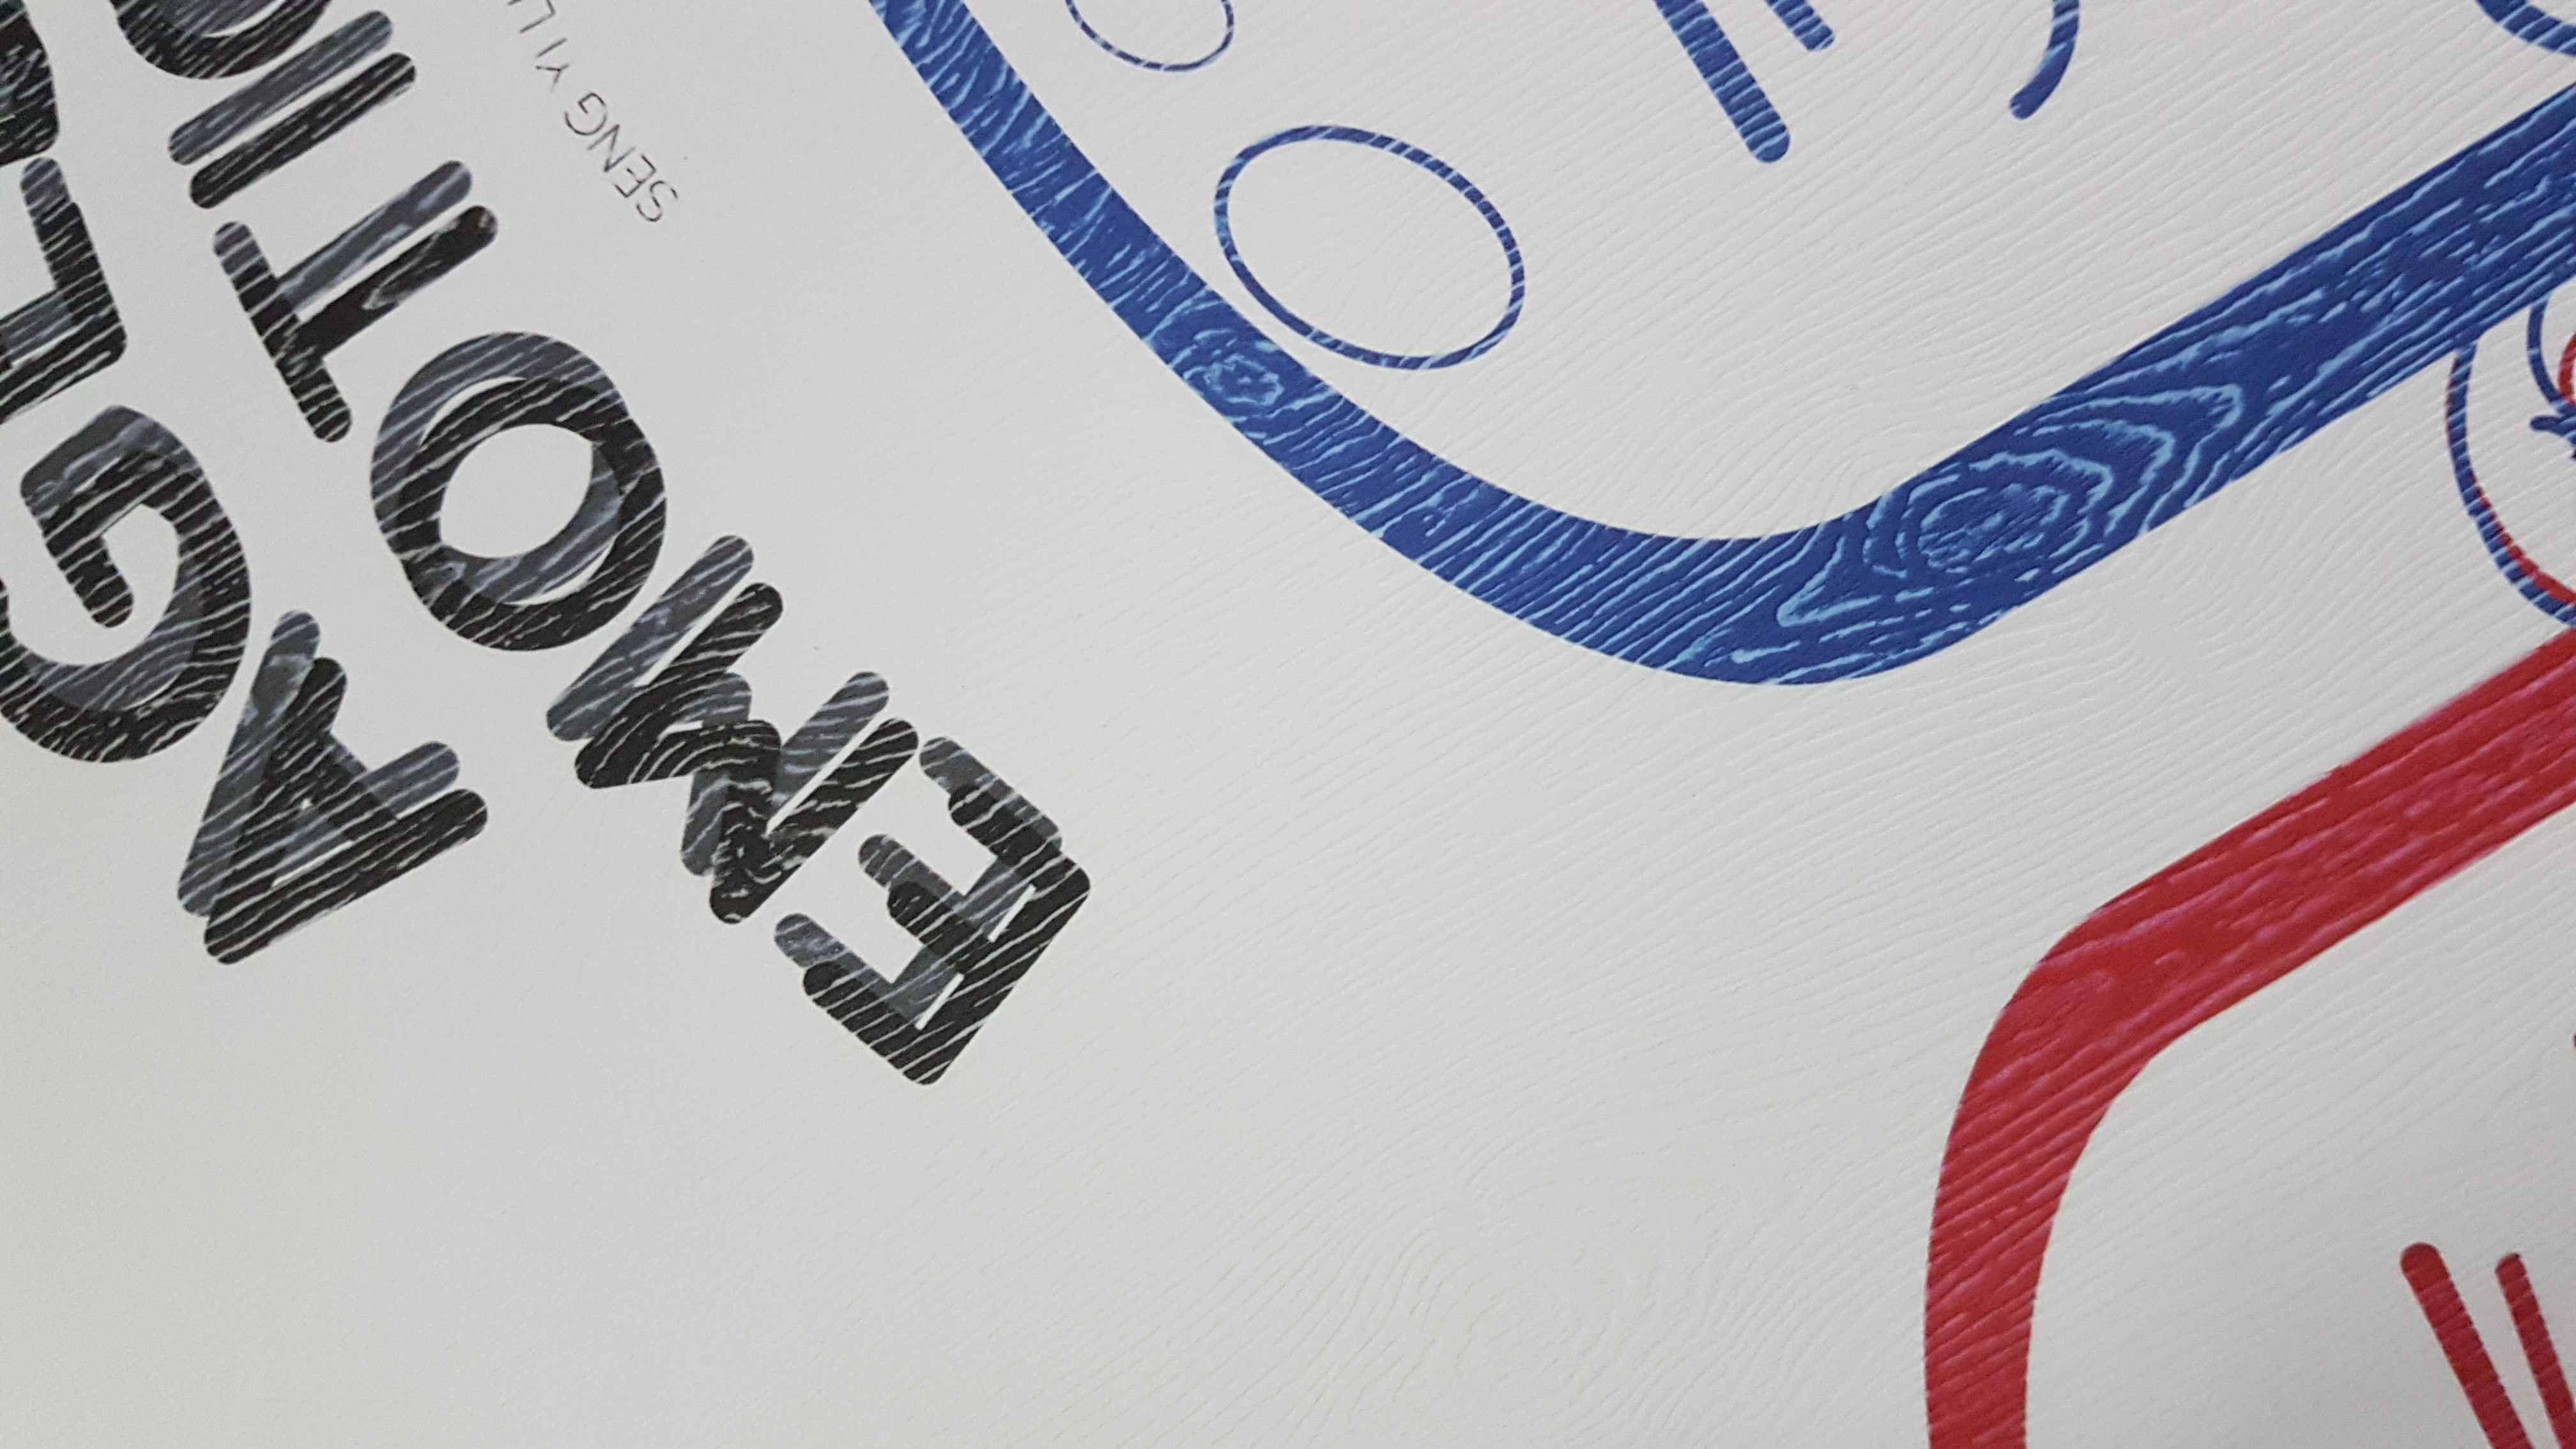
Original choice of paper for cover page.

I chose another paper type that allowed better ink transfer while keeping to the rooted feeling I wanted my book to evoke. Hence, I chose this linen texture cover. The texture reminds me of the clothes washed by my grandmother when I was a kid.

A3 Linen White Textured Paper, 250 GSM
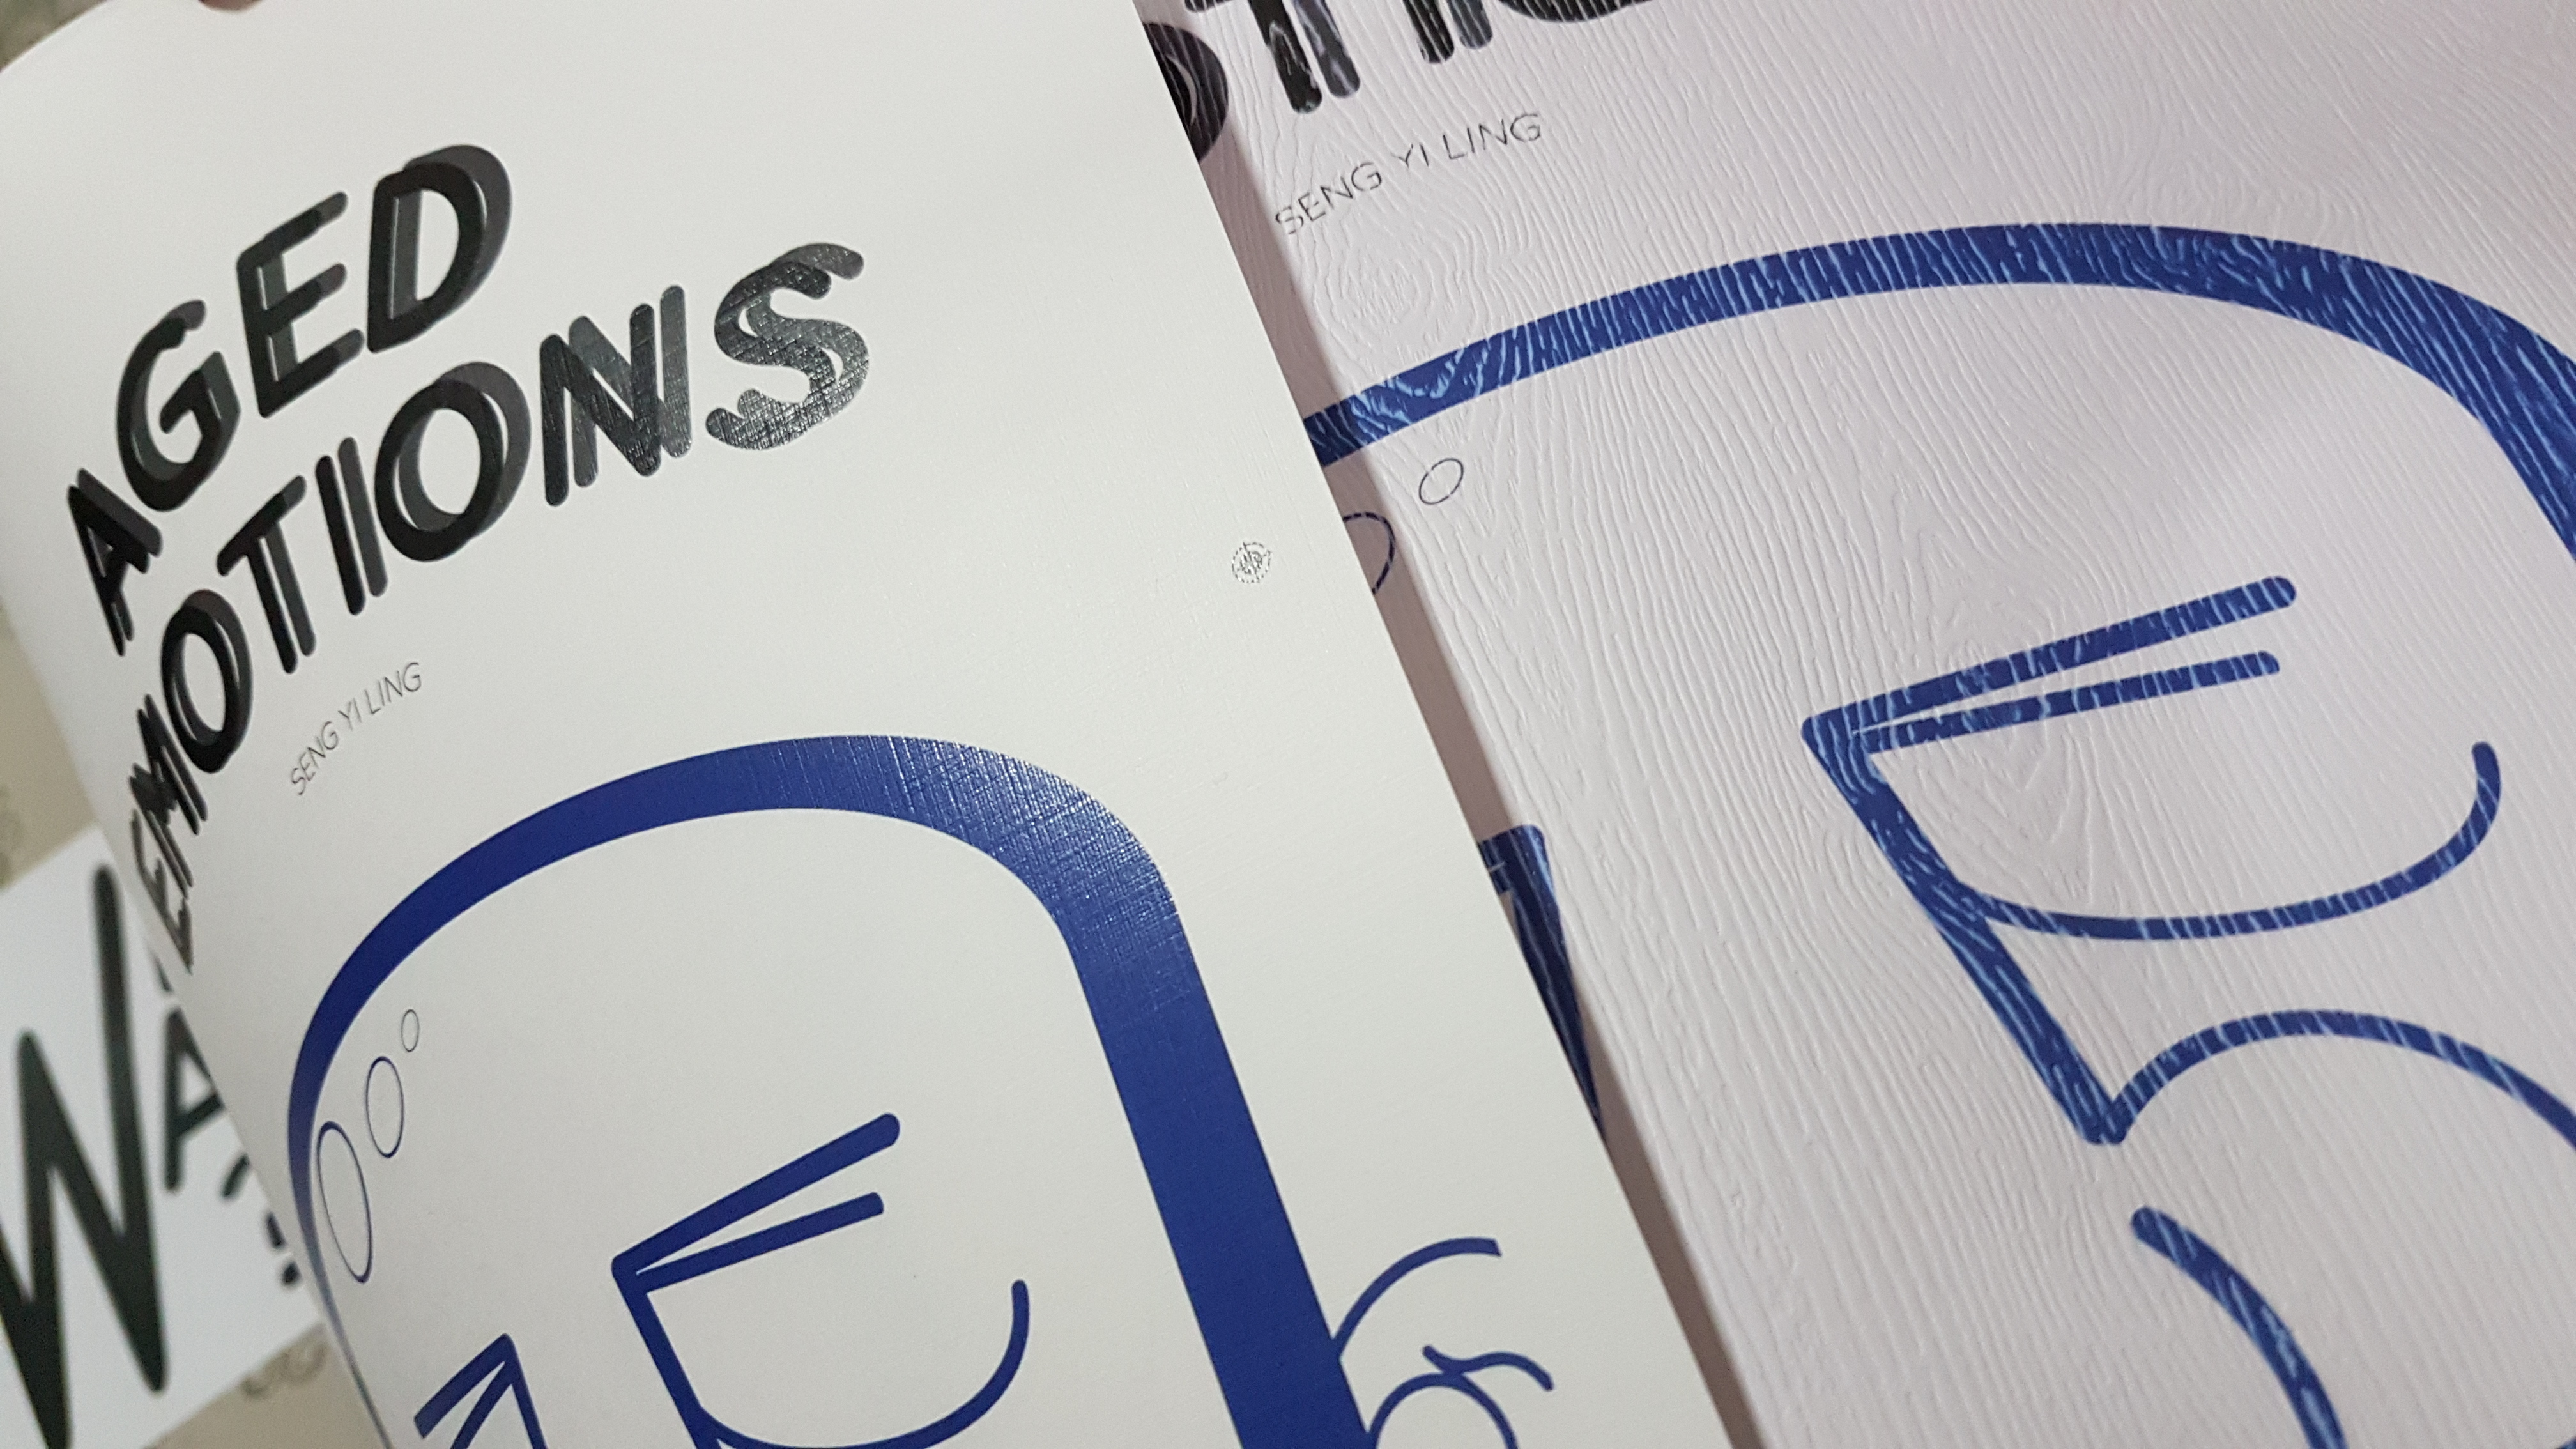
Left: Linen Texture Paper
Right: Wood Texture Paper

Regardless, I liked the texture of the papers and it felt really good to the touch!

I proceeded to do my markings for saddle stitching. I realized that every single piece of paper printed did not align centrally and I had to manually shift the paper when I wanted to use the awl to poke the holes.
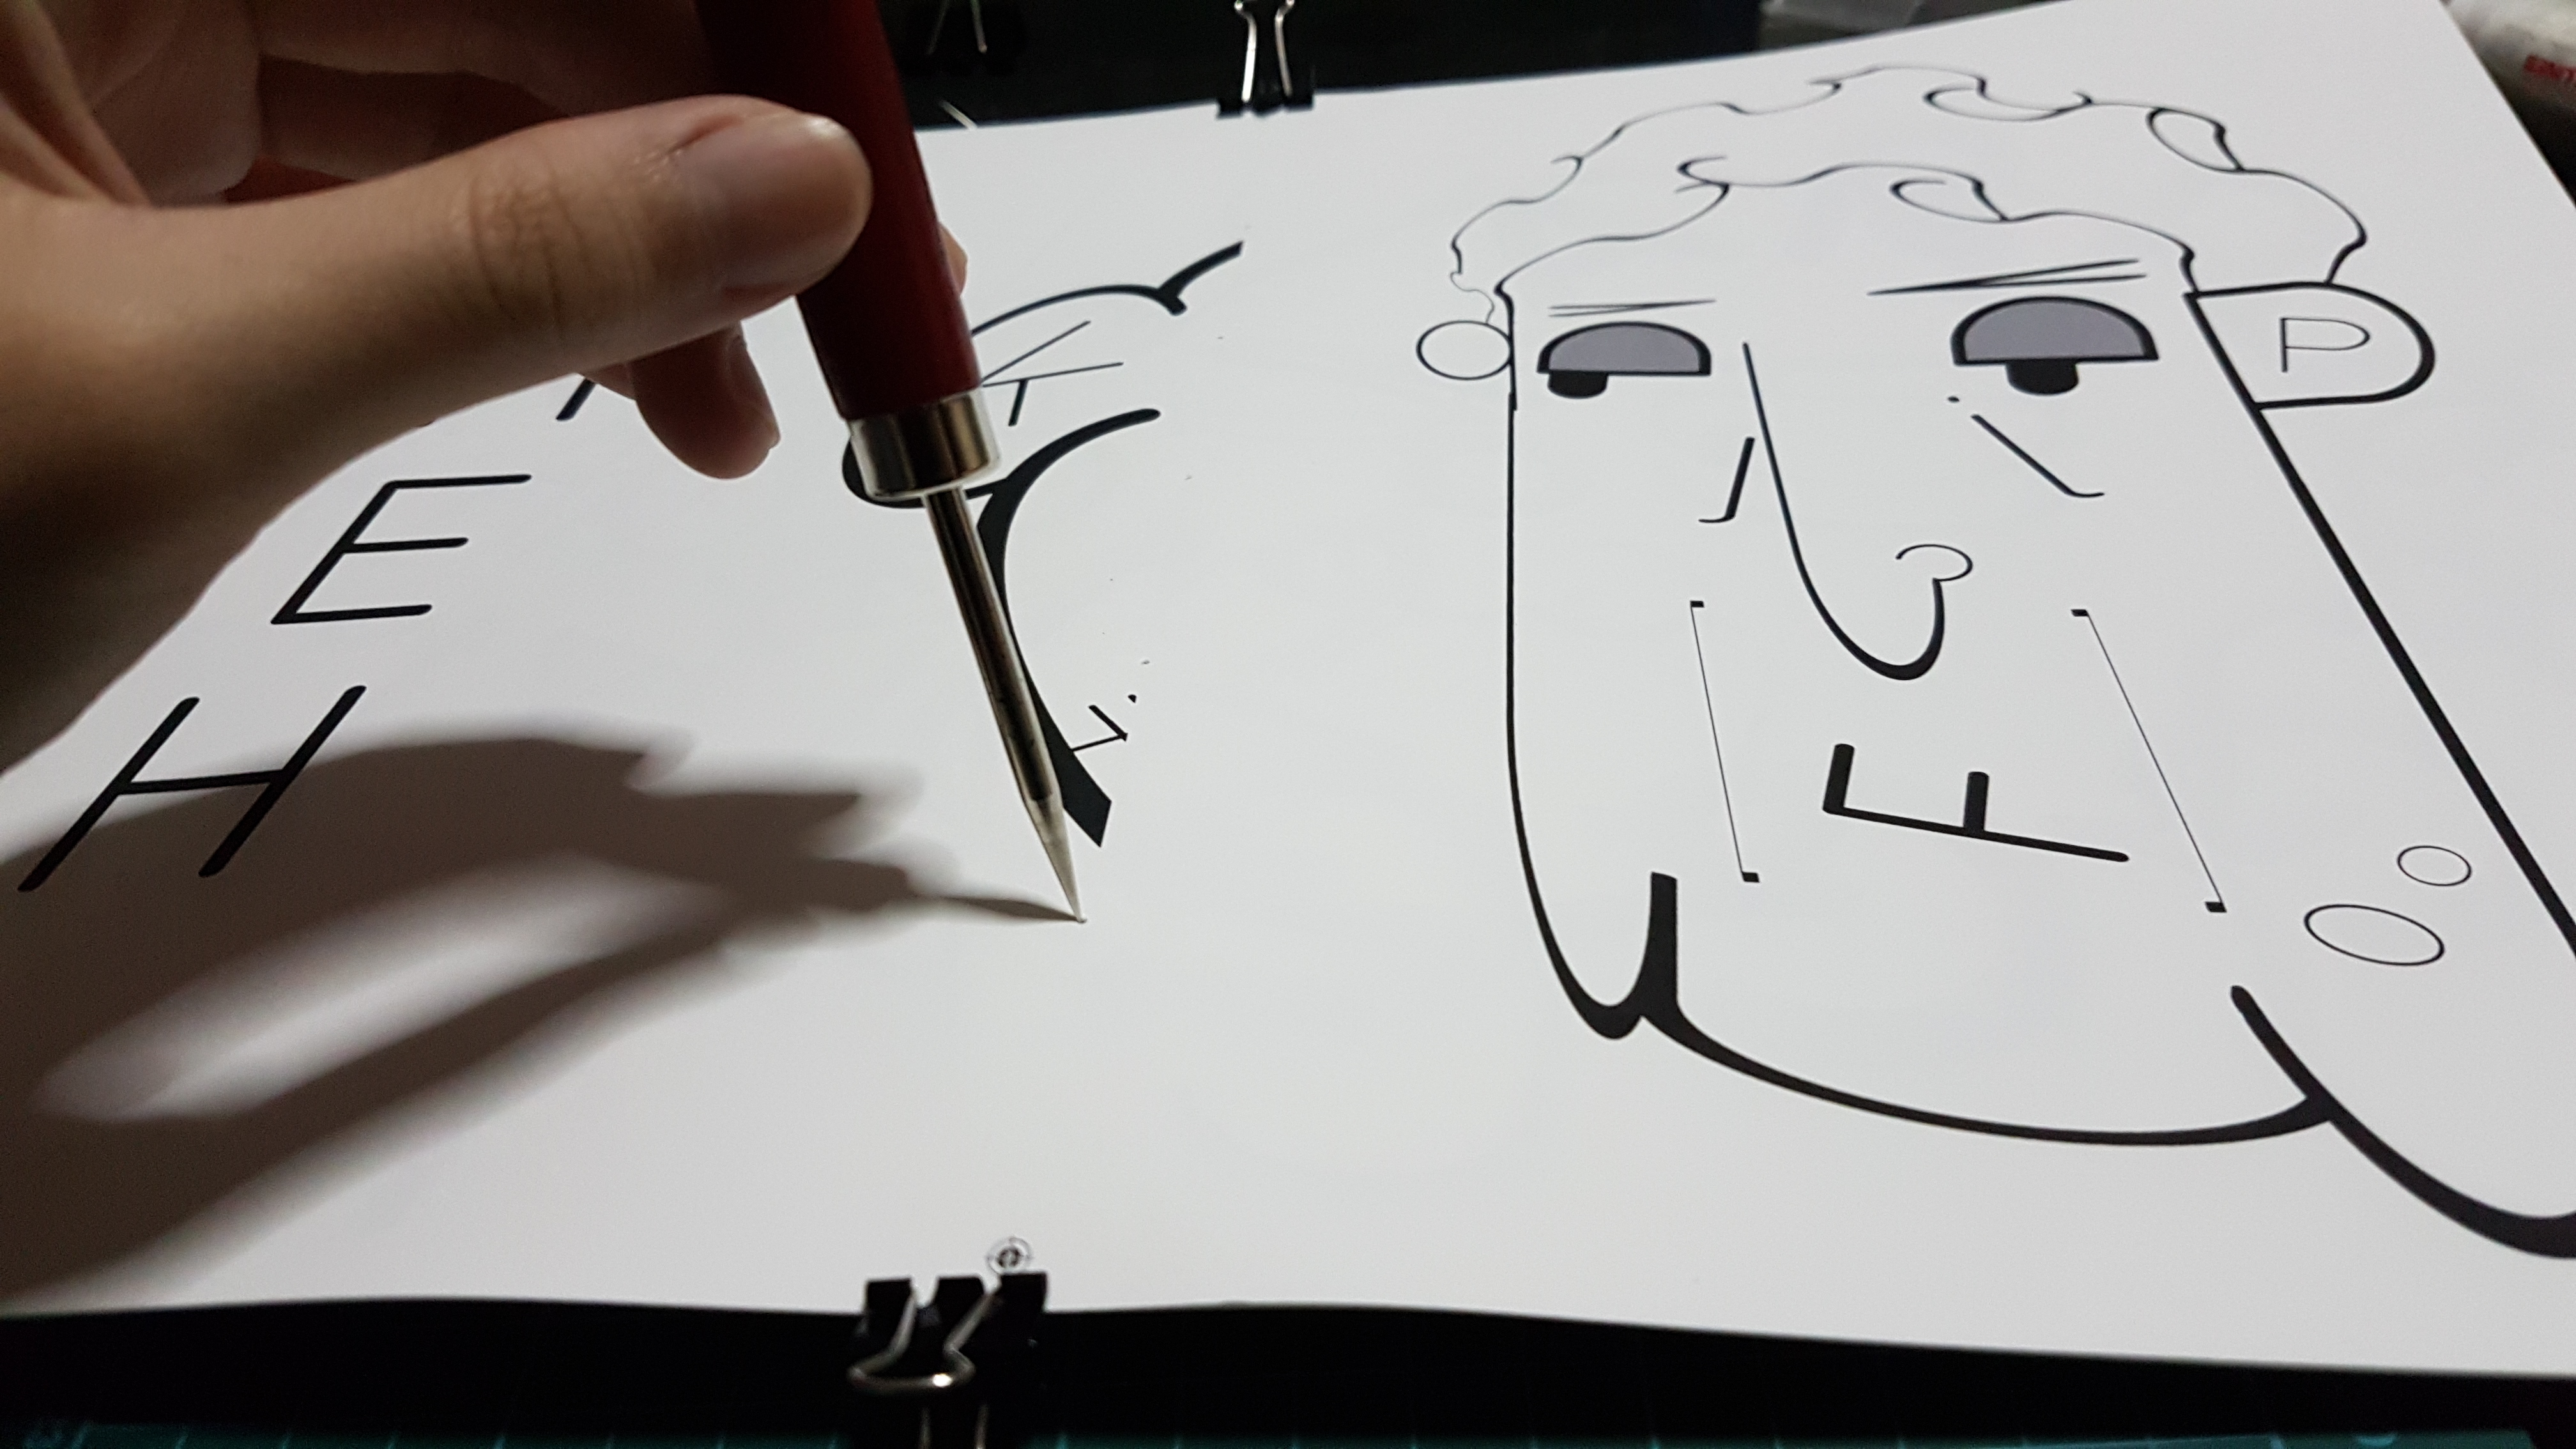
Poking the centerline with an awl.

Self notes to saddle stitching

  1. Use a pencil to draw the central line of the page.
  2. Divide the line with the number of holes you want on that piece and proceed to poke the markings with an awl.
  3. Draw a line on the centre of the next piece of paper, put that poked paper and new paper against the light and use the light that went through the holes as markings for the next page. Bind it with binder clip and poke through the same hole.
  4. Use the second piece as template for the next few pieces.
  5. Saddle stitch the whole stack and fold the book in half. Pressing the book down with weights to flatten it. Process to cut off the crop marks with the book folded.
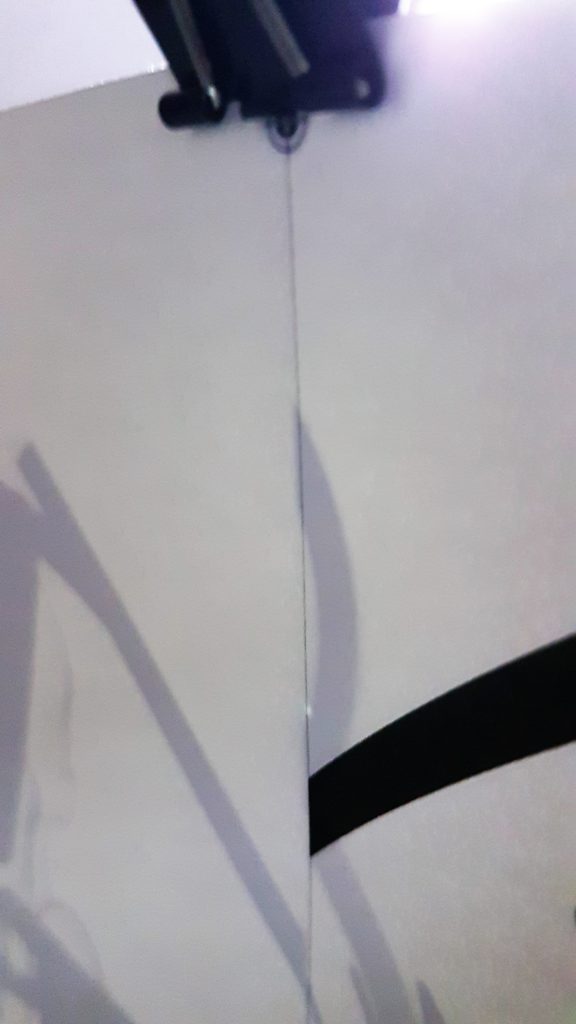
Aligning the hole to the pencil mark.

And I am rather happy with how the result turned out! It was rather neat and secure! 🙂

For the external deliverables, I made a poster for Typography 1 and made a few matte stickers with the existing icons for the poster!
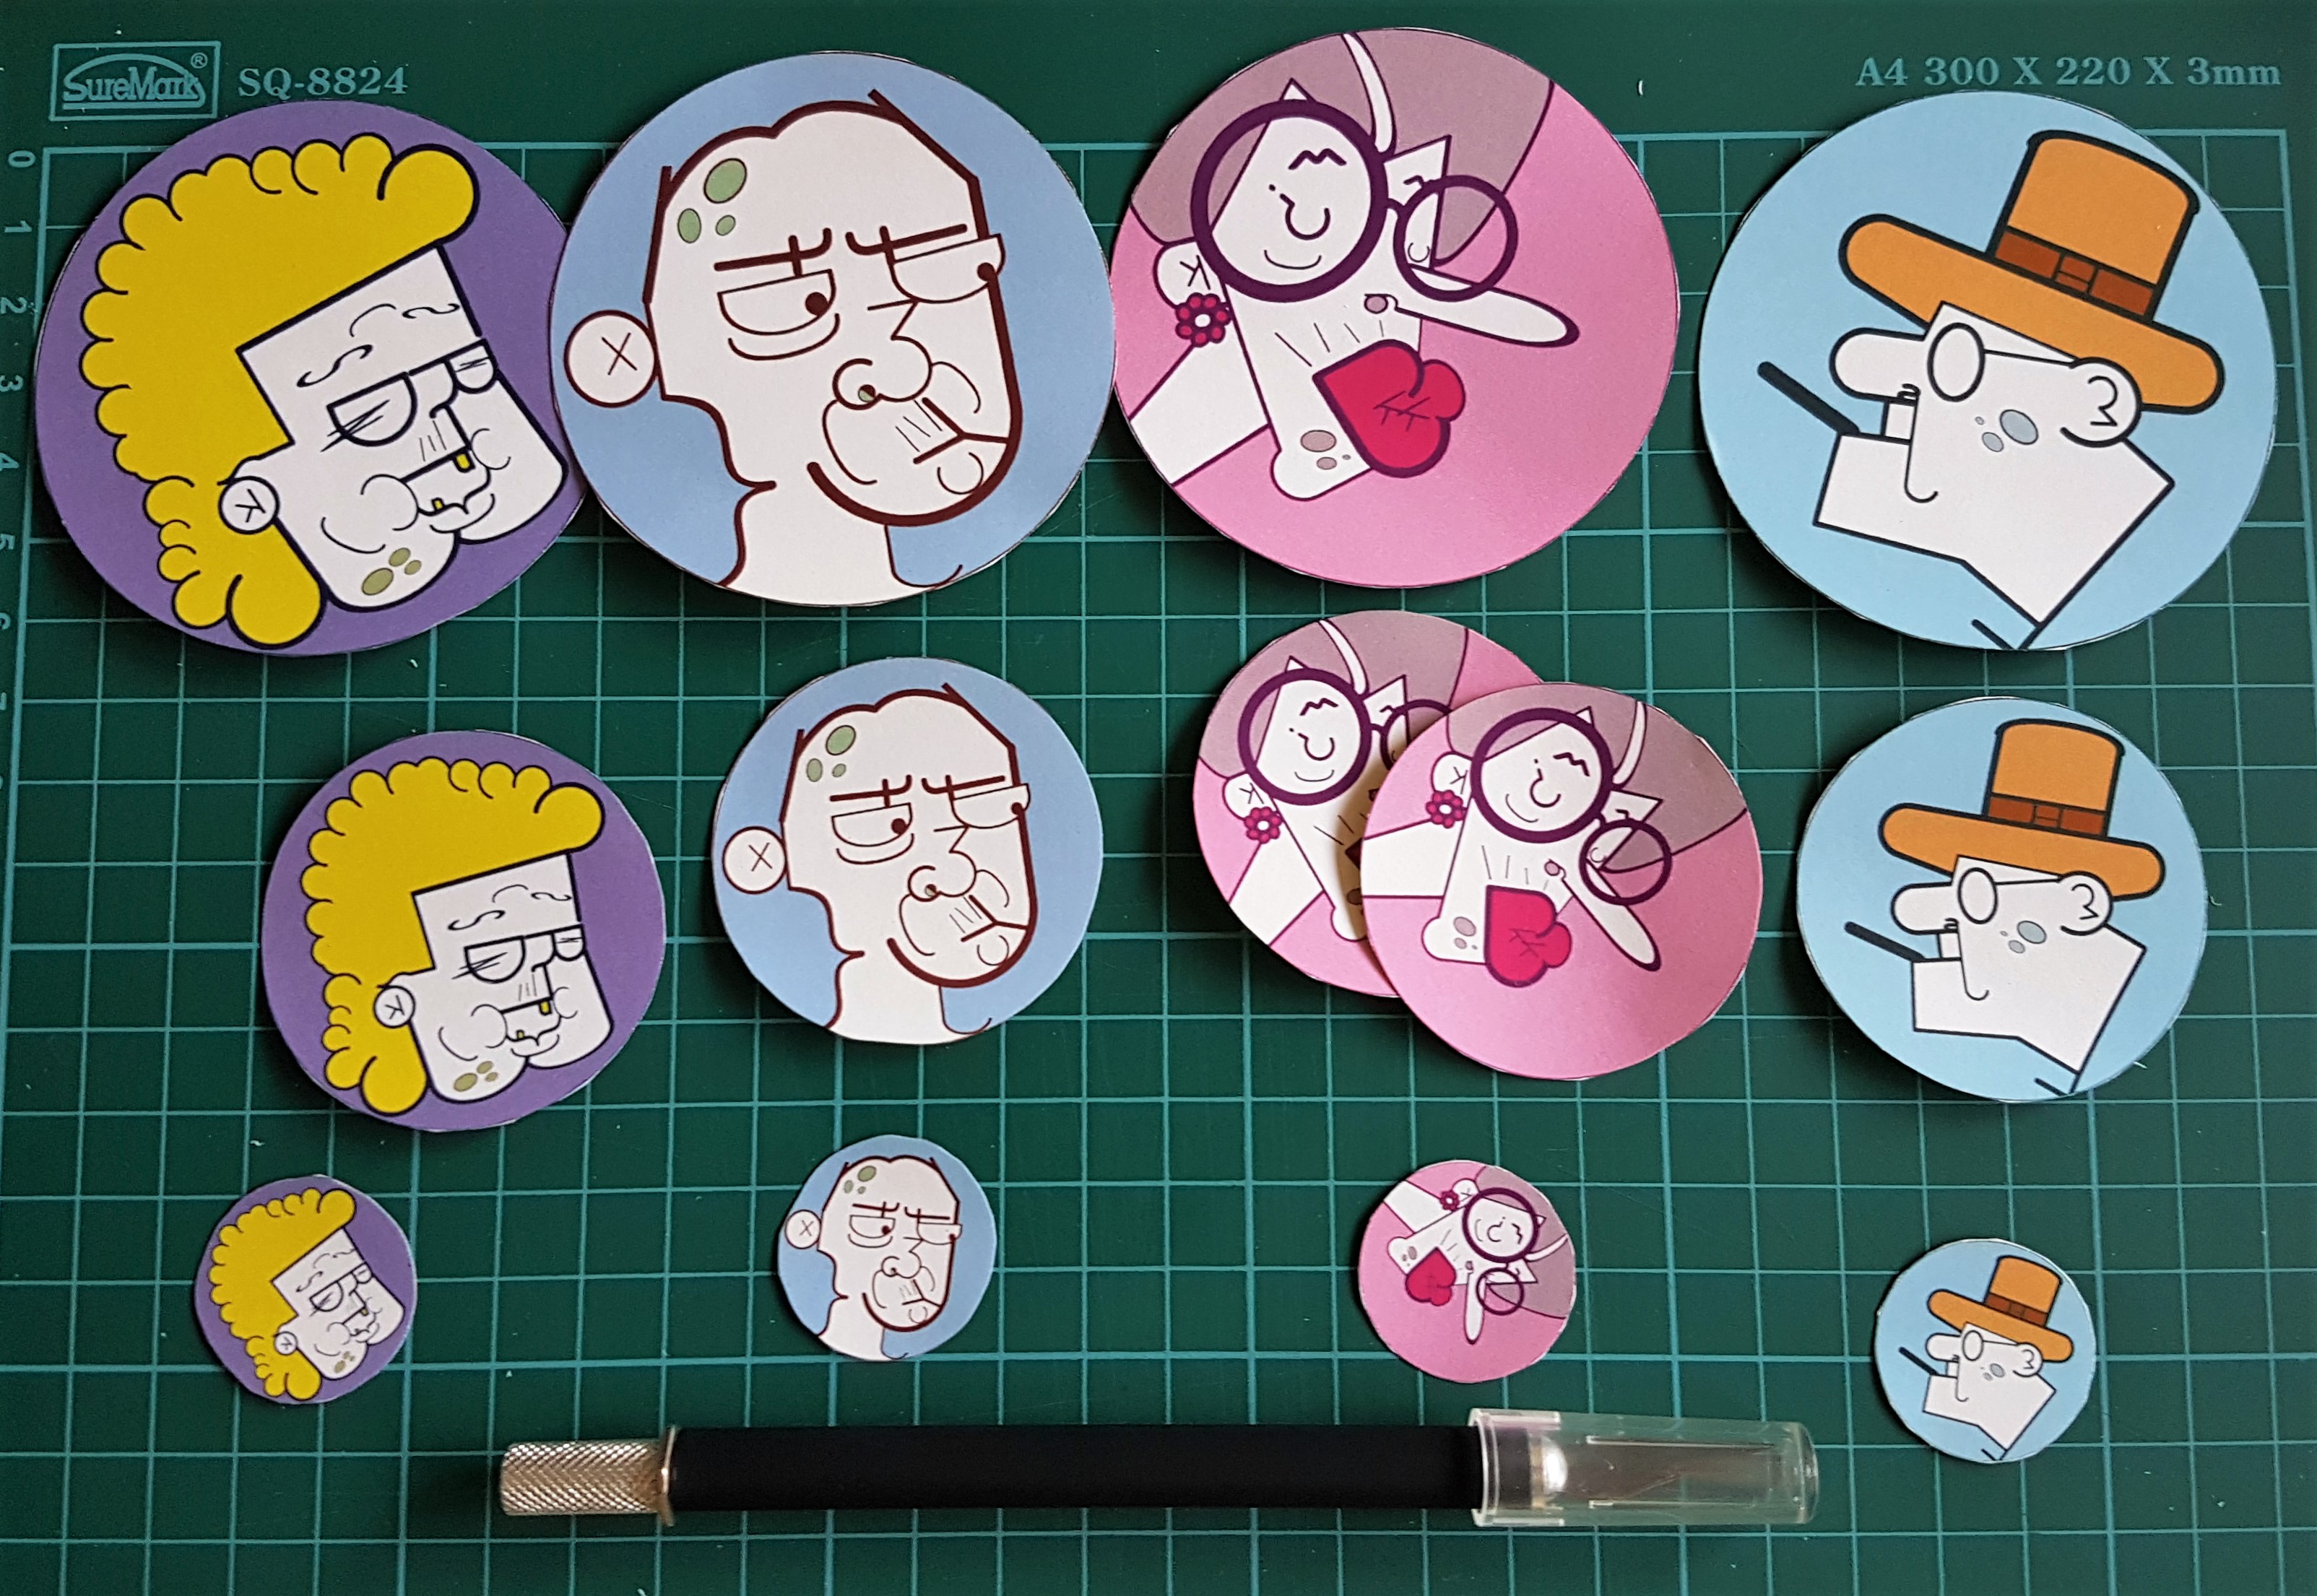
Stickers! I made them in various sizes to see which works best!

I really liked the choice of paper I chose for the poster, though it is unusual for a poster, the sheen of the paper and color made the poster look elegant. Like champagne!

The paper is 300gsm and the poster is in A3 sized.
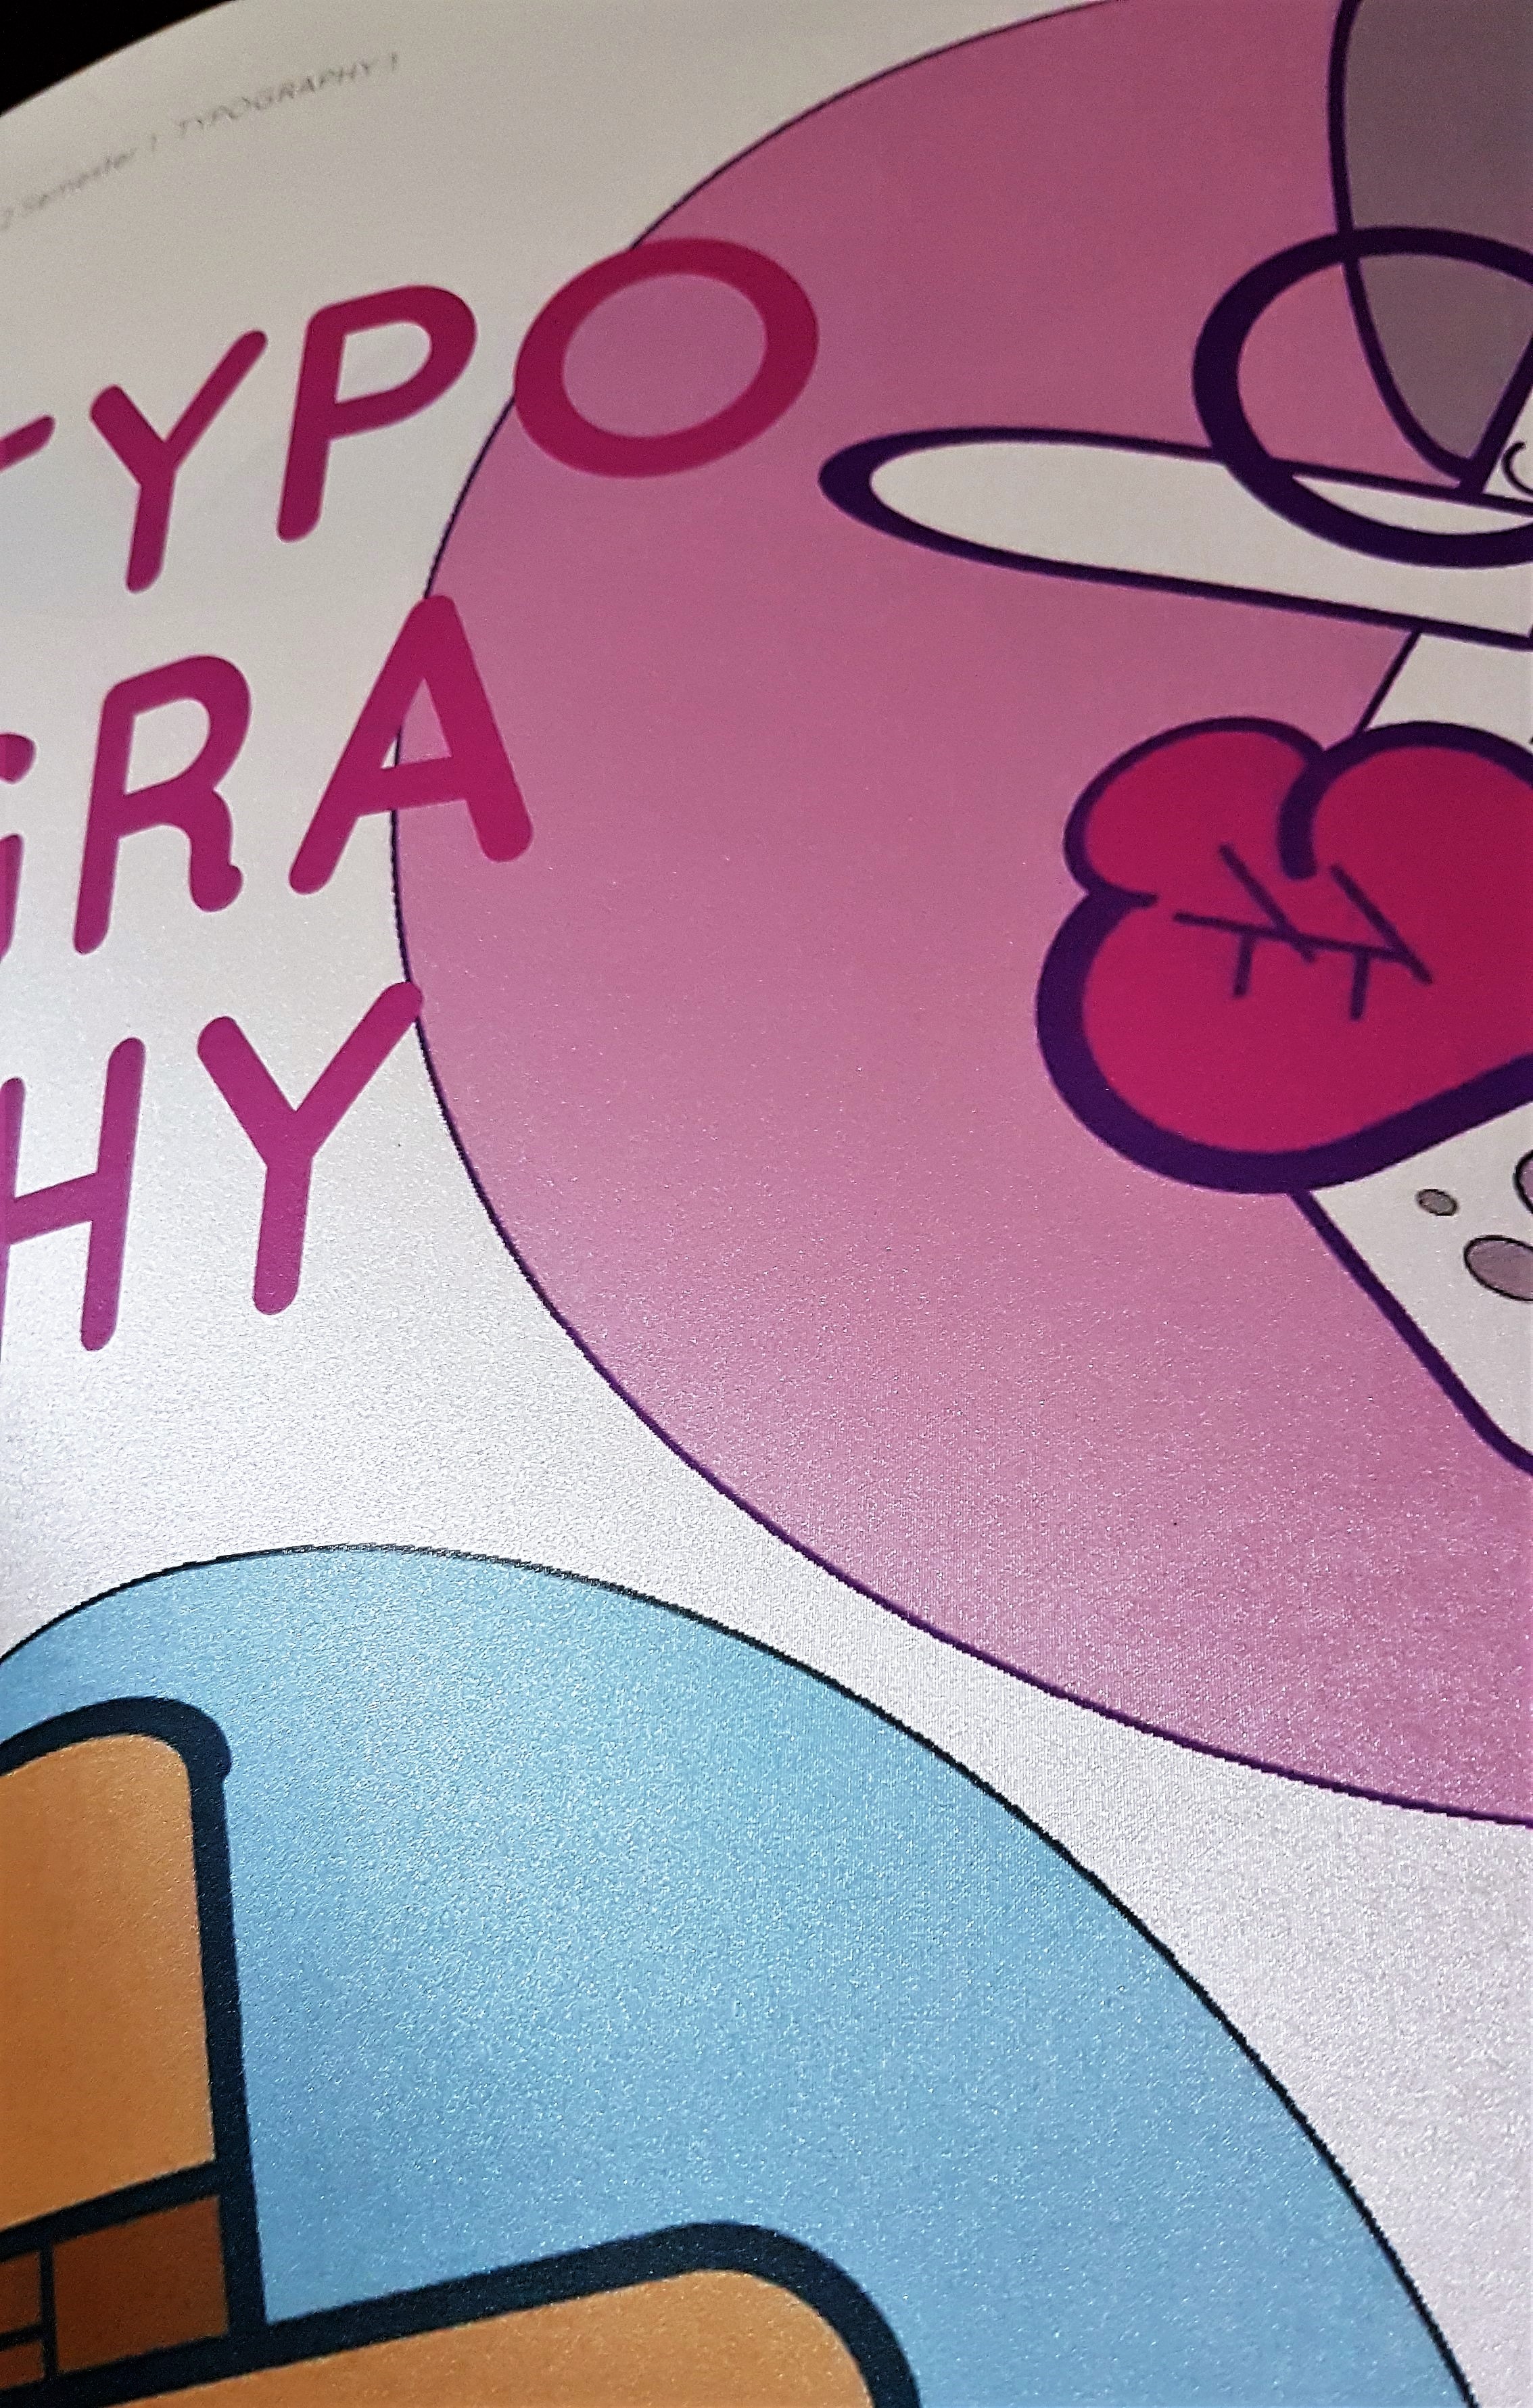
I really like the sheen when light falls on the poster. The lines are actually not there, I just enhanced the contrast for the shimmery sheen to be seen.


THANK YOU FOR STICKING THROUGH THIS VERY LONG DETAILED DOCUMENTATION POST WITH ME!

Not only this post was for sharing the journey of how this book came about, it was also a way of documenting notes on things I have learnt along the way, so in the future I would not make the same mistakes! 🙂

Next up, is the FINAL post for this assignment which I will show the fruits of labour and deliverables for presentation!

Click the image below for the FINAL POST! 🙂

Y2S1 TYPO1 – Assignment 4: PERSONAL CREATION (FINAL)

Cheers,
Seng Yi Ling

New assignment! Lets go!

BRIEF 3

Brief 3 BLACK & WHITE TYPE: Playing with type language
Summary Typography is a versatile element in the world of visual communication. Not only is it meant for language communication but also as graphic communication. The following experiments will get you to think differently about typography. It aims to equip you with the principles of type and also pushes for discovery of new typeform. Use only black and white, no other colours are allowed.
Assignment objectives: Exercise 3a and 3b will allow students to appreciate type beyond its textual nature but as a graphic element of image creation. Exercise 3c develops the students’ sensitivity to the scale and white spaces of typography and the impact it produces to communicate emotions.
Task 1 3a. Type as image

Select one traditional typeface and create a series of composition explorations from it. You may use the various font within the typeface as your series but you need to stick to your chosen typeface. Explore the various anatomy of the selected letter and see how you can create an image out of it. You may also crop or combine certain anatomy together to create your image !

For example:

Typeface: Baskerville

Font: Bold / Light / Italics

Deliver: 2 best compositions at 14cm by 14cm.

Printed on quality white paper card (more than 150gsm)

Task 2 3b. Type as pattern

Create a series of patterns using a single letterform from any traditional typeface (for eg, an “S”). Copy and repeat the letter in columns or rows to make an overall pattern. Change the spacing of the letters to create variations, create repetitive rows and columns and try overlap them. Change the orientation of elements to find your own grid. Repeat

that grid to see what kind of pattern reveal itself

Deliver: 2 best pattern creations at 14cm by 14cm.

Printed on quality white paper card (more than 150gsm)

Task 3 3c. Type as emotion

What does emotion looks like in black and white? Express the word “HELLO” in the following mood. Choose only 4.

Friendly, Angry, Seductive, Confused, Arrogant,

Depressed, Annoyed, Excited, Bored.

Use only one typeface throughout but feel free to vary the different weights, caps, spacing, sizing etc. Explore negative and positive spaces too! No manipulation of type.

Deliver: 4 different emotional type creation at 14cm by 14cm.
Printed on quality white paper card (more than 150gsm)

What you
must deliver
for this assignment
A total of 8 square cards

A process documentation link on OSS

Grading criteria
  • Due diligence of experimentation
  • Depth of methodology and craftsmanship
  • Aesthetics of image creations
  • Sensitivity of paper choices
Due date: Week 10

So before that, Miss Angeline allowed us to do some experiments in class to have a gauge of what the assignment for task 1 and 2 is about!

Task 1 trial: We were told to try different methods to distort the alphabet on the paper physically and rearranging it to create an image out of it. I cut the letter up with a pair of scissors and arranged it like so. Can you tell what letter and typeface it previously was? 🙂
Task 2 Trial: Afterwards we were to experiment with the repetition of a letter to create a pattern! Can you tell what letter and typeface it previously was? 🙂 It was the letter ‘P’ of the Typeface: Bauhaus 93.

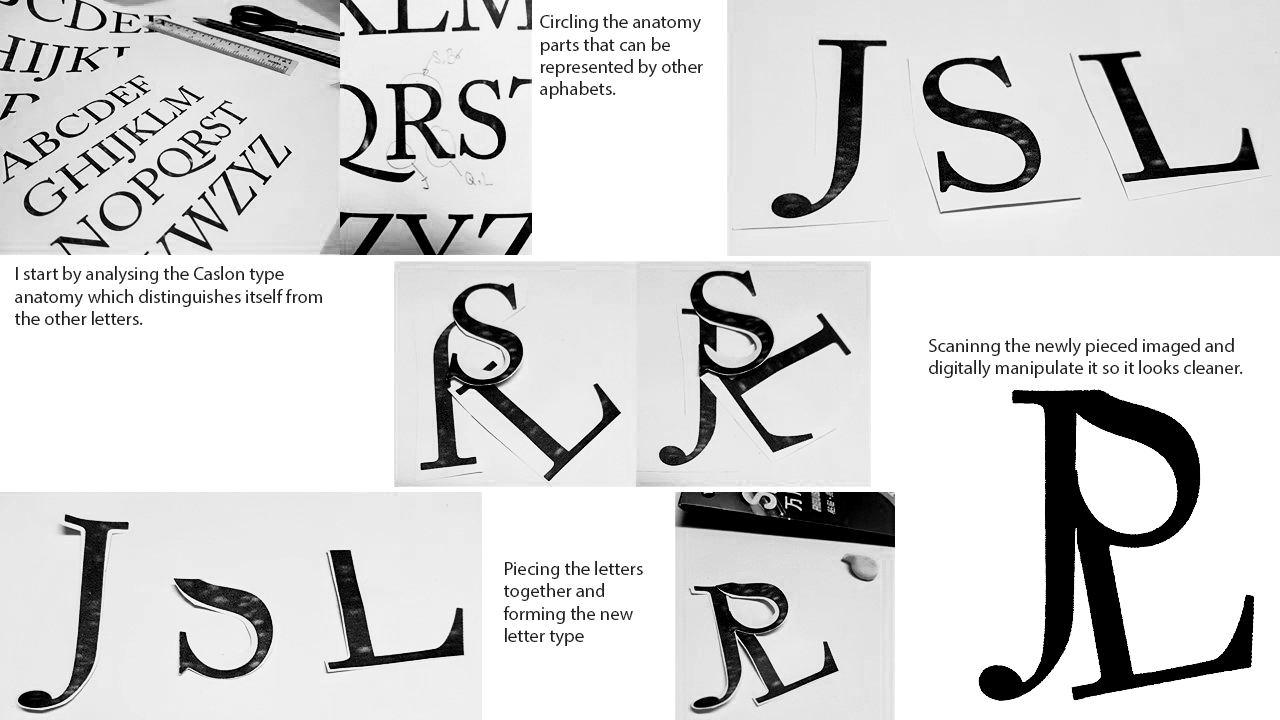
3a. Type as image

Using different letters of the same typeface, I will slice and dice the anatomy of the letter; and then creating the letter using the anatomy of the other letters, to become another typeface.

I chose a few typefaces to narrow down which one I would like to use eventually in the end. In my search, I was looking for type that had more personality. Type where the mere fraction of its anatomy can distinguish itself from the other alphabets. Hence, I chose these 3 to analyse.

And I chose Adobe Caslon in the end as I felt that the Caslon type anatomy has more personality and can aid in distinguishing the letters.

MethodologyI also tried to recreate some other alphabets.


3b. Type as Pattern

I had a lot of fun doing this segment of the assignment as it not only is very interesting to see how each letter of each type can create beautiful patterns, the variety is endless because every angle the letter is inverted or tilted, bolder etc. It gives off a completely different feeling!

I used the typeface: Garamond for this part of the project as I really liked the old style serif. It looks classy and posh, especially the letters with the round descender, such as the lower case ‘y’.

I decided to play with many ways of creating patterns with the lower case Garamond ‘y’.

Garamond Lowercase ‘y’: I was inspired by Bohemian carpets for this pattern, wanted something that resembles the sun.

Garamond Lowercase ‘y’: Inverted the colors for this: White on Black background. I also increased the scale so that the radial composition can be seen more clearly, while also turning the composition in 45 degrees to make it less straight.

Garamond Lowercase ‘y’: Mirroring and reflecting.

I decided to play with optical illusion for upper case ‘Q’, the tail of ‘Q’ is very long and sleek, hence direction can be created subtly with the tail of ‘Q’.

Garamond Uppercase ‘Q’:
Repeating the upper case Q in a radial direction, and reflecting it so it will create a sense of movement with the different directions as indicated by the tail of the Q.

Garamond Uppercase ‘Q’:
Inverted the colors, White on Black.

Garamond Uppercase ‘Q’:
Created outlines and varying the core color to create more movement, as though you are being sucked into the hole on the top left hand corner

I have realized that not only layout and composition is very important as it is not merely just repetition, I wanted to create movement in my compositions. Hence, I chose to do my patterns in radial form, to create some form of optical illusion. In addition, I inverted the colors and played with tonality and outlines to push my designs.


3c. Type as Emotion

For this segment, I chose to use the typeface: Helvetica. My objective was to convey emotions through layout, scale and tonality.

I chose Helvetica because the typeface is very neutral. There is no biasness or any form of personality which was what I wanted as it can help me achieve my goal: Strip off any preconceived notion of typeface to express the emotion. For instance, if I were to use ‘Black Letter’ for this segment, Black Letter is medieval and vintage. Hence, using Black Letter to express the emotion, ‘anger’ it will feel like an angry old man being angry. Well… that is my interpretation. 🙂

Inspired by a weak heartbeat on the heart monitor

Changed the tonality of ‘LO’ and arranged in high and low to emulate boredom

All pushed to the side in a black background Wanting to be alone. All letters are tilted as though leaning on each other for support

Excitement is bursting of out the frame! E is tilted to show slight cheekiness as compared to the straight ‘HLLO’

Pushed all to the corner. Tonal contrast shows that it is slowly being consumed by darkness.

A more Obessive Compulsive Disorder (OCD) perspective where everything is aligned properly and there is a titled letter to ruin the formation. Used Greyscale for visibility.

Swirly line formation to create a whimsical mood. Scale changes as though it is approaching you. Letters go out of the frame to express enthusiasm in the greeting.

I have come to the end for this process documentation of my explorations! Stay tuned to my final Assignment 3 post to see my final productions! 🙂

Thank you!

Seng Yi Ling.

After reviewing the very constructive and helpful feedbacks given by my classmates and Miss Ina, I made several changes!smile

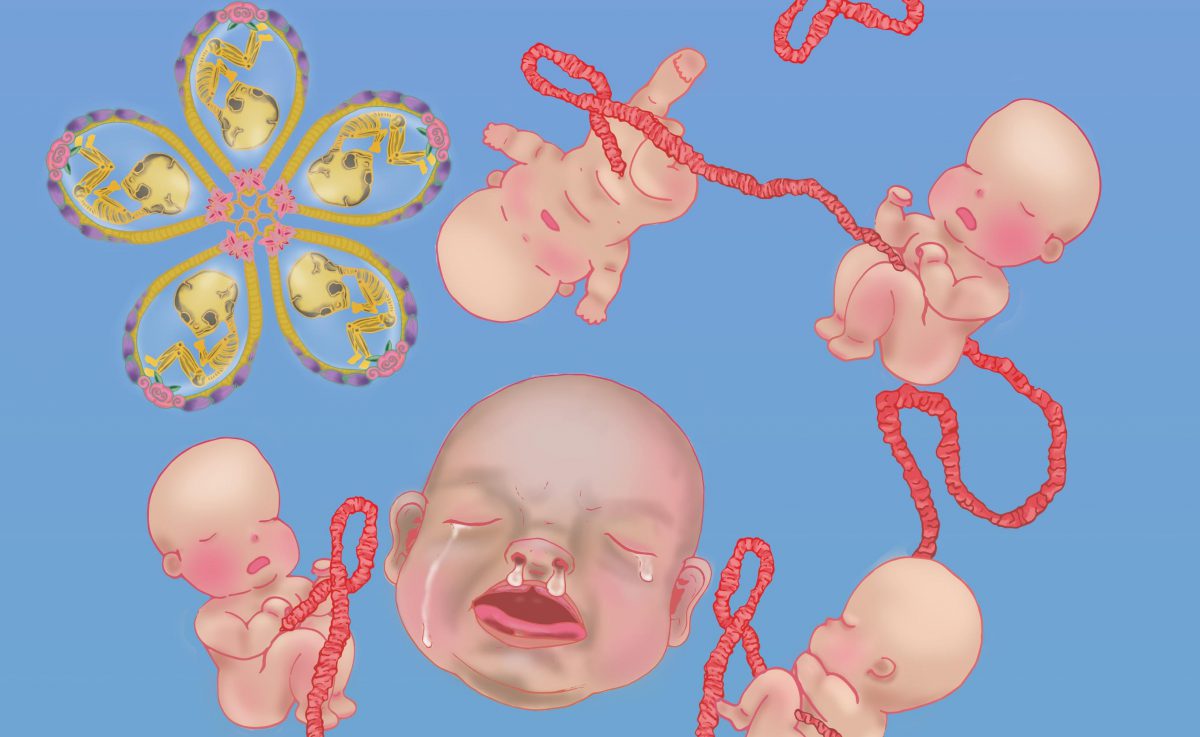
I took the advice to play with opacity and I drew extra motifs: Lotus Petals. I imagined falling petals with he floating babies would be really dreamy.

Hence I placed all my bloomed lotuses at the top, and the petals falling from there. This creates visual direction as well from top to bottom, where all the fallen petals gather at the bottom.

And then I added more existing motifs and varied the background to evoke different mood.

After consulting with Miss Ina, she asked me to try another composition where the babies are buried in lotus petals!

And it was indeed a very different feeling as compared to the floating babies composition, and I added other existing motifs to see what else works best!

I can’t help but think of the film American Beauty upon looking at the babies buried in lotus petals haha!

Furthermore, I added an overlay of the babies behind the existing ones as suggested to create greater depth to the background that works best, preparing them for test print with varying brightness, contrast and saturation!

To be honest, the comments given were really helpful because I was really stuck for a long time and the comments really helped to give me a new direction to approach my banner. THANK YOU. 🙂
Hello all! It has been a while since I have updated this page. So here is my progress so far!smile


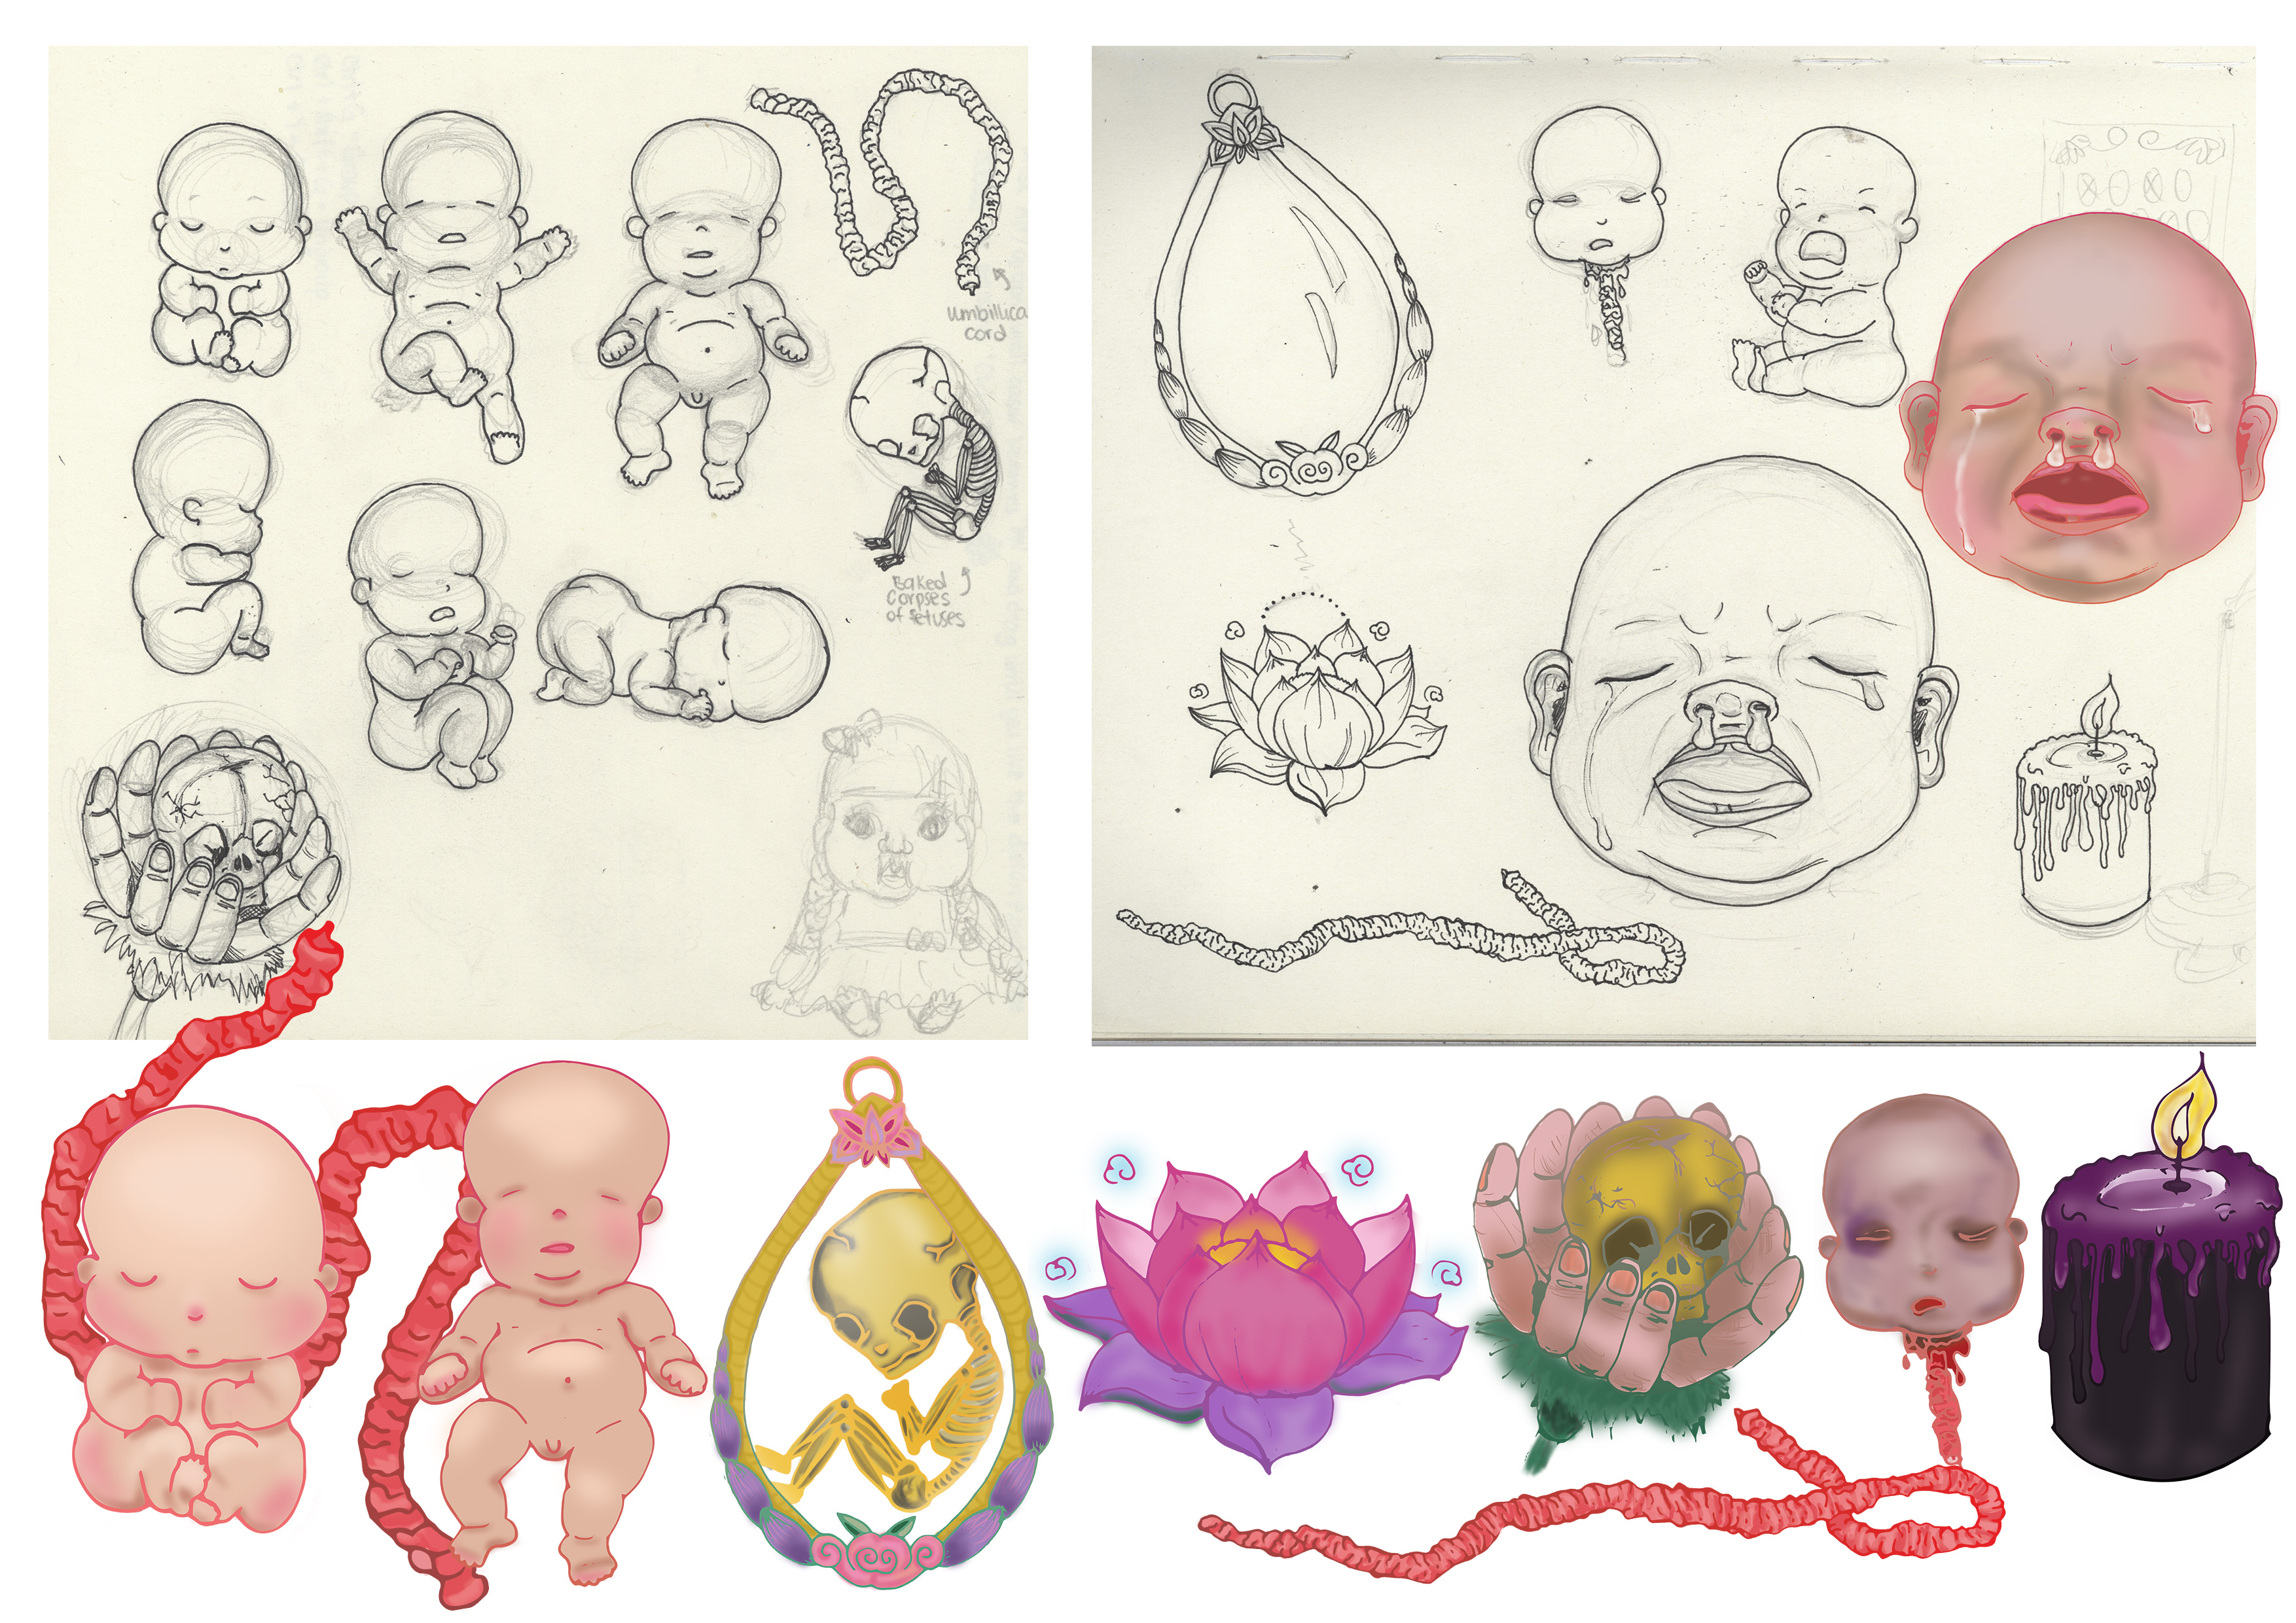
I digitalized my motifs which I drew on paper and then used a Wacom tablet to color in my motifs, adding shading and also changed the outlines of the motif.

I drew out a few layouts that I can explore placing my composition as I faced serveral,several issues regarding file size on Adobe Illustrator which delayed my process severely. 🙁 These is just ONE of the explorations for the layout compositions.

Banner Draft 1
I simplified the composition based on last week’s suggestion and tried out the initial design I had in mind. Composition is the same for both here, but I changed up the background gradient color to evoke different feelings.

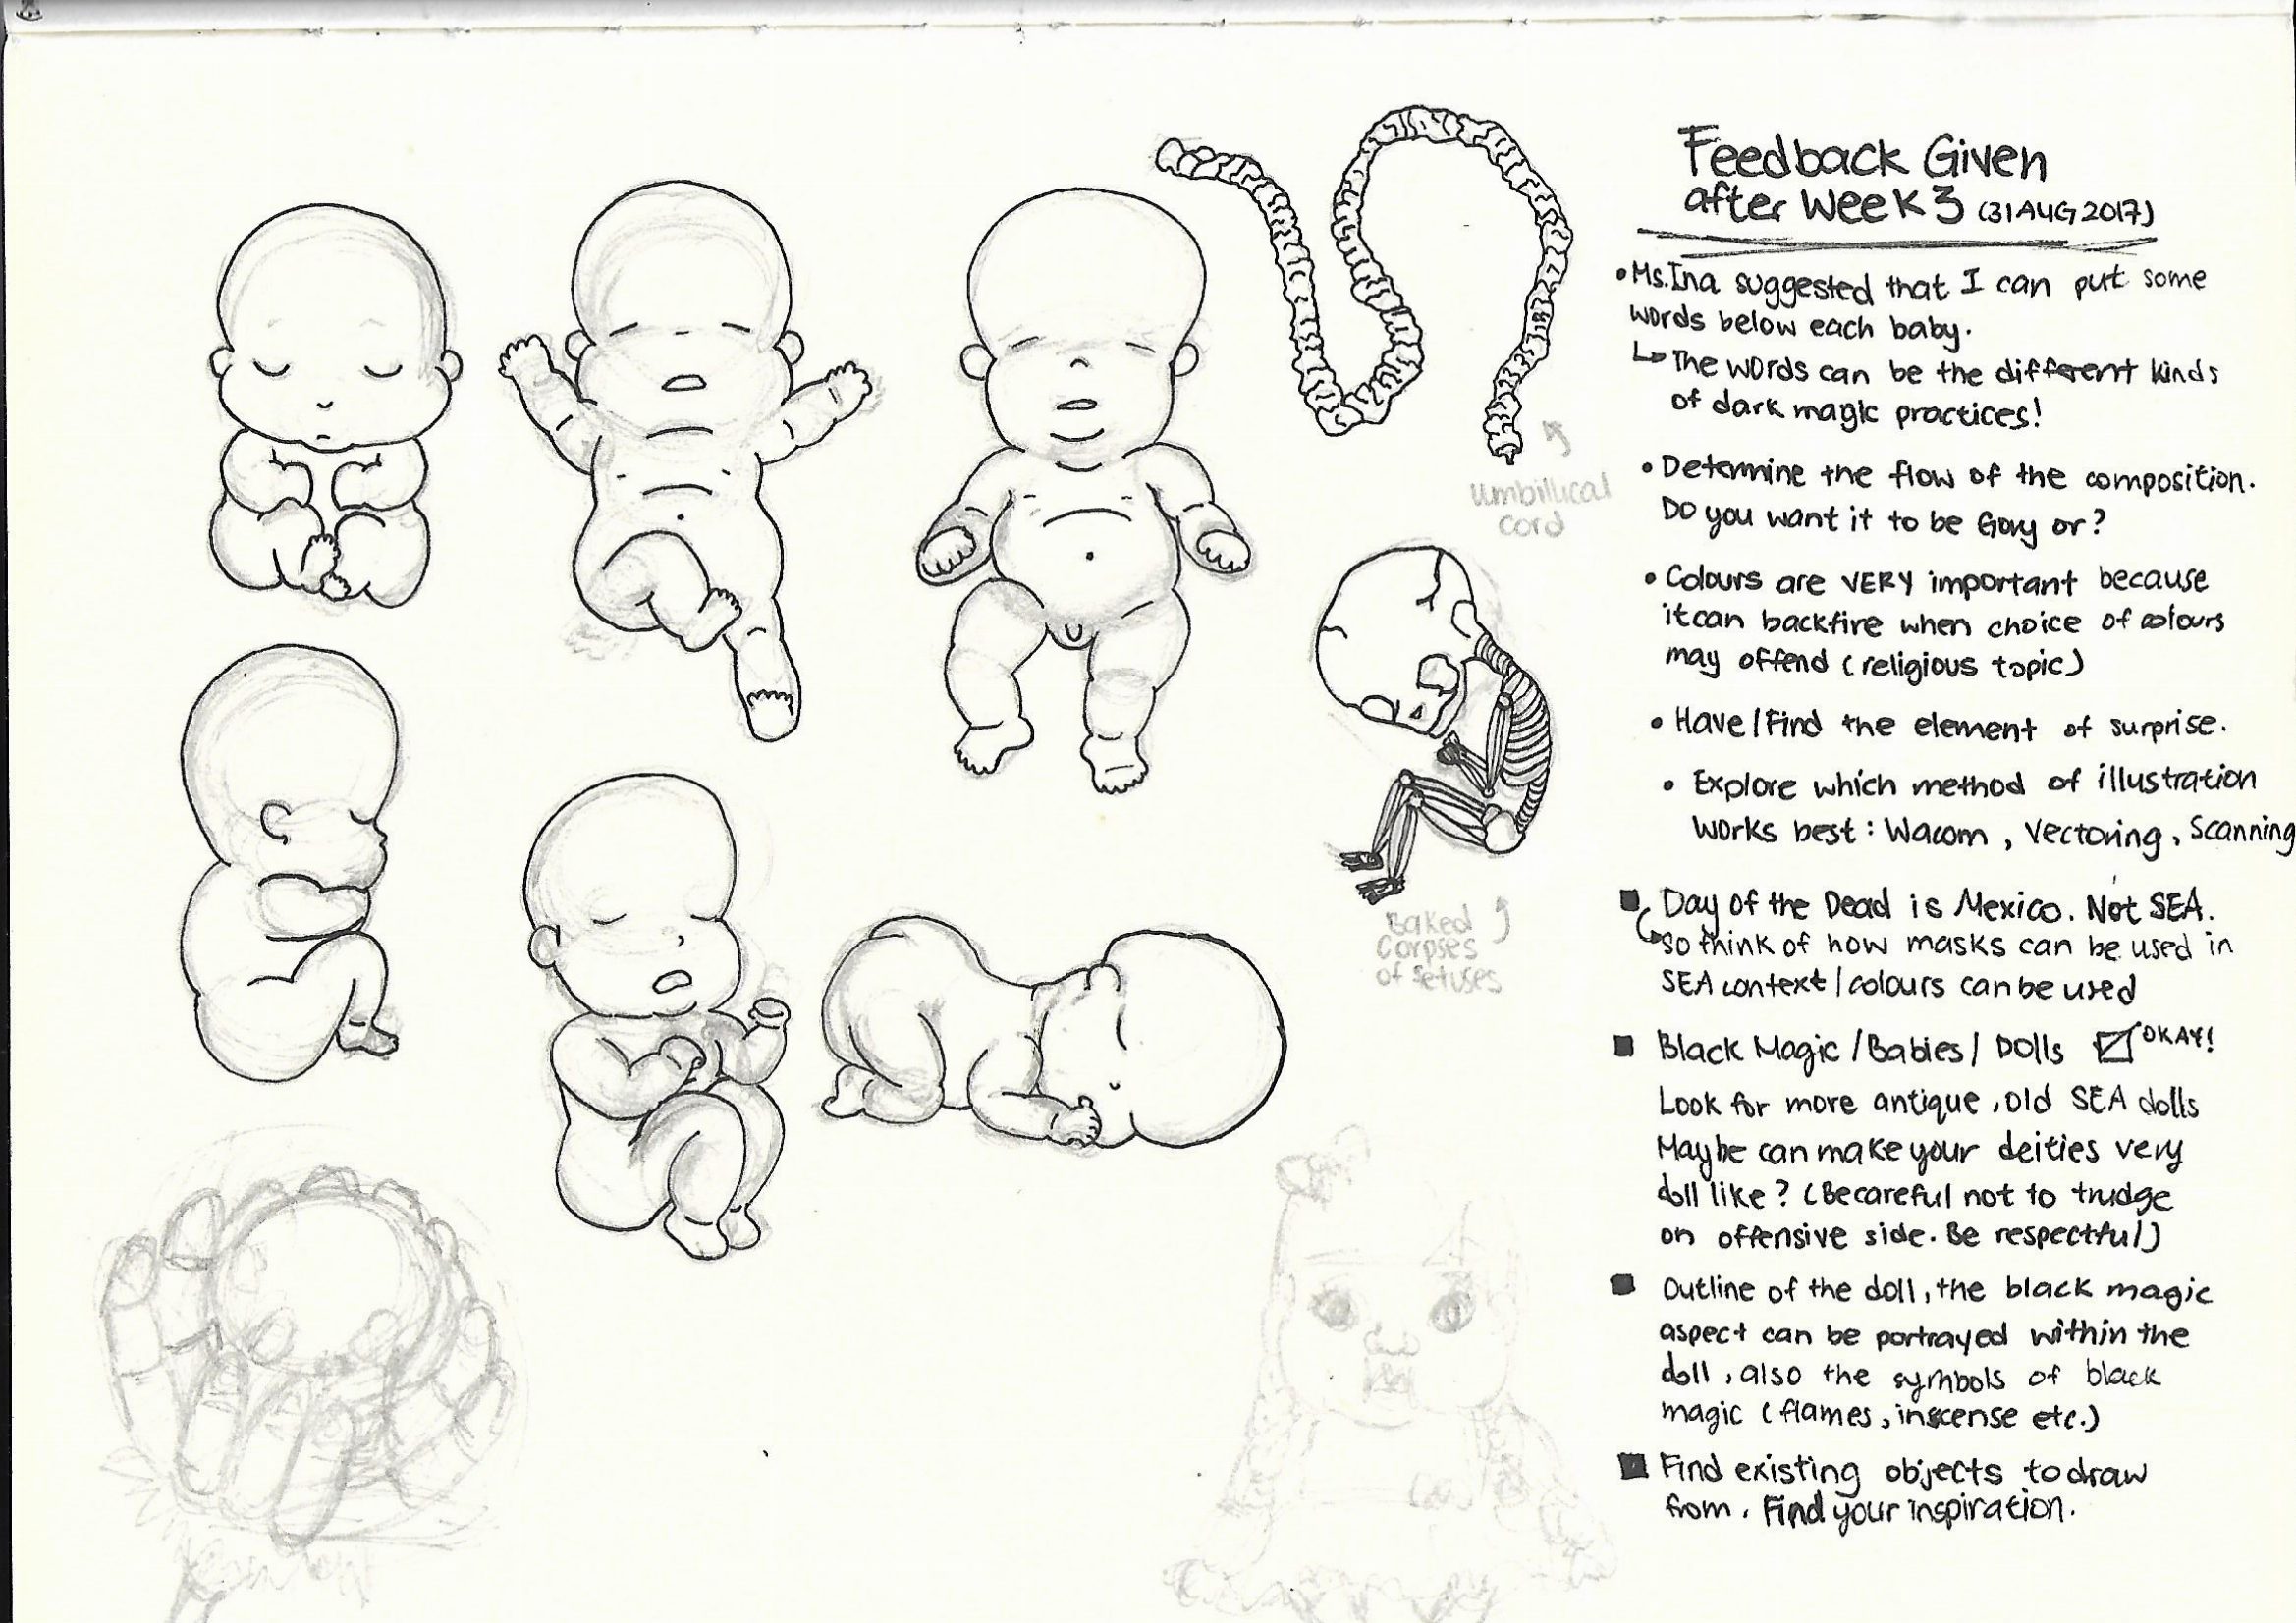
Feedbacks and suggestions given by my lovely classmates and Miss Ina 🙂

  • Banner looks rather flat because there is no depth and motifs are roughly all of the same size.
  • Very constrained by the banner width hence it looks tight and not spacious.
  • Look on Pinterest for some inspiration for layouts and compositions.
  • Can refrain from being constrained by the width by extending motifs out of the margin. Perhaps umbilical cord and fray outside too?
  • Can play around with opacity, perhaps used in background? Flowers in the BG in low opacity.
  • Play around more with scale, to create depth. Baby big head can be of actual size? Cause now got no dominance.
  • Introduce a new motif to encapsulate the babies? Bring in an element that they can reside with.
  • Connect hard drive to laptop and save it in there, can save your computer from going into coma state.
  • Change up the colours. Maybe change the BG to more than 1 colors. Avoid going for the same colors as the motifs, other wise the motifs wont pop.

Will be doing up more draft layouts based on the feedbacks given and update this page again!! 🙂

Moving on to the second part of the project: Organic type.

This is the brief given by Miss Angeline! 🙂

BRIEF 2B: ORGANIC TYPE

Brief 2B ORGANIC TYPE: Exploring free form type
Summary Typefaces are more than just mechanical characters, when produced creatively by the hand, type can provide a unique personality that a machine can never match. Cast away all preconceptions of typeface and create your own free form type that is expressive and unique !
Assignment objectives This assignment intends to take you away from your computer screen to explore the creation process of handmade typefaces, appreciating the beauty and emotions of an organic letter form
Task: Try your hands at a variety of hands-on materials and produce another phrase, quote, memory or lyric ideally between 15-25 characters including spaces. You can use the same phrase as in assignment 2a.

  1. Transfer your creation onto a digital form and then deliver
    your organic typographical creation on an A3 sheet printed on quality paper.
  2. With your organic typeface creation – apply it onto something tangible. for eg. a book cover, a title of a newsletter, a bag, a series of greeting cards etc..
Tips There will be an in-class exercise to practice the making of this assignment. Do not miss it !
What you
must deliver:
An A3 printed poster with your organic type

A digital simulation of your organic type application

A process documentation link on OSS

Grading criteria
  • Due diligence of organic experimentation
  • Depth of methodology and craftsmanship
  • Aesthetics of letterform creation
  • Sensitivity of paper choices
Due date: Week 7 (together with vernacular type)

During the ‘In Class Pratice’ I was taken back to my Year 1 Foundation 2D class as it explores similar aspects of mark making! 🙂

I used tiny stamps and neon highlighters as an inkpad to create this, and then Angeline taught us to use Photoshop to manipulate the designs, which brings about more variety of how far the designs can be pushed!

I’ve realized that materials to create marks and impressions are all around us, and it is up to us to make full use of it to express what we want to our fullest potential. cool


EXPERIMENTATION

Starting was really hard for me because I couldn’t think of what materials to use and what 15-25 characters would be best to bring out the essence of the material used.

Just so happen, my father dropped a glass mug at home. I took the glass shards and further crushed it, hopefully I can do something with it! 🙂


The letters look really nice and I further experimented with the photo manipulation and played around with the colors!

It is very jarring against the white background I have realized… I was about to go blind. Hence a black background might be better! Debbie (my classmate) suggested that I should add a tinge of blue to make the glass less yellowish and it worked out really good! Thanks Debbie 🙂 ! I also added some glass shards to make it look more shattered. 🙂

Application of Organic Type on products.

Pink on the glass looks pretty sweet and on the edgy typeface !

Changing a Trajan typeface to my glass font. It looks really funny because the original typeface made the poster look really scary, but mine looks like a horror parody movie!


That is it for my Organic Type process documentation! The next up will be the Final post! Hope you’ll like it and that everything will turn out fine in the end!! innocent

Hello! So I did up some sketches and added some more possible motifs, based on the feedbacks given presentation last week!

Afterwards I tried out different forms of illustrating it in digital form, just to see which method works the best. I was looking for feasibility and which method looks best.
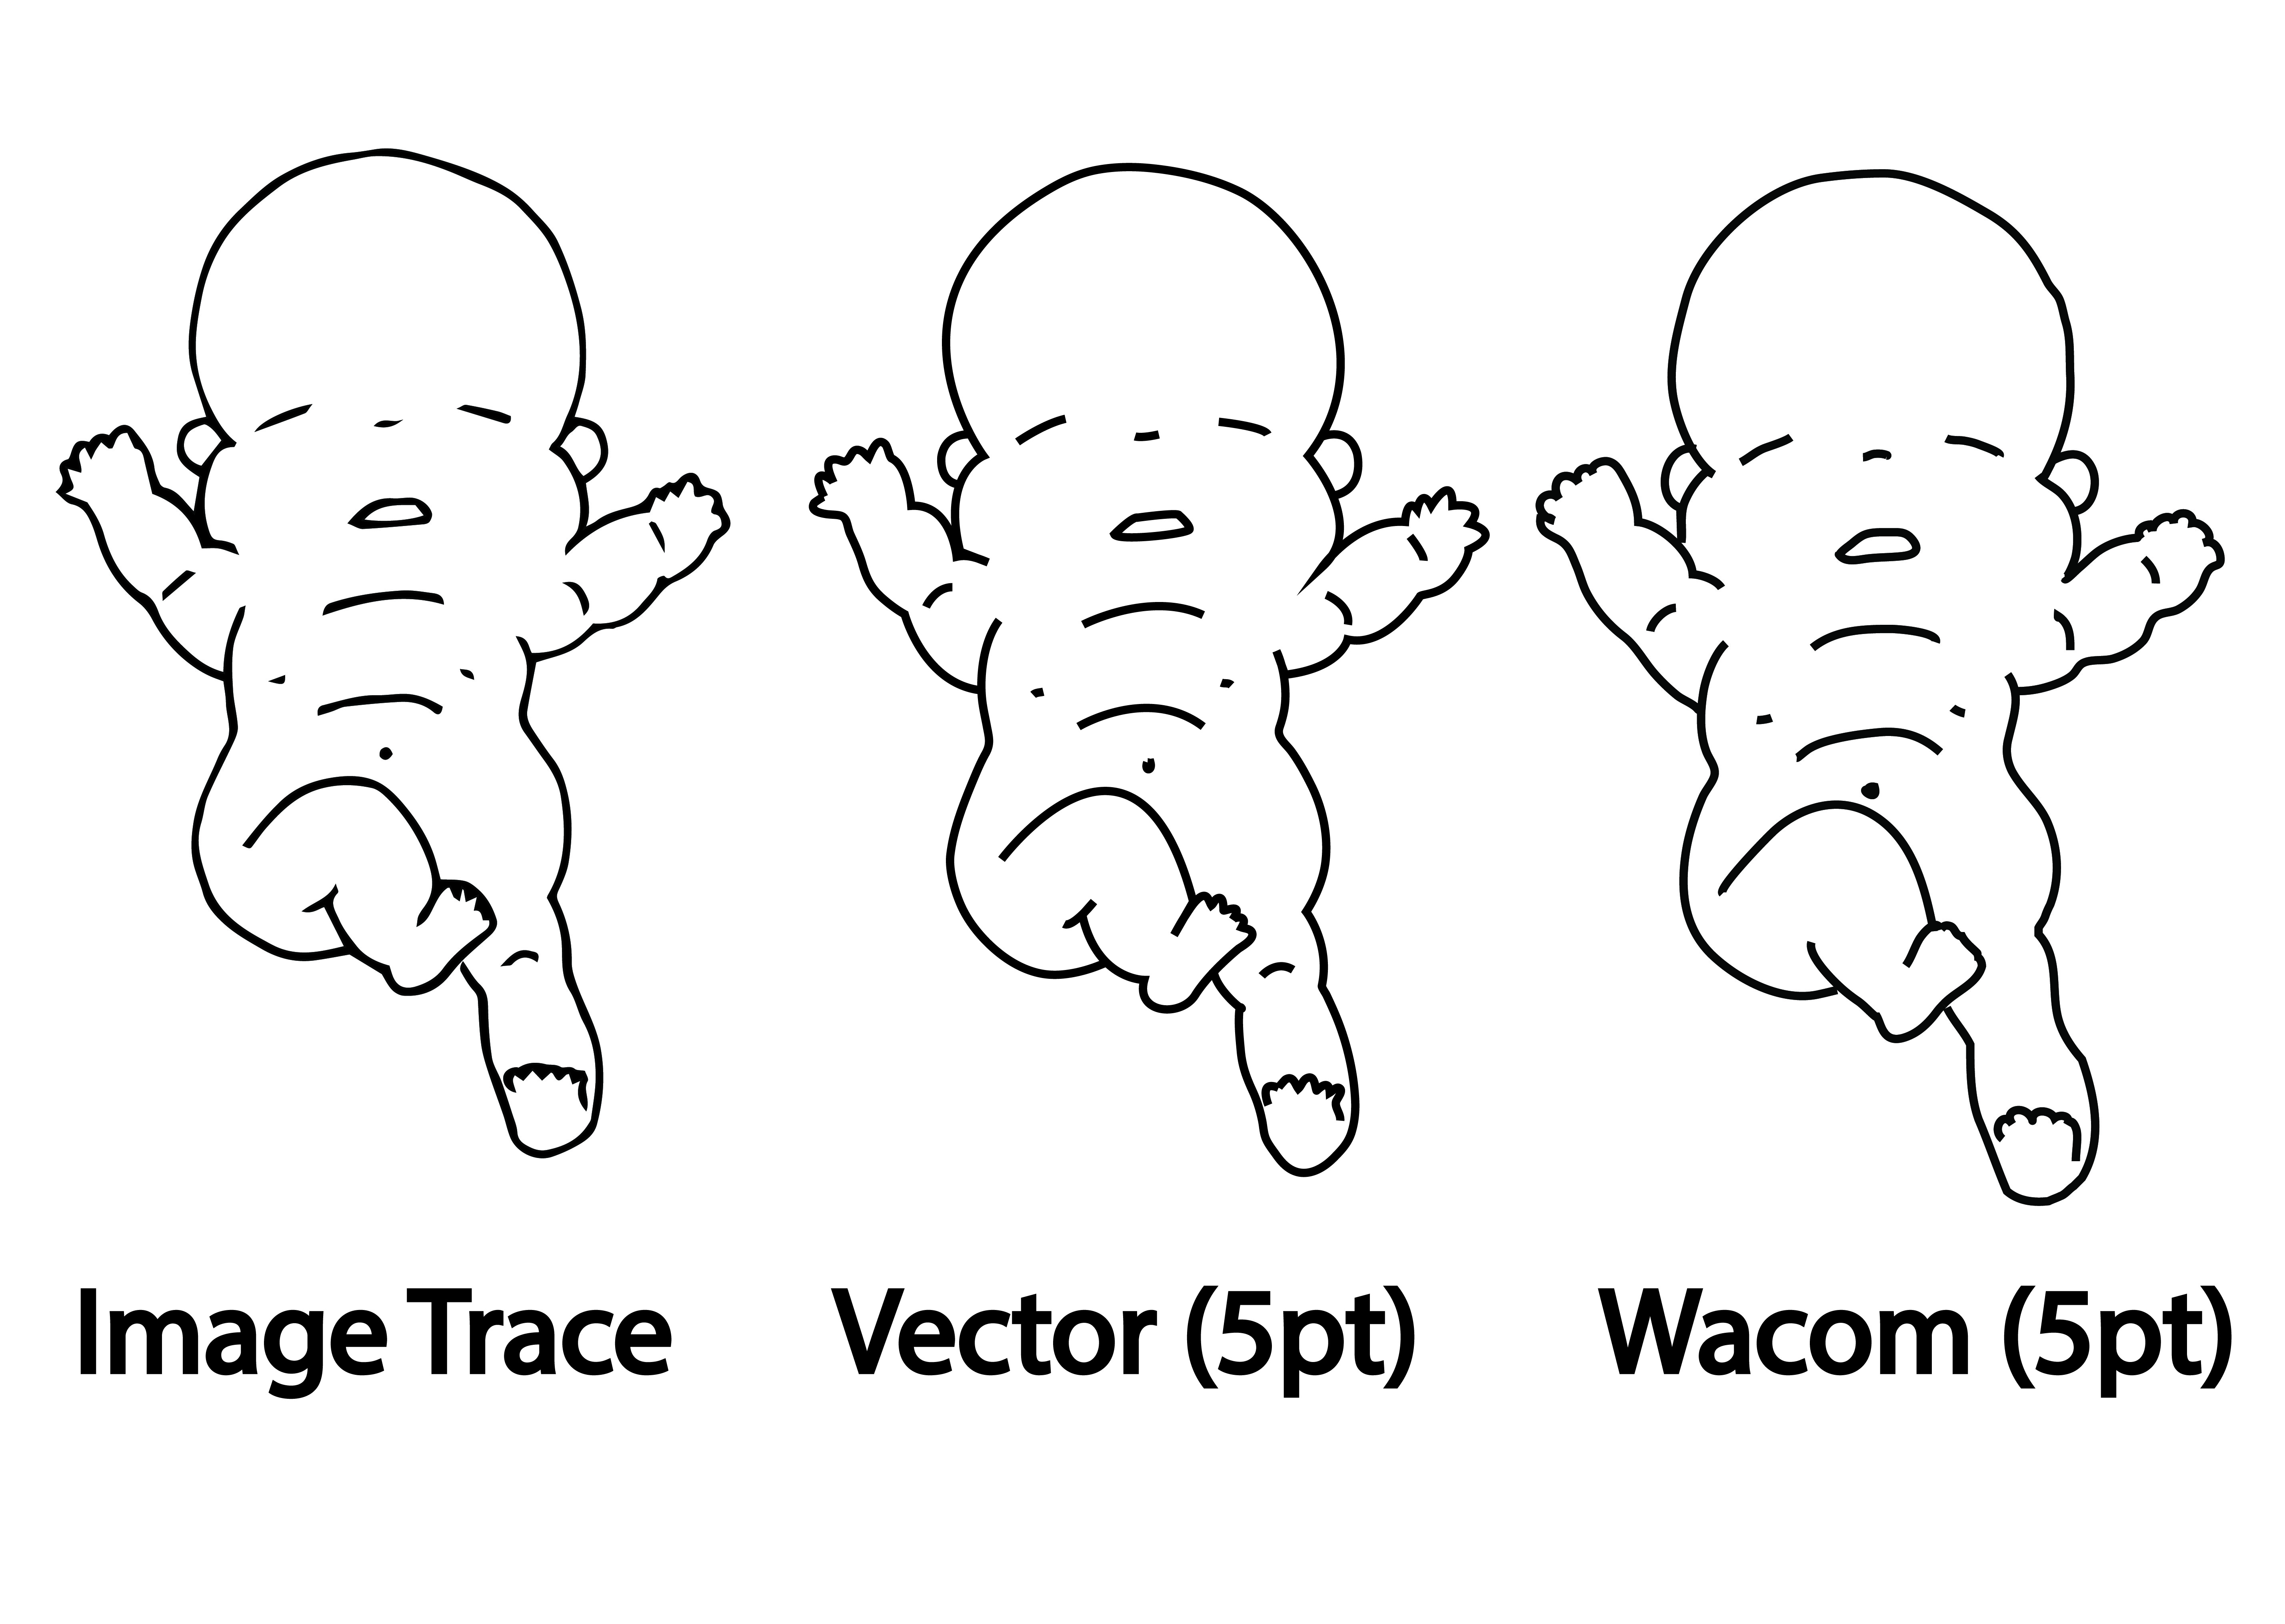
Thus, I attempted Image Trace, Vectoring and tracing with Wacom tablet.

Every method has its pros and cons.
-Image trace was a fast method since I already outlined it on paper, but the issue was that some lines are not clean.

-Vectoring gave clean lines and shapes, issue faced was that it was time consuming.

-Using Wacom is very fast, but I am still unfamiliar with the tablet, and little details such as the toes are just rounded up.

Hence, I would prefer working with Vectoring or maybe Image Trace for this project, and then coloring it using Wacom.

So I colored the baby using Wacom tablet over the Vectored outline method and got this as a result.
I discovered that resizing the colored baby on Adobe Illustrator poses a problem, as the colors will usually shift… I wonder how can I deal with that issue hmm…


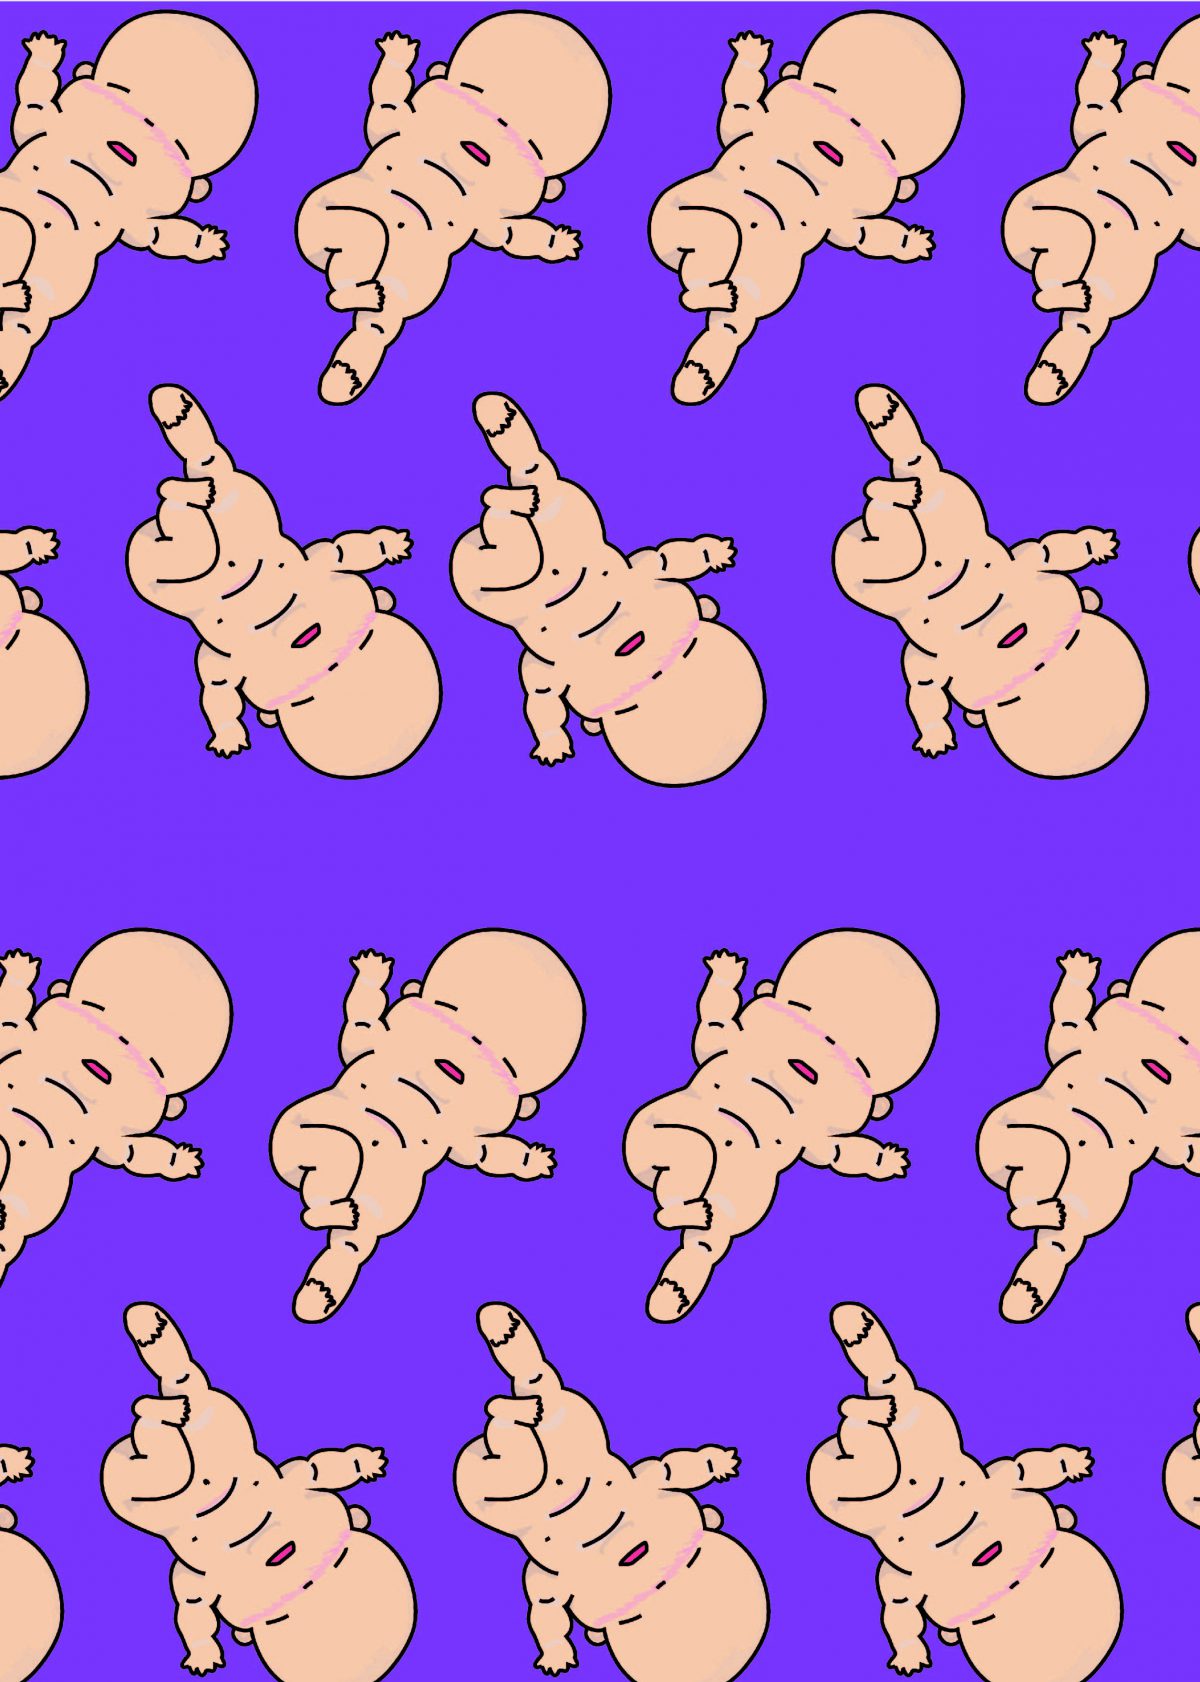
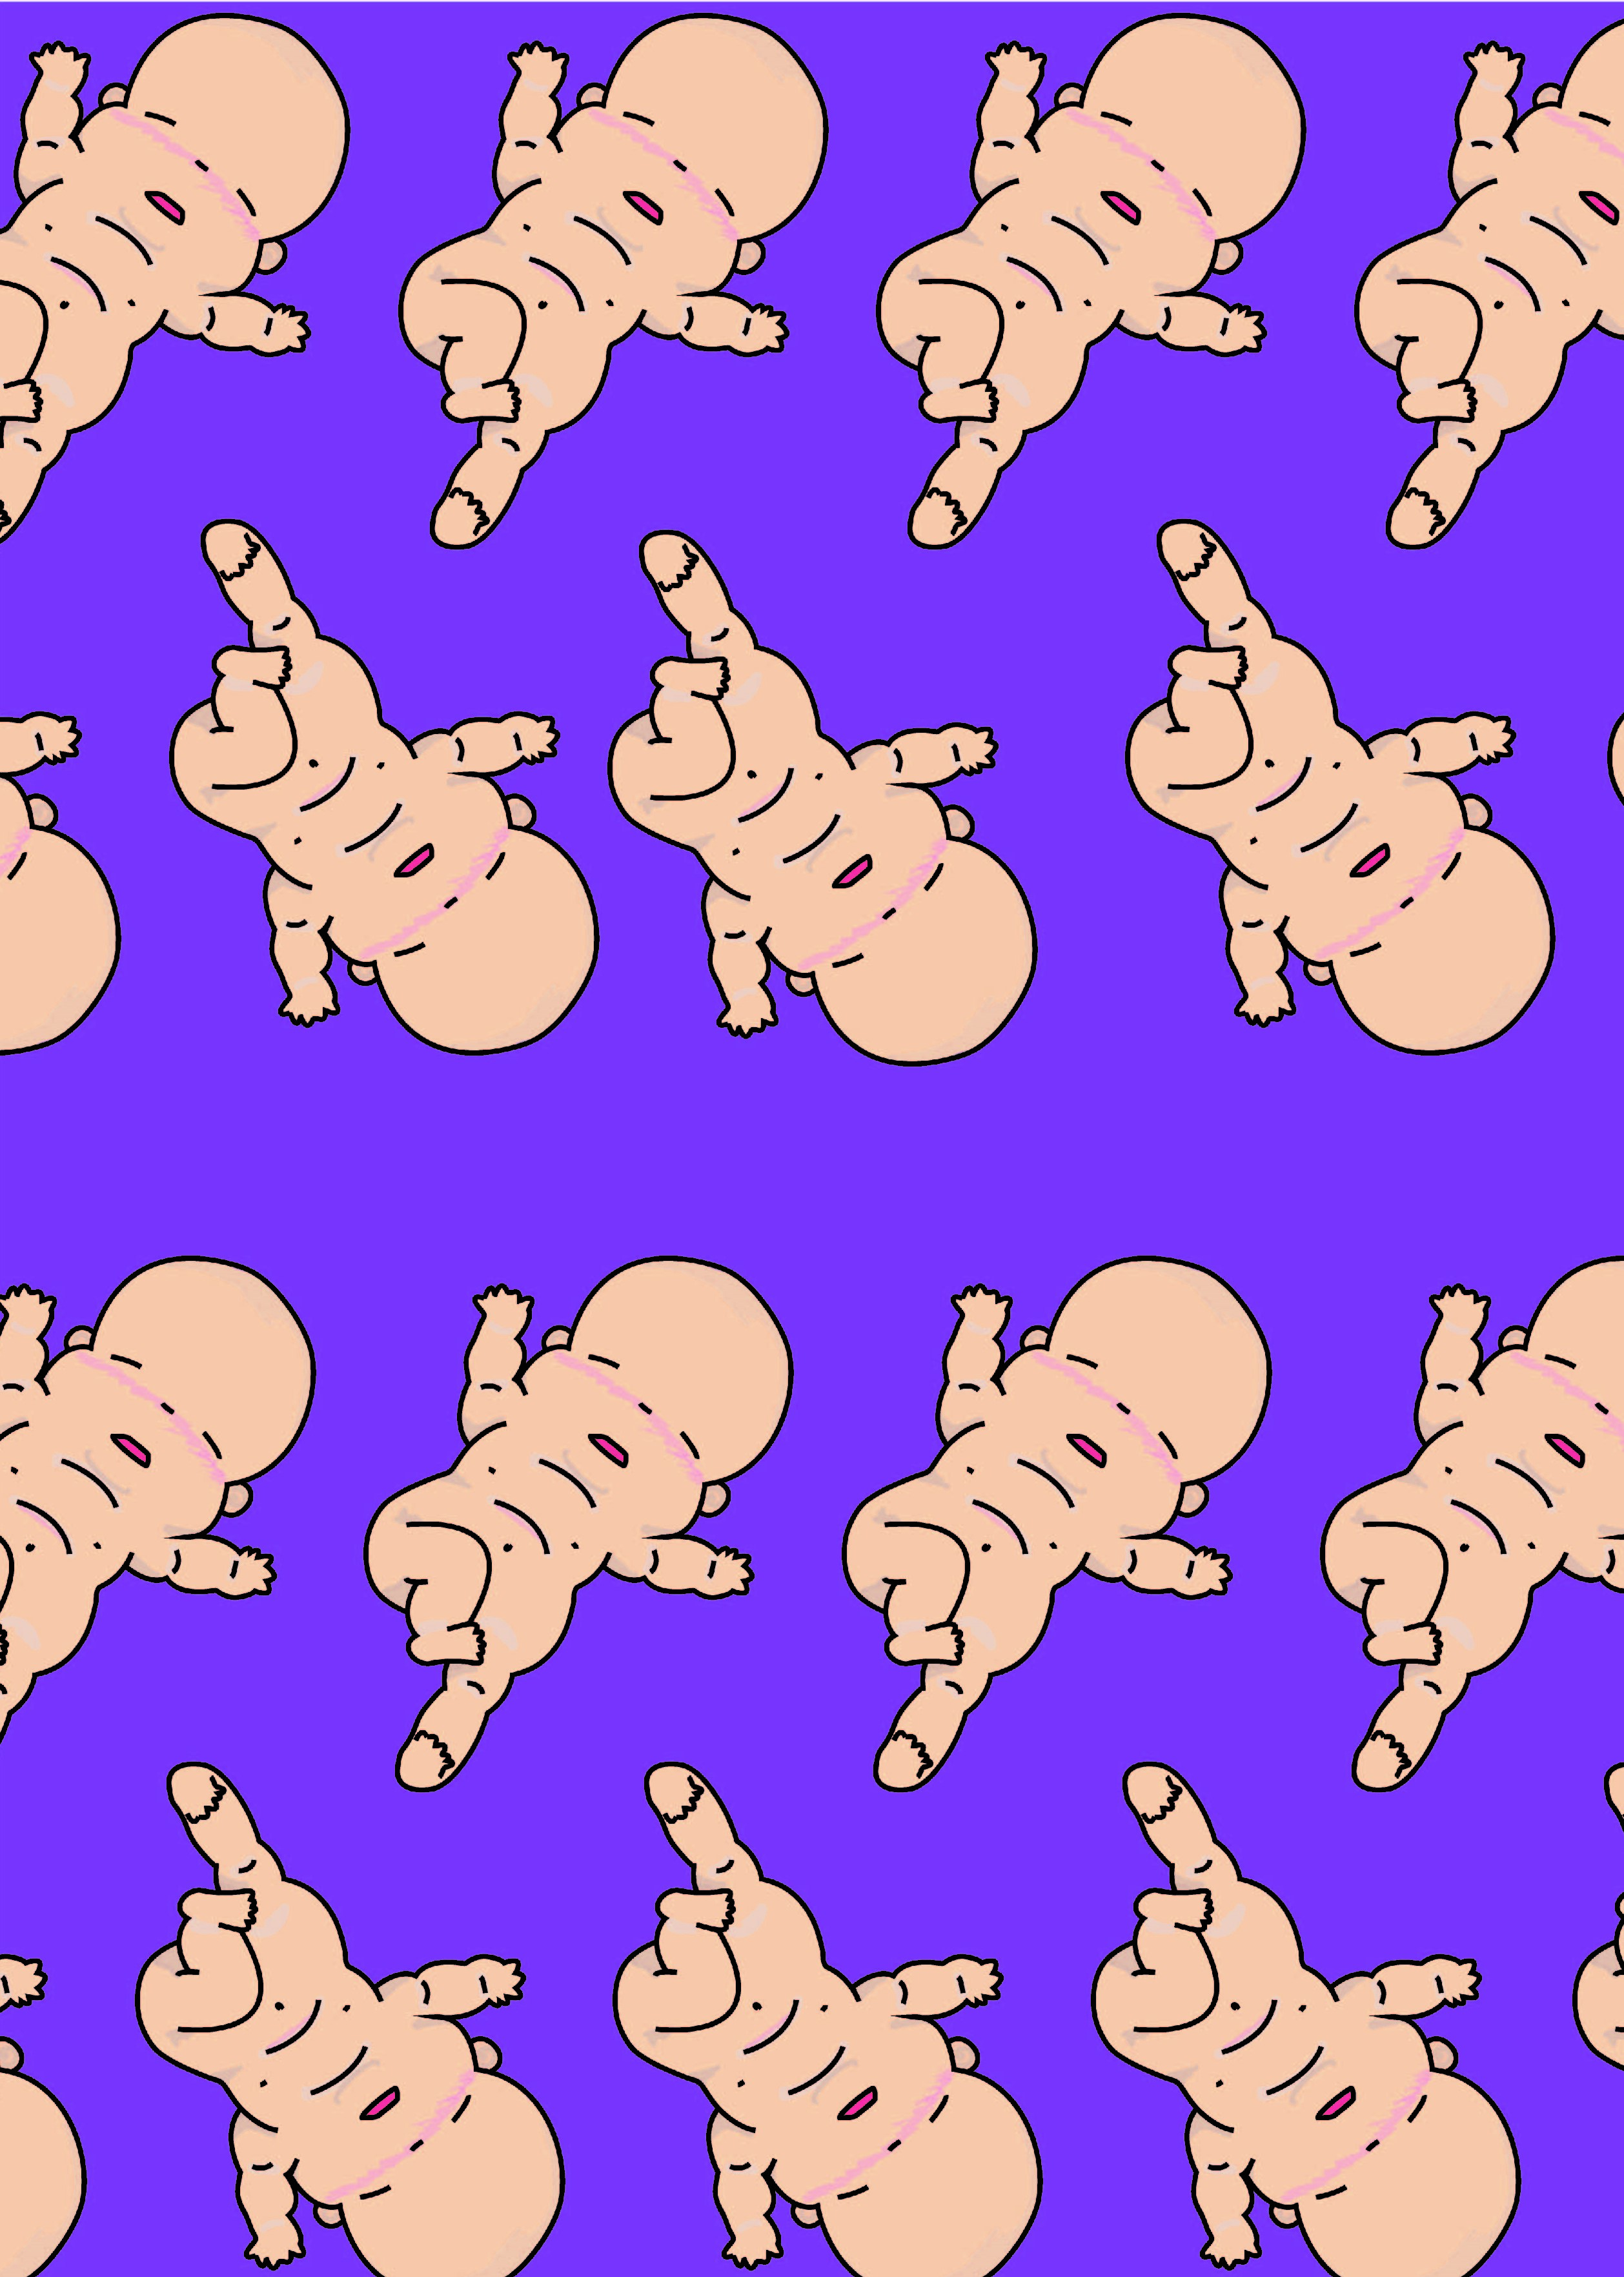
With the colored baby, I tried doing up a pattern just by rotating, flipping and copying just to see how it’ll look like.

Woo~ it looks like they are doing a mass baby yoga event!
However, I think the lines overall still don’t look very clean and amateurish. I think colors is something I should also pay extra attention to since it may dull the whole composition if not used correctly.

What do you think? 🙂

5 elements of Cinema

  1. Sound
  2. The Medium of Film
  3. Site, Space
  4. Audience
  5. Screen

There is always a template. A 3 act structure in a story. However in Expanded Cinema, the audience in this expanded cinema gets rid of the structure, the spoon feeding of the story and they finds out the ending themselves. The audience would be more active rather than passive.

Doug Aitken
Doug Aitken (b. 1968) has created a body of work that explores the evolving ways people experience memory and narrative and relate to fast-paced urban environments.

https://www.youtube.com/watch?v=QUfn1X2i_cM

Chapters of Black Mirror

  1. Departure
  2. Losing Baggage
  3. Tropical Conspiracy
  4. New Condition

The location at which the installation and performance art is held on a vessel in an open sea.

Main actress and other performers performs live on screen with 3 screens around her. The story goes in a way the actress travels from one point to the other.

The character is on an unexplained journey from one place to the other via plane, car and on foot. The character only interacts with herself as she leads a life of a journey alone.

Why use a vessel in an open sea?? Boat cause maybe it is a mode of transport. Maybe a metaphorical mean of isolation? Like a lonesome boat in vast sea. Hence, location as to where the installation is held is important. In addition, the artists statement of her works are important as the audience of that country he presents to may not get the context as it is not relevant to them.

Making reference to an old film which the song is constantly played throughout is ‘Only have eyes for you’.

Why he uses that song? It is a very old popular song. And covers of this song by others makes this popular. Spectators will find familiarity when they drive past that video screening

History of Avant Garde film

1920s have limited resources and cameras were not easily accessible unless you have resources and money. Whereas, 1960s is a period of change. Feminist movement, Cold war, Technology is on the rise, cameras are more easily available.

Ruyi showed us a couple of clips and asks us for the emotions we felt through watching these clips. And as usual, since the emotion is subjective to each film, everyone had different thoughts and feelings for each clip.

Ralph Steiner


For this clip, there was a mixture of emotions for me. It was soothing and at the same time uncomfortable.

I believe the artist was intending to match the movement of the gears to the music or vice versa, and many of the time where I felt was soothing was when the gears or mechanism fit perfectly with the music. (The OCD in me is acting up)

However, I felt uncomfortable at times because the mechanism and music don’t go well together. IT IS OFF BEAT. Or when the note is prolonged, I’d expect a ‘clunk’ sound but it did not give me that satisfaction. ( The OCD in me is acting up again)

Hans Richter

https://www.youtube.com/watch?v=b972EQOOEoY

Visuals can be music as well, even without music. In our heads we would have created a sound that goes with the moving images. We see music.

Stan Brakhage
“Film is like poetry rather than visual arts.” – Stan Brakhage

Brakhage uses material experiment in his films where each film is like mark making. The film strip acts as a canvas and not medium for story telling.

Multiple Screens Experiments

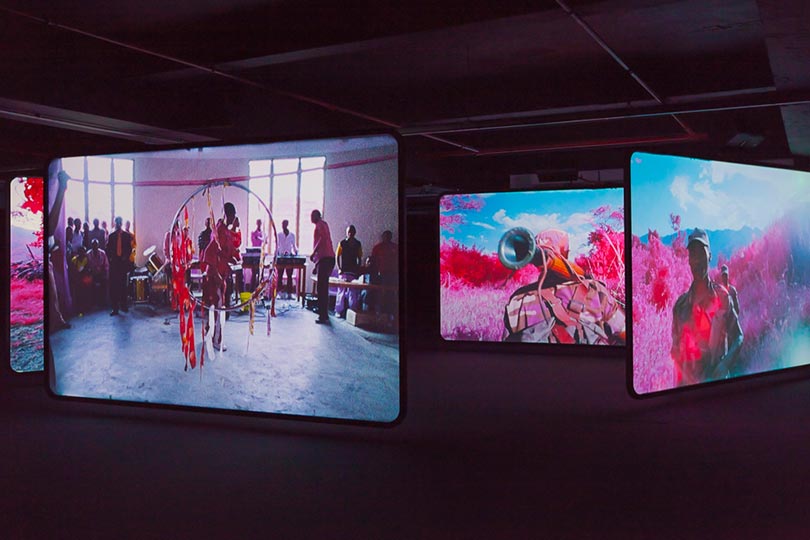
With the use of multiple screens, audience is immersed and bathed in your work in that space; or even overwhelmed by the information provided given if that is the artists intention.

Omer Fast

What you will look when you walk around the story. The authority of the story is question. Different modes of story and reconstruction of the Journalism whether the recounting of stories are reliable.

Left side of the screen doesn’t match with the soldier’s story. It makes you question Omer Fast as well as the Soldier’s account.

The message Omer Fast may be trying to express is that what the media shows to you can be very deceiving. Actors casted, exposes the lies . It is a take to mocking journalism as the abrupt cuts of the videos, locations of scenes and audio is all fake and post edited to how Omer Fast wants it to be.

Other than sexism, the female figure on the right is not using any word in her singing. She is evoking sounds that expresses what she is feeling inside. The male figure on the left has words to express himself and he does it with ease, and with a live audience listening to him. Women are not suppose to perform live infront of an audience as it is against societal norms of where she comes from.