Final Life Update: Hear/Here (Colours of the Wind)

Video:

Short Essay:

This project revolves around the idea of the gaps between noise/sound, hence we created a portable device that will sample the overall surrounding sound and in response would light an LED in a corresponding colour. The colour is based on a calculation where ‘red’ is volume , ‘green’ is pitch (regardless of octave) and ‘blue’ is pitch (exact octave). Red and Blue were scaled to fit a range of 0 to 255, however, for the Green there were 5 ranges created, skewed accordingly so that the range for a humanly possible pitch is larger then a not humanly possible pitch. The code makes use of an array to store data in each pixel, until all nine pixels have been used up, then the information would be overwritten for the following pixel.

References for the code:

  • Origin of basic-ass code (which is no longer here): https://www.teachmemicro.com/arduino-microphone/
  • Origin of getAmplitude code: https://learn.adafruit.com/adafruit-microphone-amplifier-breakout/measuring-sound-levels
  •  Origin of getFrequensea code: https://www.norwegiancreations.com/2017/08/what-is-fft-and-how-can-you-implement-it-on-an-arduino/
  • Origin of NeoPixel code: https://learn.adafruit.com/adafruit-neopixel-uberguide/arduino-library-use


Our work takes reference to works like ‘Pulse Index’ by Rafael Lozano. It is similar in the sense that it takes record of the viewers in put, in their case the thumbprints, in our case sound, and record it on a visual plane to show the changes overtime.
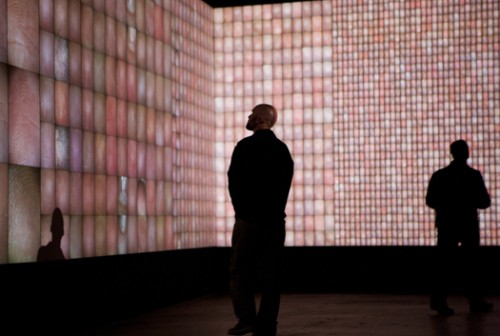
Rafael Lozano-Hemmer, "Pulse Index", 2010. "Time Lapse", Site Santa Fe, New Mexico, 2012. Photo by : Kate Russel

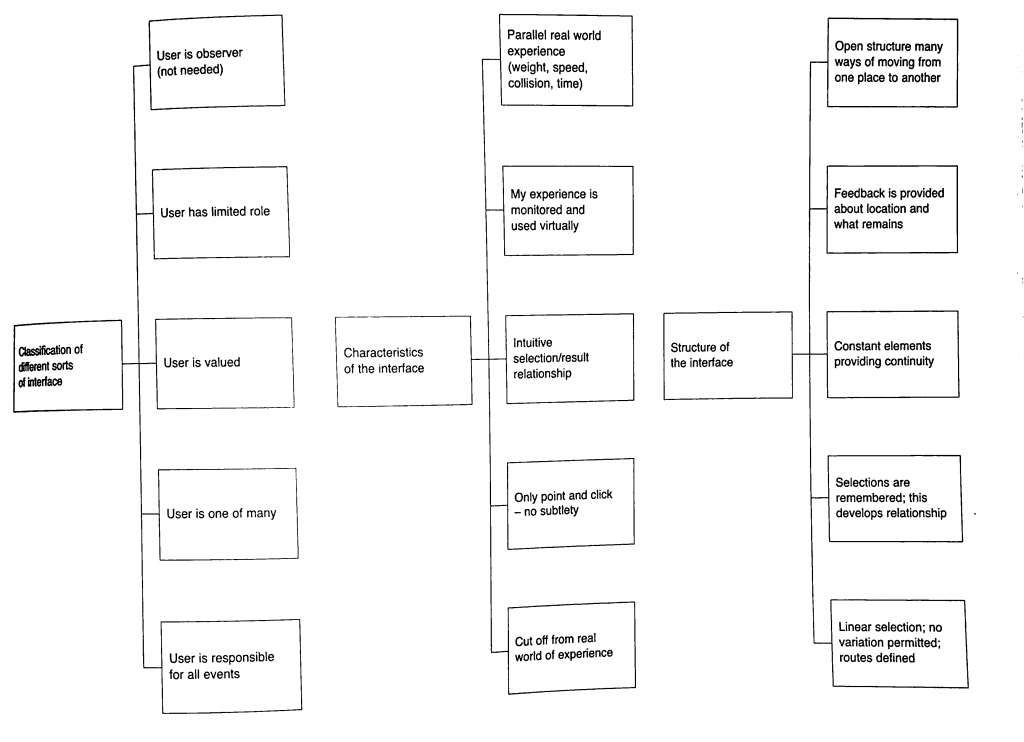
Characteristics of Interface:

Classification of interface:

Our project falls under ‘User is one of Many’ and ‘User is valued’. Our project values the unity of the environmental sound and how your sound is captured in this collective and you cant discern what is your sound and what is the environment, hence the user is one of many part. However, the user is valued is also present in a way that they are the anomaly that created the most change when they interact with it directly.

Characteristics of interface:

Our project falls under ‘Monitered and reflected experience’ as well as ‘Intuitive selection/results relationship’. For the former, the device is to collect the environmental sound and show a colour represnetation, hence all interatctions are copied and shown directly based on the sounds that you make. The latter is true as when you see the light changing to sound, the viewers will automatically try to interact with it to see the extent that it will change to, hence creating the result of trying to find the gaps between the sounds you make when you see the different coloured representations of each instance of sounds made.

Structure of Interface:

Based on the flow chart, our Project complies to everything except the last one ‘Linear Selection’. The first idea of open structure is seen in the way we made our device portable. The second idea of ‘Feedback provided’ is done so in the form of LED lights lit in accordance to the sound of the environment/people within the environment interacting with it. The third idea is ‘Constant elements providing continuity’, since the set up is designed to reflect the sound at every (how many seconds). Finally selections are recorded in nine LED pixels, showing 8 seconds of the recently past environmental sounds.

(Liz finally answered the question yay)

Who did what:

The coding for this project was done by En Cui and the physical fabrication of the device was put together by me (Elizabeth) (but you know in the end Liz kind of screwed up alot of the soldering and stuff and needed En Cui and Lei’s help to put them together. Thank youuu)

Process:
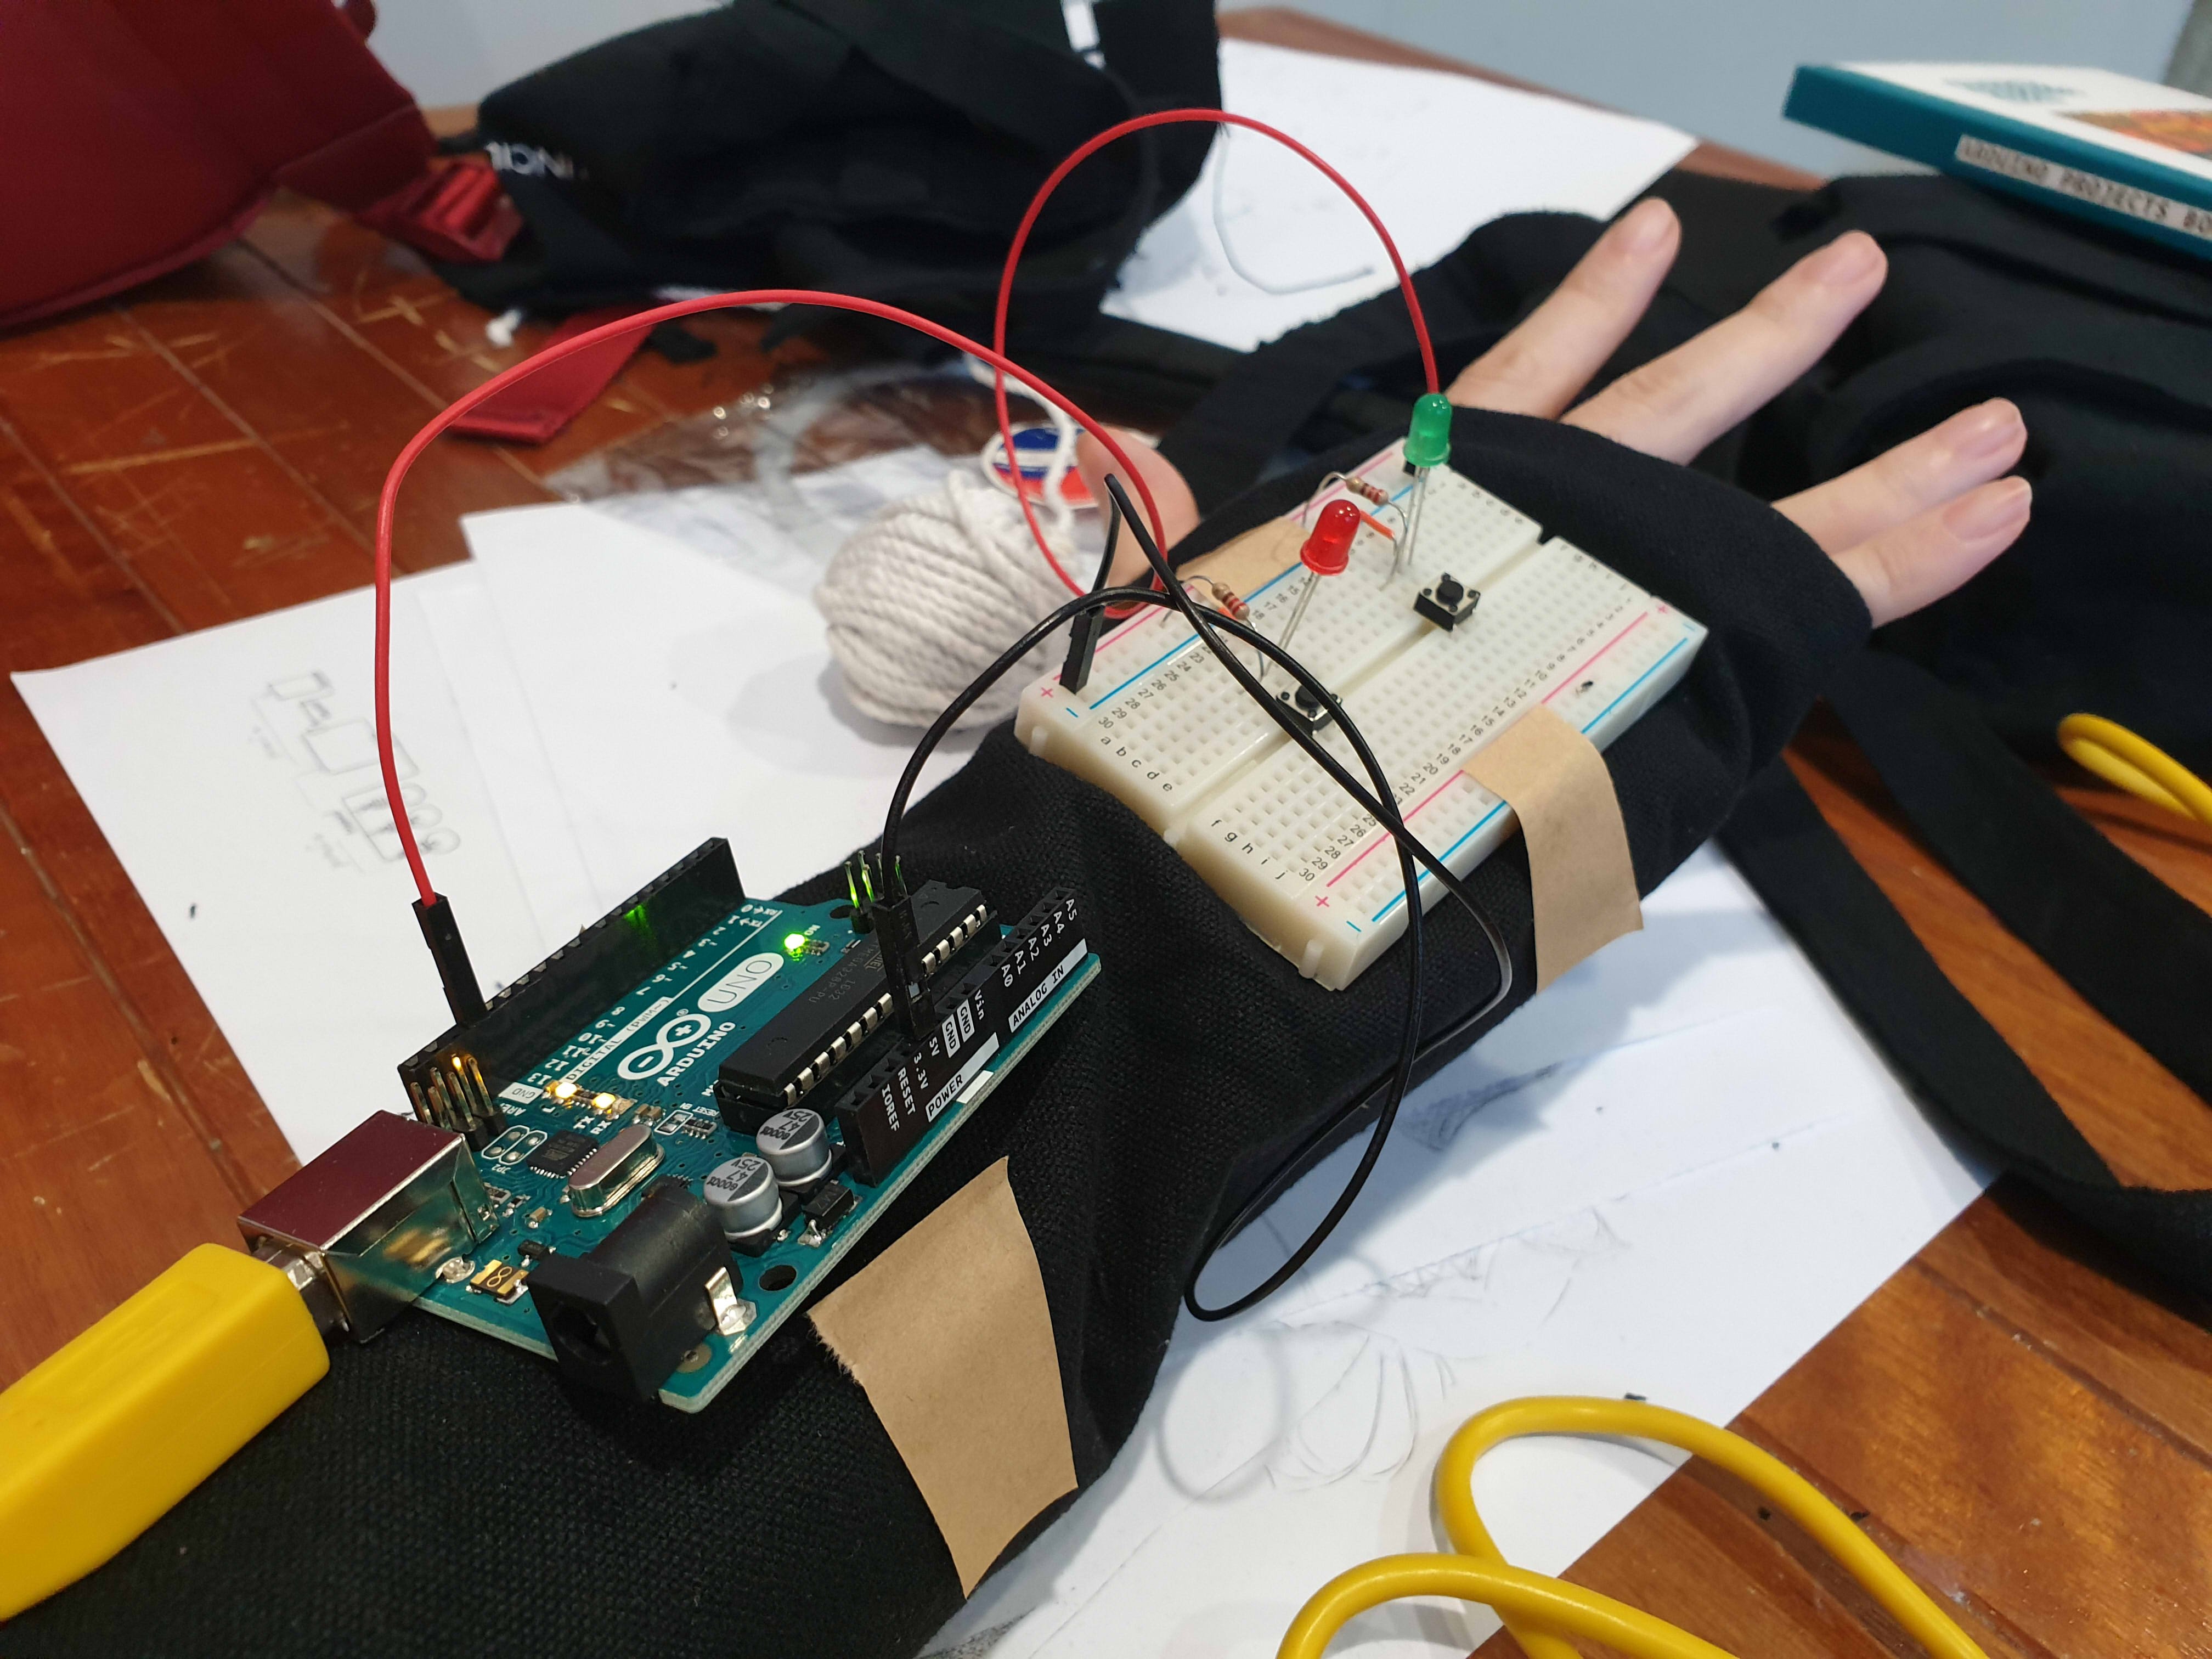
From the initial stage of mannually making LEDs light up by pressing the buttons whenever someone made a sound we created a circuit where the LED would light up in a certain colour according to the environmental sound.

After that we used this circuit as a a reference and moved from a single RGB LED to a strip of LED wire. That way we could create a set up where the colour of a certain period of time could be recorded and compared to the pervious period of time.

yay the LED lights up.

Measuring the length of wire for the glove.

This is where problems started surfacing on the soldering part so there was a redo. (soldering wise and circuit wise sob)

Testing out the Circuit.

Yay it’s done.

After Review:

Everyone reacted to the work as we hoped they would despite only having two participants. They crowded and tried to put in their own input by making noises around the two. Though we have coments that the feedback is not fast enough to show the exact inflection of voice as one is speaking, hence not very obvious. We forgot to mention this during the review, but the delay is also constrained by technical limitations. If we reduce the delay, we will need more LEDs to represent the same amount of time, and the Arduino memory overloads at 13 LEDs. Additionally, even at delay(0), the Arduino still cannot function fast enough to get the desired result:

As a result of the delay, our theme in this work might not be very obvious to the viewers to pick up on as a result. The eventual solution may thus be to use something with more processing power.

There are comments on how they are working very hard to satisfy the device as well. Some say that it seemed like a prop for band or choir performances, or a tool for training how to get the exact pitch.

Summary Reflection:

EC needs to actually know when it’s not possible than maybe possible.

Liz should not be so innovative. Liz is just not good with technology.

We should have thought out the final form better.

Extended Concluding thoughts (if you want to read about our woes):

En Cui’s Reflection:

Concept-wise, the challenge was that the core concept and form were not well-aligned. While we talked out several issues, there’s still the challenge of the interstice being unclear. But I think, in the end, the clarity of the message depends on how you interact with the wearable. For example, the distinction is much clearer if you experience the wearable in multiple contexts, than just one.

Regarding the code and circuit, it was actually mostly okay. While things didn’t always work, the only solution needed was to observe the problem, deduce what could be possible reasons for its occurrence, then test out my hypotheses one by one. Examples include mathematical errors and faulty wiring. I also did soldering part 2 for the microphone, and honestly the solution was just learning to recognise patterns of problems and solutions based on past mistakes, such as the solder not sticking to the iron (wiping more), or getting fingers burnt (plasters).

I also realise after a full day of reflection that I’m just incompetent at doing group work efficiently. Leaving me in charge is a generally bad idea.

Elizabeth’s Reflection:

For the most bit I felt very challenged by the project, especially since it is the first time we were using and putting together components to make a circuit. for the physical fabrication portion it was the first time I used a solder, and my circuit looked very ugly after that, and I dont really think I improved in that aspect very much even after multiple attempts 🙁 When using the Hot glue gun to insulate the exposed solder I think I made the circuit worse, because there was already a built up of solder.

Also, I did not solder the circuit down the right way apparently. You can only solder your wires to one side of the LED because they are fickle and like to have their electrical charge flowing in one direction. Also, do not solder and hot glue your circuit till you are 100% sure it works, saves you a lot of heartpain and time, (thank you Lei and En Cui for dealing with my screw ups D;).

I also made a few mistakes by piercing the LED strip’s digital pins on accident thinking I can sew it down that way. Thinking about it now, I should have known better then to try piercing any part of the components.

Speaking of computer, I feel very attacked by my own computer, since I think it has issues running the code we shared over google docs, and gave me a heart attack that I might have short circuited the only RGB LED in the starter pack, and still the circuit refused to light after I confirmed that I did not. I think there is something wrong with my computer DX. I either leave the testing for computer to En Cui or find a school computer for this (pick the right computer for this, not all computers have arduino).

If we had a bit more time and I had a bit more skill in soldering, we wish to have more LED lights to reflect the change in sound.


Final Project, life update

From last Week’s flow chart, En Cui and I worked on creating a mock up circuit which follows a segment of the flow chart.

Mock Up model 1

We started with a basic microphone set up.

From here we tested to see if we can get the input reading through the serial monitor of the surrounding sounds, and the changes when we spoke into the microphone.

Problems:

  • Serial Montitor showed that the input was either a ‘high’ at 1022/1023, or a ‘low’ 0.

Conclusion at this segment:

  • We thought our microphone was iffy

Nonetheless we continued, as the microphone was still able to detect sound we decided it will be good enough for now and we will solve this issue later.

Mock Up model 2

Subsequently, we added onto the first model to include the LED output.

From here the code was expanded to include a code to control an RBG LED and to read frequency and Volume of the surrounding environment. Initially, the code was done in  random way where for every 3 digits that the frequency had the digit in the hundred place would be the percentage of red, tens the percentage of blue, and ones for green, that would make up the colour that the light bulb would create.

Watch Video at:

Problems:

  • The colour of the lightblub was coming out abit too randomly

So from there we attempted to group a range of frequencies and match them to a colour. Subsequently we made it such that the volume is matched to the brightness of the LED.

Internet rage

The Artwork

Title: Angry Woman

Artist: Annie Abrahams

There is a total of 5 videos in the series Angry Woman made by Annie Abraham. In the first two videos 24 women of different nationalities would express their anger on camera at home, in their own language. The next two videos feature the women expressing their anger on camera in a single language, number 3 in French and 4 in English, but this time for only 12 minutes. the last one the 5 was a sequence of women screaming into the computer.

The review

Social Broadcasting can be defined as

The broadcasting of video, text and pictures directly to an intended audience through social media channels such as facebook, Youtube, Instagram and other channels as opposed to traditional channels such as radio, TV and print.

So why would this be considered a good medium for art?

(Screenshot from the third video of Annie Abraham’s ‘Angry Woman’)

First and foremost, it is unpredictable. In the third video there is the silent woman at the top left corner that illustrates her anger through actions and not words. She creates this visual contrast with the others, whilst their tone rises and falls with the passion of their anger, she remains quiet showing hand gestures like shooting the screen and biting her hands, to show the actions that we so deeply want to take when we want to vent.

(Screenshot was taken from the fourth video of Annie Abraham’s ‘Angry Woman’)

This also leads to the idea of contrast, with various women speaking and a single person only creating gestures it forms a vivid difference in that single video screen which draws attention to it. Subsequently, in the fourth video, where everyone was speaking in English, there was a single person who was screaming, or making incoherent bemoaning sounds. this hence creates a different sound effect to latch onto amongst the waves of others talking.

(Screenshot taken from the fourth video of Annie Abraham’s ‘Angry Woman’)

It is also about negotiation, where in a broadcast, one would like to synchronise their actions. In the 4 video, after about 7 minutes, all seven women on screen started taking calming breaths almost as if all of them decide to cool down together. Abit like what we did for one of our micro-projects.

When the performers’ Webcams were succumbing to technical issues, she transformed this problem by directing the group to intentionally turn their cameras on and off, creating a shifting, evolving, changing collage of images in direct play with altered configurations of the online interface.

Whilst this idea of negotiating and cooperating is apparent in certain ways of her work, the idea of negotiation can play a key role in making the social broadcasting fun (and covering up glaring flaws to the system).

But why is this done on social media and not the television. In a way social media is like a platform for a two way connection, where the tv and advertisment is a single connection (radio in some cases you can call in, but its still mostly one way). Anyone with a social media has the ability to take part in these works of art, in a way it gives like minded individuals, in this case ‘angry women’, the ability to join in the work and contribute it.

In a society where authenticity and privacy become endangered it is important to find ways to access our vulnerabilities and doubts, to make them public, to cherish our messy side. We need to make space for the beast in the beauty, to go back to reality, to claim the human.

Social broadcasting becomes a way for people to share issues that they feel strongly for, and be empathised with by a like-minded crowd. In a way, it creates a safe community for all to share and be vulnerable without fear of being judged.

Credits

  • http://www.starlightmediahouse.co.nz/latest-news/what-is-social-broadcasting/
  • https://thirdspacenetwork.com/symposium2018/disentangling-the-entanglements/
  • https://www.researchcatalogue.net/view/18236/18237

Let us DIWO

DIWO and Maker Culture

During our Week 5 lesson we had the chance to have a lecture with Marc Garrett. He talks about the Furtherfield and how the idea of ‘Do-It-With-Others’ (DIWO) has allowed them to achieve greater heights.

What is so great about this idea of DIWO though?

Whilst many artist are able to create artworks by themselves, DIWO brings across this idea of community, a sort of shared experience that can be felt amongst others. It becomes a more accessible art, and even in the case they are almost like volunteery projects that help the community, or ‘Values-In-Action’ as we call it in Singapore.

Image result for furtherfield projects

(Source taken from: https://www.facebook.com/Furtherfield/)

On their website thery have various workshops like ‘Design 4 ACTION! Permaculture Course’ and exhibitions all aimed towards helping the community.

It explores the extent of which those who view and interact with work, including those from under-represented groups, becomes co-producers in the network, rather then the ‘audience’.

(Source taken from: http://www.tate.org.uk/art/artworks/beuys-7000-oak-trees-ar00745)

When I think large scale community progects I think of this art project by Joseph Beuys, ‘7,000 oaks’. ‘7,000 oaks’ start with 7,000 basalt stone, each a pair to one of the 7,000 trees, were piled in front of the Museum Fridericianu. Everytime a tree was planted the pile was reduced. While the project idea was started by one man, it took a community to help make this project successful, and later the project spread further into other communities with this idea of wanting to change.

Maybe in a way, its because this issues are important to the community, which will eventually become the drive, all the call to action.

Subsequently there is this idea of pooling ideas together to create something better.

Furtherfield connects people to new ideas, critical thinking and imaginative possibilities for art, technology and the world around us. Through artworks, labs and debate people from all walks of life explore today’s important questions.

Similar to them, our Experimental Interaction lessons aim to nuture this idea of collaboration. In our micro-project the tele-stroll,  we made use of the idea of the third space to create a video where two people in two different locations could interact as either a single person, or keep the company of each other. It is playful and brings together the ideas of two individuals to create something  even better.

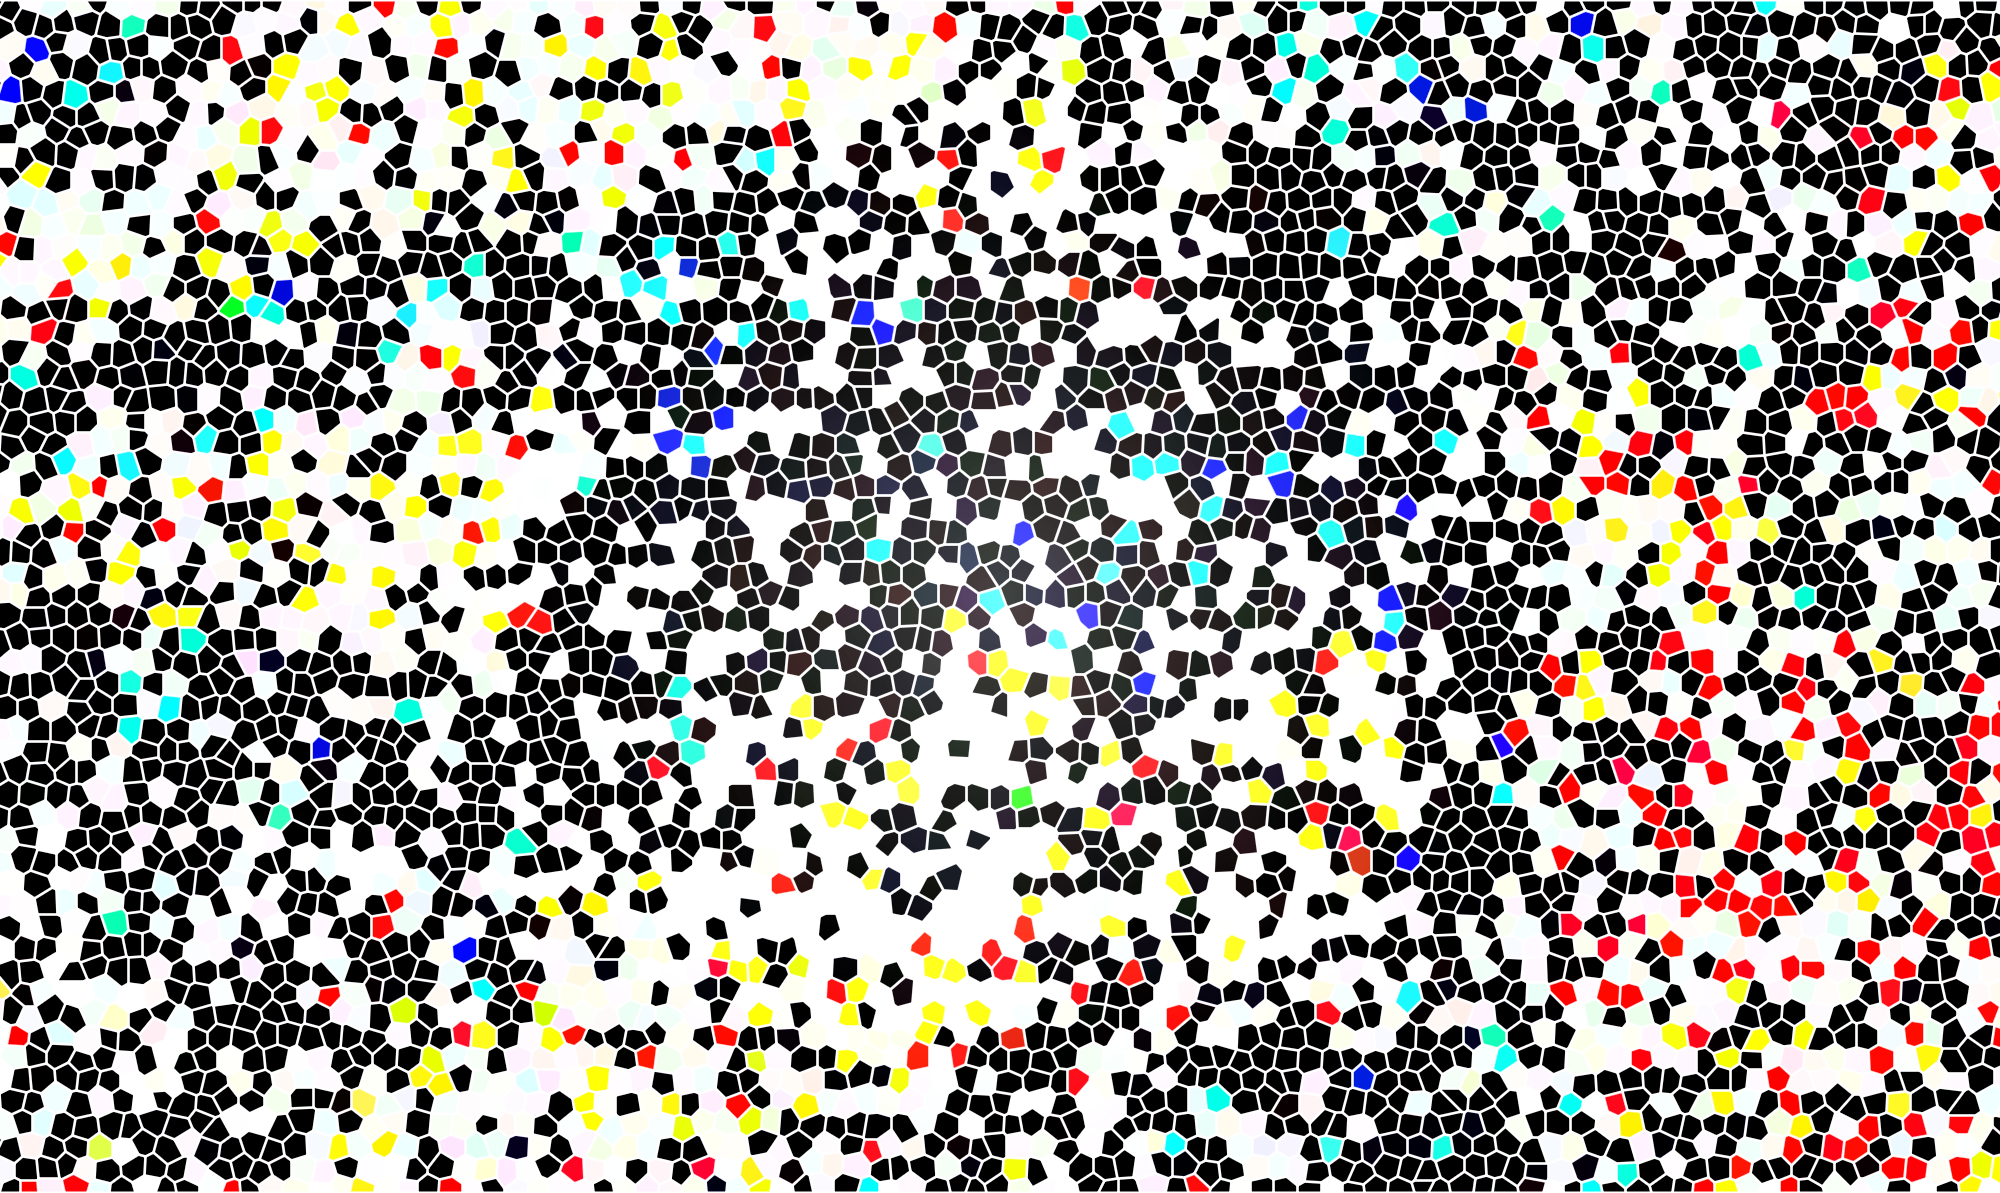
Even a bit more recently, there is the idea of our glitched art works, which is a combination of the ideas of various people. It comes out differently, sort of representing how different each and everyone of us thinks.

The Conclusion

Thinking about it now, two heads are always better then one, and thats because our ideas are different, the way we work is different, and thats probably why DIWO would be a good thing for the makers culture, as the ideas of many would result in something far more creative then just the ideas of one.


When your N̸̰̙̻̖̮̭͚̊͆̑̄͐̉̕̕̕͝í̵̛̫̞͖͇͕̲̤̗̳͈͍̝͋͆̕g̶̡̡̡̛̣̙̹̣̠̳̞̞͉̻̱̓̎̽̈́̂͋͑͌͌͠h̸̨̨̟̺̙̖͉̺͈̻͔̻̱̗̓̏̒̄̍̀̓̾̚ṫ̶͓̠͎̗̞̬̺̟̲̭̀͐̂͆̽̔̒̒̀̇͗́͆́m̷̰͊̆̏̅͋̓̈́́͊͘a̷̢͙̤͇͓͉͇̹̞̯̰͈̮͑͑̃̈͝͠r̵̡̤̰̥͙̝̄͒͂̾̾͑̋̈́͑͌͠ͅe̵̛̼̲͕͖̗͙̝̣̝̍͗͗̓̂͝s̴̱̼͈͇͕̣͍͇̝̍̉͝ Become Reality

Micro-Project 5

So we were playing with G̴͔̘͚̞͚̞͓̭͈͛̓͆̏̈́̅̀͒͂ļ̵̫̓̾́̃̈́́̐͝í̴̢̧̝̰̱̗̰͙̘̖̼̜̪͎t̶̬͓̙̹̊ͅč̷̨̢̜͖̪̪͇̫̼̭̳̎͒̈́̆̈͐͗̂̈́̕̚͝ͅh̸̢̭͈͈̟̖̖̙̱̼̠̝̽̑̇͛͜ͅ ̶̲̠͉̭͍̦͎̬̪̙̣̜́͐͆̎͛̉͑a̶̡̧̟̺͎̫̜̳̗̤̣͎͗͐͂̉̎͛͛́́͐̇̚͜͜͝͝r̵͇͆̓̾̓̈͊̀̅̇̇̓̉ẗ̴̨̡͓̩͎͖̦͎̘̪̟̲̲̬͔́̈́̀͆̀͌̑ Today.

We were asked to edit one group mates image and then save it. Next we pass it to the next group mate to re edit again. the process repeats till everyone has edited the image once.

So my group members edited my image something along the lines of the image below.

Its quite fun actually, defacing  each others pictures, in fact most of them did not look like ourselves after the entire transformation was over. Its more interesting when we don’t look like ourselves anyway.

Telematic Embrace, Together but Not

Mirco-Project 3 

The review

During lesson, our class went through what was coined the ‘telematic embrace’.

During the lesson we held a online conference on Adobe Connect. Then we were asked to do a few tasks in front of our web cams. From where we sat, we could all see most of our classmates undergo each task rather differently, resulting in a wall of rather interesting imagery.

(Source was an image shared by our proffessor Randall Packer)

The task above was to share a photo we have on our phone. Through this exchange, we are able to learn alot about our own classmate. The photos we have on our phone says alot about who we are personally. In a situation where they are placed next to each other it is a playful contrast of of our personalities, despite sharing the same major.

(Source was an image shared by our proffessor Randall Packer)

The task above was to place our clear water bottles over the screen to create and interesting effect. Despite being quite easy to create, to achieve such a synchronised collaborative art work, one must be willing to cooperate and negotiate. In each photo that we have contributed to, it is only due to our willingness to follow the instructions given to us that we are able to create a cohesive combined image.

The conclusion

This idea of ‘Do-It-With-Others’ would have rather unpredictable results despite the contributers having the same set of instructions. It makes the outcome of the works surprising and unique as various ideas contrast and complement each other.

Micro-project 2: Tele-stroll

Micro-Project 2: Tele-Stroll

This project was supposed to be a reflection of how two artists would collaborate to create an almost telepathic walk with both parties walking in two different areas.

In this project I paired up with Farzana to create just that.

The Plan

The initial idea is for the video to reflect the more personal use for technology, and how we use it in our everyday lives. Hence we used it to simulate a study session.

The locations we chose was a library setting and a home setting, which are common areas that students choose to study for thir projects. However in both scenarios one would act rather differently when studying. In this case Farzana is ‘studying’ in the library and I am ‘studying’ in hall.

We also planned to synchronised our actions from a certain time and attempt to join up our actions in others. It kind of reflect the kind of studious mentality that every singaporean has growing up in this rat race environment.  Subsequently, there is a change in action for the at ‘home’ set up, showing a more distractable nature when you are in a place of comfort rather then outside. This results in more movement and a change in evironment, to want to break free from studying and just wander about (procrastination).

The Outcome

The outcome was a little haphazadous. Due to the poor internet connection, some of the video got buffered on my end, due to the more obscure locations I wandered to.

Posted by Ros Farzana on Wednesday, 24 January 2018

The Reflection

I find this form of video taping quite personal, almost like walking and talking with your friend in real life. Even for something as simple as studying, one does not need to leave the comforts of their home any more to find company.