3D MA City of Voids – Research & Process (Individual)

So in this lesson we started touching on MA City of Voids idea. This final project is a group work and my teammates are Bala, Azizah and me. We had to come up with 2 sounds using the objects and instruments below:

These are the sounds we created from it:

1st recording:

2nd recording:

I chose to focus on our 2nd recording. Using the Audacity app like we are told to, I studied the pitches produced by those sounds and made use of the “thick lines and long lines” seen in them to create my forms in my demo mood box.

Graphical annotation of our 2nd recording sound in space.

I also looked up on the kinds of modular structures to understand more of what is preferred when creating the mood box based on my sounds.

The ones below are a few examples that attracted my attention because of how each are unique.

This is one of my references as I loved the curved idea out of the modular structure. Hence my idea of making a wave-like thing in my mood box.
I used this as another of my reference as I was intrigued by the square formations that seem like it’s jutting out of the walls at different places and looking like it’s a music of it’s own. Hence thinking of using my LEGO as part of my mood box.

I wanted to use the colour scheme as seen below, it just felt right according to the music played in the recording – soothing (hence the light weight gold that could be folded like waves and looks smooth), but the sounds after ends up being sudden (hence the long silver metal jutting out), and then something rough and rushed (LEGOs to be placed in certain areas to represent them).

In the process of making, I used thin bendable gold brass foils to create the sound waves hence the bending of the foil is needed here. And the thick silver metal looking like it strung out in the middle as it shows the short note after the end of 2 intervals in the recording. (seen below)

Initially i wanted to use the blue legos as seen above to make the second SO, but i felt that it doesn’t go along with the rhythm well and also like our prof advised, maybe it will be better if i replace it with something that looks like a spring.

So i made use of a thick wire that i had and tried to make a spring look-a-like:

And yep, I prefer it this way. When I listen to the recording again, it suits alongside the last SO. 🙂


3D Mnemosyne – Pair work process [II] and Final

In our next Mnemosyne task, we were all paired up and my partner is Alina. We were told to make use of our mnemosyne bottles to create a new work with our partner, something that is WEARABLE. HAH, that one got us shook.

For our work, we decided to incorporate a few parts of our bottle design and take that into consideration when making a new work.

This is Alina’s bottle design.
This is mine.

So we decided to create a ‘top’ incorporating the things we learnt before on planes such as twisted, bent and curved planes.

We chose to use 2 good scents:

  • caramel scented (mine)
  • argan-olive oil (Alina’s)

Our bad scent:

  • the smell that lingers in a dentist clinic

The materials we used:

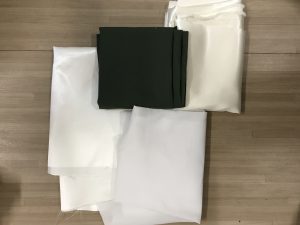
  • white silk (for Dominant portion)
  • olive green cloth (for SD portion)
  • white cloth; extra
  • thin bendable gold-coloured wire (for SO portion)
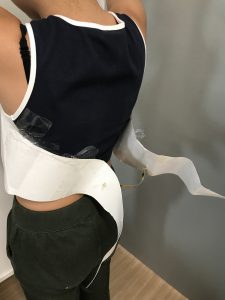
Materials used that is not seen inside: gold wire as SO to attach the top together by the back in a curved loop.

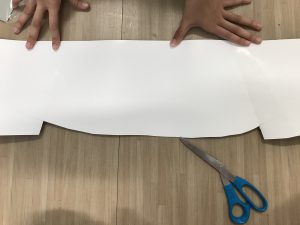
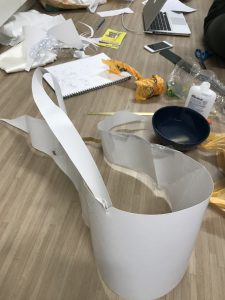
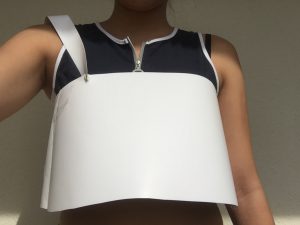
So we made a mock up of our top first by using art card.

The structure of the top.

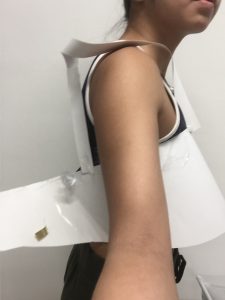
Twisted plane over the shoulder.
From the front to the back, it curves, and then the ends curved outwards into a complex plane.

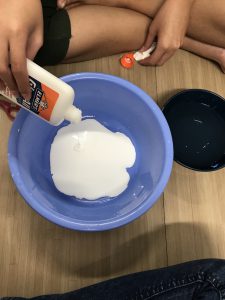
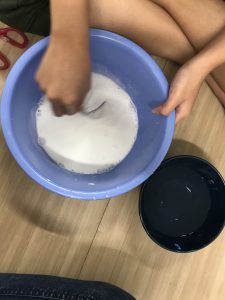
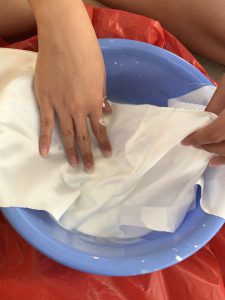
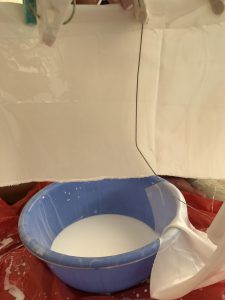
Then we  began with the real thing where Alina came up with the suggestion of gluing the white silk so as to make it wearable and not flimsy.

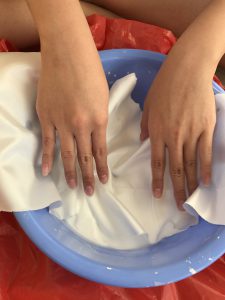
Soaking the white silk into the load of white glue.

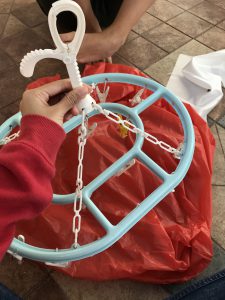
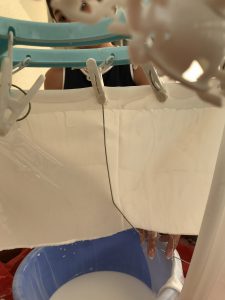
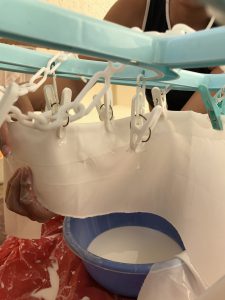
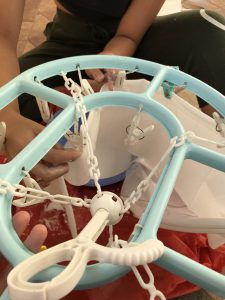
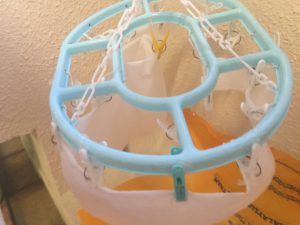
We also needed a hanger to clip on our silk and let it dry according to the shape we needed for our top.

We placed a hard wire behind that helps to act as the spine to our flimsy cloth, so as to create the structure for when the cloth dries up.

Folding it carefully and according to the body shape as the structure for our top.

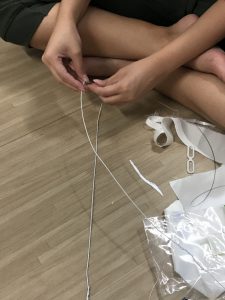
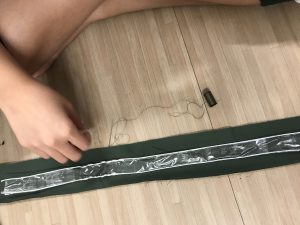
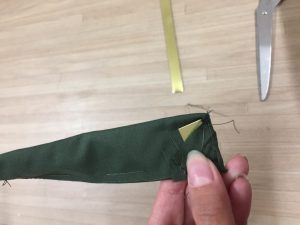
While waiting for the cloth to dry, we did wire structuring for our SO to connect the front to the back by the shoulder.

And so made 2 of those thick wires and we pasted them in such a way that we can make a bigger surface area to create the structuring of the SD part of our olive-green cloth, over the shoulder. (as seen below)

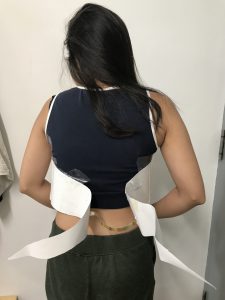
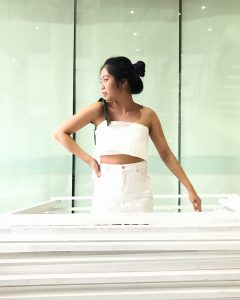
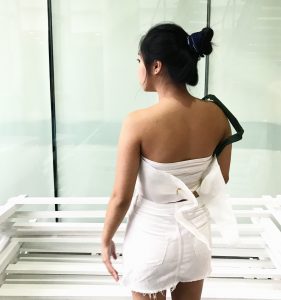
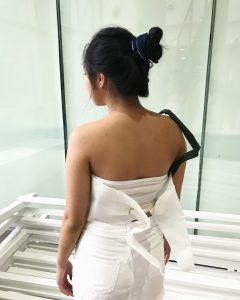
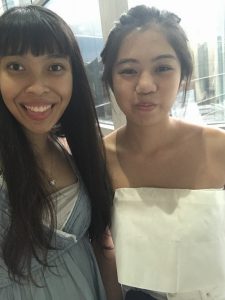
All of the above led to the final product:

FINAL

I love the outcome, happy to say that it looks legit and wearable haha, considering the planes inside too to create it.

YAY and we are done 🙂

3D Mnemosyne – Process [I]: Scents portrayed in forms

We were suppose to come up with 2 forms out of the scents we talked about in previous lessons. So my good scent was something like caramel/vanilla (because it’s buttery-sweet and I loooove sweet smell, like as if they can be eaten), and my bad scent was smoke (because it reminds me of how my sister started smoking, and how my dad’s not quitting).

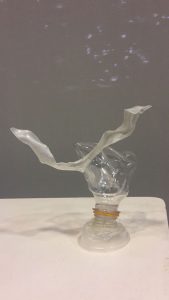
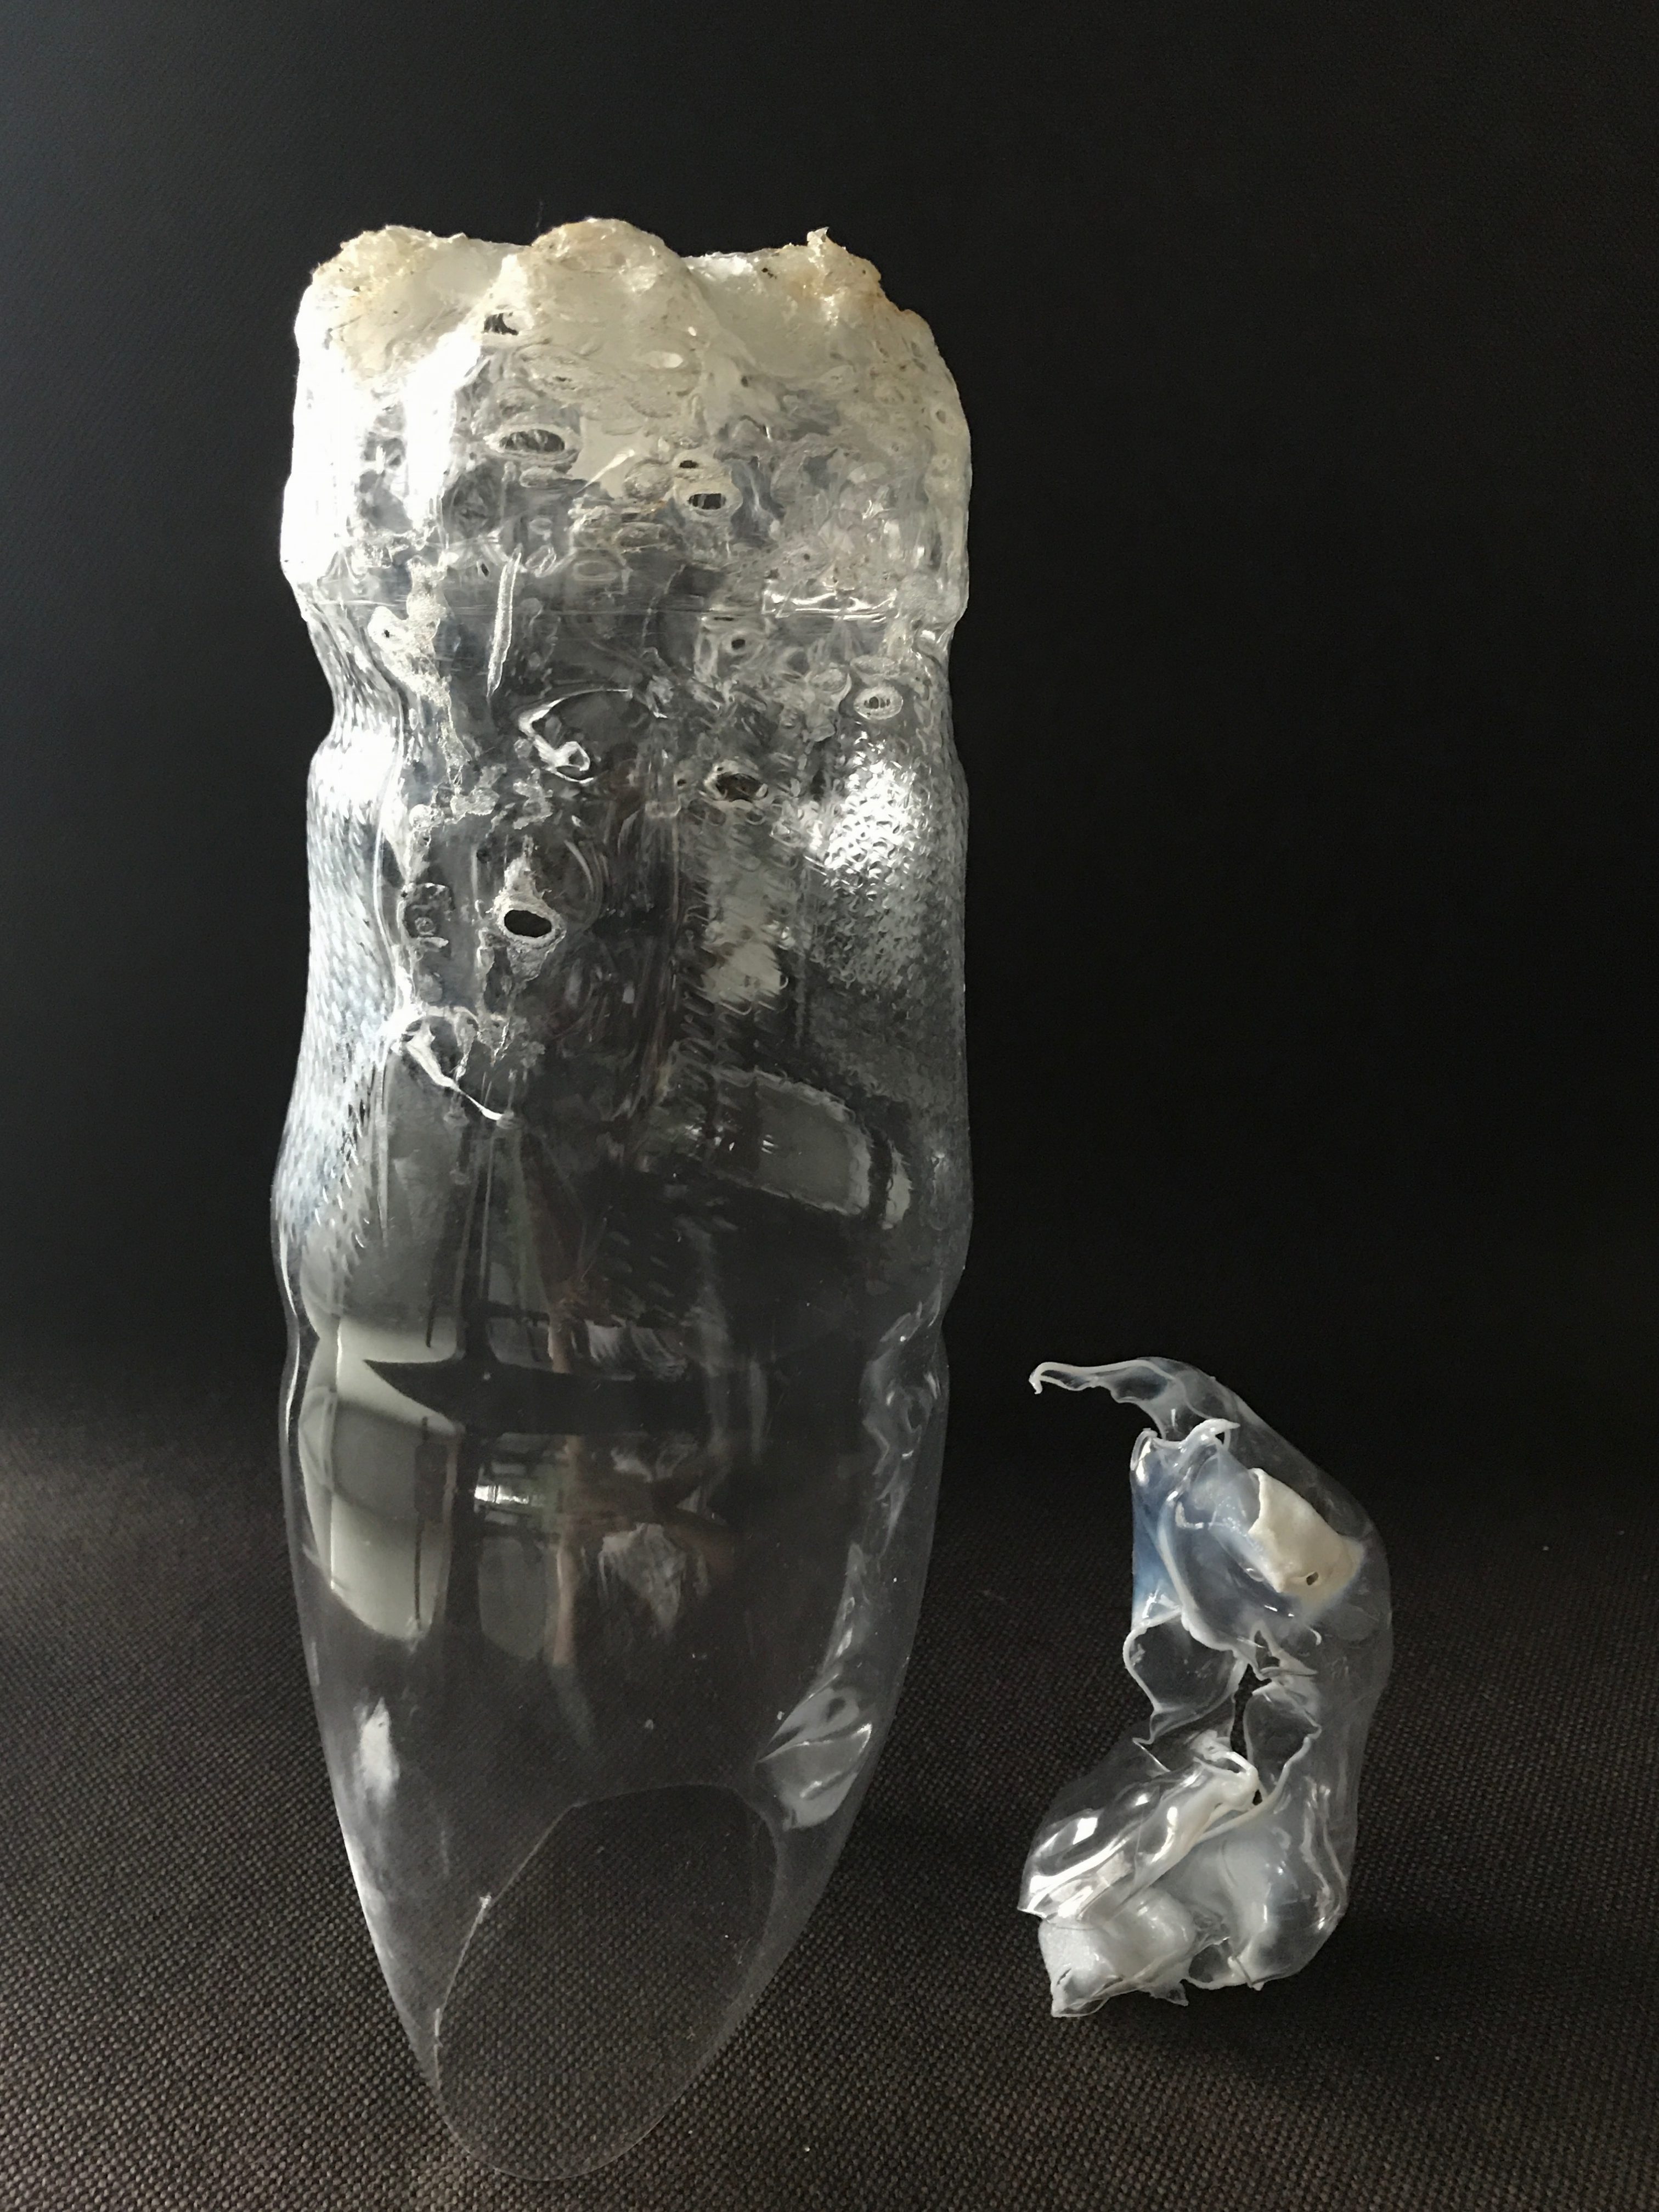
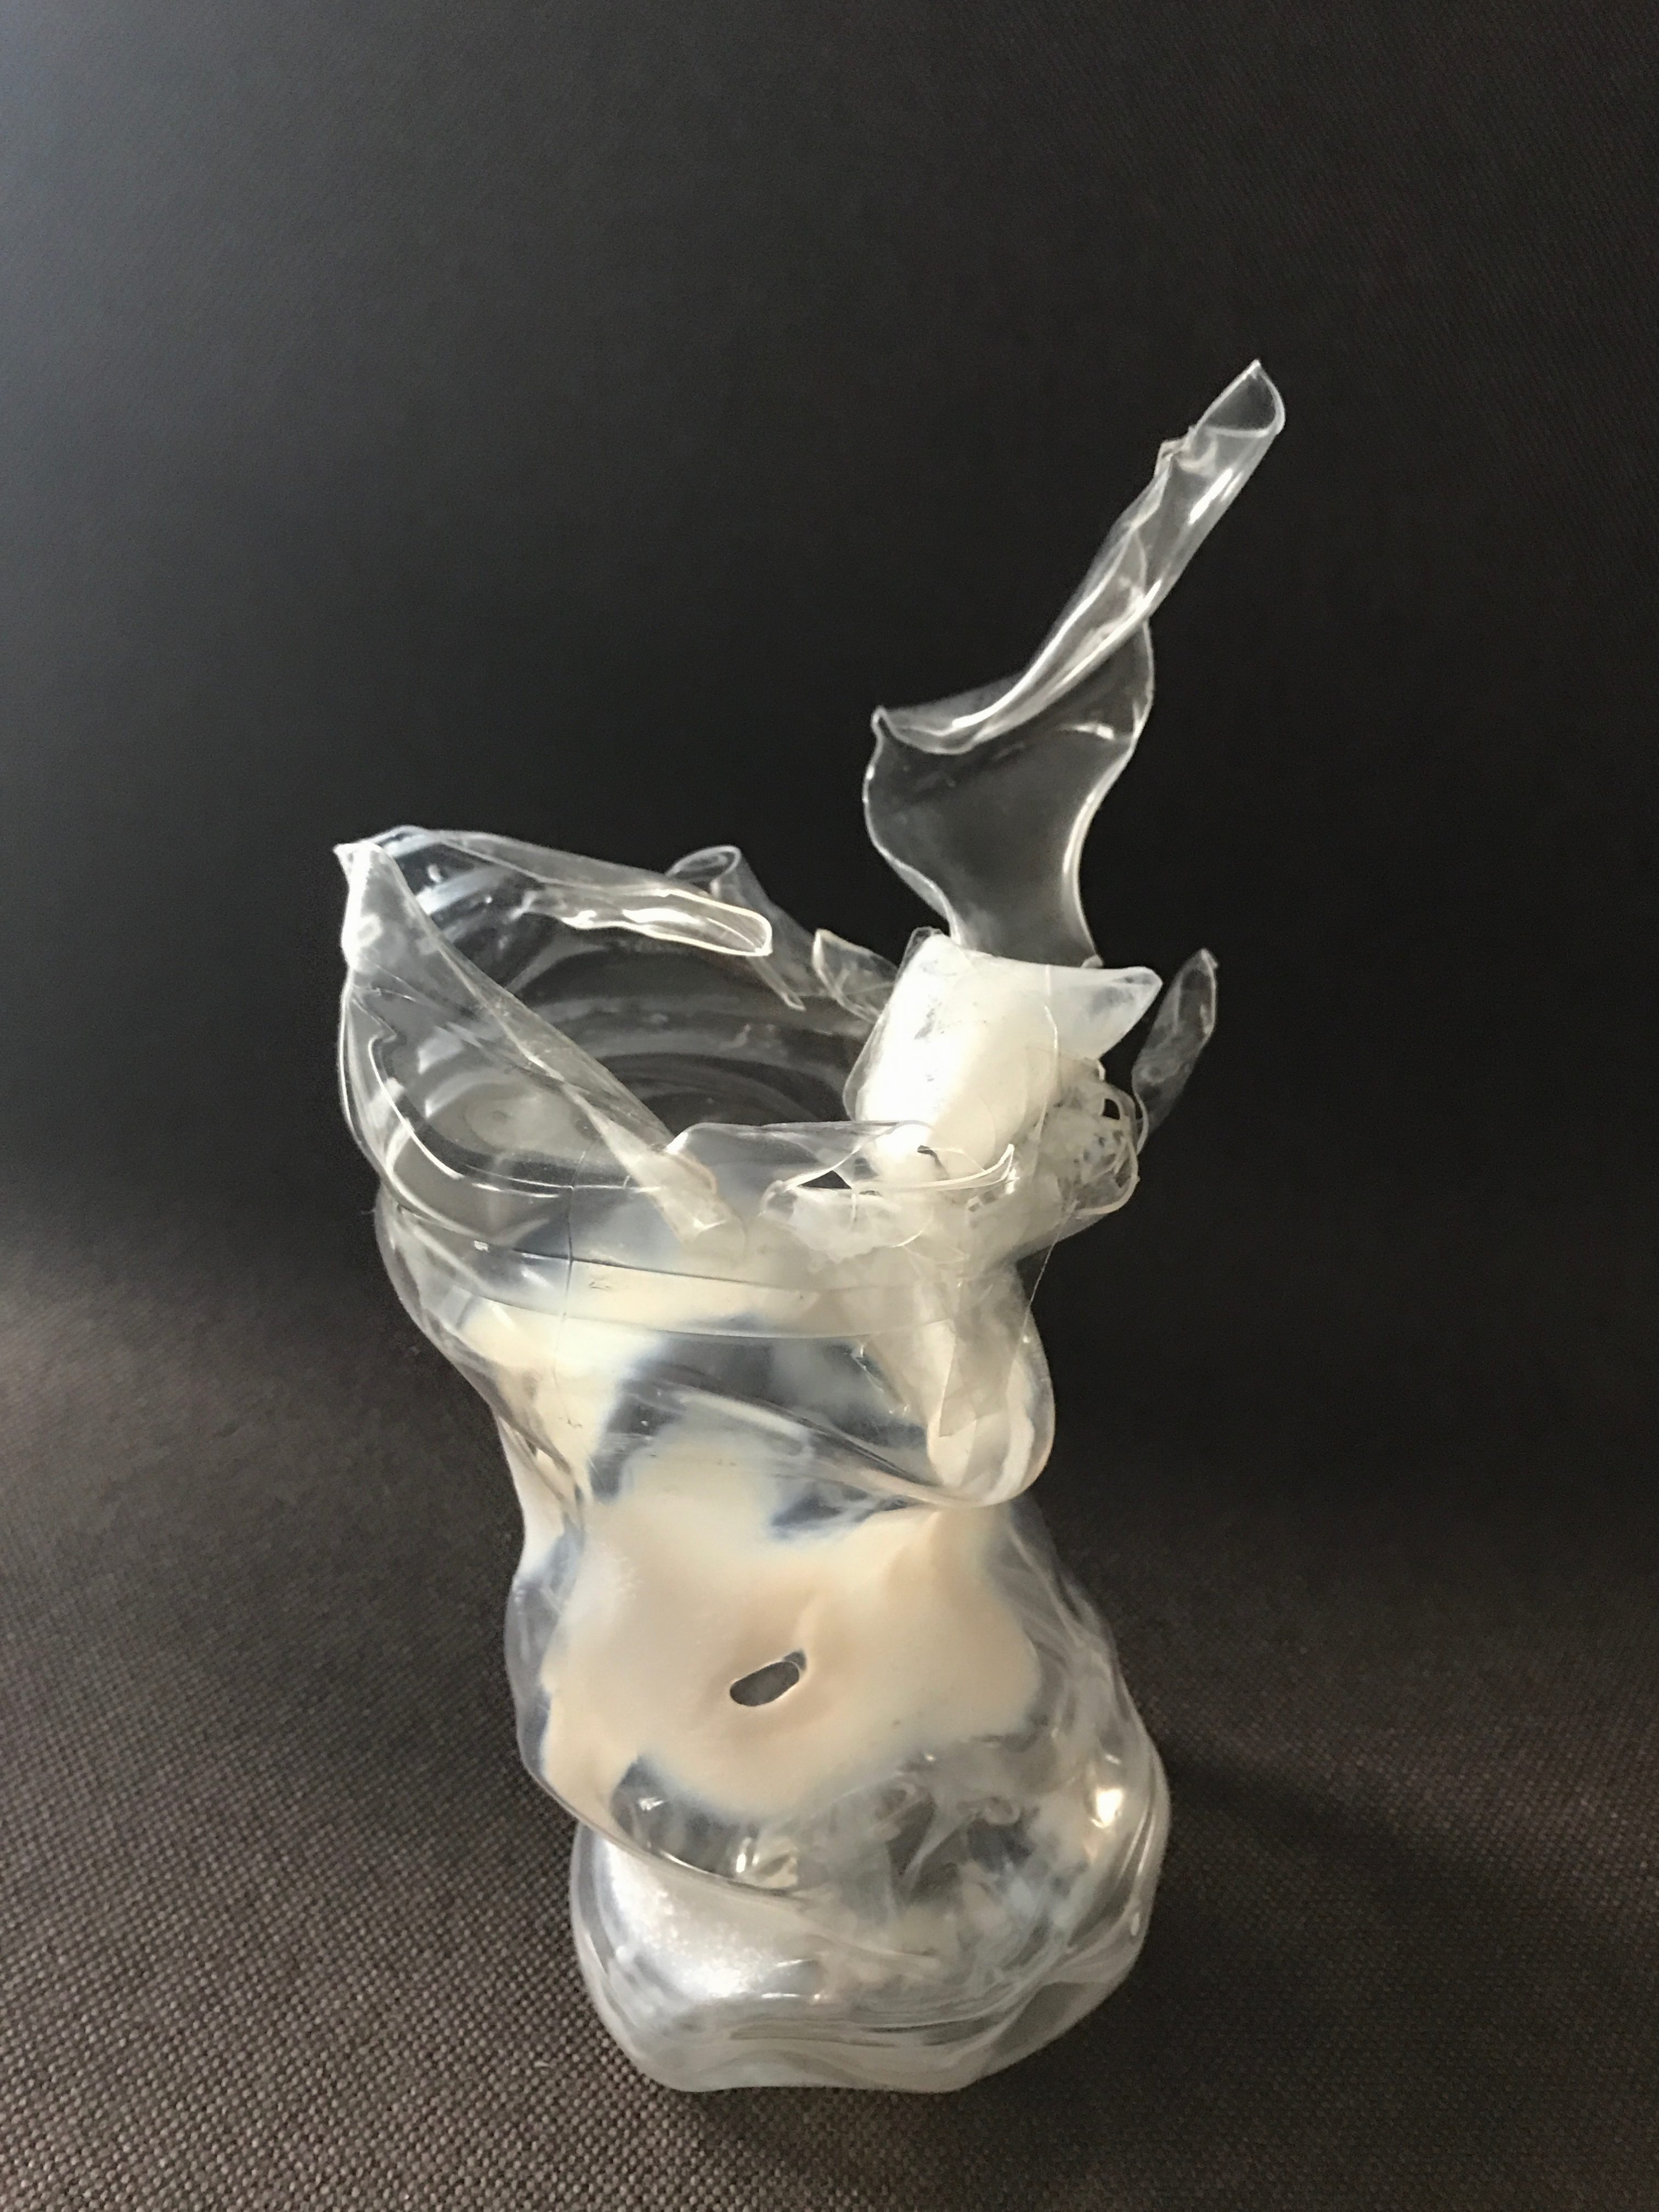
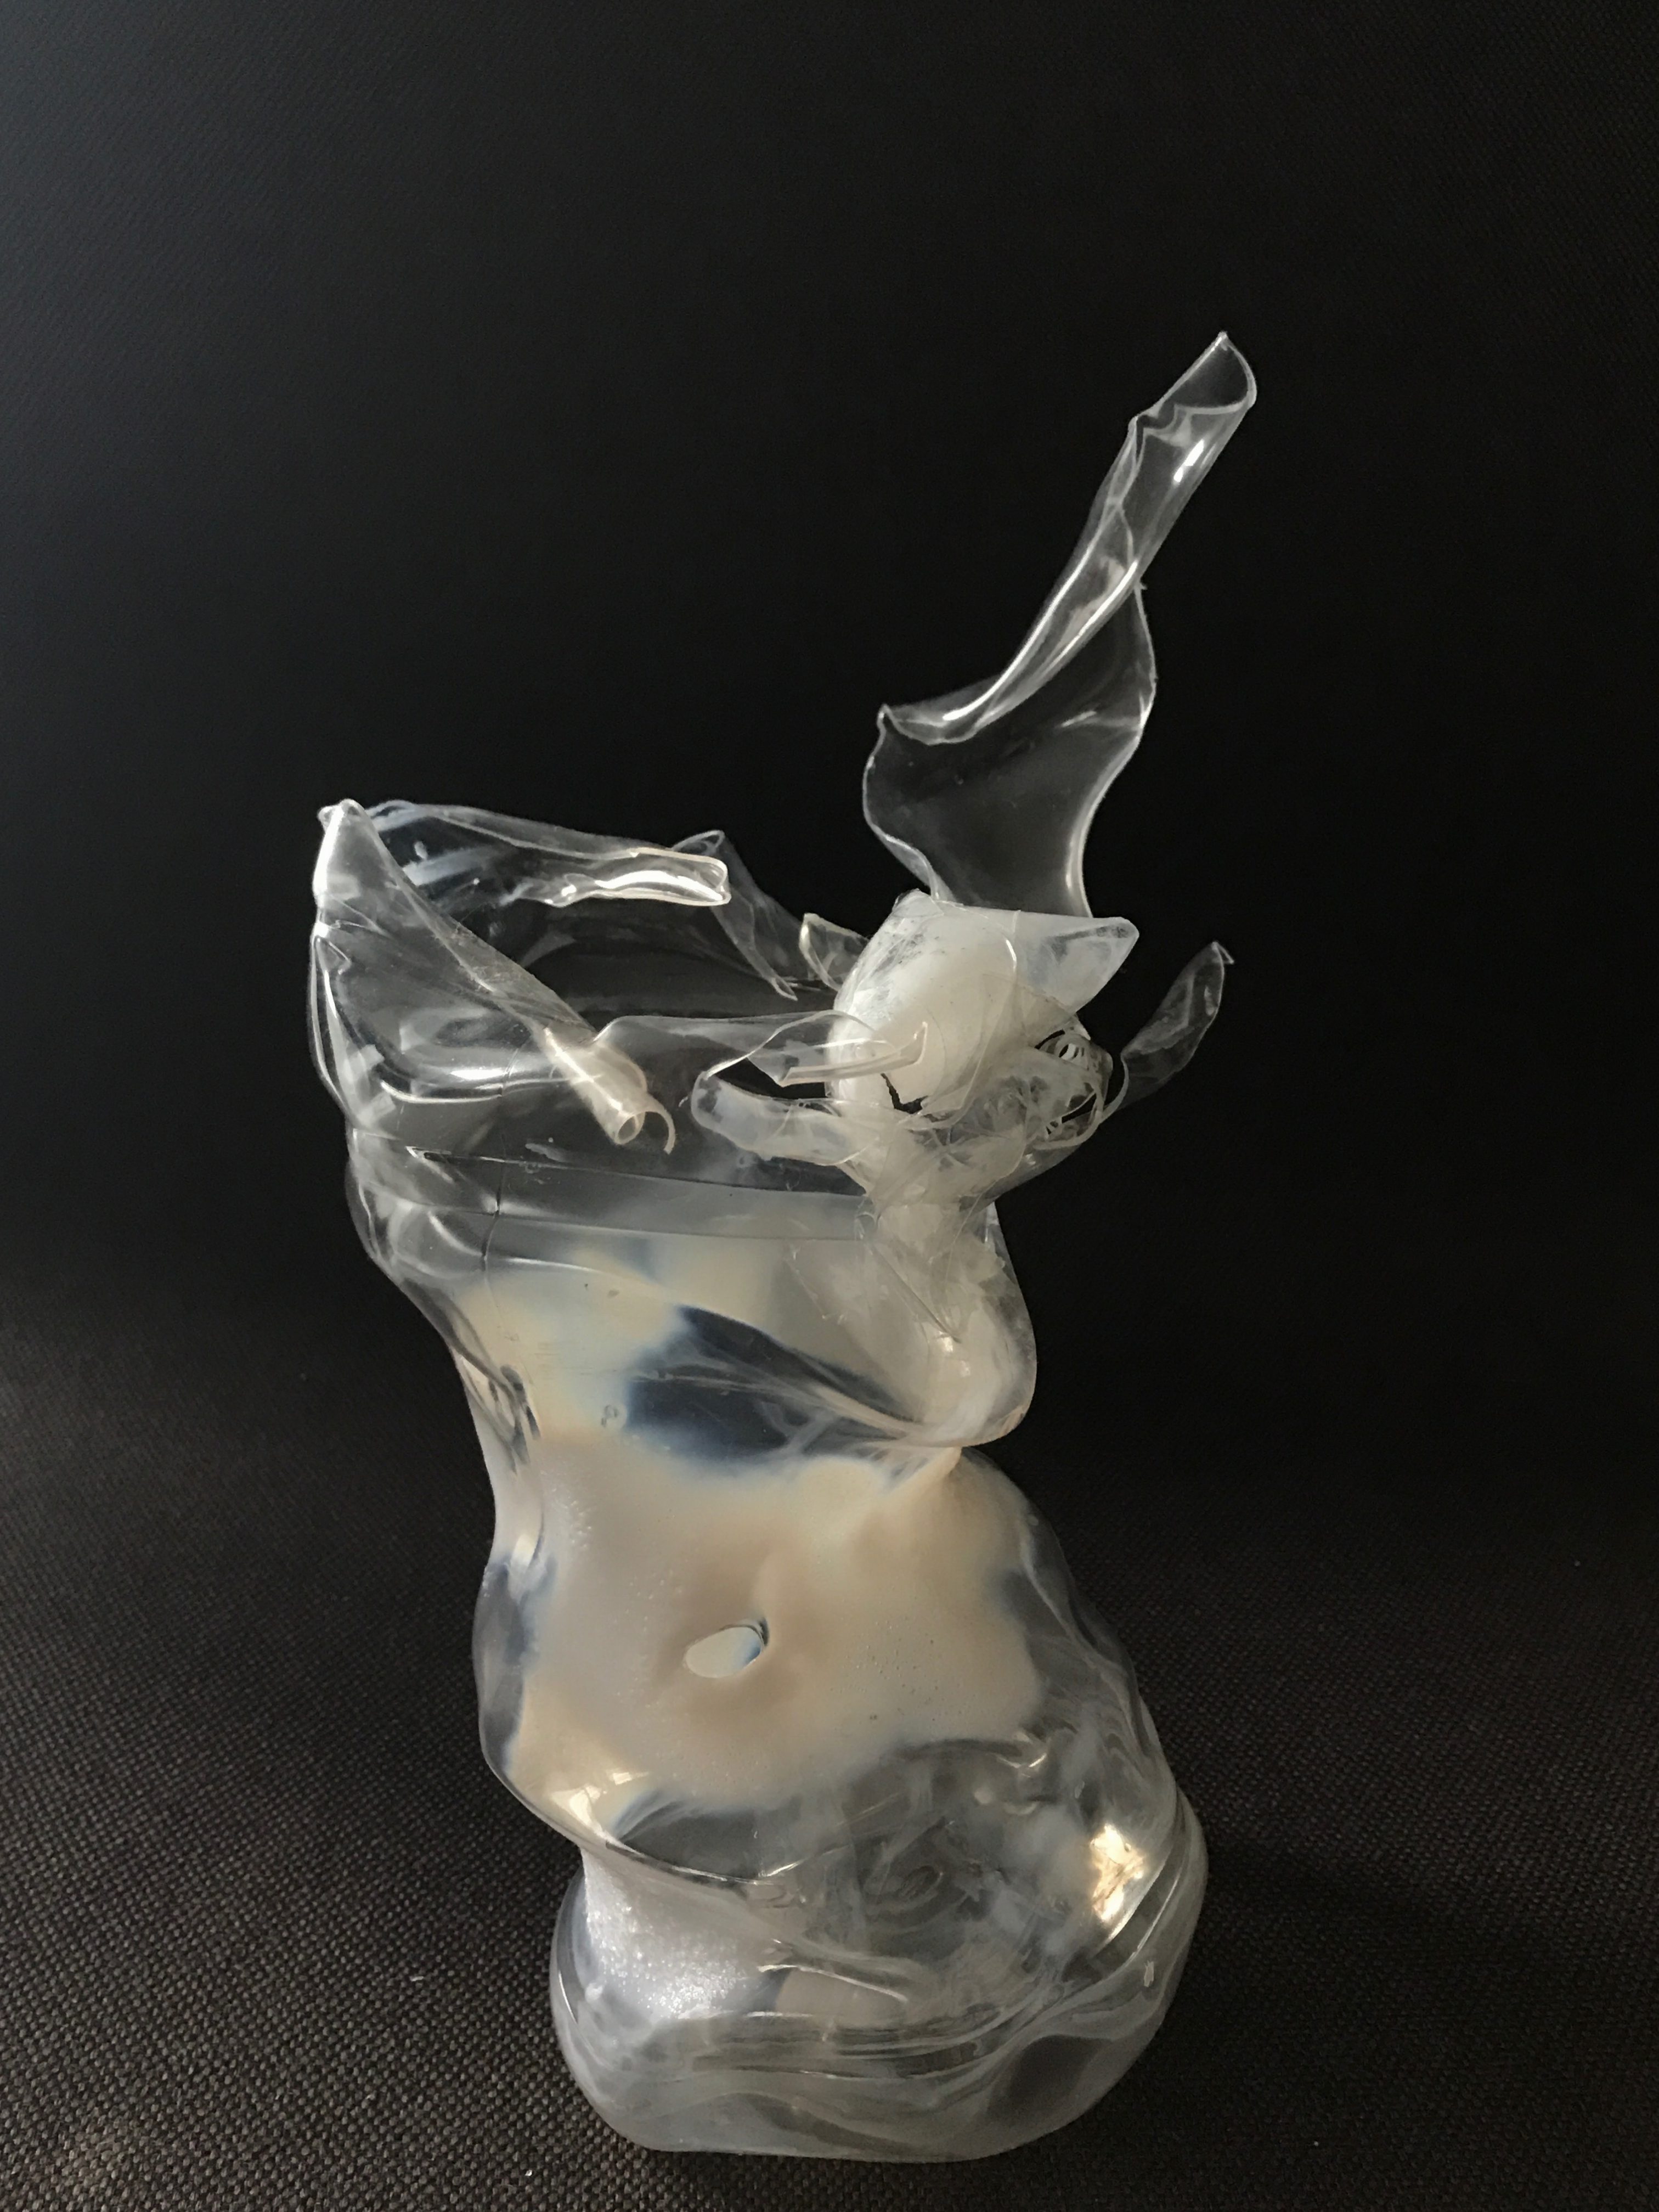
Based on the figure below, taking on the shape of a smoke is the form on the right – it is curved/slanted and can be said that it has no absolute shape, because it’s suppose to represent smoke and it somehow fades into air (as seen from the curvy thin strip growing at the top of it). It also has white ombre in some parts to show the smoke-like portion.

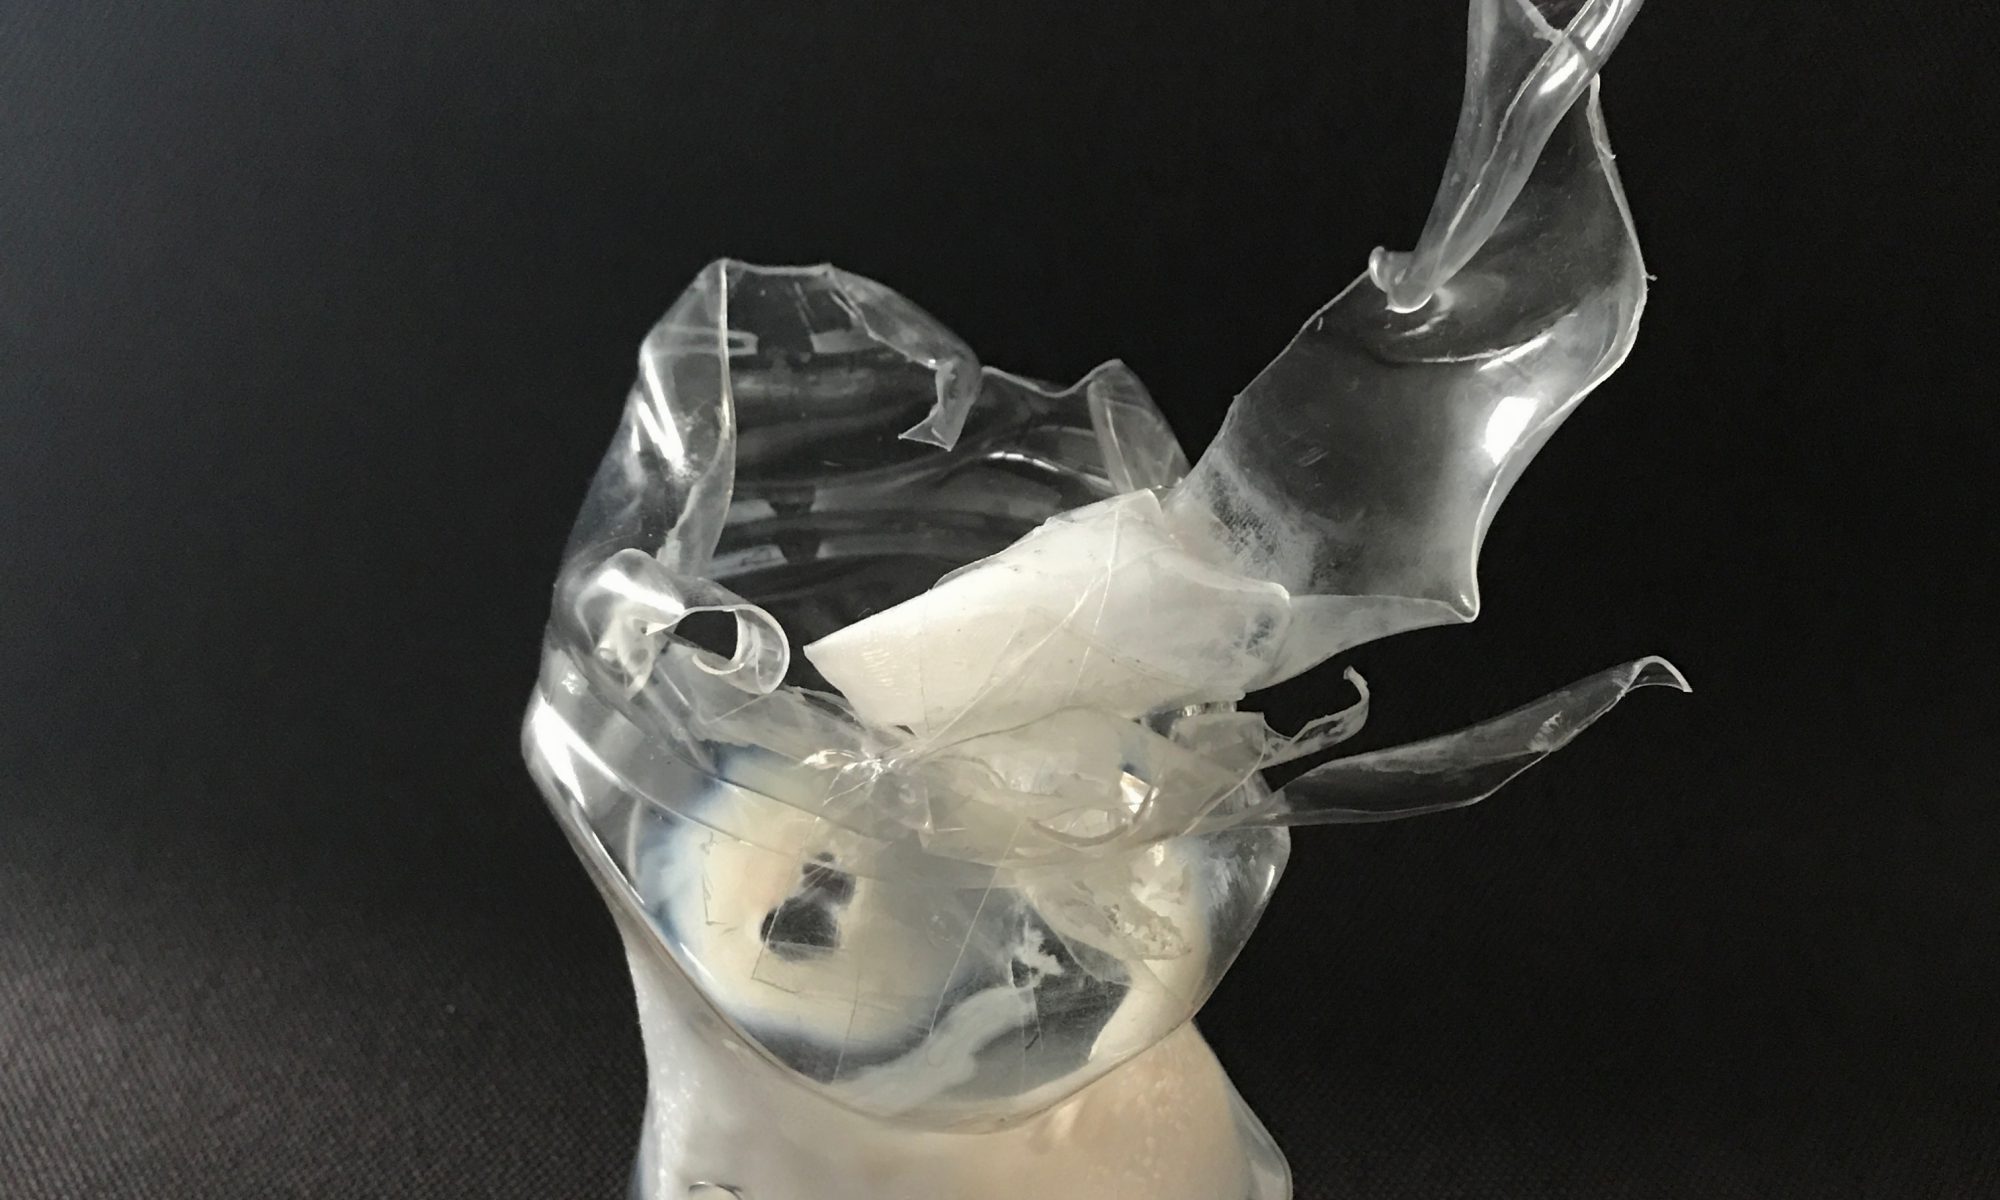
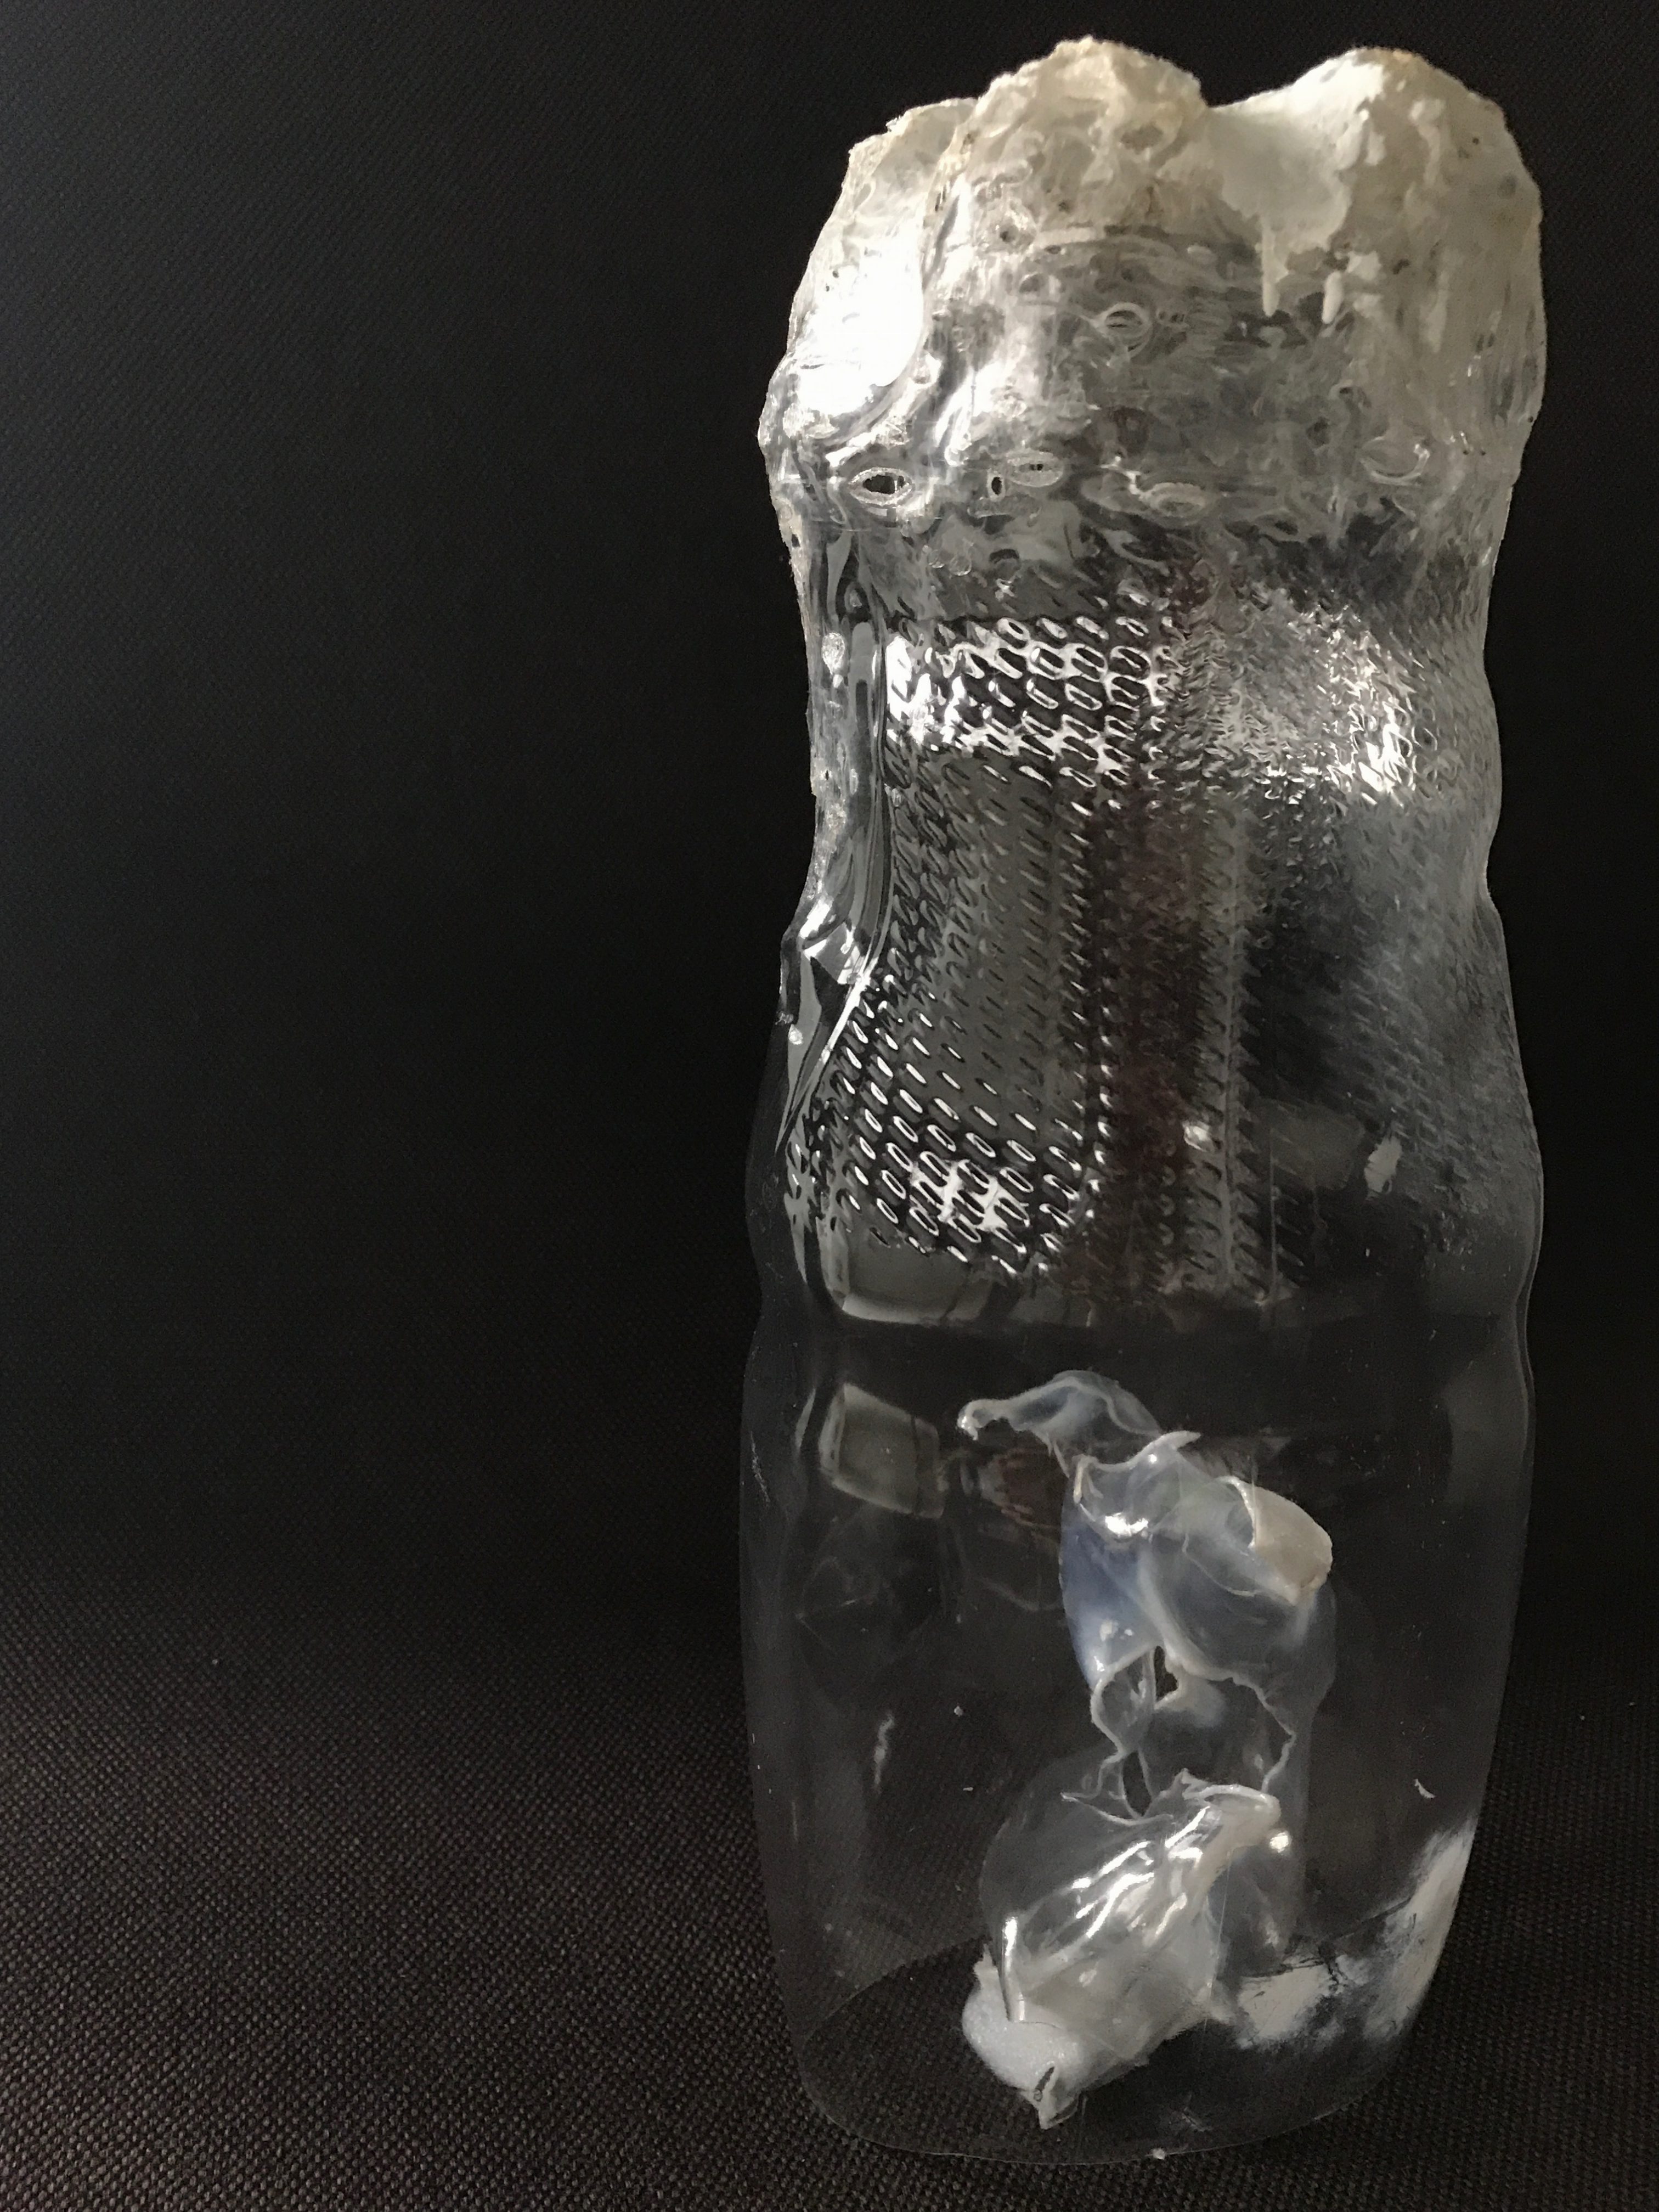
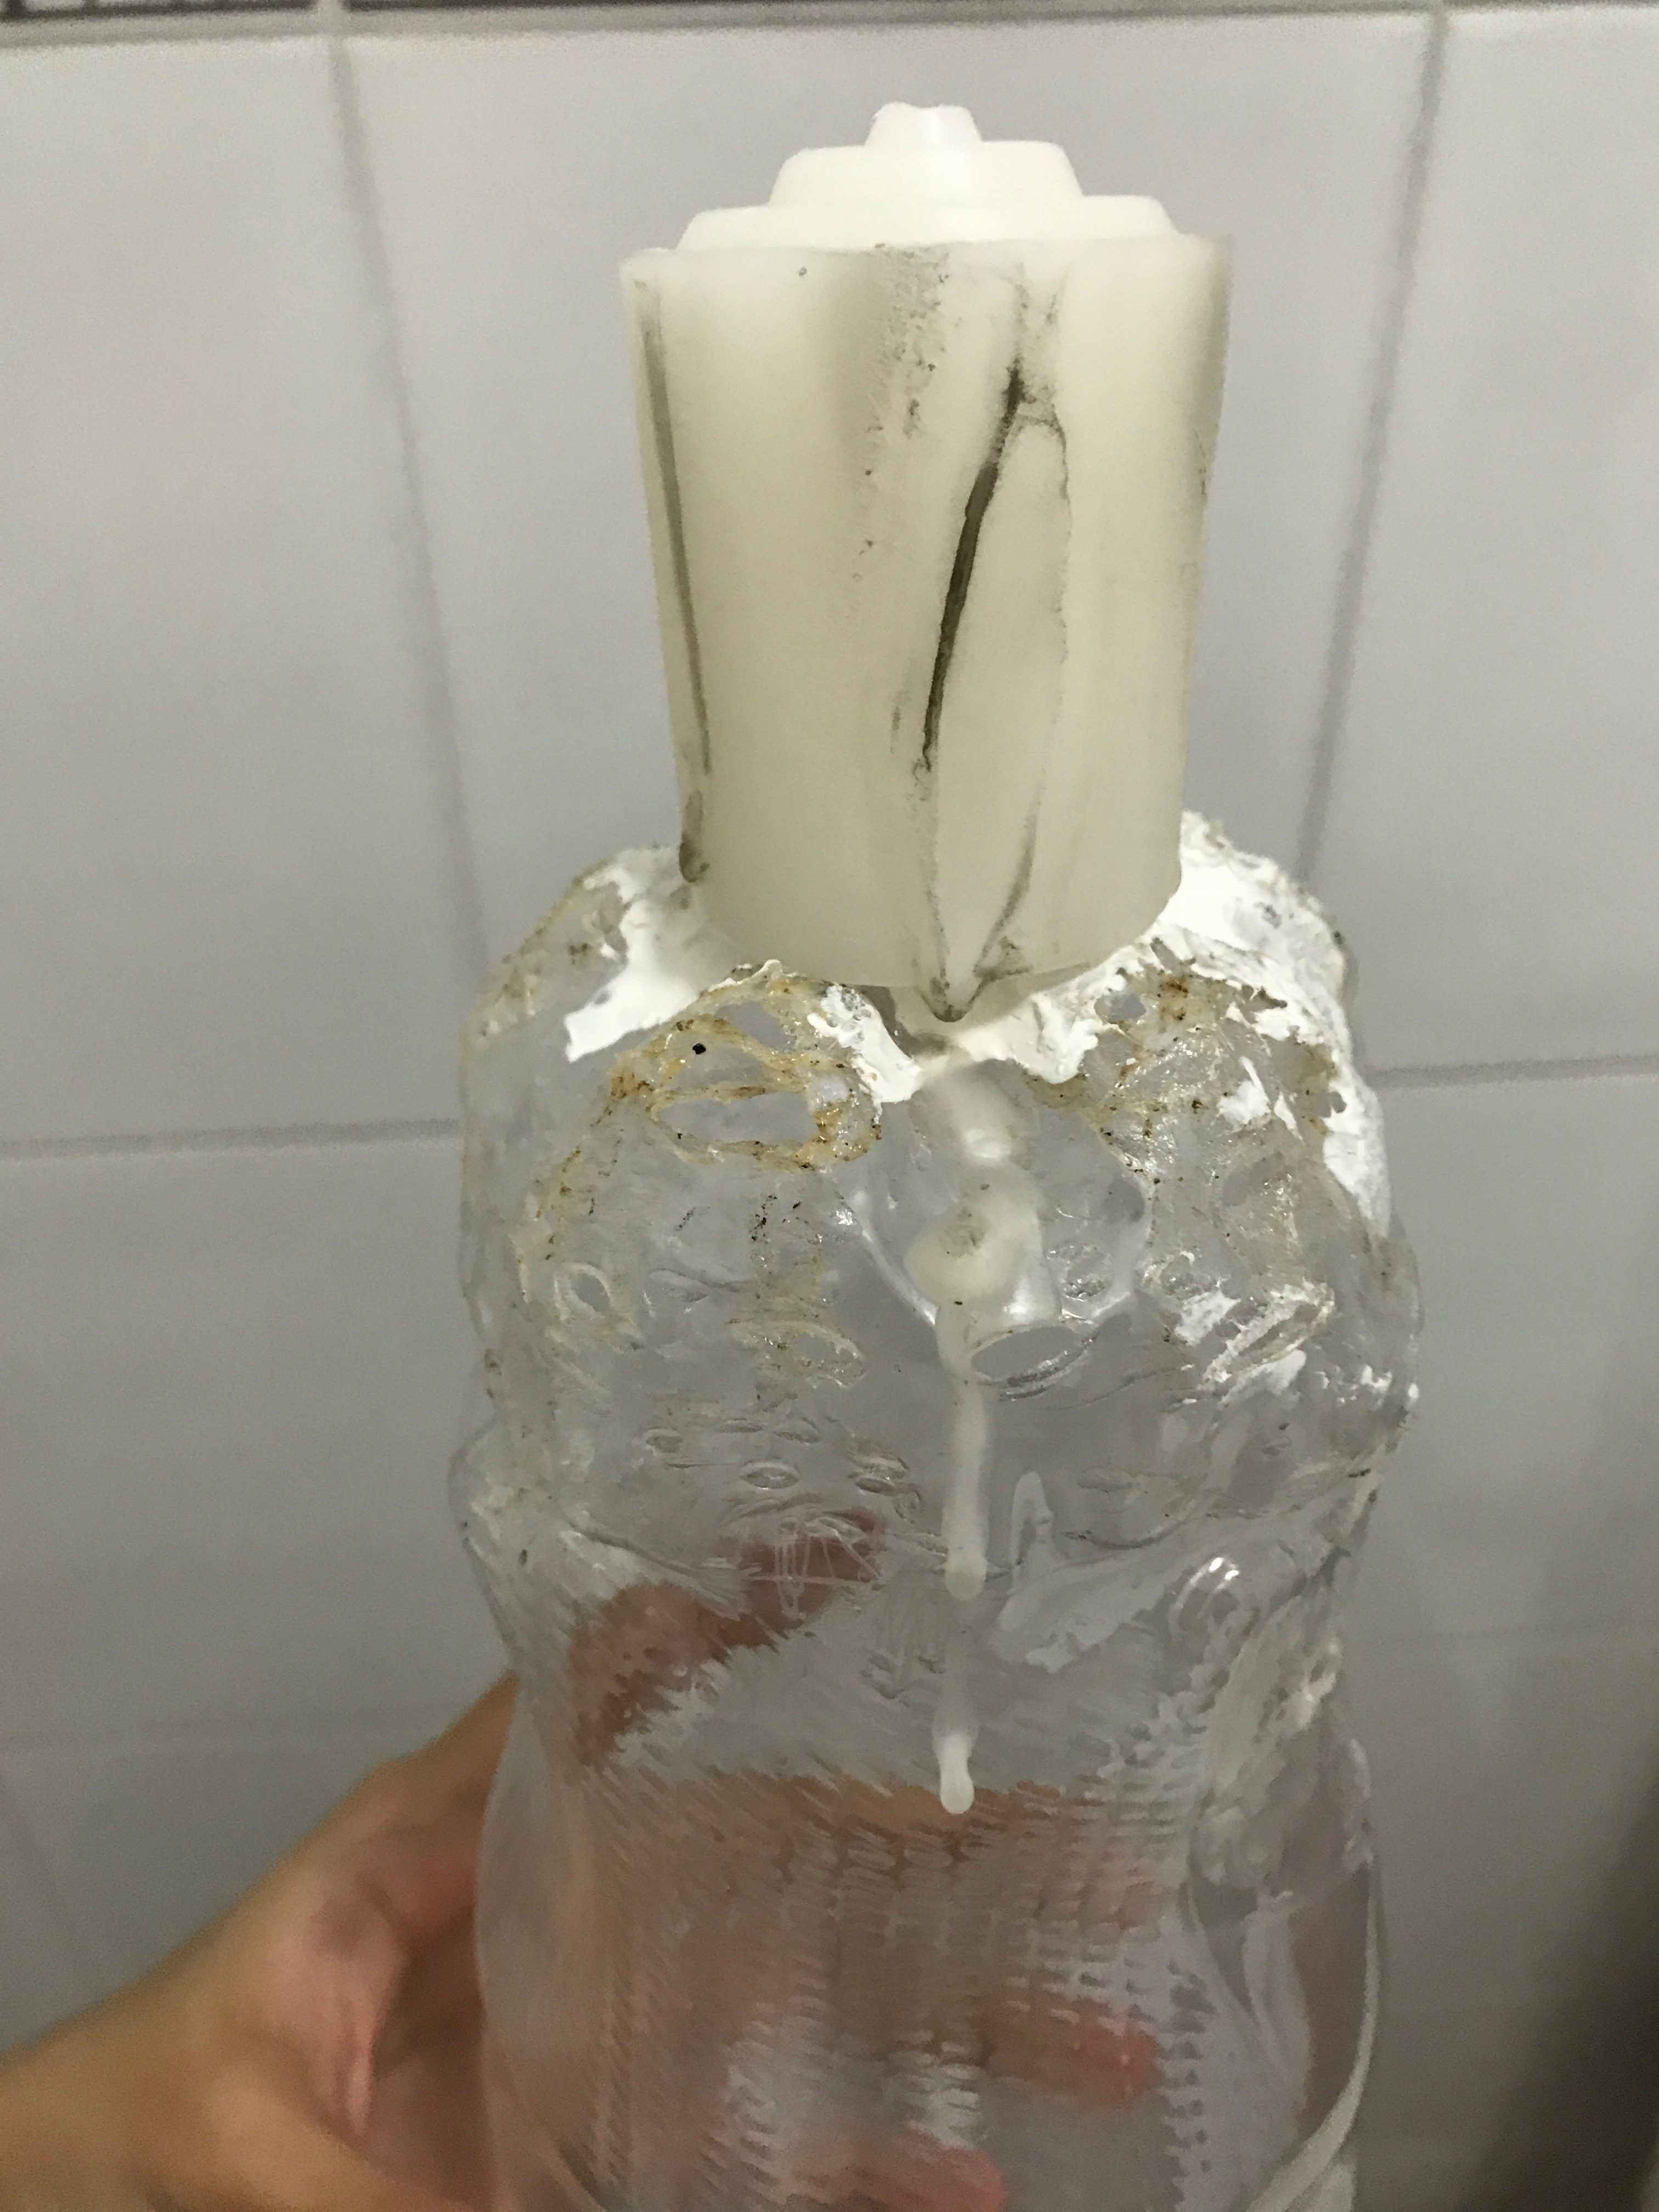
For my caramel/vanilla scent, we look at the form on the left. The white/caramel-coloured top is suppose to represent the vanilla/caramel melting and dripping. The reason for the holes I created was to simply represent the smoke creating holes into my good scented form.

Here’s the reason why:

My caramel scented form, is suppose to act as the dome that covers my smoke scented form, in a way to show that my good scent is overwhelming and able to cover the bad scent.

But of course I want my two forms to come as one – a whole figure itself, hence I showed the slight effect of my “smoke” here managing to create holes in the top part of my good-scented form. This is the part where my vanilla/caramel (white part above) drips down, as an idea to show that either way, my good scent will cover up those holes (voids), and will eventually overpower my bad scent.

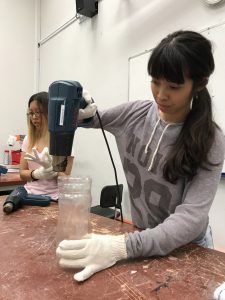
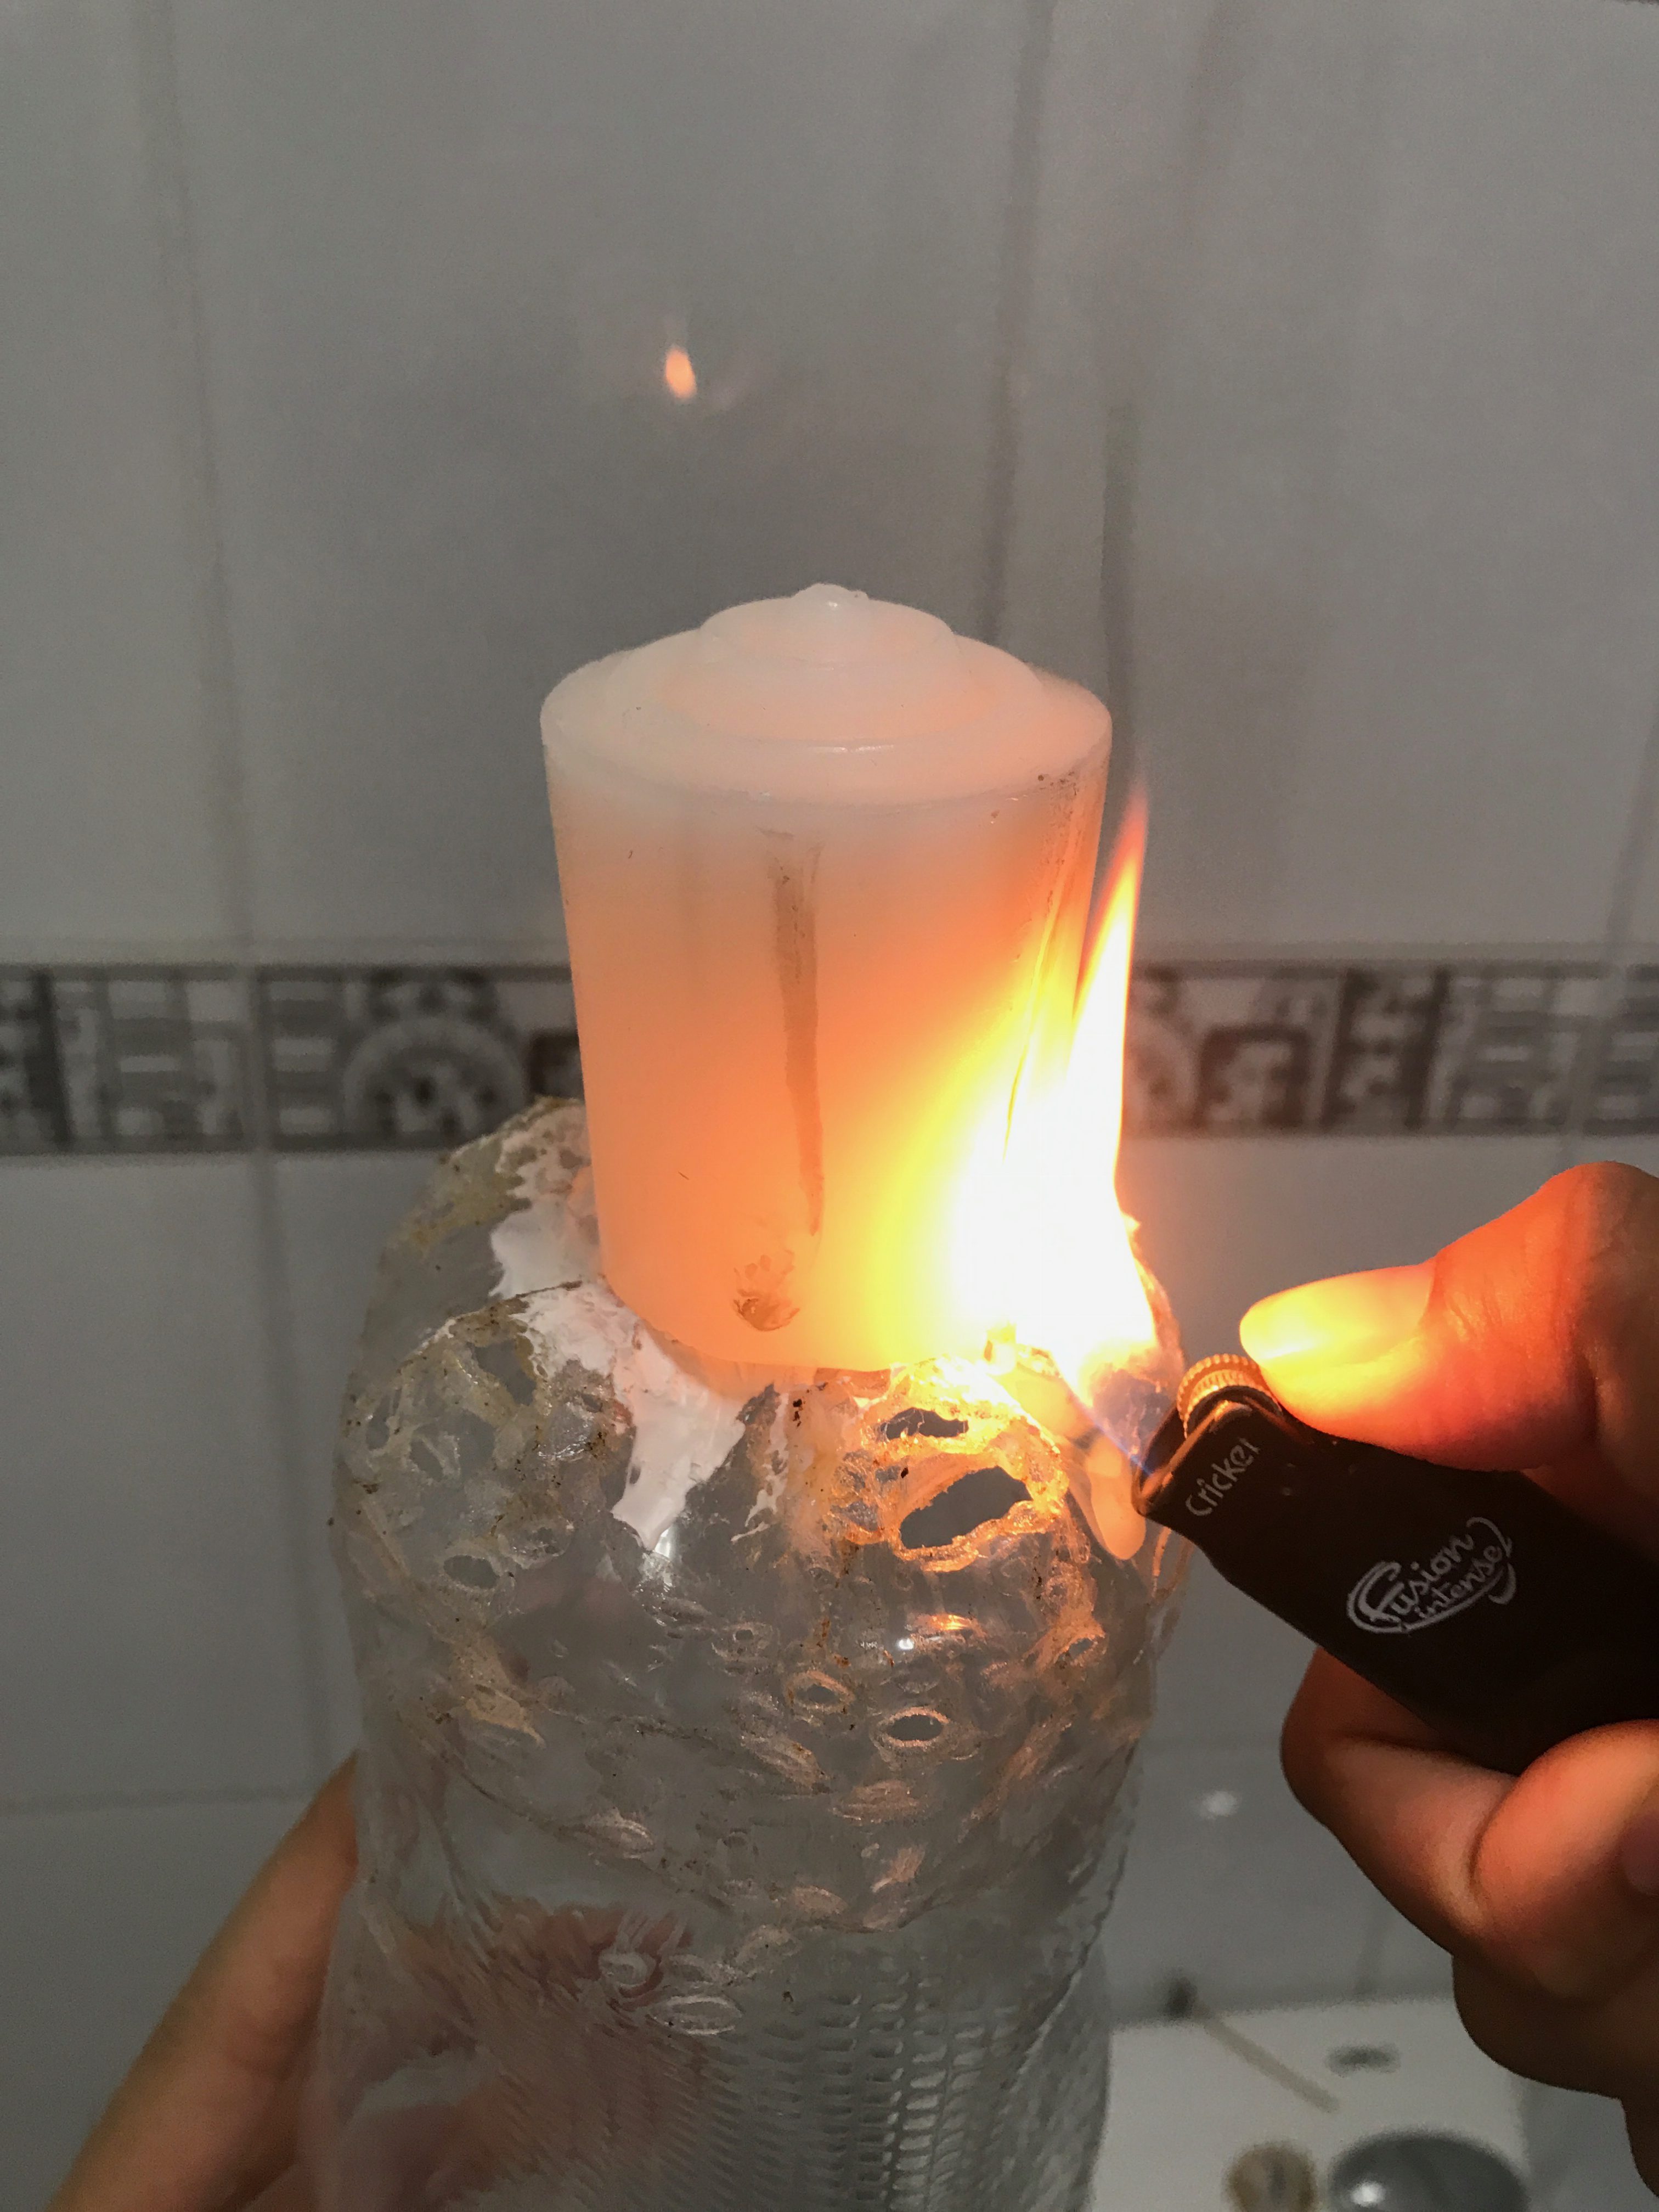
I created all of the above effect using the heat gun. The slow movement across a small bottle (for the smoke form) to create the “smoky” white look looping around it.  And also melted the bottom part of a big bottle (for the dome-caramel-scented form) to create like a…sort of, small-becoming-larger-at-the-top kind of dome.

From a small bottle, white effect in certain places but not so overwhelming to keep the smoky effect. To portray my “smoke” scent.

For the vanilla/scented form, I tried melting wax to get the melting effect but it wasn’t too successful.

The wax couldn’t be maintained there, so in the end I just painted the top white and burned bit parts of the sides to make it look slightly “caramelised”.

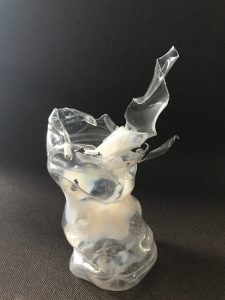
ANYWAYS……I made another form out of both the good and bad scents. This is the other one.

Under good lighting.
Under certain lightings, but I loved the tinted light below and how the curves on top looks more prominent. I couldn’t pick haha so I put both pictures here.

For this, the bad scent starts off from the bottom, as seen from the holes and white portion, slowly digressing to the good scent as it spirals upwards, hence looking like a thin twisted strip of spiral as it is suppose to resemble a “caramelised” thing (like the ones we see on cupcakes, an edible caramelised strip added as a deco).

In my next post, it will be on me and my pair’s works and scents combined together to make 1 work that’s wearable! Let’s see how that goes.

Gaia’s Ikebana (III) – process and final

Hi – welcoming you to this post with my newfound buddy on that day, my twigs. I call them “autumn”, for some reason idk.

Funny story behind this is, I was trying to look like i’m just taking a stroll around our neighbourhood field but my friend which is also my neighbour drove past me when I was almost done with picking branches and he caught me anyways. Hahahaha how lovely.

Before getting those branches done for art, of course i would clean them to rid of any insects.

Preparing for ikebana 1:

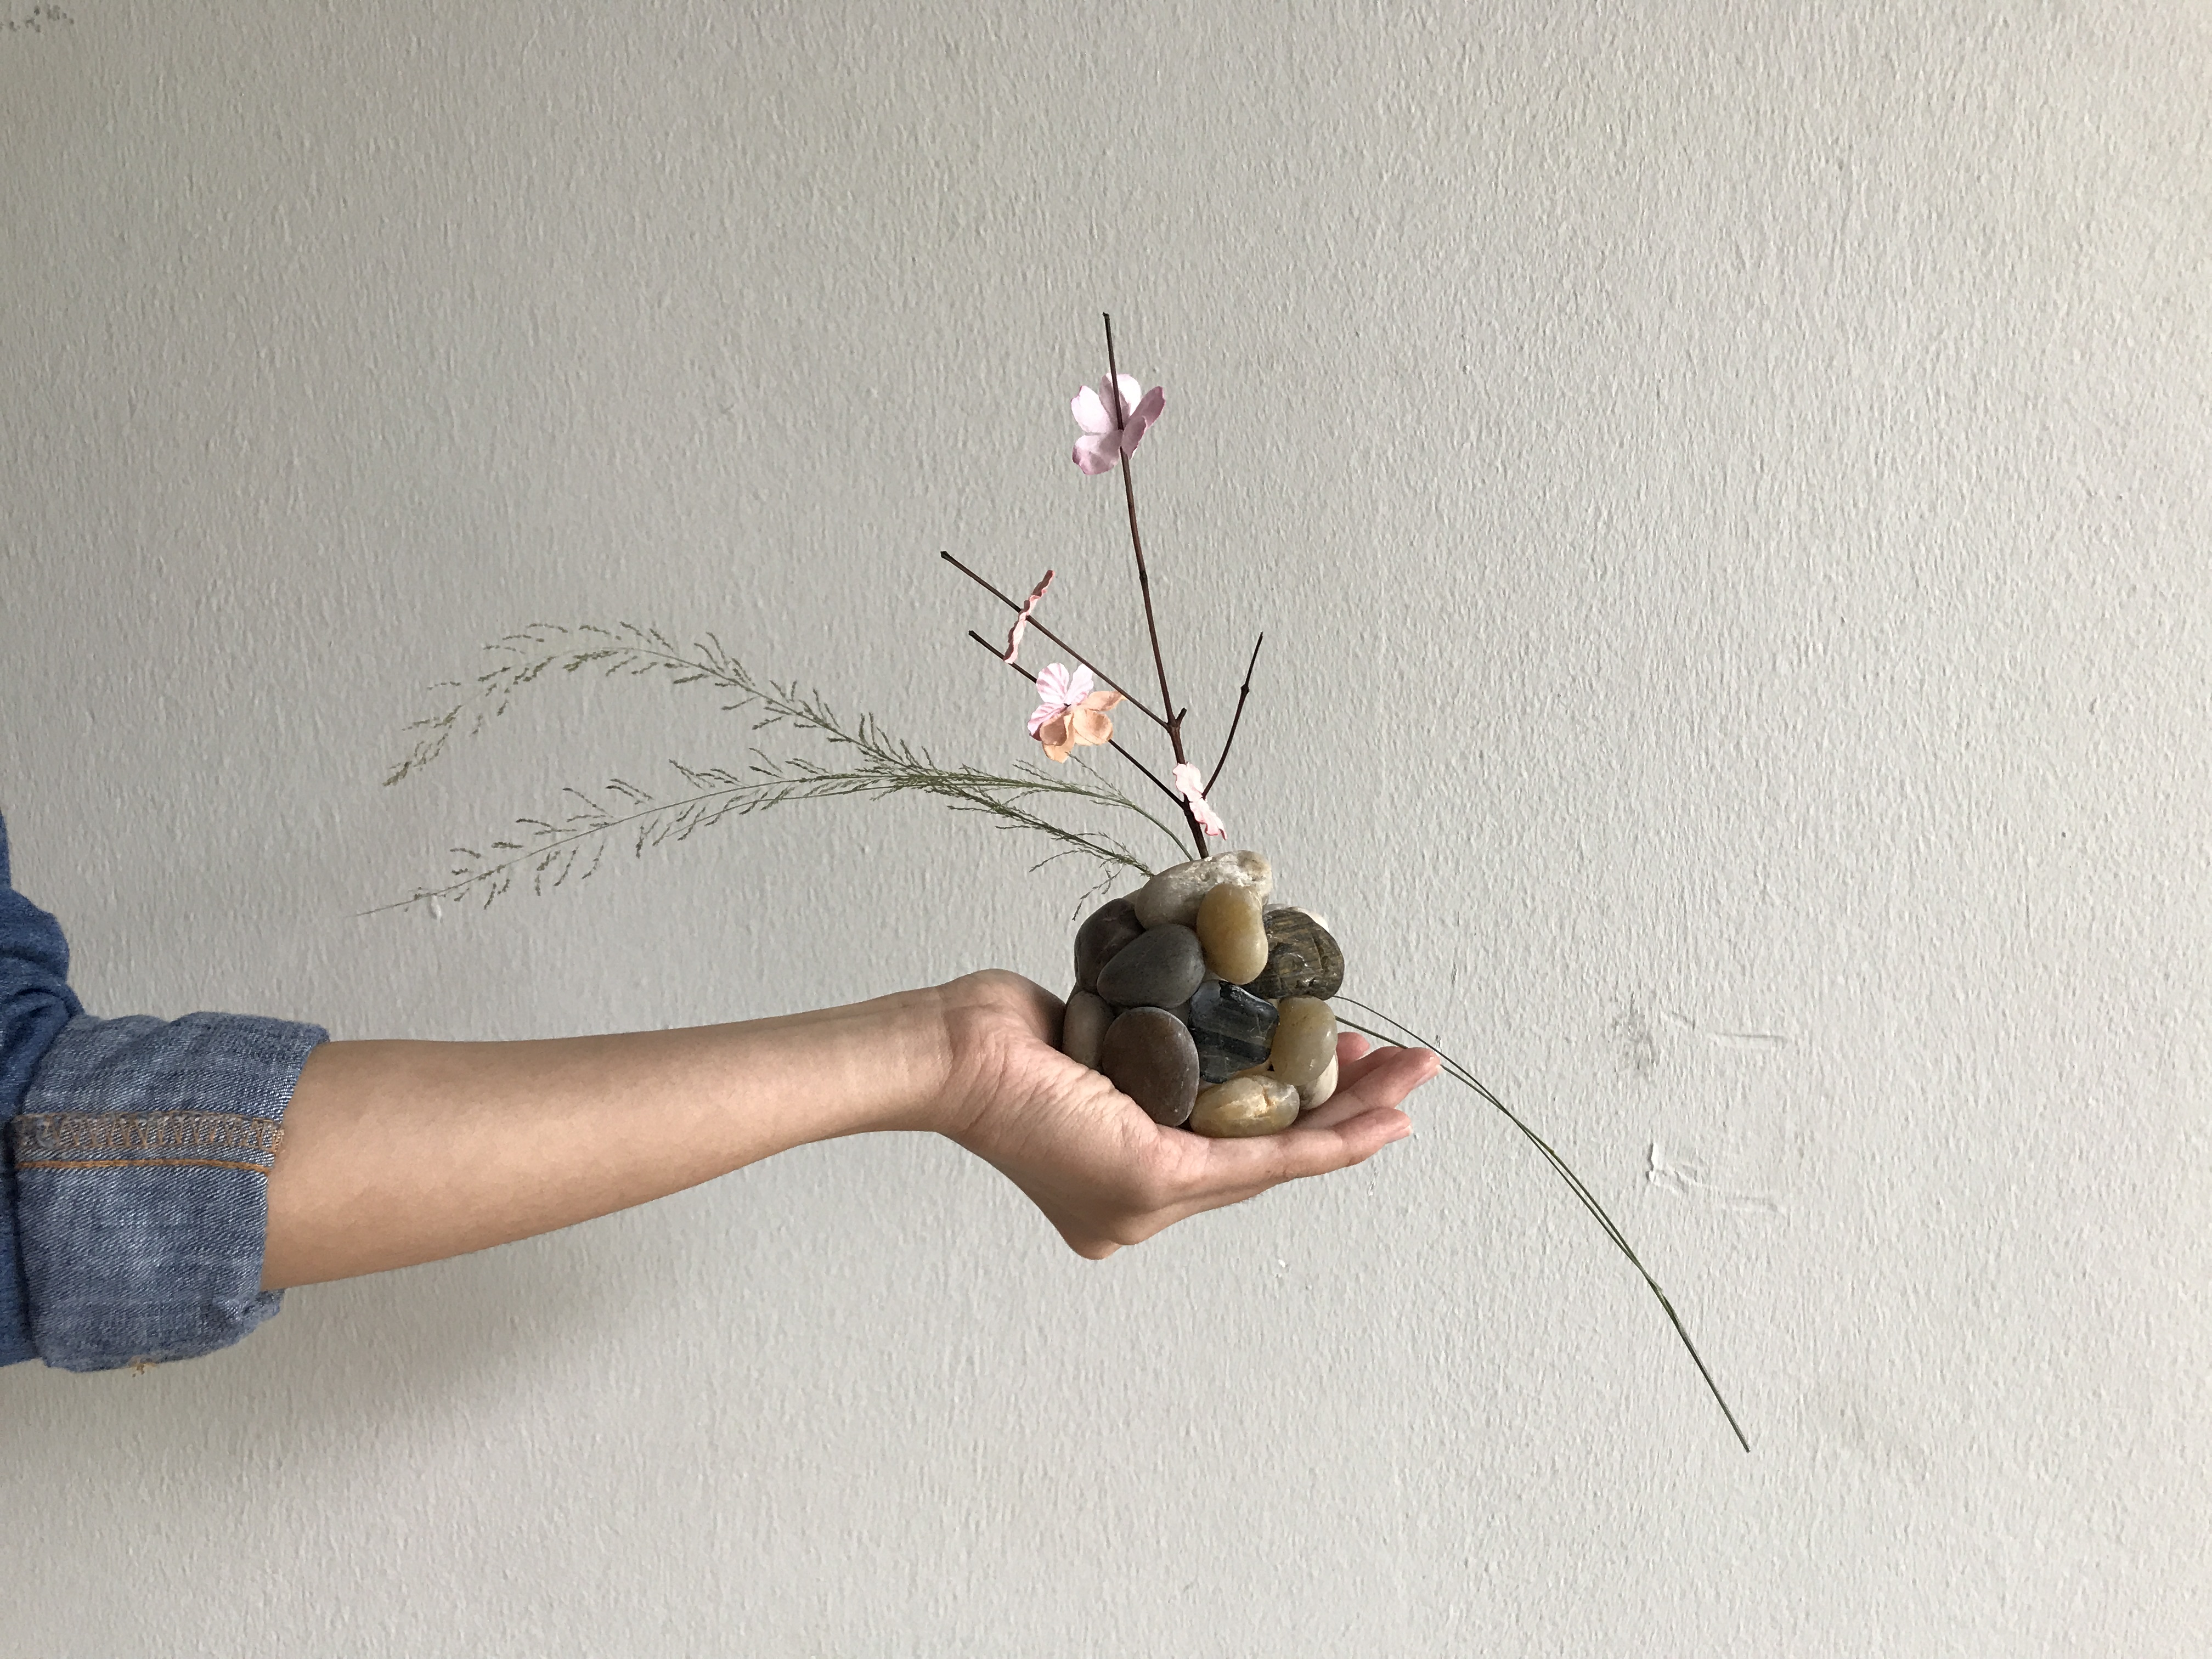
Using pebbles of different sizes and almost same tone of colours that resembles nature, to create my sphere, my dominant:

End result of sphere:

Then making fake pastel pink flowers to be poked through the twigs, to make them look like spring flowers. I also tried to use real little flowers you usually see growing out of those vast grasses:

Wedging the twigs into the pebble sphere, putting it in the right order and placement to make the long leaves hang loose like one of the Japan’s flowers that bloom during Spring, the Japan wisteria tree annnnnd voilaaa!

Initially I didn’t want to show this in class because for me, i was not satisfied as I couldn’t find a right place to put a cone, it just seemed lovely this way. BUT after viewing it in class, the best ideas came from professor and my friends where they suggested I could just get more of those long flowy leaves and stack them like the direction you see above and it will already be shaped into a loose cone on the other end!

HOW INTERESTING.

So because I didn’t know this, and because I still was excited to create more, I just decided to create 1 more. A different style.

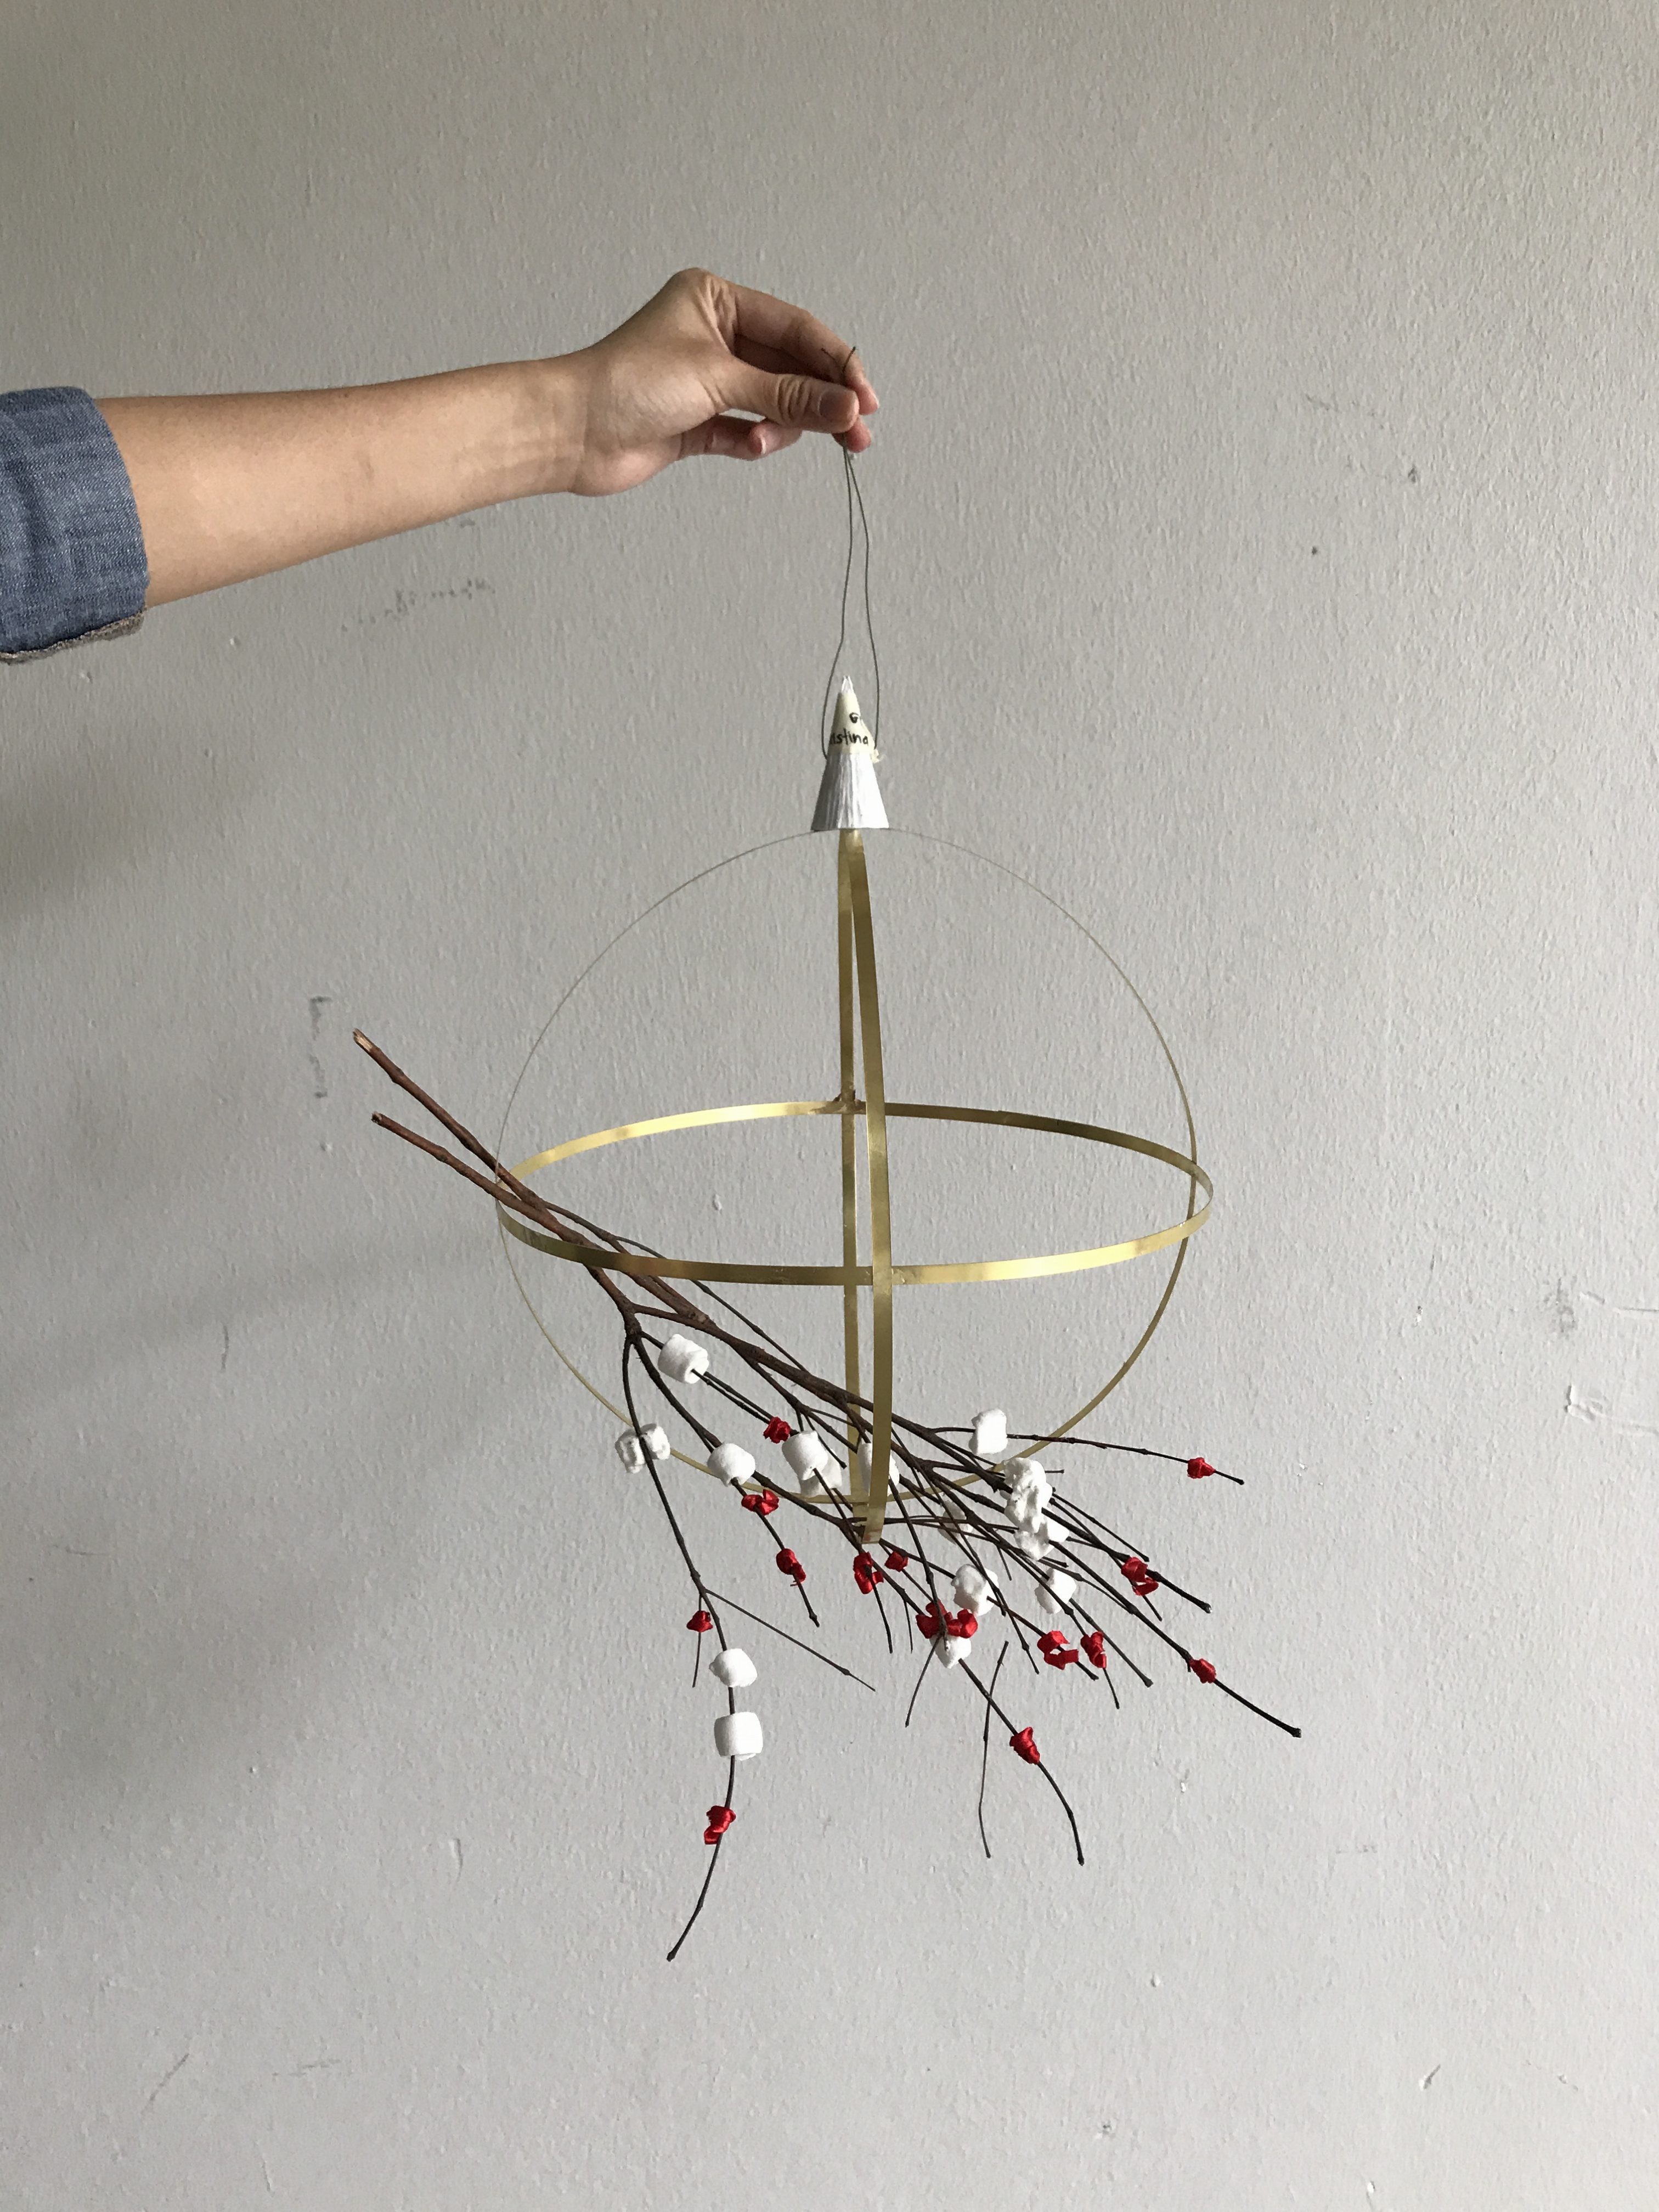
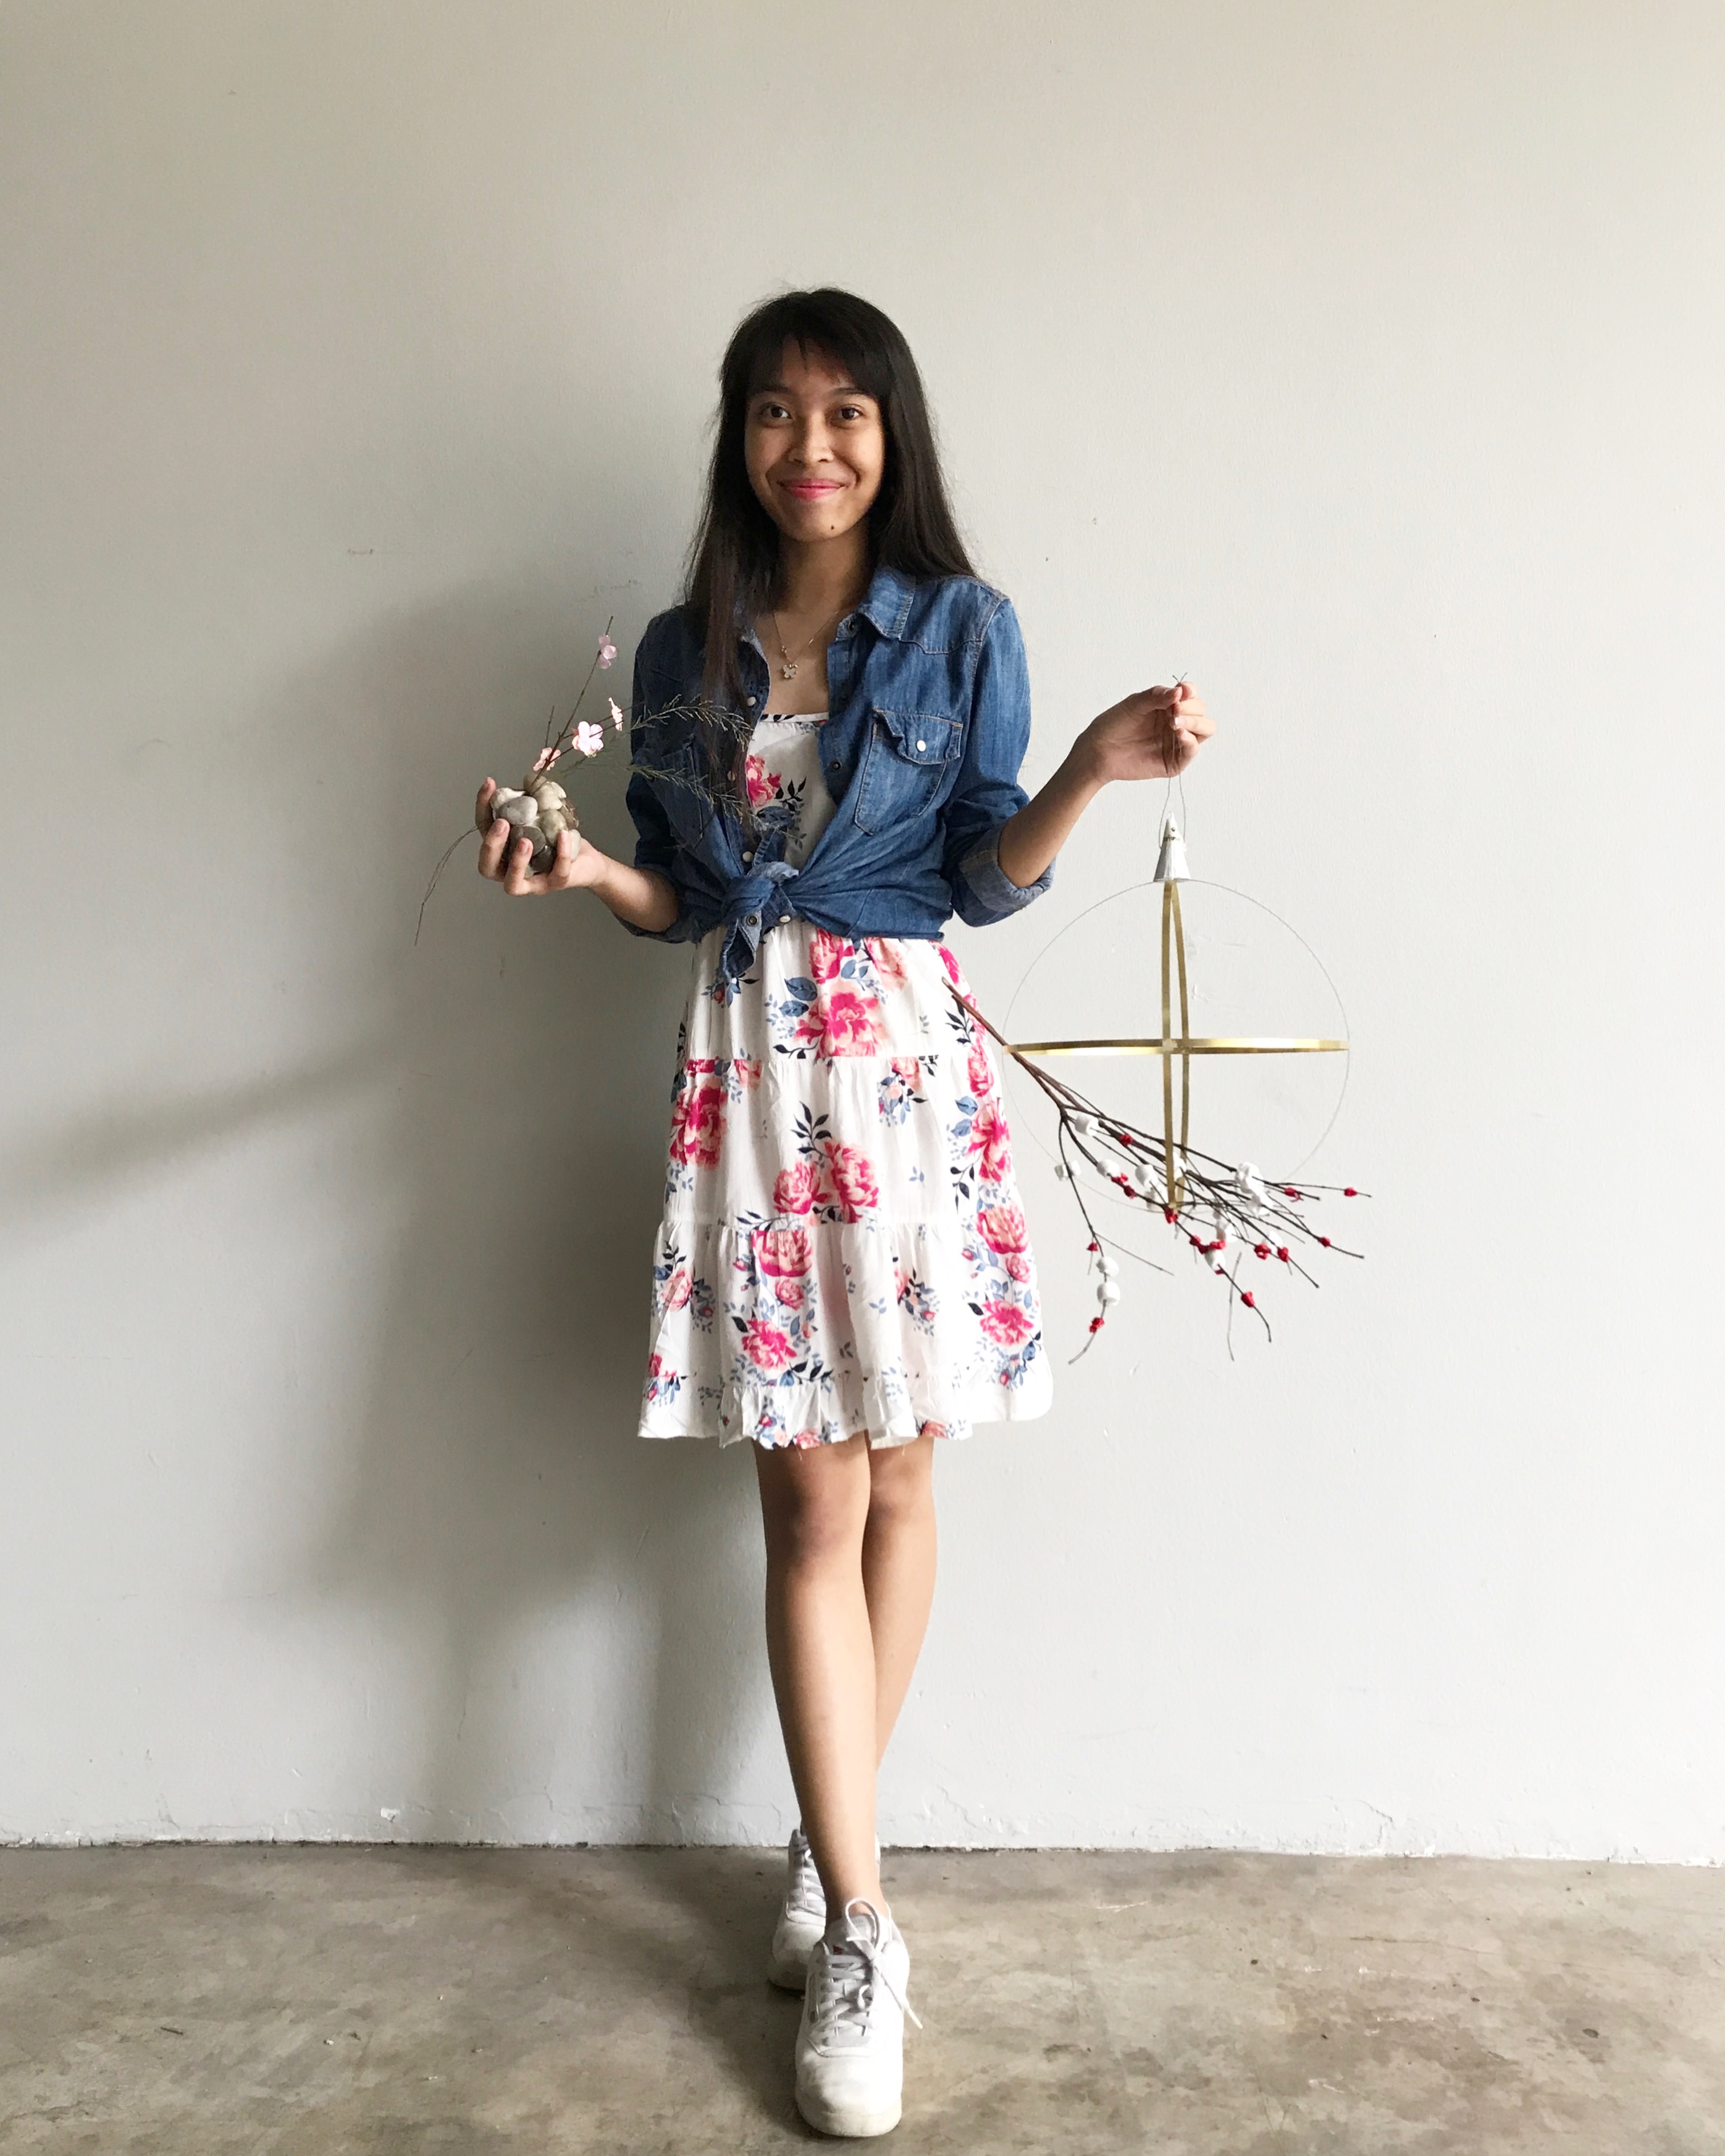
Ikebana 2: I used 3 bendable gold wires for this, to create another huge sphere as my dominant.

In the end after putting marshmallows (i thought of spring flowers as something that scented vanilla and sweet) and fake red flowers made out of ribbons wedged into the twigs, this is the outcome:

I could have made the cone be less obvious by simply just attaching 4 wires at the top and shape it into a cone as the handler. But overall I liked this one too, and the previous ikebana too. There’s room for improvements but I like what I did and that’s just something to be proud of.

So here my 2 SO(s) are the red and white ‘flowers’ that represent my hopeless romantic state whenever i think of Spring and their new beginnings. My 2 SD(s) are the twigs and the cone/wires on top as the handler (that could have been more obvious if i just amde the cone out of long thin wires). And my D is of course, the huge gold wire sphere. Purposely made it gold so it also seemed simple but elegant.

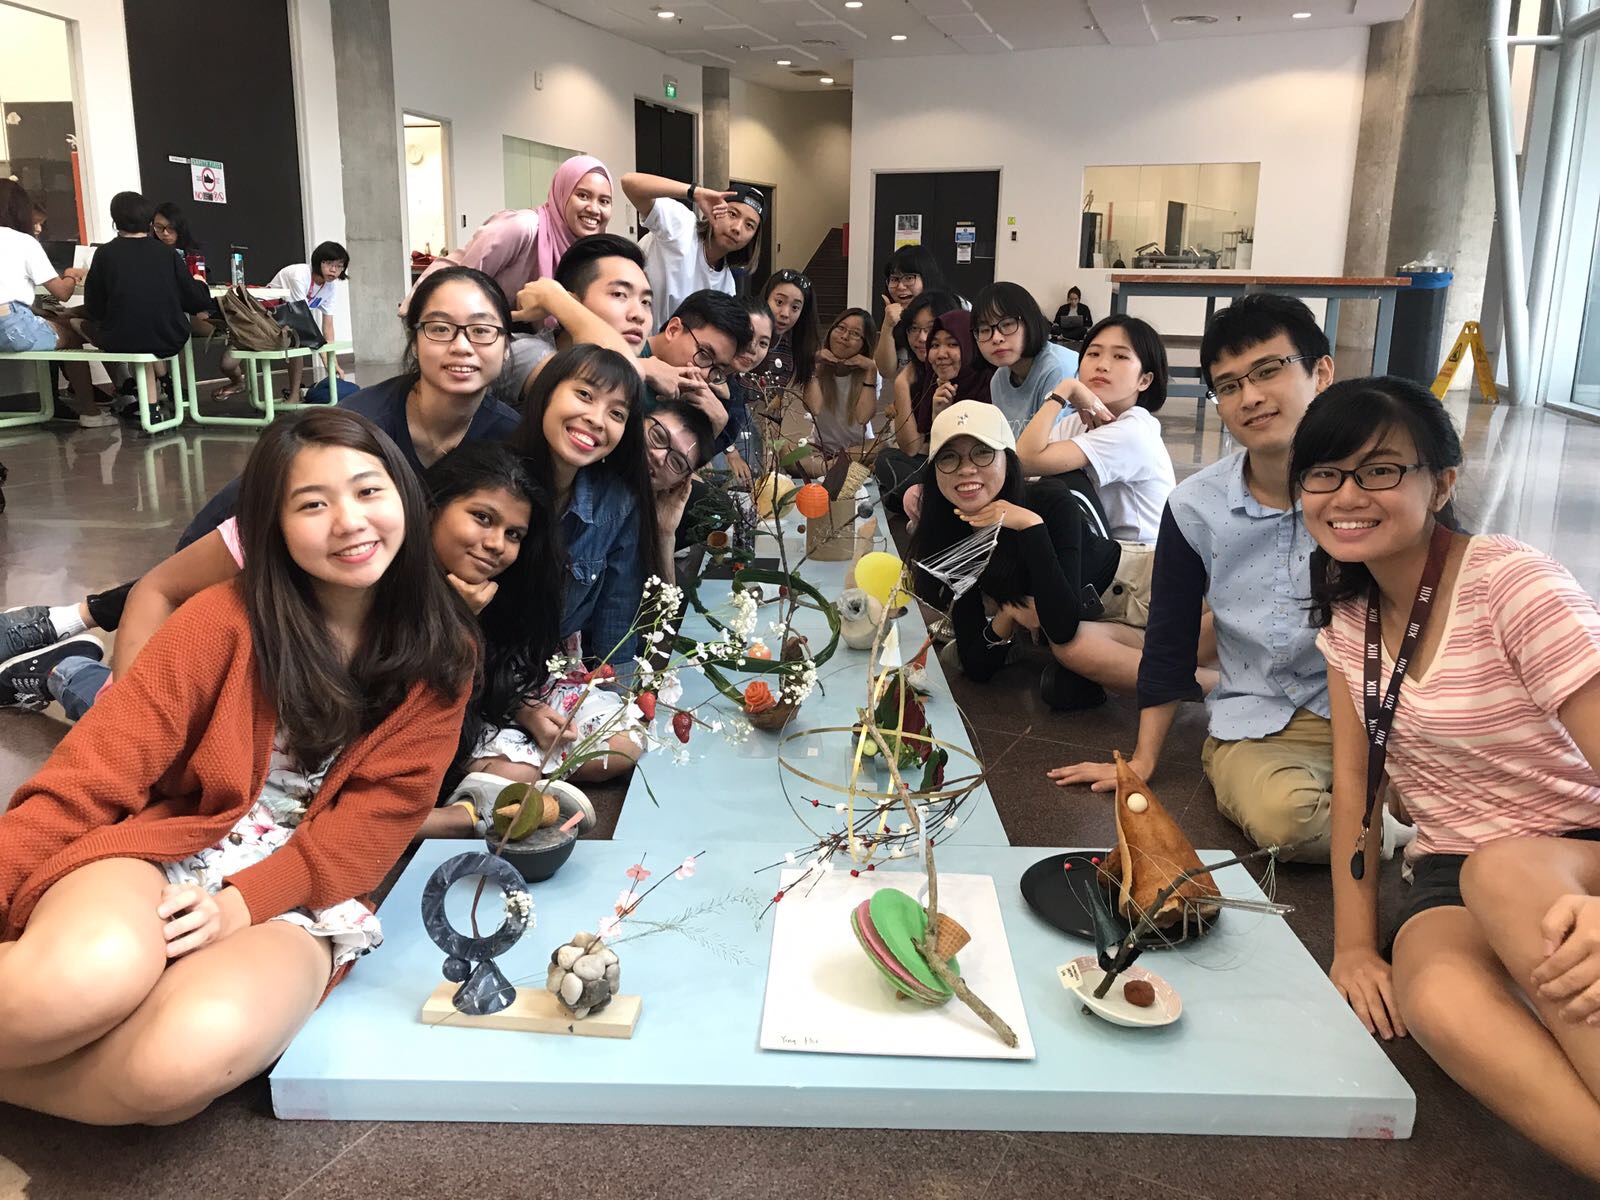
Overall, this was probably the best 3D class i’ve had because I truly enjoyed what I did and I loved the Gaia Ikebana idea – so enriching! And my classmates’ works are so unique it makes me smile so much, it was honestly a fun lesson. The process towards this made it worthwhile. smile

These beautiful works from these beautiful faces.


Gaia’s Ikebana (II) – research process

I was given the theme Spring.

When it comes to Ikebana, it is not just some flower arrangement, but it is “the art of Japanese flower arrangement, with formal display according to strict rules”.’

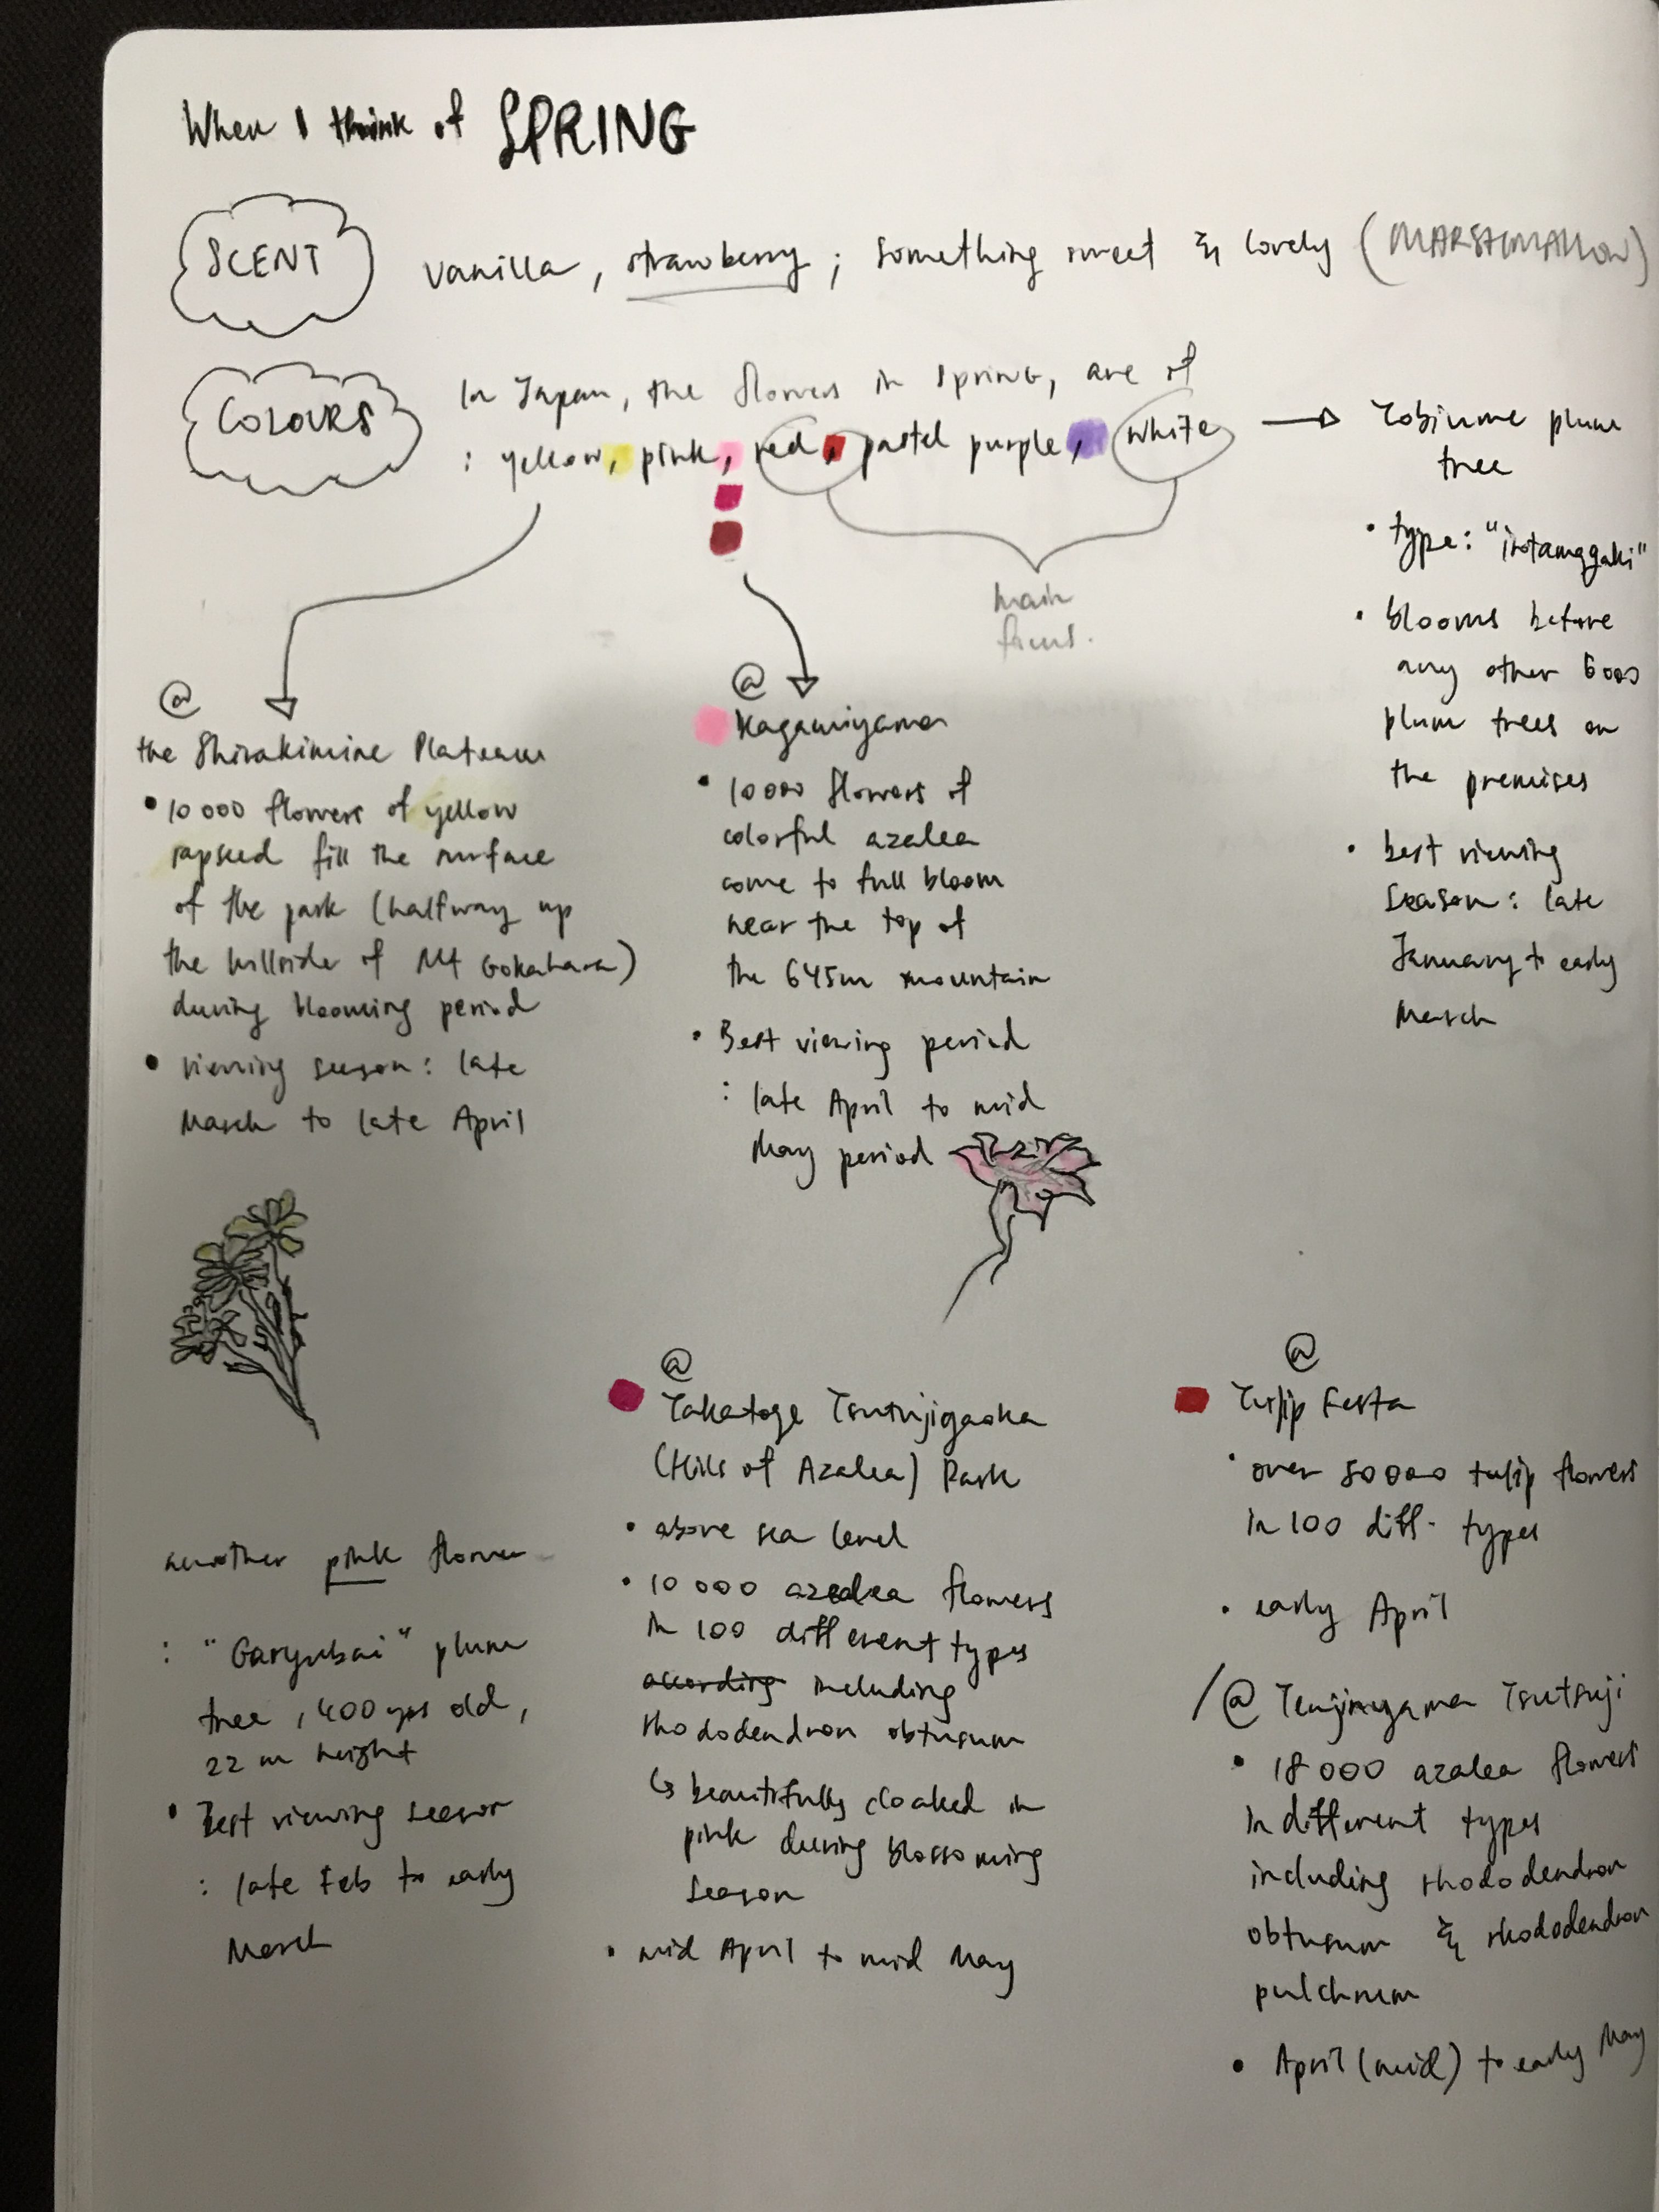
Before doing my final Ikebana, I researched more on the spring season in Japan as I wanted to know more about it first – like what are it’s features in the flowers that bloom? what kind of flowers are they? when do they take place during the seaon?

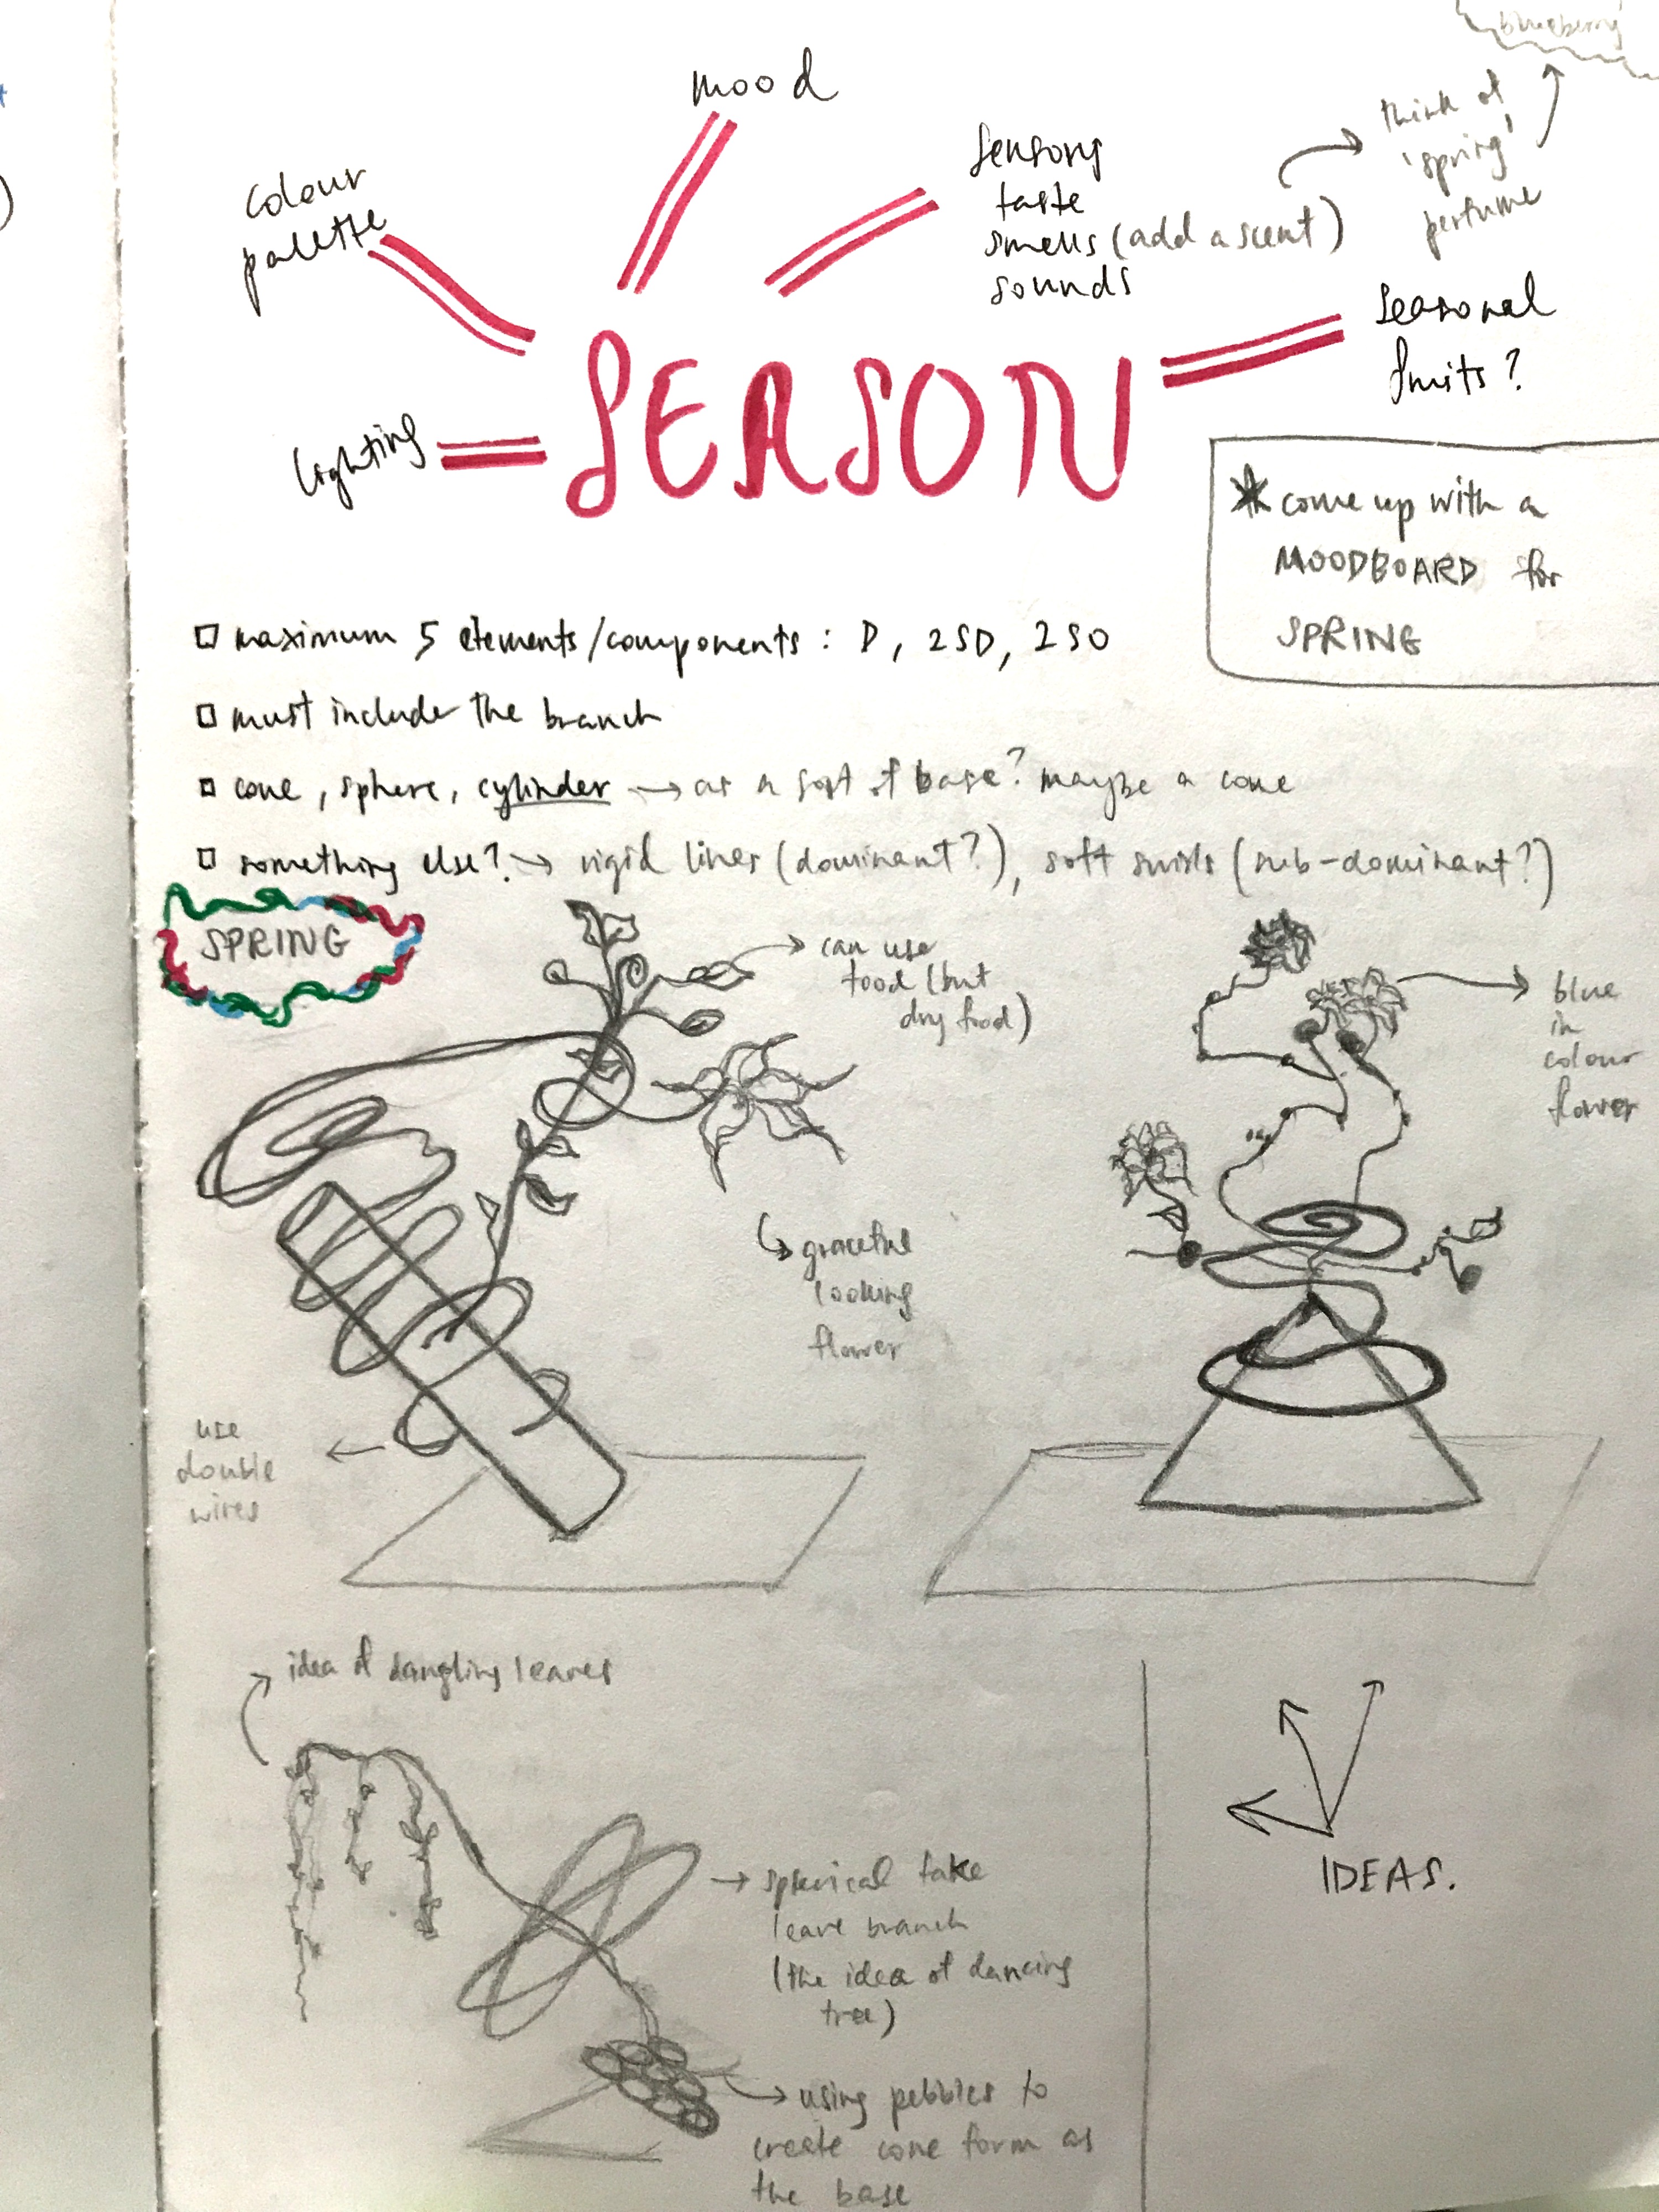
I didn’t want to just know what an “ikebana” is, I wanted to know how to make a good one by incorporating the different features of the each blossoming flowers in Japan and what’s so special about different ikebana styles, hence researching on what I had to. The picture below are my initial ideas i came up with on the day we were given the Ikebana task.

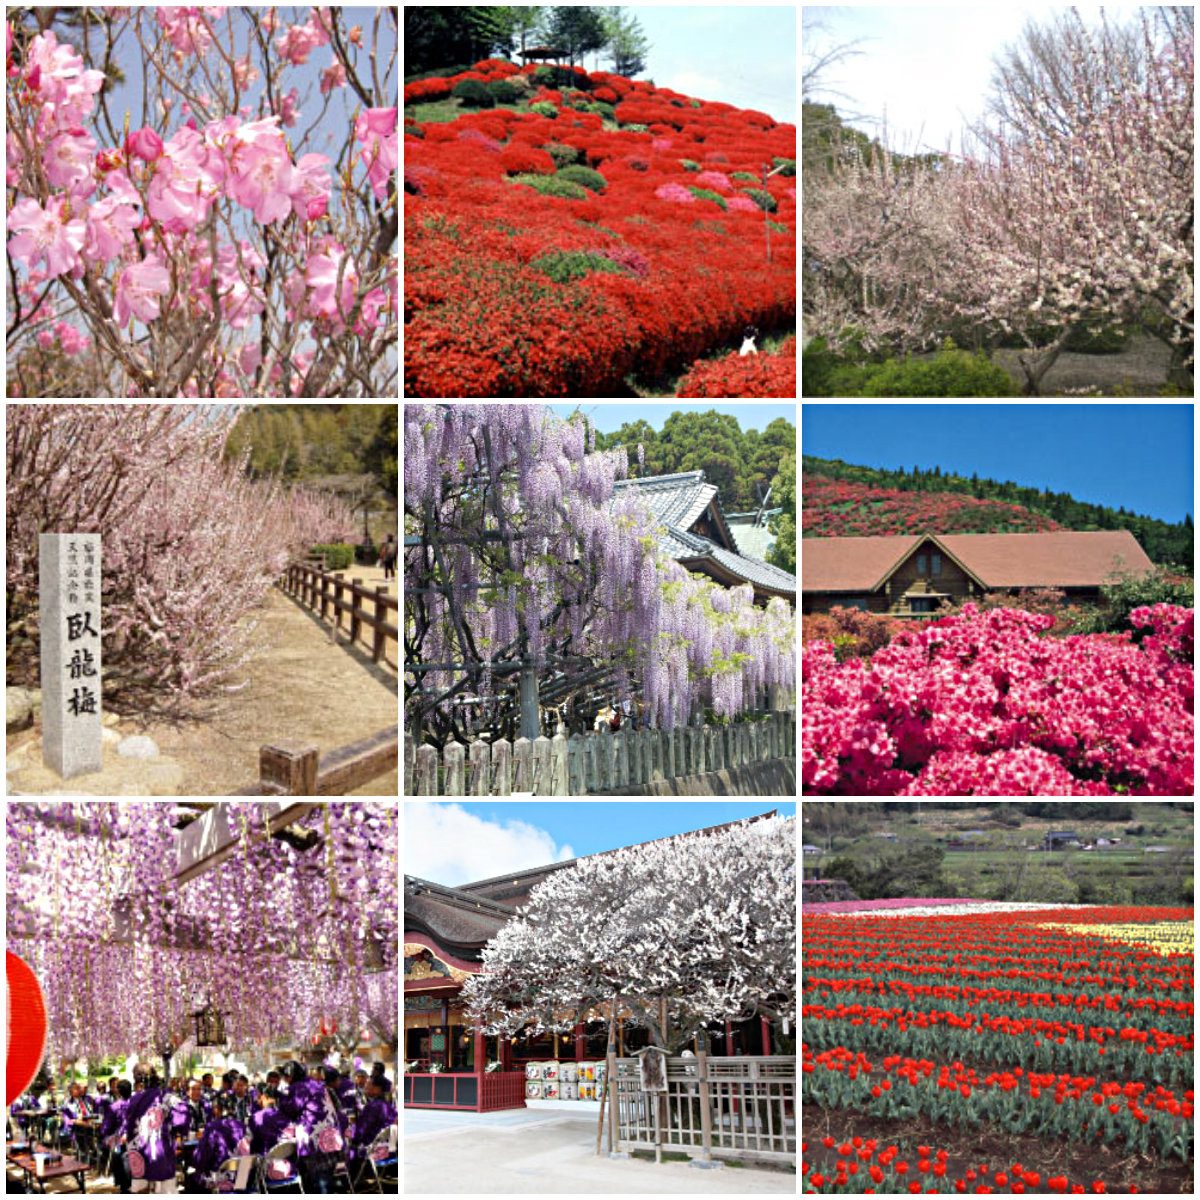
My moodboard – mainly for colour and flower features.

The picture above are the kinds of flowers that bloom during the Spring season in Japan. Notice that I did not include any other bright colours such as yellow (which also blossom during Spring there) as I wanted to focus on these colours for my flowers in Ikebana. And also looking at some of the plants that simply fall elegantly with flowers clinging onto them – that’s one of my inspiration when making one of my Ikebana works.

So I wrote all of what I know down on my sketchbook.

From there I went on to see the kinds of ikebana style i wanted to make. So i searched up a few and these few caught my attention.

I was also interested in some other artist works such as Andy Goldsworthy and Jordyn Miley. This is because it shows the amount of patience they had to make unique sculptures out of branches and twigs and basically nature, without destroying much of their initial stage, which is what I am trying to do when making my ikebana.

For Goldsworthy, it’s because he made use of nature ONLY without destroying the aspect of it to create such an interesting sculpture, a land art. He would work with nature alone and not use other materials to say for example, stick them together to make a sculpture. An example would be the one below.

Woven branch circular arch

For Jordyn Miley, she does abstract nature weaving like the one below.

So the rough ideas I got from these was that, hmm maybe try weaving branches or twigs together to make a sphere? Since we still needed to incorporate spheres, cylinders and cones. And that itself could be my dominant, while the little flowers could be my double SO(s). And what if i also used pebbles instead?

I got alot of inspiration from all these and there was so many “what ifs” so I thought why not try making 1 first and see how it goes then maybe make another.

These are my final outcome ideas:

Stay close for the upcoming post where I will share my final Ikebana work (or should say “works”)! TEEHEE.

My application for 3D Pandora’s Box FINAL

I don’t know if this was overdue but i’m gonna share it anyway. [hi Ms Cheryl I have already included the link on my previous post on ‘progress’  stated below like you wanted] Before I go into the details, here is the link to my previous posts on my 3D Pandora Progress (the 1st link) and my 3D Pandora Final (the 2nd link)

3D Pandora – Progress Towards Final ‘Counter-Balance’ Structure

3D Pandora – Final ‘Counter-Balance’ Structure

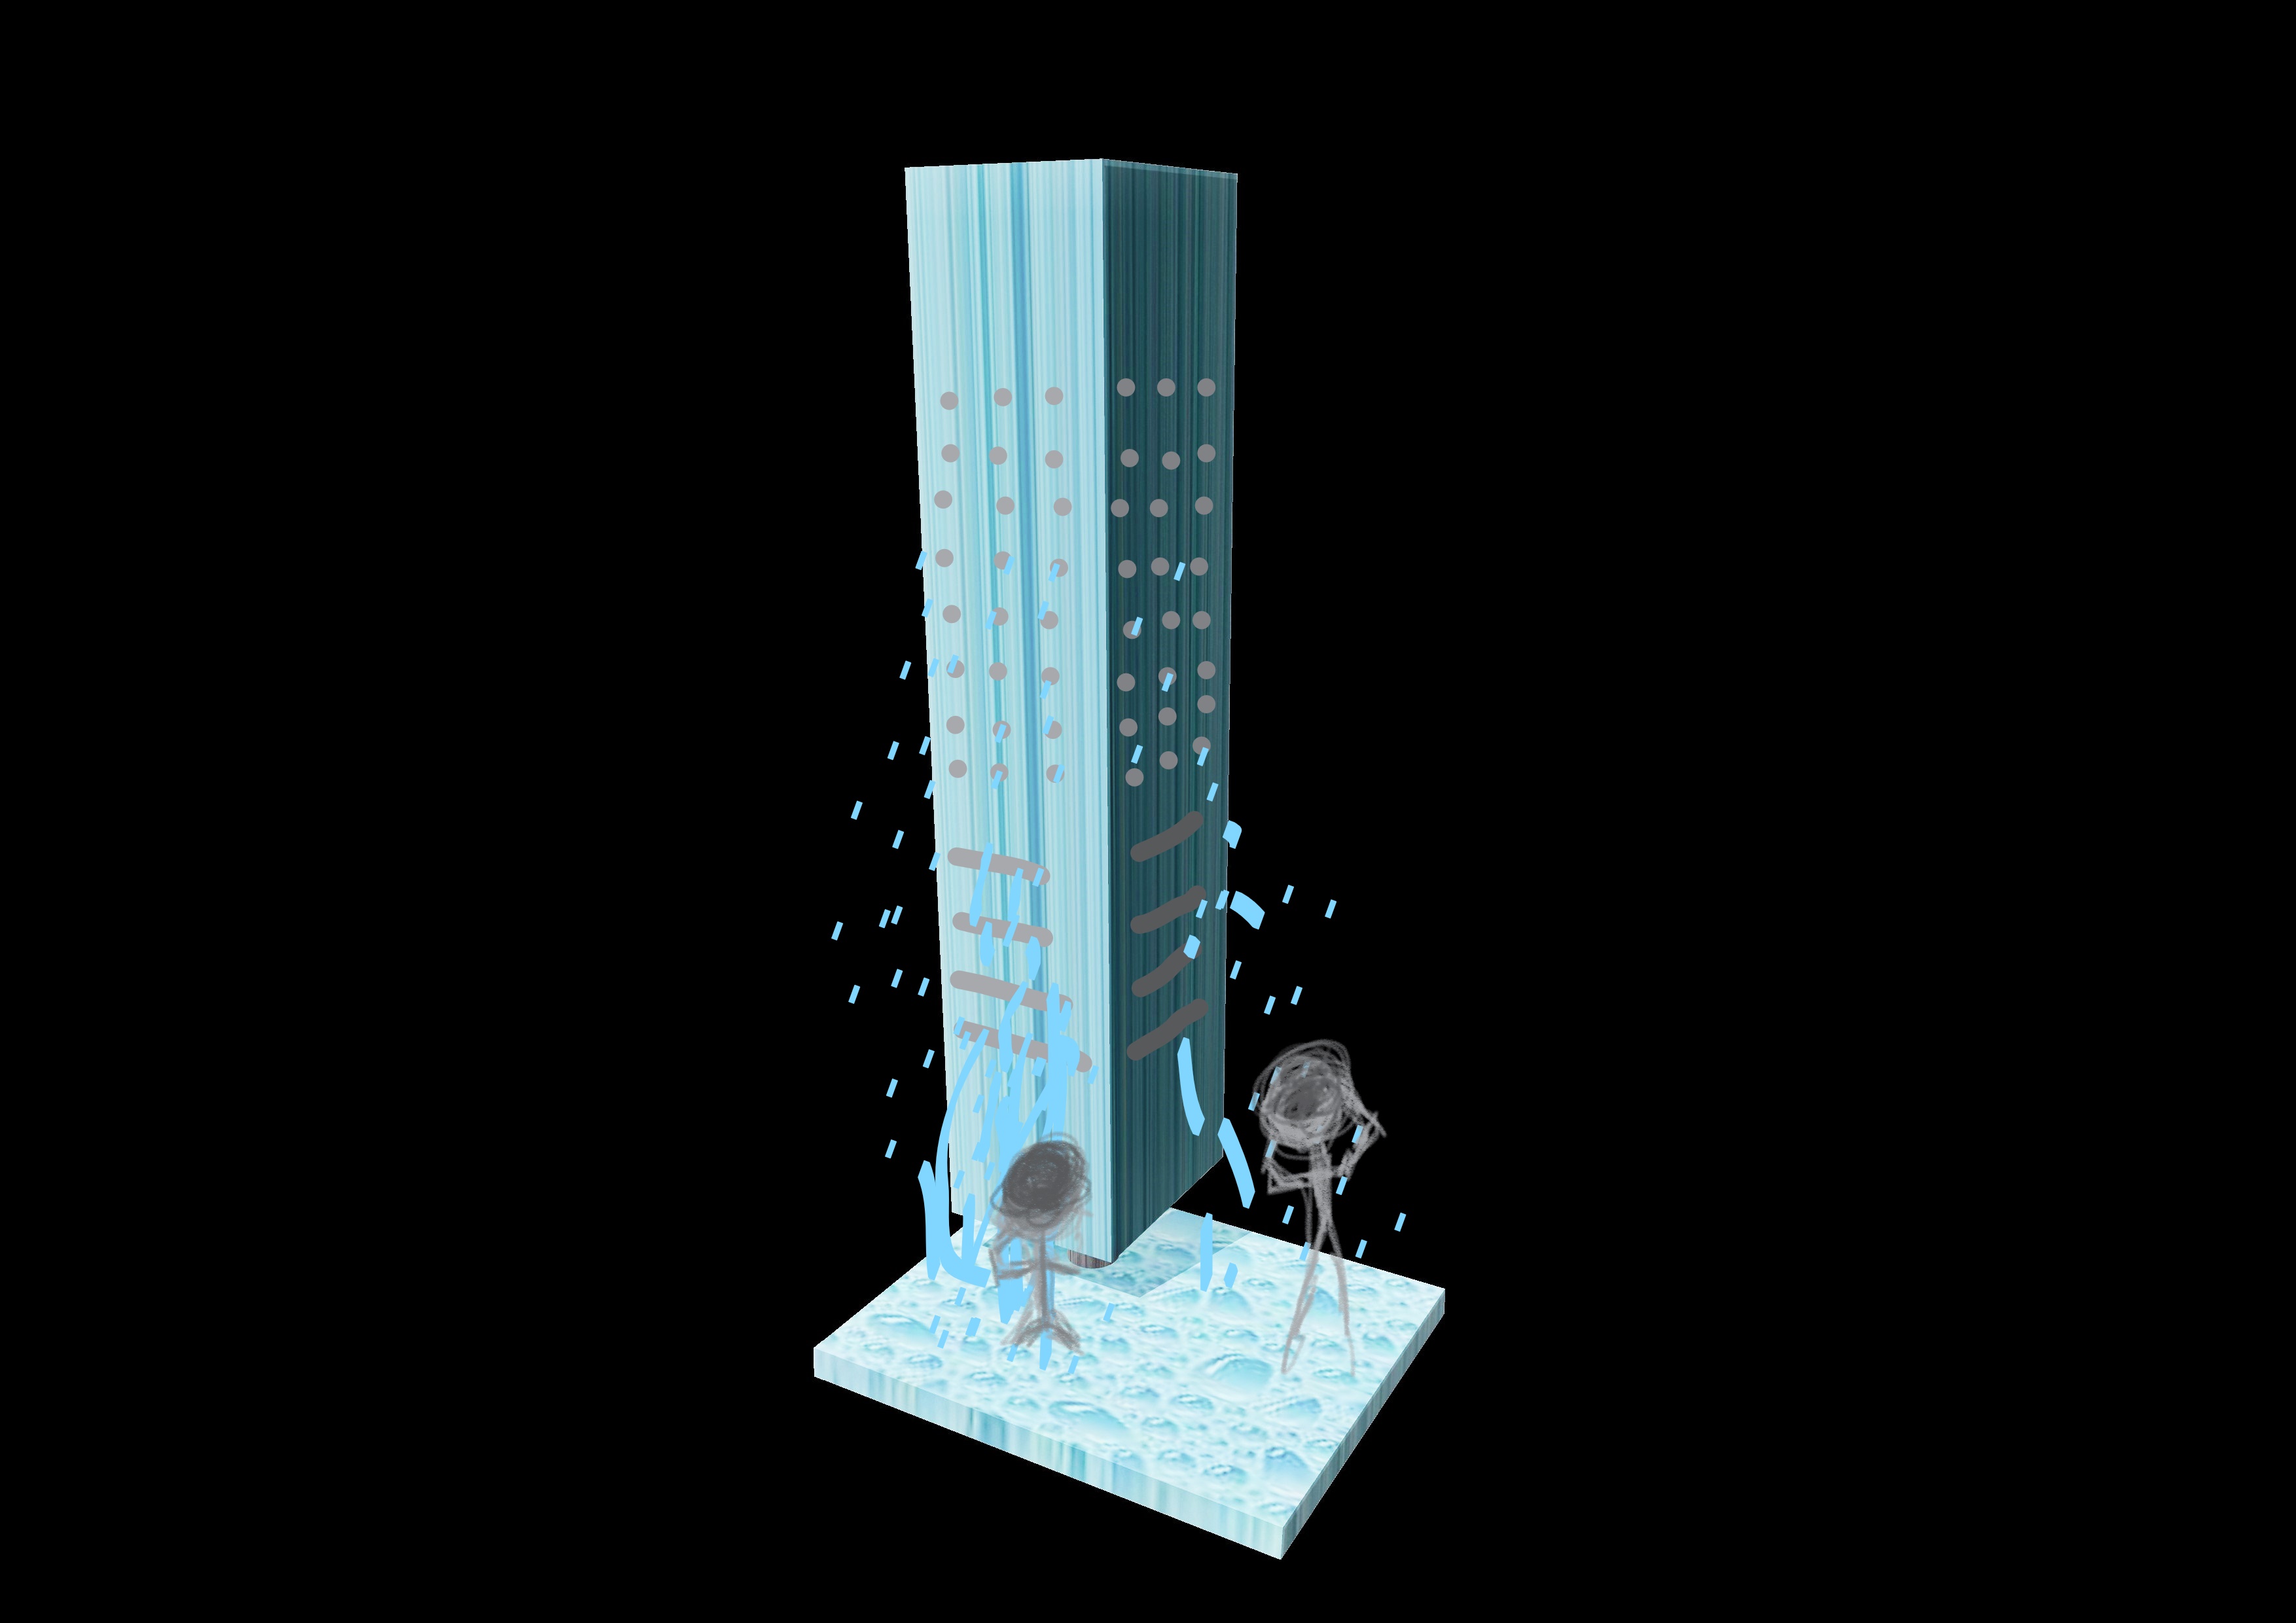
So my application for my structure would be a hugeeee shower panel for the public’s usage that could cater to more than 5 people at once. Meaning, it could be placed at swimming pool areas or especially at the beaches where people need to take some rinse before and after getting into the waters.

I apologise if i can only afford to draw stickman here……but yeah they are bathing there.

In the 1st picture below, if you see closely, I changed up the material for the SO digitally by using marble colour because I decided the marble material would be better when we are using this in wet areas as it last longer when we talk about non-corrosion or rust (they don’t rust). In the following pictures after, I decided to decorate the shower panels with colours of turquoise-blue and water droplets as it resembles well with the idea of shower, water and the surroundings.

Yeah I took a long time editing and moving the cubes to the right places for this but my drawing ends up looking horrid to show what my application would be like, my apologies. frown I hope it still makes sense!

Gaia’s Ikebana (I) – exploration

WOW new stuff.

I missed out on the previous lesson where the class was told to explore circular cuttings to get spheres, cylinders, and cones. So that’s one thing I learned from my friends when I caught up with some of what I was missing out. And I panicked. Because foaming curvilinear volumes??? (When it took me so long to even get my cuboids right in the first place)

Apparently we are using the same method, just on curvilinear volumes this time. So we have to input the same method of D, SD, SO and y-axis to x-axis. But this time, it can’t be perpendicular and instead diagonally. Of course, there’s more I have yet to learn on this because I was slightly confused at first, but I think I got a slight jist of it now. (will consult on this soon!)

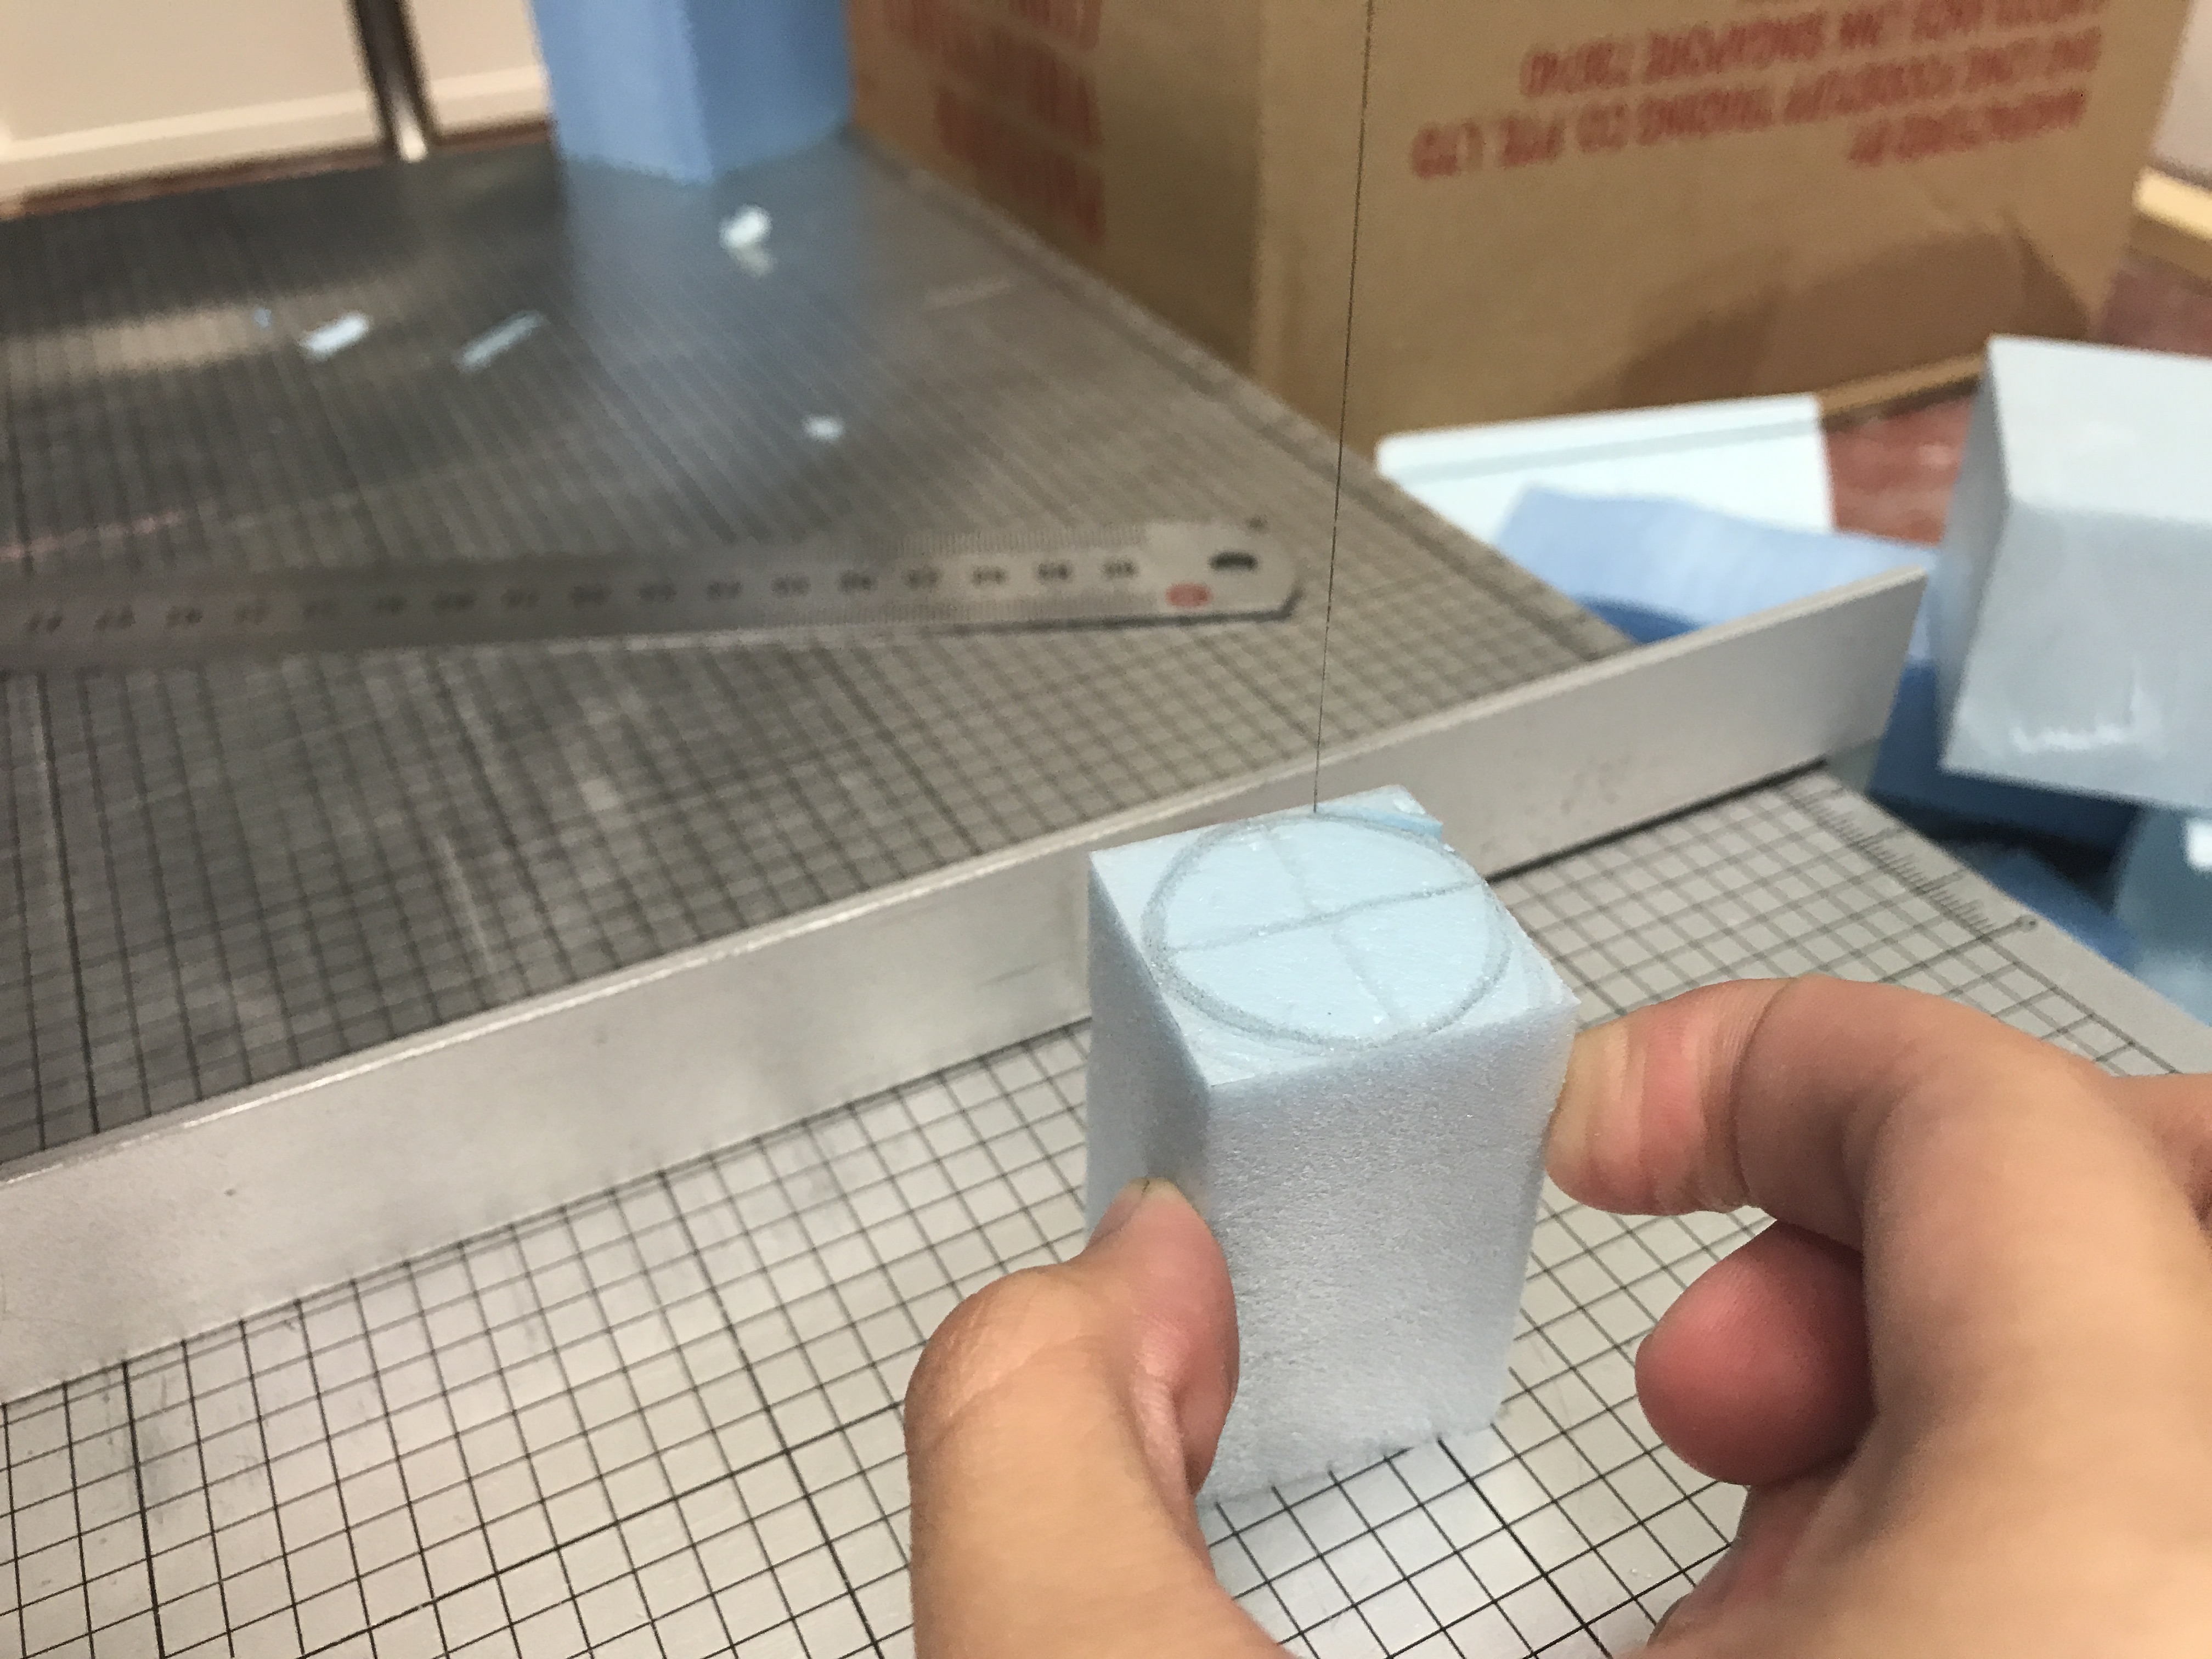
YAY with the help of my kind friends, I learnt how to sculpt cylinders and cones using foam!

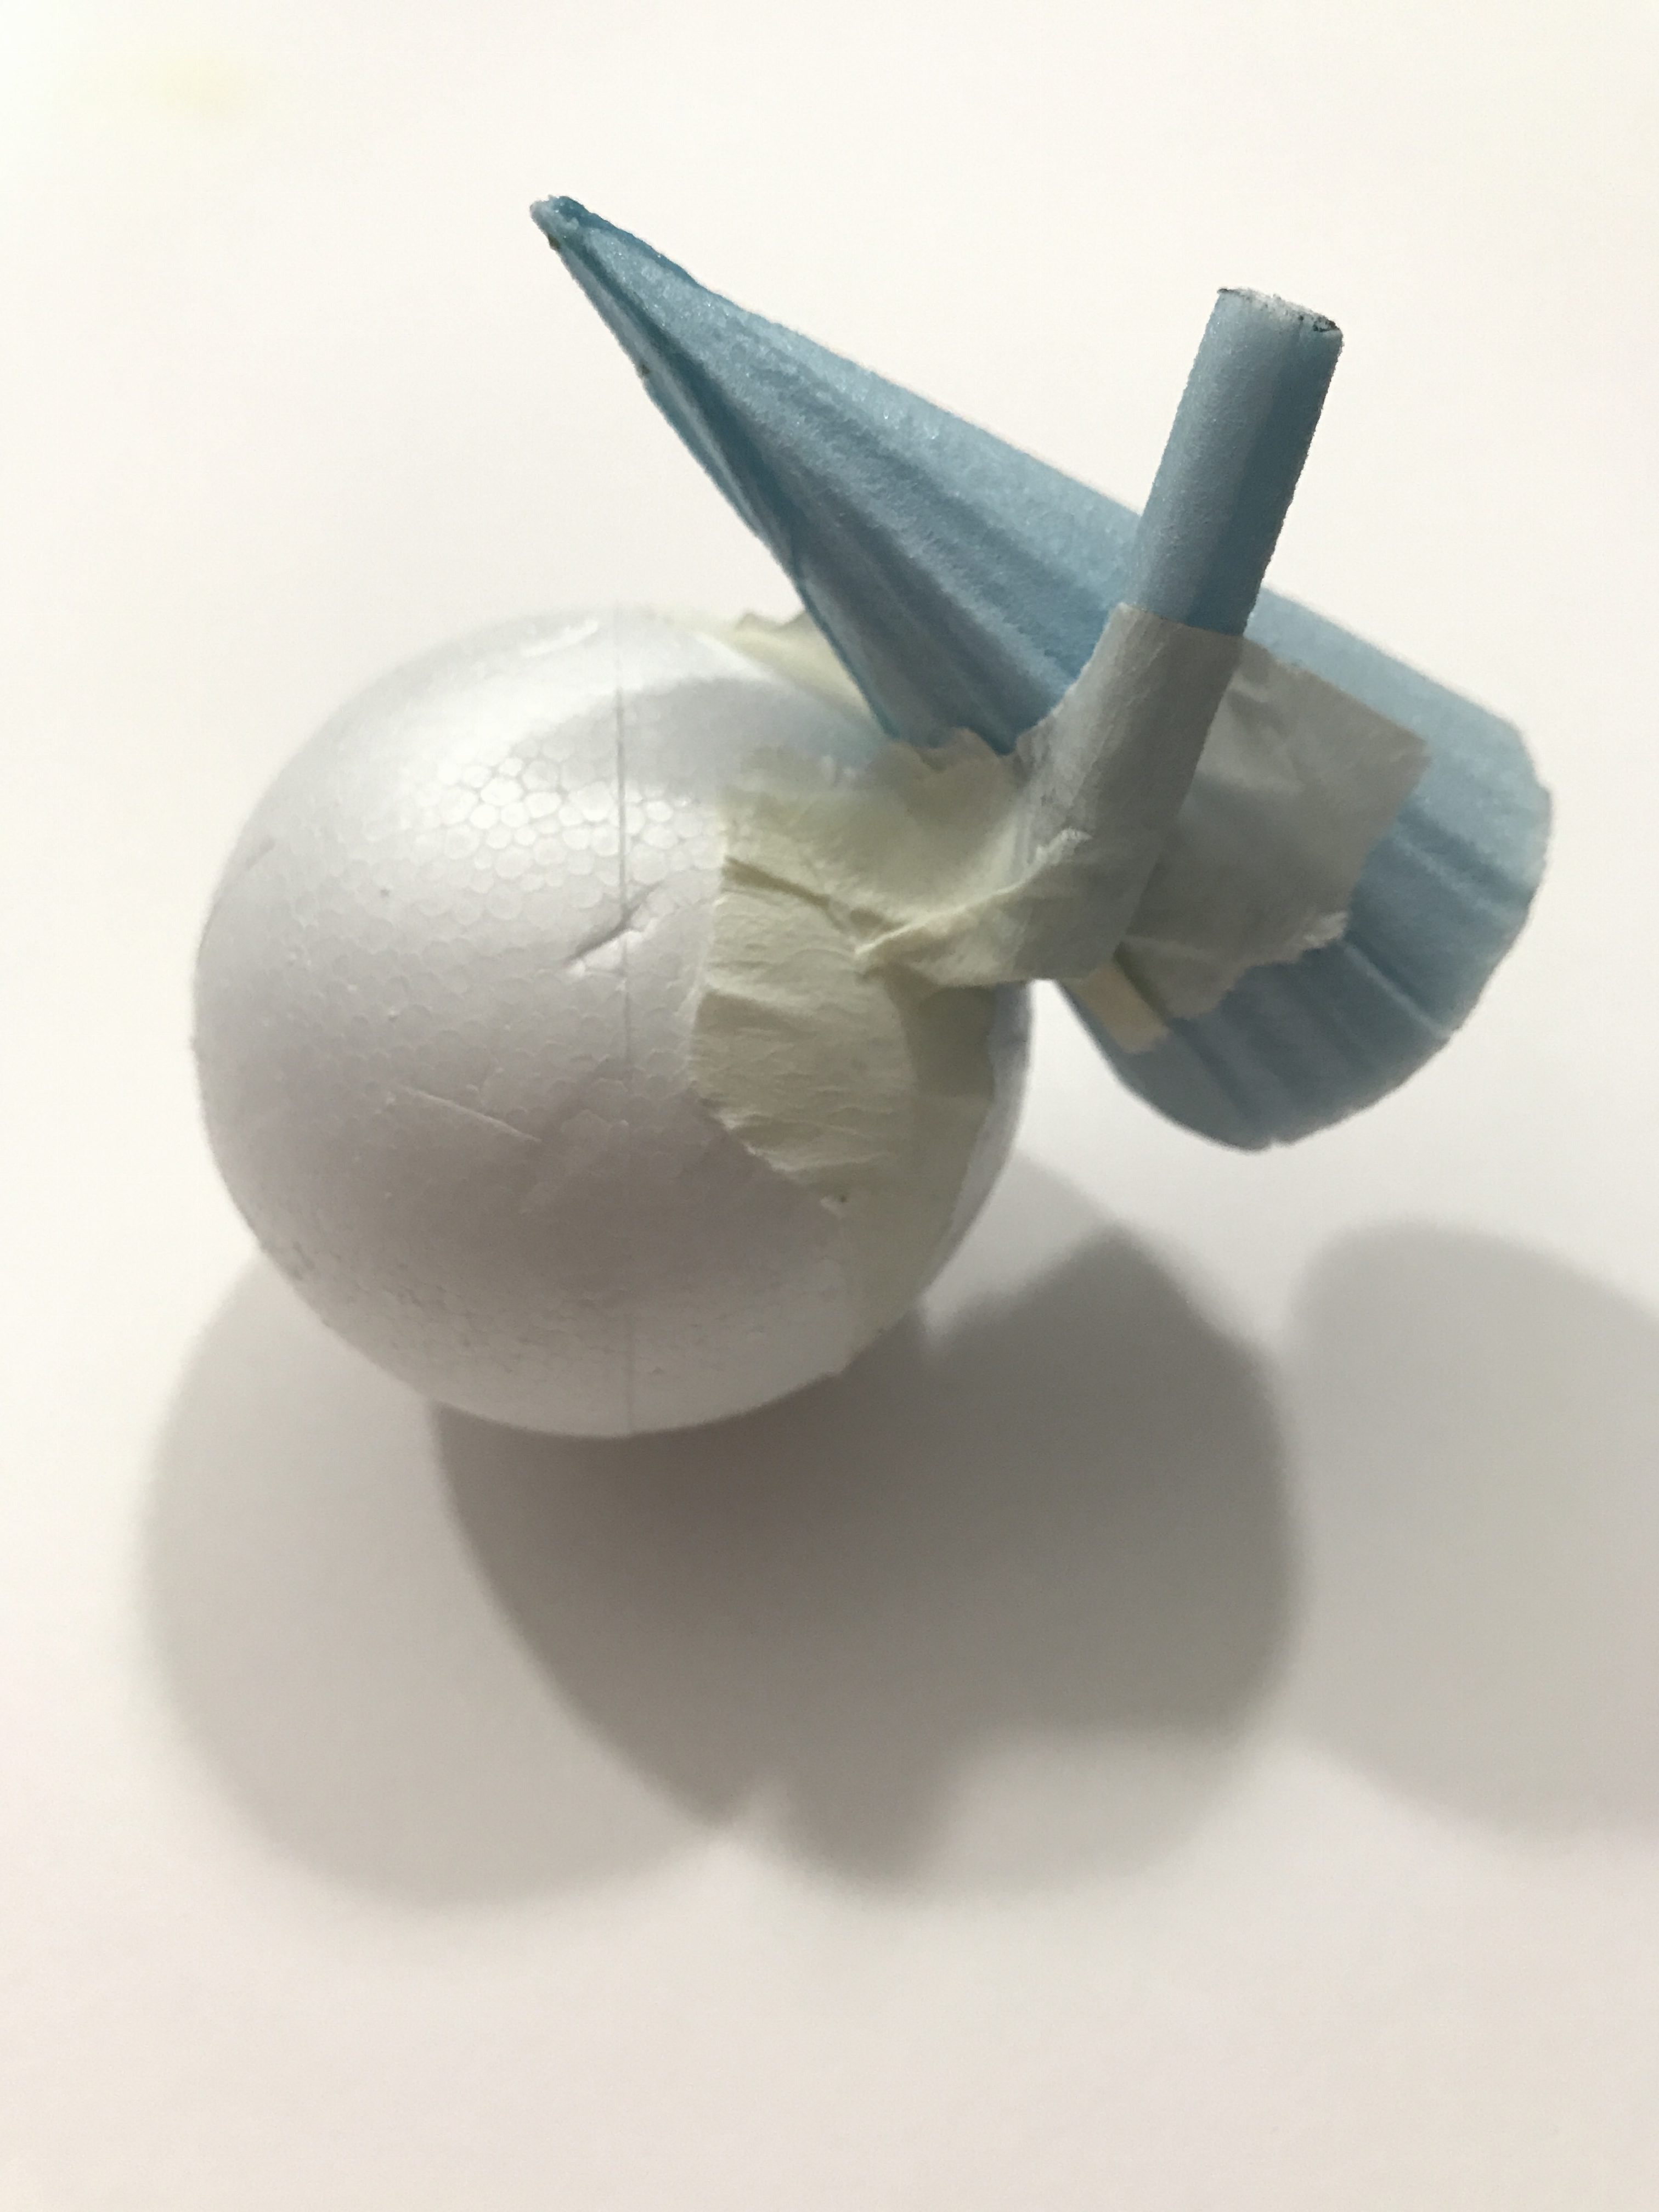
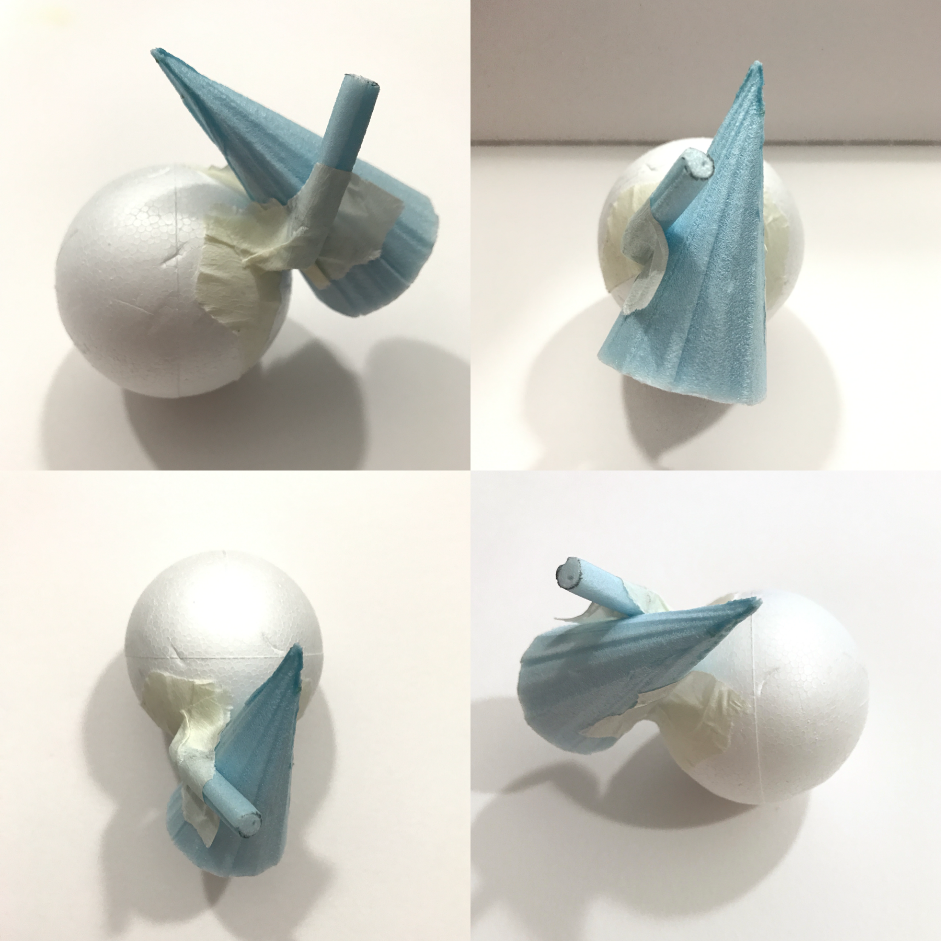
STRUCTURE DRAFT 1:

If I have a favourite CUPCAKE, this is what it will look like:

D: sphere            SD: cone         SO: tiny cylinder

STRUCTURE DRAFT 2:

My ‘Sam’ satellite. Orrr mini speakers.

D: cone       SD: thin cylinder      SO: short but thick cylinder

Reevaluation:

Only after this whole post I realised my 1st structure was off – my D and SD looks the saaaameee, the same kind of volume 🙁 I think I should have cut the cone to be a little smaller but bigger than the SO. Or I could turn my sphere to the smallest size so it can act as the SO instead and my tiny cylinder can be my SD. (I still have yet to learn to sculpt a sphere hmm)

Then I also realised in my 2nd structure, the cone lying on my small cylinder creates a right-angle, making it perpendicular? It shouldn’t be perpendicular. Maybe I could have just cut the bottom of the cone a little bit so it doesn’t touch the ground and still stick at about 1/3 of it’s height.

Ahh I still have so much more to learn and figure out, because what about the radius too? I’m pretty sure I have to take note of that next time. I’ll be sure to clarify more tomorrow during lesson.

[Will leave this space to add on for improvements based on the above structures after consulting]


3D Pandora – Final ‘Counter-Balance’ Structure

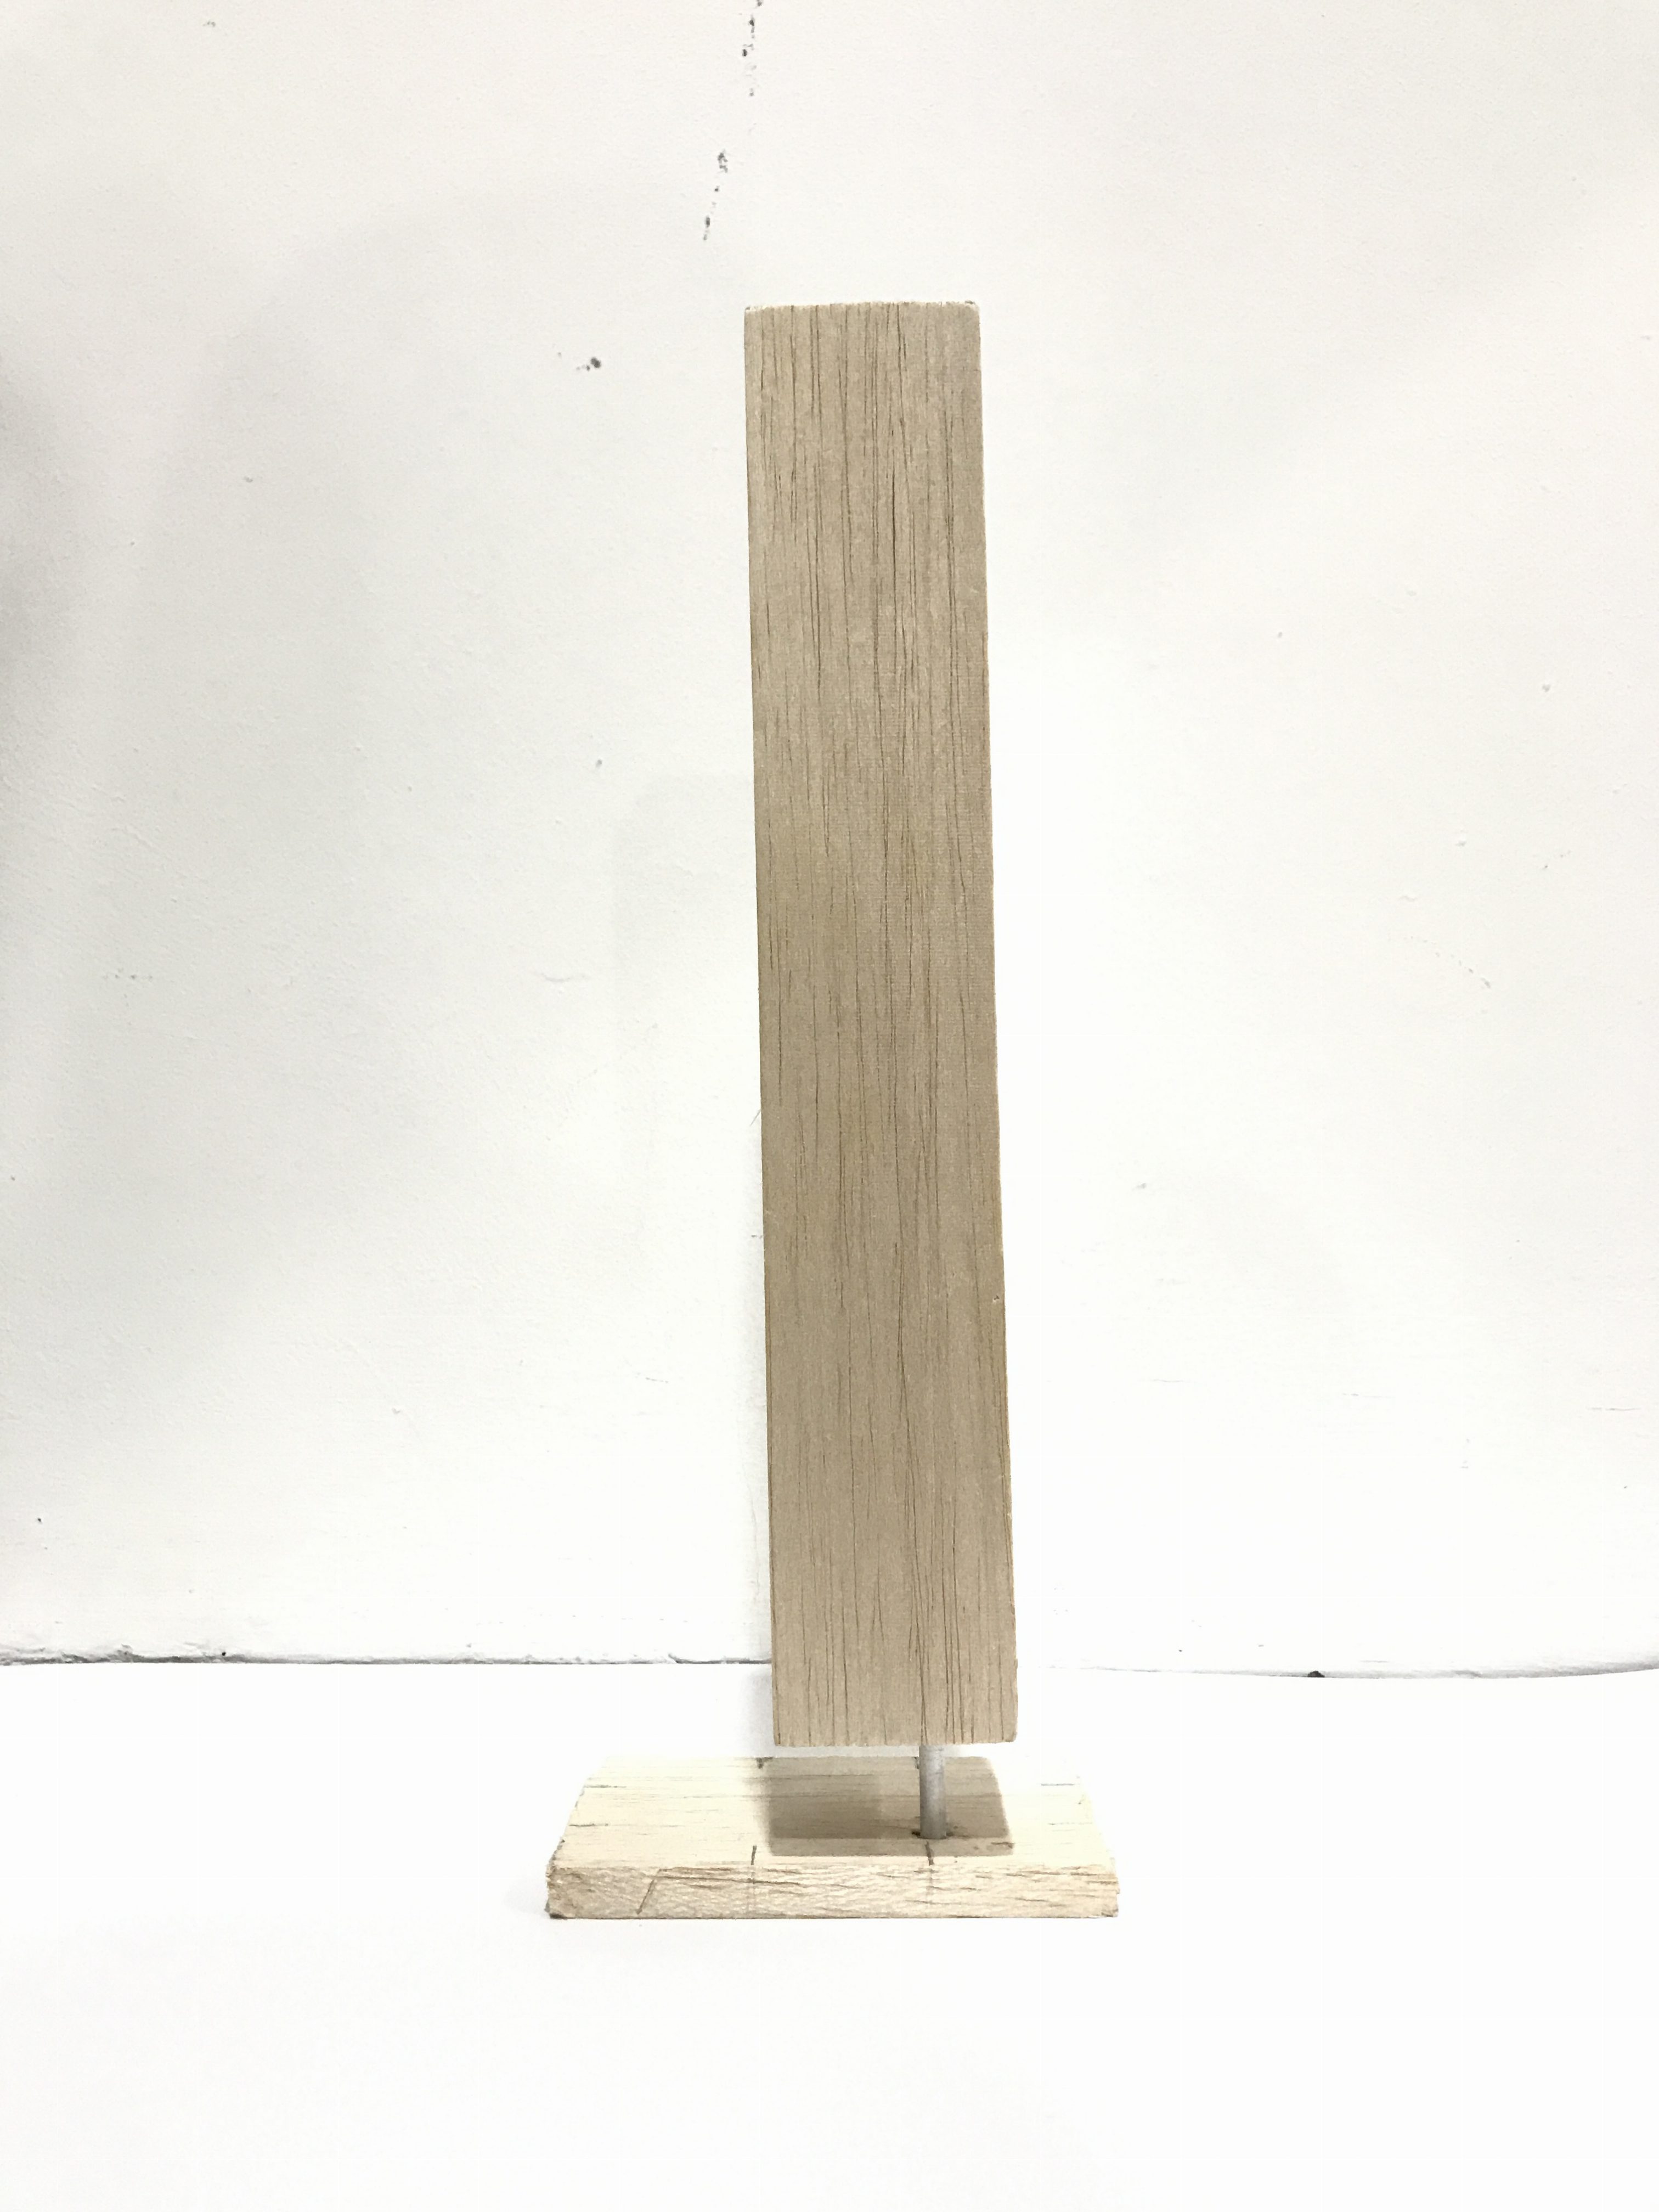
I already posted my process to getting to this. This is my final ‘Counter-balance’ structure.

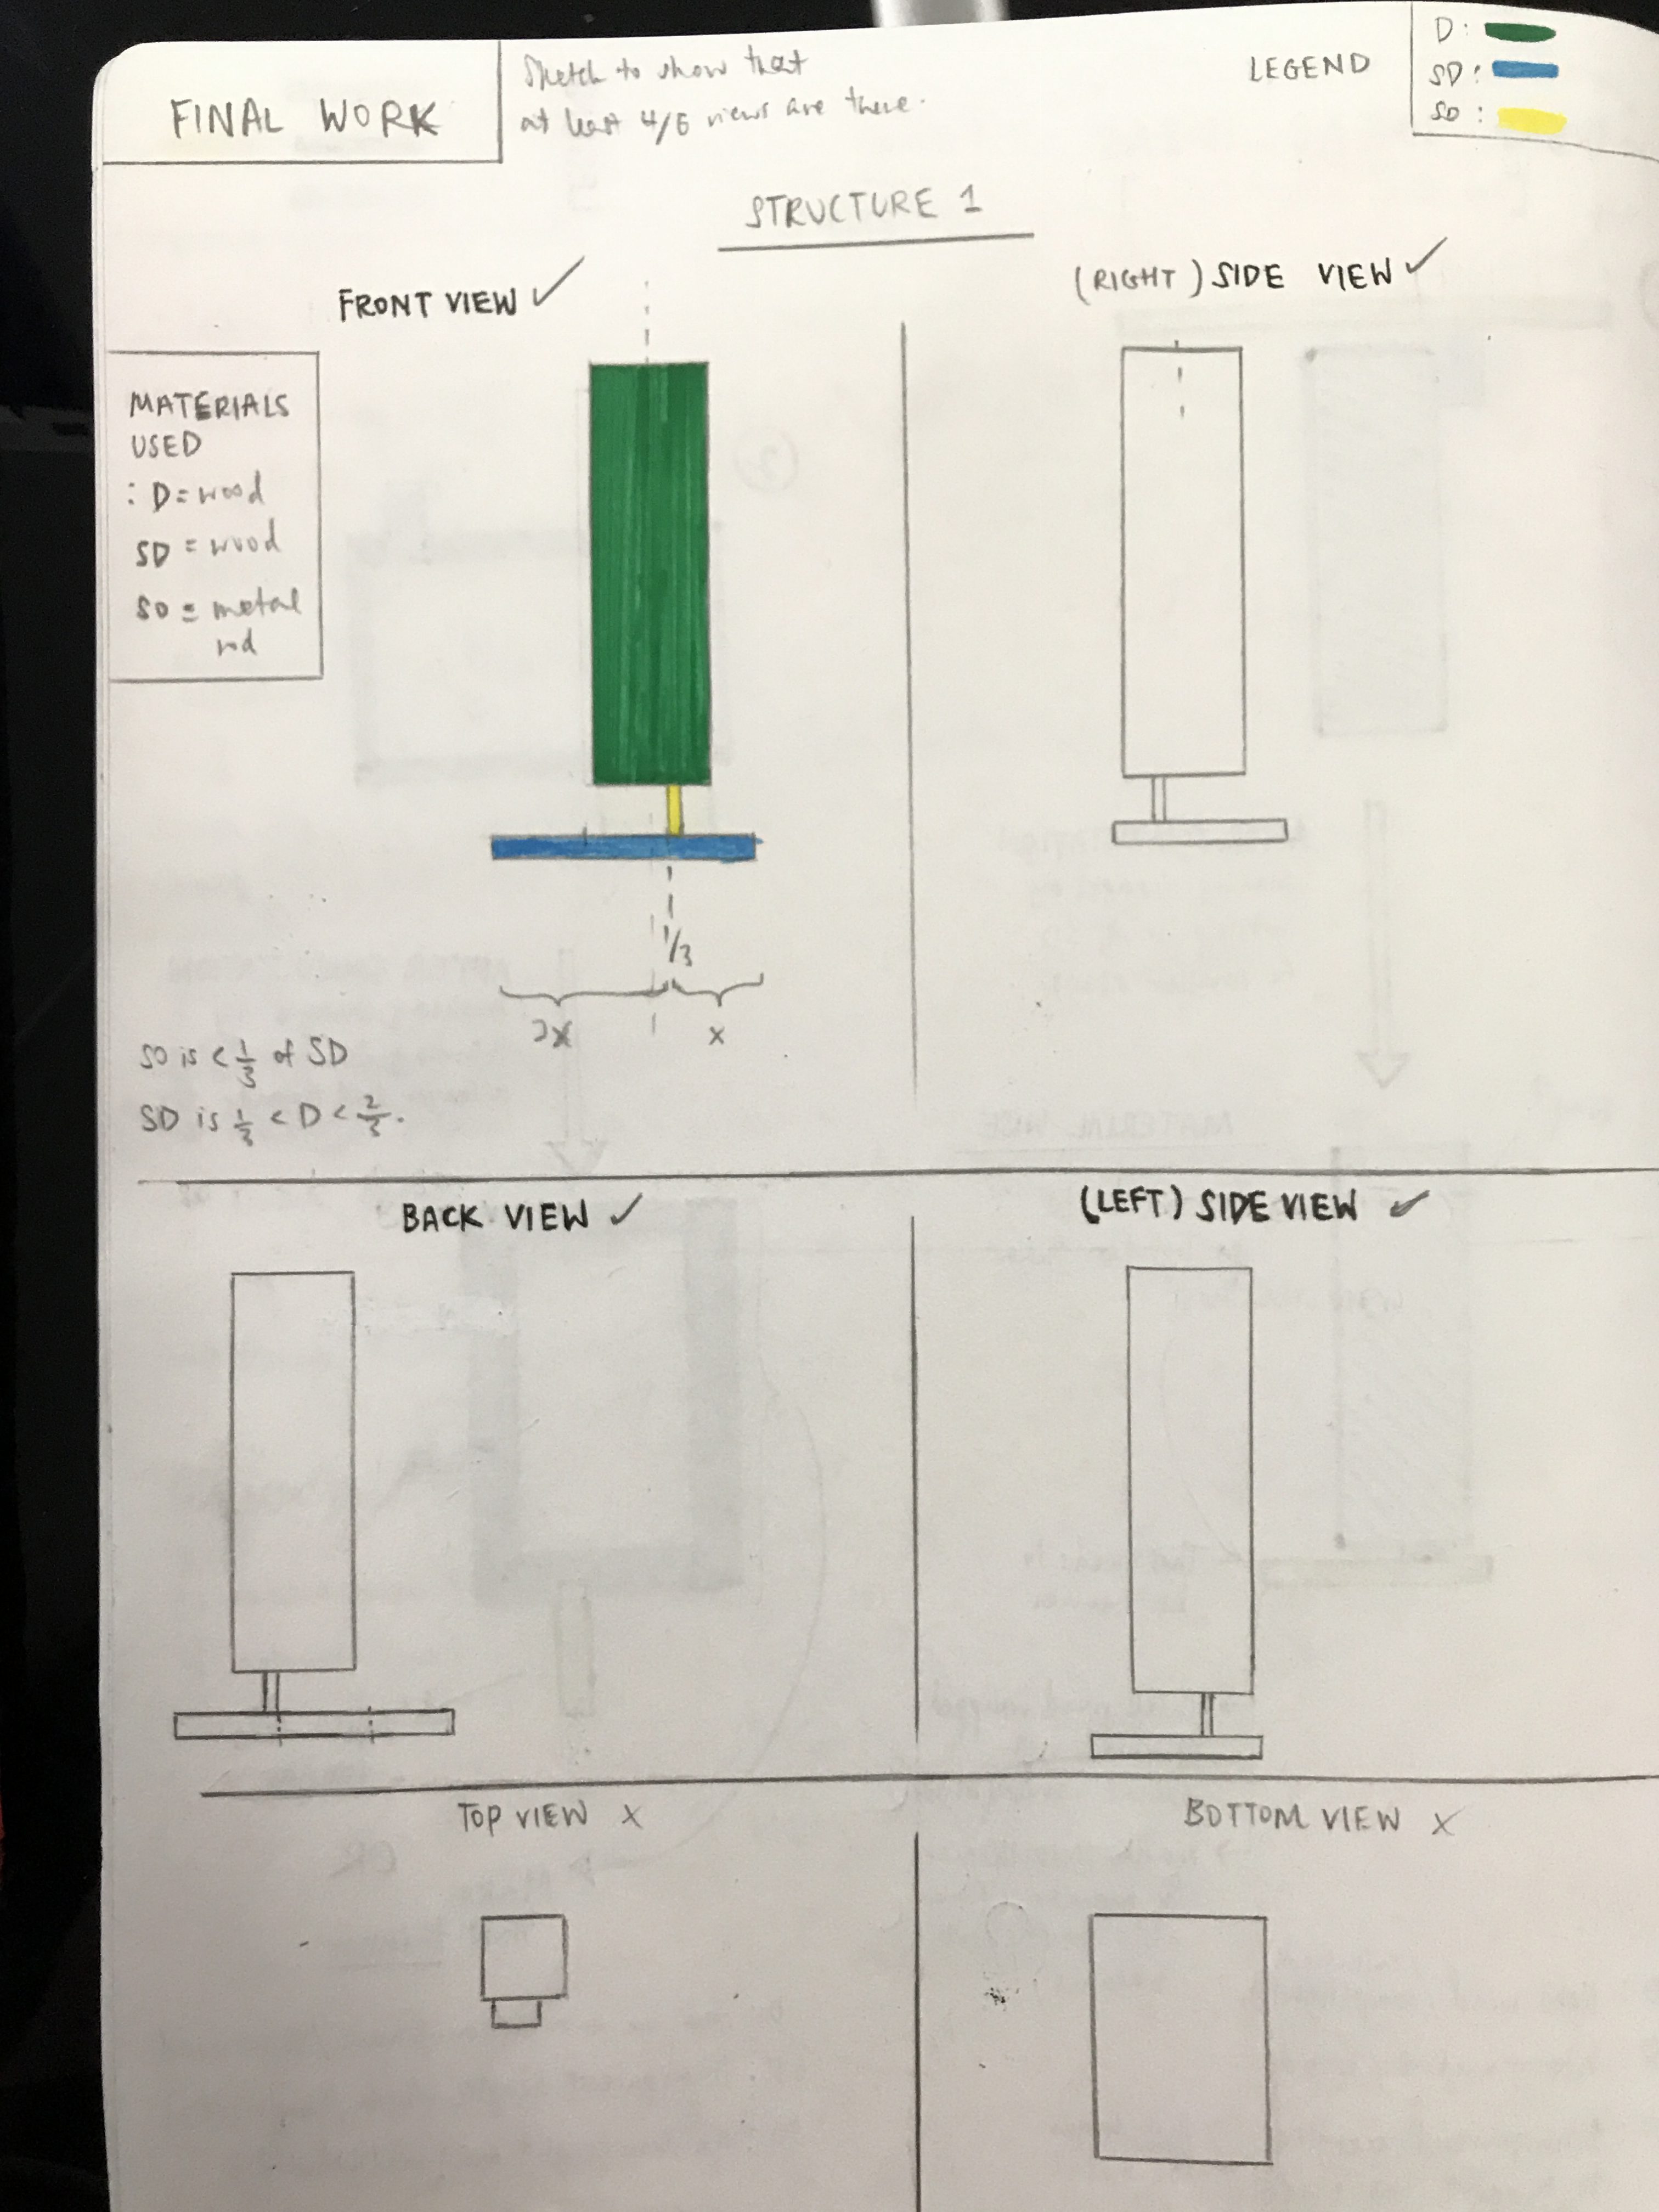
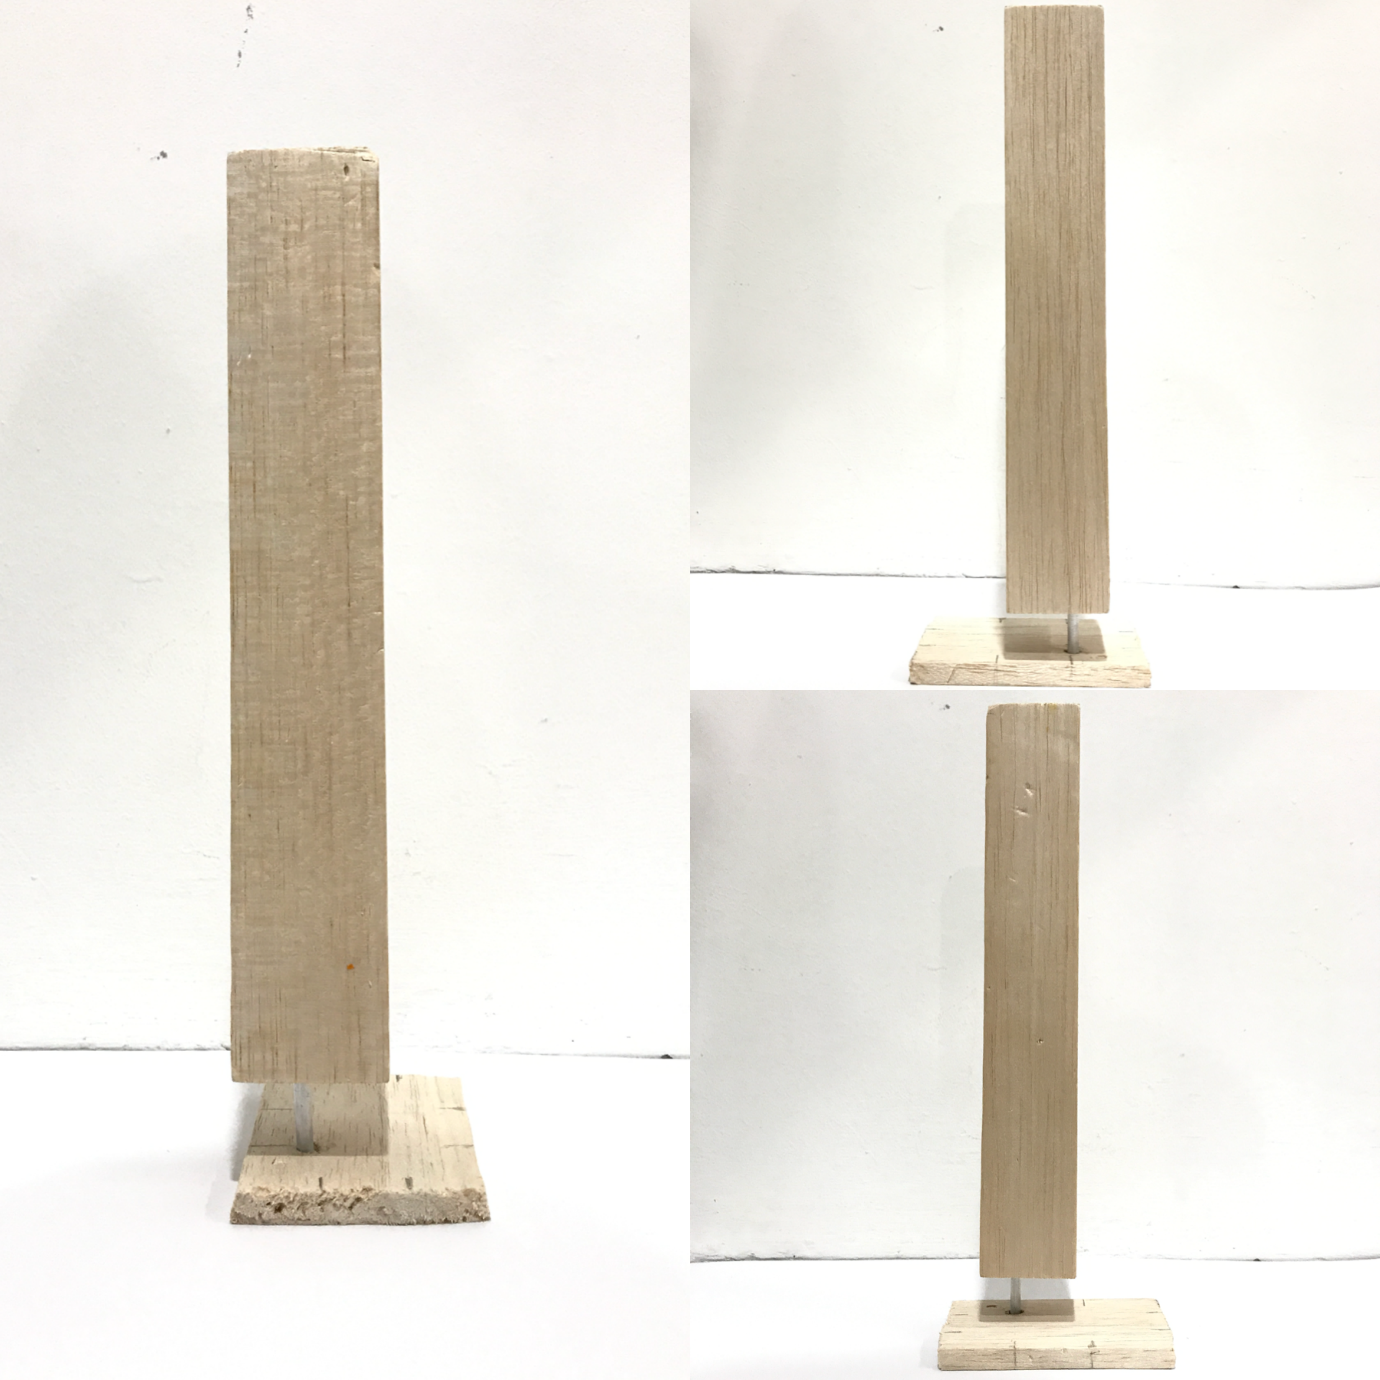
The all-sides view of the structure and showing that at least 4/6 of it went right.


The reason why I wanted to use a metal rod for the SO was because metal can easily be the backbone of alot of things. And the material of this metal is specifically aluminium as it is known for not rusting or corroding easily. Hence if it touches water, it won’t rust. IN ALL HONESTY, this was hard to create to balance it well. I had to get the right measurements for everything. I thought of making it into a floating building, or a hardy bar soap dispenser. undecided

3D Pandora – Progress Towards Final ‘Counter-Balance’ Structure


PREPAAARE, a really (thought-through and reflective) long post incoming.

In last week’s lesson, we went through each and everyone’s boxes and consulted our professor. After my consultation for my ‘counter-balance’ work I went to make some changes to my boxes. So there are two structures that I’m planning to create (as seen below):
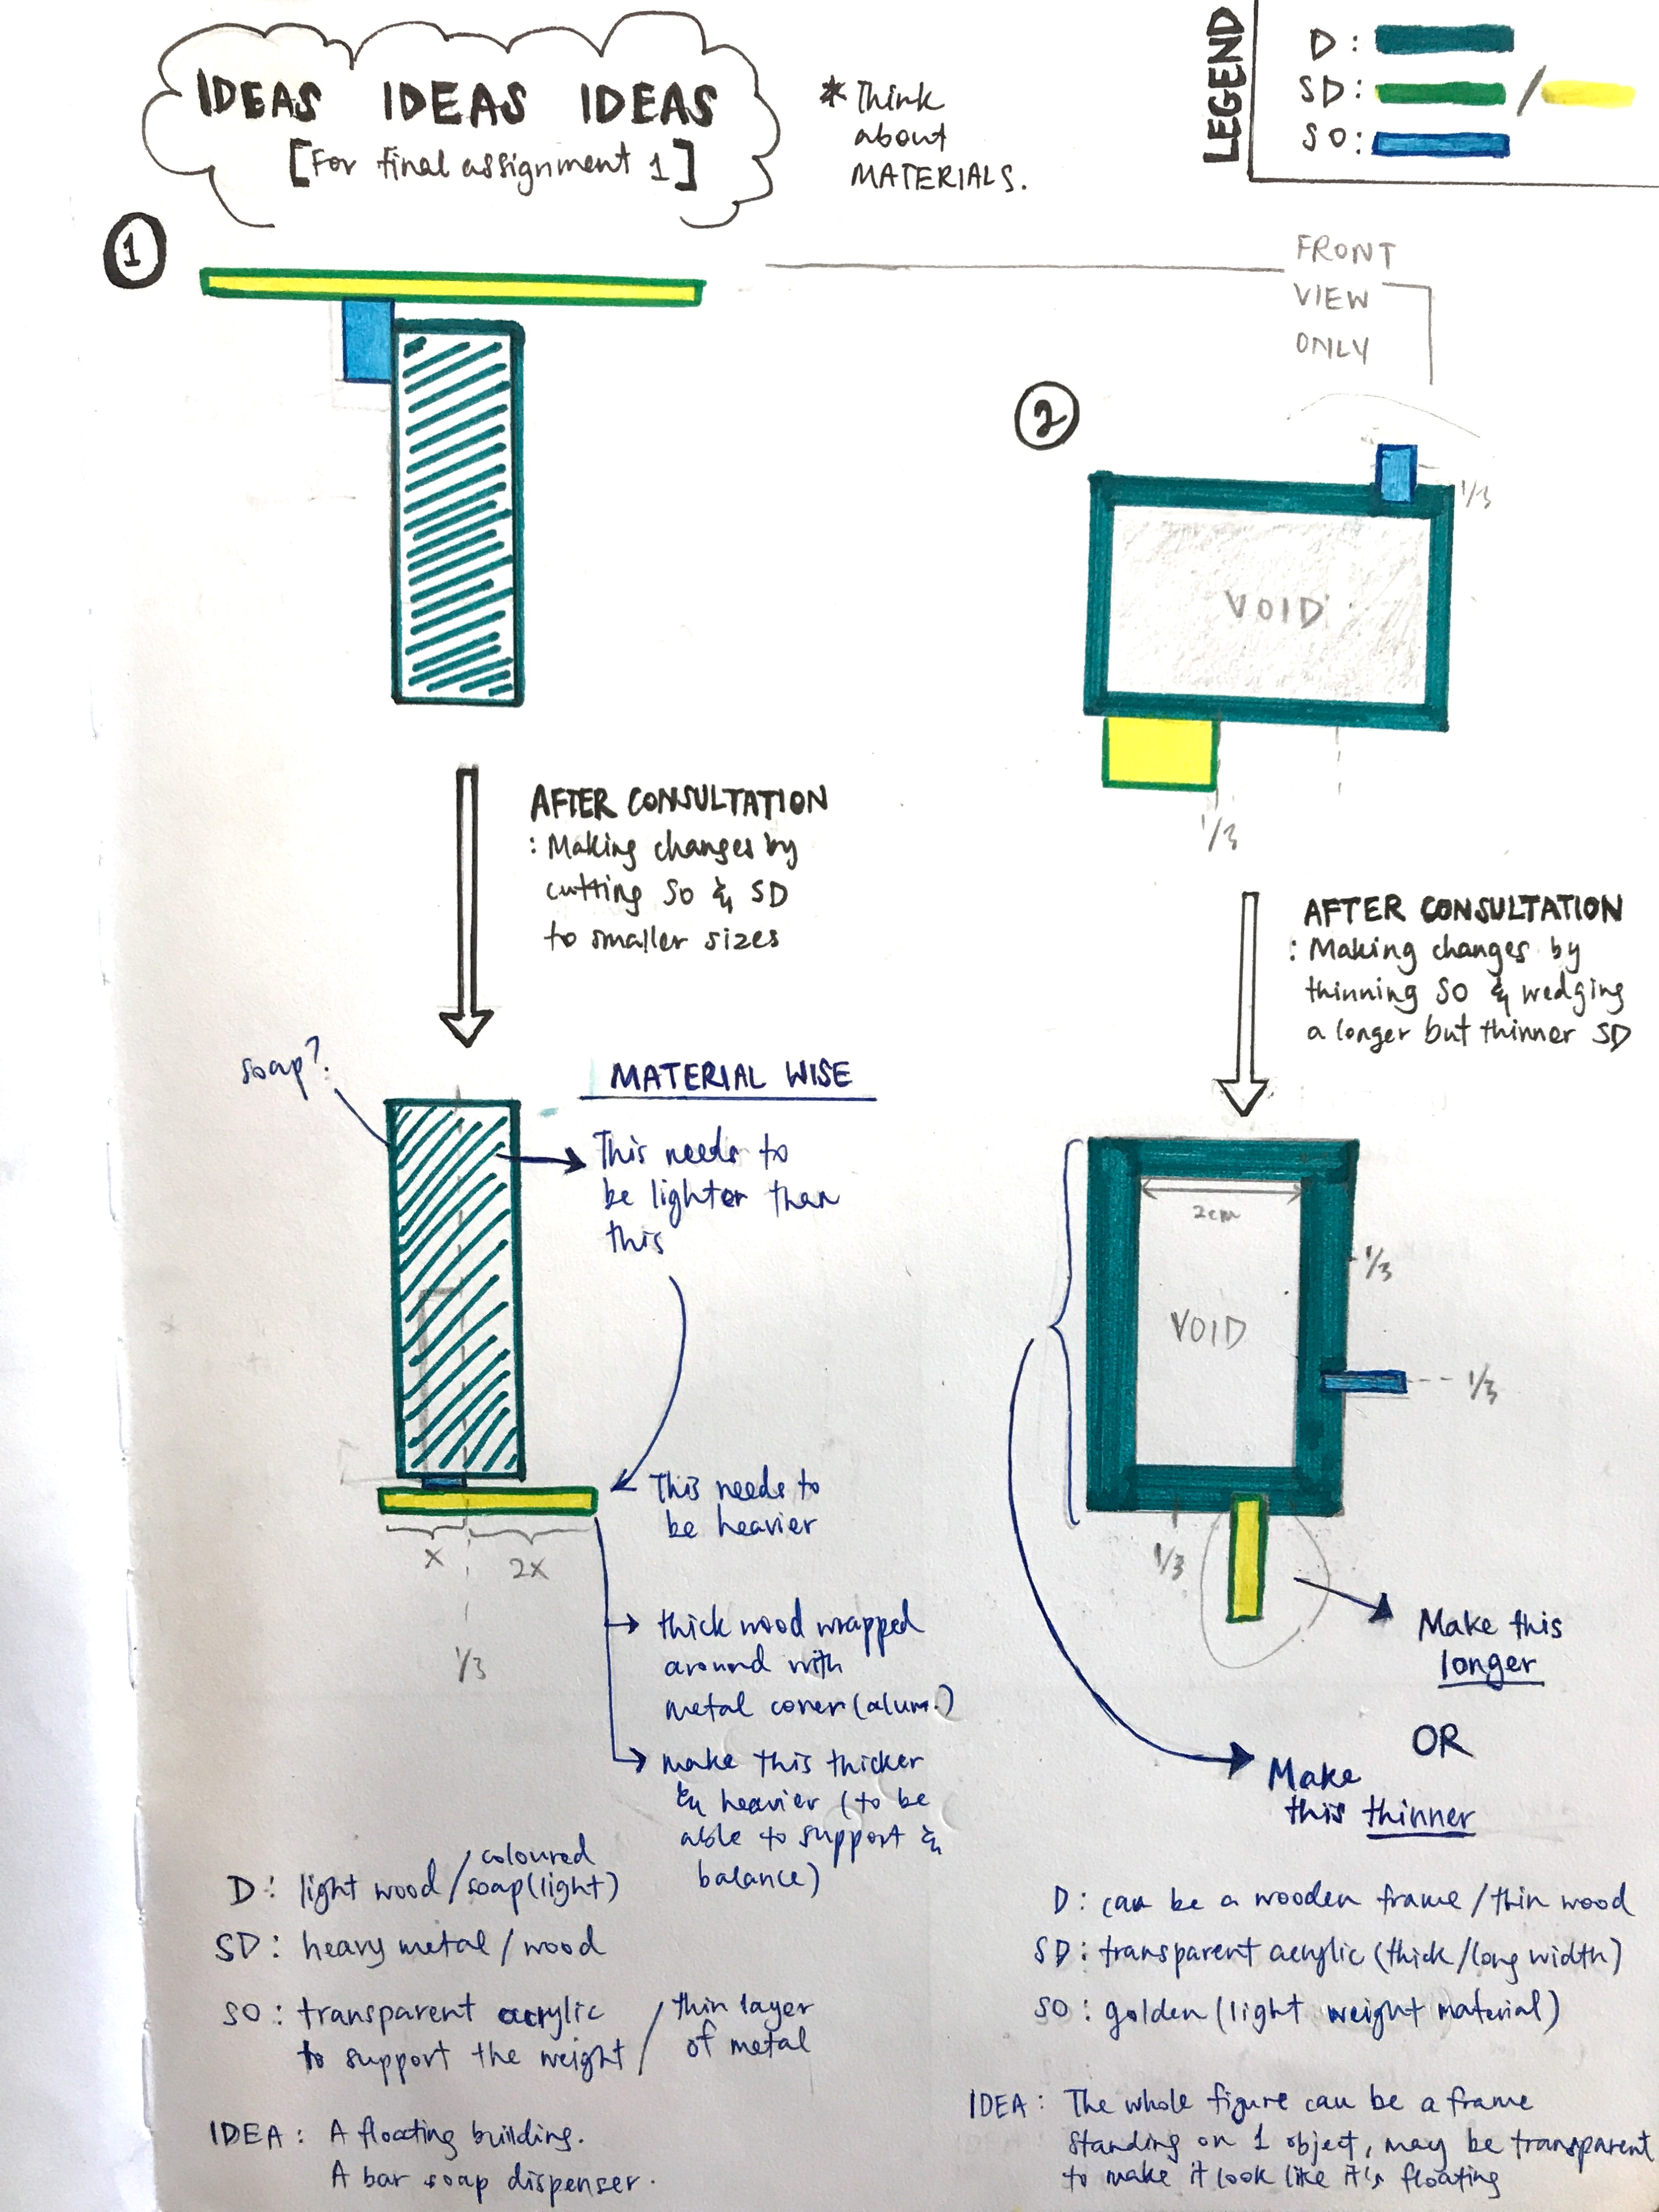
In my 1st structure, I went to make changes to the SO and SD to make my D block more dominant, and basically make an interesting counter-balance figure. It was quite hard to ensure that my figure balances as my D foam block was thick, tall and mainly weighs more than the SD could handle. So I decided that the D block had to be lighter than SD and the SD had to be heavier to be able to support the whole structure.

In my 2nd structure, I went to also make changes to my D and SD by making the D thinner and choosing an acrylic slightly longer to try and support the D and SO.

Of course taking into account of the length and width of the blocks too, it wasn’t easy. ESPECIALLY when we have to start including the materials we want to use.

So in this post, I will be sharing a few of my fails when creating structure 2 and structure 1 with other materials. And then I will show how I finally made progression towards a successful structure through structure 1 draft model (as I shifted more of my focus onto it).

LET’S BEGIN!
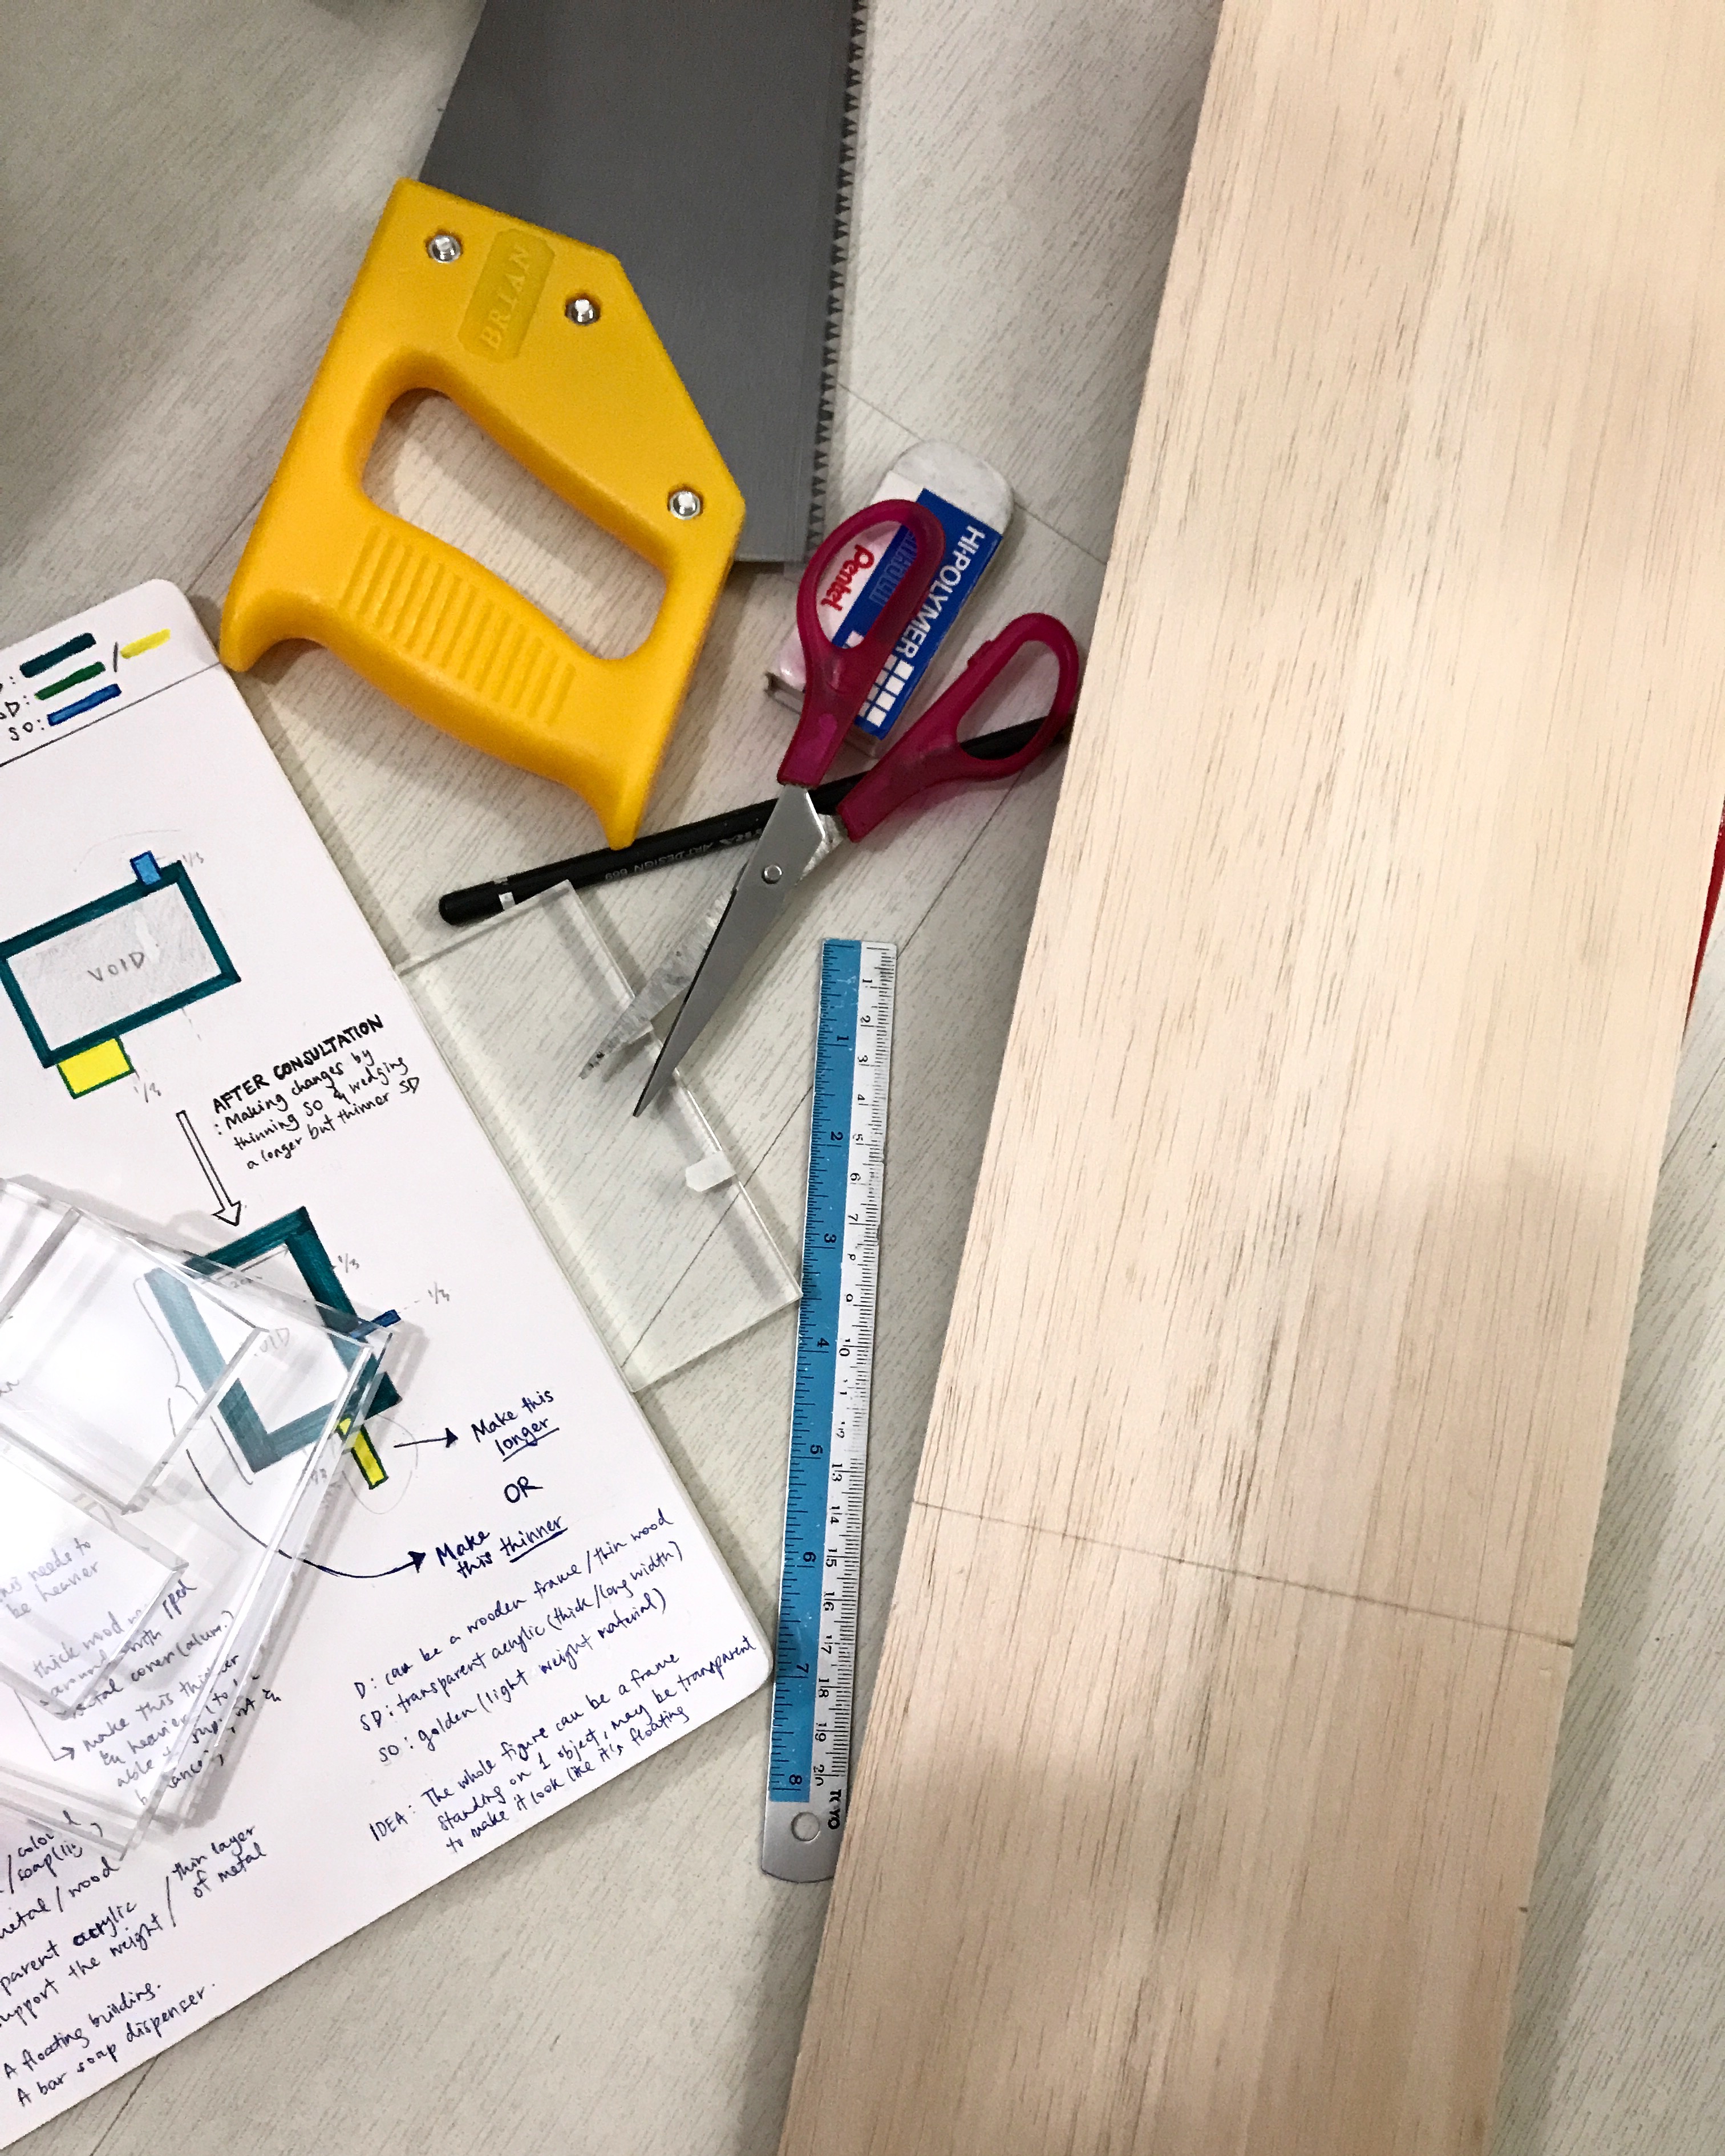
TRYING TO MAKE STRUCTURE 2

I started by trying to come up with a good structure using wood and acrylic and aluminium metal for structure 2. The wood for my Dominant block, the acrylic for my Sub-dominant block, and the aluminium metal for my Sub-ordinate block. Here below are some progress shots.
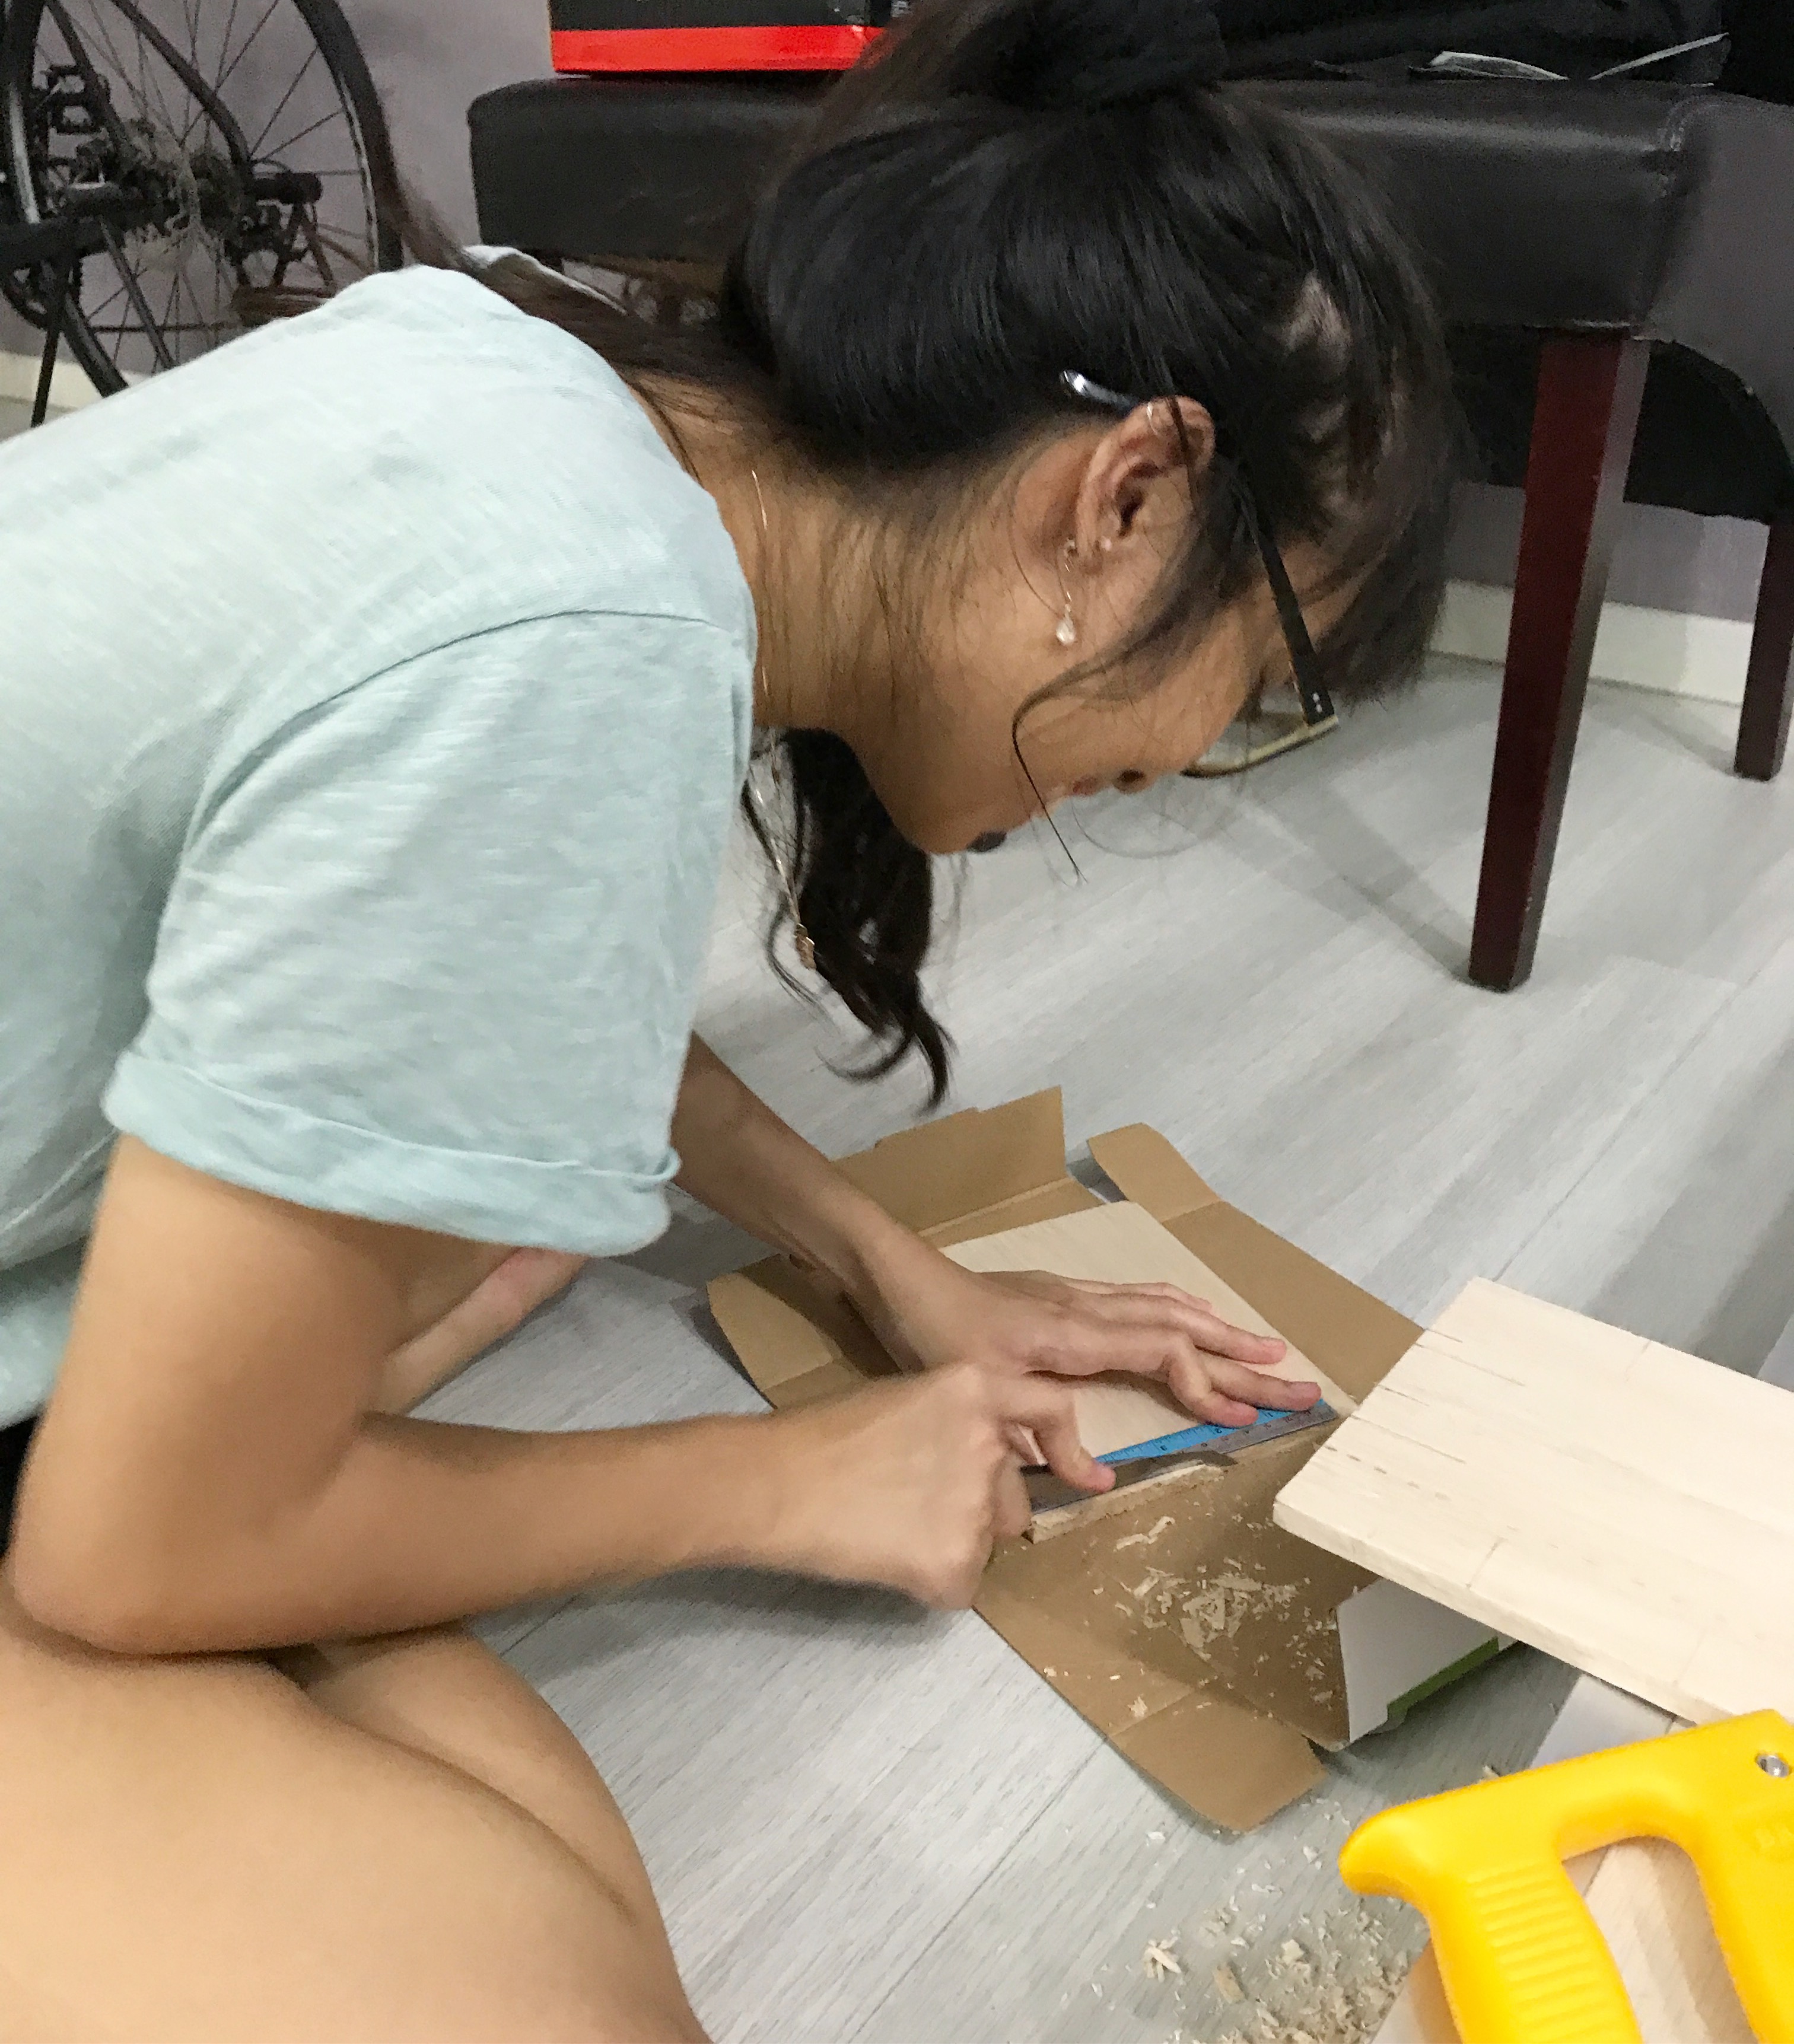
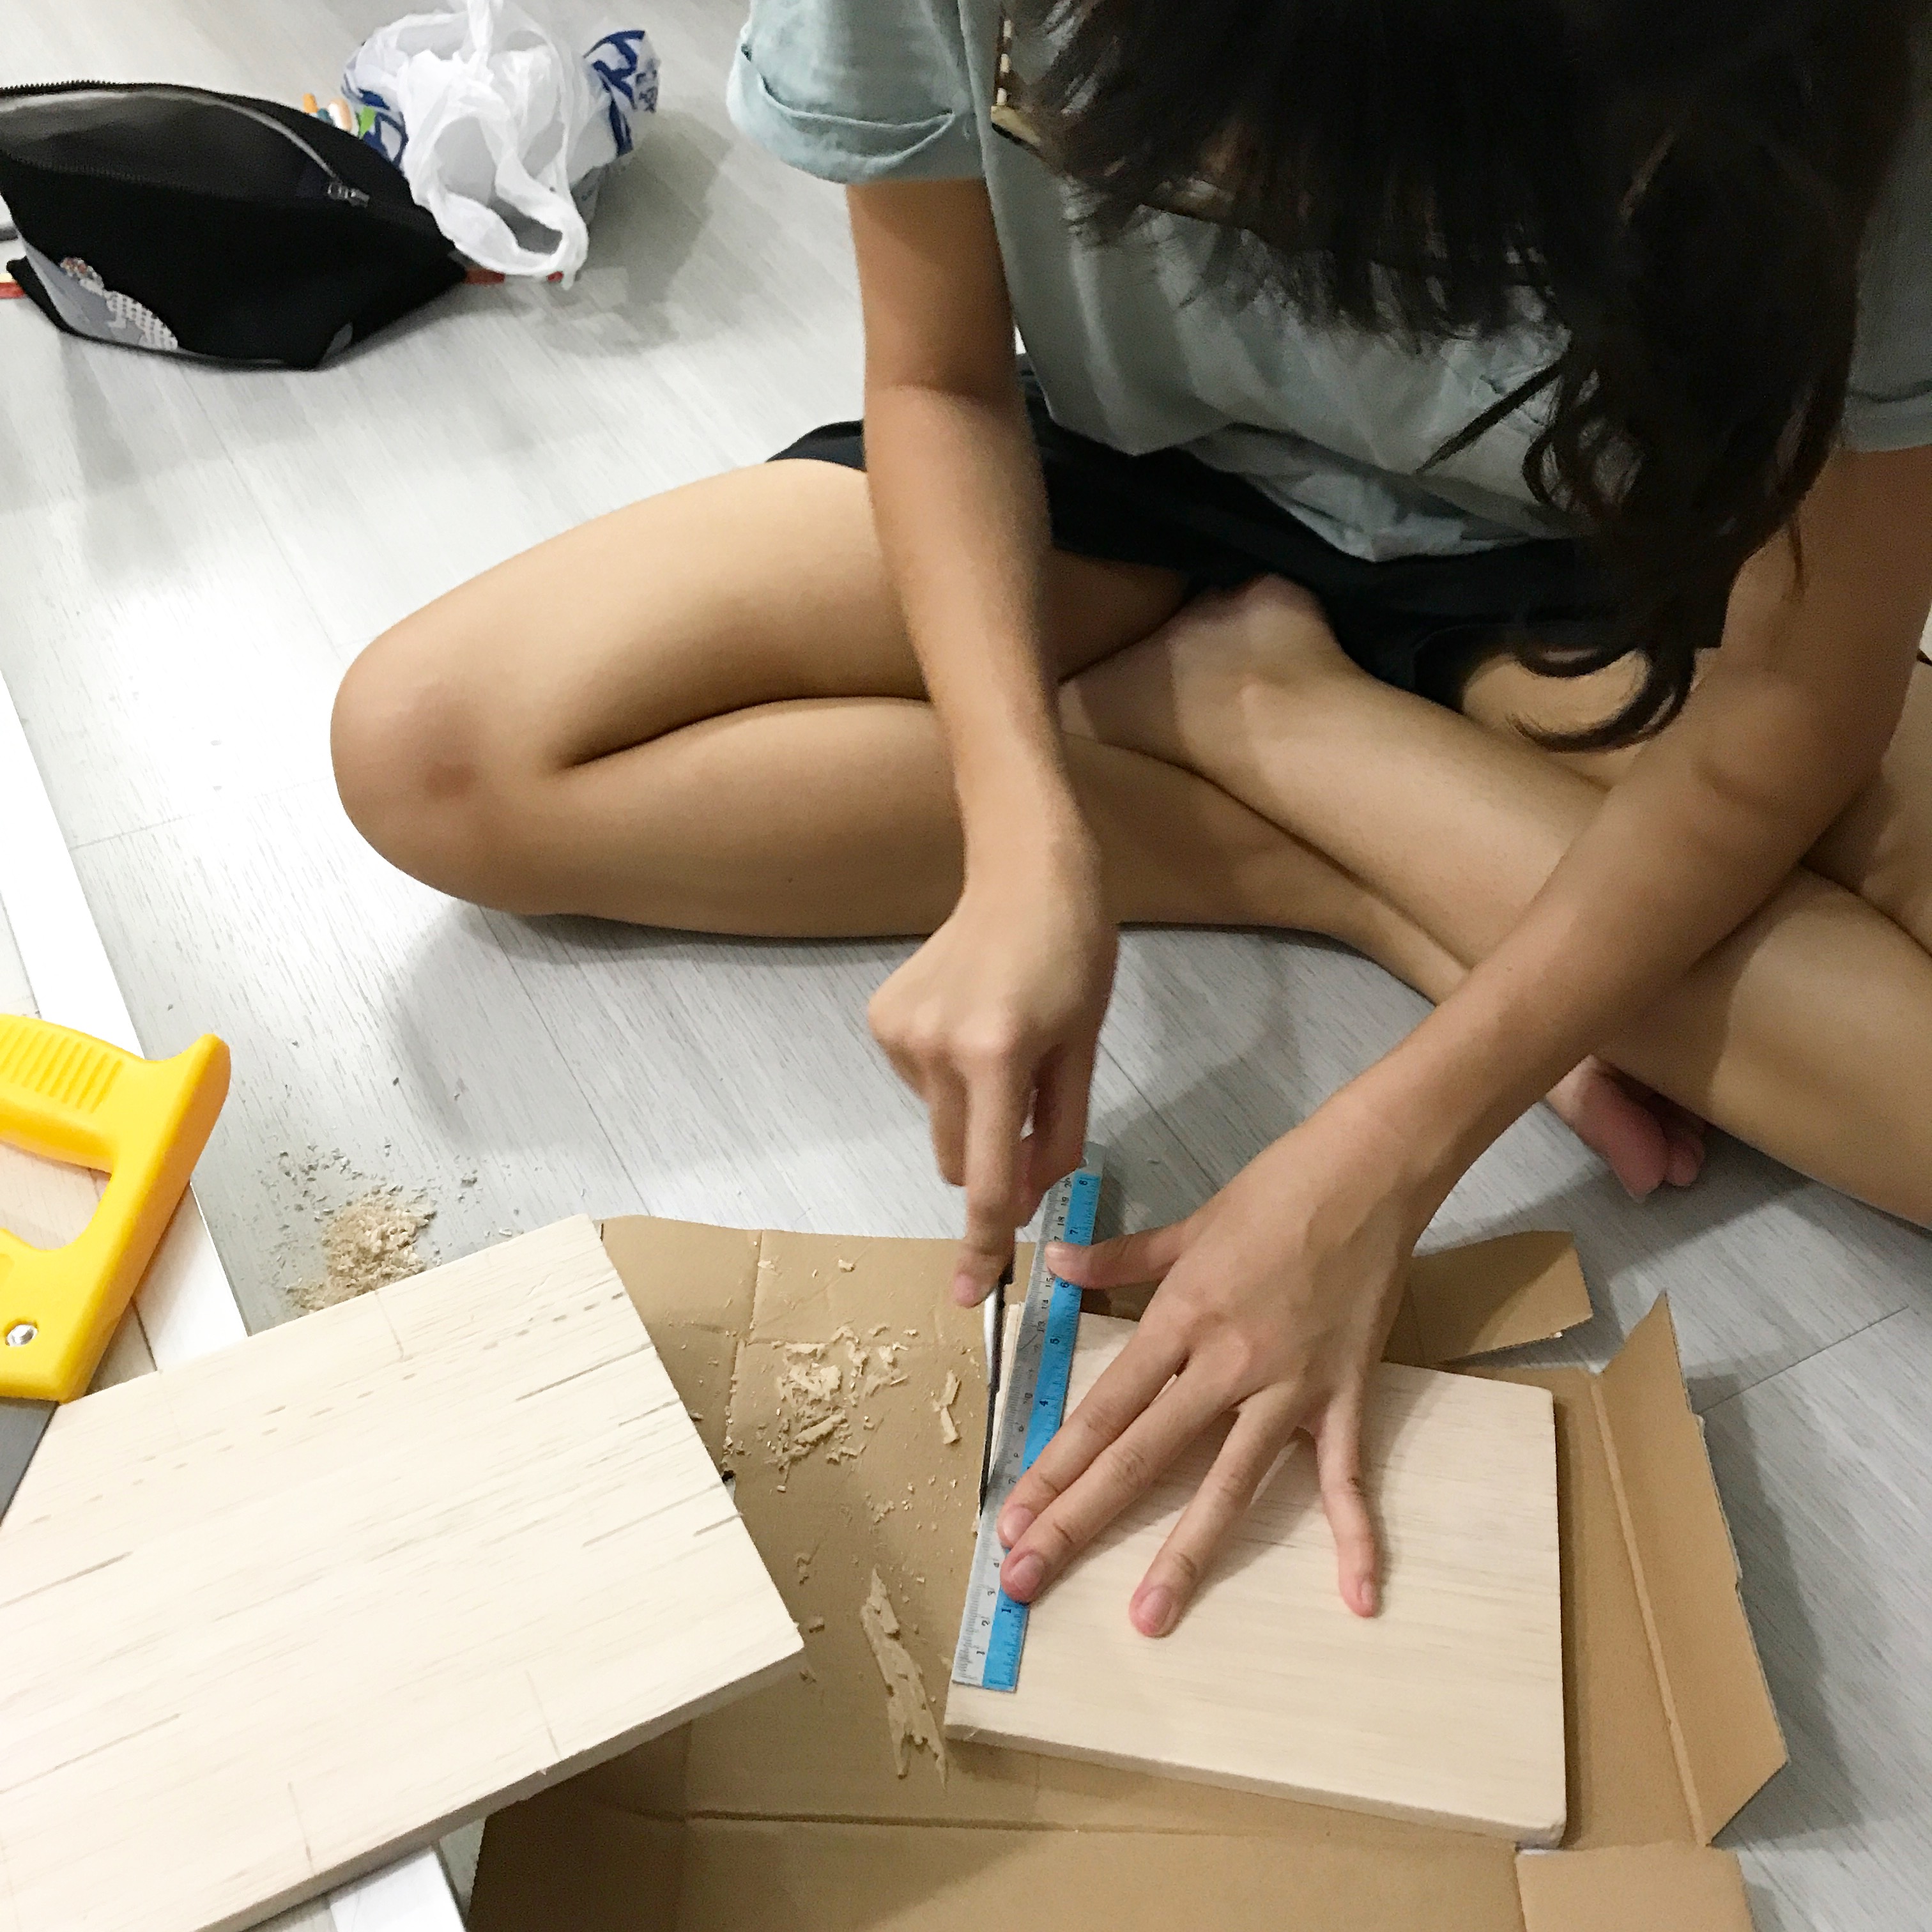
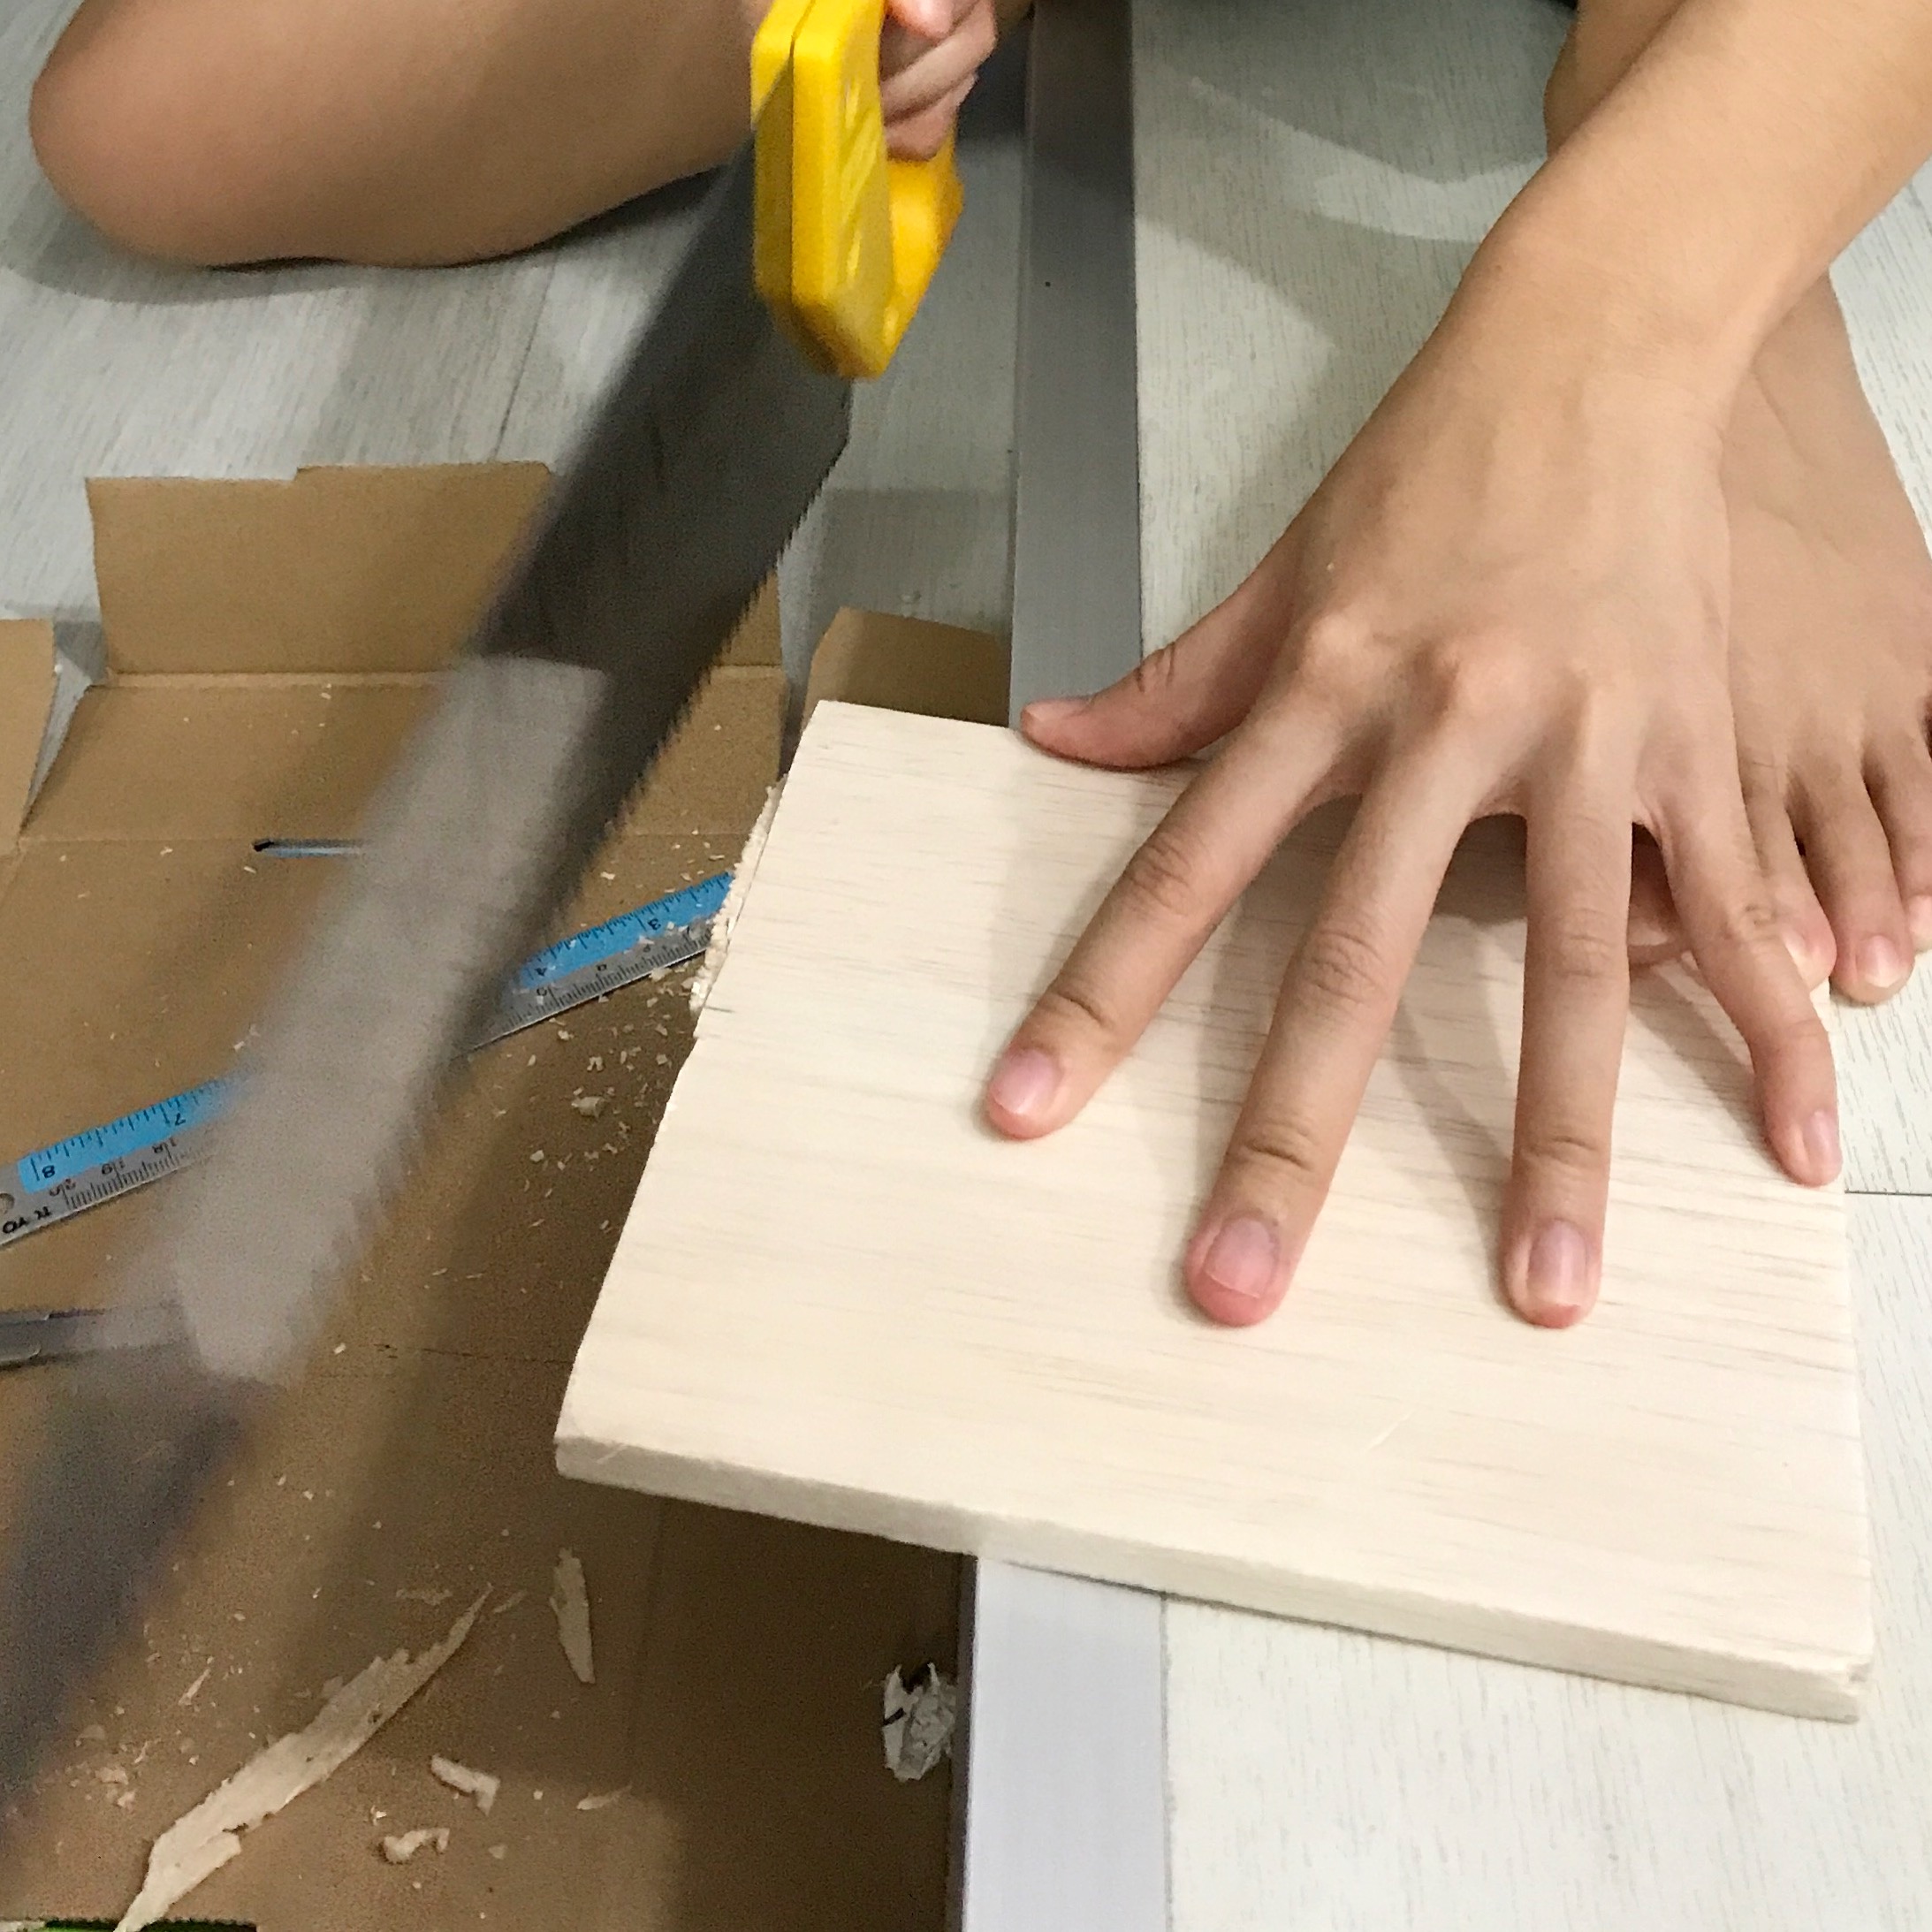
It was definitely tough to cut out the portion of the wood that I wanted, despite using a saw because there are some problems I encountered while doing so:

  • some parts of the wood are made harder hence harder to have a clean cut
  • when cutting through them, it is hard to maintain the same measurement at the length and the width
  • it is EVEN harder to carve the middle of the wood out to turn it into a frame!!! 🙁

When I was trying (very) hard to carve it out, the thin portion at the sides starts to break and I’d have to super glue them back together. And even though it works and everything finally looks like a frame, I still had to do some wedging at the bottom of the frame to insert my medium acrylic block for my SD.  But the chaos happened here: my saw couldn’t wedge through the hard part of the wood properly and I ended up cutting the space for my SD a little wider. 🙁
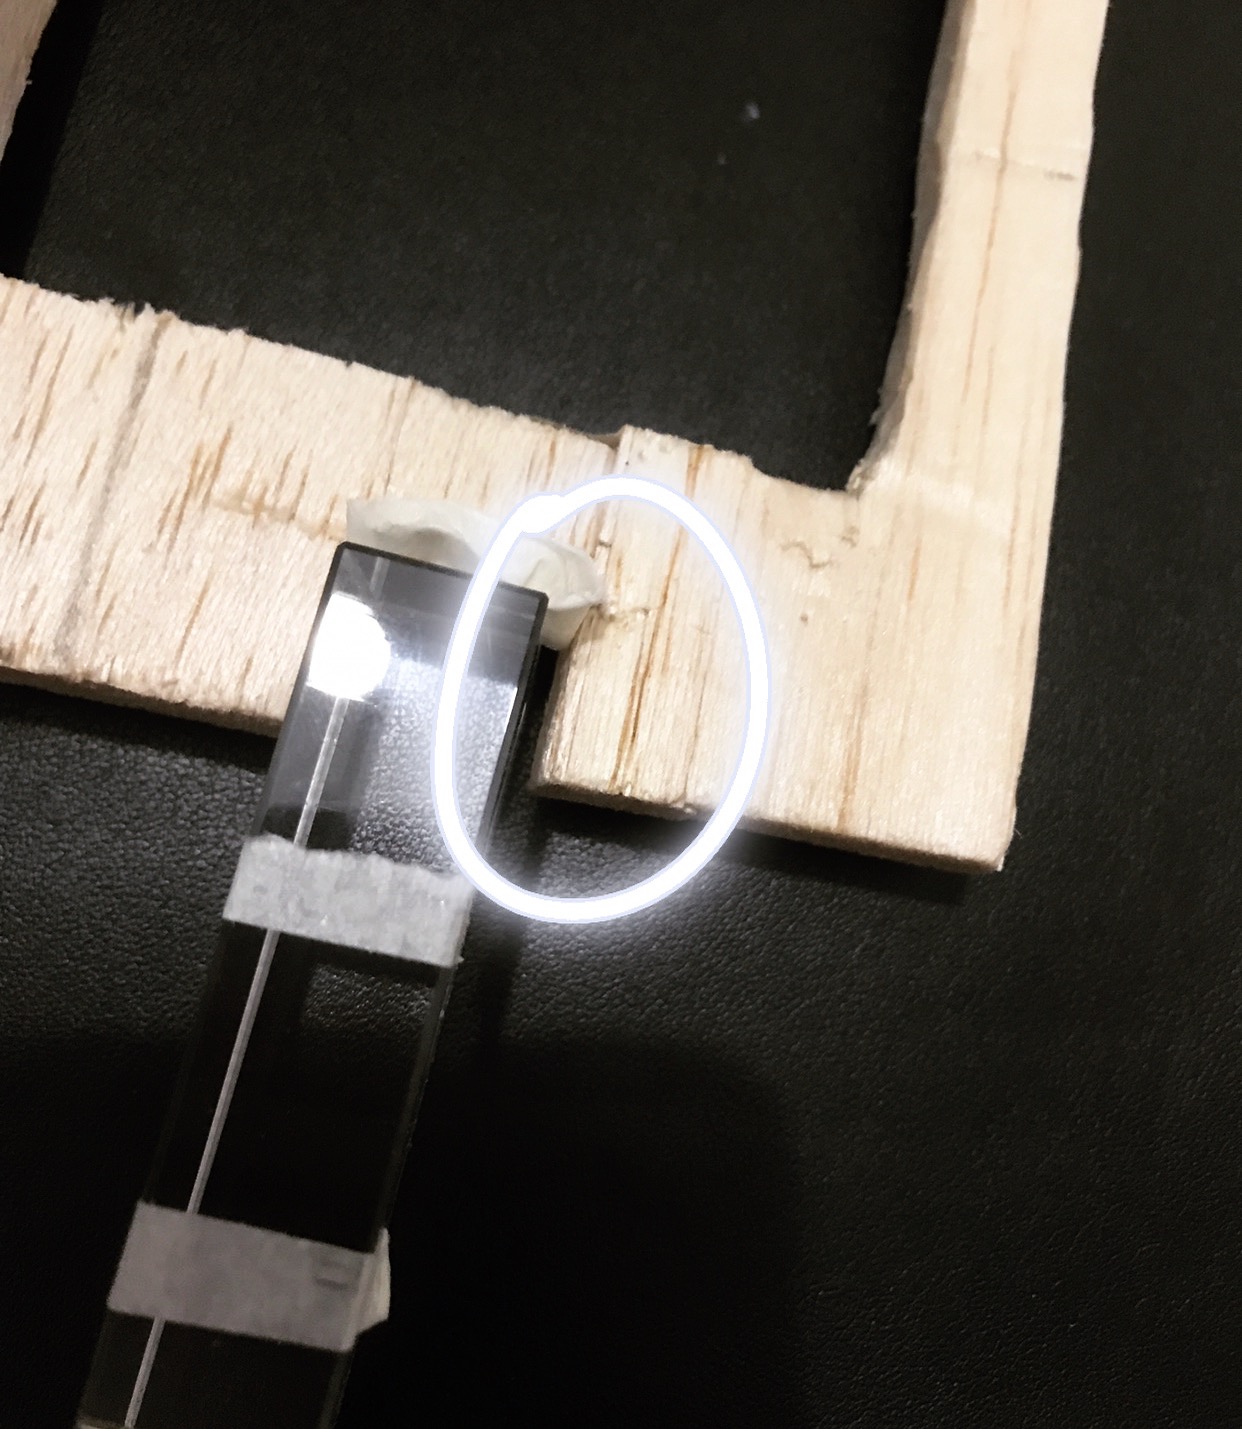
This in turn could not let my whole figure balance, unlike my foam model, as it was too spacious there and the acrylic could not hold the wood frame better.

Seen here below shows that I had to balance it by holding it unlike my foam model which could just stand/balance on it’s own. I haven’t even wedge the side (like seen on the foam model) to insert my aluminium metal as my SO because i know it still wouldn’t balance if the wedging is too spacious below (it can’t hold the whole blocks above).
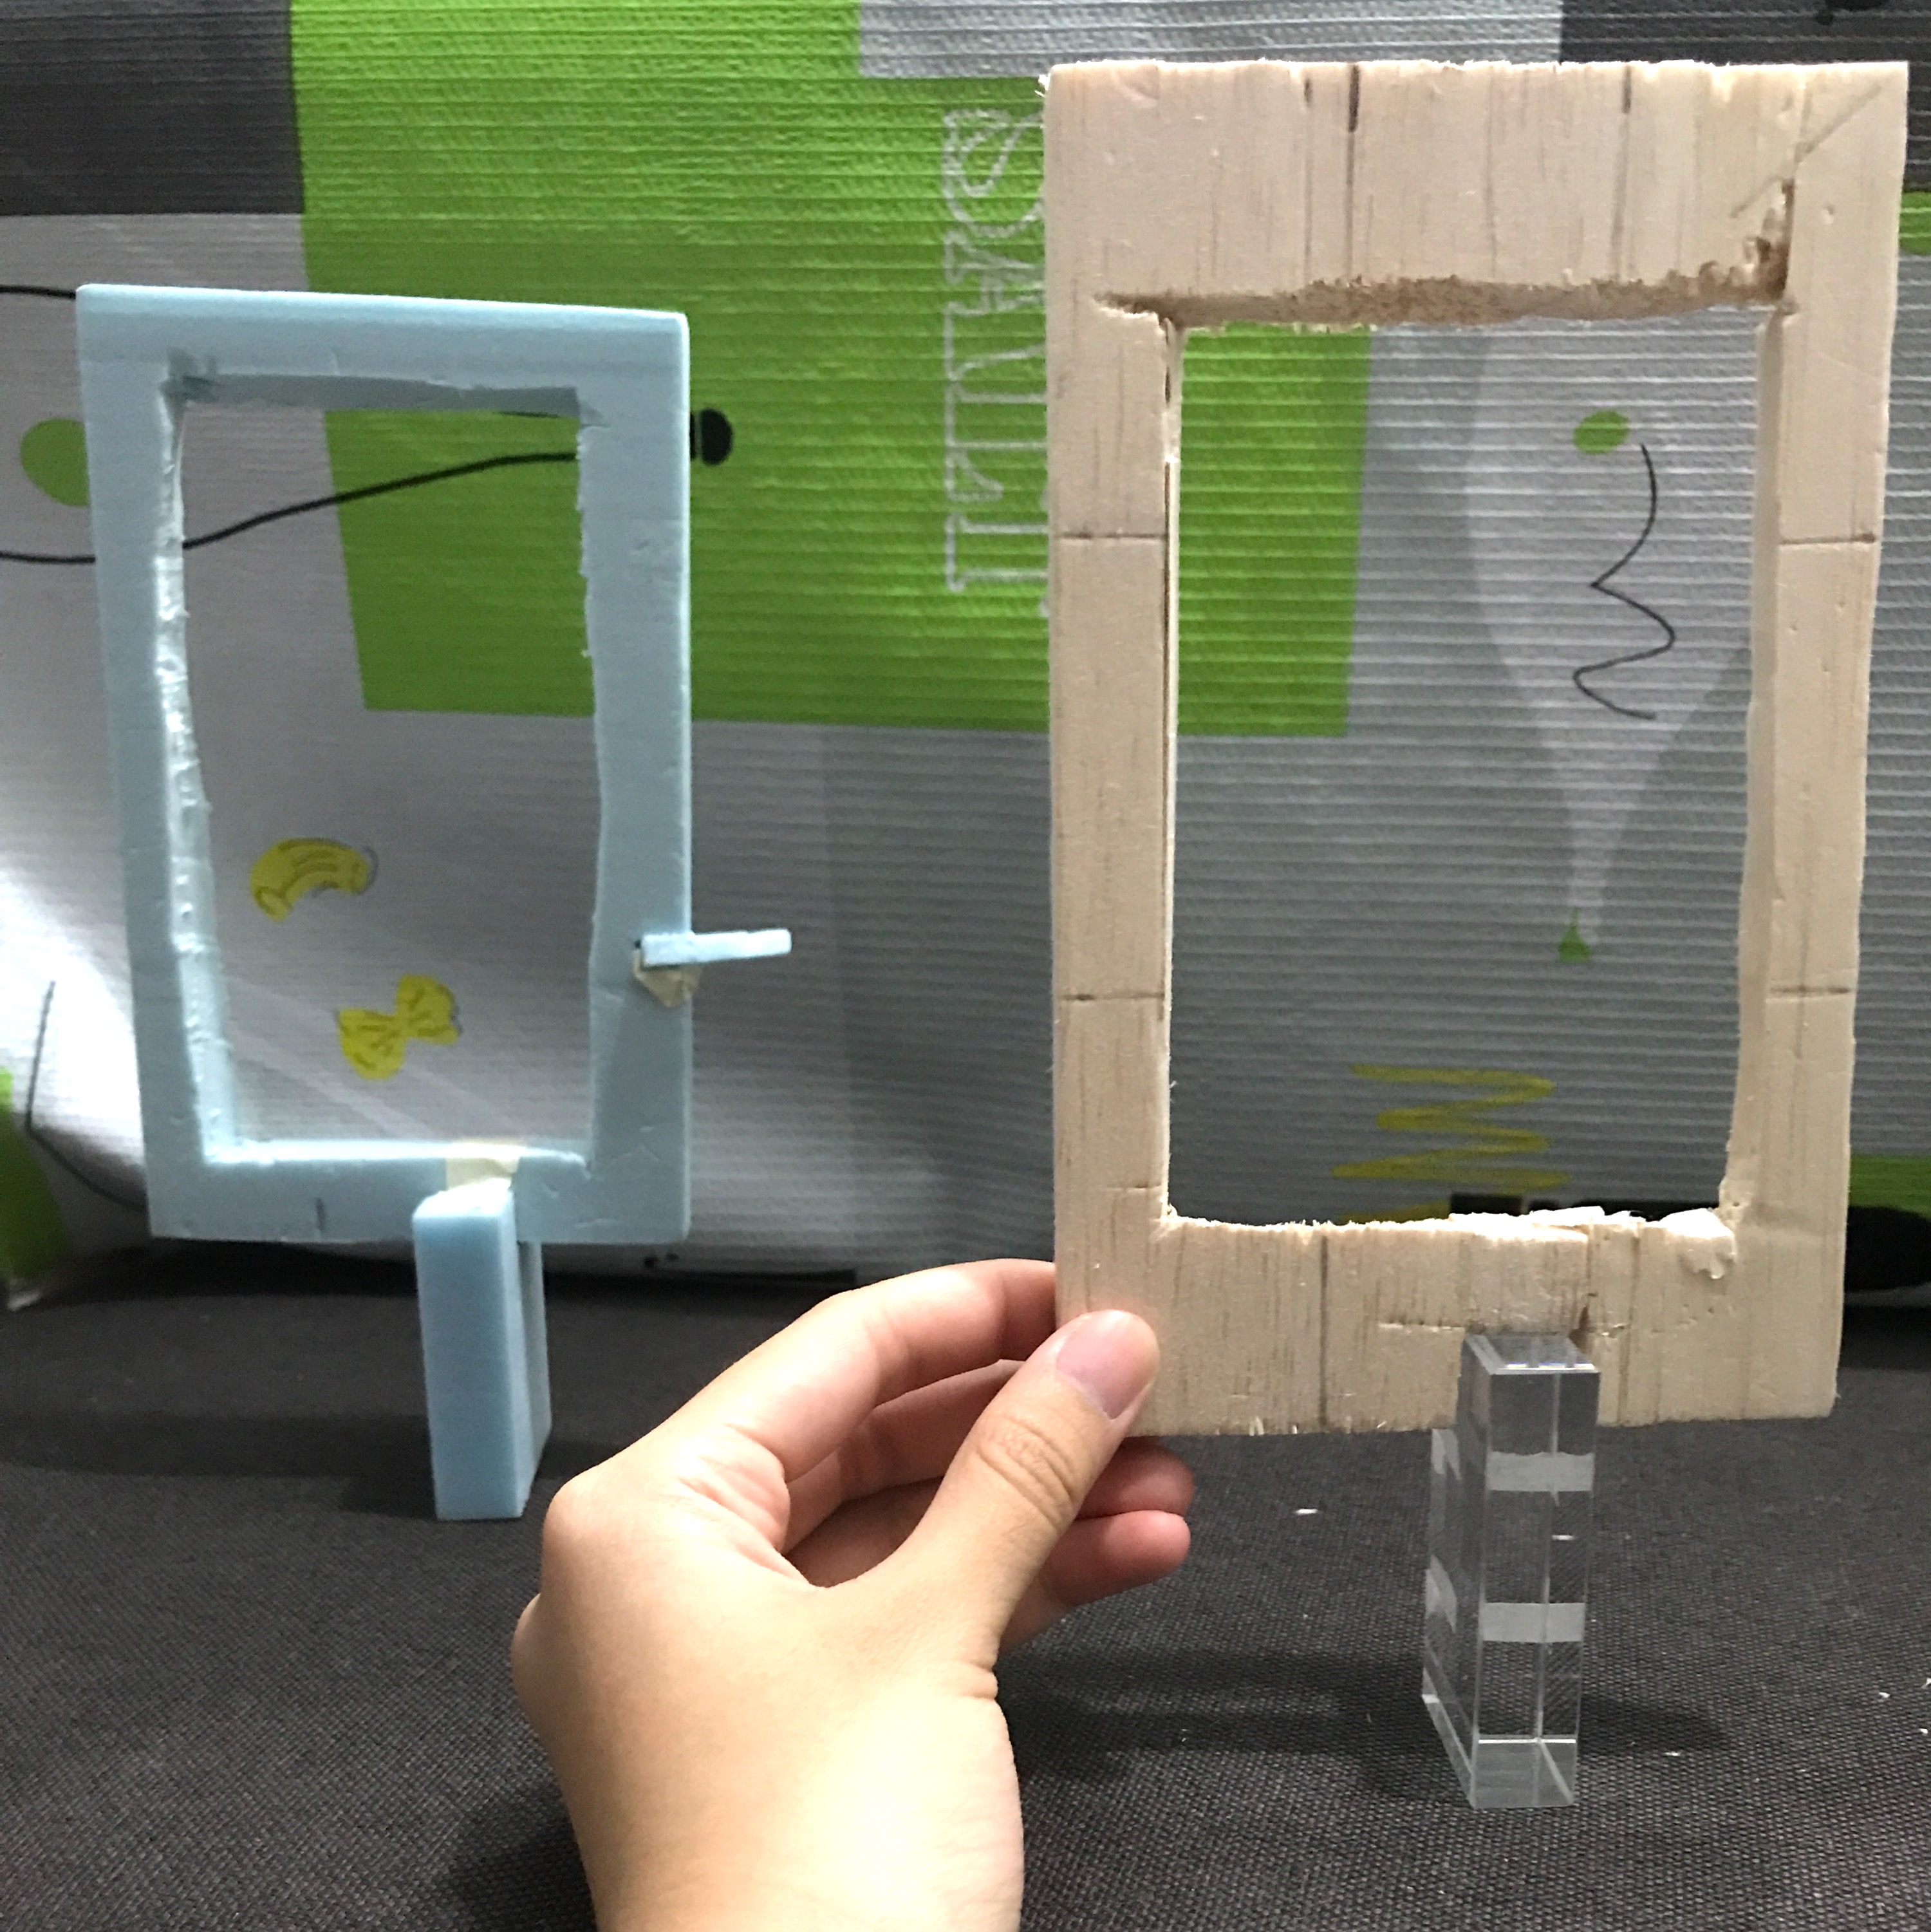
Conclusion: Failed attempt at structure 2.

So instead of wasting time on finishing it and since I knew what my problem was in that structure, I decided to just move on to doing the other structure. STRUCTURE 1.

PROGRESSION TO STRUCTURE 1
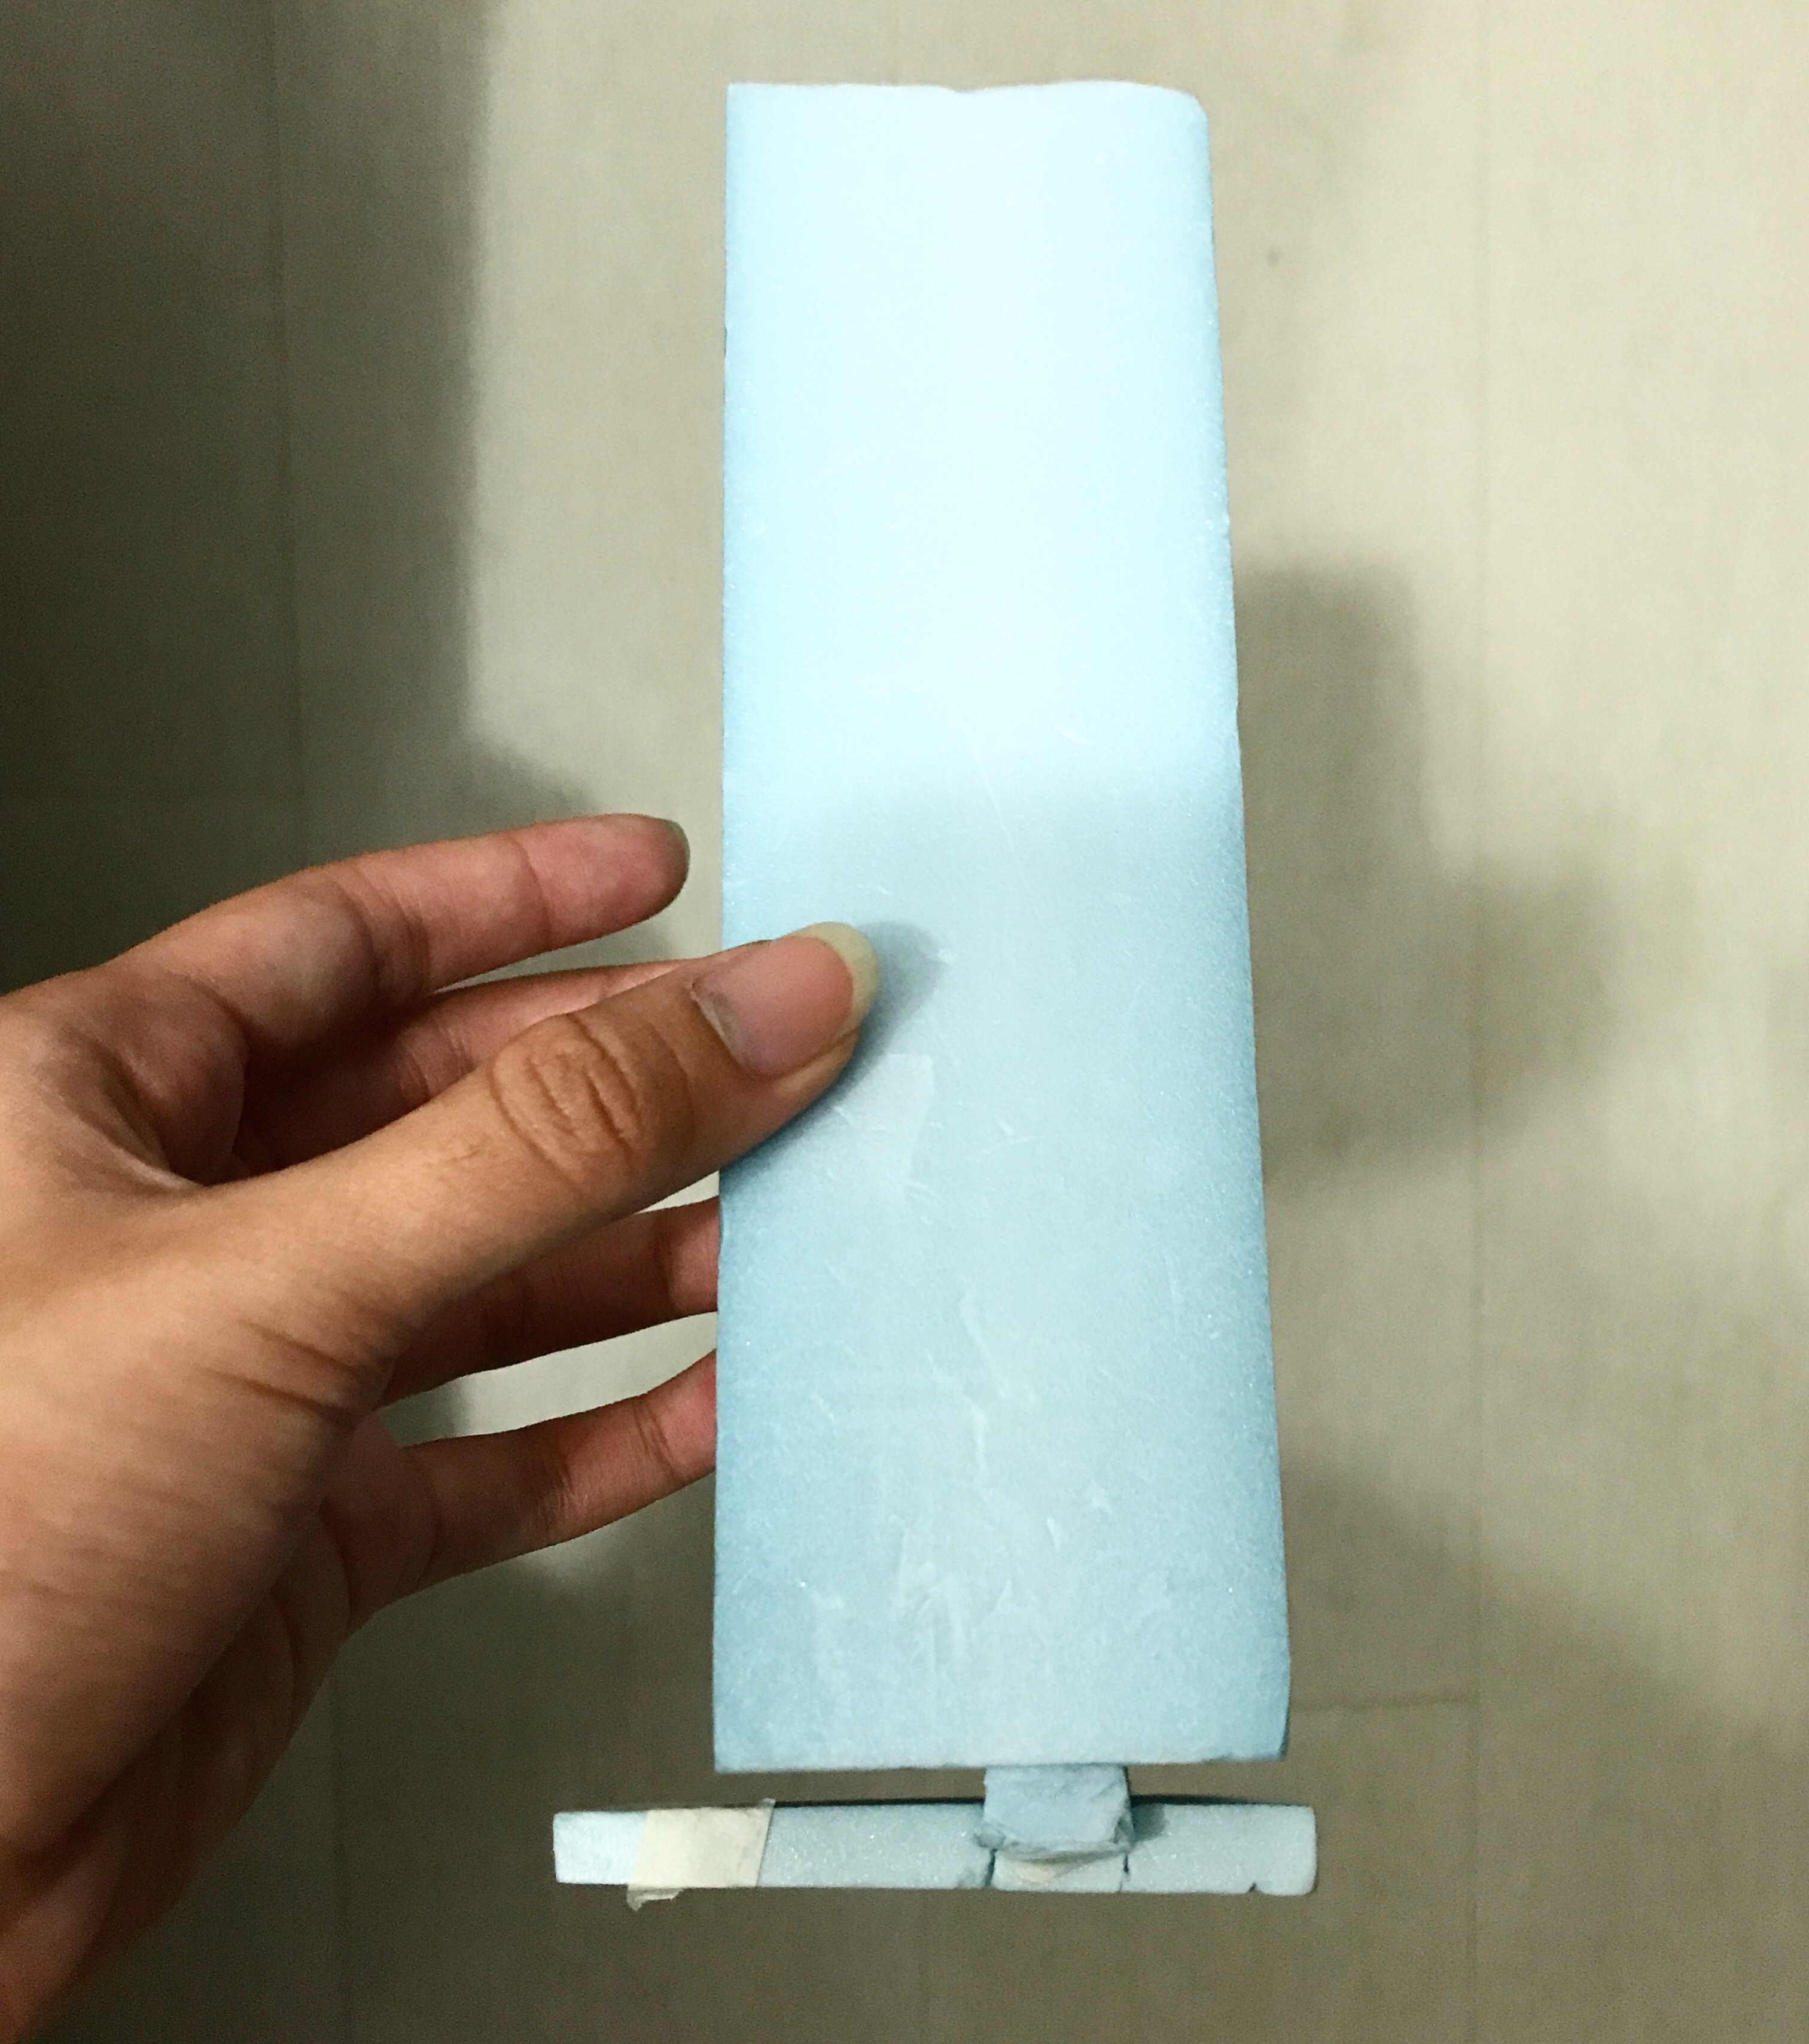
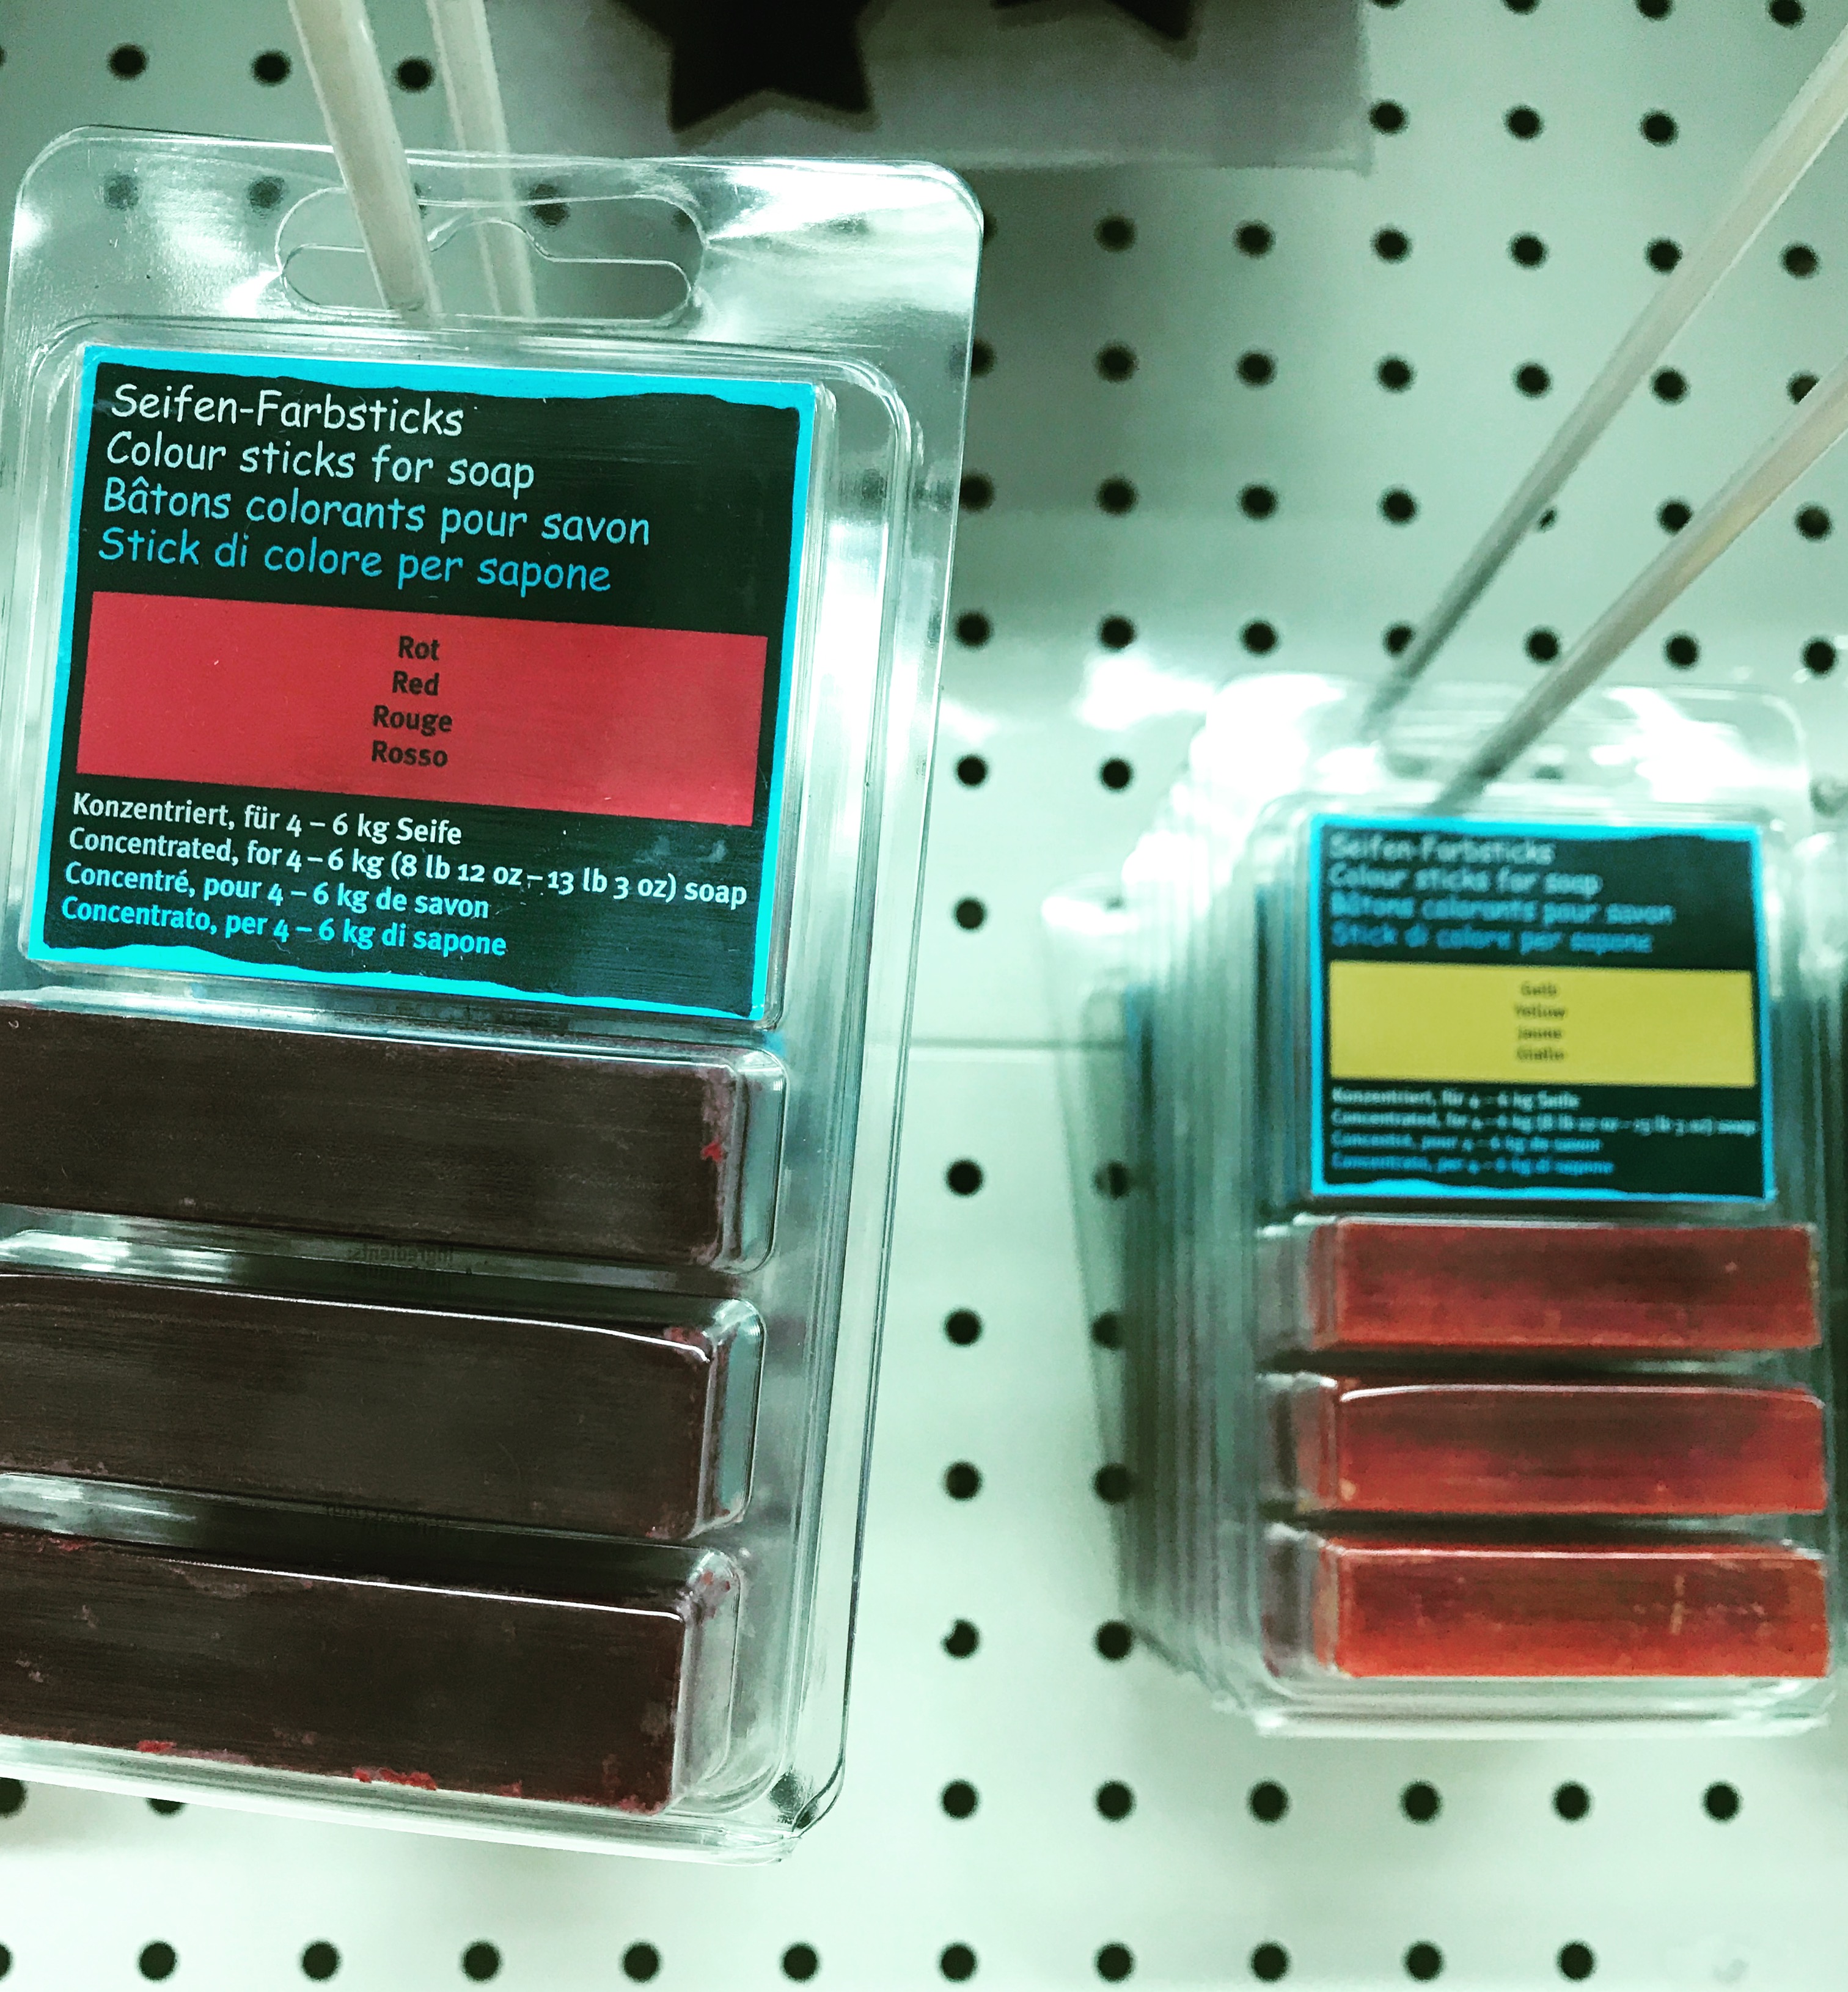
My initial idea for this was to create perhaps a ‘bar soap dispenser’ strictly for 1 person use only (mainly for people who is allergic to sharing soaps). I wanted to create it using this interesting coloured-hardy soap bar I found in store as my Dominant. (seen below: the kinds of coloured sticks for soap)
So I tried and as you can see in the figure below when I’m holding it, it’s a mini model.

Now why this one failed too:

  • Yes it could balance like you see it balance in the first picture BUT only for a first few minutes
  • This is partly due to the veryyy thin and small Sub-Ordinate which was just a thick wire stick into the D and wedged into the small-based SD. There’s no good material to create a good support there.
  • The soap is not hardy of a material enough, it will slowly tilt to the right when not handled with care or moving around while holding it and then fall off, hence not balanced at all on it’s own. I’d have to hold both the SD and D together.
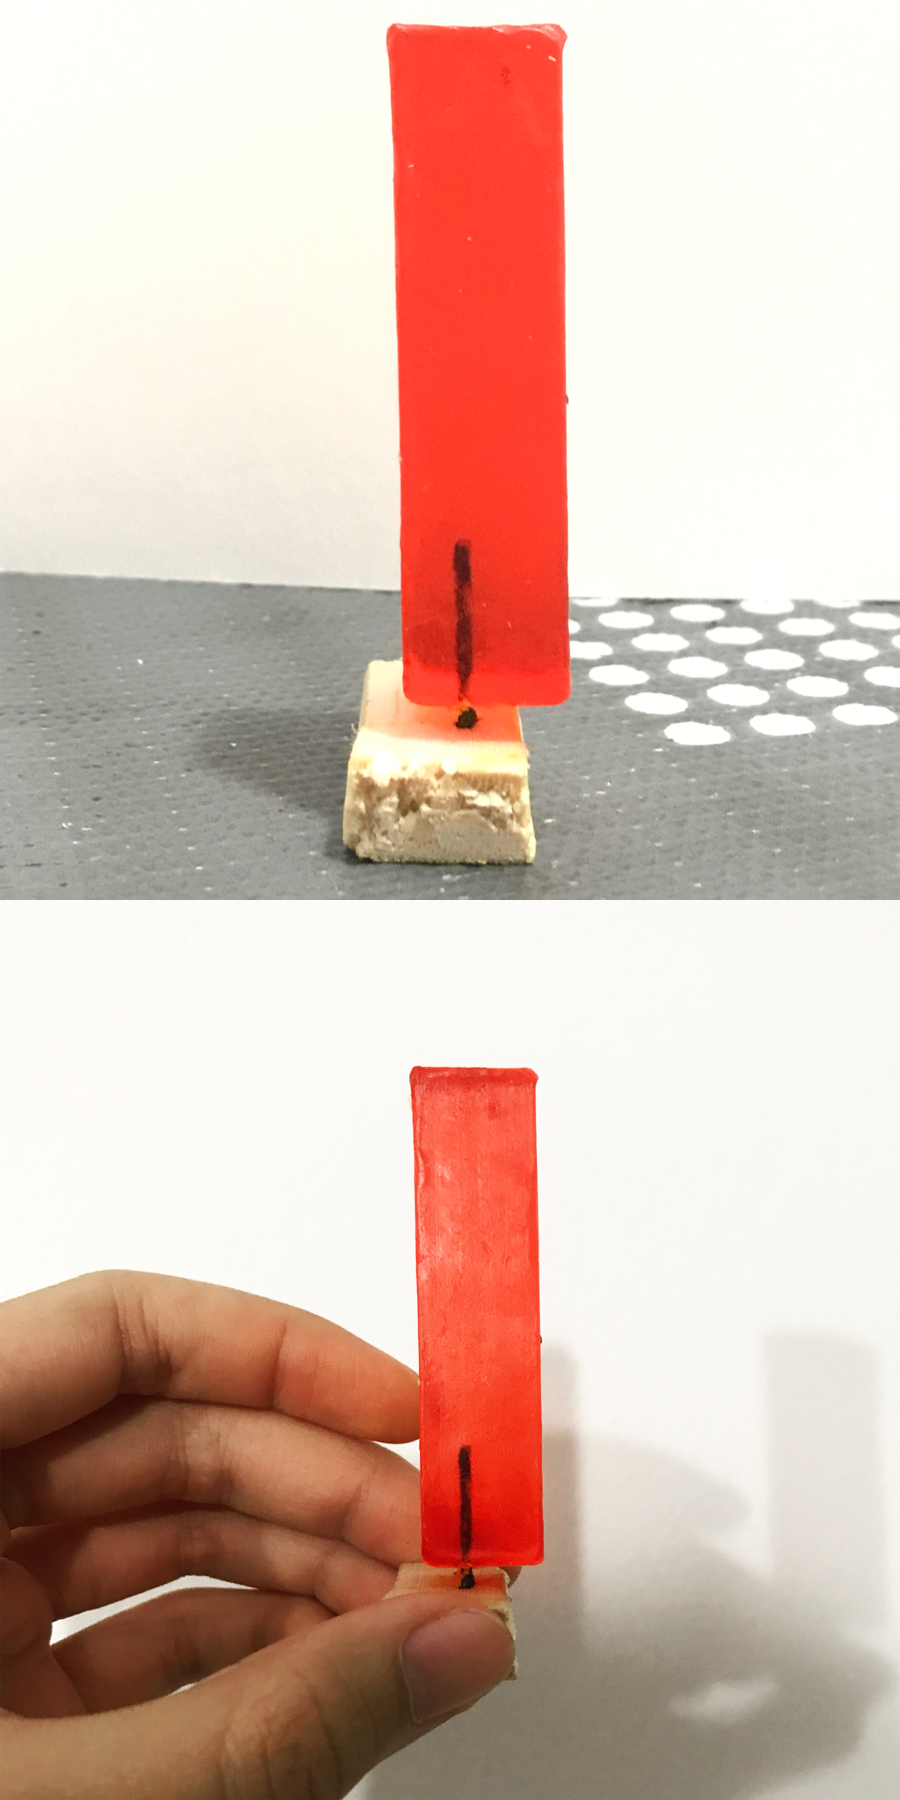
Conclusion: Failed too due to fragility of soap that i bought – could cut through so easily it will fall off. Defeats the purpose of me wanting it to be soap bar dispenser if it’s not hardy enough.

I decided to redo by using other materials and not to make a small-scaled structure. This time, I tried using wood for both D and SD. I chose a kind of wood that’s not so heavy-weighted so as to balance it off in the end of counter-balance.

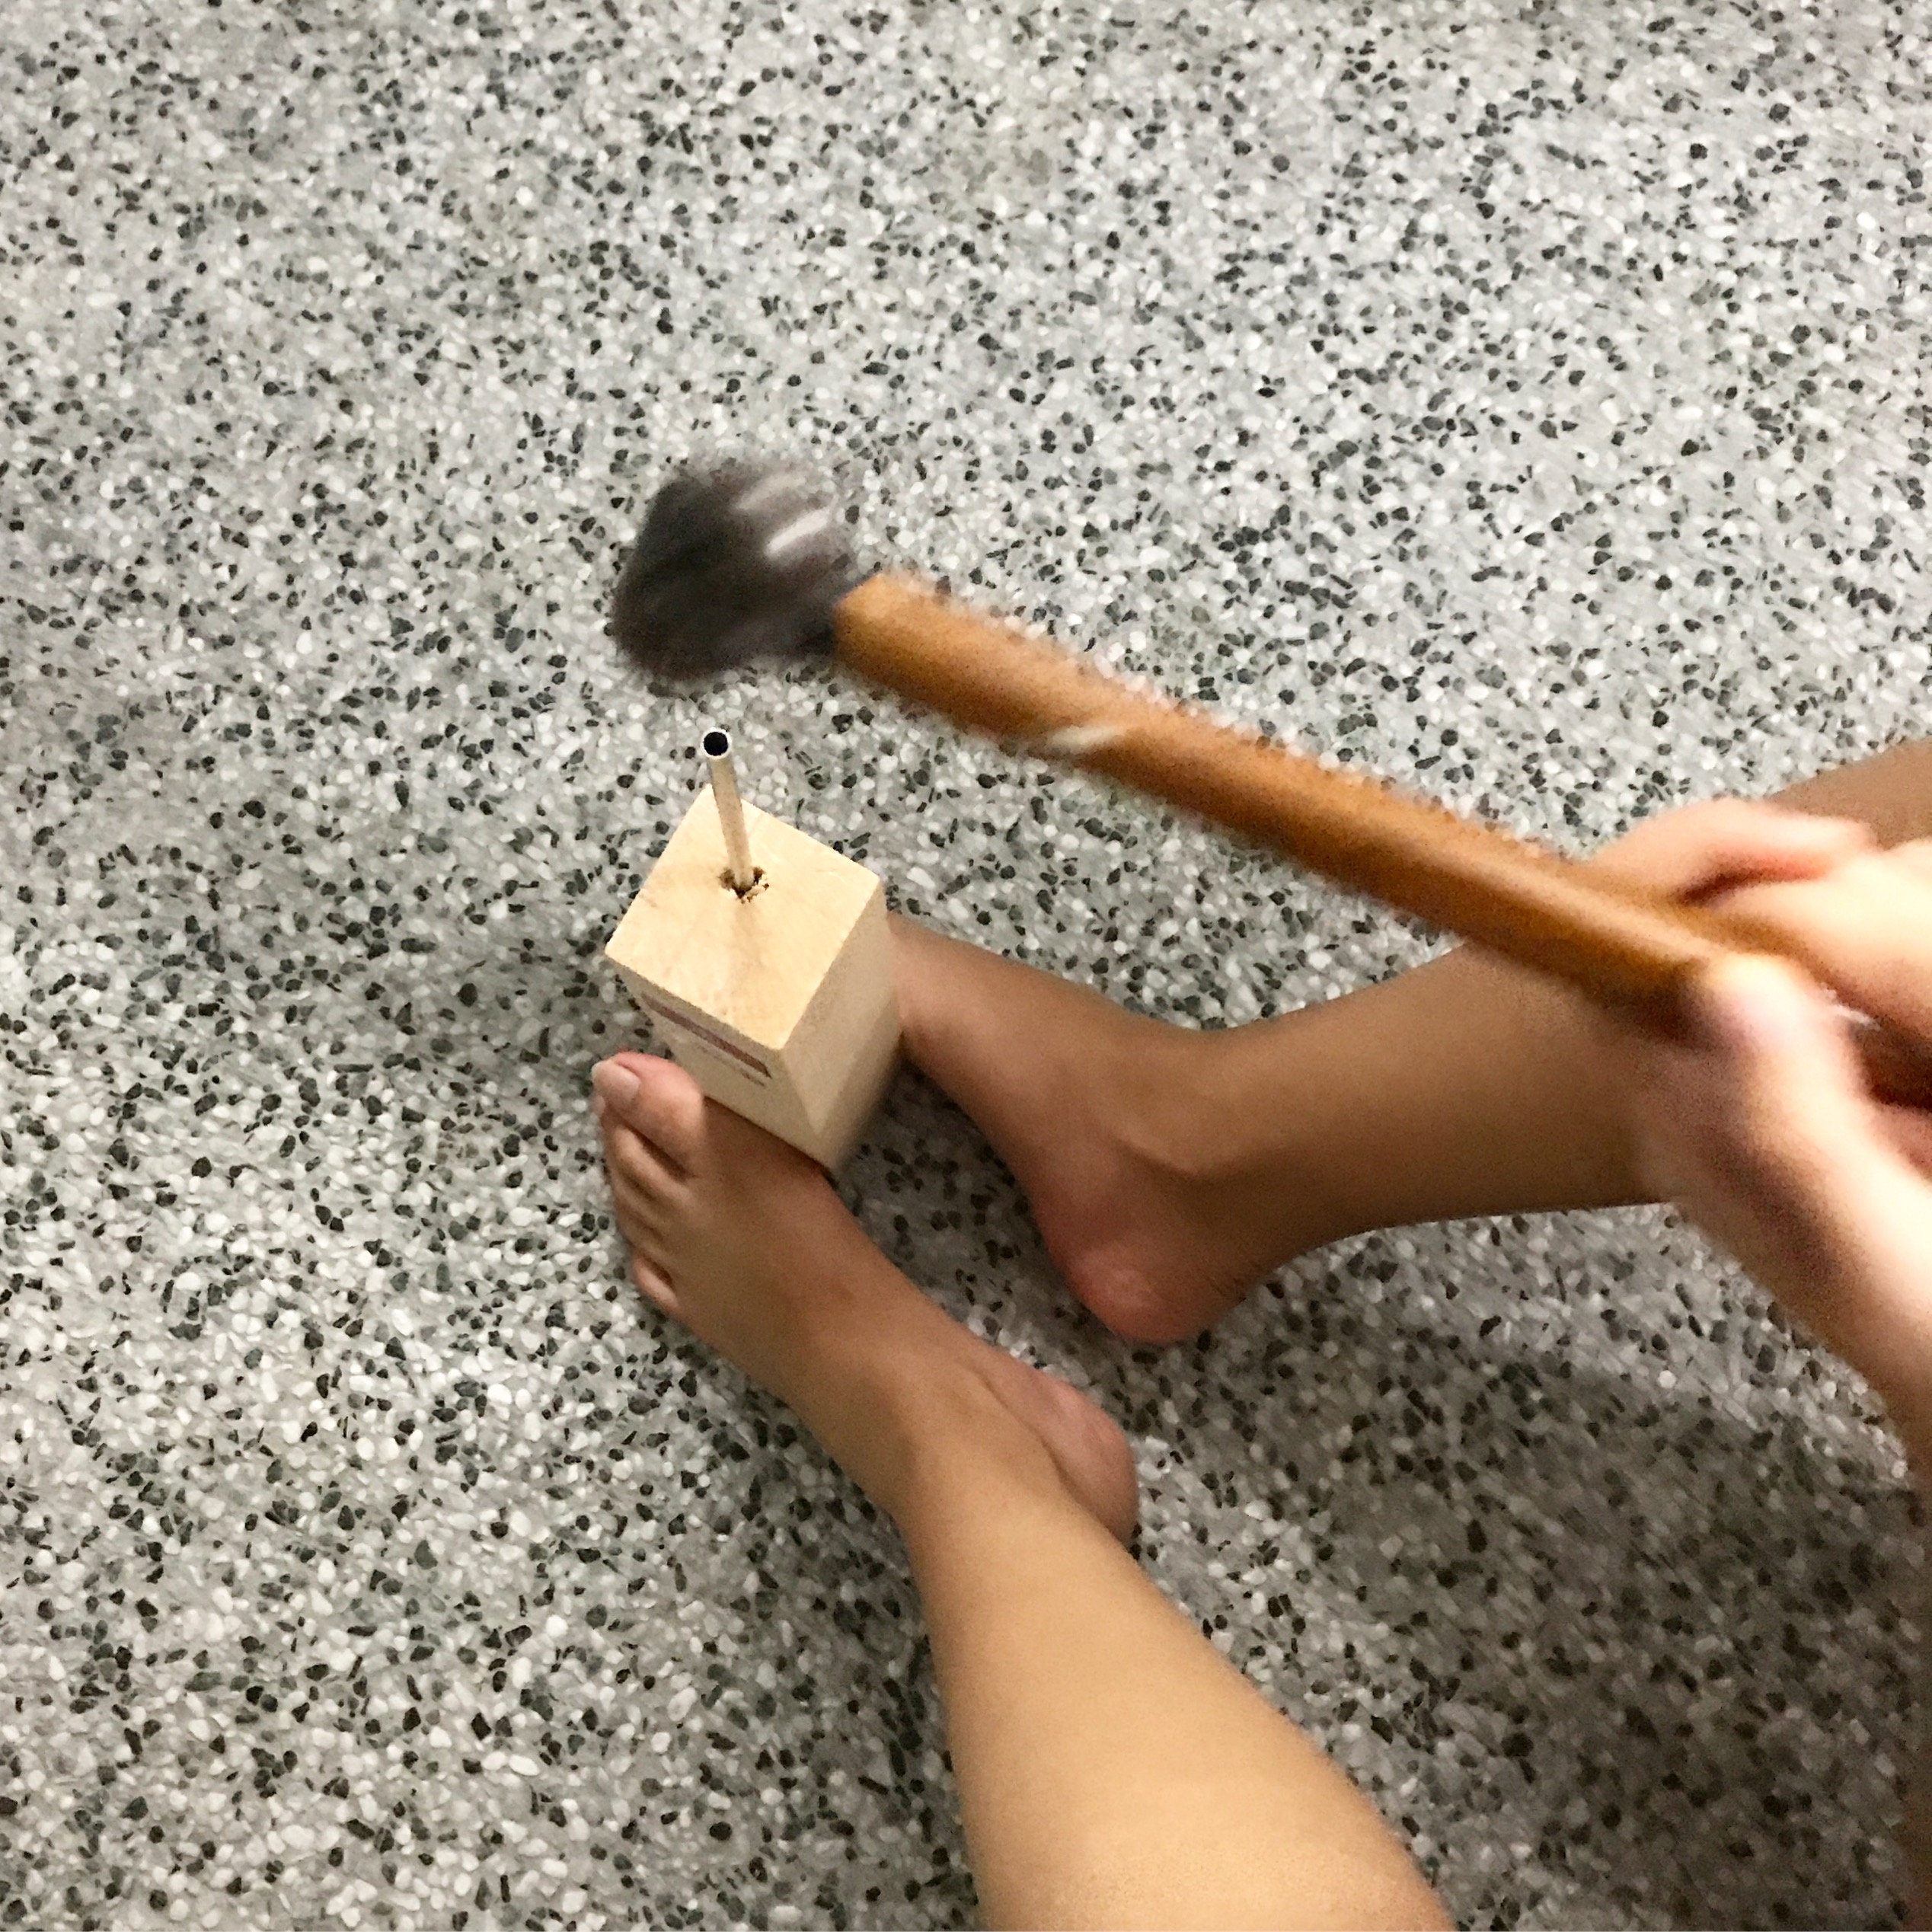
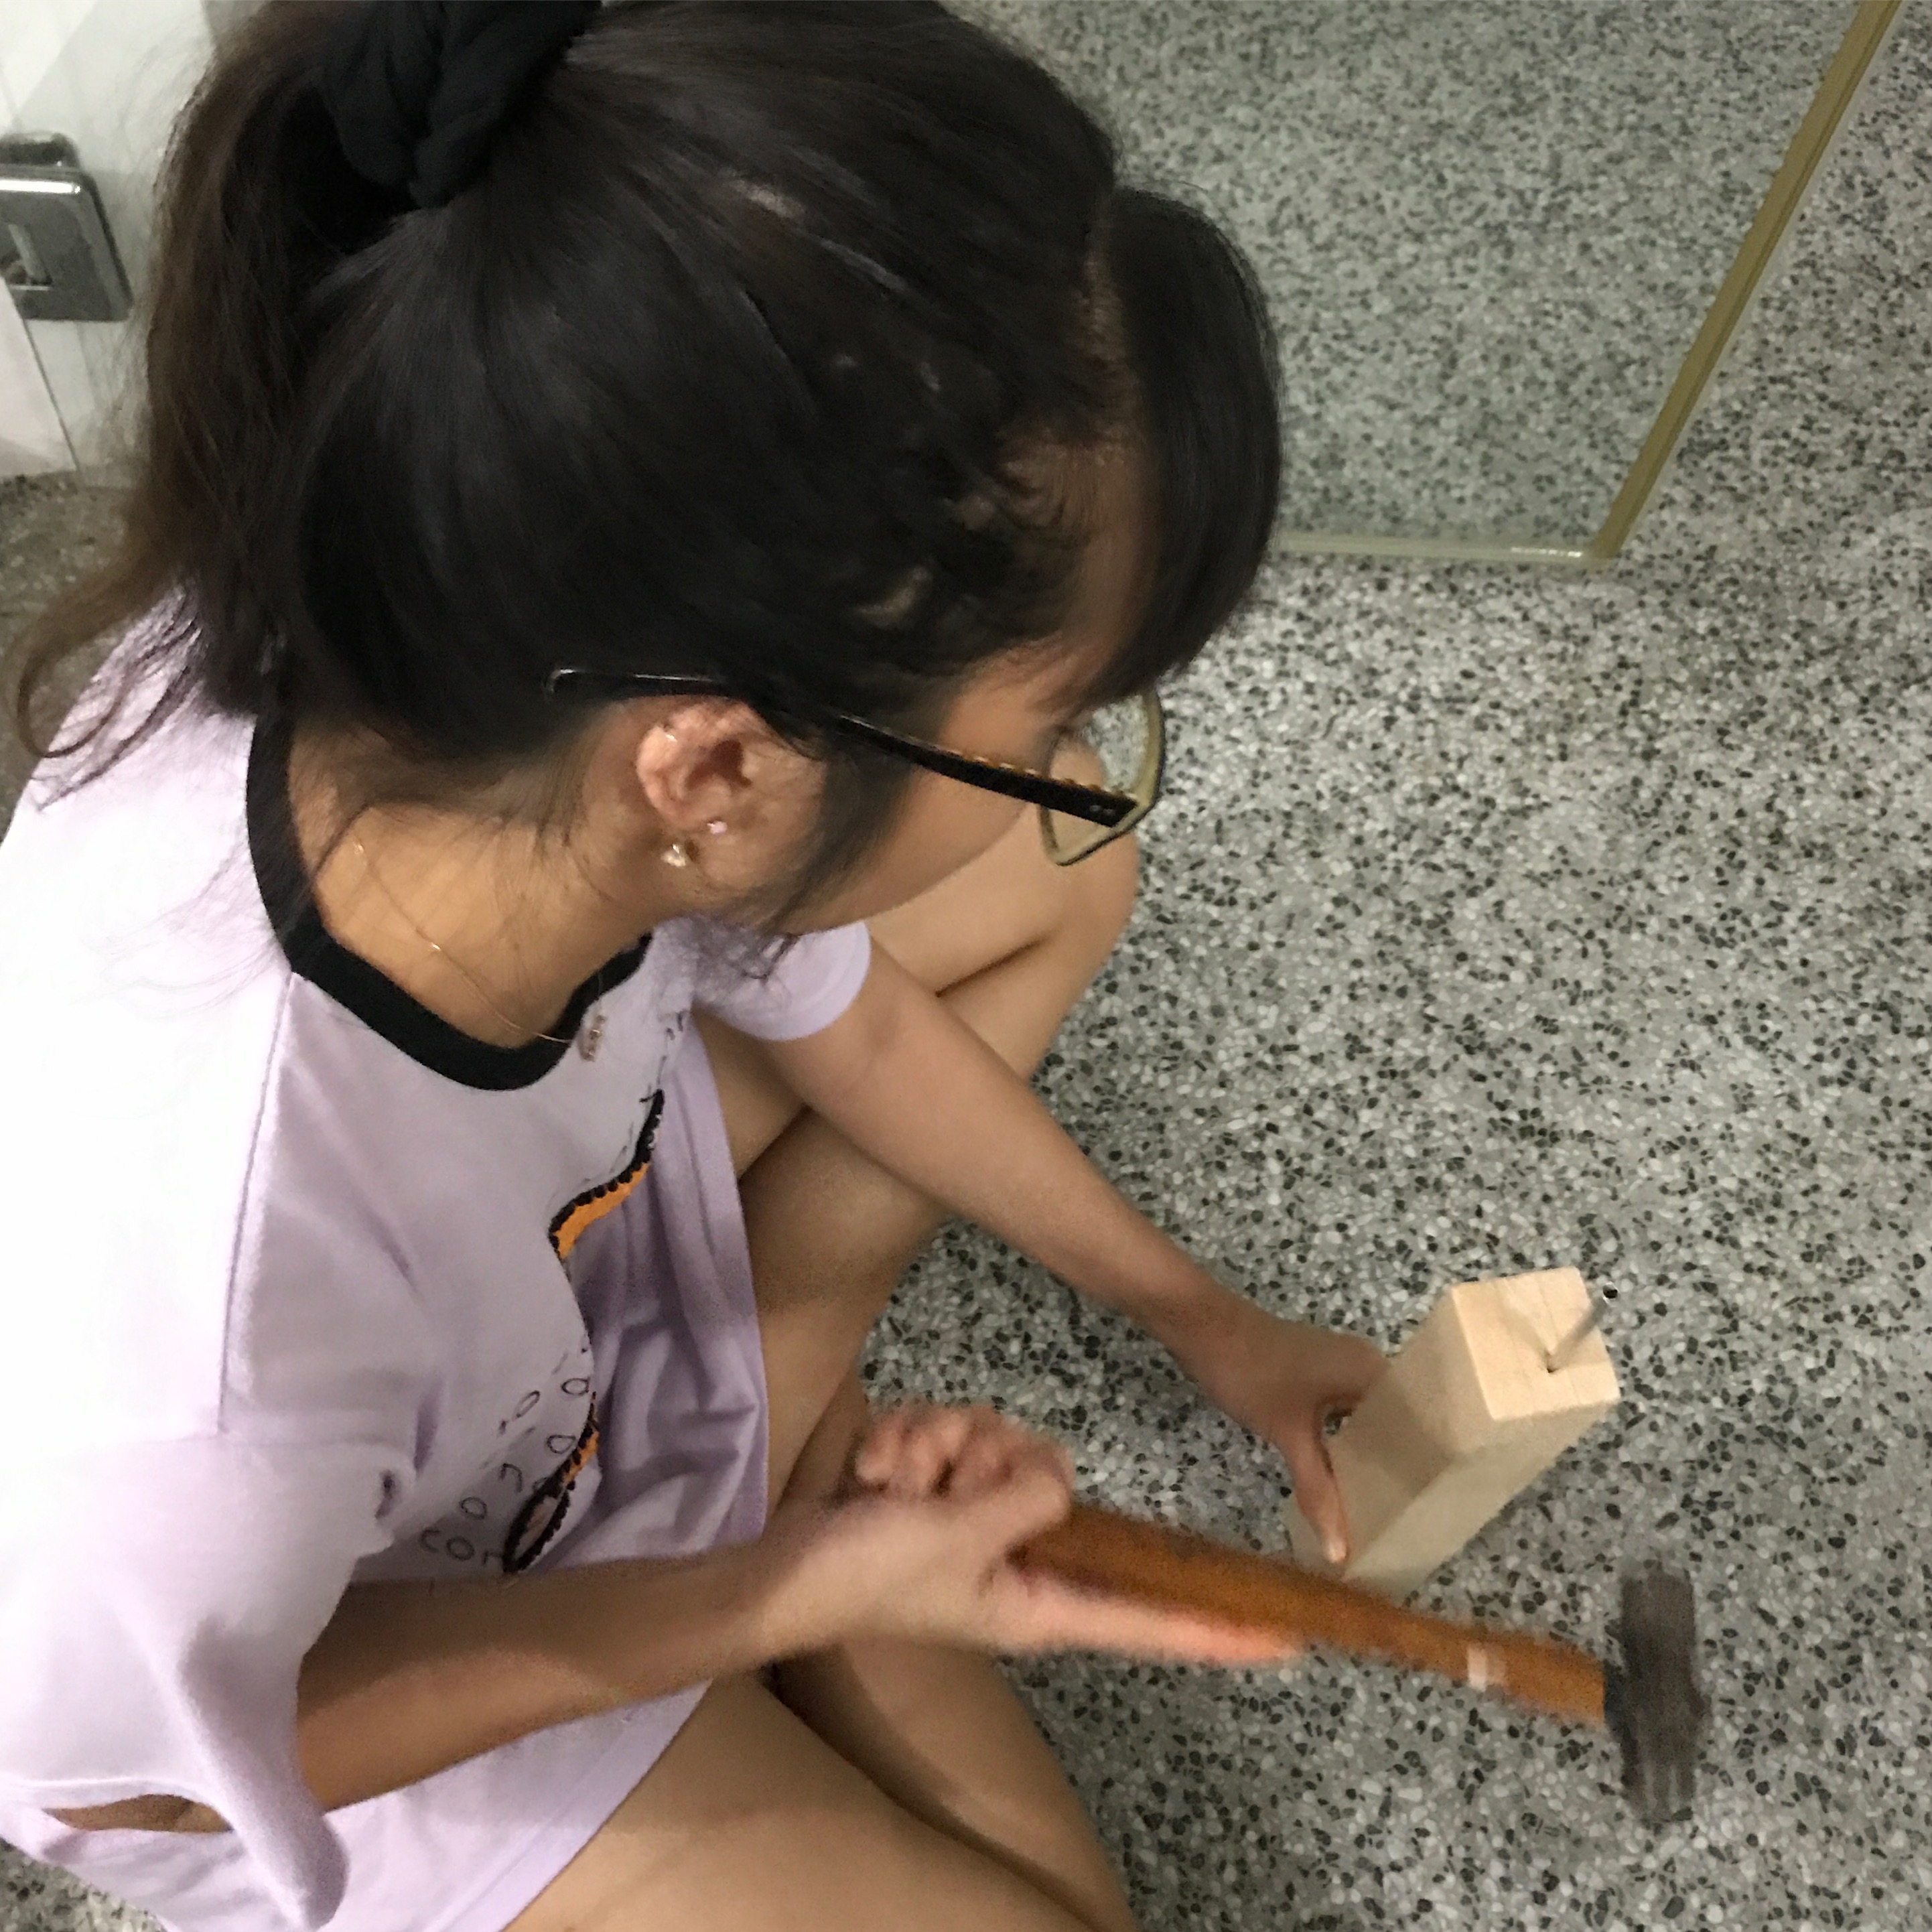
The process that made it hard to work with was wedging a small deep hole in D to insert my long thin but HARDY aluminium metal rod into it, and also into the SD which acts as my base. Hence desperate times calls for desperate measures – if you cannot create a deep hole, you hammer the rod into it to force it to make a deep hole.

Progress shots while making use of other materials and not soap.
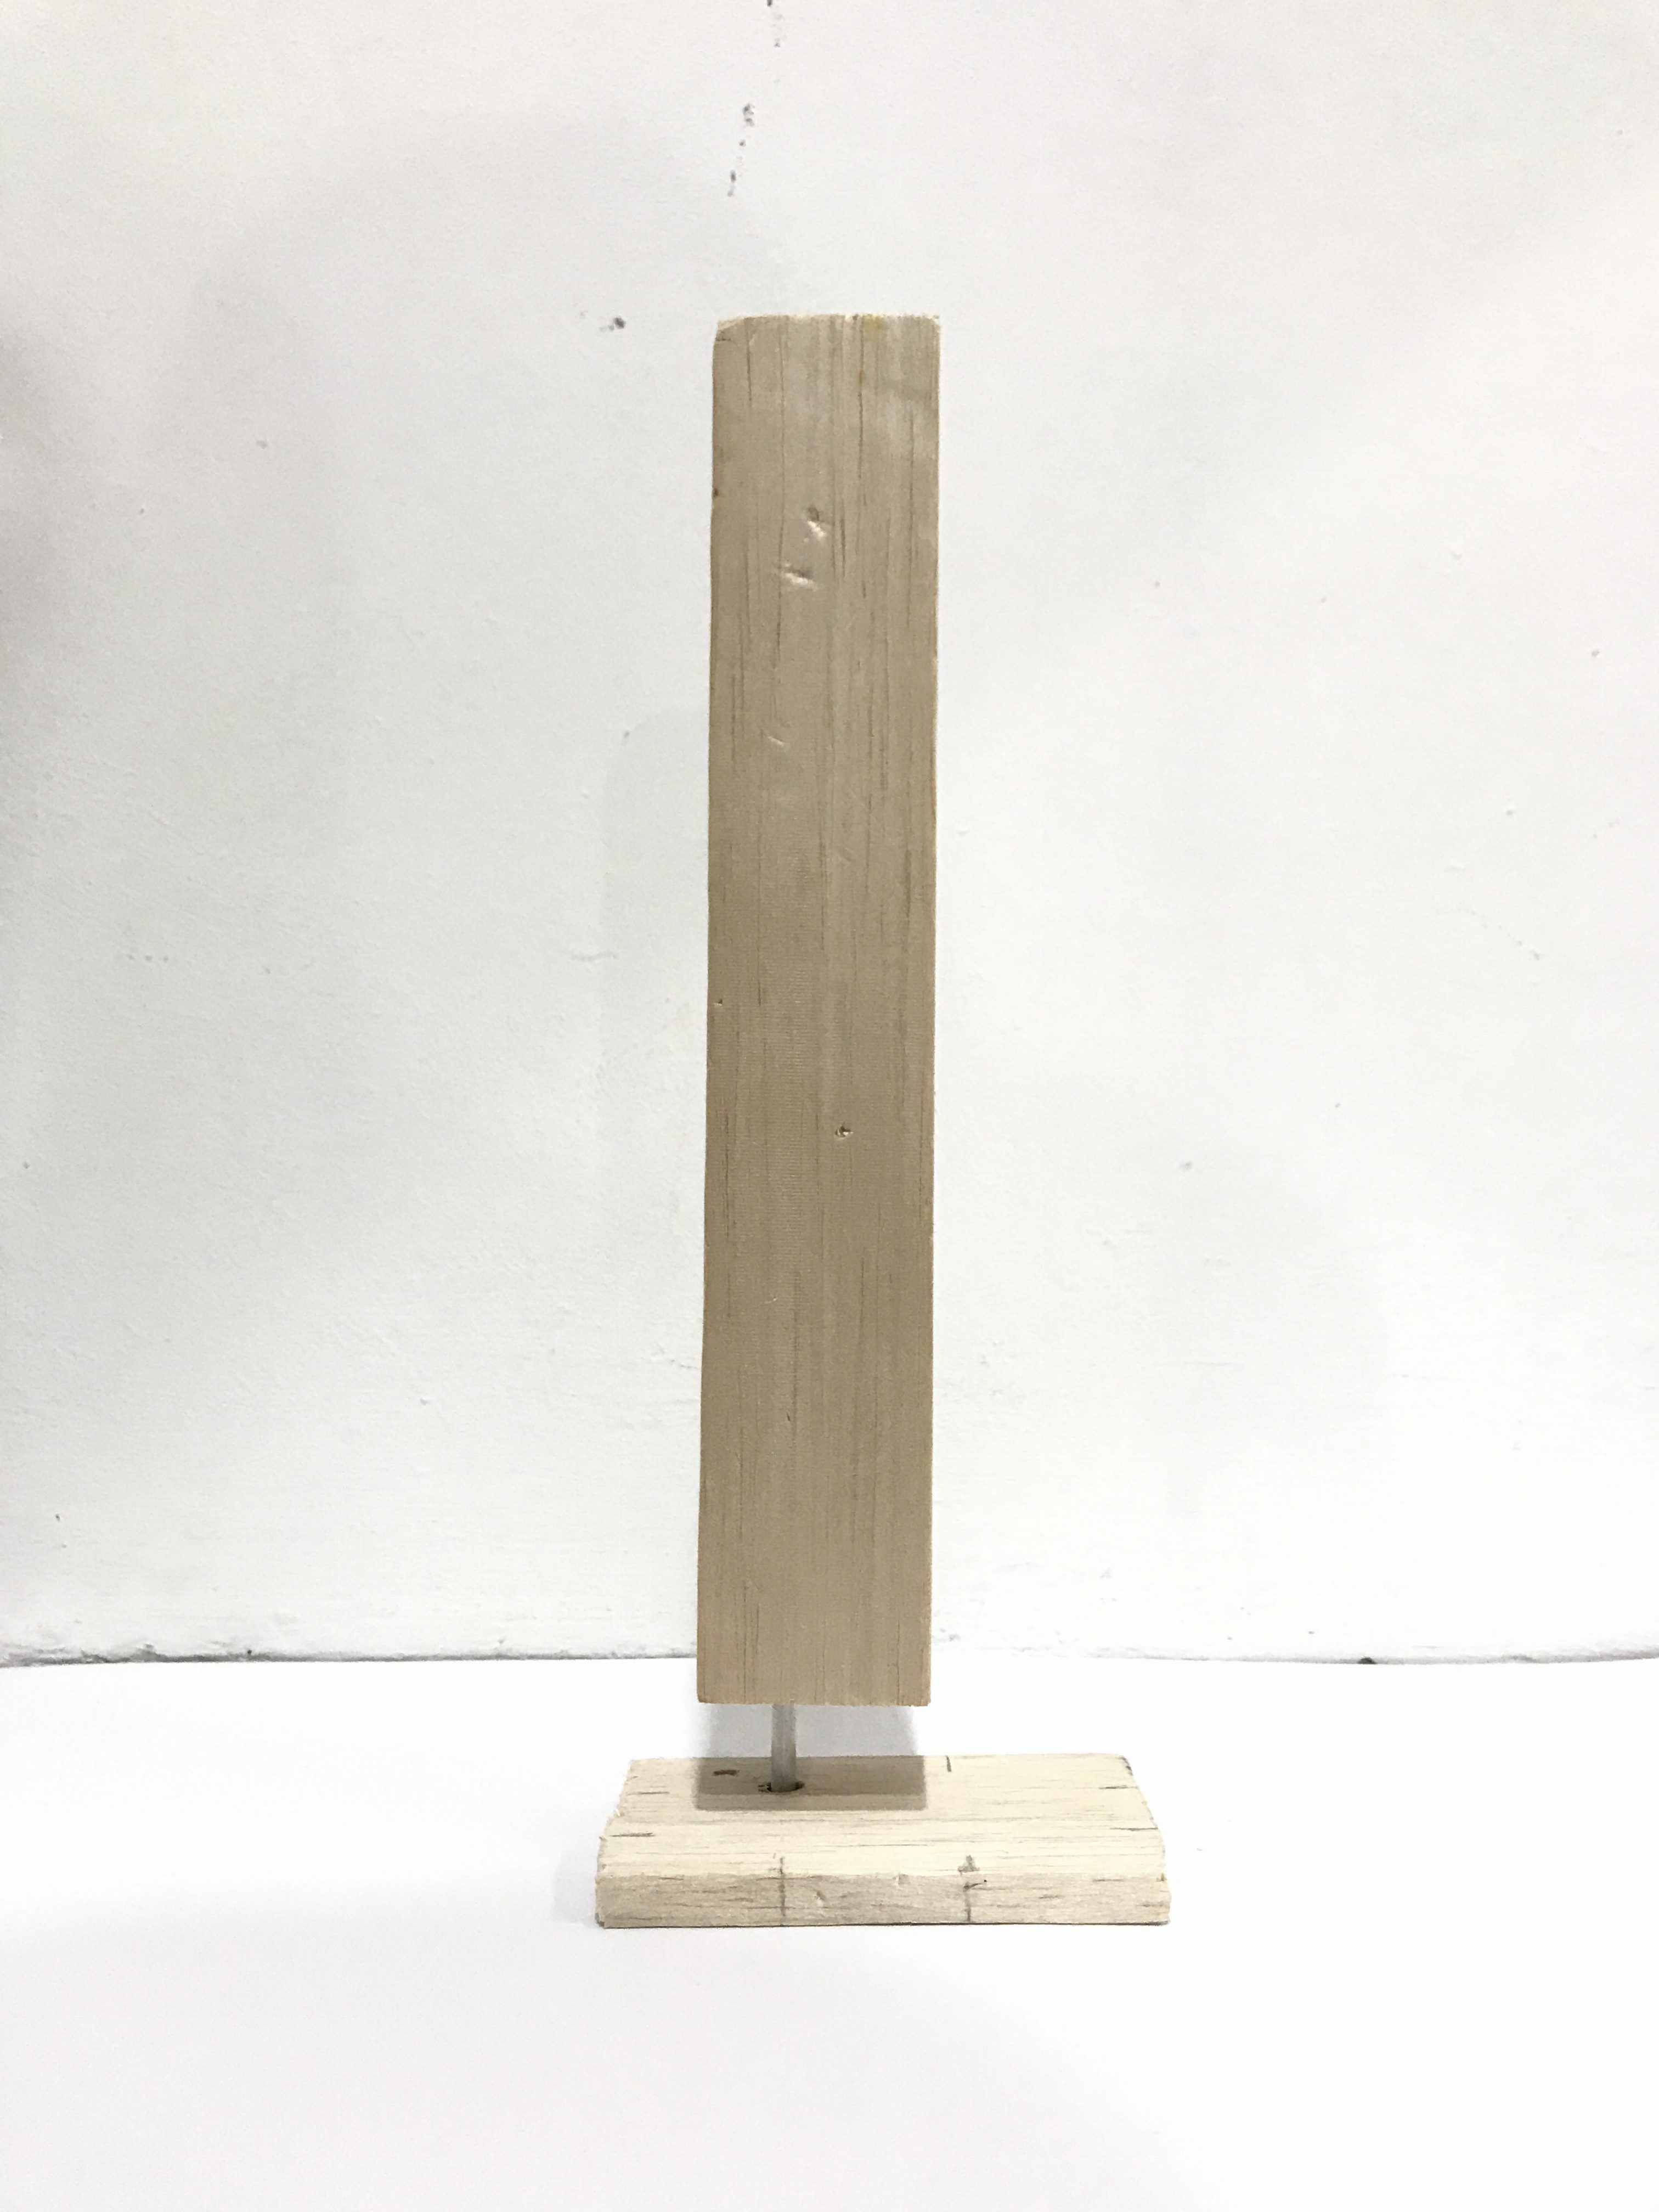
And surprisingly, IT WORKS. surprised IT STAYS BALANCING DESPITE THE COUNTER-BALANCE. FINALLY.

TAAA DAAA.
 

Continuation of this will be on my next post where I will go into detail on this final work. See ya there! laughing


Reflection & 2D Sketch Analysis of my 3D boxes

@ myself: TIME TO REFLECT A BIT.

So in our 1st 3D lesson, we learnt about the “rule of thirds” and applied it while attaching our boxes.

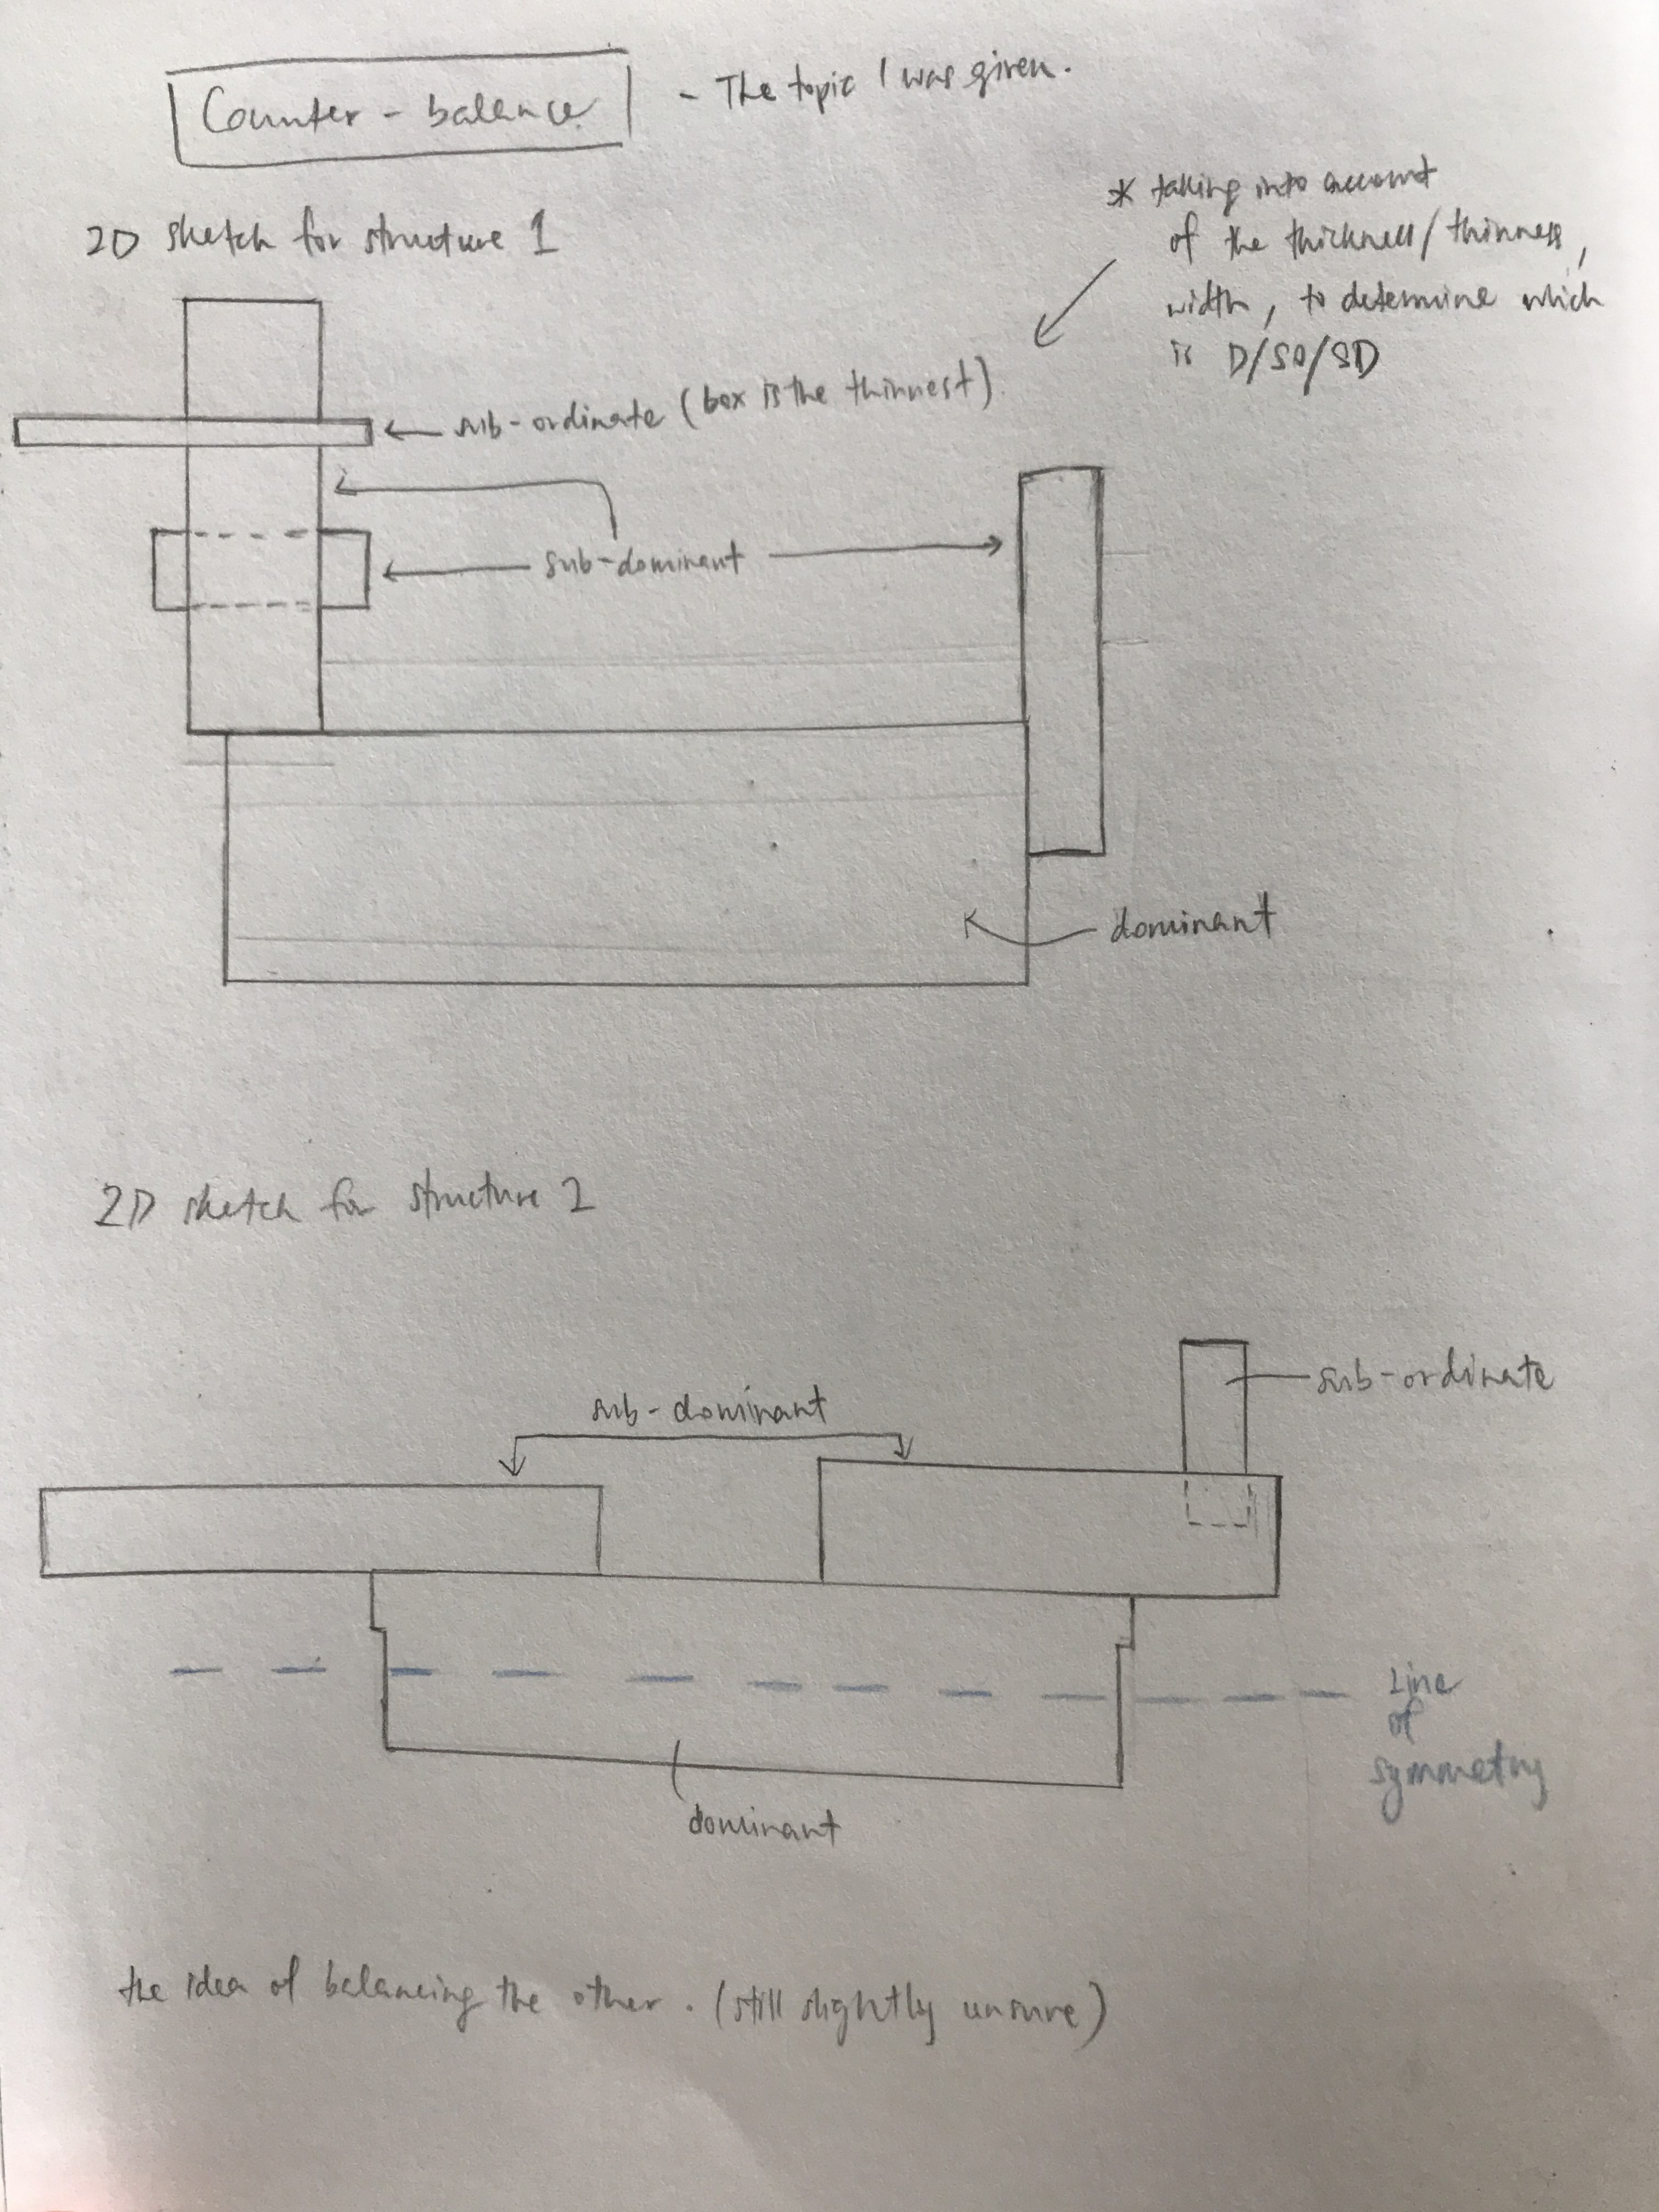
HAHA i look like i had fun doing it but it was actually quite tough figuring out which sizes of boxes to stick together and taking note of their thickness just to ensure that in all sides the “D, SD, and SO” stays the same in the figure. Considering the void and line-of-symmetry too. WELP, at least I tried. I was given the word ‘Counter-balance’ and here’s my sketch of the boxes i attached together after the 1st lesson.

Yes I agree, it is abit sketchy and it isn’t well thought through. This is also because i was unsure what counter-balance really meant and how to really visualize it in boxes (even though i did try to research on internet to help me out abit, didn’t really work).

BUT after the 2nd lesson which was just this week, I learnt a few more critical things to take note of when putting these boxes together.

I learnt about the Gestalt Principle where the whole is > than it’s parts, we have to try not to align the boxes together, and that we should at least aim for 4/6 right views in portraying the D, SD, SO as mentioned before. (I also learnt about the 3 ways of joining boxes such as wedging butttt we’ll get further more into that later)
So here is the aftermath of going through it during lesson about my topic and recreating my figure of boxes.

STRUCTURE 1

STRUCTURE 2

2D SKETCH ANALYSIS OF BOTH

In Structure 1, the Bottom View is slightly bigger than the one you see in picture, but that’s because in real life when I physically hold it up, the SD box can be also seen to be smaller than the D box hence the difference in scale.

I learnt quite alot by the 2nd lesson and I’m still learning and I think that’s the best part, especially after making mistakes first time round because you learn more. I’m still trying to keep in mind about the 4/6 D, SD, SO views  in every angle because that is quite hard to maintain when creating since we are used to focusing on one view haha and hence the importance in choosing our boxes. 🙂